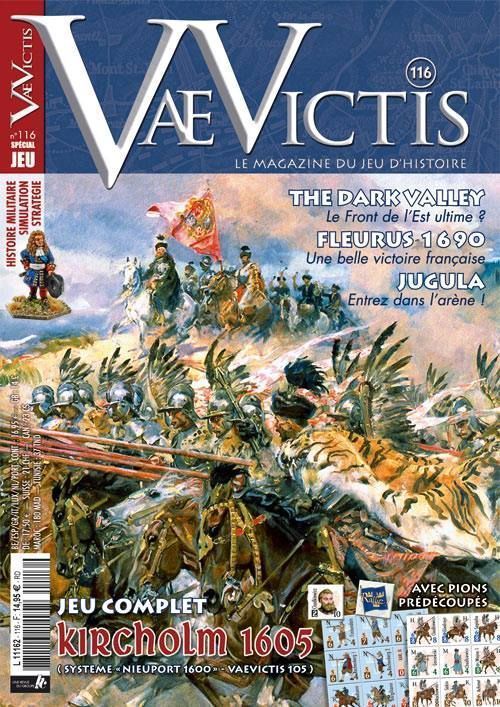
Kircholm 1605
Kircholm 1605 Rulebook
Table of Contents
Table of Contents
1 – General
1.1 – Game scale
A turn equals 20 to 30 minutes in real time. A hex is around 150 meters. Units represent 200 - 1200 men depending on the type or 5-10 cannons.
1.2 - Definitions
- Wing: all units are assigned to a wing; an army has 3 to 5 wings
- Orders: At all times, each wing has one of three Orders. They are, in order of precedence: Charge!, March!, and Rally!.
- Commanders: Each commander controls a wing and each unit has a commander.
- Morale status of the unit (see 12.2): Each unit's status is indicated by whether the unit is flipped to its front or back side or by a status marker. The Statuses are: Normal – front side of the counter, Disordered – back side of the counter, Shaken – front of Status Marker, Broken – back of Status Marker.
- Distance between two units: the hex of one unit counts but not that of the other unit.
1.3 - Other
The game uses a 10 sided die (d10). 0 equals 0, not 10.
Description of counters
The counter illustrations in the printed rules are not reproduced here.
2 – Game counters
2.1 - Commanders
Commanders have a Command value (0, 1 or 2) and a Movement value. A Wing Commander (WC) must always be stacked with a unit of his wing. (If he moves alone, he must end his movement in a hex containing another unit from his wing.) The Command value is used for reactivation, pre-emption, change of orders, interception, melee, and morale tests.
2.2 – Combat units
Combat units are of two sizes: square (called simple) or rectangular (called double). These units have movement, fire and morale values as well as a letter indicating their type:
Cavalry
- H: Hussars (Husarze), 200-300 men armed with pistols and a heavy lance, in armour and with the best horses.
- G: Gendarmes, about 200 men, equipped with lances, armoured
- C: Cuirassiers, 200-300 men, equipped with pistols, armoured. Pistols are used in melee.
- R: Reîtres (Ryttare/Rajtarzy/Petyhorcy): 200-300 soldiers armed with pistols and light or no armour. The Petyhorcy also have light lances.
- A: Arquebusiers, 200-300 men, equipped with arquebuses or carbines, lightly armoured
- K: Cossacks (Kozacy): 200-300 soldiers armed with arcs and/or pistols, without armour and on light horses.
Infantry
- S: Swiss, 600 men, 80 % pikemen, 20 % musketeers.
- L: Germans/Walloons, 600 men, 60% pikemen, 40% musketeers
- T: Soldiers adopting a Spanish formation style (Tercio), 1200 men, 40% pikemen, 60% arquebusiers.
- N: Soldiers adopting a Dutch formation style, 500-600 men, 50% pikemen, 50% musketeers/arquebusiers.
- M: Musketeers: light infantry and hajduks, 500-600 men, all musketeers/arquebusiers.
A tercio unit is composed of a double T unit (1 manga of pikemen and 1 manga of arquebusiers) and possibly a simple M unit (1 manga of musketeers) with the same name.
2.3 - Markers
There are several kinds and indicate:
- the order chosen by a wing (see 3.1 and 6.2);
- the preemption of a wing (see 4.4);
- the status of a unit (see 12.2);
- if a unit charges and/or is intercepted (see 11.3 and 8.3);
- if a unit is out of command (see 5.1.3).
3 – Sequence of play
3.1 – Order Phase (1st turn only)
Players secretly chose the orders of each of their wings (unless specified otherwise in the special rules of the scenario). They are revealed simultaneously at the beginning of the game.
3.2 – Initiative
Determine which player is the active player, able to activate a wing first (see 4.1).
3.2.1 – Activation Phase
The active player activates one of his wings (see 4.2). When this activation is finished (after a possible continuation, see 4.3), the second player can activate one of his wings (see 4.2 and 4.4). This phase is repeated until all wings have been activated or until both players pass one after the other.
3.2.2 - Details of the Activation Phase
A – Preemption attempt
Once a wing is activated, the inactive player may attempt to preempt this activation and activate one of his own wings instead. If he succeeds, the commander of the preempted wing receives a "bypassed" marker (see 4.4).
B – Change of orders
The active player can try to change the order of the wing he just activated (see 6.3).
C – Unit Action
Each unit of the activated wing (including the commander) may perform one of the following actions: Movement (Fire is part of movement, see 8 and 10) or Rally (see 13), depending on the restrictions of his current order (see 6.2).
Some actions may trigger a reaction movement from the units of the inactive player (see 8.2 and 10.3).
D – Melee
Units adjacent to enemy units may engage them in close combat or melee (see 11).
E – Reactivation attempt
The activated wing may attempt to reactivate itself - go again (see 4.3). If it succeeds, go back to A.
F - New activation
If the activated wing fails in its reactivation attempt or if the active player ends his activation, the preempted wing (if there is one) is then activated (go to B). Otherwise, the players determine which wing will be activated next (go to A).
3.3 – Rout Phase
All "broken" units must make a rout movement (see 13.2).
3.4 – End of turn
Flip Commanders and Artillery to their front side.
4 - Initiative and activation
4.1 - Initiative
The player with the most wings of the orders of highest precedence goes first. If there is a tie, the side with the better commander goes first. If that is also a tie, roll the die; the high roller goes first.
4.2 - Activation
Players alternate activating their wings until all wings are activated, respecting the precedence of the orders. (A wing cannot be activated if there are other wings with orders of a higher precedence remaining.)
Example: Player A has two wings with a Charge! order and a wing with a March! order. Player B has a wing with a Charge! order, a wing with a March! order, and a wing with a Rally! order. Player A is the first player (2 Charge! orders). He activates a wing with a Charge! order, then player B activates his wing with a Charge! order. Player A activates his second wing with a Charge! order, then player B activates his wing with a March! order, and so on.
If player A had three wings with a Charge! order, he would activate his second then third wings with a Charge! order before player B could activate his wing with a March! Order.
4.3 - Reactivation
A player may attempt to reactivate an activated wing (under a Charge! or March! order) a second time for a maximum of 2 activations. The player finds the wing's current order on the Reactivation/Preemption table and rolls the die, adding all applicable modifiers. If the result is equal to or less than the number indicated, the wing is activated again. If the attempt fails, the wing commander is flipped to his "activated" side.
4.4 - Preemption
Once a wing is activated, the inactive player may attempt to preempt this activation. To do so, he chooses one of his non-activated wings (under a Charge! or March! order) and consults the Reactivation/Preemption table.
He finds the attempting wing's current order and rolls the die, adding any applicable modifiers. If the result is less than or equal to the number on the chart, the wing is activated. (The player can then attempt reactivation).
The wing whose activation has been preempted is marked as bypassed ("en attente") and will be activated immediately after the preempting wing is finished. The marker is attributed to the commander of the wing. A wing that has successfully continued may also be preempted and will not be considered "bypassed", but rather "finished" if the attempt is successful. The WC is flipped to his "activated" side.
If a preemption attempt fails, the commander is marked "no reactivation" ("Sans réactivation") and may not attempt reactivation.
A commander with a "no reactivation" marker may not attempt a preemption.
Note: A preemption cannot be preempted.
5 - Command
5.1 – Command
To move and combat normally, a unit must be in command. Units' command status is checked just before their activation at the beginning of step 3.2.2.C. An out of command unit receives the appropriate marker.
5.1.1 - Line of command (LoC)
To be in command, a unit must be able to trace an LoC to its wing commander. The length of this LoC is two hexes for infantry and three hexes for cavalry.
A unit unable to trace an LoC to its commander but able to trace an LoC to a unit in command (except artillery) is considered in command. LoC cannot be traced through a hex containing an enemy unit or terrain that is impassible.
5.1.2 – Return to command
Command of a unit is determined at the moment the unit begins its activation. Thus, a Wing Commander or another unit belonging to the same wing can move to bring an out of command unit back to the LoC. Then remove the "Non commandée" (out of command) marker from the concerned unit.
5.1.3 – Out of command unit
An out of command unit:
- must move in order to be in command again;
- may only fire in "reaction" (see defensive fire, 10.3);
- may not be adjacent to an enemy unit during its movement.
5.2 - Commanders
A commander is the leader of a wing and commands all the units of that wing. He is activated with his wing and can undertake one of the following actions:
- Movement: He can move normally and engage in reaction movement (see 8.2). He must remain with the unit with which he is stacked if it advances after melee or engages in retreat or rout movement. He must always finish his movement stacked with a unit.
- Rally: He can help in rally (see 13). In this case, he cannot move.
5.2.1 – Death of a commander
If a unit stacked with a commander is eliminated in melee or after fire (after unable to retreat, for example), the commander is removed from the game.
After a melee, each player must roll 1d10 for each participating commander. On a 9, the commander is eliminated.
If a hexagon containing a commander is the target of fire, and the fire hits the targeted hex, the shooter re-rolls 1d10. The commander is removed from the game on a result of 9.
5.2.2 – Replacement
If a wing commander is eliminated, he is replaced by an "aide de camp" placed on any unit of the wing at the end of the turn.
If the commander is eliminated before his wing is activated, the wing will not have the opportunity to be activated.
An aide de camp always enters with the same orders as its predecessor. If all the units of the wing are eliminated, there is no replacement and the wing is no longer activated.
6 - Orders
6.1 – General orders
At the beginning of the game, players secretly attribute orders to each of their wings and then place the corresponding marker on the commander. Active units are subject to the following restrictions depending on the orders of their wing.
The act of changing orders during the game is not automatic, but depends on the wing's current orders and its desired orders, as well as the wing commander's value.
6.2 – Types of orders
- Charge! (Chargez!): A unit under Charge orders must end its movement at least one hex closer to the enemy unit closest to it. If the enemy unit is in a frontal hex of an unbroken friendly unit, the active player can (if he wishes) take into account the next closest enemy unit (and so on). If a friendly unit is already adjacent to an enemy unit, it cannot move away but can change facing and/or perform offensive fire. No unit may rally.
- March! (Marchez!): A unit under March orders may move but may not become adjacent to the enemy. Units adjacent to their WC or stacked with him may attempt to rally (in which case the commander may not move, see 5.2). A unit which is already adjacent to the enemy may fire.
- Rally! (Ralliez!): A unit under Rally orders may move but may not end its movement closer to the enemy. All units may attempt to rally. A unit already adjacent to the enemy may fire.
6.3 – Changing Orders
A wing that has just been activated may attempt to change its orders. The player consults the Change of Orders Table and cross-references the current Orders with the desired Orders. Roll the die and add any applicable modifiers. If the result is less than or equal to the number indicated, the wing changes orders and the new orders are in effect beginning with that activation. If the attempt fails, the wing is activated with its original orders.
6.4 – Commanders and orders
- Under a Charge! order, a commander must move with a unit of his wing.
- Under a March! or Rally! order, a commander may move unless he is helping a unit to rally (see 13).
7 – Facing
Front / Flank / Rear
Units must face a hex vertex.
7.1 - Simple units
A simple unit always has 2 frontal hexes (top of the counter), 2 flank and 2 rear.
Cavalry may change facing at a cost of one movement point (MP) per vertex. Infantry may change facing at a cost of 2 MP per vertex. Simple units may counter-march (change facing 180 degrees) at a cost of 2 MP. Artillery may change facing as many vertices as it wishes instead of firing (the player places the appropriate marker (offensive fire/defensive fire) or turns the unit to its "Tiré" (Fired) side).
7.2 - Double units
A double unit has 3 frontal hexes (top of the counter), 2 flank and 3 rear. A double unit may counter-march (change facing by 180°) for 2 MP. If it is in an enemy's frontal hex, it must also take a morale test. If it fails, the 2 MP are spent (without changing facing) and the unit's status decreases by one level. A double unit can change facing during movement (see 8.5.2).
7.3 - Special case
For melees only, an unbroken T, L or S unit (simple or double) in defence is considered to only have frontal hexes.
8 - Movement
8.1 – Overview
Each unit has a movement allowance per turn expressed in movement points (MP) that is defined by its status at the beginning of the activation. Exception: Artillery can never move (it has 0 MP) but it can change facing (see 7.1). If a unit is degraded to broken or shaken status during its movement, movement immediately ends and if the unit is broken it must immediately retreat two hexes.
To enter a hex, a unit spends the MP indicated by the terrain (see Terrain Table). The movement of one unit must end before the next unit's may begin. A unit can only advance on one of its frontal hexes. During its movement, a unit must respect stacking limits (see 9).
8.2 – Reaction movement
Only simple units with a normal or disordered status or commanders can carry out reaction movement even if they were previously activated. There is no limit to the number of reaction movements a unit may carry out.
Units may only engage in reaction movement if:
- their movement allowance (with the disorder effects) is greater than or equal to that of the unit causing the reaction;
- they have an LoS (Line of Sight) on the unit provoking the reaction (see 10.2);
- they are not in a frontal hex of an enemy unit that is Normal or in Disorder.
Each unit can only attempt a reaction movement once per enemy wing activation. A unit using reaction movement cannot engage in defensive fire in response to the specific action that prompted the movement (see 10.3).
The different types of reaction movement are:
- Facing change: if an enemy unit spends MP or rallies at a distance of 2 hexes or fewer, the unit can change facing by one vertex for infantry and two hexes for cavalry.
- Retreat: if an enemy unit spends MP or rallies at a distance of 2 hexes or fewer, the unit can spend its full movement allowance to move away (it must finish its movement farther away from the enemy unit). It cannot become adjacent to an enemy unit. This option is only available for infantry units under Rally! orders or cavalry (under any orders) approached by infantry.
The active unit that prompted the reaction – regardless of the type of reaction movement - can then pick up its movement where it left off as soon as the reaction movement is resolved.
8.3 - Interception (for cavalry only)
If an enemy unit enters a hex (by any means) in the interception zone of a cavalry unit (see diagram 3) that has no enemy unit in its frontal hexes, the unit may attempt to intercept once per enemy activation by rolling on the Interception Table. A unit that attempts an interception receives an "Interception" marker regardless of the result of the attempt. This marker is removed at the end of the current wing's activation.
If the modified die roll is less than or equal to the number listed on the Table, the intercepting unit is moved adjacent to the enemy unit, maintaining its facing, and movement for the intercepted unit must cease. The intercepted unit loses any "Charge" marker and its charge bonus in the ensuing melee phase (at the end of the current activation). Neither of the units may fire.
Two or more units may attempt to intercept the same unit. The player rolls the die for each attempt as he announces it.
A cavalry unit that has intercepted can carry out an action during the activation of its wing. Similarly, a cavalry unit whose wing has already been activated can intercept.
Diagram 3 (interception zone) is not reproduced here.
8.4 – Fire as a function of movement
Offensive fire is a function of movement which costs the unit 2 MP. For details, see 10.
8.5 – Movement of double units
8.5.1 – Basic movement
When a double unit moves and enters two hexes of different terrain/elevation, it uses the higher cost of the two for movement and decline in status.
If one half of the unit receives a decline in status because of terrain, the entire unit suffers the effects. This also applies to status losses due to combat.
8.5.2 – Movement and pivoting
A double unit can advance with both halves of the unit entering into frontal hexes. It can also pivot: half of the unit enters the centre frontal hex while the other half remains in place (thereby changing the facing of the unit) for a cost of 2 MP plus the cost of the hex.
8.6 – Musketeer mangas
M units represent mobile musketeer mangas that can act at a certain distance from their tercio. An M unit can act differently than the double unit of its tercio (of the same name). It must, however, remain two hexes or fewer from its double unit. If it is no longer in this range at the end of its wing's activation, it must move in order to once again be 2 hexes or fewer away unless it is adjacent to an enemy unit. As soon as this is no longer the case, the M unit must move closer to its double unit.
9 - Stacking
9.1 – General
In general, stacking is limited to one infantry or cavalry unit per hex. There cannot be interpenetration among units. Exception: Any unit type can pass through or stack with an artillery unit. If a unit penetrates a hexagon containing enemy artillery, that unit is eliminated. A wing commander must always be stacked with a unit of his wing. If he moves alone, he must end his movement in a hex containing a unit of his wing.
9.2 – Stacking and combat
When units are stacked, each unit can fire normally and keeps its own facing. If the hexagon is hit by fire, each unit must take its own morale test. In the case of melee, the artillery is ignored and shares the outcome of the unit with which it is stacked.
9.3 – Stacking and retreat
If a unit must retreat but cannot because of stacking limits or terrain, it must consult the "Unable to retreat" table. The player rolls 1d10, adds any modifiers and consults the result.
10 - Fire
10.1 – General
Offensive fire is a function of movement and costs the firing unit 2 MP. Defensive fire is free. (See 10.3).
Any unit with a fire capacity can carry out defensive fire or offensive fire on an enemy unit, according to the following conditions:
- the targeted unit must be within fire range;
- the targeted unit must be in a fire zone (see 10.4);
- the artillery unit firing must have an LoS to its target.
10.2 - Line of sight
An artillery unit must have a clear line of sight (LoS) to its target to be able to fire. An inactive unit must have a clear LoS to the active unit it reacts to execute a reaction movement (8.2). The LoS is traced between the centres of the 2 hexes occupied by the concerned units and depends on the level of elevation of these hexes.
- If the 2 units are at the same level, the LoS is blocked if it passes through a hex of a higher level or if it passes through a hex of the same level with a blocking terrain element.
- If the 2 units are at different levels, the LoS is blocked if it passes through a hex with a level greater than or equal to the unit with the higher level or if the hex adjacent to the lower level unit along the LoS contains a blocking terrain element at the same level as the lower level unit.
Note: Players must take into consideration the ratio between the size of a hex (100m) and the difference in altitude between 2 levels (10m). In addition, there is no plateau effect: all the slopes are continuous.
Blocking terrain elements are:
- any friendly or enemy unit (except commanders and artillery);
- any obstacle hex (village, wood) or spine or an obstacle hex (bocage).
An LoS is never affected by the nature of the hexes occupied by the 2 units concerned. When an LoS passes along the spine of a hex, it is only blocked if both of the hexes contain blocking elements. A unit always has a clear LoS toward the 6 adjacent hexes.
10.3 - Types of fire
Firing is not simultaneous and its results are applied immediately.
- Offensive fire: fire costs 2 MP; a unit can advance then fire, or fire then advance, or any combination of the two as long as it has the necessary MP.
Example: A unit with a March! or even Rally! order that is already in contact with the enemy can change facing, fire, then move away from the enemy. Note: do not forget that actions in an enemy unit's fire zone may provoke defensive fire (see following paragraph).
A unit can spend up to 2 additional MP to obtain a favourable die roll modifier (+1 for each MP spent), even if the unit is already in contact with the enemy (in this case, no defensive fire is provoked).
A unit can only execute one offensive fire per turn.
- Defensive fire (or reaction fire): an inactive unit can fire when:
- it has been the target of fire coming from its fire zone;
- an active unit enters a hex of its fire zone (this case includes an attacking unit that advances after melee, retreats, or becomes Broken);
- an active unit changed facing in its fire zone;
- an active unit rallies in its fire zone.
A unit can carry out an unlimited number of defensive fires as long as these conditions are met.
Example: an infantry unit in the fire zone of an enemy unit is activated. It changes facing in order to have this unit in its fire zone by spending 2 MP and provokes a defensive fire on itself. It can then fire offensively by spending 2 MP, which provokes a new defensive fire from the enemy unit.
Note: The infantry may never attack the cavalry in melee, but only by fire.
- Artillery: The artillery does not use MP to fire. Each turn, artillery can fire once in offensive fire during its activation and once in defensive fire. Place the marker on its appropriate side (offensive fire/defensive fire) after the first fire. The unit is turned to its "Tiré" (Fired) side after its second and final fire (the marker is removed). It does not need to be in command.
- Double unit: Each hex of this unit acts independently as two simple infantry units.
10.4 - Zone and range of fire
In general, the range of fire of all units is 1 hex (otherwise stated, the neighbouring hex) except for the artillery whose range is 10 hexes.
The frontal and flank hexagons of the infantry and cavalry constitute their fire zone. The artillery possesses a fire zone which extends 10 hexes from its frontal hexes.
Example of fire: The Spanish player is active. A enters the fire zone of E, F and G who fire defensively, and then A fires offensively at F who responds with another defensive fire. B fires on D and on E who respond. C fires on D, and D responds.
10.5 – Fire resolution
Each unit that can fire has a fire value indicated on the counter. The player rolls 1d10 and applies any of the following potential cumulative modifiers:
- Defensive fire on cavalry: -1
- Artillery fire on cavalry: -2
- Spending of additional movement points (up to 2 MP): +1 / +2
- Fire at the flank or rear of the enemy: +1
- +/- Terrain
If the result is greater than or equal to this value, the target must take a morale test. This test is modified by the die result minus the unit's fire value.
Example: if the fire value is 6 and the player gets a 9, his adversary adds (9-6)=3 to his morale test die result.
For the artillery, the number to reach is given on the table of artillery fire based on the distance (expressed in hexagons) and the same procedure then applies.
11 - Melee
11.1 – General
Melee takes place at the end of each wing's activation after the player has finished all other possible actions with the units of the wing. The wing's orders have no effect on melees.
11.2 - Procedure
Active units with an enemy unit in any of their frontal hexes can declare a melee. Inactive units that have not been designated as a target of the combat and that have enemy units in any of their frontal hexes can declare a reaction melee. After the declaration of all of these melees and reaction melees, the reaction melees are resolved first (results are applied immediately and in the order chosen by the active player), followed by the melees declared by the active player.
The unit initiating the melee is then called the attacker and the target is called the defender.
Several hexes can attack the same hex; the attacker chooses the head unit (the others are supporting units). The head unit is used to calculate the melee modifiers; the supporting units only add the modifiers for flank or rear attacks, for multiple attackers, and possibly a charge bonus or commander bonus. An infantry unit can support a cavalry unit that is a head unit combatting an enemy cavalry unit (see 11.6). The head unit will be the one to advance after the combat, if necessary.
A Broken unit can neither engage in nor support a melee.
In general, the active player chooses by which side of the line of combat he wishes to begin, then continues down this line. The attacker rolls 1D10 and immediately applies the various modifiers to the result.
Unlike in fire, a double unit can attack or support only one hex (see diagram below). The defender must occupy (or have at least 1 hex in the case of a double unit) the central frontal hex of the attacking unit.
When a double unit defends itself, it defends as a block even if the attacker is adjacent to only one of its hexes.
11.3 – Modifiers
Close combat modifiers are all cumulative and are as follows:
- Morale of the attacker minus morale of the defender;
- Interaction of unit types (see Interaction table);
- Number of supporting units (+1 per unit, maximum of 5);
- +1 if a double unit attacks an enemy unit in its centre frontal hex and his 2 other frontal hexes contain no enemy units;
- Number of flank or rear hexes from which the attack begins (+1 per hex);
-
- value of attacking commander if he is involved in the combat;
-
- value of defending commander if he is involved in the combat;
- Terrain of the defender;
- Charge bonus (+1 or +2 depending on the type).
If a unit type H, G or C initiates a melee after having crossed 2 hexes of clear terrain without changing facing, it receives a +2 bonus. The other types of troops except K and M may do the same for a +1 bonus. The bonus is illustrated by a "Charge" marker and applies to the head units and support (only 1 Charge bonus per melee).
Note: The cavaliers crossed the battlefield at a trot and only galloped over the last 100 meters or so to charge the enemy.
-
- ? Lance bonus for H and G type units. The bonus applies only in attack to the head units and supporting units (only 1 lance bonus per melee) and only during their first melee.
Source note: the printed rule reads "+ ? Lance bonus"; the lance values are given as "+1 or +2 Lance" in the Die modifiers list and in 11.6c, and are transcribed as printed here.
Example of melee: The Spanish player is active and designates his melees. B, with the support of C, attacks D. A charges F. Since E and G are inactive units not designated to participate in the combats and with an active unit in a frontal hex, they can declare a reaction melee against A. The combat sequence is:
- E and G attack A; G is chosen as head unit. The modifiers are: morale difference = -1; interaction of units = 0; one supporting unit = +1; no flank attack; no commanders present = 0; terrain = 0; no charge bonus; total = 0.
- B and C attack D; C is chosen as head unit. The modifiers are: morale difference = +1, interaction of units = +2; a supporting unit = +1; no commanders present = 0; terrain = 0; flank attack = +1; no charge bonus; total = +5.
- If A survives the attack of E and G, it attacks F. The modifiers are: morale difference = +2; interaction of units = +2; double unit against simple unit = +1; no commanders present = 0; terrain = 0; charge bonus = +1; total = +6.
11.4 – Melee results
A and D refer to the attacker and the defender, the number indicates the unit's reduction of morale level and the number after R is the number of hexes of retreat. First apply the reductions in morale level then the retreats of the defender and then those of the attacker.
Example: A1-D2R2, the attacker is reduced a level, the defender is reduced two levels and retreats two hexagons.
If the unit is reduced more levels than it has, it is eliminated. The result of the melee applies to the head unit in an attack.
11.5 – Retreat and advance after close combat
- Disordered and shaken units that must retreat maintain their facing.
- If a unit becomes broken, it must retreat two hexes and then change facing (see 12.2). Once broken, it does not apply other retreats.
Example: After a D1R2 result, a shaken unit becomes broken, retreats 2 hexes and changes facing but does not retreat 2 additional hexes (R2 result not applied).
As a priority, a unit retreats toward its edge of the map or otherwise to a free hex.
If a unit cannot retreat because of stacking limits (see 9), it must consult the "Unable to retreat" table.
Artillery is eliminated if it must retreat.
If the defender retreats or is eliminated, the head unit of non-shaken attacker must advance to the liberated hex. If the head unit of the attacker retreats or is eliminated, the defender (if he is not broken) may advance.
Advancing units may change their facing by one vertex after entering a hex.
If a double unit advances after combat, the two halves of the unit must advance if possible. If only one hexagon is free, the double unit must pivot to occupy it. A double unit cannot change facing after advancing. In other cases, the double unit cannot advance.
11.6 – Special rules
a) The infantry can never attack the cavalry in melee. Exception: A normal or disordered infantry unit can engage a shaken cavalry unit in melee. It can nevertheless support a friendly cavalry attack against the enemy cavalry regardless of the status of this enemy cavalry.
Note: A cavalry unit with shaken status is disorientated on the battlefield. Its commanders give contradictory orders or begin to give in to panic; the cavaliers act as individuals. In terms of military organisation, the unit ceases to exist and is paralysed (thus its zero movement capacity). Reduced in this way, it is at the mercy of a troop of footsoldiers galvanised by the scent of victory. On the other side, a broken cavalry unit is in full flight and unable to be pursued by the footsoldiers.
b) A or K type units cannot attack (or support) an infantry unit in melee, unless it is broken or type M.
c) The lance bonus of an H or G unit only applies if it is the head unit or a supporting unit in the attack. The "Lance" marker is automatically removed from a Gendarme unit at the end of its first melee as attacker or defender.
d) If a unit attacks a lone cannon in melee, the cannon is automatically eliminated and the level of the attacking unit is not reduced.
12 - Morale of units
Units have a morale value indicated on the counter. There are four levels of morale: normal, disordered, shaken, and broken. Exception: Artillery has only one morale level (normal).
12.1 - Morale test
A unit may be required to test its morale after a melee, fire or movement. To test morale, roll 1d10. If the result (possibly modified by the value of the commander stacked with the unit and, in the case of fire, the difference resulting from the fire roll) is less than or equal to the morale value of the unit, the test is successful. If the test fails, the unit is reduced by one level.
Exception: The artillery is directly eliminated. A broken unit that fails is eliminated. A unit can never become broken because of the terrain or an attempt to change facing.
12.2 - Morale effects
- Normal: initial values (front side of the unit).
- Disordered: movement divided by two, -1 for morale, +1 for fire (backside of unit).
- Shaken: movement equals zero, -2 for morale, +2 for fire. The unit can only fire defensively (front side of marker).
- Broken: rout movement only, -5 for morale, no fire (back side of marker).
Penalties apply to the front side of the counter, normal status.
If a unit reaches the broken level, it must immediately retreat 2 hexes then change face to orientate itself toward its edge of the map. It must consult the "unable to retreat" table if it cannot retreat.
13 - Rally
A unit that rallies can win back a morale level by being stacked with its wing commander (automatic rally) or by passing a morale test. A unit can attempt to be rallied even when adjacent to an enemy unit, but this provokes enemy reaction fire.
13.1 – Procedure
Rally is automatic if the unit is stacked with its commander.
The other units must take a morale test; those adjacent to their commander benefit from his modifier.
A unit that passes its test wins back one level of morale; a unit that fails its rally test loses a level of morale.
- Rally! Order: All the units of the wing can attempt to rally if the wing is active.
- March! Order: Only units which are adjacent to or stacked with their wing commander may attempt to rally.
13.2 – Rout phase
During this phase, each broken unit uses its normal movement allowance to move along the shortest path in hexes toward its edge of the map. It pays normally for changes in facing and must keep its back to the enemy. If the unit cannot carry out this movement or exits the map, it is eliminated and counts in the victory conditions. Exiting the map costs 1 MP.
Reference Tables
Melee Table (11.4)
| Die | ATT | DEF |
|---|---|---|
| -2 or less | A eliminated | D1 |
| -1 | A3 | D1 |
| 0 | A2R2 | D1 |
| 1 to 2 | A1R2 | D1 |
| 3 to 4 | A1R1 | D1 |
| 5 to 6 | A1 | D1R1 |
| 7 to 8 | A1 | D1R2 |
| 9 | A1 | D2R2 |
| 10 | A1 |
Die modifiers in melee (11.3):
- +/- Morale Difference (Attacker – Defender)
- +/- Interaction between units (Interaction Table)
-
- Attacking commander value
-
- Defending commander value
- +2 charge bonus for G, C, H
- +1 charge bonus for other types (except K)
- +1 or +2 Lance
- +1 per supporting unit (max. 5)
- +1 if a double unit attacks an enemy unit in its centre frontal hex and its 2 other frontal hexes are free of enemy units.
- +1 per flank or rear attack (per hex)
-
- Defender Terrain
Interaction Table
Rows are the attacker, columns are the defender. Cells marked "Prohibited" may not occur (11.6a). † Only if the infantry unit is broken (11.6b).
| ATT \ DEF | G | H/C | A/K | R | S | L | T | N | M |
|---|---|---|---|---|---|---|---|---|---|
| G | 0 | -1 | +1 | 0 | -2 | -2 | -2 | -1 | +1 |
| H/C | 0 | 0 | +2 | +1 | -1 | -1 | -1 | -1 | +1 |
| A/K | -2 |
Fire Table (10)
| Unit type | G | C/H/R/K | A | S | L | T | N | M |
|---|---|---|---|---|---|---|---|---|
| Die result for a hit | - | 6 or + | 5 or + | 7 or + | 6 or + | 5 or + | 5 or + | 4 or + |
Success: Morale test = 1D10 + the surplus in relation to the die result for a hit.
Example: the die result for a hit is 6, an 8 is rolled -> +2 to the Morale test die.
Defensive infantry Fire on Cavalry: -1 Spending additional MP (2 MP max): +1 / +2 Fire on Flank or Rear of enemy unit: +1 +/- Terrain
Artillery Fire Table
| Range | 1 | 2 | 3 | 4 | 5 | 6 | 7 | 8 | 9 | 10 |
|---|---|---|---|---|---|---|---|---|---|---|
| Die result for a hit | 2 or + | 3 or + | 4 or + | 5 or + | 5 or + | 6 or + | 6 or + | 7 or + | 7 or + | 8 or + |
Die roll modifiers:
- +/- Terrain occupied by the target
- Artillery firing on Cavalry: -2
- Defensive fire on the cavalry: -1
- Fire on enemy rear or flank: +1
Unable to Retreat Table
| Die | Effects |
|---|---|
| 2 or less | Eliminated |
| 3–6 | Reduced one level, retreat ignored |
| 7 or more | Improved one level (but never better than disorder), retreat ignored |
Die Modifiers:
- Original morale of 6 or less: -2
- Original morale of 8: +1
Change of Orders Table (6.3)
Desired order across the top; current order down the side. Entries give the die result needed to change orders.
| Current order \ Desired order | Charge! | March! | Rally! |
|---|---|---|---|
| Charge! | — | 2 or - | 5 or - |
| March! | 4 or - | — | 4 or - |
| Rally! | 1 or - | 2 or - | — |
Die roll modifiers:
- Command value of the wing commander
- Command value of the commander in chief if stacked with a commanded unit of the wing
- +1 if the wing commander is adjacent to an unbroken enemy unit
- -1 for a cavalry wing that wants to change to Charge!
- +1 for a cavalry wing that wants to change to March!
- -2 to change to Rally! If more than half of the wing's units are shaken, broken or eliminated (artillery units do not count)
Orders Summary (6.2)
- Charge!: All units must end movement closer (by at least one hex) to the closest enemy unit. If a unit is already adjacent to an enemy unit, it may not move away from it, but may change facing and/or perform offensive fire. No unit may attempt rally.
- March!: Units may move but may not become adjacent to an enemy unit. Units adjacent to their wing commander or stacked with him may attempt to rally (the WC may not move in this case, see 5.2). A unit already adjacent to an enemy unit may fire.
- Rally!: Units may move but may not finish their movement closer to the enemy. All units may attempt to rally. A unit already adjacent to the enemy may fire.
Reactivation / Preemption / Interception Table
Die result needed, by the current order of the wing:
| Current order | Reactivate | Preempt | Intercept |
|---|---|---|---|
| Charge! | 3 or - | 4 or - | 4 or - |
| March! | 2 or - | 3 or - | 3 or - |
| Rally! | Prohibited | Prohibited | Prohibited |
Reactivation / preemption modifiers:
- Command value of the wing commander (if not adjacent to an unbroken enemy unit)
- -1 if the wing is composed only of cavalry
- +1 if the wing commander is adjacent to an unbroken enemy unit
Interception modifiers:
- Command value of the wing commander if stacked with the unit
- -1 if the original morale is 8
- +1 if the original morale is 6 or less
- -1 for G, H or K type units
- +1 if the unit is in disorder
Terrain Effects Table
| Terrain | Movement and effects |
|---|---|
| Clear terrain, Garden, Level of high tide | 1 MP. Level 0. |
| Difficult | 2 MP. Level 0. |
| Slope | +1 MP (toward the upper level only). A unit at the top of a slope has a +1 bonus in melee in defence. |
| Hedge | +1 MP. A cavalry unit cannot charge. |
| Village † | 2 MP. A cavalry unit loses a morale level. No charge bonus. A unit in this type of hex inflicts a -2 die roll modifier (DRM) for fire on his opponent. A unit in defence in this type of hex benefits from a -1 DRM in melee. |
| Woods †, Fences | 2 MP. A cavalry unit loses a morale level. No charge bonus. A unit in this type of hex inflicts a -1 DRM for fire on his opponent. |
| Swamp | 2 MP. All units lose a morale level. No charge bonus. |
| Dunes | 2 MP. A cavalry unit loses a morale level. No charge bonus. A unit in this type of hex has a +1 bonus in fire/melee and in attack/defence. Level 1. |
| Canal, wooded countryside † | +1 MP. All units lose a morale level. No charge bonus. |
† Blocking terrain for the LoS (10.2).
Unit Status Effects Table (12.2)
| Status | Side shown | Effect |
|---|---|---|
| Normal | Front side of the unit | Movement and morale intact |
| In disorder | Back of the unit | Half-movement and -1 in morale and +1 fire |
| Shaken | Front of the marker | No movement, -2 in morale and +2 fire (defensive only) |
| Broken | Back of the marker | Rout movement only, -5 in morale, no fire |
Scenario: Kircholm, 27 September 1605
Duration: 8 turns
Victory: After 8 turns, victory goes to the side that has destroyed the most enemy units. Each H type unit destroyed counts as 2 units. The death of Chodkiewicz counts as 3 units.
Sudden victory: The game ends in sudden victory:
- if the Polish-Lithuanian destroys all the units of the Lennartson, Mansfeld and Brandt formations or if Karl IX dies.
- if the Swede reaches hex 2311 or if 3 Polish-Lithuanian formations have the Rally! order at the same time.
Deployment
Poland-Lithuania
- Jan Karol Chodkiewicz 2004
- Reserve: Teodor Lacki 1906
- Lacki 1, Lacki 2: 1906, 1907
- Right wing: Jan Piotr Sapieha 1903
- Chodkiewicz Cav: 1803
- Zacharias: 1802
- Sapieha: 1903
- Left wing: Tomasz Dabrowa 2009
- Dabrowa: 1810
- Witting: 2008
- Wielamowski: 1910
- Achmet: 1911
- Machowski: 2009
- Voluntarij: 2010
- Bogdan: 1613
- Sakin: 1514
- Battle corps: Wincentego Wojna 1807
- 1x Artillery: 1707
- Chodkiewicz Inf: 1805
- Woyna 2: 1806
- Woyna 1: 1807
- Gosiewski: 1808
- Kurland: 2006
- Giedroyc: 2003
Sweden
- Left wing: Henri Brandt 1104
- Engdis: 1103
- Linderson: 1104
- Pedersonn (Cuirassiers): 1105
- Lennartson's Corps: Anders Lennartson 1207
- Pedersonn (Infantry): 1202
- Larsonn: 1203
- Erichsonn: 1204
- Stiliken: 1205
- Forbus: 1206
- Friedthen: 1207
- Thomsonn: 1208
- Nilsonn: 1209
- Månsson: 1210
- Right wing: Joachim von Mansfeld 1109
- Hindersonn: 1108
- Olofsonn: 1109
- Some: 1110
- Lüneburg's Corps: Lüneburg 0309
- 2x Artillery: 0405, 0407
- Finnish: 0304
- Mikaelsonn: 0305
- Rechensberg 2: 0306
- Rechensberg 1: 0307
- Mansfeld: 0308
- Guards: 0309
Lennartson's corps begins with the Charge! order.
Special rules
- Lance of the hussars and petyhorcy: Place a Lance +2 marker on each unit of Hussars and a Lance +1 marker on the Zacharias unit. During the first melee, this marker gives a cumulative bonus (with Charge and other lances) and is removed from the game at the end of the melee. The head unit as well as the supporting units must use it.
- Chodkiewicz: At any time during phase B, the Polish-Lithuanian player decides to which wing Chodkiewicz belongs (one wing per turn). He gives his bonus in combat and morale to whichever unit of the wing he is stacked with. He can be alone in a square but he is automatically eliminated if an enemy unit crosses through or engages him in melee.
- Tatars: The units Bogdan and Sakin are always in command.
Historical option
- Apathy of Karl IX: the reserve corps and the corps of Lüneburg begin with a Rally! order.
Variant 1
- Swedish infantry formation: Some sources affirm that after the crushing defeats in the previous campaigns, the infantry stopped positioning itself in the Swedish style formation and adopted the Spanish style massive squares (but without the mangas of musketeers). The Swedish player can decide at the beginning of the game that all his infantry formations are type T. It is impossible to return to another type during the game. The following units act like double T units for all the rules (combat and fire especially):
- Pedersonn (Infantry)/Larsonn
- Erichsonn/Stiliken
- Forbus (alone)
- Friedthen/Thomsonn
- Nilsonn/Månsson
- Finnish/Mikaelsonn
- Rechensberg 1/Rechensberg 2
- Mansfeld/Guards
Variant 2
- The Swedish army stays together: Karl IX does not fall into the trap of the false retreat of the Polish-Lithuanian army and advances his army at the same time, following the advice of Lüneburg.
- The corps of Lennartson does not necessarily begin with the order Charge! The Swedish player chooses normally.
- For the initial set-up, units of the corps of Lüneburg, the reserve under Karl IX and the two artillery units are put 6 hex forward to the southeast.
- Example: Finlandais and Abel are respectively placed in 0904 and 0805.
Both variants can be selected together or separately.
Notes on this transcription
- Credits, playtester and proofreader thanks, and the publisher's further-reading link at the end of the source have been omitted as attribution rather than rules.
- Counter illustrations (introduction to section 2) and Diagram 3 (interception zone, section 8.3) are pictures in the printed booklet and are not reproduced.
- Section 7.2 cross-refers to "8.52" in the printed text. This is transcribed as 8.5.2, the section on movement and pivoting that the reference points to.
- Section 8.1 refers to the "Terrain Table", which is printed as the Terrain Effects Table. Section 8.3 refers to the "Interception Table", which is the Interception column of the Reactivation/Preemption/Interception table. Both are transcribed under their printed names above.
- Section 11.3 prints the lance bonus as "+ ?". The value is given as "+1 or +2 Lance" in the melee die modifiers and in the 11.6c note; the printed "?" is left in place with a source note in section 11.3.
- The deployment grid repeats several identifiers across different units as printed (1109 for Mansfeld and Olofsonn; 1207 for Friedthen and Lennartson; 2009 for Machowski and Dabrowa; 0207 for Karl IX and Börgilsonn; 0309 for Lüneburg and Guards). They are transcribed exactly as printed and have not been corrected.
- The deployment grid is a two-column layout. Entries were assigned to a side and a formation by their position in the printed grid and by the continuing numbering within each block (for example Thomsonn, Nilsonn and Månsson continue the 1202-1207 numbering of Lennartson's Corps).