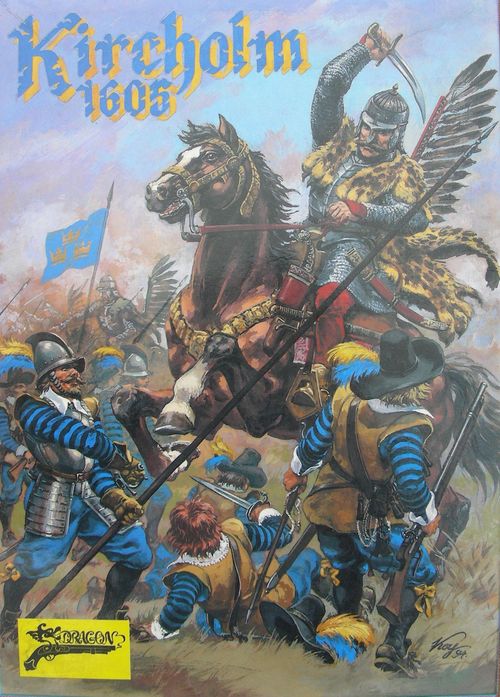
Kircholm 1605 (Dragon)
Kircholm 1605 (Dragon) Rulebook
Table of Contents
Table of Contents
- 1.0 Introduction
- 2.0 Components
- 3.0 Phases and Stages of the Game
- 4.0 Orientation of Units
- 5.0 Levels of Combat Effectiveness
- 6.0 Unit Formations
- 7.0 Movement Rules
- 8.0 Zones of Control
- 9.0 Fire Combat
- 10.0 Melee
- 11.0 Charge
- 12.0 Lances
- 13.0 Artillery
- 14.0 Reorganisation
- 15.0 Commanders
- 16.0 Scenarios
- 17.0 Reference Tables
- 17.1 Unit Formations
- 17.2 Melee Results (REZULTATY WALKI WRĘCZ)
- 17.3 Fire Results (REZULTATY OSTRZAŁU)
- 17.4 Costs of Turning, Changing Formation, and Firing a Volley
- 17.5 Reorganisation of a Unit (REORGANIZACJA ODDZIAŁÓW)
- 17.6 Terrain Characteristics (CHARAKTERYSTYKA TERENU)
- 17.7 Results of Artillery Fire (REZULTATY OSTRZAŁU Z DZIAŁ)
1.0 Introduction
"Kircholm 1605" is a wargame based on real events. It simulates the course of the known battle, in which Swedish units, three times more numerous, were defeated by the forces of the Polish-Lithuanian Commonwealth (Rzeczpospolita). Jakub Sobieski said of this victory: "future ages will marvel at this victory more than they will believe it."
The game is played on a map showing the Kircholm battlefield. All the most important commanders and unit types are represented on it. In designing the rules, care was taken to reproduce the character and course of the real battle, while making sure that the procedures for conducting the wargame were not overly complicated.
The game consists of three scenarios: two historical and one general. The first sets the initial deployment of the forces, the second determines the moment of first contact and the course of the fighting, and the third leaves the entire initiative to the players.
The rules are fairly difficult and require careful, repeated reading. The game is essentially designed for two people, but after an appropriate division of the counters more players may take part.
2.0 Components
2.1 Game Board
The board, measuring 96 x 68 cm, depicts the terrain of the Kircholm battlefield. It contains all the characteristic terrain features. For free placement of units and orderly movement, a hexagonal grid is printed on the map. Each hex (field) is uniquely identified by its coordinates. For example, A12 or B16 means the hex lies at the intersection of the vertical row A12 and the diagonal row B16.
The map also carries a legend explaining the conventional symbols that appear on it, and a row of numbered fields called the turn track (tor etapów).
2.2 Counters
Before the game starts, the sheets of counter fronts and backs should be carefully cut out along the lines, and then glued together after folding. When gluing, care should be taken that the same unit numbers, or the appropriate types of auxiliary counter, appear on both sides of each counter.
Unit counters (counters representing units). Each unit counter has the following elements:
- Unit front (górna krawędź stanowiąca front oddziału): the upper edge of the counter; it marks the front of the unit.
- Unit rear (dolna krawędź stanowiąca tył oddziału): the lower edge of the counter; it marks the rear of the unit.
- Unit side (bok oddziału): the side edges of the counter.
- Unit identifier (identyfikator oddziału): the name or number that identifies the unit (see [2.31]).
- Unit type (rodzaj jednostki): the type of unit, which often also defines its formation (szyk).
- Close-formation symbol (symbol szyku zwartego): the star symbol, where it applies (see [2.35]).
- Melee strength (siła walki wręcz): the number of points in the first position of the counter's three-part value.
- Fire strength (siła ognia): the number in the middle position.
- Mobility (ruchliwość): the number of movement points in the last position.
The example counter for Chodkiewicz reads 15-0-2: melee strength 15, fire strength 0, mobility 2.
Artillery battery counters (żetony reprezentujące baterie artylerii). Each battery counter has the following elements:
- Identifier (identyfikator): the battery number.
- Unit front and rear and sides (as for unit counters).
- Melee strength (siła walki wręcz) and mobility (ruchliwość, see [2.34]).
- Fire strength (siła ognia): a letter, A or B.
- Unit type (rodzaj jednostki): the firing (ogniowy) or transport (transportowy) formation.
The front of the battery counter shows the firing formation (szyk ogniowy), with the printed values 0.5-(1) and fire strength A. The reverse shows the transport formation (szyk transportowy), with the printed values 0.25-3. The mobility in parentheses on the front is explained in [2.34].
Commander counters (żetony reprezentujące dowódców). Each commander counter shows the commander's name, and a modifier for the melee table (modyfikator tabeli walki) with the commander's influence on reorganization (wpływ dowódcy na reorganizację). The example counter for Karol IX reads 2-2.
Other counters.
- Disorganization counter (żeton dezorganizacji), marked D (see [5.1]).
- Flight counter (żeton ucieczki), marked U (see [5.2]).
- Artillery loading counters (żetony ładowania dział): the reverse side reads "dział naładowane" (guns loaded) and the front side "ładowanie dział" (loading guns).
- Hussar lance counter (żeton kopii husarskich): used to mark the lances of hussars (kopie husarskie).
- Volley counters (żetony oddanych salw), numbered 1 and 2 on the two sides (żetony oddanych salw; the numbers mark the volleys delivered).
- Charge counters (żetony szarży): the charge modifier depends on the terrain: on flat terrain (w terenie płaskim) the modifier is 0; uphill (pod górę) it is -1; from an elevation (ze wzniesienia) it is +1. These values are the melee-table modifiers (modyfikator tabeli walki wręcz).
- Shock counter (żeton symbolizujący szyk uderzeniowy), with the value (x2)-0-6: the multiplier of the melee-strength factor (mnożnik współczynnika siły walki wręcz), the fire strength (siła ognia) in the middle, and the mobility (ruchliwość) at the end.
Unit types (Rodzaje jednostek). The types of unit shown in the components list, each with its formation in brackets:
- hussars (husaria) (basic formation)
- petyhorcy (light cavalry) (basic formation)
- reiters (rajtarzy) (basic formation)
- reiters (rajtarzy) (shooting formation)
- arquebusiers (arkabuzerzy) (basic formation)
- arquebusiers (arkabuzerzy) (shooting formation)
- Tatars (Tatarzy) (basic formation)
- volunteers (wolontariusze) (basic formation)
- Swedish infantry (piechota szwedzka) (defensive formation)
- Swedish infantry (piechota szwedzka) (shooting formation)
- Lithuanian infantry (piechota litewska) (defensive formation)
- Lithuanian infantry (piechota litewska) (shooting formation)
- battery of guns (bateria dział) (firing formation)
- battery of guns (bateria dział) (transport formation)
2.3 Basic Definitions and Terms Used in the Game
2.31 Unit identifier. Swedish infantry units correspond to half-regiments. For example, 1/2 Lennartsson means the first half-regiment of the second regiment of the Lennartsson group. In the case of cavalry (rajtaria), the identifier denotes the cornet (kornet), a tactical unit that is a component of the regiment. For example, 2/3 Mansfeld means the second cornet of the third regiment of Mansfeld.
In the Rzeczpospolita forces, units grouped in banners (chorągwie; in infantry, in the form of rota) carry the names of the banners' commanders, with a sequence number where applicable. For example, 1 Machowski means the first banner of Machowski.
The identifier of an artillery counter, on either side of the forces, corresponds to a battery of 2-3 guns. In that case the identifier denotes the battery number.
2.32 Melee strength (siła walki wręcz) is the unit's melee strength, expressed in points, that is, its real fighting power during combat.
2.33 Fire strength (siła ognia) determines the shooting capability of a unit. For artillery units, fire strength is symbolised by the letter A or B.
2.34 Mobility (ruchliwość) is the amount, expressed in movement points, that reflects the potential ability of the unit to carry out the actions allowed to it (movement, turns, changing formation, delivering volley fire, etc.) during its own movement phase. If the limit is given in parentheses (for example, infantry in a defensive formation, or artillery in a firing position), the unit in that formation may not spend its movement points on movement. 2.35 Close-formation symbol (symbol szyku zwartego). Most units, mainly cavalry, may appear in different formations, most often shown by the reverse and front of the counter and by drawings. For example, a pikeman with a pike indicates a defensive formation, and a musketeer with a musket indicates a shooting formation. Close formation (in reality a tightening of the intervals between riders in a rank) has no separate drawing. Instead, the cavalryman figure carries the symbol ★.
2.36 Melee-table modifier (modyfikator tabeli walki) is a number (positive or negative) that changes the result when you look up the outcome in the MELEE RESULTS table (REZULTATY WALKI WRĘCZ). Negative modifiers shift the original result to the left, and positive modifiers shift it to the right, by the stated number of columns. For example, with a 1:1 ratio of attacker to defender, a modifier of +3 shifts the original result three places to the right, giving 3:1. The same 1:1 ratio with a modifier of -2 gives 1:2.
The results columns of the table, from left to right, are: 1:3, 1:2, 1:1.5, 1:1, 1.5:1, 2:1, 3:1, 4:1. The central column, 1:1, is marked with the symbol *; the shift -2 applies to the left, and +3 to the right.
2.4 Scale of the Game
The map on which the battle takes place is drawn to a scale of 1:2500. One hex represents about 50 m of real terrain. Each cavalry counter represents a unit of 100-150 riders. For infantry, one counter represents 240-360 men. Artillery counters correspond to batteries of 2-3 guns. One stage (etap) represents 6-10 minutes of real time.
3.0 Phases and Stages of the Game
The game is played over 30 cycles called stages (etapy). During each stage, each side has the right or duty to carry out a series of specified actions. The turn track (TOR ETAPÓW) printed on the board, together with the STAGE marker (żeton etapy), is used to mark successive stages.
To keep the order and sequence of the game, all the actions carried out in each stage are divided into seven parts called phases (fazy). In each phase, strictly defined actions are carried out, and no action connected with the game may be taken outside the phase assigned to it. A stage is considered finished after all the actions provided for in phases 1 to 7 have been carried out in order. After a stage is finished, the STAGE marker is moved one space further along the turn track, and play then begins again with phase 1.
3.1 Phases
A phase may be skipped when the actions provided for in it do not have to be carried out and the players do not choose to carry them out. Within a phase, the actions may be carried out in any order.
Phase 1 – artillery loading phase. This phase is common to both players. All artillery units of the Polish and the Swedish side that are in a firing position and not covered by a LOADING GUNS (ŁADOWANIE DZIAŁ) or GUNS LOADED (DZIAŁA NAŁADOWANE) counter are covered with a LOADING GUNS counter. Units that begin this phase covered by a LOADING GUNS counter become loaded; they are covered with a GUNS LOADED counter.
Phase 2 – movement of Rzeczpospolita forces. Any number of Polish commanders and units may move (or, in the case of fleeing units, must move) a distance limited by the number of movement points they possess. Within the movement-point limit (mobility), Polish units may also turn, change formation and conduct fire. During this phase Swedish units may carry out counter-fire with hand weapons. In this phase, all loaded artillery units of both players that are in a firing formation may also fire.
Phase 3 – combat of Rzeczpospolita units. Polish units may (or must, if a detailed rule requires it) attack Swedish units in melee.
Phase 4 – reorganisation of Rzeczpospolita forces. The player representing the Poles may attempt to reorganise his own units that are in a state of disorganisation or flight.
Phase 5 – movement of Swedish forces. Analogous to phase 2, except that Polish units may carry out counter-fire.
Phase 6 – combat of Swedish units. Analogous to phase 3.
Phase 7 – reorganisation of Swedish forces. Analogous to phase 4.
4.0 Orientation of Units
In Kircholm 1605, counters representing units must be placed on hexes in a strictly defined way. A unit must be oriented so that its front points towards one of the vertices of the hex it occupies. The two hexes in front of the unit's front are called front hexes (heksy frontowe); the hexes lying on either side are called side hexes (boczne); and the two hexes behind the unit are called rear hexes (tylne).
5.0 Levels of Combat Effectiveness
All units appearing in the game have three levels of combat effectiveness:
- fully effective (pełnosprawny)
- disorganised (dezorganizacji)
- fleeing (ucieczki)
During the game, as a result of combat, fire or other events, units may lose their combat effectiveness and drop to the lower levels, i.e. into a state of disorganisation or flight. The effect of moving into a state of flight or disorganisation is not permanent. With some luck, units may, through reorganisation, become fully effective again.
5.1 Disorganisation
5.11 A cavalry unit that becomes disorganised automatically changes to the basic formation (a shooting formation for infantry, and the transport formation for artillery), and is covered with a DISORGANISATION counter.
5.12 A unit in a state of disorganisation has the following characteristics:
- its melee-strength factor is divided by 2;
- its fire-strength factor is reduced to 0;
- cavalry units have 4 movement points, and infantry and artillery units have 2;
- artillery may not conduct fire and may not load (it changes to the transport formation);
- it may not change formation (to any other than that given in [5.11]);
- it may not voluntarily enter an enemy zone of control; if it is forced to do so, it automatically moves into a state of flight;
- it may not conduct pursuit;
- it has a normal zone of control, i.e. it takes part in combats on general principles;
- it may be moved by others;
- it has a front (it must be oriented), and may move and turn;
- if it again becomes disorganised (or fleeing), it moves into a state of flight;
- it may become fully effective only through reorganisation.
5.2 Flight
5.21 A unit that has moved into a state of flight is placed:
- in the case of cavalry, in the basic formation;
- in the case of infantry, in the shooting formation;
- in the case of artillery, in the transport formation.
Note: unlike the state of disorganisation, this does not mean that a unit in flight is in any of the formations listed above. It serves only to determine the reduced melee strength of the fleeing unit, which is calculated from the factors corresponding to the formations listed.
When a unit moves into a state of flight, it is covered with a FLIGHT (UCIECZKA) counter.
5.22 A unit in a state of flight has the following characteristics:
- it has no front and does not form any formation; it may move in any direction without the need to turn, and when attacked from any direction it defends itself with 1/5 of its melee-strength factor for the basic formation (cavalry), shooting formation (infantry) or transport formation (artillery);
- it need not be oriented (it has no front);
- its fire-strength factor is reduced to 0;
- all cavalry units have a limit of eight, and infantry and artillery units a limit of four movement points;
- during its own movement phase it must withdraw to a distance of not less than 5 hexes from any enemy unit that is not in flight; if this is impossible, it is eliminated;
- artillery may not conduct fire;
- it may not form any formation;
- it may not conduct pursuit;
- it has no zone of control and therefore may not attack;
- it may not enter the zone of control of an enemy unit; if it is forced to do so, it is eliminated;
- it may be moved by others;
- it is eliminated if it again becomes disorganised or fleeing;
- it may become fully effective again only through two reorganisations: first to the level of disorganisation, and later to fully effective.
6.0 Unit Formations
During the game, each fully effective unit must remain in one of the formations available to it, depending on the type of weapon it represents. The possible formations for each type of troops that appear in the game are shown on the reverses and fronts of the counters representing individual units (see [2.2] – unit types – and [2.35]). The exceptions to this rule are the shock formation (see [6.25]) and the double shooting formation (see [6.24]).
6.1 Infantry Formations
6.11 At the beginning of the 17th century, infantry units were formed of soldiers armed with edged weapons (pikemen) and with firearms (musketeers). Depending on the situation on the battlefield, units were grouped so as to make the best use of the complementary advantages of the two types of weapon. In Kircholm 1605, infantry units may appear in a shooting formation or a defensive formation.
6.12 The defensive formation (szyk obronny; mainly used against cavalry) represents an arrangement of infantry in which pikemen are placed at the front of the unit in order to shield the musketeers. In this way, the unit's melee strength increases, but its shooting and manoeuvre possibilities are seriously limited.
6.13 The shooting formation (szyk strzelecki) represents an arrangement in which the pikemen are on the flanks of the unit or behind it, behind the musketeers. Thanks to this arrangement, the full fire power available to the unit can be used.
6.2 Cavalry Formations
6.21 Cavalry units appearing in the game may form at least three of the following five formations:
- basic formation (szyk podstawowy)
- shooting formation (szyk strzelecki)
- double shooting formation (szyk strzelecki podwójny)
- shock formation (szyk uderzeniowy)
- close formation (szyk zwarty)
The exceptions are the banners of the Tatars and the volunteers, which may appear only in the basic formation.
6.22 The basic formation (szyk podstawowy) is a medium-deep, manoeuvre-and-attack grouping of cavalry, allowing efficient movement and repositioning, and charging enemy units. All cavalry units of both sides may form this formation.
6.23 The shooting formation (szyk strzelecki) formed by cavalry is a deep, multi-rank grouping that allows the use of the firearms the unit carries, by means of the so-called caracole (the caracole operation consisted of the first rank of riders firing a volley, then riding back to the rear of the formation; the next rank then advanced to attack, fired its volley and fell back behind the first, and so on). This grouping reduces the unit's mobility and its real fighting strength. The shooting formation may be used by arquebusier and reiter units (of both sides).
6.24 The double shooting formation (szyk strzelecki podwójny) may be formed by reiter and arquebusier units. It consists of placing two units of the same type in shooting formation on one hex. The orientation of both units must be the same. If even one of the units in this formation drops to a lower level of combat effectiveness (this may happen as a result of a volley fired at close range, see [9.4]), the formation must be broken up by moving the given unit to an adjacent hex. The adjacent hex must be empty and may not be in the zone of control of an enemy unit. If this is impossible, the unit is eliminated. If units in a double shooting formation are fired upon or take part in a combat (defence or attack), the effects apply to both units. If the level of combat effectiveness drops, the formation must be broken up (under the rules mentioned earlier).
Note: if even one of the units is not in a shooting formation, it is not possible to place two units on one hex.
6.25 The shock formation (szyk uderzeniowy) is a shallow (3-4 ranks) but wide cavalry grouping, allowing the full combat power of the unit to be used. The relatively large intervals between riders allowed the whole unit to turn efficiently. A unit in the shock formation occupies two separate hexes. To mark this grouping, a SHOCK FORMATION counter is placed under the unit. The cavalry counter on top must be set so that it represents the basic formation. The melee strength of a unit in the shock formation is twice the strength of that unit in the basic formation. A unit's movement ability in the shock formation is always 6 movement points. A unit that moves into the shock formation expands to the right and folds in to the left, keeping its front (orientation) from the previous formation.
If only one flank took part in a given clash, or only one flank was the target of fire, the effects apply to the whole unit.
Only units of husaria, petyhorcy, arquebusiers and reiters may form the shock formation, and only Polish banners of these types.
6.26 The close formation (szyk zwarty) is a not-very-deep but tight (small intervals between riders) grouping of cavalry, used only for attacks on infantry. This formation is sensitive to fire and not very manoeuvrable, but it has great attacking power. A unit in close formation may move at most one hex, after which it must change formation (because of the difficulty of keeping the intervals between riders small). After a melee, regardless of its result, the unit automatically changes from close formation to basic formation. Only units of husaria and petyhorcy may form the close formation.
Note: in close formation, attacks are permitted only against infantry or artillery units. An attack in close formation against a cavalry unit is prohibited.
6.3 Artillery Formations
6.31 Artillery units may be in a firing formation or a transport formation.
6.32 The firing formation (szyk ogniowy) represents the placement of the guns in a battle position, allowing them to be loaded, to fire, and to carry out small turns.
6.33 The transport formation (szyk transportowy) allows an artillery unit to move. In this position an artillery unit may not conduct fire.
7.0 Movement Rules
7.1 General Rules
7.11 In general, units may move only during their own movement phases. Within a limited scope, unit movement is also possible during both combat phases and during the opponent's movement phase.
7.12 At the start of each of a player's own movement phases, all units have strictly defined limits of movement points (mobility). During this phase, at the cost of their movement points, units may move, turn, change formation and deliver hand-weapon volley fire, until their movement-point limits are used up.
7.13 During its own movement phase, the player must first move all fleeing units that stand closer than 5 hexes from an enemy unit that is not in flight (so that after the movement they stand at a distance of at least 5 hexes). Movement of the other units is not obligatory, and the order in which the player who controls them moves them depends only on his own choice.
7.14 In a given phase, to carry out the actions described in [7.12], a unit may not spend more movement points than its mobility.
7.15 A unit need not use up its entire movement-point limit in a given phase.
7.16 Movement points not used in one stage may not be used in the next.
7.17 Movement points may not be transferred from one unit to another.
7.18 A change of formation (the new formation may have a different mobility, or a reduced level of combat effectiveness, incurred while moving) does not change the initial movement-point limit of the unit (the limit it had at the start of its own movement phase).
7.2 Movement Rules
7.21 In general, units may move only forward (except as provided in [7.8]), that is, by entering any hex lying in front of the unit's front (front hex, see [4.0]). Examples of movement for units in the basic and shock formations are shown below.
(Diagrams of movement examples omitted; they show units in the basic and shock formations moving through front hexes.)
Units must move from one hex to the next in continuous motion; jumping over hexes is not permitted. On entering each successive hex, the unit must spend the appropriate number of movement points, depending on the type of terrain it is entering (see the table CHARAKTERYSTYKA TERENU, "Terrain characteristics").
7.22 A unit may not enter a hex occupied by an enemy unit.
7.23 A unit may not enter a hex occupied by a friendly unit.
7.24 Any number of units may pass through one hex during a given movement phase.
7.25 A unit may end its movement on a friendly unit, but only if its purpose is to form a double shooting formation.
7.26 A further correction of the position of a unit that has just ended its movement is possible only with the consent of the opponent.
7.3 Turns
7.31 While moving, a unit may make turns within the limit of its movement points. Making a turn enables the unit to change its direction of march.
7.32 Turns of 60 and 180 degrees are possible (a turn of 120 degrees is treated as two turns of 60 degrees). The cost of making a turn depends on the type of troops and the formation adopted, and is given in the table KOSZT WYKONANIA ZWROTU ("Cost of making a turn").
7.33 The type of terrain does not affect the cost of making a turn.
7.34 A unit in the shock formation makes a turn in such a way that one of its wings makes a move forward. It is forbidden to make a turn by moving one of the wings backwards.
(Diagram of turns omitted.)
Example. Units A and B correctly make turns. The way in which units C and D make turns is not permitted.
7.4 Changing Formation
7.41 During its own movement phase, while moving, a unit may change formation. Changing from one formation to another always costs 1 movement point (exception: artillery batteries, see the note in [13.23]).
7.42 During one movement phase a unit may change formation many times, until its movement-point limit is used up.
7.43 A change of formation does not change the movement-point limit used in this phase, which results from the fact that the mobility factor of a unit in its new formation may differ from its starting value.
Example. A unit begins its move in the close formation (mobility two movement points). Its first action is to change formation: at a cost of 1 movement point it moves into the basic formation. Although its mobility is now 7, it may spend only 1 more movement point (because its starting limit was 2 movement points).
7.44 A change of formation does, however, change the limit of shooting volleys that the unit may fire in a given movement phase (the limit depends on the formation adopted).
7.45 See [9.36].
7.5 Fire
7.51 During its own movement phase, units with a fire-strength factor greater than 0 may, at the cost of their remaining movement-point limit, fire (deliver volleys) at enemy units (see [9.2]).
7.52 The cost of delivering one volley is 1 movement point.
7.6 Movement of Fleeing Units
7.61 Units in a state of flight that stand closer than 5 hexes from a non-fleeing enemy unit must, at the start of their own movement phase, move beyond that limit. The movement of the other fleeing units depends entirely on the will of the player controlling them. The only restriction is that they may not approach to within less than 5 hexes of enemy units that are not in flight.
7.62 The mobility of fleeing units is 8 movement points for cavalry and 4 movement points for infantry and artillery.
7.7 Effect of Terrain
7.71 A unit spends one movement point for entering a clear hex. If it enters a hex with different terrain (woodland, built-up area), the unit may have to pay a higher cost (see the table CHARAKTERYSTYKA TERENU). When crossing a stream or the edge of a slope (only when going uphill), it spends an additional +1 movement point.
7.72 The effects of terrain are cumulative. For example, an infantry unit entering a hex with built-up terrain, while at the same time crossing the edge of a slope (uphill), is forced to spend 2+1, that is, 3 movement points.
7.73 The cost of entering a given hex depends not only on the type of terrain, but also on the type of unit and the formation adopted by it (see the table CHARAKTERYSTYKA TERENU).
7.74 An artillery unit moving in a given movement phase only along a road increases its mobility to 4 movement points.
7.75 A fully effective cavalry unit that is in built-up or marshy terrain, and that makes a turn or changes formation there, moves into a state of disorganisation.
7.76 A fully effective cavalry unit that enters built-up or marshy terrain risks lowering its level of combat effectiveness. After the unit enters built-up terrain, a die is rolled. The level is lowered (by one) if 1 or 2 is rolled.
7.77 For a unit moving in the shock formation, the effect of terrain is taken into account if at least one of its wings does not move through clear terrain.
7.8 Movement Backwards
7.81 Infantry and cavalry units, regardless of the formation they are in, may at the cost of their entire movement-point limit move one hex backwards (without making any turn), entering any hex lying behind the unit (rear hex, see [4.0]).
7.82 A backward move may not be made if, as a result, the unit would enter the zone of control of an enemy unit.
7.83 An infantry unit in the defensive formation automatically changes to the shooting formation after making a backward move.
7.84 If, as a result of a backward move, a unit leaves an enemy zone of control, the procedure described in [8.33] must be carried out. The enemy unit whose zone of control the unit left may pursue (by one hex; see [10.7]).
8.0 Zones of Control
8.1 General Rules
8.11 The zone of control of a unit consists of the two (or three, if the unit is in the shock formation) adjacent hexes lying in front of the unit's front (front hexes, see [4.0]).
(Diagram of zones of control omitted.)
8.12 All infantry and cavalry units, except those in a state of flight, have zones of control throughout the whole game.
8.13 The presence on the same hex of several zones of control, belonging to enemy or friendly units, has no consequences. In such a case all the zones of control covering the hex exist independently of one another, without cancelling or excluding one another. The hex is then controlled by several units (enemy and friendly).
8.14 A zone of control does not in any way affect friendly units.
8.2 Effect of Zones of Control on Movement
8.21 On entering the zone of control of an enemy unit, a unit must immediately stop, regardless of the movement points it has not yet used in this stage.
8.22 A unit entering the zone of control of an enemy unit does not incur any additional movement-point cost.
8.23 If a fleeing unit enters a hex that lies within the zone of control of an enemy unit, it is eliminated.
8.24 A commander moving alone may not enter the zone of control of an enemy unit.
8.25 The zone of control of a unit does not in any way affect the movement of friendly units.
8.3 Leaving an Enemy Zone of Control
8.31 During its own movement phase, a unit may leave the zone of control of an enemy unit, but this operation carries the risk of losing combat effectiveness (a fully effective unit moves into a state of disorganisation, a disorganised unit moves into a state of flight, and a fleeing unit is eliminated).
8.32 The first way of leaving an enemy zone of control is to make a move forward. After leaving the zone of control of the enemy unit, a die must be rolled:
- if an infantry unit left the zone of control of an enemy infantry unit, or a cavalry unit left the zone of control of an enemy cavalry unit, its level of combat effectiveness is lowered if 1 or 2 is rolled;
- if an infantry unit left the zone of control of an enemy cavalry unit, its level of combat effectiveness is lowered if 1, 2, 3 or 4 is rolled;
- if a cavalry unit left the zone of control of an enemy infantry unit, its level of combat effectiveness is lowered if 1 is rolled.
A unit leaving an enemy zone of control in this way incurs no additional movement-point cost.
(Diagram omitted.)
8.33 The second way of leaving an enemy zone of control is a backward move of the unit (see [7.8]). Only infantry units may use it.
(Diagram omitted.)
After leaving the zone of control of the enemy unit, a die must be rolled:
- if the withdrawing unit left the zone of control of an enemy infantry unit, its level of combat effectiveness is lowered if 1 or 2 is rolled;
- if the withdrawing unit left the zone of control of an enemy cavalry unit, its level of combat effectiveness is lowered if 1, 2, 3 or 4 is rolled.
8.34 The third way of leaving an enemy zone of control, possible only for cavalry units, is to leave it by making a turn of 180 degrees, and then moving forward. The cost of making the turn is in this case 1 movement point more than the value given in the table KOSZT WYKONANIA ZWROTU. After the turn, a die must be rolled:
- if the withdrawing unit made the turn in the zone of control of an enemy cavalry unit, its level of combat effectiveness is lowered if 1, 2, 3 or 4 is rolled;
- if the withdrawing unit made the turn in the zone of control of an enemy infantry unit, its level of combat effectiveness is lowered if 1 or 2 is rolled.
After the effects of making the turn have been applied, the unit may leave the enemy zone of control by moving forward (according to the procedure given in [8.32]).
8.4 Moving within an Enemy Zone of Control
8.41 A unit beginning its movement within the zone of control of an enemy unit may move within it, at the cost of its entire movement-point limit, by one hex forward, but this automatically lowers its level of combat effectiveness by one level.
Example. Unit A moves within the zone of control of an enemy unit.
Note: in the diagram below, unit B does not move, but leaves the zone of control of unit 4 and then enters the zone of control of unit 3. In this case the procedure given in [8.32] should be applied.
8.5 Making Turns within an Enemy Zone of Control
8.51 A unit standing in the zone of control of an enemy unit may, at the cost of its entire movement-point limit, make a turn of 60 degrees. This operation does not carry the risk of lowering its level of combat effectiveness.
8.52 A turn of 180 degrees is also permitted (again at the cost of the entire movement-point limit), but only when it leads to combat.
Example. Unit A makes a turn of 180 degrees in order to engage units 1 and 2.
8.53 A turn of 180 degrees is also permitted when leaving an enemy zone of control; in that case, however, the risk of losing combat effectiveness is accepted (see [8.34]).
8.6 Changing Formation within an Enemy Zone of Control
8.61 A unit that, during its own movement phase, has found itself in the zone of control of an enemy unit may no longer voluntarily change its formation.
8.62 The exception to this rule is when an infantry unit (only infantry: cavalry and artillery may not do this) enters, on its own initiative, the zone of control of an enemy unit. In that case it may, at the cost of one additional movement point, move into the defensive formation (this allows the infantry unit to increase its melee-strength factor). However, this operation carries the risk of dropping to a lower level of combat effectiveness.
A compulsory die roll may apply:
- if a unit changes formation in the zone of control of an enemy infantry unit, it drops to a lower level of combat effectiveness if 1 is rolled;
- if a unit changes formation in the zone of control of an enemy cavalry unit, it lowers its level of combat effectiveness if 1 or 2 is rolled.
8.63 A unit may not form the shock formation if, after its right wing has expanded (it expands to the right, see [6.25]), that right wing would stand in the zone of control of an enemy unit.
8.64 If only the right wing of a unit in the shock formation is in the zone of control of an enemy unit, folding the formation is permitted (the unit folds its shock formation to the left, so that after the change of formation it stands outside the zone of control of the enemy unit). As a result of such folding, the unit may lower its level of combat effectiveness: a die is rolled, and a result of 1 or 2 means a drop to a lower level of combat effectiveness.
8.7 Effect of Zones of Control on Combat
8.71 A unit may melee (attack in hand-to-hand combat) only the unit (or units) that lies within its zone of control. In other words, to attack an enemy unit, during the movement phase the attacker must move its own unit so that the enemy unit lies within its zone of control.
9.0 Fire Combat
9.1 General Rules
9.11 All infantry and cavalry units (artillery is described in [13.0]) with fire-strength factors greater than zero may conduct fire (deliver volleys). A unit may fire at enemy units lying in front of its front (within a 60-degree sector; the exception is the Tatars). The distance at which fire may be conducted, and the effectiveness of a volley, depend on the type of troops. For each type of unit, three ranges are distinguished: direct (bezpośredni), effective (skuteczny), and maximum (maksymalny). The diagrams below show all the types of troops able to conduct fire, with the hexes that may be fired upon marked by these three ranges (B = direct, S = effective, M = maximum):
- reiters (rajtarzy)
- arquebusiers (arkabuzerzy)
- infantry (piechota)
- Tatars (Tatarzy)
(Range diagrams for each unit type omitted; the letters B, S and M mark the ranges.)
A necessary condition for firing at a unit is that line of sight be maintained between the firing unit and the target (see [13.17]).
9.12 Fire is permitted in two periods:
- the unit's own movement phase (main fire, see [9.2]);
- the opponent's movement phase (counter-fire, see [9.3]).
9.13 Volley fire is carried out in volleys (salwy). The number of volleys a unit may fire in each movement phase (whether its own phase or the opponent's phase) depends on the type of troops and the formation adopted:
- infantry in the defensive formation: 1 volley;
- infantry in the shooting formation: 2 volleys;
- reiters and arquebusiers in the shooting formation, or in the double shooting formation*: 2 volleys;
- Tatars: 1 volley.
*Each unit entering a double shooting formation has a limit of 2 volleys; the units fire separately, one after the other.
The above volley limits apply to the units of both players in each movement phase, not in each stage. For example, infantry in the shooting formation may fire 4 volleys during one stage of the battle (two in each of the two movement phases).
Note: when determining the number of volleys possible, the formation the unit has at that moment is always taken into account, not the formation it had at the beginning of the phase. In this case there is no equivalent to the rule in [7.18].
9.14 Within its volley limit, a unit may during one movement phase fire at different hexes (at most 2), since one volley may be fired at only one hex.
9.15 It is permitted for one unit to be the target of fire from several units (see [9.55]).
9.16 A unit may not fire even a single volley if, at the start of its movement phase, it is in the zone of control of an enemy unit, or if it has in its own zone of control an enemy unit that is not in a state of flight. This rule follows from the fact that a unit which has engaged in melee, or has been forced into it, has practically no chance of conducting fire. In this game one hex represents about 50 real metres, and the situation in which enemy units stand on neighbouring hexes in practice represents the clash of both units in melee.
9.17 If, as a result of movement (by its own movement or by the enemy's), a unit finds itself in the zone of control of an enemy unit, it may fire only a direct volley (see [9.4]).
9.18 After each volley fired, the unit must cover its counter with a VOLLEY counter (żeton oddanej salwy). The number on the counter must match the number of volleys fired in this phase. After the end of each movement phase of its own, all VOLLEY counters covering units are removed from the board.
9.19 A volley limit not used in this phase may not be carried over to the next phase.
9.2 Main Fire
9.21 Main fire is conducted during the unit's own movement phase. At the cost of its movement-point limit, a unit may fire volleys within the actions described in [7.12]. The cost of one volley is 1 movement point for infantry units and 2 movement points for cavalry units.
Example. The unit (1) is in a basic formation at the beginning of its own movement phase. Unit A is a unit in the shooting formation, and unit B is also in the shooting formation. Unit (1) moves to hex "x" and then "y", spending two movement points, which makes it possible (according to [9.32]) for units A and B to fire volleys at it. Each of them fires one volley at unit (1) (without effect). Reiters change formation to the shooting formation, and then enter hex "z" (spending a further two movement points). Units A and B again each fire one volley at unit (1) (also without effect). The cavalry unit fires a volley at unit B and then enters hex "w", ending its movement.
Example. Unit A need not fire a volley at unit 1. It can keep one volley in reserve, in case another unit enters its fire hex.
9.3 Counter-Fire
9.31 Counter-fire takes place in the opponent's movement phase. It consists of firing volleys at the opponent's units that are carrying out their movement.
9.32 All own units that have the moving enemy unit (or, more precisely, the enemy unit spending its movement points) within their fire range may fire at it. They may fire one volley each time the enemy unit spends one movement point (if it is an infantry or artillery unit), or each time it spends two movement points (if the moving unit is a cavalry unit). A unit may use its movement points for changing formation, turning, firing a volley, and so on, and may also lose them as a result of fire, where the result is 1p or 2p.
9.33 A unit firing in counter-fire is not obliged to fire all its volleys at the same target.
9.34 If the moving enemy unit has finished its movement without using all its movement points, the number of volleys each unit with it in its fire range may fire is equal to:
- the number of unused movement points (if it is an infantry or artillery unit);
- the number of unused movement points divided by two and rounded down (if it is a cavalry unit).
9.35 It is also permitted to fire volleys at enemy units that have not spent any movement point and are within the fire range of own units. In that case, after all the enemy's moves are finished, own units that have the listed enemy units in their fire range may fire at them as many volleys as their not-yet-used limits allow.
9.36 An infantry unit carrying out counter-fire may, instead of firing a volley, change its formation during the opponent's movement phase. This is the only exception to the rule that a unit may change formation in the opponent's movement phase.
9.4 Direct Volley
A direct volley requires separate treatment, given its specific character. It was usually fired from a distance of a dozen or so metres, so its effectiveness was very high. Allowing the enemy (most often charging cavalry) to come so close, however, required great psychological resistance from the soldiers.
9.41 During its own movement phase, a unit may fire a direct volley at the moment when, as a result of its movement, an enemy unit finds itself within its direct range (see [9.11]). During the movement of the enemy, a direct volley may be fired when the enemy unit itself enters the direct range.
9.42 A direct volley may not be carried out in the case described in [9.16].
9.43 During one movement phase a unit may fire only one direct volley. The rule in [9.34] does not apply to a direct volley.
9.44 A unit carrying out a direct volley must then undergo the following test. The player controlling it rolls a die, and the unit becomes disorganised if the result is:
- 1 or 2, if the target is infantry;
- 1, 2 or 3, if the target is cavalry.
If the target is an artillery unit, the above procedure is not carried out.
9.45 During its own movement phase, the procedure in [9.44] is carried out after the direct volley has been fired, but only if the fire produced no result (no effect).
9.46 During the opponent's movement phase, the procedure in [9.44] is carried out before the volley is fired.
9.5 Fire Procedure
9.51 The player whose unit is to fire a volley names the firing unit and its target. He rolls the die twice (or rolls two dice) and then adds up the results. In the FIRE RESULTS table (REZULTATY OSTRZAŁU), he finds the row appropriate to the type and formation of the target unit, the range, and the total of points rolled. The result is read at the intersection of that row with the column corresponding to the fire strength of the firing unit. If the total of points is greater than 7, the result of the fire is always no effect.
9.52 The effects of fire (of a volley fired) shown in the FIRE RESULTS table are:
- ● – no effect;
- 1p – the fired-upon unit loses 1 movement point (if it is infantry or artillery) or 2 movement points (if it is cavalry);
- 2p – the fired-upon unit loses 2 movement points (if it is infantry or artillery) or 4 movement points (if it is cavalry);
- D – the fired-upon unit moves into a state of disorganisation;
- U – the fired-upon unit moves into a state of flight.
Results D and U apply only where they indicate a lower level of combat effectiveness than the unit had before the volley.
Note: the effects of results 1p and 2p obtained within one volley are not added together (where several units each fire one volley).
9.53 For results 1p and 2p, it is assumed that the fired-upon unit spent 1 or 2 movement points (infantry, artillery), or 2 or 4 points (cavalry), respectively; see the consequences in [9.32].
9.54 If a unit firing in counter-fire obtains the result 1p or 2p, it may fire its next volley only after the moving unit has spent a further 1 or 2 movement points (infantry), or 2 or 4 points (cavalry). In other words, this means a loss of the opportunity to fire a volley, resulting from the rule in [9.32].
9.55 If several units fire at one unit, the fire result is determined separately for each of them.
9.6 Influence of Terrain on Fire
9.61 If the target is an infantry unit in a wagon laager (w taborze) or in built-up terrain, then when looking up the result in the FIRE RESULTS table, the fire-strength factor of the firing unit is reduced by one. In other cases, the influence of terrain on fire is not taken into account.
10.0 Melee
10.1 General Rules
10.11 Melee between opposing units may be conducted only during combat phases. The player is called the attacker when his phase is in progress; the other player is then the defender.
10.12 A combat phase consists of a series of successive clashes (starcia), in which units belonging to both sides take part.
10.13 A unit may attack an enemy unit only if, at the start of its own combat phase, that enemy unit is in its zone of control.
10.14 Each clash may take the form of an attack by one unit on several enemy units (obviously, if they are in its zone of control), or by several units (or one) on one enemy unit. Clashes in which several enemy units from each side take part are forbidden.
Note: the only exception to the above rule is when units in a double shooting formation take part in a clash. In that case they are treated as a single unit whose strength is equal to the sum of their melee-strength factors.
10.15 In a given combat phase, clashes are conducted until both of the following conditions are met:
- all enemy units that are in the zones of control of attacking units have been attacked;
- all the attacking player's units that have an enemy unit in their zone of control have made their attacks.
10.16 During one combat phase, each unit may take part in at most one clash.
10.17 The attacking player himself decides which units will take part in a given clash. In other words, he indicates the attacking units and the unit that is the target of the attack.
10.18 The attacking player also decides the order in which clashes are resolved.
10.2 Method of Resolving a Single Clash
10.21 To resolve a single clash:
a) compare the melee-strength factors of the attacker and the defender. Once the ratio is obtained, round it in favour of the defender to the nearest value appearing in the MELEE RESULTS table (REZULTATY WALKI WRĘCZ), which shows the comparative ratio of strengths;
b) apply to that ratio the modifications (see [2.36]) for the terrain, the presence of commanders, hussar lances (kopie husarii) and so on. The modified ratio gives the final column in which the result of the combat is looked up;
c) the attacking player rolls the die. The result of the fight is found at the intersection of the row corresponding to the number of points rolled and the column obtained earlier (from point b);
d) the effects of the combat are applied.
The next clash may be started only after the result of the previous combat has been applied.
10.22 The effects of individual modifications are cumulative. For example, a unit of husaria that has lances (modifier +1) and which charges downhill (modifier +1) receives a total modifier of +2.
10.23 If, after the modifier is applied to the ratio ([10.21]-b), its value is greater than 6:1 or less than 1:5, then take 6:1 or 1:5 respectively as the final value.
10.3 Calculating the Ratio of the Attacker's Strength to the Defender's
10.31 When calculating the ratio of attacking to defending strength ([10.21]-a), the final result should be rounded in favour of the defender. For example, if the attacker's strength is 5 and the defender's is 3, the ratio 5:3 (i.e. 1.66(6):1) is rounded in favour of the defender to 1.5:1.
10.32 The strength of the attacking unit and of the defending unit depends on the position from which the attacking unit attacks the defender:
- if the attacker attacks the defender from the rear (see [4.0]), its melee-strength factor is increased four times;
- if the attacker attacks the defender from the side (see [4.0]), its melee-strength factor is increased two times.
10.33 If several units attack one unit, then when calculating the ratio ([10.21]-a), the attacker's strength is the sum of the strengths of all the attacking units, calculated according to [10.32].
Example. Units A, B and C attack unit 1. The strength of unit A (since it attacks from the rear) is 5x4=20. The strength of unit B (attacking from the side) is 4x2=8. The strength of unit C is unchanged and is 6. In this case the ratio of strengths is 34:3, i.e. 11:1.
10.34 If one unit attacks several units, each of which is attacked from a different position:
- the strength of a unit attacked from the rear is reduced four times;
- the strength of a unit attacked from the side is reduced two times.
If this one unit attacks several units, then for the defender's strength take the sum of the strengths of all the defending units, calculated by the above key.
Example. Unit 1 attacks units A and B. The attacker's melee-strength factor does not change. The strength of unit A is reduced four times (since it is attacked from the rear), and the strength of unit B is reduced two times (since it is attacked from the side). Strength of unit A: 5x0.25 = 1.25; strength of unit B: 4x0.5 = 2.0. The sum of the defenders' strengths is therefore 3.25, and the ratio of strengths is 3:3.25, i.e. 1:1.5.
10.35 If only one flank of a unit in the shock formation is attacked (a situation that can arise only when the attacking unit finds itself in the zone of control of one flank only), the strength of the defending unit is halved. The situation is analogous if a unit in the shock formation attacks with only one flank. In both cases only half of the unit takes part in the combat, but the result of the combat applies to the whole unit.
10.36 If a unit in the shock formation attacks one unit but from different sides, the unit in the shock formation may be divided notionally into two parts: one wing (half of the total strength) attacks from the front, and the other wing (also half of the total strength) attacks from the side.
Example. The strength of a unit in the shock formation is 8 points. Its left wing (4 points), attacking from the side, has 4x2, i.e. 8 points of strength; its right wing (4 points), attacking from the front, does not change its strength. The total strength of the attacker is therefore 8+4=12 points.
10.37 If a unit in the shock formation attacks several units simultaneously, and one of them is attacked from two sides (unit A in the diagram), then that unit's strength is divided into two equal parts, one of which defends from the front and the other from the side.
Example. The strength of the attacking unit in the shock formation is 8 points (it does not change). The strength of the defending unit B remains unchanged (the unit is attacked from the front). Unit A (2 points) is divided in half (1 point each): one part fights from the front (so defends with one point of strength), and the other is attacked from the side, which means its strength is halved. The total strength of the defender is therefore: unit B 2 points; unit A 1 point + 1 point x 0.5 = 1.5 points. 2+1.5 = 3.5 points. The ratio of strengths is 8:3.5, which rounds to 2:1.
10.38 Each Polish infantry unit taking part in a clash (attack or defence) against Swedish cavalry reduces its melee-strength factor by half. It is enough that at least one Swedish unit taking part in the given clash is a cavalry unit.
Note: this rule results from the fact that in the Commonwealth army of the time the proportion of pikemen within the infantry was much smaller than in armies of the western type. In Commonwealth armies, protection of the musketeers from enemy cavalry was usually entrusted to their own cavalry.
10.4 Effects of Combat
10.41 The effects of combat, presented in the MELEE RESULTS table (REZULTATY WALKI WRĘCZ), consist of two parts separated by a diagonal line. The symbols placed before the line refer to the attacker, and those placed after the line (in the case of defence) refer to the defender.
10.42 The symbols in the table mean:
- E – all units are eliminated;
- D2W3 – each of the units moves down two levels of combat effectiveness, and the withdrawing unit withdraws three hexes;
- D2W2 – each of the units moves down two levels of combat effectiveness, and the withdrawing unit withdraws two hexes;
- D1W1 – each of the units moves down one level of combat effectiveness, and the withdrawing unit withdraws one hex;
- W1 – all units withdraw one hex;
- ● – no effect.
10.5 Withdrawal
10.51 A unit that is forced by the result of combat to withdraw must move the distance specified, measured from the hex it occupied during the clash.
10.52 Units in a state of flight may withdraw in any direction (without the need to make any turn).
10.53 Fully effective units and units in a state of disorganisation may withdraw by moving backwards (see [7.8]). If this is impossible, they withdraw in any direction, but automatically move into a state of flight (a unit in flight has no front, and so may move in any direction).
10.54 Units withdraw regardless of their mobility and of the cost of the terrain crossed.
10.55 A withdrawing unit may not:
- enter a hex that wholly represents the river Dźwina;
- leave the board;
- enter a hex occupied by an enemy unit.
If a withdrawing unit cannot withdraw otherwise, it is eliminated.
10.56 During withdrawal, a unit may not pass through a hex occupied by another friendly unit. Ultimately, the withdrawal path of a withdrawing unit can be cleared by moving friendly units (see [10.6]).
10.57 A withdrawing unit may enter the zone of control of an enemy unit, but each such entry into a hex lowers its level of combat effectiveness by one level.
10.58 A unit forced to withdraw automatically changes to the basic formation (infantry: the shooting formation).
10.59 If during withdrawal a cavalry unit is forced to enter built-up terrain or marsh, its level of combat effectiveness is lowered by one level (but at most down to the fleeing state).
10.6 Displacement
10.61 A unit forced to withdraw may pass through a hex occupied by a friendly unit. To ensure a free path, the friendly unit standing on that hex must be moved so that it gives way to the withdrawing unit.
10.62 A unit may be displaced by one hex forward or backward by carrying out a move.
10.63 A displaced unit may not enter or leave enemy zones of control. In addition, the displaced unit must observe the limitations given in [10.55].
10.64 A displaced unit may not be eliminated for the reasons given in [10.63]. In such a case, the withdrawing unit is eliminated.
10.65 During one combat phase, a unit may be displaced many times.
10.66 A displaced unit automatically changes to the basic formation (infantry: the shooting formation; artillery: the transport formation).
10.67 A displaced unit risks a lower level of combat effectiveness. To check this, a die is rolled. The displaced unit loses one level of combat effectiveness if the result is:
- 1 or 2, for a displaced fully effective unit;
- 1, 2 or 3, if the displaced unit is in a state of disorganisation;
- 1, 2, 3 or 4, if the displaced unit is in a state of flight.
10.7 Pursuit
10.71 All units that won in the given clash may pursue. The number of movement points each unit taking part in the pursuit may spend during the pursuit equals the number of hexes by which the defeated unit had to withdraw. If the defeated unit was eliminated, the victor is entitled to pursue at a cost of 3 movement points.
10.72 A unit that decides to pursue automatically changes to the basic formation (infantry: the shooting formation), without loss of movement points. The exception is a unit in the shock formation, which is not obliged to change to the basic formation.
10.73 A pursuing unit must first enter the hex occupied by the defeated unit (or one of the hexes, if several defeated units were involved). The further direction of movement of the pursuing unit is free.
10.74 Artillery units may not conduct pursuit.
10.75 Regardless of the terrain in which the pursuit takes place, the pursuing unit spends 1 movement point for entering each hex. A turn of 60 degrees during the pursuit costs 1 movement point, even for a unit in the shock formation.
10.76 A unit conducting a pursuit is forced to stop after entering the zone of control of any enemy unit.
Note: during withdrawal and pursuit, the rules [7.75] and [7.76] apply.
10.8 Effect of Terrain on Melee
10.81 The effect of terrain on melee is taken into account through the modifications (see [2.36]), whose values for particular types of terrain are given in the column "influence on melee" of the table CHARAKTERYSTYKA TERENU (terrain characteristics).
10.82 The effect on melee depends only on the type of terrain in which the defender stands. The exception is a charge, where the terrain crossed by the charging unit is important (see [11.2]).
10.83 The effect on melee is cumulative: the effects of each type of terrain that, in the given clash, has an influence on melee are introduced.
10.84 Streams and bridges affect melee only when all the attacking units stand on the opposite side of the stream or bridge in relation to the defender.
10.85 A slope affects melee only when the defender is uphill and all the attacking units are attacking uphill (they stand at the bottom of the slope).
Example. In the case of an attack by unit A (standing at the foot of the slope) on unit 1 (standing on the top of the slope), the ratio of strengths (see [10.21]-a) is modified by -1.
10.86 Roads have no effect on melee; only the type of terrain through which the unit passes is important.
10.87 If several units are attacked simultaneously and each of them stands on different terrain, the terrain modifier most favourable to the defender is adopted (the modifiers of the terrains occupied by the individual units are not summed), with the exception of [10.88].
10.88 The melee strength of an infantry unit defending in built-up terrain, or in a wagon laager (tabor), is doubled. In this case the effect of terrain is always taken into account, for each unit (if several units defend), independently of the introduction of modifiers resulting from the effect of other types of terrain.
11.0 Charge
11.1 General Rules
11.11 Every fully effective cavalry unit may make a charge (szarża). The condition is that during its own movement phase it passes through the last three hexes (up to the moment it stops) without making any turn. After the charging unit ends its movement, an enemy unit must be in its zone of control.
11.12 A charge may not be made if any of the last three hexes passed by the unit (plus the hex on which the defender stands) is built-up terrain, a wagon laager (tabor), woodland, or marshy terrain. Moreover, a charge across a stream (or bridge) is forbidden, even when the defender stands right behind it.
11.13 The last three hexes may be passed by the charging unit only in the basic, shock or close formation (but the restriction in [6.26] must be remembered).
11.14 During passage through the last three hexes, only a change of formation from shock to close, or the reverse, is permitted.
11.15 A unit that, in its own movement phase, fulfilled the conditions given in [11.11], [11.12], [11.13] and [11.14] is covered, after the end of its movement, with a CHARGE counter (żeton szarży) marking the charge.
11.16 A charging unit doubles its melee-strength factor.
11.17 A charging unit may not attack jointly with infantry. Joint attacks with cavalry units that are not charging are permitted. Several charging units may take part in one clash.
11.18 After the clash in which a charging unit took part has been resolved (in the player's own combat phase), the CHARGE counter covering that unit is removed from the board.
11.2 Effect of Slope on a Charge
11.21 It is assumed that the charging unit makes a charge uphill (pod górę) if, while passing the last three hexes, it crosses the edge of a slope from the bottom upwards (see the consequences in [10.85]). To record that the charge was made uphill, the charging cavalry unit must be covered with a CHARGE counter showing -1.
11.22 If all the units taking part in the clash attack uphill, the ratio of strengths is modified by -1.
11.23 It is assumed that the charging unit makes a charge downhill (z góry) if, while passing the last three hexes, it crosses the edge of a slope from the top downwards, or if, after ending its movement, it stands on the top of a slope while the defender is at the bottom. To record that the charge was made downhill, the cavalry unit must be covered with a CHARGE counter showing +1.
11.24 If among the attacking units (there may be a unit charging uphill among them) there is at least one unit charging downhill, the ratio of strengths (see [10.21]-a) must be modified by +1.
11.25 If a charging unit passed the last three hexes on flat terrain, the counter covering it is marked with the digit 0.
12.0 Lances
12.1 Rules for Use
12.11 At the start of the game, each hussar unit (and only hussar units) is covered with a LANCE counter (żeton kopii) symbolising its lances.
12.12 A hussar unit permanently loses its LANCE counter in the following cases:
- after the first melee in which that hussar unit took part has been finished;
- at the moment it loses at least one level of combat effectiveness.
12.13 An attacking hussar unit with a LANCE counter modifies the ratio of strengths (see [10.21]) by +1 in its favour. In defence, the effect of the lances is not taken into account.
12.14 If several hussar units with LANCE counters take part in a given attack, their effects are summed (for example, two attacking units with LANCE counters together give a modifier of +2).
13.0 Artillery
At the turn of the 16th and 17th centuries, artillery was beginning to play an increasingly important role on the battlefield. Because of its low mobility it was used mainly for sieges and for the defence of fortresses or fortified positions. Its share in battles fought in the open depended on the character of the clash itself. In battles fought by linear tactics, where the main thrust was based on the maximum fire power of the whole formation, its share was rather considerable. In clashes of a manoeuvre character, the usefulness of artillery was rather small. During the war for Livonia it was rarely possible to deliver more than 1-2 volleys in the course of a battle.
13.1 Conditions for Firing
13.11 Artillery units may conduct fire only during movement phases (see [3.1] – phase 2 and phase 5). A volley may be fired during the phase of the unit's own movement or of the opponent's movement.
13.12 For artillery units, three ranges of fire effectiveness are distinguished:
- B – direct range;
- S – effective range;
- M – maximum range.
The diagram in the rulebook marks the hexes that may be the target of fire, depending on the orientation of the artillery unit.
13.13 During one movement phase, the target of artillery fire may be only one hex.
13.14 An artillery unit may fire only if it has loaded guns (see [13.3]) and is in the firing formation.
13.15 An artillery unit that stands in the zone of control of an enemy unit, or has within its direct range an enemy unit that is not in a state of flight, may not fire a volley (analogously to [9.16] – the exception is the direct volley, see [13.6]).
13.16 An artillery unit may fire at a given hex only when nothing disturbs visibility.
13.17 Two hexes are mutually visible if the straight line joining the centres of the two hexes does not pass through a hex that contains:
- a unit;
- woodland;
- built-up terrain.
These restrictions do not apply to the hex on which the firing unit or the target unit stands.
Note: visibility is also obstructed by elevations (see the diagram in the rulebook).
13.2 Principles of Artillery Operation
13.21 At the start of the game (regardless of the scenario), all artillery units of both sides have loaded guns (covered by GUNS LOADED counters).
13.22 An artillery unit that, at the beginning of its own movement phase, is in the firing formation may during that phase carry out one of the following actions (one at a time): fire a volley, make one turn of 60 degrees, or change formation.
Note: a volley may be fired only when the guns are loaded.
13.23 During its own movement phase, each artillery unit in the transport formation may, at the cost of its movement points, move, make turns or change formation.
Note: for an artillery unit, the cost of changing formation requires the entire movement-point limit.
13.24 A battery covered by a GUNS LOADED counter remains loaded when it moves, changes formation or makes turns.
13.25 During the opponent's movement phase, an artillery unit may only fire a volley (being, of course, in the firing formation). A volley may be fired at any moment of the phase.
13.3 Loading Cycle
13.31 After a volley is fired (in the phase of its own movement or of the opponent's), the GUNS LOADED counter is removed from that artillery unit.
13.32 In the loading phase (common to both sides), each artillery unit in the firing formation that is not covered by a counter symbolising loading or loaded guns is covered with a LOADING GUNS counter (ŁADOWANIE DZIAŁ).
13.33 All units of both players that begin the loading phase covered by LOADING GUNS counters become loaded; they are covered with GUNS LOADED counters.
Note: if an artillery unit covered by a LOADING GUNS counter changes to the transport formation for any reason, that counter is removed from it. A change of formation for loaded guns has no consequences (see [13.24]).
13.34 Loading guns (carrying out the actions described in [13.32] and [13.33]) is forbidden if the artillery unit stands in the zone of control of an enemy unit.
13.4 Fire Procedure
13.41 The player controlling an artillery unit names the firing unit and the target, and then:
- rolls the die twice and calculates the sum of the points obtained;
- finds the result of the volley in the table FIRE RESULTS FROM GUNS (REZULTATY OSTRZAŁU Z DZIAŁ), at the intersection of the column corresponding to the type and formation of the fired-upon unit and to the range in which it stands (determined by the number of hexes), with the row determined by the fire strength of the battery and the sum of the points rolled.
13.42 If several artillery units fire at one hex, the above procedure is carried out separately for each firing battery.
13.5 Fire Results
13.51 The results of fire given in the table FIRE RESULTS FROM GUNS (REZULTATY OSTRZAŁU Z DZIAŁ) mean:
- U – the fired-upon unit moves into a state of flight;
- D – the fired-upon unit moves into a state of disorganisation;
- ● – no effect of the fire.
Note: the results U and D apply only if they indicate a lower level of combat effectiveness than the one the fired-upon unit had before the volley.
Example. No effect is applied if the fired-upon unit, which is already in a state of disorganisation, obtains the result D.
13.6 Direct Volley
13.61 A direct volley may take place only during the opponent's movement phase, when an enemy unit enters the direct fire range of the artillery unit (not necessarily with the intention of attacking that unit). In such a case, after the enemy's movement is finished, the player controlling the artillery battery, before firing the volley, carries out a procedure analogous to [9.44]. He rolls the die, and the artillery unit becomes disorganised if the result is:
- 1 or 2, if the target is infantry;
- 1, 2 or 3, if the target is cavalry.
If the battery becomes disorganised, a volley can of course no longer be fired.
13.7 Melee
13.71 Artillery batteries have no zone of control.
13.72 An artillery battery may not voluntarily enter the zone of control of an enemy unit.
13.73 During its own combat phase, an artillery battery is forced to attack in melee the enemy unit that is within its direct range.
13.74 An artillery battery is eliminated if, as a result of melee, it is forced to withdraw.
13.75 An artillery battery may not conduct pursuit.
13.76 An artillery battery forced to move by displacement automatically changes to the transport formation.
13.77 If an artillery unit takes part in a melee, any LOADING GUNS counter lying on it (if present) is removed (the loading process is interrupted). For loaded guns there are no consequences.
14.0 Reorganisation
14.1 Rules and Conditions for Reorganisation
14.11 A unit that has dropped to a lower level of combat effectiveness may, during its own reorganisation phase, make an attempt to organise itself (reorganise) in order to regain the level of combat effectiveness it lost.
14.12 Only units in a state of disorganisation or flight may undergo reorganisation.
14.13 A unit in a state of disorganisation that stands in the zone of control of an enemy unit may not make reorganisation attempts.
14.14 A unit in a state of flight may attempt to organise itself, but only when it stands at a distance greater than 10 hexes from every enemy unit that is not in a state of flight.
14.15 During one phase, a unit may make only one reorganisation attempt.
14.16 The order of reorganisation of units within a given phase is immaterial.
14.2 Reorganisation
14.21 To carry out a reorganisation, the player rolls the die and then reads the result from the table REORGANISATION OF UNITS (REORGANIZACJA ODDZIAŁÓW). The result is looked up in the column corresponding to the unit's level of disorganisation (U – unit in a state of flight; D – unit in a state of disorganisation). A result marked with the letter R means the reorganisation attempt succeeded. The symbol "●" means the attempt to organise the unit failed.
14.22 If the reorganisation attempt succeeded, the unit regains one level of combat effectiveness, that is: a unit in a state of flight moves into a state of disorganisation, and a disorganised unit becomes a fully effective unit.
14.23 A successfully reorganised unit is marked by removing or placing the counter that shows its current level of disorganisation.
14.24 Reorganisation attempts may be supported by commanders (see [15.3]).
14.25 If as a result of reorganisation a unit regains full combat effectiveness, it automatically changes to the basic formation (cavalry), the shooting formation (infantry), or the transport formation (artillery).
14.26 If as a result of reorganisation a unit moves from flight to disorganisation, it must be oriented (at the discretion of the player controlling it), since a disorganised unit has a front.
15.0 Commanders
15.1 General Rules
15.11 In Kircholm 1605, each side has counters symbolising commanders who, during the battle, led specified groupings. During the game, each commander may command (direct) friendly units, and not only those that belong directly to his grouping. The names of commanders placed on unit identifiers (especially among the Swedish units) have only a historical meaning.
15.12 Commanders have no zones of control. Their movement ability equals 8 movement points (this value is not printed on the counters). They move according to the rules that apply to infantry units (using the table CHARAKTERYSTYKA TERENU). A commander may move in any direction without making turns; since commanders have no front or rear, their orientation on hexes is immaterial.
15.13 Commanders may, without restriction, occupy hexes jointly with their own units.
15.14 A commander who stands together with a unit in the shock formation is obliged to occupy the hex lying on the left flank of the unit.
15.15 Commanders may pass through hexes on which friendly units stand.
15.2 Influence of Commanders on Melee
15.21 A commander moving alone may not enter the zone of control of an enemy unit.
15.22 If a unit taking part in a clash shares a hex with a commander, the ratio of strengths (see [10.21]-a) is modified: in an attack, by the value of the commander's melee-table modifier with a positive sign; in a defence, with a negative sign (see [2.36]).
Example. A unit with a melee-strength factor of 4, standing together with a commander whose melee-table modifier is 2, attacks an enemy unit with a melee-strength factor of 2. The ratio of strengths is 4:2, i.e. 2:1. Since the commander is on the attacker's side, the obtained ratio is modified by +2, so that the final ratio is 4:1 (two positions to the right; see [2.36]).
15.23 If several commanders stand on one hex, only one of them may support a given clash.
15.3 Influence of Commanders on Reorganisation
15.31 If a reorganising unit stands on a hex together with a commander, or on an adjacent hex, the reorganisation-influence factor of that commander is added to the result of the die roll (see [14.21]).
15.32 The reorganisation of a unit may be supported by only one commander.
15.33 One commander may support the reorganisation of several units.
15.4 Reducing the Level of a Unit's Disorganisation
15.41 If a unit standing on a hex together with a commander, or on an adjacent hex, is forced to lower its level of combat effectiveness, the player controlling it rolls the die. If the number of points rolled is equal to or less than the commander's reorganisation-influence factor, then that commander prevents the unit from losing one level of combat effectiveness.
Example. If a fully effective unit becomes disorganised (lowered by one level), the commander may cause the unit to remain fully effective. If a fully effective unit moves into a state of flight (lowered by two levels), the commander may at most cause it to be disorganised, i.e. to lose only one (and not two) levels of combat effectiveness.
15.5 Elimination of a Commander
15.51 A commander is eliminated in the following cases:
- an enemy unit passes through or stops on the hex occupied by the commander;
- a unit that occupied a hex jointly with the commander has been eliminated;
- if a unit occupying a hex jointly with the commander lowers its level of combat effectiveness, the player controlling it rolls the die, and a result of 1 means that the commander is eliminated.
16.0 Scenarios
16.1 Scenario 1
This scenario reflects the situation in which both armies stand on the hills, occupying convenient defensive positions. The deployment of the forces is as follows.
Swedish army (identifier – board coordinates)
| Identifier | Coordinates | Identifier | Coordinates |
|---|---|---|---|
| 1/1 Lenartsson | A13 B34 | 1/1 Karol IX | A3 B26 |
| 2/1 Lenartsson | A13 B33 | 2/1 Karol IX | A3 B25 |
| 1/2 Lenartsson | A13 B31 | 3/1 Karol IX | A2 B25 |
| 2/2 Lenartsson | A13 B30 | 1/2 Karol IX | A3 B23 |
| 1/3 Lenartsson | A13 B28 | 2/2 Karol IX | A3 B22 |
| 2/3 Lenartsson | A13 B27 | 3/2 Karol IX | A2 B22 |
Polish army (identifier – board coordinates)
| Identifier | Coordinates | Identifier | Coordinates |
|---|---|---|---|
| (Pc) 1 Dąbrowa | A43 B32 | (H) Chodkiewicz | A43 B45 |
| (Pc) 2 Dąbrowa | A43 B33 | (H) Niewiaromski | A43 B46 |
| DĄBROWA | A43 B34 | SAPIEHA | A43 B44 |
| (A) Witting | A45 B33 | (H) Sapieha | A45 B45 |
| (A) Plettenberg | A45 B34 | (H) Wilamowski | A45 B46 |
| (A) Wall | A45 B35 | (H) Boruchowski | A47 B46 |
Key to the symbols in brackets: W – volunteers (wolontariusze); Pc – petyhorcy (pancerni); A – arquebusiers (arkabuzerzy); H – hussars (husaria); R – reiters (rajtaria); T – Tatars (Tatarzy); P – infantry (piechota); art. – artillery (działa).
All cavalry units are in the basic formation, infantry units in the shooting formation, and artillery in the firing formation. The artillery batteries of both players are loaded. Swedish units face the Polish units, and Polish units face the Swedish units.
Victory conditions. The winner is determined after the end of the last stage, by comparing the victory points (p.z.) obtained by each player. Victory points are obtained for the player's own fully effective units located on the board at the end of the game.
The Polish player receives:
- 3 p.z. for each unit of husaria;
- 2 p.z. for each unit of petyhorcy (pancerni);
- 1 p.z. for each other unit (including a battery of guns);
- 1 p.z. for each of the remaining commanders (except Chodkiewicz);
- 2 p.z. for Chodkiewicz.
The Swedish player receives:
- 2 p.z. for each unit of Guard reiters;
- 1 p.z. for each other unit (including a battery of guns);
- 2 p.z. for Karol IX;
- 1 p.z. for each of the remaining commanders (except Karol IX).
16.2 Scenario 2
The course of the battle in this scenario is closest to the historical one. It reflects the situation in which the Swedish units decided to attack, and their first clash occurred near the Polish positions. The deployment and orientation of the Polish units are identical to scenario 1. The Swedish units are placed as follows.
| Identifier | Coordinates | Identifier | Coordinates |
|---|---|---|---|
| 1/1 Lenartsson | A32 B40 | 1/1 Karol IX | A12 B30 |
| 2/1 Lenartsson | A32 B39 | 2/1 Karol IX | A12 B29 |
| 1/2 Lenartsson | A30 B37 | 3/1 Karol IX | A11 B29 |
| 2/2 Lenartsson | A30 B36 | 1/2 Karol IX | A12 B27 |
| 1/3 Lenartsson | A32 B36 | 2/2 Karol IX | A12 B26 |
| 2/3 Lenartsson | A32 B35 | 3/2 Karol IX | A11 B26 |
Victory conditions. This scenario is played until one of the following conditions is met:
- on the right side of row A27 there are fewer than 5 fully effective Swedish units;
- 67% of the Swedish units on the board are in a state of flight or disorganisation;
- the game is interrupted if the Poles obtain 30 p.z. more than the Swedes, where victory points are obtained for eliminating enemy units according to the scale of points of scenario 1.
If the game is interrupted before stage 7 (as a result of fulfilling one of the conditions above), the Poles win; if it is interrupted after stage 7, the Swedes win. If the game ends at stage 7, the result is a draw.
The Swedish player's cavalry units are in the basic formation, infantry units are in the shooting formation, and the artillery batteries are in the transport formation (loaded). All Swedish units face the Polish units.
The Swedish player receives victory points as in scenario 1 (2 p.z. for each unit of Guard reiters; 1 p.z. for each other unit, including a battery of guns; 2 p.z. for Karol IX; 1 p.z. for each of the remaining commanders except Karol IX). The Polish player receives victory points as in scenario 1 (3 p.z. for each unit of husaria; 2 p.z. for each unit of petyhorcy; 1 p.z. for each other unit, including a battery of guns; 1 p.z. for each of the remaining commanders except Chodkiewicz; 2 p.z. for Chodkiewicz).
16.3 Scenario 3
In this scenario both players are left great freedom in deploying their own units. The Swedes deploy their forces to the left of row A32, and the Poles to the right of row A41 and within 2 hexes of their own camp. The formation and orientation of the units are arbitrary. All artillery batteries are loaded.
Victory conditions. Victory goes to the player who brings about a situation in which, among the enemy units remaining on the board, 67% (or more) are in a state of disorganisation or flight. If neither side meets this condition by the end of the last stage, the game ends in a draw.
17.0 Reference Tables
17.1 Unit Formations
The table gives, for each type of troops, the formations it may adopt (● = permitted).
| Type of troops | Basic | Defensive | Shooting | Shock | Close | Double shooting | Transport | Firing |
|---|---|---|---|---|---|---|---|---|
| Husaria | ● | ● | ● | |||||
| Petyhorcy | ● | ● | ● | |||||
| Arquebusiers | ● | ● | ● |
* – Tatars fire in the basic formation.
17.2 Melee Results (REZULTATY WALKI WRĘCZ)
Columns: ratio of the attacker's melee strength to the defender's melee strength. Rows: the number rolled on the die. Entries are read as attacker's result / defender's result, using the legend in [10.42]. The table was transcribed from a low-resolution scan; verify against a clearer copy before use.
| Roll | 1:5 | 1:4 | 1:3 | 1:2 | 1:1½ | 1:1 | 1½:1 | 2:1 | 3:1 | 4:1 | 5:1 | 6:1 |
|---|---|---|---|---|---|---|---|---|---|---|---|---|
| 1 | W1/- | ● | ● | -/W1 | -/D1W1 | -/D1W1 | -/D1W1 | -/D2W2 | -/D2W2 | -/D2W3 | -/E | -/E |
| 2 | D1W1/- | W1/- | ● | ● |
17.3 Fire Results (REZULTATY OSTRZAŁU)
Columns: the fire strength of the firing unit (5 to 1). Rows: the target's type and formation, the range (direct / effective / maximum) and the sum of points rolled. Legend: D – disorganisation; U – flight; ● – no effect; 1p, 2p – loss of 1 or 2 movement points. The fire tables were transcribed from a low-resolution scan; verify against a clearer copy before use.
Artillery, infantry, and cavalry in the close formation (zwarty)
| Range | Sum | 5 | 4 | 3 | 2 | 1 |
|---|---|---|---|---|---|---|
| Direct | 2 | D | D | U | D | U |
| Direct | 3 | D | D | U | U | D |
| Direct | 4 | D | D | ● | ● | D |
| Direct | 5 | D | ● |
Cavalry in the basic, shooting, or double shooting formation (podstawowym, strzeleckim, strzeleckim podwójnym)
| Range | Sum | 5 | 4 | 3 | 2 | 1 |
|---|---|---|---|---|---|---|
| Direct | 2 | ● | D | D | U | D |
| Direct | 3 | D | ● | U | D | D |
| Direct | 4 | ● | U | D | D | ● |
| Direct | 5 | U | D |
Cavalry in the shock formation (uderzeniowym)
| Range | Sum | 5 | 4 | 3 | 2 | 1 |
|---|---|---|---|---|---|---|
| Direct | 2 | ● | ● | U | U | D |
| Direct | 3 | U | U | D | D | D |
| Direct | 4 | D | D | ● | ● | ● |
| Direct | 5 | D | ● |
17.4 Costs of Turning, Changing Formation, and Firing a Volley
Costs are in movement points. ● – the action is forbidden.
| Action | Infantry: shooting and defensive | Cavalry: basic | Cavalry: shooting and double shooting | Cavalry: shock | Cavalry: close | Artillery: transport and firing |
|---|---|---|---|---|---|---|
| Turn of 60° | 1 | 1 | 2 | 3 | 2 | 1 |
| Turn of 180° | 1 | 2 | 3 | 1 | ● | ● |
| Change of formation | 1 | 1 | 1 | 1 | 1 | all movement points |
| Volley | 1 |
* – Tatars only.
17.5 Reorganisation of a Unit (REORGANIZACJA ODDZIAŁÓW)
| Points rolled | Result: D (disorganised unit) | Result: U (unit in flight) |
|---|---|---|
| 1 | ● | ● |
| 2 | ● | ● |
| 3 | ● | ● |
| 4 | ● | ● |
| 5 | R | ● |
| 6 | R | R |
| 7 | R | R |
| 8 | R | R |
R – reorganisation succeeded. ● – no effect (reorganisation failed).
17.6 Terrain Characteristics (CHARAKTERYSTYKA TERENU)
Columns: the cost of entering a hex, or of crossing its edge, by the unit type and formation, and the influence on melee. ● – entry forbidden. ★ – see the footnotes below. "–" – no effect.
| Terrain | Inf.: shooting/defensive | Cav.: basic | Cav.: shooting/double | Cav.: shock | Cav.: close | Artillery: transport | Commanders | Influence on melee |
|---|---|---|---|---|---|---|---|---|
| Clear ground | 1 | 1 | 1 | 1 | 1 | 1 | 1 | – |
| Woodland | 2 | 4 | 4 | 4 | ● | 2 | 2 | – |
| Built-up area | 2 | 2 | 2 |
★ – if the movement takes place along a road, the mobility of the unit increases by 1 movement point (see [7.74]). ** – the unit bears no additional cost if it crosses the edge of a slope while going downhill.
17.7 Results of Artillery Fire (REZULTATY OSTRZAŁU Z DZIAŁ)
Columns: the fire strength of the battery (A or B), the sum of points rolled, and the type and formation of the target, by range. "–" – no effect. Transcribed from a low-resolution scan; verify before use.
| Battery | Sum | Inf./cav. close: direct | effective | maximum | Cav. basic/shooting/double: direct | effective | maximum | Art./cav. shock: direct | effective | maximum |
|---|---|---|---|---|---|---|---|---|---|---|
| A | 2 | U | D | D | D | U | D | U | D | D |
| A | 3 | U | U | D | U | D | D | D |