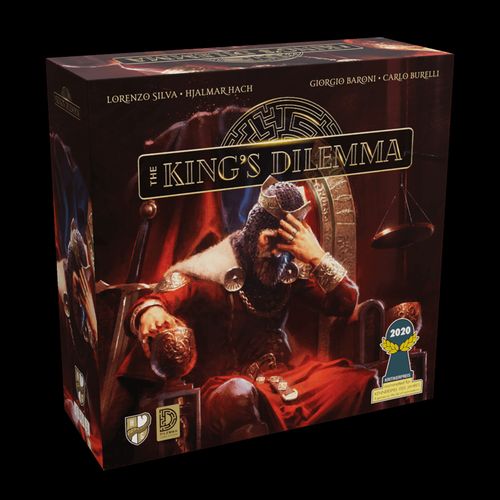
The King's Dilemma
The King's Dilemma Rulebook
Table of Contents
Table of Contents
- Disclaimer
- A Legacy-Like Experience
- Dilemma Card System
- Components
- Kinds of Cards
- Game Overview
- Before Your First Game
- Game Setup
- Legacy Setup Effects
- Playing the Game
- Phases of the Round
- Triggering the End of the Game
- End of the Game
- Triggering the End of the Campaign
- The World of the King's Dilemma
- Mystery Stickers
- Realm Chronicles
- The King's Dilemma Troubleshooting Tool
Disclaimer
This game is set in a fictional and often cruel fantasy world. It was designed to put you in front of morally challenging situations and tough choices. Many of the dilemmas you will face involve ethical and moral choices related to sensitive topics that could upset your sensitivity or that of the people playing with you, such as injustice, violence, slavery, and racism. By design, the game will occasionally put you in front of the uncomfortable choice between what you think is right, and what is best for winning. Remember that this is a just game, and you're playing a fictional character. Even if the game world follows elements of the real world, nothing should be taken as real.
None of the atrocities described in The King's Dilemma™ are in any way promoted, encouraged, or even considered as acceptable by the publisher, designers, scriptwriters, nor the distributors of this game.
A Legacy-Like Experience
The King's Dilemma is a unique interactive narrative experience, featuring several branching storylines that lead to many possible endings. The game will also require you to permanently sign cards, stickers, and player screens, and the game board will also be irreversibly altered as game events unfold. The number of games you will be able to play is finite, and it will vary depending on the choices you take during your adventure. On average, you will play about 15 hours of gameplay, corresponding to about 15 games. When the story comes to its end, the game is over and it cannot be reset and played again from the beginning.
Note: To enjoy the game experience of The King's Dilemma™ to the fullest, we strongly suggest that you always play with the same group of people. However, it's not a problem if a particular player skips a few games. The game also provides more House screens than what is needed for a single match, making it possible to have new people join an ongoing game (up to a total of 12 people).
Dilemma Card System
The King's Dilemma™ is a Dilemma Card System™ game. The Dilemma Card System™ is a board game system developed by Horrible Games, allowing for interactive, narrative game experiences.
Components
- This Rulebook
- 75 Envelopes
- 15 Vote cards (5 Aye cards, 5 Pass cards, 5 Nay cards)
- 6 Secret Agenda cards
- 12 House screens
- 1 Stability marker
- 5 Momentum markers (double sided)
- 1 Map (double sided)
- 5 Positive Open Agenda tokens
- 5 Negative Open Agenda tokens
- 1 Cover tile
- 72 Coin tokens
- 65 Power tokens
- 3 Mystery sticker dossiers (with 4 Mystery stickers each)
- 1 Sticker booklet (177 Chronicle stickers)
- 1 Leader token
- 1 Moderator token
- 5 Resource markers
- 12 Outcome markers
The Realm Board
The double-sided Realm board shows, among other elements: the Chronicle area (with Story card spaces), the Time Counter, the Stability Track, the Resource Track, the Event area, the King's Death space, the Balance area (with an AYE space, a middle space, and a NAY space).
Kinds of Cards
Story cards
Story cards are always the first card in their envelopes. They may have a special ability and/or a Signature space on their front, and they explain a portion of the game story on their back. Ending cards are a special kind of Story cards (see page 27).
Dilemma cards
Dilemma cards are the most common kind of card in the game. Their front side presents you with a problem, asks you a question, and shows a preview of the two possible outcomes (AYE or NAY). Their back side describes the two outcomes in detail. To determine which outcome will be chosen, you will have to perform a Vote (see page 16).
The front of a Dilemma card asks a question. Once the outcome is decided, you flip the card: the blue bar describes what happens if you choose to answer "yes" to the question, and the red bar describes what happens if you choose to answer "no."
Event cards
Event cards are only contained in Special Envelopes (see page 27). They must be placed in the Event area of the Realm board, and describe the special rules for the corresponding game event. These cards may need to be saved and restored between different games until the event is complete. Event cards are marked "THIS IS A SPECIAL ENVELOPE! DO NOT SHUFFLE THESE CARDS INTO THE DECK." Read the story on the front, then turn the card over to read the special rules for this envelope.
Trigger cards
Trigger cards are mostly found in Special Envelopes (see page 27), with a few exceptions. They are usually shuffled into the Dilemma deck and trigger special—and often recurring—game effects when they are drawn. They may need to be saved and restored between different games until the corresponding event is complete. Trigger cards are marked "TURN THIS CARD OVER AND FOLLOW THE INSTRUCTIONS."
Game Overview
In The King's Dilemma, players become the representatives of various influential families (or "Houses") and members of the King's Council. Historically, the kings of Ankist always placed an absolute trust in their Council, so the real power lies in their hands: they are the real leaders of the government of Ankist.
Each round, you will draw a card from the bottom of the Dilemma deck and experience the game story unfold. Each card is unique, and it will pose you a problem (or Dilemma) that the Council will have to solve on the King's behalf. You will have to discuss, bargain, and make decisions that will shape the story of the game and determine the fate of the Kingdom of Ankist. Each time a Dilemma card is resolved, it is permanently removed from the Dilemma deck. Occasionally, though, your decisions will result in the addition of completely new cards to the deck, unlocking new events that will happen in the future as a consequence of your decisions.
You will have to keep the kingdom going while also seeking an advantage for your own House; this power struggle may lead the kingdom into war, famine, or riot, or it could generate wealth and well-being. It will depend on your choices! Each decision has consequences, though: what is good for the kingdom as a whole may be bad for your House. Will you act for the greater good, or will you think only of yourself?
At the end of each game, you will score Agenda Points. Agenda Points are used to determine the winner of that game. Additionally, depending on how you ranked during the game and the circumstances that triggered the end of the game, no matter if you won or not, you will also score Prestige Points and/or Crave Points that you must record on your House screen. Both are "endgame points" that will help you shape the ultimate fate of Ankist, and determine the overall winner of your campaign.
Before Your First Game
1. Prepare Your Starting Dilemma Deck
Open Envelope 00 (see page 26) and take out its contents. Read the first card included in the Envelope (the Story card), then place it on the Realm board, in the Storyline space with the same symbol. Afterwards, shuffle the remaining Dilemma cards and cover them with the Cover tile. This will be your starting Dilemma deck; use it when you are asked to take the Dilemma deck from the box during Step 7 of the Game Setup (see page 9). Always make sure to keep all the Dilemma cards face up, and never read the text on the back side of the cards until you are explicitly allowed to do so (see page 15)!
Game Setup
1. Prepare the Realm Board and Tokens
Place the Realm board in the middle of the table. Then place each Resource marker in the corresponding space of the center row of the Resource Track. Randomly determine which side of each marker is facing up (throw the pieces like a coin to get random color results, white or black).
Place the Stability marker on the middle space of the Stability Track.
The Resource markers represent the overall status of your kingdom, condensed into 6 values: Influence, Wealth, Morale, Welfare, Knowledge, and Stability.
- Influence represents the strength of your army, your reputation in the eyes of other countries, how effectively you enforce the law, and the respect the people of Ankist have for your leadership.
- Wealth represents the amount of money in the royal treasury, the amount of luxury resources you have, the quality of life for the upper classes, and your power to buy resources from other countries.
- Morale represents the happiness of your people, how positive they are about their lives and their condition, how much they believe in a better future, and how much they can find relief in religion.
- Welfare represents the health of your population and the amount and availability of necessity resources, like food and water; it's also the lack of maladies and the amount of people in your kingdom.
- Knowledge represents the quantity and quality of the technological and medical advances achieved by your kingdom, the measure of your cultural and artistic expressions, and how much you know about the past history of the world.
- Stability represents the equilibrium of your society. It is at its best when it is in the middle of its track, meaning that the realm is perfectly balanced. When it nears the lower end of its track, things are going extremely badly, causing social tensions. When it nears the top end, on the other hand, some factions are accumulating more power than others, creating instability.
Place the rest of the tokens and markers near the Realm board. This is called the "general pool." Take 3 Power tokens from the general pool and place them on the middle space of the Balance on the Realm board.
2. Choose a House Screen
Once you choose a House screen, it will always be your House screen, and you will have to use it in every subsequent game of your campaign. It will allow you to track your Prestige and Crave scores while you progress through the game story (see page 33). It also lists several achievements: the long-term goals of your House. For more details on the achievements available on your House screen, see page 13.
Note: You can add new players to your campaign even after you've played some games, but they must still choose a new House screen before their first game of The King's Dilemma and use it during every subsequent game. However, to fully enjoy the game at its best, we strongly suggest that you always play the game with the same group of people, from the start to the end of the campaign.
Before proceeding, write the name of your House on your screen. When you choose the name of your House, feel free to use your real family name (e.g., "House Smith"), a fantasy-like variant of it (e.g., "House Smeethe"), or a completely fictional name of your choice (e.g., "House Humblescore"). Keep in mind, though, that this will also be the name you will have to use every time the game will ask you to Sign something (see box below).
SIGNING
The game will occasionally ask to sign something (Story cards, Chronicle stickers, and so on). Signing Chronicle stickers and Story cards indicates that you are responsible for your decisions and their consequences, as determined by how you voted to resolve the different Dilemmas you have faced during the game, and how the game story will progress as a result.
An example House screen shows Victory Points tracks for Prestige and Crave, an Achievements panel, a House Alignment track (Extremist, Opulent, Moderate on one side; Rebel, Opportunist, Greedy on the other), and a House Number used to break ties.
Breaking Ties of Prestige
During the game, you may be asked who has the highest or the lowest Prestige. In these cases, you must look at the number of Prestige Points marked on your House screen. A higher number of Prestige equals a higher Prestige. In case of a tie, look at the House number at the bottom of the left side of your House screen. A higher House number means you have a higher Prestige in regards to breaking a tie.
3. Take Your Vote Cards
Place your House screen in front of you, then take 1 AYE, 1 NAY, and 1 PASS card and place them face up in front of your House screen. They will be used during the Voting Phase. Put any unused cards back in the box.
4. Take Power and Coins
Place 8 Power tokens and 10 Coins behind your House screen. Note that all Houses start with the same amount of Power and Coins at the beginning of the campaign, but in later games, depending on the achievements you will unlock and other factors, the initial amount of Power and Coins at your disposal during game setup may change (for more details, see pages 13-14). Remember to always check if you have unlocked achievements to exploit at the beginning of each game!
5. Choose a Secret Agenda Card
The player with the lowest Prestige (in case of a tie, see above) shuffles all the Secret Agenda cards and randomly removes 1 from the deck. This player then chooses 1 of the remaining cards. After the first player has chosen their Secret Agenda card, give the Secret Agenda deck to the player with the second lowest Prestige, who must now choose a Secret Agenda card from those that remain, and so on, until all players have chosen 1 Secret Agenda card. The Secret Agenda is your main source of Agenda points at the end of the game (see page 30). Put all the unused cards back in the box, without looking at them. They will not be used until the next game.
Example: With 5 Houses, Mark is the player with the lowest Prestige, so he looks at the Secret Agenda cards, randomly removes 1 card, looks at the rest, and chooses to take the "Moderate" Secret Agenda card. The next player to choose 1 of the remaining cards will be Frank, who has 7 Prestige and a House number of 2, followed by Julia (8 Prestige and a House number of 5), and Alexandra (8 Prestige and a House number of 7). All the unused cards will be put back into the box, without being revealed.
HOUSE ALIGNMENT
When choosing your Secret Agenda, keep in mind that using the same Secret Agenda in more than one game will allow you to unlock a small achievement (see page 13). Each House screen also shows the "Alignment" of your House, i.e., your two "favorite" Secret Agenda cards. Unlocking the corresponding achievements will give you a bigger bonus, compared to the others.
6. Take the Leader and Moderator Tokens
The player with the highest Prestige (in case of a tie, see above) takes the Leader token (used to determine who plays the first turn during the Voting Phase and who will be the Signer of the decision at the end of the Voting Phase).
The player with the lowest Prestige (in case of a tie, see above) takes the Moderator token (which can be used by its owner to break ties during a vote).
7. Take the Dilemma Deck
Take the Dilemma deck (composed of Dilemma cards and Trigger cards) from the Dilemma Save slot and shuffle it, then cover the top of the deck with the Cover tile, without looking at it. Always make sure to keep the Dilemma deck with the cards facing up, and never read the text on the back side of the cards until you are explicitly allowed to do so (see page 15)!
8. Check Legacy Setup Effects
If this is not your first game, check if you also need to apply one or more legacy setup effects (for more details, see the next section). Otherwise, your setup ends here.
...you're ready to start!
THE SAVE SLOTS
After you have completed your first game of The King's Dilemma, you will use the Dilemma Save slot inside the game box to store the Dilemma deck in its current state (including all active Trigger cards), and the Story Save slot to store the ongoing Event cards and all the unlocked Story cards. This way you can "save your game" and restart from the same point in your story at the beginning of the next game!
Legacy Setup Effects
Setup Story and Event Cards
Take the Event cards and the Story cards stored in the Story Save slot of the game box (if any were present). Set up the Event cards following the rules described on the cards themselves. Then, divide the Story cards by Storyline (the symbol in the top right corner) into different decks, ordered by number, with the highest number on top, and place them on the spaces with the corresponding symbols at the edges of the Realm board.
Note: It can be useful to read all the available Story cards at the beginning of each game, to remind all players of the events that occurred in the past in your kingdom, and who was responsible for them. It is extremely recommended to do so if you're introducing new players into an ongoing campaign!
Chronicle Stickers
Chronicle stickers represent long-term ongoing events triggered by your decisions. They can either be Positive (with a white title bar) or Negative (with a black title bar). They are attached to the Realm board in the row with the Resource symbol corresponding to the one in their top left corner as part of the outcome effects of some Dilemma cards, but they have no immediate effect. If there are Chronicle stickers on your Realm board, apply the following Legacy effects before starting the game:
Chronicle Aging
Mark 1 space on each Chronicle sticker that is attached to the Chronicle area of the Realm board. The marks indicate how old the event that triggered that Chronicle is, and how likely it is that people will forget about it.
Example: You must mark 1 space on each Chronicle sticker on the board. The older Negative sticker (to the left) now has a total of 2 marked spaces, while the newer Positive one (to the right) has just 1.
Apply Resource Legacy
For each Resource, count how many Positive Chronicle stickers are attached to the Chronicle area of the Realm board in the row with the corresponding symbol and move the matching Resource marker up on the Resource Track an equal number of spaces. Then, count how many Negative Chronicle stickers are attached to the Realm board, and move the matching Resource marker down on the Resource Track an equal number of spaces.
Note: Leave the Stability marker in the middle of the Stability Track and don't flip Resource markers during this step.
Example: At the beginning of this game, there are 3 Influence Chronicle stickers: 2 are Positive, 1 is Negative. The Influence Resource marker must be moved up 2 spaces, and down 1 space on the Resource Track (so you can just move it up 1 space). There are also 2 Wealth Chronicle stickers, 1 Positive and 1 Negative (so the Wealth marker actually stays still), and 2 Negative Morale stickers (so the Morale Resource marker must be moved down 2 spaces).
Apply Power Legacy
Check the signatures on the stickers attached to the Chronicle area of the Realm board. For each Positive sticker signed by a player, that player must take 1 Power from the general pool and add it to their personal pool (behind their House screen); for each Negative sticker signed by a player, that player must return 1 Power from their personal pool (behind their House screen) and discard it to the general pool instead (it may even happen that a player starts the game with no Power at all).
Example: Tony signed 3 Positive Chronicle stickers and 1 Negative Chronicle sticker, so he gains 3 - 1 = 2 Power at the beginning of the game. Catherine only signed 2 Negative Chronicle stickers, so she needs to discard 2 Power from her pool at the beginning of the game.
Assign Open Agendas
For each Resource, check the signatures on the stickers attached to the Chronicle area of the Realm board.
The player participating in the current game who signed the most recent Positive Chronicle sticker for that Resource (i.e., the one with the fewest marks on it) receives the corresponding Positive Open Agenda token. In case of a tie, the player who signed the rightmost sticker among the ones that are tied wins the tie. The player participating in the current game who signed the most recent Negative Chronicle sticker for that resource receives the corresponding Negative Open Agenda token. In case of a tie, the player who signed the rightmost sticker among the ones that are tied wins the tie. Stickers signed by players not participating in the current game are ignored during this step.
Place any Open Agenda tokens you have received in front of your House screen, so that all players can always see them. Open Agenda tokens will contribute to your end game score, determining the winner of each single game (see page 30).
Each player can only be assigned up to 2 Positive Open Agenda tokens and up to 2 Negative Open Agenda tokens during a single game. If a player is assigned more, at the end of this step, they must choose which 2 they want to keep, and discard the rest. The Open Agenda tokens discarded in this way are not assigned to any player during this game, and can be put back into the box.
Note: It can be useful to read the available Chronicle stickers at the beginning of each game, to remind all players of the events that occurred in the past in your kingdom, and who was responsible for them. It is extremely recommended that you do so if you're introducing new players into an ongoing campaign!
OPEN AGENDAS
People remember those who did something that ended up being beneficial (or detrimental) to the kingdom. Open Agendas represent this memory. For example, if you caused the most recent damage to the realm's economy in a previous game, people will blame you if the economy keeps going down at the end of the current one. On the other hand, if you passed good laws that improved the realm's influence and it keeps going strong, they'll give you credit for that. This will translate into bonus (or penalty) Agenda Points at the end of the game.
Example: Laura signed 1 Positive Influence Chronicle sticker. Charles also signed 1 Positive Influence Chronicle sticker, but he's not participating in this game, so it is ignored and the Positive Open Agenda token for Influence is assigned to Laura. No Negative Influence Chronicle stickers are attached to the Realm board, so the Negative Open Agenda token for Influence is not assigned to anyone. Looking at the Morale Chronicle stickers, Martina, Valentine, and Noah are all tied with 1 Negative Morale Chronicle sticker signed by each of them. Martina's sticker is the oldest with 3 marks, so she loses the tie. The other two stickers both have only 1 mark (they were attached during the previous game), but Noah's is the most recent one (the rightmost one), so he wins the tie and he is assigned the Negative Open Agenda token for Morale.
House Achievements
Each House screen lists several achievements. Each achievement has a condition that has to be met (one or more times) in order to unlock the corresponding special ability. Whenever a condition is met, you must mark 1 of the spaces for that achievement. You usually do this only at the end of the game, with the exception of Narrative achievements (see below). When all spaces for an achievement have been marked, the achievement is complete, and the corresponding special ability is unlocked.
Each achievement has a condition to achieve. Whenever that condition is met, you must mark 1 space for that achievement. When all squares have been marked, you unlock a special ability.
Note: The top achievement on each House screen is a Narrative achievement. They are unlocked if certain specific story events happen during the game. Some of these story events are mutually exclusive: if another player unlocks theirs, it may mean you'll never be able to unlock yours! The condition indicated on your screen gives you a clue: whenever you see the events of the game going in a direction you think goes against your narrative achievements, try to turn them to your favor instead!
The top achievement on the right side of your House screen is always the Narrative achievement for your House, which is triggered by specific story events. The other three achievements have gameplay-related triggering conditions.
Some special abilities give instant, one-time bonuses when they are unlocked. Others change the amount of Power or Coins you start the game with. Finally, some special abilities are proper abilities that you can activate at will, or that can be triggered when specific game conditions are met. You will find a quick overview of all the kinds of special abilities you may find on your House screen in the Story Legacy section below.
Story Legacy
Many Story cards show special abilities, similar to the ones you can unlock with the achievements on your House screen. Only the special ability of the top Story card of each storyline is active: whenever a new Story card covers the old one, the old special ability is immediately deactivated.
Like House achievements, the special abilities granted by Story cards may give instant, one-time bonuses when they are unlocked, change the amount of Power or Coins you start the game with, or be proper abilities that you can activate at will or that can be triggered when specific game conditions are met.
Here's a quick overview of all the kinds of special abilities you may find on your House screen or the Story cards:
Legend of Special Abilities
- These abilities are immediately triggered when the corresponding achievement is unlocked or the corresponding Story card is played on the board.
- These abilities are triggered at the start of each game (abilities on Story cards that are not the top card of their pile are ignored).
- These abilities are triggered when a certain condition is met during or at the end of a game (abilities on Story cards that are not the top card of their pile are ignored).
- Abilities with marking spaces are only found on Story cards. When a special ability has 1 or more of these marking spaces, you must mark 1 space each time the ability is used or activated. When all spaces have been marked, the ability can't be used anymore.
- +X Prestige / Crave: Immediately mark the indicated number of Prestige / Crave points on your House screen (only the Signer in case of a Story card).
- +X Coins: Take the indicated number of Coins from the general pool and add them to your pool (only the Signer in case of a Story card).
- +X Power: Take the indicated amount of Power from the general pool and add it to your pool (only the Signer in case of a Story card).
- +X Cohesion / Dissent: These abilities are only found on Ending cards (see page 27). All the Cohesion and Dissent values on the Ending cards will count during the Grand Finale of the campaign.
Example: As long as a card is the top card in its pile, its Signer will gain 2 Coins at the beginning of each game, and whenever any player (not just the Signer) gains Agenda Points for the Positive Open Agenda for that Resource, they gain 1 additional Agenda Point (see page 30).
Playing the Game
The game is played in rounds, with each round divided into 5 phases:
- Draw and Read a Card from the Dilemma Deck.
- Place the Outcome Tokens on the Balance.
- Vote of the Council.
- Vote Resolution.
- Dilemma Resolution.
They are all related to the card drawn from the Dilemma deck at the beginning of the round. In most cases this will be a Dilemma card that will describe a problem the kingdom faces, then it will ask you a question that you will have to simply answer either AYE or NAY through a vote (see page 16). The card will then be flipped over, revealing the consequences of the choice you have made (see page 23).
At the end of the round, the drawn card will be put on the Time Counter to mark the passage of time, then a new round will start by drawing another card from the Dilemma deck. The game can end in two ways:
- The King Abdicates if Stability reaches either end of the Stability Track (for more about Stability, see page 24).
- The King Dies if the card was placed on the final space of the Time Counter and certain conditions are met (see page 29).
The score for each player is determined by their Secret Agenda cards (see page 30) and their Open Agenda tokens (see page 32). Bonus Agenda Points are also awarded for the players with the most Power and/or Coins remaining in their pool at the end of the game. The player with the most points is the winner.
Phases of the Round
1. Draw and Read a Card from the Dilemma Deck
This is the first thing you do each round. Draw 1 Dilemma card from the bottom of the deck (always make sure you look at it with the front side face up, and that you don't accidentally show the back to the other players!) and read it aloud, so that all players can clearly hear it. It's not really important who reads the card to the other players: you could give this task to the player who currently has the Leader token, you can do it in turns in clockwise order, or you can pick one of you who will always read all of the cards as the "narrator" because of their outstanding storytelling skills… choose whatever works best for you!
2. Place the Outcome Tokens on the Balance
When you've read the Dilemma card for the round, look at the symbols in the AYE and NAY spaces of the card, and place the corresponding Outcome tokens on the two scales of the Balance (see picture). They indicate the most obvious consequences of both possible decisions you may take, and they act as a quick reminder for all players, even those who are far away from the Dilemma card and do not have an eye on it. The possible outcomes that may be shown here include the increase or decrease of Resource values (immediate consequences) and the placement of a Chronicle sticker (long-term consequences).
Legend of Dilemma Outcomes
- Resource Outcomes: When one of these symbols appear on the AYE/NAY space on the front of a Dilemma card, the value of the corresponding Resource will increase (positive outcomes) or decrease (negative outcomes) if that outcome is chosen during the Voting Phase.
- Chronicle Stickers: When this symbol appears on the AYE/NAY space on the front of a Dilemma card, a Chronicle sticker will be attached to the Realm board if that outcome is chosen during the Voting Phase.
Example: A card may suggest that approving a cut on bread taxation during a famine will damage the monetary reserves (AYE outcome), but rejecting it may damage the welfare of the people, with a long-lasting consequence represented by a Negative Sticker (NAY outcome). The corresponding Outcome tokens are placed on the two scales of the Balance.
UNEXPECTED CONSEQUENCES
Beware! Not all consequences will be explicitly indicated in the AYE and NAY spaces on the front side of a Dilemma card. You should analyze the text of each Dilemma card carefully, to predict potential unexpected outcomes.
3. Vote of the Council
When you are done analyzing and discussing the Dilemma card, it's time to move to the Voting Phase. Starting with the Leader (i.e., the player with the Leader token) and going clockwise, declare if you will VOTE AYE, VOTE NAY, PASS AND GATHER POWER, or PASS AND BECOME MODERATOR:
Vote Aye
You vote to support the proposal at the end of the Dilemma card. To do so, you must place 1 or more Power tokens on the AYE card in front of your House screen. To VOTE AYE, take 1 or more Power from your pool and place them on your AYE Vote card.
Vote Nay
You vote to reject the proposal at the end of the Dilemma card. To do so, you must place 1 or more Power tokens on the NAY card in front of your House screen. To VOTE NAY, take 1 or more Power from your pool and place them on your NAY Vote card.
Pass and Gather Power
You do not support nor oppose the proposal at the end of the Dilemma card, and you spend your energies to gather more Power for future votes. Take 1 Coin from the general pool and put it on your PASS card. You will participate in the distribution of Power placed on the middle space of the Balance at the end of the Voting Phase. This Power will be equally distributed between all players who opted to PASS AND GATHER POWER (see page 21).
- To PASS AND GATHER POWER, immediately take 1 Coin from the general pool and put it on your PASS Vote card.
- At the end of the Voting Phase, you will participate in the partition of Power from the middle space of the Balance.
Pass and Become Moderator
You do not support nor oppose the proposal at the end of the Dilemma card, and you give up your chance to gather more Power at the end of the phase to become the new Moderator instead (the player who breaks ties during all votes). Take the Moderator token from the player who currently has it (it can be yourself); also, take 1 Coin from the general pool, then put them both on your PASS card.
You immediately become the new Moderator (and can use its effect right away). No other player can take the Moderator token away from you for the rest of this Voting Phase. But, you will not participate in the distribution of Power at the end of the phase.
You can only PASS AND BECOME MODERATOR if no other player has already done so in this Voting Phase. If you do, immediately take 1 Coin from the general pool and the Moderator token and put them both on your PASS Vote card.
At the end of your voting turn, if you are now the player with the most Power on your Vote (no matter which side you chose), you immediately take the Leader token. Do not take the Leader token if you only equal the highest bidder's amount of Power. The position of the Leader token is crucial in determining when the Voting Phase ends.
The Voting Phase ends at the end of the turn of the player to the right of the Leader. However, since the Leader token may move during the Voting Phase, it is possible that some (or all) players will have multiple turns to vote, as you continue to take turns going clockwise until the phase ends, even if the Leader token changes hands. Remember: You instantly become the Leader when you become the player who played the most total Power during this Voting Phase.
When your turn comes around again, you cannot change your vote (so, if you opted to PASS on your first turn, you can't decide to VOTE AYE or NAY in a subsequent voting turn this round and you do nothing on your turn). All you can do is add more Power to your vote or "stay" and do nothing. If you do "stay," you are not out of the voting and you can still add more Power if you get another turn. The Voting Phase will proceed for as many "voting rounds" as needed, until the end of the turn of the player to the right of the Leader.
Bargaining
During the Voting Phase, players can freely bargain and make arrangements. You can never exchange Power directly, nor trade the ownership of the Leader token or the Moderator token, but you can give or accept Coins in return for different "services." For example, you could ask another player to vote on your side, or even ask them to PASS instead of joining the vote, in exchange for Coins. You could also "buy the right" to Sign something from the Leader, or you could pay the Moderator to break a tie in your favor.
Note that once the players have agreed to the terms of an arrangement and Coins have been exchanged to mark the deal, the agreement is binding. Beware though: more informal declarations of intention, without an actual exchange concluded, could be bluffs and are not binding!
Example: Theodore has the Leader token, so he takes the first turn of the Voting Phase. He's not invested in any of the outcomes of the current Dilemma card, so he decides to PASS AND BECOME MODERATOR, taking the Moderator token from Julius and placing it on his PASS card. No other player will be able to take the Moderator role from Theodore this round. Julius plays next, and opts to VOTE AYE by placing 1 Power on his AYE card. Since he is now the player with the most Power invested in the vote, he takes the Leader token from Theodore. It's now Armin's turn. He decides to VOTE NAY, but he chooses to only place 1 Power on his NAY card, so Julius keeps the Leader token.
The next player to vote is Diana. She decides to VOTE AYE and places 1 Power on her AYE card. Julius still keeps the Leader token, but the AYE front is now in the lead, 2 Power to 1. The only player who still has to perform their first voting turn is Frances, who opts to VOTE NAY by placing a whopping 4 Power on her NAY card! Since she is now the player with the most Power invested in the vote, she becomes the Leader and immediately takes the Leader token from Julius. NAY now leads 5 Power to 2, but the Voting Phase isn't over yet.
Theodore passed during the first voting round, so he is out of the vote. Julius increases the strength of his vote by placing 3 additional Power, for a total of 4, enough to get the two sides tied 5 to 5, but not enough to take the Leader role from Frances. Armin plays next. He is low on Power, but still decides to add 1 Power to his vote, bringing NAY to the lead again 6 to 5. Diana only has 1 Power left behind her screen, too, so she can only bring the two factions back to a tie, 6 to 6. Since Frances is the Leader, the Voting Phase ends at the end of Diana's turn. The tie will have to be broken during the Vote Resolution Phase.
4. Vote Resolution
The Voting Phase ends when the player to the right of the Leader ends their turn. Add up the total Power played on all AYE and NAY cards respectively. The side that has the most Power wins, which determines the Outcome of the Dilemma card. In case of a tie, the Outcome must be determined by the Moderator, who gets to decide the winning side of the Vote. If all players opted to PASS during the Vote, the Moderator decides the winning side of the Vote; they also assume responsibility for this decision and take the Leader token.
If the Leader token is held by a player on the losing side, the Leader token is immediately given to the player on the winning side who invested the most Power on their AYE/NAY card. If players of the winning side are tied, the ownership of the Leader token must be determined by the Moderator, who can bargain with the tied players about who will be assigned the Leader token, if they so desire (see page 18).
Example: Since the Voting Phase is ending with a tie, Diana asks Theodore, who is the Moderator, if he is willing to break the tie in her favor in exchange for 3 Coins. Theodore is only willing to accept the offer if he receives 5 Coins. Diana can't up the ante, but Julius is willing to add 2 more Coins from his pool to bring the total to 5. Frances and Armin can't beat the offer, so it's a deal! Theodore is now obliged to break the tie in favor of Julius and Diana.
At the end of the Voting Phase, the Leader token was still assigned to Frances, who voted NAY. The vote was won by the AYE faction, though. Diana invested 2 Power tokens, while Julius invested 4. As Diana is not interested in bargaining to obtain it, the Leader token is automatically assigned to Julius, who will also Sign any Story card and/or Chronicle sticker unlocked as a consequence of this Voting Phase.
Perform Cleanup after the Vote
If, during the Voting Phase, one of the players opted to PASS AND BECOME MODERATOR, make sure that player removes the Moderator token from their PASS card and places it on the table in front of their House screen so that is easily visible to all players. The PASS AND BECOME MODERATOR vote option will be available again during the next Voting Phase.
All players who opted to PASS must remove the Coin from their PASS card and add it to their pool (behind their House screen).
After this, if there are Power tokens in the middle space of the Balance, they must be equally distributed between all players who opted to PASS AND GATHER POWER. Any leftover Power must be left on the Balance.
Example: Rita and David both opted to PASS AND GATHER POWER during this Voting Phase. There is 5 Power on the middle space of the Balance; at the end of the Voting Phase, Rita and David will each take 2 of these Power. The remaining Power can't be shared, so it remains on the middle space of the Balance.
Finally, all players who opted to vote for the losing side take the Power they placed on their AYE/NAY card and put them back into their pool behind their House screen; all players who voted for the winning side must take all the Power they placed on their AYE/NAY card and place them on the middle space of the Balance. These tokens are not shared between the players who opted to PASS AND GATHER POWER this round; they will be available to players deciding to PASS AND GATHER POWER during the next Voting Phase.
Note: If a lot of Power has been invested during a Voting Phase, many players may be tempted to PASS AND GATHER POWER during the next Voting Phase!
Example: All players who voted for the winning side of the vote take all the Power they placed on their chosen Vote card and put them on the middle space of the Balance. All players who voted for the losing side of the vote take all the Power they placed on their chosen Vote card and put them back into their pool behind their screen.
5. Dilemma Resolution
Once the outcome of the vote has been determined, you need to resolve the current Dilemma. This process has several sub-phases:
- A. Read the outcome for the winning side of the vote (AYE or NAY) on the back of the Dilemma card.
- B. Apply the changes to Resources, Stability, and Momentum indicated by the outcome.
- C. Apply a Chronicle sticker (if indicated).
- D. Open an Envelope (if indicated).
- E. Place the Dilemma card on the Time Counter.
- F. End of the Round (check if the King abdicates or dies, triggering the end of the game).
A. Reading the Outcome and Applying the Effects of the Dilemma Card
Turn the Dilemma card over, following the direction indicated by the symbol for the winning side (AYE/NAY), then read the Outcome of the decision taken by the Council. After you read the outcome, apply its effects (see below).
If AYE wins the vote, take the corner of the card corresponding to the AYE space and flip it horizontally. If NAY wins the vote, on the other hand, take the corner corresponding to the NAY space and flip it vertically.
B. Moving Resources and Stability and Updating Momentum
The main outcome of a Dilemma card is moving Resource markers up or down. For example, if a Dilemma card says "+3 [Resource]," you must move that Resource's marker up 3 spaces. If it says "-3 [Resource]," you'll have to move the marker down 3 spaces instead. Outcome effects must be resolved one at a time, from left to right, as shown on the Dilemma card. In addition to the moves due to the outcome of the Dilemma card, you may also need to move the marker an additional 1 or 2 spaces depending on its Momentum (see below). Also, each time you move a Resource marker, check if you have to update its Momentum afterwards.
Whenever a Resource is moved, the Stability marker must also be moved up or down an equal number of spaces (including any additional spaces due to Momentum, see below).
Beware: If a Resource marker reaches either end of the Resource track, its movement stops, but the Stability marker must still be moved the full number of spaces; If the Stability marker reaches either end of the Stability Track, on the other hand, the King Abdicates and the end of the game is triggered at the end of the round (after all phases of the current round have been completed, including step F of the Dilemma Resolution, see page 28). The Stability marker, however, does not move any more, even if there are other Resource markers to move.
Momentum
Each Resource tends to continue going up when it is rising, or down when it is dropping. This is called Momentum, which is indicated by the color of the Resource marker: If the marker is white-side up, it has Positive Momentum, meaning that it is moving up, and if it is black-side up, it has Negative Momentum, meaning that it is moving down.
If a Resource marker moves in the same direction as its Momentum (such as due to the effects of a Dilemma), it moves 1 additional space and adds a Momentum marker of the same color (white = up, black = down). As long as it has the Momentum marker attached to it, if it moves in the direction of its Momentum again, it moves 2 additional spaces instead. A Resource marker can never have more than 1 Momentum marker.
But, Momentum is lost if the Resource changes direction. Flip the Resource marker over to show the other side and remove any Momentum marker attached to it. For example, if a Resource with Positive Momentum and a Momentum marker moves down, the Resource marker is flipped to show the black side and the Momentum marker is removed.
Example: The outcome of a Dilemma card causes Influence to go up 1 space and Morale to go down by 1. The Influence Resource marker has Negative Momentum (i.e., it is on the black side) and it also has a black Momentum marker; so, it is moved up 1 space, the Momentum marker is removed, and the Influence Resource marker is flipped to the white side to reflect its change of Momentum. The Stability marker is also moved up 1 space.
The Morale Resource marker has Negative Momentum too, but it has no Momentum marker on it; so, the Morale Resource marker is moved down 1 space because of the effect of the Dilemma card, and then down again 1 additional space because it already had Negative Momentum. Additionally, a black Momentum marker must be placed next to it: if it is moved down again next time, it will move 2 additional spaces (1 for the Negative Momentum and 1 for the black Momentum marker). After you move the Morale Resource marker, the Stability marker must be moved down 2 spaces.
Example: In this example, the outcome of a Dilemma card makes the Morale Resource marker go down 2, while Knowledge must go up 1. Since the Morale Resource marker has Negative Momentum and a black Momentum marker on it, it will have to move down a total of 4 spaces. The Stability marker must also move down 4 spaces, and this brings it to the bottom of the Stability Track. The end of the game is triggered. The Dilemma effect regarding Knowledge must still be applied, but the Stability marker does not move because the King has already abdicated.
C. Apply Chronicle Stickers
When the outcome of a card shows a Chronicle sticker symbol, you need to attach a Chronicle sticker to the Realm board. Take the Chronicle sticker booklet, find the Chronicle sticker with the number indicated on the Dilemma card and read it aloud. The current Leader must Sign this Sticker (see box on page 6) and will be responsible for its effect (whether it had a positive or negative effect for the kingdom).
Once the Chronicle sticker has been Signed, you must attach it to the row with the Resource symbol indicated in the top left corner of the sticker in the Chronicle area of the Realm board. You must attach it to the empty space furthest to the left in that row. If no empty spaces are available, you must attach it over the sticker with the most squares marked (i.e., the oldest sticker in that row); in case of a tie, you must attach it over the tied sticker furthest to the left.
The Chronicle stickers award you Power bonuses and penalties and will determine how the various Open Agenda tokens will be assigned at the beginning of the next game, but they have no immediate effect during the current game.
D. Open Envelope
If the outcome of a card shows an envelope symbol, you must search the box for the Envelope with the corresponding number and open it. A standard Envelope will contain 1 Story card and 3 Dilemma cards.
When you open a standard Envelope, you must follow these steps:
- Read the Story card.
- The Leader must sign the Story card (if needed).
- Place the Story card on the matching Storyline space of the Realm board.
- Shuffle the remaining 3 cards from the Envelope you just opened into the Dilemma deck.
Beware: If you forget to open an envelope when you should, the game will get stuck!
Special Envelopes
If you open a Special Envelope (i.e., the first card you find when you open the envelope is marked with the sentence "This is a Special Envelope!"), you have to follow the instructions written on the cards in that envelope instead of the standard procedure described above.
Ending Cards, Narrative Achievements and Majority Signer Bonuses
Each Storyline can end with one of several different Ending cards. In addition to any special ability they may show on the front, like the regular Story cards, Ending cards may have additional features:
- Cohesion / Dissent: If shown in the top-right corner of an Ending card, the specified amount of Cohesion or Dissent will count during the Grand Finale of the campaign (see page 35).
- Narrative Event: If shown on the back side of the card, it unlocks the Narrative achievement for one of the Houses. These story events are sometimes mutually exclusive: if a player unlocks theirs, it may mean another player will never be able to unlock theirs!
- Majority Signer Bonus: When an Ending card is first played on the board, check all the other Story cards of that Storyline and see which player Signed the most of them (including the Ending card itself): that player immediately receives the Majority Signer Bonus shown on the Ending card. In case of a tie, all tied players receive the bonus.
Example: Lex only signed 1 card of this storyline. Angela signed 2. With 3 cards signed, John has the most signed cards for this storyline. He gets the Majority Signer Bonus shown on the card, and immediately marks 3 Prestige on his House screen.
E. Place the Dilemma Card on the Time Counter
Unless the Dilemma card explicitly tells you otherwise, put the Dilemma card halfway under the left edge of the game board with the back side facing up, next to the top empty space of the Time Counter, so that the winning outcome is still visible.
There are two kinds of special Dilemma cards that must never be placed on the Time Counter: Event cards and Trigger cards. Both are placed in the Event area of the Realm board, instead. Follow the instructions on the cards themselves when you encounter one of these cards!
F. End of the Round
While you are applying the effects of the outcome of a Dilemma card, check if the King Abdicates (see page 29). If the King did not abdicate, but the last Dilemma card was placed on the space marked with the King's Death symbol, check if the King is Dead (see page 29). If neither of these conditions has been met, just start a new round by drawing another card from the bottom of the Dilemma deck.
Triggering the End of the Game
The game can end in two ways:
The King Abdicates: If the Stability marker reaches either end of the Stability Track when applying the outcome of a Dilemma card, the King abdicates and the end of the game is triggered. Further changes to Resources must still be applied, but the Stability marker does not move any more.
When things go well but power is distributed unevenly among the factions of the kingdom, the Council will have enough power to force the King to abdicate. On the other hand, the King may also decide (or be forced) to abdicate if things get really bad, to bring about a change in leadership and try to revive the fortunes of the kingdom.
The King is Dead: If the last Dilemma card was placed on the Time Counter space marked with the King's Death symbol, check if there is a King's Death symbol on the central space of the back side of that Dilemma card AND/OR if it is the fifth card placed on that space. In either of those cases, the King is Dead, and the end of the game is triggered. If the card placed on the King's Death space does not trigger the King's death, all Dilemma cards are added to that space for the rest of the game (until the King's Death is triggered by a card with that symbol or the fifth card is played to this space; the end of the game may also still be triggered if the King abdicates, see above).
Note: Any effect of a Dilemma card triggering the end of the game must still be applied before moving on to the end of game phase. This means that:
- any unlocked Chronicle sticker must be attached;
- any unlocked Envelope (regular or Special) must be opened and properly set up (reading its Story card and shuffling the other cards into the Dilemma deck);
- any Event triggered by that card must be resolved;
before moving to the End of Game procedure.
End of the Game
The end game procedure is divided into 5 steps:
- Calculate Scores.
- Mark Scores on the Realm Chronicles.
- Check House achievements.
- Update House Alignments.
- Final Cleanup.
1. Calculate Scores
The score for each player is determined by their Secret Agenda cards and their Open Agenda tokens. Bonus Agenda Points are also awarded to the players with the most Power remaining in their pool at the end of the game.
A. Secret Agenda Cards
Each Secret Agenda card shows two different scoring conditions: a Resource Goal, related to the position of the Resource markers at the end of the game, and a Money Ranking Goal related to how many Coins you have at the end of the game in relation to the other players. The number of Agenda Points you gain from your Secret Agenda depends on how well you performed in regards to these two goals.
Resource Goal
The Resource Goal rewards you for keeping a certain number of Resource markers in specific areas of the Resource Track. The interaction between the differing interests generated by these goals will encourage you to support or compete with the other players to keep the Resource markers in the position you desire. A specific player may be your ally during the current Voting Phase, but strongly oppose you during the next, depending on their personal interests in each specific moment. Try to read the intentions of the other players and deduce their Secret Agenda to gain an advantage during each Voting Phase.
Each Secret Agenda card shows the Agenda name, a Resource Goal diagram, Resource Goal scoring, and Money Ranking Goal scoring.
Money Ranking Goal
The bottom of each Secret Agenda card also lists the number of Agenda Points you gain if you are the first, second, or third player with the most Coins at the end of the game. The different Secret Agendas have different scores linked to money; for example, Greedy makes a lot of Agenda Points for the Money Ranking Goal, so a player with this Secret Agenda will be more inclined to accept money from the other players during negotiations. Vice-versa, a player with Rebel makes few Agenda Points for the Money Ranking Goal, so they will probably be more inclined to spend Coins to "buy" the other players and "oil the machine" in their favor. In case of a tie, all tied players share the same position (and get the corresponding score described on their Secret Agenda card).
SCORING STRATEGIES IN DIFFICULT SITUATIONS
It may happen that no Dilemma card involving the Resources you are interested in moving is drawn from the deck and you can't change the situation in your favor. If this happens, remember that the less Agenda Points you are getting, the more likely it will be the other players will be willing to take your side. In desperate situations, if you are sure you won't be scoring many Agenda Points, you can always try to make the King abdicate in order to decrease the Prestige and Crave scoring gaps between players at the end of the game (see the table on page 33).
Finally, remember that what matters for the purpose of the whole campaign is not the amount of Agenda Points you score during a single game, but the sum of the Prestige and Crave you will obtain over several games. Always think long term.
Example: This 3-player game ended because the King abdicated (Stability reached the lower end of the Stability Track). Valentine was playing as a Moderate. The area marked on her Secret Agenda card contains 3 Resource markers, so she gets 10 Agenda Points. With 4 Coins behind her screen, she only ranks 3rd for number of Coins, so she scores 1 additional Agenda Point, for a total of 11 Agenda Points.
B. Open Agenda Tokens
Each Open Agenda token is associated with a specific Resource (Welfare, Morale, Influence, Knowledge, or Wealth) and it can be either Positive or Negative.
- For each Positive Open Agenda you have, you gain Agenda Points if the corresponding Resource marker is the highest (3 points) or second highest (1 point) on the Resource Track of the Realm board. In case of a tie, all tied Resources give the same bonus.
- For each Negative Open Agenda you have, you lose Agenda Points if the corresponding Resource marker is the lowest (-3 points) or the second lowest (-1 point) marker on the Resource track of the Realm board. In case of a tie, all tied Resources give the same penalty.
Example: With the final status of the Resource Track and the assigned Open Agenda tokens depicted, at the end of the game the Positive Open Agenda token for Influence is worth 3 Agenda Points, while the ones for Morale and Knowledge, which are tied for second place, are worth 1 Agenda Point. On the other hand, the player who has been assigned the Negative Open Agenda token for Knowledge loses 1 Agenda Point even though the Knowledge Resource marker is in second place: it is also second to last! Finally, the players who were assigned the Negative Open Agenda tokens for Welfare and Wealth, which are tied for last place, lose 3 Agenda Points.
C. Majority of Power Tokens
The player(s) with the most Power remaining behind their screen gains 2 additional Agenda Points. The player(s) with the second most Power remaining behind their screen gains 1 additional Agenda Point. In case of a tie, both players score the bonus for the tied position.
Example: Valentine had the most Power tokens left behind her screen at the end of the game, so she gets 2 additional Agenda Points. Armin and Theodore, tied for second place, each get 1 additional Agenda Point.
2. Mark Scores on the Realm Chronicles
Using the next available unused scoring table in the Realm Chronicles section of this rulebook (see page 44), write down all the Agenda Points you collected during this game, then add them up. The player with the most Agenda Points is the winner of this game! The Heir to their House will have the honor of marrying the king's heir, and the next king will share their blood. In case of a tie, the victory is shared, and the Moderator chooses which of the tied players has the privilege of marrying into the royal line.
All players participating in this game must record their campaign scores on the back of their House screen, following the scoring table for their result: whether the King Died, the King Abdicated at the top end of the Track, or the King Abdicated at the bottom end of the Track, and their ranking during this game (1st, 2nd, 3rd for 4-5 players, 4th for 5 players, or Last) determines the number of Prestige Points and Crave Points they record.
In case of a tie of Agenda Points, all tied players receive the same Prestige and/or Crave points. Moreover, there is always a player in "last place," regardless of the number of players. For example, in a 5-player game, if two players tied for fourth place (and no player behind them), they are both considered "last" (in this case, they each gain the corresponding score for coming in last instead of the 4th place score). These scores, recorded at the end of each game, will determine the overall winner when you reach the final ending of the story at the end of the campaign! Depending on your choices during the game, the Prestige and Crave scores you obtain during the campaign will have different values.
Finally, the winner of this game may choose the name of the king who will rule during the next game. Write this name in the King space of the scoring table you will use for the next game (e.g., "King John the First, of House Smeethe;" again, feel free to use your real name or a fictional one, but always use the House name you wrote on your House screen).
PRESTIGE POINTS AND CRAVE POINTS
In addition to determining the winner of the current game, this ranking is also used to determine the amount of Prestige and Crave Points each player must record on their House screen.
Even though Crave points are scored by players ranking last at the end of a game, they are not "negative points." Both Prestige and Crave will count towards the final victory at the end of the campaign.
Prestige represents the things you did to increase the prestige and well-being of the kingdom, and the glory your House obtained as a consequence. Crave, on the other hand, represents the "crave for power" of your House. It is tied to selfish acts you performed in the name of your House, and to your desire for revenge after you proved to be less influential than the other Houses in your decades-long power struggle. Depending on your choices during the game, at the very end of the campaign they will have different values, and both may help you achieve the ultimate victory!
3. Check House Achievements
Check if you fulfilled the conditions of any of the achievements listed on your House screen and, if so, mark 1 space for each of those achievements (see page 13). Many achievements refer to the position of Resources at the end of the game: In case of a tie, all tied Resources share the same position. If a special ability is unlocked, it may have to be applied immediately (see page 14).
4. Update House Alignment
Mark 1 space for the achievement corresponding to the Secret Agenda you used during this game in the House Alignment section of your House screen. If the achievement was already unlocked, do not mark any space.
Example: Catherine played as Opulent. She marks the last space of the matching achievement, unlocking 2 Prestige that she must immediately mark on her House screen. Note that since she already unlocked the achievement for Greedy, no further space would be marked if she played another game with that Secret Agenda.
5. Final Cleanup: Save Your Game!
There are a few steps you must follow at the end of each game of The King's Dilemma, to clean up the game and save its state, so that you can resume your story at the same exact point where you left it. Follow this procedure before putting the game back into the box:
- Take the Trigger cards that were placed in the Event area during this game (if any) and shuffle them back into the Dilemma deck. Then, put the whole Dilemma deck and the Cover tile into the Dilemma Save slot of the game box, to "save your game" until the next time you play.
- Take all the Dilemma cards you resolved during the game from the Time Counter, and Trash them by inserting them into the Trash slot inside the game box. These Dilemmas already "happened" in the past of your Realm, and will never be used again!
- Put all the Secret Agenda cards and the Vote cards in the Setup slot.
- Put all the unlocked Story cards and all the ongoing Event cards in the Story Save slot.
Triggering the End of the Campaign
Sometimes, a card from the Dilemma deck will ask you to attach a Mystery sticker. Mystery stickers are contained in "dossiers" and hidden behind doors marked with letters from A to L. When you are instructed to attach a Mystery sticker, open up and tear off the dossier door matching the letter shown on the card, using the precut corner, then attach the sticker hidden behind it to the space with the matching Storyline symbol in the Mystery Stickers section of this rulebook, starting on page 42. You will attach exactly 6 Mystery stickers during your campaign.
When the sixth Mystery sticker has been attached, after you complete the resolution of the Dilemma card that made you attach that sticker, you must immediately open Envelope 70, which contains the events of the Grand Finale of The King's Dilemma. At the end of this event, you will determine whose House is the overall winner of your campaign.
Both the Prestige and the Crave scores that you marked on your House screen during the various games will be crucial; the Cohesion and Dissent values that were revealed on the Ending cards as a consequence of your decisions will also affect the end result of the campaign.
To avoid "spoilers" to the campaign story, the exact meaning of all these "end game points" will only be revealed during the Grand Finale of the game!
Note: The Mystery Sticker dossiers also hold pieces of the kingdom's deeper lore and history, revealed only as each dossier is opened during the campaign, so as not to spoil the story in advance.
The World of the King's Dilemma
The Council
You are members of the Council, a governing body ruling in the name of the King located in Lybra, the capital city of the Kingdom of Ankist. You represent one of the twelve noble families who rule the Duchies and the Marks into which the kingdom is divided. Your main interest is obviously to make Ankist prosper; however, you are also trying to increase the power and the prestige of your own family over the others. The game campaign spans decades and generations, so you will assume the role of a different representative of your House each game—you won't be the same person over multiple games.
The Kingdom of Ankist
Ankist is one of the largest states in Lywik, but it's not the only one. Ankist itself is the result of the union of many formerly independent kingdoms, conquered in wars or united by diplomacy, that were incorporated over the centuries as Duchies or Marks. The north and the south of Ankist have uncertain borders: the unclaimed borderlands are full of raiders, cutthroats, and dangerous nomadic tribes.
The structure of the kingdom is feudal. The Duchies and the Marks are managed by their ruling Houses, represented by the players; these families are all loyal to the king of Ankist, but also have counts and barons that are loyal to them. The Houses are responsible for rallying the army, gathering taxes, and generally administering their territory in the name of the King. The King is personally assisted by the Chamberlain, who will deal with the Council about several general matters. The Council can also rely on the Royal Treasurer, who is charged with monitoring the finances and dealing with the economy of the kingdom.
Ankist has a complex and vibrant society, divided into five main social classes:
The Merchants: They are entrepreneurs who run commercial activities and finance trading expeditions. They generally have a large income or fortune that they can rely on. To pursue their commercial interests, the merchants of Ankist unite themselves into local guilds. They don't usually behave as a united faction, because the various guilds may have diverging interests, but they periodically elect a Guild Master or Mistress, who is considered neutral by all the guilds and speaks to the Council for all of them.
The Scholars: The brightest minds of the kingdom are usually encouraged to join a university, where they can spend their lives looking for new knowledge and discussing the most important theories. They don't have a real hierarchy, except the one given by their reputation and the funds that they manage to collect from the rich and the nobles to pursue their studies. However, they do have a sort of "leader" in the figure of the Rector, a life-lasting honorific position given to the most eminent scholar of their time through election, tasked with bringing cultural issues to the attention of the Council. The Rector also appoints the Librarian Chancellor, who assists the Council in making decisions regarding all scholarly matters and also acts as "court physician."
The Army: Recruited by the Dukes and Marquises but under the direct orders of the Council, the army keeps peace and order in the kingdom. The Council's strategic orders are executed by two generals: the High Commander, who reports directly to the Council about external threats and commands the army during wars, and the Royal Marshal, who leads the King's Guard and intervenes in case of riots or other internal troubles. Only a minority of the soldiers are regulars: most of them are conscripts, men and women called to serve in times of need that go back to their homes in times of peace.
The Common People: With their numbers and resiliency, they are the backbone of the kingdom. They mostly have humble jobs like farming, woodcutting, tailoring, or mining. They do not own any significant wealth and the fruits of their work serve them just to get by. Their interests are defended by the Tribune, an elected figure with a mandate of ten years who reports the problems of the common people to the Council.
The Cult: The most influential High Priestesses of the Cult sit on the Circle of the Blessed. Among them, a Prior Mother is selected as the leader of the Cult through a specific ritual: it is said that the Mother herself guides this decision. While not considered divine herself, the Prior Mother deals with doctrinal issues and is considered the voice of the Mother in our world. Another extremely important figure of the Circle of the Blessed is the Holy Attendant, who deals with material problems of the Cult and often sits on the Council, to report on Cult-related issues.
Justice
With the conviction that each wrong must be followed by an equal and opposite reaction to restore balance, justice in the kingdom of Ankist is commonly based on the law of retaliation: the more serious the felony, the more harsh the punishment. The more common crimes are dealt with by local judges, although the duke, marquis, or even the king may be consulted to ask for a pardon. On the other hand, the most ambiguous cases are brought to the attention of the First Judge, an expert and wise man of law at the head of the Justice Court of Lybra, who studies these matters and submits their advice to the Council.
The Rest of the Known World
Despite Ankist being one of the most influential and powerful kingdoms of the world, it is not the only one. Two continents are known to the people of Ankist: the northern continent of Lywik, where the kingdom of Ankist is, and the mostly unknown southern continent, only known for the fierce Ivory Desert and the tales and legends shared by the few foreign travelers venturing to our lands.
The Kingdom of Mhuir: Ankist shares a border with Mhuir to the northwest. The two kingdoms used to be almost comparable in size a few decades back, but Mhuir is now much smaller after they lost a war against Ankist in the year 143. Still, it is culturally and technologically more advanced.
The Kingdom of Cidlada: The small and poor kingdom of Cidlada, to the south of Ankist, does not really have much to offer. Despite being completely harmless, it has not yet been conquered by any of its neighbours only because its stingy lands are even more onerous to administer than they would be easy to conquer.
The Republic of Kauppias: The Republic of Kauppias, despite ruling over the cold and rocky territories located to the northeast of the Kingdom of Ankist, has commercial abilities beyond imagination that more than compensate for the harshness of their homeland. Their leader, the Doge, is elected every five years among the most talented merchants, and despite having only limited powers, they are the head of their army of mercenaries and, most importantly, they can veto the decisions of the Bank of Cards, one of the most influential banks in the whole world.
The Kasuk Empire: Beyond the Cheile Sea, the Kasuk Empire extends its territories for miles and miles to the distant east. Most of its territories are barren steppes, frozen in winter and impossible to farm, therefore the majority of its population lives on the coasts of the Cheile Sea, particularly in the Placid Waters Gulf. The Emperor, always accompanied by his personal guard composed of the best fighters from the north, lives in opulence and luxury just like his bureaucrats and nobles, while their subjects are miserable and beaten down.
The Southern Continent: Besides the coastal city-states, the southern continent is barely explored. The inland is apparently wholly occupied by a vast desert called the Ivory Desert, where no one can live, while a tall mountain range called the Nebula Mountains cross it from north to south, splitting it into two halves.
The Cult of the Mother
The Cult of the Mother is the only religion in the kingdom of Ankist and in most of the other known lands. The Mother is considered the only true goddess, and she is worshipped as a benevolent figure together with her eight Saint Daughters. However, especially in remote places, paganism is sometimes still present, but the Cult treats it as superstition, claiming that the pagan gods are likely misinterpretations of the Saint Daughters.
Dogma
The religion of the Cult is based on the fact that all is created and regenerated by the Mother. When you die, you go back to the Mother's womb where you will be regenerated before being born again. Birth and death are equally important: birth can't be prevented in any way and corpses must be buried in order to go back to the Mother. The Cult claims that the Mother once walked in this world in human form to elevate humanity above the beasts, but she was not human.
This dogmatic truth has been questioned by several heretical theories in the past. A famous heresy theorized the existence of a "Ninth Daughter," and claimed that the Mother was not an immortal goddess, but just the empress of an ancient civilization, part of a matrilineal dynasty where the ninth daughter would inherit command. Another heresy asserts that the Saint Daughters are as divine as the Mother: they would actually be her sisters, and the Mother herself would be the aforementioned ninth. Yet another one says that the Saint Daughters were actually the ancient pagan gods who were defeated by the Mother and submitted to her will. These heresies are all vigorously denied by the Cult.
The Eight Saint Daughters of the Mother
The Cult worships the Mother and her Saint Daughters as a unity, but commoners may ask the favor of a specific Daughter according to what they need. The Saint Daughters have a dual nature: They each represent a virtue they gifted to the world and the avoidance of a vice that could be fostered by an excess of that same virtue. In this sense, the Saint Daughters represent harmony and balance. Those who seek courage without recklessness will pray to Tilde. Those who seek strength and vigor without violence will pray to Orsal. Those who pray to Aegna will have wisdom and avoid folly. Those who seek creativity, arts, and games will pray to Lyria, who will tell them when playfulness must stop. Aire is the patron of love, but she is mindful to avoid jealousy. Those who need their business to thrive will ask Raela to intercede for them and they will be granted wealth as long as they are generous with it. Caerthas brings justice, but always with mercy. Those who seek rest or think they deserve to feast after a great effort will pray to Myhir, without ending in laziness.
Structure of the Cult
The Cult of the Mother only allows women to join its ranks. The priestesses of the Cult informally call each other "Sisters" and live in monasteries. Priestesses can indulge in romantic relationships and have children, but they usually do not marry, even if it is not formally forbidden. They can raise their daughters at the monasteries until they reach puberty, then the girls can chose to become priestesses themselves or to leave. If a priestess gives birth to a son, he will be have to be raised by his father, outside of the monastery.
The monasteries are of different sizes and shapes, but all of them, from the smallest village monastery made of only two rooms to the biggest ones which can host up to hundreds of priestesses, have a public space, where all the believers gather and assist in the rites, and a private space, where the priestesses live and perform special rituals. Only priestesses can enter this space, but while lay women may occasionally be welcomed as guests, access is never allowed to men. The biggest monasteries are lead by an elected figure called the High Priestess.
History of the World
At the present time, Ankist is one of the strongest and largest kingdoms in the world, and has enjoyed several decades of peace. But less than two centuries ago it was divided into many small kingdoms and raider tribes. Little is known about what happened before this age of fragmentation, but what we know for sure is that the lands of the current Kingdom of Ankist, as well as most of the other known lands, were ruled by several lost civilizations throughout the ages. The monumental vestiges they left behind are present in most of the cities of the kingdom.
The Salaan Union (around 800 years ago)
All that remains of this great civilization are a few vestiges on the coasts of both the Siar Ocean and the Cheile Sea, such as gigantic lighthouses in ruins or shipyards readapted throughout the centuries and still in use in some cities of the kingdom. Some say that in ancient times their rule spanned over the whole world.
The Sabbiyan League (around 1100 years ago)
Older ruins are present across the south of Ankist. Many market squares in the southern cities are built around these structures, and a few obelisks made from sculpted sandstone survived the test of time. The bas-relief scenes represented on these obelisks mainly depict scenes of trade, suggesting that commerce was the main strength of this civilization.
The First King (around 1400 years ago)
Historians agree that all of the most ancient and timeworn monasteries of our kingdom (and beyond) were built by Ommad, the legendary First King, a historical yet almost mythical figure. His rule allegedly spanned over the whole world, and even though it ended hundreds of years before our kingdom was even born, our royal family claims to have a direct lineage from him. At the present time, he's praised more for bringing the Cult of the Mother to our continent and converting the northern pagan tribes than for his considerable military successes. He was so illustrious, that every state claims to be his birthplace.
Mythical History
Some historians suspect there was another forgotten Empire that might have been the cradle of civilization. This belief comes from the many spurious copies of a legendary artifact that has been lost for centuries, called the Golden Map. We've been seeking this item for decades to no avail.
Mystery Stickers
When you attach a sticker to the last empty space, after you complete the resolution of the Dilemma card that made you attach that sticker, you must immediately open Envelope 70, which contains the events of the Grand Finale of The King's Dilemma. It's almost time to determine whose House is the overall winner of your campaign!
(This section of the physical rulebook provides the twelve lettered spaces, A through L, on which the Mystery stickers revealed during the campaign are attached.)
Realm Chronicles
Use the Chronicles of the Kingdom of Ankist to record the results of all the games of your campaign. Each scoring table has spaces for the King's name and the date of the game, and for each participating House to record their Secret Agenda score, Open Agenda score, Coins, Power, and Total Agenda Points, along with their finishing rank.
The King's Dilemma Troubleshooting Tool
Is your Dilemma Deck out of cards? If you don't know how to proceed, you may have missed some instructions described on the cards you have already played, but don't worry, we've got you covered! Scan the QR code to access our Troubleshooting Tool and we'll get you back on track in no time!
If you have any issues, please contact us at [email protected], or visit www.horrible-games.com.