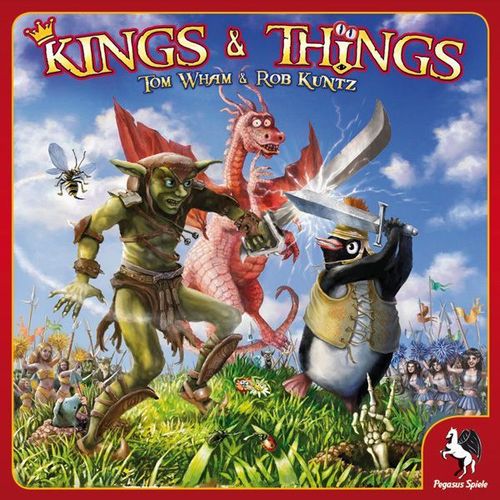
Kings & Things
Kings & Things Rulebook
Table of Contents
Table of Contents
- 1. Equipment
- 2. Setting Up the Game
- 3. The Sequence of Play
- 4. Winning the Game
- 5. Gold and Income
- 6. Heroes
- 7. Recruiting Things
- 8. How to Deploy an Army
- 9. Movement
- 10. Exploration
- 11. Combat
- 12. Forts
- 13. Hero Abilities
- 14. Random Events
- 15. Magic
- 16. Two and Three Players
- Appendix A: Heroes
- Appendix B: Random Events
- Appendix C: Magic
- Appendix D: Kings & Things* Time Line
- Short Rules
- More Rules
- Beginners' Game
1. Equipment
- 208 cardboard playing pieces
- 60 wooden control markers (you'll need to put stickers on these)
- 32 plastic Forts, including: 10 Towers, 8 Keeps, 8 Castles, and 6 Citadels
- 24 plastic Battle Markers
- 48 hex tiles
- 4 dice
- 4 stand up cardboard Player Shields (fort on one side, info on the other)
- 58 Gold Coins (no, they're not real) in 6 denominations (1, 2, 5, 10, 15, 20)
- 1 cloth Thing Bag
- Player Information Sheets
The Hex Tiles
Kings & Things* does not use a regular board. Instead, you build your own board, changing the terrain layout each time you play. (Those fertility spells are fickle and still quite potent.) The hex tiles represent the sea and seven different types of land (jungle, frozen waste, forest, plains, swamp, mountain, desert) you will encounter and battle over on your way to imperial glory.
Hex tiles: Plains (6), Frozen Waste (5), Mountains (6), Swamp (6), Jungle (5), Forest (6), Desert (6), Sea (8).
Historical Note: Once the lands of Kadab were blessed with really nice weather. We mean really nice. It was so nice that people (and Things) came from all over the world to settle down and soak up the sun. Then an accident destroyed Yazilik University, the empire's center of magical learning and power. Well, when the old school went boom in the year 250 it released several conflicting fertility spells which changed the climate and complexity of the land. Frozen wastelands are now in close proximity to steaming swamps and vast deserts are adjacent to verdant plains.
The Playing Pieces
Historical Note: The creatures of Kadab (and even many inanimate objects) have been blessed with at least a rudimentary intelligence since the Big Boom at Yazilik U. As the magic that was released from those hallowed halls settled over the land, it became evident that life wasn't going to be quite the way it was. Things were awarded full rights as citizens by Emperor Nablopal III's Code of Laws and Things (back in the Year 248, before the empire collapsed). So goblins, dinosaurs, flying squirrels, elves, buffalo and even killer penguins all have a say in the politics of the land (even though some still have a 1ittle trouble understanding - much less appreciating - the honor).
One of the ways you gain power is by mustering armies of whatever creatures, or Things, that are willing to join your cause, usually in exchange for gold (or food and a good time). Things are keyed to specific terrain types.
Things. Most of the cardboard counters that come in the game have crossed swords on the back. These are known as Things, and before play begins, they are all placed in the cloth Thing Bag. They represent the fantastic creatures, special income counters, magic items, treasures, and random events in the world of Kings and Things*.
Special Income Counters. 22 of the pieces in the Thing Bag are not creatures, but places. 10 of them are keyed to specific terrain types and produce gold income for their owners. 12 of the special income counters are villages and cities, that not only provide their owners with income, but also help fight to defend the hex. These are also Things.
Heroes. The two sided purple counters are mighty warriors known as Heroes. Heroes fight like most Things, but many have special abilities. For details about them, see Appendix A: Heroes. Heroes are not Things, and are kept in a special area called the "bank" near the board.
Black Cloud. This piece is only used to mark the terrain hex specified by the event: weather control (see Appendix B: Events). It is not a Thing.
First Player Marker. Before the game begins, randomly determine a first player. Give this piece to that player. This player goes first in each phase of a turn. The First Player Marker is passed to the left at the end of each complete turn. It is not a thing.
Gold Coins. These are the money of Kadab. Each player starts the game with 10 gold and earns more as the game proceeds. The coins are kept near the board in a common "bank".
Player Shields. The Shield is used to store Things that you are not currently using (such as unsupported Things, magic, events, and treasure) and hides them from the prying eyes of others. Heroes, gold coins and fortifications may never be put behind the Shield. Inside the screen is a turn sequence summary.
Summary Sheets. The Summary Sheets provide quick reference about the special abilities of the Heroes, events, and magic.
Battle Markers. Use these to indicate hexes in which a battle must be fought because of opposing armies or exploration.
Control Markers. Before the game you must put stickers on these wooden pieces. Each player chooses a set of these markers to indicate control of hexes, or armies. Control markers are kept in the "bank" and used by the players as needed.
Forts. There are four levels of fortifications that may be played in hexes that a player controls. The tower, keep, castle, and citadel are all referred to as "forts". Each player starts with a tower. Forts are built during the Construction Phase. Spare forts are kept in the "bank" near the board.
Thing Bag. Prior to play, all Things (with crossed swords on the back) are placed in the Thing Bag. From the Bag come the armies, events, magic and special income counters of the game.
Dice. The dice are used to resolve battles, exploration, and events.
Kept in a convenient "bank" area to the side of the game are the Gold Coins, the Black Cloud (used with the Weather Control Event), the famous Heroes of the world of Kadab, four sizes of plastic fortifications, and Battle Markers.
Sample Creature Counter
Example counter "Elk Herd": the counter shows the creature's name (Elk Herd), his picture, his terrain (Frozen Waste) and his Combat Value (2).
Funny Symbols Used on Counters
- Wing symbol = Flying Creature
- Star = Magic-Using Creature
- C = Can Charge in Combat
- R = Uses Ranged Combat
- Asterisk (*) = Has Special Ability
- Parenthesis around combat value = Can take more than one hit in Combat
2. Setting Up the Game
The Standard Four Player Game
Before you can set out to reunite the shattered kingdom of Kadab (by conquering it yourself, of course), you should be aware that Kings & Things* works best with four players. But if you can't find that many minor nobles, even two or three players will find the game fun and exciting.
There are a number of tasks that need to be done to set up the game. They are:
First Player. All players roll 2 dice. The high roll becomes the first player and is given the First Player Marker.
The Bank. This is where all those important game pieces are kept so they are easily accessible throughout the game. Sort the plastic fortifications, the battle markers, the gold pieces and two sided wooden control markers by type. Set them off to one side of the playing area.
The Thing Bag. From this players will randomly draw Things during the game. Place all of the Thing counters in the Bag.
Heroes. Randomly determine which side of the back-printed Hero counters will be used in the game. This is best accomplished by placing them all in your hands, giving them a good shake, and then dropping them on the table. Sort after dropping and place them near the bank. From now on be careful not to turn these counters over unintentionally.
Hex Tile Set-up. Now it's time to see exactly what the Big Boom is doing to the Kadab terrain this week. Set aside four of the Eight sea hexes (short for hex tiles.) Then shuffle all the land and four remaining sea hexes together face down into a large deck. Now lay out the board according to the diagram in the illustration. Don't turn the hexes face-up yet.
(Diagram: the board is a large hexagonal arrangement of 37 hexes laid out in a spiral from the centre outward; the arrow shows the order in which hexes are laid out. The four stars at the corners of the outer ring indicate the four possible starting points.)
Starting Positions. There are four possible places to start your kingdom, as shown in the previous illustration. The First Player chooses a starting position first, followed by the other players in clockwise order (you may have to shift seats when you're through, so don't get comfortable). The final arrangement of seats, clockwise from the first player is known as the player order. Now you can turn those hexes face-up.
Note: If your starting position is a sea hex or is adjacent to two or more sea hexes, you may remove the sea hex(s) and replace it with a hex drawn from the deck. Repeat this process until your starting position is land with at least two land hexes adjacent to it.
Starting Kingdoms. Each player chooses a set of control markers from the bank, takes one and places it in its starting hex to show that he owns it. Then, in player order, each player selects and marks a second hex. Repeat this procedure one more time so that each player has a kingdom consisting of three hexes. A player's second and third hex must be adjacent to at least one of his previous hexes, and may not be adjacent to the hex of another player. Unused control markers stay in the bank.
Starting Forces. Next, each player takes 10 gold pieces (see Section 5) and one tower from the bank, and a Player Shield. In player order each player takes his tower and puts it in one of his hexes.
Then, again in player order, each player draws 10 Things from the Thing Bag (at random - no peeking!). In player order each minor noble may place some or all of his Things on the board:
-
Special income counters include cities, villages, and other counters keyed to specific terrain and printed with gold values. You can place one (and only one) special income counter in each hex you own. Villages and cities can be placed in any of your hexes. Other special income counters can only be placed in hexes of their terrain type.
Example: The Elephants' Graveyard counter says 'Jungle'. If you have a jungle hex, you may place the graveyard there; if you don't you can't place the graveyard on the board, but you may want to store it behind your Player Shield in case you later conquer a jungle hex.
-
Creature counters include killer raccoons, ice worms, and other various critters that populate Kadab. You can place your creature counters in any hexes you own, up to 10 per hex. Place them face down and make neat little stacks in whatever hexes you put them. Creatures not supported by the types of hexes that you control will be considered 'bluff creatures' and you might wish to exchange them in the next phase of setup (see Section 8).
-
Magic items, treasures, and events (along with any other unplayed Things) are placed behind your Shield.
Exchanging Things. Next, in player order, players who still have Things behind their Shields can turn them in for new ones. A player gets to draw one new counter for each counter he returns to the Bag. Decide what Things you will return; then draw replacements; then put the returned counters into the Thing Bag. If you don't like your replacement counters, tough - you can't replace them again.
Again in player order anyone who drew replacement counters can place them on the board, according to the rules above. The rest are placed behind the Shield.
Preparing the Deck. Shuffle all the unused terrain hexes together with the four sea hexes set aside earlier. Keep this deck face down and set it near the bank.
Two or Three Players
In a two or three player game the board is smaller; see Section 16.
3. The Sequence of Play
Kings & Things* is played in turns; each turn is divided into phases.
The First Player
During setup, a player order was determined (see Section 2) and that player received the First Player Marker. During each phase, the players perform actions in order.
Example: In the Gold Collection Phase, the first player takes gold, then the player to his left does, etc. Once all players have taken gold, the next phase begins.
At the end of the turn, the player order shifts. The old second player - the one to the first player's left - becomes the new first player (receiving the First Player Marker) and performs actions first in each phase of the next turn. At the end of each subsequent turn, the player order shifts like this again. We suggest that you have an official 'changing of the order' at the end of each turn.
Note: In a two-player game the player order does not change.
The Turn Sequence Outline
An abbreviated sequence of play is printed on the back of the Player Shield. What follows here is a brief explanation including rule section references.
Gold Collection Phase. Determine income and collect gold pieces from the bank (see Section 5.) Gold collection is mandatory.
Recruiting Characters. Each player may attempt to recruit one Hero if any remain in the bank (see Section 6.) Hero recruitment is optional.
Recruiting Things. Each player draws Things from the Bag. Players may trade in unwanted Things from behind their Shields. Place Things on the board (see Section 7.) Thing recruitment is mandatory.
Random Events Phase. Each player may play one Random Event counter from behind his Shield (see Section 14.) Random event play is optional.
Movement Phase. Each player may move his counters (creatures and Heroes) on the board (see Section 9.) Movement is optional.
Combat Phase. Each player may explore or fight battles (see Sections 10 and 11.) Combat is optional. Sort of.
Construction Phase. Each player may build forts (see Section 12.) Construction is optional.
Special Powers Phase. During this phase the Master Thief and the Assassin Primus may use their special powers, if they are in the game (see Appendix A: Heroes). Use of special powers is optional.
Changing Player Order. The second player receives the First Player Marker and becomes the first player, (see Section 3.) Changing player order is mandatory.
4. Winning the Game
The object of Kings & Things* is to reunite the kingdom of Kadab under your wise and benevolent rule. Whoever can prove his ability to rule will certainly gain the undying gratitude of the killer penguins and ravaging pixies everywhere and be crowned the new Emperor of Kadab. The proof lies in the ability to build and/or capture the very impressive fortified structures known as citadels.
How to Build a Citadel
There are four fort levels. In size order, they are: tower, keep, castle and citadel. Starting with a tower, you will eventually increase the fort in size until you have constructed a citadel (see Section 12.)
You can only build a citadel during your part of a Construction Phase. You need to already own a castle, have an income of 20 (or 15 in a two- or three-player game), and pay 5 gold. See Section 5.
Building a Citadel: Tower, then Keep (+5 gold pieces), then Castle (+5 gold pieces), then Citadel (+5 gold pieces). Income must be 20 gold or 15 in a 2 or 3 player game.
You may not build a citadel if you already own one (whether you conquered or built it).
You don't actually receive income during the Construction Phase you simply count up your income to see if you're eligible to build a citadel.
Once built, a citadel can only be lost by conquest. You do not lose it if your income dips below 20 (or 15 in a two or three-player game).
Winning with a Citadel
Citadels are big. Citadels are impressive. Citadels are what allow a minor noble to rise above his fellows to become Emperor.
If you are the first player to build a citadel and no one else builds one by the end of the next Construction Phase you win - hooray! If someone else builds a citadel before then, the game still ENDS at the end of the next Construction Phase. At that time, all players with citadels count their Gold Income. The player with the highest Income is the winner. If there is a tie, the player with the most land hexes is the winner. If that is a tie, the player with the largest army (most creatures and Heroes) is the winner. If there is still a tie, the players share the victory.
A player wins immediately upon capturing a second citadel. (Since you can only build a citadel if you already own one, your second citadel must be captured from another player).
If there is only one citadel on the board and you capture it from its present owner, you must hold it until the end of the Construction Phase of the next turn in order to win, just as though you had built it.
If you build a citadel and then lose it to another player, you may build another citadel (since you can build one if you don't currently own one) as long as you meet the income requirements as usual.
5. Gold and Income
Gold pieces wonderful to have. They can be spent to gain Heroes, recruit Things, build forts, and bribe defenders during exploration. You get these wonderful shiny trinkets during each Income Phase. You can also gain gold pieces by playing treasures drawn from the Bag or captured during exploration.
Income
Each turn during the Gold Collection Phase, you receive as many gold pieces as your income. Income is the net worth of your kingdom, determined by certain items you control (see below). Treasures turned in for gold do not count as income.
Income is determined as follows. You receive:
- one gold piece for each land hex you control, plus
- as many gold pieces as the combat value of each fort you control, plus
- as many gold pieces as the printed value of each special income counter you control on the board (see below), plus
- one gold piece for each Hero you control.
Example (illustration): A player controls 3 hexes, one containing a Village (1), one a Gold Mine (3), one a castle (combat value 3) and a Hero (1). This player's income is 11: 3 Control = 3; 1 Village = 1; 1 mine = 3; 1 castle = 3; 1 Hero = 1; total 11.
Gold Counters
When you gain gold pieces, take gold counters from the bank and place them in front of you. You can't hide your gold from the other players - keep them in full view at all times.
Important: Gold counters are never put in the Thing Bag, behind your Shield, or on the board.
Treasure Counters
Treasures include pearls, diamonds, treasure chests, and more. Treasure counters can be drawn from the Bag or captured during exploration. See Section 10. Place them behind your Shield and play them when you need additional gold pieces.
To play a treasure counter, display it and take the printed number of gold pieces from the bank. The treasure counter is returned to the Thing Bag. A treasure counter may be turned in at any time. Important: Once taken from the Bag or captured during exploration, treasure counters are never placed on the board.
Treasure counters are useful because they disguise your true wealth and are harder to lose than gold. However, since you may not have more than 10 counters behind your Shield (see Section 7), you may not be able to hold them as long as you wish.
Special Income Counters
There are ten special income counters keyed to specific terrain (see Section 2). In addition, there are twelve city/village special income counters which can be played in any land hex.
Special income counters: Diamond Field (Desert, 1), Timberland (Forest, 1), Gold Mine (Mountain, 3), Elephants' Graveyard (Jungle, 3), Farmlands (Plains, 1), Peat Bog (Swamp, 1), Oil Field (Frozen Waste, 3), City (any land hex, 2). (Printed values as shown; the sample illustration also shows a Village with value 1.)
6. Heroes
These amazing and adventurous Heroes of Kings & Things* are pretty powerful. Two different Heroes are printed on opposite sides of the same counter, but only one is used at any given time (see Appendix A). Each turn you may try to add one new Hero to your army.
Obtaining a Hero
How do you go about getting such august personalities as Deerhunter, the Grand Duke, and Ice Lord to join your cause and lead your armies?
During the Recruiting Heroes Phase, choose one unowned face-up hero from near the bank and roll two dice (see Appendix A for a list of the Heroes). Double the character's combat number and compare this number to your die-roll. If you roll greater than or equal to the number, you gain the Hero. Otherwise he remains unowned unless you spend gold.
Using Gold to Modify the Roll
Money talks in this game! Before or after rolling the dice, you can spend gold pieces to modify the die-roll.
- For every 5 gold pieces spent before rolling, you can add one to the roll.
- For every 10 pieces spent after rolling, you add one to the die-roll.
Example: you want to add the Dwarf King (combat value of 5) to your army. You need to roll a 10 (twice 5) on two dice. You spend 10 gold pieces to add 2 to your roll. The dice fall and the result is 7. You add the 2 for the gold spent, making the total 9. You're still 1 short. You can end your phase or spend 10 more gold, adding 1 to get to the King.
Hero Abilities
Many Heroes have individual powers, their counters are marked with an asterisk. These are described in Appendix A.
Discharging Heroes
Before rolling in the Recruiting Heroes Phase, you may discharge (return to the bank) any or all Heroes in your army. This is one way to make other Heroes (the ones on the face-down side) available. You may also want to discharge a Terrain Lord to make room for another one in your rag-tag army. (Only one Terrain Lord may serve in your army at any given time). Just flip a returned hero to the side you want when you return it to the pool.
When Heroes Flee
When a Hero is eliminated, he flees back to the pool of unowned Heroes next to the bank. He can be recruited by any player, starting with the next Hero Recruitment Phase. The player who lost the hero may turn the counter over before returning it, making a different hero available.
7. Recruiting Things
During the Recruiting Things Phase, you add new creatures to your army by drawing counters from the Thing Bag. There are three ways to acquire new creatures: free recruits, paid recruits, and trade-ins.
Note: Three methods are used during this phase. Figure your free recruits, paid recruits (a maximum of five), and your trade-ins (a maximum of five) and take them all from the Bag at once, remembering to pay your gold and discard traded counters. This ends the phase.
Free Recruits
You get one free recruit for every two land hexes you control, rounding up (so, for example, you will get two free recruits on the first turn of the game). Simply draw this many counters from the Thing Bag.
Paid Recruits
At the same time, you may pay gold pieces to the bank to buy recruits for your army. For every 5 gold pieces you spend, you may draw one additional counter. No more than 25 gold pieces may be spent to buy recruits in any one turn.
Trades
Also at this time, you may exchange unused counters from behind your Player Shield for new recruits and Things. For every two counters you return to the Bag, you may draw one additional counter.
- Display all counters you wish to trade in. Draw the full number of Things you are allowed for the phase. Then return the traded counters to the Thing Bag.
- You may trade in any unplayed Things from behind your Shield, regardless of type.
Example: Your kingdom consists of five hexes, you have 40 gold pieces, and you have five counters behind your Shield. You receive three free recruits for your land holdings, you can spend 25 gold pieces for five additional recruits, and you can trade four of the counters behind your Shield for two additional recruits, making a total of 10.
Note: The Exchanging Things portion of the initial set-up (on a one-for-one basis) can only be done at the start of the game (see Section 2). After the game has begun, the only time you may trade in Thing counters is during the Recruiting Things Phase (according to the rules above).
Player Shield Limit
There is a limit to what may be hidden behind your Player Shield. After drawing all recruits and placing creatures on the board (see Section 8), you may not have more than 10 counters behind your Shield. This limit is always in effect.
Example: If you use the Thief to steal another player's counter when you already have 10 counters behind your Shield, you must immediately play or discard one counter.
If you are ever discovered to have 11 or more counters behind your Player Shield, you must immediately return the excess to the Thing Bag. (The player to your right chooses randomly - without looking at your counters - which ones you must return).
Emptying the Thing Bag
If the last Thing is drawn from the Bag, the special true elimination rule is invoked. From that point on, magic items, treasure, and events are not returned to the Bag when used. Instead, they are set aside and out of play for the rest of the game.
You may not examine the number of counters in the Bag prior to announcing how many recruits you wish to buy or trade for.
8. How to Deploy an Army
The total force of all your creatures and Heroes on the board is known as your rag-tag army (don't ask us why - Kadab's a funny place).
Heroes
As soon as you recruit a Hero, you must place it in a hex you control. Heroes cannot be placed behind your Shield and are always played face up. (After all, Heroes are too important to be kept out of the action and too brave to languish in hiding).
Things
Magic, Events, and Treasure: Once taken from the Thing Bag or captured during exploration, magic, event, and treasure counters are never placed on the board. Instead they remain behind your Player Shield until you wish to use them (see Sections 5, 14 and 15).
Cities and Villages: City and village special income counters may be placed face up in any hex you control which does not already contain another special income counter.
Other Special Income Counters: include Oil Fields, Farmlands, and Diamond Fields, among others. They add wealth to your coffers and increase your level of income. They can only be placed (face up) in the terrain hex indicated on the counter. Special income counters are not affected by the Terrain Lords (see Section 6 and Appendix A).
Example: Oil fields may only be placed in a frozen waste hex, farmland in plains, and diamond fields in deserts. Having the Ice Lord will not allow you to place the oil fields in the mountains.
(Illustration: the Farmlands counter is played correctly in plains. The Elephant's Graveyard may never be played in mountain despite the presence of the Jungle Lord.)
Creatures: Each creature in the land of Kadab has certain basic needs - special food, letters from home, the knowledge that it is fighting for home and thinglings - Things which only the right terrain or a Lord who understands the creature can give. That's why you must own a hex of the right terrain or have the right Lord to use a creature properly. Oh, you can recruit a creature without this, but it will pine for its own homeland, and its allegiance will be fragile indeed.
Creatures may be played face down in any hex you control. A creature is a bluff if you don't own a hex of its terrain type.
To survive and be real, a creature needs support. Support is the basic stuff that every creature must have to thrive and lead meaningful lives. Creatures can be supported two ways: by hexes, and by Terrain Lords.
A hex supports all creatures of its terrain type, anywhere in your kingdom. So, for example, if you own a swamp hex, all of your swamp creatures are supported, wherever they may be.
Terrain Lords are Heroes (see Section 6 and Appendix A). Each is printed with the name of the terrain type. If you have a Terrain Lord, any creatures of his terrain in the same hex as he is are supported. For example, if you had the Swamp Lord, any swamp creatures in his hex would be supported - but swamp creatures elsewhere would not.
(Illustration: Counter "A" (the slime beast) is a supported counter, because it is in the same hex as the Swamp King. (The Swamp King does not require support.) Both counters marked "B" (the Skeleton and the Camel Corps) are supported, because the player owns at least one hex of their type. Only counter "C" is a bluff, as the player owns no mountains, and the Swamp King is in the wrong hex.)
Bluff Creatures
Bluff creatures (those creatures which aren't supported by a terrain hex of their type or the appropriate Terrain Lord), can move explore, initiate combat, and so on, just like supported creatures. A bluff creature remains in play until it is flipped face up. (This usually happens when combat is about to begin.) At the instant this happens, any of the other players can demand its removal.
But if no one notices that the creature is a bluff, it stays in play and can still fight. When someone finally notices that it's a bluff, it is removed - unless it has already been flipped face down.
If you have a bluff creature on the board and acquire a hex of its terrain type (or the right Terrain Lord), it's no longer a bluff - it is now supported, and isn't removed if flipped face up. Conversely, supported creatures can become bluffs if you lose a hex or a Terrain Lord.
Example: One stack of counters in your army is made up of dervishes, nomads and old dragons - all desert creatures. You don't own a desert hex or the Desert Master, so they are all bluffs. If you capture a desert hex during the first battle of a Combat Phase, the creatures are supported for all subsequent battles.
Example: During a battle you lose your last desert hex. All of your desert creatures are now bluffs.
Example: You lose your Desert Master. All desert creatures in his stack are now bluffs (unless you own a desert hex somewhere).
Removing Counters from the Board
Creatures may never be taken off the board voluntarily. Once played, they remain on the board. Creatures are only removed if they are discovered to be bluffs, as a result of combat, or due to random events.
Special income counters may be voluntarily removed by the owner (You might want to do this to make room for a more valuable counter or to deny resources to an invading army.) This may be done anytime except during the Combat Phase. Removed counters are put back into the Thing Bag, not back behind your Shield.
9. Movement
This is the way creatures get from place to place in Kings & Things*. During the Movement Phase, all creature and Hero counters in your army may move. Forts, special income counters, and control markers (except those marking your army sacks) never move.
Movement Speed
Each creature and Hero in your army may move up to four hexes each turn.
Each swamp, mountain, forest and jungle hex counts as two hexes when moving. All other hexes count as one hex.
Example: A creature can move through two '2' hexes, one '2' hex and two normal hexes, or four normal hexes in a turn.
Don't count the hex where your creature starts when moving, but do count the hex in which it ends its move.
Creatures may move individually or in stacks, dropping off and picking up counters anywhere along their movement range.
Movement Restrictions
You may only move your counters during your part of the Movement Phase (exception: retreats: see Section 11).
No more than 10 of your creatures can end movement in the same hex. Control markers, special income counters, and forts do not count towards this limit. Heroes do.
- This restriction doesn't limit a hex to 10 creatures. It limits it to 10 friendly creatures. There could be four stacks of 10 creatures in a single hex, each controlled by a different player.
- This restriction does not apply to a citadel hex. You can attack or defend a citadel hex with any number of creatures and Heroes.
If your creatures begin a Movement Phase in the same hex as enemy creatures (all other players are considered your enemy), they are pinned, and may not leave the hex. Also, your creatures must stop moving as soon as they enter a hex occupied by face-down enemy creatures, or by face-up enemy creatures which have a combat value. A combat value is the number Things need to roll to inflict hits upon the enemy. It is the number located in the lower right-hand corner of the counters. Special income counters (other than cities and villages) don't have a combat value and do not participate in combat.
- Your armies cannot be pinned by bluffs. At the beginning of your move, you may ask the player whose counters are pinning you to reveal at least one supported creature. If he refuses (or can't), your army may move normally.
- Bluffs can force your creatures to stop moving since you must stop moving when you enter a space with face down enemy counters (this will, of course, result in combat). Flying creatures (see below) may continue through such a hex, unless the player owning the face down counters reveals a flying creature.
Each counter or stack of counters must finish moving before any other counter or stack may move.
Only flying creatures may move onto a sea hex, and they are not allowed to end their movement on one. If, for any reason, a creature or stack of creatures ends its move on a sea hex, they are immediately returned to the Thing Bag. (Exception: see Appendix C for explanations of the Balloon and the Fan).
Flying Creatures
Not all creatures in Kings & Things* are land-bound. While walking may be a fine way for walruses, elves and the Marksman to get around, Vampire bats, pixies and Ghaog II will stick to the skies, thank you!
Flying creatures may always move up to four hexes, regardless of the terrain below. Flying creatures can fly over enemy-occupied hexes. These creatures are marked with the wing symbol.
Flying creatures must stop when they enter an unexplored land hex (a land hex that is unowned by any player).
When a stack of creatures moves into, or wishes to leave, a hex that contains face down enemy counters or face up enemy counters with a combat value, your flying creatures may continue moving, provided there are no enemy flying creatures in the hex.
- You must reveal all flying creatures you wish to continue moving (bluff creatures could be removed if discovered at this time).
- The enemy player has the option of revealing any or all of his flying creatures in the hex (bluffs could be removed). He does not have to reveal bluff creatures.
- You must leave behind as many of your flying creatures as the number of flying creatures your enemy reveals. Others may continue on their way. This procedure must be repeated for each enemy-occupied hex your flyers enter.
- You may not enter or pass through a hex that contains the maximum number of friendly creatures because the moment you enter the hex to fly through, the limit of 10 is exceeded.
(Illustration: Player A's force of 4 flying creatures enters B's hex. A announces (and reveals) his four flyers and declares he wishes to continue movement. B chooses to reveal both (he could have chosen to reveal one or none) of his flying creatures. 2 of A's flyers must remain in the forest hex, but the other two may continue onto the frozen waste hex.)
Movement Into Enemy or Unexplored Territory
Important: Whenever a stack of your creatures enters enemy or unexplored territory, mark it by placing one of your control markers on top of the stack.
Remember that enemy controlled hexes do not halt your army's movement. Only enemy units with combat values do (creatures, Heroes, forts, cities, or villages).
Counters that move into unexplored territory (unowned Hexes, see Section 10) must stop moving.
You can conquer any enemy hex without a battle if any of your counters end the Movement Phase there and the hex contains no enemy counters with combat values. Just replace the control marker with one of your own.
10. Exploration
Who knows what vile monsters lurk in the wilds of Kadab? Or what treasures there are to be discovered? What magic Items to be found? There's only one way to find the answers to these all-important questions. Send you rag-tag army out to explore!
When one of your armies enters an uncontrolled hex, it must end movement there. During the Combat Phase it explores the hex and finds out what strange and wonderful (and possibly dangerous) Things it has encountered. It is possible to conquer a hex without a fight, but you could meet creatures you have to bribe or battle.
Determining the Defense
When you explore a hex, roll one die. If you roll a 1 or a 6, the hex is undefended and captured without a fight. Place a control marker (the one on top of your stack will do nicely) to show that the hex is now part of your growing kingdom. Counters used to explore an undefended hex are not flipped over - so bluff creatures can be used for exploration.
If you roll anything but a 1 or 6, the hex you are exploring is defended. The player to your right draws as many counters from the Thing Bag as the number you rolled and places them in the hex. He controls the defending creatures during the upcoming combat. Defending creatures do not require support; swamp creatures could defend a desert hex.
- If a special income counter is drawn, it is returned to the Bag unless it is keyed to the hex terrain, or is a city or a village.
- If more than one playable special income counter is drawn, the counter(s) with the lowest income value is returned to the Bag. The player to your right makes the decision in the case of equal values.
- If a treasure is drawn and the exploring player captures the hex, he may take the treasure and place it behind his shield.
- If a magic item is drawn and there are no defending creatures with combat value in the hex, the explorer may take the magic item and place it behind his shield. If there are defending creatures, cities and/or villages, the defending forces may, at the option of the player who controls them, use the magic item(s) (see Section 15).
- Defending random events are immediately returned to the Bag.
Example: You have moved your Arch Cleric, troll, elk herd, and witch doctor into an unexplored swamp hex. You roll a five and the player to your right (who will serve as the defender) draws that many Things from the Bag. The draw includes an oil field special income counter, a diamond treasure counter, the magic sword, a white dragon, and a giant ape. The oil field is not keyed to the swamp, so it is immediately returned to the Thing Bag and the defender decides to let the ape use the sword. Next you may try to bribe (see below) the defenders or go on with the battle.
Bribery
You may bribe defending creatures.
You may bribe a defending creature, city or village by paying as many gold pieces as its combat value. Bribed creatures return to the Bag without putting up a fight. A bribed city or village is 'neutralized' (see Section 11). You may, if you wish, bribe some but not all of the hex's defenders.
Important: If the defending force contains treasure, magic and or special income counters, then the cost to bribe any counter in the force is double.
(Illustration: This player rolled a "4" for his exploration and the player to his right drew the defending force: a Diamond Field (1), Crawling Vines (6), Skeletons (1) and Bears (2). The exploring player could bribe this entire force for 18 gold pieces, or, for instance just pay 4 gold pieces to bribe the Bears. Costs are doubled because of the active special income counter.)
If you bribe all creatures, cities and villages in the hex, you get any treasure and unused magic items they were guarding.
Fighting the Defenders
If there are still defenders in the hex, combat is resolved (see Section 11). All attacking creatures (yours, silly) are turned face-up, and bluff creatures are removed if noticed.
If you retreat from combat, surviving defenders remain face-up in the hex, ready to fight the next minor noble who comes along. Once the defenders have fought for at least one combat round, they cannot be bribed, even if a different player's army attacks. They may never retreat, and will instead fight to the last... um... man.
Replenishing the Defenders
If you attempt to explore a hex already occupied by defenders (i.e., some other player tried to conquer the hex (and failed) you must fight those defenders. You may not bribe them, and no die is rolled for exploration.
If both the defending and attacking forces are eliminated in combat, the hex remains unexplored. Any player who later explores the hex must roll for defenders as described above.
11. Combat
The player who finally emerges as Emperor of the lands of Kings & Things* is more than just brilliant, well loved, and devoted to the good life. The victorious minor noble also has a strong army of creatures at his side, willing to battle to the end to uphold Truth, Justice and a Good Time. Where better to prove such ideals than on the field of combat?
When counters of more than one player come together in a hex, a battle must be fought to determine ownership of the hex. Each battle is resolved in a series of rounds, and continues until all but one side has been vanquished or retreats.
The Combat Phase
All battles are resolved during the Combat Phase - including ones triggered by exploration.
The Player Segment
Each Combat Phase is divided into Player Segments. Each player (in player order) announces and resolves any one battle. He may announce a battle in any one hex where he and another player(s) have counters, or he may announce that he is exploring any one unexplored hex where he has counters. In the latter case any battle with defending creatures is resolved in the same segment.
The owner of the hex where combat takes place is called, the defender. If the hex is an unexplored one, the defensive creatures are the defender. The other player(s) are called attackers.
If you have no battles to resolve or hexes to explore, your segment is skipped.
If your units are involved in more than one battle or exploration, you may only resolve one per Player Segment.
You must resolve one battle or exploration during each Player Segment that you are eligible to do so. You may not voluntarily pass.
Player Segments continue, one battle at a time, until all players have run out of battles to fight and hexes to explore. Then the phase is over (phew!).
Battle Rounds
Historical Note: The creatures and Things of Kadab have an interesting view of the afterlife. It is their firm conviction that if eliminated in battle, they will go to a mysterious place called The Bag. There they will await their glorious call back to Kadab to once again fight for the minor noble of their choice.
In order to keep you from becoming confused, we offer the following guidelines for conducting battle.
- When a battle begins, take the counters involved from their hex and place them off to the side of the board. Place a battle marker in the contested hex.
- In battle, creatures use magic, missile and melee to attack the opposing forces. In Kings & Things* there is no actual bloodshed - all defeated creatures wander back to the Thing Bag, to be called into service again during the Recruitment Phase. Such creatures are called 'eliminated'.
Battles are fought in a series of rounds, each of which consists of the following steps:
- Magic: You and your opponent(s) roll for all creatures printed with the star-symbol.
- Ranged: You and your opponent(s) roll for all creatures with the R-symbol.
- Melee: You and your opponent(s) roll for all other creatures.
- Retreat: First the attacker and then the defender has the opportunity to withdraw from the hex, ending the battle. If both attacker and defender decide to stay, go back to the first step. Otherwise, read on. (If three or more players are involved see Multiple Combat).
- Post-Combat: The player who wins the battle makes sure his control marker is in the hex, then checks to determine whether forts and special income counters are damaged or lost (see detailed explanation of Post Combat).
Rolling for Hits
In each of the three combat steps (Magic, Ranged and Melee), different types of creatures roll dice to inflict hits on the enemy army. The basic procedure is the same for each type.
You roll one die for each creature except those with a "C" printed on their counters. C signifies a Charging creature which uses two dice. If the number rolled for a creature is equal to or less than its combat value, one hit is inflicted on the enemy army. C creatures can inflict two hits, since they roll two dice.
Example: Your walrus and white knight meet a mountain man and a nomad on the field of battle. You roll one die for the walrus, two dice for the knight (a C creature). You need to roll less than or equal to 4 for the walrus (that's its combat value) and 3 for the knight. The knight gets two die rolls. If the knight rolls 3 or less on each die, he inflicts two hits on the enemy.
Note: A few creatures have combat values of six. These hit automatically, but the die must still be rolled. (The Talisman or Black Cloud could affect these creatures and their rolls).
- Forts, cities and villages have combat values equal to their current level (For example, a city which has taken one hit has a combat value of 1). See Section 12.
Applying Hits
During a Combat Step, you and your opponent roll for all creatures which can fight in that step, before either side suffers any losses. After losses are applied the next step begins.
Example: During the Magic Combat Step, all of your magic creatures roll, and so do your opponents. If hits are inflicted, they are applied after all magic creature die-rolls, but before moving to the Ranged Combat Step. If you choose to apply a hit to a ranged creature it is returned to the Bag and won't get to fight in the Ranged Step.
(Illustration, Rolling for hits: Player A has a White Dragon (5, magic), a Dryad (1, magic), a Unicorn (4), a Golem (magic item, 6) and a White Bear (4). Player B has an Arch Cleric (5), a Head Hunter (2, ranged), Tribesmen (1, ranged), Wolves (3), Killer Penguins (3) and a City (2). Player A rolls a 3 and a 2 in the magic step, player B rolls a 6. Player A scores one hit, which player B takes from the City. Player B rolls a 4 and a 1 in the ranged step, for one hit. Player A removes the star-creature. In melee Player A rolls a 4, 4, 4, scoring 3 hits. Player B rolls a 2, 2, 2, scoring only 2 hits (the city was reduced to a combat value of 1). Losses are taken as shown. Player A retreats.)
If a creature or Hero (except the Sword Master, see Appendix A) takes a hit it is eliminated. A fort, village or city can take as many hits as its combat value. If it takes that many it is neutralized (flip it over). If it takes fewer hits, mark the hits with a gold piece or a die showing the number of hits it has taken.
When a city or fort is neutralized, flip it over. It is not destroyed, but it can no longer participate in the battle.
- Forts, villages and cities which take fewer hits than their combat value continue to fight, but at their reduced strength. Castles and citadels do not lose their R and star-status.
- See Section 12 for more details about forts in combat.
Retreats
Is the fight going badly? Did the hex you decided to liberate from your opponent contain one surprise too many? Well, discretion is the better part of violence or something like that. At the end of each combat round, the attacker (the player who doesn't own the hex) has the option to retreat, ending the battle. If the attacker decides to stay and fight, then the defender (the owner of the hex) has the option to retreat.
To retreat, move your counters to an adjacent hex you control which is not currently occupied by enemy counters. If no such hex exists, your force may not retreat; it must stay and fight. When a force retreats, all friendly creatures and Heroes in the battle hex must retreat together into the same hex. If that hex contains more than 10 friendly creatures, the excess are removed (see Section 9, Movement Restrictions). If there are more than two players involved in the same battle, see Multiple Combat, below.
Note: Only creatures and Heroes may retreat; forts and special income counters must be left behind. They may continue to fight alone if they have not been neutralized.
- The defenders of a previously unexplored hex may not retreat.
Post-Combat
What happens once the dust settles over the battlefield and the combat is decided? Well, after all but one side has been eliminated or forced to retreat, ownership of the hex and the status of the forts, cities, villages, and other special income counters must be determined.
If all attacking counters are eliminated or forced to retreat, the hex remains the property of the defender, even if all defending counters were eliminated or neutralized. If the defending forces are eliminated, neutralized or forced to retreat and at least one attacking counter remains, the attacker captures the hex. He replaces the control marker with one of his own.
After the battle, check each fort, city, village, and other special income counter in the contested hex to see if it was damaged (regardless of whether it was used to absorb hits or even if no hits were inflicted in the battle). Roll one die for each counter. On a roll of 2 through 5 there is no damage. On a roll of 1 or 6, the city, village or special income counter is destroyed (return it to the Bag) or the fort is reduced one level (castle to keep, keep to tower, tower eliminated).
Important: Citadels are never reduced or destroyed.
The reduction in value suffered by a special income counter or fort in the course of a battle lasts only as long as the battle (unless you roll a 1 or a 6, when resolving damage see above). Once the battle is over, flip all surviving neutralized counters back over and remove any gold pieces or dice you used to indicate hits.
Important: After you capture a hex, you may immediately place any counters from behind your shield on that hex (see information and restrictions in Section 8).
Multiple Combat
It is possible for the armies of more than two minor nobles to fight over the same hex. Talk about lots of fun. Multiple combat involves two or more players' forces coming together in another player's hex.
During each round (not step) of such a battle, each player must declare which one player he will try to inflict his hits on. Each player must fight someone in every round.
- A player may change the target of his combat each round, but not while a round is in progress. If you fight minor noble C in your Magic Combat Step, you must continue fighting him until your next Magic Combat Step. Then you can declare another target. Declarations should be made simultaneously (or written down).
Players may retreat individually, leaving the others to continue the battle (though this may bring jeers from the other players). The attacking player to the left of the defender has first option to retreat, followed by each other attacker in player order. Then the defender may elect to retreat. The battle continues until only one player is left alone in the hex.
Fighting Over Explorations
What?! Your force of killer puffins and flying squirrels has entered a hex to explore it for your kingdom and - horrors! - they've run into minor noble D's army of dwarves and mountain men! This presents a problem. Read on.
If two or more competing armies occupy the same unexplored hex, a battle ensues. It must be fully resolved before the sole remaining army may explore the hex. If all creatures are eliminated in the combat there is no exploration. When only one army remains in the hex, roll for defenders and conduct exploration as usual.
In the case of multiple players fighting over the same unowned hex, the attacker is considered to be the player who initiates the combat. The defender in multiple combat over an unowned hex is the player to the right of the attacker. If he has no counters in the hex, then the next player to the right is the defender.
12. Forts
Towers, keeps, castles and citadels are collectively called forts. Obviously forts are not drawn from the Bag. They are instead built during a Construction Phase. A tower is the smallest level of fort and is the first piece you can build. It can subsequently be increased in size to a keep and then a castle. A castle then can be increased to a citadel.
A citadel may not be built until your Gold income is 20 or more (15 in a two- or three-player game). If you are the only Minor Noble with a citadel for one complete turn (Construction Phase to Construction Phase) or you own two citadels, you win the game (see Section 4).
Building Forts
Forts are built during the Construction Phase. You may build forts in any or all of the hexes you own. If a hex has no fort in it you may spend 5 gold pieces and build a tower there.
If a hex has a fort in it, you may spend 5 gold pieces to upgrade the fort to its next level: tower to keep, keep to castle, and (if you qualify) castle to citadel. You may not ever build more than one level of fort in a hex in one turn. A hex may never have more than one fort. It can, however, contain both a fort and a special income counter. If there aren't enough forts left in the bank of a particular level, that level may not be built until pieces become available (usually as a result of combat).
Forts and Income
Forts provide income for your kingdom each turn. You receive as many gold pieces as the total level of forts in all hexes you control. You may never sell forts.
Forts In Battle
Yes, your forts can help your army of dinosaurs, buffalo, and elephants in battle!
A fort's level is also its combat value. Forts roll to inflict hits as though they were creatures (and with all that magic floating around, they just might be!).
- Towers and keeps have combat values of 1 and 2 respectively. Castles have a ranged combat value of 3; Citadels have a magic combat value of 4 (see Section 11). Even if a castle or citadel takes hits, it still attacks as an R or star unit, regardless of its current combat value.
Forts Taking Losses
Forts, like cities and villages, have parenthesized combat values (that means they're in brackets). This indicates that they can take multiple hits instead of being eliminated by a single hit the way creatures are.
13. Hero Abilities
Some Heroes are useful because they have the same sorts of abilities as creatures, only more so. Others have special powers. These special powers are described in Appendix A. A summary of these powers is printed on the Information Sheet as well.
- The Assassin Primus and the Master Thief only use their special powers during the Special Powers Phase. Other Heroes use their abilities when appropriate.
14. Random Events
During the Random Events Phase, you may play one event counter from behind your shield. This is optional; you are not required to use an event simply because you have one. When you play a Random Event, find it in the list in Appendix B and apply the effect described. Don't worry about memorizing all these rules now, just refer to the Appendix (or to the summary on the reference sheet) when you need to see what an event does.
15. Magic
Historical Note: Magic was developed in the far-off land of Irilax and brought to Kadab by the famous magician Yazilik. He established a great school of the wizardly arts and named it Yazilik University (mages are known for their giant egos). When the university was accidentally destroyed (the fanatical members of the declining priesthood of Sulugi accidentally pointed a powerful temple artifact at the school and accidentally shouted "Destroy the vile wizards!"), not only the terrain of Kadab was irrevocably altered. Many strange and wondrous magic items were scattered throughout the Empire. The minor noble who finds and correctly uses these powerful trinkets may be the one that finally reunites the shattered kingdom.
Then again, maybe, maybe not.
The Thing Bag contains many magic item counters. Each magic item may be used once, and then must be returned to the Bag. The effects of each item are described in Appendix C: Magic. Again, don't feel compelled to memorize all of this stuff. That's why we gathered it up and put it there for you to refer to. Magic items may be played when appropriate, according to the description of their effects listed in the Appendix.
16. Two and Three Players
Missing a minor noble or two? No problem! Here's what to do in a two and three player game:
- Place two hexes of each terrain type and five sea hexes (instead of four) aside before laying out the board. The smaller board layout and starting positions are shown in the illustration.
In a two player game, the player order does not change at the end of each turn. In a two or three player game, the income needed to build a Citadel is 15.
(Illustration: a smaller hexagonal board, laid out in a spiral; the arrow shows the order in which hexes must be laid out. Stars indicate starting positions, marked A (three positions) and B (three positions) - the first player chooses which set will be used. In a two player game the 2nd player must choose the hex opposite the first.)
Appendix A: Heroes
Assassin Primus (4*)
During the Special Powers Phase of each turn, if you control the Assassin Primus you may announce an assassination attempt. Point to any hex on the board. You and the owner of that hex each roll two dice. If the other player's roll is greater than yours, the attempt failed. Go on with the game.
If you both roll the same number roll again. If you tie or beat your opponent's roll this time, there is no other effect. If the other player beats your second roll, the Assassin was caught in the act and leaves your army in shame. Put her back in the bank with the unowned Heroes (see Section 6).
If your first roll was greater, one character is eliminated from the hex you chose. Now choose a target within the hex. You can choose any one Hero or face down Thing in the hex (Since the Things are face-down, you may not know exactly who, or what you are assassinating).
The owner of the hex also chooses a target. Roll a single die. On a result of 1 through 3, your target is eliminated and is returned to the Thing Bag. On a result of 4 through 6, his target is eliminated. If there is only one character or Thing in the hex, no roll is necessary; the single counter is eliminated. The Assassin may not use her ability on a fort or a special income counter.
Historical Note: The Assassin Primus is the leader of the powerful Assassin's Guild and the granddaughter of the dark assassin who struck down the entire royal family in the Year 253 (leading to the collapse of the Empire). She has the power to eliminate enemy counters without engaging in combat.
Baron Münchhausen (4*)
At the beginning of a battle involving the Baron, enemy cities, villages and/or forts (in the hex with him) receive one hit. This takes place before any combat rounds are fought.
Historical Note: The Baron is a genius at siege warfare. He is best known for his brilliant takeover of the indestructible Citadel of Everlasting Defense.
Deerhunter (4*)
Any counters that begin and end the Movement Phase with the Deerhunter may move through all terrain as thought it were a movement 1 hex. In addition, the stack of counters may leave an enemy-occupied hex at the beginning of its movement phase (avoiding the troublesome pinning rule: see Section 9), although they must stop upon entering a new enemy-occupied or unexplored hex.
Historical Note: Deerhunter is the most famous explorer and tracker of the age. Even the ever-changing terrain of Kadab rarely slows this stout adventurer down.
Dwarf King (5*)
If the Dwarf King is in your army, the gold value of all your mines (special income counters keyed to mountain terrain) is doubled. This increase counts for gold collection and for determining eligibility for building a citadel.
Historical Note: The dwarves arrived in Kadab slightly after the northern nomads did. They saw the worth of the land and thought the weather was nice, so they stayed. Now it is their home (no matter what the weather is like) and they are determined to help re-establish the Great Kingdom (besides there are now too many refugees from war-torn Kadab cluttering up the Dwarf Kingdom; something must be done).
Grand Duke (4*)
A distant cousin of Baron Münchhausen, his ability is the same (see above).
Marksman (5*, ranged; alternate combat value 2)
During ranged combat, before rolling for the Marksman's shot, you must decide whether you will use the 5 or the 2 combat value. If you use the 5, the battle is fought as usual. If you use the 2 and hit, you may choose which enemy counter is eliminated (usually that would be your opponent's choice).
Historical Note: The Marksman once shot a kernel of corn off a flying squirrel's head, so the legend says. He's never been able to get another one to let him try again, though.
Master Thief (4*)
The Master Thief's ability works like the Assassin's (see above). During the Special Powers Phase, if you control the Thief, you may designate another player and you each roll two dice.
If your opponent's roll is greater, the thievery attempt failed. Go on with the game.
If you both roll the same number roll again. If you tie or beat your opponent's roll this time, there is no further effect. If the other player beats your second roll, the Thief was caught in the act and leaves your army in disgrace. Place the Thief back in the bank with the other unowned Heroes.
If your first roll was greater, you may either steal one counter at random from behind your opponent's Shield, or take all of his gold pieces (your choice).
Sword Master (4*)
When the Sword Master is hit in combat, roll a die. On a result of 1 or 6 his skill doesn't save him; he is eliminated. On a result of 2 through 5 he parries the clumsy attack and recovers for the next round. However, the Sword Master may only parry one hit per round of battle. If he takes multiple hits in a single round, he is eliminated.
Historical Note: They say this guy can out-duel whole legions of water buffalo, killer penguins and sand worms. Blindfolded. So they say.
Terrain Lords, Kings and Masters
With a Terrain Lord in your army, it is possible to support creatures of his terrain type. The Terrain Lord must be in the same hex as the characters he is supporting. He does not support creatures of his terrain type elsewhere in your kingdom as a hex would.
Historical Note: The Desert Master, Forest King, Ice Lord, Jungle Lord, Mountain King, Plains Lord, and Swamp Master all have the same ability; they carry around a little bit of their terrain type with them and can use it to support your army.
Important: The Terrain Lords hate each other. You may not control more than one Terrain Lord at a time. If you are discovered to have more than one, all but one are returned to the Hero pool in the bank. The player to your right decides which are removed.
Warlord (5*)
At the beginning of a battle involving the Warlord, before any combat rounds are resolved, you may designate one enemy creature in that hex (not a Hero) and roll one die. If your roll is equal to or greater than the chosen creature's combat value, that creature immediately joins the Warlord's force (even if this exceeds the 10 creatures per hex limit). If the new creature cannot be supported, either by a Terrain Lord or by your terrain, the other player can demand its removal. If the desertion fails, combat continues as normal.
Historical Note: This fellow is a master in the ways of war. Enemy troops will desert and join his army when they see him coming. Not bad, eh?
Appendix B: Random Events
During the Random Events Phase, you have the option to play one event from behind your Shield.
Big JuJu
Big JuJu is used to change one hex somewhere on the board to a totally different type of terrain. The Big JuJu requires that you have a magic using creature (one with a star symbol) to use this event. You can use the Big JuJu on a hex within your magic-using creature's range. The creature's range is the number of hexes equal to its combat value. Count the number of hexes from the creature to the hex you want to change (including the target hex but not including the magic creature's hex). If the distance is greater than the magic creature's combat value the hex is out of range and you can't change it.
Historical Note: In the Year 188, all looked grim as the terrible host of dragons, led by Ghaog the First, tore its way boldly across the Plains of Kadab toward the final confrontation with the forces of Emperor Nablopal. Just as all looked lost for the kindly citizens of Kadab, a blinding flash of light burst over the land and the vile beasts found themselves up to their ankles (or whatever) in boggy swampland. Wizard Yazilik had cast the Big JuJu upon them.
(Illustration: Counter A has a magic combat value of one. He may use Big JuJu on any one of the hexes in the circle in the center (including his own hex). Counter B, the Arch Cleric, can affect any of the shaded hexes.)
If you are changing a hex you own, you may look through the unused hex deck and replace it with any other hex you choose.
If you are changing an unowned hex, or a hex controlled by another player, shuffle the hex deck and draw the top tile. Replace the hex you chose with this one. If you draw the same terrain type as the one you are changing, you may draw again until you have drawn a hex of a different type.
Terrain-dependent special income counters are lost when the hex changes. Return them to the Thing Bag. The owner of the changed hex may immediately place unused counters from behind his Shield into the hex.
If the replacement hex is a sea hex, all creatures in the hex may escape to an adjacent friendly hex. If there are none, the creatures are lost. All forts and special income counters sink to the bottom and are returned to the Bank or the Thing Bag.
Important: A hex containing a Citadel is immune to Big JuJu.
Dark Plague
When this event occurs, every player may lose creatures from every hex he controls. In each hex add up the combat values of all cities, villages and forts in the hex. This is the number of creatures that will be lost from that hex (see example below). If there is no village, city, or fort in a hex, it is safe from the Plague.
Historical Note: There you are, minding your own business as you conquer... um... reunite the Empire, when out of the clear blue sky, a Dark Plague falls upon your overcrowded and unsanitary cities, villages and forts. All around you, your loyal creatures succumb to the awful disease. But hey, the misfortune is shared... this event hurts ALL PLAYERS.
Only creatures are affected by the Dark Plague. You can, however, lose cities, villages, and fort levels to satisfy your losses if you wish, but you don't have to. Each city or village counts as one creature for this purpose. Each level of fort lost also counts as one creature.
Note: A Citadel may not be reduced to take losses for the Dark Plague.
Example 1: The Dark Plague occurs. In one hex you have a castle, a city, and five creatures. The total combat value of the cities, villages, and forts in this hex is 6. That is the number of creatures this hex muse lose. You may choose to reduce your castle to a tower for two losses, remove your city for one loss, and remove 2 creatures. Or you can remove all five creatures, or any combination of the above to meet the 5 losses required. After this is done, go on to your next hex and check for losses. Remember, the Dark Plague does not affect hexes that are empty of creatures.
Example 2: The Dark Plague occurs. In one hex you have a keep, a village, and two creatures. The total combat value of the keep and village is three. You are required to lose three creatures, but you only have two in the hex. You can remove the two creatures and that will end the Plague in that hex. Villages, cities, and forts are immune to the Plague, but you may reduce or remove them instead of creatures to protect and preserve parts of your army.
Defection
You say you need a true hero to look up to? No problem! Get one to defect to your side. When you use Defection, you may immediately attempt to add a Hero to your forces. You may try to take it from the bank or from another player.
Decide which Hero you want. You and the current owner of that Hero each roll two dice. (If the Hero is unowned, pick a player to roll dice against you.) If your roll is higher, take the Hero and place it in a hex you control. If your roll is equal to or lower than your opponent's, there is no defection. Gold may NOT be spent to modify this roll.
Good Harvest
You (and only you) immediately collect gold from your hex tiles and your Heroes as though this was your Gold Collection Phase (but not from special income counters).
Mother Lode
You (and only you) immediately collect double the normal amount of gold from your special income counters (including villages and cities) as though this was your Gold Collection Phase (but not from hex tiles and Heroes). Note: if you have the Dwarf King in your army, (see Appendix A) collect 4x gold from your Mines.
Teeniepox
This is another dreaded disease in the lands of Kadab. Unlike the Dark Plague, it affects only one player. When you cause Teeniepox to occur, choose the lucky victim.
The player you choose rolls one die. If the roll is a 1 or a 6, there is no effect. If the roll is 2 through 5, that player loses a number of counters equal to the die roll from one of his hexes. To determine which hex to lose from, count the combat value of each village or city and fort in the hex and choose the hex with the largest value.
When removing counters, each creature and Hero counts as one, as do villages or cities, and levels of fort. The player must match the number rolled, even if he must remove all counters from the selected hex.
Note: A Citadel cannot be reduced by Teeniepox.
Terrain Disaster
Want to cause a neat disaster in Minor-noble-to-your-right's Frozen Waste Hex? Sure you do! When you play this event, point at a hex (regardless of ownership), and roll two dice. If the roll is a 6, 7, or 8 the disaster occurs in the chosen hex. On any other roll you must point to another hex of the same terrain type and roll again. If this roll is a 6, 7, or 8 the disaster occurs here. Otherwise you must point to another hex of the same type and roll again. Continue pointing and rolling until the disaster occurs or you have pointed to, and rolled for all hexes on the board of the chosen terrain type. If the disaster doesn't occur in any hex of that type, there is no event.
If the disaster does occur, the player owning the affected hex (if any) must roll a die. If the result is a 1 or 6 there is no effect. If the result was a 2 through 5, the player loses as many counters from that hex as the number rolled. Villages, Cities, and levels of fort must be removed if there aren't enough creatures to satisfy the losses.
Note: A Citadel cannot be reduced by a Terrain Disaster.
Vandals
Nasty, obnoxious barbarians from another kingdom show up and trash one level of an opponent's fort. Choose your favorite opponent (this might be the time to get back at the pesky minor noble to your right). That player immediately loses one level of fort from somewhere in his kingdom (his choice). This loss might be the elimination of a tower, or the reduction of a castle to a keep.
Note: A Citadel cannot be reduced by Vandals.
Weather Control
Be nice to another player. Cause a wind storm in his desert, a snow storm in his frozen waste, or have torrential rain pummel his plains. To play this event, you must have a magic using creature (one with a star symbol) and you must designate a target hex within your magic user's range (see Big JuJu, above). Place the Black Cloud marker in the chosen hex. The cloud remains in the hex until someone else uses Weather Control or the Fan (see Magic, below) to move it to another hex, or that hex is captured by another player (if the hex is captured by another, return the Cloud marker to the bank).
While the Black Cloud is in a hex, all counters belonging to the player who owns the hex have their combat value reduced by one. Counters with a combat value of zero are unable to fight, but can be used to take hits.
Example: A Weather Control event has been played on your mountain hex. The Black Cloud marker is placed in the hex to show that it is affected. In the hex you have a giant roc with a combat value of 3, an ogre with a 2, and a village with a 1. Each has its combat value reduced by 1 because of the lousy weather conditions. Now the roc hits on a 2, the ogre on a 1, and the village cannot fight at all (it's at zero). Remember, only the counters belonging to the owner of the hex are affected by the Cloud.
Willing Workers
Your well-paid and happy workers have completed an extra level of fort for you. You may place a tower in any hex you own that does not already contain a fort, or increase an existing fort by one level. You may not obtain a citadel with this event, even if you meet the requirements for one.
Appendix C: Magic
Magic may be played from behind your Shield when appropriate.
Balloon
The Magic Balloon can only be played during your part of the Movement Phase. The Balloon is a slow (only moves three hexes) flying creature that can carry any three other creatures inside.
- All three passengers must begin in the same hex, and may not move normally in that turn. Instead, place the three selected creatures plus the Balloon in the target hex.
- No Creature with a combat value of 4 or more may be transported by the Balloon (this includes all Heroes).
- Passengers riding in the Balloon lose all normal abilities and fight as R creatures during any battle in the turn they move by Balloon (they are considered to be dropping stuff down on the enemy). The Balloon fights too, dropping stuff down on the unsuspecting enemies below. The Balloon and its passengers may retreat to any friendly hex within three hexes of the battle as long as the Balloon is still in play. When taking casualties, be sure to lose the occupants of the Balloon before you lose the Balloon, itself, or all inside perish with it.
The Balloon is returned to the Thing Bag at the end of the turn in which it is used, its magic exhausted.
Bow
The Bow may only be used during the Combat Phase. Place it on top of one of your creatures engaged in battle. That creature fights as an R creature for the rest of the battle and has its combat value increased by 1. The R rating replaces any other symbol on the creature using the Bow (e.g. a C creature fights as an R creature while using the Bow; it attacks during the Range Step and does not use the benefits of its charging ability).
The Bow may be transferred from one creature to another in the same hex during a battle. Just put it on top of a different creature at the beginning of the next round. The Bow may be used to take a hit (return it to the Bag). If the creature wielding the Bow is eliminated, the Bow must be given to a new creature in the same hex at the beginning of the next round of combat (if any are left). The Bow is returned to the Bag at the end of the battle in which it was used.
Dispel Magic Scroll
This item may be played any time another player uses a magic item or uses magic creatures in a battle. This scroll causes another player's magic item to have no effect when played. In battle, this scroll causes another player's magic creatures to fight during the Melee Step. If timed correctly, the scroll can affect one magic item and all magic creatures in an enemy force during a battle. The scroll lasts to the end of the battle but is returned to the Thing Bag at the end of the turn in which it was played.
Dust of Defense
The dust may only be used when defending a hex in battle. The Dust causes an attacking army to immediately retreat from your hex. Return it to the Thing Bag when played.
Fan
You may play the Magic Fan when another player uses the Balloon, the Dust of Defense, or Weather Control. You may also use the Fan to relocate the Black Cloud when it is in play.
- Using the fan blows an approaching Balloon off course, sending it into any hex adjacent to its target hex (user's choice, but the new hex must be friendly to the Balloon if possible). If the Balloon is displaced into a sea hex, it is lost, but its passengers may escape to a friendly hex - if there is one!
- Using the Fan scatters the Dust of Defense, negating its ability. The battle proceeds as usual.
- Using the Fan displaces the Black Cloud to an adjacent hex, or if the user wishes, removes the Cloud from the board.
Return the Fan to the Thing Bag when used.
Firewall
You may play the Firewall at the start of your battle (whether you are the attacker or the defender). When played roll one die. The Firewall becomes a magic fort that fights during the Magic Combat Step; its combat value is equal to your die roll. Use one of the dice to record the Firewall's value. The Wall attacks during the Magic Step using its current value. The wall can take a number of hits equal to its combat value. The wall returns to the Thing Bag at the end of battle (so be sure to use it to take hits before losing creatures).
Golem
This fearsome fellow may be played at any time during a battle (the sooner the better). The Golem is a melee 6 creature who is immune to damage from ranged (R) creatures. In addition, during any Ranged Combat Step, the Golem reduces by one the number of hits scored against its companions. The Golem cannot be killed by Ranged (R) combat.
Example: If three ranged hits were scored against a stack containing the Golem, only two would have to be taken by its fellow creatures.
Applying a melee or magic hit to the Golem eliminates it. Return the Golem to the Thing Bag after the battle. However, its presence counts for purposes of determining control of a hex.
Lucky Charm
The Lucky Charm may be played any time a die roll has been made by you or another player. You may immediately increase or decrease one die roll by one. Return the Charm to the Thing Bag when used.
Example: If someone tried to recruit a Hero and rolled a 7 but needed an 8, the holder of the Charm could use it to change the roll to an 8 and insure success.
Elixir
This magic potion may be played whenever you would suffer ill effects from the Teeniepox or the Dark Plague. The elixir cancels any effects against your entire army. Once used it is returned to the Thing Bag.
Sword
The Sword may only be used during the Combat Phase. Place it on top of one of your creatures engaged in battle. That creature fights as a C creature for the rest of the battle and has its combat value increased by 1. The C rating replaces any other symbol on the creature using the Bow [sic] (e.g. an R creature fights as a C creature while using the Sword and attacks during the Melee Step and does not use the benefits of its ranged ability).
The Sword may be transferred from one creature to another in the same hex during a battle. Just put it on top of a different creature at the beginning of the next round.
The Sword may be used to take a hit (return it to the Bag). If the creature wielding the Sword is eliminated, the Sword must be given to a new creature in the same hex at the beginning of the next round of combat (if any are left). The Sword is returned to the Bag at the end of the battle in which it was used.
Talisman
This shiny item may be played at any time during a battle (better sooner than later). Once you play the Talisman, every time you apply a hit to one of your creatures in that hex, you may roll one die. On a result of 2 through 5, the creature miraculously leaps out of harm's way and is saved to fight again. Wow! On a result of 1 or 6, though, the hit is applied as usual and the Talisman crumbles into dust (return it to the Thing Bag). Each creature gets only one saving throw per Combat Step, so if a creature is forced to take two hits in a single step, it is eliminated regardless of the presence of the Talisman.
The Talisman is returned to the Thing Bag if it survives to the end of the battle.
Appendix D: Kings & Things* Time Line
- The Year 0: The Big Oops (when the Universe was created); "Oops, look what I did!"
- 0-1: The Boring Years; nothing much occurs so thousands of years are condensed to fit in history books (it's a lot longer than it looks).
- The Year 1: Nomadic tribesmen, escaping the cold weather of the Far North, settle in what will later be called "Kadab." The origin of the name is one of the great mysteries of life and a source of constant debate among the slime beast population.
- The Year 50: Jealous of the Good Times being had by newly settled nomads (and wanting to escape something too), dwarves from the East colonize the lands bordering Kadab.
- The Year 150: Mesurnan the First impresses the locals by constructing the first Citadel; is voted First Emperor of Kadab.
- The Year 152: Sulugi priests gain prestige with their "Teachings of the Thing Bag"; gold standard is adopted.
- The Year 158: As Kadab prospers and forts go up all across the land, Things begin arriving. "There goes the neighborhood", comments a nearby dwarf mine baron of the time.
- The Year 171: Mesurnan 'returns to The Bag' and his sons Mursilla, Argishon and Nablopal divide the Empire.
- The Year 175: Kingdoms of Mursulla and Argishon declare open season on flightless aquatic birds and other Things. New science called Magic is developed in far-off Irilax.
- The Year 178: Argishon assassinated (suspects include his wife, the first Assassin Primus, and a disgruntled penguin with a crossbow).
Short Rules
Before your first game of Kings & Things* you will need to read the rules carefully. If you have played Kings & Things* before and your last game was a while ago these short rules will give you a head start.
Winning the Game (Page 7)
The object of the game is to build (or capture) a citadel and to defend it for a complete turn. If there is only one player with a citadel and no other player manages to build a citadel until the end of the next Construction Phase, this player is the winner. If more than one player has a citadel at that time, the player with the highest income is the winner.
Setup - for 4 Players (Page 5)
Special 2-and-3-player-game: Page 16.
-
Each player places a Player Shield in front of himself and places a tower in front of it. Each player receives 10 Gold.
-
Put the counters with crossed swords on the back into the Thing Bag: all creatures, village and city counters, special income counters, treasures, magic and event counters. All these counters are known as Things.
-
Place the remaining pieces for Kings & Things* on the table as a general bank: control markers, gold coins, forts (tower, keep, castle, citadel), Heroes, battle markers and the Black Cloud. Determine the face up side of the Heroes randomly.
-
Set 4 of the 8 sea hexes aside. Shuffle all remaining terrain hexes and placed them face up on the playing area, starting with a center hex and going around it spirally. Each player rolls 2 dice: The high roller is the first player of the first game round and takes the First Player Marker. The first player then chooses a starting hex, followed by the other players in clockwise order. Players may have to shift seats, according to their chosen starting hexes.
Starting hexes may not be adjacent to each other. Any sea hexes adjacent to a player's starting hex, or a sea hex chosen as starting hex, are replaced.
-
Each player places 1 of their control markers on their starting hex. Then, in player order, each player selects and marks a second hex. Repeat this procedure one more time. A player's second and third hex must be adjacent to at least one of their previous hexes.
-
Each player draws 10 Things from the bag and puts 1 tower in one of their 3 starting hexes. In player order, the players decide which and how many Things they stack face down in their own hexes and which they will keep hidden behind their Shield. Please refer to the rules proper on how to use the different types of counters (, page 6). Before placing their Things players are allowed to turn in as many Things as they want with an exchange ration of 1:1.
Sequence of play (Page 7)
Kings & Things* is played in rounds, and each round is divided into 9 phases. In player order, always beginning with the first player and then in clockwise direction, each player completes the current phase before the next phase begins.
Phase 1: Gold collection (mandatory) (Page 8) Each player determines their income and collects gold pieces from the bank. (Page 8)
- 1 gold for each land hex you control;
- as many gold coins as the combat value of each fort you control;
- as many gold coins as the printed value of each special income counter you control on the board;
- 1 gold for each hero you control.
Phase 2: Recruit Heroes (optional) (Page 9) Each player may attempt to recruit 1 unowned Hero. In order to succeed, the player's die roll with 2 dice must be greater than or equal to twice the Hero's combat value. By spending gold before or after rolling the dice the player may modify the die-roll:
- For every 5 gold spent before rolling: die-roll +1
- For every 10 Gold spent after rolling: die-roll +1
Before rolling you may discharge any or all Heroes you control. Flip them to the side of your choice before returning them to the supply.
Phase 3: Recruit Things (mandatory) (Page 9) Each player figures their free recruits, paid recruits and trade-ins and then draws Things from the Bag:
- Free: 1 Thing for every two land hexes the player controls, rounding up.
- Paid: 1 Thing for every 5 gold the player spends (maximum 5 Things).
- Trade-ins: 1 new Thing for every 2 Things from behind the Player's Shield.
Any creatures placed face down on the board must be supported, otherwise they are Bluff creatures.
Phase 4: Random Events (optional) (Page 16) Each player may play 1 of their events. Please refer to Appendix B (Page 18) for detailed information on all events.
Phase 5: Move Army (optional) (Page 11) Each player may move their creatures and Heroes on the board. Forts, special income counters and control markers (unless stacked with an army) never move.
All moving counters may move up to 4 terrain hexes. Each swamp, mountain, forest and jungle hex counts as 2 hexes when moving non-flying creatures. All other hexes count as 1 hex. Creatures and Heroes may move individually or in stacks, dropping off or picking up counters anywhere along their movement range. Stacks must stop when
a) entering an uncontrolled hex, b) entering a hex containing a stack of enemy counters, c) beginning movement in a hex containing enemy counters.
No more than 10 friendly creatures/Heroes may end movement in the same hex (except in a citadel hex).
Mark any uncontrolled terrain hexes or hexes containing opposing stacks with a combat marker.
Flying creatures (wing symbol) may fly over enemy-occupied hexes. If enemy flying creatures in that hex are revealed, the same number of moving flying creatures must stop in that hex.
The same movement rules as for stacks apply to single counters.
Phase 6: Combat (Page 13) Players, in order, each resolve one battle or exploration until all are resolved. If a player is involved in more than one battle, he decides which to resolve first.
Resolve battles (mandatory) (Page 13) When counters of more than one player come together in a hex, a battle must be fought. When a battle begins, place the counters (Things & Heroes) involved off to the side of the board; leave the control markers and the battle marker in the contested hex.
Battles are fought in a series of battle rounds, each of which consists of the following battle steps:
- Magic: All players involved roll 1 die for each of their magic units. Then hits are applied. Citadels fight during the magic step.
- Ranged: All players involved roll 1 die for each of their ranged units. Then hits are applied. Castles fight during the ranged step.
- Melee: All players involved roll 1 die for each of their other units. Then hits are applied.
- Retreat: First the attacker and then the defender has the opportunity to withdraw from the hex, ending the battle. If both decide to stay another battle round begins.
A unit inflicts a hit if the number rolled for it is equal to or less than its combat value. Hits are applied only after dice have been rolled for all units eligible for that step. For each hit inflicted, the player taking the hit decides which of their units they return to the Bag or to the supply (if a Hero). A fort, village or city can take as many hits as their combat value. If it takes that many it is neutralized (flipped over) for the rest of this battle.
After the battle each fort, city, village and special income counter in the contested hex must be checked for damage (see Post Combat).
If the attacking player was successful, he replaces the control marker in the contested hex with one of his own.
After all battles (including exploration) have been fought proceed to the next phase.
Exploration of Uncontrolled Hexes (mandatory) (Page 12) Exploration of uncontrolled hexes also occurs as part of combat. If a player has an army in an empty hex they roll 1 die. On a roll of 1 or 6 the hex is undefended and captured without a battle (place control marker!). On a roll of 2 to 5 as many Things as the number rolled are drawn from the bag and placed in the hex. Events are immediately returned to the bag.
Any magic or treasure counters drawn remain in the hex. Any defenders can be bribed by spending gold. If there are still defenders left a battle ensues.
Phase 7: Construction (optional) (Page 15) Each player may build any number of new forts or upgrade existing forts (limit 1 fort per hex). It costs 5 gold to build a tower in a friendly hex or upgrade an existing fort to the next level: Tower to keep, keep to castle, castle to citadel. No more than 1 upgrade or new fort may be built in a given hex in one turn.
A citadel may only be built if the player's income is at least 20 gold and they have not built (or captured) a citadel yet.
Phase 8: Use Special Powers (optional) (Page 16) The Master Thief and the Assassin Primus may use their special powers during this phase only, if they are in the game. All other Heroes use their special powers when applicable (please refer to Appendix A, Page 16).
Phase 9: Change First Player (mandatory) (Page 7) Pass the First Player Marker to the next player on the left.
More Rules
Player Shield Counter Limit (Page 10)
Players may never have more than 10 Things behind their Shield. If some other player has a reason to assume that a player has hidden more than 10 Things, the accused player must remove their screen and show their counters (face down). The accusing player then chooses any counters that must go back into the Bag.
Empty Thing Bag (Page 10)
If the last Thing is drawn from the bag the special true elimination rule is invoked. From that point on, magic items, treasures and events are not returned to the bag when used. Instead they are removed from the game altogether.
Bluff Creatures (Page 11)
All creatures not supported by their own terrain type (refer to the counter) or the appropriate Terrain Lord are Bluff creatures. Bluff creatures remain in play until they are flipped face up in battle or because of being noticed by some other player. Revealed bluff creatures are returned to the Bag.
End of Game and Winner
A game of Kings & Things* ends as soon as one player has built/conquered one citadel and still holds it by the end of the next Construction Phase, this player is the winner. If there are two or more citadels on the board then the player with the highest income wins (of those players owning a citadel). If a player conquers their second citadel they win immediately and the game is over.
Beginners' Game
Setup for a beginners' game of Kings & Things*:
- The illustration shows the possible starting hexes.
- Four players will use the large game board, their starting hexes are marked "A".
- Three players are using the smaller game board as well. Their starting hexes are marked either "B" or "C".
- Two players are using the smaller game board as well. Their starting hexes are marked either "D" or "E" or "F".
- All players select a 2nd and 3rd starting hex, both of which must be adjacent to their 1st starting hex. These are the players' baronies.
- All starting hexes are marked with the respective player's coat of arms.
- All players place one tower on any one of their three starting hexes.
Legend: A 1-4: starting hexes in a 4-player-game. B 1-3; C 1-3: starting hexes in a 3-player-game. D 1-2; E 1-2; F 1-2: starting hexes in a 2-player-game.
(Illustration: a pre-laid fixed hex-tile map with these starting hexes marked.)