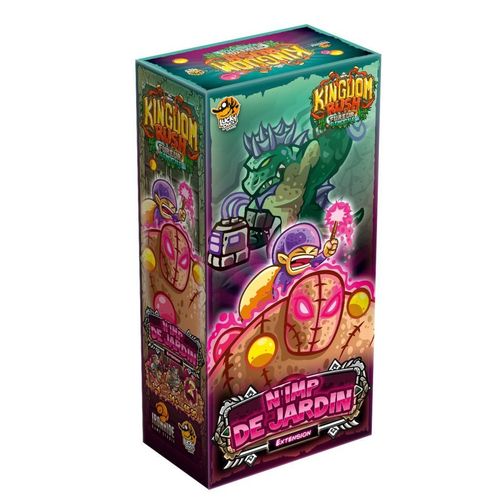
Kingdom Rush: Elemental Uprising – Gnomish Gnonsense Expansion
Kingdom Rush: Elemental Uprising – Gnomish Gnonsense Expansion Rulebook
Table of Contents
Table of Contents
- Game Components
- New Hero: Razz and Rags
- Rogue Gnome Modifiers and Garden Gnomes
- Elemental Rift Cards
- Scenario 1: Saute-Mouton (Sheep Jump)
- Scenario 2: L'Appât du Gnome (The Gnome Bait)
- Scenario 3: Il nous faut un plan BEEEEÉ (We Need a Plan, BAAAAH)
- Scenario 4: Marteau c'est trop ! (Hammer Is Too Much!)
- Events
Game Components
- 3 Sheep Horde cards
- 1 Xyzzy miniature
- 5 Garden Gnome Horde cards
- 3 Gnoll Warchief cards
- 5 Xyzzy tokens
- 6 Mushroom Horde cards
- 1 Hero card (Razz and Rags)
- 11 Xyzzy Special cards
- 4 Elemental Rift cards
- 2 (unlabelled card stack on the components sheet, shown beside the Elemental Rift cards)
- 1 Hero insert
Razz and Rags components:
- 1 Razz and Rags Hero board
- 1 Razz and Rags miniature
- 18 Razz and Rags Damage tiles
- 3 Lapinou Damage tiles
- 4 Razz and Rags Special Ability tiles
- 4 Level reference cards
- 3 Rogue Gnome modifiers
New Hero: Razz and Rags
This expansion includes a new pair of heroes: Razz the tinkering gnome and Rags, his rag golem. Admittedly they do not move very fast, but they make up for it by attacking several Hordes at once and by having good longevity!
You may use Razz and Rags in all the scenarios of this box (except scenario 3, as specified), with other expansions, or with the base game, just as you would for any other hero.
Razz and Rags Abilities
At the start of Razz and Rags's activation, place your Lapinou Damage tiles, each on a different Horde, on up to 2 Razz and Rags slots; or remove all Lapinou Damage tiles in play and deal [2 damage tiles] [raw damage icon] to each Horde from which you removed a Lapinou.
Each round, you must choose between placing the Lapinou tiles on two different Hordes or removing them to deal raw damage. Lapinou tiles cannot cover any enemy and cannot be placed on a Boss's Life card. You may remove them during one round and place them on the Hordes of your choice in the next round.
Ability 1: Lapi-Lapikaze (covers Lapikaze)
Lapi-Lapikaze: Razz and Rags now have 3 Lapinou Damage tiles. These can only be placed on empty spaces of a Horde.
This passive ability lets you use up to 3 Lapinou Damage tiles instead of 2.
Ability 2: Complètement Marteau
Complètement Marteau (card text): "Then move 1 space."
This ability deals the same amount of damage as Razz and Rags's basic attack, but as raw damage. You may then move 1 space.
Ability 3: Courroux du Gnome (Gnome's Wrath)
Courroux du Gnome (card): the card has no written text; it shows a placement diagram of damage tiles on Hordes, joined by "and".
This ability is an improved version of Razz and Rags's basic attack.
Ability 4: Razzmatazz!
Razzmatazz!: Place each of your Damage tiles on a different Horde, up to 2 Razz and Rags slots.
Razzmatazz! lets you remove and replace the Lapinou tiles during the same round (placing them back on the previous Hordes or on different ones). You can therefore deal damage every round instead of every other round.
Rogue Gnome Modifiers and Garden Gnomes
You have 3 Rogue Gnome modifiers. They cost only 1 gold coin instead of 2, but their effects differ from one round to the next.
Shuffle the 5 Garden Gnomes cards and place them near the board. Each round, after the Hordes appear and before you play your cards, draw 1 Garden Gnomes card: it determines how the Rogue Gnome modifiers work for that round.
Disintegrate (Désintégrer): If 2 Rogue Gnomes attack a Horde, deal it [2 blue damage tiles] + [2 blue damage tiles]. If 3 Rogue Gnomes attack a Horde, destroy it.
Pickpocket (Vol à la tire): If at least one Horde within range of a Rogue Gnome is destroyed this round, gain [gold coin].
Trick or Treat! (Des bonbons ou des sorts !): If you bought at least 2 Rogue Gnomes, gain [crystal]. Shuffle all Garden Gnomes cards (including this one) to form a new deck.
Poison: [2 blue damage tiles] can only be placed on a Horde that has no Damage tile.
Expédélilicieux!: Deal [blue damage tile] to an adjacent Horde.
Elemental Rift Cards
This expansion contains 4 new Elemental Rift cards. Add them to those of the base game, Kingdom Rush: Fureur Élémentale (Elemental Uprising), to increase replayability!
Scenario 1: Saute-Mouton (Sheep Jump)
One might think gnomes and gnolls have a lot in common, but the similarities end at their names. These two kingdoms are in perpetual war, and it is high time you took sides. Gnome envoys ask that you protect their precious sheep. Face the Gnoll Warchief and his Hordes to help your friends: you yourselves may find yourselves in need one day!
Victory condition: You win the game if you save at least 16 flocks of sheep.
You lose immediately if the Kingdom loses its last health point, if all Spawn stacks (piles Apparition) are exhausted, or if you lose too many flocks of sheep (see the Sheep Horde rules, page 8).
Life: 5 hearts.
Heroes: All heroes are available. You may use hero abilities with the [hero ability icon]. In a 1- or 2-player game, use 2 abilities per hero. In a 3- or 4-player game, use 1 ability per hero.
Towers: All towers are available. The 6 basic tower modifiers and the Rogue Gnome modifiers are available.
Iron Challenge (Défi de Fer): Save 24 flocks of sheep. To win, you must escort ALL flocks to the exit without any of them suffering the slightest damage.
1. Preparing the Spawn Stacks
Hordes: Prepare the Horde cards as indicated below.
| Wave 0 | Wave 1 | Wave 2 | Wave 3 | Wave 4 | Wave S |
|---|---|---|---|---|---|
| 1x Red | 1x Green | 2x Green | 1x Yellow | 1x Yellow | 1x GW (Gnoll Warchief) |
| 1x Yellow | 2x Yellow | 2x Red | Event A | ||
| 2x Red | 3x Red | 3x Sheep |
Spawn stacks: Event cards are described on pages 22–23 of this booklet. Build the three Spawn stacks as shown in the diagram. The top of each stack is at the top of the diagram and the bottom is marked "bottom of the stack". Rows are listed here from top to bottom, with the number printed on each row and the Horde colour shown by its icon; the numbers are reproduced as printed.
- Spawn stack 1: GW (Gnoll Warchief); 2 (Red); 0 (Red); 2 (Yellow); 3 (Red)
- Spawn stack 2: 2 (Green); 2 (Green); 2 (Yellow); 2 (Red); 1 (Red)
- Spawn stack 3: 2 (Red); Sheep Horde; 3 (Red); A (Event A); Sheep Horde; 1 (Red); 1 (Yellow)
2. Preparing the Board
Place the map tiles as shown in the board diagram. The diagram is labelled with the tile codes A2, A6, A10, A11, A12 and B7 and shows the three Spawn stack markers (1), (2) and (3) around the board. Below the map, the diagram shows the Exit and the following tokens:
- Kingdom health: 5 hearts.
- Alert tokens: 4 [!] tokens. Each time a flock of sheep Horde leaves the board, count how many flocks survived. For each group of 4 flocks, turn one [!] token over to its blue face. You win the game when all 4 [!] tokens are turned over at the end of a round.
Treasure: 3 crystals and 3 gold coins.
Tower setup by player count: Each layout diagram on pages 8 and 9 shows the map tiles and Horde positions for that player count; the diagrams cannot be transcribed in text, so only the tower lists printed beside them are given here.
- 1 player (page 8): 2x Mage Tower, 1x Militia Barracks, 2x Dwarven Bombard
- 2 players (page 9): 2x Mage Tower, 1x Archer Tower, 1x Militia Barracks, 2x Dwarven Bombard
- 3 players (page 9): 1x Mage Tower, 1x Militia Barracks, 2x Dwarven Bombard
- 4 players (page 9): 1x Mage Tower, 1x Militia Barracks, 1x Dwarven Bombard
3. New Rules
Sheep Hordes: Each Sheep Horde contains 8 flocks (2x1-space zones illustrated with sheep icons). These Hordes cannot be attacked by towers or heroes: they are on your side! But they activate and move like classic Hordes, marching toward the Kingdom.
You do not lose the game if a Sheep Horde reaches the Kingdom: on the contrary, that is the goal!
When a Sheep Horde activates, move it forward 3 spaces. Each time it jumps over a Horde of another type, or vice versa, deal [damage tile icon] to that Sheep Horde. If it is flown over, first deal it [damage tile icon] before placing the flying Horde over it. Neither heroes nor soldiers can enter a Sheep Horde.
You may not move Sheep Hordes in any other way (for example by the Storm Flower or by Faustus's ability).
New Enemies:
Gnoll Warchief, Special Attack: Blade Tornado (Tornade de lames)
Return 1 modifier from a tower adjacent to the Gnoll Warchief to the supply. If that is impossible, reduce the level of an adjacent tower by 1 instead. Then, ALL Blossoms adjacent to the Gnoll Warchief wither.
Scenario 2: L'Appât du Gnome (The Gnome Bait)
Your people are restless. The walls are covered with anonymous threatening messages about the Gnoll Warchief who ravages your lands. People spread terrifying rumours of explosive mushrooms that would spring up everywhere. The gnomes turn out to be self-centred creatures, demanding bleating and clinking coin for their future support, in particular Razz and Rags. They demand gold and sheep! Nobody will solve these problems for you. Be the leader you swore to be!
Victory condition: You win the game if you save 10 flocks of sheep and finish with 6 gold coins in the treasury to pay the gnomes.
You lose immediately if the Kingdom loses its last health point or if all Spawn stacks (piles Apparition) are exhausted.
Life: 5 hearts.
Heroes: All heroes are available. You may use hero abilities with the [hero ability icon] or [two hero ability icons]. In a 1- or 2-player game, use 2 abilities per hero. In a 3- or 4-player game, use 1 ability per hero.
Towers: All towers are available. All tower modifiers are available.
Iron Challenge (Défi de Fer): Each of the 3 Sheep Hordes must reach the Kingdom with 16 of its flocks saved, and you must still have 8 gold coins at the end of the game. (As printed. Each Sheep Horde holds 8 flocks according to the Sheep Horde rules in scenario 1; the source does not reconcile the two figures.)
1. Preparing the Spawn Stacks
Hordes: Prepare the Horde cards as indicated below.
| Wave 0 | Wave 1 | Wave 2 | Wave 3 | Wave 6 | Wave 7 | Wave M | Wave S |
|---|---|---|---|---|---|---|---|
| 1x Red | 2x Red | 3x Yellow | 2x Red | 1x Yellow | 1x Red | 3x M1 | 1x GW (Gnoll Warchief) |
| 3x Yellow | 3x M2 | Event A | |||||
| 1x Green |
Spawn stacks: Event cards are described on pages 22–23 of this booklet. Build the three Spawn stacks as shown in the diagram. The top of each stack is marked "top of the stack" and the bottom "bottom of the stack". Rows are listed here from top to bottom, with the number or code printed on each row; the numbers are reproduced as printed.
- Spawn stack 1: Sheep Horde; 1 (Yellow); GW (Gnoll Warchief); 2 (Yellow); 1 (Red); 1 (Red)
- Spawn stack 2: M1 (Mushroom); 1 (Yellow); 1 (Yellow); 2 (Yellow); M1 (Mushroom); 3 (Red)
- Spawn stack 3: 6 (Yellow); A (Event A); 7 (Red); Sheep Horde; 2 (Yellow); 3 (Red)
2. Preparing the Board
Place the map tiles as shown in the board diagram. The diagram is labelled with the tile codes A2, A3 and A6 and shows the three Spawn stack markers (1), (2) and (3) around the board.
- Champiboum deck (Paquet Champiboum): set this deck beside the board, as shown in the diagram.
- Kingdom health: 5 hearts.
- Treasure: 3 crystals and 2 gold coins.
Tower setup by player count (the layout diagrams on pages 12 and 13 are not transcribed beyond the lists printed beside them):
- 1 player (page 12): 1x Adept Tower, 2x Archer Tower, 1x Militia Barracks, 1x Dwarven Bombard
- 2 players (page 13): 1x Mage Tower, 2x Archer Tower, 1x Militia Barracks, 1x Dwarven Bombard, 1x Dwarven Artillery
- 3 players (page 13): 1x Mage Tower, 1x Archer Tower, 1x Militia Barracks, 1x Dwarven Bombard
- 4 players (page 13): 1x Mage Tower, 1x Archer Tower, 1x Dwarven Bombard
3. New Rules
Sheep Hordes: In this scenario, count the remaining flocks when a Sheep Horde escapes: at least 10 flocks must survive. You may leave Damage tiles on the Sheep Hordes to help with the count (no Objective token is used in this scenario).
This victory condition applies only to this scenario.
New Enemies:
Boom Hordes (Hordes Boum): When destroyed, a Boom Horde deals 1 damage to each hero and each soldier on or adjacent to it.
Mushroom Hordes (Hordes Champignon): Before starting, shuffle the Champiboum cards (M2) and set this deck aside.
When destroyed, a Mushroom Horde (M1) deals 1 damage to each hero and each soldier on or adjacent to it. Then it transforms: replace this Horde with the first card of the Champiboum deck (M2).
Champiboum Hordes appear only following the destruction of Mushroom Hordes.
Scenario 3: Il nous faut un plan BEEEEÉ (We Need a Plan, BAAAAH)
A long council meeting has finally taken place and reached a consensus on the solution. The gnomes will send their crazy duo, Razz and Rags, in search of a flock of sheep able to tip the balance of the war. According to your scouts, the Saurian King Xyzzy has arrived. Send your troops with the Gnome-Golem team to make sure these nutters know what they're doing! Xyzzy can wait, the sheep cannot.
Victory condition: You win the game if you escort the Sheep Horde to the red zone with Razz and Rags.
You lose immediately if the Kingdom loses its last health point or if all Spawn stacks (piles Apparition) are exhausted.
Life: 5 hearts.
Heroes: All heroes are available except Razz and Rags. You may use hero abilities with the [hero ability icon] or [two hero ability icons]. In a 1- or 2-player game, use 2 abilities per hero. In a 3- or 4-player game, use 1 ability per hero.
Towers: All towers are available. All tower modifiers are available.
Iron Challenge (Défi de Fer):
- Setup: Remove 2 hearts from the Kingdom.
- From the moment Razz and Rags reach the Sheep Horde, all Hordes on a Path space that are closer to the exit than the Sheep Horde's coloured band advance one more time during phase 4 (advance the Hordes).
1. Preparing the Spawn Stacks
Hordes: Prepare the Horde cards as indicated below.
| Wave 0 | Wave 1 | Wave 2 | Wave 3 | Wave 4 | Wave 5 | Wave 6 | Wave 7 | Wave 8 | Wave 9 | Wave M | Wave S |
|---|---|---|---|---|---|---|---|---|---|---|---|
| 1x Green | 2x Red | 1x Green | 1x Green | 2x Green | 1x Yellow | 1x Green | 1x Yellow | 1x Yellow | 1x Green | 3x M1 | 1x GW (Gnoll Warchief) |
| 1x Red | 2x Red | 1x Red |
Spawn stacks: Event cards are described on pages 22–23 of this booklet. Build the three Spawn stacks as shown in the diagram. The top of each stack is marked "top of the stack" and the bottom "bottom of the stack". Rows are listed here from top to bottom, with the number or code printed on each row and the background colour of the row (Red, Green or Yellow) as shown in the diagram.
- Spawn stack 1: 1 (Red); GW (Gnoll Warchief); M1 (Mushroom); 4 (Green); 6 (Red); 8 (Red); 1 (Red); 7 (Red); 9 (Red)
- Spawn stack 2: 6 (Green); M1 (Mushroom); 2 (Green); 5 (Yellow); B (Event B); 9 (Green); 8 (Red); 3 (Red)
- Spawn stack 3: 7 (Yellow); 3 (Green); 8 (Yellow); A (Event A); 7 (Red); 7 (Red); 3 (Red); 9 (Yellow)
2. Preparing the Board
Place the map tiles as shown in the board diagram. The diagram is labelled with the tile codes A11, A15, B3, B4, B5, B6, B8, B9 and B13 and shows the three Spawn stack markers (1), (2) and (3) around the board.
- Champiboum deck (Paquet Champiboum): set this deck beside the board, as shown in the diagram.
- Kingdom health: 5 hearts.
- Treasure: 3 crystals and 2 gold coins.
Tower setup by player count (the layout diagrams on pages 15 and 16 are not transcribed beyond the lists printed beside them):
- 1 player (page 16): 1x Mage Tower, 2x Archer Tower, 1x Militia Barracks, 1x Dwarven Bombard
- 2 players (page 17): 1x Mage Tower, 2x Archer Tower, 2x Militia Barracks, 1x Dwarven Bombard
- 3 players (page 17): 1x Mage Tower, 1x Archer Tower, 1x Militia Barracks, 1x Dwarven Bombard
- 4 players (page 17): 1x Archer Tower, 1x Militia Barracks, 1x Dwarven Bombard
3. New Rules
Sheep Horde: This scenario uses only one Sheep Horde. It cannot suffer any damage, and it does not move on its own. Once Razz and Rags' miniature has reached it, it allows itself to be escorted.
Hero Challenge: Razz and Rags (Défi de héros : Razz et Rags)
Razz and Rags start the game next to the exit and move at the start of phase 2 (Play Tower and Hero cards). They may move up to 2 spaces but must stop as soon as they enter a Horde. They cannot activate Blossoms.
Each time they would suffer damage, remove 1 heart from the Kingdom instead. Razz and Rags are never removed from the board during this scenario.
Razz and Rags are the only ones able to enter a Sheep Horde (they inflict no damage, and you may place their miniature anywhere on that Horde). Once they have reached the Sheep Horde, they must escort it to the red zone indicated in the scenario setup. From the following round, at the start of phase 2 (Play Tower and Hero cards), you may move the Horde and Razz and Rags' miniature together up to 2 spaces. They cannot end their movement on another Horde, but they may enter an empty construction site. If a Horde jumps over the Sheep Horde on which Razz and Rags are, remove 1 heart from the Kingdom.
You win if the Sheep Horde reaches the red zone after the Hordes move.
Scenario 4: Marteau c'est trop ! (Hammer Is Too Much!)
It is time for the great battle. Xyzzy's hammers make the earth tremble, and the explosive mushrooms fling it in every direction. No matter that you urge your people to keep calm, nobody listens to you. It is a mix of fear and excitement that guides your troops. The Saurian King is here. Elves, dwarves, gnomes. Side by side. For freedom!
Victory condition: You win the game as soon as Xyzzy is destroyed!
You lose immediately if the Kingdom loses its last health point or if all Spawn stacks (piles Apparition) are exhausted.
Life: 5 hearts.
Heroes: All heroes are available. You may use hero abilities with the [hero ability icon] or [two hero ability icons]. In a 1- or 2-player game, use 2 abilities per hero. In a 3- or 4-player game, use 1 ability per hero.
Towers: All towers are available. All tower modifiers are available.
Iron Challenge (Défi de Fer): Remove the 2 Action cards bearing the Iron Challenge icon from Xyzzy's deck.
1. Preparing the Spawn Stacks
Hordes: Prepare the Horde cards as indicated below.
| Wave 1 | Wave 2 | Wave 4 | Wave 5 | Wave 6 | Wave 7 | Wave 8 | Wave 9 | Wave M | Wave S |
|---|---|---|---|---|---|---|---|---|---|
| 1x Red | 1x Yellow | 2x Yellow | 1x Green | 1x Red | 1x Yellow | 2x Green | 1x Yellow | 3x M1 | 2x GW (Gnoll Warchief) |
| 1x Yellow | 2x Red | 2x Red | 1x Red | 3x M2 |
Spawn stacks: Build the three Spawn stacks as shown in the diagram. The top of each stack is marked "top of the stack" and the bottom "bottom of the stack". Rows are listed here from top to bottom, with the number or code printed on each row and the background colour of the row (Red, Green or Yellow) as shown in the diagram.
- Spawn stack 1: 8 (Green); GW (Gnoll Warchief); 9 (Red); 5 (Green); M1 (Mushroom); 8 (Red)
- Spawn stack 2: 8 (Green); 8 (Red); 7 (Red); M1 (Mushroom); 4 (Yellow); 7 (Red)
- Spawn stack 3: 7 (Yellow); M1 (Mushroom); GW (Gnoll Warchief); 6 (Red); 9 (Yellow); 1 (Red)
2. Preparing the Board
Place the map tiles as shown in the board diagram. The diagram is labelled with the tile codes A4, A5, A7, A8, A11, A13, B3 and B6 and shows the three Spawn stack markers (1), (2) and (3) around the board.
The following components are set beside the board:
- Xyzzy Action deck (Paquet Action de Xyzzy)
- Xyzzy Life stack (Pile Vie de Xyzzy)
- Clac! card (Carte Clac)
- Champiboum deck (Paquet Champiboum): set this deck beside the board, as shown in the diagram on page 20.
- Kingdom health: 5 hearts.
- Treasure: 3 crystals and 3 gold coins.
Tower setup by player count (the layout diagrams on pages 19 and 20 are not transcribed beyond the lists printed beside them):
- 1 player (page 20): 2x Mage Tower, 1x Archer Tower, 1x Militia Barracks, 1x Dwarven Bombard
- 2 players (page 21): 2x Mage Tower, 1x Archer Tower, 2x Militia Barracks, 1x Dwarven Bombard
- 3 players (page 21): 1x Mage Tower, 1x Archer Tower, 1x Militia Barracks, 1x Dwarven Bombard
- 4 players (page 21): 1x Mage Tower, 1x Militia Barracks, 1x Dwarven Bombard
3. New Rules
New Enemies:
Xyzzy: In this scenario, you face a Boss: Xyzzy, represented by a miniature on the board. Xyzzy moves and makes attacks differently from classic enemies.
Setup (Mise en place): Before starting, take the 5 Xyzzy Life cards (numbered in the bottom right corner) and stack them face up, in order, from No. 5 at the bottom to No. 1 on top. Place this Life stack near the board, with the remaining "Clac!" card close by. The 5 other Xyzzy cards (without a number or spaces) are his Action cards. Shuffle them and place them within reach: they form Xyzzy's Action deck.
Attacking Xyzzy: When you want to attack Xyzzy, you must target his miniature. However, Damage tiles are placed on the card on the top of his Life stack, and you must cover all the spaces that represent Xyzzy to defeat this card. When that is done, remove all Damage tiles during phase 3 (Destroy the Hordes) and apply the instructions printed on the back of the card. If it bears a "Clac!" effect, place it on the previous "Clac!" card; otherwise, remove it from the game.
Xyzzy must be destroyed with towers and Blossoms: no pawn or miniature can be placed on his card. It is therefore impossible to attack him in melee, and hero miniatures do not deal raw damage merely by their presence.
Activating Xyzzy: Xyzzy acts at the start of phase 4 (advance the Hordes), before the other Hordes move. His activation takes 3 steps:
- Charge: Draw the first card of Xyzzy's Action deck and add 1 [hammer icon] to his reserve. (If the Action deck is empty, shuffle the discard pile to form a new one.)
- Clac!: Xyzzy resolves his "Clac!" action as many times as he can, spending his [hammer icons]. If the action has no effect, or if he does not have enough [hammer icons] to activate it, keep the [hammer icons] for the next round.
- Movement: Xyzzy moves 2 spaces if he has performed no "Clac!"; he moves 1 space if he has clacked once, and does not move at all if he has clacked more than once.
Events
Scenario 1
Event A
"Hurry! They're surrounding our flocks of sheep! We must save them!"
Spawn 2 Hordes at this Spawn stack. Do not place any Damage tiles on the flocks of sheep over which the red Horde jumps at that moment.
Scenario 2
Event A
"Expaliarmarrous!" shouts a gnome, mispronouncing his incantation. The forest folds in on itself, then returns to its normal shape, but something is different...
Move the tokens and Spawn stacks as illustrated on page 22 (the map diagram is not transcribed in text), then spawn a new card at this (3rd) stack.
Scenario 3
Event A
It's a trap!
Nothing happens here. Instead, spawn a new Horde at Spawn stack 1.
Event B
The mushrooms start to glow. What happens this time?
At the end of this round, each hero (including Razz and Rags) adjacent to a Boom Horde takes 1 damage.