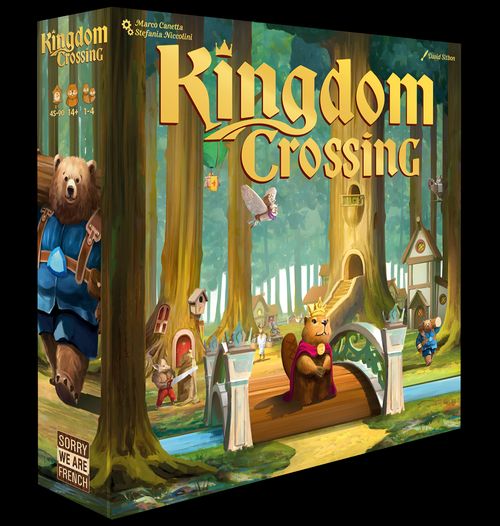
Kingdom Crossing
Kingdom Crossing Rulebook
Table of Contents
Table of Contents
Components
General components
- 1 game board
- 1 tree board
- 4 player boards
- 4 starting cards (double-sided)
- 20 Structure cards (2 decks of 10 cards)
- 5 Queen cards
- 80 Character cards (8 decks of 10 cards)
- 1 first player token
- 1 balloon figure
- 26 Favor of the Queen tiles
- 6 Bridge Goal tiles (double-sided)
- 4 empty-deck tiles
- 14 Paco & Paca tiles (for solo mode)
- 40 Bird tokens (12×, 12×, 8×, 8×)
- 20 Flower tokens (8×, 8×, 4×)
- 20 Sculpture tokens (8×, 8×, 4×)
- 60 Coin tokens (32×, 18×, 10×)
- 4 Prestige markers (0–50/50–100)
Components for each player
- 1 Beaver (worker)
- 3 Houses
- 1 Home card
- 6 Action tiles (double-sided)
- 7 Paw markers
- 6 Bridge Goal markers
- 4 Resource markers (lumber, stone, sap, and food)
- 1 Invest track marker
- 1 Prestige marker
General Game Setup
- Place the game board in the middle of the table, and place the tree board next to it.
- Sort the 80 Character cards by their backs, then do the same with the 20 Structure cards, to make a total of 10 face-down decks (10 cards each). Randomly place one deck on each of the 10 matching spaces on the game board. Then reveal the top card of each deck face up.
- Sort the 40 Bird tokens by their backs and place them in a face-down stack on the matching space in each of the four regions on the game board.
- Take the 5 Queen cards and randomly return one of them to the box without looking at it. Then make a face-down deck from the 4 remaining cards and place it on the matching space on the tree board.
- Take the 6 Bridge Goal tiles and place each of them, random side up, on the 6 matching spaces on the tree board. Note: in your first game, you may decide to place all the Bridge Goal tiles easy-side up.
- Shuffle the 26 Favor of the Queen tiles and make 3 roughly equal-sized face-down stacks from them, placing them on the matching spaces on the tree board. Reveal 1 Favor of the Queen from each stack and lay it face up to the right of each stack.
- Place the Flower tokens and Sculpture tokens near the game board.
- Place the Coins in the general supply near the game board; this supply is considered unlimited.
- The player who most recently crossed a bridge takes the first player token and begins the game.
Player Setup
Each player does the following:
Take a player board and the following components in your chosen color: 1 Beaver, 3 Houses, 7 Paw markers, 6 Bridge Goal markers, 1 Invest track marker, and 1 Prestige marker. Also take 1 Home card, a set of 6 (double-sided) Action tiles, and 4 Resource markers (lumber, stone, sap, and food).
- Prepare your 6 Action tiles to the left of your player board, unimproved side up.
- Place your 7 Paw markers and 2 of your 3 Houses on the matching spaces on your board.
- A. Place your 4 Resource markers on the leftmost space of the matching resource tracks (space 0), then B. place your 6 Bridge Goal markers on the matching spaces on your player board.
- A. On the game board, place your Invest track marker on the leftmost space of the Invest track, then B. place your Prestige marker on space 0 of the Prestige track.
- Slide your Home card under the left side of your player board so that the income portion remains visible.
- Set your Beaver and 1 House aside.
Start of Game
Take the 4 starting cards and lay out as many of them (random side up) next to the game board as there are players. Return any unused starting cards to the box. Then reveal as many Favors of the Queen as there are players (from any already-prepared stack), and lay one beneath each starting card so as to form pairs of starting cards and Favors of the Queen. Starting with the last player, and continuing in reverse turn order, each player chooses a pair: place the Favor of the Queen next to your player board, and carry out the following steps with the starting card:
- Coins: Take the coins shown on the card from the general supply.
- Invest: Carry out the Invest action, if shown (see page 6).
- Resources: Advance the matching Resource markers on your player board.
- Flower/Sculpture: Take a Flower or Sculpture token with 1 symbol (with 1 or 2 stars) from the general supply and place it on any matching space on your player board.
- Starting Home: Place your Beaver and your House in the region where the shown bird lives.
- Guild: Place your starting card in the column of the matching guild above your player board.
- Balloon: The starting player places the balloon in the region where they begin the game.
Basic Concepts of the Game
Regions and Bridges
The game board is divided into 4 regions connected by 7 bridges. In each region you will find Characters you can meet, or Structures you can use. Players' Beavers move from one region to another by crossing bridges they have not yet crossed during the round. Optimizing your movement is an important path to victory.
Characters
There are 8 kinds of Characters, each belonging to one of 5 guilds: the Foxes guild, the Owls guild, the Bears guild, the Wild Boars guild, and the Deer guild. Each Character card shows, in its corner, the guild it belongs to, the coin cost to hire it, and its effect.
When you hire a Character, spend the coins shown in red on the card (return them to the general supply). Then resolve its effect and place it in the column above your player board that matches the guild this Character belongs to.
- Sponsors: When you hire them, you gain coins.
- Collectors: When you hire them, you gather sap.
- Lumberjacks: When you hire them, you gather lumber.
- Farmers: When you hire them, you gather food.
- Masons: When you hire them, you gather stone.
- Florists: When you hire them, you place Flower tokens on your player board.
- Sculptors: When you hire them, you place Sculpture tokens on your player board.
- Merchants: When you hire them, you gain various resources or bonuses.
Structures
There are 2 kinds of Structures: both give you an immediate bonus that is also an income you receive at the start of every round.
- Buildings: Are free, and reward you with coins depending on your strategy.
- Means of Transport: Cost coins, and give you various bonuses, usually resources or Prestige.
The Queen
When you meet her, you gain a small bonus and the first player token. Only one player can meet the Queen each round.
Action Tiles
These are the game's core mechanism: on your turn, you must choose one of your available Action tiles (those still to the left of your player board) in order to either rest and gain coins, OR cross the stated number of bridges you have not yet crossed this round. If you do the latter, you must be able to hire a Character (or use a Structure) from the region where you stopped, gaining its bonuses. During the game, you will have the chance to improve your Action tiles by flipping them to their improved side.
Birds
There are 4 kinds of birds, each living in one region of the game board. At the start of every round, one bird token is placed face up on every card (Character or Structure) in its region, so that the player who picks that card earlier also gets the help of the birds, in the form of their bonus.
The Balloon
Using the balloon is the only way to place all 7 of your Paw markers on the game board and gain more flexibility of movement. Flying the balloon, however, is not exactly cheap.
Player Board (Resources and Decorations)
Your player board represents your contribution toward building the eighth bridge, so gathering resources and acquiring decorations will help you on your path to victory. In general, you gather resources (lumber, stone, sap, and food) for final scoring and for completing Bridge Goals. However, when you reach a specific space on a resource track, you gain an immediate bonus. In addition, when you reach the last space of any resource track, you gain a Favor of the Queen.
Decoration tiles (Flowers and Sculptures) are placed on the matching spaces on your player board according to the picture on the decoration tile you took (watch out for the small difference between decorations with 1 or 2 stars). They also let you earn Prestige from your Character cards, provided your resource marker has advanced past these tiles.
Bridge Goals
At the start of the game, 6 Bridge Goal tiles are placed on the game board; they represent the Queen's requirements for building the eighth bridge. Each Bridge Goal is double-sided, with one side easier to complete than the other. On your turn, you may complete a Bridge Goal, and the faster you do it, the more Prestige you gain.
Favor of the Queen
Favors of the Queen are personal goals that earn you Prestige at the end of the game. They can be obtained in several different ways during the game.
Invest Action
The Invest track is a way to gain coins. Whenever you encounter this symbol, choose one of the following options:
- Advance one space on the Invest track.
- Take the coins shown at your marker's position, then return it to the leftmost space of the track.
Coins
Whenever you gain coins, take them from the general supply. Whenever you spend coins, spend them from your personal supply and return them to the general supply.
Prestige
Whenever you gain Prestige during the game, advance your Prestige marker on the Prestige track accordingly.
End-of-Game Prestige
This kind of Prestige is only gained at the end of the game.
How to Play
The game consists of 4 rounds, each divided into 3 phases:
- Morning Phase: In turn order, players take their income (A), then birds land in the forest (B), and the Queen wakes up (C).
- Noon Phase: In turn order, each player chooses one Action tile and resolves it. The Noon Phase ends once every player has played 4 Action tiles.
- Evening Phase: If your Beaver ended the round in a region with one of your Houses, choose, in turn order, one income that you receive.
1) Morning Phase
A) Income
In turn order, you receive your income. Income comes from 2 different sources:
Guild Income: During the game, you will place Character cards in the matching columns above your player board. For every 2 cards in a column, you gain the income in the order of your choosing.
- Foxes guild: For every 2 cards here, gain 2 Prestige.
- Owls guild: For every 2 cards here, carry out the Invest action. To carry out the Invest action, choose one of the following: advance your marker one space on the Invest track, OR take the coins shown at your marker's position and then return it to the leftmost space of the track.
- Bears guild: For every 2 cards here, resolve the ability of one of your Structures. If you would resolve the abilities of more than one Structure this way, each one must be different.
- Wild Boars guild: For every 2 cards here, improve one of your Action tiles by flipping it to its improved side. If you cannot, gain 2 Prestige instead.
- Deer guild: For every 2 cards here, gain a resource of your choice (lumber, stone, sap, or food) and advance the matching marker on your player board.
Structure Income: Resolve the abilities of all your Structures, including your starting Home card.
IMPORTANT: During your first Income phase of the game, don't forget to resolve the ability of your starting Home card, which is carrying out the Invest action.
Example: Bruno resolves his income in round 3 as follows: 1. Foxes guild: he only has 1 card, so he gains no income from this guild. 2. Owls guild: he has 4 cards, so he carries out two Invest actions: he decides to advance his marker on the Invest track by one space, twice. 3. Bears guild: he only has 1 card, so he gains no income from this guild. 4. Wild Boars guild: he has 3 cards, so he may improve one of his Action tiles. 5. Deer guild: he has 2 cards, so he gains a resource of his choice: one lumber, bringing him to the 5th space on that track and gaining an immediate bonus of 3 coins. 6. Structures: his starting Home lets him carry out one Invest action: he decides to take the coins shown at his marker's position and then return it to the leftmost space of the Invest track. He also resolves the abilities of his other 2 Structures: 1 Prestige for each Owls guild card (4 Prestige, since he has 4 cards from this guild) and 1 stone.
B) Birds Arrive
From each region, return to the box the birds from the previous round that are still on cards (if any), then place one bird face up on every card (Character or Structure) in its region.
Only in a 2- or 3-player game: Some Bird tokens have a "3" or "4" symbol on the back. If this number is higher than the number of players in the game, discard those Bird tokens. It's possible that some Character or Structure cards will have no Bird token this round.
Example: Agnes places Bird tokens on the Character and Structure cards in the matching regions. Since she is playing a 2-player game with Bruno, she returns all birds marked "3" and "4" to the box.
C) The Queen Wakes
Return the Queen card from the previous round (if any) to the box, then reveal the next card from the deck.
2) Noon Phase
In every round, starting with the first player, you carry out 4 actions (one after another, in clockwise order). When it's your turn, you must choose one of your Action tiles to the left of your player board and decide whether you will rest or work.
Rest: Move the Action tile to the right of your player board and gain the coins shown in the "rest" part in the tile's upper-right corner.
Example: Agnes chooses this improved Action tile, moves it to the right of her player board, and decides to rest, gaining 8 coins.
Work: Move the Action tile to the right of your player board and activate it. All tiles (with one exception) let you move your Beaver without interruption, crossing the exact number of bridges you have not yet crossed this round that connect to the region your Beaver currently occupies. Every time you cross a bridge, you must place one of your Paw markers on it as a reminder that you have already crossed it this round.
- Your Beaver must cross 1 bridge. Gain 2 coins.
- Your Beaver must cross 1 bridge. Gain 1 Prestige.
- Your Beaver must cross exactly 2 bridges.
- Your Beaver must cross 1 bridge, then at any point during this turn you may spend 4 coins to gain one resource of your choice (only once).
- Your Beaver must cross exactly 3 bridges.
After moving, carry out these steps in order:
- Choose a card to buy (Character or Structure). Remember that at the end of your move you must buy a card from the region where you stopped. If you cannot, you must choose to rest instead of working (or move somewhere else).
- Meeting a bird: If there is a Bird token on the card, resolve its bonus (if possible), then store it face down next to your player board.
- Hire the Character or use the Structure by paying its cost (in coins): Character: Spend the coins shown (if any), then immediately resolve its effect and place the card in the matching guild column above your player board. Then reveal the next card from the deck face up. Structure: Spend the coins shown (if any), then immediately resolve the Structure's ability and slide it under your player board so that the income portion remains visible. Then reveal the next card from the deck face up.
- You may claim one or more Bridge Goals (see Claiming a Bridge Goal below).
Example: Agnes uses an Action tile that lets her gain 2 coins and cross one bridge. She places her Paw marker on this bridge, and her Beaver ends its move in a region. She decides to hire a Lumberjack, but first meets the bird that was placed on the card at the start of the round: she takes the Bird token and places it face down next to her player board, then resolves its bonus: she gains 2 coins. She then hires the Lumberjack: she spends 7 coins and advances her lumber marker by 2 spaces.
IMPORTANT: When a deck of cards runs out (this happens more often in a 4-player game), take one not-yet-used empty-deck tile at random and place it in the empty space. The tile stays there for the rest of the game and lets players gain the benefit of its effect.
Your Beaver does not move and stays in its region. This turn, simply take the Queen card for this round and take the first player token if you don't have it. Resolve the card's effect, then place it in the matching guild column above your player board if you don't already have it. Since only one Queen card is available each round, only one player (across all players) may visit the Queen per round.
Example: Bruno decides to use an Action tile that lets him visit the Queen, since the Queen card is still available. He takes the Queen card, takes the first player token, and resolves its effect twice (instead of once), because he already has this Action tile improved. He then places the Queen card in the matching guild column above his player board.
IMPORTANT: When you place your 6th Paw marker, you immediately gain 3 Prestige; when you place your 7th Paw marker, you immediately gain 4 Prestige. In other words, if you place all 7 of your Paw markers in the same round, you gain a total of 7 Prestige.
Houses
When you have placed above your player board 1 card from each guild, place your leftmost House in a region where you do not yet have a House. With 2 cards from each guild, place your last House in a region without one of your Houses and gain a Favor of the Queen.
The Balloon
Using the balloon is the only way to place all 7 Paw markers on the game board during a single round. It's also useful if you want to cross a bridge you have already crossed this round (without placing a second Paw marker on it).
You may only use the balloon if you have chosen the Work action, and only before OR after placing your Paw markers while crossing bridges, but never in the middle of your move. In every case, you use the balloon before hiring a Character or using a Structure.
To use the balloon, you must spend coins: if the balloon is in the same region as your Beaver, using it costs 3 coins. If it is not, using it costs 10 coins.
Move your Beaver and the balloon to a region of your choice; you do not place a Paw marker for this. You may move to a region even if you have placed Paw markers on every bridge connected to it, since you are traveling by air after all.
Example: The balloon is not in the same region as Agnes's Beaver. So she spends 10 coins to bring the balloon to the same region, then moves her Beaver to another region with it.
She must then work, using an Action tile that lets her cross 2 bridges. In doing so, she places her 6th and 7th Paw markers, gaining 3 + 4 = 7 Prestige for placing her last two Paw markers on the game board. She now hires one of the two Characters.
3) Evening Phase
In turn order (starting with the player holding the first player token), each player resolves these steps:
A) If your Beaver is in a region with one of your Houses, choose one income you receive: either the income from one guild, OR the income from one Structure.
IMPORTANT: If you choose income from a guild and you have 4 or 5 cards in that column, you gain its income twice. You gain it three times if you have 6–7 cards, and so on.
Example: Bruno's Beaver ended this round in a region with one of his Houses, so he may choose one income he receives. He decides to take the Owls guild income. Since he has 4 cards there, he may carry out 2 Invest actions: he decides to advance his marker on the Invest track by one space, twice.
B) Then return the 4 Action tiles you played this round back to the left of your player board, so that all 6 of your Action tiles are available again next round. Be careful not to flip them over in the process.
C) Take your Paw markers back from the bridges and place them back on your board.
D) You may claim one or more Bridge Goals.
Claiming a Bridge Goal
After carrying out an action (rest or work), or at the end of the Evening Phase, you may claim one or more Bridge Goals if you meet the matching requirement. Place one of your Bridge Goal markers on the claimed tile, specifically on the leftmost available space (the one worth the most Prestige), and immediately gain the shown amount of Prestige. If you have placed a Bridge Goal marker on both Bridge Goals in the same row, you also gain a Favor of the Queen (see below).
IMPORTANT: in a 2-player game, the second player always places their Bridge Goal marker on the 3rd position.
Example: Agnes's lumber marker reaches the 3rd space on the track this turn, and her sap marker is on the 5th space. This lets her claim this goal as the second player to do so, since Bruno already claimed it earlier — and because they are playing a 2-player game, the second player must place their marker on the 3rd space, which Agnes does, gaining 1 Prestige. This is the second Bridge Goal marker she has placed in the same row, so she takes a Favor of the Queen.
Obtaining a Favor of the Queen
There are several ways to obtain a Favor of the Queen:
- You already have one at the start of the game.
- By claiming both Bridge Goals in the same row.
- By gaining 10 units of one kind of resource (lumber, stone, sap, or food).
- By placing all your Houses on the game board (by hiring 2 Characters from each different guild).
- One Merchant Character lets you gain one.
When you gain a Favor of the Queen, choose one of the 3 face-up tiles, or draw a random one from any stack. If you choose a face-up tile, immediately refill the display. If one stack runs out, refill it with a tile from one of the other stacks.
Example: Bruno's marker just reached the 10th space on the stone track: he gains a Favor of the Queen. He chooses the middle one and places it next to his player board. He then refills the vacated spot with a new Favor.
A Favor of the Queen earns you Prestige at the end of the game.
End of Game
The game ends when round 4 ends. Players must spend their remaining coins as follows: for every 5 coins spent, advance one space on the Invest track. Then players calculate their total score by adding the following Prestige to what they gained during the game:
- Invest track: Gain Prestige based on the position of your Invest marker.
- Guild cards: For every guild (except the Deer guild), gain Prestige as follows: multiply the number of cards you placed in that guild's column above your player board by the number of stars your matching Resource marker has passed. The stars are shown on the Flower and Sculpture tokens you placed on your player board during the game. Each resource matches one guild: lumber matches the Foxes guild, stone matches the Owls guild, sap matches the Bears guild, food matches the Wild Boars guild. No resource matches the Deer guild.
- Structures: Look at your Resource marker that has advanced the least, to determine the Prestige value of each of your Structures. Remember that your starting Home card is also a Structure.
- Favor of the Queen: Score each one in the way it tells you to earn Prestige (see the Appendix for details).
The player with the most Prestige wins the game. In case of a tie, the player with the most remaining coins wins. If the tie persists, the tied players share the victory.
Example: Agnes tallies her score. Her Prestige marker is currently on space 46 of the Prestige track, and she adds the following Prestige to it:
1. Invest track: She spends 10 coins (out of her remaining 12) to advance her Invest marker by two spaces, reaching a space worth 7 Prestige. 2. Guild cards: Her lumber marker advanced past a decoration tile with 2 stars, so she gains 2 Prestige for each Foxes card, for a total of 6 Prestige. Her stone marker advanced past two decoration tiles, each with 1 star, so she gains 2 Prestige for each Owls card, for a total of 8 Prestige. Her sap marker did not advance past any decoration tile, so she gains no Prestige for Bears cards. Her food marker advanced past a decoration tile with 1 star, so she gains 1 Prestige for each Wild Boars card, for a total of 3 Prestige. 3. Structures: Her Resource marker that advanced the least is on the 3rd space, so she gains 3 Prestige for each Structure card. Since she has 3, she gains 9 Prestige. 4. Favor of the Queen: She has two — one gives her 1 Prestige for every Bird token (7 Prestige) and the other gives her 2 Prestige for every Wild Boars card (6 Prestige). In total, she gains 13 Prestige from her Favors of the Queen. Agnes finishes the game with a total of 92 Prestige!
Solo Mode Rules
In solo mode, you play against Paco & Paca, two beaver siblings who, like you, are trying to obtain Favors of the Queen.
General Game Setup
- Steps 1–8: Proceed the same way as when setting up a 2-player game.
- Step 9: Paco & Paca begin the game first — after all, they live in the forest.
Player Setup
Your own setup does not change. Then set up Paco & Paca:
- Choose any unused player color and take: 1 player board, 3 Houses, 1 Home card, 6 Bridge Goal markers, 4 Resource markers (lumber, stone, sap, and food), and 1 Prestige marker. Return the rest of the game material in this player color to the box.
- Place 2 Houses on the matching spaces on the player board.
- Place the 4 Resource markers on the leftmost space of the matching resource tracks.
- Place the 6 Bridge Goal markers on the matching spaces on the player board.
- Place the Prestige marker on space 0 of the Prestige track.
- Slide the Home card under the left side of the player board.
- Set 1 House aside for now.
Randomly take 2 starting cards and 2 Favors of the Queen and form 2 pairs from them. You choose a pair first. Paco & Paca (who are the starting player) take the second one and place their House in the matching region.
General Concepts for Paco & Paca
Paco & Paca do not have a Beaver on the game board. They simply take cards from 1 or 2 different regions, without spending coins for them. Paco & Paca don't pay attention to what's shown on the cards; they simply collect Character and Structure cards next to their player board just like you do. For every Character card they place next to their player board, they advance by 1 space with the Resource marker linked to the matching guild:
- Foxes guild: Advance 1 space with the lumber marker.
- Owls guild: Advance 1 space with the stone marker.
- Bears guild: Advance 1 space with the sap marker.
- Wild Boars guild: Advance 1 space with the food marker.
- Deer guild: Advance 1 space with the Resource marker that is furthest behind. In case of a tie, use the following order: lumber, stone, sap, and food (top to bottom).
Nothing else happens when a card is slid under their player board.
If the advancing marker moves past an empty Flower or Sculpture space, take the matching tile and place it on Paco & Paca's player board to fill that space.
When advancing a Resource marker, Paco & Paca only pay attention to that symbol, and gain a Favor of the Queen as soon as they reach the end of the track. They ignore all other symbols.
Difficulty Levels
You may choose an easier or harder game depending on which set of tiles you use. You may choose from the following:
- Beginner: 11 solo tiles + 3 rest tiles.
- Advanced: 11 solo tiles + 2 rest tiles.
- Expert: 11 solo tiles + 1 rest tile.
- Master Builder: 11 solo tiles.
Return all unused tiles to the box.
How to Play
You and Paco & Paca alternate turns just like in a multiplayer game. During the first round, Paco & Paca go first. After that, the starting player changes depending on whether you, or Paco & Paca, visit the Queen (as in a multiplayer game).
1) Morning Phase
Take the solo tiles + the chosen rest tiles (if any) and shuffle them together face down. Make a stack from them. Nothing else happens for Paco & Paca, since they don't gain income.
2) Noon Phase
During Paco & Paca's turn, reveal the top 2 tiles of the stack. Resolve both tiles separately, in order (reveal and resolve one first, then reveal and resolve the second).
- If there is a bird on the tile, take the pictured card and the Bird token on it, if any. Slide the card under Paco & Paca's player board. Advance their matching Resource marker as described above. They simply collect the bird. Reminder: Paco & Paca pay attention to neither the card's effect nor its cost. In addition, Paco & Paca don't pay attention to the bird's bonus either.
- If there is a Queen's crown on the tile, take the Queen card, if it is still available. Slide the card under Paco & Paca's player board. Advance the matching Resource marker as described above. If they take the card, Paco & Paca also take the first player token. If the Queen card is no longer available, Paco & Paca come away empty-handed. Then move the balloon to the next region clockwise.
- If this tile appears, nothing happens. Paco & Paca enjoy a well-deserved rest.
3) Evening Phase
Nothing happens for Paco & Paca.
Claiming a Bridge Goal
Paco & Paca can claim a Bridge Goal the same way you can, and score it the same way too.
Tip: You don't need to constantly check whether Paco & Paca have completed a goal.
IMPORTANT:
- When you complete a Bridge Goal, check just beforehand whether Paco & Paca have already completed it. If so, place their marker in the 1st position and yours in the 3rd position (just like in a 2-player game, the 2nd position is skipped).
- Before tallying the final score, check Paco & Paca's goals one last time, so you don't miss anything.
- Paco & Paca cannot claim this goal.
Houses
When Paco & Paca complete a row of cards, they remove a House from their player board and place it anywhere on the map; the position of their Houses has no effect on the game.
Favor of the Queen
Just like any other player, Paco & Paca gain Favor of the Queen tiles when they place their third House, when they complete 2 Bridge Goals in the same row, or when they gain 10 units of the same kind of resource. They always take the highest tile of the 3 displayed (the one closest to the Queen). Then slide the tiles up and reveal another.
End of Game
Paco & Paca score points in the final scoring as follows:
- Prestige gained during the game (from completed Bridge Goals).
- Invest track: Since Paco & Paca do not have a marker there, they gain no Prestige from this track.
- Guild cards: For every guild, Paco & Paca gain Prestige the same way you do.
- Structures: For every Structure, Paco & Paca gain Prestige the same way you do.
- Favor of the Queen: Each Favor of the Queen tile they gained is worth 2 Prestige for every rest tile you used during setup.
Example Scoring for a Game with 2 Rest Tiles
During the game, Paco & Paca gained 15 Prestige from completing Bridge Goals.
For the cards next to their player board, they gain:
- Foxes guild: 4 cards × 2 stars = 8 Prestige
- Owls guild: 6 cards × 3 stars = 18 Prestige
- Bears guild: 7 cards × 3 stars = 21 Prestige
- Wild Boars guild: 5 cards × 2 stars = 10 Prestige
- Deer guild: 0 Prestige
- Structures: 4 cards × 3 Prestige = 12 Prestige
They gained 3 Favor of the Queen tiles (1 from the start of the game, 1 for placing their 3rd House, and 1 for completing both goals in one row). Since this game used 2 rest tiles, each Favor of the Queen tile is worth 2 × 2 = 4 Prestige. So they gain 12 Prestige from that.
Paco & Paca finish with a total of 96 Prestige. They are tough opponents.
Appendix
Favor of the Queen
The 26 Favor of the Queen tiles carry the following texts (some texts appear on more than one tile):
- 2 Prestige for every Favor of the Queen (including this one).
- 1 Prestige for every Flower or Sculpture symbol.
- 3 Prestige for every pair of Flower + Sculpture symbols.
- 2 Prestige for every Flower symbol.
- 2 Prestige for every Sculpture symbol.
- 1 Prestige for every lumber / stone / sap / food you have gathered (one tile per resource).
- 2 Prestige for every card of the Foxes / Owls / Bears / Wild Boars / Deer guild (one tile per guild).
- 2 Prestige for every set of 4 different resources.
- 2 Prestige for every red/yellow Bird token.
- 3 Prestige for every blue/green Bird token.
- 1 Prestige for every Bird token.
- 3 Prestige for every House on the game board.
- 2 Prestige for every Structure card.
- 3 Prestige for every guild (not Structures) from which you have at least 3 cards.
- Prestige equal to your position on the Invest track.
- 2 Prestige for every improved Action tile.
- 2 Prestige for every completed Bridge Goal.
Card Abilities Related to Paw Markers
Some cards' abilities depend on how many Paw markers a player placed on the game board during the round.
- Gain 1 lumber for every 2 Paw markers you placed during the round.
- Gain 1 coin for every Paw marker you placed during the round.
- Gain 9 coins minus the number of Paw markers you placed during the round.
Florists and Sculptors
- Gain two Flower tokens with one symbol each (with 1 or 2 stars), or one Flower token with two symbols (with 3 stars), and place it on any space of the same size and the same picture on your player board.
- Gain 1 Sculpture symbol for every 3 Paw markers you placed during the round. If you placed 6 or 7 Paw markers, you may gain 1 Sculpture token with 2 symbols (with 3 stars), or 2 Sculpture tokens with 1 symbol each (with 1 or 2 stars).
Buildings
The abilities of all Buildings are immediate and are also income.
- Gain 1 coin for every Structure you have (including this one).
- Gain 1 coin for every Flower/Sculpture symbol you have.
- Gain 1 coin for every card you have from the Wild Boars / Bears / Owls / Deer / Foxes guild.
- Gain 1 coin for every pair of birds you have.
- Carry out 1 Invest action.
Means of Transport
The abilities of all Means of Transport are immediate and are also income.
- Gain 1 lumber / 1 stone / 1 sap / 1 food.
- Gain 1 Prestige for every card you have from the Foxes / Owls / Bears / Wild Boars / Deer guild.
- Gain 1 Prestige for every Structure you have (including this one).
Merchant Abilities
- Carry out 3 Invest actions.
- Gain 2 or 3 different resources.
- Resolve the ability of up to two of your Structures.
- Gain a Flower or Sculpture token with one symbol (1 or 2 stars) and place it on any matching space on your player board.
- If you placed at least 5 Paw markers during the round, gain a Flower or Sculpture token with one symbol (1 or 2 stars) and place it on any matching space on your player board.
- Gain a Favor of the Queen.
- Upgrade one of your Action tiles.
- Take the bird from any card on the game board and resolve its effect as if it were on this Merchant card.
- Gain 1 resource of your choice for every House you placed on the game board.
Bridge Goals
Each Bridge Goal tile has an easy side and a harder side; the point values below are for the 1st through 4th player to claim that side.
- Easy: Have at least 3 lumber and 5 sap (3/2/1/0 Prestige). Hard: Have at least 7 lumber and 5 sap (5/4/3/2 Prestige).
- Easy: Move your Invest marker back 3 spaces, without gaining coins (5/4/3/2 Prestige). Hard: Move your Invest marker back 4 spaces, without gaining coins (7/6/5/4 Prestige).
- Easy: Have at least 5 stone and 3 food (3/2/1/0 Prestige). Hard: Have at least 5 stone and 7 food (5/4/3/2 Prestige).
- Easy: Place 3 of your Houses on the game board (3/2/1/0 Prestige). Hard: Have at least 5 Structures, including your Home card (6/5/4/3 Prestige).
- Easy: Place at least 2 Flower symbols and 4 Sculpture symbols on your player board (3/2/1/0 Prestige). Hard: Place at least 5 Flower symbols and 3 Sculpture symbols on your player board (4/3/2/1 Prestige).
- Easy: Meet at least 7 birds (3/2/1/0 Prestige). Hard: Meet at least 8 birds (5/4/3/2 Prestige).
Empty-Deck Tiles
- Gain any resource, or gain a Flower or Sculpture token with one symbol (1 or 2 stars) and place it on any matching space on your player board.
- Do the above twice.
- If you placed at least 4 Paw markers during the round, gain any resource, or gain a Flower or Sculpture token with one symbol (1 or 2 stars) and place it on any matching space on your player board.
- For every 3 Paw markers you placed during the round, gain any resource, or gain a Flower or Sculpture token with one symbol (1 or 2 stars) and place it on any matching space on your player board.
Action Tiles
Each Action tile has a base side and an improved side.
- Base: Rest: Gain 5 coins. Work: Gain 2 coins. Your Beaver must cross a bridge. Improved: Rest: Gain 8 coins. Work: Gain 4 coins. Your Beaver must cross a bridge.
- Base: Rest: Gain 3 coins. Work: Gain 1 Prestige. Your Beaver must cross a bridge. Improved: Rest: Gain 5 coins. Work: Gain 3 Prestige. Your Beaver must cross a bridge.
- Base: Rest: Gain 3 coins. Work: Your Beaver must cross a bridge, then at any point during this turn you may spend 4 coins to gain a resource of your choice (only once). Improved: Rest: Gain 5 coins. Work: Your Beaver must cross a bridge, then at any point during this turn you may spend 2 coins to gain a resource of your choice (only once).
- Base: Rest: Gain 3 coins. Work: Your Beaver must cross exactly two bridges. Improved: Rest: Gain 5 coins. Work: Carry out an Invest action, then your Beaver must cross exactly two bridges.
- Base: Rest: Gain 3 coins. Work: Your Beaver must cross exactly three bridges. Improved: Rest: Gain 5 coins. Work: Your Beaver must cross exactly three bridges. If you would meet a bird this turn, resolve its effect twice.
- Base: Rest: Gain 8 coins. Work: Your Beaver must stay in this region, then take the Queen card for this round and resolve its effect. Improved: Rest: Gain 15 coins. Work: Your Beaver must stay in this region, then take the Queen card for this round and resolve its effect twice.
Birds
- Gain 1 lumber / stone / sap / food.
- Gain 2 or 3 coins.
- Gain 7 coins minus the number of bridges you crossed this round.
- Gain 1 coin for every bridge you crossed this round.
- Carry out one Invest action.
- Resolve the ability of one of your Structures.
- If you crossed 5 bridges, gain a Flower or Sculpture token with one symbol (1 or 2 stars) and place it on any matching space on your player board.
- Gain 1 Prestige for every 2 bridges you crossed this round.
- Gain 2 Prestige.
- Upgrade one of your Action tiles.
Player Board Bonuses
- Lumber: When your marker reaches the 5th space, gain 3 coins. When it reaches the 10th space, gain a Favor of the Queen.
- Stone: When your marker reaches the 6th space, upgrade one of your Action tiles. When it reaches the 10th space, gain a Favor of the Queen.
- Sap: When your marker reaches the 7th space, carry out an Invest action. When it reaches the 10th space, gain a Favor of the Queen.
- Food: When your marker reaches the 8th space, resolve the ability of one of your Structures. When it reaches the 10th space, gain a Favor of the Queen.
Round Summary
1) Morning Phase
- A – Gaining Income: Guild income: for every 2 cards in a column, gain the matching income. Structure income: resolve the abilities of all your Structures, including your starting Home.
- B – Birds Arrive: From each region, return the birds from the previous round to the box, then place one bird face up on every card in its region.
- C – The Queen Wakes: Return the Queen card from the previous round (if any) to the box, then reveal the next card from the deck.
2) Noon Phase
Choose one of your Action tiles to the left of your player board and decide whether you will rest or work.
- Rest: Move the Action tile to the right of your player board and gain the coins shown on the tile in the Rest section.
- Work: Move the Action tile to the right of your player board and activate it. Most tiles let your Beaver cross one or more bridges you have not yet crossed this round. When crossing a bridge, place a Paw marker on it. In addition, you may spend coins to use the balloon, before or after placing Paw markers, to optimize your movement. Then choose a card in the region where you arrived — if there is a Bird token on it, resolve its bonus and take the bird. Then buy the card with coins, resolve its effect, and place it in the upper part of your player board (Character) or the lower part (Structure).
The Noon Phase ends once every player has played 4 Action tiles.
3) Evening Phase
If your Beaver ended the round in a region with one of your Houses, choose one income you receive, then take back your 4 Action tiles and your Paw markers.
Easily Forgotten Rules
- Each round, only one player may take the Queen card.
- Resolve the effects of your Building cards immediately and during every Income phase.
- You may claim more than one Bridge Goal at once.
- Every time you place one card of each guild in the upper part of your player board, place one of your Houses in a region.
- During the first Income phase of the game, you only resolve the effect of your starting Home.
- Invest action: advance your marker one space on the Invest track, OR take the coins shown at your marker's position and then return it to the leftmost space of the track.
Scoring at the End of the Game (end of round 4)
For every 5 coins spent, players advance 1 space on the Invest track. Then players calculate their total score by adding the following Prestige to what they gained during the game:
- Invest track: Gain Prestige based on the position of your Invest marker.
- Guild cards: For every guild (except the Deer guild), gain Prestige as follows: multiply the number of cards from that guild placed in the upper part of your player board by the number of stars your Resource marker has passed.
- Structures: Look at your Resource marker that advanced the least to determine the Prestige value of each of your Structures.
- Favor of the Queen: Score each one in the way it tells you to earn Prestige.
The player with the most Prestige wins the game. In case of a tie, the tied player with the most remaining coins wins. If the tie persists, the tied players share victory.