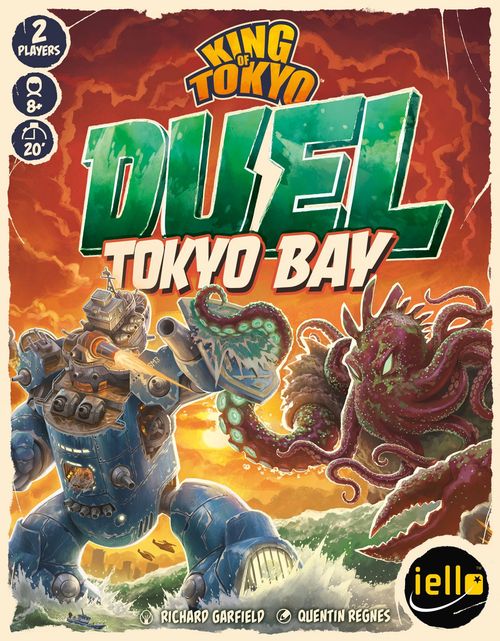
King of Tokyo: Duel – Tokyo Bay
King of Tokyo: Duel – Tokyo Bay Rulebook
Table of Contents
Table of Contents
Contents and Game Elements
x6 Monster boards — These boards represent the Monsters you play as in King of Tokyo Duel: Tokyo Bay. Each has a name (1), special power (2), and a starting value (3) for Life Points.
x6 Dice — Each die has 6 symbols that represent the actions you can take on your turn.
x2 Extra dice / x4 Dice tokens — These tokens and dice can be gained through certain Power cards and effects.
x2 Markers (Fame and Destruction) — These markers move back and forth on their respective tracks on the board.
x2 Life Point trackers — These wheels track your Life Points (heart). The 0 is represented by a skull.
Energy cubes — a supply of cubes used to buy Power cards and activate effects.
x2 Starting tiles (Fame and Destruction) — placed at the center of each wide track at the start of the game.
x50 Power cards — Power cards have a name (1), a cost to pay in Energy cubes (2), a type (3), and an effect (4).
x12 Support tokens — Both identical sets of 6 tokens represent each of the 6 die faces. Each token has an active and inactive side.
x14 Debris tiles — These tiles will be placed on the board during the game. They all have a Debris bonus (Smash, Heal, Energy, or Dice token).
x4 The King's Debris tiles — used only when playing with The King (see The King's Debris Tiles, below).
x1 H.A.D.E.S. token & x1 R.A.M.P.A.R.T. Protocol tile — used only when playing with H.A.D.E.S.
x4 Fan tokens — used only when playing with Cyber Bunny.
x4 Shield tokens — used only when playing with Iron Back.
x3 Kraken tokens — used only when playing with Kraken.
These elements are tied to their respective Monster's special power.
x1 Board — This board has 2 wide tracks: Fame and Destruction. There are also 3 spaces for Power cards, a Victory zone (x4) on each side, and Power card spaces.
Setup
- Each player chooses a Monster board. Place it power side up in front of you, then take any additional pieces needed for your Monster's special power (see Choosing Monsters, below).
- Each player takes a Life Point tracker. Adjust it to the number of Life Points shown on your Monster board.
- Place the board between you so that each of you is at one end of the tracks. Place the corresponding starting tile (Fame or Destruction, depending on the color) in the center of each wide track. Then place the Fame and Destruction markers on their respective starting tiles.
- Shuffle all the Power cards and make a face-down deck. Shuffle the 14 Debris tiles and make a stack.
- Place the top 3 cards from the deck, face up, on the 3 spaces of the board.
- Each player takes a set of 6 Support tokens (in the color that matches their Life Point tracker). Place them active side up in front of you.
- Set aside the dice, extra dice, Energy cubes, and Dice tokens.
Fame and Destruction Tracks
The Monsters have taken the fight into the Bay, each trying to be the first to reach solid ground. When you pull the Fame marker to your side of the board, advance towards the city with the support of the crowds and get closer to victory by becoming the most celebrated Monster. When you pull the Destruction marker to your side of the board, you ramble towards the city and get closer to victory by becoming the most feared Monster.
How to Play
Take turns one at a time.
First Player
Each player rolls all 6 dice. The player who rolled the most Smash symbols becomes the first player (in case of a tie, repeat this step).
Important: During their very first turn, the first player rolls 5 dice instead of 6. Meanwhile, the second player takes 1 Energy cube and places it in front of them.
Turn Overview
- Roll Dice
- Resolve Dice
- Buy Power Cards or Gain 1 Energy
- End Your Turn
1. Roll Dice
On your turn, you may roll the dice up to 3 times. You may stop rolling at any time.
During your first roll, roll all 6 dice. Before your roll, you may discard Dice tokens to roll an equal number of extra dice (you may have a maximum of 2 in front of you at any time). You may never roll more than 8 dice. For later rolls, choose the dice you would like to reroll (set the others aside). Before a new roll, you may always take back any dice that you set aside during a previous roll.
Once you have finished your 3 rolls or decided to stop, keep the dice in front of you. This is your Roll. When a Power card or any other effect refers to your Roll, it refers to these dice and tokens.
Also add any Support tokens you gained during the previous turn to your Roll.
2. Resolve Dice
You must resolve all dice in your Roll, in any order you choose, according to the symbols rolled:
Smash
Your Rival takes 1 Smash hit for each Smash rolled. Each Smash hit causes your Rival to lose 1 Life Point. If they lose their last Life Point, the skull symbol appears on their Life Point tracker and you win the game (see End of the Game, below).
Heal
Gain 1 Life Point for each Heal rolled. You cannot gain more than your starting Life Points (shown on your Monster board).
Energy
Gain 1 Energy cube from the reserve for each Energy symbol rolled and place it in front of you. Energy is represented by Energy cubes. Keep them in front of you until you spend them. If you gain Energy, but there are none left in the reserve, use an appropriate substitute.
Special Power
Check the special power on your Monster board (see Choosing Monsters, below). If you have enough Special Power symbols in your Roll, you may activate your special power multiple times. You must activate your special power entirely, including any additional effects, before you can activate your special power again.
Fame / Destruction
For each triple Fame or Destruction rolled, pull the corresponding Fame or Destruction marker 1 space towards you on its track. For each additional matching symbol rolled, pull the Fame or Destruction marker 1 additional space towards you.
Example: Destruction + Destruction + Destruction = Pull 1 Destruction. Destruction + Destruction + Destruction + Destruction + Destruction = Pull 3 Destruction.
Pulling the Fame or Destruction Marker
The Fame and Destruction markers can only be pulled onto tiles on their respective track. At any time, if you must pull the Fame or Destruction marker, check the state of the track and where the marker will end up:
- Onto the next tile: Pull the corresponding marker onto this tile. If this tile has a Debris bonus, apply it:
- Smash bonus: Your Rival takes 1 Smash hit.
- Heal bonus: Gain 1 Life Point.
- Energy bonus: Gain 1 Energy.
- Dice token bonus: Gain 1 Dice token. You can have up to 2 in front of you.
- Onto a water zone (the track isn't complete and there's no tile for the marker to move onto): Draw a Debris tile, and place it on your side of the corresponding track. Slide tiles if necessary (see Water Zones & Sliding Tiles, below). Then, pull the corresponding marker onto this tile (and apply its Debris bonus, if any).
- Onto a Victory zone on your side of the board (once the track is complete): Do not move the corresponding marker. Capture a Debris tile instead (see Capturing a Debris Tile, below).
Complete Tracks
A track is complete if it has its starting tile and 4 Debris tiles. You should not see any water zones. No Debris tiles can be added to a complete track.
Water Zones & Sliding Tiles
A water zone is a space on a track that doesn't have any Debris tiles. You should not see any water zones on a complete track. After placing a Debris tile on the board (to be able to move a marker) or removing one (through an effect), slide the tiles on that track so they are adjacent and centered on the track. Water zones, if there are any, must exist on both ends of the track. This way you can quickly check whether the track is complete.
Capturing a Debris Tile
Draw a Debris tile from the stack, apply its Debris bonus, and place it in front of you (instead of placing it on the track). You win the game if you capture 3 Debris tiles (see End of the Game, below).
Lost Dice and Support Tokens Mode
Note: We recommend playing with this mode by default to add more balance to your games, notably to help with unlucky Rolls. This mode can also be used in your games of King of Tokyo Duel.
When resolving dice, treat a result as a "Lost Die" when it has no effect, such as:
- If you have Fame or Destruction but not enough to pull the Fame or Destruction marker.
- If you have Special Power, but not enough to activate your special power.
- If you have Heal when your Life Points are at their maximum value.
Note: Any other results, no matter the situation, cannot be treated as a Lost Die. Canceled or discarded dice are never treated as Lost Dice.
For each pair of Lost Dice in your Roll, you may gain one of the active Support tokens in front of you. Support tokens will reinforce your next turn, using these rules:
- The Support token(s) gained must be added to your Roll on your next turn. Each token counts as an extra result of the chosen face.
- A Support token is fully treated as a die with the corresponding face during the 2. Resolve Dice step. It therefore interacts with all Power cards or special powers as normal dice do.
- You cannot change the result of a Support token.
- You must treat a Support token as a Lost Die if it meets the conditions. Once a Support token is resolved in your Roll, it becomes inactive and you flip it to its inactive side. You cannot gain that token again for the rest of the game.
After resolving all your dice, continue to 3. Buy Power Cards or Gain 1 Energy.
3. Buy Power Cards or Gain 1 Energy
Buy Power Cards
You may buy one or more face-up Power cards from the board (one at a time). To do so, pay as many Energy cubes as shown on the top-left of the chosen card. The card in the rightmost space of the board always costs 1 less than the cost shown.
Each time you buy or discard a card, slide the cards to the right along the track to reveal the space closest to the deck. Reveal the top card of the deck and place it on the empty space. It is immediately available for you to buy. This means you may buy multiple cards with a reduced cost of -1 back-to-back on the same turn.
You may also spend 2 Energy to discard all 3 face-up Power cards and reveal 3 new ones, which are immediately available to buy. As long as you have Energy available, you may continue buying or discarding Power cards.
Gain 1 Energy
If you do not want to or cannot buy any Power cards on your turn, gain 1 Energy. Spending 2 Energy to discard all 3 Power cards does not count as buying Power cards.
Types of Power Cards
There are 2 types of Power cards:
- Keep: Keep these Power cards face up in front of you until the end of the game (unless indicated otherwise).
- Discard: Resolve these cards immediately, then discard them.
- Rival cards: These cards are treated just like Keep cards, but they have a different name to remind you that their effects activate during your Rival's turn.
4. End Your Turn
Certain Power card effects activate at the end of your turn. Resolve them in any order you choose.
Pass the dice to your Rival, who begins their turn starting with 1. Roll Dice.
End of the Game
The game can end at any time. You are declared the winner if you fulfill any of the following conditions:
- Your Rival's Life Points are reduced to 0.
- Both tracks are complete (no visible water zones) and the Fame and Destruction markers are both on the last tile of their respective tracks, on your side of the board.
- You capture your third Debris tile.
- The victory condition on one of your Rival cards (marked with a Rival-card symbol) is met. These cards can be gained throughout the game.
Choosing Monsters
King of Tokyo: Duel – Tokyo Bay features 6 new Monsters, each with a special power and a Difficulty rating (1 to 3). You can also choose to play with any Monster from the King of Tokyo Duel line — they are all compatible with this game (see Compatibility, below).
H.A.D.E.S. — Difficulty 1
R.A.M.P.A.R.T. Protocol: Special Power > Move 1 zone.
Setup: Place the token on the starting zone of your R.A.M.P.A.R.T. Protocol tile. Move the token in the direction of the arrows. With each move, gain the bonus of the new zone. There is no limit to the number of times you can complete a loop around the tile.
H.A.D.E.S. gives you access to several bonuses. Identify the right time to use and gain them.
Roll example: Special Power = Move 1 zone from the starting zone > Pull 1 Destruction. Special Power = Move 1 more zone > Your Rival takes 3 Smash. Energy + Energy = +2 Energy.
Gigarex — Difficulty 1
Prehistoric Rage: Special Power > You and your Rival take 1 Smash. +1 additional Special Power symbol > Your Rival takes 3 more Smash.
When Gigarex is angry, they're ready to hurt anyone in their rage (including themself)! Deal damage to your Rival, but make sure to have enough Life Points to absorb the counter attacks!
Roll example: Special Power = You and your Rival each take 1 Smash. Special Power = Your Rival takes 3 more Smash. Heal = +1 Life Point. 2 Lost Dice.
Pagura — Difficulty 2
Fish: Special Power > Reveal the top card of the Power card deck. For each symbol in the effect zone of the revealed card, gain the corresponding bonus:
- Smash symbol: Your Rival takes 1 Smash.
- Heal symbol: Gain 1 Heal.
- Energy symbol: Gain 1 Energy.
- Dice token symbol: Gain 1 Dice token (max. 2 in front of you).
- At least 1 Fame symbol and 1 Destruction symbol: Pull 1 Fame and 1 Destruction.
Ignore all other symbols on the revealed card: without a Fame symbol there is no Fame bonus, and vice versa; a Special Power symbol on the card, and any other symbol not listed above, has no effect here.
During a treasure hunt, you don't always find what you're looking for. With Pagura, make sure you have enough Special Power in your Roll to fish the best bonuses.
Roll example: reveal a card and gain +2 Energy and +1 Heal from its symbols. 1 Smash.
Iron Back — Difficulty 2
Setup: Take the 4 Shield tokens and make a reserve near you. You start the game with no Shield tokens.
Iron Back has 2 special powers: gain Shield tokens, or exchange them. During step 2. Resolve Dice, choose which one will be active that turn.
Ionic Shield: When you take a Smash hit, you may choose to discard 1 Shield token instead of losing 1 Life Point.
Iron Back can accumulate up to 4 Shield tokens, which makes him particularly resistant to Smash. If you don't need protection, discard all your Shield tokens to exchange them for Energy or make a powerful attack.
Roll example (first special power): Special Power > Pull 1 Destruction. Energy + Energy > +2 Energy. Heal > +1 Heal. 2 Special Power symbols > gain 2 Shield tokens.
Roll example (second special power): Energy + Energy > +2 Energy. Discard your 2 Shield tokens: for each Shield discarded, gain 1 Energy or your Rival takes 1 Smash. 3 Lost Dice.
Kraken — Difficulty 3
Setup: Take the 3 Kraken tokens and make a reserve near you. Each token is double-sided and associated with a die face.
Tentacle Trap: Special Power > Take 1 Kraken token or give 1 Kraken token to your Rival.
When you take a Kraken token, choose one from your reserve and place it in front of you. On your next turn, during step 1. Roll Dice, you may keep rerolling dice with the face shown on the token. Return the token to your reserve after finishing your rolls.
When you give a Kraken token to your Rival, choose one from your reserve and place it in front of your Rival. On their next turn, during step 1. Roll Dice, they cannot reroll dice with the face shown on the chosen token. Return the token to your reserve after they finish their rolls.
Kraken has a lot of influence over dice. Use its power to avoid certain results when rerolling, or to force your Rival to keep them, delaying their strategy.
Roll example: Special Power = take 1 Kraken token. Heal + Heal + Heal = +1 Life Point (already at maximum, so 1 Lost Die).
Cyber Bunny — Difficulty 3
Setup: Shuffle the 4 Fan tokens and make a stack, face down.
Fan Club: Special Power > Reveal the top Fan token from the stack.
When you reveal a Fan token, place it in front of you. During step 3. Buy Power Cards or Gain 1 Energy, you may discard all or some of the Fan tokens in front of you to activate their effects:
- Discard the 3 available Power cards and reveal 3 new ones. Gain 1 Energy.
- Reduce the cost of 1 Power card you buy this turn by 3 Energy.
- Draw 5 Power cards, choose 1, and exchange it with one of the 3 available cards. Shuffle the remaining cards and the exchanged card back into the deck.
- Reduce the cost of all Power cards you buy this turn by 1 Energy.
If you must reveal a Fan token and the stack is empty, make a new stack by shuffling the discarded Fan tokens, then reveal the top token as normal.
Cyber Bunny's fan club loves to give him new gadgets. Identify the most interesting cards and buy them at the lowest cost to strengthen your mastery of the game.
Important: Games with Cyber Bunny can last longer than with other Monsters. This is due to its tendency to buy cards.
Roll example: Special Power + Special Power = reveal 2 Fan tokens from the stack. Energy = +1 Energy. 1 Lost Die.
The King's Debris Tiles
Setup: Take The King's 4 Debris tiles and make a reserve near you.
The King (when played from King of Tokyo Duel): Special Power > Choose a Debris tile from your reserve and add it to the top of the stack of Debris tiles.
The King's Debris tiles are treated like regular Debris tiles, except for how you activate them: When The King's Debris bonus is applied (by you, your Rival, or an effect), it's always The King who gains the corresponding Debris bonus. The King's Rival never gains a Debris bonus when activating these tiles.
Note: To play with The King from King of Tokyo, you need to adapt the rule for his special power. Therefore, you do not use The King's Buzz tokens included in King of Tokyo Duel.
Example: The King's Debris tile grants +1 Heal and +1 Energy — always to The King, regardless of who pulls the marker onto it.
Achievements
We identified a few actions you can do that deserve to be celebrated. If you meet the condition of one of the achievements on the sides of the box, mark it with the corresponding sticker. If you accomplish all the achievements, congratulations: Tokyo Bay belongs to you!
Compatibility
All Monsters from the King of Tokyo Duel line are compatible with all Duel boxes. It is not recommended to shuffle the Power cards from different games together, especially since certain cards are tied to board mechanics unique to each box (Debris tiles or Buzz tokens, for instance). Modifying the deck risks unbalancing certain effects and mechanics. Of course, you are free to personalize your games as you like!
Power cards from King of Tokyo Duel: Tokyo Bay are marked with the Tokyo Bay symbol.