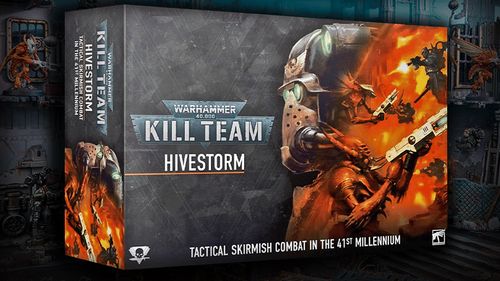
Warhammer 40,000: Kill Team – Hivestorm
Warhammer 40,000: Kill Team – Hivestorm Rulebook
Table of Contents
Table of Contents
Core Rules
Tools of War. To play a game of Kill Team, you will need: a kill team — a collection of Citadel miniatures (operatives) for each player; their accompanying rules (available for free at warhammer-community.com); a measuring device in inches; a minimum of 10 six-sided dice (D6); tokens and markers; a killzone — game board and terrain features; and a mission pack.
Each game has a sequence that tells you how to set up the playing area, prepare your kill team and achieve victory. The main step of the game sequence is the battle, where your operatives fight one another and you attempt to achieve victory. A battle consists of multiple turning points, and each turning point includes a Strategy phase and a Firefight phase. They must be completed in order and in full, at which point the turning point ends and the next begins. Repeat this process until the battle ends, as specified by your mission pack.
As you read through the core rules you may find unfamiliar terms. These are explained in alphabetical order in the Key Principles section below.
START TURNING POINT → STRATEGY PHASE → (repeat until battle ends) → FIREFIGHT PHASE → END TURNING POINT
Strategy Phase
1. Initiative. The player with initiative activates first in the turning point and decides the order of resolution for rules that would happen at the same time. In the first turning point, the player with initiative is determined by the game sequence of your mission pack. In subsequent turning points, the players roll-off and the winner decides who has initiative. However, if the roll-off is a tie, the player who didn't have initiative in the previous turning point decides who has initiative (this takes precedence over roll-offs and ties). In some mission packs you will also determine initiative when setting up the battle; the player with initiative then decides the order of resolution for simultaneous rules that happen before the battle begins.
2. Ready. Each player gains 1 Command point (CP). In each turning point after the first, the player who doesn't have initiative gains 2CP instead. Players keep CP until spent. Each player readies all friendly operatives. CP are a valuable resource used to activate additional rules called ploys. An order token with the lighter side up shows an operative as ready.
3. Gambit. Starting with the player who has initiative, each player alternates either using a STRATEGIC GAMBIT or passing. The players repeat this process until they have both passed in succession. Strategy ploys are the most common STRATEGIC GAMBIT, but any rule labelled STRATEGIC GAMBIT can be used. You cannot use each STRATEGIC GAMBIT more than once per turning point.
Firefight Phase
WHEN A FRIENDLY OPERATIVE IS ACTIVATED: 1. Determine order. 2. Perform actions (repeat until all operatives are expended, then the next player activates). 3. Expended. If all your operatives are expended but not your opponent's, you can counteract instead.
1. Determine Order. Select the operative's order (Engage or Conceal). It has this order until it's next activated.
- Engage: the operative can perform actions as normal and can counteract.
- Conceal: the operative cannot perform Shoot and Charge actions, and it cannot counteract. However, it's not a valid target while in cover.
2. Perform Actions. The operative performs actions. While an operative is doing so it's known as the active operative. Each action costs Action points (AP), and you cannot spend more AP during an operative's activation than its Action point limit (APL, see Datacards below). An operative cannot perform the same action more than once during its activation — this is known as action restrictions. Some rare rules will change the cost of actions; regardless of how many AP changes an action is affected by, the minimum is always 0AP, taking precedence over all AP changes.
You don't need to declare all your operative's actions when it's activated. Instead, your operative can perform an action, and then you can decide the next action after seeing its effects.
If an action is declared or begun but it's not possible to complete, the action is cancelled. Revert back to the game state before that action — for example, if an operative has moved but cannot complete its move, return the operative to where it was before it moved; it hasn't performed that action and you haven't spent AP on it. An operative with an APL of 2 could perform the Reposition (1AP) and Shoot (1AP) actions, totalling 2AP, but couldn't perform the Fall Back (2AP) and Shoot (1AP) actions, totalling 3AP.
3. Expended. When you've finished with your operative's activation, that operative is expended. While expended, an operative is not ready.
Counteract. Counteracting isn't an activation, it's instead of activating. This difference is important; for instance, it means action restrictions won't apply.
Actions
Whenever a free action is granted (not costing the operative any AP), the following apply: the conditions of the action must still be met; it does not cost the operative any additional AP to perform the action; and the operative still counts as performing the action for all other rules purposes (e.g. it can't perform it again this activation if action restrictions apply). If an operative performs a free action outside of its activation, this does not prevent it from performing that action during its activation, or vice versa.
Reposition — 1AP
Move the active operative up to its Move stat to a location it can be placed. This must be done in one or more straight-line increments, and increments are always rounded up to the nearest inch. It cannot move within control range of an enemy operative, unless one or more other friendly operatives are already within control range of that enemy operative, in which case it can move within control range of that enemy operative but cannot finish the move there.
An operative cannot perform this action while within control range of an enemy operative, or during the same activation in which it performed the Fall Back or Charge action.
Dash — 1AP
The same as the Reposition action, except don't use the active operative's Move stat — it can move up to 3" instead. In addition, it cannot climb during this move, but it can drop and jump.
An operative cannot perform this action while within control range of an enemy operative, or during the same activation in which it performed the Charge action.
Fall Back — 2AP
The same as the Reposition action, except the active operative can move within control range of an enemy operative, but cannot finish the move there.
An operative cannot perform this action unless an enemy operative is within its control range. It cannot perform this action during the same activation in which it performed the Reposition or Charge action.
Charge — 1AP
The same as the Reposition action, except the active operative can move an additional 2". It can move, and must finish the move, within control range of an enemy operative. If it moves within control range of an enemy operative that no other friendly operatives are within control range of, it cannot leave that operative's control range.
An operative cannot perform this action while it has a Conceal order, if it's already within control range of an enemy operative, or during the same activation in which it performed the Reposition, Dash or Fall Back action.
Pick Up Marker — 1AP
Remove a marker the active operative controls that the Pick Up Marker action can be performed upon. That operative is now carrying, contesting and controlling that marker.
An operative cannot perform this action while within control range of an enemy operative, or while it's already carrying a marker.
Place Marker — 1AP
Place a marker the active operative is carrying within its control range. If an operative carrying a marker is incapacitated, it must perform this action before being removed from the killzone, but does so for 0AP — this takes precedence over all rules that prevent it from doing so.
An operative cannot perform this action during the same activation in which it already performed the Pick Up Marker action (unless incapacitated).
Shoot — 1AP
Shoot with the active operative by following the sequence below. The active operative's player is the attacker; the selected enemy operative's player is the defender.
An operative cannot perform this action while it has a Conceal order, or while within control range of an enemy operative.
- Select Weapon.
- Select Valid Target. If the intended target has an Engage order, it's a valid target if it's visible to the active operative. If the intended target has a Conceal order, it's a valid target if it's visible to the active operative and not in cover. (In rare instances you can be both attacker and defender, such as shooting a friendly operative caught by the Blast weapon rule — you then roll both attack and defence dice.)
- Roll Attack Dice. Roll a number of D6 equal to the weapon's Atk stat. Each result that equals or beats the weapon's Hit stat is retained as a success (a roll of 6 is always a critical success; a roll of 1 is always a fail). If the target is obscured, the attacker must discard one success of their choice instead of retaining it, and all the attacker's critical successes are retained as normal successes and cannot be changed to critical successes (this takes precedence over all other rules).
- Roll Defence Dice. The defender rolls a number of D6 equal to their Save stat's defence dice allowance and retains results that equal or beat their Save stat as successes (6 is always critical). Cover in this step usually applies to operatives with an Engage order, as a Conceal order would have prevented the operative from being a valid target in the first place.
- Resolve Defence Dice. A normal success can block a normal success. Two normal successes can block a critical success. A critical success can block a normal success or a critical success.
- Resolve Attack Dice. A normal success inflicts damage equal to the weapon's Normal Dmg stat. A critical success inflicts damage equal to the weapon's Critical Dmg stat. Some weapons shoot multiple times in one action (such as those with the Blast and Torrent weapon rules), so operatives aren't removed until the whole action has been resolved.
Fight — 1AP
Fight with the active operative by following the sequence below. The active operative's player is the attacker; the selected enemy operative's player is the defender.
An operative cannot perform this action unless an enemy operative is within its control range.
- Select Enemy Operative. The operative fighting is the active operative; the operative retaliating is the selected enemy operative. If a rule says an operative cannot retaliate, it can still be fought against, but attack dice cannot be collected or resolved for it.
- Select Weapons.
- Roll Attack Dice. Both the attacker and the defender (if it can retaliate) roll attack dice with their selected weapons.
- Resolve Attack Dice. A normal success inflicts damage equal to the weapon's Normal Dmg stat; a critical success inflicts damage equal to the weapon's Critical Dmg stat — this is resolved straight away. A normal success can block a normal success; a critical success can block a normal success or a critical success. Blocking doesn't stop a strike as it's happening, it stops a success that's yet to be resolved — you can still block even if your opponent has no unresolved successes remaining.
Key Principles
Bases. All operatives are on bases. The base is an important part of the miniature for rules purposes, in particular measuring distances. Each operative's base size is specified on its datacard. The sides of different bases can touch, but a base cannot be placed on another. Friendly operatives can move through other friendly operatives (the base and the miniature), but not through enemy operatives. Bases cannot move through terrain, or be over the edge of the killzone.
Control Range. Many rules relate to control range, such as moving, fighting and using cover. Something is within an operative's control range if it's visible to and within 1" of that operative. Control range between operatives is mutual — operatives are within each other's control range if one of them is visible to and within 1" of the other.
Damage. While an operative has fewer than its starting wounds remaining, it's wounded. While it has fewer than half its starting wounds remaining, it's also injured. Subtract 2" from the Move stat of injured operatives and worsen the Hit stat of their weapons by 1. Keep track of each operative's remaining wounds with dice, tokens or by writing it down. 'Incapacitated' and 'removed from the killzone' are separate — some rules take effect when an operative is incapacitated, but before it's removed. Some rules allow an incapacitated operative to perform a free action before being removed from the killzone; such an operative cannot perform more than one free action (excluding Place Marker) in this instance, and that operative's player decides the order of any of its rules that occur before it's removed from the killzone (taking precedence over the player with initiative deciding).
Cover. Cover is determined from one operative to another, usually when one of them is shooting. An operative is in cover if there's intervening terrain within its control range. However, it cannot be in cover while within 2" of the other operative. An operative in cover with a Conceal order is not a valid target. An operative in cover with an Engage order is a valid target, but has a cover save (see the Shoot action).
Datacards. Datacards contain specific rules for each operative, including key stats: Type of operative. Operative stats — APL (Action point limit): the total cost of actions an operative can perform during its activation, and a stat used to determine control of markers (regardless of how many APL stat changes an operative is affected by, the total can never be more than -1 or +1 from its normal APL, taking precedence over all stat changes). Move: the operative's move distance, used when performing the Reposition, Fall Back and Charge actions (an operative's Move stat can never be changed to less than 4", taking precedence over all stat changes). Save: the result required for successful defence dice whenever another operative is shooting the operative. Wounds: the operative's starting number of wounds, reduced as damage is inflicted upon it. If an operative's stats or its weapons' stats are changed during an action, apply the change once the action has been completed (changes to weapon rules are applied immediately).
Weapon stats — the kill team selection pages specify what weapons an operative has; if it doesn't specify, an operative has all the weapons on its datacard. Atk: the number of attack dice to roll whenever an operative uses this weapon. Hit: the result required for successful attack dice. Dmg: the first value is the weapon's Normal Dmg stat, the second its Critical Dmg stat. Different weapons can share a primary name but have different secondary names in brackets (e.g. 'plasma gun (standard)' and 'plasma gun (supercharge)') — these are separate weapons, but a rule referring to just the primary name includes all weapons with that primary name. A higher numbered Hit and Save stat is worse; a 4+ Hit stat worsened by 1 is 5+.
Weapon rules — additional rules that apply whenever the operative uses this weapon. Additional rules — additional rules the operative has, and unique actions it alone can perform. Keywords — used to identify the operative; some rules only affect operatives with the relevant keywords, shown in KEYWORD BOLD font. Keywords in orange with a skull symbol (e.g. TEMPESTUS AQUILON) are faction keywords, identifying all operatives from that kill team. Base size is given in mm.
Dice (D6, D3). Use six-sided dice to determine the outcome of various rules. This will often require x+, where x is the lowest possible result, e.g. 3+ — a result of 3, 4, 5 or 6 fulfils this. Sometimes a range is required, e.g. 1-3. To roll a D3, roll one D6 and halve the result (rounding up). xD6 or xD3 means roll x dice and add the results together; D6+x or D3+x means roll that dice and add x. You can never re-roll a dice roll more than once, and cannot select the original result even if the new one is worse. If it's an attack or defence dice, re-roll before it's retained or discarded. If multiple players can re-roll dice at the same time (e.g. during a Fight action), they alternate either re-rolling a dice or passing until both pass in succession, starting with the player with initiative.
Distances. Various rules have a distance requirement in inches. When measuring to and from something, do so from the closest part of it — for an operative, from its base, ignoring its miniature. When measuring to and from an area of the killzone, measure the horizontal distance only. 'Within' a distance is fulfilled if any part is that distance or less; 'wholly within' is fulfilled if every part is that distance or less. An operative is always within and wholly within distance requirements of itself and a marker it's carrying, and operatives within a certain distance of an operative carrying a marker are also within the same distance of that marker.
Equipment. Equipment are additional rules you can select before the battle, as specified in your game sequence. Universal equipment can be selected for any kill team, whereas faction equipment is specific to one. Each player cannot select each equipment option more than once per game.
Intervening. Rules such as cover and obscured require you to determine if something is intervening, e.g. terrain — if it's between the operative and the intended target, it's intervening. When unclear, use targeting lines: the operative's player draws imaginary straight lines 1mm in diameter from any point of its base to every facing part of the intended target's base. Anything at least one of these lines crosses is intervening; anything all of these lines cross is wholly intervening. Targeting lines are normally drawn in a two-dimensional (top-down) manner, but should be drawn three-dimensionally if there's a height difference between the operatives (e.g. one is on Vantage terrain).
Keywords. Keywords are an identification method for certain rules, most commonly used with operatives (see Datacards) — some rules only affect operatives with the relevant keywords. Some rare rules also have keywords, e.g. SUPPORT or STRATEGIC GAMBIT — these mean nothing on their own, but other rules interact with them. Keywords are shown in KEYWORD BOLD font; those in orange with a skull symbol are faction keywords.
Killzone Floor. The killzone floor is the lowest level of the killzone (i.e. the game board). Anything that's on a marker that's on the killzone floor is also on the killzone floor.
Markers. Markers are placed in precise locations (a location in which they can be placed) and impact the game and operatives around them. They can be placed underneath operatives (temporarily remove operatives to do so), and operatives can be placed upon them. Objective markers are 40mm in diameter; all other markers are 20mm in diameter. Operatives contest markers within their control range. Friendly operatives control a marker if the total APL of those contesting it is greater than that of enemy operatives, but control cannot change during an action. While an operative is carrying a marker (see the Pick Up Marker action) it contests and controls that marker, and is the only operative that can.
Obscured. Obscured is determined from one operative to another, usually when one of them is shooting. An operative is obscured if there's intervening Heavy terrain — but it cannot be obscured by intervening Heavy terrain that's within 1" of either operative. When an operative is shooting an obscured target: the attacker must discard one success of their choice instead of retaining it; and all the attacker's critical successes are retained as normal successes and cannot be changed to critical successes (this takes precedence over all other rules).
Operatives. Operatives are the Citadel miniatures used in the game. Your operatives are friendly operatives; your opponent's are enemy operatives.
Orders. Engage: the operative can perform actions as normal and can counteract. Conceal: the operative cannot perform Shoot and Charge actions, and it cannot counteract, but it's not a valid target while in cover. Operatives are given a Conceal order when set up before the battle; you can change an operative's order whenever it's activated. Order tokens have two sides — the lighter side shows an operative is ready (it can be activated in the Firefight phase) and the darker side shows an operative is expended.
Ploys. Players can spend CP on ploys to gain rules bonuses at the opportune moment. Unless otherwise specified, all ploys cost 1CP. Every strategy ploy is a STRATEGIC GAMBIT (used in the Gambit step of the Strategy phase); some apply rules resolved 'immediately', otherwise they apply rules that last until the end of the turning point. Firefight ploys are used in the Firefight phase and apply rules as the ploy specifies. All players have access to the Command Re-roll firefight ploy and the ploys in their kill team's rules; other than Command Re-roll, each player cannot use each ploy more than once per turning point.
Command Re-roll — 1CP. Tactical Ploy. Use this firefight ploy after rolling your attack or defence dice. You can re-roll one of those dice.
Precedence. Some rare rules will conflict with each other, so it must be established which takes precedence. In order of priority, a rule takes precedence if: 1. it specifically says so; 2. the online designer's commentary says so; 3. it's not found in the core book (i.e. other rules take precedence over core book rules); 4. it says 'cannot'; 5. the active operative's controlling player decides; 6. the player with initiative decides.
Roll-off. If a rule requires a roll-off, both players roll one D6 and whoever has the highest wins the roll-off. If there's a tie, roll-off again.
Tokens. Tokens are used to help you keep track of rules effects. They are often placed next to the relevant operative, but can be moved to make space for other operatives and markers as necessary, and are removed when the tracked rules effect ends. Order tokens are the most common token, showing an operative's order and if it's ready or expended.
Valid Target. Some rules require you to select a valid target for an operative, most commonly when it's shooting. If the intended target has an Engage order, it's a valid target if it's visible to the active operative. If the intended target has a Conceal order, it's a valid target if it's visible to the active operative and not in cover.
Visible. For something to be visible, the operative must be able to see it. To check visibility, look from behind the operative and determine if you can draw an unobstructed straight line 1mm in diameter from its head to any part of what it's trying to see. Ignore operatives' bases when determining this. An operative is always visible to itself.
Weapon Rules
Weapon rules apply whenever a friendly operative uses a weapon that has them. Weapons gain no benefit from having the same weapon rule more than once, unless the weapon rule has an x, in which case select which x to use. If a weapon has multiple weapon rules that would take effect at the same time, you can choose the order they take effect.
- Accurate x. You can retain up to x attack dice as normal successes without rolling them. If a weapon has more than one instance of Accurate x, you can treat it as one instance of Accurate 2 instead.
- Balanced. You can re-roll one of your attack dice.
- Blast x. The target you select is the primary target. After shooting the primary target, shoot with this weapon against each secondary target in an order of your choice (roll each sequence separately). Secondary targets are other operatives visible to and within x of the primary target — they are all valid targets, regardless of a Conceal order. Secondary targets are in cover and obscured if the primary target was.
- Brutal. Your opponent can only block with critical successes.
- Ceaseless. You can re-roll any of your attack dice results of one result (e.g. results of 2).
- Devastating x. Each retained critical success immediately inflicts x damage on the operative this weapon is being used against. If the rule starts with a distance (e.g. 1" Devastating x), inflict x damage on that operative and each other operative visible to and within that distance of it. The success isn't discarded after doing so — it can still be resolved later in the sequence.
- Heavy. An operative cannot use this weapon in an activation or counteraction in which it moved, and it cannot move in an activation or counteraction in which it used this weapon. If the rule is Heavy (x only), where x is a move action, only that move is allowed, e.g. Heavy (Dash only). This weapon rule has no effect on preventing the Guard action.
- Hot. After an operative uses this weapon, roll one D6. If the result is less than the weapon's Hit stat, inflict damage on that operative equal to the result multiplied by two. If it's used multiple times in one action (e.g. Blast), still only roll one D6.
- Lethal x+. Your successes equal to or greater than x are critical successes, e.g. Lethal 5+.
- Limited x. After an operative uses this weapon a number of times in the battle equal to x, they no longer have it. If it's used multiple times in one action (e.g. Blast), treat this as one use.
- Piercing x. The defender collects x less defence dice, e.g. Piercing 1. If the rule is Piercing Crits x, this only comes into effect if you retain any critical successes.
- Punishing. If you retain any critical successes, you can retain one of your fails as a normal success instead of discarding it.
- Range x. Only operatives within x of the active operative can be valid targets, e.g. Range 9".
- Relentless. You can re-roll any of your attack dice.
Game Sequence
1. Set Up the Battle. Each player selects a kill team for the battle. Determine a mission pack and mission. Set up terrain features and ensure their types are specified. Roll-off — the winner decides who has initiative. Set up objective markers (all must be set up on the killzone floor). Each player selects a different drop zone, starting with the player with initiative.
2. Select Operatives. Each player secretly selects their operatives for the battle, adhering to the selection requirements in their kill team's rules, then reveals their selections simultaneously. Each player secretly selects up to four equipment options (each option cannot be selected more than once per player), then reveals their selections simultaneously. Each player gains 2CP.
3. Set Up Operatives. Each player alternates setting up an item of equipment that's set up before the battle (ladders, etc.), starting with the player with initiative — item by item, not option by option. Each player alternates setting up one third of their kill team (rounding up), starting with the player with initiative. When a player sets up an operative, it must be wholly within their drop zone and must be given a Conceal order.
4. Play the Battle. In the first turning point, the players roll-off and the winner decides who has initiative. If it's a tie, the player who didn't have initiative during set up decides (this takes precedence over roll-offs and ties).
5. End the Battle. The battle ends when the mission specifies. If one player has no operatives in the killzone but the battle hasn't ended, the other player(s) play out each remaining turning point until it does. The player with the most VP is the winner; if all players are tied, it's a draw.
Marker/Token Guide
Order tokens (Engage/Conceal, ready or expended side up) track each operative's order and activation status. An Injured token marks an operative below half starting wounds. A Guard token marks an operative that has performed the Guard action. APL +1/-1 tokens track temporary APL changes. Generic tokens track rules effects for which no specific token exists. Objective markers and an Initiative token are also used, alongside mission-, equipment- and kill-team-specific markers such as Ammo Pile, Comms Device, Mine, Smoke Grenade and Frag/Krak/Stun grenade tokens.
Killzones
Killzones provide an immersive experience and a tactically engaging battlefield for your operatives — simply use the game board and terrain features a killzone includes. Unless otherwise specified, a killzone game board is 30" x 22". A terrain feature is composed of different parts, each a type of terrain (one part can be more than one type); always view terrain features in parts, rather than as one large terrain feature where everything is the same.
Terrain and Movement
Operatives cannot move through terrain — they must move around, climb over or drop/jump off it.
Climbing. An operative must be within 1" horizontally and 3" vertically of terrain that's visible to them to climb it. Each climb is treated as a minimum of 2" vertically. Operatives must finish a move in a location they can be placed — they cannot finish midway through a climb, drop or jump; if this isn't possible, they cannot begin the move.
Dropping. Operatives drop down when they move off terrain or after they've jumped. Ignore 2" of vertical distance that they drop during each action — a vertical drop of 2" or less is ignored. If they drop multiple times during an action, only 2" total is ignored, not 2" from each drop.
Jumping. Operatives can jump from Vantage terrain higher than 2" from the killzone floor when they move off it. You can move them up to 4" horizontally from the edge when they jump, done like any other move except in one straight-line increment; the operative must then drop or climb from there. If there's a terrain part such as a rampart at the edge the operative would jump from, it must climb it first, then jump from the highest point it must climb over. When jumping to a terrain feature, you can ignore its height difference of 1" or less, including its rampart (if any).
Terrain Types
- Heavy. Larger terrain. It can obscure operatives.
- Light. Smaller terrain. It doesn't have any additional rules of its own, but other rules interact with it differently (e.g. Vantage terrain).
- Blocking. Usually the gaps between or underneath a terrain feature. Visibility cannot be drawn through such gaps, and for the purposes of cover and obscured, the gaps are intervening like the terrain around them.
- Vantage. The upper levels of the killzone — areas operatives can be placed upon above the game board (if terrain is not Vantage terrain, operatives can move over it but cannot finish a move or be set up on it). Vantage terrain is also Light terrain. Whenever an operative on Vantage terrain is shooting an operative with an Engage order, its ranged weapon has the Accurate 1 weapon rule if the target is at least 2" lower than it, or Accurate 2 if at least 4" lower. Whenever selecting a valid target for an operative on Vantage terrain, operatives at least 2" lower with a Conceal order cannot use Light terrain for cover (though this doesn't remove their cover save, and the defender can retain it as a critical success instead, or retain one additional cover save). For the purposes of obscured, ignore Heavy terrain connected to Vantage terrain that the active operative or the intended target is on. If an operative is obstructed from moving across Vantage terrain by enemy operatives or other terrain features, it can move around these obstructions (without dropping off) so long as part of its base is always on the Vantage terrain.
- Accessible. Operatives can move through Accessible terrain (this takes precedence over Bases and Terrain and Movement), but it counts as an additional 1" to do so. Only the centre of an operative's base needs to move through Accessible terrain.
- Insignificant. Usually very small terrain. For the purposes of climbing and dropping, ignore it — an operative can move over and across Insignificant terrain without going up and down.
- Exposed. Usually very small terrain, or terrain with large gaps that operatives shouldn't be able to take cover behind. For the purposes of cover and obscured, it's never intervening.
- Ceiling. Operatives with a round base of 50mm or less, or an oval base of 60x35mm, can move underneath Ceiling terrain regardless of the operative's height (this takes precedence over Terrain and Movement). The operative must still finish the action in a location it can be placed.
Killzone: Volkus
Killzone: Volkus, the killzone included in Kill Team: Hivestorm, has 2x strongholds, 2x large ruins, 2x small ruins, 2x heavy rubble and 3x light rubble.
Stronghold. The upper level(s) of a stronghold terrain feature is Ceiling and Vantage terrain. The door is Accessible and Heavy terrain. The fire steps are Vantage, Insignificant and Exposed terrain. The broken vent is Blocking terrain. The three barrel containers on one Stronghold are Blocking and Heavy terrain. The small broken ramparts on the edge of that Stronghold's Vantage terrain are Insignificant and Exposed terrain. The gap on the lower Vantage terrain of the other Stronghold is Accessible terrain. No more than one friendly operative can be on the highest upper level of that Stronghold at once, and that operative must be placed to one side of that level, not the middle (so an enemy operative cannot be prevented from moving onto or being set up on the other side); if an operative's base is too big to be placed there, move or set it up as far as possible, then treat it as being to one side, holding it as far on that level as possible when it matters for other rules (control range, visibility, distance, etc.) — this takes precedence over the rules for bases and being in a location it can be placed. All other parts of a stronghold are Heavy terrain. For the purposes of control range, ignore the door and parts of this terrain feature less than 2" high when determining visibility.
Large Ruin. The upper level is Ceiling and Vantage terrain (for the purposes of intervening and targeting lines, treat this level as the same height as the first upper level of a stronghold). The upper rampart is Light terrain. The door is Accessible and Heavy terrain (for control range, ignore the door when determining visibility). The door's viewpoint is Blocking terrain. Unbroken windows are Barred and Heavy terrain — Barred terrain: visibility cannot be drawn through this terrain unless the operative or what they're trying to see is horizontally within 1" of it. All other parts are Heavy terrain.
Small Ruin. This is Heavy terrain.
Heavy Rubble. This is Heavy terrain.
Light Rubble. This is Light terrain.
Universal Equipment
The following equipment options are available to all kill teams, alongside their faction equipment. You cannot select each option more than once per battle.
1x Ammo Cache. Before the battle, you can set up one of your Ammo Cache markers wholly within your territory. Friendly operatives can perform the following mission action:
- Ammo Resupply — 0AP. One of your Ammo Cache markers the active operative controls is used during this turning point. Until the start of the next turning point, whenever this operative is shooting with a weapon from its datacard, you can re-roll one of your attack dice. An operative cannot perform this action while within control range of an enemy operative, if that marker isn't yours, or if that marker has been used this turning point.
1x Razor Wire. Razor wire is Exposed and Obstructing terrain. Before the battle, you can set it up wholly within your territory, on the killzone floor and more than 2" from other equipment terrain features, access points and Accessible terrain. Obstructing: whenever an operative would cross over this terrain feature within 1" of it, treat the distance as an additional 1".
1x Comms Device. Before the battle, you can set up one of your Comms Device markers wholly within your territory. While a friendly operative controls this marker, add 3" to the distance requirements of its SUPPORT rules that refer to friendly operatives (e.g. 'select one friendly operative within 6"' would be 9" instead). You cannot benefit from your opponent's Comms Device markers.
1x Mines. Before the battle, you can set up one of your Mines markers wholly within your territory and more than 2" from other markers, access points and Accessible terrain. The first time that marker is within an operative's control range, remove that marker and inflict D3+3 damage on that operative.
2x Light Barricades. Light barricades are Light terrain, except the feet, which are Insignificant and Exposed. Before the battle, you can set up any of them wholly within your territory, on the killzone floor and more than 2" from other equipment terrain features, access points and Accessible terrain.
1x Heavy Barricade. A heavy barricade is Heavy terrain. Before the battle, you can set it up wholly within 4" of your drop zone, on the killzone floor and more than 2" from other equipment terrain features, access points and Accessible terrain.
2x Ladders. Ladders are Insignificant and Exposed terrain. Before the battle, you can set up any of them wholly within your territory, upright against terrain that's at least 2" tall, more than 2" from other equipment terrain features, and more than 1" from doors and access points. Once per action, whenever an operative is climbing the terrain feature a ladder is placed against, treat the vertical distance as 1" if the ladder is within that operative's control range during that entire climb.
1x Portable Barricade. A portable barricade is Light, Protective and Portable terrain, except the feet which are Insignificant and Exposed. Before the battle, you can set it up wholly within your territory, on the killzone floor and more than 2" from other equipment terrain features, access points and Accessible terrain. Protective: while an operative is in cover from this terrain feature, improve its Save stat by 1 (to a maximum of 2+). Portable: this terrain feature only provides cover while an operative is connected to it and if the shield is intervening (ignore its feet). Operatives connected to the inside of it can perform the following unique action:
- Move With Barricade — 1AP. The same as the Reposition action, except the active operative can move no more than its Move stat minus 2" and cannot climb, drop, jump or use any kill team's rules that remove and set it back up again. Before this operative moves, remove the portable barricade it's connected to; after it moves, set up the portable barricade so it's connected again, but it cannot be set up within 2" of other equipment terrain features, access points or Accessible terrain (if this is not possible, the portable barricade is not set up again). This action is treated as a Reposition action; an operative cannot perform it while within control range of an enemy operative, or during the same activation in which it performed the Fall Back or Charge action.
Utility Grenades. When you select this equipment, select two utility grenades (2 smoke, 2 stun, or 1 smoke and 1 stun). Each selection is a unique action your operatives can perform, but your kill team can only perform that action a total number of times during the battle equal to your selection.
- Smoke Grenade — 1AP. Place one of your Smoke Grenade markers within 6" of this operative; it must be visible to this operative, or on Vantage terrain of a terrain feature that's visible to this operative. The marker creates an area of smoke 1" horizontally and unlimited height vertically from (but not below) it. While an operative is wholly within an area of smoke, it's obscured to operatives more than 2" from it, and vice versa. Whenever an operative is shooting an enemy operative wholly within an area of smoke, weapons with the Piercing 2 or Piercing Crits 2 weapon rule have the Piercing 1 or Piercing Crits 1 weapon rule instead, unless they're within 2" of each other. In the Ready step of the next Strategy phase, roll one D3; remove that Smoke Grenade marker after a number of activations equal to that D3 have been completed or at the end of the turning point (whichever comes first). An operative cannot perform this action while within control range of an enemy operative, or if you have reached the total number of times your kill team can perform it.
- Stun Grenade — 1AP. Select one enemy operative visible to and within 6" of this operative. That operative and each other operative within 1" of it takes a stun test: roll one D6, on a 3+ subtract 1 from its APL stat until the end of its next activation. An operative cannot perform this action while within control range of an enemy operative, or if you have reached the total number of times your kill team can perform it.
Explosive Grenades. When you select this equipment, select two explosive grenades (2 frag, 2 krak, or 1 frag and 1 krak). Each selection is a ranged weapon your operatives can use, but your kill team can only use that weapon a total number of times during the battle equal to your selection.
| Name | Atk | Hit | Dmg | Weapon Rules |
|---|---|---|---|---|
| Frag grenade | 4 | 4+ | 2/4 | Range 6", Blast 2", Saturate |
| Krak grenade | 4 | 4+ | 4/5 | Range 6", Piercing 1, Saturate |
Breaching Charge. Once per battle, when a friendly operative performs the Breach action, you can use this rule. If you do, that operative can perform that action for 1 less AP (to a minimum of 1AP) as though it had the word 'breach marker' on its datacard.
Mission Pack: The Great Gun Fires
Volkus' capital hive city, Hive Fissilicus, is dominated by the Massif Ballistus, known also as the Great Gun. This colossal ordnance rises from the city's heart, a mechanical behemoth from Humanity's distant past. Whenever it is fired, the fumes and recoil released lay waste to those areas beneath its atmosphere-scraping barrels.
This mission is designed to be played using the game sequence and the Transmission crit op from the Kill Team Core Book. In this mission, your kill teams must extract crucial intelligence scattered during a previous battle, but the irreversible hymnals of firing have already begun to echo throughout the city. Your kill teams must seize their objectives and exfiltrate before the gun's destructive recoil reduces your area of operations to a wasteland of corpse-strewn rubble.
Mission Rules
Facing the Firing. In the Set Up the Battle step, randomly determine one neutral killzone edge to also be the Massif Ballistus killzone edge.
The Great Gun. A different mission rule is applied during each turning point:
- Turning Point 1 — Hymnals of Firing. The operation of the Great Gun is laced in mysticism and ritual. These arts are maintained through each holy Day of Firing. When such a day dawns, the populace of Volkus are led in song by the priesthood of the Adeptus Ministorum, the voices of billions heralding the impending firing of the Great Gun. The shrines of the Massif Ballistus echo with chanting and prayers that build to a fever pitch as the firing approaches. In these last moments, operatives rush to complete their mission with heightened urgency and motivation. Add 1" to the Move stat of operatives until the end of the turning point. Add 3" to the distance requirements of SUPPORT rules until the end of the turning point (e.g. 'select one friendly operative within 6"' would be 9" instead). This is not cumulative with the Comms Device universal equipment.
- Turning Point 2 — Calm Before. The chanting halts and prayers fall silent. The eyes of the faithful turn upwards to the sky-scraping barrel in awestruck anticipation… No additional rules.
- Turning Point 3 — Devastating Report. As the Great Gun's twin barrels erupt, a storm of searing gases are unleashed upon the city below. Ash and fire explode across the battlefield, searing exposed flesh and stunning everyone in the vicinity. In the Ready step of the Strategy phase, inflict D3+1 damage on each operative that doesn't have intervening Heavy terrain within its control range between it and the Massif Ballistus killzone edge (roll separately for each). Then, each operative that doesn't have intervening Light or Heavy terrain within its control range between it and the Massif Ballistus killzone edge gains one Shockwave token. Friendly operatives with a Shockwave token cannot be activated or perform actions until each friendly operative without a Shockwave token is expended. Whenever an operative with a Shockwave token is expended, remove that token.
- Turning Point 4 — Aftershock. The ground shakes violently beneath the operatives' feet as the Great Gun's subterranean mechanisms absorb the terrifying recoil of the Massif Ballistus. Even the most agile of warriors are driven to the soil by the force of these quakes. Subtract 2" from the Move stat of operatives. Whenever an operative performs the Dash action, roll one D6: on a 1, they stumble and can only move up to 1" during that action. The battle ends after four turning points have been completed.
Mission Action
- Initiate Transmission — 1AP. One objective marker the active operative controls is transmitting until the start of the next turning point. An operative cannot perform this action during the first turning point, or while within control range of an enemy operative.
Victory Points
At the end of each turning point after the first: if friendly operatives control any transmitting objective markers, you score 1VP; if friendly operatives control more transmitting objective markers than enemy operatives do, you score 1VP.