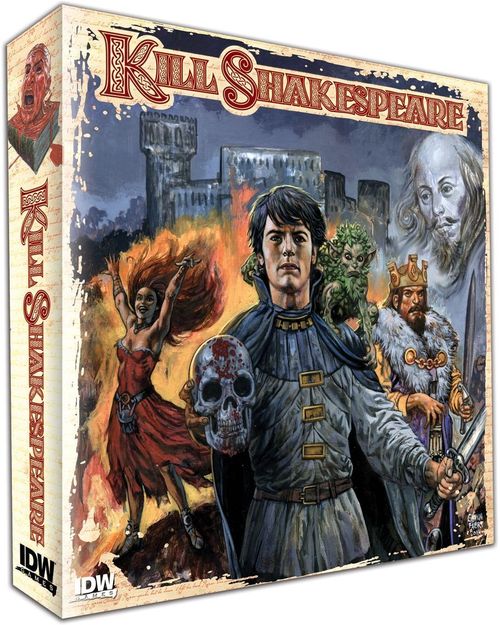
Kill Shakespeare
Kill Shakespeare Rulebook
Table of Contents
Table of Contents
Components
- Game Board (1)
- Rule Book (1)
- Score Tracker (1)
- Character Sheets (5)
- Influence Tokens, 5 colors (170)
- Bid Tokens, 4 colors (40)
- Juliet Token (1)
- Wheel of Fate (1)
- Quill Token (1)
- Battle Tokens (30)
- 8-Sided Dice (8)
- Area Tokens (8)
- Lowered Defense Tokens (20)
- Dice (2)
- King Richard Meeple (1)
- Player Meeples (4)
- Lady Macbeth Meeple (1)
- Action Deck (45)
- Troop Deck (60)
- Reward Deck (24)
- Information Deck (45)
- Event Cards A (12)
- Event Cards B (12)
- Easy Quest Deck (20)
- Hard Quest Deck (30)
Game Overview
Kill Shakespeare is a semi-cooperative area control board game. Players must work together to prevent Richard III and Lady Macbeth from taking over the realm and finding and killing the elusive bard, William Shakespeare. Each round players will decide whether to pay to cancel the threats and magic of Richard III and Lady Macbeth or to save their resources to bid on items that will help them complete various Quests. Players will swiftly navigate around the land working to liberate the realm of Illyria, battling Richard III's troops and claiming his strongholds as their own. While the players can lose as a party, only one can be crowned the ultimate winner.
Object of the Game
Prevent Richard III from finding Shakespeare and keep the land from losing all hope. Over the course of six rounds players must keep Richard III from reaching the end of the Search For Shakespeare track, and keep the hopes of rebellion alive in at least four of the eight Areas on the board. If they can do that, the rebellion succeeds and from their ranks, a Champion will emerge!
Game Setup
- Place the game board and the Score Tracker within view and reach of all players.
- Each player chooses a character and takes their Character card.
- Each player chooses a color and takes the Bid tokens, pawn and Influence markers of that color.
- If a player selects Juliet, that player exchanges one of the value 3 Bid tokens with the +2 Bid token.
- Each player sets up their Character card and personal area as follows:
- Use the side that corresponds to the number of players playing (2 players or 3+ players).
- Place one Influence marker on the neutral space of the Energy track, which is represented by the wine glass with a star in it.
- Place one Influence marker in each of the two available Influence marker spaces at the top of the card.
- Place all remaining Influence markers beside the Character card, creating a 'reserve'.
- Place all Bid tokens aside. Bid token quantity and value are hidden from other players during the Event and Bidding Phases.
- Each player places one Influence marker on the 5 space of the Score Tracker.
- Randomly determine player turn order. Each player stacks 2, 3, or 4 of their Influence markers if there are 4, 3, or 2 players (respectively) on the appropriate spot on the Turn Order track. The stack tracks turn order; each Influence marker will be used to track players' actions during the Action Phase.
- In turn order, each player allows fate to decide where his or her pawn starts on the map. Each player rolls one six-sided die and places their pawn in the Area that corresponds to the die result (1 - Isle of Prospero, 2 - Messaline, 3 - Delphos, 4 - Cawdor, 5 - Maentua, 6 - Bohemia). Only one pawn is allowed in each Area at the beginning of the game; if an Area is already occupied, re-roll. Players' pawns may not start in Avon or in The Forest of Arden.
- Turn the Wheel of Fate so that the arrow of the starting player's color points to the single Troop symbol.
Round Sequence
Kill Shakespeare is played over six rounds (or possibly less if the prodigal rebellion is crushed and defeated by King Richard III and Lady Macbeth first). Each round consists of four or five phases, depending on if it is a scoring round or not, which are played in turn order.
- Prep Phase
- Event Phase
- Bidding Phase
- Action Phase
- Scoring Phase (Round 3 and 6 only)
Phase 1: Prep (skipped for the first round)
a) Advance the Round marker to the current round.
b) Rotate the Wheel of Fate clockwise one space.
c) Resolve Area tokens.
- Player (if any) with the '+1 Energy' Area token receives one free Energy upgrade.
- Player (if any) with the 'Action Card' Area token draws one Action card from the Action card deck.
- Player (if any) with the 'Troop card' Area token receives one Troop card of value 1 from the appropriate Reward card deck.
- Player (if any) with the 'Stolen Letter' or 'City Plan card' Area token may choose to take 1 of these cards from the corresponding Reward card deck.
d) In turn order, players may exchange three black Influence markers, if they have them, and draw three Battle tokens. One Battle token is kept, the other two are returned without revealing their values. The Battle token guidelines are as follows:
- Players may make multiple exchanges, if they desire and are able to, on their turn. Each exchange is performed and resolved individually.
- Battle tokens are stored facedown on each player's Character card; their values are kept hidden (except during the Scoring Phase) but can be referenced by the owning player at any time.
- Each Character has an associated Battle token limit, which is indicated on their Character card. If a player is at this limit they may still perform the exchange. To respect their Character's Battle token limit, a player must either swap the newly acquired Battle token with one of their existing ones or choose to discard all of the newly drawn tokens.
- If one or more Battle tokens drawn have a Quill symbol, King Richard III advances one space on the Search For Shakespeare track for each Quill revealed. The Quill Battle tokens are removed from the game. The player still chooses one reward from any remaining Battle tokens that they have drawn.
e) Each player retrieves all of his or her Bid tokens from the game board and their Character card.
f) Reduce the Hope by one (by adjusting the eight-sided die) in all Areas that are not liberated. An Area is not liberated if there is a King Richard III Influence marker adjacent to the Area's Stronghold symbol. If the Area is liberated, do not adjust the die; its Hope remains constant.
- If, at any point in the game, an Area's Hope is reduced to 0 the Area's Hope die is removed and King Richard III advances one space on the Search For Shakespeare track. If Avon's Hope becomes 0, King Richard III advances two spaces.
- An Area's Hope may not be less than 0.
g) If necessary, each player refills one or both of the Influence marker spaces on their Character card from their reserve.
h) Each player takes the Influence markers set beside the Turn Order track during the previous Action Phase and restacks them on their appropriate Turn Order spot.
i) Refill the Troop and Information card tracks as described in step 17 of the Setup (but do not reshuffle each deck!).
j) Restock the Quests:
- If necessary, discard any Quests remaining on any of the two red spaces on the Quest track. Advance King Richard III one space on the Search For Shakespeare track for every Quest card removed this way.
- Preserving their order, slide any remaining Quest cards to the right, filling the two red Quest track spaces first. If players have completed enough Quests to not fill one of the two red Quest track spaces, it remains empty for the remainder of this round.
- Fill any remaining empty spaces on the Quest track with new Quest cards. If either of the two red spaces are empty, leave them empty. Refer to the Round tracker to determine how many Easy and Hard Quests to add each Round. Players only draw and place as many Quests as there are available spaces to put them on the Quest track (maximum 5).
Always place Quest cards from right-to-left. Easy Quests are placed first, followed by any Hard Quests. If the Easy Quest deck is exhausted, players may only take cards from the Hard Quest deck.
Note: If a new Quest card requires the active player, indicated by the player icon with a '1' in it, to be in an Area with a destroyed Stronghold, it is discarded and a new Quest card is drawn. Repeat as many times as necessary.
Phase 2: Event
a) The starting player takes the top Event card from the deck, reads it aloud, and places it faceup next to the Event deck.
b) Movement Orders: The starting player moves King Richard III's and/or Lady Macbeth's pawns individually and in order. Their pawns are moved to the Area indicated on the Event card and resolved as follows:
- King Richard III: Place one black Influence marker from the reserve in the Area he moves to. Reduce the Area's Hope by one, even if the Area is liberated. If Hamlet is in this Area, he must flee to an adjacent Area and pay the Energy cost. If he is exhausted and is unable to pay the Energy, he loses one Victory Point. Hamlet may also use his positive special ability at this time.
- Lady Macbeth, when moving to an Area with player Influence: If there is one or more player Influence markers in her destination Area, one of the players who has Influence in the Area rolls one six-sided die. On a roll of 1-4, the player in that position on the Turn Order track loses one Influence marker from the Area (if possible). On a roll of 5, all players with Influence in the Area lose one Influence marker from that Area; on a roll of 6 nothing occurs. If no Influence is lost by the rebellion, an Iago card is placed faceup on the Iago card stack (next to the revealed Event card). If Othello is targeted by the die result and he only has his pawn in the Area, nothing happens to him.
- OR:
- Lady Macbeth, when moving to an Area without player Influence: If her destination Area does not contain any player Influence markers, place a black Influence marker from the reserve in the Area. The Area's Hope remains unchanged.
- Although players cannot control King Richard III's and/or Lady Macbeth's movements, they may play certain Action cards to cancel their movement's effect.
- If as a result of the Movement order, King Richard III or Lady Macbeth's pawn remains in the same Area, their effects are still applied.
c) Event Cancellation Bid: After completing Richard III and Lady Macbeth's movement, players may now attempt to cancel the Event card's effect. The price to cancel an Event is marked at the bottom of the card (2 players / 3 players / 4 players). Every Iago card faceup on the Iago track adds an additional cost of 4, 6, or 8 Bid points depending on the number of players. Players are free to discuss, debate, and plan together, but are not obliged to be honest and follow through.
Players secretly place their bids, using any number of Bid tokens, in a closed fist and simultaneously reveal their bid point value when all players are ready.
- If the sum of all the bid point values is equal to or greater than the cost to cancel the Event, the Event and all of its effects are cancelled. The player who contributed the highest bid point value receives two Victory Points. If there is a tie both players receive two Victory Points, unless one of the players is Falstaff, who wins the draw.
- If the sum of all the bid point values is less than the cost to cancel the Event, the Event and all of its effects occur. The player who contributed the highest bid point value receives one Victory Point. If there is a draw both players receive one Victory Point, unless one of the players is Falstaff, who wins the draw.
- If the players fail to cancel an Event, all faceup Iago cards on the Iago card stack are removed; his treachery has succeeded!
Juliet's +2 token and the +1 Area token may be used after the bids are revealed.
If there is a Quill on the Event card, King Richard III will advance one space on the Search For Shakespeare track. The players may avoid this if they collectively pay an additional 6, 9, or 12 (for a 2, 3, or 4-player game) bid points during the Event Cancellation Bid. King Richard III's advance can only be stopped in addition to cancelling the Event.
Used Bid tokens are placed aside and are not available again until the Prep Phase of the next round.
Event Phase Example: The Event card THE BETTER PART OF VALOUR is drawn in a 4-player game. The cost to cancel the Event is 21 bid points. Unfortunately, there are also two faceup Iago cards in play. To cancel the Event players must pay (2 x 8 = ) 16 bid points in addition to the cost indicated on the Event card; 21 + 16 = 37 bid points. Additionally, the Quill on the Event card may be cancelled to prevent King Richard III from advancing one space on the Search For Shakespeare track. This costs the players an extra 12 bid points above the cost to cancel the Event; 37 + 12 = 49 total bid points are required to cancel the Event and the Quill. It is possible that the players may pay enough to cancel the Event but not the Quill.
d) The starting player rolls both six-sided dice and places them on the compass symbol on the map. The dice are resolved as follows:
- 2-9: No immediate action required. This is resolved during the competitive bids in the Bidding Phase.
- 10: Immediately add one black Influence marker to Lady Macbeth's current Area.
- 11: Immediately add one black Influence marker to King Richard III's current Area.
- 12: Advance King Richard III one space on the Search For Shakespeare track.
e) Wheel of Fate: The Wheel of Fate is controlled by the last player in Turn Order. This player may pay three bid points to rotate the Wheel of Fate clockwise one space; they may do this as often as desired so long as they can pay the extra cost for each additional space rotated. Conversely, the last player may play one Jester card to rotate the Wheel of Fate counter-clockwise one space; this can only be done once per round. Once all Wheel of Fate adjustments are made, all players receive the item corresponding to their positions on the Wheel of Fate.
Phase 3: Bidding
a) Planning: Using some of their remaining Bid tokens as currency, players may freely discuss and plan how to allocate Bid tokens to their Energy and Time tracks on their Character card. Any number of Bid tokens may be allocated to either of the two tracks. Turn order is not relevant for planning.
- Energy track: The cost, in bid points, to increase one Energy level is listed at the bottom of each Energy level. Energy levels cannot be increased beyond the limits of the Energy track, nor can an Energy level be skipped. Players may increase their Energy levels as often as they are willing and able to pay. Used Bid tokens are placed aside and are not available again until the Prep Phase of the next round. Players require Energy to move their pawns from Area to Area and to complete various Quests.
- Jester cards, various Action cards, and the 'Cheap Energy' Area token may prove valuable during planning.
- Time track: Each player may place as many Bid tokens as necessary with their bid point values faceup on their Time track. This represents 'Time', which is necessary to complete various Quests in the Action Phase. In the event players overpay the cost, change is not provided.
b) Competitive Bids: Players competitively bid on Turn Order, Prophecy cards, and Troop cards using the last of their Bid tokens as currency. A maximum of two Bid tokens may be used to bid on each item; players may also choose not to bid on any item. Bids on all three items are made before they are all simultaneously revealed.
- Turn Order: In order from highest to lowest bid, each player chooses a position on the Turn Order track.
- Information Cards: In order from highest to lowest bid, each player selects one card from the Information card track. If playing with 2 players, see the Special Rules section.
- Troop Cards: In order from highest to lowest bid, each player selects one card from the Troop card track. If playing with 2 players, see the Special Rules section.
- If a player "wins" an Iago card, it is placed faceup on the Iago card stack. The player loses 1 Victory Point (or 2 if the player is Othello).
- If a player did not place a bid (either by force or by choice) or bid a total bid point value of '0' on the Information or Troop cards, they do not 'win' a card; the card is unclaimed. Unclaimed Iago cards are placed faceup on the Iago card stack next to the Event deck; all other unclaimed cards are discarded.
- If, at any point in the game, a fourth Iago card is placed faceup on the Iago card track King Richard III advances one space on the Search For Shakespeare track. The fourth Iago card is discarded but the previous three Iago cards remain in place; they are not discarded.
Phase 4: Action
If a 2-9 was rolled in step 'd' of the Event Phase, a player may be awarded with an Action card if they make one competitive bid of exactly the same value as the dice result. This is only awarded once per player per round.
The 'Spy' card and the appropriate Action card may be used to look at all of the face-down cards in one, or all, of the card tracks.
Each player places bids on the three tracks as follows.
- Turn Order: Each player (in turn order) places zero, one or two Bid tokens next to the Turn Order track. The first Bid token is played faceup. The second Bid token (if used) is placed facedown as a closed bid.
- Information Cards: Each player (in player order) places zero, one or two Bid tokens next to the Information card track. The first Bid token is played faceup. The second Bid token (if used) is placed facedown as a closed bid.
- Troop Cards: Each player (in player order) places zero, one or two Bid tokens next to the Troop card track. The first Bid token is played faceup. The second Bid token (if used) is placed facedown as a closed bid.
If a player has the 'blind bid' Area token, their first Bid token for all categories can also be placed facedown.
c) Resolve Bids
Simultaneously flip over and reveal all facedown Information and Troop cards along with any facedown Bid tokens used for the Turn Order, Information Card, and Troop Card bids. Juliet's +2 token and the +1 Area token may be used after all bids are revealed. If necessary, these tokens are resolved in turn order. Each of the three bid items is resolved in the same order they were bid on. Falstaff wins any draw, otherwise draws are broken in turn order (which may change when the bids are resolved!)
- Turn Order: In order from highest to lowest bid, each player chooses a position on the Turn Order track.
- Information Cards: In order from highest to lowest bid, each player selects one card from the Information card track. If playing with 2 players, see the Special Rules section.
- Troop Cards: In order from highest to lowest bid, each player selects one card from the Troop card track. If playing with 2 players, see the Special Rules section.
Actions
In turn order, each player must take one of the four possible Actions. After their turn is complete the active player removes one Influence marker from their pile on the Turn Order track and sets it adjacent to their stack, so Turn Order may still be identified after all turns are complete. Once all Influence tokens are removed, the Action Phase is complete. In a 2, 3, or 4-player game each player has 4, 3, or 2 Actions (respectively) available to them each round.
Possible Actions:
a) Complete a Face-up Quest (from the Quest track)
- Input Requirements: The active player must have their pawn in the first Area ('1') and satisfy all additional input requirements on the Quest card. Inputs that are greyed out are discarded; inputs in color are not discarded and are kept by the active player. Quests may be completed in any order.
- 2-player Quests: Some Quests require two players to complete. The active player must meet all the input requirements listed on the Quest card (as above). The second, or non-active, player is only required to have their pawn in the second Area (indicated on the Quest card with a '2'). The active player may ask a non-active player to move their pawn to the second Area if there are no player pawns already there (see 'Movement' below). A non-active player may not leave an Area, nor decline to help the active player if they are already in the required Area to complete a 2-player Quest. If there are two or more non-active player pawns in the required Area, the active player may choose who will help.
- Rewards: The active player takes and keeps the Quest card and receives all of the rewards listed on the bottom. For 2-player Quests the second, non-active, player is always awarded with two Victory Points and an Action card for their assistance.
b) Move Influence Markers
The active player may move up to two of their Influence markers on the map to an adjacent Area; the markers' starting Areas and destination Areas need not be the same.
c) Place Influence Marker
The active player may take one of the two available Influence markers on their Character card (from step 'g' of the Prep Phase) and place it in the same Area as their pawn. The Influence token does not come from the player's reserve.
d) Take No Action
The active player may gain two Energy in lieu of taking an Action.
Extra Action: If any player(s) possess a card or token granting an extra Action, these actions are granted at the end of the Action Phase. Any extra Actions taken are resolved in turn order and players may only take one extra Action per round, regardless of how many cards or abilities they possess.
In addition to taking one Action on their turn, the active player may also do the following as often as they like (provided they have the means to do so):
- Trade (or donate): Any cards with other players. All trades/donations must include the active player and need not be considered 'fair'. Only cards can be traded.
- Movement: It costs 1 Energy for a player to move their pawn from one Area to an adjacent Area. A non-active player may move their pawn, but is not obligated to, only if the active player asks them to do so to help complete a 2-player Quest. The non-active player must still pay the Energy cost.
- Hamlet receives one free movement to any Area every round.
- 'Extra Action' Card: The active player may exchange any three cards for one 'Extra Action' card. The player may do this as often as desired, but may only take one 'Extra Action' per Action Phase (as described above).
Battle King Richard III: Liberate an Area: A battle is immediately triggered in an Area when the players' Influence markers outnumber King Richard III's Influence markers. All players with Influence in the Area must participate in the battle. The battle is resolved as follows:
- In reverse turn order, each player with Influence in the Area removes one of their Influence markers and one of King Richard III's Influence markers. This is repeated until all of King Richard III's Influence markers are removed from the Area. Players return their Influence marker(s) to their supply; King Richard III's Influence marker is kept and may be used to exchange for Battle tokens (in the Prep Phase and at the game's end).
- Othello's pawn counts as one Influence for triggering a battle. During battle resolution his pawn is not removed and stays in the Area. He does not receive a King Richard III Influence marker for his pawn. His pawn will always be the last man standing after battle.
- The Area is liberated! Remove King Richard III's black Influence marker adjacent to the Area's Stronghold symbol to indicate that the rebellion may now attempt to siege and destroy the Area's Stronghold.
- At the end of a battle, one player's Influence token will be left in the Area. This player is awarded the Area token and places it on the corresponding Area space on their Character card. The Area tokens are further described on the Decoding the Icons page at the back of the rulebook.
Warning! If at any point King Richard III regains Influence superiority in a previously liberated Area, the Area token is removed from the owning player's Character card and from the game.
Siege and Destroy a Stronghold: An Area's Stronghold may only be destroyed after the Area itself is liberated. An Area's Stronghold is immediately destroyed when there are more player Influence markers in the Area than the Stronghold's Defense rating, which is indicated next to the Stronghold's symbol on the game board (Prospero-3, Messaline-4, Delphos-4, Cawdor-5, Maentua-5, Bohemia-5, Arden-6, Avon-6).
Destroying a Stronghold is resolved as follows:
- The player with the most Influence in the Stronghold's Area takes an Influence marker from their reserve and places it next to the Stronghold's symbol (where King Richard III's Influence marker started the game); this player is now the Area Leader. Ties are settled in player order. Falstaff wins any tie he is involved in.
- All players that helped destroy a Stronghold, by having one or more Influence markers in the Area, are awarded Victory Points. Each participating player receives a number of Victory Points equal to the Area's remaining Hope divided by the number of players involved in destroying the Stronghold. Any remainders are rounded down and are additionally awarded to the Area Leader.
- If the Stronghold in The Forest of Arden is destroyed, Lady Macbeth's pawn is removed from the game; ignore all future movement orders for her during the Event phase.
Example of Victory Point Reward: Juliet, Hamlet and Falstaff conquer Avon, which currently has 4 Hope; Juliet gets two points because she has the most Influence in the Area; Hamlet and Falstaff get one point each.
If more players help destroy a Stronghold than there is Hope in the Area, then the Area Leader receives all of the Victory Points.
Rebuild a Stronghold: If at the end of the Action Phase an Area with a destroyed Stronghold has more King Richard III Influence markers than the sum of the players' Influence markers in that Area, the Stronghold is rebuilt by King Richard III. The Area is forever lost to the rebellion and its Hope is immediately reduced to zero. King Richard III advances one space (two spaces if the Area is Avon) on the Search For Shakespeare track. Remove the Area's Hope die from the game and exchange the Area Leader's Influence marker adjacent to the Stronghold symbol for one of King Richard III's. The Area Leader loses two Victory Points, and the Area token is removed from their Character card.
Phase 5: Scoring (only in Rounds 3 and 6)
- Round 3 only: If King Richard III has more Influence markers than the players in at least five Areas, he advances one space on the Search For Shakespeare track.
- Round 6 only: In turn order, players may exchange King Richard III Influence markers for Battle tokens. Players follow the same procedure and guidelines as described in Part 'd' of the Prep Phase with one exception: each player may only make one exchange.
Scoring Categories: Relative Rank
The Victory Points awarded in three of the Scoring Categories are dependent on a player's rank, or how they did relative to each other. The awarded Victory Points depend on the number of players in the game:
- 2 players: The first player receives 2 Victory Points.
- 3 players: The first and second players receive 3 and 1 Victory Points (respectively).
- 4 players: The first, second, and third players receive 3, 2, and 1 Victory Points (respectively).
In the event of a tie for any rank, all tied players receive the full Victory Point amount for that rank. To determine if additional Victory Points will be awarded to players that finished below the tied rank of a particular Scoring Category, individually count all the players that have already been awarded Victory Points; if there is still a position available to be scored, it is. Reminder: Falstaff wins all ties.
The Relative Scoring Categories are the following:
- Most Influence markers on the map.
- Most Areas as 'Leader'. A player must be an 'Area Leader' in at least one Area to score Victory Points. (Recall that an 'Area Leader' is determined when its Stronghold is destroyed).
- Most Quests completed. A player must have completed at least one Quest to earn any Victory Points. The Quest's difficulty level is not important.
Scoring Categories: Individual Performance
The remainder of the Scoring Categories are based on individual performance and are as follows:
- Each player earns Victory Points for Iago cards in their possession. An Iago card can be earned by exchanging the Jester card for it or by accomplishing certain Quests. In either instance, the player takes a faceup Iago card from the Iago card track (if available). 1, 2, or 3+ Iago cards award 0, 1, or 3 Victory Points to the possessing player. Iago cards are not discarded after they score (Round 3); players keep them for future scoring or trading opportunities.
- Each player reveals and scores the total value of their Battle tokens. Battle tokens are not discarded after they score (Round 3); players keep them for future scoring (Round 6).
- Each player may discard any number of Jester cards for one Victory Point each.
- Each player earns one Victory Point for every Area that they 'Lead'. (Recall that an 'Area Leader' is determined when its Stronghold is destroyed).
- Round 6 only: The player who has completed the most Easy Quests and the player who has completed the most Hard Quests both earn one Victory Point. In the case of a tie, Falstaff wins. Otherwise all tied players receive one Victory Point.
- Round 6 only: Each player receives Victory Points for the total number of Areas where they have at least one Influence marker present. The awarded Victory Points are:
| Areas with Influence | Victory Points |
|---|---|
| 1-2 areas | 0 points |
| 3-4 areas | 1 point |
| 5 areas | 2 points |
| 6 areas | 3 points |
| 7-8 areas | 5 points |
Othello's pawn counts as one Influence marker on the map.
End Conditions
If at any point during the game one of the following conditions is met, the rebellion fails and the game ends in immediate defeat for all players:
- King Richard III finds and kills Shakespeare (by advancing to the final space on the Search For Shakespeare track). If this occurs, fate may reward the rebellion with a second chance. In reverse turn order the first player who has a Jester card must play it; King Richard III's Influence marker on the Search For Shakespeare track goes back one space. Shakespeare lives and the rebellion limps on!
- 4 Areas have zero Hope. The people's spirits are crushed for good and the rebellion ends in defeat for all players.
- If King Richard III has 13 or more total Influence markers on the map at the end of the 6th round. The rebellion was too slow, unorganized, and ultimately useless.
If the rebellion survives to the end of the game, a Hero will emerge from its ranks. The player with the most Victory Points is the Hero (and game winner). In the event of a tie involving Falstaff, he wins! If Falstaff is not involved in the tie, then the player currently in first position for turn order wins the tie.
Special Rules
- Players must keep all of their information public except for the value of any Battle token(s) they possess and the value and quantity of their Bid tokens; these may be kept hidden.
- An Area has no stacking limit and may contain any combination of players' Influence tokens.
- If, at any point in the game, a fourth Iago card is placed faceup on the Iago card track King Richard III advances one space on the Search For Shakespeare track. The fourth Iago card is discarded but the previous three Iago cards remain in place; they are not discarded. The faceup Iago cards may only be removed when an Event is not cancelled, when a player is awarded with one for completing a Quest, or when a player uses a Jester card to take one.
Jester Cards May Be Used in the Following Ways
- Event Phase: To turn the Wheel of Fate one step counter-clockwise (Event phase: step 'e').
- Action Phase: As a wild card to replace any Information (Stolen Letter or City Plan) or Troop (any value) cards required to complete a Quest.
- Anytime:
- To move King Richard III's Influence marker back one space on the Search For Shakespeare track.
- To take one faceup Iago card from the Iago card track. Players keep any Iago cards removed this way to score in the scoring rounds (Rounds 3 and 6).
- A player may increase their Character's Energy to their maximum level at no cost.
- Game End: Jester cards are worth one Victory Point each.
2-Player Game Setup Rules
- Setup: Use the 2-player side of the Character card. Put one non-playing, or neutral, pawn next to the game board.
- Bidding Phase: Four cards are placed in the Information and Troop card tracks (as done in a 4-player game). The winning bidder chooses one card first; then the second player chooses one card. The winning bidder then selects a second card followed by the losing bidder.
- Action Phase:
- All players have four Actions.
- If the second, non-active, player does not want to or cannot help with a Quest that requires two players, the active player may spend one Energy to place the neutral pawn in an Area of their choice in order to satisfy the Quest requirement. When the Quest is complete the neutral pawn is put back beside the game board.
Variant Game Play
The following are some suggestions to mix up the game play to either make it more challenging, less challenging, or simply different. Players are free to pick and choose any of the suggestions listed below in a particular category to tailor the Kill Shakespeare game experience for their own enjoyment. Players are also free to come up with their own variants; be inventive and enjoy!
Expert Game Play (Setup Changes)
- Place the Quill token further along on the Search For Shakespeare track.
- Add one extra black Influence marker to one or more Areas. Players may work up to and decide what is appropriate for their gaming preferences.
- Reduce the Hope of one or more Areas by one.
Novice Game Play (Setup Changes)
- Place the Quill token off the Search For Shakespeare track. Move it to the starting position, marked with a star, when King Richard III makes his first advance on the track.
- Each Area starts with four of King Richard III's black Influence markers; Avon and The Forest of Arden do not receive any additional markers.
- Increase the Hope of one or more Areas by one.
Other Game Play Variants
- The Quests of Kill Shakespeare are written as thematic sets. Players may be awarded two extra Victory Points for collecting all three parts of a specific Quest set.
- Play the game until players eradicate all of Richard III's black Influence markers from the board. The game ends as soon as the last black Influence marker is removed from the map.
The Cast
Hamlet: The son of the King of Denmark, Hamlet was banished from his home after trying to avenge the murder of his father. His ship was caught in a mighty tempest and when Hamlet awoke he found himself in Illyria. While many claim that he must be the Shadow King, Hamlet has little desire to be caught up in the politics of the land. Vengeance is all that matters.
Hamlet's charisma and eloquence allows him to charm the people of the land to aid him, giving him one free move a turn, but the fact that King Richard III is convinced Hamlet is the Shadow King means the Dane can never end a turn in the same region as Richard.
If Hamlet is proven to be the Shadow King he will kill Shakespeare and take the Quill in order to bring his father back from the dead and return home to Denmark to mete out bloody justice upon his father's killers.
Juliet: After a failed suicide attempt following the death of her lover Romeo, Juliet was spirited away from her home, never to return. Since then the young girl has rejected Cupid for the embrace of a cause, becoming the head of the Prodigal rebellion and leading the fight to save the oppressed. A dynamic speaker and resilient fighter, Juliet has won the loyalty of the people who see her as a natural new Queen, a potential role the humble Juliet is uncomfortable with.
Because of her keen strategic mind Juliet gets the last word amongst all players when she bids on resources, but the demands of leading the Prodigals means she has less time than any other characters.
If Juliet is the one to wear the Shadow Queen's mantle, she will save Shakespeare and ask him to use his power to return the land to its former glory.
Othello: After being deceived into killing his wife Desdemona by his former lieutenant Iago, Othello has rejected all rank and responsibility to become a sword-for-hire, hoping to fill the hole left in his soul. The soft-spoken Moor is still one of the greatest fighters in Illyria and is being paid, and paid well, to aid the Prodigal cause.
Because of his prowess with a blade Othello counts as an extra fighter in any encounter, but Othello's hatred of Iago means he can never earn points by playing an Iago card and Iago's negative effects hurt the Moor more keenly than anyone else.
If Othello wins the title of Shadow King he will save Shakespeare but cares not whether the Bard is good or evil; he simply wants Shakespeare to unmake him so that he can be reunited with Desdemona.
Viola: Viola is a woman with a secret: she is pretending to be the famed pirate Captain Cesario. Viola took the mantle of Cesario after her lover died fighting Richard's fleet and has hidden herself in the Captain's clothing ever since. As a pirate Viola believes in anarchy and trusts nobody. She fights with the Prodigals because she wants Richard dead for what he did to the man she loved.
Viola's mastery of the water means she can travel faster than any other character in Illyria, but her pirate crew is unreliable in a fight and Viola will be at a disadvantage whenever troops are called for.
If Viola fights her way to becoming the Shadow Queen she will kill Shakespeare and take the Quill herself so that she can rid Illyria of all its would-be rulers.
Falstaff: A wonderful pain in the ass, Falstaff is an often drunk but more often helpful smuggler who has aided the Prodigal cause since the beginning. The big man values wine, women and song, but also faithfully believes in Shakespeare and would like nothing better than to be (mostly) sober when the Creator returns.
The consummate smooth talker, Falstaff wins all draws that he is involved with in the game, but the big man is terrified of water and can never use ships to travel or enter Prospero's Island.
If Falstaff stumbles his way into legend as the Shadow King he will save Shakespeare and ask for a small reward: a modest-sized castle complete with servants and a larder filled with spiced food and strong drink would suffice. Oh, and maybe a horse would be nice. Yes, Richard's kingdom for a horse!
Decoding the Icons
The icon key on the back page of the printed rule book is a pictogram and is not reproduced here as text. Its entries are: Energy, Energy Cost, Energy Starting Point, Energy Above Starting Point, Energy Below Starting Point, Port (movement between any Areas costs one Energy), Stolen Letter, City Plans, Find Shakespeare, Troops, Iago, King Richard, Lady Macbeth, Player Icon, Spy Action Token (peek at ALL hidden cards), Dice, Re-roll Dice, Influence, Replace Influence, Move Influence, Eight-sided Dice, Bid Token, Blind Bid (bid with ALL tokens facedown), Card, Hidden Card (peek at hidden cards in one track), Positive Attributes, Additional Action, Unavailable/Removed, Total Number Reduced (-2), Total Number (x2), Time, Hope, Victory Points, Stronghold, and -1 Defense.