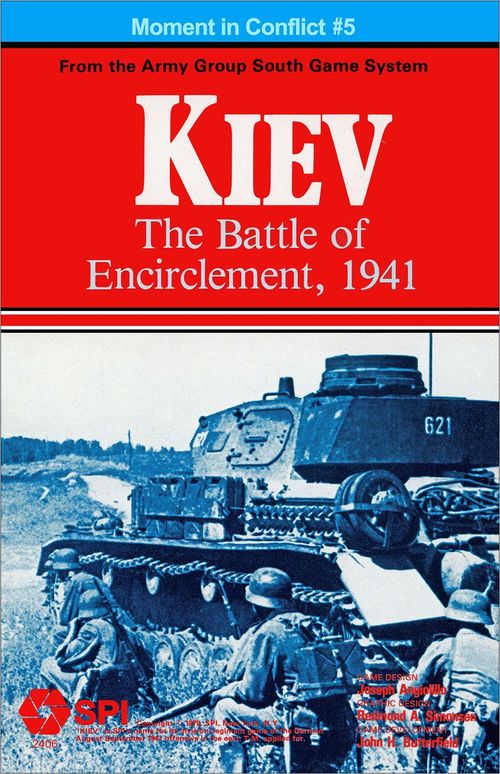
Kiev: The Battle of Encirclement, 1941
Kiev: The Battle of Encirclement, 1941 Rulebook
Table of Contents
Table of Contents
- Read This First
- 1.0 Introduction
- 2.0 How to Play the Games
- 3.0 Game Equipment
- 4.0 Sequence of Play
- 5.0 Movement
- 6.0 Overrun
- 7.0 Stacking
- 8.0 Zones of Control
- 9.0 Combat
- 10.0 Terrain Effects on Movement, Combat and Supply
- 11.0 Headquarters Units
- 12.0 Supply
- 13.0 Untried Units
- 14.0 Air Power
- 15.0 Reinforcements
- 16.0 German Unit Organization
- Charts and Tables
- Kiev Exclusive Rules
- 17.0 Introduction
- 18.0 Setting Up the Game
- 19.0 Additions and Changes to the Standard Rules
- 20.0 Divisional Integrity
- 21.0 German Leaders
- 22.0 Stalin's Directive
- 23.0 Reinforcements
- 24.0 Victory Conditions
- 25.0 Play-by-Mail (Optional)
- Player's Notes
- Kiev Addenda (as of October 1979)
Read This First
The rules of this SPI simulation game are organized in a format known as the Case System. This system of organization divides the rules into Major Sections (each of which deals with an important aspect of play). These Sections are numbered sequentially as well as being named. Each of these Major Sections is introduced by a General Rule, which briefly describes the subject of the Section. Many times this General Rule is followed by a Procedure which describes the basic action the Player will take when using the rules in that Section. Finally, the bulk of each Major Section consists of Cases. These are the specific, detailed rules that actually regulate play. Each of these Cases is also numbered. The numbering follows a logical system based upon the number of the Major Section of which the Cases are a part. A Case with the number 6.5, for example, is the fifth Primary Case of the sixth Major Section of the rules. Many times these Primary Cases are further subdivided into Secondary Cases. A Secondary Case is recognizable by the fact that it has two digits to the right of its decimal point. Each Major Section can have as many as nine Primary Cases and each Primary Case can have as many as nine Secondary Cases. The numbering system is meant as an organizational aid. Using it, Players can always easily tell where a Case is located in the rules. As a further aid, an outline of the Major Sections and Primary Cases is given at the beginning of the rules.
How the Section and Case Numbers Work:
Major Section Number / Primary Case Number / Secondary Case Number: [6.53]
The preceding example would be the number of the third Secondary Case of the fifth Primary Case of the sixth Major Section of the Rules.
How to Learn to Play the Game:
Familiarize yourself with all of the components. Read all of the General Rules and Procedures and read the titles of the Primary Cases. Set up the game for play (after reading the pertinent Section) and play a trial game against yourself referring to the rules only when you have a question. This procedure may take you a few hours, but it is the fastest and most entertaining way to learn the rules short of having a friend teach them to you. You should not attempt to learn the rules word-for-word. Memorizing all that detail is a task of which few of us are capable. SPI rules are written to be as complete as possible — they're not designed to be memorized. The Case numbering system makes it easy to look up rules when you are in doubt. Absorbing the rules in this manner (as you play) is a much better approach to game mastery than attempting to study them as if cramming for a test.
Outline of the Major Sections:
- 1.0 INTRODUCTION
- 2.0 HOW TO PLAY THE GAMES
- 3.0 GAME EQUIPMENT: 3.1 The Game-Map and Charts; 3.2 The Playing Pieces; 3.3 Parts Inventory
- 4.0 SEQUENCE OF PLAY: 4.1 The Game-Turn; 4.2 Game-Turn Sequence Outline
- 5.0 MOVEMENT: 5.1 How to Move Units; 5.2 Movement Inhibitions and Prohibitions; 5.3 Rail Movement
- 6.0 OVERRUN: 6.1 Restrictions on Overruns; 6.2 Resolution of Overruns; 6.3 Disruption
- 7.0 STACKING
- 8.0 ZONES OF CONTROL: 8.1 Extent of Zones of Control; 8.2 Effects of Zones of Control
- 9.0 COMBAT: 9.1 Which Units May Attack; 9.2 Multiple Unit and Multi-Hex Combat; 9.3 Terrain Effects on Combat; 9.4 Combat Resolution; 9.5 Combat Results Table; 9.6 Combat Results and Unit Steps; 9.7 Retreats; 9.8 Advance After Combat; 9.9 Divisional Integrity
- 10.0 TERRAIN EFFECTS ON MOVEMENT, COMBAT, AND SUPPLY: 10.1 Rivers, Lakes and Seas; 10.2 Cities, Towns, Roads, and Railroads; 10.3 Effects of Mixed Terrain; 10.4 Terrain Effects Chart
- 11.0 HEADQUARTERS UNITS: 11.1 The Leadership Rating; 11.2 Movement of HQ Units; 11.3 Supply and Combat Capabilities of HQ Units
- 12.0 SUPPLY: 12.1 Line of Supply; 12.2 Effects of Supply
- 13.0 UNTRIED UNITS: 13.1 Placement of Untried Units; 13.2 How Units Are Revealed; 13.3 "No-Strength" Units
- 14.0 AIR POWER: 14.1 Air Points and Combat; 14.2 Other Uses of Air Points
- 15.0 REINFORCEMENTS
- 16.0 GERMAN UNIT ORGANIZATION
1.0 Introduction
Army Group South: Four Battles in the Ukraine is a set of division/regiment level simulations of crucial campaigns in the southwestern Soviet Union during World War II. The four games in the set (Kiev, Rostov, Operation Star, and Korsun) pit Soviet forces against the German (and Axis-allied) forces which comprised Army Group South in its various incarnations from 1941 through 1944. One Player controls the Soviet forces while the other controls the German and Axis-allied forces.
The games are designed to insure maximum playability while providing the Players with historical insight into the strategic dynamics of each campaign. The game system of Army Group South is an adaptation of the system pioneered in SPI's Panzergruppe Guderian game. Players familiar with that game (or other similar wargames) should be able to play any of the AGS games after skimming these Standard rules and the Exclusive rules.
Each individual Folio game is packaged with a Standard rules folder, common to all four games, and an Exclusive rules folder containing rules that apply only to that game. Owners of the entire QuadriGame receive the Standard rules and all the Exclusive rules folders.
2.0 How to Play the Games
The Players Set Up Their Units
After choosing a game, and before starting to play, each Player places his units on the map. Each unit is set up according to the deployment in the Exclusive rules of the game being played. Units that do not begin on the map are reinforcement or replacement units that will be placed on the map during the course of the game. The Players then consult the Exclusive rules to determine which side (Soviet or German) is the first Player and which is the second Player.
The First Player Moves
First, the Player checks to see which of his units are in supply. Those units which are out of supply may be moved only half their normal Movement Allowance and are also halved in Combat Strength. After determining which of his units are in and which of them are out of supply, the first Player begins to move them.
The first Player may move as many of his units as he wishes in any Game Turn. Each unit may be moved up to a certain maximum number of hexes, which is dependent on the particular unit's Movement Allowance (printed on the unit) and the type of terrain in the hexes which the unit is moved through. Weather, a variable in the Exclusive rules of each game, may also affect movement. Any reinforcements due the first Player may be placed on the map and moved.
Should the first Player move any unit into a hex which is next to a hex containing an Enemy unit, he cannot move that unit any further, as he has moved into an Enemy Zone of Control (unless he is going to conduct an overrun). Any units belonging to the first Player that start in any Enemy Zone of Control may not be moved, unless the unit is being used to conduct an overrun or the Exclusive rules allow the Player to disengage his units.
While moving his units, the first Player may decide to overrun Enemy units. Any unit or stack of units may attempt an overrun, at a cost of three Movement Points. If the overrun works and the Enemy unit(s) has to be retreated or is eliminated, the first Player may continue moving the units up to their full Movement Allowance. An overrun is considered part of movement, although it resembles combat.
The First Player Attacks
After the first Player has moved all the units he can or wishes to move, he may resolve any combats which he chooses to initiate. He may have any of his units attack Enemy units which are in hexes adjacent to his own units. He is not forced to initiate any attacks. Any of his attacking units which are out of supply attack at half their printed Combat Strength. If the first Player's units are dependent upon HQ units for attack ability or the attack is affected by airpower or any points of the Exclusive rules, these factors must be taken into account. After doing so, for the first of his attacks the first Player adds the Attack Strengths of all his units which are involved and compares it to the total strength of the defending unit(s). Any untried units involved in this attack are now flipped over and their Combat Strengths revealed. He then converts the ratio of these totals to a simplified odds statement, such as "1 to 1" or "2 to 1" and rolls a die. Cross-referencing the result of the die roll with the combat ratio on the Combat Results Table, the Players determine the outcome of the attack.
The results obtained on the Combat Results Table dictate which units involved in the combat have to either take a loss or retreat. Players subtract losses and/or retreat the losing units as called for. If the first Player wins the combat, he may advance his victorious units into any vacated hexes. He then proceeds to resolve his other attacks, one by one, in any order he chooses, until he has resolved all the attacks he has initiated.
The First Player Moves Again
After any and all his attacks have been resolved, the first Player may move any of his mechanized units (including cavalry and headquarters) a second time, up to their full Movement Allowance. As in the first Movement Phase, a unit which begins in an Enemy Zone of Control may not be moved, and a unit which is moved into an Enemy Zone of Control must stop and may not be moved any farther. Overruns and disengagements (if allowed) may be conducted.
The First Player Removes Disruption Markers
The first Player removes Disruption markers from any of his units that have previously been disrupted.
The First Player Uses His Air Points
If the Exclusive rules of the game provide the first Player with Air Points, he may now expend them on the functions (other than combat support) described in those rules. After he has done so, the first Player-Turn is over.
The Second Player Takes His Turn
The second Player now moves his units, conducts his attacks, moves his mechanized units again, etc., in the same manner and sequence as the first Player. When the second Player's turn is over, one Game-Turn has passed. The next Game-Turn starts with the first Player moving his units.
In Summary
The above sequence is followed in general for a set number of Game-Turns (depending on the game), after which the Players check the Victory Conditions to see who has won.
While playing the first few Game-Turns, the Players should keep an eye on the Sequence of Play (Section 4.0) and any modifications to the Sequence as outlined in the Exclusive rules. These outline the distinct order in which each Player should undertake the functions of his Player-Turn.
3.0 Game Equipment
3.1 The Game-Map and Charts
Each of the 17" x 22" mapsheets portrays the area in which a particular battle was fought, including all terrain significant to the battle. A hexagonal grid superimposed over the terrain features regularizes movement and the positioning of the playing pieces. Also printed on the mapsheet or in the rules are various charts and visual aids.
3.2 The Playing Pieces
The cardboard pieces represent the military units that took part in the actual battles. The numbers and symbols on the pieces represent the strength, movement capability, and type of unit represented by that piece. These playing pieces are referred to as units.
3.21 How to Read the Units
German Panzer Regiment (front): the counter shows a Set-up Hex (top right), the Unit Type symbol, the Regiment number over the Division number (e.g. 15/11), the Attack Strength, Defense Strength and Movement Allowance (e.g. 5-2-8), and the Regiment's own unit designation.
German Panzer Regiment (back): shows the reduced-strength side, with the Reduced Attack Strength and the Reduced Defense Strength (e.g. 3-1-8).
Soviet Infantry Division (front): shows the Unit Size (XX), the Unit Designation (e.g. 237), the Attack Strength, Defense Strength and Movement Allowance (e.g. 5-7-6).
Soviet Infantry Division (back): shows the Untried Strength (e.g. U-6).
Soviet HQ Unit (front only): shows the Army Designation, the Commander (e.g. 37), the Leadership Rating (e.g. 3) and the Movement Allowance (e.g. 10).
Unit designations are the historical identity numbers of the units. Each unit has either one or two identity numbers (separated by a slash). Units with only one number are corps, divisions, brigades, or independent regiments. A unit size symbol identifies the unit's size. Units with two numbers are regiments that belong to divisions. The number to the left of the slash is the regiment number and the number to the right is the division.
Unit size symbols are as follows: III = regiment; X = brigade; XX = division; XXX = corps.
3.22 Summary of Unit Types
Values are given as printed on the counters: Attack-Defense-Movement on the front, and the untried or reduced side on the back.
Axis Units — Non-Mechanized Units
- Infantry Division (note that two counters are sometimes used to represent up to four steps): front 8-10-8, back 5-7-8.
- Jaeger Division: front 5-7-9, back 3-4-9.
- Mountain Divsion: front 7-9-8, back 4-6-8.
Axis Units — Mechanized Units
- Panzer Regiment: front 6-2-10, back 3-1-10.
- Panzergrenadier or Motorized Infantry Regiment: front 1-3-10, back 0-1-10.
Soviet Units — Non-Mechanized Units
- Rifle Division: tried side 4-5-5; untried side 3-3-5.
- Airborne Rifle Division: front 5-5-5, back 3-3-5.
Soviet Units — Mechanized Units
- Cavalry Division: front 2-3-8, back U-8.
- Tank Brigade: front 5-4-8, back U-8.
- Tank Corps: front 14-10-8, back 10-7-8.
- Motorized Rifle Brigade: front 2-1-8, back U-8.
- Motorized Rifle Corps: front 14-10-7, back 10-6-7.
Army HQ: front shows the Army designation (XXXX 1511), the Leadership Rating (5) and the Movement Allowance (10); back blank.
Note: Some Axis and Soviet counters specific to only one of the games are not included here. See Exclusive rules.
Game Markers (as printed on the counter sheet):
- Air Point
- Out of Supply (front and back)
- Disrupted (front "Dis"; back "Out of Supply")
- Entrenchment (shown at level 1 and level 2)
- Game-Turn marker
3.23 Definitions of Unit Values
Attack Strength is the relative strength of a unit when attacking. Defense Strength is the relative strength of a unit when defending. Attack and Defense Strength (referred to collectively as Combat Strength) may be affected by supply, terrain considerations, or whether the unit is executing an overrun. Note that some units may have an untried (i.e., unknown) Combat Strength at start.
Movement Allowance is the maximum number of Movement Points that may be expended in moving a particular unit during a Movement Phase.
Leadership Rating is the maximum number of hexes away from a combat unit a headquarters unit may be and still be able to provide supply for that unit. The Rating also represents the HQ unit's limited attack and defense capabilities. Only HQ units have a Leadership Rating.
3.3 Parts Inventory
| Part | Folio | Quad |
|---|---|---|
| Game Map | 1 | 4 |
| Die-Cut Counter Section (200 counters) | 1 | 4 |
| Standard Rules Folder | 1 | 2 (identical) |
| Exclusive Rules Folder | 1 | 4 (different) |
| Die (or randomizer) | 1 | 1 |
| Game Box | 0 | 1 |
| Zip-lock Bag | 1 | 0 |
If any of these parts are damaged or missing, fill out and mail the enclosed Complaint Card and a replacement will be sent out promptly.
4.0 Sequence of Play
4.1 The Game-Turn
Each game in the Army Group South Quadrigame is played in Game-Turns. Each Game-Turn is composed of two Player-Turns. The Player whose Player-Turn is in progress is called the Phasing Player. Each Game-Turn proceeds strictly as outlined in case 4.2.
4.2 Game-Turn Sequence Outline
A. The First Player-Turn
- Initial Movement Phase. The Phasing Player checks his units' supply status. Reinforcements scheduled to arrive this Game-Turn are placed on the map. Any or all of his units may now be moved in any direction(s) to the limit of each unit's Movement Allowance and within the restrictions outlined in the rules for movement and supply. The Phasing Player may conduct overruns in this Phase.
- Combat Phase. Friendly units may attack Enemy units according to the rules of combat. If either Player has Air Points, he may allocate them to aid his attack or defense.
- Mechanized Movement Phase. Friendly cavalry, headquarters and mechanized units may be moved again, if possible. Overruns may be conducted.
- Disruption Removal Phase. The Phasing Player removes Disruption markers from any of his units that suffered disruption as a result of Enemy overrun.
- Air Power Phase. The Phasing Player may allocate any available Air Points to various functions described in the Exclusive rules. This Phase is included only in the Rostov and Korsun games.
B. Second Player-Turn
- Initial Movement Phase. After checking supply, the Phasing Player may move his units, bring in reinforcements, and conduct overruns.
- Combat Phase. Friendly units may attack Enemy units, and both sides may allocate available Air Points.
- Mechanized Movement Phase. Friendly cavalry, HQ and mechanized units may again be moved if possible. Overruns may be conducted.
- Disruption Removal Phase. The Phasing Player removes Disruption markers from his units.
- Air Power Phase. The Phasing Player may allocate Air Points.
C. Game-Turn Indication Interphase
The Soviet Player advances the Game-Turn marker to signal the beginning of the next Game-Turn.
5.0 Movement
Commentary: Successful execution of a military operation requires that a commander appreciate the terrain in which he is fighting so that he may best move and deploy his forces to attack and defend. Each map is overlaid with a hex-grid pattern that abstracts the terrain in which the battle occurred. Using this hex-grid and the Movement Allowance of each unit, the Players may maneuver their forces.
General Rule: Movement occurs during the Movement Phases of each Game-Turn. During each Player's respective Movement Phase, he may move all, some, or none of his units as desired. The Phasing Player may also conduct overruns (see Section 6.0) and/or move units by rail. During the Mechanized Movement Phase, the Player may also move some, all or none of his mechanized units and conduct overruns.
Procedure: Each unit or stack of units is moved individually hex-by-hex in any direction or combination of directions. Movement of a unit into a hex "costs" a certain number of Movement Points. As a Player moves a unit, he keeps track of the number of Movement Points expended for each hex. Once a Player's hand is removed from the unit (stack), movement is completed for that unit for that Phase.
5.1 How to Move Units
5.11 Movement is calculated in terms of Movement Points (Exception: Case 5.3, Rail Movement). Each unit has a Movement Point Allowance indicating the maximum number of Movement Points that can be expended for the movement of that unit in any one Movement Phase.
5.12 A Player may expend as few or as many Movement Points as desired in moving one of his units, up to the limit of that unit's Movement Point Allowance. Movement Points may not be saved from one Game-Turn to the next, nor may unused Movement Points be transferred from unit to unit.
5.13 For each clear terrain hex into which a Player moves a unit, one Movement Point is expended. Other terrain costs more (or, in the case of roads for mechanized units, less) to enter or cross; these costs are detailed in Section 10.0 (Terrain Effects on Movement, Combat and Supply) and on the Terrain Effects Chart.
5.14 A unit may always be moved one hex during a Friendly Movement Phase. In other words if no Movement Points have been expended for a unit and it has insufficient Movement Points to be moved into any adjacent hex, it may be moved into one of those hexes anyway, within the restrictions of Case 5.2.
5.2 Movement Inhibitions and Prohibitions
5.21 During a Player's Movement Phase, no Enemy units (units owned by the opposing Player) may be moved.
5.22 Friendly units in no way affect or impede the movement of other Friendly units (however, see Case 6.17). A unit may never be moved into a hex containing an Enemy unit.
5.23 Friendly Zones of Control (see Section 8.0) never affect the movement of Friendly units. A unit that is moved into a hex that is in an Enemy Zone of Control must stop and cannot be moved any further that Game-Turn (Exception: Section 6.0, Overrun).
5.24 A unit may not be moved out of a hex that is in an Enemy Zone of Control, unless the unit is eligible to be disengaged (see the Exclusive rules), or is being used to conduct an overrun.
5.25 Any unit that is out of supply (see Section 12.0) at the beginning of a Friendly Movement Phase has its Movement Allowance halved for that Movement Phase, with any fractions ignored.
5.26 Combat may not occur during a Movement Phase; however overrun—a combination of movement and combat—may take place.
5.27 Movement may also be inhibited by terrain; see Section 10.0.
5.3 Rail Movement
In all the games except Korsun, one of the Players may move his units by rail movement. In Kiev and Rostov Soviet units (only) may be moved by rail. In Operation Star German units (only) may be moved by rail. To utilize rail movement a Player moves a unit through rail hexes disregarding other terrain.
5.31 In order to be moved by rail, a unit must begin and end the Movement Phase in Friendly rail hexes. It must be moved from Friendly rail hexes to adjacent, connected Friendly rail hexes without ever leaving the railroad during the Phase. It need not begin the Movement Phase in supply to be moved by rail.
5.32 Which rail hexes are friendly, the number of units per turn which may be moved by rail, and the permissable length of rail movement (in hexes) is defined in the Exclusive rules of each game, under Rail Capacity.
5.33 A unit being moved by rail may not start the Player-Turn in or be moved into or through an Enemy-controlled hex. A unit may not expend any Movement Points on "normal" movement in the same Movement Phase in which it is moved by rail.
5.34 Units may only be moved by rail during the initial Movement Phase of the owning Player's Player-Turn. A Player may not utilize rail movement during his Mechanized Movement Phase.
5.35 Railroads afford no movement advantages or disadvantages whatsoever to units not being moved by rail, including units being moved across rivers.
6.0 Overrun
Commentary: In mobile combat situations common to the East Front of World War Two, forces would often attack "on the move," sacrificing fire power for maneuverability. This is called overrun. During either of his Movement Phases a Player may attempt to move a unit into an Enemy occupied hex by executing an overrun.
General Rule: During either Movement Phase of his Player-Turn, the Phasing Player may have any combat unit (or stack of units; see Case 6.13) attempt to overrun an Enemy unit(s). An overrun is an attempt to move into an Enemy occupied hex. A successful overrun results in the elimination or retreat of the Enemy units. A successful overrunning unit occupies the hex and may be further moved up to the extent of its Movement Point Allowance. Units successfully overrun are disrupted. Note: Although bearing some resemblance to combat, overrun is a function of movement.
Procedure: By expending three Movement Points, the Phasing Player has a Friendly unit (or stack of units) execute an overrun against an adjacent Enemy unit. The Phasing Player totals the Attack Strength of his unit(s), and halves it, dropping any fractions. The non-Phasing Player totals the Defense Strength of his unit(s), taking into account terrain and supply considerations. An "attack" by the Phasing Player's units is then resolved (see Section 9.0, Procedure). If the overrun is successful, the overrunning units are moved into the vacated hex, and the Phasing Player may then continue moving the overrunning units (assuming it still retains any unexpended Movement Points).
6.1 Restrictions on Overruns
6.11 Overruns may be conducted by the Phasing Player only during his Movement Phase or Mechanized Movement Phase. Overruns may never be conducted during a Combat Phase.
6.12 A unit must be in supply (see Section 12.0) at the beginning of the Movement Phase (prior to the movement of any units) to be eligible to execute an overrun. Thus, supply for units conducting an overrun is determined at the beginning of the Movement Phase, not at the instant of overrun (see Case 6.21).
6.13 Units that begin a Movement Phase stacked in the same hex may be used to execute an overrun provided they are not moved independently prior to resolution of the overrun. Friendly units that begin the Movement Phase in different hexes may not be used together to conduct a single overrun.
6.14 A single overrun can be conducted against more than one Enemy unit only if such Enemy units occupy the same hex. A single overrun may not be directed against units in more than one hex.
6.15 There is no limit to the number of overruns which may be executed against the same unit in the same Movement Phase.
6.16 There is no limit to the number of overruns which a unit may conduct, except the restrictions of the unit's Movement Allowance. Remember, three Movement Points must be expended to conduct each overrun.
6.17 An overrun may not be conducted from a hex occupied by Friendly units that are not taking part in the overrun. That is, a unit may not be moved into a Friendly occupied hex and conduct an overrun from that hex. Exception: A unit may conduct an overrun from a hex occupied only by a Friendly HQ unit. The HQ unit does not contribute to the overrun but is affected by any adverse results incurred by the Friendly units.
6.2 Resolution of Overruns
6.21 Supply for units defending against an overrun is determined at the instant of resolution.
6.22 Should an overrun attack fail to dislodge the Enemy units from the overrun hex, the units executing the overrun may not be moved any further in that Movement Phase.
6.23 Should an overrun attack result in the retreat of, or any loss to, the overrunning units those units may not be moved any further (except to retreat as called for) in that Movement Phase, regardless of whether it has any remaining Movement Points or whether the hex overrun was vacated.
6.24 Should an overrun attack result in the retreat or elimination of all defending units, and no loss or retreat for the overrunning unit(s), then the latter must be advanced into the vacated hex (at no additional cost in Movement Points and regardless of any Enemy Zones of Control) and the Phasing Player may continue moving the units if they have Movement Points remaining (see Case 8.23).
6.25 Enemy units that successfully defend against an overrun may not be advanced into a vacated hex if overrunning units are retreated or destroyed.
6.3 Disruption
6.31 Units that defend against an overrun and suffer any loss or retreat (not including an engaged result) as a result of the overrun are disrupted. Disruption is indicated by placing a Disruption marker on top of the affected units. Only defending units can become disrupted, and disruption pertains only to overrun—not to normal combat.
6.32 Disrupted units may not attack; they defend normally. They may not be moved; they exert a Zone of Control. Disrupted HQ units may not be used to provide supply for Friendly units. Additional disruption results have no further effect on disrupted units.
6.33 Disrupted units automatically return to normal in the Friendly Disruption Removal Phase.
7.0 Stacking
Commentary: Each hex on the map represents a limited area of space into which only a certain amount of men and equipment can be effectively deployed. Therefore the Players are restricted in the number of units they may place in a hex.
General Rule: A Player may never have more than three Friendly combat units in any one hex at the end of either of his Movement Phases or at any time during the Combat Phase. He may have as many as four units of any kind in a hex, as long as at least one of the units is an HQ unit. Informational markers, such as Disrupted markers, never count against stacking. Units may pass freely through other stacks of Friendly units, except during retreats, and the restrictions of stacking apply only at the end of the Friendly Movement Phases and throughout the Combat Phases. If units are found to be in excess of the stacking restrictions at the end of a Friendly Movement Phase or at any point during the Combat Phase, the excess must be eliminated and removed from play. The choice of which unit to eliminate is up to the owning Player.
8.0 Zones of Control
Commentary: Although a unit physically occupies only one hex, the strength it represents is able to extend its presence into a larger area. This area is called the Zone of Control of that unit.
General Rule: The six hexes surrounding a hex constitute the Zone of Control (ZOC) of any combat unit(s) in that hex; such hexes are referred to as controlled hexes. Friendly Zones of Control inhibit the movement of Enemy units. Zones of Control extend into all six hexes adjacent to the controlling unit's hex. All units must cease movement when they enter an Enemy-controlled hex and may not leave that hex voluntarily.
8.1 Extent of Zones of Control
8.11 All units exert a Zone of Control at all times.
8.12 The Zone of Control of a unit extends into all six hexes adjacent to the hex the unit is in. Zones of Control do not extend across major river hexsides, nor across impassable or all-sea hexsides. No other terrain restricts Zones of Control.
8.2 Effects of Zones of Control
8.21 A unit that is moved into an Enemy Zone of Control must stop and may not be moved out of that hex during that Movement Phase (however, see Case 6.24).
8.22 There is no additional Movement Point cost to move a Friendly unit into an Enemy-controlled hex.
8.23 Generally, a Player may not move a unit out of an Enemy-controlled hex. However, both Players may utilize overruns to do so and in some cases may attempt to disengage units; see the Exclusive rules. Friendly units may also leave Enemy-controlled hexes as a result of combat.
8.24 Friendly Zones of Control never affect Friendly units. There is no additional effect of having more than one unit exerting its Zone of Control onto a given hex.
8.25 The presence of a Friendly unit (but not Friendly Zones of Control) negates Enemy Zones of Control for purposes of tracing Friendly supply lines (see Case 12.1) and command radii (see Case 11.31) and conducting retreats of Friendly units (see Case 9.71) in the hex occupied by that unit. Friendly units do not negate Enemy Zones of Control for purposes of movement.
9.0 Combat
Commentary: In warfare, the aim of combat is to obtain geographical objectives or simply to destroy the enemy. Attacks in Army Group South are resolved using a Combat Results Table which makes possible a wide range of outcomes. After all, in any endeavor the end results cannot be precisely predicted. Thus, a commander attempts to maximize his chances of success by skillfully choosing where to attack and effectively employing his available forces.
General Rule: Combat occurs during the Combat Phase between adjacent opposing units at the Phasing Player's discretion. The Phasing Player is termed the attacker and the non-Phasing Player the defender, regardless of the overall strategic situation.
Procedure: Total the Attack Strength of all attacking units involved in a specific attack and compare it to the Defense Strength of the units in the hex under attack. State the comparison as a ratio of the attacker's strength to the defender's strength. Round off the ratio in favor of the defender (e.g., 29 to 10 = 2 to 1) to conform to the simple ratios found on the Combat Results Table; roll one die and read the results on the appropriate line under the ratio. Apply the results immediately, before resolving any other combat.
9.1 Which Units May Attack
9.11 Units may attack only during their own Combat Phase (see also overrun, Section 6.0). They may attack any and all units to which they are adjacent.
9.12 Attacking is voluntary; units are never compelled to attack, and not every unit adjacent to an Enemy unit need participate in an attack. A Friendly unit that is not participating in a given attack is never affected by the results of that attack.
9.13 An Enemy-occupied hex may be attacked by as many units as can be brought to bear in the six adjacent hexes.
9.14 No unit may attack more than once per Combat Phase, and no Enemy unit may be attacked more than once per Combat Phase. (Remember, overrun is not combat.)
9.15 In order for a Soviet unit to attack, it must be within the Command Radius of an HQ unit at the instant of combat (see Case 11.3).
9.2 Multiple Unit and Multi-Hex Combat
9.21 All units in a hex must be attacked as a single combined Defense Strength. The defender may not withhold a unit in a hex under attack.
9.22 Other units in a hex that contains an attacking unit need not participate in that or any other combat. Thus, when one unit in a stack is attacking a given hex, the other units in the stack could attack a different hex or not attack at all.
9.23 If a unit is adjacent to more than one Enemy-occupied hex, it could attack all of them in a single combat. Thus, units in a single hex may attack more than one hex. The only requirement is that all attacking units must be adjacent to all defending units.
9.24 A given unit's attack and/or Defense Strength is always unitary; i.e., it may not be divided either for attack or defense.
9.3 Terrain Effects on Combat
9.31 Units defending in certain types of hexes have their Defense Strength (only) increased. (See Section 10.0, Terrain Effects on Movement, Combat, and Supply for a complete explanation.)
9.32 When determining the final strength of a unit, first multiply for all "increase" effects (doubling for terrain defenses, etc.), then halve for supply, etc., if applicable. Round down any fractions to the nearest whole number after all these calculations—not before. A single unit or stack of units may never be worth less than one after all these calculations have been made.
9.4 Combat Resolution
Combat odds are always rounded off in favor of the defender. For example, an attack with a combined Attack Strength of 26 against a group of units defending with a strength of 9 (26 to 9) would be rounded off to the next lowest combat ratio column on the Combat Results Table: "2-1." That column would be used to resolve the attack.
9.5 Combat Results Table
(see Charts and Tables)
9.6 Combat Results and Unit Steps
Many counters have combat and movement values on both sides. At the start of the game, each such unit is placed with its stronger side up. Should an adverse combat result be applied against the unit, it may be flipped over, or replaced with a counter representing it at a weaker state to show combat losses.
9.61 German Division units have a number of strength levels (steps). They may be reduced in strength as a result of combat by one, two, or three steps. Thus, if a German division at full strength incurs a one step loss, the counter is replaced by the next-lowest strength level counter of that unit. An 8-10-9 suffering a one step loss would be flipped over to its 5-7-9 side. If it suffered a two step loss, it would be replaced by a 3-4-9 division counter. If there are no steps remaining, that unit is eliminated.
9.62 Most Soviet units consist of only one step. If such a Soviet unit receives a one step loss, it is eliminated.
9.63 In some of the Army Group South games, Soviet units may have more than one step. This will either be on the back side of the unit or represented by another counter. See the Exclusive rules of the game being played.
9.64 Most German mechanized regiment units have two steps, the second step being on the reverse side of the counter. Most German infantry divisions have four steps. In some of the games, certain German units do not possess the full number of steps possible for that unit. The set-up of each game indicates at what strength level a unit is deployed at and thus, how many steps it possesses (see Section 16.0).
9.65 All combat results are expressed (on the Table) in terms of the steps lost or hexes retreated. Results to the left and right of the slash apply to the attacker and defender, respectively. A result of E means that all steps for the unit involved are lost and no retreat option is possible.
9.66 A number result (1, 2, or 3) means that the affected unit(s) must either lose the given number of steps or all be retreated the given number of hexes. The Player whose unit is so affected may not take a step loss and retreat; he must either retreat or take step losses.
9.67 When a loss of one step is required or chosen, the Player removes one step from any one unit involved. Example: If three Soviet units are defending against a German attack and the Combat Results Table shows a result of -/1, the Soviet Player has the option of either removing one of his units (or steps) and leaving the remaining units in place, or retreating all three units one hex.
9.68 Some results on the Combat Results Table are split results; e.g., 1/1. In a split result, the defender's result is always applied first, whether it is a step loss or a hex retreat, then the attacker applies his result. If any attacking units remain in their original hex, they may be advanced after combat, provided the defending hex has been vacated. The defender may never advance in a split result.
9.69 A result of ENG (engaged) means that each side must lose one step; no retreat option is available. In addition, neither side may advance after combat.
9.7 Retreats
If a Player's units incur an adverse result in combat, and he does not wish to fulfill the result by taking step losses, he must retreat all his units that were involved in the combat. This is done by moving the units away from the combat position and the Enemy. Retreating does not require the expenditure of Movement Points.
9.71 Retreats are always optional. A Player may choose to lose steps rather than retreat. However, a unit may never be retreated into or through an Enemy unit or an Enemy-controlled hex, unless the latter hex is occupied by a Friendly combat unit. Units may not retreat off the map; those that do are considered eliminated.
9.72 Retreats are always conducted by the owning Player.
9.73 A retreating unit must be retreated the required number of hexes away from the hex it occupied when that particular combat was initiated.
9.74 A retreating unit must, if possible, retreat into a vacant hex. If no vacant hex is available, it may retreat into or through a Friendly-occupied hex. Units may not retreat into or through a hex in violation of stacking restrictions. If forced to do so, the excess retreating units are eliminated.
9.75 If two or more Friendly units are being retreated as a result of a single combat, they may be retreated into different hexes. However, the retreat of all those units is considered simultaneous.
9.76 If a unit is forced to retreat into a Friendly-occupied hex as a result of combat, and that hex then undergoes an attack in that Combat Phase, the retreated unit does not add its Defense Strength to that of the other units in the hex. However, if that new hex suffers any combat result (loss or retreat) the previously retreated unit(s) is automatically eliminated. Note: This does not apply to overrun, which is not combat.
9.77 If in a split result the defending units have been retreated or eliminated and the attacker decides to retreat, the attacking units may not be retreated into any hex that was Enemy-occupied or enemy-controlled at any time during that combat. However, see Case 8.25.
9.78 A unit may not be retreated across a major river hexside (regardless of the presence of a road or railroad) unless there is no other vacant or Friendly-occupied hex into which the unit can legally be retreated.
9.8 Advance After Combat
If the Enemy has been forced to retreat or is eliminated in combat, Friendly units may be advanced by moving the units toward the retreated Enemy units. This does not require the expenditure of Movement Points.
9.81 Whenever an Enemy unit is forced to retreat (or is eliminated) leaving a hex vacant as a result of combat, it will leave a vacant hex or path of vacant hexes behind it called the path of retreat. Any or all victorious attacking or defending units which participated in the combat are allowed to advance along the Enemy path of retreat (however, see Cases 9.68 and 9.82).
9.82 Advancing Axis victorious units may ignore Enemy Zones of Control and may cease advancing in any hex along the path of retreat. Advancing Soviet units must stop when they enter an Axis Zone of Control. No advancing unit may leave the path of retreat, except in the situation described in Case 9.84.
9.83 The option to advance after combat must be exercised immediately, before any other combat resolution. A Player is never forced to advance a unit after combat. After being advanced, units may neither attack nor be attacked (if they are defending units advancing) in that Phase (see Case 9.14), even if their advance places them adjacent to Enemy units whose combat is yet to be resolved or who are not involved in combat. However, advances are useful in cutting off the retreat of Enemy units whose combat has not yet been resolved.
9.84 If all units in a hex are eliminated, the victorious units may be advanced a maximum of two hexes after combat. The first hex must be the hex formerly occupied by the eliminated unit(s); the second hex may be any vacant or Friendly-occupied hex (however, see Cases 9.69 and 9.82).
9.85 Units may be advanced a maximum of the number of hexes the enemy unit has retreated (e.g., a -/2 retreat means a possible attacker advance of two hexes maximum).
9.86 Advance after combat does not apply to overrun.
9.9 Divisional Integrity
In all four games of Army Group South, German regiment units (only) that belong to a division are eligible for divisional integrity providing the units are stacked with or in close proximity with one another. Units that are eligible for divisional integrity are noted by having both a regimental and divisional designation printed on the counter. Units that fulfill the requirement for divisional integrity have their strengths increased. This signifies the fact that all elements of the division not represented in the game (such as artillery and reconnaissance) are effectively supporting the regiments of that division.
Each of the four games utilizes varying game mechanics for implementing divisional integrity. See the Exclusive rules of the game being played for details.
10.0 Terrain Effects on Movement, Combat and Supply
General Rule: The type of terrain that is present in a hex or on a hexside affects the movement of units into that hex or through that hexside and may increase the Defense Strength of a unit in that hex or being attacked through that hexside. Terrain never directly affects the attack strength of a unit. Terrain may also restrict supply. These terrain characteristics are summarized for each type of terrain on the Terrain Effects Chart (10.4). Special properties of certain terrain types are explained below.
10.1 Rivers, Lakes, and Seas
Note that there are two types of rivers on the Army Group South maps (see Terrain Key on each map).
10.11 Each minor river hexside costs all Soviet units one Movement Point to cross, in addition to the normal expenditure of Movement Points necessary to enter the hex on the other side of the river hexside. In the Kiev and Rostov games, Axis units must expend two extra Movement Points to cross a minor river hexside. In Operation Star and Korsun they need expend only one.
10.12 The strength of any unit that is attacked exclusively through a minor river hexside is doubled. The defending unit's strength is doubled only if all the attacking units are attacking across river hexsides. If one unit is not attacking across a river hexside, then the river affords no defensive advantage (see Cases 9.32 and 10.32).
10.13 To cross a major river hexside, all units must expend at least two Movement Points in addition to the normal cost to enter the hex on the other side of the major river. In all the games except Korsun, either Soviet or Axis units must expend three additional Movement Points to cross a major river hexside. See the Terrain Effects chart and the Exclusive rules. No unit may ever be moved through a major river hexside into a hex upon which an Enemy unit, that is adjacent to that river, exerts a Zone of Control, unless that hex is occupied by a Friendly unit.
Exception: Units may be moved across a major river into an Enemy Zone of Control during the Combat Phase in an advance after combat if the units attacked through that hexside or are following a path of retreat. Overruns through major river hexsides are not permitted.
10.14 Units attacked exclusively across major river hexsides have their Defense Strength tripled.
10.15 Units may trace supply across major rivers only at Friendly cities that are adjacent to the river or on roads or railroads that cross the river. Major rivers have no effect on the line of communications (see Case 11.32) between Soviet units and their HQ units.
10.16 Units may never be moved through, attack across, or trace supply through an all-lake or all-sea hex or hexside.
10.2 Cities, Towns, Roads, and Railroads
10.21 The Movement Point cost to move a unit into a hex containing a town or railroad is determined by the other terrain in the hex. That is, if a mechanized unit is moved into a woods hex which also contains a town, two Movement Points are expended; if a unit is moved into an otherwise clear hex containing a town, one Movement Point is expended.
10.22 Units may be moved through rail and city hexes by rail movement (see Case 5.3) if the owning Player has rail capacity. It costs one Movement Point to move a unit into a city hex using normal movement.
10.23 It costs ½ Movement Point to move a mechanized unit into a road hex through a hexside crossed by that road. Roads have no effect on infantry movement.
10.24 Roads, railroads and towns have no effect on combat. Units defending in a hex containing a road, railroad and/or town may be doubled or tripled depending on the other terrain in the hex or on the hexsides any attack is mounted through.
10.25 Note that there are no roads on the Operation Star map and no railroads on the Korsun map.
10.26 The strength of a unit in a city which is attacked is doubled (see Case 9.32).
10.3 Effects of Mixed Terrain
10.31 Movement Point costs to move from one hex to another are cumulative. Thus if a Soviet unit is moved across a minor river to a clear terrain hex, two Movement Points must be expended—one for the river hexside and one for the clear terrain hex—while if a Soviet mechanized unit crosses a river hexside to enter a woods hex, three Movement Points must be expended—one for the river hexside and two to enter the woods hex.
10.32 If a unit is entitled to more than one defensive bonus, its Defense Strength is tripled. Example: If a unit in a city were attacked from across a minor river hexside, its Defense Strength would be tripled. Under no circumstances is a unit's Defense Strength ever more than tripled by terrain. However, a unit with divisional integrity benefits from defensive terrain bonus in addition to its divisional integrity bonus (i.e., being doubled).
10.4 Terrain Effects Chart
(see Charts and Tables)
11.0 Headquarters Units
Commentary: Throughout World War Two, Soviet doctrine limited the Soviet forces to strict orders from the higher echelons of command, represented in the Army Group South games by the headquarters units. In order for Soviet units to operate effectively they must remain within a limited number of hexes of a headquarters unit. Axis units were commanded more flexibly and therefore are not dependent on HQ units.
(Illustration: a sample Soviet HQ counter, Maslov, HQ, 38, Leadership Rating (4), Movement Allowance 10.)
General Rule: Soviet units depend upon HQ units for supply and attack co-ordination. HQ units may be used to enable Soviet combat units to attack and/or maintain them in supply.
11.1 The Leadership Rating
The Rating of each individual HQ unit represents three different capabilities: (A) the Command Radius, in the number of hexes, within which Soviet combat units must be to initiate an attack or be considered in supply; (B) the maximum number of Combat Points that the HQ unit may possibly add to the Attack Strengths of units with which it is directly stacked; and (C) the defensive combat strength of the HQ unit when alone in a hex (however, see Case 11.38).
11.2 Movement of HQ Units
11.21 HQ units are moved as if they were non-motorized infantry units for the purpose of calculating Movement Point costs (see 10.4, Terrain Effects Chart) except that they are moved along roads as if they were mechanized units. HQ units may be moved by rail (see Case 5.3) and do not count toward the limits of the Player's rail capacity. HQ units may be moved in the Mechanized Movement Phase.
11.22 An HQ unit may be placed in a hex containing up to three Friendly combat units (i.e., they do not count against the stacking limit). However, no more than one HQ unit may occupy a single hex.
11.23 An HQ unit may be moved into an Enemy-controlled hex only if that hex is occupied by at least one Friendly non-HQ unit. If an HQ unit is moved into an Enemy controlled hex with an untried unit, and that unit is revealed to be a "no strength" unit, then the HQ must immediately be retreated to the hex from which it entered the Enemy ZOC and may not be moved further. The Enemy unit may not move after this "retreat." If the HQ cannot, for any reason, retreat, it is eliminated.
11.3 Supply and Combat Capabilities of HQ Units
In order for a Soviet combat unit to attack and/or be in supply, a line of communications (see Case 11.31) must be traceable between the unit and a Friendly HQ unit that is itself in supply (see Case 12.1).
11.31 A line of communications is a line of adjacent hexes no longer than the Command Radius (see Case 11.1) of the HQ unit from which it is traced. A line of communications may not be traced through an Enemy-occupied hex. It may not be traced through an Enemy-controlled hex unless that hex is occupied by a Friendly unit. In calculating the length of a line of communications, the hex occupied by the HQ unit is not counted, and the hex occupied by the combat unit is. The line of communication may be traced through any traversable terrain.
11.32 There is no limit to the number of units to which a line of communications may be traced from a single HQ unit. A line may be traced to any unit from any Friendly HQ unit.
11.33 No Soviet combat unit may attack (not overrun) Enemy units unless a line of communications (see Case 11.31) can be traced from a Friendly HQ unit to the combat unit at the instant of combat. The combat unit could attack (at half strength) if a line of communications could be traced to a Friendly HQ unit that was out of supply; the unit would be out of supply but in communications.
11.34 A Soviet combat unit to which a line of communications from a Friendly HQ unit cannot be traced defends at half-strength, as it is out of supply (see Case 12.2). The unit would also be out of supply if a line of communications could be traced to an HQ unit, but that HQ unit was out of supply.
11.35 HQ units exert a Zone of Control. They are treated in all ways like normal combat units, except that they have no attack strength.
11.36 If an HQ is in a stack of units that suffers a combat result, the HQ undergoes all retreats undertaken or may be used to absorb step losses, if so desired. It may also be advanced after combat with regular combat units. If the combat units in the stack divide their attack (9.23), the HQ may only be assigned to one of the attacks, suffering any results that that attack incurs.
11.37 Soviet combat units stacked with a Friendly HQ may add the Leadership Value of the HQ to an attack, but the value added to the combat units' total strength may never be more than equal to its given strength after any deductions for supply, etc. HQ unit points may not be split for these purposes. Example: A 6-8-6 unit is stacked with an HQ unit with a value of "four" and in supply; if it attacks, it attacks with a total strength of "10" (six plus four for the HQ). If a 1-2-6 is stacked, in supply, with a "4" HQ, its total attack strength is "2", as the HQ may never add more to an attack than the total value of the non-HQ units (1 + 1 = 2).
11.38 HQ units never add anything to the defense strength of units they are stacked with. In Rostov and Operation Star, HQ units use their Leadership Rating as their Defense Strength only when alone in a hex. In Kiev and Korsun they use one-half of their Leadership Rating (rounded down) as their Defense Strength.
12.0 Supply
Commentary: Logistics affect every aspect of warfare. If ammunition, fuel and basic necessities cannot be supplied to the troops, their survival for any period of time is in question. In order to get the most out of their forces, the Players must prevent their units from being cut off by the Enemy or by hostile terrain so that the units may be kept in supply.
General Rule: In order to be moved up to its full capacity and attack and defend at full strength, a unit must be in supply.
Procedure: At the beginning of each Movement Phase—prior to the movement of any units—the Phasing Player determines which of his units are in supply. Only those units may be moved up to the limit of their Movement Point Allowances and utilized to execute overruns. During each Combat Phase, immediately prior to the resolution of each attack in turn, the supply status of the attacking and defending units is determined. Those units in supply (only) attack and defend at full strength, respectively.
12.1 Line of Supply
A line of supply is a path of consecutive, adjacent hexes that leads from a unit to a supply source. A line of supply may not be traced through an Enemy-occupied hex. A line of supply may not be traced through an Enemy-controlled hex unless it is occupied by a Friendly unit.
12.11 A line of supply may be traced through any type of terrain hex except all-sea or lake hexes or hexsides. A line of supply may be traced into, but not through, a swamp hex. Major river hexsides also block supply (see Case 10.15).
12.12 Refer to the Exclusive rules of the game being played to determine permissible lengths of supply lines and Friendly supply sources.
12.13 Units from which a valid line of supply cannot be traced are considered out of supply. Place an Out of Supply marker on the affected units. The marker is removed when the units are determined to be in supply.
12.14 In order for Soviet units to be considered in supply, a line of communications (see Case 11.31) must be traceable from the unit to a Friendly HQ unit from which, in turn, a line of supply of any length must be traceable to a Friendly supply source.
12.2 Effects of Supply
12.21 Any Friendly unit that is out of supply at the beginning of a Friendly Movement Phase has its Movement Point Allowance halved in that Phase and cannot be utilized to execute an overrun. This is true even if, due to subsequent movement during that Phase, the unit is in a position where it would be in supply. (Note also that a unit that is in supply at the start of a Movement Phase is considered to be in supply for the entire Phase, even if it is moved to a position where it would be out of supply.)
12.22 Supply for combat is determined "at the instant of combat". Therefore, it is possible for a unit that was in supply at the start of a Combat Phase to be placed out of supply (due to advance or retreat of other units) prior to the resolution of an attack against it.
12.23 Any combat unit that is out of supply has its Combat Strength halved on attack and defense. This reduction is effected after any other modifications for terrain or divisional integrity have been made. Any fractional Combat Strengths are rounded down, except that no unit may ever be reduced to a Combat Strength of less than "one."
12.24 Units may exist out of supply indefinitely; no unit is ever eliminated solely for lack of supply.
13.0 Untried Units
Commentary: In the first two years of the Russo-German war, millions of Soviet soldiers were mobilized, hurriedly trained, and thrown into the front to face the Axis. The quality of these forces varied greatly; some fought with distinction while others dissolved at first enemy contact. This unknown quantity is represented in the games by untried units, which make up a large portion of the Soviet Player's forces.
(Illustration: an untried Soviet division counter, XX, U-8.)
General Rule: The Combat Strength of certain Soviet units that have not yet participated in combat are untried (i.e., unknown to both the Soviet and Axis players). Refer to the Exclusive rules of the game being played to determine which units are considered untried (there are no untried units in Korsun). All untried combat units are placed on the map with their untried side face-up. As the game progresses and opposing units engage in combat with one another, the strengths of the untried units will gradually be revealed, as the counters are inverted whenever they are first involved in combat and remain revealed thereafter.
13.1 Placement of Untried Units
13.1 All untried units, whether they start the game on the map or enter the game later as reinforcements, are deployed on the map in their untried state. When the Soviet Player is directed to deploy an untried unit, he selects one of the appropriate type (i.e., rifle, armor, etc.) at random from among those that have not yet been used in the game. Neither Player should be aware of the actual strengths of untried units until they are revealed in accordance with Case 13.2.
13.2 Once units are placed and play begins, units remain in their untried state until they are involved in combat. The true strength of the unit is revealed at the instant of combat; i.e., neither Player may see what the actual strengths of the units are until it is time to throw the die for that particular combat. Once units have been committed in combat, they may not be withdrawn or re-allocated, even if the odds are unfavorable.
13.3 "No-Strength" Units: Certain combat units have no combat strengths (both the attack and the defense strength are "zero"). These units are removed from the game at the instant of revelation, as they can neither attack nor defend. As long as they remain untried, however, they have a Zone of Control and block supply and retreat lines, etc.
14.0 Air Power
General Rule: Each Game-Turn, the Players receive a number of Air Points which they may use in combat. In some of the Army Group South games, there is no airpower, while in others Air Points may be used for other purposes. The number of Air Points provided for each side per Game-Turn is detailed in the Exclusive rules.
14.1 Air Points and Combat
14.11 Each Player may apply his Air Points to help him obtain better odds in combat. Before the ratio for a given combat has been calculated (and before revealing untried units), either or both Players may allocate Air Points.
14.12 The attacker announces his intentions to use Air Points first, then the defender.
14.13 No more than one Air Point per side may be allotted in a given combat.
14.14 The expenditure of an Air Point on a given combat adjusts the ratio one column in favor of the Player using the Air Point. Thus a 2-1 attack with Air Power becomes 3-1; if that combat had Air Power used defensively instead, the 2-1 would become 1-1. If both the attacker and defender apply a Point, the ratio is unaffected (the opposing Air Points cancel each other out).
14.15 Air Points may not be used in overruns.
14.2 Other Uses of Air Points
In some of the games there are no Air Points assigned to either Player, while in others Air Points may be used for other purposes in addition to or instead of combat support, such as rail interdiction, air supply, and other Air Power functions. These uses are usually executed during the Air Power Phase of the Player-Turn.
15.0 Reinforcements
General Rule: Both sides receive reinforcements according to the reinforcement schedules for each side which are printed in the Exclusive rules of the game being played.
Procedure: Reinforcements are always deployed in the initial Movement Phase of the Player-Turn; never in the Mechanized Movement Phase. The necessary Movement Point cost must be paid to place a unit in the appropriate reinforcement entry hex. All reinforcements are considered in supply for the Player-Turn of their entrance. In some of the games certain Soviet units arrive in an untried state. Reinforcements may arrive on the map by rail movement if directed to enter in a railroad hex and if the owning Player has the capability to move units by rail.
16.0 German Unit Organization
Commentary: The Combat Strengths of the German units in all the Army Group South games are based on a common set of numerical values. For the Player's interest only, the following list summarizes the strengths of the various types of German units that fought in the Ukraine during World War Two. By comparing this list with the Combat Strengths of the German units in the games, the Players can visualize the relative strengths of the German forces in the different stages of the war. These common Combat Strengths serve to relate not only the German Army in the games, but also the Soviet Army; since if the relative German strength is consistent, then the Soviet strengths interacting with the German strengths must also be comparable from game to game. In short, all the games in the Army Group South Quad work together to show the Players how effective the armies and their strategies were in the various stages of the war in Russia.
General Rule: (see Charts and Tables, Case 16.0 below)
Charts and Tables
9.5 Combat Results Table
Combat ratio (attacker strength to defender strength). Each row is a die roll.
| Die | 1-3 | 1-2 | 1-1 | 2-1 | 3-1 | 4-1 | 5-1 | 6-1 | 7-1 | 8-1 | 9-1 | 10-1 |
|---|---|---|---|---|---|---|---|---|---|---|---|---|
| 1 | 1/- | 1/1 | -/1 | -/1 | -/2 | -/2 | -/2 | 1/3 | -/3 | -/E | -/E | -/E |
| 2 | 1/- | eng | 1/1 | -/1 | -/1 |
All results to left of slash apply to attacker; all results to right of slash apply to defender. E = all affected units eliminated; opposing Player may advance two hexes. 1,2,3 = Player whose units are affected may choose to lose the indicated number of steps or retreat all affected units the number of hexes indicated; opposing Player may advance his units along the path of retreat. eng = engaged; each side must take one step loss and remain in place; no retreat or advance after combat is possible.
Notes: In a split result (i.e., 1/1), the defender takes losses or retreats first, then the attacker must decide to retreat or lose a step. If the defender's hex is vacated and the attacker elects to take a step loss, the attacker may advance after combat. All victorious units may advance after combat. Retreat paths are determined by the retreating Player. Attacks at a ratio greater than 10-1 are resolved as 10-1; attacks at a ratio less than 1-3 are resolved as 1-3.
10.4 Terrain Effects Chart
| Terrain | Movement Point Cost | Effect on Defender Strength | Effect on Supply and ZOC |
|---|---|---|---|
| Clear | 1 | None | None |
| Woods | Mech: 2; Inf: 1 | Doubled | None |
| Minor River | Axis: +2; Soviet: +1 | Doubled | None |
| Major River | Axis: +3; Soviet: +2 | Tripled | ZOCs and supply blocked |
| City | 1 | Doubled | None |
| Town | NA | None | None |
Mech = armor, mechanized infantry, cavalry; Inf = infantry, rifle; NA = not applicable (other terrain in hex); P = prohibited; ZOC = Zone of Control.
16.0 German Unit Organization (Charts)
(continued from Standard rules)
General Rule: Each unit type is listed with its full-strength attack and defense values, followed by the attack and defense values of its steps. Movement Allowances are not included since they differ from game to game, depending on the map scale and the length represented by a Game Turn. In all cases, a German unit has a combat value that corresponds to one of the strength levels for that unit type. Players will note that often a unit does not begin play at its maximum possible strength, reflecting the fact that the unit had suffered losses before the start of the game. Unit types are followed by the date when that formation first was raised or reorganized on the East Front. Some of the later games include units with an older organization since the unit was raised before the new organization was put into effect.
16.1 Infantry Divisions
- Infantry Division (1941): 8-10, 5-7, 3-4, 1-2
- Infantry Division (late 1943): 7-8, 4-5, 2-3
- Mountain Division (1941): 7-9, 4-6, 2-3, 1-1
- Mountain Division (late 1943): 7-8, 4-5, 2-3
- Light (Jaeger) Division: same as Infantry (1941) with one extra Movement Point.
16.2 Mechanized Divisions
- Motorized Infantry Division (1941): two motorized Infantry Regiments: 3-3, 1-2
- SS Motorized Infantry Divisions (1941): two or three SS Motorized Infantry Regiments: 3-3, 2-2
- Panzer Grenadier Division (1943): two Panzer Grenadier Regiments: 4-3, 2-2
- Panzer Division (1941): Panzer Regiment: 6-2, 3-1; two Motorized Infantry Regiments: 1-3, 0-1
- Panzer Division (1943): Panzer Regiment: 5-2, 3-1; two Panzer Grenadier Regts: 2-3, 1-1
16.3 Miscellaneous Units
In some games there are German units with one-of-a-kind organization. These include infantry regiments, battlegroups, remnants of destroyed divisions, and independent regiments or brigades. Such units have combat strengths quantified in the same manner as the above German units.
Kiev Exclusive Rules
Outline of the Exclusive Rules (Kiev): 17.0 Introduction; 18.0 Setting Up the Game (18.1 Soviet Set-Up; 18.2 German Set-Up); 19.0 Additions and Changes to the Standard Rules (19.1 Sequence of Play; 19.2 Units and Markers; 19.3 Rail Capacity; 19.4 Overrun; 19.5 Terrain Effects; 19.6 Soviet Units and Combat Results; 19.7 Retreats; 19.8 Supply; 19.9 Mud); 20.0 Divisional Integrity (20.1 Restrictions and Divisional Integrity; 20.2 Gross Deutschland Integrity Bonus); 21.0 German Leaders; 22.0 Stalin's Directive (22.1 Effects of the Directive; 22.2 Relieving Units); 23.0 Reinforcements (23.1 Soviet Reinforcements; 23.2 German Reinforcements); 24.0 Victory Conditions (24.1 Victory Points for Controlling Town and City Hexes; 24.2 Victory Points Awarded to the Soviet Player; 24.3 Victory Points Awarded to the German Player); 25.0 Play-by-Mail (25.1 Changes to the Exclusive Rules for Play-by-Mail; 25.2 Play-by-Mail Procedure).
17.0 Introduction
Kiev is a division/regiment level simulation of the German Blitzkrieg campaign that started 29 August 1941 and ended 26 September 1941. It ended with the largest encirclement in history: 665,000 Soviets were destroyed; 3718 guns and 884 armored fighting vehicles captured; and the remains of the great Soviet prewar army of April 1941 was finished as a fighting force. If Russia would ever win the war it would have to be by using her vast resources and reserves to build an entire new army to combat the Nazis.
Each Game-Turn is equivalent to two days of real time. Each hex on the map represents 8 kilometers from side to side.
18.0 Setting Up the Game
General Rule: After deciding which side each Player will play, the Soviet and Axis units are sorted by type. Those units that represent the forces present at the start of the game are placed on the map. The Soviet Player sets up his units first, then the Axis Player sets up his units.
Cases:
18.1 Soviet Set-Up: The Soviet Player first divides his units into three piles: tried combat units (those with no markings on the reverse side), HQ units, and untried units. All the untried units are set aside for the time being; they are brought into play as reinforcements. He then places all of the tried combat units and the HQ units in the hexes on the map that match the hex printed on each counter. Note that three of the HQ units are not placed on the map; they arrive as reinforcements. A total of 60 Soviet units are set up before play.
18.2 German Set-Up: The German Player (printed as "Ther German Player") divides his units into three piles: units with a hex number printed on them, units with a Game-Turn and Entry Area letter printed on them, and units with rpl printed on them. Units in the latter two categories are not placed on the map initially; they are either reinforcement units or replacements. All units with a hex number printed on them are placed in the matching hex on the map, with the hex number face up. A total of 41 German units are set up before play.
19.0 Additions and Changes to the Standard Rules
General Rule: The following rules are changes and amendments to the Standard rules of Army Group South that are necessary for the play of Kiev. In addition, Sections 20.0 thru 22.0 present new concepts which are used in the game. Unless specifically altered by these rules, all the Standard rules apply in full.
Cases:
19.1 Sequence of Play
19.11 The Soviet Player is the first player and the German Player is second in every Game-Turn.
19.12 There are 13 Game-Turns in a complete game of Kiev.
19.13 There is no Mechanized Movement Phase during the Soviet Player-Turn. This Phase should be dropped from the Sequence of Play (4.2). The Soviet Player may move his units only in the Initial Movement Phase of his Player-Turn.
19.14 There is no Air Power Phase in either Player-Turn. This Phase should be dropped from both Player-Turns in the Sequence of Play. Neither Player has Air Points to expend in Kiev. Section 14.0 of the Standard rules should be ignored.
19.2 Units and Markers
19.21 There are no Axis-Allied units in Kiev.
19.22 Disruption markers have not been provided with the game. Units do not become disrupted if they suffer an adverse result while defending against an overrun (exception to Case 6.3).
19.23 Out of Supply markers have not been provided with the game. Units that are out of supply should be recorded on a separate sheet of paper, or blank counters from another game may be used to indicate that units are out of supply.
19.24 The third step of German infantry divisions that start the game with a strength of 5-7-7 are represented by 1-2-7 German infantry divisions without unit designations. These units are marked rpl. Any 1-2-7 unit can be used as a third step for a 5-7-7 infantry division.
19.3 Rail Capacity
Only the Soviet Player may move units by rail. Soviet units being moved by rail may enter any non-German-occupied or -controlled rail hex. The German Player may not move any of his units by rail movement. A unit being moved by rail may be moved a maximum of 25 rail hexes in a single Initial Movement Phase. The Soviet Player may move up to eight units (including reinforcements) by rail per Game-Turn.
19.4 Overrun
19.41 Overruns may only be conducted by mechanized units (including armor, motorized infantry and cavalry). Infantry units may not be used to overrun (exception to Section 6.0).
19.42 Units that suffer an adverse result while defending against Enemy overrun are not disrupted. There is no disruption in Kiev (exception to Case 6.3).
19.43 HQ units and German Leaders (see Section 21.0) may add their leadership rating of units they are stacked with that are being used to conduct an overrun in accordance with Case 11.37. The Leadership Rating would not be halved when calculating the strength of the overrunning units. This is an exception to Case 6.17.
19.5 Terrain Effects
19.51 A unit may never be moved across a major river hexside directly into a swamp hex, unless that hexside is traversed by a road or the unit is being moved by rail. This does not apply to advance after combat, nor does it apply to a unit being moved from a swamp hex across a major river into a nonswamp hex.
19.52 A unit may not be retreated across a major river hexside unless that hexside is traversed by a road or railroad. If the unit has no other possible retreat route, it must take step losses instead (except to Case 9.78).
19.53 Any supplied units in hex 0319 (Kiev city) have their Defense Strength tripled (not doubled). If the units are out of supply, their Defense Strength is doubled (since their Defense Strength is already halved for being out of supply, they would in effect defend at face value).
19.6 Soviet Units and Combat Results
19.61 Whenever an overrun or combat reveals an untried unit to be a unit with an asterisk (*), the Soviet Player loses his option to take step losses to fulfill the results of the combat or overrun (except when an engaged is rolled). Units in that battle must be retreated (if called for by the Combat Results Table) even if it would mean the elimination of some or all the Soviet units involved.
19.62 Once a unit with an asterisk becomes tried (that is, has survived its first combat or overrun), the asterisk is ignored for any further combat. Thus, only in a situation where an asterisk unit is actually revealed does the Soviet Player lose the option to take step losses.
19.63 Soviet units with a Defense Strength of zero (see Case 13.3) are not automatically eliminated when revealed. If all the Soviet units involved in a combat or overrun are revealed to be no-strength units, they would be eliminated. Otherwise, the combat takes place normally.
19.64 No-strength units may be used to absorb step losses.
19.65 If all the attacking units involved in a combat or overrun have a total strength of zero, the attack does not take place and the attacking units are automatically eliminated. In attacks in conjunction with other units, no strength units may be involved (for purposes of taking step losses).
19.66 All Soviet HQ units use one half of their Leadership Rating as their Defense Strength (see Case 11.38). Fractions are rounded down.
19.67 A Zone of Control exerted by a Soviet HQ unit does not inhibit the tracing of Enemy supply or the retreat of Enemy units. HQ units are considered not to exert a Zone of Control for these purposes (exception to Case 11.35). HQ units do exert a Zone of Control that affects Enemy movement. Enemy units must stop moving when they enter a hex controlled by an HQ units and may not leave that hex except as a result of overrun or combat.
19.7 Retreats
If a Player decides (or is required) to retreat his units rather than taking step losses, his units are retreated by the Enemy Player. This is an exception to Case 9.72 of the Standard rules. However, the Enemy Player may not retreat the units in such a way that they would be eliminated by the retreat, if an alternate safe retreat path is available. All the restrictions of Case 9.7 apply in full when retreating Enemy units.
19.8 Supply
19.81 German supply lines may be of any length.
19.82 German supply lines must be traced to any non-Soviet-occupied map-edge hex along the north, west, and/or south sides of the map that contain a road running off the mapsheet (except hexes in Area N).
19.83 Soviet supply lines are based on the Command Radius of Soviet Army and Army Group HQ's as outlined in the Standard rules. These HQ units must then be able to trace a line of supply to a Soviet supply source.
19.84 Soviet supply sources include any non-German-controlled map-edge hex along the eastern side of the mapsheet containing a road or railroad leading off the mapsheet contained in Areas K, L, M or N.
19.85 All Soviet Units are in supply for movement and combat during the entire first turn of the game (unless they have their supply cut off by German Zones of Control and/or swamp hexes/major river hexsides during the German Player-Turn). Thus, during the first Game-Turn, Soviet supply lines may be of any length so long as the supply line can be traced to a supply source.
19.9 Mud
Game-Turns 8 and 9 are considered mud Game-Turns and are so marked on the Game-Turn Record Track on the map. During these two Game-Turns, the following movement restrictions are in effect:
- All units except cavalry units have their Movement Allowance halved (round fractions down).
- All cavalry units have a Movement Allowance of six.
- The German Player has no Mechanized Movement Phase (the Soviet Player never does).
20.0 Divisional Integrity
General Rule: The German Player gains a divisional integrity combat bonus if regiments of the same division are stacked together. Regiments can be recognized as belonging to the same division whenever the large number to the right of the slash (/) on the unit designation is the same.
Procedure: Whenever two or more regiments of the same divsion are stacked together in the same hex all of the regiments of that division in that hex have their attack and defense strengths doubled.
Cases:
20.1 Restrictions on Divisional Integrity
20.11 If a German leader (see Section 21.0) or a German unit not belonging to the division is stacked with two or more units of a divsion, only the units belonging to the division are doubled. The non-divisional units add only their face-value strengths to the stack.
20.12 Divisions represented by a single counter (infantry) and German Leaders are not eligible for Divisional Integrity.
20.2 Gross Deutschland Integrity Bonus
(Illustration: the motorized infantry regiment counter Gross Deutschland, III 2B, GD, 2-2-10.)
The motorized infantry regiment Gross Deutschland (GD) may be used as a regiment for any division eligible for the divisional integrity combat bonus. If it is stacked with any German mechanized regiment, both GD and the other regiment are doubled for attack and defense. If GD is stacked with regiments from two different mechanized divisions, only one of the regiments would be doubled, at the German Player's choice.
21.0 German Leaders
General Rule: The German Player is provided with two leader counters: Guderian and Kliest. These represent the command of the Second Panzer and First Panzer Armies respectively. German Leaders have capabilities similar to Soviet HQ units but do not coordinate German Supply.
Procedure: German Leaders may add their Leadership Rating to the Attack (or overrun) Strength of German units with which they are stacked. Leaders use one half of their Leadership Rating as their Defense Strength. However, unlike Soviet HQ units, leaders may add that Defense Strength to the Defense Strength of German units with which they are stacked. German leaders exert a Zone of Control identical to that of Soviet HQ units (see Case 19.67) and are subject to all rules concerning Soviet HQ units in Section 11.0, except that they have no bearing on German supply.
22.0 Stalin's Directive
Commentary: Hitler's no retreat order at Stalingrad and elsewhere is well known. Less well known is that Stalin was prone to similar fits of insanity. Frustrated by mounting casualties and crumbling fronts, Stalin, on 9 September 1941, in a fit of temper, issued his famous "stand-fast-and-die" order. Consequently the already weakened Soviet armies effectively lost their ability to react to German breakthroughs in their rear areas.
General Rule: During Game-Turns 7 through 13 the stand-fast order could be in effect. Game-Turns 7-9 are automatically affected by the Stand-fast order, and all of the rules listed under this section are in effect. At the beginning of Game-Turn 10 and each turn thereafter the Soviet Player rolls the die. If the stand-fast order was in effect during the previous Game-Turn he adds one to the result. If the modified die roll is 1-4 inclusive, the stand-fast rule is in effect for that Game-Turn. When the stand-fast rule is in effect, the Soviet Player only is restricted in movement.
Cases:
22.1 Effects of the Directive
Soviet units may only move along the hexrow they are in (i.e., a hexrow running north-south) or to a lower numbered hexrow unless one of the following conditions is met:
- the unit is "relieved" by a Soviet unit from a higher numbered hexrow (see 22.2) or,
- the unit is west of the Seim-Desna-Dnieper river (minor or major river running from hexsides 2302/2401 to 2432/2433 inclusive) or,
- the unit is a Soviet HQ unit.
22.2 Relieving Units
A unit relieves another unit by moving from a higher numbered hexrow to the hex containing the unit it intends to relieve. It must stop on that hex and may not continue moving during that Movement Phase.
22.21 A unit may only relieve one other unit per turn. That is, one unit could not relieve more than one unit in another hex.
22.22 A unit may be moved by rail or road in any direction as long as it ends its move in the same or lower numbered north-south hexrow.
22.23 The relieving unit may not be a Soviet HQ unit.
22.24 The Soviet Player may always retreat, advance after combat, and/or overrun with his units in any direction. The stand-fast-and-die order applies only to all movement except any hex in which an overrun is conducted in.
22.25 Units that are not relieved but able to move may use any combination of movement: along the same hexrow, to a lower numbered hexrow, or road movement (or rail movement exclusively) so long as the unit ends its movement on the same hexrow or a lower numbered hexrow.
23.0 Reinforcements
General Rule: Both Players receive reinforcements. These may be placed on any map edge hex containing a road (or railroad for Soviet reinforcements) that is part of the entry area printed on the counter (in the case of German units) or in the Soviet Reinforcement Schedule (23.1). Any number of reinforcement units may be placed in any given entry hex so long as the entry hex does not contain an Enemy unit. Reinforcements may not be withheld; they must be brought into play on the turn they are scheduled to enter.
Cases:
23.1 Soviet Reinforcements
All Soviet reinforcements are drawn from the Untried units the Soviet Player set aside when he set up for play (exception: The three Soviet HQ reinforcement units are not placed on the map in an Untried state.) When the Soviet Player takes his reinforcements he draws units of the appropriate type from among the Untried units and places them in any road or railroad hex of the entry area listed for that unit. Soviet reinforcements enter as follows:
- Game-Turn 1: Five infantry and three armor units in areas K through N.
- Game-Turn 2: Six infantry units and the 38 Army HQ in areas K through N.
- Game-Turn 3: Three infantry, one cavalry, one armor unit, and the 17 Army HQ in areas K through N.
- Game-Turn 4: Six infantry, two cavalry and one armor unit and the 37 Army HQ in areas K through N.
- Game-Turn 5: Five infantry and four armor units in areas L or M.
- Game-Turn 6: Five infantry, one cavalry and one armor unit in areas L or M.
- Game-Turn 7: Seven infantry units in areas L or M.
- Game-Turn 8: One infantry unit in area M.
- Game-Turn 9: One cavalry unit in area M.
- Game-Turn 10: One armor unit in area M.
23.2 German Reinforcements
All German reinforcements have a Game-Turn number and an entry area printed on each unit. For example: "2B" means that the unit is placed on any road hex in entry area B on Game-Turn 2. All German reinforcements are brought into play at their highest printed strength level.
24.0 Victory Conditions
General Rule: Players win the game based on Victory Points allocated at the end of Game-Turn Thirteen (the end of the game). Players gain Victory Points for controlling cities and towns (being the last Player to have a unit move through the hex or occupy it, not by placing the hex in its zone of control) and eliminating enemy units.
Procedure: At the end of Game-Turn Thirteen, Players total the number of Victory Points based on the Cases below. The German Player starts the game controlling city hexes 0602 and 1329. All other town and city hexes are controlled by the Soviet Player. If the total number of Victory Points that the German has is at least 133 Victory Points more than the Soviet Player total, the German Player wins. Any other result is a Soviet victory.
Cases:
24.1 Victory Points for Controlling Town and City Hexes
Both Players are awarded the same number of Victory Points for controlling town and city hexes: 25 Victory Points for Kiev (0319); 10 Victory Points for each other city hex; 5 Victory Points for each town hex.
24.2 Victory Points Awarded to the Soviet Player
The Soviet Player is awarded Victory Points for eliminating German units as follows:
- 25 Victory Points for each Panzer division (all component units) that is completely eliminated.
- 20 Victory Points if the 2Pz HQ is eliminated.
- 15 Victory Points if all three units of the SSR Mot division are eliminated.
- 10 Victory Points if both units of any motorized infantry division are eliminated.
- 10 Victory Points if 1P2 HQ is eliminated.
- 8 Victory Points for any Panzer regiment (without eliminating the entire three regiment division) that is eliminated.
- 5 Victory Points for each infantry, cavalry and/or motorized infantry regiment (without eliminating the entire division) that is eliminated.
24.3 Victory Points Awarded to the German Player
The German Player is awarded 10 Victory Points if the AGSW HQ is eliminated and 1 Victory Point for each other Soviet unit eliminated. Soviet units that are out of supply at the end of the Game are considered eliminated for Victory Point purposes.
25.0 Play-by-Mail (Optional)
Commentary: The following rule modifications have been included for those Players who wish to play Kiev by mail. These rule modifications are only used in play-by-mail. Although this method of playing the game takes more time and writing, many players find play-by-mail both a challenge and an exciting way to play opponents not in their immediate vicinity.
General Rule: Play-by-mail utilizes a computerized format of writing directions for movement, overrun, combat, advance after combat, and retreating Enemy units. Instead of die rolls to resolve combat and overruns, the closing stock results found in the daily newspaper provide the necessary randomization for the CRT.
Procedure: Players must record movement at the Initial Movement Phase in one letter, combat in a second letter, and mechanized movement (German only) in a third letter. A Play-by-mail procedure has been included Case 25.2 to help players get into a play-by-mail game with as few errors as possible.
Cases:
25.1 Changes to the Exclusive Rules for Play-by-Mail
25.11 The Soviet Player loses his option to retreat in any combat or overrun that involves an asterisk unit. This rule applies during the entire game. Since asterisk units are not "revealed" as in the person-to-person game, the loss of a retreat option occurs whenever an asterisk unit is involved in an overrun or combat.
25.12 Soviet reinforcement units enter the map already tried according to the following Reinforcement Chart (Historical Reinforcement):
- Game-Turn One: 132, 135, 193, 195, 292 infantry, 131 motorized, 19 & 41 tank.
- Game-Turn Two: 75, 187, 200, 282, 307, and 28 mountain infantry.
- Game-Turn Three: 165, 224, 228 infantry, 34 cavalry, 110 tank.
- Game-Turn Four: 24, 110, 137, 171, 295, 23 NKVD infantry, 2 & 14 cavalry, 215 motorized.
- Game-Turn Five: 121, 148, 175, 284, 304 infantry, 81 & 240 motorized, 20 & 35 tank.
- Game-Turn Six: 146, 147, 199, 206, 227 infantry, 137 cavalry, 212 motorized.
- Game-Turn Seven: 13, 15, 97, 116, 190, 264, 289 infantry.
- Game-Turn Eight: 13 NKVD infantry.
- Game-Turn Nine: 128 cavalry.
- Game-Turn Ten: 3 tank.
25.13 All units that start the game on the map should be placed in the exact hexes indicated in the set-up. Units should not be substituted for units with the exact same Attack and Defense Strength and Movement Allowance.
25.2 Play-by-Mail Procedure
The following procedure is recommended for Play-by-mail of Kiev. It could be used for play-by-mail of any other game in the quad once the historical reinforcement rate is used. Each German Player-Turn requires three letters (movement, combat, mechanized movement) and each Soviet Player-Turn requires two (movement and combat).
25.21 A Player records the movement of units (or stacks of units) one at a time by listing the unit being moved, followed by the hexes he intends to move it into, followed the number of movement points expended to move it into that hex. If a unit(s) is used for an overrun, the word "overrun" should be written after the hex. A player may wish to list alternatives in the movement of units based on what happens in a given overrun. If no alternatives are listed, the rest of the movement proceeds along the primary line of instructions (if possible.)
25.22 To resolve overruns, the Player receiving the letter uses the newspaper giving the final transactions in the stock exchange for the next stock transaction date after the postmark found on the letter. To resolve the first overrun listed, the player receiving the letter locates the first stock (in alphabetical order) with a sales-in-hundreds of three or more digits. He divides the sales-in-hundreds by six and uses the remainder as the die roll (no remainder results in a roll of six). The next overrun is resolved by use of the next stock with a sales-in-hundreds with three or more digits in the same manner as the first; the third overrun is resolved using the third stock, etc.
25.23 All directions for the retreat of Enemy units by the Player moving must be in writing. If he fails to record where units are to retreat, the Player receiving the letter makes the decision.
25.24 As a rule of thumb any retreat not written down is resolved by the Player resolving the move. Any illegal move does not take place (due to lack of movement points). Any unit a Player forgets to move does not move. In effect, a Player moving is writing down his move as if he were conducting a campaign with written orders. The more thorough he is, the less errors he will make.
25.25 Players record combat one attack at a time, listing the attacking and defending units, how the units will retreat and advance, and alternate attacks based on the result of a previous attack. If no alternative is listed, the next attack written down occurs second, etc. Combat is resolved the same way that overrun is resolved, one battle at a time using the stock results for the closing date of the next stock transaction date after the postmark.
25.26 As with movement, any direction not listed should be taken advantage of by the Player receiving the letter. Illegal combat and advances do not take place.
Player's Notes
As mentioned in the Designer's Notes, Kiev is an intricate game. The subtleties of the strategies and tactics available to both players combine to make Kiev a very involved and absorbing game if you are an expert positional player, rather than a unit pusher. Expect to spend as much time on this game as you would on a larger game.
German Notes
As one might expect, the German player must apply pressure in as many areas as possible, probing the weak points. The judicious selection of target areas and the use of all units is a must.
The German Player will quickly find that massive breakthroughs are not only difficult to obtain in the early turns, but if, by good fortune, one is obtained, the German Player will be hard-pressed to exploit it. Kiev is interesting in that, for a game on a battle so early in the war, the Soviets have an excellent local counterattack capability. German Panzer formations are rather brittle as well. These points combine to allow the Soviets to pinch off advancing German units if they are advanced too far. This problem is especially crucial if German infantry is not available to take casualties. (Note: This situation may surprise some gamers who might have expected that Kiev was a romp for the Germans because of all the publicity about how many prisoners were taken. However, the German formations, especially the Panzers, were short of equipment and supplies and tired from the constant combat and advances of the past month.)
A note about the Panzer forces: do not split up Guderian's or von Kleist's mobile forces. Doing so reduces their effectiveness almost exponentially. Keep them as mobile as possible by using the German second impulse to disengage. Guderian's advance is slow but inexorable. Von Kleist's entry will liven things up quite a bit, so don't get impatient. The Soviets can adequately defend against a thrust on one side of the bulge, but not on two.
One of the more interesting aspects of Kiev is the terrain. Avoid it!! — especially the NE woods/swamp area. This area looks inviting, but a few well placed Soviet units can make moving in this area like swimming in molasses. In general, swamps should be avoided because they block supply lines.
The German Player can probably win the game by being patient and careful. He must use good tactics and implement a broad front strategy of capturing Kiev and all but two of the other town/city hexes while sustaining a minimum of casualties.
Soviet Notes
The Soviet player has the usual role of reacting to what the German player does, but he does have a number of alternatives. The Soviets have a good local counterattacking capability which should be used to blunt any German attempts at breakthroughs. The Soviets must not get overanxious, however. Counterattacks should only be made when German units can be surrounded, the units are weak, or, of course, when Victory Points are at stake. The Soviets must be massed (i.e. 6 or more Soviet units attacking unless all Soviet strengths are known). The last thing you want as the Soviet Player is to get an asterisk unit in a weak attack and have to retreat (remember, the winner retreats all units in an attack).
The Soviet ability to blunt breakthroughs is further enhanced by the veritable masses of reinforcements the Soviet player gets in the early turns. These reinforcements can serve to correct a number of deficiencies in the Soviet position. For the most part, they are usually committed to the flanks of the bulge, or kept in reserve. If they are sent too far forward, the Stalin Directive will make it very difficult to withdraw them.
The first Soviet turn is crucial. All Soviet units are in supply for all of Game-Turn one. Starting Game-Turn two they must be able to trace supply to a headquarters unit. It is therefore imperative that the Soviet Player position his HQs in such a way as to garner the maximum supply range for Game-Turn two. Although it looks hard, it can be done. Think of the problem as a puzzle with many correct answers. Whatever you do as the Soviet Player, do not put Soviet HQs in the front lines on Game-Turn One or any other Game-Turn unless it becomes a matter of life or death. They are too valuable.
The Major River should be covered with stacks of 2 or 3 units as often as possible. This strategy will allow you to cope with most all adverse combat results and will keep the German on the "right" side of the major river until von Kleist's entry. The major river crossing rule is crucial in this regard because this rule does not allow crossings into the Zones of Control of Enemy units that are adjacent to the major river. Sometimes, due to the bend of the river, this rule will allow the Soviet Player to guard many hexes of river front with just one stack.
Most of the strong Soviet units should be sent to the northern flank of the bulge at the beginning of the game. This position is where Guderian will be. Turn six should be spent withdrawing units from the western sectors without giving the Germans an easy time. Turn seven starts Stalin Directive which will make removal of these western units very difficult, if not impossible. These withdrawn units plus the turn six reinforcements should be used to construct a defensive line around Lubny and the swamps west of it in order to contain von Kleist.
The Stalin Directive and the relieving rules are very interesting and do tend to cut down on Soviet interior line mobility. Turn five and six reinforcements should be held in the eastern map areas for these reasons. The mud turns on Game-Turns Seven and Eight will effectively end most of the German advances for those two turns, allowing the Soviets to reposition a few extra units which might be just enough to stabilize the line.
Once the mud turns are over, watch out. By this time the Germans will be able to move most handily in just about any direction. Hopefully Soviet losses will not have been too devastating, allowing the Soviets to construct a decent second line of defense. Guderian's and von Kleist's panzer forces will be exerting a lot of pressure and Kiev will very probably fall. It is the Soviet player's task to prevent the German Player from taking all but two towns/cities.
One note about retreating German panzer divisions. Always retreat the individual regiments as many hexes as possible. This tactic will prevent the German player from using divisional integrity for strong overruns in his subsequent Movement Phase.
If the game has been played well by both sides, it should be a tense race to the finish. If the German player has captured Kiev and all but two town/city hexes, and the Soviets have suffered heavy casualties while the German suffers minimal losses, the German Player will probably win. If the Soviet Player can preserve a fair amount of his army and hold onto two or more town/city hexes, he will probably win. The Soviet Player should not be too concerned about losses in the beginning. He will lose a lot of troops. Losses should stabilize in the middle game. How the Soviet Player handles the middle game will determine whether his losses go way up or stay stable in the end game. Under no circumstances should the Soviet Player give up as long as he holds at least two town/city hexes. His high rate of reinforcements will keep him in the game.
Kiev Addenda (as of October 1979)
Counters (correction): The following Soviet Rifle divisions should be set up as follows, instead of as listed on their counters: 277th (1-1-6) in hex 1307; 151st (1-2-6) and 87th (3-2-6) in hex 0219; 99th and 141st (both 0-1-6) in hex 0925.
[23.1] (correction): Game-Turn 1: Five infantry units in areas K through N; three armor units in areas L through N.
[24.2] (correction): The reference to the SSR Mot division should read the DR Mot division. The 1P2 HQ should be the 1 Pz HQ.
Corrections and additions for the Rostov, Operation Star and Korsun games in the same addenda sheet are not reproduced here.