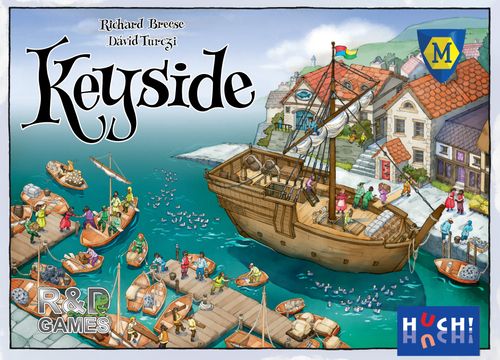
Keyside
Keyside Rulebook
Table of Contents
Table of Contents
Components
- Island board
- 4 Player mats
- Buildings mat
- Resources mat
- 12 Harbour scoring tiles
- 12 Harbour tiles
- 8 Resource and farm tiles
- 24 Headland tiles (6 x 4 colours)
- 8 Market tiles
- 24 Cottage tiles
- 16 Cow tokens
- 16 Pig tokens
- 24 Sheep tokens
- 24 Fish tokens
- 24 Wheat tokens
- 24 Stone and 24 wood tokens
- 36 Gem tokens (12 x 3 types)
- 18 Skill tiles (3 x 6 colours)
- 24 Activity markers (4 x 6 colours)
- 24 Dice (4 x 6 colours)
- 18 Sailors (3 x 6 colours)
- 72 Keyples (18 x 4 colours)
- Cloth bag for gems
- Start player marker
- Lead player marker
- 3 Boats
- 4 Dice strips
- 8 Multiplier tiles
- 4 Turn order cards
Setup
-
Place the island board in the middle of the playing surface. The area in the middle of the island board is the town.
-
Place 1 harbour tile at random in each of the harbour board indents, connecting the roads on the island board to those on the harbour tiles. Use the side with 3 dice spaces for a 2 or 3-player game. The dice and keyple spaces marked with a 3 are not used in the 2-player game. Use the side with 4 dice spaces for a 4-player game.
-
Place a harbour scoring tile at random on each harbour tile. For your first couple of games use the side with the black numbers. In subsequent games, use either the black or the red numbered side or a mixture of both.
-
Place the forest, quarry and wheat fields tiles in any 3 non-adjacent resource locations, with the side shown face up and the roads on the island board and the resource tiles connecting. Place resource tokens of the corresponding type equal to 3 times the number of players on each of the 3 tiles. For example, if there are 3 players, place 9 wood tokens on the forest, etc.
-
Place the 5 farm tiles at random, either side up, in the remaining 5 resource locations, with the roads on the island board and the farm tiles connecting.
-
Place the 8 market tiles at random in the market locations, facing outward from the centre of the island board, either side face up.
-
Place 1 of the boats next to the number 1 harbour (indicated by the boat icon on the harbour scoring tile). In a 2-player game, place a second boat 6 harbours away. In a 3 or 4-player game, place a second boat 4 harbours away from the first boat, and the third boat 4 harbours away from both the others. Place 6 sailors, 1 of each colour, in each boat.
-
Place the buildings mat within easy reach. Place the cottage tiles cottage side face-up on the plots with the corresponding letter. Stack the skill tiles in their corresponding coloured plots in numerical order with the 5 on top and 1 at the bottom.
Each player now takes the following:
-
A player mat A‒D (see letter in top left corner of the mat) in their chosen colour. (After you are familiar with the game try playing with the different boards E‒G on the reverse sides.)
-
6 activity markers (1 of each colour) which are placed on the round spaces of the corresponding colours at the bottom of the player mat.
-
18 keyples of their chosen colour: 12 to be placed in the store above the red column on the player mat and 6 in the town location in the centre of the island board.
-
6 headland tiles of their chosen colour, which are placed by the side of the player mat.
-
A dice strip, taken at random. (For use in the first game and optional thereafter.) To be placed by the player mat.
-
6 dice (1 of each colour). To be placed by the player mat.
-
A turn order card. If desired, this can also be used as a screen when choosing dice.
The start player is the player who most recently landed on an island. Give them the start player marker and the lead player marker.
Place any unused pieces back in the game box.
First game setup
To guide you in your first game, each player starts with a cottage tile and a keyple on a related harbour tile.
Select cottages C, F, N and X (identified by their letter on a coloured circle background). Each player takes 1 of these cottages at random and places it on the top of the player mat in the building plot of the corresponding colour, with the cottage side face up. Place any unclaimed cottages back onto the buildings mat.
A player with cottage C places a keyple from their player mat into the harbour containing the harbour scoring tile 11 and any players with cottages F, N and X place 1 of their keyples into the harbours containing harbour scoring tiles 1, 5 and 9 respectively.
Game Play
The game of Keyside is played over 3 rounds, each representing a year.
Each round is divided into 2 phases: landing and resolving harbours.
Starting with the player who has the start player marker, each player takes a turn to lead in clockwise order.
In the landing phase, when leading, move a boat to a harbour and place a sailor from that boat, plus your matching coloured dice, into the harbour. You may also introduce 1 of your keyples into the harbour. If possible, other players can choose to follow by playing a matching coloured dice of equal or lower value and may also introduce a keyple into the harbour.
Each player progresses from the landing phase to the resolving harbours phase when they have no dice left to play. Some players may progress before others depending on whether or not they have followed on other players turns.
In the resolving harbours phase, when leading, choose a harbour to resolve that contains 1 or more of your keyples. All players with keyples in this harbour will gain the benefit that harbour provides, irrespective of the number of their keyples in the harbour. These benefits include gaining resources, headland building opportunities, keyple movement, keyple recruitment and access to farms, markets and skill tiles. Keyples remain in the harbour for the rest of the game unless subsequently moved.
At the end of the game you score points for each keyple in a harbour, based on the criteria on the harbour scoring tile. In addition, points are scored for buildings on your player mat, headlands, skill tiles and occupying the forest, quarry and wheat fields locations.
The player with the most points wins the game.
Round structure
Dice setup
All players secretly set their dice to values 1‒6, one dice of each number, then reveal the dice simultaneously. Once revealed, the numbers cannot be changed.
If this is your first game, we suggest that each player receives a dice strip at random and sets their dice as indicated by the strip. In the first round all players should set their dice strip to the light blue shallow water side and in the second round to the dark blue deep water side. In round 3, players individually choose either side of the dice strip or select the dice without using the dice strip.
In subsequent games players may individually choose whether to use a dice strip.
Start of round
The start player begins the round. The start player in rounds 2 and 3 is determined when resolving harbour tile 'I'.
Player turns
What you can do on your turn will depend on whether you still have 1 or more dice to play.
If you have 1 or more dice, you are in the landing phase and must play 1 of these dice.
If you have played all your dice, then you progress to the resolving harbours phase.
Anytime actions
At any time on your turn you may also:
- spend a skill tile to advance an activity marker on your player mat
- spend a fish to flip a market tile to its reverse side.
Landing phase
If you are the lead player and have 1 or more dice, perform the following steps in order:
-
Place the lead player marker near the top right of your player mat.
-
Select a coloured dice from those you still have available.
If there is at least 1 available harbour (i.e. 1 without a sailor on the harbour tile), choose either to perform steps 3 to 10 or steps 11 and 12. If there are no available harbours, perform steps 11 and 12.
-
Select a boat containing a sailor of the same colour as the dice chosen.
-
Move the boat to an available harbour, i.e. one that does not have a boat present, has no sailor on the harbour tile, has not already been resolved this round and is within reach.
The reach of a boat is a number of harbours away in either direction, up to the value shown on the dice. A boat must always move a minimum of 1 harbour.
Example: The light green (LG) player chooses the orange 2 dice. There is an orange sailor in the boat. The boat can move 1‒2 harbours in either direction. The LG player chooses to move the boat 1 harbour anti-clockwise.
A boat can move past a harbour with a boat in it, but cannot stop there. An occupied harbour still counts as a harbour for movement calculation purposes.
Note: If there is no legal harbour for your chosen boat to move to, return to step 2 and select a different dice. If there are no legal moves available with any of your dice, you must choose the second option of step 2 instead and perform steps 11 and 12.
-
Place the sailor of the same colour as the dice from the boat onto the sailor shaped space in the harbour.
-
Place the chosen dice onto the leftmost dice space in the harbour (i.e. next to the sailor). The lead dice can then always be identified.
-
In clockwise order, other players may now follow you with a dice of the same colour, if they have a dice that is equal or lower in value to your lead dice. If they choose to follow, they place their dice in the next available dice space in the harbour.
Note, following other players means you will use up your dice more quickly and progress to the resolving harbours phase sooner.
- Any headland tile on either side of the harbour is automatically activated.
Example continued: The LG player places the orange sailor from the boat into the harbour and places the orange dice they chose in step 2 above into the left dice space on the harbour tile. The purple player also has a value 2 orange dice. They choose to follow and place their dice in the next available dice space. The other players cannot follow as their orange dice values are greater than 3. The purple player's rally point headland is activated and they immediately recruit a keyple from their player mat into the town.
- Advance the activity marker on the corresponding skill track of your player mat and activate this level.
Note: A keyple obtained from advancing on the red skill track can be used in step 10.
- If there is a free keyple space on the harbour you may move a keyple up to 3 locations to the harbour and place it in any keyple space that does not already contain a keyple – the position does not matter.
Note: The number of keyple spaces available in a harbour depends on the number of players.
In clockwise order, any other player who followed may now also move a keyple into the harbour if there is still a space, following the rules above.
Then go to step 13.
If you are unable to carry out steps 3 to 10 (because there are no available harbours, or you are unable to make a legal move), you must perform steps 11 and 12 instead. Note, you are always allowed to perform steps 11 to 12 instead of steps 3 to 10, even if there is a legal move.
-
Place your dice on the round space at the bottom of the matching colour skill track on your player mat.
-
Advance the activity marker on this skill track and then activate the new level.
-
Pass the lead player marker to the next player.
Resolving harbours phase
If you have no dice remaining you are in the resolving harbours stage.
- Take the lead player marker and place it near the top right of your player mat.
If there are 1 or more harbours left to resolve containing 1 or more of your keyples, take actions 2 to 4, then action 7.
If there are 1 or more harbours left to resolve, but no harbour left contains any of your keyples, choose either action 5 or 6, then action 7.
If there are no harbours left to resolve then the end of the year is triggered. Play continues with players choosing action 5 or 6 until the player to the right of the start player has had their turn. If the player to the right of the start player triggers the end of the year, the year ends immediately.
Note, a harbour is only resolved if a sailor and dice have been placed on it.
-
Select a harbour to resolve. The harbour must contain at least 1 of your keyples and a sailor.
-
Move the dice (keeping the dice the same side face up) and sailor off the selected harbour tile into the adjacent sea area, so that it is easy to see which harbours have been resolved.
-
Gain the harbour benefit. In clockwise order, all other players also gain the benefit if they have a keyple in the harbour.
If you are not performing actions 2 to 4, choose either action 5 or 6, then action 7.
-
Take any 2 stone, wood or wheat.
-
Advance 1 space on any skill track and gain the benefit.
-
Pass the lead player marker to the next player in a clockwise direction.
End of years 1 and 2
-
The player who resolved harbour tile 'I' takes the start player marker.
-
Each player retrieves a set of 6 dice of different colours.
-
The boats remain in the harbours where they last docked. Fill the boats with 1 sailor of each colour.
-
All the keyples remain in their current locations, ready to work again in the following year and score points for their efforts at the end of the game.
Game end and scoring
The game ends at the end of the third round.
-
The player who resolved harbour tile 'I' takes the start player marker.
-
Starting with the player with the start player marker, each player may spend skill tokens to advance the markers on their player mats.
-
Leave all the boats, sailors, keyples and dice where they are.
End of game scoring
Use the score pad provided.
The player with the start player marker allocates the start player marker to their player mat as 1 of any of the following for scoring purposes: a cow, pig, sheep, fish, stone, wheat, wood or any type of gem. Items can be scored more than once in accordance with the harbour scoring tiles, cottages and houses.
In order, score:
- Harbour scoring tiles 1 to 12
- Buildings on players' mats
- Gems on players' mats
- Headland tiles D, E and F
- Skill tiles
- Forest, quarry and wheat fields tiles.
The player with the most points wins the game. If scores are tied the players share victory.
Score sheet
The score pad has one column per player and the following rows:
Harbours — one row for each harbour scoring tile, numbered 1 to 12, with sub-totals.
Buildings and gems — one row for each of the yellow, green, red, blue, purple and orange cottage/house columns, plus a row for gems, with sub-totals; then rows for headland D (Statue), headland E (Support), headland F (Beach), skill tiles, and forest/quarry/wheat fields.
Totals — the grand total for each player.
Detailed Rules
Movement of keyples
The movement action allows 1 keyple to move up to 3 locations. Movement is optional.
Movement is along roads from any location (harbour, town, farm, quarry, wheat fields, forest or market). Each location moved into counts as 1 movement.
When a boat docks at a harbour, 1 keyple can be moved up to 3 locations into that harbour.
Examples: A keyple moves 2 locations, from the town, through a market, to a harbour. A keyple moves 3 locations from harbour K, through the 2 grey markets, to harbour D.
The footprint inside a resource tile icon (found in harbour B and on the green skill track levels 2 and 3 on the player mats), indicates that a keyple can be moved up to 3 locations, but only into a farm, forest, quarry or wheat fields that does not already contain a keyple.
Movement cannot be split between keyples. If a player has 2 movement actions, the same keyple can be moved twice.
Player mats
The player mat shows, from left to right: the identification letter; building plots for cottage and house tiles of the matching colour; stores for resources gained (the green store is the barn); 6 coloured skill tracks, levels 0‒4, on which activity markers can advance vertically or diagonally within their coloured track; activity markers, placed at level 0 at the start of the game.
Use player mats A‒D, which provide the same rewards, until you are familiar with the game. Choose player mats E‒H for different challenges. Player mats A‒D are explained below.
Advancing on the player mat
You may advance an activity marker vertically or diagonally upwards on the skill track of the corresponding colour when you:
- Lead and play a sailor from a boat (see landing phase step 9).
- Choose the advance option (see landing phase step 12).
- Choose the advance option on the yellow skill track steps 1 to 3 (see below).
- Activate the grey 1 market stall.
- Spend a skill tile.
Whenever an activity marker advances to a new level an action or ability becomes available. Actions are undertaken immediately and are one-off. Abilities are marked with an infinity symbol and are available for the rest of the game.
Actions on level 4 can be repeated if an activity marker on level 4 is re-activated. The activity marker stays on level 4.
Taking an action is optional.
Yellow skill track: Thatcher
Level 1: Left: Place 2 wheat into your wheat store. If available, take from the wheat fields, otherwise take from the resources mat. Right: Advance any 1 of your activity markers (including yellow) 1 space on a skill track and gain the benefit.
Levels 2‒3: Left: Pay a wheat to build any coloured cottage on your player mat or upgrade any cottage on your player mat to a house. Right: Advance any 1 of your activity markers (including yellow) 1 space on a skill track and gain the benefit.
Level 4: Place an available yellow cottage tile face up onto the yellow building plot on your player mat or, if a cottage has already been built there, upgrade the cottage to the house at no cost. If you have already built a yellow house this action is lost. Pay a wheat to build any coloured cottage on your player mat or upgrade any cottage on your player mat to a house (including a yellow cottage just built).
Green skill track: Farmer
Level 1: Import 2 sheep from the resources mat into your barn.
Levels 2‒3: Left: Import 1 animal of any type from the resources mat into your barn. Right: Transfer up to 2 animals from your barn into farms. Place the animals onto resource icons that do not already contain an animal and take the indicated resources. In addition, you may move a keyple up to 3 steps onto a keyple icon in any farm or resource location that does not already contain a keyple. This will usually be the farm the animals are being placed in, but it could also be a different farm, the forest, quarry or wheat fields.
Level 4: Place an available green cottage tile face up onto the green building plot on your player mat or, if a cottage has already been built there, upgrade the cottage to the house at no cost. If you have already built a green house this action is lost. Exchange up to 2 animals for different type(s). You can exchange an animal in a farm you control or in your barn. The exchanged animal is placed in the same location.
Red skill track: Steward
Levels 1‒3: Left: Transfer up to 2 keyples from your store to the town. Right: Move 1 or 2 keyples up to 3 steps each.
Level 4: Place an available red cottage tile face up onto the red building plot on your player mat or, if a cottage has already been built there, upgrade the cottage to the house at no cost. If you have already built a red house this action is lost. Move 1 or 2 keyples up to 3 steps each.
Blue skill track: Fisher
Level 1: Import 1 fish from the resources mat into the fish store.
Level 2: Left: Import 1 fish from the resources mat into the fish store. Right: Activate a market where you have a keyple.
Level 3: Left: Import 2 fish from the resources mat into the fish store. Right: Take a skill tile from a market where you have a keyple.
Level 4: Place an available blue cottage tile face up onto the blue building plot on your player mat or, if a cottage has already been built there, upgrade the cottage to the house at no cost. If you have already built a blue house this action is lost. Take a skill tile from a market where you have a keyple.
Purple skill track: Jeweller
Level 1: Take a gem unseen from the gem bag and place into your gem store. At the end of the game, each gem of 1 type (only) is worth 1 point.
Level 2: Take 2 gems unseen from the gem bag and place into your gem store. At the end of the game, each gem of 2 types (only) is worth 1 point each.
Level 3: Take 3 gems unseen from the gem bag and place into your gem store. Ability: At the end of the game all gems are worth 1 point each. This scoring continues to apply if the purple activity marker has advanced to level 4.
Level 4: Place an available purple cottage tile face up onto the purple building plot on your player mat or, if a cottage has already been built there, upgrade the cottage to the house at no cost. If you have already built a purple house this action is lost. Activate a market where you have a keyple.
Orange skill track: Headland builder
Level 1: Left: Take 1 stone from the quarry, if available, or otherwise from the resources mat and place into your stone and wood store. Right: Take 1 wood from the forest, if available, or otherwise from the resources mat and place into your stone and wood store.
Level 2: When building a headland, the cost may be reduced by 1 resource.
Level 3: When building a headland, the cost may be reduced by up to 2 resources. However, there is always a minimum build cost of 1 resource of the appropriate type. Ability: This skill is retained if the activity marker has been advanced to level 4.
Level 4: Place an available orange cottage tile face up onto the orange building plot on your player mat or, if a cottage has already been built there, upgrade the cottage to the house at no cost. If you have already built an orange house this action is lost. Build a headland for 1 stone or wood.
Cottages and houses
There are 24 cottage tiles, referenced A‒X; 4 in each of the 6 skill colours.
You may build 1 cottage of each colour on your player mat from those available on the buildings mat. Cottages are placed above the column of the matching colour, at the top of your player mat.
You cannot take a second cottage of the same colour or exchange any cottage for a different one.
Each cottage tile can be upgraded to a house tile by flipping the tile to its reverse side. A cottage must be built before a house. A house can only be built by upgrading a cottage.
Any cottage can be acquired, or upgraded to a house, by activating the universal grey cottage/house building icon. If the building icon is coloured (level 4 on the player mats), then a cottage of that colour only can be built or upgraded.
The universal building icon is found in harbour H and on the yellow market tile and the yellow skill track levels 2, 3 and 4.
When an activity marker reaches level 4 on your player mat, a cottage of the corresponding colour is built automatically if it has not already been built. If there is already a cottage, then this can be upgraded to a house at no cost. If the activity marker at level 4 is activated again, the marker cannot move any higher, but a cottage of the corresponding colour can be upgraded to a house.
If the requirements are satisfied, all cottage tiles score points at the end of the game as shown by the yellow victory points icon on the tiles. Tiles will score more points if flipped to the house side. The points available from the house are shown by the silver points indicator at the top right of the cottage side of the tile, as well as on the house side.
Where resources, farm animals, gems or fish are required, you must have these in your stores or in a farm that you control in order to score the points indicated.
The points available for each cottage (C) and house (H) are as follows:
Yellow buildings
- A: Cottage = 2 pts. House = 4 pts.
- B: For every 2 wheat: Cottage = 1 pt. House = 2 pts.
- C: For each cottage or house on your player mat: Cottage = 1 pt. House = 2 pts.
- D: For each house on your player mat: Cottage = 1 pt. House = 3 pts.
Green buildings
- E: Cottage = 2 pts. House = 4 pts.
- F: For each pair of a pig and a sheep in your barn or farms you occupy: Cottage = 1 pt. House = 2 pts.
- G: For each pair of a cow and a pig in your barn or farms you occupy: Cottage = 2 pts. House = 3 pts.
- H: For each set of a cow, a pig and a sheep in your barn or farms you occupy: Cottage = 3 pts. House = 5 pts.
Red buildings
- I: Cottage = 2 pts. House = 4 pts.
- J: For each of your keyples in a market: Cottage = 2 pts. House = 4 pts.
- K: For every 6 of your keyples anywhere on the island: Cottage = 1 pt. House = 2 pts.
- L: If you have built the headland C ‒ the rally point (even if overbuilt): Cottage = 3 pts. House = 6 pts.
Blue buildings
- M: Cottage = 2 pts. House = 4 pts.
- N: For every 2 fish on your player mat: Cottage = 1 pt. House = 2 pts.
- O: If you have built headland A ‒ the wharf (even if overbuilt): Cottage = 3 pts. House = 6 pts.
- P: If you have built headland B ‒ the lighthouse (even if overbuilt): Cottage = 3 pts. House = 6 pts.
Purple buildings
- Q: Cottage = 2 pts. House = 4 pts.
- R: For each different type of gem on your player mat: Cottage = 1 pt. House = 2 pts.
- S: For each set of emerald, ruby and sapphire on your player mat: Cottage = 2 pts. House = 4 pts.
- T: For each plot on your player mat that does not contain a cottage or a house: Cottage = 1 pt. House = 3 pts.
Orange buildings
- U: Cottage = 2 pts. House = 4 pts.
- V: For every 2 wood on your player mat: Cottage = 1 pt. House = 2 pts.
- W: For every 2 stone on your player mat: Cottage = 1 pt. House = 2 pts.
- X: For every headland you have built (even if overbuilt): Cottage = 1 pt. House = 2 pts.
Harbour tiles
There are 12 different double-sided harbour tiles, identified with the letters A to L. The side of the harbour tile used in a game depends on the number of players.
Each harbour tile has a number of keyple spaces on which to place keyples. The number of spaces available depends on the number of players: 2 players = 4 spaces, 3 players = 5 spaces and 4 players = 7 spaces.
The harbour tiles are resolved in the resolving harbours phase. Only players with a keyple in a harbour gain the benefit. The number of keyples is not relevant. As long as you have at least 1 keyple on a harbour tile you can participate in the resolution of the tile.
The player who activates the tile takes the benefit first, followed by the other players in clockwise order. The position of keyples at the top of a harbour tile is not relevant.
A harbour tile can only be activated if there is a sailor, and therefore dice, in the harbour.
For several harbour tiles the total value of the dice placed in the harbour determines the nature or strength of the benefit.
Stone, wheat and wood are taken from the quarry, wheat fields and forest if available. Once these supplies are exhausted, resources are taken from the resources mat. Animals and fish are always taken from the resources mat.
The benefits received from individual harbour tiles are as follows:
-
A. Place 2 animals from the resources mat into your barn: (total dice value) 1‒2 = 2 cows, 3‒5 = 2 sheep, 6+ = 2 pigs.
-
B. Place any animal from your barn onto a resource icon in a farm that does not already contain an animal: 1‒2 = 2 animals, 3‒5 = 1 animal, 6+ = 3 animals. Gain the resources that the animals are placed on. Additionally, you may move a keyple up to 3 locations into a farm, forest, quarry or wheat fields that does not already contain a keyple. This is usually the farm in which you placed the animals, but it could also be a different farm, or the forest, quarry or wheat fields. You may still move a keyple even if you do not have, or move, any farm animals.
-
C. Gain wood: 1‒2: 2 wood, 3‒5: 1 wood, 6+: 3 wood. If you own the forest you receive double the quantity.
-
D. Spend wood to build a headland. 1‒2 the building requirement is 2 wood, 3‒5: 4 wood, 6+: 3 wood.
-
E. Receive stone: 1‒2: 2 stone, 3‒5: 1 stone, 6+: 3 stone. If you own the quarry you receive double the quantity.
-
F. Spend stone to build a headland. 1‒2 the building requirement is 2 stone, 3‒5: 4 stone, 6+: 3 stone.
-
G. Gain wheat: 1‒2 = 2 wheat, 3‒5 = 1 wheat, 6+ = 3 wheat. If you own the wheat fields then you receive double the quantity.
-
H. Spend wheat to build a cottage or upgrade a cottage to a house. 1‒2 the building requirement is 1 wheat, 3‒5: 2 wheat, 6+: 1 wheat.
Harbour scoring tiles
There are 12 double sided harbour scoring tiles identified with the numbers 1‒12 in black and red text. Use the side with the black numbers until you are familiar with the game. Then try playing using the side with the red numbers, or with a random mixture of black and red numbered tiles.
Points are scored at the end of the game based on the number of keyples you have in a harbour (including the keyple on the red panel on harbour tile I) multiplied by the requirement of the tile.
Example: You have 2 keyples in the harbour containing the black harbour scoring tile 2. You have 5 pigs. You score 2 pairs of pigs = 6 pts x 2 (number of keyples) = 12 pts.
Note, where the number of points generated by each keyple is restricted, this is indicated on the harbour scoring tile.
Requirements must be met in full, i.e. 3 sheep = 4 points. If you have 5 sheep, no points are awarded for the surplus 2 sheep.
All resources, farm animals, etc., can be scored multiple times using different scoring tiles, cottages and houses and, in the case of gems, your player mat.
Black numbered scoring tiles
- 3 Sheep = 4 pts. 9 Sheep = the maximum of 12 pts per keyple. The sheep may be in your barn or in a farm you own. (Note, the white boat icon on this tile identifies it as where a boat starts the game.)
- 2 Pigs = 3 pts. 8 Pigs = the maximum of 12 pts per keyple. The pigs may be in your barn or in a farm that you own.
- 1 Cow = 2 pts. 4 Cows = the maximum of 8 pts per keyple. The cows may be in your barn or in a farm that you own.
- 1 Wheat = 1 pt. 12 Wheat = the maximum of 12 pts per keyple.
- 2 Fish = 3 pts. 8 Fish = the maximum of 12 pts per keyple.
- 1 Gem of any type = 1 pt. 12 Gems = the maximum of 12 pts per keyple.
- 2 Stone or wood = 1 pt. 24 stone and/or wood = the maximum of 12 pts per keyple.
- If you have no keyples remaining on your player mat at the end of the game, each of your keyples in this harbour scores 6 pts; if you have 1 or 2 keyples remaining on your player mat, you score 4 pts, etc.
- Points are awarded for the headlands you have built (including those overbuilt). Each keyple scores 8 pts if you have built all 6 headlands; 6 pts for 5 headlands, etc.
- For each animal: cow, pig or sheep that you have in a farm you own, score 1 pt. 12 Animals in farms = the maximum of 12 pts per keyple.
- Each cottage on your player mat = 1 pt. Each house = 2 pts.
- If you have 6 different coloured skill tiles score 8 pts, etc. The values of the skill tiles do not matter.
Red numbered scoring tiles
- Each sheep in your farms scores 1 pt. 12 Sheep in farms = the maximum of 12 pts per keyple.
- Each pig in your farms scores 2 pts. 6 Pigs in farms = the maximum of 12 pts per keyple.
- Each cow in your farms scores 3 pts. 4 Cows in farms = the maximum of 12 pts per keyple.
- For each different resource you have in your stores and farms: cow, sheep, pig, stone, wood and wheat, score 2 points.
- 1 sheep (in your stores and farms) and 1 fish = 2 pts. 6 pairs of sheep and 6 fish = the maximum of 12 pts per keyple.
- 1 gem and 1 stone = 2 pts. 6 pairs of gems and 6 stones = the maximum of 12 pts per keyple.
- Each set of a stone, a wheat and a wood = 3 pts. 4 Stones, 4 wheat and 4 wood = the maximum of 12 pts per keyple.
- If you have 10 or fewer keyples on harbour tiles at the end of the game each keyple in this harbour scores 10 pts. 11‒12 keyples 6 pts, etc.
- Each keyple you have in a market at the game end = 3 pts. 4 keyples in markets = the maximum of 12 pts per keyple.
- Each keyple you have on a resource tile: farm, forest, quarry or wheat fields at the game end = 3 pts. 4 keyples on resource tiles = the maximum of 12 pts per keyple.
- Each house on your player mat = 3 pts. 4 houses = the maximum of 12 pts per keyple.
- Score pts equal to the total value of skill tiles collected divided by 2 (rounded down). 24 points divided by 2 = the maximum 12 pts per keyple.
Market tiles
There are 8 different market tiles.
To activate a market you must have a keyple on that market tile.
There is no limit to the number of players who can have a keyple on any single market tile. You may only have 1 of your own keyples on each market tile, so you can only activate a market tile once per turn.
The blue, green, orange and purple market tiles are double sided, as indicated by the 'flipping fish' icon. Only the trade depicted on the visible side is available. On your turn, before using a market tile, you may pay a fish to flip a market tile over to its other side. A follower, as well as the lead player, may do this as part of their following action. If a market is flipped, subsequent followers activate the new side, unless they pay a fish in order to flip the tile back again.
The market tile is always flipped over at the end of a turn in which the tile has been activated. So all players trading at the market on the same turn use the same side of the market before it is flipped, unless they use a fish to flip the market tile.
Items given in exchange can be from your player mat, or, if an animal, from a farm you control.
- Blue: Top side: Exchange 1 fish for 2 pigs. Reverse side: Exchange 1 pig for 2 fish.
- Green: Top side: Exchange 1 wheat for 2 sheep. Reverse side: Exchange 1 sheep for 2 wheat.
- Orange: Top side: Exchange 1 wood for 3 stone. Reverse side: Exchange 1 stone for 3 wood.
- Purple: Top side: Exchange 1 stone for 2 gems (drawn unseen from the gem bag). Reverse side: Exchange 1 gem for 3 stone.
- Grey 1: Spend 1 wheat to advance an activity marker up 1 level on any of the skill tracks (or to repeat level 4 if on level 4).
- Grey 2: Spend 1 fish or 1 wood to move 1 or 2 keyples up to 3 locations each. These can include the keyple that activated this market. The same keyple can be moved twice.
- Red: Transfer 1 keyple from your player mat to the town.
- Yellow: Spend 1 wheat to build any cottage or upgrade a cottage to a house.
Skill tiles
There are 18 skill tiles, available from 6 different coloured stacks of 3 tiles on the buildings mat, with a 5 pt tile on top, a 3 pt tile in the middle and a 1 pt tile at the bottom.
You can gain the top skill tile from a stack if:
- you activate a skill tile icon, and
- you have a keyple in the market of the same colour.
Example: The light green player has a keyple in the orange market. When a skill tile icon is activated, they can choose to take the top available orange skill tile and place it by their player mat.
You may have more than 1 skill tile of each colour. Note, no skill tiles are available to keyples on the 2 grey market tiles ‒ there are no grey skill tiles!
Skill tile icons are located on:
- Harbour tiles 'I' and 'K'.
- Levels 3 and 4 of the blue skill track on the player mats.
- Headland 'B' ‒ lighthouse.
You can spend skill tiles as required on your turn or at the end of the game, to progress 1 step on the skill track of the corresponding colour. Spent skill tiles are removed from the game and placed back in the game box.
Store your skill tiles by the side of your player mat. Skill tiles give 5, 3 or 1 pt(s) at the end of the game, as indicated by the number on the tile.
Resource tiles
There are 8 resource tiles: 5 farms, the forest, quarry and wheat fields.
Forest, quarry and wheat fields
At the beginning of the game the forest (wood), quarry (stone) and wheat fields (wheat) each hold 3 resources of the designated type per player, i.e. 9 resources in the 3-player game.
When you gain wood, stone or wheat, always take these from the forest, quarry or wheat fields respectively, if they are still available there. Only when they are all taken do you take resources from the resources mat. The resources on the forest, quarry or wheat fields are never replenished after they have been emptied.
Once the resources on these locations are used up, the tile is immediately flipped over to the reverse side, which has a keyple space.
You should always receive all the resources you are entitled to. If, for example, there is only 1 stone remaining in the quarry and you are due 3 stone, take the stone from the quarry, then flip the quarry tile over and take the other 2 stones from the resources mat.
Once a resource tile is flipped you can claim a resource location by placing a keyple on the tile using any of the following actions:
- a move action,
- harbour B resolution,
- the right side of the green skill track, levels 2 and 3, on your player mat.
After claiming a resource location, whenever you acquire further resources from a corresponding harbour: C for wood, E for stone and G for wheat, receive double the number of resources.
Owning a resource location does not double production of a resource when an animal is placed in a farm.
Resources are not limited. Use a resource multiplier tile if required.
The owners of the forest, quarry and wheat fields score 3 points for each at the end of the game.
Farms
You can claim a farm in a similar way to the other resource locations by placing a keyple on a keyple icon in a farm that does not already contain a keyple. Additionally you can play cows, pigs and sheep (but not fish) onto one of the 4 resource icons in a farm that does not already contain an animal, using the actions above.
You can only introduce an animal into a farm from your barn. You cannot move an animal from one farm to another, or from one resource icon in a farm to another.
You can place an animal into any farm, whether or not the farm is claimed. If you place an animal into a farm which has been claimed by another player you get the resource, however the player whose farm it is gets ownership of the animal. Animals in farms always belong to the player owning the farm.
If you trade an animal from a farm at the blue or green market stall, then the resource icon in the vacated farm can be occupied again and a further resource generated.
If you place an animal on a fish icon then you gain a fish.
Headland tiles
Each player has the same set of 6 headland tiles in their player colour. These are identified with the letters A to F for ease of reference.
You can build a headland using:
- wood at harbour D,
- stone at harbour F,
- either wood or stone when activating levels 2 to 4 on your player mat.
Spent resources are placed on the resources mat.
You can build a headland in a space between 2 harbours that does not already contain a headland, or you can overbuild your own existing headlands by placing a headland tile over one of your previously built headlands.
Headlands A, B and C are activated when a boat docks at a harbour on either side of the headland. The owner of the headland gets an immediate benefit. An overbuilt headland can no longer be activated.
Usually headlands A, B and C will be activated twice in year 2 and twice in year 3 if they are built in year 1. (It is possible that a headland can be activated in year 1, if unusually a headland is built before all the boat actions are completed.) If you have a headland on both sides of a harbour, then both headlands can be activated, in any order.
Headlands D, E and F must be visible to score points at the end of the game.
-
A. Wharf. You receive either 1 or 2 fish from the resources mat, depending on which side the boat has docked. (Note, the wharf tile is double sided and can be placed either side up.)
-
B. Lighthouse. You may either activate a market that you have a keyple in, or acquire a skill tile from a market you have a keyple in, depending on which adjacent harbour a boat has docked in. (Note, the lighthouse tile is double sided and can be placed either side up.)
-
C. Rally point. You recruit 1 keyple from your player mat and place this in the town.
-
D. Statue. You score 8 points at the end of the game.
-
E. Support. You score as an additional keyple on the adjacent harbour at the end of the game. (Note the support tile is double sided and can be placed either side up.) Note, the support keyple does not count as a keyple for the purpose of participating in an adjacent harbour's action or for scoring headland F.
-
F. Beach. You score 2 points for each keyple you have in the 2 adjacent harbours.
Solo game rules
In the Keyside solo game you play against an automated opponent known as Keytoma, while trying to light beacons and gain points.
Components
- Resolution card
- 18 Double sided beacon/landslide tiles
- 3 Flag tiles (marked 1-2, 3-4 and 5-6)
Setup
Set up the components as described in the multi-player rules with the following modifications:
-
Harbour tiles ‒ use the side with 3 dice spaces (as if playing a 2 or 3-player game).
-
Place 3 resource tokens of the corresponding type in the forest, quarry and wheat fields.
-
Set up three boats (as if playing a 3 to 4 player game).
-
Place 6 gems of each colour in the gem bag, return the rest to the game box.
-
Take 3 dice strips at random and place light blue side face up in Keytoma's play area. Place 6 dice, 1 of each colour next to them, plus 18 keyples of a second colour ‒ these will be Keytoma's keyples.
Keytoma does not use a player mat, headland tiles or activity markers.
Place the resolution card in Keytoma's play area.
Separate the beacon/landslide tiles into 3 piles: A, B and C, with the landslide sides face up. Shuffle the 3 piles separately and draw 1 tile from each pile. Flip these 3 tiles to reveal the A, B and C beacons. These are the 3 beacons you will aim to light to win the game.
Place the remaining beacon/landslide tiles with the landslide side face up, the 3 flag tiles and all 18 keyples of a third colour (these will be referred to as "pirates" and are not Keytoma's keyples) next to Keytoma's play area.
Roll an unused dice. Place the flag tile 1-2 on the harbour of that number (1-6). Place flag tile 3-4 four harbours away from the first flag tile in a clockwise direction and the third flag tile 5-6 four harbours away from both of the first 2 flag tiles.
Note: when referring to the number of a harbour, use the numbers 1 to 12 shown on the harbour scoring tiles assigned to each harbour tile.
Game play
Dice setup
Choose your dice, or use the remaining fourth dice strip. Then reveal 1 of the dice strips at random, either side face up, from Keytoma's player area. Set Keytoma's dice to those values and return that dice strip to the game box.
Repeat this at the beginning of years 2 and 3 using the remaining dice strip(s).
Player turns
Take the start player marker in year 1 and start the game. You and Keytoma then take alternating turns as per the multi-player rules, whether you're in the landing phase or the resolving harbours phase.
Note that unlike the multi-player game, it is possible for a harbour to contain dice but no sailors, because Keytoma places a dice in the landing phase but does not place sailors. You cannot land sailors (and thus add more dice) to such a harbour.
Landing phase
Keytoma following on your turn
If Keytoma can legally follow you with a dice of the same colour that is equal to or lower than the dice you selected, then roll an unused dice. Keytoma follows you on a roll of 2+ if the harbour you have chosen has a flag tile and otherwise follows you on a roll of 5+.
If Keytoma follows you and there is a space, place 1 of Keytoma's keyples on the harbour. Otherwise place 1 of Keytoma's keyples on the first harbour clockwise with a free space.
Keytoma's turn
Roll an unused dice. Find the flag tile that is showing that number. Keytoma places its (higher) median dice (the middle one) on the harbour marked by that flag tile (without moving a boat or allocating a sailor) and places 1 of its keyples there if there is a space. If there is no space Keytoma places 1 of its keyples on the first harbour clockwise with a free space. You may follow as normal.
If you have a headland tile (A, B, C) adjacent to this harbour, it triggers normally.
Example 1: If Keytoma has all 6 of its dice the 2 middle dice are 3 and 4 and Keytoma places the higher of those two dice, the 4.
Example 2: If Keytoma has already placed its number 5 dice (1, 2, 3, 4 and 6 remain), then the middle dice is 3, so Keytoma places that dice.
Moving the flag tiles
After you or Keytoma land at a harbour with a flag tile, move the flag tile clockwise to the next harbour which has not yet been landed on and does not have a flag tile.
If no such harbour remains, move the flag tile to the same harbour as the next flag tile in a clockwise direction. Later, as soon as a valid harbour is presented (when a harbour without a flag tile is resolved), move the smaller numbered flag tile to that harbour. Consequently flag tiles will always be on harbours that are valid targets for landing on.
Resolving harbours phase
Keytoma resolving a harbour
Keytoma's action depends only on the colour (not the number) of the dice at the harbour, regardless of which harbour Keytoma is resolving. Perform the effect shown on the resolution card as indicated by the colour of the dice. If Keytoma selected the harbour, this effect is resolved before you gain the harbour's (regular) benefit. If you selected the harbour, then you gain the benefit first and before Keytoma's effect is resolved.
Note: If Keytoma activates harbour I, then Keytoma takes the start player marker.
Your turn to select a harbour to resolve
If you select a harbour to resolve with 1 or more of Keytoma's keyples (pirates don't count) and 2 dice present (i.e. the harbour was landed on and you or Keytoma followed during this year), then after you have gained your benefit, Keytoma resolves its effect as shown on the resolution card. In any other case Keytoma does nothing when you select a harbour to resolve.
Keytoma's turn to select a harbour to resolve
Roll an unused dice. Starting from the flag tile with the rolled number, proceeding clockwise, find the first harbour with at least 1 dice and at least 1 of Keytoma's keyples. Resolve that tile, Keytoma first as shown on the resolution card, then you.
If on Keytoma's turn, Keytoma has no harbours left to resolve, but there are still harbours to resolve, then roll an unused dice. Keytoma performs the corresponding action: 1 yellow, 2 green, etc. If performing the 6 orange action: (i) roll a dice, (ii) identify the corresponding flag and (iii) place a landslide tile into the first available headland space clockwise from this harbour.
Using the resolution card
The resolution card determines Keytoma's actions, which depend on the colour of the dice. The number is only relevant if Keytoma has no harbours left to resolve, but there are still harbours to resolve.
Yellow dice: Randomly select 1 colour of which you haven't yet built a cottage/house, then remove at random 1 cottage tile of each other colour.
If there is at least 1 unclaimed farm with 2 or more animals, a pirate claims it. Otherwise place a pirate on this harbour (if there is a space) and place a pig on a random unclaimed farm.
Note: When you need to select a random farm, roll an unused dice. Identify the harbour with the matching numbered flag tile. Starting from there and looking inland, proceed clockwise until you find a suitable farm tile.
Whenever you need to place an animal on a space in a farm, select the space in the following order: gem, fish, wheat, stone, wood.
Green dice: Place a cow on a random unclaimed farm.
Pirates claim any of the forest, quarry and wheat fields tiles that have not already been claimed. Place a pirate in the empty keyple space.
If it has not been possible for pirates to claim any of the forest, quarry or wheat fields, then they claim all unclaimed farms with 2 or more animals.
Finally (regardless), place a sheep on a random unclaimed farm.
Red dice: Place 2 pirates on this harbour's keyple spaces (or as many as possible if there are fewer than 2 spaces).
Blue dice: Randomly select 2 of the highest value skill tiles and remove them.
Purple dice: Draw 2 gems from the gem bag. If they are the same colour, remove 1 and return the other. Otherwise remove both.
Orange dice: Place a landslide tile into the first available headland space clockwise from this harbour (or from the harbour containing the 1-2 flag if there is no designated harbour).
End of years 1 and 2
At the end of years 1 and 2, do not refill the boats with sailors. Return the 6 sailors you used in the year to the game box.
Game end and scoring
Use the score sheet to calculate your score as in the multi-player game. If you have scored at least 120 points and lit at least 2 of your 3 beacons, you have won the game. Otherwise you have lost. Can you score higher next time?
Increasing the difficulty
To increase the challenge level of this solo mode, choose 1 of these rule changes:
- To win, you need to light all 3 of your beacons.
- After finishing setup, place 1 of Keytoma's keyples on the keyple spaces of the harbour counter-clockwise from the flag tile showing 1-2.
- After finishing setup, place a landslide tile in the headland space counter-clockwise of the flag tile showing 3-4.
- After finishing setup, place 2 pirates on the keyple spaces of the harbour counter-clockwise of the flag tile showing 5-6.
Lighting beacons
A beacon is lit if the conditions on the tile are met or exceeded at the end of the game.
- A1: Have 3 headlands in an unbroken row.
- A2: Build 2 of headlands A, B and C.
- A3: Score at least 12 points from headland F.
- A4: Have 3 or more keyples in 3 harbours.
- A5: Control 3 farms.
- A6: Have at least 1 keyple in 9 harbours.
- B1: Retain 3 skill tiles of the same colour.
- B2: Retain 4 skill tiles of the same number.
- B3: Have 10 fish.
- B4: Have 3 activity markers on level 4.
- B5: Have 4 gems of 1 colour.
- B6: Have 9 gems.
- C1: Fulfil the 12-point multiplier condition in 2 harbours. You must have at least 1 keyple in both harbours.
Note, for beacons C2 to C6 below, do not include points gained from headlands E and F.
- C2: Score 35 points from harbours 8 and 9 combined.
- C3: Score 35 points from harbours 1 and 2 combined.
- C4: Score 35 points from harbours 4 and 10 combined.
- C5: Score 35 points from harbours 3 and 11 combined.
- C6: Score 35 points from harbours 7 and 12 combined.
Acknowledgements
Game design: Richard Breese and Dávid Turczi. Solo game design: Dávid Turczi. Illustrator: Vicki Dalton. Graphics and realisation: Richard Breese. German translation: Ferdinand Köther. Solo game development and playtesting: John Albertson, Richard Breese and Shane Fowler.
Published 2025 by R&D Games, 3 Denne Close, Stratford upon Avon, CV37 6XL, United Kingdom.