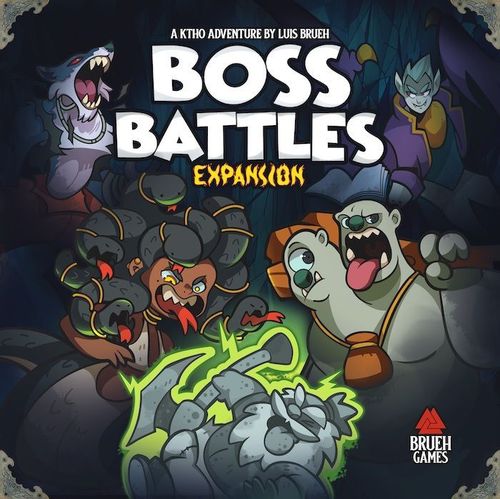
Keep the Heroes Out!: Boss Battles
Keep the Heroes Out!: Boss Battles Rulebook
Table of Contents
Table of Contents
- Components
- Warning: Unlockable Packs
- The Rookies
- Skull Rooms
- Epic Heroes
- Crate Tokens
- Partners in Crime (Variant)
- Boss Battles
- Why Are the Bosses Monsters and not Heroes?
- Mix-and-Match Boss Battles
- New Monsters: Clarifications
- Monster Questions
- Monster Size Chart
- New Scenarios
- 21. DIY Stone Troll
- 22. The Gorgon's Groove
- Rock My World
- 23. Community Service
- A Blast From the Past
- 24. Family Ties
- Red Moon Rises
- 25. Gilded Loyalty
- Darkling Unchained
- The Jewel Lies
- 26. Safety Drill
- Bibbidi-Bobbidi-Boo!
- Papers & Perils
- 27. Under Siege
- The Merger
- A Gate to Strange Worlds
- 28. Pest Control
- Hatchling Invasion
- Who Wants to Live Forever
- 29. The Ultimate Price
- Undead and Back Again
- 30. The Forever King
- Scorching Titan
- The Last Stand
- Extras: Holiday Special
- Rookies (Rules Reference)
- New Actions
Components
Components are listed with their counts as printed on the Battlebook.
- Monsters: Stone Troll (1), Gorgon (1), Reaper (1), Werewolf (1), Vampire (1), King Slime (1), Bats (3), Faeries (4), Spiders (5), Puppies (6), Shroom Troop (8)
- Difficulty tiles (2)
- Guild Cards: Rookies (12), Scenarios (35)
- Battle board (1)
- Boss Cards (90)
- Gadget Cards (6)
- Unlockable Packs (15), DO NOT OPEN unless you are told so
- Hero Class Cards (2)
- Rookie Tokens (5)
- Rookie Meeples (5)
- Crate Tokens (7)
- The Jewel (1)
- Junk-bot tokens (4)
- Double-sided room (1)
Warning: Unlockable Packs
Every time you see the Warning symbol, read carefully the conditions written in the sign before proceeding to the next paragraph (or page) of the Battle Book.
Within this expansion you will find 15 Unlockable packs of cards (A to O), that after opened will add over 150 cards allowing you to play as the new monsters among other surprises. Card quantities are listed inside each pack, instead of in the components section. These cards are not listed on the components section. Unlocking this content will require you to play the new scenarios and sometimes to complete them in a specific way. If the packs are opened too early, it may spoil your fun.
The Rookies
Rookies are the guilds' apprentices, they still haven't chose their hero trade just yet, and are not the most coordinated, always arriving at the dungeon all by themselves.
During setup, shuffle all Rookie cards and then add a number of Rookies along with the other hero cards to create the Guild deck. The more Rookies you add, the easier a scenario becomes. The suggestions below are the recommended amount of Rookies for playing the Boss Battles scenarios. Feel free to use them or adjust them to your group experience level to customize your experience. You may add Rookies in the base game scenarios as well.
- Family: Add 4 Rookies
- Challenging: Add 8 Rookies
- Hardcore: Add 12 Rookies
Playing with Rookies gives you more decision space, as they summon only one hero. They also help you acquire more cards throughout the game, as they drop resources when defeated, enhancing the deck building aspect of the game.
Show Off: Rookies don't have a show off ability.
Summoning a Rookie: Every time you draw a Rookie card, only one token will be summoned into the dungeon. If there's more than one room of that type, you choose where the Rookie arrives.
Bag of Goodies: Every time you defeat a Rookie, place a resource of your choice on that dungeon room (Coin, Frog, Book or Bone).
Example: the Ratkin player summoned the Rookie on the Blacksmith room, instead of in the Workshop to save his monster. Later the Ratkin moved and attacked the Rookie, removing it from the dungeon, and placing a coin on the Blacksmith room to acquire equipment cards.
Guild Master's Compatibility
You may combine the Boss Battles Expansion and the Guild Master's Revenge Expansion if you want to play the new scenarios as ONE vs ALL.
Rule Updates: Before the game starts, the Guild Master will shuffle the Rookie cards and then add a number of Rookies into the Guild deck based on the difficulty chosen (4 Rookies for Family, 8 for Challenging, 12 for Hardcore). Additionally, the Guild Master cannot summon two consecutive hero cards of the same room type in the same Heroes Phase, unless one (or more) of these cards are Rookies. Remember: the monster players decide in which of these two rooms of the matching type the Rookie will be summoned AND will also resolve all the heroes on the dungeon following priority usual.
Tokens or Meeples? If you are using the Hero meeples that come in the Guild Master's Revenge expansion, use the Rookie meeples instead of tokens. A Rookie meeple enters the dungeon Active (standing) and you should lie them down when you want to mark them as Exhausted.
Can I Upgrade Rookies? The Guild Master can acquire and assign upgrades to the Rookies the same way they would for other heroes.
Can I Control Bosses? The Bosses are NOT members of the Guild, and therefore the Guild Master is unable to draw Boss cards or upgrade them. While the chaos created by Bosses may benefit you — as some may inspire your heroes and attack monsters (the enemy of my enemy...), they also create opportunities for the Monsters to snatch a win from under your nose.
Skull Rooms
Rooms belonging to the Skull room type have an unsettling aura.
The skull room type represents the grim influence of the Jewel, slowly corrupting the hearts of the monsters nearby. While some rooms may get this type temporarily during a particular scenario, there are only two rooms native to this room type: Guardians and Vortex. These two rooms are printed as one double-sided tile, the reason for this is thematic as both locations are the same chamber, just in in different moments in time.
Guardians
Additional Setup: If the Guardians room is present in a scenario, shuffle all Gadget cards and make a pile (face up) adjacent to the Loot Offer. The Gadgets add one additional spot in the Loot offer. Every time you discard a tactics card to refresh the Loot, you may also discard the top Gadget card to the bottom of the Gadget deck.
Activate the Guardians, to discard a Trap to acquire the top Gadget card.
Example: to acquire the gadget card, you must go to the Guardians room, Activate it and discard a trap in the room, then you add the gadget card to your discard pile.
Search: ALL Gadget cards have a new type of action: Search. Search allows you to look through your tactics deck and take a card with the indicated action type into your hand (in this example, the card must have a ranged attack), and then reshuffle your tactics deck. If there are no cards in your deck that match the search target, you take no cards into your hand and then shuffle your tactics deck.
Example: later on, the Imps player by using their acquired gadget could: Search their deck for a Summoning action card; or Summon another imp into a room they have an Imp and then get an Activate action. They chose the later.
Vortex
Activate the Vortex, to discard one of your monster meeples in the Vortex room back to your lair to Destroy one of your Tactic cards.
Destroy allow you to discard one of your tactics cards permanently (either on your hand or discard pile), placing the selected card back to the game box, trimming your deck. Be careful! Destroying all your Ambush actions may eliminate you out of the game.
Example: the Imps player used Swarm Activate in the Vortex room to discard all 3 of their meeples back to their lair and destroy 3 cards from their discard pile back to the game box. Trimming your deck down allows for unusual deck building strategies. In this example, the Imps removed all their trap cards. Now, they have a deck that can acquire Loot cards much faster. However, be careful! Taking this action may be a risky move if you are new to the game.
Epic Heroes
Epic Hero cards are marked with the numbers '20' and '30' and may replace regular heroes to create the Guild deck to increase the difficulty of the game. Unlike regular scenario cards, Epic Hero cards Summon one Hero when sent to the Cells.
- Epic Archer: When summoned and when Charging into a room, perform an additional Ranged Attack targetting the room closer to the Vault.
- Epic Warrior: When summoned, remove 1 resource from the room. When they Charge into a room, perform one extra Melee Attack to a Monster in it.
- Epic Rogue: When summoned, remove 1 trap from the room. When they Charge into a room, remove 1 trap from it.
- Epic Mage: When summoned in the Cells, Inspire all Heroes there. When he charges into a room, flip a completed portal in it back to the incomplete side.
- Champion: your Melee and Ranged attacks can't target other Enemies (Heroes or Boss) when your target is in a room with the Champion, you MUST target the Champion instead. When defeated place a resource of your choice in the room.
Example: the Gnoll player used the swords equipment to perform a swarm Melee Attack. As there is a champion in the room, he is the only possible target, receiving 2 damage. Then, they used the fire scroll to perform 3 Ranged attacks. As the champion is still in the room, the first Ranged Attack MUST target him dealing the last damage needed to defeat it, dropping a resource of their choice in the room. Finally the remaining two ranged attacks can target and eliminate the other two epic heroes.
Crate Tokens
Crates are multi-purpose tokens and their case-by-case rules will be written in the scenarios they are being used for. For example, some scenarios may ask you to move crates around like resources, while others may use them to replace room types (and in this case, you can't move them!).
Partners in Crime (Variant)
Using this variant will allow you to play up to 6 players while reducing downtime:
Divide the players in duos: Each duo will share their turns, going through all their turn phases together. So in a 6 player game, you would only need to wait 2 other turns to play again. Each partner of a duo will select one monster from a different role (for example, if a player picks a crowd control, his partner needs to select a supporter or a defender) and take their meeples and starting cards as usual. But partners start the game with 3 cards and draw back to 3 at the end of their turns (instead of 5).
Partners may play their cards in any order, without showing each other the cards in their hands and can only use their own monster(s). Every time a scenario asks players to draw extra cards, only one partner of each duo will draw cards, every time it asks them to discard cards, only one partner will discard cards. The duo will choose who draws and who discards cards case by case. If you use the cells in a shared turn, you choose how you divide the 3 card draws among the two players.
This rule is meant to be used with even numbers of players, if you have an odd number, let's say 5, then you could have 2 duos and a solo monster. In this case the solo monster would play as usual (drawing back to 5 cards).
Boss Battles
Boss Battles adds an exciting twist, making the endgame feel more dramatic, as you need to DEFEAT a boss in order to win the scenario, while still protecting your Treasure at the Vault. Each Boss plays very differently — and you will NEED to read their rules in the scenario when your Guild deck runs out at the end of Wave 1. However, they all follow some basic guidelines that are important to know before facing this threat.
Waves
- 1st Wave: Read the scenario rules, they will explain you the immediate dangers (Initial, Ongoing, Triggered and Events) and will also give you tasks you should aim to complete before the end of this wave. There's also hints on what type of cards you need to acquire during the 1st wave so you can have better odds to defeat the Boss that is coming.
- 2nd Wave: After the end of 1st Wave and before reshuffling the Guild deck, go to the following page and read the additional rules, resolving the Instant abilities immediately upon reading them. Some scenarios will remove cards from the Guild deck (or also add cards to the Guild deck) before reshuffling so be attentive and read everything in order.
When preparing for 2nd Wave, shuffle the Boss cards and place them face-down on the Battle board. Each Boss deck has 10 cards with a dark background showing a picture of the boss, and information on how to defeat them.
For example: 1) the Gorgon has 15 health points, so having a monster able to deal massive damage is what you are aiming for. 2) Meanwhile, the Guardians can only be damaged by discarding Scroll cards without using them in the same room as the Guardians are, so you should try to acquire those cards before the end of 1st Wave. If there's a 2nd circle — as the spider above — it means that this boss also has the ability to deploy their own minions.
Each scenario will tell you additional steps you will need to take to prepare for Wave 2, and how to resolve the Boss cards and actions after each Heroes phase. Boss cards are never discarded, after you resolve them, place them on the bottom of the Boss deck.
Keeping Track of the Damage
Every time you inflict damage to a Boss, place one heart token on top of their Battle board. If there are 5 heart tokens on the Battle board, remove them, placing only one heart token on top of a "heart 5" slot. When you have as many heart tokens on the boss as the damage needed to inflict them to either win — or lose! — a scenario as explained in the rules, end the game immediately.
For example, if you attacked the Gorgon with 3 Melee Attacks, place 3 heart tokens on top of their Battle board to mark all 3 damage they received. If you manage to deal all 15 damage to her, before the Guild deck runs out, then you win!
A Race Against Time
In regular scenarios, going through all the cards in the Guild deck without losing Treasure "4" would make for a win. In Boss Battles things will get a little tricky! The Boss deck never runs out of cards (Boss cards are never discarded, after you resolve them, place them on the bottom deck), but the Guild deck absolutely does. If you run out of Guild cards and there is still a boss rampaging at the dungeon you lose the game. However, if you focus all your attention on defeating the Boss, but forget to protect Treasure "4" at the Vault, the heroes may take it and you can also lose the game this way. So finding a good balance is key to winning the Boss Battles scenarios.
Why Are the Bosses Monsters and not Heroes?
Spoiler alert! Proceed with caution... This will be explained during the Chronicle.
Thematically: the Jewel is trying to find someone strong enough to hold it — AND SURVIVE! — so the gem can control them all the time. It does that by maximizing negative thoughts such as greed, pride, envy and wrath. The monsters usually do not realize they were being influenced and when defeated will come back to their senses. Meanwhile most humans would just be consumed by touching the Jewel.
Mechanically: having them as monsters give us the possibility to add a great deal of replayability by having multi-purpose meeples, without raising the costs for this expansion too much. Keep in mind the Boss Battles expansion has far more cards (and illustrations) than our Base game.
Mix-and-Match Boss Battles
After you complete all Boss Battles scenarios and are comfortable with the new rules, you can use them to homebrew Boss Battles by either creating your own scenarios or combining old scenarios with a Boss battles during 2nd wave. To do so, you will need to add into the old scenarios a few elements of the new one that makes the Boss Battle possible, without removing the elements that makes the original scenario special.
For example: to combine "Endangered Species" with the "Raging Troll Boss Battle" and homebrew a "Hungry Troll scenario" you would need to setup Scenario 13 with all its rules and then add the Skull token to the Laboratory, replacing it's type. Then, on Wave 2, when revealing Boss cards, the Hungry Troll boss will charge AND throw heroes towards the nearest room with Lizardfolk, instead of the Vault. Additionally, every time the Troll removes a Lizardfolk from the dungeon or when you reveal a "Feed the Troll" boss card and the Troll eats the bone, the Hungry Troll will lose one Health Point — they are now a little less hungry after all. If at any point there are no Lizardfolk left in the dungeon you lose the game. If, at the end of the game, you still have the Treasure with a value of 4 in the Vault AND Lizardfolk in the dungen, but you ALSO have the Hungry Troll in your dungeon, you lose the game too! However, if at any point during the 2nd Wave, you make it take a ciesta by dealing a total of 15 damage, you immediately win! — With some creativity, possibilities are limitless.
New Monsters: Clarifications
Spoiler alert! Proceed with caution... To dodge spoilers skip to the Boss Battles scenarios.
Overlord Monsters
A few of the monsters that you can unlock have the ability to command a specific type of Minion. A Minion is a secondary monster that acts as your subordinate for as long as your monster meeple is in the same room as them and that will also join you in your Swarm actions.
The Shroom Troop special ability grants them access to special abilities of unused monsters, giving them flexibility to adapt during play. That said, not all abilities will be as useful to the Shroom Troop.
- Dragon: Healing is useless as your meeples only have 1 HP.
- Cthulhu: You can only mind control while asleep, and without the Nap cards, the Shroom Troops can't use this ability.
- King Slime: You only place slimes if you are alive after receiving a damage, as the Shroom Troop is removed from the dungeon with one hit, they would not be able to place slimes.
- Vampire: While having the ability search for cards and command Bats would be amazing, without the cards to summon Bats you can't use them. Meanwhile, a few other options are great for the Shroom Troop!
- Imps or Poltergeist: Moving faster allows you to acquire some more Loot cards! Use this ability on early game.
- Skeletons: Use them during early game to acquire Beast cards.
- Lizardfolk: If you need to defeat many heroes spread in multiple rooms, dealing ranged damage is your way to go.
- Werewolf: While it requires you some setup to get the bones first, the Werewolf ability can help you defeating bosses.
- Slimes: Drawing more cards in late game can be amazing for you if you acquired Loot cards earlier.
Example: the Vampire player could use his Moomootaur card to draw a card, and then command his bat to move to the library. However, once the Bat is there, he will not be able to command the bat to melee attack, as the bat is NOT in the same room as his meeple.
Example: the King Slime player was attacked twice in melee. In the first time, they took the damage and placed a Slime in the room with their special ability. Then, for the 2nd attack, the Slime player used one of their defend cards to split into two slimes avoiding the damage while maximizing their defenses.
When using Throw you need to take in account the Shroom Troop size, as it allows you only to throw monsters that are smaller than you, or traps and resources. So, while the Stone Troll would be able to throw any Medium or Small monsters (as they are huge!) For the Shroom Troop, using this special ability, will let you only throw traps or resources.
Some Overlords start with Swarm action cards, others don't. It's always beneficial for the Overlord to acquire Equipment cards during the game and maximise the potential of their Minions.
As an Overlord monster, you CANNOT use your Minion special ability, and CANNOT use actions on their meeples if you are not in the same room as them. That said, a player can control the Overlord while another player controls the Minions in the same game.
While the Overlord counts Minions in the same room for their Swarm actions, if another player is controlling the Minion and they use a Swarm action, they will not count the Overlord meeple. A Minion also CAN'T give your Overlord commands.
Finally, when playing with Shroom Troop, keep in mind that your starting cards give you many ways to summon monsters, but few actions. Your strength relies on being able to adapt to your group/scenario needs. So, be ever-changing, and try acquiring Loot cards — and sometimes using Destroy to cull cards helps too!
Monster Questions
Can I use new monsters in old scenarios?
Absolutely! Having more monsters gives you new ways to enjoy all scenarios and create new combinations, with one exception, If an old scenario is using a Minion as an NPC (for example, scenarios that have skeletons or slimes) you are not allowed to play as their Overlord monster in that scenario.
What is the best monster to defeat bosses?
It depends. If the Boss receives damage from attacks, monsters that can use swarm attacks are better (Lizardfolk, Werewolf, or monsters that have many meeples AND you acquire equipment cards for them — like Ratkin, Gnolls and Slimes). For Bosses that need you to discard Loot cards, Supporters are the way to go (Imps, Faeries, Witches etc).
Who goes first?
The player with the fewer Monsters in their Clan — not counting minions — starts the game. If there's a tie, then players choose.
Can I unlock new monsters playing One-shots?
Absolutely! You can unlock all the new monsters playing One-shots, provided you meet the requirements described in each scenario. However, playing the scenarios in order will make more sense if you are following the story, and winning the last scenario on Chronicle mode will give you access to Chronicle abilities.
Monster Size Chart
Monster size chart. Rule Update: Monsters are now divided in three size categories: Huge, Medium and Small. If you have unlocked the Chronicle Ability "Piggyback Riders" you can now carry monsters in the same-size category as yours or belonging to a smaller category. However, Huge monsters can NEVER be carried.
The printed size chart is a graphic of monster icons in three columns: Huge (4 monsters), Medium (the larger group of monsters), and Small (the remaining monsters). The chart does not print monster names as text, so it is not reproduced here; consult the printed chart in the Battlebook.
Puppies: Your barking ability can force enemies or allies to move out of a room with your meeples. Characters running away from your meeples will fall on traps (even monsters), and also may trigger scenario specific rules as well, so you have to be extra careful. Also, a monster being chased away can't use piggyback abilities or carry resources.
High Witch Cynthia: After unlocking Cynthia, you will be able to play just her, or the original two witches in all scenarios, but not both at the same time.
Mind Controlling a Boss: If the Boss has a Meeple on the dungeon that follows the same priorities as a Hero (Charging, attacking Monsters, etc) then you can Mind Control if you have access to this action. However, bosses that can only be hurt by discarding loot cards on their room and that do not move, can't be mind controlled or receive damage from other heroes being Mind Controlled.
For example, in Scenario 26, Cynthia can't mind control the Magic Cauldron to attack the Shrooms (or vice versa).
Mind Controlling a Champion: If you Mind Control any other hero in the same room to attack, they MUST target the Champion. The only way to avoid their special ability is by controlling the Champion to attack the other heroes.
For example, on Scenario 30, if the Puppy player uses his special ability to move the Bat out of a room with a hero, the hero will use their Opportunity Attack scenario ability to Melee attack the Bat removing their meeple.
New Scenarios
While you can still play the new Scenarios as One-shots, the Boss Battles scenarios are intended to be played in order.
Our story plots pick up where we left off in 'Keep the Heroes Out', that said, you don't need to have played all the previous scenarios to follow the story, but having played a few of them and being comfortable with the rules will improve your experience. If you completed Chronicles before, don't forget to use the Special Abilities you have previously unlocked.
Chronicle Mode Rule Update: When you start a new Scenario in a Chronicle, during Setup, add Rookies based on the difficulty chosen to the Guild deck plus 2 more Rookies for each scenario you lose during the Chronicle (to a maximum of 12). If you win the last Scenario of a Chronicle, you will unlock a special ability for all your future plays. Whether you win or lose a Scenario, you always move on to the next one. Players may choose any of the available Monster Clans to play with and may swap monsters in between games, provided the chosen monsters are not being used as NPCs for the scenario.
Scenario List
The Boss Battles story is divided in 3 consecutive Chronicles to be played in order.
- Act I - New Beginnings: 21. DIY Stone Troll; 22. The Gorgon's Groove; 23. Community Service; 24. Family Ties. Unlocks: Gadget Blueprints.
- Act II - Kings & Fools: 25. Gilded loyalty; 26. Safety Drill; 27. Under Siege. Unlocks: Junk-bot Builder.
- Act III - Demon's Jewel: 28. Pest Control; 29. The Ultimate Price; 30. The Forever King. Unlocks: Epic Levels.
Extras (Bonus Scenarios) — Holiday Special: H1. Silent Night; H2. The More the Merrier; H3. Santa Baby. Unlocks: Secret Santa.
If you win the last Scenario of a Chapter, you unlock the relevant ability, which you may use in all future plays.
Gadget Blueprints
Junk-bot Builder: You found special Blueprints in a file cabinet: "Okay! So I figure out a way to rebuild the Guardians... Kinda! They may not be as massive or efficient as they once were... And we can't really control them either. But they are pretty cool, I think." Open card pack "G". Add the new cards to the Gadgets deck.
Epic Levels
When you acquire Loot cards, put them on the top of your Tactics deck, instead of your discard pile.
Secret Santa
After players have chosen their monsters during setup, deal 3 Loot cards from the deck to each player. Each player then selects one card and gives it to the player on their right facedown and discards their other 2 cards to the bottom of the Loot deck. Each player shuffles the gifted card along with their starting cards without peeking. If playing true solo, draw 3 cards and take one for yourself.
Junk-bots
Additional setup: shuffle the Junk-bots and place them face-down (with the Junk pile side showing) on the Blacksmith room. If you do so, also shuffle all Gadget cards and make a pile (face up) adjacent to the Loot Offer. The Gadgets add one additional spot in the Loot offer. Every time you discard a tactics card to refresh the Loot, you may also discard the top Gadget card to the bottom of the Gadget deck. Junk-bots can only be added to scenarios that don't have the Guardians room.
Junk pile: you may carry one junk pile token with a monster meeple the same way you would carry a resource. If you have a monster in the same room as a Junk pile you can Activate it to build the Junk-bot (flipping the tile and revealing the Junk-bot you've built).
Junk-bots: Once assembled they are considered Medium-sized monsters and heroes will exhaust to attack them as usual. Once a junk-bot is destroyed, you can't rebuild it, place the token back in the box.
- Tinker-bot: Activate to discard a Trap in the same room as this bot to acquire a gadget card.
- Battle-bot: Every time this bot receives one damage, if they are not destroyed by it, deal one damage to a hero (or boss) in the same room as this bot.
- Task-bot: Once per turn, you may use this bot to Activate their room ability. You do NOT need to have one of your Monsters in the same room.
21. DIY Stone Troll
Moving into this abandoned dungeon was rough! There are so many collapsed rooms, clogged toilets, and we keep finding old traps malfunctioning all the time. And I feel we haven't explored even half of its halls! But we finally finished unpacking and now it's the perfect opportunity to make our new domain cozier. Perhaps we'll even consider ordering our very own DIY stone troll - after all, what could possibly go wrong?
Special Setup: Players cannot play as the Stone Troll in this Scenario. Shuffle the "Assembling the Troll" cards (marked with the number 21) along with the Heroes cards to create the Guild deck.
Special Rules:
- Unsettling vibes (Initial): Consider the Laboratory as Skull (instead of Special) type for this Scenario.
- Special Delivery (Initial): During setup, place 5 crates face-down in the cemetery, you may move a crate around the same way you carry a resource, however, the Warrior cannot discard crates from the dungeon.
- Do It Yourself (Event): Every time you reveal an "Assembling the Troll" card, discard all crates in the Laboratory. If at least one crate is discarded this way, all monsters draw one Tactics card! If there are no crates in the laboratory when you reveal this card, all players discard a Tactics card of their choice from their hand.
Warning: flip this page at the end of wave 1, before reshuffling the guild deck.
The Raging Troll!
I begged the old hag "Follow the instructions, don't take a chance!" But she dismissed it all with a wave of her wand. The stones pirouetted in the air, a colossal boulder forming the torso, another splitting into legs and arms. And now for the head – one eye or two? What should we do? "Why not both?" Cynthia cackled and the colossus started to shake. "It's alive! It's ALIVE!" Uh-Oh, Big mistake.
- 1 It's Alive! (Instant): Remove all "Assembling the Troll" cards from the Guild deck, also remove any crates that are on top of the Laboratory room from the dungeon. Trigger Clumsy Troll.
- 2 Clumsy Troll (Triggered): As it rises, its massive body bursts through our low ceiling, causing it to collapse. If it was confused before, now it is hurt and ANGRY! Shuffle the Guild deck for the 2nd wave and then remove any crate tokens still in the dungeon. For EACH crate removed after you shuffled, discard a Guild card and place the relevant Hero exhausted, without showing off its special ability in the Laboratory. Trigger Boss Battle.
- 3 Boss Battle (Triggered): After resolving the first Heroes Phase in the 2nd Wave, shuffle all the Raging Troll Boss cards and place the deck on the Battle board, then place their meeple standing (active) in the Laboratory and inspire all heroes there. Finally draw and resolve one Boss card.
The Raging Troll has 15 Health points. This Boss will attack Monsters, Inspire Heroes, Charge and Plunder Treasure when active following the same priorities as a Hero, after resolving them, lay down their Meeple to mark it as exhausted. During wave 2, after each Heroes phase, reactivate the Raging Troll, inspire all heroes on their room, then draw and resolve one Boss card. After resolving the Boss card effect, resolve the Raging Troll and all active Heroes.
If, at the end of the game, you still have the Treasure with a value of 4 in the Vault, but you also have the Raging Troll in your dungeon, you lose the game! However, if at any point during the 2nd Wave, you make it unconscious by dealing a total of 15 damage, you immediately win!
Boss cards:
- Throw: The Troll throws all Heroes in their room to the furthest room in a straight line towards the Vault. If they are already in the Vault, nothing happens.
- Charge: Move the Troll one room towards the Vault, ignoring any Treasure or Monster that could block their advance. If they are already in the Vault, nothing happens.
- Feed the Troll: The Troll discards a bone in their room, if they do so, all players draw a Tactics card. If the Troll is not fed, all players discard a Tactics card of their choice from their hand.
If the Troll is Unconscius, open card pack "A".
After the debris settled, I stumbled upon a crumpled note: "Warning! Once the head is assembled, it can't be undone — OR RETURNED! — One eye for the wanderer's guide, two eyes for bidding trespassers goodbye. Should there be three eyes, run for your lives!"
Stone Troll (monster)
With two rocky heads it's hard to think straight.
Activate to: Throw items, traps, and smaller monsters furthest room in a straight line from your meeple.
Role: Crowd Control
Pro tip: Avoid acquiring Equipment. You have many Melee attack cards, so try crafting the right potion that helps you draw them more often.
Example: the Stone Troll player used the Two Activations in their card to use their special ability twice and throw a book and a slime from the Library to the Study so the Slime player can craft Scroll cards in their next turn.
22. The Gorgon's Groove
"A performance to die for" was The Inquisitor's headline. I didn't bother to read their review to dodge spoilers, but was something about her having a rock-solid fan base among the guild! Meddie's tour next stop is our Dungeon, so her manager handed us some waivers, just the standard stuff... "Are you prepared to be petrified with excitement?" — Please and thank you! Where do I sign?
Special Setup: Players cannot play as the Gorgon in this Scenario. Replace all Warriors cards from the Guild deck with the "Fanclub" cards (marked with the number 22).
Special Rules:
- Collapsed chamber (Ongoing): Consider the Builder room as Swords, Hats, Mystic Eye & Crossbones types, instead of Special. You can't use the Builder action.
- Golden Ticket (Ongoing): You may move the golden ticket around the same way you carry a resource, however, warriors cannot remove it from the dungeon. If a monster player ends their turn in the same room as the Golden Ticket, draw back to 6 cards instead of 5.
- Superfan (Event): Every time you reveal a "Fanclub" card, summon two warriors in the room with the golden ticket. If this card is sent to the cells, summon one warrior in the cells as normal.
Warning: flip this page at the end of wave 1, before reshuffling the guild deck.
Rock My World
Meddie's commanding voice was a spectacle of beauty and danger. Her serpentine locks writhed with life, each snake dancing to the haunting melody. In a split second, she slithered near a warrior in the crowd, almost kissing his cheek... and turned the fool into stone!
- 1 The Show Begins (Instant): All special rules & cards from Wave 1 are still in effect on Wave 2. Reshuffle the Guild Deck. Trigger Audience Participation.
- 2 Audience Participation (Triggered): After resolving the first Heroes Phase in the 2nd Wave, shuffle all the Gorgon Boss cards and place the deck on the Battle board, then place their meeple standing (active) in the room with the golden ticket and inspire all heroes there. Finally draw and resolve one Boss card.
The Gorgon has 15 Health points and seems to be testing your defenses. This Boss will attack Monsters, Inspire Heroes, Charge and Plunder Treasure when active following the same priorities as a Hero, after resolving them, lay down their Meeple to mark it as exhausted. During wave 2, after each Heroes phase, reactivate the Gorgon, inspire all heroes on their room, then draw and resolve one Boss card. After resolving the Boss card effect, resolve the Gorgon and all active Heroes.
If, at the end of the game, you still have the Treasure with a value of 4 in the Vault, but you also have the Gorgon in your dungeon, you lose the game! However, if at any point during the 2nd Wave, you prove your strength by dealing a total of 15 damage to her, she petrifies all heroes in the dungeon and ends her show, you immediately win!
Boss cards:
- Sing with me!: The Gorgon inspires all heroes in all rooms adjacent to her.
- Breaking Hearts: The Gorgon deals 1 damage to one monster in an adjacent room, targeting Monsters closer to the Vault. If the Gorgon is already in the Vault, Draw a Guild card and send the relevant Hero to the cells.
- Make it rain: The Gorgon discards a coin in their room, if they do so, all players draw a Tactics card. If the monsters are stingy, draw and resolve a Guild card.
If Meddie petrified the heroes, open card pack "M".
It turns out the Inquisitor's article was about Meddie being wanted, DEAD or ALIVE for turning the queen into a statue during her previous event. "I'll have to lay low for a little while. Mind if I hide here with you guys?" — I tried to say no, but I couldn't move an inch.
Gorgon (monster)
I see the world petrified.
Activate to: Look the top card of the Guild deck. Then decide whether this card goes back on top or on the bottom of the deck.
Role: Defender
Pro tip: Use your special ability often and make sure to send Mages to the bottom of the deck before throwing heroes to the cells. Use the extra actions to craft potions that help you draw [icons not legible in the text layer; see the Battlebook page 14].
Example: the Gorgon player used their special ability to look at the top card of the guild deck and place the mage on the bottom of the pile and then throw heroes to the cells to draw extra cards. Another effective use of their ability would be placing the hero back on top, not use the cells, and then position yourself on the dungeon with that information to defend treasures.
23. Community Service
The Vampire Hearing. "The voices in my head commanded me to do things, I had no choice. I wish I had destroyed the map in Olga's grimoire, but I failed and you chained me. Since you brought me here, the whispers silenced... For now. It has been weeks that I'm myself again. I've been here before, a long, long time ago. This maze is cursed. I'm weak and famished. You don't want me here and I don't want to be here." the vampire pleaded to Dark Pestilence, our ratkin judge. Well played bookworm! Going BONKERS saved you from the butcher this time.
Don't trust all the stories you hear at the tavern... I swear! Our inmates are always released after serving their sentences. Some still breathing, some a little undead... But always with a smile. For the vampire, it was decided he would help with the renovations as an unpaid consultant. He was fully against it, but the judge gave him no choice. Having him around can be handy... he lived in these ruins before, so he may be the only one who can help us bring this place to its former glory. And I hate to admit it, but I miss the times when he ran our library...It was much easier to find the books we wanted. Olga's map mentions a portal in between worlds! This is probably another hoax, but it's worth checking out to see what are we are dealing with here. The bookworm tried to dissuade us from our pursuit and since then keeps rocking himself back and forth, mumbling strange words. I will try to bring him some hardcovers to cheer him up.
Special Setup: Players cannot play as The Spiders in this Scenario. Shuffle the "Prisoner" cards (marked with the number 23) along with the Heroes cards to create the Guild deck.
Special Rules:
- Find the Gate (Initial): Consider the Builder room as Swords, Hats, Mystic Eye & Crossbones types, instead of Special. When summoning a Hero or a Monster, if there are not enough rooms matching the required type, you may summon them in the Vault instead. At end of the 1st WAVE, if you haven't connected the Builder room to the Guarded Gate you lose the game!
- Rusty Guardians (Initial): The guardians are deactivated, you can't use their room action.
- Sorcerer's Apprentice (Ongoing): Remove all "Scroll" cards from the Loot deck, shuffle it and leave the pile face up, as one of the 5 cards available in the loot offer to be crafted. Every time you discard cards to refresh the loot, you may move the top Scroll card in this stack to the bottom of its pile.
- The Devil's Share (Event): Every time you reveal a "Prisoner" card, the vampire will take all the books in the prison. For each book they take, take the top scroll card from the scroll deck and place it in a chosen monster player's discard pile, just as if that player had crafted it normally. If there's no book at the prison when this card is revealed, draw 2 cards from the Guild deck and send the relevant Heroes to the Cells.
Warning: flip this page at the end of wave 1, before reshuffling the guild deck.
A Blast From the Past
"No ordinary means will defeat the Guardians. But fear not, even in captivity, I've inscribed spells for this very moment! Unleash the enchantments, and behold magic that chains cannot contain!" exclaimed the vampire, in his fancy pajamas.
- 1 Guardians Awake (Instant): All special rules & cards from Wave 1 are still in effect on Wave 2. Reshuffle the Guild Deck. Trigger Iron Guardians, Treacherous Traps & Mecha Spiders.
- 2.1 Iron Guardians (Triggered): After resolving the first Heroes Phase in the 2nd Wave, shuffle all the Guardian Boss cards and place the deck on the Battle board, then place two Mecha Spiders standing (active) in The Guardians room. Finally draw and resolve one Boss card. During Wave 2, after each Heroes Phase, place two Mecha Spiders standing (active) in The Guardians room and then draw and resolve one Boss card and then resolve any Mecha Spiders or active Heroes.
- 2.2 Treacherous Traps (Triggered): Watch out! Our traps are being rigged! Anytime a monster enters a room with a trap, deal them 1 melee damage and remove the trap. You can still create traps or move along with traps as normal, Heroes still fall into traps when summoning or moving into them.
- 2.3 Mecha Spiders (Triggered): Are considered Heroes with 1 Health. Every time a Spider exhausts to attack or loot treasure, lay down their meeple to mark it as exhausted.
The Iron Guardians can't be attacked, the only way to damage them is by having a monster meeple in the Guardians room AND discarding a Scroll card from your hand without using it's effect. If, at the end of the game, you still have the Treasure with a value of 4 in the Vault, but you also have the Guardians attacking, they will collapse the room and you lose the game! However, If at any point during the 2nd Wave, you deal 5 total game [sic — printed as "total game"] to the Guardians, their eyes will change to blue as they calm down and start talking, you immediately win!
Boss cards:
- Deploy: Place one trap on each of the Mecha Spiders on the dungeon.
- Clean-up: Discard all traps in rooms with no Mecha Spiders.
- Refresh: Reactivate all Mecha Spiders on the Dungeon.
If the Guardians eyes change to blue, open card pack "O".
"Sorry, Master. We defended the gate as you told us, but after centuries, our joints got rusty and we couldn't move anymore. So we had to use the jewel to mechanize these spiders and cover more ground," the iron golem said to Olga. "You are mistaking me for my great aunt who owned this grimoire. Let's free these lovely little crawlies."
Spiders (monster)
Although made of thin strands, their web can't be easily broken.
Activate to: lay down one of your spiders on the board. If a hero or a boss is summoned or moves into a room with a lied-down spider, exhaust it before inspiring or attacking, then stand-up all the spiders in the room. If you move a spider that was lying down, it stands up.
Role: Defender
Pro tip: Lie-down spiders far from each other. Acquire Movement Beasts, if able.
Example: the Spider player used their special ability to lie down two Spiders in the same room which was not the best strategy... As when a hero enters the room, the hero will exhaust but you will also stand-up the two spiders. Meanwhile, the other spider in the matching room will be defeated by the other hero.
24. Family Ties
Once upon a time, our Dragon chose to adopt a young boy sold into slavery. She rescued him, tended to his wounds, and raised him as her own. However, the boy had a secret—he was a werewolf, and as he came of age, the moon called for him. One day, a surprising letter arrived, declaring our Dragon a granny and announcing the arrival of their werewolf puppies for a weekend stay. Now, a year into this unexpected arrangement, we find ourselves stuck with fully grown stinking Gnolls. Most dogs have their quirks, but trust me, Gnolls are the worst. The Dragon is usually a sweetheart, except when she's mad – then it's like talking to a fiery storm. Recently, we stumbled onto a problem – those Gnolls she thought were her grandkids? Turns out, maybe not. I can't say I'm surprised... After realizing it, she nearly turned the Gnolls into barbecue bites. So, we had to lock her up for a bit and sent the Gnolls packing, which made our dragon even angrier. But here's the kicker – things started moving around on their own. It's like someone's playing pranks on us from the shadows. What a mess!
Special Setup: Players cannot play as Dragon, Gnolls, Werewolf & Puppies. Shuffle the "Invader" cards (marked with the number 24) along with the Heroes cards to create the Guild deck.
Special Rules:
- Chained Dragon (Initial): The Dragon is chained and will ignore and be ignored by heroes.
- Dungeon Hatch (Ongoing): If at the end of a player's turn there's a Gnoll on the hatch, remove it from the dungeon.
- Lurking Shadow (Event): Every time you reveal an 'Invader' card, remove the 4 room type tokens from the board and then randomly place them back on the same four rooms, which may change their room type, then draw and resolve another guild card.
Warning: at the end of wave 1, before reshuffling the guild deck, open card pack "D" and then flip this page.
Red Moon Rises
With heightened senses, the Werewolf raced through the labyrinth, his eyes ablaze with a fusion of ferocity and desperate determination. "Where are my kin? Where are my offspring?" he howled, the words distorted by the lupine resonance in his throat.
- 1 Where are My Babies? (Instant): Remove all "Invader" cards and add the "Traitor" cards (marked with the letter D) before reshuffling the Guild Deck. Then, place all 7 Gnoll meeples at the Vault and Trigger Gnoll Stampede, The Werewolf Returns.
- 2.1 Hit and Run (Event): Every time you reveal a "Traitor" card, If one gnoll can Melee Attack a Monster or the Werewolf, they will Attack. Then move all Gnolls in this tile one room towards the Dungeon Hatch.
- 2.2 Gnoll Stampede (Triggered): After each player's turn Move one Gnoll towards the Hatch. Gnolls are considered Enemies to Monsters with 3 Health Points and will ignore and be ignored by heroes. Every time you Attack a Gnoll, Move all the other Gnolls in that room by one room towards the Dungeon Hatch. If any Gnoll leaves the Dungeon trough the hatch you lose the game immediately. When you defeat a Gnoll, place a Puppy in the room.
- 2.3 Werewolf Puppies (Triggered): puppies cannot be removed or discarded. If a Hero attacks a Puppy, move the puppy one room away from the Vault. Puppies can be moved along like resources. If at any point you manage to bring all 6 puppies to the Vault and Dragon, Werewolf and Puppies Reunite you immediately win! If, at the end of the game, you still have the Treasure with a value of 4 in the Vault, but the Puppies are not at the Vault, you lose the game.
- 2.4 The Werewolf Returns (Triggered): After resolving the first Heroes Phase in the 2nd Wave, shuffle all the Werewolf Boss cards and place the deck on the Battle board, then place the Werewolf in the Dungeon Hatch standing (active) in the Study. Finally draw and resolve one Boss card.
The Werewolf has 5 Health points and is fighting on your side. This Boss will exhaust to attack Heroes or Gnolls in their room or to Move one room towards the nearest Gnoll (Ignoring heroes and treasures). Heroes still consider the Werewolf a monster and will target him if able. During wave 2, after each Heroes phase, reactivate the Werewolf and then draw and resolve one Boss card. If the Werewolf Health Points becomes zero, you lose the game immediately. If there are no Gnolls on the Dungeon anymore, place the Werewolf on the Vault.
Boss cards:
- Fury Swipes: The Werewolf Melee Attacks a Gnoll or a Hero in their room, if they do so, they will draw and resolve another Boss card this turn.
- Uproar: All players look at the top 3 cards of their Tactics deck and take all the ones with Melee Attacks and discard the others.
- Dragon Mama: If the Dragon is in the Cells, reactivate all Heroes in the Cells and then the Dragon moves to the Vault. If the Dragon is at the Vault, Melee Attack or Ranged Attack one Gnoll.
If Dragon, Werewolf & Puppies are reunited, open card pack "J".
The werewolf barked at the Gnoll leader, who whined "We've been booted from more places than I've got fur. Thought we'd found a cozy spot, until, of course, your little rascals showed up a week later. So, we rolled up our sleeves, worked our best to hide their scent, and have been playing babysitter to these troublemakers ever since" lamented the gnoll.
Werewolf (monster)
The strength of the wolf is the pack.
Activate to: Discard a bone in your room. If you do so, perform a Swarm Melee Attack.
Puppies: have 1 HP and can ONLY be commanded by the Werewolf when they are on the same room. They can also be used in his Swarm Actions.
Role: Crowd Control
Pro tip: Acquire Movement Equipment and the shovel for maximum damage.
Example: the Werewolf player uses the Boots Equipment to Swarm Move himself and the Puppy on their room bringing one bone each to the Workshop. Then the Werewolf activates twice to use their special ability two times, each of them expending a bone to perform a Swarm Attack, dealing a total of 8 Damage to the Gorgon Boss.
25. Gilded Loyalty
For the third time — We are not your Minions! On that day, we were hired by the Conglomerate to help you fix that old dump you called a dungeon and we just went along with your ego-trip. But that gig is up, and now we have a new boss. I'm sorry, but we cannot fix your toilet today! No hard feelings, though. Perhaps after our shift is over, we can find a reason to stay and fight for you tonight... But please, tell your vampire not to look at me this way... he's giving me the chills! When was the last time you fed him?
Special Setup: Players cannot play as Imps, Vampire & Bats. Shuffle the "Get'em boys" ('9') and the "Slash them" ('25') cards along with the Heroes cards to create the Guild deck.
Special Rules:
- Into the night (Initial): Consider the Prison as Skull type for this Scenario, and the Guardians room as Special instead of their original types.
- Freelance Henchmen (Initial): Shuffle the crate tokens with the 4 flags and place them face-down on the Builder. After each player's turn, before the heroes phase reveal a crate token and place an active Imp in a room matching the symbol revealed or on a Special room. After you use all crate tokens, reshuffle them and make a new pile. You cannot use the Builder action for this scenario or move the crate tokens around the dungeon. Imps are considered Heroes with 1 Health, and you lay them down when exhausted. In the begining of the 2nd Wave you will be able to discard coins to hire the Imps to help you during the whole 2nd wave on the Builder.
- Get'em boys (Event): Every time you reveal this card, if the Imps are working for you, place a Trap in each room that has at least one Imp. If they are working for the guild Immediately draw and resolve 2 more Guild cards.
- Slash them (Event): Every time you reveal this card, if the Imps are working for you, All imps on the board will melee attack. If they are working for the guild Immediately discard 2 Guild cards without resolving them.
Warning: flip this page at the end of wave 1, before reshuffling the guild deck.
Darkling Unchained
"So hungry I can't think... I can't focus... Time's relentless passage left me weak but not through. I'll rise again, spread my wings and leave my mark. When I return, they'll be in despair, for revenge, my darling, is served medium-rare" muttered the mad vampire, embraced by the dark.
- 1 Night Shift (Instant): If at the beginning of the 2nd wave there's at least one coin at the Builder, Trigger Henchmen, they will stay and fight for you. For each additional coin spent this way you may keep one of the "Get'em boys" or "Slash them" cards. All cards you can't afford will be discarded from the Guild deck. If no coins are discarded, remove all Imps and crate tokens from the Board. Then, reshuffle the Guild Deck and Trigger Prison Break.
- 2.1 Henchmen (Triggered): "The King commanded us to locate the Gorgon and kill anything in our path! Yet, his stingy right-hand-man only pays us from 9 to 5. Well, time's up for today" — Imps are now considered monsters with 1 HP. All players may use the Imps on the dungeon in their turn as if they were part of their clan. After each player, before the Heroes Phase, reveal a crate token and place an Imp in a room matching the symbol revealed or on a Special room. After you use all crate tokens, re-shuffle them and make a new pile.
- 2.2 Prison Break (Triggered): After resolving the first Heroes Phase in the 2nd Wave, shuffle all the Vampire Boss cards and place the deck on the Battle board, then place their meeple standing (active) in the Cells and inspire all heroes there. Finally draw and resolve one Boss card. The Vampire has 10 Health points and is in Bloodlust frenzy due to starvation. This Boss will attack Monsters, Inspire Heroes, Charge and Plunder Treasure when active following the same priorities as a Hero, after resolving them, lay down their Meeple to mark it as exhausted.
During wave 2, after each Heroes phase, reactivate the Vampire, inspire all heroes on their room, then draw and resolve one Boss card. After resolving the Boss card effect, resolve the Vampire and all active Heroes. If, at the end of the game, you still have the Treasure with a value of 4 in the Vault, but you also have the Vampire in your dungeon, you lose the game! However, if at any point during the 2nd Wave, you defeat the vampire by dealing a total of 10 damage to him, he will vanish in a cloud of bats, you immediately win!
Boss cards:
- Bats (Event): Summon a bat in the same room as the Vampire. Bats are considered Heroes with 1 HP that ignore treasure, being only blocked by monsters. A Bat will move towards the Vault as much as they can, reactivating all heroes in their path until exhausting to fight a monster.
- Reader (Event): The Vampire discards all books in his room and takes one damage for each book discarded this way. If no books are discarded, send a Hero to the Cells.
- Bite (Event): The Vampire performs one additional Melee Attack, if they do so, the Vampire Heals 3 Health Points.
If the Vampire vanished in a cloud of bats, open card pack "L".
The vampire is out there, but these ruins are huge and it may take months for someone to track him. Honestly, I don't believe anyone is actively searching for the bookworm at the moment. If the King really knows the Gorgon is still here, we are in BIG-BIG trouble.
Vampire (monster)
If you need me, I'll be in my coffin.
Activate to: Discard a Book to search your Tactics deck for one card of your choice.
Bats: have 1 HP and can ONLY be commanded by the Vampire when they are on the same room. They can also be used in his Swarm Actions.
Role: Supporter
Pro tip: Acquire Attack Equipments and then defend the Vault in 2nd wave.
Example: the vampire player activated and discarded a book to use their special ability, which then allows them to look at all the cards in their tactics deck and pick a card of their choice. Then the Vampire used this card to Swarm move along with the Bats to the Library.
The Jewel Lies
In the depths of our dungeon, an unsettling feeling rippled through the air, igniting an atmosphere of greed and thirst for power. We didn't know at the time, but, within the Guardians chamber, a radiant red jewel — divided in two equal pieces — whispered promises too good to believe.
26. Safety Drill
At the crack of dawn, Olga brewed a disgusting stew in her magic cauldron. "Advanced Fungomancy," she described, but by the smell, I'm sure she's slow cooking swamp merman's feet. At least open the hatch, for Pete's sake! But she completely ignored it, her hands twirling over ingredients, adding droplets of potions and trinkets into the bubbling mix. This time, she's fixated on creating a squad of mushroom people. Why, you ask? To test our defenses and prep us for the arrival of the "King's army". — As if the King would come himself to our lair. This is NONSENSE! I really miss the days when the crazy witch just craved frog leg soup.
Special Setup: Players cannot play as the Shroom Troop. Shuffle the "Magic Cauldron" cards (marked with the number 26) along with the Heroes cards to create the Guild deck.
Special Rules:
- Enhanced Defenses (Ongoing): Consider the Guardians room as Swords, Hats, Mystic Eye & Crossbones types, instead of Skull.
- Myco-brewing (Event): Every time you draw a Magic Cauldron card, if you discard a frog in the Apothecary all players draw an extra Tactics card. If you don't have a frog to discard, all players MUST destroy one tactics card from their hand or discard pile and return it to the game box.
Warning: flip this page at the end of wave 1, before reshuffling the guild deck.
Bibbidi-Bobbidi-Boo!
As the living mushrooms sprouted, Olga couldn't resist a playful grin. They looked really adorable with their tiny caps held high, marching straight from the pot and stumbling on each other. My heart melted by their cuteness... Until I saw how easily they knocked out a Moomootaur...
- 1 Grub's up (Instant): All special rules & cards from Wave 1 are still in effect on Wave 2. Reshuffle the Guild Deck. Trigger Shiitake Showdown & Shroom Troops.
- 2 Shiitake Showdown (Triggered): After resolving the first heroes phase in the 2nd wave, shuffle all the Safety Drill Boss cards and place the deck on the Battle board, then place two Shroom Troops standing (active) in the Apothecary, where the Magic Cauldron event token is located. Finally draw and resolve one boss card. During wave 2, after each Heroes Phase, place two Shroom Troops standing (active) in the Apothecary and then draw and resolve one Boss card and then resolve any active Shroom Troops and Heroes.
- 2.1 The Magic Cauldron can't be attacked, the only way to stop them from brewing more shrooms is by having a monster meeple in the Apothecary room AND discarding a Beast card from your hand without using it's effect overloading the stew. If, at the end of the game, you still have the Treasure with a value of 4 in the Vault, but you also have Magic Cauldron brewing, you failed Olga's safety drill and you lose the game! However, If at any point during the 2nd Wave, you discarded 7 total Beast cards in the Magic Cauldron, the Magic Cauldron Burps before succumbing to a peaceful slumber, you immediately win!
- 2.2 Shroom Troops (Triggered): Are considered Heroes with 1 Health. Every time a Shroom Troop exhausts to attack or loot treasure, lay down their meeple to mark it as exhausted.
Boss cards:
- March!: Reactivate all Shroom Troops on the Dungeon.
- Suicide Squad: Summon one Shroom Troop on each trap on the dungeon (removing all traps in the dungeon and all Shroom Troops summoned this way).
- Magic Growth: Summon one active Shroom Troop on each open portal on the dungeon.
If the Magic Cauldron Burps, open card pack "E".
Olga's drill was tough as nails. Right now, we are all bruised and NONE OF US really understands the gibberish the Shroom Troops say, so things can get a little weird when they carry those nasty buddies on their toadstools, but give it time... We will come around.
Shroom Troop (monster)
We grow everywhere.
Activate to: Discard a frog to acquire a special ability from a Monster that is not currently in play. You may use this acquired ability as if it were yours. Note that only one other monster's ability can be attached to you at any given time. If you activate your ability again, you have to replace the currently attached special ability card.
Role: Defender
Pro tip: You can easily adapt by changing your special ability, acquire cards with Activations and go for what your teammate monsters are lacking.
Example: the Shroom Troop player used their special ability and spent a frog in a room with a Shroom Troop meeple to attach the Imp's special ability to their card. They can now use Activate to move one of their Shroom Troops on the Dungeon. Keep in mind, you also need to fulfill any other requirements to use the Ability. For instance, Cthulhu only mind controls while asleep, and without the Nap cards the Shroom Troops can't use this ability.
Papers & Perils
Waging war creates a lot of paperwork. Even a monarch knows you can screw up many things in life, but messing up with your taxes will get you in trouble. So, wherever the King goes, he brings a parade of slimy bureaucrats borrowed from the Dungeon Conglomerate, ensuring everything is done by the book. Not the best choice for allies, if you ask me! The Conglomerate is always plotting something...
27. Under Siege
The King's army has arrived at our doorstep, and we can hear their battering ram relentlessly trying to breach our front gates. When we asked Meddie why she would kill the Queen, she denied it, insisting that she merely transformed the Queen into a stunning statue, which should last only a couple of hours. However, someone else may have poisoned the Queen at the gala, as when the petrification wore off, they found the Queen very much dead. The Necromancer identified the cause as Black-necked cobra venom. So the court hastily pointed fingers at the Gorgon, assuming the snakes on her locks could do that — they can't. Blinded by revenge, the King can be easily manipulated. Whoever is behind this had a plan. I can't believe I'll die on my day off.
Special Setup: Players cannot play as the King Slime or Slimes. Shuffle the King Bruce II ('27') and the Slimy Bureaucrat cards ('19') along with the Heroes cards to create the Guild deck.
Special Rules:
- Under Renovations (Ongoing): Consider the Builder room as Swords, Hats, Mystic Eye & Crossbones types, instead of Special. You can't use the Builder action.
- The King's Army (Event): When you reveal the King Bruce II card, draw and resolve 3 Guild cards, all players draw an additional Tactics card as well.
- Slimy Bureaucrats (Event): Every time you reveal a Slimy Bureaucrat card, summon Slimes in the rooms shown on the card, then place an extra Slime in every room that already has at least one exhausted Slime, Inspire those Slimes and all other Heroes in those rooms. Slimes are considered Heroes with 1 Health, and you lay them down when exhausted.
Warning: flip this page at the end of wave 1, before reshuffling the guild deck.
The Merger
As the King marched forward, confident of his impending triumph, the cunning bureaucrats combined into one giant slime, enveloping him in their gooey embrace. In an instant, there was nothing left but bones and the crown. The King is dead. All hail the King Slime.
- 1 The Merger (Instant): Remove the "King Bruce II" card, then reshuffle the Guild deck. Remove all slime meeples from the dungeon. Trigger The Jewel Rises.
- 2 The Jewel Rises (Triggered): The Guardians hurried to stop the Slime King, but his corrosive goo crumbled their rusted bodies. Within the blob, the two Jewel fragments merged, reopening the vortex. Remove all Gadget cards from the Loot offer and flip the Guardian room to it's Vortex side. Make sure to place back into the room anything that was there before flipping it. Trigger All hail the King Slime.
- 3 All hail the King Slime (Triggered): After resolving the first Heroes Phase in the 2nd Wave, shuffle all the King Slime Boss cards and place the deck on the Battle board, then place their meeple standing (active) in the Vortex room and inspire all heroes there. Finally draw and resolve one Boss card.
The King Slime has 15 Health points and is being controlled by the Jewel on their body. This Boss will attack Monsters, Inspire Heroes, Charge and Plunder Treasure when active following the same priorities as a Hero, after resolving them, lay down their Meeple to mark it as exhausted. Every time a monster Melee Attacks the King Slime, place one exhausted slimy bureaucrat in their room.
During wave 2, after each Heroes phase, reactivate the King Slime, inspire all heroes on their room, then draw and resolve one Boss card. After resolving the Boss card effect, resolve the King Slime and all active Heroes. If, at the end of the game, you still have the Treasure with a value of 4 in the Vault, but you also have the King Slime in your dungeon, you lose the game! However, if at any point during the 2nd Wave, you defeat the King Slime by dealing a total of 15 damage to him, they will drop the Jewel, you immediately win!
Boss cards:
- Absorb!: Remove a Slimy Bureaucrat in the King Slime's room, and then cure all the damage done to the King Slime (they are now back to 15 Health points).
- Turning passion into paperwork: Remove a Slimy Bureaucrat in the King Slime's room, and then after resolving the King Slime and all active heroes, reactivate the King Slime and reveal and resolve an additional Boss card.
- Hardworkers: Reactivate all Slimy Bureaucrats on the dungeon. If there's none, place 2 active Slimy Bureaucrats in the King Slime's room.
If the King Slime dropped the Jewel, open card pack "H".
When the King Slime woke up, he greeted us with a joyful smile. The Jewel absorbed all of his memories and knowledge, leaving a mighty doofus behind. I'm curious how long it'll take for the Dungeon Conglomerate to bounce back from losing their brainiest bureaucrats.
King Slime (monster)
The King is dead. All hail the King Slime.
Passive: Every time the King Slime receives one damage from a Melee Attack, if they are still alive, summon a Slime on their room. Slimes have 1 HP and can ONLY be commanded by the King Slime when they are on the same room. They can also be used in his Swarm Actions.
Role: Crowd Control
Pro tip: Acquire potions that can help you draw more cards [icons not legible in the text layer; see the Battlebook page 24].
A Gate to Strange Worlds
A portal to another world... What a perfect place to invite that roommate you really don't vibe with! So, "someone" had this incredible idea of inviting the Stone Troll to take a quick peek into the other side — secretly hoping to give him a gentle nudge into the vortex. What I failed to realize, though, is just how hefty trolls can be. Instead, when the Troll pulled his face back from the vortex, it returned with — so gross! — faeries everywhere! Ew, just remembering it makes me gag.
28. Pest Control
After the incident, Olga placed the Troll under quarantine in the Beast Trainer's lockup for a night to figure out a way to get rid of the faeries, which was a terrible idea. You see, faeries are like ticks, but instead of blood, they feed on magic, and because of this, all our beasts got it, making it really hard to round up the little nasties. So, now, this magic plague is spreading, as one of the Treants got away and seems to be hatching their eggs. I honestly am having nightmares with my late aunt who got "lame disease" from her "fairy godmother" and couldn't stop telling the same boring story about how she lost her fancy shoe after leaving a party by midnight.
Special Setup: Players cannot play as the faeries in this Scenario. Shuffle the "Infestation" cards ('28') along with the Heroes cards to create the Guild deck.
Special Rules:
- Spreading Plague (Ongoing): Consider the Graveyard room as Crossbones and the Vortex room as Mystic Eye instead of their original types.
- Magic Ticks (Event): Every time you reveal an "Infestation" card, either a player discards a Potion from their hand without using its effect, or you MUST place a Faerie Egg (Event token) on a Crossbones room. If you have no Event Tokens left and you needed to place a Faerie Egg when you resolved this card, draw and resolve one additional Guild card instead.
- Quarantine (Ongoing): Each room can hold up to two Faerie eggs (Event tokens). You can't activate room actions on rooms with Faerie eggs.
Warning: flip this page at the end of wave 1, before reshuffling the guild deck.
Hatchling Invasion
Once in a century, the Faerie Queen lays eggs that serve as her settlers to expand the colony. These eggs are sent to distant lands, hatching disgusting little troublemakers. As the faeries stabilize their new home, they usually calm down, especially when there are no more eggs to protect. — but now you go and try explaining that to an Infested Treant, and see if they let you cut their beard. I dare you.
- 1 Invasion Begins (Instant): All special rules & cards from Wave 1 are still in effect on Wave 2. Reshuffle the Guild Deck. Trigger Hatching Eggs, Faerie Queen's Army & Pesticide.
- 2.1 Hatching Eggs (Triggered): After resolving the first Heroes Phase in the 2nd Wave, shuffle all the Infested Treant Boss cards and place the deck on the Battle board, then summon one Faerie meeple standing (active) on EACH Faerie Egg (Event token) on the dungeon and then inspire all heroes there. Finally draw and resolve one Boss card. During wave 2, after each Heroes phase, summon one Faerie meeple standing (active) on EACH Event token on the dungeon, inspire all heroes on their rooms, then draw and resolve one Boss card. After resolving the Boss card effect, resolve the Faeries and all active Heroes.
- 2.2 Faerie Queen's Army (Triggered): Faries are considered Heroes with 1 Health. Every time a Faerie exhausts to attack or loot treasure, lay down their meeple to mark it as exhausted. Due to their diminutive size, Faeries are immune to Ranged Attacks.
- 2.3 Pesticide (Triggered): Olga finally found a solution! It was about time! To remove one Faerie Egg (Event token) from a room, a monster needs to be in the same room as the Faerie Egg and then discard a Potion from their hand without using it's effect. If, at the end of the game, you still have the Treasure with a value of 4 in the Vault, but you also have one or more Faerie Eggs on your dungeon, you lose the game! However, if at any point during the 2nd Wave, you stop the Faerie Invasion by removing all Faerie Eggs from the dungeon, you immediately win!
Boss cards:
- For the Queen!: Reactivate all Faeries on the dungeon and inspire all heroes in those rooms.
- Drain Stamina: Players that have at least one monster meeple in the same room as a Faerie MUST discard one Melee Attack card from their hands. If they don't have any, then they must discard two cards from their hand instead.
- Drain Magic: Players that have at least one monster meeple in the same room as a Faerie MUST discard one Ranged Attack or Portal card from their hands. If they don't have any, then they must discard two cards from their hand instead.
If the Last Faerie Egg was destroyed, open card pack "F".
Without the Queen around or their precious eggs, the few remaining faeries are no longer a threat. Sure, hearing them buzzing near my food still freaks me out a little, but seeing how much the Troll hates them makes my day.
Faeries (monster)
Are drawn to magic like moths to a flame.
Passive: Due to their diminutive size, Faeries are immune to Ranged Attacks.
Role: Supporter
Pro tip: Destroy your cards cautiously, as you risk eliminating yourself if you destroy all cards that let you summon more Faeries into the dungeon.
Example: the Faeries player was ranged attacked by two archers, defending all the Shroom Troops in the Vault without taking any damage. Later, the faeries decided to Destroy a card from their discard pile back to the box to acquire a Scroll card from the available Loot, to be added in their discard pile.
Who Wants to Live Forever
Forty years ago, a teenage boy woke up in strange ruins, with not many memories of who they were or clues on how they got there. At their side, a rotting demon skull and a backpack containing a few trinkets, an old grimoire, a handful of coins, and a letter with a last farewell and instructions on how to find an orphan girl. To afford raising her, the kid joins the Heroes Guild. First as a rookie, then as a mage, then a necromancer... If they could only reanimate the demon skull and ask them some questions about his mother... At each try, his life force diminishes, day by day looking more and more like a corpse. "Rigor Mortis", the young king mocks him. The name sticks.
29. The Ultimate Price
"I searched these ruins for twenty years... Who do you think drew the map? When I gave you my mother's grimoire, I really hoped you would take the family business and run the Guild after me. But, instead, you decided to join the coven. Those degenerate hags! And befriend monsters of all things... How could you fall so low... I raised you better than this! I'm glad to see you alive again my child. Though I fear not for long, after all, it is your fault our King is dead", lamented the Necromancer, his undead army standing behind him.
Special Setup: Players cannot play as Skeletons or Reaper. Shuffle Rigor Mortis ('29') & the Skeleton cards ('15') along with the Heroes cards to create the Guild deck.
Special Rules:
- Ballroom (Ongoing): Consider the Builder tile as Swords, Hats, Mystic Eye & Crossbones types, instead of Special. You can't use the Builder action.
- Undead Army (Ongoing): Under the control of the Necromancer, Skeletons are considered Heroes with 1 Health. When you reveal a Skeleton card, summon Skeletons in the rooms shown on the card. Every time a Skeleton exhausts to attack a monster, lay down their meeple to mark it as exhausted and place another exhausted Skeleton in the same room.
- Necromancer (Event): Every time you reveal a Rigor Mortis card, reactivate all Skeletons in the dungeon and inspire the heroes in these rooms. If there are no Skeletons on the dungeon, summon 2 Skeletons in the Vortex room.
Warning: flip this page at the end of wave 1, before reshuffling the guild deck.
Undead and Back Again
"The jewel is whole again... How? This should be impossible! But maybe I could harness its power to reanimate the demon skull. Or perhaps I could reshape the vortex into a window to the past so I can save you, my child. I could finally know who I am or save you. But not both. My body is not strong enough, not anymore. What to do? What should I choose?" cried the Necromancer, the gem glowing in his hands while his skin disintegrated, consumed by the red crystal.
- 1 The Ultimate Price (Instant): Remove the "Event token" and the "Rigor Mortis" cards, then reshuffle the Guild deck. Trigger A window to the Past.
- 2 A window to the Past (Triggered): The vortex changed, and changed again. Through the swirling portal, images of what had been. Forty years ago, a teenage boy woke up bruised, by his side a demon skull and a backpack. Eighty years ago, a mother sacrificed herself to defeat an impossible evil and save her son... And again. And again. Until the mind of the Necromancer was gone, leaving nothing but a pile of bones.
"Not strong enough. To harness the demon's jewel power, one needs an immortal body," said the vampire, but the words were not his. In a hypnotic trance, he took the jewel, and the vortex changed again. A hundred years ago, two small children ran from the beast, with no one to save them. "But not anymore," cried the bookworm, pushing Olga into the vortex. "I wish things could be different. But this is how it happened... I am truly sorry, Olga."
Trigger Trapped in time, Demon's Jewel & Mindless Reaper.
If the witches are in play: Open card pack "C".
- The High Witch (Instant): Place one of the Witch meeples and all their starting cards back in the box (keeping only the Loot cards they acquired during this game), then shuffle Cynthia's starting cards with their Loot cards and draw five cards.
While the phrases came out of the vampire's mouth, I swear I saw Cynthia whispering them, word by word, a few seconds earlier.
High Witch Cynthia (monster)
The master was also the apprentice.
Activate to: Discard a book to Mind Control a Hero (or Boss) in the dungeon to either move or melee attack each other.
Role: Supporter
Pro tip: Acquire cards that let you place more books so you can make better use of your special ability and then open a portal in the library so you move there often and place more books.
Cynthia can use only ONE witch meeple, and starts with her 5 Tactics cards plus 2 random scrolls. (Gather all Scroll cards from the Loot deck, shuffle them and give her 2 scroll cards.)
Example: by discarding a book, Cynthia mind controls a Mage to attack another hero, using her special ability.
- 3.1 Trapped in time (Triggered): After Olga is pushed through the Vortex, it closes behind her. You can no longer use the Vortex action.
- 3.2 Demon's Jewel (Triggered): Place the Red Jewel meeple in the Vortex room. You can move the Jewel as if it was a resource, but the Jewel can't be discarded from the dungeon. If a player ends their turn with one (or more) of their monster meeples in the same room as the Jewel, they MUST either discard one of their meeples in the room back to their supply or Destroy one of their Tactics cards (either from their hand or discard pile), returning it to the game box. After the Heroes Phase, if there is a Hero in a room with the gem (remember: Skeletons are also considered heroes for this scenario), move their exhausted meeple AND the Jewel to the Reaper's room, ignoring monsters and treasures on their way and not inspiring anyone on their way.
- 3.3 Mindless Reaper (Triggered): In the dimly lit chamber, a pile of bones lies scattered, seemingly lifeless. Suddenly, an unholy energy surges through and the bones begin to twitch and rattle, reassembling themselves into a macabre figure. Limping awkwardly, the reanimated Necromancer — now the Reaper — starts to move, joints protesting with each step, interrupted only by the sound of the death scythe dragging on the cold stone floor. After resolving the first Heroes Phase in the 2nd Wave, shuffle all the Reaper Boss cards and place the deck on the Battle board, then place their meeple standing (active) in the Vortex room and inspire all heroes there. Finally draw and resolve one Boss card.
The Reaper has 20 Health points and is being controlled by the Demon's Jewel. This Boss will attack Monsters, Inspire Heroes, Charge and Plunder Treasure when active following the same priorities as a Hero, after resolving them, lay down their Meeple to mark it as exhausted. As long as the Reaper is in the same room as the Demon's Jewel, they are immune to damage. When the Reaper moves, they will bring the Jewel along to the next room with them.
During wave 2, after each Heroes phase, reactivate the Reaper, inspire all Heroes on their room, then draw and resolve one Boss card. After resolving the Boss card effect, resolve the Reaper and all active Heroes. If, at the end of the game, you still have the Treasure with a value of 4 in the Vault, but you also have the Reaper in your dungeon, you lose the game! However, if at any point during the 2nd Wave, you defeat the Reaper by dealing a total of 20 damage to him, The Reaper becomes a pile of bones once more, and the Vampire — now wearing the crown — steals the Demon Jewel, you immediately win!
Boss cards:
- Death Scythe: The Reaper makes one additional Melee Attack against a monster, if they do so place a Bone in the room.
- Dawn of the Dead: Summon one Skeleton on each room with at least one Bone.
- Undead Parade: Reactivate all Skeletons on the dungeon and inspire all heroes in those rooms. Every time a Skeleton exhausts to attack a monster, lay down their meeple to mark it as exhausted and place another exhausted Skeleton in the same room.
If the Vampire wears the crown, open card pack "N".
Weeks later, the bones reassembled themselves once more. "Where am I?" said the Reaper. "In the Forever King's dungeon" lamented Cynthia, arms chained to the ceiling. "Now that Vincent knows it was me all along, I can't control him anymore".
Reaper (monster)
Death is not the end, it's just a transition.
Activate to: Discard a bone to summon a Skeleton in the same room as the Reaper. Skeletons have 1 HP and can ONLY be commanded by the Reaper when he's on the same room as them. They can also be used in his Swarm Actions.
Role: Supporter
Pro tip: Use the Graveyard often to boost your Skeleton's numbers. Acquire offensive Equipment for maximum damage.
Example: the Reaper player used the Swarm action card to get 4 Activations. With the first two, they placed Bones in the Graveyard using the room action, then using the other 2 activations, they used their special ability, discarding the 2 bones to summon 2 Skeletons at the Graveyard.
30. The Forever King
It's been five weeks since we were captured by the guild. The King had no heir, so with his right-hand also gone, the guild master is now also in charge of the kingdom. "A King to rule a thousand years", I overheard the jailer saying the other day — And here I was thinking glamourizing bloodsuckers was just a thing in Wallachia... Hope the bookworm is not as fascinated by stakes as his second cousin.
Before setup, open card pack "K".
Special Setup: Players cannot play as the Dragon, Vampire & Bats. Shuffle the Forever King ('K') cards along with the Heroes cards to create the Guild deck. Set aside all Epic Hero cards (marked as "20" and "30"). You will use them later on during the game.
Special Rules:
- Imprisoned (Initial): During setup, the monsters meeples begin in the Cells, instead of their depicted (room) types.
- Opportunity Attack (Ongoing): If a monster tries to move out of a room with one or more exhausted Heroes, the monster will receive one Melee Attack damage.
- Prison Break (Ongoing): During setup, place 6 Crates face-down in the Cells and the Key token face-up. Crates and key can be moved the same way you would carry a resource, however, the Warrior cannot discard them. When you move hidden under a crate, your monster can't be targeted by Opportunity Attacks.
- Epic Training (Event): Every time you reveal a "Forever King" card, choose one of the regular hero types and substitute all of their cards (both in the Guild deck and discard pile) by their Epic hero counterpart but reshuffle only the Guild deck, then, all players draw a Tactics card, finally, draw and resolve an extra Guild card. You can find more information on Epic heroes, on page "5" of this booklet.
- Caged Dragon (Initial): Out of spite, the guild locked the Dragon with the beasts. If you bring the key token to the Beast Trainer room, you can use one Activate to free the Dragon, removing the Event token and placing the Dragon meeple on it's place. Give the player who freed the Dragon all Dragon starting cards. The player shuffles all Dragon cards along with their Tactics cards. After their turn, this player will draw back to 7 cards instead of 5. Dragon cards can only be used to control the dragon while your monster cards can only be used for your original monster. However you can use Loot cards you acquired on either. If by the end of Wave 1, the dragon is still imprisoned, the Dragon goes Mad. You can no longer free the Dragon.
Wave 1 outcome:
- If the dragon goes mad by the end of Wave 1, proceed to "Scorching Titan".
- If you freed the Dragon, by the end of Wave 1 proceed to "The Last Stand".
Scorching Titan
Suddenly, a burst of flames erupted from the dragon's maw, the inferno quickly setting ablaze the food supply crates stacked "conveniently" near the cages. As the fire grew, the beast trainer's chamber was engulfed into a pandemonium as the other beasts fled while the dragon, a living embodiment of untamed power, unleashed her wrath upon the lockup. — Dang, girl! My premium roast beef was in one of those crates.
- 1 Dragon Rage (Instant): As the flames grow, the vampiric king leaves the dungeon disappointed — Remove all monsters and heroes from this room back to the supply, you can no longer use the Beast Trainer room action. Remove all Beast cards from the Loot, then remove all "Forever King" cards from the Guild deck, and then reshuffle the Guild Deck. Trigger Freakin' Mad Dragon.
- 2 Freakin' Mad Dragon (Triggered): After resolving the first Heroes Phase in the 2nd Wave, shuffle all the Mad Dragon cards and place the deck on the Battle board, then place their meeple standing (active) in the Beast Trainer room. Finally draw and resolve one Boss card.
The Mad Dragon has 25 Health points and is out of her mind. This Boss will attack Monsters, Inspire Heroes, Charge and Plunder Treasure when active following the same priorities as a Hero, after resolving them, lay down their Meeple to mark it as exhausted.
During wave 2, after each Heroes phase, reactivate the Mad Dragon, inspire all heroes on their tile, then draw and resolve one Boss card. After resolving the Boss card effect, resolve the Dragon and all active Heroes. If, at the end of the game, you still have the Treasure with a value of 4 in the Vault, but you also have the Mad Dragon in your dungeon, you lose the game! To win the game you can either make her unconscious by dealing a total of 25 damage to her, or calm her down by having all six puppies in the same room as the Dragon (which will require someone to play as the Werewolf — or the Puppies if you are playing it again after unlocking them).
Boss cards:
- Dragon's Breath: The Dragon makes two ranged attacks to an adjacent room closer to the Vault. If the dragon is already at the Vault, then heal the Dragon for 5 points instead.
- Scorched Earth: Discard all resources in the Dragon's room, and all resources in all rooms adjacent to the Dragon.
- Fire Rain: All players that have at least one meeple in the same room as the Dragon MUST destroy two Tactics cards back to the box, either from their hand or discard pile. If they don't have enough cards between their deck and discard pile, destroy cards from the top of their tactics deck to satisfy this requirement.
If you've calmed the Dragon down, open card pack "I".
The werewolf puppies timidly approached the mad dragon with a mixture of curiosity and innocence, their high-pitched barks fading into a subtle whimper. The embers grew surrounding the colossal body of the fearsome monster until, her eyes suddenly softened, as she recognized the tiny pack — "Nanny!" they yipped.
Puppies (monster)
Are yappy little rascals.
Activate to: Move an exhausted Hero, Boss, or monster belonging to another player from any room where you have any puppy meeples to an adjacent room. Enemies or Allies moved this way do not Inspire and will fall on traps.
Role: Defender
Pro tip: Acquire Loot that give you Ambush actions so you can summon more puppies on the dungeon. Be careful when barking at Allies.
Example: the Puppies player used their special ability to bark at both the Mage and the Slime, moving them into the Workshop. Both Mage and Slimes will fall into the Traps there. Thankfully, the Slime player had the card to defend themselves while splitting into two Slimes.
The Last Stand
"I told you I didn't want to be anywhere near that cursed place... But you don't listen, do you? Now I'm cursed too. I spent a lifetime searching for a spell powerful enough to shatter the demon's jewel, only to find I can't wrangle my thoughts long enough to make it happen. And who'd have thought, it was my dear sister making me go insane. Family, eh? You'd think they'd have better hobbies... By the way, I see that you found the gift I left for you" said the melancholic vampire, lockup key in hand.
- 1 It is time to end this! (Instant): Remove all "Forever King" cards from the Guild deck, and then reshuffle the Guild Deck. Trigger Final Boss.
- 2 Final Boss (Triggered): After resolving the first Heroes Phase in the 2nd Wave, shuffle all the Final Boss cards and place the deck on the Battle board, then place their meeple standing (active) in the same room as the Key token and inspire all heroes there. Then remove the Key from the dungeon. Finally draw and resolve one Boss card. The Vampiric King has 30 Health points and is being corrupted by the Demon's Jewel power. This Boss will attack Monsters, Inspire Heroes, Charge and Plunder Treasure when active, following the same priorities as a Hero, after resolving them, lay down their Meeple to mark it as exhausted.
During wave 2, after each Heroes phase, reactivate the Vampiric King, inspire all heroes on their room, then draw and resolve one Boss card. After resolving the Boss card effect, resolve the Vampiric King and all active Heroes. If, at the end of the game, you still have the Treasure with a value of 4 in the Vault, but you also have the Vampiric King attacking the dungeon, you lose the game! However, if at any point during the 2nd Wave, you defeat the Vampiric King by dealing a total of 30 damage to him, King Vincent — the vampire, will reclaim his mind and cast a spell to shatter the demon's jewel, destroying it! You immediately win!
Boss cards:
- Bats (Event): Summon a bat in the same room as the Vampire. Bats are considered Heroes with 1 HP that ignore treasure, being only blocked by monsters. A Bat will move towards the Vault as much as they can, reactivating all heroes in their path until exhausting to fight a monster.
- Page-turner (Event): The Vampire discards all books in his room, if at least one book was discarded this way, all players may destroy a Tactics card from their hand or discard pile back to the box. If no books are discarded, draw and resolve an extra Guild card.
- Bloodlust (Event): The Vampire performs one additional Melee Attack, if they do so, the Vampire Heals 5 Health Points.
If King Vincent shattered the Jewel, open card pack "B".
"I can't believe it! Freedom, at last! I couldn't have done it without your help... Now, go have adventures of your own!" exclaimed the bookworm, swinging open the hatch and letting his loyal bats soar into the night. Then, after a long sigh, he continued "Now, let's talk business, shall we? You should also leave and lay low for now. I'll do my best to divert the guild's efforts elsewhere while I devise a plan to bring Olga back to us. But remember, even if we pull this off, the witch won't ever be the same." — Cool with me. I'm not mentally ready to take up the plow and hoe for a while, but hey! It's better than ending at the gallows.
Bats (monster)
Turn on the dark, I'm afraid of the light.
Activate to: Move a bat (through passageways) all the way to the closest enemy in the dungeon (hero or boss). You decide if there is more than one valid target. When moving using this ability, you can't carry anything with you.
Role: Crowd Control
Pro tip: Defeat Rookies on trading spots (icon not legible in the text layer; see the Battlebook page 32) to get resources and acquire Loot.
Example: the Bats player used their echolocation to move all the way to the Rookie's room (as they are the closest enemy to the selected bat meeple using only passageways). They can't carry any resources on their way or use portals for this special ability.
Extras: Holiday Special
The following scenarios were not originally planned to be printed, as they feature Cthulhu — a guest monster who is not part of our main story for the series and is also not included in this Expansion. However, these scenarios are a lot of fun! Even if you don't own the "Great Dreamer Expansion" you can still play them by replacing the Cthulhu's meeple by an Event token.
Special Setup: Players cannot play as Cthulhu in this Scenario. Shuffle the Librarian cards (marked with the number 5) along with the Heroes cards to create the Guild deck.
H1. Silent Night
When my second cousin asked me if I could babysit for them, I said "For sure! Taking care of one more Munchkin during the holidays will be no problem!" Little did I know that they adopted a world-ending cosmic baby. He sleeps so cute though! So for now we will do the most to keep things quiet here, take turns reading the best bedtime stories... and hope for the best!
Special Rules:
- Bedtime Stories (Event): Every time you reveal the Librarian card, discard all books in the Library room — Cthulhu remains asleep, dreaming of heroes being captured — For each Book discarded this way draw another card from the Guild deck and send the relevant Hero to the Cells. If there are no books to discard in the Library room, Cthulhu has a Nightmare where heroes are invading the dungeon from all sides, draw and resolve 2 extra Guild cards, one at a time!
- Keep it quiet (Ongoing): Monsters cannot perform swarm actions in the Library room. Cthulhu is sleeping there and they don't want to wake them up!
H2. The More the Merrier
We had everything under control... for a moment. The world-wrecking baby was sound asleep so it was time to prepare my mother's special recipe for our holiday feast. It's a yummy one and very easy to make, so you can try making it at home! All you need is to stuff a Rhino-Turkey with oculord eyes, peanut butter and... bone marrow — which I completely forgot to buy! So I had to ask the dragon to fly to the next village and bring us some... Imagine my surprise to see the dragon returning home bringing a basket with 7 puppies instead! I jokingly asked if I could cook them, and she almost vaporized me on the spot! Thankfully, I got skilled at dodging dragon fire already. Anyway, now we have a problem, because if these rowdy puppies wake up Cthulhu, we are all doomed!
Special Setup: Players cannot play as Cthulhu or Gnolls in this Scenario. Shuffle the Puppies ("18") cards with the Heroes cards to create the Guild deck.
Special Rules:
- Gnolls (Ongoing): Gnoll puppies cannot be removed/discarded from the dungeon. If a Hero attacks a Gnoll, move it to an adjacent room (closer to the Vault). Gnoll puppies can be moved along like resources but cannot use portals or be carried through portals.
- Puppy Pandemonium (Event): When you reveal a Puppies card, you must move all Gnoll puppies from one room of your choice to an adjacent room, closer to the Vault.
- Keep it REALLY quiet (Ongoing): Monsters cannot perform swarm actions in the Vault. Cthulhu is sleeping there and they don't want to wake them up! If at any point of the game one (or more!) gnoll puppies reach the vault, Cthulhu wakes up and the Monsters lose the game. If you lose the Treasure with value 4 from the Vault, you also lose the game.
H3. Santa Baby
Special Setup: Players cannot play as Cthulhu or Gnolls in this Scenario. Replace the Mage cards with the Epic Mage cards (marked with the number 20) and add the Librarian cards (marked with the number 5) to create the Guild deck.
- Epic Mage: When summoned in the Cells, Inspire all Heroes there. When he charges into a room, flip a completed portal in it back to the incomplete side.
Special Rules:
If you want a thing done right, do it yourself — I said while rushing into the town to snatch some bone marrow from the tavern kitchen — and what a terrible idea that was! You see, the whole guild was there celebrating and all dressed up fancy to reenact the wise men tale. The place was so crowded that I could have just snuck in quickly... but I didn't! No, no sir... I needed to make fun of their bejewelled pajamas. Now we have the guild on our doorstep, past midnight, while we try to babysit seven puppies and a nightmare of a baby! That's it, I'm over the holidays.
- Gnolls (Ongoing): If a Hero attacks a Gnoll, instead of removing it, move it to an adjacent room (closer to the Vault). Gnoll puppies can be moved along like resources but cannot use portals or be carried through portals. If a Gnoll reaches the Vault, remove it from the dungeon back to the box.
- Bedtime Stories (Event): Every time you reveal the Librarian card and Cthulhu is not awake discard all books in the Vault. For each Book discarded this way draw another card from the Guild deck and send the relevant Hero to the Cells. If there are no books to discard in the Vault or if Cthulhu is awake, draw and resolve 2 extra Guild cards, one at a time!
- Keep it quiet, or else! (Ongoing): Monsters cannot perform swarm actions in the Vault. If at any point of the game one (or more!) Gnoll puppies reach the vault, before removing them, Cthulhu wakes up, activate Thank you Santa!
- Thank you Santa! (Triggered): Cthulhu is now awake! When this happens, take all the remaining treasures in the dungeon and pile them in the vault organized by lower to higher numbers. After each heroes phase Baby Cthulhu will open the top Treasure chest — ignoring the number on it! — (resolve the treasure abilities as usual). Heroes can still plunder the top treasure following the usual rules. If the heroes (or Cthulhu) opens Treasure 4 you lose the game.
Rookies (Rules Reference)
During setup, add a number of Rookies along with the other hero cards to create the Guild deck.
- Show Off: Rookies don't have a show off ability.
- Summoning a Rookie: Every time you draw a Rookie card, only one token will be summoned into the dungeon. If there's more than one room of that type, you choose where the Rookie arrives.
- Bag of Goodies: Every time you defeat a Rookie, place a resource of your choice on that dungeon room (Coin, Frog, Book or Bone).
New Actions
Spoiler alert! If you have not played the Chronicle yet, proceed with caution...
Unless otherwise stated, actions are resolved individually, in any order you choose, splitting the actions depicted in one card to one or more of your Monsters in the Dungeon. You may also choose not to use all the actions depicted in a card. If an action requires a Token and there are no more left in the supply, you can not perform the action. Some of the new actions have a unique symbol, you can see their meaning below:
- Destroy: Destroy one of your tactics cards (either on your hand or discard pile), place the selected card back in the game box.
- Search: Search your Tactics deck for a card of an action type (in this example, Ranged Attack), then add the selected card to your hand and reshuffle your Tactics deck. If there's none, you just reshuffle the deck.
- Throw: Throw items, traps, and smaller monsters to the furthest room in a straight line from your meeple.
- Oracle: Look the top card of the Guild deck. Then decide whether this card goes back on top or on the bottom of the deck.
- Spider web: Lay-down one of your spiders on the dungeon. If an enemy is summoned or moves into a room with a lied-down spider, exhaust it before inspiring, then stand-up all the spiders in the room.
- Banish: Discard the top card of the Guild deck (without resolving it).
- Mind Control: Move (ignoring Treasure and not Inspiring) or Attack (Melee) using an exhausted hero (or boss) in the dungeon. Mind controlled heroes or bosses will fall on traps.
- Nap time: Cthulhu sleeps (lie him down) or wakes up (stand him up). Heroes ignore Cthulhu while he is sleeping.
- Echolocation: Move a bat (through passageways) all the way to the closest hero or boss in the dungeon. When moving using this ability, you can't carry anything with you.
- Bark: Move a hero, boss, or monster out of a room where you have a puppy into an adjacent room. Enemies or Allies moved this way do not Inspire and will fall on traps.