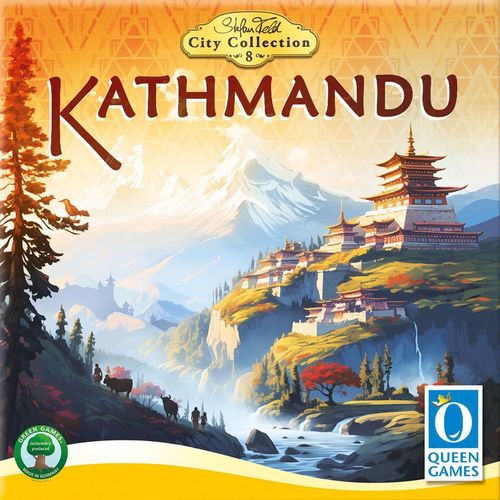
Kathmandu
Kathmandu Rulebook
Table of Contents
Table of Contents
- General Overview
- Components
- Setup A)
- Setup B)
- Playing the Game
- End of the Game and Final Scoring
- The Equipment Cards
- The Animal Cards
- Long Game
- Expansion 1: Tents
- Expansion 2: Characters
- Overview of the Game
General Overview
A game for 2-4 travelers aged 14 years up.
Components
- 6 Terrain boards
- 24 Maps, 2 each "A" and "B" in 6 colors
- 4 Kathmandu tiles (wooden tiles for the DELUXE version)
- 1 Start board, with start spaces
- 1 Destination board, with the city of Kathmandu
- 24 Goods, 4 each per type (wooden tiles for the DELUXE version): Thangka picture, Silk, Spices, Prayer mill, Statue, Ring
- 6 Special goods (wooden tiles for the DELUXE version)
- 7 Border strips
- 1 Game board (front and reverse side)
- 80 Resources, 16 each per type (100 wooden resources for the DELUXE version): Backpack, Compass, Paint box, Coins, Yak fodder
- 36 Equipment cards (with reverse side)
- 12 Weather tiles: 6x Sun, 6x Storm (with reverse side)
- 12 Start equipment cards (with reverse side)
- 20 Exhaustion markers
- 27 Animal cards (with reverse side)
- 24 Dice, 4 each per color
- 4 Temple tiles
- 1 Storm, with 2 plastic bases
- 1 Scoring overview board
- 1 Stefan Feld standee, with plastic base
- Individual components in 4 player colors (yellow, red, blue, and green):
- 1 player board
- 1 Scoring marker, 1 50/100 points tile and 1 150/200 points tile
- 9 Offerings
- 1 Yak
Setup A)
- First build the landscape through which you will travel with your yak during the game:
You always need the start board and the destination board, which you lay out first and last respectively. In between, lay out any 4 of the 6 terrain boards with a random side facing up. Note the following:
- You don't have to place the boards in a straight line - you can and should also build "curves". Only 1 other board may be adjacent to the start and destination board and exactly 2 boards must be adjacent to each terrain board - they thus form a "snake".
- Between adjacent boards must be placed so that the border between the boards is passable by at least 2 spaces. The border is passable if there are no mountains on either side. This border can be crossed via 2 spaces.
- Also note the orientation of the red compass needle on the 4 terrain boards: the more of them point in the direction of Kathmandu, the more difficult your journey will be. For the first few games, we recommend placing only 2 boards with the red compass needle pointing in the direction of Kathmandu.
- Place 5 border strips, one on each gap between 2 boards.
Tip: You can clamp the border strips upright between the panels. The rules show the border strips lying flat to better see them in the example pictures.
Setup B)
-
Place 1 temple tile each on the 3rd and 5th board of the landscape, counted from the start board. The spaces are marked by a little tower in the right-hand corner of the space. The other 2 temple tiles are not needed and remain in the box.
-
The Kathmandu tiles are stacked in ascending numerical order (15 at the top) and placed on the city of Kathmandu on the destination board.
-
The exhaustion markers form a general supply.
-
Shuffle the goods and distribute them face down among the cities so that there is 1 good on each of the 4 spaces of each city. Then reveal the goods. Put the remaining goods back in the box. Place the special goods next to the landscape.
-
Sort the 5 different resources and place them in the general supply.
-
Place the game board next to the landscape, with the front side facing up.
-
Of the 12 weather tiles, take 3x "storm" and 2x "sun". Shuffle these and randomly place 3 of them face down on the first 3 spaces of the round track. Put the remaining 2 back in the game box without looking at them. Then again shuffle 3x "storm" and 2x "sun" and place 3 more tiles face down on the round track. The last two spaces remain empty - they are only needed for the "Long Game" (p. 14).
Note: You can decide how many storm and sun tiles you want to have in the game. The idea: the more storm tiles there are, the faster the storm will follow you, and the more stressful the game gets. You can also shuffle all 12 tiles, draw 6 of them and leave the weather completely to chance.
- Shuffle the equipment and animal cards as well as the maps separately and place them face down in stacks on the corresponding spaces of the game board. Then reveal the following number of cards:
- Equipment cards: Reveal cards until there is one more equipment card than the number of players participating, e.g. 4 cards for 3 players.
- Animal cards: Reveal 1 animal card (in a 2-player game) or 2 animal cards (in a 3- or 4-player game).
- Maps: Reveal 3 of the maps and place them on the corresponding spaces on the game board.
-
Place the storm next to the start board.
-
Choose a player color and take in this color:
- 1 Player board
- 1 Yak
- 1 Scoring marker, 1 50/100 points tile, and 1 150/200 points tile, which you will use during the final scoring at the end of the game (see p. 10).
- 10 Yak tiles: Separate the "10 points" yak tile from the other yak tiles. Then shuffle the remaining 9 yak tiles, form a face-down stack and place the "10 points" yak tile underneath. Place the stack above your player board. Now reveal the top yak tile and place it to the right of the stack.
- 9 Offerings, which you place on the corresponding spaces on your player board.
- 1 Overview card
-
Take 1 die in each of the 6 colors and 1 each of all 5 resources from the general supply.
-
Shuffle the start equipment cards. Everyone receives 2 cards each, which you place face-up at the bottom right of your player board. Return any undistributed start equipment cards and excess game components to the box.
-
Now you all draw 2 maps each from the face-down pile and place them next to the top right of your player board. If you draw 2 maps of the same color, place the second tile under the stack and draw a new map. Repeat this until you have 2 different colored maps.
-
The player who has last been to Kathmandu or Nepal (or closest to it) receives the Stefan Feld standee.
-
Now place the yaks on the start spaces of the start board: The player to the right of the player with the Stefan Feld standee begins and places their yak on any start space. The others follow in anticlockwise direction and place their yak on an empty start space.
-
Finally, you all roll your 6 dice once and place them next to your player board.
Playing the Game
Kathmandu is played over 6 days, with each day consisting of 3 rounds. The player with the Stefan Feld standee always starts a round, the others follow in clockwise order.
Once the 6th day has been played, the final scoring takes place. Whoever has the most points wins.
When it is your turn, perform the following steps in this order:
- Select 1 die and take 1 resource
If necessary: Rest - Remove all exhaustion markers [No movement or actions!]
-
Move your yak
-
Perform actions on the target space
1) Select 1 die and take 1 resource
Choose 1 unused die (dice that are not on your player board are considered unused), place it on your player board and gain 1 resource in the color of the chosen die from the general supply.
The black die is a wild: get any 1 resource of your choice.
Important: Before you choose a die, you may re-roll all unused dice once per round. To do this, you must place 1 of your unused dice at the bottom right of your player board. You may not use this die again during this day.
You will need the resources for various actions during the course of the game. You can find an overview of the actions on the back of this rulebook.
Note: The resources are considered unlimited - if the supply of any type is depleted, find a suitable replacement.
Example: Dirk places the unused gray die at the bottom right of his player board to re-roll the rest of his dice. He then chooses the brown die and places it on the left-most die space. He receives 1 backpack (brown resource) from the general supply.
Rest: Remove all exhaustion markers
Check whether there are 3 exhaustion markers on your player board:
- If this is the case, (after selecting your die and taking the corresponding resource), return all exhaustion markers to the supply and end your turn.
- If this is not the case, you can proceed with 2) Move your yak.
Example: Vincent has 3 exhaustion markers on his player board. He chooses the pink die, receives 1 yak fodder from the supply and then discards all exhaustion markers. His turn then ends.
2) Move your yak
You now use the number of pips on your previously chosen die to move your yak. Follow the yak movement rules below.
Yak movement rules
- The yak can only move in a straight line. It must move exactly as many spaces as the number of pips on the chosen die.
- If the yak would move onto a mountain space or over the edge of a board, it stops on the last space before the mountain or edge instead and ends its movement there. You receive 1 exhaustion marker that you place on your own player board.
Example: Dirk has chosen a die with 2 and must now move his yak 2 spaces in a straight line.
Example: Nathalie has chosen a die with 5 and moves her yak forwards in a straight line. This would move her yak over the mountains, where it is not allowed to move to or over. The yak remains on the last space in front of the mountains and Nathalie receives 1 exhaustion marker.
- If your yak crosses a border strip, you must return 1 yak fodder to the supply. If you do not have any yak fodder, you receive 1 exhaustion marker but may still move the yak across the border strip.
Note: The border strip is not a space - it is not counted when you move your yak, and you cannot stop on it.
- During your turn, only if your yak's first step is in the direction of the red compass needle on the board it starts its movement on, you must discard 1 compass. If you don't have a compass, you receive 1 exhaustion marker instead, but you can still continue moving your yak.
Example: Vincent moves his yak across a border strip. He has no yak fodder to give away and receives 1 exhaustion marker.
Example: Ani moves her yak in the direction of the red compass needle: She puts 1 compass back into the general supply.
- Exhaustion marker: You can never have more than 3 exhaustion markers. If you get another one, put it back to the supply.
- Equipment cards change the rules for the turn in which you play them. The card effect always takes precedence over the basic rules.
The space on which your yak movement ends is called the target space. Several yaks can be placed on the same space. You can now perform different actions depending on the target space.
3) Perform actions on the target space
After moving, you can perform the following actions on the target space - several actions if possible:
Fulfill a yak tile
Check whether your current (face-up) yak tile shows the same landscape as your target space. If this is the case, it is fulfilled. Reveal the next yak tile from the stack and place it on the fulfilled tile. This is now your current yak tile.
If you reveal the last yak tile, you have fulfilled all the tiles and receive 10 points in the final scoring.
Example: Dirk's yak comes to a halt on a snow space. He then completes his current yak tile and reveals the next tile from the stack.
Paint an animal
If there are one or more animal cards in the general display that show the same landscape as your target space, you may take 1 of the corresponding animal cards and place it next to your player board in exchange for 1 paint box. You may only take 1 animal card per turn. The display is only replenished at the end of the day!
Example: Nathalie moves her yak to a meadow space. She hands in 1 paint box and takes the animal card with the rhinoceros (meadow background) from the general display.
Collect equipment
If there are one or more equipment cards in the general display that show the same landscape as your target space, you may take 1 of the corresponding equipment cards and place it next to your player board in exchange for 1 backpack. You may only take 1 equipment card per turn. The display is only replenished at the end of the day!
Example: Ani moves her yak to a grain field space. She hands in 1 backpack and takes the equipment card "Climbing gear" (grain field background) from the general display.
Buy goods
If your target space is a city space with a goods tile on it, you can buy the good by paying 1 coin. Place the goods tile on your player board.
If the special goods tile of the same type is still without an owner, you may take it and place it next to your player board in exchange for 1 additional coin. If the special good is already with someone else, you can give that player 1 coin instead to take the special goods tile and place it next to your player board. The player in question may not prevent this.
Example: Dirk moves his yak to a city space. He spends 1 coin to take the "prayer mill" goods tile lying there. The corresponding special goods tile is still in the general supply. He spends 1 more coin to gain it as well.
Make offerings
If your target space is a temple space or temple tile, place 1 offering from your player board on the temple. You take your offerings from left to right from your player board. Only 1 offering per player may be placed in each temple.
After making an offering, take 1 map from the face-up display or from the top of the face-down pile and place it next to your player board. Free spaces in the map display are refilled immediately (if possible). Once the maps have been depleted, you can no longer receive a map.
Example: Vincent moves his yak onto a temple space. He places the first offering from his player board, as seen from the left, on the temple space. Then he chooses 1 map from the open display on the game board and takes it.
Visit Kathmandu
If your target space is one of the 9 spaces of Kathmandu, take the top Kathmandu tile and remove any exhaustion markers still on your player board. Kathmandu counts as a city space: You may fulfill a yak tile, collect 1 equipment and/or paint 1 animal, if applicable. Then, place your Yak next to your player board.
From now on, each time it is your turn again, you receive any 1 resource from the supply. However, you may no longer move your yak or perform any actions.
Example: Nathalie moves her yak to one of the 9 spaces in Kathmandu. She receives the top tile from the stack of Kathmandu tiles (15 points).
Swap maps
If the yak of one or more other players is on your target space, you may choose 1 map of your choice from one of these players and exchange it for 1 of your maps of your choice. The player in question may not prevent this.
If you or the player in question does not have a map, you cannot perform the action.
Maps that are secured with a chest (see Equipment cards on p. 12) cannot be selected for exchange.
Example: Ani (red) moves her yak to the space where Vincent's yak is currently located. She takes the red A from his collected maps. In exchange, she gives him her purple B.
The equipment cards
Equipment cards give you advantages on your turn and allow you to change the basic rules of the game in different ways.
During your turn, you can use as many equipment cards as you like, even in combination. You discard the cards after using them once. You may use each of your equipment cards at a specific time during your turn - either before, during or after your yak movement.
The equipment cards and their effects are explained in detail on page 12.
End of the day
After 3 rounds, 1 day is over. All 3 dice spaces on each player board are then occupied by a die.
Note: At the end of the last day, you only have to carry out the "Reveal 1 weather tile and move the storm" step and can skip the rest!
Pass on the Stefan Feld standee
The Stefan Feld standee is passed to the player who has used the 3 dice with the lowest total value in this round.
If there is a tie, you give the standee to the player sitting closer to the one who previously had the standee in a clockwise direction. If this player is also involved in the tie, the standee goes to the next player involved in a clockwise direction.
Example: The following dice were used in this round: Ani: 3, 3, 4 [10]; Nathalie: 4, 6, 6 [16]; Dirk: 2, 4, 5 [11]; Vincent: 2, 3, 4 [9]. Vincent therefore has the lowest total value and receives the Stefan Feld standee.
Reroll the dice
Now roll your 6 dice for the next day.
Reveal 1 weather tile and move the storm
Now, reveal the next weather tile on the game board, starting with the leftmost tile:
If it is a blue storm tile, the storm is moved to the next border strip in the direction of Kathmandu. When the storm is moved for the first time, it is placed behind the first border strip.
If it is a yellow sun tile, the storm does not move.
If your yak is now behind the storm, regardless of whether or not the storm has been moved, you receive 1 exhaustion marker, even if it was already behind the storm before it moved.
The storm does not subsequently hinder your yak's movement, and you do not receive another exhaustion marker when moving through it.
Example: The first weather tile is revealed: Storm! The storm is moved from the edge of the start board to the first border strip. As Vincent's yak is now behind the storm, he receives 1 exhaustion marker.
Replenish the card display
Finally, replenish the general display of equipment and animal cards:
- Equipment cards: Refill the display until there is one more equipment card than the number of players participating in the game.
- Animal cards: Reveal 1 additional animal card (in a 2-player game) or 2 additional animal cards (in a 3- or 4-player game), regardless of whether there are still animal cards on display or not.
End of the Game and Final Scoring
The game ends after the end of the 6th day.
Important: The last weather tile must still be revealed at the end of the last day. If yaks are now behind the storm, their owners receive 1 exhaustion marker.
Note: If all Yaks have arrived in Kathmandu before the end of the 6th day, the game ends prematurely. In this case, no last weather tile is revealed, because you are safe from the storm in Kathmandu.
Now, turn the game board to the side with the scoring track and the large final scoring overview. Place your scoring markers on space 0 of the scoring track.
The final scoring now takes place: You will receive points, which you can mark on the scoring track with your scoring marker. If you circle the scoring track once with your scoring marker during scoring, take the 50/100 points tile in your color and place it next to your player board with the 50 facing up. After another round, turn it to 100. After a 3rd or 4th round use the 150/200 points tile.
Final scoring
You will receive (or lose) points in the following categories:
Offerings
You receive as many points for your offerings as are visible in the free space of the last offering you made (i.e. the last free space from the left).
Example: Dirk receives 25 points for his offerings.
Goods, special goods, Kathmandu tiles
You receive the points depicted on each goods tile in your possession. Each special goods tile in your possession at the end of the game is worth 7 points. You also receive the points depicted on the Kathmandu tile.
Example: Nathalie receives 16 points for her goods, 7 points for the special goods tile and 11 points for the Kathmandu tile.
Sets of different goods
A set of 5 [all 6] different types of goods earns you 7 [12] points. You may have several sets, but each good can only be part of 1 set. Special goods cannot be part of a set.
Example: Dirk receives 7 points for a set of 5 different goods. As he cannot use the special goods as part of a set, he receives no further points.
Maps
For the maps in your possession, you receive:
- 1 point per single A- or B-map
- 4 points for 1 same-colored pair A + B
- 8 points for 1 pair A + B of the same color that has been secured by a chest (see equipment cards)
Example: Vincent receives a total of 15 points for his collected maps: 3 points for 3 single halves, 4 points for a purple pair, 8 points for the green pair secured with the chest.
Animal cards
Determine the highest number of animal cards (e.g. 5) and the lowest number (e.g. 0) collected by the players. The difference (here: 5-0=5) is the point value per animal card for all players (in this example 5 points per animal card).
Example: Ani has 5 animal cards, Vincent and Nathalie each have 2 animal cards, Dirk has not collected any animal cards. This means that each animal card is worth 5 - 0 = 5 points: Ani receives 25 points and Vincent and Nathalie 10 points each.
Yak tiles
Count your remaining face-down yak tiles and score points according to the table below:
| Face-down yak tiles | 0 | 1 | 2 | 3 | 4 | 5 | 6 | 7 | 8 |
|---|---|---|---|---|---|---|---|---|---|
| Points | 10* | 0 | -1 | -3 | -6 | -10 | -15 | -21 | -28 |
*These are the 10 points depicted on the last yak tile.
Example: Dirk still has 2 face-down yak tiles: He loses 1 point.
Distance to Kathmandu
Count how many border strips there are on the way between your yak and Kathmandu and score points using the table below:
| Number of border strips | 0 | 1 | 2 | 3 | 4 | 5+ |
|---|---|---|---|---|---|---|
| Points | 0 | -2 | -5 | -9 | -14 | -20 |
Example: Nathalie's and Dirk's yaks have reached the destination board - they do not lose any points. Vincent is 1 and Ani 2 border strips away from the destination board: Vincent loses 2 points and Ani 5 points.
Equipment cards and resources
For each remaining (i.e. unused) equipment card and for each resource in your supply: Gain 1 point.
Example: Ani receives 5 points for 2 remaining equipment cards and 3 resources.
Exhaustion markers
For each exhaustion marker on your player board: Lose 3 points.
Example: Vincent loses 6 points for 2 exhaustion markers on his player board.
Mark all your points or minus points on the scoring track. Whoever has the most points at the end of the final scoring wins.
In the event of a tie, the player who has come closer to Kathmandu or even reached the city itself wins. If the tie persists, the tied players share the victory.
The Equipment Cards
Cards with the "before" icon can only be used before your yak movement. Cards with the "during" icon can only be used during your yak movement. Cards with the "after" icon can only be used after your yak movement.
Tool case - You may take any 3 different resources from the supply.
Telescope - You fulfill your current yak tile: reveal the next yak tile.
Climbing gear - You may move your yak over mountain spaces with the movement steps of your die, but you may not stop on them. If your die number is too low to cross the mountains, you may not use this equipment.
Magnifying glass - You can turn your selected die to its opposite side and then use this number for your yak movement steps.
Water bottle - You may adjust the number of your die by +1/-1 and turn it to the corresponding side. You cannot turn the die from 1 to 6 or vice versa.
Tea leaves - Double the movement steps of your die. However, you must walk the doubled number of steps completely in a straight line.
Wooden barrel - You may re-roll any number of your unused dice up to three times in immediate succession.
Terrain map - You may move your yak to any other space within the same contiguous area, also across a border strip (return 1 yak fodder!), in which it is currently located.
Bridle - Once during its movement, your yak may turn at a right angle.
First aid bag - You may remove 2 exhaustion markers from your player board and return them to the general supply. This effect occurs even before the step Rest, so that you can first reduce your exhaustion markers and then move your yak as usual.
Chest - You may turn over all your pairs of maps of the same color (A+B) that you have collected so far and place them under this card: You have secured them in the chest and receive 8 points for each of these pairs in the final scoring.
Rope ladder - You may place 1 offering on a temple, while your yak is on one of the 8 spaces adjacent to this temple.
The Animal Cards
Red Panda, Mule, Gharial, Oriental Garden Lizard, Green Tree Snake, Golden Pheasant, Blackbuck, Himalayan Tahr, Dzo, Himalayan Monal, Red-headed Trogon, Spiny Babbler, Bengal Tiger, Monitor Lizard, River Dolphin, Jackal, Langur, Snow Leopard, Greater One-horned Rhino, Indian Elephant, Bharal, Himalayan Serow, Rhesus Monkey, Musk Deer, Yak, Wild Buffalo, Hog Deer.
Long Game
If you would like to make your trip to Kathmandu a little longer and more extensive, then the long game is just right for you.
Changes to Setup
-
Use all 6 terrain boards when building your landscape. All other requirements remain unchanged.
-
Place all 4 temple tiles on the marked spaces of the 3rd, 4th, 5th, and 6th board, counted from the start.
-
Place a total of 8 weather tiles on the game board: Take 3 times "storm" and 3 times "sun". Shuffle these and randomly place 4 of them face down on the first 4 spaces of the round track. Put the remaining 2 tiles back into the game box without looking at them. Then shuffle 4 times "storm" and 2 times "sun" and occupy 4 more spaces on the turn track with 4 face-down tiles drawn from these. Discard the rest of the weather tiles.
Changes to gameplay
Instead of 6 days, you now play 8 days. The rest of the rules remains unchanged.
Expansion 1: Tents
Changes to Setup
Shuffle the tent cards and place them face down on the game board.
Changes to gameplay
End of the day: Receive tent cards and pass on Stefan Feld standee
At the end of the day, all players who have used the 3 dice with the lowest total each receive 1 tent card from the pile into their hand. You should keep these cards face down.
At the end of each turn
After a player has completed all actions on their target space on their turn, the other players check whether they have a tent card with the same landscape type as this target space in their hand. If so, they may play these tent cards. The player whose turn it is, receives 1 exhaustion marker from the general supply for each of these tent cards played.
The played tent cards are then removed from the game.
Expansion 2: Characters
Changes to Setup
Everyone receives a character card of their choice, which they place in the bottom right-hand corner of their player board.
Instead of receiving 1 of each resource and 2 start equipment cards, you receive the number of resources and start equipment cards as depicted at the top of the character card (in the brown bar).
Changes to gameplay
Each character has an individual ability (lower area highlighted in white) that you can use during the game. The abilities are explained in more detail below:
Mountaineer - The mountaineer may move with his yak over mountain spaces and end his movement on a mountain space.
Yak guide - The yak guide may always turn the pink die to any side before using it for the yak movement. She may exchange 2 yak fodder for any 1 other resource.
Monk - Up to 3 times during the game, when ending the yak movement on a temple space, the monk may make 2 offerings at once. He still only receives 1 treasure map.
Merchant - When the merchant buys a goods tile, she may buy 1 tile of her choice from any space in the city.
Border guard - When crossing a border strip, the border guard may move their yak along the border so that it emerges on any space behind the border on the new terrain board. There, the yak continues its movement in the same direction as before. However, 1 yak fodder must still be paid for crossing the border strip.
Artist - When painting animals and collecting equipment, the artist is not limited to the landscape of her target space, she may also include the landscape types of the 4 orthogonally adjacent spaces around her target space. This gives her more choice, but she may never take more than 1 animal card and 1 equipment card per turn.
Overview of the Game
Round sequence
1) Select 1 die and take 1 resource (after rerolling, if required)
To reroll: Set aside 1 unused die, reroll the rest of the unused dice. Place the selected die on your player board and gain 1 resource of the same color as the die.
Rest - If you have 3 exhaustion markers, you MUST rest: Remove all exhaustion markers - no movement or actions!
2) Move your yak - Move your yak in a straight line the exact number of spaces as the number of pips of the selected die. Take 1 exhaustion marker if you cannot complete the movement (due to mountains or board edges). If you move in the direction of the red compass needle: Discard 1 compass (otherwise gain 1 exhaustion marker). When crossing a border strip: Discard 1 yak fodder (otherwise gain 1 exhaustion marker).
3) Perform actions on the target space (see below)
After 3 rounds: End of the day
Pass on the Stefan Feld standee (+ draw 1 tent card) - The player with the lowest total of used dice receives the Stefan Feld standee (+1 tent card).
Reroll the dice
Reveal 1 weather tile and move the storm - Sun: The storm is not moved. Storm: The storm is moved to the next border strip. All players behind the storm receive 1 exhaustion marker.
Replenish the card display - Equipment: Replenish to number of players +1. Animals: Reveal 1 card (2 players) / 2 cards (3/4 players).
Actions on the target space
Swap maps - Other player on the target space? Give them 1 of your maps and take 1 of their maps.
Buy goods - Target space is a city space with a goods tile? Spend 1 coin and gain the goods tile. Spend 1 more coin: Gain the matching special good tile. If this was with another player, they will receive the coin.
Fulfill a yak tile - Does the landscape on your current yak tile match the target space? Reveal the next yak tile.
Gain Animal-/Equipment cards - The landscape of the target space matches the one on a card in the display? Spend 1 paint box and receive 1 animal card with a matching landscape. Spend 1 backpack and receive 1 equipment card with a matching landscape. Only 1 animal card and 1 equipment card per turn!
Make offerings - Target space is a temple? Place your next offering from the left on the temple and receive 1 map. Only 1 offering per player per temple!
Visit Kathmandu - Target space is Kathmandu? Gain the top Kathmandu tile and discard all exhaustion markers. Do not perform any movement or actions on future turns but take any 1 resource.