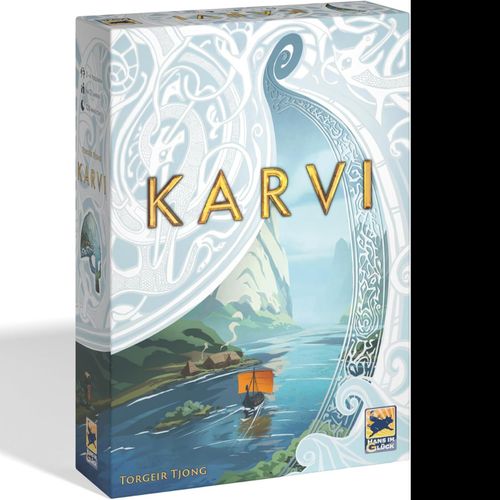
Karvi
Karvi Rulebook
Table of Contents
Table of Contents
Components
- 1 game board
- 24 raid tiles
- 24 upgrade tiles (8 stern, 8 sail, 8 head)
- 20 rune stones (12 normal, 8 special)
- 16 resource tiles (6 fur, 6 silver, 4 gold)
- 12 trading posts (3 per color)
- 12 towers (3 per color)
- 4 scoring meeple (1 per color)
- 8 dice (2 per color)
- 55 resources (20 fur, 20 silver, 15 gold)
- 4 overview cards
- 5 start cards
- 36 trade cards
- 45 upgrade cards (15 helmet, 15 ship, 15 beer)
- 4 player tableaus
- 1 village tableau
- 4 action boards
- 3 stop-area tiles
- 72 warriors (12 per number)
- 24 provisions
- 4 ships (1 per color)
- 24 trade tiles
- 8 blockades
- 7 tuck boxes (6 large, 1 small)
Setup
Here, we show you how to set up the game. We will explain the game as if you were doing everything and how you can explain it to others once you have read the instructions.
1. 2 and 3 players: Place the game board with the 2-3 symbol face up in center of the table. 4 players: Flip the game board to its 4 side.
2. Locations. There are 6 different kinds of raid and trade tiles. Sort the tiles by the symbols face down. There are 4 tiles for each symbol. You need 1 tile per player of each kind. If you have fewer than 4 players, discard the remaining tiles unseen to the box.
Then stack the tiles face down on the game board. Place each stack on a location of the same symbol. Some locations show 2 symbols, so place one of the two stacks showing that symbol on those locations at random. Place the other stack on the other matching location. Each location must have exactly 1 stack.
3. Action track. Place the village tableau below the game board. Turn each of the 4 action boards to the side showing this symbol and connect them to the village tableau with the action spots facing towards the village. The backs of the boards offer more variety. See p. 18 for more detail on this.
- 2 players: Return the stop-area tile for 4 players to the box. Stack the 2 stop-area tiles showing this symbol in random order on the village tableau. Then, place the blockades on all of the 7 action spots showing a 3+. The remaining blockade is only needed for a variant (p. 18). These spots are unavailable.
- 3 players: Return the stop-area tile for 4 players to the box. Stack the 2 stop-area tiles showing this symbol in random order on the village tableau.
- 4 players: Stack all 3 stop-area tiles showing this symbol in random order on the village tableau.
4. General supply. Place all of the resources (fur, silver and gold) into a supply next to the game board. Place the resource tiles next to it. Create another supply next to the game board of all the provisions and warriors.
5. Special rune stone. Shuffle the 8 purple rune stones face down (snake side down). Place 1 rune stone per player in the top right corner of the game board and 1 per player at the top left. If you have fewer than 4 players, return the remaining rune stones to the box.
6. Trade and upgrade cards. Shuffle all the trade cards and stack them face down next to the game board. Reveal 3 cards and place them face up next to the stack. Sort the upgrade cards by their backs. There are 1s and 2s in each of the three types: Helmet, beer and ship cards. Shuffle each of the stacks separately and then place 3 facedown stacks of 2s next to the game board. Place the stacks of 1s on top of their respective stack of 2s.
7. Scoring meeple and ships. Everyone chooses a color. Place the scoring meeple of your color on 0 on the scoring track. Place your ship on Kaupanger. Return the ships and meeple that are not being used to the box. The rest of your player components are explained on the next page.
Tuck boxes
We have included 7 tuck boxes into which you can sort the components after your first game. The images show what belongs in each box:
- All cards
- All warriors
- Trade and raid tiles
- All rune stones and upgrade tiles
- Fur, silver, gold and resource tiles
- Wooden pieces in player colors, blockades
- Ships and provisions
Individual setup
The following section explains what all of you need to do:
1. Take the player board of your color and place it in front of you.
2. Randomly pick 3 rune stones and place them face down (blue stripe up) over your tableau.
3. There are 3 types of upgrade tile: Stern, Sail and Head. Randomly pick 2 of each type and place them face down (blue stripe up) above your tableau.
4. Take your 3 towers and 3 trading posts. Place 1 of each into your personal supply to the left of your tableau. Lay the remaining 2 trading posts and towers in their respective places on your player tableau.
5. Place an overview card this side up next to your tableau.
Start cards
Shuffle the 5 start cards. If you have 4 players, use this side (4). For 2-3 players, you will need this side (2-3). Give each player one start card, and then return the remaining cards to the box.
Now take the items indicated on your card. Below, we explain what each of the components are and how they work.
- Place your resources in your personal supply to the left of your tableau.
- For warriors, you must take a tile of the strength shown. Place it blue side up on one of the places on your tableau. The appearance of the warrior and where you place them on the tableau is unimportant: Only the number on the warrior is relevant.
- Upgrade cards go immediately into your hand.
- Place provisions directly onto your ship on the game board.
- Finally, place one of your die (for 4 players) or both dice (2 and 3 players) on the village tableau. We'll explain what that means on the next page.
Return the remaining player components to the box.
2 and 3 players: Take both dice of your color. The player with the lowest value on their start card places their first die on the leftmost spot (position 1) of the stop-area tile and their second die on the rightmost spot (position 6). The player with the next lowest value now places their two dice on positions 2 and 5. The last player places their dice on the two spots in the middle (position 3 and 4). In a 2 player game, positions 3 and 4 remain empty. Then set your dice to the value shown on your start card (either 2 or 3 beers).
Note: If you have the start card with value 2, set your left die to 3 beer and the right die to 2 beer. Finally, return all start cards to the box.
4 players: Take 1 die of your color. Return the other one to the box. The player with the lowest value on their start card places their die on the leftmost spot (position 1) of the stop-area tile. The player with the next lowest value places their die on position 2, and so on. Continue in this way until everyone has placed their die. Then set your die to the value shown on your start card (either 3 or 4 beers). Finally, return all your start cards to the box.
Your first rune stone
To finish, you must decide which of your rune stones you want to place on your tableau as a free rune stone. Choose one and place it face up on one of the designated spots on your tableau. Rune stones give you points at the end of the game, which is explained in more detail on p. 17.
Only your first rune stone is free. Later in the game, you will have to use the upgrade-action and fulfill requirements to place your other rune stones (p. 12).
Overview and gameplay
The goal of the game is to become the most famous and significant Jarl of all time. Each turn, you use your dice to perform various actions: You can trade or raid, and you can replenish your supplies and become stronger. As you do, you'll be able to travel with your ship to remote locations, to build towers and trading posts or to gather more information about your enemies. You'll record these glorious adventures on rune stones, whereas in other adventures, you'll have to settle for less significant victory points.
You take your turns one after the other, but not in clockwise order: The turn order is determined by the sequence of the dice on the action track. The player whose die is furthest back is always the one whose turn it is. That player must move that die clockwise along the action track to one of the action spots to perform their action.
Since only 1 die can be last at any point, it is always clear whose turn it is next. You may also perform free actions during your turn, either before or after using your dice action.
At the beginning of the game, the die furthest back is the one furthest left, so the player with the lowest start card starts the game. You will play a total of 3 rounds (4 rounds in a 4 player game). The winner is the player with the most points at the end of the game.
Your dice
Now let's take a closer look at the dice. They symbolize your tribe members, who are working for you. But they get thirsty... Each die has a certain number of beers on it, indicated by the dice pips. The more beers on a die, the more actions you can perform.
Moving dice
The following rules apply to each die movement:
- You must move your die clockwise along the action track.
- You may move your die forward any number of spots, but at least one spot.
- You may not move a die that is in the stop-area to another spot in the stop-area. Each die must have landed on at least one action spot outside the stop-area before it reenters the stop-area.
- The action spot must be free, i.e. contains no other dice or blockades (in the 2 player game).
- You may only move your die to an action spot if this die can pay the beer cost shown on it. Paying for beer is explained on the next page.
After you have moved your die to an action spot and paid the cost, you may perform the corresponding action. The different actions you can choose are explained later. Once you have finished your turn, play passes to the player whose die is now furthest back.
Note: You can have multiple turns in a row.
Pay beer
Most action spots cost at least 1 beer. You must pay this cost as soon as you place your die on the action spot.
- When you place your die on an action spot, it loses the corresponding number of dice pips. Show this by turning the die so it displays the remaining number of pips.
- Action spot costs cannot be split across both dice. The die that triggers the action is the only one that can pay that cost.
- You may only place the die on an action spot if you can pay its cost. If the die shows no pips, you may only place it on action spots with a 0. We'll explain how to replenish your beer supply on p. 11.
End of round
If you cannot or do not wish to place your die on an action spot along the action track, you must place your die on an action spot in the stop-area and perform an action there instead.
Caution: A die placed in the stop-area stays in the stop-area until the end of the round. A round ends when all the dice are back in the stop-area. Then a new round begins. You may only move your die out of the stop-area on your turn in the next round. When you start a new round, the player whose die is furthest left plays first, as usual.
Note: Each die can only be assigned to 1 action in the stop-area per round.
Caution: At the start of round 2: Once all the dice have been moved out of the stop-area, you must remove 1 stop-area tile from the stack and return it to the box. This means that different actions are available in the stop-area in each round. It also helps you count how many rounds you have played.
Reminder: In 2 and 3 player games, you will play a total of 3 rounds. With 4 players, you play 4 rounds.
Perform an action
When you place your die on an action spot, you may perform the action shown there. The different dice actions are: Top up beer, Get provisions, Gather resources, Gain income, Upgrade, Trade, Raid.
There are also some free actions that you may perform additionally on your turn, before and / or after your dice action.
Free actions
You can find a reminder of all the free actions on your overview card. The free actions are:
- Move your ship (once per turn)
- Play an upgrade card (as often as you like)
- Discarding upgrade cards (as often as you like)
- Trade gold (as often as you like)
Move your ship
Your ship can sail to any of the locations depicted on the game board. You can move your ship either before or after you have performed your dice action. You can only move your ship using this free action once per turn. Your ship can move over any number of adjacent spots.
However, you must pay 1 provision for each step you move your ship. To do this, take 1 provision from your ship and return it to the general supply. This means if you don't have any provisions, you can't move your ship using this free action. We'll explain how to replenish your provisions on p. 11.
Occupied spot. Only the starting spot in Kaupanger has enough space for more than 1 ship. On each of the other spots, there is only enough space for 1 ship, and you may always move through another ship. To end your movement on an occupied spot, you have to "displace" the other ship. When displacing a ship, you move it to a free adjacent spot. This does not count as a step, so no provisions have to be paid. You decide, where the other ship has to move.
There are two ways to displace ships:
- The stronger ship wins: If your combat strength is greater than that of the player who owns the ship, you displace the other ship. You get combat strength from your warriors. We will explain this in more detail on p. 14.
- If your combat strength is equal or less than the other player's, you must pay 1 additional provision into the supply to displace the other ship. If you cannot do this either, you may not move your ship to that spot.
Special case: If you are unable to place the other ship on an adjacent spot as per the normal rules, place it on a spot that is 2 spots away instead.
End movement. If you end your movement in your turn at a location, you may either take a trade or raid tile, or build a building. If you were displaced onto a location by someone else, you may not immediately perform the actions at that location. However, you may use the free action on your turn to "move" your ship 0 spots and pay 0 provisions to perform the actions at that location. If you cannot perform the action at the location, nothing else happens. Your ship may still stay on that spot.
Scouting: Collect trade or raid tiles. If you end your ship's movement on a location with a trade or raid tile, you may take one of the tiles. Take all the tiles from this location and secretly view their front sides. Choose 1 of them and put it face up next to your tableau. Return the other tiles face down. At this point, you do not need to pay anything or meet any other requirements.
Caution: You can only have 1 tile of each kind, whether or not the tiles are next to or on your tableau. This means that if you have visited a location and collected one of its tiles, you cannot take another tile from there. Other than that, you can have as many tiles next to your tableau as you wish. The "Trade" and "Raid" sections on p. 13-14 explain what you can do with such tiles.
Note: The earlier you scout out a location, the greater your choice. There is, however, 1 tile per player in each stack.
Build trading posts or towers. If you end the movement of your ship on a spot with a building site for a trading post or tower, you may build the building shown there in your color. To build a trading post or a tower, take that component from your personal supply to the left of your tableau and place it on the next available space at that location. You immediately score, once only, the number of points on the space where you placed your building. You can build a tradepost or tower, if you have the building in your supply. Otherwise, you cannot perform this action, and so nothing happens.
Caution: You can only build 1 of your buildings at each location. In the "Gain income" section on p. 12, you will find out why trading posts and towers are worth building (besides giving you points). There are special building sites in the top left and top right corners of the game board (Waterford and Vík í Mýrdal), which will be explained on p. 16.
Play an upgrade card
To start with, you collect upgrade cards in your hand. You may look at them at any time, but keep them hidden from the other players. There is no card limit for your hand. We explain how to get cards on p. 12.
- Ship cards allow you to move your ship or get provisions.
- Beer cards give you benefits for actions and dice, or provide beer.
- Helmet cards refer to your warriors.
You may play any number of cards from your hand during your turn, either before and / or after a dice action. To play a card, you must pay the cost shown on the top of the card from your personal supply. This gives you the bonus shown on the card. You receive all bonuses in one action box. If there is more than one action box on a card, you must choose one box. Once you have played a card, place it face down to the left of your tableau. This is where you collect all the cards you have played during the game. You cannot use your played cards again, but they can still earn you points later.
Note: Explanations of individual cards can be found on p. 21 - 23. All cards are numbered, which makes it easier for you to find them in the rulebook.
Discarding upgrade cards
Instead of playing upgrade cards, you may also discard any 2 upgrade cards from your hand. In exchange, you gain 1 gold. The discarded cards go back into the general supply at the bottom of their corresponding stacks.
Trade gold
Gold is a "universal resource", meaning that at any point during your turn you may exchange as much gold as you want for other resources. You can pay 1 gold to gain 1 silver or 1 fur to put into your personal supply, or you could instead increase your die by 1 beer or get 1 provision for your ship. Any gold you spend goes back into the general supply.
Dice actions
In the following section, we will explain all the actions that are performed when you place your die on the corresponding action spot.
Caution: On some action spots, there is a + between 2 actions. If this is the case, you may perform both in any order. If there is a / between them, you must choose one of the two actions.
Reminder: You must first pay the beer cost before you can place your die on an action spot and perform that action. In general, you can always take less of something, but still use the action.
Resources and warriors
On these action spots, you gain resources and warriors. Take the resources shown from the general supply and put them in your personal supply to the left of your tableau. Take the number of warriors with the value shown from the general supply and place each one blue side up on a free space on your tableau. If there are no free spaces, you may return one of your warriors to the general supply to make space.
Reminder: The appearance of the warrior and where they are placed on your tableau is unimportant.
Top up beer
With this action, you can increase the beer supply of your dice. To do this, increase the value of one or two of your dice by the total number of beers shown. Any dice that have been increased remain in the same position as before. You may split the beer on your dice. You do not have to increase the die that activated this action.
At the start of the game, you may increase your dice by a total of 2 beers. This information can be found on your tableau. We explain how you can top up more beer on p. 15.
Get provisions
More provisions means you can sail along the longer routes. This action gives you provisions. The number of provisions you can take is shown on your tableau. At the beginning of the game, you take 2 provisions, which you place directly on your ship's mast. Your ship can have a maximum of 6 provisions.
Gain income
You gain 1 resource (either fur or silver) and increase your combat strength by 1. For each trading post you have already built anywhere on the game board, you take 1 additional fur or silver. For each tower you have already built anywhere on the game board, you gain 1 additional combat strength. This information can also be found on the village tableau.
Increase combat strength. Each time you increase your combat strength, you must return 1 of your warriors to the supply and take one whose combat strength is 1 higher. Place it on your tableau as usual. You can always split the combat strength you receive. If your warrior already has combat strength 6, you cannot increase it any further. If you have no more warriors on your tableau but have the opportunity to increase your combat strength, you cannot perform that increase.
Caution: However, you may not turn your warrior over. If you increase the strength of a healthy warrior (blue side), you must also put the warrior with the higher value onto your tableau healthy side up. If she was injured (red side), your new, stronger warrior must also be placed on your tableau injured side up. We explain how warriors become injured and what "combat strength" means under "Raid" on p. 14.
Upgrade
When performing this action, you can either draw an upgrade card, or place a tile.
Draw an upgrade card. To draw an upgrade card, choose 1 of the 3 different upgrade stacks. Draw the top card and add it to your hand.
Reminder: You may play upgrade cards as a free action, even straight after drawing them (p. 10).
Place upgrade tiles or rune stones. Above your tableau lie upgrade tiles and rune stones. The upgrade tiles offer permanent effects, and the rune stones earn you points at the end of the game (more detail on p. 17). With this action, you can choose exactly 1 tile (upgrade or rune stone) above your tableau and place it on your tableau. Each tile has a blue section that contains a requirement. You must fulfill this requirement in order to place that tile on your tableau. In addition, you must pay the cost shown below that tile on your tableau.
Then you take the tile, flip it and place it face up on the corresponding spot on your tableau. You immediately gain the points covered by the tile. You do not have to place the upgrade tiles from left to right. For example, you may place the head down straightaway, even if you haven't placed the sail yet. The permanent effect from the upgrade becomes active once you have finished the upgrade-action.
You may also place an upgrade tile or rune stone if the space is already occupied: You simply place the new tile on it, but do not score any points. The old tile loses its effect, although it still counts towards any requirements and the final scores of other rune stones (p. 17).
Trade
You may activate a trade tile that you have previously collected with your ship and placed next to your tableau. Choose one of the tiles next to your tableau and pay the cost shown on it. This gives you the bonus shown beneath the cost. You gain 1 or 2 trade cards and points. Then place the tile face down on the leftmost empty space of the trade track on your tableau.
You have also secured the trade goods shown on the tile. This will give you advantages later in the game (see "Trade and raid track" on p. 15). If you place the trade tile on a space with a trading post (spaces 2 and 4), remove it from your tableau and put it in your supply. You can now build it when moving your ship.
Trade cards. When you get a trade card, choose 1 of the faceup trade cards next to the game board. Then you immediately get the bonus shown on it.
Reminder: If a card has 2 action boxes, pick 1 of them. Then place the trade card face down to the left of your tableau. After your turn, replenish the display to 3 cards.
Note: You replenish the cards only after your turn. Therefore you cannot get more than 3 cards in one turn.
Raid
You may activate a raid tile that you have previously collected with your ship and placed next to your tableau as long as you meet its combat strength requirement. The number next to the shield on the raid tile indicates the minimum combat strength required to defeat the opponents. If your combat strength is high enough, you can activate the tile, but must suffer the amount of damage shown on that tile. After that damage, you receive the bonus shown on the tile.
Next, place the raid tile face down on the leftmost empty space on the raid track on your tableau. You have now successfully raided this location. This will give you advantages later in the game (see "Trade and raid track" on the next page).
Note: You do not have to activate the tiles in ascending combat strength. If you place the raid tile on a space with a tower (spaces 2 and 4), you remove it from your tableau and put it in your supply. You can now build it when moving your ship (p. 9).
Combat strength. Your combat strength is the sum of all the values of the warriors on your tableau. When adding up your combat strength, it doesn't matter which side of a warrior is face up (blue or red side).
Damage. Unfortunately, your opponents fight back. Each of the raid tiles state how much damage your warriors suffer when that raid tile is activated. Warriors have 2 states: If their blue side is face up, they are healthy. If their red side is face up, they are injured. For each point of damage you suffer, you must choose to either:
- Flip 1 healthy warrior on your tableau; or
- Remove 1 injured warrior from your tableau.
If you flip a warrior to their "injured" side, nothing happens immediately.
Reminder: Her combat strength also remains the same. If this warrior suffers damage again, you must remove her and put her back in the general supply. Of course, all brave warriors go to Valhalla, so you will immediately receive points equal to her combat strength. You may also assign 2 points of damage to a healthy warrior to immediately remove her and score those points. If you are unable to suffer damage because you have no more warriors, any excess damage goes to waste.
Heal warriors. You can also heal your warriors. You can find this action on some of the trade cards or helmet cards. Turn as many of your warriors as shown from the red (injured) side to the blue (healthy) side.
Trade and raid tracks
As described before, you may activate tiles that you have collected with your ship and place them on the trade or raid track. If you place a trade or raid tile on a space with a building, you put that building into your supply. You can see different improvements under each of the tracks. You unlock these when you place a tile on the space above them. They are then available for the rest of the game. Since the improvements on both tracks work in the same way, we will explain both tracks at the same time.
More beer and more provisions
Improved beer-action. This improvement increases the amount of beer you get with the beer-action (p. 11). Instead of the start value of 2 (shown to the left of the trade track), you get the improved value. You simply use the highest unlocked value, as the values are not cumulative.
Improved provisions-action. This improvement increases the number of provisions you get with the provisions-action (p. 11). Instead of the start value of 2 (shown to the left of the raid track), you get the improved value. You simply use the highest unlocked value, as the values are not cumulative.
Locked action
Once you've unlocked this improvement with your second trade or raid tile, you may use a locked action on the action track. When you use a locked action, the space with the improvement shows you which bonus you get when choosing that action. If you've unlocked the improvement on both tracks, you need to pick one bonus.
- Second trade tile: Take 1 silver and 1 gold.
- Second raid tile: Increase your combat strength by 3.
Obstructed spots
There are 2 spots on the game board with a map on them. You may only move your ship onto or across these spots if you have activated either the 4th trade tile or the 4th raid tile.
Unlocking the yellow locations and routes. These routes and the locations connected to them are marked in yellow, to remind you of this rule. You also need to unlock the map before you can move along these routes. In all other respects, they work in exactly the same way as the other areas of the game board.
Caution: You only need to unlock one of these improvements to be able to move to any of the yellow locations and routes.
Special case: With special abilities, it is possible to move your ship directly to obstructed spots. In this case, you can move within this area and out of it, but not back in.
Special case: If you displace another ship, you may only move it to an obstructed spot, if that player has already unlocked the map.
Build a trading post at Vík Í Mýrdal or a tower at Waterford. As soon as you build a building at a location in the obstructed area, you immediately pick up the connected stack of special rune stones. You look at them and choose one, then return the rest to the location. You immediately receive the bonus indicated at the top of that tile. Then you may turn the tile over and place it on your tableau on a free rune stone spot.
Special case: If you do not have enough space for it, you have to either discard the new special rune stone after taking its bonus or cover a rune stone on your tableau. Special rune stones give you points at the end of the game (p. 17).
Trade or raid in Francia
Each track has space for 6 tiles and has 6 improvements. The final improvement on each track offers you a special trade- or raid-action.
- "Francia" trade-action. Whenever you use the trade-action, you can pay 4 fur and/or silver to get 8 points.
- "Francia" raid-action. Whenever you use the raid-action and have a combat strength of at least 25, you get 12 points but also suffer 3 damage.
Note: There are only 6 different trade and 6 different raid tiles, so you cannot activate more than that.
End of the game and final scoring
The game ends after 3 rounds (2-3 player game) or after 4 rounds (4 player game). Once the last die has been placed in the stop-area, the game ends after that player's turn.
Note: When you remove the last stop-area tile, you play until the end of the round you just started.
Then there is a final scoring phase. For this, you all flip your overview cards. Everyone adds up their own score by following the steps on the card. You score points for each of your rune stones and other components left in your supply.
- Each runestone on your tableau scores you points based on the requirements you have met. Each rune stone has an easy and a difficult requirement. You may only fulfill one of them. Each special rune stone gives you points for each of the symbols shown.
- You get 1 point for each combat strength of your warriors.
- For your trade tiles, simply square the number of tiles: You score that number of points. (Example: 5 trade tiles gives 5x5=25 points.)
- You get 1 point per pip (remaining beer) on your dice.
- Pay 2 provisions to get 1 point for each.
- Pay 1 gold or 2 remaining upgrade cards from your hand to get 1 point for each.
- Pay 2 resources to get 1 point for each. Everything that is left over now, goes to waste.
After the final scoring phase, the player with the most points wins the game. In case of a tie, the player with the bigger beer belly or whose dice is furthest left in the stop-area wins.
(In)finite Components
- Fur, Silver, Gold: Resources are unlimited. If you run out, you can use the resource tiles to substitute 5 resources of the type shown. You can exchange resources with those tiles at any time.
- Warriors: If you are allowed to take a warrior or increase her combat strength, but there are no warriors of that strength left in the supply, you may take a weaker warrior instead.
- Provisions: There will always be enough provisions. Reminder: You may not have more than 6 provisions.
- Upgrade cards: If you are allowed to take an upgrade card of a certain type, but there are none left in the stack, you may take a card of another type instead. If there are no more upgrade cards in the supply, you go empty-handed.
- Trade cards: If there are no more trade cards in the supply and you need to take one, you go empty-handed.
Variants
Draft start cards. If you have already played the game 1 or 2 times, we recommend this variant: During setup, the player who lost the last game takes all 5 start cards and chooses 1 of them. Then they pass the remaining cards to the player on their left. You do this until everyone has chosen a start card. Then, as usual, you receive everything shown on your card and place your dice on the stop-area tile.
More Action variety. Already played the game a few times and want to add more variety? When setting up the game, flip all the stop-area tiles and action boards to their side.
Chaos variant. Still not enough? Then swap the short action boards with each other and the long action boards with each other. Use a mixture of sides. This variant can strengthen and weaken certain combinations, but always offers new challenges.
Less luck. At the beginning of the individual setup, give each player all of the 8 upgrade tiles of one type or all 12 rune stones. Then each player must pick tiles (2 upgrade tiles per type and 3 rune tiles) from the pile and passes the rest of the pile to the player on their left. Keep doing this until each player has 2 upgrade tiles of each kind and 3 rune stones, as per the normal setup. 3 players: One player gets all the rune stones and stern tiles. 2 players: One player gets all the rune stones and stern tiles, and the other gets all the sails and heads.
Note: We recommend this variant only for players who already know Karvi well and bring a lot of patience for the setup.
You always lose, because you are just unlucky? From now on, whenever you get an upgrade card, you may instead draw 2 and choose 1 to keep. Return the other to the stack.
Note: This variant will make the game longer, but offers even more tactical depth.
Explanation of Symbols
In Karvi, there are many symbols. We'll start by explaining the basic system of the symbols.
Basic system
- A / between two symbols means or. If there is more than one, you can pick a combination of your choice. (Example: 3 fur and/or silver in a combination of your choice.)
- Cost are in red font and have a minus sign (except beer cost).
- Anything that is not a cost is a bonus you get. This bonus could be cards, resources, points, warriors or actions. If you can do this more than once, or if you get more than one, there is a number in front of it. Points and warriors with a certain combat strength, have a number within the symbol.
Arrows and action boxes
On one side of the arrow (left or above) is a trigger, requirement or cost. Next to or below the arrow is the bonus for this action. If there is a number in the arrow, this indicates the maximum number of times you may perform the action. If there is nothing on it, you may only use it once. A ? means, you can use it as many times as you want, as long as you meet the requirement or pay the cost each time.
The number above a bracket indicates how often you choose between the 2 different bonuses. You may choose any combination of the bonuses.
If there are multiple action boxes on a card, you must choose one to perform. If there are several symbols in one action box, you have to perform them one after the other from left to right and from top to bottom.
Requirements
Whenever there is a requirement symbol on another symbol, this indicates a requirement. You only have to fulfill the requirement and do not need to pay anything. Here also applies: If there is no number, you need 1. There are several requirements:
- Trade tiles, raid tiles and upgrade tiles: These have to be activated on your tableau to fulfill the requirement. Upgrade tiles are sterns, sails and head tiles.
- Trade goods: The trade tile with the shown symbol has to be activated on your tableau.
- Cards: Only played cards next to your tableau count, not the cards in your hand.
- Trading post, tower or any building: The buildings have to be built in your color on the game board.
- Healthy, injured, any warrior: Only warriors on your tableau showing the correct side will count.
- Combat strength: The sum of all the values of the warriors on your tableau.
- Provisions: Only provisions on your ship count.
Points
You get the points shown in the symbol and move your scoring meeple the same amount on the scoring track. There are special dice actions which give you points as well. Whenever points are shown in the upper right corner of a symbol, you receive this number of points for each of these symbols. (Example: 1 point per upgrade card played, no matter what type.)
Upgrade tiles
The effects on all upgrade tiles begin immediately after you place the tile on your tableau. You may use them during your turn until the end of the game (or until you cover the tile). Some upgrade tiles give you a bonus, when you perform the dice action shown. You may take the bonus before or after performing that action.
Stern
All stern tiles give you a bonus when you use an upgrade-action. It does not count towards the action you have used to place the stern tile itself.
Sail
- Once per turn (in addition to your free actions), you can pay 2 provisions to move any number of spots. All other rules for ship movement still apply (e.g. obstructed locations, displacing).
- Once per turn (in addition to your free actions) you may pay 1 provision to move your ship up to 2 spots. All other rules for ship movement still apply (e.g. obstructed locations, displacing).
- When you build a tower, immediately increase your combat strength by 2. When you build a trading post, immediately get 2 resources (fur or silver).
- Once per turn as a free action, you can reduce one of your dice by 2 beers. Then you perform a trade or raid action.
- From now on, dice actions cost you a maximum of 1 beer. If the spot costs 0, you pay nothing, as usual. Special case: This effect also applies if you use action spots with the help of beer cards.
- You have now unlocked the obstructed spots. This effect is identical to the improvement on the trade and raid tracks.
Head
- When performing a raid-action, you get 1 less damage and 4 additional points.
- After one of your warriors has died in a raid, you may perform the beer-action.
- For each trade card you get, you also get 4 additional points.
- When performing a raid-action, you get double points for the raid. This also applies for the raid in Francia (p. 17). You do not double the points you get for dying warriors (p. 14).
Upgrade cards
Helmet cards
- 6. Remove a tower from your tableau and put it in your supply. You unlock the tower furthest to the left.
- 8. You get 2 points per healthy warrior on your tableau. After that, you can flip 2 injured warriors to their healthy side.
- 9. Take 3 points per tower built in your color (max. 9 points).
- 10. Increase the combat strength of each healthy warrior on your tableau by up to 2. You cannot split that combat strength. After that, you can flip 2 injured warriors to their healthy side.
- 11. Increase the combat strength of each injured warrior on your tableau by up to 2. You cannot split that combat strength.
- 12. Double the combat strength of up to 2 healthy warriors. Example: You have only 2 healthy warriors (with strength 2 and 4). You double their strength. You put them back into the supply and take warriors with strength 4 and 6 (since 6 is the maximum).
- 13. Flip any number of your healthy warriors to their injured side. You gain 3 points for each warrior you have flipped (max. 15 points).
- 14. Flip any number of your healthy warriors to their injured side. You gain 1 gold for each warrior you have flipped.
- 15. Return one of your healthy warriors to the general supply. This gives you 10 points. This does not count as "dying" (p. 14), so you do not get the additional points equal to the combat strength.
- You get points equal to the combat strength of 2 of your healthy warriors (max. 12 points).
- You get points equal to the combat strength of one of your healthy warriors (max. 6 points).
Beer cards
- This symbol reduces the cost of an action spot to 0. You may use the action spot shown without paying beer. If no specific action spot is shown, you follow the usual rules during your turn.
- 16. Use the beer-action as usual, without moving your die.
- 18. Set one of your die to 2 beers.
- 19. As usual, move your die furthest back to an action spot. However, you do not have to pay the beer cost.
- 20. Move one of your dice back 1 spot, pay the beer cost and use the action shown. You do not count blocked spots (either other dice or blockades). You cannot choose a die in the stop area or move into the stop area with this action.
- 21. Use any action spot that your die occupies again. You do not have to pay the beer cost. You may choose actions in the stop-area.
- 22. Set the beer supply of one of your dice to the same beer supply as any other die.
- 23. Take points equal to your beer supply. You may use the action once per die (max. 10 points). Example: Both of your dice have 3 beers left, so you get 6 points. 4 players: You have only one die, so you can use this action once. You get a maximum of 5 points.
- 25. Use any free action spot, which can be one in the stop-area. You do not have to pay the beer cost.
- 26. Use any free action spot, which can be one in the stop-area. You have to pay the beer cost with any of your dice, but you cannot split the cost between them.
- 27. See the explanation of card 20. However, you do not have to pay the beer cost.
Ship cards
- Move your ship the number of spots shown. You do not have to pay provisions for that. You only have to pay provisions, if you displace someone else when you have less combat strength than them. If this symbol is on an upgrade tile or upgrade card, you can move even if you have already used the free action "Move your ship". Otherwise, all the usual movement rules apply (pp. 8-9). You must displace any other ships, and trigger the location where you end your movement.
Note: With this action, you can end your movements on different locations in a single turn, and therefore build several buildings or collect multiple tiles in one turn.
- If this symbol is next to a ship's movement, you cannot displace another ship when ending your movement. If you end your movement on an occupied spot, you place your ship next to the other ship. The ships stay together on the spot, until one moves to another spot.
- If this symbol is next to a ship's movement and you end your movement on an occupied spot, you must displace the other ship. You do not need to have greater combat strength, nor do you have to pay extra provisions. Special case: If your ship ends its movement on a spot with several ships, you displace them one by one. For each ship, you must have greater combat strength or pay provisions.
- 35. Make 2 separate movements of 1 step each. You end your movement in both spots, so you can even trigger 2 locations with this card. You don't have to pay provisions for this. The usual displacement rules (pp. 8-9) apply here.
- 36. Remove a trading post from your tableau and put it in your supply. You unlock the trading post furthest to the left.
- 37. You get 2 points for each provision on your ship. If you have 3 provisions, you can use the action up to 3 times (max. 6 points).
- 38. Pay up to 3 provisions to get 4 points for each, without moving your ship (max. 12 points).
- 42. Take 3 points per trading post built in your color (max. 9 points).
- 43. Place your ship on a spot with a map. You may do this even if you have not yet unlocked the map (p. 16). You don't have to pay provisions for this. You may then move within the obstructed area until your ship moves out of it. Use the provisions-action as per usual without moving your die.
- 44. Place your ship next to another ship, without displacing the other ship. If the other ship is in an obstructed area (for example, in Waterford), you may still move to it, even if you haven't unlocked the map yet (p. 16). You don't have to pay provisions for this. You may then move in the obstructed area until your ship moves out of it.