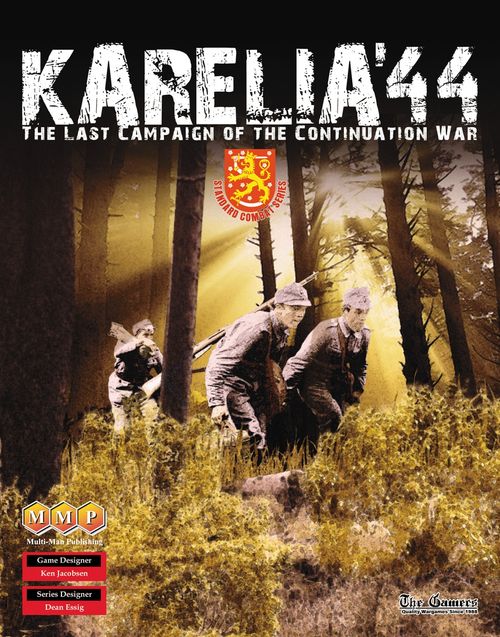
Karelia '44: The Last Campaign of the Continuation War
Karelia '44: The Last Campaign of the Continuation War Rulebook
Table of Contents
Table of Contents
Sequence of Play
Pre-Game Turn
- The Boss's Patience Phase
- Air Point Determination Phase
Soviet Turn
- Prepared Offensive Prep marker adjustment
- Prepared Offensive Announcement (if no Prepared Offensive, skip to Reinforcement Phase)
- Reduce Prepared Offensive # Marker
- Move Prepared Offensive Prep Marker to "3"
- 2nd Wave Designation Segment
- Massive Barrage Target Designation
- Reinforcement Phase
- Barrage Phase
- Movement Phase
- Combat Phase
- Supply Phase
- Finnish Reaction Phase
- Exploitation Phase
- Clean Up Phase
Finnish Turn
- Reinforcement Phase
- Movement Phase
- Combat Phase
- Supply Phase
- Exploitation Phase
- Clean Up Phase
General Information
Scale
Each turn represents two days, and a hex equals 2 kilometers. Unit sizes range from battalions to regiments.
Counter Colors and Ownership
The Finnish player controls all Finnish (Light Blue) units, two Estonian (flag) units, and the one German (Grey) unit. Any mention of "Finns" includes these German and Estonian units.
The Soviet player controls all Soviet units, both regular (Brown) and Guards (Red). Also, the units are coded as belonging to either the 21st Army (no stripe) or 23rd Army (White Stripe).
Multiple Terrain Types
If a hex contains multiple terrain types, use the best terrain for defense and the worst for movement.
1.0 General Special Rules
1.1 Stacking
Up to three units of any type or size can stack in one hex. Markers do not count for stacking. If a hex is found to be overstacked at the end of a Player Turn or at the instant of any Combat or Overrun, DG the offending stack.
1.2 Steps
All units have a number of steps shown on their counter. Flip a unit to its back-side when it takes its first step loss (or eliminate it if it only has one step). Eliminate flipped two-step units when they suffer a second loss. Place a step loss marker under a three-step unit that suffers a second step loss. Regardless of this step loss marker, the unit's back-side combat strength is unaffected. Eliminate a three-step unit that suffers a third step loss.
1.3 Movement
1.3a There are two types of movement: Motorized and Leg. Motorized units (with a Yellow-colored unit symbol) use the Motorized column of the Terrain Effects Chart. All other units use the "Leg" column.
1.3b The EZOC cost is +1 MP instead of the usual SCS +2 MPs.
1.3c The normal SCS terrain limitation on overruns (2 MPs, SCS 6.0c) is 3 MPs here. The cost to do an overrun, however, remains 2 MPs.
1.4 Supply
1.4a Soviet HQs, and Finnish units are supplied if they can trace to an appropriate supply source. Use the SCS Supply Rules, 12.0.
1.4b Soviet non-HQ units must be supplied by a Soviet HQ which is, itself, in supply as per 1.4a (see also 2.2c).
1.4c Out of Supply Effects. Attack, Defense and Movement are x1/2. Out of Supply artillery units cannot Barrage.
1.4d Soviet Supply Sources. Any road, track, or railroad leading off the map south of the Finnish MLR is a Soviet Supply Source.
1.4e Finnish Supply Sources. Any road, track or railroad hex leading out of the northern or western map edge is a Finnish Supply Source.
1.5 Disorganized (DG) Units
Units become DG as a barrage result or because of overstacking. When the Barrage Table gives a DG or numeric result, mark all remaining units in the target hex with a DG marker. Non-DG units can move through or stack with DG units with no effect. If they stop in such a hex, they do not adopt the DG status of other units in it.
1.5a Effects of DG. DG units have their Attack, Barrage, Defense, and Movement Allowance x1/2. DG units cannot overrun, do not exert a ZOC, and lose any Exploitation or 2nd Wave Capability they might have. DG has no effect on HQ Supply Range or the ability of the Finns to use their Reaction Phase. There are no additional effects for multiple DG results.
1.5b Recovery from DG. During the Clean Up Phase, the phasing player removes all DG markers from his units (including any that are Out of Supply).
1.6 Artillery
1.6a Artillery units have a Barrage Strength on the bottom left of the counter. Barrage Strengths can never "add in" on ground attacks or create ZOCs. Artillery units can barrage any hex at or within 4 hexes. There is no Line of Sight requirement.
The only spotter requirement is that Soviet Massive Barrages must have a friendly unit adjacent to the target hex. There are no other spotter requirements. If a barrage requires a spotter and it is not available, the barrage cannot be fired at that hex.
If attacked, artillery units defend like any other unit using their defense strength.
1.6b An artillery unit can fire only one barrage per friendly Barrage Phase and cannot split its fires against multiple hexes. A given hex can be the target of one barrage per phase (exception: see 2.6f). Any number of artillery units can engage in a single barrage (see also 2.6b). Out of Supply artillery units cannot barrage. DG artillery units barrage at half strength.
1.6c Use the Barrage Table to conduct barrages. The possible results are: No Effect, Disorganized (DG), and Step Loss. Step loss results also DG the target. Only the target's terrain affects barrages.
1.6d When the Barrage Table calls for a step loss, the owning player selects any desired unit in the stack to take the loss. The selected unit need not be the strongest. DG the remaining units.
1.7 Airpower
One player can receive Air Points each turn. Each player rolls one die during the Air Point Determination Phase to determine the number available to his side. Subtract the smaller number of the two to determine the number remaining available to the player that started with more.
Example: If the Russian player rolls a six (4 Air Points) and the Finn player rolls a three (w/o Group Kuhlmey) (1 Air Point), the result would be 3 Air Points remaining for the Russian player to use that turn. If both players get the same number of Air Points, then neither will have any to use.
Air Points are available only for that turn and cannot be saved for later. They can be used in any number of different phases, but each Air Point can only be used once per game turn.
Each Air Point can shift a combat (regular or overrun, attack or defense) one CRT column in the owning player's favor. Identify Air Points to be used before determining the odds. No more than two Air Points per side can be dedicated to a single Combat or Overrun.
1.8 Exploitation Phase
Exploitation Capable units can use this phase as per the series rules. Russian 2nd Wave units can also access this phase.
2.0 Soviet Special Rules
2.1 The Boss's Patience
The Russian player is under enormous pressure from above to accomplish Stalin's objectives in this offensive. Time is critical and the player does not know exactly how long "the Boss" (Stalin) will let him have to get this done. Because of this, the length of the game is variable. If the commander is particularly unlucky, he may be explaining his actions in front of the Boss a lot sooner than he would wish. You do not want to be doing this…
2.1a Boss Points. These control how long the game will go on. Track them on the map's Boss's Patience Track. The Soviet player receives one or more Boss Points at start and may do several things to earn more of them. To keep the game going, the Soviet player must maintain at least one remaining Boss Point.
Hint: Don't go into the Boss's Patience Phase with less than 2 Boss Points unless you absolutely have to…
2.1b The Boss's Patience Phase. During this phase, roll one die. On a 1-3, reduce your Boss Point total by one (see 2.1d if you run out). On a 4-6, the total remains the same and play continues. Roll for Boss Points on Turn 1 normally.
2.1c Getting More Boss Points. There are a number of things the Russian player can do to get additional Boss Points (and he will need to do so). These are listed on the Boss's Patience Points section of the Charts and Tables. Follow the instructions there. To withdraw the needed units, simply pluck them off the map during the Soviet Movement Phase (and at no other time). Note that units being withdrawn must be on the game map and not still in the pool of available reinforcements.
Correct the track marker to reflect the new number of Boss Points. Note that you can never have more than 5 Boss Points in the bank… if you ever manage to get more than that, the excess is wasted.
If you get extra Boss Points from the MLR or the VT Lines, the points remain even if the Finns (somehow) retake one or more VP Stars on those lines. Units removed from play to get extra Boss Points can never come back.
2.1d Running Out of Boss Points. The game ends; determine the winner at that moment.
2.2 Headquarters
2.2a Soviet HQ units supply Soviet units. Otherwise they act as any other unit. A Soviet HQ can only supply units of its own army.
2.2b Return an eliminated Soviet HQ in the next Soviet turn. It re-enters in any road hex with a unit of its own army. If no such unit exists (Shame on you!!! You'd better surrender!!!), the HQ does not return.
2.2c Each Soviet HQ unit has a "Supply Range" (in hexes, not MPs) printed on the bottom-left of the counter (in parenthesis); this is not an attack strength. Units are in supply if they are at or within their parent HQ's range (counting from the HQ to the unit). Terrain—even "P" terrain—has no effect on Supply Range. An HQ successfully traces to a unit if the hex count can make it into the unit's hex. The Supply Range cannot be traced through hexes containing Finnish units or unnegated EZOCs.
2.2d Soviet units cannot intentionally move out of the Supply Range of their HQ (this includes overruns and advance after combat). If forced outside of it for any reason, they must move back into it during the next available Soviet phase in which they can move. The HQ, however, can move such that all or some of its units are temporarily Out of Supply. Such units can remain Out of Supply indefinitely provided the units do not move, but if they do move, they must move toward their HQ and supply trace.
2.2e HQs can only move along roads/tracks/railroad hexes. If they are forced to retreat off a road, they must move back as rapidly as possible. The trace back from the HQ to a supply source is not constrained to road hexes, only the HQ itself is.
2.3 Reinforcements
Soviet reinforcements enter at the whim of the Soviet player starting on the first turn of the scenario. Of the available pool, 6 units can enter on each turn. The player is free to select from those available as desired. The player can bring on less than 6 units or none at all on a given turn if he prefers, entering reinforcements is always voluntary.
Unless stated otherwise in the scenario, reinforcements enter via any road or railroad leading off the map south of the Finnish MLR.
2.4 Army Requirements
2.4a Units from different armies cannot stack or attack together. Should they ever be forced to do so, DG the stack.
2.4b HQs can only supply units of their own army.
2.5 Inflexibility
2.5a Attack Coordination. The Soviets can never attack using more than two hexes against any single defending hex. Exception: Any number of hexes containing only Guards units can attack together with the normal two non-Guards or mixed hexes.
2.5b Barrage Coordination. No more than three Soviet artillery units can fire together in one barrage.
2.5c Limited Initiative. Only Soviet Exploit Capable units and Guards units can conduct overrun attacks. No other Soviet unit can do so (even if temporarily "Exploit Capable" because of belonging to a 2nd Wave).
2.5d Low Odds Restriction. Any Soviet attack found to have final odds of less than 2:1 (without rounding) is automatically considered to have a "no effect" result. Air Points can be used to shift an attack up to 2:1 (or more) and allow it to occur, but if Air Points are used and the odds are still less than 2:1, then the Air Points are wasted. This rule is not in effect during a Prepared Offensive Turn.
2.6 Prepared Offensive Turns
Prepared Offensives represent the intensive preparation the Russians apply to major offensives and the use of the additional (behind the scenes) heavy artillery units. They do, however, take time to prepare.
2.6a There are two tracks that control the use of Prepared Offensives: Prepared Offensive Prep and Prepared Offensive #. Both use their own markers.
2.6b The Prepared Offensive Prep Track controls the number of turns that are needed between Prepared Offensive turns. Each game turn, during the Prepared Offensive Determination Phase, shift the marker one box to the right. If the marker begins the phase in the Ready Box, then a Prepared Offensive could be used that turn or held in readiness for an upcoming turn. When a Prepared Offensive Turn is used, shift the Prepared Offensive Prep marker back to the "3" Box and begin the process again.
2.6c The Prepared Offensive # Track merely says how many Prepared Offensives are available. When one is announced in the Prepared Offensive Determination Phase, move the Prepared Offensive # marker one box to the right. Once it is in the "0" box, no more Prepared Offensives remain and none can be launched for the rest of the game.
2.6d On a Prepared Offensive Turn (only) all Soviet attacks (regular and overrun) use the Prepared Offensive shift on the Combat Results Table (1 column right). Do not use this on any other turn and never for a Finnish attack.
2.6e The Low Odds Restriction (2.5d) is lifted during a Prepared Offensive Turn.
2.6f A Prepared Offensive Turn allows the Soviet player to make six barrages on the Massive Barrage column, to apply the special shift on the CRT, and to designate units to be part of the 2nd Wave (2.7). These barrages must be spotted by a Soviet unit (1.6a). Do these in the Barrage Phase. No regular Russian artillery unit can fire during these turns (they are contributing to the Massive Barrages). Simply place the six markers in the desired target hexes and execute those barrages. In an exception to 1.6b, up to two Massive Barrage markers can be placed in a given target hex and two barrages will then be applied to that hex.
2.7 The 2nd Wave
During a Prepared Offensive Turn (and at no other time), the Russian player can designate any number of stacks (up to the countermix marker limit) as being the "2nd Wave" of that offensive. This allows Non Exploitation Capable units to use the Exploitation Phase (however see 2.5c).
2.7a Place 2nd Wave markers on any Soviet unit or stack at any time during the 2nd Wave Designation Segment (which only occurs on Prepared Offensive Turns). To be marked as part of the 2nd Wave, the stack cannot be in an EZOC. The countermix limits the number of 2nd Waves that can be designated. Each marker can designate all or some of the units in a hex as being part of the 2nd Wave. Place the marker on top of the units in the 2nd Wave.
2.7b 2nd Wave units can move, but cannot conduct any sort of barrage or combat or enter an EZOC until released. Artillery units can be marked as 2nd Wave, but the only thing these units can do as a result is move faster.
2.7c 2nd Wave units are released at the beginning of the Exploitation Phase. Released units can move and/or overrun normally during that phase. 2nd Wave artillery units may not barrage.
2.7d 2nd Wave status has no effect on unit values—HQ ranges remain the same, and units have the same MAs and defense strengths as they would without the marker.
2.7e If a Finnish unit moves such that its ZOC extends into a hex containing 2nd Wave units, remove the marker.
3.0 Finnish Special Rules
3.1 Finnish Forces
3.1a Nationality Restrictions. There are no nationality restrictions; all Finnish, German and Estonian units behave as if they were one army. For simplicity, all Finnish forces (to include non-Finn allies) are referred to as "Finns" or "Finnish" in this game.
3.1b Estonians. The I/200 and II/200 Battalions were formed by Estonian volunteers. These units have the Estonian flag instead of the unit type symbol. They are non-Motorized infantry units.
3.2 Reinforcements
3.2a Finnish reinforcements arrive based on a die roll on the Finnish Reinforcement Table made during the Finnish Reinforcement Phase. If the roll is successful, allow the next available group of reinforcements to arrive that turn. They enter play either in Viipuri/Vyborg or in any road or railroad hex leading out of the northern or western map edge.
3.2b In scenarios 1 and 2, no group has arrived. In scenario 3, the first two have arrived and the first available one is Group 3.
3.2c When all groups have arrived, the Finns get no more reinforcements.
3.3 Finnish Defensive Lines
3.3a Soviet units receive no benefit from being in a Defensive Line hex—they only exist when used by the Finns.
3.3b Soviet units cannot overrun Finnish Defensive Line hexes.
3.3c Defensive Line hexes adjacent to Finnish units that normally have ZOCs (even if they don't have one at that moment) are considered to be "occupied" by the Finns. These "ghost" units do nothing (and cannot be attacked, etc.) except to keep Soviet units from entering the Defensive Line in hexes that would otherwise be empty. The hex must actually be empty of all units to get a "ghost."
Use the provided ghost markers to help keep track of where ghosts exist.
Special Cases:
a) The Finnish unit providing the ZOC must be in a Defensive Line hex itself. In other words, the Finnish unit cannot be behind the line (and un-attackable) and provide ghosts in the line itself. It is OK for a Finnish unit to be in a different Defensive Line than that containing the ghosts, provided the hexes are adjacent.
b) If the Russians enter any hex of the line, no ghost is available in that hex again, regardless of changing circumstances, unless a Finnish unit moves through the hex.
c) Ghosts do not exist when it comes to advance after combat.
d) Ghosts go away after the unit creating them is destroyed or retreats. They do not linger.
e) Use the available "Ghost" counters to identify Ghost held hexes in areas where the situation becomes complex.
3.3d Neither hex of Viipuri is part of any Defensive Line. In all cases, only hexes physically containing one of the three Defensive Line symbols are part of a given line.
3.4 The Combined Finnish Movement and Barrage Phases
Each Finnish "movement" phase (Movement, Exploitation, and Reaction) allows both movement and barrages by eligible units. The player can organize these phases any way he likes—artillery can move and then fire—or—fire then move, and some units can barrage followed by others doing their movement (and possibly overrun) to take advantage of the results. As long as no artillery unit barrages more than once and each unit (or stack) finishes its phase before another starts, the player's imagination is the limit to what he can do. It is not, however, permitted to move a unit some of its movement, then switch to another unit and later finish up with the earlier one. Note that only Exploitation Capable artillery can take advantage of this ability in the Finnish Exploitation Phase.
3.4a It is possible for Finnish artillery to combine fires on one target and then finish their moves independently, or for artillery to move from separate locations and then fire together (all at the end of their moves), but it is not possible to move some first and fire at the end while firing others first and then moving. The latter is not permitted.
3.4b Note that while all this flexibility exists, a given hex can be the target of only one barrage in a single phase. The only exception to that are the Soviet Massive Barrages.
3.4c Units that are no longer in an EZOC at the moment they begin to move (even if they started in one when the phase began) can conduct overrun attacks.
3.5 Finnish Reaction Phase
Any Finnish unit not in an EZOC at the moment it chooses to move can move in the Reaction Phase in the Soviet Player Turn. DG and Out of Supply units can use this phase. There is no other special requirement or status needed to do this and non-DG units able to move in the phase can make overrun attacks during it. All the handling rules in 3.4 apply here as well.
3.6 Group Kuhlmey
When the Soviets launched their massive attack in the Karelian Isthmus, Hitler sent the Finns several units to help them resist these attacks. Along with a more or less token ground component (122 Infantry Division, and 303 AG Brigade), more significant help came in the form of Group Kuhlmey. This was a composite unit formed by some 35x Stuka's, 15x Fw-190 Jabo's, 30x Fw-190 fighters and a handful of recon aircraft. Their effect on the Soviet advance was soon felt and they played an important part in finally stopping the Soviet onslaught.
3.6a Group Kuhlmey arrives in the first group of Finnish reinforcements. Use the Group Kuhlmey Arrival Boxes and its marker to keep track of its status.
3.6b The only effect of Group Kuhlmey is the change of the column used to determine the number of Air Points available.
Scenarios
Scenario 1: The Full Campaign
This scenario covers the entire month long campaign.
Play Area: All
Soviet player sets up first
Soviet player moves first
Soviet Information: Prepared Offensive Prep: Ready Prepared Offensive #: 3 Boss Points at Start: 3 (none of the additional Boss Points have been used)
Set Up: All Soviet units must set up south of the Finnish Main Line of Resistance.
21 Army Units
47.01: (12)-1-3 HQ (21 Army)
w/i 1 43.01: 109 Inf Div (381, 456, 602 Inf, 404 Arty), 3-2-10 Tank Rgt (185)
w/i 1 45.01: 72 Inf Div (14, 133, 187 Inf, 9 Arty)
w/i 1 47.03: 45 Gd Inf Div (129, 131, 134 Inf, 96 Arty), 4-3-10 Tank Rgt (31 Gd)
w/i 1 48.03: 63 Gd Inf Div (188, 190, 192 Inf, 133 Arty), 3-3-10 Tank Rgt (260 Gd), (4)-1-5 SP Arty Grp
w/i 1 50.01: 64 Gd Inf Div (191, 194, 197 Inf, 134 Arty)
w/i 1 50.04: 381 Inf Div (1259, 1261, 1263 Inf, 935 Arty)
w/i 1 52.05: 358 Inf Div (1187, 1189, 1191 Inf, 919 Arty)
w/i 1 52.03: 178 Inf Div (386, 693, 709 Inf, 332 Arty)
w/i 4 57.03: 372 Inf Div (1236, 1238, 1240 Inf, 941 Arty)
Anywhere (stacked or adjacent to any other 21st Army unit): 4x (8)-1-2 Arty Grp, 1x (5)-1-2 Arty Grp, 2x (9)-1-6 Gd Katy Grp
Anywhere south of the Finnish MLR: 286 Inf Div (994, 996, 998 Inf Rgt, 854 Arty), (3)-1-5 SP Arty Grp, 4-3-10 Tank Rgt (26 Gd), 4-3-10 Tank Rgt (27 Gd), 6-4-10 Tank Bde (1), 6-4-10 Tank Bde (152)
Reinforcements (use 2.3): 13 Inf Div (119, 172, 296 Inf, 48 Arty), 46 Inf Div (176, 314, 340 Inf, 393 Arty), 90 Inf Div (137, 173, 286 Inf, 96 Arty), 168 Inf Div (260, 402, 462 Inf, 412 Arty), 265 Inf Div (450, 941, 951 Inf, 798 Arty), 268 Inf Div (942, 947, 952 Inf, 799 Arty), 314 Inf Div (1074, 1076, 1078 Inf, 858 Arty), 382 Inf Div (1265, 1267, 1269 Inf, 946 Arty), 7-5-12 Tank Bde (30 Gd), 3-2-6 Tank Bde (220), 3-2-10 Tank Rgt (98), 3-2-10 Tank Rgt (124), (4)-1-7 Gd SP Arty Grp, (3)-1-5 SP Arty Grp (23 Army)
23 Army Units
56.05: (10)-1-3 HQ (23 Army)
w/i 2 53.10: 10 Inf Div (62, 98, 204 Inf, 30 Arty), 3-2-10 Tank Rgt (226)
w/i 2 58.13: 142 Inf Div (461, 588, 701 Inf, Arty Rgt)
w/i 2 57.08: 92 Inf Div (22, 203, 317 Inf, 60 Arty)
w/i 4 57.03: 177 Inf Div (483, 486, 502 Inf, Arty Rgt), 281 Inf Div (1062, 1064, 1066 Inf, 816 Arty), 4-3-10 Tank Rgt (46 Gd)
Finnish Information:
Set Up: All Finnish units must set up on or north of the Finnish Main Line of Resistance.
w/i 5 43.06 (the infantry regiments must set up in MLR hexes): 10 Inf Div (1, 58, Er 20, I/200 Estonian Inf, 26 Eng, 9 Arty), (5)-1-8 Arty Grp
w/i 4 51.09 (the infantry regiments must set up in MLR hexes): 2 Inf Div (7, 49, Er 12, HP Inf, 33 Eng, 15 Arty), (6)-1-8 Arty Grp
w/i 3 54.15 (the infantry regiments must set up in MLR hexes): 15 Inf Div (15, 57, S. Claus Inf, 2 Jg, 31 Eng, 12 Arty), (2)-1-8 Arty Grp
w/i 3 60.17: 19 Inf Bde (2x Inf, Arty)
w/i 3 33.13 (all units set up on or north of the VT Line): 3 Inf Div (11, 53, Er 13 Inf, 34 Eng, 16 Arty)
w/i 2 24.23: Pz Div (Pz, AG, 1, 2 Jg, AT, 2 Eng, 14 Arty)
30.04: Cav Bde (Häme Bicycle, 1 Jg)
22.10: Cav Bde (Uud Bicycle, 6 Jg, 12 Arty)
w/i 2 40.23: 18 Inf Div (6, 48, Er 28 Inf, 23 Eng, 19 Arty)
w/i 1 10.28: 4 Inf Div (5, 25, Er 14 Inf, 25 Eng, 1 Arty)
w/i 1 13.27: 3 Inf Bde (2x Inf, Arty)
Anywhere north of the VKT line: 1-2-6 Estonian Inf Bn (II/200)
Group Kuhlmey has not yet arrived.
Victory Conditions: Side with 20 or more VPs when the game ends wins.
Scenario 2: Opening Moves
This scenario simulates the first frantic days of the campaign in the 21st Army area. The Soviet player must maximize his advantage before the Finns regain their balance.
Play Area: West of 51.xx and south of xx.23 (inclusive)
Soviet player sets up first
Soviet player moves first
Special Rules: The game ends when the Russian player runs out of Boss Points (as is normally the case) or when he captures all the VP stars of the VT line.
Ignore the VP star in 50.20 for this scenario.
Soviet Information: Prepared Offensive Prep: Ready Prepared Offensive #: 3 Boss Points at Start: 3 (None of the additional Boss Points have been used and withdrawals cannot be used to get more in this scenario. The MLR capture can be used—counting only hexes in play.)
Set Up: All Soviet units must set up south of the Finnish Main Line of Resistance.
21 Army Units
47.01: (12)-1-3 HQ (21 Army)
w/i 1 43.01: 109 Inf Div (381, 456, 602 Inf, 404 Arty), 3-2-10 Tank Rgt (185)
w/i 1 45.01: 72 Inf Div (14, 133, 187 Inf, 9 Arty)
w/i 1 47.03: 45 Gd Inf Div (129, 131, 134 Inf, 96 Arty), 4-3-10 Tank Rgt (31 Gd)
w/i 1 48.03: 63 Gd Inf Div (188, 190, 192 Inf, 133 Arty), 3-3-10 Tank Rgt (260 Gd), (4)-1-5 SP Arty Grp
w/i 1 50.01: 64 Gd Inf Div (191, 194, 197 Inf, 134 Arty)
w/i 1 50.04: 381 Inf Div (1259, 1261, 1263 Inf, 935 Arty)
w/i 1 52.05: 358 Inf Div (1187, 1189, 1191 Inf, 919 Arty)
w/i 1 52.03: 178 Inf Div (386, 693, 709 Inf, 332 Arty)
Anywhere (stacked or adjacent to any other 21st Army unit): 4x (8)-1-2 Arty Grp, 1x (5)-1-2 Arty Grp, 2x (9)-1-6 Gd Katy Grp
Anywhere south of the Finnish MLR: 286 Inf Div (994, 996, 998 Inf Rgt), (3)-1-5 SP Arty Grp, 4-3-10 Tank Rgt (26 Gd), 4-3-10 Tank Rgt (27 Gd), 6-4-10 Tank Bde (1), 6-4-10 Tank Bde (152)
Reinforcements (use 2.3): 46 Inf Div (176, 314, 340 Inf, 393 Arty), 90 Inf Div (137, 173, 286 Inf, 96 Arty), 168 Inf Div (260, 402, 462 Inf, 412 Arty), 265 Inf Div (450, 941, 951 Inf, 798 Arty), 268 Inf Div (942, 947, 952 Inf, 799 Arty), 314 Inf Div (1074, 1076, 1078 Inf, 858 Arty), 7-5-12 Tank Bde (30 Gd), 3-2-10 Tank Rgt (98), 3-2-10 Tank Rgt (124), (4)-1-7 Gd SP Arty Grp
Finnish Information:
Set Up: All Finnish units must set up on or north of the Finnish Main Line of Resistance.
w/i 5 43.06: 10 Inf Div (1, 58, Er 20, I/200 Estonian Inf, 26 Eng, 9 Arty), (5)-1-8 Arty Grp
w/i 4 51.09: 2 Inf Div (7, 49, Er 12, HP Inf, 33 Eng, 15 Arty), (6)-1-8 Arty Grp
w/i 3 33.13 (all units set up on or north of the VT Line): 3 Inf Div (11, 53, Er 13 Inf, 34 Eng, 16 Arty)
w/i 2 24.23: Pz Div (Pz, AG, 1, 2 Jg, AT, 2 Eng, 14 Arty)
30.04: Cav Bde (Häme Bicycle, 1 Jg)
22.10: Cav Bde (Uud Bicycle, 6 Jg, 12 Arty)
w/i 2 40.23: 18 Inf Div (6, 48, Er 28 Inf, 23 Eng, 19 Arty)
Group Kuhlmey has not yet arrived.
Victory Conditions: If the game ends because the Russians have taken the VP stars on the VT line, they win, otherwise, the Russians win if they occupy 5 VP stars. In all other cases, the Finns win.
Scenario 3: Tali-Ihantala
This scenario recreates the Battle of Tali-Ihantala, the largest battle ever fought on Nordic soil. After the fall of Viipuri, the Finns had to seal off Soviet penetration unless they wanted to see the Red Army roaming freely across the Finnish mainland. They threw almost everything available to stop the Soviet mayhem... and they prevailed... barely.
Play Area: West of 17.xx and north of xx.25 (inclusive)
Finnish player sets up first
Soviet player moves first
Special Rule: Besides most set up areas you'll find a number in parenthesis. This number shows the number of steps lost by units setting up in that area before the start of the scenario. The owning player may freely distribute or concentrate those losses as he sees fit. Note that the number is the total number of lost steps for the whole group, not a number per unit!
Finnish Information:
Set Up: w/i 2 1.34 (2 steps): Pz Div (Pz, AG, 1, 2 Jg, AT, 2 Eng, 14 Arty)
w/i 1 3.32: 20 Inf Bde (2x Inf, Arty)
w/i 1 3.34 (5 steps): 10 Inf Div (1, 58, Er 20, I/200 Estonian Inf, 26 Eng, 9 Arty), (5)-1-8 Arty Grp
w/i 1 6.32 (1 step): 3 Inf Bde (2x Inf, Arty)
w/i 2 9.33 (3 steps): 18 Inf Div (6, 48, Er 28 Inf, 23 Eng, 19 Arty), 15 Inf Div (2 Jg Bn), 3-5-6 Inf Rgt (13)
w/i 2 14.32 (3 steps): 4 Inf Div (5, 25, Er 14 Inf, 25 Eng, 1 Arty)
Anywhere north of the VKT line: (6)-1-8 Arty Group, (2)-1-8 Arty Group, 1-2-6 Estonian Inf Bn (II/200)
Group Kuhlmey has arrived. Reinforcement Groups 1 and 2 have arrived.
Soviet Information: Prepared Offensive Prep: Ready Prepared Offensive #: 1 Boss Points at Start: 2 (Both of the additional withdrawal Boss Points remain, the terrain ones have already been used)
Set Up: In addition to infantry losses shown in each set up area, three steps must be removed from tank units.
w/i 1 6.30 (1 step per division): 314 Inf Div (1074, 1076, 1078 Inf, 858 Arty), 372 Inf Div (1236, 1238, 1240 Inf, 941 Arty)
w/i 1 7.28 (1 step): 90 Inf Div (137, 173, 286 Inf, 96 Arty)
w/i 1 8.29 (2 steps): 358 Inf Div (1187, 1189, 1191 Inf, 919 Arty)
w/i 1 10.29 (2 steps): 178 Inf Div (386, 693, 709 Inf, 332 Arty)
w/i 1 9.27 (2 steps): 381 Inf Div (1259, 1261, 1263 Inf, 935 Arty)
w/i 1 12.29 (2 steps): 286 Inf Div (994, 996, 998 Inf, 854 Arty)
w/i 1 14.29 (2 steps): 72 Inf Div (14, 133, 187 Inf, 9 Arty)
w/i 1 15.30 (2 steps): 109 Inf Div (381, 456, 602 Inf, 404 Arty)
w/i 2 15.27 (2 steps per division): 45 Gd Inf Div (129, 131, 134 Inf, 96 Arty), 63 Gd Inf Div (188, 190, 192 Inf, 133 Arty), 64 Gd Inf Div (191, 194, 197 Inf, 134 Arty), 4-3-10 Tank Rgt (27 Gd), 7-5-12 Tank Bde (30 Gd), 3-3-10 Tank Rgt (260 Gd)
12.27: (12)-1-3 HQ (21 Army)
w/i 1 12.27: (4)-1-5 SP Arty Grp
Anywhere (rows xx.28 and xx.27 only): 6-4-10 Tank Bde (1), 6-4-10 Tank Bde (152), 3-2-6 Tank Bde (220), 3-2-10 Tank Rgt (98), 3-2-10 Tank Rgt (124), 3-2-10 Tank Rgt (185), 4-3-10 Tank Rgt (26 Gd), 4-3-10 Tank Rgt (31 Gd), (3)-1-5 SP Arty Grp, (4)-1-7 Gd SP Arty Grp
Anywhere (stacked or adjacent to any other 21st Army unit): 4x (8)-1-2 Arty Grp, 2x (9)-1-6 Gd Katy Grp
Reinforcements (use 2.3, except entry is done at 17.25): 168 Inf Div (260, 402, 462 Inf, 412 Arty), 265 Inf Div (450, 941, 951 Inf, 798 Arty), 268 Inf Div (942, 947, 952 Inf, 799 Arty)
Victory Conditions: The player gaining 8 VPs wins.
Abbreviations
AG: Assault Gun Arty: Artillery AT: Antitank Bde: Brigade Bn: Battalion Cav: Cavalry Eng: Engineer Er: Erillinen (Separate) Gd: Guard Grp: Group HP: Heimopataljoona (Kindreds Battalion) HQ: Headquarters Häme: Hämeen Ratsurykmentti (Häme Mounted Regiment) Inf: Infantry Jg: Jäger Katy: Katyusha MLR: Main Line of Resistance Rgt: Regiment S. Claus: Santa Claus. A battalion of older men so named because of their white beards. SP: Self-Propelled Uud: Uudenmaan Rakuunarykmentti (Uusimaa Dragoon Regiment) VKT: Viipuri-Kuparsaari-Taipale Vol: Volunteer VT: Vammelsuu-Taipale
Designer's Notes
The Soviet attack on Finland during the summer of 1944 was part of Stalin's promise to Churchill and Roosevelt—that is, launching a major offensive to coincide with the D-Day landings. What he intended as a quick knockout blow turned into a painful stalemate. In fact, the summer offensive against Finland was the only late war Soviet attack that didn't achieve its objectives.
I chose to limit my attention to the Karelian Isthmus. While other engagements took place during the given timeframe, they were merely sideshows. The Soviets intended to rapidly seize Vyborg (Viipuri) and push on to Helsinki.
The next step was the map. A number of good Finnish sources were available. Many thanks to Jari Mikonen for his patient assistance with the language!
A number of good OOB books exist and the Finnish consulate was very helpful in pointing me in the right direction. Some smaller units, mostly on the Finnish side, were left out. These units had a negligible effect on the campaign.
Designing the specific strengths and weaknesses of the opponents was a bit more challenging. The Soviet Army that attacked in 1944 was not the hapless mob of 1939. Improved tactics, leadership, and coordination made the Red Army formidable. This force could, given sufficient preparation, bludgeon its way through almost any defense, but had difficulty maintaining momentum.
In many ways, the operational doctrine of the Finns was the opposite of the Soviets. Finland did not have the luxury of huge manpower reserves. Luckily, Finland could count on a top-notch professional officer corps. During World War I, Finns travelled to Germany and became the 27th Royal Jäger Battalion. Just about every Finnish field commander here had been trained in aggressive tactics there.
Both sides used airpower with varying degrees of effectiveness. The Soviets had numerical superiority, but didn't always use it to maximum effectiveness. Most curious was the lack of an interdiction effort. Finnish reinforcements poured freely into the Karelian Isthmus. One has to wonder what effect it would have had on the campaign if the Soviets had been effective in delaying any of these reinforcing divisions.
In the end I hope I created a game that features manoeuvrability and a real chance for both sides to win, The Finns cannot afford to cut and run in the early game and simply hunker down around Vyborg; the Soviets have sufficient power to blast through the defenses. The Soviets cannot afford to throw away units in a headlong rush. The Finns have enough of a bite that they can bleed the Soviet spearheads long before they reach the northern map edge.
Developer's Notes
When I first played Karelia '44 I could sense we would have a difficult time showing the correct operational tempo.
As it was submitted by Ken, the game, as pretty much all games in the market, considered clear the base terrain both for combat and movement. Almost the whole map, however, is forested. To simplify things, I chose woods as the base terrain—a woods hex would cost 1 MP to move into and combat table columns were shifted to integrate the effect of woods in combat.
Some of the VKT hexes may seem odd. They really should run along the river and lake shores. I "retreated" some of the positions one hex to allow the Soviets to try an assault on the line—otherwise the line would be a-historically impregnable.
It was my intention to show players the strengths and weaknesses of both armies. The Soviet army feels far less flexible than that of the Finns. Their units must follow strict coordination rules and a sluggish supply system.
The Finns have several attributes players will learn to love. Their units are generally more resilient and flexible. The defensive lines provide some respite and force the Soviet player to spend time to prepare well planned assaults.
The Finnish OOB work was effective in identifying the major units involved in this campaign. Thanks go to the experts of the Axis History Forum who helped clear a lot of points about the Finnish OOB. If you want to learn anything about the Finnish Army, a visit to the Winter War/Continuation War folder of that forum is strongly recommended. The people there are very kind and their knowledge is impressive.
A few notes about units...
Finnish infantry divisions were formed by two infantry regiments reinforced by an infantry battalion as reserve.
The Finnish Engineer battalions look strong compared with other infantry units because other minor divisional units have been factored into them.
The Finnish Artillery Regiments have an excellent fire-control system. This allows Finnish artillery to fire extremely efficient barrages with great accuracy on very short notice, something unimagined by the Soviets.
Heimopataljoona (HP) 3: Heimo units (roughly translated as "kindred" or "tribal") were formed by native people of areas pertaining to the Soviet Union but closely related to their Finn brothers.
Estonian Volunteer Infantry: Quite a few Estonians wanted to fight against the Soviets. As war advanced, Estonian volunteers were enough to form a full infantry regiment (JR 200), the two battalions of which took part in the Karelian Isthmus battles.
Panssaridivisioona (simplified for gamers as "Panzer", Pz): The Finnish Armored Division was an odd hybrid unit incomparable to any other country's Armored Division. Its biggest unit was the Armored Brigade which was weak and ineffective. The brigade contained about 90 captured Soviet tanks—80 of which were unreliable T-26s! The real punch of the division was in the smaller, but far more effective, Assault Gun Battalion, equipped with 23 StuG-III G, which the Finns affectionately called Sturmi.
Cavalry Brigade: In spite of its name, the Cavalry Brigade had abandoned its horses in 1943. Both of its regiments (actually roughly equivalent to battalions) were still mounted... on bicycles.
Ernesto submitted a fine game here. Dean's work consisted of playtesting and refinement. In the end, some pretty substantial changes were made, but all were predicated on a lot of actual play time.
Boss Points and the Variable Length: When the game was received, it had a rigid, conventional turn structure of 19 or so turns. In game after game, it became apparent that the game devolved to a fight for a handful of VP hexes in the map corners.
Adding the Boss Points gave a variable length unknown to both players. The Russian player is under the gun and must go all out to take the first two defensive lines. After that, he must balance the withdrawals and his progress against the need to keep the game going. The Finnish player's best strategy is to cling as long and as forward as possible.
The odds against a 100% failure on the part of the Russians is very low. Assuming the player is unable to take the MLR—something that usually happens on turn 2—and takes advantage of his withdrawals to fight with the absolute minimum of 5 Boss Points for the game, the chance of ending the game in five turns is 1 out of 32 (if the Russian don't take the MLR by turn 5, he was going to lose anyway). The average game will last 14 turns. A quick Russian will be right on the line of winning on turn 14…any advantage of time one way or the other affects balance to be sure, but the point is that the Russian will be under a lot of pressure to perform.
Russians vs Finns: Initial testing discovered that players held the VT line until it looked liked the Russians were able to really attack it and then run to the corners of the map and try to run out the clock. It wasn't fun—for either side.
From this came the multiple phases that allow the Finns freedom to hit and run with integrated barrages. The player who masters the fluid nature of the Finnish defense will be a tough opponent for any Russian. Likewise, the player who thinks the Finns must rigidly defend, will find he has not done enough to win.
The Finns must stall, that's true, but a more effective means of stalling is not a succession of lines, but rather a hit and run campaign featuring lots of dead Russians, DG'd potential attackers and shifting about the field.
For the Russians, the "minimum of 2:1" rule was implemented to keep them from applying a strictly attritional strategy.
Some rigid rules were consolidated regarding Massive Barrages, and the Russians were given the slightly more flexible Prepared Offensive system. This is a tool for the Russians to use when they get into a tough spot with the defensive lines. Obviously, using the first one on turn one to blast the MLR is a no brainer. The second will happen around turn 6 (probably about the same time as the Russian player is sweating over his Boss Points) to try to take the VT line. The last is one in the bank for later.
Ghosts: These were added as the Finns were getting swamped because they did not have enough bodies to fill in their defensive lines. Ghosts allow them to extend into adjacent hexes making some interesting decisions as to where to put the "real" unit (since ghosts, themselves, cannot be attacked). For the longest time, there was no marker for ghosts (they are generally easy enough to figure out), but some situations could get complex. Adding a little fun and playful humor was just a bonus.
Charts and Tables
Air Point Availability Table
Roll once for each side.
| Die | Soviet | Finnish (No Group Kuhlmey) | Finnish (Group Kuhlmey) |
|---|---|---|---|
| 1 | 1 | - | 2 |
| 2 | 2 | - | 2 |
| 3 | 3 | 1 | 3 |
| 4 | 3 | 1 | 3 |
| 5 | 4 | 1 | 3 |
| 6 | 4 | 2 | 4 |
Barrage Table
Two dice. -1 DRM if the target is Finns in the VT or VKT Defensive Lines (applies to regular and Massive Barrages). There are no other terrain effects here.
| Dice | Barrage Strength 1-4 | 5-7 | 8-11 | 12-15 | 16+ | Massive Barrage |
|---|---|---|---|---|---|---|
| 4 or less | - | DG | ||||
| 5 | - | DG | DG | |||
| 6 | - | DG | DG | DG | ||
| 7 | - | DG | DG |
Finnish Reinforcement Table
Roll one die each Finnish Reinforcement Phase. On a 5 or 6, get the next available reinforcement group below. On a 1-4, better luck next turn. If no groups remain, there are no more reinforcements.
Group 1: Group Kuhlmey, 20 Inf Bde (2x Inf Grp, Arty Grp), 3-5-6 Inf Rgt (13)
Group 2: 11 Inf Div (30, 50, Er 21 Inf, 28 Eng, 4 Arty)
Group 3: 6 Inf Div (12, 35, Er 16 Inf, 36 Eng, 14 Arty)
Group 4: 6-6-10 German AG Bde (303), 17 Inf Div (13, 61, Er 27 Inf, 32 Eng, Svir Co, 8 Arty)
Boss Patience Points
Roll one die each Boss's Patience Phase. On a 1-3, reduce the marker by one Boss Point. On a 4-6, there is no change.
Additional Boss Points can be accrued by each of the following, but each event can only be used once. For a terrain feature to be taken, all VP stars in it must be occupied. W/D means remove from play.
- 1 Point: The MLR has been taken
- 1 Point: The VT Line has been taken
- 1 Point: W/D 24 Steps of non-Gds units (any unit types)
- 1 Point: W/D All Gds units
Prepared Offensive Special Abilities
a) Allows 6 Massive Barrages (but must be spotted). b) Up to 2 Massive Barrages allowed per target hex. c) 2nd Wave units can be used. d) CRT shift of 1 right in play for all Russian attacks. e) Low Odds Restriction (2.5e) lifted for the turn.
Combat Results Table
See Low Odds Restriction (2.5d)
Notes: A—Attacker Result (reduce [#] results by 1 step loss if the attacker is Finnish). D—Defender Result. #—Step loss. r#—Retreat result (Finnish Defenders can reduce retreat by one if in a Defensive Line hex, if desired).
Shift Soviet attacks (regular or overrun) one additional column right on Prepared Offensive turns. Low Odds Restriction: Russian attacks with final odds less than 2:1 (no rounding) are automatically no effect. This does not apply in Prepared Offensive turns.
| Dice | 1:3 or less | 1:2 | 1:1 | 2:1 | 3:1 | 4:1 | 5:1 | 6:1 | 7:1+ |
|---|---|---|---|---|---|---|---|---|---|
| 2 | A2 | A2 | A2 | A2 | A2 | [A2] | [A2] | [A2] | A1 D1 |
| 3 | A2 | A2 | A2 | A2 | [A2] | [A2] D1 | [A2] D1 | A1 D1 | A1 D1 |
| 4 |
Errata
(from the 13 June 11 errata sheet)
-
A DG Finnish unit, otherwise qualified to create ghosts, still creates ghosts.
-
If a Soviet unit is to be removed to obtain Boss Points, it must be done at the very beginning of the phase.