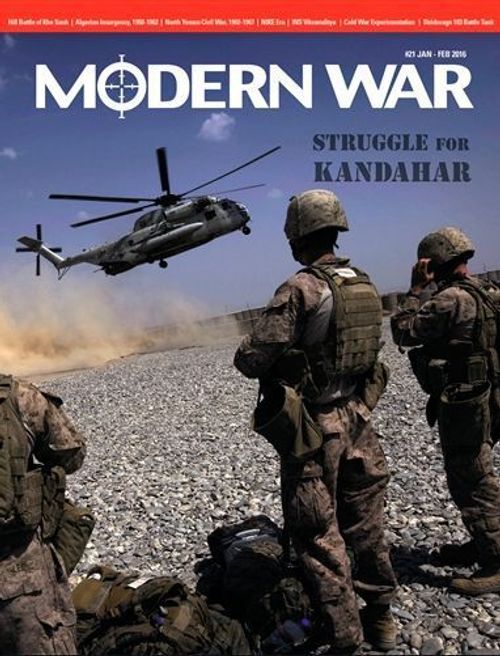
Kandahar: Special Forces in Afghanistan
Kandahar: Special Forces in Afghanistan Rulebook
Table of Contents
Table of Contents
- 1.0 Introduction
- 2.0 Components
- 3.0 Set-Up
- 4.0 Game Turns & Phases
- 5.0 Winning the Game
- 6.0 Purchasing Weapons/Equipment
- 7.0 Mission Objectives
- 8.0 Stacking
- 9.0 Portage
- 10.0 Movement
- 11.0 Rivers
- 12.0 Creating Noise
- 13.0 Combat
- 14.0 Air Support & Friendly Fire
- 15.0 Suppressive Fire
- 16.0 New Old Stock (Optional)
- 17.0 Misadventure (Optional)
- 18.0 Weapon Characteristics (Optional)
1.0 Introduction
Kandahar: Special Forces in Afghanistan gives you command of a Special Forces team in Afghanistan, circa 2003 to 2013. Your duty is to lead your men on a variety of randomly generated missions (representing orders direct from high command), choose weapons and equipment that are best suited for the mission, decide on how to posture your team, plan your approach, and some method of extraction (how will you get your men out?). However, it is not quite that simple; you must choose weapons and equipment that do not expose your team and do not reveal the presence of your clandestine mission to the media. Your goal is to disrupt the enemy's freedom of action in your area of operations with a minimal "footprint," and minimal cost.
1.1 Solitaire System
Kandahar: Special Forces in Afghanistan is a solitaire game in which the player assumes the role of a Special Forces colonel in command of a Special Forces unit. The game system will generate missions and enemy responses to your unit's presence.
1.2 Unit Sizes
Each Special Forces team represents about five men, and each Special Forces commander and officer represent one man each. Each enemy combat unit represents various sizes of units, typically a platoon (about 30 men, give or take).
1.3 Game Scale
Each hex on the map represents a couple of hundred meters from side to opposite side. Each game turn may represent anything from hours to days, depending on the tempo of the Special Forces' activities during play.
2.0 Components
2.1 Game Equipment
A complete game of Kandahar: Special Forces in Afghanistan includes: this rules set, a game map, and a single sheet of die-cut counters (playing pieces). The player will need to provide himself with one ten-sided die and one six-sided die (although two would be helpful), plus two coffee mugs or other suitable containers to serve as draw pools.
Note: A die roll of "0" is to be considered a "10" (ten), not a zero.
2.2 The Game Map
The map shows a fictional area of a region in the Kandahar province of Afghanistan, and is overprinted with a numbered hexagon grid to regulate the movement of units and the placement of mission objective game pieces. The map also contains all charts (such as a game turn track) necessary for game play.
2.3 The Game Pieces
There are five basic types of counters in the game.
Weapons and Equipment: a wide variety of weapons and equipment to outfit your team(s) of Special Forces, each with different values and capabilities. The values are printed numbers which represent the relative effectiveness of each weapon and item of equipment, whereas their capabilities are explained later in the rules.
Special Forces Teams: There are eight game pieces representing two Special Forces teams (an A-Team, B-Team, an officer, and a commander per each team), each with different values that represent their relative effectiveness and capability.
"Casualties" Markers: There are 16 game pieces representing effects to Special Forces teams (or possibly commanders or officers). These game pieces are blindly drawn whenever a Special Forces team has been successfully attacked by an enemy unit (see 13.1).
Mission Objectives: There are dozens of various game pieces representing random missions for your Special Forces team to achieve. The game system will randomly generate various missions throughout the game, and your success or failure as the leader of your Special Forces unit depends on achieving the missions, but without becoming neutralized by enemy forces in the area.
Enemy Units: There are dozens of game pieces representing enemy units that will be orchestrated by the game system to attempt to neutralize your Special Forces.
2.4 Information on Game Pieces
The numerical values printed on each game piece represent five distinct characteristics, explained as follows.
Firepower: The upper leftmost number represents the firepower of that game piece.
Cost: The upper rightmost number is the price of that weapon or equipment (to be available for usage during a mission) which is bought with Purchase Points (PP) (see 6.2). The cost represents the monetary value of that particular weapon or item of equipment and/or the fuel and ordnance to bring it on station.
Noise: The lower leftmost number represents the additional noise created by the presence of that weapon or item of equipment which may give away the location of a Special Forces team (such as the engines of an aircraft, a patrol boat, or a helo that is loitering overhead, or perhaps just the rustling of branches when carrying an unwieldy item through the jungle).
Movement: The lower rightmost number represents the movement (or movement effect) of that game piece. A printed number indicates the movement points that are possessed by that unit, which allows that unit to move during each game turn (see 10.0). A number printed with a "-" (minus) symbol indicates that it is a weapon or item of equipment that subtracts from the printed movement of one Special Forces team it is stacked with. A number printed with a "+" (plus) symbol indicates that it is an item of equipment that adds to the printed movement of one Special Forces team it is stacked with.
Note: Additionally, plus-type movement game pieces may also move independently when not stacked with a Special Forces team.
3.0 Set-Up
To set-up the game, set aside three cup-sized containers (such as coffee mugs); place all of the enemy combat units (the red units) in one container, all of the mission objective game pieces in the second container, and then all of the casualties markers in the third container. Each of these containers will function as draw pools throughout the game.
3.1 Base Camp
At the beginning of the game, the player may place his base camp game piece in any hex anywhere on the map (except in or adjacent to a village).
If the player purchased the second base camp game piece, he must also place that on the map at the beginning of the game.
3.2 Special Forces Teams
Two Special Forces teams begin the game as free set-ups (the two printed with a "0" PP cost), although the player may purchase one or two more Special Forces teams at a cost of "20" PP for another A-Team, and/or a cost of "15" PP for another B-Team.
3.3 Commanders & Officers
Two Special Forces leaders (a commander and an officer) begin the game as free set-ups (the two printed with a "0" PP cost), although the player may purchase one or two more Special Forces leaders at a cost of "8" PP for another commander and/or a cost of "4" PP for another officer.
All starting and purchased Special Forces teams, commanders, and officers must begin the game in a base camp hex. If the player had purchased multiple base camps, he may set up any of his Special Forces in either and/or both base camp hexes as he prefers.
3.4 Mission Objective
After the Special Forces game pieces have been set-up (but before any weapons and/or items of equipment have been purchased), blindly draw one mission objective game piece from the mission objective container and place it on the map per the procedure outlined in 7.0. That mission objective game piece is the Special Forces' first mission of the game (see 4.0 below).
3.5 Weapons & Equipment
After the first mission objective game piece has been set-up on the map, the player may purchase any weapons and/or equipment to facilitate the accomplishment of that mission (see 6.0). All purchased weapons and items of equipment must begin the game set-up in a base camp hex. If the player had purchased multiple base camps, he may set up any of his weapons and/or equipment in either and/or both base camp hexes as he prefers.
Note: Portage limits (see 9.0) are always ignored in base camps. See 9.3.
If any additional weapons, items of equipment, or Special Forces game pieces are purchased during the course of a scenario, they must be immediately placed in any base camp(s), as well.
3.6 Enemy Units
Place two randomly-drawn enemy units face down on the Purchase Points track on the map; these two enemy units are to be used as track markers (though the player may not know the identities of these two random enemy units during the course of the game). All other enemy units are then placed in the Enemy Combat Units box on the map, face-down so that they will be drawn randomly when required by the game. Or, the player may place them in a non-clear bowl, cup, or mug instead to facilitate random drawing when necessary.
4.0 Game Turns & Phases
Each game consists of game turns, but there is no actual finite end of the game; the game can potentially last indefinitely, but is however considered completed after enough missions have been accomplished or too many Special Forces have been neutralized. Each game turn is divided into five distinct "phases" which regulate the order in which specific activities can or must occur. These phases are listed as follows and explained later under specific pertinent rules.
Mission Objective Placement Phase (see 7.0): Place the current mission objective on the map (this phase is only played when the game begins, or after the previous mission objective has been accomplished or forfeited). Also, during this phase, after a new mission objective game piece has been drawn and placed, the player may purchase any available (i.e., not already on the map) weapons and/or items of equipment.
Designer's Note: Some mission objectives will require that your Special Forces have specific weapons or equipment, without which it will be impossible to accomplish that objective (for example, to accomplish the "Disarm I.E.D." mission objective, you must purchase the Tools game piece). Be sure to allocate purchase points for these required expenses when you conduct your initial purchases, or you may be forced to forfeit that mission.
Friendly Movement Phase (see 10.0): The player may move any of his Special Forces teams at this time, up to the limit of each team's movement allowance.
Friendly Combat Phase (see 13.0): If any Special Forces team is adjacent to any enemy combat unit, it may (but is not required to) attack that enemy combat unit's hex at this time.
Enemy Movement/Combat Phase (see 10.6): Any enemy combat unit that is present on the map must* move directly closer—as far as it is capable of moving with its printed movement value—towards any "detected" Special Forces team(s) that are present on the map. Once adjacent (or if already adjacent before moving) to any detected Special Forces team(s), that enemy combat unit must attack the adjacent Special Forces team(s).
*See the Suppressive Fire rule (see 15.0).
Enemy combat units remain on the map until all detected Special Forces teams are eliminated or stacked with a base camp (at which time the enemy units are removed and returned to their container to be drawn again later, per the normal rules).
Success Determination Phase (see 5.0): The player can choose to end the game at any time (or until all of his teams are eliminated), at which time his level of victory (or defeat) is determined per 5.0. Once a player has ended a game, no further missions are achievable. If there are no additional mission objectives available, the game ends and the player is to determine his level of victory (or defeat) at that time (see below).
5.0 Winning the Game
The success of your career as the leader of a Special Forces outfit depends upon two things: how many mission objectives you accomplish, and how many Special Forces teams become eliminated doing so. The elimination of enemy combat units is not relevant with regards to determining victory.
Designer's Note: Killing low level Islamic Extremists is not a cost-effective use of the Special Forces, and so in the game it is the accomplishment of the mission objectives (mission objectives that would otherwise be considered too insignificant or perhaps too impractical for the regular Army) that is the proper employment of such highly trained men.
During the Success Determination Phase of any game turn, the player must count up the quantity of mission objectives that he has accomplished, but deducting the quantity of mission objectives he forfeited (subtracting the total of forfeited mission objectives from the total of accomplished mission objectives). Furthermore, the player must also subtract the quantity of Special Forces teams that have been eliminated (regardless of the teams or game pieces that still remain on the map) from the net total.
The final grand total of accomplished mission objectives (after deducting forfeited missions and eliminated Special Forces teams) will determine victory or defeat, and the level of victory or defeat as follows.
| Accomplished Missions | Victory Assessment |
|---|---|
| None | Court-martial |
| 1 to 2 | Demotion |
| 3 to 4 | Reassignment |
| 5 to 6 | Poor performance |
| 7 to 8 | Adequate performance |
| 9 to 10 | Meritorious service |
| 11 to 14 | Promotion |
| 15 to 20 | Award |
| 21 to 27 | Award and Promotion |
| 28 to 29 | National Hero |
| 30 | Medal of Honor |
6.0 Purchasing Weapons/Equipment
The game is provided with various weapons and items of equipment that the player may purchase to enhance the effectiveness of his Special Forces. Some weapons and/or items of equipment will be necessary to accomplish a particular specific mission, which the player should consider when deciding his purchases.
6.1 Mission Objective Requirements
Purchase Points are only ever spent to buy weapons and equipment during any Mission Objective Placement Phase(s). A player begins with 100 Purchase Points (see 6.2) that he may spend during the very first Mission Objective Placement Phase, or during any subsequent Mission Objective Placement Phase(s).
The types of weapons and/or equipment that are necessary to accomplish specific mission objectives are listed (alphabetically) in the accompanying chart. Note that some mission objectives do not require any specific weapons or equipment when beset.
| Mission | Equipment |
|---|---|
| Assassinate Mullah Omar | Sniper or Booby Trap |
| Bait the Enemy | Drone |
| Befriend Villagers | Med Kit or Bribe |
| Bribe a Local | Bribe |
| Bring Back Enemy P.O.W. | Intel |
| Build Infrastructure | Tools |
| Destroy Camp | Demo |
| Disarm I.E.D. | Tools |
| Escort Reporter | Med Kit & Ammo |
| Establish Landing Zone | Radio & M249 |
| Find Weapon Cache | Dog or Night Vision |
| Help Villagers |
Note: Weapons and/or equipment is never expended when accomplishing a mission objective. It is only the presence of the required weapon or item of equipment in the mission objective hex that is necessary to accomplish that mission objective.
Note: There is no guarantee that any particular mission objective will be drawn from the mission objective container, so no particular weapon or equipment must be necessarily purchased. Furthermore, the player will have an opportunity to purchase additional weapons and equipment during each ensuing Mission Objective Placement Phase, assuming he has enough purchase points to do so.
Transcriber's note: each mission objective counter carries its Purchase Point award in the upper left corner (the printed example is "10" for Rescue P.O.W.). The individual award values are printed on the mission objective counters, which are not part of this rules document, so they are not listed here.
6.2 Purchase Points
Purchase points (PP) are the game's currency, used to buy weapons and/or equipment, and even additional Special Forces teams and/or base camps. A player will begin the game with 100 Purchase Points to purchase provisions for his various missions throughout the game. Moreover, additional PP are also acquirable after accomplishing each mission objective (which varies depending upon the type of mission objective that has been accomplished) as indicated by the PP award value printed on the upper left corner of each mission objective game piece.
A PP Track has been provided along the edge of the map for a player to track his current total of PP (use any spare game piece, such as an unpurchased weapon or item of equipment to denote the current PP level).
It is permitted for a player to save any unspent PP throughout the game to purchase weapons and/or equipment during a later game turn (during the Mission Objective Placement Phase of that game turn).
The game ends automatically when the last Special Forces team on the map has become eliminated (which is considered to be an immediate defeat, regardless of mission objectives accomplished), or when the last mission objective has been drawn from the mission objective container. Of course, a player is always free to end a game whenever he prefers and accept the victory assessment that he achieved up to then.
6.3 Bonus Purchase Points (Forward Operation Bases)
In addition to the starting PP (see 6.2), the player is entitled to add an additional 10 PP per each base camp that is set up within four (4) hexes of the northeast map edge.
7.0 Mission Objectives
During each Mission Objective Placement Phase, if a new mission objective is to be drawn (at the beginning of the game, or if the previously drawn mission objective had been accomplished or forfeited), the player must blindly draw one mission objective game piece from the mission objective container. That will be the Special Forces' target, meaning that at least one Special Forces team (with any required weapons and/or equipment, if necessary) must move to and enter that hex to successfully accomplish that mission objective there.
After drawing a mission objective game piece, the player must then roll one six-sided die and refer to the Mission Objective Placement chart (below), and then cross-reference that die roll result with the specific mission objective that was drawn. The cross-referenced result is a hex number. Set-up that mission objective game piece in the same numbered hex on the map (corresponding to the die roll result).
| Drawn Mission Objective Game Piece | Die Roll 1-2 | Die Roll 3-4 | Die Roll 5-6 |
|---|---|---|---|
| Assassinate Mullah Omar | 0902 | 2007 | 1107 |
| Bait the Enemy | 1016 | 1913 | 0306 |
| Befriend Villagers | 1106 | 1012 | 0902 |
| Bribe a Local | 1218 | 0112 | 1007 |
| Bring Back Enemy P.O.W. | 0532 | 2508 | 2635 |
| Build Infrastructure | 1310 | 2408 | 0921 |
If a mission objective game piece becomes placed into a hex that is already occupied by any Special Forces team or base camp, that mission objective is considered automatically accomplished immediately. However, in such a case, all Special Forces in that same hex are then automatically detected.
7.1 Accomplishing a Mission
A mission is considered to be accomplished if at least one Special Forces team has entered that mission objective's hex, and is stacked with all necessary weapons and/or equipment required to accomplish that mission (see 6.1). When a mission is accomplished, that mission objective game piece is immediately removed from the map and placed in the Accomplished box on the map.
Each mission objective that is accomplished increases the odds of victory (see 5.0).
7.2 Forfeiting Mission Objectives
At any time during a game turn, after the Mission Objective Placement Phase, the player may decide that the current mission objective is unachievable or simply too risky, in which case he can declare that he is forfeiting that mission objective.
A mission objective that is forfeited is removed from the map permanently, but it yields no value to the player. Furthermore, the current game turn must be played out to completion, and a new game turn (beginning with the next Mission Objective Placement Phase) commences normally.
8.0 Stacking
Stacking multiple game pieces in the same hex is always permitted, and no specific limit is imposed during the game (for enemy or Special Forces teams). However, portage limitations (see 9.0 below) limit the quantity of weapons and items of equipment that may be "carried" by each Special Forces team game piece.
Enemy units may stack in any allotment that occurs as a result of placement or movement, although a stack of enemy units do not ever combine their attacks when attacking. Each enemy unit in the same stack conducts a separate attack normally.
9.0 Portage
Portage is the maximum amount of weapons and/or equipment that each Special Forces team may utilize (during combat or the accomplishing of a mission) and/or haul (carry during movement) at any one time.
It is permitted for a Special Forces team to drop off or abandon weapons and/or equipment to either utilize and/or haul any other weapons and/or equipment or to simply dispossess weapons and/or equipment that the player does not want them to use or carry. This can be done at any time during movement or just prior to resolving combat, so long as a Special Forces team does not ever utilize or carry more than its portage allows at any one time.
9.1 Special Forces Teams
Each Special Forces team is limited to utilizing and/or hauling a maximum of six (6) weapons and/or items of equipment at any one time.
Note: A commander or officer game piece is not considered to be a Special Forces team (see 9.2), and can only haul a maximum of one (1) weapon or item of equipment at any one time per 9.2.
Exception: Plus-type movement game pieces that are printed as a black number symbol may be hauled by other plus-type movement game pieces (see 10.4). The portage limit is less than or equal to their noise value.
It is permissible for a Special Forces team and a plus-type movement value game piece to add their portage together (if stacked and moving together). For instance, a Truck with a portage of "+7" (in other words, the same value as that Truck's printed noise value) may be added to the portage of a Special Forces team (which is "6") that it is currently moving with, for a total portage of "13" in this example. In such cases, however, the game pieces must remain together during their entire movement to combine their portage.
9.2 Plus-Type Movement Game Pieces
A plus-type movement game piece may haul a quantity of weapon and/or equipment game pieces equal to or less than (<) that plus-type movement game piece's noise value (the noise value of any plus-type game piece is coincidentally also its portage value). As an example, a Truck may haul a maximum of seven other game pieces (except other plus-type game pieces; no plus-type movement game piece may ever haul any other plus-type movement game piece).
9.3 Base Camp Utilization Exception
A Special Forces team may utilize all weapons and/or equipment while it is stacked in a base camp hex (although a base camp does not increase any game piece's portage limit). This is only relevant in cases where an enemy unit happens to become placed or inadvertently moves into that base camp hex while en route towards another detected Special Forces game piece elsewhere on the map.
10.0 Movement
All game pieces are printed with a movement value which indicates the amount of movement that each such game piece possesses. Some of the game pieces are printed with a standard movement value, represented as a single digit whole number (for example "4"), some game pieces are printed with a minus ("-") movement value, represented by a negative number (for example "-1"), and some game pieces are printed with a plus ("+") movement value, represented by an additive number (for example, "+20"). These movement types are explained below (see 10.2).
Note: Game pieces printed with a negative movement value cannot move alone; they may only move when "hauled" by other types of game pieces (game pieces with a standard or plus movement value), see 9.0.
When moving game pieces, they may only be moved one at a time, and only from a hex along a route of contiguously adjacent hexagons (if moving more than one hex). As a unit enters each hex, it must "expend" movement value from its own printed movement value. Each type of hex (in other words, the type of terrain in any hex that is entered) requires a specific value "expenditure." The value expenditure of that specific hex is deducted from the printed movement value of a Special Forces team (or of any plus-type movement value game piece that is moving without a Special Forces team) whenever it enters that type of hex.
Exception: Weapons and/or any items of equipment that are being hauled (see 9.0) do not ever require any value expenditure.
The value expenditure cost of each type of hex (in other words, each type of terrain) is printed on the map (see 10.7), but only ever applies to each Special Forces team that enters that hex (or to any plus-type movement value game piece that is moving without a Special Forces team). In the event that a Special Forces team and a plus-type movement value game piece are moving together, the terrain value expenditure is only deducted once (from the collective movement of both game pieces if added together per rule 10.4).
Example: a Truck game piece is moving without a Special Forces team and enters a hex printed with Village terrain. That Truck must therefore expend two of its printed movement value to enter that Village hex. When that Truck enters that Village hex, it joins with a single Special Forces team and a radio game piece. During the next turn, all three game pieces move together into an adjacent Mountain hex. That Special Forces team (but not the Truck, because it is now moving with a Special Forces team) must expend two of its printed movement value to enter that particular Mountain hex. Incidentally, the terrain expenditure cost does not apply to the radio equipment because it is being hauled (terrain expenditure costs do not apply to any weapons and/or equipment being hauled).
A game piece that is hauling any other game piece(s) may "drop off" any game piece(s) as it continues moving, but any game piece that is "dropped off" may not then continue its own movement during that same game turn, even if it had not yet moved during that game turn.
When moving, each game piece's movement value is expended incrementally whenever that game piece enters any adjacent hex from its present hex (during the Special Forces' Friendly Movement Phase).
10.1 Movement Procedure
Movement must be conducted as a series of connected hexagons. Each game piece can be moved in any direction or combination of directions upon the map, as desired by the player or directed by the game system (in the case of enemy combat units, that must move towards the closest detected Special Forces game piece; see 12.9). Each game piece may only ever be moved once per game turn, although no Special Forces game piece is ever required to be moved, if the player prefers not to. Once any game piece has completed its movement, its movement is finished for the remainder of that game turn, and may not be retracted.
10.2 Movement Types
There are four different types of game pieces in terms of distinct movement capabilities, and each game piece in the game is only ever one type of movement classification, explained as follows.
a) The standard movement value (printed on Special Forces teams only). Game pieces with this type of printed movement may be moved independently, and may haul any other types of game pieces (within portage limits, per 9.0).
b) The plus (+) type of movement value (printed on certain items of equipment). Game pieces with this type of printed movement may be moved independently, and may haul other types of game pieces (except other plus-type movement game pieces, unless its movement value is also printed as a black number). In addition, plus-type movement value game pieces may add their movement value to a game piece with a standard movement value during movement.
c) The minus (-) type of movement value (printed on most weapons and equipment). Game pieces with this type of printed movement may not move independently, but may only ever be hauled by other game pieces printed with a standard movement value or a plus-type movement value.
d) Enemy movement values (printed on all enemy game pieces). Enemy units are printed with standard movement values, but only move in accordance with rule 10.6.
10.3 Standard Movement Values
During a Friendly Movement Phase, the player may (but is not required to) move any of his Special Forces team game pieces. Each game piece that he intends to move must be moved one at a time, and its movement must be completed before the next game piece is moved.
Exception: Game pieces that are stacked together in the same hex may be moved together as a singular movement. In such cases, that stack's movement must be completed before another game piece is moved (although it is permitted for some game pieces in that stack to halt in a hex as the other game piece(s) continue to move, but such units may not move any further during that game turn after halting).
Movement is only ever from a game piece's current hex via a path of connected adjacent hexes on the map, but never any farther than its total movement allowance (which can be decreased by other game pieces printed with a minus value, and/or increased by other game pieces with a plus movement value).
As a game piece enters a particular hex from the adjacent hex that it currently occupies, the expenditure cost of the type of terrain in the entered hex must be immediately subtracted from the moving game piece's total movement allowance.
Note: A game piece's total movement allowance is simply its printed movement value and the movement value of any weapons and/or equipment it is hauling (or being hauled by).
The expenditure cost of each type of terrain is printed on the map. A game piece may move until it expends all of its printed movement value (or before then, if the player prefers to halt that game piece's movement along the way, which he may do, if he prefers).
Game pieces that are printed with standard movement values cannot accrue or save up movement from turn to turn, nor impart or give any of their movement values to any other units, including other units printed with a standard movement value.
Game pieces with a standard movement value may carry (i.e., haul while stacked with) other game pieces of any kind, but not in excess of portage limits (see 9.0).
10.4 Plus (+) Movement Values
Game pieces with a plus ("+") movement value are similar to standard movement type game pieces, but may also haul (carry) other game pieces (except other plus-type movement value game pieces).
Exception: A plus-type movement value game piece with a movement value printed with a black number may indeed be carried by any other plus-type movement value game piece (see below).
When hauling (carrying) a game piece with a standard movement, a plus-type game piece's movement value may be added to it, thereby increasing its total movement allowance (if they are, and remain, stacked together for the entirety of that movement; this means that they must begin their movement together). However, the "+" movement value of a plus-type movement value game piece may never be added to any other plus-type movement value game piece (although it is permitted for multiple plus-type movement value game pieces to be moved together as a stack with a Special Forces team, using any of the plus-type movement value game piece in that stack that has been added to that Special Forces team's movement).
Note: The "+" value of only one plus-type movement value game piece may ever be added to any single standard movement value game piece. In a stack of multiple plus-type movement value game pieces, the player may nominate any one of them (of his choice) to be added to the moving Special Forces team's standard movement.
A plus-type movement value game piece may also haul minus-type movement value game pieces (see 10.5) per 9.2. In such a case, the movement value of the minus-type movement value game piece must be subtracted from the hauling plus-type movement value game piece as it moves.
A plus-type movement value game piece may not haul any other plus-type movement value game piece, unless that other game piece's movement value is printed as a black number. A plus-type movement value game piece with a movement value printed as a black number may be hauled by any other plus-type movement value game piece. However, in no case may the movement values of two plus-type movement value game pieces ever be added together.
Example: A Truck (which is a plus-type movement value game piece) is printed with a movement value of "+6." Thus, that Truck may have its movement value (+6) added to the printed movement value of a Special Forces team (with a printed standard movement value of "4") it is stacked with, for a total movement value of "10." If that Truck is also hauling an AT-4 (with a minus movement value of "-2"), that AT-4's minus movement value must be deducted from that Truck's and Special Forces's collective movement value (10) for a total of "8."
A plus-type movement value game piece may only impart its movement value to a single standard movement game piece in the same hex, although a plus-type movement value game piece may haul any weapons and/or equipment in the same hex (up to its portage capacity), even if utilized by a different Special Forces team before then.
All game pieces that are stacked with and moving with any "+" movement value type of game piece may add that plus value to its own movement, and thus move together (up to the limit that those stacked game piece's collective movement value). For example, a Truck (with a movement value of "+6") may be moved with a Special Forces team (with a standard movement value of "4") for a total movement of ten (10) so long as they move together.
It is perfectly legal for a plus-type movement value game piece to move independently of any Special Forces team (up to the limit of its printed "+" number). Of course, as mentioned, if hauling any minus-type movement value game piece(s), the minus value(s) must be deducted from the plus-type movement value game piece's movement allowance.
Designer's Note: Plus-type movement value game pieces are assumed to be crewed by at least one or multiple other soldiers, such as a driver or pilot, etc.
When moving any plus-type movement value game piece independently (including commanders or officers), it does not create noise (even when hauling or moving along with other plus-type movement value game pieces), and cannot be attacked. However, if any enemy unit becomes placed or is moved (in pursuit of a detected Special Forces team) into the same hex as any plus-type movement value game piece moving independently, that plus-type movement value game piece is eliminated immediately (though may be repurchased during a later Mission Objective Placement Phase, normally).
Note: This stipulation applies even during instances in which an enemy unit is in the same river hex as, for example, a raft (even though that enemy unit would not technically be entering the water there).
10.5 Minus (-) Movement Values
Game pieces with a minus ("-") movement value have no ability to move independently, but may be hauled by a standard or plus-type movement value game piece (within portage limits) if moving together as part of the same stack, if the player desires. No minus-type movement value game piece may ever haul any other game piece, although when being hauled by a standard or a plus-type movement value game piece, a minus-type game piece's negative movement value must be deducted from it, thereby decreasing its total movement allowance (even if that minus-type movement value game piece is dropped off during its movement). Moreover, the "-" movement value of each minus-type movement value game piece is cumulative when hauled together by the same standard or plus-type movement value game piece).
Example: A Special Forces team (printed with a standard movement value of "4") that is stacked with a UH-60 helicopter (printed with a plus movement value of "+30") and an M2 .50 CAL (printed with a minus movement value of "-3") yields a net movement value total of 31 (4 + 30—3 = 31). That stack is therefore assumed to have a movement value of 31.
Note: Some minus-type movement value game pieces are printed with a "-0" value, indicating that they actually do not deduct any movement when being hauled.
Game pieces printed with a "-" movement value cannot move by themselves, nor haul any other type of game piece (though they may be hauled by other game pieces with a standard or plus-type movement value). It is perfectly legal for a plus-type movement value game piece to haul any minus-type movement value game piece.
Designer's Note: When a Special Forces team is moving across the map stacked with, for example, a UH-60, it is obviously not meant to be implied that those men are hauling a ten-ton helicopter through the mountains. Of course, the idea here is that the UH-60 (or CH-47, or whatever) is loitering in the area, or perhaps nearby on station (to be called upon whenever it is needed). This, incidentally, is also the reason for the high noise value that is associated with some game pieces; an aircraft overhead would certainly alert the enemy that something was going on in the area.
10.6 Enemy Movement Values
Enemy combat units are printed with standard movement values. After being placed on the map, enemy combat units must* be moved (during the Enemy Movement/Combat Phase) directly towards the closest detected Special Forces team on the map (unless that Special Forces team has entered a base camp, which nullifies detection for that Special Forces team). This movement stricture is enforced even if there is technically a more efficient route (around difficult terrain) to move towards a detected Special Forces team (representing the fact that the enemy units may not necessarily know precisely where the Special Forces are or have moved to).
Note: Some enemy combat units are printed with a "0" movement value (these units may represent checkpoints, snipers, static positions, oblivious patrols, or often sometimes things like vipers or scorpions or IEDs, or whatever). Such units are never moved, but instead remain on the map in their current hex until all detected Special Forces units have entered a base camp. Nevertheless such units do attack normally should they ever be adjacent to any Special Forces team during the Enemy Movement/Combat Phase.
Enemy combat units pay the normal terrain expenditure cost when entering any hex (although any enemy combat unit that encounters any all-water hex must halt its movement there; see 11.0). Enemy combat units are entitled to (and, in fact, must if necessary) conduct a minimum movement to enter terrain that is closer to a detected Special Forces team (if that enemy combat unit otherwise does not possess enough movement value to enter a particular type of terrain). Enemy combat units may freely enter any hexes that contain other enemy units, without restriction.
10.7 Terrain Movement Expenditures
When any game piece enters a hex, it must expend (deduct) an allotment of its movement value as indicated by the terrain chart printed on the map. All game pieces must expend the same exact expenditure of movement to enter a particular hex, although water types of hexes impose additional restrictions (see 11.0).
Designer's Note: Even helicopter game pieces are required to expend additional movement to enter terrain requiring more than one movement expenditure, as it is to be assumed that they are flying low and in between and around difficult terrain (known in the common vernacular as flying "nap-of-the-earth").
Transcriber's note: the per-terrain expenditure values are printed on the game map, which is not part of this rules document, so the terrain chart itself is not reproduced. The only expenditure values stated in the rules text are the examples in 10.0 (Village and Mountain hexes each cost two) and in 11.1 (a stream hex normally costs two).
In those cases where there is more than one type of terrain in a hex, movement costs are not cumulative. The moving game piece must simply pay the single highest movement cost to enter that hex.
10.8 Minimum Movement
Regardless of the net movement value, a game piece with a standard or plus-type movement value may always move at least one hex, assuming that it had not already moved during that same movement phase, and assuming the terrain in that hex does not prohibit normal movement therein. In such cases, however, a minimum move is always assumed to expend that moving game piece's or stack's entire movement value to enter that hex.
Note: A minimum move also qualifies as a stealthy movement (see 12.2).
10.9 Zones of Control
No game piece ever projects any kind of zone of control to any adjacent hex(es). However, when any enemy combat unit moves adjacent to any Special Forces team (or stack), it must attack that Special Forces team (or stack) there immediately.
Weapon and equipment game pieces, if not stacked with any Special Forces team, are automatically eliminated when any enemy combat enters such a hex.
10.10 Mission Objective Halt
Any Special Forces team that enters a mission objective's hex must halt in that hex so as to be considered as having accomplished that mission. It is permissible for any Special Forces team to move through a mission objective hex without halting, but moving through a mission objective's hex does not ever qualify as an accomplishment of that mission.
10.11 Stripping Gear
Prior to the beginning of each Special Forces game piece's movement, the player may leave any weapon(s) and/or item(s) of equipment in its current hex so as to unburden the Special Forces game piece of the weapon(s) and/or item(s) of equipment. The stripped weapon(s) and/or item(s) of equipment thereafter remain in that hex until occupied by any enemy unit (which thus eliminates the stripped gear), or until reclaimed by an eligible Special Forces game piece that reenters that hex.
Note that "stripping gear" is not the same as abandonment per 12.3, and does not have the same effect; stripping gear in this context merely means that a Special Forces game piece is not hauling the stripped gear.
11.0 Rivers
River hexes may be entered by any game piece per the normal terrain expenditure cost.
11.1 Patrol Boats & Scuba Equipment
Special Forces teams may be moved with a patrol boat game piece exclusively via river hexes during the Friendly Movement Phase. In doing so, a Special Forces team (or stack) that is stacked with a patrol boat may be moved via a series of connected river hexes, expending only one (1) movement value (instead of two as when entering a stream hex normally).
Patrol boat movement is only permitted while moving via river hexes. A patrol boat game piece may be stacked with and moved with any Special Forces team (or stack) into any other type of terrain hexes, but they otherwise provide no movement bonus when not being moved via a river hex.
12.0 Creating Noise
When any Special Forces team (or stack of Special Forces teams) has completed its full intended movement during a game turn, the player must then roll one ten-sided die (once) to check if that Special Forces team (or stack) has created noise in its final hex and thus been heard and detected by enemy units.
Note: This procedure applies even if a Special Forces team or stack has already been detected heretofore. A moving Special Forces team or stack is subject to a noise die roll each time it completes movement, thereby allowing the possibility that it will be detected by more enemy units.
The noise of a team (or stack) is determined by adding the noise value of every game piece in the same hex after entering that particular final hex, as a sum total of the noise value. Some weapons and items of equipment are not noisy and thus do not add to the noise level in a hex, whereas others do (indicated by a "+" noise value number). Moreover, some items of equipment actually decrease the noise level in a hex (indicated by a "-" noise value). Furthermore, if there are two or more Special Forces teams in the same hex, they must always add their noise values together.
Each commander and officer also adds to a Special Forces team's or stack's noise level (+1), which simply represents the presence of an extra man, particularly one who may be urging haste in an attempt to accomplish the mission.
After determining the total noise level in a hex (but only after movement has occurred in that final hex; noise is never checked for units before they complete their movement, or that have not moved at all), one ten-sided die is rolled (once). If the die roll is higher than (>) the total noise level (the sum of all noise values) in that last entered hex, then no noise has been heard (or no Special Forces have been seen) by any enemy units, and that Special Forces team (or stack) has not been detected.
Note: The noise level is checked per final hex, not per unit; only one die roll is rolled per last hex entered, regardless of how many game pieces have entered that hex.
If, however, that die roll is equal to or lower than (<) the total noise level (the sum of all noise values) in that entered hex, then that Special Forces team (or stack) has been heard and detected by the enemy (see 12.7). In such a case, every game piece in that hex is thus considered to be detected until those units enter a base camp.
Exception: A noise die roll of "0" (zero) is always considered to be no detection, regardless of the total noise value or other modifiers, but a noise die roll of "1" (one) is always considered to be an automatic detection, regardless of the total noise value or other modifiers.
12.1 Terrain Noise
Certain types of terrain will also affect (modify) the noise level of a hex that has been entered by a Special Forces team (or stack).
Note: Noise is irrelevant to enemy combat units, which are always considered to be known by the player once placed on the map.
Each type of terrain is listed with a noise value which will modify the noise level (either as a "+" or a "-" value) of a Special Forces team (or stack) that has entered that hex. Each type of terrain's noise value is listed as follows (as well as on the map).
| Terrain | Noise Value |
|---|---|
| Trail | +3 |
| Village | +2 |
| Peak | +1 |
| Crops | +1 |
| Clear | 0 |
| Mountain | 0 |
| Landing Zone (L.Z.) | 0 |
| Cave | 0 |
| Palm Grove | 0 |
| River | -1 |
| Stealthy Move (12.2) | 0 |
Designer's Note: Some locations are considered "noisy" simply because they may be more visible, or just more exposed to locals or disturbed wildlife, etc. The conundrum is that many of the mission objectives may necessitate that the Special Forces move through a potentially noisy location to get there (such as a village, for example, where a hidden Islamic sympathizer could be tipping off the Special Forces' presence, or something like that). But while it is not, in fact, necessarily noisy to march down a pathway, the chances of being spotted—if nothing else—while waltzing down the road are obviously high quite regardless of how much noise is actually being made).
When determining the noise level of a hex that has been entered, add or subtract the noise value of the type of terrain in that hex per 12.1 normally (in addition to the noise value of any weapon or item of equipment in that hex).
12.2 Stealth Movement
A Special Forces team (and any weapons and/or items of equipment stacked with it) may be considered to be moving stealthily by only moving one hex per each Friendly Movement Phase. Moving stealthily means that the terrain noise value in that singularly entered hex is always "0" (regardless of the actual terrain therein), unless actually already less than "0" (such as rivers).
12.3 Abandonment
It is possible for Special Forces teams, officers, and commanders to escape a detection that has occurred per 12.0 (but not per 12.4) such that no enemy units are placed per 12.8 after a detection (however, combat noise always causes an automatic detection; escaping detection is not possible after combat has occurred per 12.4).
Note: The decision to escape detection must occur before any enemy units are drawn and placed.
To escape detection, the player must pick up a detected Special Forces team, officer, and/or commander (but without any of their weapons or items of equipment) and place them directly into an existing base camp hex anywhere on the map (if no base camp exists, escape is not possible). Escape is automatic, but any weapons and items of equipment that are abandoned (including plus-type movement value game pieces) must be eliminated (albeit available to be repurchased normally).
Abandonment of weapons is different from stripping gear (see 10.11).
12.4 Combat Noise
Whenever a Special Forces team (or stack) attacks any enemy combat unit, it automatically causes noise and is considered to be detected immediately. A Special Forces team does not cause noise when it is attacked, however, even if it eliminated the enemy unit as a result of that combat.
Additionally, all enemy units anywhere on the map must immediately move directly towards that Special Forces team's (or stack's) hex during the Enemy Movement/Combat Phase, via the most direct route in terms of closest hexagons (not terrain movement costs), regardless of the terrain (paying the normal terrain expenditure costs, nonetheless). See 10.6 for enemy combat unit movement procedures.
Once a Special Forces team (or stack) has been detected, all enemy combat units anywhere on the map must move directly towards that Special Forces team (within the limits of their own available movement) during each and every Enemy Movement/Combat Phase throughout the game until that Special Forces team enters a base camp (see 12.9), or is eliminated. Once all detected Special Forces units have entered a base camp or have been eliminated, all enemy combat units that are present on the map automatically disappear (to be placed back into their container) even if no mission has been accomplished.
Note: As mentioned, an enemy unit must always attempt to move closer to the closest detected Special Forces unit. If there are two equally-closer hexes to choose from in pursuit of a Special Forces unit, an enemy unit must always enter the hex that is closer to the nearest base camp, if legal and possible. In cases where both of those equally-closer hexes are equidistant to the nearest base camp, the player may choose which that enemy unit enters.
If a stack of Special Forces teams split off into multiple directions during a Friendly Movement Phase, the present enemy combat units must then move towards the Special Forces team—if detected—to which they are closest (in terms of hexagons, not terrain cost) during each and every Enemy Movement/Combat Phase during the game until that Special Forces team has entered a base camp (see 12.9), or has been eliminated. In the latter two instances, enemy units do not ever pursue other Special Forces teams still on the map after the first Special Forces team has entered a base camp or has been eliminated.
Note: If an enemy combat unit is equally close to two or more separate Special Forces teams in different hexes, the player may choose which Special Forces team that the enemy combat unit will move towards (and he may do this repeatedly during the course of the game, if he prefers—even switching off between different equidistant Special Forces teams—every occasion that that an enemy combat unit is equally close to two or more separate Special Forces teams).
If, during the course of an enemy combat unit's movement, that enemy combat unit enters a hex where a base camp is located, that base camp is immediately eliminated (removed from the map) permanently, and is not considered to be useable or functional for any purposes thereafter. It does not exist, and cannot be returned to play.
If, during the course of an enemy combat unit's movement, an enemy combat unit enters a hex where any discarded weapon and/or item of equipment is located, that weapon and/or item of equipment is immediately eliminated (removed from the map), although it may be repurchased during a later Mission Objective Placement Phase, normally.
12.5 Disturbing the Hornet's Nest
Once any particular Special Forces team (or stack) has been detected, it remains detected until it enters a friendly base camp hex (see 12.9), at which time all enemy combat units cease their movement immediately and are removed from the map (to be returned to the enemy combat unit container) unless there is another detected Special Forces team (but not merely a lone commander or officer) presently elsewhere on the map (see 12.6). Note that the detection of any particular Special Forces team (or stack) has no effect upon the detection of any other Special Forces team (or stack) in any other hex.
12.6 Commander & Officer Movement
Because commanders and officers are plus-type movement game pieces, they do not, by themselves, cause noise and may never be "singled out" or attacked independently of any Special Forces team. While alone, a Special Forces commander and/or officer is immune from detection, pursuit and attack. Of course, Special Forces commanders and officers cannot accomplish missions alone (see 7.1), so don't get the idea that you can send Snake Eyes out to accomplish missions by himself.
12.7 Detected Special Forces Teams
If combat or a noise check die roll reveals that a Special Forces team has become detected, roll one six-sided die to determine the quantity of enemy units that will appear on the map in the proximity of that detected Special Forces team's (or stack's) hex. The die roll equals the quantity of enemy units that will appear on the map. For example, if the die roll is "3," three enemy units will appear on the map (see 12.8).
After determining the quantity of enemy units that will appear on the map in response to a detected Special Forces team (or stack), the player must blindly draw that same quantity of enemy combat units from the enemy combat unit container. Those units will then be placed per the enemy combat unit scatter mechanism (see 12.8 below).
12.8 Enemy Combat Unit Placement
When enemy combat units are drawn and are to be placed on the map, the player must roll two separate six-sided dice for each enemy combat unit. Before rolling, he must nominate one six-sided die as the "direction" die roll, and the second six-sided die as the distance die roll (the player must do this for each enemy combat unit that he blindly drew per 12.7 above), using the Special Forces team's (or stack's) hex as the location from where direction and distance is counted. This is called a scatter mechanism, and is exemplified by a hex graph noted below.
When determining direction, the northernmost hexside in the Special Forces team's (or stack's) hex is always considered to be the "1" (one) direction (as it relates to the directional die roll). Thus, the adjacent hexside to the right (clockwise) of the "1" hexside is considered to be the "2" (two) direction, and so on in a clockwise circle to account for all six possible directions around that Special Forces team's (or stack's) hex.
Next, after determining direction, the second six-sided die roll determines the distance from the Special Forces team's (or stack's) hex in terms of a quantity of hexagons equal to that second die roll (counted from the Special Forces team's hex, straight outward) per the hex-row direction just determined above (either 1, 2, 3, 4, 5 or 6). The direction and distance die rolls will thus be the placement of one drawn enemy combat unit, relative to that Special Forces team's (or stack's) hex location.
Note: If an enemy combat unit's placement is beyond the edge of the map, assume that the map edge is actually connected to the opposite side of the map, and place that unit there instead (per the same direction and distance die roll). Though such units will appear on the other side of the map in such cases, they function normally and must attempt to pursue the closest detected Special Forces unit normally.
Exception: If any enemy combat unit becomes placed in an all-water hex, it is placed back into the enemy combat unit container (but not to be withdrawn now).
If an enemy unit is placed into a hex where another Special Forces game piece is already present, that enemy unit must attack that Special Forces game piece normally (instead of moving towards the originally detected Special Forces game piece) during the Enemy Movement/Combat Phase, and this other Special Forces game piece is immediately considered detected and will be pursued normally by all other enemy units that are closer to it (i.e., closer to it than the detected Special Forces game piece that caused that enemy unit's placement). So long as that enemy unit remains stacked with a Special Forces game piece, it will attack that Special Forces game piece each and every Enemy Movement/Combat Phase until either is eliminated.
12.9 Enemy Combat Unit Movement
After placement, that enemy combat unit must be moved towards that Special Forces team's (or stack's) hex during each Enemy Movement Phase, following the most direct route possible (in terms of hexes, and despite any terrain costs*) in an attempt to become adjacent to that Special Forces team (or stack).
Note: Enemy units do not ever pursue any plus-type movement game piece that is moving independently.
Once adjacent to that (or any) Special Forces team (or stack), that enemy combat unit must then conduct combat against the Special Forces team (or stack) in that hex. An enemy combat unit that is adjacent to a Special Forces team will attack it each game turn (during the Enemy Movement/Combat Phase) until that Special Forces team has moved to a hex that is no longer adjacent to any enemy combat unit, or until that enemy combat unit (or the Special Forces team) is eliminated, or until that Special Forces unit has entered a base camp hex.
Note: Although, if an enemy unit is presented with a choice of entering two equidistant hexes while in pursuit of a Special Forces team, that enemy unit must enter whichever of the two hexes requires the lower movement expenditure.
If a Special Forces team has successfully moved away from an attacking enemy combat unit, it is still considered to be detected, and all of the enemy combat units present on the map must pursue that Special Forces team (via the most direct route possible) in a relentless attempt to perpetually move adjacent to that Special Forces team and attack it. All enemy combat units must attempt to attack a detected Special Forces team until the Special Forces team is eliminated, or has entered a base camp hex (at which time that Special Forces team immediately becomes un-detected and immune from enemy attacks and pursuit. If there are no other detected Special Forces units anywhere on the playing area of the map, all enemy units are removed from the map and returned to the enemy combat unit container).
An enemy unit will always pursue the closest detected Special Forces team (if there are multiple Special Forces teams on the map).
12.10 Base Camps
All Special Forces game pieces begin the game at any present base camp(s), and sortie from the base camp(s) toward mission objectives. Otherwise, base camps serve as sanctuaries for Special Forces teams. When all detected Special Forces teams occupy any base camp, all pursuing enemy combat units are removed from the map automatically, and then returned to the enemy combat unit container.
A Special Forces team that currently occupies a base camp is not detectable (except as a result of combat occurring in that hex, if any). If any enemy unit, as a result of placement or movement, happens to occupy a base camp hex, that base camp is eliminated immediately per 12.5, unless a Special Forces team is already present in that base camp hex. Otherwise, a base camp itself never becomes detected, per se (in other words, a discovered base camp, itself, never incites enemy units to move towards it, even if combat occurred there or is adjacent to its location.
However, so long as any detected Special Forces game piece remains on the map (if not in a base camp), any enemy combat units on the map must remain on the map and must move during each enemy Movement/Combat Phase (towards the closest detected Special Forces game piece not currently in a base camp hex) as directly and quickly as possible.
If all base camps have been eliminated, it is not possible for any Special Forces team to be "un-detected." However, the player is always eligible to purchase one extra base camp game piece during the Mission Objective Placement Phase of a game turn, assuming he has enough available PP to do so.
Designer's Note: The loss of all base camps does not necessarily cause the player to lose the game, but insofar as any present Special Forces teams will remain detected while roaming around the map, it is very difficult to survive long while trying to accomplish mission objectives. It is therefore prudent to take precautions to prevent the capture of base camps, either by careful placement, or by guarding them with extra Special Forces teams.
12.11 Moving Base Camps
Base camps do not move, but the player may choose to move one or both of his base camps during the Mission Objective Placement Phase. To do so, he must roll one ten-sided die (per base camp that he intends to move); that die roll is the amount of PP that he must pay to move a base camp, at which point he may pick up his base camp from its current location and place it anywhere on the map (if otherwise legal) during that same phase.
Note: A moved base camp is not entitled to extra PP per 6.3, regardless of where it is moved.
Note that moving a base camp does not move any Special Forces units, weapons or equipment with it. Only the base camp itself is moved.
The player may otherwise move a base camp as often as he wishes during a game, provided that he pays for each move (per a single die roll for each move, as explained above).
13.0 Combat
Whenever any Special Forces team (or stack) is adjacent to any enemy combat unit (or when in the same hex as an enemy combat unit, per 12.6), it may conduct one attack against one adjacent hex wherein there is at least one enemy combat unit.
Note: If there is more than one enemy combat unit in the same hex, the player may choose which of the enemy combat units to attack that turn; if it is eliminated, then the other enemy combat unit must be attacked (unless the adjacent Special Forces unit has been moved away, or has been eliminated) during the next turn, and so on in this fashion until the Special Forces team has successfully moved away from the combat hex, or has become eliminated (or has entered a friendly base camp hex).
Likewise, whenever any enemy unit is adjacent to any Special Forces team(s), it must conduct one attack against each such hex (one attack per hex, per Enemy Combat Phase).
Note: Plus-type game pieces by themselves can never be attacked.
Once any attack is conducted (whether an enemy attack or a friendly attack), it is resolved per the following procedure.
-
One six-sided die is rolled per attack, and that die roll result is multiplied by ten (x10) to yield a "tens" result (either 10, 20, 30, 40, 50, or 60).
-
Then, add the printed attack value (or subtract the printed attack value, in the case of any present helicopter game pieces) of every game piece in the attacker's hex, if any, to that (or from that, in the case of helicopters) "tens" die roll result. This will yield the attack result total.
Note: Weapons and equipment game pieces can never be used to attack by themselves, only added to the attack die roll of a unit or team that is attacking or being attacked.
- Next, determine the terrain penalty in the hex that is being attacked (pertaining to the type of terrain in that hex), as indicated on the terrain chart printed on the map. Add that terrain penalty to the attacker's total die roll. The final result will be a grand total.
Example: If the hex being attacked is a palm grove type of hex, the terrain penalty in that hex is -10. Therefore, if the attacker's result total was 23, the grand total would be 13 (reduced from 23 to 13 because of the palm grove terrain penalty).
Transcriber's note: the terrain penalty for each terrain type is printed on the game map, which is not part of this rules document. The palm grove value (-10) is the only one stated in the rules text.
- Lastly, repeat the above two steps for the unit(s) being attacked in the attacked hex, adding each attacked combat unit's attack value to its own die roll, exactly per step 2 above.
Exception: The terrain penalty only applies to the attacker's attack value, not to the die roll for the game pieces in the hex being attacked.
-
Whichever net die roll result is higher wins that battle. If both die roll results are exactly equal, both the attacking and the attacked unit(s) in the combat hex have lost the battle.
-
If an enemy combat unit has lost the battle, it is eliminated and removed from the map (it is returned to the enemy combat unit container).
-
If a Special Forces team has lost the battle, a casualties marker is immediately drawn from the casualties pool and placed on the map (with that Special Forces team) per 13.1 (see below). If a Special Forces team suffers casualties more than once, it is eliminated instead (return the casualties markers to the casualties pool).
Note: A team itself is not considered to have suffered casualties if a "Commander Killed" or "Officer Killed" casualties marker is drawn after losing a battle. Rather, a commander or officer, respectively, in the same hex is eliminated instead (see 13.1) and there is no effect to any team in that hex.
- If a Special Forces team suffers casualties or is eliminated, the player must now determine if any weapon or equipment game pieces in that same hex are eliminated. This is determined by rolling one six-sided die immediately after a Special Forces team suffers casualties: that die roll result indicates the quantity of weapons and/or equipment game pieces (of the player's choice) that must be eliminated from that hex.
Note: Weapons and equipment game pieces that are eliminated are eligible to be purchased again by the player during any subsequent Mission Objective Placement Phase.
The elimination of any commander or officer does not ever cause any weapon or equipment to become eliminated, unless that commander and/or officer was the only game piece in that hex. Conversely, a commander or officer does not prevent the loss of weapons or equipment, if it occurs.
13.1 Casualties
Whenever a Special Forces team has suffered casualties (if it has not been eliminated), the player must blindly draw a Casualties marker from the Casualties box on the map, which is then placed atop that Special Forces team in the same exact hex.
A casualties marker imposes reductions to that Special Forces team's value(s), depending upon the specific casualties marker that is drawn. If a "Commander Killed" or an "Officer Killed" casualties marker was drawn, one Special Forces commander or officer, respectively, must be eliminated from that hex instead, if any. If no commander or officer is present in that hex, then that casualties marker has no effect, and it is returned to the casualties pool, and no further effect is incurred to the Special Forces team there.
Commander and officer Special Forces game pieces are never affected by any casualties markers other than "Commander Killed" or "Officer Killed," respectively, whether alone or with another game piece.
Transcriber's note: the individual casualties markers (their reduction values) are printed on the 16 casualties counters, which are not part of this rules document, so their individual effects are not listed here.
Commander and officer game pieces cannot be specifically attacked, even while moving independently (but will become eliminated if any enemy unit enters or becomes placed into a commander's or officer's hex). See the last paragraph of 10.4.
When the player is rolling a die to determine victory during the Success Determination Phase, each eliminated Special Forces team (whether a starting team or a purchased team), eliminated commander, and eliminated officer modifies the odds of victory (see 5.0).
When a casualties marker is drawn, regardless of the result, this ends combat from the enemy unit that inflicted it for that game turn. Any other pending combat from another enemy combat unit, if any, is then resolved normally.
Designer's Note: The various ratings of the casualties game pieces represents a wide variety of different outcomes. For instance, a casualties marker with a lower movement value might represent Special Forces that are carrying off their wounded, and things like that, etc.
A Special Forces team may only suffer casualties once per game before becoming eliminated. In other words, if two casualties markers (other than "Commander Killed" or "Officer Killed") are drawn for the same Special Forces team (no matter which game turn each is drawn), that Special Forces team is eliminated immediately.
Note: There is no way to every purposefully remove any Special Forces team's casualties marker, although a Special Forces team that is eliminated does not retain any casualties marker it had received.
If a Special Forces team is eliminated, all of the weapons and items of equipment, if any, in that same hex are eliminated as well (even if any commander or officer is also present in that same hex), but not if there is another Special Forces team in that same hex that can claim possession of those weapons and items of equipment.
Note: A commander or officer does not prevent the loss of weapons or equipment, if it occurs.
Another Special Forces team can only claim to have possession of an eliminated Special Forces team's weapon(s) and/or item(s) of equipment if it currently has sufficient remaining capacity to haul it/them at that moment (even if not moving), although another Special Forces team is always permitted to discard any weapon or item of equipment that it is currently hauling to haul a different weapon or item of equipment also present in the same hex.
Even weapons and items of equipment that would not technically be considered to be physically carried in reality (such as Missile) will be eliminated when the carrying Special Forces team is eliminated (if no other Special Forces team is available to take up the weapons and/or items of equipment).
Designer's Note: This is not suggesting that a Special Forces team's elimination has caused the hypothetical platform firing the missile to be eliminated, but rather that it's lost contact or has been withdrawn, or whatever, etc.
Eliminated weapons and items of equipment may be repurchased normally with available PP, however (assuming that there are still other Special Forces teams still remaining in the game).
The game ends when the last Special Forces team is eliminated, even if any commander or officer game piece still remains.
13.2 Combat Restrictions
Every game piece that is adjacent to an enemy game piece is eligible to attack its hex during the same combat phase. However, only Special Forces teams may combine the combat value of multiple Special Forces teams in the same hex (into a singular collective value) when engaged in combat. Multiple enemy combat units that attack may only attack as separate units (as separate attacks) even during the same game turn, or even if stacked together in the same hex.
No unit or team may divide its attack value to attack multiple hexes during the same phase. Additionally, attack values cannot ever be accumulated from turn to turn.
When attacking a hex that is occupied by more than one enemy combat unit, an attack may not be directed against more than one enemy combat unit at the same time; each enemy combat unit must be attacked separately.
13.3 Combat Example
A Special Forces team (with an attack value of "2") is stacked with an officer game piece (with an attack value of "+1"), an M203 (attack value of "+3"), and a AH-1 (attack value of "+25"), for a total attack value of 31.
That Special Forces team is adjacent to an enemy unit with an attack value of 10, and so the player decides to attack that enemy unit during the Friendly Combat Phase. Therefore, the player first rolls one six-sided for his Special Forces, rolling a disappointing "2." He then multiplies that "2" die roll result by 10, which becomes 20 (2 x 10 = 20), but then he also adds the total attack value of all of his weapon game pieces in the same hex (adjacent to the attacked enemy combat unit), which had already been figured to be 31, for a total net result of 51 (20 + 31 = 51).
Next, the type of terrain in the attacked hex is Clear, and thus no terrain penalty applies to the attacker.
Lastly, the player rolls a six-sided die for the attacked enemy combat unit, and he also multiplies that die roll by ten. In this example, the attacked enemy combat unit's die roll is "4," which is multiplied by ten, and therefore becomes forty (4 x 10 = 40). Then, that enemy combat unit's attack value (in this case, "10") is added to the die roll result, for a grand total net result of 50 (40 + 10 = 50).
In the previous example, the Special Forces' total net result was 51, whereas the enemy combat unit's grand total net result is 50. Therefore, the Special Forces have won the battle. Thus, the enemy combat unit becomes eliminated immediately, which removes it from the map (to be returned to the enemy combat unit container).
14.0 Air Support & Friendly Fire
After any combat has occurred whereby any air support* weapon was used (regardless of the outcome of that combat), the player must then roll one six-sided die and reference the scatter mechanism diagram printed on the map. Using the hex of the enemy unit that was involved in that combat (even if it was just eliminated) as the central hex of that scatter mechanism, the die roll indicates where stray air support has also hit (assume that the distance is automatically only "1" in this case). If the roll indicates a stray air support hit in any hex containing any Special Force game piece(s), all Special Forces game pieces in that hex are eliminated immediately (including any base camp, if any). If that stray air support hits a hex containing any other enemy unit instead, that enemy unit is eliminated immediately. Stray air support hits in any other (unoccupied) hexes have no further effect.
Note: Air support is identified as any weapon game piece that is printed with a +10 noise value and a -0 movement value (i.e., an AH-1, AH-64, B-52, F-15, F-16).
Transcriber's note: the scatter mechanism diagram is printed on the map, which is not part of this rules document.
15.0 Suppressive Fire
Suppressive Fire is a technique by which a player can attempt to prevent an enemy unit from moving (at the beginning of the Enemy Movement/Combat Phase, before that enemy unit moves) towards a detected team. To attempt Suppressive Fire, the player must select any weapon game piece(s) currently possessed by any detected team present on the hex map. Only a weapon (but not a commander or officer) game piece that is printed with a "+" (plus) firepower rating may be used to attempt suppression.
Note: Each weapon that's used to attempt Suppressive Fire will not be available to be used by any team during combat occurring during the same Enemy Movement/Combat Phase (regardless of the outcome of that suppression attempt), though a successful suppression will prevent a targeted enemy unit from moving at all during the current Enemy Movement/Combat Phase.
To attempt Suppressive Fire, the player must, first, nominate all of the weapon game pieces that he intends to "fire" per each attempt, and he also designates the specific enemy unit(s) that the nominated weapon(s) will be trying to suppress (he does not nominate one weapon at a time to observe the outcome of its attempt before the next; he must decide how many weapons that will be attempting suppression).
Next, the player must roll one six-sided die per each such nominated weapon (one at a time, and only against the enemy unit it is targeting). If that die roll is greater than (>) the distance in hexagons from the weapon's location to the targeted enemy unit's location (counted from the weapon's hex to—and including—the targeted enemy unit's hex), it successfully suppresses that enemy unit.
Note: Suppressive Fire is not affected by any terrain, distance, or line-of-sight considerations, nor the type or size of enemy unit it is suppressing. However, Suppressive Fire does not prevent any enemy unit that is already adjacent to it from conducting its attack normally during that Enemy Movement/Combat Phase; Suppressive Fire, if successful, simply prevents an enemy unit from moving during the current Enemy Movement/Combat Phase.
Each weapon game piece may conduct one Suppressive Fire attempt against a single enemy unit per Enemy Movement/Combat Phase (regardless of the outcome of that suppression attempt). Once a weapon has been used to attempt Suppressive Fire, flip it over to its blank side until the end of that same Enemy Movement/Combat Phase (regardless of the outcome of the attempt); that weapon is not available to be used during any combat that occurs that phase (though it is subject to all normal rules referring to weapon game pieces, such as elimination occurring as a result of combat, even if that weapon was not used in combat). Otherwise, flip that weapon back over to its front side at the end of that same Enemy Movement/Combat Phase, at which point it functions normally again.
The only effect of Suppressive Fire is that the targeted enemy unit may not move during that Enemy Movement/Combat Phase; an enemy unit is never eliminated by Suppressive Fire, nor does it ever lose any combat strength or capability (this means that it is nonsensical to suppress any enemy units that are already adjacent to a Special Forces team). When that Enemy Movement/Combat Phase ends, that enemy unit is no longer suppressed, and the weapon is flipped back to its normal front side.
16.0 New Old Stock (Optional)
Players that already have the game Green Beret (Modern War #18) may purchase any of the weapons and/or equipment game pieces from Green Beret to be used in Kandahar (though never vice versa) with his normal allotment of purchase points.
Exception: A player may not purchase base camps, commanders, officers, or teams from Green Beret (they're too old).
However, to represent the age and overhaul required for such old hardware, the player must roll one ten-sided die per weapon and/or equipment game piece that he would like to purchase from Green Beret, adding that die roll to the original printed cost of that game piece. Each die roll only applies to one particular game piece (not a game piece type), and a player may roll once per each game piece from the Green Beret game that he'd like to purchase.
Note: A roll of "0" in this case is to be regarded as a zero (not ten), which would mean no additional cost for that game piece.
If the additional cost to purchase a particular game piece from Green Beret is more than the player is willing to pay, he may simply discard that game piece from his game (he is never required to purchase a game piece that he deems to be too expensive), but obviously he is only ever permitted to roll once per each game piece that he would like to purchase from Green Beret.
There is no other effect to using old Vietnam-era weapons or equipment, although any attendant rules that apply to a game piece from Green Beret do apply in Kandahar as well, if relevant. If a mission objective in Kandahar requires a particular type of weapon or equipment, the same type of weapon or equipment from the Green Beret game fulfills that requirement, as well.
Note: Kandahar mission objectives that require the M249 game piece will be fulfilled with the M60 or RPK game piece from Green Beret. Similarly, Kandahar mission objectives that require the M203 game piece will be fulfilled with the M79 game piece from Green Beret.
17.0 Misadventure (Optional)
Instead of a mission becoming automatically accomplished when its hex is occupied by a Special Forces team (per 7.1), this optional rule requires the player to roll one six-sided die and then multiply that number by ten (x10) exactly as if engaged in combat.
If his die roll result is less than (<) the total attack value of every Special Forces team, leader, and weapon in that mission objective hex, that mission is considered accomplished normally. However, if his die roll result is equal to or greater than (>) the total attack value, the mission is not considered accomplished and simply remains in that hex.
A player is eligible to roll once per game turn until that particular mission objective is finally accomplished or voluntarily forfeited (which a player may opt to do immediately after a failed die roll), but only so long as a Special Forces team is present in that mission objective's hex (with all necessary weapons and/or items of equipment required to accomplish that mission).
18.0 Weapon Characteristics (Optional)
This rule allows a few kinds of weapons in Kandahar to be used in specific ways (in addition to their normal capabilities), as follows:
18.1 Indirect Fire Support
A Special Forces team hauling a radio may utilize the M777 artillery, M224 mortar, and/or missile without having to actually haul it. To do so, that weapon must be present at a base camp; it functions normally during one combat engagement, but it is permanently eliminated after one usage (it is out of ammo).
18.2 First Aid
A Special Forces team hauling a Medkit may remove any one Casualties marker from itself by permanently eliminating its Medkit.
18.3 Booby Trap
A Booby Trap may be intentionally abandoned in any hex, but it thereby automatically eliminates any enemy unit that enters its hex. Thereafter, that Booby Trap is permanently eliminated, however.