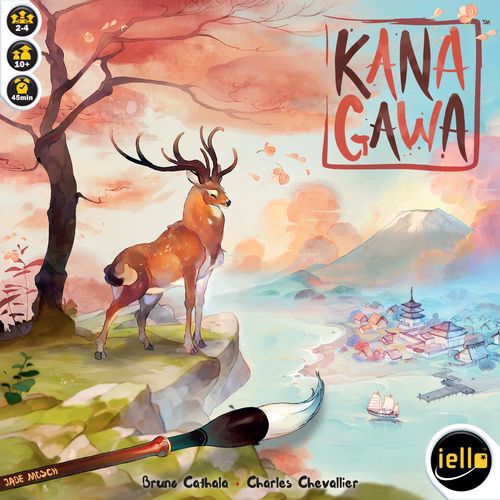
Kanagawa
Kanagawa Rules
Table of Contents
Table of Contents
Overview of the Game
Contents
- 1 School board
- 4 Starting tiles
- 72 Lesson cards (18 × 4 colors, identified by the color on the back)
- 1 Grand Master pawn
- 1 Assistant pawn
- 19 Diploma tiles
- 15 Brush pawns
- 3 Storm tokens
Goal of the Game
Improve your Studio and assign your Brushes to the Landscapes that inspire you to make the most beautiful Print. Focus on flora, fauna, portraits, architecture, or even seasons to gain your Diplomas.
Try to obtain the greatest number of Harmony symbols to prove yourself worthy of the Grand Master Hokusai and win the game.
Game Elements
School Board
This board represents the place where Hokusai provides his courses. It shows you how to play the Lesson cards (face-down or face-up) depending on the number of players and the progression of the round.
The School board has three rows (First row, Second row, Third row), and each row is divided into sections for two players, three players, and four players, indicating which spaces are face-up and which are face-down.
Lesson Cards
These cards depict the lessons taught by Hokusai and are made up of two parts that each have a different use: the Studio and the Print.
Studio
You can use the left side of the card to improve the abilities of your Studio. These improvements come in three types:
- Landscape: These icons show which type of Landscape a player can paint in the background of their Prints if they play one of their Brush pawns on it. The Landscape types are Forest, Mountain, Plain, Ocean, and Wild (counts as any Landscape).
- Supplies: These icons have an immediate effect that happens when you add the card to your Studio.
- Gain a Brush pawn
- Take the Assistant pawn
- Know-how: These icons give you a new ability that you may use every round for the rest of the game.
- Move a Brush
- Keep a Lesson card between rounds
You can use the right side of the card to expand your Print. This side has different elements:
- Landscape: Shows the type of Landscape in the background of the Print. A player must play a Brush on an icon of this type in their Studio to be able to paint this Print.
- Main Subject: Shows which Subject to paint, allowing you to earn Diplomas.
- Season: Shows the Season on the Print. The Seasons are Spring, Summer, Fall, Winter, and Storm (wild: counts as any Season).
- End of game bonus: Worth 1 Harmony Point at the end of the game.
Back of the Lesson Cards
Each color on the back refers to a Main Subject that can be found on the other side.
- A green back means there can be 1, 2, or 3 Trees on the Print.
- A blue back means there can be 1 Animal on the Print.
- A red back means there can be 1 Character on the Print.
- A yellow back means there can be 1 Building on the Print.
Brush Pawns
These pawns represent some of the supplies that you have in your Studio, which help you make your Print.
Brush pawns are symbolized on the Lesson cards by this icon: the Brush icon.
Storm Tokens
These tokens represent a wild Season that you can get from certain Diploma tiles. At the end of the game, you will place Storm tokens on cards in your Print. These cards will then feature whichever Season you choose.
Example: At the end of the game, you play a Storm token on your third Lesson card. You decide to transform this token into the "Spring" Season to make a sequence of five Springs and gain the most Harmony points.
Diploma Tiles
These tiles represent objectives to complete, including your Print's composition level and your Studio's construction level. Completing these objectives greatly benefits you in the race toward victory… unless your pride pushes them beyond your reach!
(A detailed list of the Diploma tiles is found on page 15 of this booklet.)
Grand Master and Assistant Pawns
These pawns represent the current first player (Grand Master pawn) and the future first player (Assistant pawn). They are symbolized on Lesson cards by this icon: the pawn icon.
The Assistant can move from player to player during a round, while the Grand Master doesn't change hands until the end of the round (see page 13).
Starting Tiles
These tiles represent the starting point of your Print and your Studio.
- Print: You just painted the first section of your Print. Your work is still tentative, even if your first Season is already clearly recognizable.
- Studio: You begin your studies with:
- Supplies (2 Brush pawns that you place in front of you),
- Know-How (an Arrow indicating the possible movement of a Brush each round),
- The type of Landscape you mastered at the beginning of the game.
Setup
- Place the School board in the middle of the table.
- Choose the first player however you like. They take the Grand Master and Assistant pawns.
- Randomly distribute the Starting tiles. Each player places two Brush pawns in front of themselves.
- Shuffle all the Lesson cards to make a deck and put it next to the board face-down.
- Sort the Diploma tiles by color and put them face-up above the School board in two rows. Sort the Diploma tiles in each color by their Harmony value.
- Top row: Diplomas associated with Prints
- Bottom row: Diplomas associated with Studios
Gameplay
The game plays over several rounds made up of the following steps:
- Follow the teachings of the Master
- Broaden your knowledge or Put it into practice
- New lesson
1. Follow the Teachings of the Master
The first player (whoever has the Grand Master pawn) draws as many Lesson cards as there are players, and places them on the first row of the School board. These cards are placed face-up or face-down according to the instructions on the spaces on which they're played.
Example: In a 4-player game, draw 4 Lesson cards and place them on the first row of the board as follows: the first and second cards face-up, the third card face-down, and the last card face-up.
2. Broaden Your Knowledge or Put It Into Practice
Starting with the first player and going clockwise, choose whether:
You want to broaden your knowledge
Pass your turn and don't take any Lesson cards yet.
This action allows you to wait a turn until more Lesson cards are added to the board, so you can take additional cards. However, you risk other players taking the cards you want before it's your turn again.
Note: If you are the last player still at school in the beginning of this step, you must put your knowledge into practice.
Note: You can always look at the back of the cards in the draw deck.
You prefer to put it into practice
Leave the School since you reckon you've learned enough to continue your work. You must immediately do all of the following:
- Choose a column of Lesson cards from the School,
- Continue your work (Improve your Studio or Expand your Print),
- Take the corresponding Diploma(s).
Choose a Column of Lesson Cards from the School
Choose a column and take all of the Lesson cards present in this column.
When you take Lesson cards, you cannot take any more cards until the next round.
Example: The second Lesson card interests you and you decide to take it: Choose this column. At this point in the game, there is only one card per column. You therefore only take one Lesson card. Taking more cards requires more patience…
Continue Your Work
You must immediately add all the Lesson cards you took to your Studio and/or your Print, in the order of your choice. You can split your cards however you like between your Studio and your Print.
Exception: Each "Keep a Lesson card" symbol on your Studio allows you to keep one Lesson card from round to round.
Improve Your Studio
You can always add a Lesson card to your Studio, there are no restrictions. To do this, turn over the Lesson card so you can read the Studio part and place it under the bottom half of your Starting tile. Place the next cards underneath those you already played to extend your Studio.
Example: You take two Lesson cards that you want to add to your Studio. Turn over these two cards and play them under your Starting Tile to extend your Studio.
You can add a card to your Studio and immediately use the effects on it (use the Landscape to play a card on your Print by moving a Brush to it, use the Arrow to move a Brush…).
When you add a card to your Studio, immediately apply the effects of "Gain a Brush pawn" and "Take the Assistant pawn":
- Gain a Brush pawn: Immediately take a Brush from the reserve.
- Take the Assistant pawn: Immediately take the small first player pawn (Assistant).
Expand Your Print
To add a new section of the Print to your canvas, you must be able to match the combinations of Brush and Landscape shown on the new card.
Optimally placing and moving your Brushes is one of the keys to success:
Place a Brush in your Studio: As long as a Brush has not yet been placed in your Studio (for example, the two Brushes you start with or any new Brush gained during the game), you can play it, at any point during your turn, on an empty Landscape icon in your Studio.
There is no limit to the number of Brushes you can play in your Studio, as long as you have enough empty Landscape icons.
Move a Brush: You can move a Brush on a Landscape icon to a different, empty icon in your Studio. However, each Brush movement requires you to use this symbol (the Arrow). Each of these symbols can only be used once per round.
Example: You want to play a card on your Print that has two "Ocean" Landscapes. You play your last Brush on an "Ocean" Landscape in your Studio. Since you have an Arrow, you move one of the Brushes you already played onto the second "Ocean" Landscape in your Studio. You can now play the card on your Print.
You can choose the order in which you "Improve your Studio" and "Move a Brush." However, each Landscape icon in your Studio can only be used once per round.
Finally, remember the two following golden rules:
- Each Landscape icon can only have one Brush.
- Each Brush can only paint one Landscape per round (before or after you move it).
Take the Corresponding Diploma(s)
As soon as your Print meets the requirements of a Diploma that is still in the middle of the table, you must immediately choose whether to take it or leave it… to try to do even better!
Take a Diploma
If you take a Diploma, take the corresponding Diploma tile and place it next to your Print. You can only take one Diploma of each color. In other words, taking a Diploma means you cannot take the other Diplomas in the same category.
Example: You play a card on your Print that has the third Tree of your Print. You must then choose whether to take the first "Tree" Diploma, or to leave it. You decide to take the "Tree" Diploma and place it next to your Print. It gives you 3 Harmony points at the end of the game. By taking this Diploma, you cannot take the two other Diplomas in this category.
Leave a Diploma
If you leave a Diploma, you will be able to try to take a more difficult Diploma in the same category, but you can no longer take the one you left.
Example: Going back to the previous example, you decide to leave the first "Tree" Diploma. You will then be able to play a fourth (or even a fifth) Tree on your Print to take one of the remaining two "Tree" Diplomas that give you more Harmony points. However, you can no longer take the first "Tree" Diploma.
Once you have played a Lesson card on your Print or Studio, you can no longer move the Lesson card.
3. New Lesson
If there are still players in school, the first player draws as many Lesson cards as there are players still at the School.
Add them to the board, on the second row, lined up below the remaining cards, following the "face-up" or "face-down" directions.
Example: In a 4-player game, you and Kevin decided to broaden your knowledge. Elizabeth and Lucy, however, each decided to take a Lesson card and put it into practice. At this point, the first player draws 2 Lesson cards and adds them to the second row of the board, lined up below the remaining cards.
Once you add the Lesson cards to the board, players still in school begin at Step 2 and continue the round as explained above.
If a player decides to broaden their knowledge a second time, add Lesson cards to the third row of the board. Follow the same placement conditions and begin at Step 2 a second time.
When all three rows of the board are full, players still at School have to take all the Lesson cards in a column and leave to put their knowledge into practice.
Example: Going back to the example on the previous page, you decide to broaden your knowledge a second time, while Kevin chooses to leave School with a column of Lesson cards. The first player draws one Lesson card and places it on the third row of the board, below the remaining cards. On your next turn, you must take all the Lesson cards in this column.
When all players have taken Lesson cards, the round ends. The player with the Assistant pawn takes the Grand Master pawn and becomes the first player for the next round.
A new round begins. Return to Step 1 "Follow the teachings of the Master".
Note: When you add the last Lesson card from the deck to the School board, you trigger the end of the game: All players in School must, in turn order, choose all the Lesson cards in a column.
When this happens, there might be fewer Lesson cards than players in school. This means the remaining columns could have fewer Lesson cards than normal… Being first player is therefore a substantial advantage.
End of the Game and Scoring
The end of the game happens when one of these two conditions is met:
- The deck is empty. The game ends at the end of the round, when all players at school have taken Lesson cards and put them into practice.
or
- At the end of a complete round when one or more players have at least 11 cards in their Print.
Before counting points, you must place each of your Storm tokens on cards in your Print to change the original Season into the Season of your choice.
Begin final scoring by adding (or subtracting if the symbol is crossed out):
- A. 1 Harmony point per Lesson card in your Print (including the Starting tile)
- B. 1 Harmony point per Lesson card in your longest sequence of identical Seasons (including the Starting tile)
- C. the Harmony points on the Lesson cards of your Print and your Studio
- D. the Harmony points on the Diploma tiles you took
- E. 2 Harmony points for the player with the Grand Master pawn
The player with the most Harmony points wins. If there is a tie, the tied players share the victory.
Explanation of Diploma Tiles
Diplomas Associated with Your Print
These Diplomas come in the four colors corresponding to the backs of the Lesson cards, and refer to the elements found in your Print.
Green (Trees):
- Gain 3 Harmony points if you have at least 3 Trees in your Print.
- Gain 4 Harmony points and 1 Storm token if you have at least 4 Trees in your Print.
- Gain 7 Harmony points and the Assistant pawn if you have at least 5 Trees in your Print.
Yellow (Buildings):
- Gain 3 Harmony points if you have at least 2 different Buildings in your Print.
- Gain 4 Harmony points and 1 Storm token if you have at least 3 different Buildings in your Print.
- Gain 7 Harmony points and the Assistant pawn if you have at least 4 different Buildings in your Print.
Red (Characters):
- Gain 3 Harmony points if you have at least 2 different Characters in your Print.
- Gain 4 Harmony points and 1 Storm token if you have at least 3 different Characters in your Print.
- Gain 9 Harmony points if you have at least 3 identical Characters in your Print.
Blue (Animals):
- Gain 3 Harmony points and 1 Brush token if you have at least 1 Boar and 1 Stag in your Print.
- Gain 4 Harmony points and 1 Brush token if you have at least 1 Crane and 1 Butterfly in your Print.
- Gain 7 Harmony points and the Assistant pawn if you have at least 1 Boar, 1 Butterfly, and 1 Stag in your Print.
Diplomas Associated with Your Studio
These Diplomas refer to the elements found in your Studio.
Pink (Brushes):
- Gain 1 Harmony point and the Assistant pawn if you have at least 3 Brushes in your Studio.
- Gain 3 Harmony points if you have at least 4 Brushes in your Studio.
Purple (Arrows):
- Gain 1 Harmony point and the Assistant pawn if you have at least 2 Arrows in your Studio.
- Gain 3 Harmony points if you have at least 3 Arrows in your Studio.
Teal (identical Landscapes):
- Gain 2 Harmony points if you have at least 2 identical Landscapes in your Studio.
- Gain 3 Harmony points and 1 Brush token if you have at least 3 identical Landscapes in your Studio.
- Gain 5 Harmony points and the Assistant pawn if you have at least 4 identical Landscapes in your Studio.
You can never have multiple diplomas of the same color!
Reminder of the Different Effects
Immediate
- Immediately take a Brush from the reserve and place it in front of you.
- Immediately take the Assistant pawn and place it in front of you. At the end of the round, when all players have played their Lesson cards, take the Grand Master pawn if you have the Assistant pawn. Place the Grand Master pawn in front of you and become the first player for the next round.
Optional
- You can move one Brush per round for each of these symbols in your Studio.
- You can keep one Lesson card in your hand at the end of each round (and play it later when you continue your work) for each of these symbols in your Studio.
End of the Game
- Gain 1 Harmony Point at the end of the game.
- Lose 1 Harmony point at the end of the game.
- At the end of the game, transform the Season on one Lesson card into the Season of your choice.
Structure of a Round
- Follow the teachings of the Master Place as many cards as there are players on the first row of the School.
- Broaden your knowledge or put it into practice
- Either broaden your knowledge: Pass your turn and do not take any Lesson cards yet.
- Or put it into practice: Take all the cards in a column of the board.
- New lesson Draw as many cards as the number of players that haven't yet taken cards, and add them to the next row, lined up below the remaining cards.
When all players have left School, begin a new round and go back to Step 1.