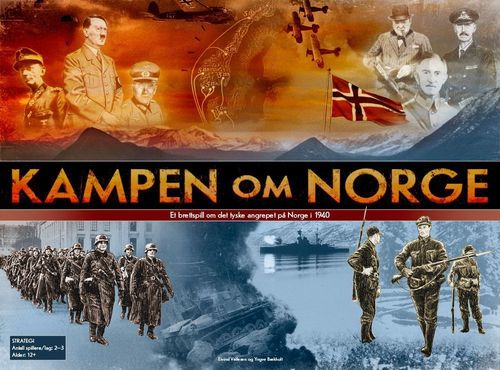
Kampen om Norge
Kampen om Norge Rulebook
Table of Contents
Table of Contents
Two Versions (Basic and Advanced)
Kampen om Norge (The Battle of Norway) can be played on two different complexity levels. The Basic Rules are easy to get into and a natural starting point the first time one plays the game, while the Advanced Rules offers more elements and a wider range of strategic opportunities. The fundamental game mechanics are the same in both versions, but if you play the basic version you need not concern yourself with the rules in chapters 5 through 8.
BASIC RULES
1 Player Roles and Objectives
1.1 Introducing the Factions
Norway Norway's mission is to defend against the German invasion. The Norwegian army is not the strongest, but time is on their side. They have good defensive cards and the longer they can delay the German advance, the greater their chance of success.
The Allies The Allied forces consists of combined British, French and Polish forces. They are treated as a single faction in the game. At the start of the game, they have not yet landed in Norway but they control most of the sea along the coast. The Allies are flexible and unpredictable and have cards that complement the Norwegian cards.
Germany Germany has the strongest army and a superior air force, but they are pressed for time. Germany needs to constantly be on the offensive and have cards that are primarily suited for this purpose. Germany faces two opponents and fits a player who enjoys planning a big operation and playing aggressively.
1.2 Number of Players
3 players When there are three players, one player controls Norway, one controls The Allies and one controls Germany. Norway and The Allies cooperate to defeat the Germans – they win together, or they lose together.
2 players When there are two players, one player controls both Norway and The Allies, while the other player controls Germany. Norway and The Allies still operate in separate turns, and have separate sets of cards, even if they are controlled by the same player.
4 or more players There are only three playable factions in the game, but playing as teams is possible. It is perfectly possible for two players to share the duties of controlling one faction. Players cooperating to control one faction have to agree among themselves how to make decisions and share tasks. When there are four players we suggest that two players cooperate playing Germany. For instance one player can assume the main responsibility for the battalions on the board, while the other takes care of the cards.
1.3 Winning the Game
The game comes to a conclusion the moment the German players draws the last unused card from his card deck. This represents Germany having used all the military resources available to the assault on Norway. The game ends immediately and the winner is decided. Germany wins the game if they at this point control all the victory cities. Norway and The Allies win if they are in control of one or more victory cities. Unoccupied victory cities are considered Norwegian.
The game also ends the moment one of the sides manage to defeat all enemy battalions on the board. In other words, Germany wins if they defeat all the Norwegian and Allied battalions on the board, and loses if all German battalions are defeated.
| Norway / The Allies | Germany | |
|---|---|---|
| Clear victory | Norway and The Allies defeat all German battalions on the board, or Norway and The Allies control 2 or more victory cities | Germany defeats all Norwegian and Allied battalions, or Germany controls all victory cities and there are only 3 or fewer Norwegian and Allied battalions left on the board |
| Marginal victory | Norway and The Allies control one victory city | Germany controls all victory cities |
2 Components of the Game
2.1 Dice
The use of dice is a major element of the game. How and when dice are used, and how the dice rolls should be interpreted is explained in the relevant phases of the game (see chapter 4). In general it is always better to roll high values on all dice rolls. In land combat the dice are referred to as combat dice (see chapter 4.2).
2.2 Playing Pieces
Every miniature soldier playing piece represents a loosely defined number of soldiers and is referred to as battalions in the game. The battalions can be used to move through and control land areas on the board. All battalions are equally strong, but can be strengthened by the use of relevant cards. Every battalion may move one space each turn (see chapter 4.1), and represent one combat die in combat (both in attack and defense, see chapter 4.2). More than one battalion moving together is referred to as a stack.
There are Norwegian, German and Allied battalions (playing pieces).
Chips When a faction has more than one battalion present in a land area, chips are used to represent the exceeding battalions. The chips are place beneath the playing piece. White chips represent one battalion and black chips represent 5 battalions. One soldier playing piece on top of two white chips in other words equals 3 battalions. (White chip: 1 battalion; black chip: 5 battalions. Pictured examples: 2 battalions, 7 battalions, 4 battalions.)
2.3 Game Board
The game board (also referred to as the board) shows a map of Norway and the surrounding seas. The map is divided into areas, where some are marked with symbols. These are explained below. The circled red numbers refer to the section of the board pictured in the manual.
Types of Areas The map board consists of three different types of areas:
- Land areas
- Sea zones
- Impassable areas
Land Areas The board has 44 land areas that are all marked with a location name and surrounded by a black border. (Mention of these location names in the game rules refer to the land areas in question.)
Movement through and occupation of land areas is performed by battalions. For a faction to control a land area it must be occupied by a battalion of that faction. Land areas occupied by one of the opponent battalions is referred to as a hostile area. Every time a battalion moves into a hostile area combat occurs (see chapter 4.1 and 4.2).
Some land areas have special properties. These are indicated by symbols:
Pictured board section: Bergen, Voss, Hallingdal, Haugesund, Stavanger og Egersund are examples of land areas. The islands that have not been given names are not considered separate land areas. Outside the coast we find Sea Zone III, which borders Haugesund, Stavanger and Egersund. The symbols for victory city, mobilization point and air field can be found in the relevant land areas. The air range from Germany is indicated by the red line, and the dotted line shows the telegraph cable from Egersund. The impassable area in the mountains have been marked with a "no access" sign. On the section of the board three fjords can also be seen – one north of Bergen, one between Bergen and Haugesund, and one between Haugesund and Stavanger. Voss is located by a fjord, and thereby considered adjacent to Sea Zone IV next to it.
- Victory cities are crucial to winning the game. Norway can mobilize reinforcements in these areas.
- The 6 victory cities are Oslo, Kristiansand, Stavanger, Bergen, Trondheim and Narvik.
- Mobilization points can also be used by Norway to mobilize reinforcements.
- The 12 mobilization points are Østfold, Kongsvinger, Hamar, Gjøvik, Hønefoss, Kongsberg, Voss, Åndalsnes, Steinkjer, Mosjøen, Bardufoss and Tromsø.
- Air fields are used to determine air range for German aircrafts (cards) on the board (see detailed explanation below).
Sea Zones The 8 sea zones have been indicated with roman numerals ranging from I to VIII and separated by blue lines. They are not actively used in the basic version of the game, but indicate where Allied and German reinforcements may be placed (see chapter 4.3) and where some action cards may be used for effect.
Sea Zones I and II (separated by a blue line with a red shadow) have been mined by the Germans and are heavily guarded by the Luftwaffe. The Allies therefore may not use the action cards Invasjon (Invasion), Kystbombardement (Coastal bombardment) or Kystevakuering (Coastal evacuation) in land areas adjacent to these sea zones.
- The box named "Skip på raid" (Raiding ships) is only used in the Advanced version (see chapter 7.2).
Impassable Areas Sweden, Denmark and impenetrable mountain areas in Norway are referred to as impassable areas. The mountain areas are colored grey and white and marked with a "no access" sign. No activity is permitted in these areas.
Other Elements on the Game Board
Fjords: Fjords are the light blue water areas (including Mjøsa) that separate certain land areas on the board. Battalions can move across fjords as usual, but attacking across fjords is harder than normal (see chapter 4.2). Defending German or Allied battalions cannot retreat across fjords after losing a combat. A land area by a fjord is considered adjacent to the sea zone next to it.
Air Fields and Air Range: To use Bombefly (Bombers) or Jagerbomber (Fighter bombers) cards in land areas north of the southernmost air range line (indicated with "Fra Tyskland" [from Germany]), Germany must control air fields on the board. The air range lines indicate how far you can reach from the various air fields. All air fields except Bardufoss have air range south to the southernmost areas in Norway. When Germany wants to transport battalions using Transportfly (Air transport) cards, the battalions need start out and end up on air fields already controlled by Germany.
The Telegraph Cable from Egersund: The Telegraph cable is only relevant in the Advanced version (see chapter 5.1).
Card Deck Squares: The card deck squares are marked with the flags of the different factions indicating where the respective card decks are placed.
2.4 Cards
The front, or face, of the card is the side that contains the card description and photo. The back of the cards are decorated with the flag of the faction they belong to.
Action Cards All three factions have separate decks of action cards. The action cards can be used for improving odds in combat, for moving battalions further on the board, and for acquiring reinforcements in the form of new battalions. How well a player manages his action cards is a decisive factor in the game.
Action cards can be used at different times during the sequence of play (including your opponents turns). The function of every card, and how and when it can be used is described in the Appendix. The effect of an action card occurs immediately and is never lasting. In chapter 4 the different action cards are also mentioned in the relevant game phases where they can be played.
Used Action Cards – face up at the bottom of the card deck When the effect of a card has been taken into account the card should be placed at the bottom of its faction's card deck facing up.
Green and Red Symbols Preceding the description of every action on a card is at least one symbol with a number on it.
- The number indicates in which phase (see chapter 4) the action card can be played to achieve that particular effect.
The symbol indicates whether the card can be played in your own or your opponents turn:
- Green "play" symbol: Actions preceded by a green triangle must be played in your own turn.
- Red "stop" symbol: Actions preceded by a red square must be played in your opponent's turn, as a reaction to an action he performs or a card he plays.
- Green circle: Actions preceded by a green circle must be played in your own turn, as a reaction to an action your opponent performs or a card he plays.
Action cards and actions with more than one symbol on it can be played at different times during the sequence of play.
Reinforcements The action cards are all marked with one or more soldier symbols on the lower right hand of the front side. These symbols represent a reinforcement value and are called reinforcement symbols. All action cards can be traded in for reinforcements (counting the reinforcement symbols) during the Reinforcement Phase, instead of being used to achieve the effects described on the card (see chapter 4.3).
Example cards pictured in the manual:
- The back of each card is decorated with the flag of the faction it belongs to – in this case The Allies.
- The first effect on the German card Gebirgsjäger (Mountain troops) can be played in your own turn in phase 2 (combat), while the second effect can be played in phase 2 in your opponent's turn.
- The Norwegian card Sprengt bro (Blown bridge) can only be played phase 1 (movement) of your opponent's turn as a reaction.
- The first effect of the Allied card Panservernkanon (Antitank gun) can be played in phase 2 of your opponent's turn, while the second effect may be played in phase 2 both during your own and during your opponent's turn as a reaction.
- The German card Fallskjermtropp (Paratroopers) can be used in phase 1 of your own turn.
Bold Italic = Action Cards In the game manual whenever action cards are mentioned by name the title is set in bold italic type.
Variations Between the Factions
Germany (62 cards)
- 5 action cards on hand
- Must use at least one card every round
- The game ends when the German card deck is used up
The player in charge of Germany may have up to 5 action cards on his hand, and at the end of his turn draws cards from his deck until he has a full hand of 5 cards. When Germany draws the last unused card in his deck and the first face up card is revealed the game ends and a winner is decided.
Norway (22 cards)
- 3 action cards on hand
- Card deck is reshuffled when used up
The player controlling Norway may have up to 3 action cards on his hand, and at the end of his turn draws cards from his deck until he has a full hand of 3 cards. When the first face up card is revealed after Norway has gone through their entire deck of cards, they reshuffle the card deck and place them face down on the board again. Because Norway will fight as long as resistance is possible they may reuse their cards in this manner throughout the game.
The Allies (28 cards)
- 3 action cards on hand
- Must use at least one card every round
- Does not receive any more cards when their deck has been used up, and must then remove 4 battalions from the board
The player controlling The Allies may have up to 3 action cards on his hand, and at the end of his turn draws cards from his deck until he has a full hand of 3 cards. When the Allied player has drawn his last unused card he receives no more cards – this represents the critical situation at the front in France, and the change of priority at the cost of the Norwegian campaign. When the first face up card is revealed in their deck, the Allies must immediately remove 4 battalions from the board. The Allied player chooses which battalions he wants to remove, and may continue to use any remaining battalions as well as cards on his hand as normal. After this point he is not obligated to use a card every round anymore.
9. April Cards Cards marked with "9. april" on the back are only used in the Advanced version of the game. See description in chapter 6.2.
Ships The ship cards are simply referred to as ships, and are also only used in the Advanced version. See description in chapter 6.1.
3 Preparations and Setup
The three decks of cards are shuffled and placed on their respective card deck areas on the board. The players roll dice to determine which player gets to choose his faction first. Highest die roll gets first choice etc. Players may of course choose to agree on the choice of factions instead of rolling dice.
Germany and Norway start out the basic game with a number of battalions on the board roughly representing the historical positions after the German landing on 9. April 1940.
Germany places the following battalions on the board:
- 2 in Oslo
- 1 in Horten
- 1 in Kristiansand
- 1 in Egersund
- 1 in Stavanger
- 2 in Bergen
- 2 in Trondheim
- 3 in Narvik
Norway places the following battalions on the board:
- 1 in Kongsvinger
- 1 in Gjøvik
- 1 in Hønefoss
- 1 in Voss
- 1 in Steinkjer
- 1 in Bardufoss
- 1 in Gratangen
- 2 in Finnmark
The Allies get 6 battalions as reinforcements in the Reinforcement Phase of their first turn. These may be placed in any land area with a coast line bordering Sea Zones III through VII. The battalions must be placed in 2 stacks of 3 battalions each, and the stacks must be placed in two different land areas that do not border each other. PS! These Allied battalions are reinforcements that arrive in the Reinforcement Phase (phase 3), and therefore may not be used in movement (phase 1) or combat (phase 2) in the same turn.
(The illustration shows initial setup on the board in the Basic version, including the reinforcements that arrive in the reinforcement phase of the first Allied turn.)
4 Sequence of Play
The sequence of play in KoN is divided into player turns. Every player turn consists of four phases. Each player performs all the actions related to the four phases of his player turn before play passes to the next player. A player controlling both Norway and The Allies has two separate consecutive player turns. The completion of the player turns of all three factions is referred to as a game round.
Germany performs the first turn. When Germany has finished their turn play passes on to Norway, and then The Allies. When the Allied player has completed phase 4 of his turn, play passes back to the German player and the second round begins, and so on.
Turn Sequence (Phases)
- Movement
- Combat
- Reinforcement
- New cards
The phases of the player turn are conducted in the order indicated above, and all actions related to one phase must be completed before the player moves on to the next phase. Phase 1 is considered completed once a player has started performing actions related to phase 2, etc.
In addition to the actions the players can perform during their own turn, there are certain actions they can perform during the opponent's turn(s):
- Play action cards with actions preceded by a red square (see chapter 2.4)
- Roll combat dice in defensive battles (see chapter 4.2)
- Retreat after losing a battle (see chapter 4.2)
This part of the game can be just as important as the actions performed during the players' own turns.
4.1 Phase 1: Movement
Phase 1 a) Naval Movement Naval movement does not occur in the Basic version of the game. This phase is described in detail in chapter 8.1 in the Advanced rules.
Phase 1 b) Land Movement All battalions may move one space each turn, into an adjacent land area. Some cards enable your battalions to move further.
Attacking When a player moves one or more battalions into a land area that is occupied by enemy battalions, the movement is considered an attack. Attacks trigger combat between the opposing battalions in the land area in question. The combats take place in the Combat Phase, after the player has completed all movement. A player may attack a hostile land area with battalions from several adjacent land areas. Attacking battalions are placed close to the border of the land area they attack from until the combat has been concluded.
Stacks Several battalions that move together from one land area to another are called stacks.
(Illustrations: a stack of German battalions move from Oslo to Hønefoss. A Norwegian battalion attacks a German battalion in Tynset from Oppdal.)
- ACTION CARDS:
- Germany: Fallskjermtropp (Paratroopers), Rask forflytning (Rapid movement), Transportfly (Air transport)
- Norway: Rask forflytning (Rapid movement)
- The Allies: Invasjon (Invasion), Kystevakuering (Coastal evacuation), Jagerfly (Fighters)
Phase 1 c) Norwegian Sabotage in the German Turn When Germany has completed all movement in their Movement Phase, Norway has the opportunity to use the cards Veisperring (Road block) and Sprengt bro (Blown bridge) (if the player has any of these cards on his hand) before moving on to the Combat Phase. Norway can also use the card Rask forflytning (Rapid movement) to escape an area under attack. Germany may counter the first two cards using Ingeniørkompani (Engineers).
- ACTION CARDS:
- Germany: Ingeniørkompani (Engineers)
- Norway: Rask forflytning (Rapid movement), Sprengt bro (Blown bridge), Veisperring (Road block)
4.2 Phase 2: Combat
Phase 2 a) Naval Combat Naval combat does not occur in the Basic version of the game. This phase is described in chapter 8.2 in the Advanced Rules.
(Illustration: the 7 German battalions that attack yield 5 combat dice. The 4 Allied battalions defending have 4 combat dice.)
Phase 2 b) Land Combat Combat occurs when a land area contains battalions from two opposing factions after movement has been completed. In each area where combat occurs a separate combat is fought and decided. Norway and The Allies can defend together if they both have battalions present in a land area under attack from Germany.
In every combat the players have a chance to play action cards and roll combat dice, in accordance with the sequence described below. The purpose of the combats is to conquer or defend land areas, and to defeat enemy battalions. The victor of a combat gains control of the land area where the combat was fought, and the loser has to retreat with any remaining troops.
- To be able to use action cards in a combat, a player needs to have battalions from the same faction as the card being played present in that combat. The only exception is Jagerfly (Fighters), which can be used even when there are no Allied battalions present.
Note on the dice: the combat dice show the faces 1 to 5 and a sixth face carrying a special "defeat" symbol, which counts as 6 in the totals. The manual prints these faces as symbols; they are written below as numbers (the manual's examples confirm the values, e.g. "Z+U, for a total of 7" is 6 + 1), and the defeat face is written "6 (defeat symbol)".
Combat Dice
- Every battalion = one combat die in combat.
- Each side receives combat dice from a maximum of 5 battalions in each combat, no matter how many of their battalions take part in the combat (Norway and The Allies count as one side in any battle where they defend together).
- Fjords: The number of combat dice received from battalions attacking across a fjord or lake is halved (rounded down).
- Cards can be used to acquire more combat dice. The combat dice acquired from cards are not restricted by the two preceding factors mentioned above.
- 6 (defeat symbol): defeats an enemy battalion
- The side rolling the highest combined total on the combat dice wins the combat. The defender wins if the dice are tied.
Land Combat Sequence The attacker may choose the order in which he wants to fight the combats. Every land combat follows this sequence:
-
Attacker plays cards The attacker plays any action cards he wants to use to affect the current combat. He can play a maximum of one card of each type (Bombefly [Bombers] and Jagerbomber [Fighter bombers] count as the same type) in any one combat.
- ACTION CARDS:
- Germany: Artilleri (Artillery), Bombefly (Bombers), Gebirgsjäger (Mountain troops), Jagerbomber (Fighter bombers), Panzer (Armor), Speidertropp (Scouts)
- Norway: Bakhold (Ambush)
- The Allies: Fransk alpejeger (French mountain troops), Fremmedlegionær (Foreign legion), Kystbombardement (Coastal bombardment), Polsk bergjeger (Polish mountain troops), Stridsvogn (Armor)
- ACTION CARDS:
-
Defender plays cards The defender plays any action cards he wishes to use to counter the cards played by the attacker, and then any other action cards he wants to use to affect the current combat. He may play a maximum of one card of each type in any one combat.
- ACTION CARDS:
- Germany: Artilleri (Artillery), Gebirgsjäger (Mountain troops), Ingeniørkompani (Engineers), Panzer (Armor)
- Norway: Bakhold (Ambush), Panservernkanon (Antitank gun)
- The Allies: Fransk alpejeger (French mountain troops), Fremmedlegionær (Foreign legion), Jagerfly (Fighters), Polsk bergjeger (Polish mountain troops), Stridsvogn (Armor), Panservernkanon (Antitank gun)
- ACTION CARDS:
4.3 Phase 3: Reinforcements
The players may in the Reinforcement Phase of their own turn choose to trade in cards that they still have on their hand for reinforcements, in the form of new battalions to be placed on the board. If a player chooses to use cards for this purpose, he disregards all actions described on the card. Instead his adds up all the reinforcement symbols on the cards he wishes to use to see how many reinforcement battalions he acquires.
- 3 reinforcement symbols equals one new battalion
6 reinforcement symbols equals 2 new battalions and so on (2 reinforcement symbols gives no new battalion, 5 reinforcement symbols equals only one battalion etc.).
Germany
- 1 free reinforcement battalion every round
- May place reinforcements by Sea Zone I and II
Germany receives one free reinforcement battalion every round on his Reinforcement Phase. The German player may place his reinforcements in land areas adjacent to Sea Zone I and II (indicated with a red shadow).
Norway
- May place reinforcements on friendly mobilization points and victory cities
- Maximum 1 reinforcement battalion in each land area
Norway may place any acquired reinforcements in any land area with a mobilization point or victory city which is not occupied by German battalions. The player may place a maximum of one reinforcement battalion in each land area every round.
The Allies
- May place reinforcements by Sea Zones III through VII
The Allies may on their turn place any acquired reinforcements in land areas along the coast adjacent to sea zones indicated with a blue shadow. They may not place reinforcements in land areas adjacent to Sea Zone I and II.
- ACTION CARDS:
- All factions (in their own turn): any action cards used for reinforcements
- Germany: Transportfly (Air transport), Ubåt (Submarine)
- The Allies: Ubåt (Submarine)
4.4 Phase 4: New Cards
Before a player completes his turn and play passes on to the next player, he draws new action cards from his card deck to his hand. A player may only draw action cards on his own turn.
If the German or Allied player has used no action cards this round, they must discard one card from their hand in their New Cards Phase and draw a new action card from their card deck.
- The player controlling Germany in his own turn draws cards until he has 5 cards on his hand
- The player controlling Norway in his own turn draws cards until he has 3 cards on his hand
- The player controlling The Allies in his own turn draws cards until he has 3 cards on his hand
Every following turn then follows the same sequence until the end of the game, when there are no more unused cards in the German deck or a player has defeated all enemy battalions on the board.
Example 1: German Turn
Germany starts their turn with 2 battalions in Oslo, 3 battalions in Gjøvik and one battalion in Kongsvinger. Norway has one battalion in Hamar. (See fig. 1a.)
Phase 1: Movement The Germany player moves the two battalions in Oslo to Hønefoss. This movement cannot be sabotaged by Norway since there are no Norwegian battalions in Hønefoss.
Germany decides to attack Hamar, and indicates this by moving the battalion in Kongsvinger to the Hamar border.
The Germans also wants to include the battalions in Gjøvik in the attack, and moves the three battalions to Mjøsa, the lake separates Gjøvik and Hamar.
When Germany has completed all their moves, Norway has a chance to play their sabotage cards. The Norway player has a Veisperring (Road block) card on his hand which he decides to use against the German battalion moving from Kongsvinger. Since Germany have no Ingeniørkompani (Engineers) cards on their hand, the battalion is moved away from the border back to where it came from.
Phase 2: Combat At the combat at Hamar the defending Norwegian battalion is now facing three German battalions attacking from Gjøvik.
Because the German battalions are attacking across Mjøsa (counts as a fjord) the number of combat dice the German player receives from his battalions is halved. The three battalions only yield one combat die (3 divided by 2 is 1,5, which is rounded down to 1). Norway also receives one combat die from his battalion, but both sides may improve their odds by playing action cards.
- Germany is the attacker this turn and thereby start playing action cards. They choose to play a Panzer (Armor) card which gives them two extra combat dice.
- Norway plays a Bakhold (Ambush) card, giving them two extra combat dice as well.
- Germany however, has a Speidertropp (Scouts) card on his hand, and plays this to cancel the effect of the Bakhold (Ambush).
- Germany rolls three times 2 on his three combat dice, for a total of 6.
- Norway rolls only one combat die, but are lucky and get a 6 (defeat symbol).
- Because Norway rolled a 6 (defeat symbol), Germany have to remove one of their three battalions from the board.
- The totals of the die rolls are tied which means the defender wins the combat and the attacker, Germany in this case, has to retreat.
- The two remaining German battalions are moved back to Gjøvik.
Phase 3: Reinforcement After all combats have been concluded, Germany opts to play a Forsterkninger (Reinforcements) card with 5 reinforcement symbols. 5 reinforcement symbols can be traded in for one new battalion in addition to the one Germany receives for free. Germany places both battalions in Oslo.
Phase 4: New Cards Germany has played three action cards this turn (which have all been placed face up at the bottom of their deck), so they draw three new action cards from the card deck. (Fig. 1b shows the board at the end of the turn.)
Play then passes to Norway.
Example 2: Allied Turn
The Allies have no battalions on the board at the beginning of their turn. Germany has 2 battalions in Åndalsnes. Norway has one battalion at Dombås.
Phase 1: Movement The Allies start the movement phase by playing the Invasjon (Invasion) card, giving him the opportunity to acquire and place reinforcements in his movement phase this turn.
Following this, The Allies play a Forsterkninger (Reinforcements) card with 7 reinforcement symbols, and a Kystevakuering (Coastal evacuation) card with 2 reinforcement symbols. The total of 9 reinforcement symbols can be traded in for 3 new battalions which can be placed on the board. Because the Kystevakuering (Coastal evacuation) card was used to acquire reinforcements, the action described on the card is ignored.
The new battalions may be placed in land areas adjacent to a sea zone with number between III and VII. The Allies choose to employ the battalions in an attack on Åndalsnes. The player places his battalions on the coast line.
Phase 2: Combat The combat in Åndalsnes is a fight between 3 attacking Allied battalions, and 2 defending German battalions. The Allies receive 3 combat dice from their battalions, while the Germans get 2.
- The Allies have used all three action cards from their hand, and may not play further cards to strengthen their attack.
- Germany has no cards on their hand that give a bonus in defense.
- The Allies cannot play any counter action cards.
- The Allies roll 3+5+4, for a total of 12.
- Germany rolls 6 (defeat symbol) + 1, for a total of 7.
- One Allied battalion is defeated and removed as a consequence of the 6 (defeat symbol) rolled by Germany.
- Germany on the other hand has the lowest total on the dice and therefore loses the combat.
- Because Åndalsnes is flanked by fjords facing both Ålesund and Kristiansund, and because Dombås is occupied by a Norwegian battalion the two German battalions have nowhere to retreat. The result of this is that both battalions must be removed from the board.
Phase 3: Reinforcement The Allies have no cards on their hand and receive no reinforcements.
Phase 4: New Cards The cards that have been placed are placed face up at the bottom of the Allied card deck, and The Allies draw 3 new action cards from the top of their deck. (Fig. 2b shows the board at the end of the turn.)
Play then passes to Germany.
Example 3: German Turn
Germany at the beginning of his turn has 2 battalions in Tysfjord. Norway has one battalion in Bardufoss, and The Allies have 2 battalions in Narvik. (See fig. 3a.)
Phase 1: Movement Germany plays a Rask forflytning (Rapid movement) card, enabling up to 2 German battalions to move 2 spaces together. The player chooses to only let one of his battalions take advantage of this special movement, and moves it via Bjørnfjell to the border of Bardufoss to indicate an attack on Bardufoss.
The player uses the other battalion on the board to attack Narvik, and moves it to the border.
Then Germany plays a Fallskjermtropp (Paratroopers) card. The card gives Germany a new battalion which may be placed wherever they want on the board, as long as it is within air range. Since Germany (outside of the map section shown) has a battalion in Trondheim they have air range as far north as Harstad, Narvik and Bjørnfjell – but Gratangen, Bardufoss and Tromsø is out of reach. The player chooses to place the battalion in Narvik, so that it may participate in the attack.
Norway has no Veisperring (Road block) or Sprengt bro (Blown bridge) card on his hand, and may not prevent the German battalion from attacking Bardufoss.
Phase 2: Combat Being the attacker, Germany may choose the order in which the combats will be fought. Germany wants to play out the attack on Narvik first.
In Narvik there are 2 German battalions facing 2 Allied battalions, giving each side 2 combat dice to begin with.
- Germany plays their cards first: Bombefly (Bombers) and Panzer (Armor).
- The Allies could have cancelled the effect of the Panzer (Armor) with a Panservernkanon (Antitank gun), but have none on their hand. They do however have a Jagerfly (Fighters) card, and plays this to cancel the German Bombefly (Bombers).
- If Germany had a Jagerbomber (Fighter bombers) card on their hand, they could have countered the Jagerfly (Fighters) card.
- Germany now has 2 combat dice plus 2 combat dice from the Panzer (Armor) card – in total 4 combat dice. Germany rolls 2 + 6 (defeat symbol) + 3 + 6 (defeat symbol), for a total of 17.
- The Allies have only 2 combat dice, and roll 6 (defeat symbol) + 5, for a total of 11.
- Looking at the number of sixes rolled, we can see that Germany must remove one battalion from the board, while The Allies have to remove both of their's. However, The Allies have a Kystevakuering (Coastal evacuation) card, and play this to rescue one of their defeated battalions. They may place this battalion in a land area adjacent to sea zones III–VII, and choose to place it in Tromsø.
- Germany wins the combat.
- There are no battalions left that need to retreat.
In Bardufoss Germany and Norway have one battalion, and thereby one combat die, each.
- Germany plays no action cards.
- Norway plays no cards either.
- Germany cannot play any counter action cards.
- Germany rolls a 5.
- Norway rolls a 4.
- No battalions are removed.
- Germany's 5 beat Norway's 4.
- Norway must retreat to an available land area. They cannot retreat to Bjørnfjell where Germany attacked from, or Narvik which is now occupied by a German battalion. Norway chooses to retreat to Tromsø, where there is already an Allied battalion.
Phase 3: Reinforcement Germany plays the card Transportfly (Air transport) enabling them to place their free reinforcement battalion on an air field they occupy. Since Germany now has a battalion in Bardufoss, the player chooses to place the reinforcement battalion there too.
Phase 4: New Cards Germany has played all 5 cards from their hand (which have all been placed face up at the bottom of their deck) and draw 5 new cards from the card deck. (Fig. 3b shows the board at the end of the turn.)
Play then passes to Norway.
ADVANCED RULES
Note: in the Advanced Rules the manual prints die results as die-face symbols; they are written here as numbers, with 6 being the face that carries the defeat symbol (see the note on dice in chapter 4.2).
5 New to the Advanced Rules
There are mainly two new elements that differ from the Basic Rules. First, the set up described in chapter 3 is replaced by a special round, called the 9. April turn. Second, the introduction of ships, that can move around the sea zones on the board. Also, the rules regarding placement of reinforcements differ slightly from those of the basic version. Victory conditions are the same.
5.1 New Elements on the Board
Sea Zones Sea zones are important in the Advanced Rules. Ships are placed and move around the sea zones.
- Sea Zones I and II (blue line with a red shadow) are guarded by the German air force, making them inaccessible to Allied ships.
- Sea Zone I through VII borders land areas along the coast.
- Sea Zone VIII borders all sea zones except Sea Zone I.
The Egersund Telegraph Cable A telegraph cable runs from Egersund to Great Britain. If the Germans occupy Egersund in the 9. april turn, the Allies lose one card from their card deck (place this card face up at the bottom of the Allied card deck).
The Raiding Ships Box German ships going on raid are placed in the on-map box titled "Skip på raid" (Raiding ships). See raiding, chapter 7.2.
Air Range at Sea To use Bombefly (Bombers) against enemy ships in a sea zone, Germany needs to occupy an air field adjacent to the sea zone in question. If they control Bardufoss, they may use Bombefly (Bombers) in Sea Zone VII.
5.2 New Card Elements
The action cards work the same way as in the basic rules, with some additions.
Allied Card deck Used Up As in the basic rules The Allies must remove four battalions when their card deck is empty. Now they must also remove 5 ships. They may remove one mindre skip (light warships) and one tung krysser (heavy cruiser), the rest must be slagskip (battleships) and hangarskip (aircraft carriers) if possible.
To use the cards Jagerfly (Fighters), Kystbombardement (Coastal bombardment), Kystevakuering (Coastal evacuation) and Invasjon (Invasion) some prerequisites must be met. These prerequisites are listed at the bottom of each action card.
German Bombers The Bombefly (Bombers) cards may also be used to attack enemy ships in sea zones within air range (see 5.1).
6 New Card Types
6.1 Ships
The ship cards represent one or more ships. These are placed in sea zones face down. All ships of the same faction in the same sea zone are placed in a single stack.
When intercepted by enemy ships they are turned face up (see chapter 8.1). Ship cards are not used in the same manner as april 9. cards or action cards, but can move around the sea zones and are not removed from the game unless sunk in a naval combat.
Enemy Ships Sharing Sea Zone As opposed to enemy battalions, enemy ships may end up sharing a sea zone, also after naval combat have occurred. Their identity is hidden until they are intercepted or intercepting and naval combat occurs. Those ships surviving combat, are after combat once again hidden (turned face down).
Dice and Ships Ships are, like battalions, represented by a die in each combat. Nevertheless, naval combat is quite different from land combat. Ships may sink or chase enemy ships (see chapter 8.2), the more powerful the ship is, the greater its chance of success. The result needed on the die roll is presented below (and on the ship cards). Ships not affected by a result stays in the sea zone when naval combat is over.
(Illustration: the front and back side of the German ship "KMS Blücher" (left, Tung krysser) and the Allied ship "HMS Warspite" (right, Slagskip). At the bottom of the face side the die rolls required for these ships to chase or sink an enemy ship are stated. Blücher: 4 or 5 chases an enemy ship, 6 sinks an enemy ship. Warspite: 3 or 4 chases an enemy ship, 5 or 6 sinks an enemy ship.)
Ships are classified into the following categories:
-
Hangarskip (Aircraft carrier): Allies only. These ships carry torpedo bombers, fighters and reconnaissance aircrafts. This makes them effective in naval combat, and presents the Allies with the opportunity to use Jagerfly (Fighters) cards in land areas adjacent to sea zones where an aircraft carrier is present.
- 5 or 6: Sinks an enemy ship
- 3 or 4: Chases an enemy ship
- Following the loss of a hangarskip (aircraft carrier), 2 action cards are voided from the card deck belonging to the faction of the sunken ship. Place these at the bottom of the deck, face up.
-
Slagskip (Battleship): The battleships are the most heavily armed and armored warships around.
- 5 or 6: Sinks an enemy ship
- 3 or 4: Chases an enemy ship
- Following the loss of a slagskip (battleship), 2 action cards are voided from the card deck belonging to the faction of the sunken ship. Place these at the bottom of the deck, face up.
-
Tung krysser (Heavy cruiser): Heavily armed and armored warships.
- 6: Sinks an enemy ship
- 4 or 5: Chases an enemy ship
- Following the loss of a tung krysser, one action card is voided from the card deck belonging to the faction of the sunken ship. Place this at the bottom of the deck, face up.
-
Mindre skip (Light warships): These cards represent constellations of light cruisers and destroyers.
The Allies May Choose Not to Void German Action Cards When The Allies sink a German ship, the player controlling The Allies may choose whether German action cards should be voided or not (the maximum number of cards voided is still the same for the respective ship categories).
6.2 9. April Cards
These cards are dealt at the start of the game and may only be used during the 9. April turn. Apart from that, they work the same way as regular action cards. The properties of the cards are described on every individual card.
Orange Symbols These symbols on the 9. April cards are the same as on the regular action cards, but they are coloured orange to mark that they all are to be used in the same turn.
- Orange "play" symbol: Play card in 9. April turn
- Orange "stop" symbol: Play card as a reaction to a card your enemy plays, or something he does in the 9. April turn.
Reinforcements All 9. April cards, like the action cards, are marked with one or more reinforcement symbols in the lower right corner on the front. Use of 9. April cards for reinforcements is explained in chapter 7.3.
(Illustration: the back and front side of a Norwegian 9. April card, "Kystfort", pictured with the caption "«Blücher» synker ved Oscarsborg".)
7 The 9. April turn
The 9. April turn replaces the set up described in chapter 3. This turn initiates the game when using the advanced rules, and covers the German landings and the preceding actions. The 9. April turn is the only turn where all the players may perform actions in the same turn (i.e. set up battalions and ships, receive reinforcements and new action cards)
7.0 Initial phase
Choose 9. April Cards and Ships At the start of the 9. April turn, the players choose 9. April cards from their respective card decks.
Germany chooses:
- 5 of their 9. April cards to keep. The rest of the cards are put back in the box face down.
- Germany also gets all his ships and dummy ships
Norway chooses:
- 3 of their 9. April cards. The rest of the cards are put back in the box face down.
- Norway also gets "Eidsvoll & Norge"
The Allies choose:
-
3 of their 9. April cards. The rest of the cards are put back in the box face down.
-
The Allies also get to draw randomly 9 out of their 18 ships. These can be used in the 9. April turn. The rest are put aside to be used after the 9. April turn.
-
- APRIL CARDS:
- The Allies: Skip til unnsetning (Ship to the rescue)
Placement
Norway begins by placing:
- 1 battalion in Finnmark
- 1 battalion in Oslo or any adjacent land area
- 2 battalions on any mobilization points
- "Eidsvoll & Norge" face up in any sea zone except Sea Zone VIII
Germany then places:
- All his ships and dummy ships face down in any sea zone.
Every German ship along the coast, may after naval combat (if not sunk) land 1 battalion (see chapter 7.2). Slagskip (battleships) and tung krysser (heavy cruisers) may also go raiding (see raiding chapter 7.2).
The Allies
-
The Allies then place their 9 randomly drawn ships in any sea zone except I and II. The Allies may, if they want, place their ships in sea zones occupied by German ships, and both sides will then have the opportunity to intercept (see chapter 7.1) the enemy ships if they want.
-
- APRIL CARDS:
- Germany: Villedende manøver (Deceiving maneuver)
- The Allies: Rekognoseringsfly (Reconnaisance aircraft)
- Norway: Omdisponering (Reallocation)
7.1 Phase 1: Movement/Naval interception
Naval Interception This follows the same procedure as naval interception in a normal turn (see chapter 8.1), except no ship may continue moving to another sea zone. Germany is considered the attacker.
-
- APRIL CARDS:
- Germany: Røykdekke (Smoke screen)
Movement There is no normal movement during the 9. April turn. Only Fallskjermtropp (Paratroopers)- and Jagerfly (Fighters)-cards can be used here.
- 9. APRIL CARDS:
- Germany: Fallskjermtropp (Paratroopers)
- Norway: Jagerfly (Fighters)
7.2 Phase 2: Combat
Phase 2a) Naval Combat Naval combat occurs the same way as in a normal turn, see chapter 8.2. Germany is considered the attacker.
-
- APRIL CARDS:
- Germany: Evakuerte matroser (Evacuated sailors)
- The Allies: Stupbombefly (Dive bombers)
Raiding German slagskip (battleships) and tung krysser (heavy cruisers) in sea zones VI, VII or VIII may now choose to go on raid. Ships that go on raid, are placed on the Raiding Ships Box (Indicated by the text "Skip på raid").
- Every German slagskip (battleship) raiding, voids two Allied action cards from the card deck. These are drawn from the top of the card deck and placed face up at the bottom.
- Every German tung krysser (heavy cruiser) voids one Allied action card.
- Action cards are voided only once, in the 9. April turn, and not in consecutive turns.
- Raiding ships may not land battalions.
- Ships choosing to go raiding, may not return to sea zones from The Raiding Ships Box (Indicated by the text "Skip på raid") unless the German player exchanges 6 reinforcement symbols. He may then call his ships back. Germany may do this in his movement phase any time during the game, and the ships may then move as normal that turn. (The Raiding Ships Box (Indicated by the text "Skip på raid") counts as a sea zone bordering sea zones VI, VII and VIII for movement purposes only)
Invasion/Landing Germany may now land one battalion from every German ship in a coastal sea zone. Each invading battalion must land in a land area bordering the sea zone occupied by the ship it was carried by.
Ships landing battalions from the sea zone occupied by "Eidsvoll & Norge", must first conduct a naval combat with "Eidsvoll & Norge" (If "Eidsvoll & Norge" has not already been in a naval combat) before they can land any battalions.
-
- APRIL CARDS:
- Norway: Kystfort (Costal defenses)
- The Allies: Minelegging (Naval mines)
Norwegian Resistance Against Invasion In every victory city invaded by one or more German battalions, the Norwegian player may roll a die to determine if they manage to mobilize in time to resist.
- 5 or 6: One new Norwegian battalion appears in that victory city
Land areas without a victory city does not resist the Germans in the 9. april turn.
Phase 2 b) Land combat Land combat occurs as in a normal turn (see chapter 4.2). Germany is considered the attacker in all land combats in the 9. April turn.
-
- APRIL CARDS:
- Germany: Bløff/trusler (Intimidation), Bombefly (Bombers), Gebirgsjäger (Mountain troops).
7.3 Phase 3: Reinforcements
Norwegian Mobilization After the German Landing Norway may now mobilize, i.e. place battalions on the map:
- 1 new battalion in every victory city not already mobilized (see chapter 7.2) or occupied by Germany.
- 1 battalion for every second mobilization point (rounded down) not occupied by Germany. Norway may choose which of the unoccupied mobilization points to place the battalions upon, but only one may be placed on each.
Reinforcements All players with 9. April cards left, may now exchange these for reinforcements (as in a normal turn, see chapter 4.4)
Germany reinforces first, then Norway, and The Allies goes last. Germany receives a free reinforcement. Rules for placement of reinforcements are described in chapter 8.3.
-
- APRIL CARDS:
- All: Any 9. April card for reinforcements
- Germany: Transportfly (Air transport)
- Norway: Ubåt (Submarine)
- The Allies: Ubåt (Submarine)
7.4 Phase 4: New cards
Removing 9. April Cards Every 9. April card is now removed from the game.
Draw New Action Cards Every player now draws action cards from their respective card decks.
- Germany draws 5 action cards
- Norway draws 3 action cards
- The Allies draw 3 action cards
After the 9. April Turn When the 9. April turn concludes, the German player starts his first ordinary turn the same way as in the basic rules (see chapter 4).
Homefleet and Allied Reinforcements The Allies are dealt their remaining 9 ships at the beginning of their first ordinary turn. These ships are placed on the map in sea zones III through VIII in the first Allied movement phase.
The Allies receive 6 battalions in the reinforcement phase of their first ordinary turn just as described in chapter 3 in the Basic Rules.
(Illustration: a German ship may e.g. move from Sea Zone IV to Sea Zone II, via Sea Zone VIII, to avoid the Allied ships in Sea Zone III.)
8 Sequence of Play – Additions
The Advanced Rules present two additions to the sequence of play: naval movement in the movement phase and naval combat in the combat phase. Naval movement occurs just before land movement, and naval combat occurs just before land combat.
8.1 Phase 1: Movement
Phase 1 a) Naval Movement All ships may move up to two spaces (sea zones) per turn, but if they enter a sea zone containing enemy ships, interception may occur.
All movement for one ship or task force (ships moving together), including interception, is completed before the player moves on to the next ship or task force. All ships starting in the same sea zone and moving along the same route must move together as one task force.
- Allied ships may not move into Sea Zone I or II.
Naval Interception When ships during naval movement enter a sea zone containing enemy ships, both sides get a chance to intercept the opponent's ships.
- The attacker gets only one interception attempt in each sea zone each turn. When he has attempted an interception in a sea zone his ships cannot enter this sea zone for the remainder of his turn.
- Ships attempting to intercept are turned face up. They are turned back face down if interception fails.
Handle one task force (or single ship) at the time:
-
Attacker intercepts The attacker (the player moving his ships) chooses if he wishes to attempt an interception or not. If he wants to make an interception attempt his movement ends in this sea zone, even if his ships has moved only one space. He must attempt to intercept with all or none of his ships present in this sea zone.
Roll a die for every enemy ship in the sea zone where the interception attempt is made.
- 5 or 6: intercepts an enemy ship
- Intercepted ships are drawn randomly among the enemy ships and dummy ships present in this sea zone.
- The ships that have been intercepted are turned face up and have to face their enemies in this sea zone in naval combat (phase 2c).
- Dummy ships that have been "intercepted" are removed from the game, with no further consequences.
- Germany always succeed with interception attempts on "Eidsvoll & Norge".
-
Defender intercepts The defender chooses if he wishes to attempt an interception or not. He must attempt to intercept with all or none of his ships present in this sea zone. The defender follows the same procedure for interception as the attacker.
-
Attacker continues movement The attacker may if he wants continue movement with those of his ships that have not been intercepted or made an interception attempt, and which have only moved one space this far. If the ships enter another sea zone containing enemy ships, both sides get another chance at intercepting the enemy.
Phase 1 b) Land Movement Conducted in the same way as in the Basic Rules (see chapter 4.1).
Phase 1 c) Norwegian Sabotage in the German Turn Conducted in the same way as in the Basic Rules (see chapter 4.1).
8.2 Phase 2: Combat
Phase 2 a) Naval Combat Naval combat serves a somewhat different purpose to land combat. The main purpose of of fighting at sea is to sink or chase the enemy's ships, so that you may give better support to your own battalions on land and prevent your enemy from doing the same. Loss of ships also leads to valuable action cards being voided from the card deck (for Germany and The Allies). This in turn can shorten the game, and give Germany less time to accomplish their objectives. For The Allies the consequence might be that they have to withdraw troops at an earlier stage.
If a faction is alone in having ships present in a sea zone, that faction is considered to be controlling the sea zone. Controlling a sea zone can be necessary to play certain action cards, and has implications for the placement of reinforcements for Germany and The Allies.
- All ships that have been intercepted in phase 1 now take part in naval combat.
- The owner of ships that have been intercepted may choose to include ships that have not been intercepted (in the same sea zone) in the combat.
- The interceptor must include all present ships in the naval combat.
- If "Eidsvoll & Norge" is present in a sea zone where naval combat occurs, it is automatically included on the Allied side.
(Illustration: the intercepted ships have been turned face up. There will be a naval combat between "HMS Warspite" and "Lett krysser med jagere" (Light cruiser with destroyers) on one side, and "KMS Admiral Hipper" on the other. The hidden German ship in the same sea zone is not involved in the combat. In Sea Zone VI all the ships remain hidden from their enemy, and no naval combat occurs.)
Naval Combat Sequence When it has been decided which ships will face each other in combat, the attacker chooses which combat he wishes to fight first, following the sequence below:
-
Attacker plays cards The attacker plays all the action cards he wants to affect the current combat with. He may play a maximum of one action card of each type (Bombefly [Bombers] and Jagerbomber [Fighter bombers] count as the same type) in any single combat.
- ACTION CARDS:
- Germany: Bombefly (Bombers), Ubåt (Submarine)
- The Allies: Ubåt (Submarine)
- ACTION CARDS:
-
Defender plays cards The defender plays the action cards he wants to counter act the attacker's cards with, and then the action cards he wishes to strengthen his defense with. He may play a maximum of one action card of each type in any single combat.
- ACTION CARDS:
- Germany: Ubåt (Submarine)
- The Allies: Jagerfly (Fighters), Ubåt (Submarine)
- ACTION CARDS:
-
Attacker plays counter action cards The attacker plays any action cards he wishes to counter act the defender's cards with.
- ACTION CARDS:
- Germany: Jagerbomber (Fighter bombers)
- ACTION CARDS:
-
Attacker rolls dice The attacker shoots first. He rolls a die for every ship involved in the current combat, starting with his strongest ships and ending with his weakest ships.
Phase 2 b) Land Combat Conducted in the same way as in the Basic Rules (see chapter 4.2).
8.3 Phase 3: Reinforcement
Reinforcements are acquired in the same way as in the Basic Rules (see chapter 4.3), but the rules for placing the reinforcements differ slightly.
Germany Germany may in his turn place reinforcements in:
- land areas adjacent to Sea Zone I and II
- land areas adjacent to a sea zone that does not contain any Allied ships, if also every sea zone south of this sea zone does not contain any Allied ships (Sea Zone VIII does not count)
- land areas adjacent to a sea zone in control of German ships. Maximum number of reinforcement battalions placed is one for every German ship present if there are Allied ships further south.
Norway Norway places reinforcements in the same way as in the Basic Rules (see chapter 4.3).
The Allies The Allies may in their turn place reinforcements in land areas adjacent to Sea Zones III through VII. They may not place reinforcements in land areas adjacent to Sea Zone I or II, or land areas adjacent to sea zones under German control.
- ACTION CARDS:
- Same cards as in the Basic Rules (see chapter 4.3)
8.4 Phase 4: New Cards
Conducted in the same way as in the Basic Rules (see chapter 4.4).
Example 4: 9. April Turn
Initial Phase
Choosing 9. April Cards and Ships: Germany chooses two Fallskjermtropp (Paratroopers) cards, Bombefly (Bombers), Bløff/trusler (Intimidation) and Gebirgsjäger (Mountain troops). The player picks all his ships up on his hand.
Norway chooses Kystfort (Coastal defenses), Jagerfly (Fighters) and Ubåt (Submarine), and pick up "Eidsvoll & Norge".
The Allies choose Rekognoseringsfly (Reconnaisance airplane), Stupbombefly (Dive bombers) and Forsterkninger (Reinforcements). The player draws 9 out of his 18 ships at random to his hand.
Initial Placement: Germany places all their ships and dummy ships in sea zones along the Norwegian coast.
The Germany player chooses to place "Admiral Hipper" and "Karlsruhe" in Sea Zone III, outside Stavanger. He places the ships face down, so his opponents do not know which ships he has placed there. (Germany also place all their other ships, but in this example we will only look at what happens in Sea Zone III and the adjacent land areas.)
The Allies then choose to use Rekognoseringsfly (Reconnaisance airplane) in this sea zone. The player rolls a die for each German ship, and gets 6 and 2 – one of the German ships is discovered and revealed, "Admiral Hipper" is drawn. The ship is then turned face down again.
Now The Allies get to place their ships in the sea zones on the board, and because they know that at least "Admiral Hipper" is present in Sea Zone III, they choose to place "Warspite" and "Lett krysser med jagere" (Light cruiser with destroyers) in this sea zone. The Allied ships are also placed face down. (See fig. 4a.)
Phase 1: Movement/Interception
Naval Interception: Germany does not want to attempt any interception, but The Allies want to intercept the German ships and indicate this by turning their ships face up. The Allies player rolls two dice for a result of 5 and 3, thereby intercepting one German ship. A ship is selected at random and turned face up, and again it is "Admiral Hipper" that is revealed. "Admiral Hipper" now has to fight the Allied ships in the naval combat phase.
Movement: Germany plays their Fallskjermtropp (Paratroopers) card and place a battalion in Stavanger. Norway reacts to this by playing the Jagerfly (Fighters) card. The German battalion must be placed in an adjacent land area, and Norway chooses to put it in Haugesund. (See fig 4b.)
Phase 2: Combat
Phase 2 a) Naval Combat: Germany chooses not to include the unintercepted ship "Karlsruhe", so the combat is fought between "Admiral Hipper" on the German side and "Warspite" and "Lett krysser med jagere" (Light cruiser with destroyers) on the Allied side.
- Germany plays no cards.
- The Allies play Stupbombefly (Dive bombers) and roll a 3 on the die. The dive bombers do not succeed in sinking any German ship.
- Germany cannot play any counter action cards.
- Germany rolls a die for "Admiral Hipper", getting a 1 – which produces no result.
- The Allies roll for their strongest ship, "Warspite", first and get a 5 – which means a German ship is sunk. Since there is only one German ship taking part in the combat there is no need to roll any more dice.
- "Admiral Hipper" is sunk (because it is the only German ship in this combat) and removed from the game. A German action card is also voided from their card deck and placed face up at the bottom.
- No ships are being chased.
- The two Allied ships are turned back face down.
Raiding: No ships are raiding.
Invasion/Landing: Because "Karlsruhe" chose not to fight it is still face down, located in Sea Zone III. This means that the ship can land one battalion in an adjacent land area. Germany turns the ship face up and place a battalion in Stavanger.
Norwegian Resistance at the Invasion: Norway rolls a die to determine whether they are able to mobilize in time to defend Stavanger. He rolls a 6 and thereby gets to place a battalion in Stavanger. (See fig. 4c.)
Phase 2 b) Land Combat: In Stavanger a German battalion is now facing a Norwegian battalion. Each side has one combat die before any cards are played. However, Germany now plays the Bløff/trusler (Intimidation) card, and roll a 3, and as a consequence the Norwegian battalion has to retreat. Norway must retreat to Egersund, the only available land area adjacent to Stavanger.
Phase 3: Reinforcement
Norwegian Mobilization: The Norwegian mobilization occurs outside the map section shown, since there are no mobilization points in this section of the board.
Reinforcements: Germany chooses not to place any of their reinforcements in this section of the board. The other factions do not have enough reinforcement symbols to acquire any reinforcements.
Phase 4: New Cards All players put their remaining 9. April cards back in the box, and draw action cards from their respective card decks.
At the end of the 9. April turn there is one German battalion in Haugesund and one in Stavanger. There is a Norwgian battalion in Egersund. (See fig. 4d.)
APPENDIX: Translation of Cards
Die results are written as numbers (6 = the defeat-symbol face; see the note on dice in chapter 4.2). Asterisks mark the card's footnotes, listed beneath each card as printed.
German Action Cards
Artilleri (Artillery)
- +1 combat die in attack**
- or
- +1 combat die in defense*
- ** May not be used if you attack with Fallskjermtropp (Paratroopers) battalions only
- * Max one Artilleri (Artillery) card in a single combat
Bombefly (Bombers)
- +2 combat dice in attack within air range*
- or
- Advanced rules: 5 or 6: Sink a ship in a naval combat within air range*
- * Max one Bombefly (Bombers) or Jagerbomber (Fighter Bombers) card in a single combat
Fallskjermtropp (Paratroopers)
- One new battalion may be placed in any land area within air range*
- * May be used to attack hostile land areas
- * Placement counts as that battalions movement this turn
Gebirgsjäger (Mountain troops)
- +1 combat die in attack**
- or
- +2 combat dice in defense*
- ** May not be used if you attack with Fallskjermtropp (Paratroopers) battalions only
- * Max one Gebirgsjäger (Mountain troops) card in a single combat
Ingeniørkompani (Engineers)
- Cancels a Veisperring (Roadblock) or Sprengt bro (Blown bridge) card
- or
- +2 combat dice in defense*
- * Max one Ingeniørkompani (Engineers) card in a single combat
Jagerbomber (Fighter Bombers)
- +1 combat die in attack within air range – may not be canceled by Jagerfly (Fighters)*
- or
- Cancels a Jagerfly (Fighters) card
- * Max one Bombefly (Bombers) or Jagerbomber (Fighter Bombers) card in a single combat (only refers to the first effect)
Panzer (Armor)
- +2 combat dice in attack**
- or
- +1 combat die in defense*
- ** May not be used if you attack with Fallskjermtropp (Paratroopers) battalions only
- * Max one Panzer (Armor) card in a single combat
Rask forflytning (Rapid movement)
- 1–2 battalions may move 2 land areas (may also move into combat)*
- * Must move together to the same area
Speidertropp (Scouts)
- +1 combat die in attack**
- or
- Cancels a Bakhold (Ambush) card*
- ** May not be used if you attack with Fallskjermtropp (Paratroopers) battalions only
- * Max one Speidertropp (Scouts) card in a single combat
Transportfly (Air transport)
- 1–2 battalions may move from one airfield to another airfield where at least one German battalion is present*
- or
- 1–2 reinforcements may be placed in an airfield where at least one German battalion is present*
- * Battalions moved with air transport cannot use their normal movement in the same turn
- * The reinforcements must be acquired separately with reinforcement symbols
Ubåt (Submarine)
- 5 or 6: Sink an Allied reinforcement*
- or
- Advanced rules: 6: Sink a ship in a naval combat
- * Use immediately after The Allies place a reinforcement on the board
Forsterkninger (Reinforcements)
- (Reinforcement symbols only.)
German 9. April Cards
Villedende manøver (Deceiving maneuver)
- Play after The Allies have placed their ships on the board. Choose one sea area and roll a die for each Allied ship in that sea zone: 5 or 6: The Allied ship must move to an adjacent sea zone chosen by Germany.
Fallskjermtropp (Paratroopers)
- One new battalion may be placed in any land area within air range*
- * May be used to attack hostile land areas
- * Placement counts as that battalions movement this turn
Bombefly (Bombers)
- +2 combat dice in attack within air range*
- * Max one Bombefly (Bombers) or Jagerbomber (Fighter Bomber) card in a single combat
Transportfly (Air transport)
- 1–2 reinforcements may be placed in an airfield where at least one German battalion is present*
- * The reinforcements must be acquired separately with reinforcement symbols
Gebirgsjäger (Mountain troops)
- +1 combat die in attack*
- * May not be used if you attack with Fallskjermtropp (Paratroopers) battalions only
- * Max one Gebirgsjäger (Mountain troops) in a single combat
Røykdekke (Smoke screen)
- One intercepted German ship may escape naval combat and land a battalion as normal
Bløff/trusler (Intimidation)
- Play at the start of a combat. Roll a die for each Norwegian battalion in that area:
- 5 or 6: The battalion surrenders and is removed from game
- 3 or 4: The battalion retreats to an available adjacent land area of the Norwegian player's choice.
Evakuerte matroser (Evacuated sailors)
- One sunken German ship may land a battalion as normal, before the ship is removed from the game.
Norwegian Action Cards
Veisperring (Roadblock)
- One German battalion must move back to where it attacked from.*
- * Play when Germany has completed movement
- * Norway must have at least one battalion in the area under attack
Sprengt bro (Blown bridge)
- A stack of German battalions must move back to where it attacked from.*
- * Play when Germany have completed movement
- * Norway must have at least one battalion in the area under attack
Bakhold (Ambush)
- +1 combat die in attack*
- or
- +2 combat dice in defense*
- * Max one Bakhold (Ambush) card in a single combat
Rask forflytning (Rapid movement)
- 1–2 battalions may move 2 land areas*
- or
- 1–2 battalions may escape from an area under attack before combat, to an available adjacent area.*
- * Must move together to the same area
- * Can not be used to move battalions into combat, or through areas occupied by enemy battalion(s).
Panservernkanon (Antitank gun)
- +1 combat die in defense*
- or
- Cancels a Panzer (Armor) card
- * Max one Panservernkanon (Antitank gun) in a single combat
Forsterkninger (Reinforcements)
- (Reinforcement symbols only.)
Norwegian 9. April Cards
Jagerfly (Fighters)
- Forces a Fallskjermtropp (Paratroopers) battalion to be placed in a land area adjacent to the intended area. Norway choose which area.
Kystfort (Coastal defenses)
- Play when Germany lands battalions in a land area with a victory city.
- 6: A German ship is sunk (randomly selected among the ships landing battalions in that land area) and may not land its battalion. The remaining ships must land their battalions in other land areas adjacent to the same sea zone.
- 4 or 5: No German battalions may land in the land area with the victory city. The German ships must land their battalions in other land areas adjacent to the same sea zone.
Omdisponering (Reallocation)
- Play after Germany have placed all their ships on the board. One Norwegian battalion may be moved into a land area adjacent to the area it currently occupies.
Ubåt (Submarine)
- 4, 5 or 6: Sink a German reinforcement*
- * Use immediately after Germany places a reinforcement on the board
- * Cannot be used against reinforcements carried by a Transportfly (Air transport) card
Forsterkninger (Reinforcements)
- (Reinforcement symbols only.)
Allied Action Cards
Fransk alpegjeger (French mountain troops)
- +1 combat die in attack*
- or
- +2 combat dice in defense*
- * May not be used in same combat as Polsk bergjeger (Polish mountain troops)
Fremmedlegionær (Foreign legion)
- +2 combat dice in attack
- or
- +1 combat die in defense
Invasjon (Invasion)
- Enables The Allies to place reinforcements in the Movement Phase (phase 1). The battalions may be used to attack hostile land areas.*
- * The reinforcements must be acquired as normal by trading in action cards with reinforcement symbols
- * Can only be used in land areas adjacent to sea zones III–VII
- * Advanced Rules: Cannot be used to place battalions in a land area where the adjacent sea zone is controlled by Germany
Jagerfly (Fighters)
- Cancels a Bombefly (Bombers) card*
- or
- Forces a Fallskjermtropp (Paratroopers) battalion to be placed in a land area adjacent to the intended area. The Allies choose which area.*
- * Can only be used in land areas adjacent to sea zones III–VII
- * Advanced Rules: Requires the presence of a Aircraft carrier in the adjacent sea zone
Kystbombardement (Coastal bombardment)
- Can be used in combats in land areas with a coast line: +2 combat dice in attack*
- * Max one Kystbombardement (Coastal bombardment) card in same combat
- * Can only be used in land areas adjacent to sea zones III–VII
- * Advanced Rules: Requires the presence of a Battleship in the adjacent sea zone
Kystevakuering (Coastal evacuation)
- 1–2 battalion may move from one land area with a coast line to another*
- or
- Evacuate one Allied battalion that has been defeated in combat in a land area with a coast line. The battalion may be placed in another land area with a coast line.*
- * The battalions may not enter combat
- * Can only be used in land areas adjacent to sea zones III–VII
- * Advanced Rules: Cannot be used if the adjacent sea zone is controlled by Germany
Panservernkanon (Antitank gun)
- +1 combat die in defense*
- or
- Cancels a Panzer (Armor) card
- * Max one Panservernkanon (Antitank gun) in a single combat
Polsk bergjeger (Polish mountain troops)
- +1 combat die in attack*
- or
- +2 combat dice in defense*
- * May not be used in same combat as Fransk alpejeger (French mountain troops)
Stridsvogn (Armor)
- +1 combat die in attack
- or
- +1 combat die in defense
Ubåt (Submarine)
- 4, 5 or 6: Sinks a German reinforcement*
- or
- Advanced rules: 5 or 6: Sinks a ship in a naval combat
- * Play immediately after Germany places a reinforcement on the board
- * Cannot be used against reinforcements carried by a Transportfly (Air transport) card
Forsterkninger (Reinforcements)
- (Reinforcement symbols only.)
Allied 9. April Cards
Minelegging (Naval mines)
- Play when Germany lands battalions from ships in a sea zone. Roll a die: 5 or 6: Sinks a random German ship in that sea zone, and prevents the ship from landing a battalion*
- * Action cards are voided from the German card deck for loss of ships as normal
Regognoseringsfly (Reconnaissance airplane)
- Play after Germany have placed all their ships on the board. Choose one sea zone and roll a die for every German ship present in that sea zone: 5 or 6: A German ship is discovered and revealed*
- * Cannot be used in sea zones I, VI or VII
- * The German ships must still be intercepted before combat
Skip til unnsetning (Ship to the rescue)
- Play before any ships have been placed on the board: The Allies may exchange one ship they have drawn for one ship chosen among the remaining ships that have not been drawn
Stupbombefly (Dive bombers)
- Play before all other naval combat: 4, 5 or 6: Sinks a random German ship*
- * May be used in sea zones III–V
- * Sunken ships are randomly drawn from all, hidden and visible, German ships present in that sea zone. If a false ship is drawn, the Stupbombefly (Dive bombers) card does no damage, but the false ship is removed.
- * Action cards are voided from the German card deck for loss of ships as normal
Ubåt (Submarine)
- 4, 5 or 6: Sinks a German reinforcement*
- * Play immediately after Germany places a reinforcement on the board
- * Cannot be used against reinforcements carried by a Transportfly (Air transport) card
Forsterkninger (Reinforcements)
- (Reinforcement symbols only.)