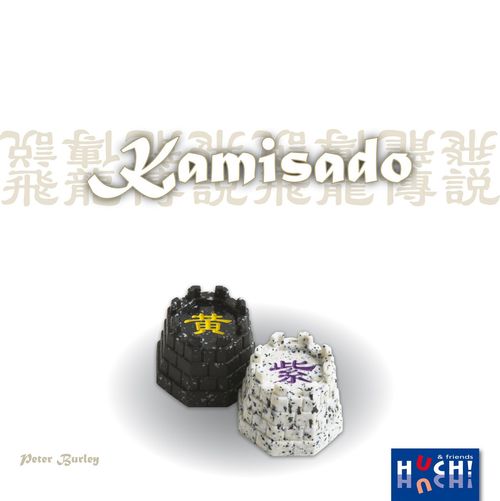
Kamisado
Kamisado Rulebook
Table of Contents
Table of Contents
Kamisado Core Rules
Preparation
Decide who plays white and who plays black. Place the board so that the corners showing the white lotus flowers are nearest to the player using white and the black lotus flowers are nearest to the player using black. Now place all your tiles on your Home Row (i.e. the row nearest to you) so that each tile's colour matches the square it is placed on (i.e. the brown tile on the brown square, the green tile on the green square, etc.).
Aim of the Game
To reach your opponent's Home Row with one of your tiles.
Gameplay
Black starts and selects any tile for his/her first move. After this opening move by black, the players take turns to move one of their tiles, according to the following three rules:
1. Movement
A tile can be moved any number of squares in a straight line, either directly forwards or diagonally forwards (never sideways or backwards). It can only be moved through empty squares, and cannot be placed on a square that already contains a tile. It cannot 'jump over' another tile. A tile may move diagonally between two tiles that are on squares that touch corner-to-corner.
2. Active Tile
On every turn, you must move the tile that matches the colour of the square on which your opponent's previous move ended. This is known as your 'active' tile for this move.
3. Blocking
You must move if you can. But if you can't move your active tile at all because it is completely blocked in every forward direction, your opponent can move again immediately, using the tile that matches the colour of the square that your blocked tile is 'trapped' on.
In theory, it is possible for a 'deadlock' situation to occur, where both players' tiles are placed in such a way that a complete 'chain' of immovable active tiles is formed. In this situation, the player who last moved a tile (creating the deadlock) loses the game.
Victory
The player who is first to reach his opponent's Home Row with one of his/her tiles is the winner (except when a deadlock situation has occurred – see above).
Kamisado Detailed Rules
Game Duration: 20-30 minutes (Single Round); 40-100 minutes (Standard Match); 40-140 minutes (Long Match); 40-180 minutes (Marathon Match)
Equipment
A playing board, divided into 64 squares in eight different colours.
The playing board is double-sided, with one side having Korean icons marked on each square. This has been done to assist those suffering from colour blindness and also for those players who just think it looks better with the beautiful Korean icons added. So you can choose whichever side of the board you like. The game is just the same, but the 'look' is different!
16 octagonal 'icon tile' playing pieces. Of these, eight tiles are white, while the other eight are black.
A punchboard containing 36 octagonal cardboard Alternative Start Position tokens.
Two rulebooks, one in English and the other in Korean.
An Example Moves booklet, which is mainly language-independent.
Gameboard Orientation
If the board has been placed correctly, each player will have an orange square at the right-hand end of his/her home row (and a brown square at the left-hand end of his/her home row).
Note: The game works equally well with the board the other way around (with an orange square on the left and a brown square on the right). However, it has been adopted as a convention that orange should be on the right, and none of the example moves described later in this rulebook will work correctly if you place the board the other way round.
Choosing The Tiles
The more experienced player takes the white tiles, while the other player takes the black tiles. In any match, the player who takes the white tiles for the first round will continue to use the white tiles for the entire match, while his/her opponent will retain the black tiles throughout the match.
Within each set (black and white) each tile is marked with a different icon. These icons (which match those that appear on the 'Korean Icon' side of the board) represent the following Korean items of cultural significance: Yangban Tal Mask (Brown), Celadon Vase (Green), Sam Taegeuk Fan (Red), Chuseok Moon Rabbit (Yellow), Mugunghwa - National Flower (Pink), Dokkaebi - Korean Goblin (Purple), Gyeongbokgung Palace (Blue) and Tiger – National Animal (Orange). Descriptions of these icons can be found on the back page of this rulebook.
These tiles are referred to throughout the rest of this rulebook as 'Icon Tiles'. The icon tiles are identified throughout the rulebook by the colour of the tile (white or black) together with the colour of the icon marked on the top. So, for example, the white tile with the red icon on the top will be referred to as 'White's red tile', while the black tile with the yellow icon will be called 'Black's yellow tile'. The icon tiles are double-sided. One side just has the icon engraved on it. This is called the 'non-Sumo' side of the tile. The reverse side contains the same icon, but with a 'sumo' ring engraved around it. This is called the 'Sumo' side of the tile.
Both players now place all their icon tiles on their own 'home row'. At the beginning of the game, all the tiles must be placed with the ringed side downwards (i.e with their 'non-Sumo' side visible). At this stage they are all ordinary non-Sumo tiles.
Single Round Games
For single round games, players can choose either of these tile placement methods:
Basic Set-up: Tile placement is performed as described in the Kamisado Core Rules. So, for both players, the tile marked with the brown icon is placed on the brown square, the tile marked with the green icon is placed on the green square etc., etc.
Matchplay Set-up: Tile placement is decided by using the octagonal cardboard tokens. The player using the black tiles selects two of these tokens from the face-down pile and then gives the token with the higher number to the player using the white tiles. Both players then set up their tiles according to the strip associated with their number. For further details, please look at "Setting up the Tiles for the next Round" below.
Object of the Game
The game is played in 'rounds'. Within each round, the object is to reach your opponent's 'home row' with one of your icon tiles. The player who manages to do this first scores one point. Before you start playing, decide which type of match you would like to play. You can choose from the following options:
- Single Round (where the first player to score 1 point is the winner)
- Standard Match (where the first player to score a total of 3 points is the winner)
- Long Match (where the first player to score a total of 5 points is the winner)
- Marathon Match (where the first player to score a total of 7 points is the winner)
Multi-round 'Matchplay' Games
For all rounds, including the first round, the setup for the icon tiles is decided as described below in "Setting up the Tiles for the Next Round". For the first round, the two octagonal tokens are picked by the player using the black tiles. For all the rounds that follow, the two octagonal tokens are picked by the player who lost the previous round.
Setting up the Tiles for the Next Round
The player who will be moving first selects TWO of the octagonal tokens at random and turns them over to see the numbers. The higher numbered token is then given to the player who will be moving second. This token will give a very slightly stronger defensive position than the lower numbered one, balancing out any slight advantage gained by the player who moves first. Both players then use the number allocated to them to find their corresponding Matchplay Start Position strip. So if the starting player draws Token 31 and Token 9, Token 31 will be given to the other player and the starting player will keep Token 9.
And now:
The starting player will use Strip 9: Pink; Orange; Green; Purple; Red; Blue; Brown; Yellow.
The other player will use Strip 31: Red; Green; Pink; Brown; Orange; Yellow; Blue; Purple.
Please note that for the starting player, the Pink tile is placed on the Brown square, then the other tiles are placed from left to right until, finally, the Yellow tile is placed on the Orange square. For the other player, the Red tile is placed on the Brown square, then the other tiles are placed from left to right until, finally, the Purple tile is placed on the Orange square. This method for selecting the tile placement provides 1260 (36 x 35) different start positions.
Method of Play (Single Round)
The tiles are set up as described in the "Single Round Games" section above.
The game is played according to the rules explained in the Core Rules.
However, in the sections that follow, fuller descriptions of these rules (and examples of their use) are provided. The diagrams that are referred to within these descriptions are to be found in the booklet 'Example Moves', supplied with this game.
Further Explanation of the Rules
- A tile can be moved any number of squares (in a straight line) either directly forwards or diagonally forwards.
- A tile can even be moved directly from a square in a player's own home row to an empty square in his/her opponent's home row, provided that this move is in a straight line and there are no tiles on any of the squares the tile has to pass through.
- A tile must be moved at least one square if it is at all possible to do so.
- If it is impossible to move the required tile in any way, the player whose turn it is to move that tile has to miss that turn, and his/her opponent moves again immediately.
- It is possible, although extremely unusual and unlikely, to get a situation where both players have tiles which are completely blocked so that they cannot be moved, and for these tiles to interact to form a 'deadlock' situation where no further tiles can be moved at all. In this situation, the player who made the last move prior to the occurrence of the deadlock situation (i.e. the player who 'caused' the deadlock) is considered to have lost the round, and his/her opponent is the winner of that round.
The examples below are provided to help you to understand the 'mechanics' of Kamisado. While reading these examples, you should refer to the diagrams in the separate booklet 'Example Moves'.
Opening Moves
In the example opening that follows, Seojoon is playing against Johan. Seojoon, being the more experienced player, takes the white icon tiles. Johan uses the black icon tiles and has the first move of the round. In any round, the player that moves first is known as the Challenger. The other player is known as the Defender for that round. The player using the black tiles is always the Challenger in the first round of any match. In subsequent rounds, the player who lost the previous round is always the Challenger and takes the first move, and the other player is the Defender.
For his first move, Johan can select any of his eight tiles. Having selected a tile, he can move this tile any number of squares directly forwards or diagonally forwards. If Johan chooses to move his pink tile first, then the possible opening moves for this tile are as shown in Figure 1(a). Alternatively, if Johan chooses to move his red tile, then the moves available are as shown in Figure 1(b).
After Johan's initial move, players take turns to move their icon tiles. Each player, on any given move, must use the tile whose icon's colour matches the colour of the square on which his/her opponent's previous move finished. So if Johan moves his red tile to a blue square, as shown in Figure 2(a), then Seojoon's first move must be with his blue tile. Once again, this tile may be moved any number of squares in a straight line, either directly forwards or diagonally forwards, provided it does not pass through any squares occupied by other tiles belonging to either player. The selection of squares that Seojoon is allowed to move his blue tile to is shown in Figure 2(b). Remember that moves must finish on an unoccupied square and that moves can never be backwards or sideways.
If Seojoon moves his blue tile to the yellow square (shown in Figure 2(c)), then Johan's next move must be with his yellow tile and the moves available to him are shown in Figure 2(d). Figure 2(e) shows Johan's move as being to a purple square, while Figure 2(f) shows all of Seojoon's possible responses with his purple tile. Figure 2(g) shows Seojoon moving his purple tile to a green square. Following on from this, Figures 2(h) and 2(i) display all Johan's potential moves and his actual move to an orange square. Figures 2(j) and 2(k) show Seojoon's options at this point and his actual move (5 squares forwards to a blue square). Figure 2(l) shows Johan's options with his blue tile on his next turn.
You Must Move if you Can!
A tile must be moved at least one square if it is possible to do so.
Figure 3(a) Jinhee has moved her brown tile forward two squares to a blue square.
Figure 3(b) Hajun must then move his blue tile. The only square that he can move this tile to is the pink square as shown in this diagram. Hajun must make this move. He cannot choose to leave his blue tile where it is and 'pass' on this turn.
The only time a player misses his/her turn without moving a tile is when there is no possible move for that tile (see the examples in Figures 4(a) to 4(c) and 5(a) to 5(f) below).
Figure 3(c) In this particular example, Jinhee can now win the round by moving her pink tile three squares forwards to the blue square in Hajun's home row.
What Happens if your Tile is Blocked?
A player who finds that the tile he/she is supposed to be moving is completely blocked (i.e. this tile cannot be moved at all, either forwards or diagonally forwards) must forfeit his/her turn. Although his/her tile remained on the same spot, it is considered that this icon tile has made a (zero-length) move that finished on this square. This means that this player's opponent will move again, using the tile whose icon's colour matches the square on which the blocked player's icon tile was trapped.
An example of a tile being blocked is illustrated in Figures 4(a) to 4(c).
Figure 4(a) Amy's brown tile has just moved forward four squares to a green square.
Figure 4(b) Helen must now move her green tile, if possible. However, this tile is completely blocked by Amy's red and yellow tiles and by her own brown tile. No movement is possible, so Helen has to forfeit this turn. Note that Helen's tile is trapped on a yellow square.
Figure 4(c) Amy takes the next turn, and because Helen's green tile was trapped on a yellow square, Amy will use her yellow tile for this turn. In this particular example, Amy can move her yellow tile three squares forwards onto Helen's 'home row' and win the round.
A more complex example can be seen in Figures 5(a) to 5(f).
Figure 5(a) Steve's blue tile has just moved forward five squares onto a green square.
Figure 5(b) Yena must move her green tile, if possible. However, this piece is completely blocked and she has no forward move. Yena must forfeit her turn. Note that Yena's green tile is trapped on a yellow square.
Figure 5(c) Steve takes the next move, using his yellow tile, because Yena's tile was trapped on a yellow square. But Steve's yellow tile is completely blocked as well, so he must also forfeit his turn. Note that his yellow tile is trapped on a blue square.
Figure 5(d) Yena now moves her blue tile (because that is the colour of square that Steve was trapped on) forward three squares to a yellow square.
Figure 5(e) Steve's yellow tile is still trapped on the same blue square, so he has to forfeit his turn again.
Figure 5(f) Yena can now move her blue tile diagonally forwards two squares to a square on Steve's home row to win the round.
Deadlock!
It is possible to get situations where neither player can move any of his/her tiles in a sequence of moves that repeat indefinitely. These are known as 'Deadlock' situations. When a deadlock situation occurs, the last person to move a tile before the deadlock occurs loses that round! (i.e. the last player to have moved is adjudged to have 'caused' the deadlock – even if they were forced to do so). Deadlock situations are extremely rare, partly because players are careful not to cause them. They can involve a 'perpetually repeating sequence' of two 'trapped' (immovable) icon tiles (one belonging to each player), or four tiles, or six, or more.
Figures 6(a) to 6(e) illustrate a deadlock situation.
Figure 6(a) Minjun's blue tile has just moved forward one square to a green square.
Figure 6(b) Vlora must now move her green tile. There is only one square she can move it to, the red one diagonally to the right. To comply with the rules, she must move at least one square, if it is possible to do so. So she is forced to move to this red square.
Figure 6(c) Minjun must now move his red tile, but this tile is completely blocked by his own brown tile and by Vlora's pink and purple tiles. So he must forfeit his turn. Note that his red tile is trapped on a green square.
Figure 6(d) It is now Vlora's move again immediately, with her green tile. Her green tile is also blocked, by her own red tile and by Minjun's yellow and orange tiles. She is trapped on a red square.
Figure 6(e) Once again, Minjun needs to move his red tile but it is still blocked and trapped on a green square. It is easy to see that we now have a 'Deadlock' situation where the sequence of moves repeats indefinitely, but neither player is able to move. Because Vlora was the last player to actually move a tile, she is considered to have 'caused' the deadlock, and so she loses the round and Minjun is the winner.
The Winner!
When you are playing up to one point (Single Round), the game is over as soon as one player moves an icon tile to his/her opponent's 'home row'. This player will be the winner.
If you wish, you can play a series of single-round games (starting each time with each tile on the square that matches it). Or you can use the Alternative Start Positions tokens to choose different start positions for each round. Score one point for each game, and take turns to play the first move.
Advanced Game Formats
However, if players have agreed to play up to 3, 5, or 7 points, then play moves into a phase that goes beyond the 'Initial Round' as described above. In the rules that follow, each type of match is described separately, but the main new features that are introduced in matches are:
- The concept of a 'Sumo' icon tile
- 'Sumo Push' moves
- The scoring system for a Standard Match, Long Match or Marathon Match
These are described in full in the following sections:
Method of Play (Standard Match)
A Standard Match is played up to 3 points (i.e. the first player to score 3 points is the winner). Start the match by playing an 'Initial Round', exactly as described above for Single Round play, but please note that the start positions for ALL rounds should be determined by using the Alternative Start Positions tokens described above in "Setting up the Tiles for the Next Round". After the end of this first round (and all subsequent rounds), two important things will happen:
A 'Sumo' is Born! The player who won the first (or previous) round flips over the icon tile that went through to the opponent's 'home row', so that the side showing the sumo ring is on top. This tile is now known as a 'Sumo' icon tile. It is restricted in terms of the number of squares it can move, but it has special powers that allow it to make a move called a 'Sumo Push'. Both these aspects of Sumo tiles are discussed in the sections below. Note: If the first (or previous) round ended in a 'deadlock' situation, then the player who did not cause the deadlock flips over the tile that matches the colour of the square that his/her opponent last moved to. If the tile to be flipped is already a Sumo tile, then the player who did not cause the deadlock wins the match! In the 'deadlock' example described above (Figures 6(a) to 6(e)), Minjun flips over his red tile (because that is the colour of the square that Vlora last moved to). Minjun's red tile is now a Sumo tile!
The Icon Tiles Regroup! The tiles are returned to each player's home row, ready for the next round. The order in which the tiles are lined up for this new round is determined by the Challenger drawing two of the Alternative Start Position tokens, as described above in "Setting up the Tiles for the Next Round". The Challenger is the player who will be moving first in the new round. Note that the Alternative Start Position tokens already used in previous rounds are not returned to the 'pool' of tokens between rounds. This ensures that no number is used more than once during any match.
Sumo powers and restrictions!
Rules applying to Sumo icon tiles:
- A Sumo tile is stronger, but slower than a normal icon tile. It may be moved up to a maximum of 5 spaces in a straight line, either directly forwards or diagonally forwards. This restriction on movement can sometimes be critical, especially if it prevents the Sumo tile from reaching the opponent's home row, in situations where it starts its move six or seven squares from the opponent's home row.
- Because a Sumo tile is stronger than a normal tile, it may perform a move called a 'Sumo push' on an opponent's normal (i.e. non-Sumo) tile. For this to happen, the opponent's normal icon tile must, at the beginning of the player's turn, be on the square immediately in front of the Sumo tile, and the opponent must have ended his/her previous move on a square whose colour matches the colour of the Sumo tile. When this happens, the player has the option of using a Sumo push on the opponent's tile. This means that the Sumo tile will move one square forwards, pushing the opponent's tile one square backwards as it goes.
- Immediately after the Sumo push, the opponent misses his/her turn, and the original player (i.e. the one who made the Sumo push) moves again straight away, using the icon tile whose icon's colour matches the square that the opponent's tile was pushed onto.
- A Sumo push cannot be made diagonally. The pushed piece must be on the square immediately in front of the Sumo, at the beginning of the turn when the push occurs.
- There must be an empty square 'behind' the pushed piece for this piece to be pushed into. The colour of this square determines what colour tile the player moves next, after his/her opponent has forfeited their next turn.
- A Sumo cannot push a piece if that piece is on its own home row (i.e. it cannot push a piece 'off the board').
- A Sumo cannot push more than one piece backwards at the same time.
- A Sumo cannot push another Sumo.
- A player can only perform Sumo pushes on his/her opponent's pieces, not his/her own.
- A Sumo push is an option that the player is not obliged to use, if there are alternative diagonally forward moves that bypass the piece which could be pushed.
- However, if the Sumo push is the only move available using the tile concerned, then the player is forced to make the Sumo push and is not allowed to 'pass' on that turn, by doing nothing, when a Sumo push is an available option.
When and How to Perform a 'Sumo Push'
Figures 7(a) to 7(e) show examples of situations in which Sumo Pushes can be carried out.
Figure 7(a) Yoojung has moved her orange tile diagonally forwards two squares to a purple square.
Figure 7(b) Pete must then move his purple tile, which is a Sumo. If he wishes, he can play a 'normal' diagonal move to either a purple or a green square.
Figure 7(c) Alternatively, he also has the option of playing a Sumo Push, by moving his purple tile directly forwards one square, and in the process pushing Yoojung's red tile backwards one square, onto a yellow square.
Figure 7(d) Because Yoojung's tile was 'Sumo-pushed', she misses a turn and Pete moves again immediately. Because Yoojung's tile was pushed onto a yellow square, Pete uses his yellow tile for this next move. The selection of moves that are available to his yellow piece are shown in this figure.
Figure 7(e) In this diagram, an alternative scenario is shown. Yoojung has moved her orange tile diagonally forwards four squares to a purple square (instead of just two squares as in Figure 7(a)). Pete now must make a Sumo Push move (once again advancing his purple tile one square, and pushing Yoojung's red tile back one square onto the yellow square). Pete has no choice here. There is no option available here to 'pass' on this turn. As in the previous example, Pete moves again immediately with his yellow tile, because Yoojung's tile was 'Sumo-pushed' backwards onto a yellow square. The choice of moves available to Pete with the yellow tile is the same as before.
Method of Play (Long Match)
A Long Match is played in exactly the same way as a Standard Match, but is played up to five points instead of three. For scoring system, see below.
Method of Play (Marathon Match)
A Marathon Match is played in exactly the same way as a Standard Match but is played up to seven points instead of three. For scoring system, see below.
Scoring System for Standard, Long and Marathon Matches
Each time a round is won by either player, the icon tile that reached the opponent's home row is flipped so that it becomes a Sumo tile. Each Sumo tile you control is worth one point. So you score a point every time you reach your opponent's home row. You must agree with your opponent, before starting the first round, which kind of match you are playing. Then you must keep playing until one player scores the required total.
- To win a Standard Match, you must score 3 points by obtaining three Sumo tiles
- To win a Long Match, you must score 5 points by obtaining five Sumo tiles
- To win a Marathon Match, you must score 7 points by obtaining seven Sumo tiles
But please note that you can also win ANY of the above types of match by getting ONE of your Sumo tiles to your opponent's home row. This is always an immediate win! (But remember that a Sumo icon tile can only move up to a maximum of five squares per turn.)
This means that:
The winner of a Standard Match (which is up to 3 points) will be either:
- The first player to obtain three separate Sumo icon tiles OR
- The first player to place a Sumo icon tile on his/her opponent's home row
The winner of a Long Match (which is up to 5 points) will be either:
- The first player to obtain five separate Sumo icon tiles OR
- The first player to place a Sumo tile on his/her opponent's home row
The winner of a Marathon Match (which is up to 7 points) will be either:
- The first player to obtain seven separate Sumo icon tiles OR
- The first player to place a Sumo icon tile on his/her opponent's home row
Matchplay Start Position Strips
The printed booklet includes 36 numbered Matchplay Start Position strips (1-36), each showing one fixed ordering of the eight icon tiles across the eight home-row square colours (Brown, Green, Red, Yellow, Pink, Purple, Blue, Orange, left to right). Together with the 36 matching cardboard tokens, these strips provide the 1260 possible start positions used in "Setting up the Tiles for the Next Round" above — see that section for the worked examples of Strip 9 and Strip 31.
Icon Tile Reference
Descriptions of the Korean items of cultural significance depicted on the icon tiles.
Yangban Tal (Brown): Hahoetal masks are the traditional Korean masks worn in the 'Hahoe Pyolshin-gut t'al nori' ceremony dating back to the 12th century. Yangban (the Aristocrat) is one of the 12 characters that are featured in the ritual dance dramas included in this ceremony. The masks are considered to be among the most beautiful and well known images representing Korean culture. There is a colourful legend about a young man named Hur who, in a dream, received instructions from his protecting deity to construct the masks. For the full story, see the Burley Games website.
Celadon Vase (Green): Celadon is a type of pottery that is glazed in the jade green celadon colour and has a type of transparent glaze, often with small cracks. Celadons produced in Korea under the Goryeo Dynasty (918–1392) are regarded as the ultimate classic wares of Korean porcelain.
Sam Taeguk Fan (Red): This traditional Korean fan contains the Sam Taeguk symbol, which is a variation of the Taeguk 'Yin and Yang' symbol that is found on the South Korean national flag. The three part 'Grand Ultimate' symbol is used in Korean Shamanism, Neo-Confucianism, Daoism and Buddhism. It symbolises the Cheon-Ji-In Trinity, where blue represents Heaven, red represents Earth and yellow represents Humanity. Heaven influences Earth, which influences Humanity, which influences Heaven.
Chuseok Moon Rabbit (Yellow): Chuseok is a major holiday in Korea, a mid-autumn festival that is celebrated on the 15th of August on the lunar calendar. The Moon Rabbit has become a symbol for this special holiday. The Moon Rabbit is also called the 'Jade Rabbit' and is said to live on the moon, pounding rice in a mortar in order to make rice cakes. There is an interesting story about the Moon Rabbit, a Fox and a Monkey, which you can read on the Burley Games website.
Mugunghwa (Pink): Mugunghwa, whose name means 'eternal blossom that never fades', has been a vital symbol of Korean culture for centuries. It is now the national flower of Korea. In other parts of the world, the name for it is sometimes 'Rose of Sharon'.
Dokkaebi Korean Goblin (Purple): Dokkaebi are legendary creatures from Korean traditional folklore. They are also known as 'Korean Goblins' and are nature deities or spirits that possess extraordinary powers and abilities that are used to interact with humans. The Dokkaebi come in many different forms, with the most common being the Cham (mischievous), Gae (evil), Gaksi/Chonggak (seductive), Oenun (gluttonous), and Oedari (playful). See the Burley Games website for further descriptions.
Gyeongbokgung Palace (Blue): Situated in northern Seoul, this is said to be the grandest and most beautiful palace in Korea. Built in 1395, it is the largest of the Five Grand Palaces constructed by the Joseon dynasty. Gyeongbokgung continued to serve as the main palace of this dynasty until it was destroyed by fire during the Imjin War (1592–1598). It was then abandoned until the 19th century, when all of the palace's 7,700 rooms were restored during the reign of King Gojong.
Korean Tiger (Orange): The tiger is the national animal of Korea and is strongly associated with Korean culture. It appears in Korean folklore and mythology, and has traditionally been a popular subject in Korean painting and sculpture. For centuries, this top predator was both feared and deeply respected by Koreans, who regarded it as a major bringer of good fortune, alongside the legendary dragon. The mountainous landscape of Korea was once home to a huge tiger population, resulting in the country being known as the 'Land of Tigers'.