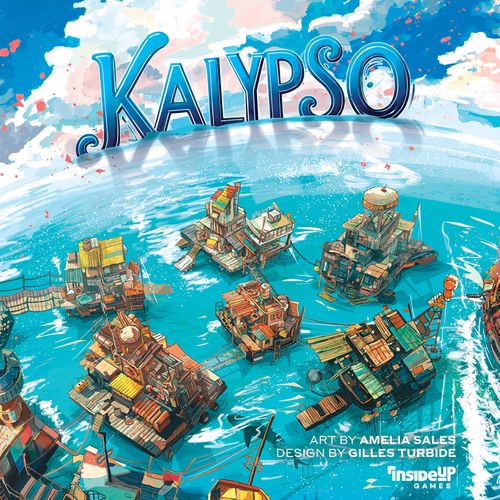
Kalypso
Kalypso Rulebook
Table of Contents
Table of Contents
- Navigating the Rules
- Objectives
- Setup Exclusive to the Competitive Mode
- Setup Exclusive to the Cooperative/Solo Mode
- Player Setup
- Game Setup
- Key Concepts
- Standard Placement Rules
- Game Phases
- Phase 1: Prepare for the Day Ahead
- Phase 2: Replenish Vortexes
- Phase 3: Expand Your Settlement
- Phase 4: Perform End-of-Round Duties
- Winning the Game: Competitive
- Winning the Game: Cooperative/Solo
- Specialists and their Abilities
- Differences by Mode: Competitive, Cooperative, and Solo
Navigating the Rules
Before you begin, decide whether you'll be playing Competitively (against other players), Cooperatively (as a team), or Solo (on your own). Most rules are shared across all game modes. Any time the rules differ between modes, those differences are highlighted using coloured boxes and icons:
- Red for the Competitive Mode
- Blue for the Cooperative and Solo Modes
If you're playing solo, keep an eye out for the solo icon. While most rules are the same as in cooperative play, a few differences for solo players are highlighted throughout the rulebook.
Focus on the rules and highlights that match your chosen mode, and skip the others. When you're ready to try a different way to play, just revisit the colour-coded sections to understand the differences in setup and gameplay. There is also a condensed list of differences on the last page of this rulebook.
Objectives
If this is your first time playing Kalypso, we recommend playing the Competitive Mode, as the Cooperative Mode is a bit more challenging.
Competitive Objective
In a world adrift, only one Settlement will rise above the rest.
Each player's goal is to construct the best Settlement from the salvage they collect. The player who ends the game with the highest score has built the most successful Settlement, and is declared the winner.
Cooperative/Solo Objective
When the world drifts apart, survival means standing together.
Your collective goal is to build a Settlement that shelters and sustains your Community, fulfills your Settlement Goals, and endures weather events.
Players win or lose together. Make it through the final round to keep your Settlement alive and win the game. But if you fail, the waves will swallow you whole.
Setup Exclusive to the Competitive Mode
Personal Play Area
Each player adds the following to their play area:
- 1 Ocean board with the competitive icon faceup (positioned at the bottom edge nearest you).
- 2 Survivors, placed beside their Ocean board.
Universal Components
- 1 Bag o' Salvage
- 1 Bag o' Fish
- 1 Bag o' Scrap
- 120 Salvage tiles
- 60 Fish tokens
- 60 Scrap tiles
- 4 Vortex boards
- 4 Ocean boards
- 15 Monument tiles
- 4 Player aids
- 36 "Rubber" Building tiles
- 32 "Metal" Building tiles
- 32 "Wood" Building tiles
- 32 "Seaweed" Building tiles
- 32 Life Preserver tokens
- 10 Settlement Goal cards
- 48 Survivor figures
- 36 Boat tiles
- 48 Garden/Net tiles
- 40 Barrel tokens
- 28 Forecast cards (4 sets of 7 cards)
Exclusive Components
- 1 Building Reference (back side)
- 1 Scorepad
Setup Exclusive to the Cooperative/Solo Mode
Team Play Area
In the middle of the shared play area, place the Holdfast Connector (currently hidden from view, under the combined Ocean boards).
Then, regardless of player count, place all four Ocean boards on top of the Connector with the cooperative icons faceup, forming the island.
Universal Components
- 1 Bag o' Salvage
- 1 Bag o' Fish
- 1 Bag o' Scrap
- 120 Salvage tiles
- 60 Scrap tiles
- 60 Fish tokens
- 4 Vortex boards
- 4 Ocean boards
- 15 Monument tiles
- 4 Player aids
- 36 "Rubber" Building tiles
- 32 "Metal" Building tiles
- 32 "Wood" Building tiles
- 32 "Seaweed" Building tiles
- 32 Life Preserver tokens
- 10 Settlement Goal cards
- 48 Survivors
- 36 Boat tiles
- 48 Garden/Net tiles
- 40 Barrel tokens
- 28 Forecast cards (4 sets of 7 cards)
Exclusive Components
- 1 Resource Tracker (front side)
- 5 Resource Tracking cubes (plus 1 Round Tracker cube)
- 1 Incoming Survivors card
- 1 Holdfast Connector
Player Setup
Each player collects the following to create their own play area:
- 1 Vortex board, with the "1/3" side faceup (playing solo? Leave the Vortexes in the box!)
- 1 Player aid
- 1 set of 7 Forecast cards (these are the only components with player colours; they're simply used to make sure each player has a full set of Forecast cards)
Game Setup
In a centralized area, within reach of all players:
1. Sort these double-sided tiles by type:
- All Buildings—sorted by background colour into 4 piles
- All Gardens/Nets
- All Monuments
NOTE: If you have space, you may split each group into two faceup piles so that both sides are visible to all players.
In a competitive game, you may store the buildings on the Building Reference board.
2. Form supply piles for each of the following:
- All Boats
- All Survivors
- All Life Preservers
- All Barrels (either side faceup)
3. Place the following into their respective draw bags:
- All Salvage (T-shaped tiles) in the grey Bag o' Salvage
- All Fish in the blue Bag o' Fish
- All Scrap (rectangular 1x2 tiles) in the green Bag o' Scrap
4. Reveal Settlement Goals
Competitive: Shuffle all Settlement Goal cards, then draw 2 and place them faceup within view of all players. Return all other Settlement Goals to the box, as they will not be used for this game.
Cooperative/Solo: Sort the Settlement Goal cards into 2 decks, A and B, according to the label in the bottom right corner of the Cooperative/Solo Objective text box. Shuffle each deck separately, then draw 1 Settlement Goal from each deck, placing them faceup within view of all players. Return all other Settlement Goals to the box, as they will not be used for this game.
5. Populate the Ocean:
Competitive: To prepare their Ocean board, each player completes the following steps simultaneously:
- Take 4 Barrels from the supply and place them (half-submerged side faceup) on the matching icons.
- Take 8 Life Preservers from the supply, placing them on the matching icons.
- Draw 2 Salvage tiles from the Bag o' Salvage. Choose 1 to keep, placing it in any orientation that touches or overlaps with the white circle in the center of your board. Each player returns the Salvage tile they did not place on their board to the Bag o' Salvage.
After all players have finished, return all Life Preservers remaining in the supply to the box, as they will not be used for this game.
Cooperative/Solo: To prepare the shared Ocean board, complete the following steps:
- Take 16 Barrels from the supply and place them (half-submerged side faceup) on the matching icons.
- Take 16 Life Preservers from the supply, placing them on the matching icons.
Each player draws 2 Salvage tiles from the Bag o' Salvage and chooses 1 of their Salvage to keep, following these initial placement conditions:
- Salvage may not overlap the Island or another Salvage tile.
- Each Salvage must be orthogonally adjacent to at least one different side of the Island—no two players may start on the same side.
All players return the Salvage tile they did not place on the board to the Bag o' Salvage.
After setup is complete, return all remaining Life Preservers to the box, as they will not be used for this game.
6. Set your difficulty level:
As a group, decide which difficulty level you'd like to play (Learning/Easy/Medium/Hard), and slide the "Incoming Survivors" card halfway under the board with your chosen difficulty visible to all players. Then, as shown in the "Round 1" column, take the indicated number of Survivors from the supply and place them on the Island.
In a 4-player game of "Learning" difficulty, 3 Survivors are placed on the Island.
New to Kalypso? Start with the "Learning" difficulty level to get your sea legs.
7. Nominate your Steward:
As a group, nominate one player to be your Settlement's "Steward." This player will be responsible for keeping track of the current round number, Fish, Community, Gardens, Solar Panels, and Boats.
The Steward takes the Resource Tracker and places the large cube in the "1" space at the top to indicate the round number. They then place 1 small tracking cube on the numbered space equal to the number of Community Members on the Island. Place the other 4 tracking cubes on the "0" space of the remaining tracks (Fish, Garden, Solar Panel, and Boat).
The Steward is also in charge of forecasting weather events. They shuffle all 7 of their Forecast cards, then place them art side faceup to form a "Forecast Deck" near the Resource Tracker.
The art on the Forecast Deck provides clues to those paying attention.
Key Concepts
Constructing a floating Settlement takes more than just salvage and ambition, it requires careful planning and a solid grasp of construction fundamentals.
In Kalypso, players build multi-layered Settlements across the surface of the Ocean.
- On page 9, you'll learn what Salvage is and how to select the best tile for your growing Settlement.
- On page 10, you'll learn how to place Salvage to expand the Foundation of your Settlement.
- And on pages 11-16 you'll discover how to evaluate and resolve bonuses that are triggered as a result of tile placement.
Before you begin building your Settlement, let's go over a few key concepts to help set you up for success.
The Ocean: A blank canvas for your Settlement
This is where the majority of the game will take place. Among the waves, you'll spot Survivors clinging to hope and half-submerged Barrels ready to be repurposed. These were placed during setup and will become available to you as you build your Foundation (see next page).
The Ocean board
You'll notice a grid overlay on the Ocean board. The grid is defined by its Zones, predefined 4×4 sections marked by bold white borders.
Each Zone may contain a combination of Fish, Life Preservers, and/or half-submerged Barrels.
Any time the term "Zone" is used, it refers specifically to these 4×4 sections. Each Zone is made up of individual squares that define valid placement spaces for tiles (see "Standard Placement Rules" on the next page).
The Foundation: Anchoring Your Settlement
With nothing but waves below, your first task is to create stability from the Salvage you find. The Foundation includes most things placed directly onto the Ocean board.
There are two categories of items placed in this layer: what you salvage and what you produce.
What you salvage
The Salvage you recover from the Vortex is the lifeblood of your Settlement, forming the majority of the Foundation. Strategic placement is key to earning rewards, constructing Buildings and Monuments, and completing objectives.
What you produce
As your Settlement develops, some Buildings will produce valuable resources, some of which (Scrap, Salvage, full Barrels, and Boats) will be placed on the Ocean board.
Your Foundation can consist of any combination of Salvage, Scrap, full Barrels, and docked Boats.
Life Preservers, (non-docked) Boats, Nets, and (half-submerged) Barrels do not count as Foundation.
Important: When you place anything that is part of your Foundation in a position which would cover a half-submerged Barrel or Life Preserver, you collect it from the board, and can use its bonus effect immediately.
The Settlement: From Salvage to Sanctuary
The Settlement is built directly on top of the Foundation, and includes Buildings, Monuments, and Gardens that support and sustain your Community. To place a tile in the Settlement, the entire area beneath it must be covered by Foundation.
Buildings: Surviving to Thriving
Every 2×2 square of materials (see p. 9) in the Foundation can be used to construct 1 of 2 specialized Buildings. Each Building tile is double-sided and shares a background colour with the building material required to construct it.
Each Building shows its Building icon and a number (or an X) in the upper right corner.
During end-game scoring (p. 18) each Building constructed in your Settlement is worth the amount of victory points (VP) indicated by the number in the upper right corner. The number in the upper right corner of each Building tile has no effect on gameplay.
From Survivors to Settlers
Over the course of the game, Survivors will seek refuge at your Settlement. You store them near your player aid or on the island depending on the game mode. They can be assigned to Forecast cards or Houses to satisfy the requirement of a Forecast (see p. 7). Or you can assign them to a Building to trigger its bonus effect (see p. 12).
Once a Survivor has been placed on a Building, including a House, it becomes a "Settler." This will be important when you perform "End-of-Round Duties" in Phase 4. A Settler remains on its Building until the end of the game.
Standard Placement Rules
Every tile placed on the Ocean board must follow these shared rules:
- Tiles may not overlap one another or the central Island.
- The tile must be at least partially within the grid of the Ocean board.
- You may test how a tile fits before committing, but once placed, they cannot be moved.
- All tiles and items must be placed in the same turn they were gained. Vortexes may not be passed, and the round cannot conclude until all tiles/items from that round have been placed.
Game Phases
Kalypso is played over 4 rounds, during which you will push to expand your Settlement, sustain the Survivors you've rescued, and overcome weather events. Every round is played simultaneously, and is split into 4 phases:
Phase 1: Prepare for the Day Ahead i) Determine the Forecast ii) Evaluate the Forecast iii) Gain Rewards iv) Face Penalties
Phase 2: Replenish Vortexes
Phase 3: Expand Your Settlement i) Choose Salvage ii) Place Salvage iii) Evaluate and Resolve Bonuses • Construct a Building • Gain Items from Enclosed Ocean Segments iv) Pass Vortexes
Phase 4: Perform End-of-Round Duties i) Face the Forecast ii) Check Survival Requirements iii) Reset the Vortexes
After the 4th round, the player with the most points wins, or if you survived and completed both Settlement Goals, you win together.
Phase 1: Prepare for the Day Ahead
Every day brings a new challenge. Like the shifting tides, the skies above can turn without warning.
Determine the Forecast
Each player selects one Forecast card (of their own player colour) to pass to a neighbour. The direction depends on the round:
- Rounds 1 and 3: pass counterclockwise
- Rounds 2 and 4: pass clockwise (this is always opposite from the arrows printed on the Vortexes)
Once all players have been passed a Forecast card, they are revealed simultaneously. Each player slides the card they were passed beneath the top of their Ocean board, with only the Forecast title and objective section visible.
There are helpful guidelines and icons at the top of each player's Ocean board indicating where to slide these Forecast cards, from left to right.
The Steward draws the top Forecast card, revealing it faceup.
All other players locate the matching Forecast from their own set of cards. Then all players, including the Steward, slide that Forecast beneath the Ocean board on the side closest to them, with only the Forecast title and objective section visible.
When sliding your card beneath the board, leave enough space to the right for the Forecasts you'll reveal in future rounds.
Evaluate the Forecast
Check the forecast to see what's coming. If you can't overcome the weather event before the end of the round, you will pay the price.
Each Forecast card includes a title, flavour text, and objective, followed by the reward you'll earn if you pass the objective, and the penalty you'll incur if you fail. Most also feature designated spaces to store the required items as they are collected.
During the course of the current round, whenever you should gain an item (Boat, Barrel, Fish, Garden, Scrap) required by the Forecast objective, you must choose to either:
A. Resolve its benefit as normal (p. 8) OR B. Assign the item by placing it directly on the corresponding storage space of the Forecast card, where it will remain for the rest of the game.
Assign Boats, Barrels, Fish, Gardens, and Scrap
These are items your Settlement will either earn or build throughout the game. You'll learn more about gaining these items throughout the rulebook.
Players are free to share items they've gained, working together to help everyone pass the Forecast objective.
Special Case: Assign a Survivor
When a Forecast objective requires a Survivor, you may assign them in the following ways:
If you have Survivor(s) stored near your player aid, you may assign them to the Forecast objective at any time during the round. (When you rescue a Survivor (p. 10), you may either store it near your player aid or assign it directly to the Forecast objective.)
Follow these steps to assign a Survivor to a House:
- Construct a House (p. 12) during the current round.
- Instead of resolving the bonus effect of the House as normal, you may instead assign the Survivor to the House itself, laying it down on the House to indicate it has been claimed for the Forecast objective.
Note: A Survivor may only be placed on a House if the current round's Forecast objective requires it. Doing so does not trigger any bonus effect.
Gain Rewards
If you've satisfied the requirements of the Forecast objective, you'll gain a reward! There are different types of rewards:
Instant benefits
Instant one-time benefits are marked with an icon and are gained as soon as the Forecast objective is met during Phase 3 (for example: +2 Scrap).
If you are rewarded with one or more items, immediately take them from the general supply. Place Fish near your player aid. You must place Boats, Barrels, Salvage, and Scrap on the ocean board before the end of the current turn.
If you gain a Boat from completing a Forecast objective, the Steward immediately increases the Boat track. Only in this way can the Boat track ever exceed the Solar Panel track.
End-Game Victory Points
End-game VP modifiers are marked with a VP icon. Remember to score these rewards as indicated by the card at the end of the game (for example: +1VP per Garden).
If the reward grants additional VP, it will indicate how many additional VP each matching item is worth at the end of the game. This bonus is in addition to any VP earned following the standard scoring rules.
Increasing the Resource Track
Team rewards are marked with an icon and are gained as soon as all players have completed the objective during Phase 3 (for example: Increase Solar Panel track by 1 TOTAL, not per player).
If the team is rewarded with a track increase, the Steward moves the tracking cube up by 1 space, regardless of the number of players.
Face Penalties
Penalties are evaluated during Phase 4: Perform End-of-Round Duties (p. 17). If you have not satisfied all requirements of the Forecast objective, you've failed and will face a penalty.
Losing Victory Points
All competitive penalties modify end-game scoring by reducing VP (for example: -4VP per missing Boat at game end).
If the penalty deducts VP, it will specify how many VP to subtract. In some cases, the amount scales according to how many requirements were missed.
Example: Ann was unable to assign either boat to the Storm's a-Comin' event, and a total of 8VP will be deducted from their overall score.
Game Over
All cooperative/solo penalties are an immediate "Game Over": If one or more players have failed to complete their Forecast objective, the game ends immediately and everyone loses.
Phase 2: Replenish Vortexes
Playing solo? Skip Phase 2 and proceed to Phase 3!
At the start of each round, flip each Vortex to match the current conditions:
- Display side "1/3" faceup in rounds 1 and 3, and
- Side "2/4" faceup in rounds 2 and 4
Then, fill each Vortex by drawing and placing 5 Salvage tiles (at random) from the Bag o' Salvage.
Most folks say the ocean's heartless. But I've seen the things it brings us in the Vortexes… useful things, every day. I think it's trying to help.
Phase 3: Expand Your Settlement
This is the heart of the game, where your Settlement takes shape. During this phase, players draft Salvage tiles and strategically place them to form groupings of identical materials which can then be used to construct Buildings or Monuments.
This phase is divided into four parts, which are performed in the following order:
A) Choose Salvage (p. 9) B) Place Salvage (p. 10) C) Evaluate and Resolve Bonuses (p. 11) D) Pass Vortexes (p. 16)
Steps A–C are performed simultaneously. Once you finish one step, you can immediately move on to the next. Players continue at their own pace, but everyone must finish steps A–C before resolving step D together.
A. Choose Salvage
Simultaneously, each player chooses 1 Salvage tile from their Vortex.
- Every Salvage tile is composed of exactly 5 icons, made up of 2–5 building materials and 0–3 plastic.
- Salvage tiles are double-sided, with the same distribution of icons on both sides. The reverse side of the tile swaps the position of the right and left icons at the top of the "T" shape.
In Solo mode, instead of choosing a Salvage tile from the Vortex, draw 2 tiles from the Bag o' Salvage. Choose 1 to keep, and place the other in the top leftmost cut-out on the Resource Tracker. The Salvage tiles on the Resource Tracker will help you keep track of how many turns you've taken this round.
In solo mode, you'll choose 5 Salvage tiles per round, while in the multiplayer cooperative game, each player chooses 4.
Types of building materials:
- Wood — Its versatility makes it the best choice for building Houses (p. 12) and Coopers (p. 12).
- Metal — Durable and malleable, metal is used for building Solar Panels (p. 12) and Shipyards (p. 13).
- Rubber — A flexible material that is essential for building Warehouses (p. 13) and Scrapyards (p. 13).
- Seaweed — An abundant natural insulator, perfect for building Net Workshops (p. 14) and Greenhouses (p. 14).
- Plastic — Once a cornerstone of the old world, plastic is now a blight on your Settlement and can't be used to build anything on its own. It can only be used as filler, surrounded by proper building materials. Plastic is NOT a building material.
B. Place Salvage
After choosing a Salvage tile from the Vortex, you'll place it on the Ocean board to expand your Foundation. Try to place matching materials together so you can construct Buildings and Monuments in step C.
How to Define Your Foundation
Competitive: At the start of the game, your Foundation consists only of the first Salvage tile placed during setup.
Cooperative/Solo: At the start of the game, your Foundation consists of the Island and all Salvage tiles that were placed during setup.
As the game progresses, your Foundation expands to include all tiles that are orthogonally connected to it, excluding half-submerged Barrels, Life Preservers, and Nets.
Placement Rules for Salvage
In addition to the standard placement rules (see p. 6), the following rules apply:
- Each new Salvage tile must be placed orthogonally adjacent (edge-to-edge) to at least one existing part of your Foundation.
- Diagonal placements (corner-to-corner) are not permitted.
- You may place Salvage so that it would cover a half-submerged Barrel or Life Preserver.
NOTE: When you launch a Boat, it may or may not be part of your Settlement when it is first placed (see p. 13 "Launching a Boat"). However, if at any time a Boat is connected to your Settlement orthogonally (docked), it is considered to be part of your Foundation for the purposes of placement.
No section of the Ocean board "belongs" to any player. All players may place tiles anywhere, following the standard placement rules, even connecting to each other's tiles, whether placed earlier in the game or on the same turn. This allows for collaborative "chaining" of placements as your shared Settlement expands.
Rescuing Survivors and Gaining Barrels
When you place any item (Salvage, Scrap, Boats, or Barrels) in a position which would cover a Life Preserver or a half-submerged Barrel, you remove it from the board, and trigger its bonus effect.
NOTE: Nets cannot be used to rescue Survivors or collect Barrels.
Rescuing Survivors
Life Preservers mark drifting Survivors. When you remove a Life Preserver from the board, it is set aside, out of play for the remainder of the game. Immediately rescue a Survivor from the general supply, adding it:
Competitive: Next to your player aid. During end-game scoring, each Survivor will award you 2VP.
Cooperative/Solo: To the Island. As soon as a Survivor is placed on the Island, the Steward increases the Community track of the Resource Tracker by 1. For the first 5 Survivors rescued in this way, you'll unlock Specialist Abilities (p. 19).
Gaining Barrels
Throughout the game, you can gain full Barrels in 4 ways:
- If you place Salvage, Scrap, Boats, or Barrels so they would cover a half-submerged Barrel on the Ocean board.
- By constructing a Cooper, resolving its bonus effect—producing a Barrel. (See "Cooper" on p. 12.)
- By passing certain Forecast objectives, earning Barrel(s) as a reward.
- By drawing a Fish with a full Barrel icon from the Bag o' Fish.
Placing Barrels
Once a Barrel is gained, it must be placed on the Ocean board before the end of the current turn, orthogonally adjacent to your Foundation, with the full Barrel side faceup. From this point on, the Barrel is part of your Foundation.
"Wild" Material
When constructing Buildings or Monuments, full Barrels are a wild building material. This means that 1 Barrel can be used in place of 1 Wood, 1 Metal, 1 Seaweed, or 1 Rubber.
A Barrel which is half-submerged has not yet been collected and therefore you may not construct on top of it.
C. Evaluate and Resolve Bonuses
After placing your Salvage tile (or any item that expands your Foundation), check to see if your placement has triggered any of the following bonus actions:
- Construct a Building (below)
- Construct a Monument (p. 15)
- Gain Items from Enclosed Ocean Segments (p. 15)
Construct a Building
Now that you've found some stability on the open water, you're ready to construct Buildings that will trigger bonus effects and help your Settlement thrive.
To construct a Building, in addition to the standard placement rules (see p. 6), both of the following conditions must be met:
- The most recent tile you placed must contribute to a completely filled 2×2 area on the Foundation of your Settlement. This area can be made up of any combination of Foundation tiles/items (Scrap, Salvage, full Barrels, and docked Boats).
- Within that 2×2 area, at least 3 of the 4 possible building material icons must be of the same single type: Wood, Metal, Seaweed, or Rubber. Remember that full Barrels are wild and represent any building material of your choice. Plastic is not a building material and can occupy at most 1 space within the 2×2 area. The newly placed tile that contributed to filling the 2×2 square does not have to contribute to the 3+ building materials required for construction.
If both conditions have been met, you may choose to construct a Building, following these steps:
Step 1: From the general supply, take the Building tile that corresponds to the 3+ matching building materials within the 2×2 square.
Step 2: Choose which side of that Building tile to Construct, placing it faceup directly on top of the 2×2 square. The Building you just constructed is now part of your Settlement.
Each Building is specialized, and once constructed, immediately triggers a unique bonus effect, which will be explained on the next 4 pages.
Example: Daniel adds a Salvage tile to his Foundation. While the 2×2 square outline now includes 3 matching Wood icons, one space within the square remains empty. Because the Foundation isn't completely filled, Daniel cannot construct a Building. On a later turn, Daniel extends his Foundation with a Scrap tile. The 2×2 square outlined now satisfies both conditions for constructing a Building, as the square has now been completely filled, and it contains at least 3 building material icons of the same type (Wood in this case).
House
Building Materials Required: 3 of one material type (Wood, Metal, Seaweed, or Rubber) within the 2×2 square.
Earn 1 VP.
Send a Settler to Work
A House provides shelter for 1 of your Survivors, giving you the opportunity to put them to work so they can contribute to your Settlement and grant you the bonus of their "workplace."
When you build a House, follow these steps:
Step 1. Take a Survivor from near your Player Aid or the Island, depending on the game mode.
Step 2. Place the Survivor on top of a Building of your choice. You may not place the Survivor on:
- A House (see note on p.7), or
- A Monument, or
- A building already occupied by a Settler (see below).
Placing a Survivor on a Building does not alter the Building's VP value during end-game scoring.
Step 3. Trigger the bonus effect of the Building you sent the Survivor to.
Building Your Community, from Survivor to Settler
Once a Survivor has been placed on a Building, it becomes a "Settler."
Competitive: During end-game scoring (p. 17), each Settler in your Settlement will award you 3VP, whereas a Survivor beside your player aid only awards 2VP.
Cooperative/Solo: By Phase 4: Perform End-of-Round Duties, every Survivor on the Island must have become a Settler, or else the game is lost (p. 15).
Cooper
Building Materials Required: 3 of one material type within the 2×2 square.
Earn 3 VP.
Produce a Barrel
When you build a Cooper, take 1 Barrel from the general supply and place it full side faceup, orthogonally adjacent to your Foundation. Remember, full Barrels are a wild building material, and can be used in place of 1 Wood, 1 Metal, 1 Seaweed, or 1 Rubber.
Solar Panel
Building Materials Required: 3 of one material type within the 2×2 square.
Earn variable VP (X).
Harness the Sun
Solar Panels provide different bonuses based on the mode you're playing:
Competitive: At the end of the game, each Solar Panel is worth X VP, where X equals the number of visible ocean spaces orthogonally adjacent to the Solar Panel.
Empty ocean spaces, and those with Fish, Life Preservers, Nets, or half-submerged Barrels, as well as "spaces" outside the edge of the board, are considered visible. All other tiles/items block visibility.
Cooperative/Solo: As soon as a Solar Panel is built, the Steward increases the Solar Panel track of the Resource Tracker by 1.
The position of the tracking cube on the Solar Panel track is always directly above the total number of Boats your Settlement can have launched at any given time. For example, 4 Solar Panels can support up to 6 Boats, but if you built a 5th Solar Panel, the limit would be increased to 8 Boats.
Shipyard
Building Materials Required: 3 of one material type within the 2×2 square.
Earn 1 VP.
Launch a Boat
Boats unlock the sea's potential, allowing you to fish new waters (see the bonus effect "Casting a Net" p. 14), collect Barrels, rescue Survivors, or "dock" to expand your Foundation.
When you build a Shipyard, launch a Boat by taking 1 from the general supply, and place it anywhere on the Ocean board, following the standard placement rules (p. 6). A Boat may be placed entirely within a single Zone or across two adjacent Zones.
Before you build a Shipyard, the team should evaluate whether any Boats are needed to complete the round's Forecast objective, or you wish to launch a Boat by placing it onto the Ocean Board.
You may assign a Boat to a Forecast objective regardless of the position of the cube on the Solar Panel track.
However, you may only launch a Boat if the Steward verifies the cube on the Solar Panel track is higher than the cube on the Boat track. Otherwise, you will not be able to launch a Boat, and it will be returned to the supply.
- If a Boat is assigned to a Forecast objective, the Boat track is not increased.
- If a Boat is launched by placing it onto the Ocean board, the Steward increases the Boat track on the Resource Tracker by 1.
Dock a Boat
If a Boat is ever orthogonally adjacent to your Foundation, whether placed as such, or later connected by another tile/item placement, it is now docked and becomes part of your Foundation. Once a Boat is docked, you may place new Salvage, Scrap, or full Barrels orthogonally adjacent to the Boat when expanding your Foundation.
Example: Ann launches a Boat, placing it on a Life Preserver on the Ocean board (removing the Life Preserver, and collecting a Survivor). At this time, the Boat is not orthogonally adjacent to any part of their Foundation, so it is not docked. On a later turn, Ann places a new Salvage tile that expands their Foundation and also happens to create an orthogonal connection to the Boat. With this placement, the Boat becomes docked. From that point on, Ann may expand their Foundation by placing new Salvage, Scrap, or Barrels orthogonally adjacent to the Boat.
Scrapyard
Building Materials Required: 3 of one material type within the 2×2 square.
Earn 3 VP.
Reclaim Scrap
Scrapyards create more Foundation, from waste. When you build a Scrapyard, draw 2 Scrap tiles from the Bag o' Scrap. One at a time, place them orthogonally adjacent to your Settlement. If one or both Scrap placements have triggered any bonus actions, they must be resolved before Vortexes can be passed.
Scrap tiles always contain 1 building material and 1 plastic!
Warehouse
Building Materials Required: 3 of one material type within the 2×2 square.
Earn 1 VP.
Reclaim Salvage
Warehouses are able to repurpose more Salvage. When you build a Warehouse, draw 1 Salvage tile from the Bag o' Salvage and place it orthogonally adjacent to your Settlement. If this placement has triggered any bonus actions, they must be resolved before Vortexes can be passed.
Net Workshop
Building Materials Required: 3 of one material type within the 2×2 square.
Earn 2 VP.
Casting a Net
When you build a Net Workshop, take 1 Net/Garden tile from the supply and place it Net side faceup fully within the same Zone as one of your Boats to Go Fishin'. (You may cast nets from Docked Boats.)
- Only one Net may be cast per Zone.
- A Net can only be used to fish in one Zone, it cannot be cast across two Zones.
- Nets cannot be cast in an enclosed segment (p. 15 "Gain Items from Enclosed Ocean Segments").
Nets serve as a reminder of which Zone(s) have already been fished. However, Nets are not Foundation, and therefore can never be built upon. Nor can they be used to enclose an ocean segment—so place them wisely!
If there is no valid Zone to be fished, the Net is lost and returned to the supply.
Go Fishin'
Count the number of visible fish icons in the Zone you cast the Net, then draw an equal number of tokens from the Bag o' Fish and look at them.
If you draw a Fish with a Barrel icon, reveal it and take 1 Barrel from the supply. The Barrel must be placed before the end of the current turn, with the full side faceup, orthogonally adjacent to your Foundation.
If you draw a Fish with a number:
- Place the Fish with the point value facedown next to your Player Aid, where it will remain until end-game scoring (p. 18). While the number of Fish you have is public information, their point values are not.
- The majority of Fish have a point value of 1, but values range from 0 to 3.
Fish are essential to sustaining your Community!
During Phase 4: Perform End-of-Round Duties, every Settler must be fed 2 Fish, or else the game is lost.
Greenhouse
Building Materials Required: 3 of one material type within the 2×2 square.
Earn 2 VP.
Plant a Garden
When you build a Greenhouse, take 1 Garden/Net tile from the supply and place it Garden side faceup in your Settlement, directly on the Foundation (any combination of Salvage, Scrap, full Barrels, and/or docked Boats). (You may, but are not required to, place the Garden adjacent to the Greenhouse.) If there is no valid placement, the Garden is lost and returned to the supply.
You may place up to 2 Gardens on the Island, in the indicated spaces.
Gardens provide different bonuses based on the mode you're playing:
Competitive: At the end of the game, each Garden is worth X VP, where X equals the combined number of Buildings/Monuments that are orthogonally adjacent to the Garden (up to a maximum of 5VP).
During end-game scoring (p. 18), the VP awarded by each Garden is determined independently. If a Building/Monument is orthogonally adjacent to more than 1 Garden, it scores 1 VP for each Garden.
Gardens are not Buildings/Monuments, therefore adjacent Gardens are not counted towards scoring.
Cooperative/Solo: Gardens are essential to sustaining your Community! As soon as a Garden is built, the Steward increases the Garden track of the Resource Tracker by 1.
The position of the tracking cube on the Garden track is always directly below the total number of Settlers your Gardens can feed each round. For example, 3 Gardens can feed up to 6 Settlers each round, but if you built a 4th Garden, you could feed 7 Settlers.
During Phase 4: Perform End-of-Round Duties, you must have enough Gardens to feed all of your Settlers (meaning the Garden tracking cube must be equal to or higher than your Community tracking cube) or else the game is lost.
Monument
Building Materials Required: 5 of one material type within a 3×3 square.
Earn 11 VP.
Construct a Monument
Although Monuments require a larger Foundation and provide no bonus effect, they can be great for bragging rights!
During end-game scoring, each Monument in your Settlement is worth 11VP. Monuments have no effect on gameplay unless specified by the Settlement goals in play.
Monuments are constructed in the same way as Buildings (p. 11) with the following adjustments:
- Monuments require a 3×3 area of Salvage, Scrap, full Barrels, or docked Boats. (Like Buildings, you may not construct a Monument on top of a Net.)
- Within that 3×3 area, at least 5 of the 9 possible building material icons must be of the same single type: Wood, Metal, Seaweed, or Rubber. (Remember that full barrels are wild and represent any building material of your choice.) Regardless of which building material was used for the Monument, all Monuments have an equal effect on gameplay.
If you've met these requirements, you may construct a Monument.
From the general supply, take any Monument tile, placing it faceup directly on top of the 3×3 square that was formed.
All Monuments have the same effect on gameplay. So pick the one that feels right for your Settlement.
Gain Items from Enclosed Ocean Segments
As your Settlement grows, you may wish to enclose segments of the ocean to collect their items.
How to Enclose an Ocean Segment
To enclose an ocean segment, your Foundation (comprised of Salvage, Scrap, full Barrels, and Boats) must completely surround it. All placement rules must be followed. The Island is also part of your Settlement; therefore, it can help create enclosures.
Example: Daniel expands his Settlement by placing a Boat orthogonally adjacent to a Salvage tile already in his Settlement. Therefore, its placement completes the enclosure of the ocean segment outlined in green.
Ann casts a Net into the same zone as one of her Boats. The Net is not part of her Foundation, so the ocean segment it borders is not considered to be enclosed.
Diagonally adjacent tiles/tokens can contribute to enclosing segments if there is also an orthogonal connection.
Ann expands her Settlement by placing a Salvage tile orthogonally adjacent to a full Barrel already in her Foundation. Because it's also diagonally adjacent to another tile in her Settlement, this placement completes the enclosure of the ocean segment outlined in green.
Daniel wishes to enclose an ocean segment by placing a Salvage tile in an indicated space. However, as this placement is not orthogonally adjacent to his Settlement, he is not allowed to do so.
The borders of Zones and the edge of the Ocean board itself do not contribute to enclosing segments. Ocean segments that are only partially surrounded by borders and Foundation tiles are not enclosed.
Gaining Items
By enclosing an ocean segment, you may gain half-submerged Barrels, Life Preservers, or Fish.
- To gain an item, it must be available and visible within the enclosed ocean segment on the Ocean board. Barrels or Life Preservers that were previously collected are no longer available.
- Items that are covered by your Foundation, Boat(s), and/or Net(s) are also not available.
For each item you enclose, you gain its reward.
Collect a Barrel
Place the Barrel token with the full side faceup to expand your Foundation.
Rescue a Survivor
Return the Life Preserver token to the general supply and rescue a Survivor by adding it near your Player Aid, or to the Island, depending on the game mode.
Caught in the Current
Enclosed Fish provide different rewards based on the mode you're playing:
Competitive: At the end of the game, each enclosed Fish that is visible is worth 1VP.
Cooperative/Solo: Immediately after enclosing 1 or more Fish, the Steward increases the Fish track as many spaces as there are visible Fish.
NOTE: Only fish gained from Nets may be assigned to Forecast objectives. When you enclose a fish, you do not draw any fish tokens, and therefore cannot assign them to the objective.
You Can Only Catch Each Fish Once
Once Fish have been claimed, they cannot be collected again.
If you cast a Net and drew the appropriate number of Fish, you may not claim rewards for the Fish again if you later enclose them.
Likewise, if you claimed Fish by enclosing them, you cannot later cast a Net within the enclosure to draw more Fish.
PASSED the Round's Forecast Objective?
Remember to evaluate your reward to determine if there is an immediate or end-game effect.
Instant one-time benefits are marked with an icon and are gained as soon as the Forecast objective is met.
Team rewards are marked with an icon and are gained after all players have completed the objective.
End-game VP modifiers are marked with a VP icon. Remember to score these rewards as indicated by the card.
D. Pass Vortexes
If players have 2 or more Salvage tiles remaining on their Vortex and all players have finished steps A–C, all players pass their Vortex to their neighbour in the direction shown on the Vortex board: clockwise in rounds 1 and 3, counterclockwise in rounds 2 and 4. Then return to step A: Choose Salvage.
Otherwise, players discard the last Salvage tile on their Vortex board, setting it out of play for the remainder of the game. Then proceed to Phase 4: Perform End-of-Round Duties.
In Solo mode, if there are still spaces for Salvage tiles on the Resource Tracker, proceed by returning to step A: Choose Salvage.
Otherwise, if all 5 spaces on the Resource Tracker have been filled, discard these 5 Salvage tiles (setting them out of play for the remainder of the game), and proceed to Phase 4: Perform End-of-Round Duties.
Phase 4: Perform End-of-Round Duties
At the end of every round, it's time to check in on your Settlement's progress. Have you met the needs of your Community, and were you able to overcome the Forecast objective? These duties must be completed in the following order:
i) Face the Forecast ii) Check Survival Requirements iii) Reset the Vortexes
i) Face the Forecast
Has your Settlement weathered the round's Forecast objective?
PASSED: If you met all requirements of the Forecast objective, its reward was evaluated and resolved (if applicable) during phase 3. Move on to the next end-of-round duty based on your game mode: (ii) for co-op/solo, (iii) for competitive.
FAILED: If you failed to meet all requirements of the Forecast objective, you face a penalty that corresponds to your chosen game mode:
Competitive: During end-game scoring (p. 18) you will lose VP as indicated by the penalty. Flip the Forecast card facedown, placing any resources from the storage area of the card on top. Then proceed to step iii.
Cooperative/Solo: Game Over. If one or more players have failed to complete their Forecast objective, the game is lost.
ii) Check Survival Requirements
Have you sheltered and sustained your community?
1. All Survivors must be sheltered: If any Survivors remain on the Island (meaning they haven't become Settlers), you immediately lose the game.
2. All Settlers must be fed: For each Settler in your Settlement, the Steward reduces the Fish track by 2. If you can't provide enough Fish to feed all Settlers, you immediately lose the game.
Example: Your Settlement has 5 Settlers, who must be fed 2 Fish each (10 Fish in total). However, you only have 9 Fish. This is not enough to feed all of your Settlers, and the game is lost.
3. All Settlers must have access to a Garden: The Steward evaluates the Resource Tracker—if the cube on the Community track is higher than the cube on the Garden track, your Settlers don't have sufficient access to produce and you immediately lose the game.
Example: Your Settlement has 8 Settlers, meaning your Settlement must contain at least 5 Gardens; however, you only have 4. This is not enough to sustain all of your Settlers, and the game is lost.
Leftover Fish and Gardens:
- Any Fish left over after you've fed your Settlers are kept for the next round.
- While Fish are consumed by your Settlers (reducing the Fish track), Gardens are permanent and continue to sustain your Community from one round to the next. The Garden track cube is never reduced.
iii) Reset the Vortexes
Skip this step and proceed as indicated if:
A. You've just completed the 4th round; proceed to "Winning the Game: Competitive" (p.18) or "Winning the Game: Cooperative/Solo" (p.18).
OR
B. You're playing solo, in which case begin the next round by starting with Phase 1: Prepare for the Day Ahead.
More Salvage from the Sea
All players flip their Vortexes to the opposite side. The side that is now faceup indicates the direction in which the Vortexes will be passed in the next round. Begin the next round by starting with Phase 1: Prepare for the Day Ahead.
Winning the Game: Competitive
As the sun sets on the 4th round, it's time to see who's built the most successful Settlement.
- Each player earns 1VP per Fish they've enclosed (if it is still visible) + XVP for Fish beside their Player Aid, where X equals the total point value on the back of all Fish tokens.
- For each Garden, score 1VP per orthogonally adjacent Building, up to a maximum of 5VP per Garden.
- Each player earns VP for their community members: 3VP per Settler on a Building, and 2VP per Survivor near their Player Aid.
- For each Solar Panel, score 1VP per orthogonally adjacent visible ocean space. (Up to a maximum of 7VP per Solar Panel.) Life Preserver tokens/icons, half-submerged Barrel tokens/icons, Nets, and Fish icons do not block visibility.
- Each player earns XVP from both Settlement Goals in play, based on how well they've met each scoring condition.
- Each player earns or loses VP according to the conditions stated on their Forecast cards.
- First, evaluate all faceup cards where the player earns VP as indicated for passing the Forecast objective. Then flip over all facedown cards and deduct VP as indicated for failing the Forecast objective. On the scorepad, record the total VP earned - VP lost.
- Each player earns VP for each of their Buildings and Monuments, according to the value indicated in the upper right corner of the tile.
We recommend scoring Buildings and Monuments last. As you track their VP, rotate the tile 90 degrees as a reminder that it has been scored. This helps prevent double-counting while maintaining the board state for tiebreakers.
The player with the highest score has built the most successful Settlement and wins the game!
Tiebreaker
If two or more players are tied, resolve the tie using the tiebreakers below. Start at the top and continue down the list until the tie is broken:
- The player with the least plastic visible in their Foundation.
- The player with the most Settlers + Survivors.
- The player with the most Monuments.
- The player with the most Buildings.
In the unlikely event that players are still tied, they share the victory.
Winning the Game: Cooperative/Solo
Surviving four rounds on the open sea is no small feat, but one last hurdle stands between you and victory.
Have you met the Settlement goals?
All Settlement goals are checked at the end of the game. If the requirements of one or more Settlement goals have not been satisfied, you lose the game.
If you have accomplished your Settlement goals, then congratulations, you've won the game! You've done what many couldn't, not just surviving but thriving in this new water world.
Lost and need some pointers?
Preparing for Success
As a reminder, in Phase 4 of each round the Forecast objective and all survival requirements must be accomplished or else the game is immediately lost. Here are reminders of these requirements, and how to satisfy them.
Completing the Forecast Objective
- All players, including the Steward, must complete the round's Forecast objective.
- Whenever a player should gain an item required by a Forecast objective, they may resolve its effect as normal, or place it in the storage area of the Forecast card, where it will remain for the rest of the game.
- If you must assign a Survivor to a House, you may do so by building a House, and then assigning a Survivor from the Island to it.
Sheltering and Sustaining Your Community
By Phase 4 of every round, you must meet all survival requirements:
- You must convert all Survivors to Settlers.
- All Settlers must be fed 2 Fish.
- The Garden tracking cube must be equal to or higher than your Community tracking cube.
Specialists and their Abilities
Gaining a Specialist
When you rescue a Survivor (see p. 10), they have the potential to become a Specialist.
First, remove the Life Preserver from the Ocean board as normal. Then take a Survivor from the supply and place it on the Island. As a reminder, this Survivor must become a Settler by Phase 4: Perform End-of-Round Duties, or else the game is lost.
If there's an open Specialist space at the bottom of the Resource Tracker, the Survivor you just rescued can become a Specialist.
Place the Life Preserver in the space matching the ability you want to unlock. That ability becomes active immediately and remains in effect for the rest of the game. Specialist abilities are permanent. Once you place a Life Preserver, it can't be moved.
If there are no open Specialist spaces, set the Life Preserver aside, out of play, for the remainder of the game. In this case, you must still "Rescue the Survivor" by placing it on the Island, but no extra ability is gained.
Specialist Abilities
The Angler
Ongoing Ability: When you cast a Net, you may either cast the Net from a Boat OR into a Zone containing at least some of your Foundation. All other rules for casting a Net still apply.
The Carpenter
Ongoing Ability: When you construct a Building on top of a 2×2 square, you'll trigger the Carpenter's ability if it satisfies both of the following requirements:
- It contains exactly 4 identical building material icons, and
- It does not contain Barrels.
This ability activates the bonus effect of both Buildings on the tile, which may be resolved in the order of your choice.
Once resolved, choose 1 of the 2 Buildings to place faceup on the 2×2 square. If a Survivor is placed on this tile later, only the bonus of the faceup Building will be triggered.
The Guardian
Ongoing Ability: When you've met the requirements to construct a Monument, you may choose to construct a Sanctuary instead.
Monument tiles have Sanctuaries on the reverse side.
Immediately after constructing a Sanctuary, you may remove up to 3 Life Preservers from the Ocean board, placing them on the designated spaces of the Sanctuary.
In addition:
- You must decide how many Life Preservers to move to the Sanctuary at the time it is constructed; unused spaces on the Sanctuary tile may not be filled later.
- Life Preservers you remove from the board in this way may not be placed on the Resource Tracker to unlock other Specialist abilities.
- When you place a Life Preserver on the Sanctuary, you do not "Rescue a Survivor," and therefore do not place any on the Island or increase the Community track of the Resource Tracker. (You also don't gain a Specialist.)
The Salvager
Ongoing Ability: On the last turn of the round, after all players have resolved step C, each player may independently choose whether they wish to place the Salvage tile remaining on their Vortex board instead of discarding it.
(Playing solo? You may choose to place the 5th Salvage tile from the Resource Tracker.)
Once all players have evaluated and resolved any bonuses from this placement, complete step D and then proceed to Phase 4: Perform End-of-Round Duties.
The Captain
Unlike the other Specialists, the Captain has both an ongoing and end-of-round ability.
Ongoing Ability: When you Go Fishin', draw 1 additional token from the Bag o' Fish. Choose 1 token to return to the bag, then resolve the effects of the remaining Fish as normal.
End-of-Round Ability: During Phase 4, immediately after successfully completing step ii, you may choose to move each undocked Boat one Zone.
Each Boat you move this way must remain partially within at least one Zone it occupied at the start of its movement. If it began across two Zones, you may choose which of those Zones it will still be partially within at the end of the round.
Differences by Mode: Competitive, Cooperative, and Solo
Objectives
Competitive: Highest score is declared the winner.
Cooperative/Solo: Shelter and sustain Community, fulfill Settlement Goals, and Forecast Objectives.
Setup
Competitive: 2 Survivors next to your Ocean board.
Cooperative/Solo: Connect all 4 Ocean boards together. Place starting Survivors on Island.
Settlement Goals
Competitive: Shuffle all, draw 2.
Cooperative/Solo: Shuffle A and B decks separately. Draw 1 from each.
Winning the Game
Competitive:
- XVP for Fish (1VP per enclosed Fish + the total value on all Fish tokens)
- 1VP/orthogonally adjacent Building/Monument (per Garden)
- 3VP/Settler, 2VP/Survivor
- 1VP/visible ocean space (per Solar Panel)
- XVP from both Settlement goals
- +/- VP according to Forecast conditions
- VP from Buildings/Monuments
Cooperative/Solo: Each of the 4 rounds, did players accomplish the following?
- Complete their Forecast objective
- Shelter every Community member
- Feed every Community member (Fish and Gardens)
At the end of the game, were both Settlement Goals reached, or exceeded? If yes, you win. If no, you lose.
Determine the Forecast
Competitive: Select one to pass to a neighbour.
Cooperative/Solo: Steward draws and reveals.
Rescuing Survivors
Competitive: Placed next to your Player Aid.
Cooperative/Solo: Placed on the Island. May become Specialist.
Buildings
Competitive: Grant Victory Points (VP and Bonuses)
- Solar Panels: VP per ocean space
- Fishing with Nets: Earn VP from Fish
- Gardens: Earn VP/adjacent building
Cooperative/Solo: Only grant bonuses (no VP)
- Solar Panels: Needed to launch Boats
- Fishing with Nets: Add Fish to track
- Gardens: feed Settlers (not consumed)
Enclosing Fish
Competitive: 1VP/visible Fish at end of game.
Cooperative/Solo: Add 1 Fish to track for each visible Fish (when enclosed).
End-of-Round Duties
Competitive: i) Face the Forecast iii) Reset the Vortexes
Cooperative/Solo: i) Face the Forecast ii) Check Survival Requirements iii) Reset the Vortexes