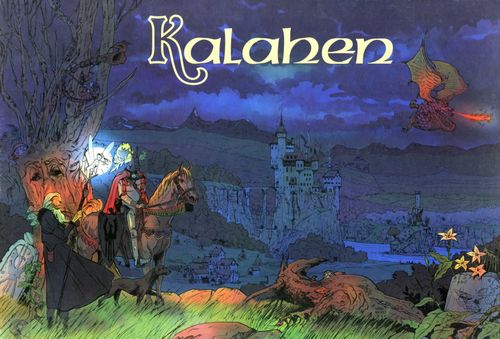
Kalahen
Kalahen Rulebook
Table of Contents
Table of Contents
Presentation of the Rulebook
This rulebook is divided into three parts:
A. General Presentation
B. Basic Rules
C. Complementary Rules
The first part describes the material used.
The second part allows you to play a "simplified" game, which gives new players the opportunity to familiarise themselves with the most important rules.
Finally, the third part offers four rules called "complementary". These are the rules that give the game all its richness and variety. But it is strongly advised to read these rules only after a first "simple" game.
A. General Presentation
Aim of the Game
The player must have his warrior find a magic formula made up of 3 parchments and bring it back to his castle.
The Different Elements of the Game
1. The Board
It represents the map of a fantastic region. One discovers castles, bridges, roads...
On each road, a small red dot indicates the type of landscape crossed: Mountain, Steppe, Forest or Marsh (each shown with its icon).
At one of the corners of the board, to the left of castle A, are four rectangles showing the four types of landscape, each next to a green and red dot.
The roads lead to dots of different colours:
- green dots: the 8 castles
- grey dots: the 4 villages
- yellow dots: the 7 cursed places. The largest, at the centre of the board, represents the Cursed Tower.
- brown dots: the two gates of Kalahen, located between cursed places 5 and 6, and the Cursed Tower
- blue dots: the 4 bridges, which cross certain roads
From the Cursed Tower departs the Crystal Bridge, the only access to the Magic Forest (all at the centre of the board).
2. The Dice
- one 6-sided die (abbreviated d6): from 1 to 6
- one 10-sided die (abbreviated d10): from 0 to 9
- three special dice, engraved from 1 to 3, showing either numbers or dots
Their use is very important throughout the game. (See the annex.)
3. The Rings
Red, yellow, green and blue, these rings represent the magic powers given to the warriors.
4. The Counters
Yellow counters represent gold pieces (abbreviated P.O., pièces d'or):
- 1 large counter = 5 P.O.
- 1 small counter = 1 P.O.
Black counters represent hit points (abbreviated P.V., points de vie). They symbolise the health and strength of the warrior:
- 1 large counter = 5 P.V.
- 1 small counter = 1 P.V.
5. The Danger Markers
- 4 green markers: indicate a safe route for that type of landscape.
- 4 red markers: indicate a dangerous route for that type of landscape.
6. The Trap Markers
- 4 blue markers: Complementary Rules only.
7. The Cards
The colour on the back of the cards determines the different types of card:
-
6 "chest" cards (brown backs), numbered 1 to 6: the Cursed Tower and the Magic Forest (both shown as illustrations on the cards).
-
21 "wandering monsters" cards (yellow backs). Complementary Rules only.
-
78 "chest contents" cards (green / blue / red backs):
-
"Parchment" cards. These are the parchments to be collected in order to assemble the magic formulas (the aim of the game). There are eight different formulas, i.e. eight different series of 3 identical parchments, marked with 1, 2 or 3 stars.
Example: three parchments marked with one, two and three stars (a complete formula).
-
Miscellaneous items:
- Flask (fiole): a healing potion of varying values.
- Purse (bourse): contains a certain number of gold pieces (P.O.).
- Teleportation: this card allows a warrior a magic movement.
-
Key (clef): this key allows access to the Cursed Tower.
-
8. The Figurines
6 warriors, representing the 6 players.
Choosing a Game Master
The game master (maître de jeu) is a full player, but has in addition three tasks to perform:
a) distribute the cards into the chests (see the Basic Rules);
b) read the Table of Events whenever a player requires it. This table is at the centre of the booklet;
c) act as the "bank" for the distribution of rings and of the yellow counters (P.O.) and black counters (P.V.).
How to Live the Adventure
During the game, each player is a warrior, represented by a figurine. At the start, it is in the castle chosen by the player.
This warrior must find the parchments scattered across the Kalahen region. It will therefore have to move from one place to another on the game board: normal movements and magic movements are described in the rules of the game.
Each time a warrior arrives at one of the 7 cursed places or in the Magic Forest, it tries to search the chest there to discover a parchment! To do so, it must first pass a trial where monsters and spells will be waiting for it!
To help it in its quest, the warrior has magic rings. The player must equip themselves judiciously. Crossed rings are shown on the game board at the various cursed places: they allow one to anticipate the colours of rings needed here or there. Thus, at cursed place no. 2, the warrior will no doubt succeed in passing the trial waiting there if it arrives at this place possessing red and green rings.
Beyond this management of magic rings, the player must also manage sensibly their gold resources and their physical resources. Thus, a warrior who loses too many hit points weakens and must therefore heal. As for gold, it must be had (or found) in order to buy healing potions and additional magic rings.
Finally, time management is also important: while trying to finish first, the player will be led to make certain choices, such as healing to regain excellent health, or continuing weakened, at the risk of meeting death at the end of the journey!
B. Basic Rules
- Using the material
- Moving and searching the chests
- Reacting to the various events
- Combat
- End of the game
Using the Material
1. Start of the Game
- Each player chooses a castle and places their figurine there.
- Each player receives 3 rings (colour of their choice).
- Each player receives 3 large yellow counters, i.e. 15 P.O.
- Each player receives 2 large black counters and 2 small ones, i.e. 12 P.V.
Warning: players may never exceed their initial number of P.V.!
- The 4 green danger markers are placed on the 4 green/red dots present on the game board (in the 4 rectangles). The 4 red markers are placed outside the rectangles.
- CARD DISTRIBUTION: the eight "chest" cards are arranged around the game board.
- Under chests no. 1 to 4, place the cards with green backs (4 equal shares).
- Under chests no. 5 and 6, place the cards with red backs (2 equal shares).
- Under the "Cursed Tower" chest, place 12 cards with blue backs. The remainder of the blue cards go under the chest card of the Magic Forest.
- This placement is made AT RANDOM and FACE DOWN.
- Each player rolls 1d10. The player with the highest score begins. Play proceeds clockwise.
2. Hit Points
How to "recover one's health":
- A warrior may buy healing potions (fioles de soins) in the various villages.
- In the chests present at the various cursed places, it is possible to find healing potions.
- A warrior may be healed in its castle by the magician.
How does one lose hit points?
- Through fatigue and the dangers of the journey along the roads.
- When combats are lost.
- When a spell cannot be countered.
State of health: when a warrior has fewer than 5 P.V., searching chests and combat are forbidden to it.
Elimination of a warrior: when a warrior reaches 0 P.V., it is eliminated from the game. This eventuality is very real.
3. Rings
How to obtain them:
- A warrior may buy additional rings in the villages.
- Each time a warrior returns to its castle, it receives 2 rings from the magician.
- In the Magic Forest.
How many may be held: 7 rings maximum. Rings may, however, be left in reserve in one's castle.
How are they used:
- to travel quickly by teleportation: this costs 3 rings.
- to increase one's chances during a combat: 1 ring doubles the score of the special dice; 2 rings triple the score of the special dice.
- to counter a spell at the various cursed places.
- A ring that has been used returns to the initial reserve.
4. Gold Pieces (P.O.)
How does one gain them:
- On each passage through a village.
- By searching the chests of the seven cursed places.
How does one spend them: only on one's turn and in the villages, by buying magic rings and healing potions.
5. Weapons (Shield, Sword)
- Each player may possess only one shield at a time. The same applies to the sword.
- The shield is indispensable for reaching the Crystal Bridge. Moreover, the shield and the sword are very useful at cursed places 5 and 6, as well as at the Cursed Tower.
- Possessing the "shield" card and the "sword" card gives the warrior a bonus during a combat.
Movement and Searching the Chests
1. Practical Layout
When a warrior has left its castle, it is important to distinguish what it takes with it from what remains at the castle.
Each player places near their castle the "parchment" cards already brought back (face up) and the surplus rings.
In front of them, each player sets up a second area where they place the magic rings taken on expedition (7 rings maximum!), their gold pieces and their hit points. It is also there that the cards drawn from the chests, and not yet deposited at the castle, must be placed face down.
2. Moving From One Place to Another
Description:
On their turn, a warrior has the choice between two initial actions:
- Either it passes its turn. In this case, it stays in place and its turn is immediately over. No other action is possible.
- Or it moves. In this case, it has two possibilities.
Normal movement: the player moves their figurine from the dot where it stands to one of the dots accessible along a single stretch of road.
Example: starting from the green dot marked with the letter B, which represents its castle, a warrior may go in one move to the nearest village (grey dot) or to cursed place no. 2 (yellow dot).
Magic movement: a warrior may decide to teleport, that is, to go immediately from one place on the board to another, even a very distant one, by using three magic rings.
WARNING: this movement does not allow one to enter or leave the Cursed Tower.
Cost of these movements:
- When a player makes a normal movement, they look at the road they must take. In its middle is a red dot indicating the nature of the terrain encountered (for example, mountain).
- The player then looks at the danger markers placed on the board (to the left of castle A). If the "mountain" dot is occupied by a green marker, their warrior makes the journey without losing any P.V.
- If the "mountain" dot is occupied by a red marker, their warrior must spend 1 P.V. to make this journey.
- Warning: AFTER moving their warrior, the player changes the colour of the marker present on the "mountain" dot. If there was green, they replace it with red, and vice versa.
- To use teleportation, a warrior must spend 3 rings.
3. Arrival at the Various Places
Arrival at villages:
- Earnings: each time, the player rolls 1d6. The score obtained indicates the number of P.O. they earn.
- Recall that if a warrior decides to pass its turn while it is in a village, it may not roll the die again.
Expenses: a warrior may buy:
-
rings
-
potions (potion = P.V.)
-
For 5 P.O., it may buy 1 ring or recover 1 P.V.
-
For 10 P.O., it may buy 3 rings or recover 3 P.V.
-
For 15 P.O., it may buy 5 rings or recover 5 P.V.
Arrival at a cursed place and searching the chests:
The warrior may decide simply to halt there or, on the contrary, to search the chest of the place.
- If it simply halts, its turn ends there.
- If it decides to search the chest of the place, it refers to the Table of Events (see further on).
It throws the die and applies the consequences. If it manages to foil the spell or defeat any monster, it may search the chest, look at everything in it, but draw only one card of its choice. It may draw another card only on a future passage. Any card thus drawn is placed near the player, face down.
Management of cards drawn from the chests:
-
A player may never possess parchments from more than 3 different formulas (out of the 8 possible).
-
When a warrior drinks a healing flask, it recovers the number of P.V. indicated on the card. Once used, this card is removed from the game.
-
A purse card is immediately exchanged for the number of P.O. indicated on the card.
-
A teleportation card allows one to make this magic movement without spending 3 rings. Once used, this card is removed from the game.
-
Possession of a key card is indispensable in order to be able to go to the Cursed Tower. This card remains valid throughout the game, and each player may possess only one at a time.
-
When a player uses a card, they must naturally show it to the other players.
Arrival at a Gate of Kalahen:
In the basic rules, this place marks a simple halt. A warrior arriving at one of the two gates ends its turn immediately. The particular interest of passing through these gates is explained in the complementary rules.
Arrival at the Crystal Bridge:
A warrior who has arrived at the Cursed Tower may decide, on the following turn, to go to the Magic Forest. To do so, it must cross the Crystal Bridge. It can only go there if it possesses a magic shield. In the same turn, it enters the Magic Forest.
Arrival in the Magic Forest:
- the player rolls 1d6 to determine its loss in P.V.;
- it searches the chest and draws one card;
- it takes 7 rings from the reserve (colour of its choice);
- it is teleported to its castle, where it will leave the surplus rings in reserve.
WARNING: this is the only case in which the return to the castle does not entitle the warrior to 2 additional rings from the magician.
Return to the castle:
- A warrior may only ever return to its own castle.
- There it deposits its "parchment" cards, face up!
- These cards are protected, but known to all (there is always a servant to carry information!).
- The warrior receives from the magician 2 magic rings of its choice (except if it returns from the Magic Forest).
- On the following turn, the warrior may decide to "pass a turn" in order to be healed by its magician. It then rolls 1d6 to see how many P.V. it recovers, and its turn is over. This operation cannot be done two turns in a row.
Table of Events
1. Description of the Table
In the middle of this rulebook is a table which the player acting as "game master" must keep in view throughout the game.
Each column of the Table represents the various events that may occur when a warrior arrives at one of the seven cursed places.
The numbers from 1 to 6 refer to the places which bear a number on the board. The last column is reserved for the Cursed Tower, the most terrifying place.
On arriving at one of the places numbered 1 to 4, the player rolls 1d6. Elsewhere, they roll 1d10.
The score of the die refers to the event of the table corresponding to that number.
Example: place 2, die roll: 3 = COMBAT!
2. Description of the Events
OUF! (Phew!): How lucky: nothing happens.
MAGIC VOYAGE: the warrior is sent, by magic, to one of the six numbered cursed places on the board. To find out which, the player rolls 1d6 and immediately places their warrior at the place indicated by the die. There, the warrior may search the chest without further concern for the Table of Events.
-
COMBAT: the warrior must confront a monster and defeat it. The player rolls the die indicated under the word COMBAT to learn the monster's number of Power Points. The combat is then resolved with the three special dice.
Three power levels for the monsters encountered:
- 1d10: result of the 10-sided die (from 0 to 9 points)
- 6 + 1d6: 6 + result of the 6-sided die (from 7 to 12 points)
- 6 + 1d10: 6 + result of the 10-sided die (from 6 to 15 points)
-
SORTILEGE (spell): the warrior must resist a magic spell. It may counter this spell if it uses rings whose number and colour are specified under the word SORTILEGE. Sometimes it will also be necessary to possess the sword and/or the magic shield.
3. Conclusion of a Combat or a Spell
If the warrior has been able to defeat the monster or counter the spell, it searches the chest and draws one card.
If the warrior is defeated, it may not search the chest and it loses P.V.:
- Places 1 to 4: the player rolls 1 special die. Its warrior will therefore lose 1 to 3 P.V. (whether the score is in points or in numbers).
- Places 5 and 6: the player rolls 1d6 and adds 1. Its warrior will therefore lose 2 to 7 P.V.
- Cursed Tower: the player rolls 1d6 and adds 3. Its warrior will therefore lose 4 to 9 P.V.
Recall that magic rings used return to the reserve.
Combats
1. Combats Against Monsters
When does one meet a monster?
In a cursed place. If the die roll gives the event "COMBAT", the player must roll the die indicated by the Table of Events, to learn the number of Power Points of the monster to be defeated.
Example: the warrior is at cursed place no. 5 and rolls a 4 on the die. It must therefore fight a monster, and this one has 1d6 + 6 power points. The player then rolls 1d6 and obtains 5: the monster will therefore have 5 + 6 = 11 power points.
How does the combat proceed?
The player uses the 3 special dice (see annex).
As soon as the monster's power has been determined, the player may decide to increase their chances by using 1 or 2 magic rings:
- With 1 ring, the score of the special dice is doubled.
- With 2 rings, the score of the special dice is tripled!
If it achieves a score equal to or greater than the monster's number of Power Points, the monster is defeated.
Otherwise, the warrior has lost. This defeat costs it P.V., the calculation of which is recalled on the Table of Events.
2. Combat Between Two Warriors
-
When two warriors find themselves in the same place, each has the possibility of declaring combat.
-
If the attacked warrior has fewer than 5 P.V., it is defeated automatically.
-
Before the combat, each player (in order to double or triple their score on the dice) secretly takes 0, 1 or 2 rings from among those their warrior still has with it. The two players then open their hands, and each sees the "bonus" the other will have for using the special dice.
-
The rings used return to the reserve.
-
In case of victory, the winning player may in any case take one item from the loser:
- either a "parchment" card (unprotected);
- or a "flask", "key", "shield" or "sword" card;
- or a magic ring.
In addition:
- if the attacking player wins, the other loses 1 P.V.;
- if the attacked player wins, the attacker loses 3 P.V.!
It is therefore necessary to think carefully before declaring a combat.
-
A warrior may never attack the same opponent two turns in a row.
End of the Game
When a player has managed to bring a complete formula back to their castle, their quest is nearly over. On the same turn, one last trial remains to be passed: defeat the dragon which awaits in front of the castle!
This dragon has 18 Power Points and fights like a monster, with all the bonuses available to the warrior.
- If it wins, it becomes the new master of Kalahen and the game is over.
- Otherwise, it loses only 1 P.V. (thanks to its magician) and must try the trial again the following turn.
And so on: one combat per turn, until victory.
If after a failure the warrior no longer has enough rings or P.V. to hope to win, it devotes 2 turns (or more) to restocking in the nearest village.
Annex
How to Obtain a Score with the Special Dice
a) The player rolls the three dice a first time and calculates their score as follows:
- they add the values expressed in numbers;
- they add the values expressed in points;
- they subtract the smallest result from the largest.
(In the examples below, a die face bearing a number is written as a number and a die face bearing dots as "points". The score is: sum of the numbers, minus the sum of the points, with the smallest result subtracted from the largest, as printed.)
- Example 1: points die 3 + points die 1 = 4 (points: 4); numbered die 2 (numbers: 2). Score = 4 − 2 = 2.
- Example 2: numbered dice 3 + 1 + 1 = 5 (numbers: 5); no points dice (points: 0). Score = 5 − 0 = 5.
- Example 3: numbered die 3 (numbers: 3); points dice 2 + 1 = 3 (points: 3). Score = 3 − 3 = 0.
- Example 4: numbered dice 1 + 1 = 2 (numbers: 2); points die 3 (points: 3). Score = 3 − 2 = 1.
b) If the player is not satisfied with their score, they re-roll a second time 1, 2 or all 3 dice (as in poker). They then redo the calculation explained above.
c) A third and final time, the player may modify their score by re-rolling 1, 2 or 3 dice. The result then obtained is the final score.
d) If the warrior possesses either the shield or the sword, it adds 1 to its final score. (The score of the special dice may therefore be increased by 2 if one possesses both weapons.)
Example 1: the player possesses the shield, but not the sword.
- 1st throw: 3 (numbered), points die (3), 1 (numbered). Score: 4 − 3 = 1.
- The player decides to keep the 3 and re-roll the two other dice.
- 2nd throw: points die (3) and 2 (numbered). With the 3, this gives a score of 5 − 3 = 2.
- The player decides to keep 3 and 2 and re-roll the last die.
- 3rd throw: points die (1).
- The table then shows: 3, 2, points die (1). Final score: 5 − 1 = 4, to which 1 must be added thanks to the shield. Corrected final score: 5.
Example 2: the warrior has a shield and a sword.
- 1st throw: 1 (numbered), 1 (numbered), points die (1). Score: 2 − 1 = 1.
- The player decides to re-roll all three dice and obtains: points die (3), 1 (numbered), points die (2).
- 2nd throw of example 2: the player keeps points dice 3 and 2 and re-rolls the last die.
- 3rd throw: points die (1).
- Final score: 3 + 2 + 1 = 6, to which 2 must be added thanks to the shield and the sword. Corrected final score: 8.
Example 3: the warrior has neither shield nor sword.
- 1st throw: points die, 2 (numbered), points die. Score: 2 − 2 = 0.
- The player decides to keep the 2 (numbered).
- 2nd throw: two points dice. The 2 kept gives a score of 5 − 2 = 3.
- The player decides to re-roll the 2 (numbered).
- 3rd throw: points die (1).
- The player therefore finally has: 3, 2, points die (1). Final score: 5 − 1 = 4 (not corrected, as the warrior has no weapons).
C. Complementary Rules
What these rules offer:
- Additional traps, placed ... by the players themselves!
- A new way of moving: levitation.
- A possibility of collaboration between players.
- The game of the Satyrs, at the gates of Kalahen.
1. The Trap Markers (blue)
Use:
When a warrior has had to spend 1 P.V. by passing along a "dangerous" stretch of road, it may (in compensation) introduce or move a blue "trap" marker on the game board. (At the start of the game, the 4 markers are off the board.)
These markers are placed either in the middle of a road, or on one of the 4 blue dots representing the bridges.
- A marker in the middle of a road represents a wandering monster. To pass along this road, it must be fought!
- Whereas a marker on a bridge makes that bridge impassable, as long as the marker is not moved elsewhere. Meanwhile, a warrior may only get from one side of the road to the other by magic movement.
Combat against a wandering monster:
If a blue marker is placed on a road, the player may decide to "force" the passage by fighting the monster. To do so, they place their warrior in front of the blue marker and draw a "wandering monster" card (yellow back).
If it wins its combat, it continues along its road. Otherwise, it returns to its starting point!
(Card illustration: the top number is the monster's Power Points; the dot marks the "experience bonus"; the bottom "2+D6" gives the P.V. lost by a defeated warrior.)
- top number: points de puissance du monstre (the monster's Power Points)
- dot: bonus expérience (experience bonus)
- bottom "2+D6": perte en P.V. d'un guerrier vaincu (P.V. lost by a defeated warrior)
Victory against a monster with a bonus:
If the "experience bonus" symbol is present on the monster's card, a victorious player takes the card and places it near them, next to their sword and shield cards. The experience gained from this combat gives them 1 additional bonus point in their future combats, like a "weapon" card.
2. Levitation
Levitation allows nothing more than a normal movement: from one dot to another nearby one. But it allows the warrior to avoid:
- the loss of one P.V. (if a dangerous road);
- combat against a wandering monster;
- the "blockage" caused by a destroyed bridge.
Cost of a movement by levitation: 2 magic rings, of any colour.
3. Collaboration Between Players
- When a player arrives at the Crystal Bridge, they may decide to call for the collaboration of another warrior.
- The magic power of the Crystal Bridge is such that, if another warrior accepts the proposal, it is instantly teleported onto the Bridge!
However, two conditions apply:
- it must be carrying its magic shield, which is indispensable for crossing the Crystal Bridge;
- it must agree to lose 1 P.V., as the price of this exceptional journey (unless it was itself at the Cursed Tower at that moment).
- Under these conditions, the two players enter the Magic Forest together, still on the same turn, and this without having to spend a single P.V.!
- As in the case of a single player, each one searches the chest and takes 7 magic rings. The player who was first on the Crystal Bridge is also the one who may "help themselves" first.
- Each player returns by teleportation to their castle.
Remark: this is the only case in which a player (the one who answers the call) may act during another player's turn.
4. The Game of the Satyrs
When passing through one of the gates of Kalahen (brown dots), a warrior may decide to play the game of the Satyrs:
- the warrior stakes either 1 P.V., or 1 P.O., or 1 ring;
- it rolls 1d10: the result obtained is the number to be reached;
- with the special dice, the player seeks to reach this number (always by the technique described in the annex);
- after the 3 permitted rolls, it compares its score with the initial number:
- if it obtains the exact score: it recovers its stake + 3 times its bet!!
- if it obtains 1 more or less: it recovers its stake + 2 × its bet.
- if it obtains 2 more or less: it recovers its stake.
- if the gap is greater: the stake is lost.
Example: a player stakes a red ring. It rolls 1d10 and gets 3. This will be the number to be reached.
The player then takes the special dice. At the end of the 3rd throw, it has on the table: points die, 2 (numbered), points die.
Final score: 4 (that is, 1 more than the number to be reached).
The player therefore recovers its stake and may choose two other rings from the reserve (colour of its choice).
This game therefore allows a player to gain rings, P.O. or P.V. quickly. It does, however, carry risks... it is up to each player to judge according to their caution or taste for adventure!
Warning: for this game, it is evident that possessing the shield or the sword provides no bonus!
Final remark:
Why eight castles, why an island near the Lands of Kalahen?... Because this adventure is only the beginning of an extraordinary story. You will learn more by obtaining the Kalahen expansion. (Forthcoming)
Annex: Table of Events
Rows are the die score; columns are the places. Places 1 to 4 are read with 1d6 (rows 1 to 6 only, per the text above); places 5, 6 and the Cursed Tower are read with 1d10 (rows 1 to 10). A dash means the place has no entry for that score (the printed table leaves that space empty).
| Die | 1 Bardhural | 2 Ur gehal | 3 Khéridal | 4 Irkhal | 5 Arakhen | 6 Méridhen | Cursed Tower |
|---|---|---|---|---|---|---|---|
| 1 | voyage 1 d6 | combat 1 d10 | sortilège red | combat 1 d10 | sortilège red yellow | ouf! | sortilège 3 different |
| 2 | combat 1 d10 | voyage 1 d6 | combat 1 d10 | sortilège blue | ouf! | sortilège blue green | combat 6 + 1 d10 |
| 3 | sortilège green | combat 1 d10 | voyage 1 d6 | ouf! | sortilège 2 identical |
(Abbreviations as printed: "id." = identical; "ouf!" = nothing happens; "voyage" = magic voyage; "sortilège" = spell, with the rings to use.)
If the warrior is defeated, it may not search the chest and it loses P.V.:
- Places 1 to 4: the player rolls 1 special die. (Loss of 1 to 3 P.V.)
- Places 5 and 6: the player rolls 1d6 + 1. (Loss of 2 to 7 P.V.)
- Cursed Tower: the player rolls 1d6 + 3. (Loss of 4 to 9 P.V.)
Note: in places 1 to 4, when meeting a monster, a result of "0" on the 10-sided die means that the monster has fled.