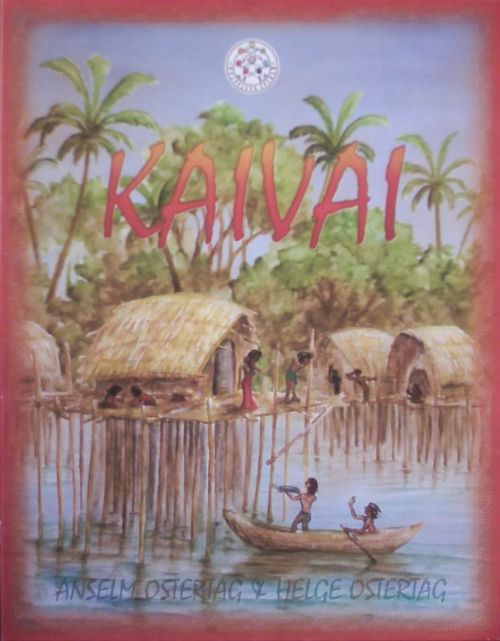
Kaivai
Kaivai Rulebook
Table of Contents
Table of Contents
Game Components
- 1 gameboard, with a glory track around the edge, a start space for the glory track, hexes, an action space, the fisherman's god, a supply for shellmoney/fish, a supply for cult hexes, a supply for influence tokens, and 12 cult hexes
- 4 player displays, each with a bidding scale, basis building costs, a movement track, a number track for shellmoney/fish, a start space for the bidding scale, and a start space for "increasing movement"
- 52 fish/shell counters (blue/yellow)
- 24 influence tokens (red)
- 4 x 15 huts
- 4 x 6 boats
- 4 x 6 fisherman meeples
- 4 dice
Each hut piece has two sides: the frontside, which becomes a Boatbuilder's Hut when a boat is placed on it or a Fisherman's Hut when a fisherman meeple is placed on it, and the backside, which is a Meeting Hut (marked with a circle around the hut).
Aim of the Game
The players try to be a worthy Kaivai by gathering as much glory as possible. The player with the most glory at the end of the game wins.
During the game 1 point of glory is earned for each fish eaten in a celebration in one of your huts. The player initiating the celebration also gains 1 point for every three fish eaten in the whole island-village. You lose glory points if you sink an opponent's boat.
There is a final scoring at the end of the game:
- You get 2 points per own hut.
- You get 1 point per cult hex in each island-village where you hold a majority at the end of the game.
The player with the most glory wins.
Preparation
Each player chooses a colour and takes the matching player display, 15 hut pieces, 6 boats and 6 fishermen (meeples) of that colour. Each player receives a starting capital of 3 shell, 3 fish and 3 influence counters. The shell counters are placed on the 5 space of the player display's number track, the fish counters are placed on the 4 space.
Note that a token on the number track indicates different things for fish and for shells. A fish token always represents a single fish; its position on the track signifies the number of rounds until the fish rots and is discarded (see Loss of Value). For shells, position on the track reflects quantity, so a shell token on the five space represents five shells (in the example, 3 fish on space 4 and 3 shells on space 5 means each shell has a value of 5, for a starting capital of 15 shellmoney). Influence counters may be kept hidden. Remaining fish/shell and influence counters are placed in their storage spaces on the board.
Around the edge of the board is a glory track. All players place a boat on the start space of that track (between 39 and 1). All players place another boat on the start space of the Increase Movement ("Zugweite Aufwerten") scale and a fisherman (meeple) on the starting space of the Bidding scale ("Gebot") on their player display.
Six cult hexes are printed on the board. These are where island-villages will develop. Two additional island-villages (each consisting of 2 cult hexes!) are placed. You must place 2 cult hex pieces on two adjacent (blue) water hexes with at least three water hexes between them and any other island-village (cult hex). Remaining cult hexes are placed in their storage spaces.
Choose whether or not you want to play with dice (adding luck to the game) or without them (no luck in the game).
All players place two starting huts for free — after the first bid (see Gameplay, Phase 1a, Placing of Starting Huts).
Gameplay
Kaivai is played over 8 rounds. Each round is divided into 4 phases:
- Bidding — The players' bids determine four things: a) turn order — turns are taken in descending order from highest bid to lowest; b) the building costs (Baukosten) for huts; c) the distance that boats may move (Zugweite); d) the lowest bidder moves the fisherman's god to another island.
- Moving the Fisherman's God — The island-village is enlarged by a cult hex. The arrival of the fisherman's god in an island-village initiates two things: it will be easier to catch fish and it is possible to create some of the rare influence tokens. These advantages make it a strong privilege to move the fisherman's god.
- Performing Actions — Beginning with the highest bidder all players in turn order choose one action per turn and perform that action (if possible) with all their boats. This main phase of the game lasts until none of the players can or will perform any further action (Building "Bauen", Fishing "Fischen", Delivering Fish "Verkaufen", Celebrating "Feiern", Moving "Bewegen", Increasing Movement "Zugweite Aufwerten").
- Loss of Value — In the final phase of a round the shellmoney loses value and the commodity fish loses freshness.
After the fourth phase a new round begins.
Phase 1: Bidding
At the beginning of each round all players make a bid between 1 and 10 by marking the appropriate number on their bidding scale with the meeple. Note that making a bid costs nothing.
The bids determine four things:
a. Turn order — turns are taken in descending order from highest bid to lowest. b. The basis building costs (Baukosten) for huts. (Money is only used for building!) c. The distance that boats may move (Zugweite). d. The lowest bidder moves the fisherman's god.
Every player must make a different bid — a number cannot be chosen twice. Players bid in ascending order of glory points, with the player with the least glory bidding first and the player with the most bidding last. In the case of a tie, the player with the lowest total value in shells goes first. If there is still a tie, the number of fish counters on the player display, then the number of boats on the board, then the number of huts on the board becomes the tie breaker.
In the first round all players are tied, so bidding order is determined randomly.
Hint: What should you keep in mind when you make a bid? In Kaivai you must anticipate the plans of your opponent players and include them in your planning. It is essential to find a balance between different complex elements:
- The turn order determines whether you can make your turns early in the action phase and therefore get the free choice between all possible actions, or if you make late turns with some actions not available any more.
- The basis building costs increase simultaneously with your bid, meaning that it is cheaper to build with a low bid. But you can only build if this action is still available (with a low bid you won't be first in turn order).
- The movement range ("Zugweite") of your boats determines which spaces you may reach (highest range for bids in the middle), so your boats could perform actions on those spaces (your operating range is very limited with a very high or very low bid).
The lowest bid grants the privilege of moving the fisherman's god in phase two (new influence tokens), but you shouldn't overestimate it, because it comes along with a drawback in choosing the actions (you are the last player in turn order!).
Phase 1a: Placing of Starting Huts (In the first round only)
All players place two huts for free. In turn order (descending order of bid) the players place their two huts. The following restrictions apply:
- At least one of the huts must be a boatbuilder's hut.
- Each hut must be placed on a water hex that is adjacent to a cult hex.
When the Boatbuilder's Hut is built, the player places a new boat from his supply on the hut. The new boat cannot be moved until the player's next turn. It cannot build, fish, deliver or be counted towards a majority until it moves off the hut. In phase 3 (performing actions) it is an advantage if you possess many boats, for the most chosen actions may be performed with every boat!
The Fisherman's Hut increases the amount of fish that a player may catch at this island (see Fishing); when a fisherman's hut is built, the player places a fisherman meeple on the hut piece.
The Meeting Hut generates new influence tokens: if a meeting hut is built on the island-village where the fisherman's god is placed, the player immediately receives an influence token; otherwise players receive an influence token from the supply for each of their meeting huts on an island-village, when the fisherman's god is moved to this island in phase 2.
Phase 2: Moving the Fisherman's God
The lowest bidder moves the fisherman's god (the large black pawn) from the island-village where it is standing to another island-village. The fisherman's god must move; it cannot remain in the same island-village. It cannot be moved to an island-village that cannot be enlarged by a cult hex. The fisherman's god starts the game off the board, so in the first round it is simply placed onto any island-village.
- On the chosen island a new cult site is erected for the fisherman's god, place the god onto it. The lowest bidder takes a cult hex piece from the supply and places it on a water hex that is adjacent to the island-village at any position. However, the piece may not be placed so as to join two island-villages or to surround a boat with impassable hexes.
- Important: Island-villages can never be joined together by building huts or placing cult hexes; boats may never be surrounded totally by an island-village!
- The cult hexes in the supply count the remaining rounds. After eight rounds the game is ending.
- Players receive an influence token from the supply for each of their meeting huts on this island-village.
- If a meeting hut is built (phase 3: performing actions) on the island-village where the fisherman's god is placed, the player immediately receives an influence token from the supply.
In phase 3 (performing actions) the fisherman's god can be used as a fisherman's hut by every player who takes the Fishing action (see Fishing).
Phase 3: Performing Actions
The most important phase of the game is phase 3, during which players perform in turn order one of six possible actions (Building, Fishing, Delivering Fish, Celebrating, Moving, Increasing Movement). The highest bidder is the first to choose one action and perform it. Each player takes their turn in descending bid order. The performing actions phase continues with players taking turns until no player can or will perform any further action.
- A player who takes his turn chooses one action. Performing an action costs influence. If a player's chosen action has no influence tokens placed on its space, the player takes an influence token from the supply and puts it on that action. Otherwise, the player must place as many of their own influence tokens on the action's space as there are already there. Hence, an action's cost in influence tokens rises each time it is chosen.
- In order to choose an action the player must be capable of performing it. For example, a player with no shells cannot choose the building action. A player whose boats cannot reach a location where they can fish cannot choose the fishing action. Choosing the Building, Fishing, Delivering Fish, or Moving action means the player can perform the action with each of his boats.
- When you choose the Building, Fishing or Delivering Fish action, moving is included: first you may move your boats and afterwards you perform the action. However, you may move only those boats which actually perform the action — for example, when you choose Building it is not allowed to move three boats and then build just two new huts: you move just those boats which afterwards are able to build a new hut.
- Each boat may move up to its movement range. A boat's movement range is the Zugweite number beneath the amount you bid this round plus any bonus from the Zugweite Aufwerten track. Each boat makes the movement first and afterwards performs the chosen action (it is not allowed to split your movement range).
- Boats move on water hexes; they cannot move over huts or cult hexes. A boat can move through a hex containing another boat. In movement prior to a building, fishing or delivering action, a boat cannot end its move in the same hex as another boat (exception: Moving).
Building
- The building action is performed using boats. Each of the player's boats may build one new hut per turn!
- A boat used for building must be adjacent to a cult site.
- A hut that is built must be adjacent to the boat's hex and to any hex of the island-village (cult site or hut). Important: a hut can never be placed so as to join two island-villages or to surround a boat with impassable hexes!
- The building of a hut must be paid for with shells. The cost is the building cost for the amount the player bid (see Baukosten on the player display) plus 1 for each hut and cult hex the island-village consists of. Costs: Bid + Island Size. For example, a player's bid is 2 and he wants to build on an island consisting of 5 hexes, thus his building costs are 2+5 = 7. He pays shell money in the value of 7 (a shell counter has the value of the numbered space it is in on the player's display; change is given, but it is not allowed to change small shell-money into big money, e.g. three shells of value 1 into one shell of value 3) and builds one of the three kinds of hut: Boatbuilder's Hut (the new boat cannot be moved until the player's next turn!), Fisherman's Hut or Meeting Hut (see Phase 1a). If the player builds another hut (with another boat) at the same island, the building costs have already risen by 1: (bid) 2 + 6 (island size) = 8.
Hint:
- Building is very important, each hut scores two glory points at the end of the game. When you are able to build, you always should do it, after all shell money just loses value if you don't use it.
- Building causes a permanent change in the topology of the game: routes are getting longer, islands become bigger and more expensive as building grounds, and building grounds will eventually run short or will be difficult to reach. In short: clever building can have a great impact on the game.
- Very important: build your huts where a lot of fish is to be sold (near to fisherman's huts), e.g. in the central part of the board, so you will participate a lot from the delivering fish action. In the long run all fish delivered to your huts can be transformed into glory points (see Celebrating).
Fishing
- The fishing action is performed using boats. Each of the player's boats may be used once for fishing per turn.
- A boat used for fishing must be adjacent to a cult site.
- For each own boat adjacent to a cult site, count the number of own fisherman's huts in that island-village. Only count the fisherman's huts from a single island-village per boat; a boat adjacent to cult sites from two island-villages would not total the huts from both, nor could it fish twice in the same turn. The total number of fisherman's huts is the number of dice the player will roll for that boat. Always start with the largest die and progress from large to smaller as further dice are needed.
- For your first hut take the biggest die (5 blue sides). For your second hut take the second biggest die (4 blue sides). For your third hut take the third biggest die (3 blue sides). For your fourth hut take the smallest die (2 blue sides). With four huts on an island you get the maximum of four dice.
- For each blue spot rolled on the dice, the player places one fish counter on the 4 space of their player display's number track. Repeat for each own boat that is fishing.
- The fisherman's god favours fishing: when you have boats adjacent to a cult site of the island with the fisherman's god, those boats catch one fish automatically. If you have huts on that island, you afterwards may roll the dice as well.
Hint: Usually you should try to concentrate your fisherman's huts on one island.
Fishing Variant
If you want to exclude luck, don't use the dice at all and play according to the following fishing rules: you catch one fish for each own fisherman's hut on an island per boat at this island-village's cult sites (important: the fisherman's god counts as a fisherman's hut for all players!): the number of boats multiplied by the number of fisherman's huts = number of caught fish, placed on the 4 space of the player display's number track. Theoretically it is possible to catch up to six fish per boat, if you have built all fisherman's huts on a single island and moved the fisherman's god onto that island.
Delivering Fish
- The delivering fish action is performed using boats. Each of the player's boats may be used once for delivering per turn.
- In order to deliver fish, a boat must be adjacent to at least one Boatbuilder's Hut with no boat on it or one Meeting Hut (fisherman's huts and cult hexes do not want fish).
- Important: Each meeting hut or boatbuilder's hut has a maximum capacity of three fish. No more fish can be delivered to a hut that already has three. A boat can deliver up to three fish to each hut it is adjacent to (huts do not have to be in the same village). For example, a boat adjacent to two huts that have no fish could deliver up to six fish — three to each hut.
- The fish are taken from the player's display (take old fish first, because of the Loss of Value phase) and placed on the huts delivered to. The fish remain there until there is a celebration.
- If fish are delivered to an opponent's hut, they are sold and the selling player receives shells from the supply as follows: 1st fish delivered to a hut — one shell on the 5 space of the player display number track; 2nd fish delivered to a hut — one shell on the 4 space of the player display number track; 3rd fish delivered to a hut — one shell on the 3 space of the player display number track.
- It doesn't matter whether a fish is really fresh or old and stinky: the price per fish just depends on the demand of the hut it is sold to.
- Fish delivered to a player's own huts earn no shells (self-supply). However, they can earn the player glory if there is a celebration.
Celebrating
- No boats are used when you perform this action!
- Choose one island-village for the celebration with at least one fish on it. It does not need to have one of your boats adjacent. Each player receives 1 point of glory for each fish counter stacked on one of their huts in the island-village.
- In addition, the player who declared the celebration receives 1 point of glory for every multiple of three fish on the island-village, regardless of who the fish belong to.
| Number of fish | 0–2 | 3–5 | 6–8 | 9–11 | 12–14 | 15–17 | 18–20 | ... |
|---|---|---|---|---|---|---|---|---|
| Bonus points of glory | 0 | 1 | 2 | 3 | 4 | 5 | 6 | ... |
- When all players have received their points of glory, the fish on that island are eaten up and go back to the supply.
Increasing Movement
- You don't use your boats in this action!
- By choosing this action you permanently increase the movement range of your boats.
- Simply move the boat on the "Zugweite Aufwerten" track ("increasing movement") on your player display one space to the right. The new space shows how much the movement range of your boats is increased.
- Your boats' full movement range is your bid + increasement.
Hint: During the course of the game the routes are inevitably getting longer because of the growing islands. So it is good to make some increasements for your movement range early in the game — it makes you more flexible in the bidding phase when very high or very low biddings don't have such a great impact on your mobility any longer.
Moving / Sinking
- Each of the player's boats may perform this action once per turn!
- You may just move any of your boats (up to your full movement range). Choose this action if you want to cover a great distance or if you want to sink an opponent's boat.
- Sinking: only when the moving action is chosen can movement be used to sink other players' boats. Ending a move in a hex with another boat is only allowed when it is to be sunk. Sinking is automatic; the opponent returns the sunken boat to his supply. Sinking is inglorious, and anyone who sinks another player's boat loses an amount of glory depending on the number of boats the opponent had at sea before the sinking:
- 2 boats: minus 4 glory points
- 3 boats: minus 3 glory points
- 4 boats: minus 2 glory points
- Important: a player's last boat cannot be sunk. A player cannot have negative glory; if they do not have sufficient glory to lose, they cannot sink a boat.
Sacrifice
- A player who makes a sacrifice, taking no actions at all in this phase, receives 2 influence tokens from the supply space.
- This is actually meant as a last resort, in case you wasted all of your influence tokens and didn't manage to create your own necessary supply by building meeting huts in time.
Hint:
- In order to avoid influence shortage, you should build some meeting huts early enough in the game.
- Since the player with the least glory points makes the first bid, he is often the one making the lowest bid in order to move the fisherman's god onto an island where he has got some meeting huts. Build meeting huts on the same island to participate from the payout of influence as well.
- It is very advisable to keep an eye on the intentions and possibilities of your opponent players, in order to know which actions they may choose. If you know you won't be able to build in the next round, you should ignore the building costs when you make a bid and try to be the first in turn order (high bid) with an adequate movement range (e.g. go fishing and delivering).
- An important hint is that you should try to act contracyclically! This is a way to save influence tokens. When all other players deliver fish and build in this round, it is better to go fishing twice. Since fish, compared to shell-money, has the advantage of a stable value, you just wait one or two rounds until no one else has got any fish and then deliver it.
Make a Gift
At any time you may give shell-money or fish to another player. If all the other players agree that this was a glorious deed, you receive 1 glory point.
Phase 4: Loss of Value
When none of the players is able to or wants to perform any further action, that is when all players skipped, the action phase is over.
In the final phase of a round the players move all the shells and fish on their personal display number tracks one space to the left. Influence tokens placed on the action spaces are returned to the supply.
The pawns on the player display bid tracks are returned to their start spaces.
Next, a new round starts with phase 1: bidding.
End of the Game and Final Scoring
After the eighth round of play the game ends with a final scoring. After the last loss of value make the final scoring, consisting of Hutscoring and Islandscoring:
- Hutscoring: All players receive 2 glory points for each own hut on the board.
- Islandscoring: The island-villages are scored one by one. When an island-village has been scored, place an influence token on it as a reminder. The next island-village to be scored is decided by the player who currently has the least glory (the player who chooses may change as scoring progresses).
The player with the majority holding in an island-village receives 1 glory point per cult site in the village. If there is a tie for the majority holding in an island-village then no glory points are awarded.
To determine the majority holding, each player totals:
- The number of own huts in the village.
- The number of own boats adjacent to a cult site in the village (note that a boat adjacent to cult sites of two villages would count in determining the majority for both).
- Any number of influence tokens.
Reveal influence: All players reveal how many they are bidding simultaneously. All players return the influence tokens they bid to the supply, even if they didn't get the majority!
The player with the most glory at the end of the game wins. In the case of a tie, the "richest" player wins (shell, fish, boats, huts).
Hint: Towards the end of the game it is advisable to move your boats to cult hexes of those islands where you could get a majority, or where you could ruin a majority of an opponent player.
General Hint: In case one player has the least glory and always makes the first and lowest bid in order to move the fisherman's god between two islands (for influence tokens), you could increase his glory by celebrating on islands where he gets glory, besides you could sink that player's boats (so you will fall back on the glory track) and you should build meeting huts on those islands as well.
Two Player Option
Both players choose a colour, and take a third colour as the neutral counterpart.
- In the beginning the neutral colour makes the first bid: 5.
- Place a fisherman (pawn) of that colour on the following four action spaces: Bauen (building) - Fischen (fishing) - Verkaufen (delivering fish) - Bewegen (moving).
- Place one hut piece of that colour beside the action spaces; it is the space for the seventh action: Remove Neutral Bid. (May be chosen like any other action in phase 3 and means you can mark the next bid of the neutral colour on its bidding scale with an influence token from the supply. In the next bidding phase the neutral colour's counter is moved to the marked bid.) Should the neutral bid change in the same round again, simply remove the influence token.
- Start of game: both players make a bid as usual (consider the neutral colour!); the player with the higher bid is the first to place his starting huts, additionally both players place one hut of the neutral colour (boatbuilder's hut without boat) on different islands.
- Bidding phase: first remove the bid of the neutral colour according to the marking (see above).
- Moving the fisherman's god: the player with the lowest bid removes the god. Should the neutral bid have been even lower, the player with the lowest bid must place the god on any island with a neutral hut on it.
- Action phase: every time it is the neutral colour's turn, exactly one influence token is placed on the space of either building, fishing, delivering fish or moving. Depending on the position in turn order the neutral colour occupies, the neutral colour starts to place influence tokens on a certain action space and continues with the next action in the next turn:
- Neutral 1st: Bauen – Fischen – Verkaufen – Bewegen – Bauen, etc.
- Neutral 2nd: Fischen – Verkaufen – Bewegen – Bauen – Fischen, etc.
- Neutral 3rd: Verkaufen – Bewegen – Bauen – Fischen – Verkaufen, etc.
- The neutral colour actually doesn't perform any actions, it just makes the actions more expensive!
- Delivering fish: you earn shells for all huts you delivered fish to except for your own huts.
- Celebrating: the player who declared the celebration gets the glory for the neutral huts too. Every time a neutral hut is involved in a celebration, the celebrating player must place a new neutral hut at any island! (Consider: moving the fisherman's god.)