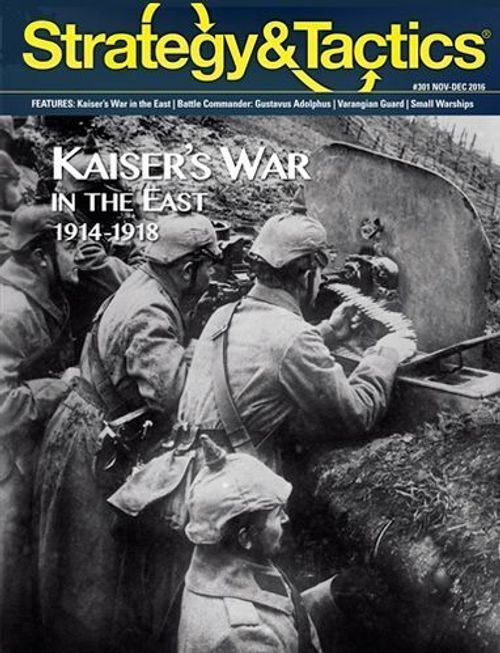
Kaiser's War in the East
Kaiser's War in the East Rulebook
Table of Contents
Table of Contents
- 1.0 Introduction
- 2.0 Components
- 3.0 Set Up
- 4.0 Victory Conditions
- 5.0 Victory Points (VP)
- 6.0 Sequence of Play
- 7.0 Map Geography & Control
- 8.0 Grand Strategy
- 9.0 Reinforcements, Mobilization, Replacements & HQ Conversions
- 10.0 Reorganization
- 11.0 Movement
- 12.0 Stacking
- 13.0 Zones of Control
- 14.0 Combat
- 15.0 Retreat After Combat
- 16.0 Pursuit
- 17.0 Supply
- 17.1 Supply Units
- 17.2 Supply Radius
- 17.3 Restrictions
- 17.4 Same Hex Supply
- 17.5 Tracing General Supply
- 17.6 General Supply Actions
- 17.7 Automatic General Supply
- 17.8 Supply Attrition
- 17.9 Offensive Supply
- 17.10 Offensive Supply Prerequisites
- 17.11 Offensive Supply Determination
- 17.12 Force Marching Details
- 18.0 Railroad Operations
- 19.0 Headquarters (HQ)
- 20.0 Fortress Units
- 21.0 Unique Units
- 22.0 Weather
- 23.0 The Balkans & Other Complications
- 26.0 Scenario: 1914
- 27.0 Scenario: 1915
- 28.0 Scenario: 1916
- Charts
- Optional Rules
- Scenario Options
- Russian Revolutions
1.0 Introduction
Kaiser's War in the East is a strategic level simulation of World War I on the Eastern Front, 1914-17. This is a two-player game; one player controls the Central Powers, the other player controls the Allies.
The concept of "victory points" (VP) is central to play of game. Players begin each scenario with a designated number of VP. They gain new VP as a result of achieving objectives; they lose VP when they lose units in combat. They may expend them to gain reinforcements and carry out certain actions. To win the game you must have more VP than your opponent, so play is a balancing act between expending VP and attaining objectives.
Errata: Ignore the reference to "Optional rules Only)" in the 1916 box of the turn track, and ignore the reference to "Ober Ost HQ" in the Nov/Dec turn space of the 1915 year row.
2.0 Components
A complete game of Kaiser's War in the East includes the following: a game map, this rules set, and a sheet of 176 die-cut counters. Players will need to provide themselves with one six-sided die.
Note: These rules use the following color system: Red for critical points such as errata and exceptions, Blue for examples of play. Check for E-rules updates to this game @ www.strategyandtacticsmagazine.com.
2.1 The Map
The map shows Eastern Europe and Russia during World War I. A hexagonal grid has been superimposed on the map to regularize the movement of units and to delineate terrain types. Units are placed in hexes and must remain within hex boundaries at all times.
Note: Various locations on the map are known as Strategic Objectives, and these are identified with a circled "supply" symbol. These locations have no function in terms of supplying units, however. They only serve as beacons to indicate which hexes are the Strategic Objectives.
2.2 Friendly & Enemy
A friendly country or unit is one that's controlled by you the player. An enemy country or unit is one that's controlled by the opposing player.
The Central Powers are: Germany, Austria-Hungary and Bulgaria. Optionally, Nationalist forces may come into play. Those nations and factions are all friendly to each other.
The Allies are: Russia, Romania, and (optionally) an Allied Expeditionary Force. Optionally, Bolshevik forces may come into play.
2.3 Counters
There are two types of counters: units represent military forces. Markers provide administration functions.
Errata: The Austro-Hungarian 7th Army counter should not be printed with an optional "dot" on its reverse side, but the Austro-Hungarian 5th Army should be.
Backprinting: Most units are backprinted with a national flag.
Optional Units: These are used only when playing with the on-line optional rules.
2.4 Combat Units
Sample Army and Sample Shock Corps counters are labelled for Size (army), Unit Identification, Unit Type (infantry), Attack Factor, Movement Factor and Defense Factor.
Land Unit Types: Regular Infantry; Storm Troops; Alpine Infantry; Marine; Cavalry; Fortress; Armored Trains; Tanks (Optional).
Support Units: Headquarters (HQ); Supply; Airbase.
- Sample HQ: The parenthesized number on upper left is the support radius; parenthesized number on the lower left is the support strength. Support Strength and Support Radius are labelled on the sample.
- HQs are backprinted with an enhanced strength. In some cases, the reverse side will have a different unit id than the front.
- Sample Supply Unit: Parenthesized number is the support radius.
2.5 Unit Sizes
Unit sizes are represented by letter codes printed on each such counter, listed as follows.
- XXXXX = army group HQ
- XXXX = army
- [XXXX] = army abteilung (detachment)
- XXX = corps
- XX = division
- X = group (brigade)
Designer's Note: The "corps" units in the game may represent anything from two elite divisions to three to five regular divisions, to many reserve formations.
2.6 Abbreviations
The abbreviations mentioned throughout the rules are defined as follows.
Germany
- AK: Alpen Korps
- BK: Baltic Corps
- Gd R: Guard Reserve Corps
- H-L: Hindenburg-Ludendorf HQ
- HKK: Higher Cavalry Command
- K: Karpathen
- KFO: Air Command East
- N: Niemen Army
- Ober Ost: High Command of the East Front
- Ost: East
- St: Stoss (Shock)
- Sud: South Army
Austria-Hungary
- B-E: Bohm-Ermolli
- B: Bohemian
- Ew: Edelweiss
- H: Hofmann
- Ost: East Army
- St: Stoss (Shock)
Nationalists
- Vol: Volunteer Army
Russians
- Cauc: Caucasian
- Finn: Finnish
- Gd: Guard
- Gr: Grenadier
- Mar: Marines
- N: Northern Front
- NW: Northwestern Front
- SW: Southwestern Front
- Shock: Shock
- Sib: Siberian
- Trkstn: Turkistan
- W: Western Front
Allies
- AEFR: Allied Expeditionary Force in Russia
- Cz Leg: Czech Legion
- RNAS: Royal Naval Air Service (armored car branch)
Bolsheviks
- KonA: Cavalry Army
- LR: Latvian Rifles
- NWF: Northwest Front
- UkrF: Ukrainian Front
- RG: Red Guard
- WF: West Front
Bolshevik units are backprinted with their corps size on the front and army on the reverse.
Optional Units: Some units are marked "Optional." They are used only with the on-line optional rules. Also, all Bolshevik and Nationalist units are used with the optional rules.
2.7 Unit Nationality by Color & Name
The national groupings of units have unique background colors to assist in their easy identification. Note that units generally have a national flag on their reverse.
- Central Powers: Germany, Austro-Hungary and Bulgaria.
- Allies: Russia, Romania, Czech Legion and Allied Expeditionary Forces.
- Bolsheviks: Bolsheviks
2.8 Game Markers
Player markers are printed with the Central Powers insignia on the front and the Allied on the reverse. Players can use them for any administrative functions, including:
- Control: Indicates which side controls a specific hex.
- PSYWAR: Indicate the launching of an optional PSYWAR attack.
- Turn: Records the current turn (use control markers as a turn marker).
- VP: Records current number of Victory Points.
2.9 Scale
Each hex on the map represents about 70 kilometers from side to opposite side. Each game turn represents one month in summer and two in winter (and spring thaw).
3.0 Set Up
Each player places units for their side, in the order listed. Play starts with the first turn of the scenario and continues until its final turn, or until one player wins a sudden death victory, or one player concedes.
3.1 Scenario Length
Scenario length may be variable. However, a scenario can go into 1918 only if using the optional on-line Bolshevik rules.
3.2 Units
Units may be designated by specific identification (e.g., 8th Army), or a number of generic types (e.g., two army corps). Units may be designated as setting up in 1) specific locations, or 2) north or south of a specific hex location (in which case, the hex row is considered to run east-west to the front line).
Example: If a scenario says to place a Russian army north of Dvinsk in 1916, it could be set up in Riga.
4.0 Victory Conditions
Victory is generally in terms of Victory Points (VP). There are two ways to win the game:
- a Sudden Death Victory check OR
- an end of game victory determination.
4.1 Sudden Death Victory
The game immediately comes to an end if either of the following are in effect at any time.
-
If one player's VP total goes to zero at any time, while the other player has at least one VP, the game immediately comes to an end. The player with one or more VP wins while the other side is overthrown in a revolution. The winning player adds 25 to his current VP level and that is his final victory level (per 4.3). If both sides' VP levels simultaneously go below zero VP, both players lose.
-
If one side controls (7.0) all Strategic Objectives hexes on the map, that side wins an Imperial Victory.
4.2 End of Game Check
If there has been no Sudden Death victory, then at the end of the last turn of the scenario, players check their VP. End of game VP are totaled as follows.
- The number of VP on the track; PLUS
- Central Powers: Gain one additional VP per Central Powers controlled city in Russia and Romania.
- Allies: Gain one additional VP per Allied controlled city in Germany, Austria-Hungary, and Bulgaria.
Note: Points for controlled cities in Romania and Bulgaria are applied only if those countries are belligerents. Also, note that the additional VP for controlled enemy cities apply only for end of game victory checks, not during the totaling of VP at the end of game turns.
The player with more VP may win. Subtract the smaller VP total from the larger and consult the table below.
4.3 Levels of Victory
| VP Difference | Level of Victory |
|---|---|
| 0-25 | Draw |
| 26-50 | Marginal Victory |
| 51-75 | Continental Victory |
| 76-100 | Imperial Victory |
Note: A Draw really means that both sides lose owing to mutual exhaustion.
5.0 Victory Points (VP)
VP are a measure of each side's overall will to fight, and political-economic strength. Scenarios will provide a starting number of Victory Points (VP) to each player. Players gain and lose VP as play progresses; see the VP Table.
VP can also be used to purchase certain units. Each player openly records his own VP total using the track on the map (or by pen and paper). VP gained and lost for various game actions are on the VP Chart.
5.1 Losing VP when Friendly Units Are Eliminated
The instant that friendly units are eliminated, the player controlling those units loses the number of VP indicated on the chart. If an army breaks down (see 10.0) and loses one or more corps, you lose VP based on the corps, not the complete army. In some cases, a player will gain VP for eliminating enemy units.
Note: The game is going to be a race between gaining control of sufficient Objective hexes (see below) to counterbalance your losses in combat.
5.2 The Entente
The Allied player gains additional VP for eliminating Central Powers units on turns when the CP Main Effort is in the West. See the VP Chart.
Note: This is due to the Russians trying to take the pressure off of other fronts on which the Central Powers are on the offensive.
5.3 Gaining & Losing VP for Capture of Strategic Objective Hexes
Strategic Objective hexes are worth VP. The instant that a player gains control of an enemy controlled Strategic Objective hex, the player gains the number of VP designated on the VP Chart; also, the enemy player loses the number of VP designated on the VP Chart.
Note: See the Control rule.
5.4 Gaining VP for Strategic Objectives Hexes during the VP Segment
During each game turn's Victory Point Segment, each player checks the number of Strategic Objectives hexes their forces occupy. Gain the number of VP designated by the VP Chart for each such hex your control. A player may gain VP for the same hexes each game turn.
Note: This is in addition for any VP gained or lost for capturing the city.
A player gains VP for all Strategic Hexes he controls. Cities which were originally on his side of the 1914 border are worth more than those which were on the other side and captured.
Example: The CP would gain 4 points for control of Berlin, but only 2 for Warsaw. This is so no matter how many times a city may be recaptured.
5.5 Mobilization
You may expend VP to bring certain additional units into play. You may never voluntarily expend VP in such an amount as to reduce your VP total to zero or less (see 9.0).
5.6 VP Limits
If a player's VP total reaches 99, it can go no higher. If it reaches zero, the game ends and the player whose score first hits zero loses. See the Victory Rule (4.0).
6.0 Sequence of Play
The game is played in sequenced "game turns." Each game turn is divided into a Grand Strategy Segment, two Player Turns (each composed of several parts called "phases") and an Administrative Segment. All actions during a game turn take place in a prescribed order called the "sequence of play."
6.1 First & Second Player
During the Grand Strategy Segment (6.0), determine which side will be the First Player and which will be the Second Player for the turn.
Example: In the 1914 scenario, the Allied side is the First Player, so the Allied player takes actions during the First Player turn, while the Central Powers takes all actions during the Second player turn.
6.2 Sequence of Play Outline
-
Grand Strategy Segment. This phase occurs only during the January-February turn of each year. Consult the Turn Record Chart to see if this will be a year in which the CP's Main Effort is in the East or West.
-
First Player Turn
- a) First Player Mobilization Phase (9.0). The First Player receives Scheduled Reinforcements and can spend VP to mobilize (build) reinforcements.
- b) First Player Reorganization Phase (10.0). The First Player reorganizes units.
- c) First Player Movement Phase (11.0). The First Player moves his units.
- d) First Player First Combat Phase (14.0). The First Player conducts attacks.
- e) First Player Second Combat Phase (14.0). The First Player again conducts attacks.
- f) First Player Supply Attrition Phase (17.0). The First Player checks for any supply attrition.
- Second Player Turn
- a) Second Player Mobilization Phase (9.0). The Second Player receives Scheduled Reinforcements and can spend VP to mobilize (build) reinforcements.
- b) Second Player Reorganization Phase (10.0). The Second Player reorganizes units.
- c) Second Player Movement Phase (11.0). The Second Player moves his land units.
- d) Second Player First Combat Phase (14.0). The Second Player conducts attacks.
- e) Second Player Second Combat Phase (14.0). The Second Player again conducts attacks.
- f) Second Player Supply Attrition Phase (17.0). The Second Player checks for any supply attrition.
- Administrative Phase
- a) VP Sub-Phase. Each player checks the number of Strategic Objective hexes his forces control and adjusts the VP Index accordingly.
- b) Turn Advance Segment. Move ahead the Game Turn Marker (one space on the Turn Record Track on the mapsheet). If it's the last turn of the scenario, the game ends and the players check for victory.
Old Hands Note: On Turn 1 of scenarios, players perform all steps of the sequence of play normally, including mobilization. Also, note that while there are two movement phases in each player's turn, each player has only one movement phase.
7.0 Map Geography & Control
7.1 Front Lines
There are three front lines on the map.
-
1914: This is indicated by the 1914 border running from Russia-Germany to Russia-Austria-Hungary. In 1914, Russia, Germany and Austria-Hungary are belligerents. All other countries are neutrals.
-
1915: This is indicated by the 1915 line. Russia, Germany and Austria-Hungary are belligerents. All other countries are neutrals.
-
1916 & 1917: This is indicated by the 1916-17 line. Russia, Germany and Austria-Hungary are belligerents. All other countries are neutrals.
Units initially deploy for the scenario on their own side of the initial front line.
Note: For 1914 and 1915, the front line terminates at the Romanian border.
7.2 Unit Control
A player controls all countries designated by the scenario for his side. Generally, all units on each side are friendly to each other; see specific rules for details.
7.3 Hex Control
You "control" a hex if any of the following is in effect.
- A unit of your side physically occupies the hex.
- A unit of your side enters the hex, then leaves, and the enemy has not yet reoccupied it with one of his own units. Place a Control marker for your side on the hex.
- If the hex was on your side of the Front Line for the start of the scenario and no enemy unit later entered it.
7.4 Hex Occupation
Certain game functions may require your forces to physically occupy a hex (as opposed to just "controlling"). You occupy a hex if one or more friendly units are in that hex. Occupation also gives you control of that hex. This is regardless of supply state (17.0) or the presence of enemy zones of control (13.0).
8.0 Grand Strategy
On the January-February turn of each year (starting with 1914), determine the CP Grand Strategy for the ensuing year per the instructions on the Turn Record Chart. This will be either CP Main Effort in the West, or CP Main Effort in the East.
The year's initiative is thus based on whether the CP Main Effort in the East or the West.
Note: This can allow for a "double-move" when the Main Effort switches.
8.1 Special Effects
If the CP main effort is in the West, then the elimination of CP units in combat costs the CP player additional VP.
9.0 Reinforcements, Mobilization, Replacements & HQ Conversions
9.1 Reinforcements
You enter new units into play during the Mobilization Phase of your player turn. There are two types of Reinforcements.
- Scheduled Reinforcements: These are units which are received according to the Reinforcement Schedule. These units cost no VP.
- Emergency Reinforcements: These are units which you can mobilize (build) by expending VP.
9.2 Scheduled Reinforcements
The Reinforcement Schedule on each player's Turn Record Chart (TRC) lists units which will appear on certain turns. These units are placed per (9.4). These units can be placed only by the schedule; you may not mobilize them via expending VP (5.0). Also, they cost no VP to deploy.
Designer's Note: These units include HQ, army, and a single Turkish corps. They represent command echelons and formations created due to training and organizational issues above the scale of the game.
The TRC also lists Supply Units which the player receives at no cost in VP.
9.3 Emergency Reinforcements
You may mobilize units (other than Scheduled Reinforcements) by expending VP. The Mobilization Table (see game charts) specifies the VP cost for each unit brought into play. You can also build supply units in addition to those received per (9.2).
Note: You cannot build armies via emergency mobilization. You can build the component corps and then combine them into armies via the Reorganization rule if there is an army available. For example, the Russian 9th Army is received as a reinforcement on turn 2. The Allied player could not build the 9th Army on turn 1, but could rebuild it if it were destroyed after turn 1.
9.4 Reinforcement Placement
A player places reinforcements (either type) on the map on the following hexes.
- Friendly Cities: These must be friendly controlled and in the same country as the unit being mobilized.
- Friendly map edges: These hexes must be friendly controlled and further must contain a railroad leading off the map edge. This must be in the same country as the unit being mobilized.
- Supply units: Per (1) and (2) above (they have no countries per se). You can also place Supply Units in captured Strategic Objective hexes.
- Special Reinforcements: A scenario or rule may designate certain units to be placed in additional ways.
9.5 Additional Conditions
You may never have more units in play than those in the counter mix.
The "Notes" column on the Mobilization Chart will provide restrictions on when certain units can be mobilized:
- Year: Some units can be mobilized only during certain years.
- Delay: Certain units are listed as having a delay. This means that you expend the VP to mobilize them on one turn, and then deploy them one or two turns later. Place the units on the Turn Record Chart on the indicated turn space to indicate this.
Example: The Central Powers mobilizes an Alpine Corps in June 1915. It is received as a reinforcement on July 1915.
9.6 Reinforcement Limits
You may place up to one HQ or army, or three units of any other type, per placement hex per friendly Mobilization Phase. This includes both scheduled and emergency reinforcements (but not supply, which is always an additional free placement). Otherwise, there is no limit to the number of reinforcements you can place in a turn.
9.7 Restrictions
Reinforcements may not be placed in a hex containing enemy units, neutral countries, or prohibited terrain. Reinforcements may not be placed in enemy zones of control (even if the hex is friendly occupied). Placement is not considered movement and doesn't use any movement points.
If all the hexes eligible for the entry of one or more reinforcement arrivals are occupied by enemy units, or are blocked for other reasons, those units are delayed until they can be properly deployed.
See the Special Units rule for additional information (21.0).
9.8 National Production
The CP may place any number of supply units in Germany. The CP may place a maximum of two supply units in Austria-Hungary, and one in Bulgaria (if belligerent).
The Allies may place any number of supply units in Russia. The Allies may place a maximum of one in Romania (if belligerent).
9.9 Replacements
In general, units that have been eliminated may be brought back into play as reinforcements by paying the VP cost for them.
9.10 Destroyed Armies
Armies which are destroyed cannot be rebuilt by mobilization per se; they can be rebuilt by building corps which you can subsequently reorganize into that army. Place armies which are destroyed for any reason in the player's Available box.
Example: The Russian 2nd Army is destroyed in combat on turn 1. On a later turn the Allied player builds three active corps and then reorganizes them into the 2nd Army (10.0).
Old Hand's Note: You can rebuild units even if they were out of supply when destroyed. HQs, however, can never be rebuilt.
9.11 Demobilization
You may remove from the map any friendly unit during the friendly Mobilization phase if it can trace General Supply (17.0). It's again available for mobilization on any future turns. Such units may not be re-mobilized on the turn of demobilization. Units removed by demobilization don't count as having been lost in combat for VP purposes, nor do they restore any VP for their removal from the map.
Note: Demobilization is occasionally useful when you need additional units for reorganization or other game actions.
10.0 Reorganization
Armies can be replaced with corps, and corps with armies, during certain points in the game turn. Breaking down armies into corps, and combining corps to form armies, is termed "reorganization." The Reorganization Chart gives the details for army and corps equivalents.
Exception: Romanian Armies cannot be reorganized.
10.1 Breakdown
You may breakdown units voluntarily in the Reorganization phase. You may be required to breakdown units involuntarily in the Combat phase, or during the Supply Attrition phase. To break down an army, remove the unit from the map and replace it with the number and type of corps indicated on the chart.
10.2 Combining
You can combine units only during friendly Reorganization phases. The involved corps must be in the same hex and within radius of a supply unit (17.0). Remove the corps from the map and replace them in the same hex with an appropriate army or army abteilung. This also expends the supply unit. One supply unit can support one army formation.
Note: The converse is not the case; if an army is broken down, no supply unit is received.
10.3 Restrictions
Units that break down or combine must generally be of the same nationality and unit type.
Example: The CP player could combine three German infantry corps into one infantry army, but not one German and two Austro-Hungarian corps (see the Sud Army rule for a special case). Similarly, you could not combine a German regular infantry corps and a shock corps into an Army Abteilung.
Players may not break down or combine units during initial deployment (unless scenario instructions allow this).
10.4 Army Availability
A player may not combine corps into an Army unless that Army was already brought into play (either by scenario deployment or as a reinforcement). However, an Army which arrives as a reinforcement does not require the combination of any corps to initially place it.
Example: The German 10th Army is a January-February 1915 reinforcement. On October 1914 the CP could not combine three corps to form the 10th Army. When the 10th Army arrives on January-February 1915, place it on the map (again, without having to combine corps or expend VP). Let's say that in that turn, 10th Army is destroyed in combat. On March-April, the CP could then combine three corps to build it.
10.5 German Army Abteilung
As a special case to the above, the CP may build Army Abteilung (Army Detachments). Combine two corps and expend a supply unit, per (10.2). Army Abteilung can be built on any turn.
Designer's Note: This represents vastly superior German higher staff and organizational skills.
10.6 Romanians
Romanian armies cannot break down. If some event would call for a Romanian army to break down, it is eliminated instead.
10.7 HQ Conversions
Army Group (xxxxx) HQs are backprinted. They are initially deployed on their front side. Starting in 1916, a player can convert HQs to their reverse (more effective) side during the Reorganization Phase. To do so, the HQ must be within radius of a friendly supply unit (17.0). Expend the supply unit and flip the HQ. The HQ remains on its reverse side for the remainder of the game (even if eliminated and rebuilt). One supply unit can support one HQ conversion. Additionally, the HQ cannot be in an enemy ZOC to be converted.
11.0 Movement
During each friendly Movement Phase, you may move some, none or all friendly units. There are three types of land movement.
- normal movement, that is governed by each unit's printed movement factor;
- forced march, which is double each unit's printed movement factor, but you must expend a supply unit (17.0); and
- railroad movement, conducted according to 18.0.
11.1 General
You move units one at a time, tracing a path of contiguous hexes through the hex grid. Units may be moved in any direction or combination of directions within the hex grid printed on the map. As each unit enters a hex it expends one or more movement points (MP) from its movement allowance (MA). Consult the Terrain Effects Chart (TEC, 43.3) for further details.
11.2 Movement Restrictions & Prohibitions
In general, you may move your units only during your own Movement Phase. Once you've moved a unit and removed your hand from it, it may not be moved again that phase unless your opponent allows it. A unit may expend all or some of its MP before coming to a halt. Unused MP may not be accumulated from phase to phase or turn to turn, nor may they in any way be transferred from unit to unit.
Note: Retreats and advances after combat are special forms of movement; see sections (15.0 & 16.0).
11.3 Zero Movement Factor Units
Zero movement factor units may not move once placed on the map except to be demobilized or go into the dead pile.
11.4 Effects of Terrain
A unit must expend one MP to enter a clear terrain hex. To enter other types of hexes, a unit must expend more than one MP per hex. When the TEC calls for an MP expenditure to cross a hexside, that cost is in addition to the cost for entering the hex.
11.5 Road Movement
Railroads are considered to have roads running alongside them. Units moving along roads (not by rail movement (18.0), but using normal movement):
- Pay one-half movement points per hex entered.
- Do not pay any movement costs for other terrain in or around a hex they're entering via a road.
- Can cross river hexsides at no extra movement point.
Note: Roads in railroad hexes may be used regardless of supply state and which side controls the railroad.
11.6 Minimum Movement
All units with a printed MA of "1" or more may generally move a minimum of one hex per friendly Movement Phase, no matter the TEC costs involved, by expending all their available movement points at the very start of that move.
11.7 Restrictions
Units may never enter an enemy occupied hex nor prohibited terrain, nor move directly from enemy zone of control directly to an enemy zone of control (13.0). This is so even for units using minimum movement.
11.8 Crossing Borders
Generally, units may go anywhere on the map other than neutral countries (23.0).
11.9 Forced March
You can double the movement factor of all friendly units within a supply unit's radius by declaring "Forced March." Expend the supply unit. See (17.8).
12.0 Stacking
Having more than one friendly unit in the same hex at the same time is called "stacking."
12.1 Stacking Limits
Generally, you may have the following number of units in a single hex:
- One army or one HQ, or three corps; plus
- One supply unit; plus
- One fortress unit; plus
- One Armored Train, or one Shock corps, or one optional Tank unit.
Example: You could have one army plus one shock corps, plus one supply unit in a hex containing a Fortress, or one supply unit plus three corps and one Fortress. Note that you could not have more than one supply unit in a hex. German army abteilung count as one army for stacking.
Note: Control markers do not count for stacking.
12.2 Application
Stacking limits apply at the end of Movement and Combat phases (friendly and enemy). If a hex is over-stacked at the end of a Movement or Combat Phase (friendly or enemy), the owning player must eliminate excess units. These do not count as VP lost.
Example: You could over-stack units during a Mobilization phase if those units were then moved off or otherwise reorganized during subsequent phases of that turn.
Friendly units may move through hexes containing other friendly units at no extra cost or penalty. There's no limit on the number of friendly units that may enter and pass through a single hex in one phase. If, however, at the end of any friendly or enemy Movement or Combat Phase, or at the end of any battle's resolution, a hex is found to be over-stacked, the excess units are eliminated by the owning player (his choice). Hexes; stacking limits also apply during initial set up.
12.3 Friendly Stacks
Friendly units of different nationalities may stack together. However, units of different nationalities may not attack together unless the attack is supported by a HQ (19.0). Supply units may stack with all friendly units on a side.
12.4 Prohibitions
A friendly unit may never enter a hex containing enemy units.
12.5 Scenario Deployment
Players must observe stacking limits during set up.
13.0 Zones of Control
The six hexes immediately surrounding a unit's hex constitute its zone of control (ZOC). All units with a printed movement of one or more (including Armored Trains) exert ZOC at all times (except supply units, which never exert any ZOC). ZOC affect enemy movement, lines of supply, and other game actions as designated.
13.1 ZOC Effects
ZOC are generally not negated by the presence of other units in hexes, enemy or friendly, but see fortresses (20.0). ZOC generally extend into and out of all terrain types and across all hexsides except for all-sea. All units of both sides exert ZOC at all times, regardless of the phase or player turn or their supply status.
13.2 Fortress ZOC Negation
Friendly unit ZOC never extend into hexes occupied by enemy Fortress units.
13.3 Multiple ZOC
Both friendly and enemy units may exert ZOC into the same hexes at the same time. There are no additional effects if more than one unit, friendly or enemy, projects its ZOC into the same hex at the same time.
13.4 Effects on Movement
Units must stop moving when they first enter an enemy ZOC. They may move no farther during that Movement Phase. Units may exit enemy ZOC in two ways.
- Due to combat results that call for retreat or pursuit; or
- Due to disengagement; see below.
13.5 Disengagement
Disengagement the act of a friendly unit moving out of an enemy ZOC during a friendly Movement Phase. To do so, the exiting unit must enter a hex that contains no enemy ZOC. Such units may enter another enemy ZOC later during the same move, as long as that first hex they entered didn't contain an enemy ZOC. It costs an extra MP to disengage in that way. Disengagement may take place only at the very start of a unit's movement. And again remember 11.3.
13.6 Effects on Combat
Attacking is voluntary; you don't have to attack simply because you have units in enemy ZOC.
Units may not retreat after combat into any hex containing enemy ZOC (again, see 13.0).
Units may advance after combat (pursue) into and/or through enemy ZOC; enemy ZOC never block advance after combat. (This is a special case of moving through enemy ZOC.)
13.7 Effects on Supply
Supply lines may be traced into but not through hexes containing enemy ZOC. (This is so even if the hex is occupied by a friendly unit. This is due to the rigid logistical systems of the era).
14.0 Combat
Units engage in combat to destroy enemy units and seize hexes.
14.1 Combat Phases
Each player has two Combat Phases in each of their own player turns. You may conduct attacks in both of your own Combat Phases. A given friendly unit may attack in one, both, or neither of your Combat Phases in each of your own player turns. Your units never attack during the opposing player's Combat Phases.
14.2 Attacking
Combat is always voluntary. Attacking units must be adjacent to the defending enemy units they will attack. The player whose turn is in progress is termed the "attacker," and the other player is the "defender" (regardless of the overall situation across the map). There are two different combat results tables (CRT), Standard and Shock.
14.3 Combat Procedure
To resolve an attack:
- The attacker declares which attacking units will be attacking which defending units. He also designates which supply and HQ units will support the attack.
- Total the combat strengths of all attacking units involved in the attack. Make any modifications for supply status and concentric attack.
- Total the defense strength of all defending units in the battle. Make any modifications for defensive terrain.
- Divide the attacker's strength by the defender's strength and multiply that result by 100 to get a percentage.
- Consult the appropriate CRT under the appropriate percentage column.
- The attacker rolls a six-sided die, and immediately applies the combat result.
- Resolve the next attack, if any.
14.4 Which Units May Attack
A unit must have a printed attack factor of "1" or more in order to be able to attack. Fortress and supply units cannot attack. Units with white-bracketed attack factors are "support units;" their roles in combat are explained below.
The attacking player may resolve his attacks in any order desired. He doesn't have to declare beforehand all the attacks he will launch during that phase. He can attack with all, some or none of his units.
A defending unit or stack may be attacked from as many as six adjacent hexes at the same time. A unit may not attack more than once per individual Combat Phase.
A defended hex may be attacked no more than once per Combat Phase.
14.5 Multi-Unit & Multi-Hex Combat
If an attacking unit is adjacent to more than one hex of enemy units, it may attack only one of those hexes. No single attack may have as its objective enemy units in more than one hex. An attacking force in two or more hexes combines the combat strengths of its units and attacks as a single force into their single target hex. Within those limits, attacks may potentially involve any number of attacking or defending units.
14.6 Combat Strength Unity
A given unit's attack and defense factors are always unitary. That is, a given unit's combat strengths may not be divided among different combats on attack or defense.
Units stacked in the same hex may be combined for an attack, or they may attack separately into different hexes, or some (or all) might simply not attack at all.
Old Hand's Note: The attacker may not voluntarily reduce the percentage column of any attack.
14.7 Defense Totality
Units defending in the same hex must be attacked as a single combined total; they may not be attacked separately.
14.8 Attack Bonuses
There are several attack bonuses that the attacking player may benefit from, depending on their applicability at the moment of an attack, listed as follows.
- Headquarters. The attacker may add in the (parenthesized) attack factor of one HQ within its support range (19.0).
- Maximum Attack Supply. The attacker doubles the attack strength of his units if they have maximum attack supply; see (17.8).
- Concentric Attack. In any battle, if the involved attacking units and/or their ZOC are in all six hexes immediately surrounding a defending hex, the attack factors of all those attacking units are doubled, including that of any involved support units. The presence of non-attacking friendly units, and/or non-involved enemy units, and/or their ZOC, don't count toward achieving or negating this bonus.
The attacker cannot gain the Concentric bonus against units defending in the same hex as a fortress unit, nor against fortress units defending by themselves.
If any hex(es) around a hex against which you are trying to achieve concentrically is/are unplayable for any reason—such as being all-sea or belonging to a neutral country—those hexes are treated as if they were actually playable when it comes to determining if the minimum attacking-unit and ZOC requirements have been met.
Note: An HQ may have its attack strength doubled through the expenditure of Maximum Attack Supply. The Supply unit used to double the HQ attack strength can also be used for other units involved in the attack if they are within range.
14.9 Multiple Attack Bonuses
If the attacker has both Maximum Attack Supply and Concentric Bonuses, then the attack strength is tripled. Any doubling for Concentric Attacks is applied after HQ support and Maximum Attack Supply are determined.
14.10 Co-belligerents
Generally, units of different countries may not combine on the attack. See HQs for a special case (19.0).
If units of more than one country are in the same hex, they defend together (regardless of the above).
14.11 Defensive Bonuses
There are several defense bonuses that the defending player may benefit from, depending on their applicability at the moment of an attack, listed as follows.
- Terrain. Defending units benefit from the terrain in the hex they occupy. Terrain in hexes occupied by attacking units have no effect on combat. The effect of terrain on combat is reflected by doubling the defender's combat strength. The TEC lists those defensive multiples. Terrain effects aren't cumulative; if there's more than one type of terrain bonus available in a hex, the defending force receives only one multiple. No defender may ever be more than doubled for any reason or combination of reasons.
- River/Lake Hexsides. A force receives the benefit for defending behind a river or lake hexside only if all attacking units are attacking across such hexsides. Further, water hexside doubling in no way works to further enhance the defense of a unit that's already doubled due to some other reason.
14.12 CRT Choice
The attacker always chooses which of the two CRTs will be used in each attack. The attacker is always free to choose the Standard CRT. In order to be able to choose the Shock CRT, there must be at least one shock-capable unit in the attack force (Shock Infantry or Tank). Note, though, that the presence of such a unit doesn't force the attacker to choose the Shock CRT.
14.13 Combat Resolution
The combat percentage is determined by dividing the attacker's strength by the defender's strength and then multiplying it by 100. Use the column corresponding to that percentage on the CRT when rolling the die.
Example 1: The attacker has 20 combat factors and the defender 12. Thus 20/13 x 100 = 153 [printed as "20/13"; with the defender at 12 the calculation is 20/12 x 100 = 166], so that combat is resolved on the 100-199% column.
Example 2: The attacker has 10 combat factors and the defender 12. 10/12 x 100 = 83; so the combat is resolved under the 50-99% column.
14.14 Combat Result Explanations
These are adjacent to the CRTs (see charts). For each result, apply the outcomes in the order listed.
14.15 Unit Eliminations
Elimination of unit(s) is explained as follows.
- You eliminate units by removing them from the map and putting them into your dead pile.
- Each combat result gives the priorities for eliminating involved units, if any. In other situations, the choice of which units are to be eliminated are up to the owning player.
- Certain results call for the elimination of non-army units—this refers to all units without the army or army abteilung symbol (xxxx or [xxxx]): HQ, corps, fortresses, supply units, armored trains, etc.
- If the Shock CRT has been chosen, this may require the attacker to lose Shock capable units before others.
14.16 Forced Breakdowns
Certain combat results call for army level units to be broken down. The breakdown occurs at the instant the combat result occurs (See 10.0).
Note: Otherwise, you may not break down units during combat (for example, you could not break down an army for its component corps to advance in separate directions).
If a combat result calls for an army to break down but there are insufficient corps available to do so, the army still breaks down but no corps are placed on the map. However, the army in this case does not count as VP eliminated.
Example: A DD result requires a Russian army to breakdown, but the Allied player has only one corps available (all others are on the map). He removes the army and places that one corps in the hex.
Romanian and Bolshevik armies have no corps breakdowns. If they are called to breakdown, they are eliminated (and count as armies for VP).
14.17 Second Attack Phase
The Second Attack Phase is conducted in the same manner as the first. A unit is not required to make a second attack just because it made a first, and units which did not attack in the first phase may attack in the second.
Note: It's useful to use pursuit (see 16.0) to move units into positions from the first attack phase to make advantageous attacks in the second.
15.0 Retreat After Combat
When a combat result requires a player's units be retreated, the player designated by the result must immediately move those units the indicated number of hexes away from their combat position. If the combat result doesn't specifically designate one player to conduct a retreat, the owning player conducts it. Retreat is not normal movement; it's counted in terms of hexes rather than movement points, and units may always retreat the number of hexes indicated regardless of their printed movement allowance.
15.1 Panic
A Panic is a special type of Retreat result. The player controlling panicked units rolls one die for each of them. Then retreat each unit a number of hexes equal to the die roll. If more than one unit panics, check for this one at a time in any order desired.
15.2 Retreat Priorities
Retreat is subject to the following restrictions. If a unit is unable to retreat within these restrictions it is eliminated instead.
- Units may never retreat into hexes containing enemy units.
- Units may not retreat into hexes containing enemy ZOC. Remember: Fortress units negate enemy ZOC, but other friendly units don't do so.
- Units may not retreat off the map or into terrain or across hexsides that can't normally be entered or crossed by land movement.
- Units may retreat into and through hexes containing friendly units, even in violation of stacking rules. If a unit would end its retreat over-stacked, it must continue retreating until it reaches a hex within stacking limits. If such a hex is not available, then that unit is eliminated.
- A retreating unit may not move into the same hex more than once. Further, it must end the retreat a number of hexes away from its original hex equal to the retreat requirement (or more, to avoid over-stacking). There is no doubling back.
- Within the strictures given above, stacked units may be retreated together or separately.
- In no case may a unit be retreated into a hex that would cause it to be eliminated or over-stacked if other retreat paths are available.
- Zero movement factor units not otherwise covered above are eliminated if forced to retreat.
15.3 Multiple Defense
Units that retreat into a hex that's attacked later that same phase defend normally and contribute their defense strengths normally (which may occur if retreating into a hex in which no enemy ZOC is exerted).
16.0 Pursuit
"Pursuit" is a special form of movement that may occur after each combat. Pursuit for a particular combat must be conducted before the resolution of the next battle is begun.
Old Hands Note: Pursuit is "advance after combat."
16.1 Pursuit Procedure
If a combat result calls for a player to conduct pursuit, he may immediately move the number of hexes indicated with eligible units involved in that combat. The first hex must be the hex the defending enemy unit(s) occupied. Any second hex (if allowed) may be in any directions.
Note: A combat result must specify "Pursuit" for it to occur. For example, even if a Stalemate result caused all defending units to be eliminated from a hex, surviving attackers couldn't enter it, since no pursuit is specified for a Stalemate result.
16.2 Pursuit Distance
Generally, a pursuit can be up to one hex. Certain combat results will specify a two hex retreat.
16.3 Qualified Units
To pursue, a unit must have a printed movement factor of one or more, and a printed combat factor of one or more (and participated in the combat).
Units with a bracketed combat factor, or a printed attack and/or movement factor of zero never pursue.
Note: Pursuit may not be enhanced by expending supply.
16.4 Details
Pursuit doesn't expend MP; however, it may only be made into hexes the pursuing units could normally enter during a Movement Phase. Pursuing units may ignore enemy ZOC. They may not enter hexes containing enemy units. Pursuit is entirely at the player's option, and a unit can pursue some, none or all hexes of a pursuit.
If the originally defended hex isn't cleared of units, no pursuit may be conducted.
17.0 Supply
There are two types of supply:
- General Supply, which is used to sustain units on the map; and
- Offensive Supply, which is used to enhance movement and attacks, and to support Reorganization.
17.1 Supply Units
Supply units are treated similar to combat units. However, they can provide special forms of supply.
Note: Supply units are printed with a front and back side so that they can be flipped over to indicate that they have been moved. Once flipped, a supply unit remains flipped until the end of that player's turn. This has no effect on Offensive Supply.
17.2 Supply Radius
Each supply unit has a supply radius number printed in its upper right corner. Supply radius is always traced from the Supply unit providing the supply to the supplied unit(s). It's traced in terms of hexes, not movement points. Supply radius does not cost movement points, nor can it be enhanced via railroads.
Example: A CP supply unit in Breslau could project supply to a German infantry corps in Krakow, three hexes away.
17.3 Restrictions
No more supply units may exist on the map than are included with the counter-mix, even if a player has accumulated supply.
- Supply cannot be traced into hexes containing enemy units.
- Supply cannot be traced across all-sea hexes.
- Supply cannot be traced into, out of or through Marsh hexes (even along a rail line).
- Supply cannot be traced into neutral countries.
- Supply radius terminated in the first hex containing an enemy ZOC (though if a friendly unit is in such a hex, it could be supplied).
- Supply radius may not be traced out of an enemy ZOC.
17.4 Same Hex Supply
A supply unit in an enemy ZOC can provide supply only to units in the same hex.
A unit in the same hex as a supply unit is in supply, regardless of enemy ZOC or other conditions.
17.5 Tracing General Supply
A unit is in General Supply if:
- If a Supply Radius can be traced to it per (see 17.2).
- If it is currently in a hex containing a friendly fortress unit.
- If it is on or adjacent to a railroad which can in turn trace a path of contiguous railroad hexes back to a hex containing a friendly supply unit. The path cannot be enemy occupied or in enemy ZOC.
17.6 General Supply Actions
A unit must be in general supply to:
- Initiate railroad movement (see 18.0).
- Avoid a supply attrition check (see 17.7).
Note: General Supply does not expend supply units. A supply unit may perform any number of general supply functions in the course of a phase or turn and still remain in play on the map.
17.7 Automatic General Supply
The following units are always in general supply:
- Supply units.
- Fortifications and units in that same hex.
Note: Fortifications are never supply sources to units outside of them.
17.8 Supply Attrition
At the end of certain turns—depending on the terrain involved; see the TEC—you must check your land units for supply attrition. If they aren't in general supply at those times, roll a die for each such unit. On a 1-3, supply attrition goes into effect. On a 4-6 there is no effect.
The terrain a unit is in during a supply check will determine if a check actually has to be made for it. That's shown on the TEC.
Effects of Supply Attrition
- If the unit is an army/army abteilung, break the unit down into component corps.
- If the unit is another type of unit, eliminate the unit.
Note: In general attrition checks are made during Winter turns.
17.9 Offensive Supply
Offensive Supply is used to enhance certain game actions. It applies to the following situations.
- Forced March Movement during Friendly Movement Phases. The supply unit is expended at the start of the movement phase. The effect is to double the movement factors of all friendly units within the expended supply unit's radius.
- Maximum Attack Supply during Friendly Combat Phases. The effect is to double the attack factors of all attacking land units within the expended supply unit's radius for one attack. This includes any HQ unit supporting the attack (doubling the HQ support factor). You can determine which supply units will support which attacks as each combat is resolved.
- Reorganization. See 10.0.
17.10 Offensive Supply Prerequisites
A unit is in offensive supply if:
- It is within Supply Radius of a Supply Unit; and
- That supply unit didn't move that same player turn; and
- The supply unit is then expended.
- Supply units used to make a maximum attack supply attack in the First Combat Phase do not carry over to the Second Combat Phase.
Note: A supply unit that is placed as a reinforcement in the same turn can be used to provide Offensive Supply.
17.11 Offensive Supply Determination
Supply status and expenditure is determined at the start of the phase. A player must declare all supply units he is expending for any purpose at the start of the phase in which they are to be expended.
Note: Rotate a supply unit 180 degrees or some other mnemonic. This will have an important impact on play, as you will have to usually move supply units to a position from which they can support attacks on one turn, and then use them for attack supply on a subsequent turn. This reflects the pace of logistics in World War I.
17.12 Force Marching Details
Units that initiate forced march need only start the movement phase in a supplied position. They may move out of supply during that move.
Supply units may use forced march movement, but another supply unit would first have to be expended to double the forced marching supply unit's movement.
17.13 Attacking Details
A player may combine non-supplied and maximum attack supplied units in the same attack (which may happen owing to the way supply radius is traced). The supplied units would double their attack factors while the non-supplied units would use their printed strength. A player can use more than one supply unit to support the same attack to meet supply radius requirements (but attack factors may never be more than doubled).
17.14 Otherwise
Units do not have to be in general or offensive supply to move or attack. They can always move and attack using their printed movement and attack factors. Units can always conduct all game actions normally, with the exception of those for which general or offensive supply is specified.
18.0 Railroad Operations
Players may use railroads to conduct rail movement. Both players may generally use any railroads on the map, included captured enemy hexes, as long as all the prerequisites for rail net movement are otherwise met.
18.1 Railroad Movement
Units may move via railroad by paying one movement point. Such units must be in a General Supply (17.0) position in the hex in which the railroad movement is initiated. Such units may move an unlimited number of hexes as long as they move entirely by rail within their side's rail net (18.4). They pay no further movement costs while making such moves. A given unit may use rail movement only once per movement phase.
18.2 Rail Capacity
Generally, a player may move a maximum of three Army Equivalents per Movement phase. An "Army Equivalent" is defined as: one army, or one HQ, or three units of any other size (including supply).
Armored Trains, however, are never counted against available rail capacity.
18.3 German Rails
The CP may move an unlimited number of German units and CP supply units if they move entirely within Germany. This does not count against the three army limit above.
18.4 Rail Nets
You may use only those railroad hexes you controlled at the start of a movement phase (see 7.0 for control). Use the Control markers as mnemonics, if needed.
Additionally, you cannot use Rail movement to cross the Russian border (from either direction). Units can use rail move on the other side of the border only if they start the movement phase there.
Note: This is due to differences in track gauges and various logistical factors.
Example: A German unit starting a rail move in Berlin moves to Thurn and stops. The unit moves across the border by land movement, ending up in Warsaw. Then, on a subsequent turn, it could use rail movement out of Warsaw.
18.5 General
Railroad and non-railroad movement may be combined in the same phase, in any order, but a unit may only make one rail move per movement phase. For example, a unit may not move by rail, move off the railroad, then move by rail again in the same phase.
Units may start or move adjacent to enemy units while using rail movement, subject to normal ZOC rules (13.0).
Note: Thus, a unit could use rail movement to move adjacent to an enemy unit and then attack it in the same turn.
18.6 Serbian Transit
The rail line running from Austria-Hungary to Bulgaria may be used by CP units starting in the first turn of 1916. Units move via the transit line and must end the move on the other side. Allied units may never use the Serbian Transit RR.
19.0 Headquarters (HQ)
HQ represent higher level command control, heavy artillery, reserves, and various support units. The parenthesized number on the left of the unit symbol is their support radius.
19.1 HQ Applicability
HQ have a parenthesized attack factor, meaning they may not attack by themselves. Each HQ may, however, add its attack factor to any one attack per friendly Combat Phase. To do so, at least one attacking unit must be within the HQ support radius. A HQ support radius is traced in the same manner as a Supply Radius (but the effects are different).
19.2 HQ Restrictions
- You may never use more than one HQ to support any one attack.
- HQs may only support an attack if at least one of the attacking units is the same nationality as the HQ.
- HQs are never affected by the outcomes of attacks they support.
- HQs may not attack by themselves. They defend normally.
- An HQ support factor may not be used to support a defense.
- HQs cannot be rebuilt.
19.3 Coordination
Generally units of different nationalities on the same side may not attack together. However, if a HQ is supporting an attack, then units of different nationalities may attack together. The HQ need support only one unit (of any nationality) to provide this coordination.
Note: Unlike Supply Units, a HQ does not have to trace a radius to all units involved in an attack to provide support; one such unit is sufficient.
Note: Also, you can attack with more than one unit without a HQ if all those units are of the same nationality.
19.4 Maximum Attack Supply
You can double a HQ support factor by expending a supply unit per (17.0). This can be the same supply unit which supports other units in the same attack (or not).
19.5 HQ Siege Guns
Fortresses lose their ability to negate concentric attacks if an attack against their hex is supported by a HQ.
20.0 Fortress Units
Fortress units provide certain bonuses.
20.1 ZOC Negation
Enemy Zones of Control do not extend into a hex containing a fortress unit. Zones of control extend normally out of friendly Fortress hexes.
Note: Fortresses have ZOC, representing garrison forces and outlying forts.
20.2 Concentric Attack Negation
Concentric attacks may not be made against hexes containing fortresses (but see 19.5).
Old Hand's Note: A "retreat" combat result will eliminate a fortress.
21.0 Unique Units
21.1 Central Powers Sud Army
The Central Powers player may create the Sud Army Abteilung on any turn. This requires one German and one Austro-Hungarian active corps, plus a supply unit expenditure. The Sud Army is considered a German army for other game purposes.
21.2 Shock Units
If an attacking force includes any shock units, the attacker can select the Shock CRT (14.3).
Note: Certain combat results may require the loss of Shock units.
21.3 Alpine Units
Alpine units double their attack strength when attacking into a rough hex. If combined with a concentric and/or maximum supply attack, they triple their attack strengths.
21.4 Armored Trains
These are treated the same as other land units, except they may move and attack only along the friendly rail net, including retreat and pursuit, although they don't have to be in general supply to move. They may attack adjacent hexes only if connected by railroads (regardless of RR control). Also, see stacking (12.0). Unlike other units using railroad movement, they can cross the Russian border without penalty, as long as other requirements are met (18.4).
Armored Trains project a ZOC normally, like any unit.
21.5 Turks
The Turkish corps is received as a reinforcement the turn that Romania becomes a Belligerent. Place it in Bulgaria. It is Central Powers controlled.
21.6 Amphibious Units
During the Movement phase, you can move an amphibious unit from any one friendly port you control to any other port in the same sea (Baltic or Black). The unit can debark from and land in ports in enemy ZOC (or not). This consumes the unit's entire move for the movement phase. Such units may attack normally from their disembarkation hex.
Note: The Optional rules provide additional amphibious missions.
21.7 Optional Units
Various units printed as "Optional" are only used with the on-line optional rules.
22.0 Weather
The Turn Record Chart indicates which turns are Summer, Winter and Thaw. Note that Winter and Thaw turns encompass two months each.
22.1 Winter
During winter game turns, the following effects apply:
- Supply radius for all Supply units for Offensive Supply purposes is reduced to the hex in which the Supply unit occupies and its six adjacent hexes.
- It costs 2 movement points to enter forest hexes (instead of 1).
- All rivers and lakes freeze. Ignore river and lake hexsides for movement and defense.
- No amphibious operations are allowed in the Baltic Sea.
22.2 Thaw
Thaw affects units in Russia. In Thaw game turns, apply (1) and (2) above. Outside of Russia, treat Thaw as Summer. For (1), use the hex in which the supply unit is located to determine the radius.
23.0 The Balkans & Other Complications
Romania and Bulgaria begin the 1914, 1915 and 1916 scenario as neutrals. The following rules apply to neutrality.
- Neither side's units may enter a neutral's territory, nor attack into it. Supply radius and HQ radius cannot be traced through neutral hexes.
- Neutral units may not move or engage in combat; They have no ZOC.
1916 Front Line: Romania is neutral at the start of the 1916 scenario; ignore the section of the 1916-17 frontline going through northeast Romania.
23.1 Belligerency
Romania becomes belligerent either according to the turn record chart or scenario instructions (historically, August 1916). Bulgaria becomes a belligerent on the Central Powers player game turn following Romania becoming a belligerent. The instant that a country becomes a belligerent with the following effect:
- Romanian units are controlled by the Allies. Its reinforcements may be placed only in Romanian city hexes. Further, only one Allied supply unit per turn may be placed in Romania.
- Bulgarian units are controlled by the Central Powers. Its reinforcements may be placed only in Bulgarian city hexes. Further, only one Central Powers supply unit per turn may be placed in Bulgaria.
23.2 Special Reinforcements
Place the German Mackensen HQ and the Turkish corps on the south map edge in Bulgaria.
23.3 Limits
Romanian units may enter only Romania, Austria-Hungary, Bulgaria and Russia. Bulgarians units may enter only Bulgaria and Romania.
Historic Note: Bulgaria entered the war in September 1915, but its efforts were mainly against Serbia. It was not until Romania entered the war in 1916 that the Bulgarians committed an army to the fighting on the territory covered by the game map.
Victory Points (5.0) Chart
Record Immediately
| Event | VP Gain | VP Loss |
|---|---|---|
| Capture (or recapture) Strategic Objective hex | Capturing side gains 5 | Enemy side loses 10 |
| CP eliminates (via combat) Allied HQ or army | 0 | Allies loses 6 VP |
| CP eliminates (via combat) Allied corps | 0 | Allies loses 2 VP |
| CP eliminates (via combat) Allied fortress | CP gains VP = fort defense factor | Allies lose VP = fort defense factor |
| CP eliminates (via combat) Bolshevik unit | 0 | Allies loses 1 VP |
| Allies eliminate (via combat) CP HQ or army | 0 | CP loses 6 VP |
| Allies eliminate (via combat) CP army abteilung | 0 | CP loses 4 VP |
| Allies eliminate (via combat) CP corps |
Record During VP Phase of Game Turn
| Event | Gain | Lose |
|---|---|---|
| Each friendly Strategic Objective hex controlled | 4 | - |
| Each enemy Strategic Objective hex controlled | 2 | - |
26.0 Scenario: 1914
This scenario begins with the opening year of the Great War on the Eastern Front.
26.1 Game Length
The first turn is August 1914. Players decide before the start of play how long the scenario will be; they must agree that the game will end on the November-December turn of any one year (1914 to 1917) of their choice. Sudden Death conditions also apply.
26.2 Starting Victory Points
- Central Powers: 65
- Allies: 80
26.3 Central Powers Grand Strategy
Main Effort in West. Allies are the First Player.
26.4 Allied Forces (Deploy first)
Russian Empire
- West Army (W) HQ (front side): Anywhere in Russia north of Warsaw (inclusive).
- Southwest Army (SW) HQ (front side): Anywhere in Russia south of Warsaw (exclusive).
- 1st Army: Kovno
- 2nd Army: Grodno
- 3rd Army: Dubno
- 4th Army: Ivanogrod
- 5th Army: "5" Army mobilization hex
- 8th Army: "8" Army mobilization hex
- 3 x Infantry Corps: One each on Warsaw, Petrograd and Odessa.
- Fortress units: One per city of same name.
- Allied Supply Unit: One anywhere in Russia north of Warsaw (inclusive); one anywhere in Russia south of Warsaw (exclusive).
Romania
- 1st Army: Bucharest
- 2nd Army: Ploesti
- 3rd Army: Turtukaia
- Fortress unit: Turtukaia
Romania begins as a neutral. See the Balkans rule (23.0).
26.5 Central Powers Forces (Deploy second)
Germany
- 8th Army: Konigsberg
- Fortress units: One each per city of same name.
Austria-Hungary
- 1st Army: Krakow
- 3rd Army: Lemberg
- 4th Army: Przemsyl
- One infantry corps: Any one Austria-Hungarian city.
- Fortress units: One per city of same name.
- Central Powers Supply Unit: One anywhere in Germany; two anywhere in Austria-Hungary.
Bulgaria
- 3rd Army: Sofia
- Fortress units: Varna.
Bulgaria begins as a neutral. See the Balkans rule (23.0).
Turkey
- None. See the Romanian Entry rule (23.0).
26.6 Reinforcements & Reorganization
Scheduled Reinforcements: Place HQs and Armies on the spaces indicated on the turn record track. Corps and supply units can be taken as needed from eliminated or unused units.
CP Armee Abteilung: Place all four in the available box. The CP may build them on any turn.
26.7 Special Rules
Home Before the Leaves Fall: On August 1914, each player gains 10 (instead of 5) VP each time their forces capture an enemy Strategic hex. Each player loses 15 VP each time the enemy captures a friendly Strategic hex (instead of 10).
27.0 Scenario: 1915
This scenario covers the Central Powers offensive that conquered Russian Poland.
27.1 Game Length
The first turn is May 1915. Players decide before the start of play how long the scenario will be: they must agree that the game will end on the November-December turn of any one year (1915, 1916 or 1917) of their choice. Sudden Death conditions also apply.
27.2 Starting Victory Points
- Central Powers: 75
- Allies: 70
27.3 Central Powers Grand Strategy
Main Effort in East. Central Powers are the First Player.
27.4 Allied Forces (Deploy first)
All units are deployed east of the 1915 Front Line.
Russian Empire
- Northwest Front (NW) HQ (front side): North of Minsk (inclusive).
- Southwest Front (SW) HQ (front side): South of Minsk (exclusive).
- 1st Army: North of Minsk (inclusive)
- 2nd Army: North of Minsk (inclusive)
- 5th Army: North of Minsk (inclusive)
- 10th Army: North of Minsk (inclusive)
- 12th Army: North of Minsk (inclusive)
- 3rd Army: South of Minsk (inclusive)
- 4th Army: South of Minsk (inclusive)
- 8th Army: South of Minsk (inclusive)
- 11th Army: South of Minsk (inclusive)
- 2 x Infantry Corps: One in Petrograd, one in Kiev
- 2 x Cavalry Corps: Anywhere in Russia
- Fortress units: One per city of same name
- Allied Supply Unit: One, anywhere in Russia
Romania
- 1st Army: Bucharest
- 2nd Army: Ploesti
- 3rd Army: Turtukaia
- Fortress units: Turtukaia
Romania begins as a neutral. See the Balkans rule (23.0).
27.5 Central Powers Forces (Deploy second)
All units are deployed west of the 1915 Front Line.
Germany
- Ober Ost HQ (front side): Konigsberg
- H-L HQ (front side): North of Lodz (inclusive)
- Mackensen HQ (front side): South of Lodz (exclusive)
- 8th Army: North of Lodz (inclusive)
- 9th Army: North of Lodz (inclusive)
- 10th Army: North of Lodz (inclusive)
- 11th Army: On or adjacent to Krakow
- 1 x Army Abteilung: North of Lodz (inclusive)
- Sud Army Abteilung: South of Lodz (exclusive)
- 1 x Infantry Corps: In Posen
- 1 x Cavalry Corps: North of Lodz (inclusive)
- Fortress units: One per city of same name
Austria-Hungary
- 1st Army: South of Lodz (exclusive).
- 2nd Army: South of Lodz (exclusive).
- 3rd Army: South of Lodz (exclusive).
- 4th Army: South of Lodz (exclusive).
- 1 x Infantry Corps: Anywhere in Austro-Hungary.
- 1 x Cavalry Corps: South of Lodz (exclusive).
- Fortress units: One each in Vienna, Komarom, Budapest, Krakow, Karlsburg (Przemysl fortress has been eliminated).
- Central Powers Supply Units: Three north of Lodz (inclusive); one south of Lodz (exclusive).
Bulgaria
- 3rd Army: Sofia
- Fortress units: Varna.
Bulgaria begins as a neutral. See Balkans rule (23.0).
Turkey
- None. See the Romanian Entry rule (23.0).
27.6 Reinforcements & Reorganization
Scheduled Reinforcements: Place HQs and Armies on the spaces indicated on the turn record track. Corps and Supply units can be taken as needed from eliminated or unused units.
CP Armee Abteilung: Place remaining two in the available box. The CP may build them on any turn.
Available for rebuilding: Russian 9th Army
Special Rules: None.
28.0 Scenario: 1916
Summer 1916 saw the Brusilov Offensive and Romanian entry into the Great War. These both gave the Allies a chance for victory, but a rapid German response restored the front.
28.1 Game Length
The first turn is June 1916. Players decide before the start of play how long the scenario will be: they must agree that the game will end on the November-December turn of any one year (1916 to 1917) of their choice. Sudden Death conditions also apply.
28.2 Starting Victory Points
- Central Powers: 80
- Allies: 65
28.3 Central Powers Grand Strategy
Main Effort in West. Allies are the First Player.
28.4 Central Powers Forces (Deploy first)
All units are deployed east of the 1916-17 Front Line.
Germany
- Ober Ost HQ (reverse side): Konigsberg
- Eichorn HQ (reverse side): Kovno
- Leopold HQ (front side): Grodno
- Linsingen HQ: Brest-Litovsk
- 8th Army: Lemberg (2622)
- 10th Army: North of Brest-Litovsk (inclusive)
- 12th Army: North of Brest-Litovsk (inclusive)
- 9th Army: Within two hexes of Grodno
- Sud Army Abteilung: South of Lemberg (inclusive)
- 2 x Army Abteilung: North of Lemberg (exclusive)
- 2 x Infantry Corps: One on Warsaw, one north of Lemberg (exclusive).
- 1 x Cavalry Corps: North of Lemberg (exclusive).
- Fortress units: One per city of same name.
Austria-Hungary
- Bohm-Ermolli HQ (front side): Przemysl
- 1st Army: On or adjacent to Russian Mobilization hex 5
- 4th Army: On or adjacent to Russian Mobilization hex 5
- 2nd Army: South of Lemberg (inclusive)
- 7th Army: South of Lemberg (inclusive)
- 1 x Infantry Corps: On or adjacent to Brest-Litovsk
- 1 x Cavalry Corps: On or adjacent to Brest-Litovsk
- 1 x Armored Train: Any rail hex in Austria-Hungary
- Fortress units: One each in Vienna, Kormarom, Budapest, Krakow, Karlsburg (Przemysl fortress has been eliminated)
- Central Powers Supply Units: One north of Lemberg (exclusive); one south of Lemberg (inclusive)
Bulgaria
- 3rd Army: Sofia
- Fortress unit: Varna
Bulgaria begins as a neutral. See Balkans rule (23.0).
Turkey
- None. See the Romanian Entry rule (28.0).
28.5 Allied Forces (Deploy second)
All units are deployed east of the 1916-17 Front Line.
Russian Empire
- North (N) HQ (front side): North of Dvinsk (inclusive).
- Northwest (NW) HQ (front side): Minsk.
- Southwest (SW) HQ (reverse side): South of Kiev (inclusive).
- 5th Army: North of Dvinsk (inclusive).
- 12th Army: North of Dvinsk (inclusive).
- 1st Army: South of Dvinsk (exclusive) and north of Dubno (exclusive)
- 2nd Army: South of Dvinsk (exclusive) and north of Dubno (exclusive)
- 3rd Army: South of Dvinsk (exclusive) and north of Dubno (exclusive)
- 4th Army: South of Dvinsk (exclusive) and north of Dubno (exclusive)
- 10th Army: South of Dvinsk (exclusive) and north of Dubno (exclusive)
- 7th Army: South of Dubno (inclusive)
- 8th Army: South of Dubno (inclusive)
- 9th Army: South of Dubno (inclusive)
- 11th Army: South of Dubno (inclusive)
- 3 x Infantry Corps: One on Petrograd, two anywhere in Russia or Romania (2926)
- 2 x Cavalry Corps: Anywhere in Russia or Romania (2926)
- 2 x Armored Trains: Any rail hexes in Russia and/or Romania (2721)
- Fortress units: One per city of same name (east of Front Line; fortresses west of Front Line have been eliminated).
- Allied Supply Units: Four, anywhere in Russia.
Romania
- 1st Army: Bucharest
- 2nd Army: Ploesti
- 3rd Army: Turtukaia
- Fortress units: Turtukaia
Romania begins as a neutral. See the Balkans rule (23.0).
28.6 Reinforcements & Reorganization
Scheduled Reinforcements: Place HQs and Armies on the spaces indicated on the turn record track. Corps and Supply units can be taken as needed from eliminated or unused units.
CP Army Abteilung: Place remaining one in the available box. The CP may build this on any turn.
Available for rebuilding: German 11th Army; Austro-Hungarian 3rd Army; Russian 6th Army.
Special Rules: None.
Supply Summary (17.0)
| General Supply | Phase | Expend Supply Unit | Effect |
|---|---|---|---|
| Railroad Movement | Movement | No | Utilize railroad movement |
| Unit Maintenance | Supply Attrition on winter turns | No | Avoid supply attrition check |
| Offensive Supply | Phase | Expend Supply Unit | Effect |
|---|---|---|---|
| Build army level unit | Reorganization Phase | Yes | Combine corps in the Army per the Reorganization Chart |
| Convert HQ | Reorganization Phase | Yes | Convert a HQ to its stronger side |
| Forced March | Movement Phase | Yes | Double movement for any/all friendly units in radius |
| Maximum Attack Supply | Friendly Combat Phase | Yes | Double the attack strength of all friendly units making one attack (including HQ) |
Charts
Standard Combat Result Table (14.0)
| Die Roll | ≤ 49% | 50-99% | 100-149% | 150-199% | 200-299% | 300-399% | 400-499% | 500-599% | ≥ 600% |
|---|---|---|---|---|---|---|---|---|---|
| 1 | AZ | AZ | AD | AD | AD | ST | BB | BB | BB |
| 2 | AZ | AD | AD | AD | ST | BB | BB | DD | DD |
| 3 |
Shock Combat Result Table (14.0)
| Die Roll | ≤ 49% | 50-99% | 100-149% | 150-199% | 200-299% | 300-399% | 400-499% | 500-599% | ≥ 600% |
|---|---|---|---|---|---|---|---|---|---|
| 1 | AZ | AD | AD | AD | AD | MD | MD | MD | MD |
| 2 | AD | AD | AD | AD | MD | MD | MD | DP | DP |
| 3 |
Attacker modifiers: Maximum attack supply: x 2. Concentric attack: x 2. Note: If both apply, then x 3.
Defender modifiers: Terrain: see TEC.
Mobilization Chart (9.0)
| Unit Type | VP Cost | Delay | Notes |
|---|---|---|---|
| Build | |||
| Infantry Corps | 4 | 0 | |
| Cavalry Corps | 5 | 0 | |
| Supply Unit | 10 | 0 | |
| Fortified Zone | 3 x defense factor | 0 | |
| Armored Train | 10 | 1 | |
| Amphibious Corps | 9 |
Combat Results (14.15)
- AD (Attacker Defeated): 1) Eliminate all attacking non-army units. 2) Break down all attacking armies into corps. 3) The attacker retreats surviving units one hex. 4) No pursuit.
- AZ (Attacker Annihilated): 1) Eliminate all attacking units. 2) Defending units may pursue one hex.
- BB (Bloodbath): 1) Eliminate all defending non-army units. 2) Break down one defending army into corps. 3) Eliminate all attacking non-army units. 4) Break down one attacking army (if any) into corps. 5) No retreat. 6) Surviving attacking units may pursue one hex if all defending units eliminated.
- BT (Breakthrough): 1) Eliminate all defending units. 2) Attacking units may pursue up to two hexes.
- DD (Defender Defeated): 1) Eliminate all defending non-army units. 2) Break down all defending armies into corps. 3) The defender retreats surviving units one hex. 4) Attacking units may pursue one hex.
- DP (Defender Panic): 1) Eliminate all defending non-army units. 2) Break down all defending armies into corps. 3) All surviving defending units make a Panic retreat (15.1). 4) Attacking units may pursue one hex.
- DZ (Defender Annihilated): 1) Eliminate all involved defending units. 2) Attacking units may pursue one hex.
- MD (Mobile Defense): 1) All defending units with a printed movement of zero ("0") are eliminated. 2) The defender must retreat all his surviving units one hex. 3) The attacker must eliminate one attacking shock unit (a shock army may be broken down into corps and one corps eliminated). 4) Surviving attacking units may pursue one hex.
- ST (Stalemate): 1) Eliminate one defending unit. 2) Eliminate one attacking unit. 3) No retreat or pursuit (even if defender entirely eliminated). (A player may break down an army and eliminate one corps.)
Optional Rules
Players should decide prior to starting play which, if any, of the following rules they'll use.
Morale
When a side's VP is at "25" or below, implement the following:
- Double the VP cost to mobilize all units.
- Austro-Hungarians, Bulgarians and Russians may not reorganize corps into armies. Germans may still do so. Sud army can also be built.
These conditions remain in effect as long as Morale is at "25" or below. If it goes back above "25", then they do not apply.
Psychological Warfare (PSYWAR)
Each player may make one PSYWAR attack per turn. This is done at the start of his player turns, before any other action is taken. No more than one such attack may be made per player turn.
PSYWAR Procedure: Expend 5 VP; consult the PSYWAR Table; roll one die; and apply that result from the PSYWAR Table (see charts). Units eliminated via the Psywar Table count as VP lost.
Note: The PSYWAR Table is referred to here and in Intelligence Operations (see 4) below) but is not printed in this rulebook; it is not transcribed.
Entrenching
A player may use Supply Units to enhance the defense.
Prerequisite: During any friendly Reorganization phase, you may flip any number of supply units to their reverse side. While on their reverse side, they cannot move or provide any game function other than Defense Enhancement. You may flip them to their front side on subsequent Reorganization phases. Supply units on their reverse side defend with a strength of "one"; they are eliminated if forced to retreat.
Defense Enhancement: The defender may declare Enhanced Defenses in any combat in which a supply unit which has been flipped per above can trace a supply route to defending units. This has the following effects: This doubles the defense strength of all infantry and shock units within supply radius for one combat. If a unit's defense strength is doubled by terrain, it is tripled. At the conclusion of that combat, you must expend the supply unit. Each supply unit can support one enhanced defense per combat phase.
Note: a supply unit which was attacked and eliminated cannot provide Defense Enhancement.
Amphibious Operations
You may use amphibious movement to move Marine units from one coastal hex to another.
Note: this rule is in addition to (21.6).
Amphibious Prerequisite: Amphibious movement is conducted in the friendly Movement phase. Only Marine units may make Amphibious moves. Each player may make a maximum of one Amphibious move per friendly turn.
Amphibious Procedure: The unit making the Amphibious move must either:
- begin the phase on a port. Pick it up and place it on any other coastal or port hex in the same sea (Baltic or Black). Also, you must expend one supply unit in the port of embarkation. OR:
- begin the phase on any coastal hex. Pick it up and place it on any friendly controlled port hex in the same sea (Baltic or Black). Also, you must expend one supply unit in the port of debarkation.
Note: effectively, an amphibious move must either begin and/or end in a port.
Landing Check: You must roll on the Amphibious Landing Table when initiating an amphibious move. Roll one die and cross index the result.
| Die Roll | Result |
|---|---|
| 1 | Unit eliminated (counts as loss in combat) |
| 2-3 | Move fails (unit remains in start hex and cannot move again this phase). |
| 4-6 | Unit lands |
Note: the supply unit is expended regardless of the outcome on the table.
Restrictions: The landing hex cannot contain enemy units. Units must land at the end of the move; units may not remain at sea. The landing hex may contain friendly units, but normal stacking restrictions must be followed.
Amphibious Assault: An amphibious unit can attack an enemy occupied coastal hex from an all-sea hex. Amphibious assault is begun during the friendly Movement Phase. The units must start in a port hex, make a normal amphibious move, but end on an all-sea hex adjacent to an enemy occupied coastal hex. During the ensuing friendly First Combat Phase, the force must attack that coastal hex. Conduct the combat normally; if the attacker gains a result allowing them to pursue, the amphibiously assaulting force may land in the invaded hex, and may even potentially attack again during the Second Combat Phase. If the unit fails to gain a result allowing them to pursue, they are eliminated. A unit making an amphibious assault may not use maximum attack supply.
Restrictions: Generally, both sides can attempt Amphibious operations. However, if the CP controls Kronstadt, the Russians cannot attempt them in the Baltic Sea. If the CP controls Sevastopol, the Russians cannot attempt them in the Black Sea.
Naval Transfer: Naval Transfer is a limited form of Amphibious movement. Each player can move a maximum of one corps (any type) or one supply unit per turn via sea. Both the start and disembarkation ports must be friendly controlled. A player cannot conduct both a Naval Transfer and an Amphibious Movement in the same turn. Also, do not make an Amphibious Landing check—naval transfers automatically succeed. They do cost a Supply unit.
- Central Powers can naval transfer between Danzig, Koenigsberg, Riga and Helsinki (if CP controlled).
- Allies can naval transfer between Petrograd, Kronstadt, Riga and Helsinki, or Odessa and Sevastopol (if Allied controlled).
Optional Fog of War
Generally, you may not examine enemy stacks. Also, players can flip their units face down if they have a flag on the reverse side to conceal the unit. They can do so at any time during the friendly Reorganization phase, and also during deployment of units.
Intelligence Operations
A player may examine enemy stacks in the following conditions:
- During combat. All the stacks involved in any one battle are mutually examined by both players at the start of each individual battle's resolution. Once stacks have been examined, the attacker may no longer call off that battle. Also, any HQ, supply or air units used to support a combat must be revealed.
- HQ Staff. At the start of the friendly movement phase, designate any one friendly HQ. Roll one die. If the result is less than or equal to the HQ's support factor, then you can examine one enemy stack within the support radius of that HQ. This radius is not blocked by enemy ZOC.
- Air Recon. At the start of the friendly movement phase, you may examine one enemy stack within range of each of your airbase units. This radius is not blocked by enemy ZOC.
- PSYWAR. Certain PSYWAR Table results will allow for the examination of enemy stacks.
If enemy units are placed face down, you can flip them face up. The enemy could flip them face down at the start of an ensuing Reorganization phase.
Off Map: Players may not examine enemy units in off-map displays. Such units, no matter if in holding boxes, dead piles, etc., may be kept covered by using note cards or other such covers.
Air Units
Historic Note: On the Eastern Front, airpower was generally used at the army level and below, so in the standard rules, it is factored into HQ support. This rule assumes a more concerted effort was made to utilize airpower.
Airbase units represent support facilities for major concentrations of combat aircraft. In general, airbase units are treated as land units. Each air unit has printed on it a parenthesized range factor.
Air Support: During friendly Combat Phases, you may add the parenthesized attack strength of one friendly air unit to the strength of one attacking force. The supported attack must be within support range of the airbase unit. An air unit may support only an attack, never a defense.
Range: An airbase may support a land attack at a distance up to the number of hexes equal to its range. Range is counted from the air unit to any one defending unit. It may be traced into and through enemy ZOC, enemy units, and any kinds of terrain and sea. When counting support range, do not count the hex in which the airbase is located; do count the hex in which the defending force is located.
Supply: You can double the support value of an Air unit by expending a supply unit. This can be the same (or different) supply unit used to support any ground units in the attack.
General: No more than one airbase may support a single attack. Airbase units may be combined with HQ support to support the same attack. You may not split an airbase unit's attack strength among more than one attack. They don't negate terrain in the defender's hex. Airbases are not be affected by the outcome of attacks they've supported unless there's an enemy airbase unit in the defending force's hex. Such a presence would cause the attack-support air unit to be affected in the same manner as a corps sized unit. Air units may not attack by themselves. They defend normally in their own hexes.
Aerial Recon: See the Optional Fog of War rule.
Additional Units
Allied Expeditionary Forces: The AEFR corps and RNAS armored car brigade represents various units from the Western Allies. The Allied player may mobilize each of these units as reinforcements on any turn starting in 1916. The corps costs 8 VP, and the brigade costs 4 VP (there is no delay). Deployment is in on any Allied controlled north map edge. If the Gallipoli scenario variant is being used, deployment also includes any Allied controlled coastal hexes on the Black Sea.
Czech Legion: This corps is Allied controlled. It appears at the instant that the First Russian Revolution goes into effect (see Optional rules). Place it on any Allied controlled railroad hex in Russia.
Nationalist Volunteer Corps: The Volunteer Corps are CP controlled. The CP can deploy them only in 1917 or 1918, and only if Allied Morale is currently "25" or lower. The infantry and cavalry corps cost 4 VP each; the shock corps costs 8 VP (but there is no delay). Nationalist units can be placed in Abo, Helsinki, Ravel, Riga, Warsaw, Kiev, Kharkov or Sevastopol. The placement hex does not necessarily have to be CP controlled, but cannot contain Allied or Bolshevik units or ZOC. Placing the unit gives the CP control of the hex.
Volunteer units cannot leave Russia. If eliminated, they can be replaced using the above procedure.
Scenario Options
Players can use scenario options to add various hypothetical situations to a game.
Moltke Plan East: Add the following to the 1914 scenario German starting order of battle: Ober Ost HQ; 9th, 10th, 11th Armies. CP Main Effort is now 1914: East; 1915 and later: West. CP receives three free supply units on Main Effort East turns, and two supply units on West turns (instead of the ones on the TRC). At the end of the November-December 1914 turn, deduct 33 VP from the CP index.
Austro-Hungarian Plan "R": In the 1914 scenario deployment, the CP sets up the Austro-Hungarian 2nd Army on Drohobyz-Boryslaw.
Russian Plan "G": In the 1914 scenario deployment, the Allies set up the Russian 4th Army on Dvinsk.
Faster Russian Mobilization: Russians 6th Army is deployed on September 1914; 7th Army on October 1914 (instead of in 1915). Allies deduct 10 VP at the start of the 1914 scenario.
Better Cavalry Doctrine: In the 1914 scenario deployment, Russia receives two cavalry corps; Germany and Austria-Hungary each receive one cavalry corps (at no VP cost). Also, attacking cavalry can now advance two hexes during pursuit if the combat result is DZ or BT.
Russians Modernize Field Artillery: In 1914 and 1915 turns, Russians receive two scheduled supply units per turn (instead of one). However, Russian fortress units no longer negate enemy zones of control or concentric attacks.
Note: the idea here is that the resources to modernize the mobile forces would be at the expense of those used to improve fortress defenses.
Fortress Conversion: You may convert friendly fortresses into Infantry Corps. This is done during the Reorganization phase. Remove one or more friendly fortresses and replace them each with one infantry corps of the same nationality. This costs no VP. The converted fortress unit can never be replaced.
If using the Russians Modernize Field Artillery option, in the 1914 scenario the Russian player can apply Fortress Conversion during initial setup. For each fortress removed, place an infantry corps in the same hex.
Gallipoli Campaign Succeeds: Starting in January-February 1916, the Allies receive one additional Supply unit per turn. Place it in the Mobilization phase at Sevastopol or Odessa (if Allied controlled; if not controlled, it is lost). This supply unit costs zero VP. Also, see the Allied Expeditionary Forces rule (rrr) [sic; as printed]. At the start of January-February 1916, add 25 VP to the CP total.
Variable Romanian Entry: Romania does not automatically enter on August 1916. Instead, at the start of the May 1916 turn, the Allied player rolls one die. If the result is "1", then Romania becomes a belligerent on that turn; otherwise it remains neutral. If Romania is neutral, on June 1916 roll another die and it becomes a belligerent on a "1-2". Continue this process until October 1916 when Romania would automatically become a belligerent.
The following CP units enter on the CP Reinforcement phase after Romania becomes belligerent: German Mackensen HQ, Turkish corps.
The following Allied units enter on the Allied Reinforcement phase of the turn after Romania becomes belligerent: Romanian 4th Army, [the printed list ends here after the comma; no further unit is printed]
The following Allied units enter on the Allied Reinforcement phase three turns after Romania becomes belligerent: Russian Romanian Front HQ.
Caporetto East: CP receives the following additional reinforcements on September 1917: German 14th Army, Austro-Hungarian 5th Army; two additional supply units. At the start of September 1917, deduct 25 VP from the CP total.
Russian Revolutions
This rule is in addition to effects for Morale. It applies only on turns of 1917 and 1918.
First Revolution: If at the start of any Allied player turn in 1917 or 1918 Allied Morale is at "25" or below, you must check for a Russian Revolution. Roll one die; results:
- 1-4: no revolution
- 5-6: Revolution!
Note: If no Revolution occurs on a turn, then roll each ensuing turn that Morale is 25 or below. Once a Revolution occurs, do not roll.
The first time this happens, then the First Revolution occurs (Provisional Government). This has the following effects:
- All Russian HQ units on their front (weaker) side are removed from the map (do not count as units eliminated). Russian HQ units on their reverse (stronger) side are flipped to their front (weaker) side. They may not be again converted to their stronger side.
- Russians do not receive scheduled supply units (they may still mobilize them by paying VP).
- The Russian VP Index may not go above "25" for the remainder of the game.
- The first time that any CP unit attacks any Russian unit after the First Revolution, the Allied player receives two free supply units on the immediately ensuing Reinforcement phase (due to inherent Russian patriotism).
Second Revolution: When Russian VP first reaches "10" or below, and the First Revolution is in effect, then the Second (Bolshevik) Revolution occurs. This has the following effects:
- Remove all Russian, Romanian and other Allied units from the map. No new Allied reinforcements are received or can be mobilized by standard game rules.
- The Allied player places all Bolshevik units on the map (face up side—seven corps plus one armored train). Place them in any Allied controlled cities in Russia. At least one unit must be placed each in Petrograd and Moscow before other cities. No more than one unit can be placed per city. If not enough cities, then the units are received as reinforcements (see below).
- The Bolshevik Partisan can be placed in any Russian hex not containing a CP unit or ZOC.
- The Russian VP Index can never go above "10".
If the Russian VP index drops through both "25" and "10" in the same turn, then implement the effects of the Second Revolution. If the Russian VP index drops to zero or below, then the CP wins a Sudden Death victory.
Bolshevik Units
The Allied player controls the Bolsheviks.
Most Bolshevik units are backprinted. The front side shows them at their corps (xxx) strength, the reverse (if any) at their army (xxxx). The reverse is for future scenarios—use only the front side.
Bolshevik units are always in General Supply. Eliminated Bolshevik units count as VP lost.
Bolshevik Reinforcements: After initial placement, the Allied player receives one available Bolshevik unit plus one Supply Unit unit per Mobilization phase at no cost in VP. Place them in any Allied controlled Strategic hexes in Russia. (the Partisan unit can be placed per the Partisan rule). Additional units cannot be mobilized via expenditure of VP.
Bolshevik Partisans: In addition to the above, Partisans cannot use Maximum Supply. They may not use railroad or sea movement. Partisans can never leave Russia (they can attack across borders).
The International: The Allied player can make one free PSYWAR attack per turn at no cost in VP.
1918
When using this option, a scenario can now extend into 1918.
Scenarios
In scenarios starting in March-April 1917 or later the First Revolution is in effect. In scenarios starting in November-December 1917 or later the Second Revolution is in effect.
Historic Note: This rule reflects the situation up until the Treaty of Brest-Litovsk. Future scenarios will cover what if the Germans continued the war in the east throughout 1918.