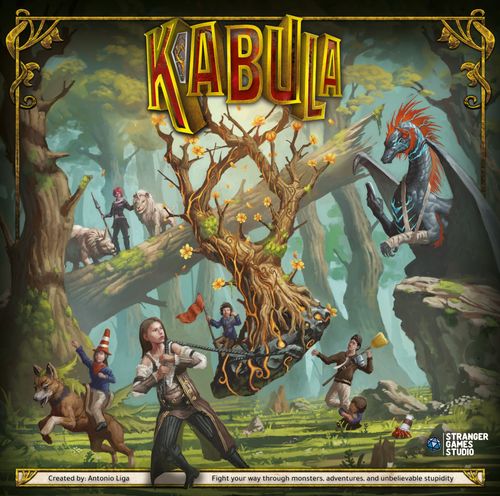
Kabula
Kabula Rulebook
Table of Contents
Table of Contents
Getting Started
What is this game like?
Kabula is an adventure game for up to five players. Each player takes the role of a deranged Hero, summoned from modern Earth to a mysterious Island, where the sacred Kabula tree makes everyone immortal. It's a beautiful place, but all is not well: your weird technology and disposable plastics have already started to infect the land, causing it to grow even stranger than it already was.
If you were a good person, you'd settle down to help undo the damage you're causing... but you're not a good person. Your goal is to steal the Kabula from its Sanctuary in the middle of the board, and defeat the Guardian protecting it. You won't be strong or popular enough to do that right away, though; you'll need to do two things first:
- Build your power. You begin the game with a small selection of equipment and a handful of Part Tokens with which to use them. As you travel around the Island, you'll gain more Items and Parts from encounters, dungeons, and monsters.
- Get Popular. That's right, did you think anybody could get the Kabula? Only the coolest Heroes can get close enough to steal it! Your dubious deeds and questionable companions will give you Tags that will make you Trending in one of three possible ways per Hero.
Tags and Traits: place one # Tag token on a Personality card every time you complete an action related to one of the two Traits it displays. Once you have #x3 on a card, flip it to its Trending side!
Familios are an important part of both these tasks. A Familio is a tame monster whose life energy is synced to yours. You can tame a Monster by defeating it in battle. Once tamed, your new Familio gives you a Tag and obeys your commands, allowing you to move and act with it just like another Hero.
Once you're Trending, you can steal the Kabula from the Sanctuary. This will trigger The Last Battle with the Guardian which protects the Kabula. Players will try to steal the Kabula from each other, while the Guardian will try to stop them all.
Once the Guardian is dead, the player holding the Kabula wins the game!
Be careful: After the Kabula is stolen from the Sanctuary, reviving is not possible anymore, the Guardian may wipe all Heroes out and win the game!
Enjoy your trip through the World of Kabula, a place where shit happens.
Please note: Explicit Content
To make it easier to adapt the game to all audiences, we have included a traffic light system to help you identify which cards you might want to put away:
- Green: Should be suitable for most audiences.
- Orange: Include more extreme violence, swearing and mild drug use.
- Red: Mostly for sexual references.
Please note that only Encounter and Dungeon cards are labelled. Monsters, Heroes, items and all other components are not meant as a surprise, so you can check the content freely.
Setup
The setup diagram (page 6) shows the Map Board with its numbered setup positions (1 to 10), the Hero and Familio RON tracker, the Guardian and Monster slots, and the Dungeon, Encounter, Common Item and Rare Item decks. The numbered steps below refer to those positions.
- Set the Board: Place the Map Board in the center of the table.
- Choose a Hero: Each player selects a Hero and takes that Hero's figure, RON tokens, and 5 Hero cards (3 Personality, 1 Equipment, and 1 Info).
OPTIONAL: Set the Automa Cards: If you are playing with Automa Hero (see page 20), place the Automa card on a Player Mat and following the info on the card, set their Heart+ and Heart dials, and place the miniature on the board. Place the Hero RON token in any free slot on the RON tracker. Automas are considered as Heroes for player count.
- Choose a Guardian: Select a Guardian. If this is your first game, choose the Water King. Place that Guardian's mat close to the Map Board, then shuffle that Guardian's deck and place it face-down on the mat's deck slot (a). Take the Guardian HP Dial (b) and set its Heart based on the number of Heroes, using the grid on the bottom left of the Guardian mat (c). Finally, place that Guardian's figure on the Sanctuary in the center of the board.
- Shuffle Decks: Shuffle the Rare Item, Common Item, Encounter, and Dungeon decks separately and place them in the corresponding slots on the board.
- Shuffle Monsters: Shuffle the Monster deck. Note that Monster cards are double-faced; make sure the Wild side (Wild Monster icon) faces up. Place the top three cards of the shuffled deck in the three Spotted Monster slots on the board. Keep the rest of the deck on the "Unspotted" slot on the board.
- Set Pin Tokens: Place the four Dungeon Pins on the four Dungeon spaces on the board, with the Dungeon side face-up. Place one Encounter/Monster Pin in each space on the board marked with a Pin icon containing a number equal to or lower than the Hero count, with the Encounter side face up (for example, a 4-player game will have Pins on the spaces labeled 4, 3, and 2).
- Set Shared Resources: Put the dice, coins, and pools of Part tokens, Nausea tokens, and Tag tokens where all players can easily reach them.
- Set Up your Hero: Each player takes a player mat. Using their Hero's info card (d), each player takes the starting Part tokens for their Hero (e) and sets their Farz dial, Heart dial, and Heart+ dial to their starting values (f). Keep starting equipment, info card, and Personality cards (Trending side facing down) close to the player mat. Finally, place your miniature on the space specified on your info card.
- Set Up the RON Tracker: Check the Guardian's mat to determine the Round Order Number (RON) condition (g). Each player places their Hero RON token on the RON tracker in left-to-right order of how recently they did the action showed on the Guardian Mat. Familio RON tokens (h) for each player are placed in the same order as Heroes, on the right-side area of the RON tracker, with their empty side up, since players have no Familio initially.
The Basics
To make your stay as pleasant as possible, we request that new arrivals follow a few simple rules. No dungeon raids after 20:00. Throw all trash in the proper receptacles, and if you've tamed a Familio on your journey, don't forget to pick up its mess!
Round Order Number (RON)
Kabula is played in turns, starting with the figure at the left of the RON tracker and passing to each other figure in order from left to right. In addition to Heroes, also Wild Monsters, Familios, and the Guardians will take turns on the RON tracker.
Once the end of the RON is reached, play passes back to the first player and a new round begins. The game continues until a player wins, or all players lose.
The RON tracker is also used to determine in which order figures are affected by area effects, and solve other ambiguities (more info on page 15).
Note: Until the Kabula is stolen from the Sanctuary, every time a new Round begins, draw one card from the Guardian deck.
Actions
Players interact with the game through Actions. To use an Action, just pay the cost and do the effect... it's that simple! When reading an Action, resolve all effects one by one in order.
You can use any Action written on your mat, any card you've equipped, and any space you occupy. You can use as many Actions as you can pay for, until an Action instructs you to End Turn.
Diagram (page 8): a typical Action card, "Obscene Outrage", with its Cost, Name, and Effect labelled. Its Effect reads: "Attack: Target spends (Any) x2 of your choice."
Generally, Actions may only be used on your turn, and you must finish resolving an Action before you use another one. Actions that Defend are exceptions to these rules; see page 14 for more details. Unless specified, if your Action targets another figure, it can only be applied to targets on your space. Unless specified, an action only affects the map space of the figure using it.
Action Colors
Actions are color-coded by effect for ease of use. Don't worry about needing to memorize them; everything you need to know about how an Action works is still written in its effect, so the colors are just intended to help you find specific things.
- Orange Actions include the text "End Turn." Look for them when you're ready to stop!
- Blue Actions include the text "Defend." Look for them when you're being attacked!
- Black Actions appear only on wild Monsters and Guardians, and indicate what they can do on their turns as a result of following their Behaviors.
- Gray Actions don't have any of the above qualities.
Bonus Effects
Some cards have additional effects; these are written after the word "Bonus" on their cards. Bonus Effects aren't Actions, and don't need to be activated; they just do whatever they say.
Example (page 8): "BONUS: Get one additional (Any) while this is equipped."
Parts
Caption (page 9): Spend body Parts: Move a Part toward the right (1 and 2). Spend an Any Part, or two Any Parts, by moving a Part twice to the right. Recharge a Part by moving it toward the left side of the mat.
Part Tokens (or just "Parts") represent your body's energy and act as currency that you can spend to use Actions. You begin the game with a small selection of Parts and you can get more of them from Encounters, Monsters, or even using some types of equipment.
- Teeth: Mostly used for aggressive actions.
- Brain: Mostly used for mental actions.
- Legs: Mostly used for movement and evasive actions.
- Butt: Mostly used for "heavy" actions, like lifting a shield or pushing a target.
- Guts: Mostly used for endurance.
- Any: This symbol means any one Part token; it doesn't matter what kind you use.
To spend a Part, move it one box to the right. Your player mat has three boxes for Parts, from left to right: Rage, Fresh, and Used. At the beginning of the game, all your Parts will be Fresh. In specific circumstances, often after suffering the effects of an attack, it is possible to move one Part one box to the left. This action is called Recharge (see page 15).
- Fresh Parts: They can be spent to use Actions. You and your Familio each have your own separate Fresh box on your player mat.
- Used Parts: They can't be spent to use Actions. Your Used box is shared between you and your Familio; tokens there belong to both of you.
- Raging (Fire icon) Parts: Like Fresh parts, they can be spent to pay for Actions, and you and your Familio have separate boxes. Some powerful Actions specifically require Raging Parts to work (like Raging Brain). If you're asked to spend a Raging part, move it all the way from Rage to Used.
You can have up to 10 Parts in your own Fresh box, and up to 5 Parts in your Familio's Fresh box. If you get any more, put Parts into your Used box until you're under the limit again. You can have any number of Parts in your other boxes.
Every time you Get a new Part, this is placed in your Used box.
Rest
Eventually, you'll find most of your Parts have ended up in your Used box, where they can't be spent on Actions. To get them back out, you'll need to Rest, using the aptly-named Rest action on your player mat. Only Heroes can trigger the Rest action, but this affects all Parts on your Player Mat, for both the Hero and Familio (if you have one).
When you Rest, move all your Parts to the Used box, including those in the Rage box. Then distribute up to 10 Parts to the Hero Fresh box, and up to 5 Parts to the Familio Fresh box.
In addition, when you Rest, discard all Nausea Tokens (Nausea icon) affecting your Hero and/or Familio.
Exploring the Island
Please be advised that our idyllic Island is still quite wild outside of the major cities and that deviating from marked trails is not recommended for adventurers who have heart conditions, bone spurs, weak bladders, or are pregnant.
Spaces and Steps
The Island is divided into hexagonal spaces. Spaces can be Plains or Mountains, with mountain regions marked with a brown shade on their inner perimeter. Moving from one space to another requires "steps," which you can get by using the Walk action on your player mat. Usually, one step moves you one space. However, moving to certain types of spaces takes more effort. Count the lines between your space and the destination to estimate the number of steps you'll need to cross into a new space.
If you want to move into a space that requires more steps than you currently have, keep using your Walk action until you have enough to cross. If you have unused steps at the end of your turn, they are lost.
Diagrams (page 10):
- Moving between 2 Plain spaces or 2 Mountain spaces requires 1 step.
- Crossing from a Plain space to a Mountain space requires 1 extra step. Look for an arrow in the direction of your movement. The opposite requires just 1 step.
- Crossing a River requires 2 extra steps. Look for a set of squiggly lines on either side of a space to remind you of these extra steps.
- If you really want to travel the hard way and do both of those things, both sets of extra steps apply!
Map Actions
Some spaces on the board have Actions written on them. Your Hero can perform these actions while they occupy that space; Familios lack the social skills to use them.
Some spaces on the board have Pin tokens. These tokens represent Map Actions that Heroes can take while occupying that space:
- Enter a Dungeon (Dungeon Pin, level 1 or level 2): When you use this Action, draw a Dungeon card and follow the instructions that match the level on the Pin. Then End Turn.
- Have an Encounter (Encounter Pin): When you use this Action, draw an Encounter card and follow its instructions. When you're finished, flip the Pin to its Monster side, then End Turn.
- Provoke a Monster (Monster Pin): When you use this action, the Spotted Monster in that territory appears on this Pin's space and attacks you (see page 16). Then remove the Pin from the board. Unlike the two above Actions, this does not end your turn.
Cities
Four main Cities are marked on the board: Kabularbor, Ridgewick, Inverbluf and the Holy City. To each of them corresponds a City Corner. While on a City space, Heroes have access to any Action listed in the corresponding City Corner. While cost and specifics vary, all Cities allow to 1) Shop, 2) Fast-travel to another City, 3) Heal while Resting and 4) Discard Parts to gain Farz.
Example City Corner (page 10, Inverbluf): Blue Line Train, Pay (Any) x3, move to another city. Bed and Breakfast, Pay (Any) x4: Heal (Heart) x6. Rest. End turn. Souvenir Shop, Shop (Common Item) x6. End turn. Historic Meat District, Discard (Any), gain (Farz) x1.
Dungeons
Every weird cave, old basement, and hole in the floor seems to have a rare treasure hidden in it... along with a deadly trap.
Dungeon cards have two levels: Level 1 and Level 2. When you draw a Dungeon card, follow the instructions for the level on the Pin you used. If you survive, you'll get a reward! Whatever the outcome, place any used card at the bottom of the Dungeon deck.
Level 1 is safer, but has lower rewards. Completing it will flip the Dungeon Pin to its Level 2 side. Level 2 is more dangerous, but has greater rewards. Completing it removes the Dungeon Pin from the board.
Note: Surviving a Level 2 is the quickest way to get a rare item.
Example of a Dungeon Card (page 11):
- Level 1, "Good Boy": "You enter the cave and find a rabid dog. You decide to pet it. Why would you do that? You get bitten of course. You now have rabies, but at least there is a small chest in the room." You are Attacked: [blade icon] x2, aimed at [Butt icon]. Get Guts x2. Draw Common Item x2. End Turn. If you survive: flip the Dungeon Pin from Level 1 to Level 2.
- Level 2, "The Abyss": "You find the Abyss you have always been warned about. You stare into it but it doesn't stare back. You start crying. Not even the abyss cares about you." You are Attacked twice: Spend Brain or lose Heart x3. End Turn. If you survive: Draw Rare Item x1 and remove the Level 2 pin.
Encounters
The Island is a weird place, and there's no telling who you'll meet out on the road. There's no better way to get popular than to just get out there and mingle!
Each Encounter card is a small story that your Hero participates in. The card has three parts: an Introduction and two Options.
To resolve an Encounter, read the Introduction, follow its instructions in order, then choose one of its Options and follow its corresponding instructions in order. Then put the card back on the bottom of the Encounter deck.
All Options have a Personality trait associated with them. When you select an Option whose trait matches one of your Personality cards, put a Tag on that card. Once you have 3 Tags on the same Personality card, flip it to its Trending side (more info on page 19).
Example of an Encounter Card (page 11), "Orc Family":
Introduction: "By the road, some monks are about to attack a family of orcs. Mama orc is distracting little orc with a toy while Papa orc is fetching the birthday cake. Their weapons are way out of reach."
- Option, trait #ROMANTIC, "Slay the Monks!": "They have no family, right? The orcs are a bit shocked but polite enough to offer you some cake." Get Teeth and Heal Heart x2.
- Option, trait #CREEPY, "SLAY THE MONKS!": "Then slay the orcs too! The Prior of the monastery may want their heads, right?" Keep this card with you. Discard at Dreary Abbey to get Heart+ +1 and Heal Heart x3.
Commerce
Support your local businesses! Some of the shops in our coastal towns have been there for a thousand years! It would be a shame if they all had to go work in a big factory somewhere because stingy tourists couldn't afford to buy something.
Farz
The currency of the land in Kabula is the Farz. Use the Farz dial on your player mat to track how much you have. You can't carry more than 15 Farz (for tax reasons).
Shopping
Shopping is the least dangerous way to acquire items. When an effect instructs you to Shop for a number of Items, either Common Items or Rare Items, follow the steps below:
- Reveal a number of cards from the top of that Item deck. For instance, if an Action instructs you to "Shop x6," you'll reveal the top 6 cards from the Common Item deck.
- Buy any number of those Items, and sell any number of your Items, at the Farz price in the upper-right corner of their cards. You can still sell Rare Items when shopping for Common Items and vice versa.
- Once you have bought and sold all the cards you want, shuffle any card you sold or revealed but didn't buy, and return them to the bottom of their corresponding deck.
Equipment
You'll find four types of Item cards on your journey:
- Weapons are used to attack enemies. All of the Weapons you have are always equipped.
- Snacks are used to heal and nourish you. Snacks are discarded upon use. All of the Snacks you have are always equipped.
- Armor protects you from damage. You can not equip two Armors with a Passive Defense triggered by the same die roll (See page 14). Place any other cards that you cannot equip underneath your equipped card. E.g., if you have two cards containing an action triggered by [Butt icon], only one at a time can be equipped.
- Familio Gear attribute extra actions or bonuses to your Familio. They cannot be used by Heroes. They can be equipped or unequipped during your Hero or Familio turn regardless of where the Familio is on the map and if a Familio dies, you get back the Familio gear in your hand.
You may only use Actions on Items you have equipped. You may freely change which items you've equipped during your turn.
For space reasons, items are often referred to based on the conditions that trigger their actions. For example a "Weapon with [Teeth icon]" or an "Armor with [Butt icon]" refer to a weapon with an attack which requires at least one [Teeth icon] to be used and an armor with a passive defense triggered by [Butt icon].
Example cards (page 12) are shown with their Farz price in the upper-right corner: "Horny Kabuto" (Rare Armor, 10 Farz), "Piña Colada" (Familio Gear, 3 Farz), "Calf-Holer" (Rare Weapon, 10 Farz), "Vegan Hot Dog" (Common Snack, 3 Farz).
Fights
While we encourage our guests to work out their differences peacefully, we understand that sometimes a fight is inevitable. Don't worry! The Kabula will give life back to your ruined body, so feel free to visit our souvenir gift shop in Inverbluf for a wide selection of novelty bludgeons!
Hit Points and Damage
Hit Points (Heart) measure a person's health. If you run out, you're dead! Your character mat has a double dial to track your current Heart, as well as your Maximum Hit Points (Heart+).
The most common way of losing Heart is taking damage (Blade). Each Blade in an effect deals 1 damage, causing its target to lose one Heart.
Hit Points can be restored by healing. If an effect instructs you to heal some number of Heart, increase your current Heart by that amount. You cannot be healed above your Heart+.
Heart and Heart+ are separate values and can be increased or reduced independently of each other. If you gain Heart+, you won't immediately gain extra Heart.
Note that some effects can cause you to lose Heart without dealing Blade. This matters when attempting to Defend (see page 14).
Attacks
When an effect instructs you to Attack, select another figure in the space you're occupying, then perform the rest of the effects on them.
Some attacks will allow you to attack targets outside of your space and some Attacks will instruct you to Attack All within a number of spaces. All means all! If your Familio is inside your range, it'll be attacked too!
Kabula has a lot of attacks that do a lot of different things. The following pages detail some of the many unique effects that Attacks can inflict on your enemies!
Spend or Else
Some Attacks will instruct you to spend Parts or Any Part, or else suffer an effect. Wild Monsters and Guardians don't spend parts (see page 16), so these Attacks will always cause them to suffer that effect. E.g. Jessika attacks the Water King using: Attack: Target spends Brain or loses Heart x2. As Guardians cannot spend Parts, the Water King loses Heart x2.
Aim
Most Attacks will instruct you to Roll Aim. To Roll Aim, roll the Aim Die and check the result; that's the part you hit!
In some cases, instead of Roll Aim, an Attack can specify where it is aimed (e.g., aimed at Butt). The effect in this case is the same as if Butt was the results of rolling aim.
Hitting a specific part can grant bonuses (if it is described in the attack action), but also trigger certain Defense actions, called Passive Defense (see page 14). For example, Zack wants to attack Jessika using his ranged attack Kidney Bean Bullet. He spends Guts, then rolls for Aim. If Teeth or Legs, the bonus on his action will trigger and Jessika will lose Heart x2. If Butt, Jessika's Passive Defense will prevent all damage. In all other cases Jessika will lose Heart x1.
There is a final category of attacks e.g., Attack: Blade x3 only Active Defense applies. Which does not require aim at all, as it bypasses passive defenses.
Example (page 13), "Kidney Bean Bullet": Attack up to 3 spaces away: Blade x1, Roll Aim: (Legs / Teeth) = +Blade. End Turn. The image also shows a blue "Defend: [shield icon] x1" Action as the defending response.
Nausea
The island is full of disgusting objects that can inflict Nausea on you. Nausea accumulates in the form of tokens, and can be given to Heroes, Familios, Monsters, and the Guardian. There is no limit to the number of Nausea tokens that a figure can have.
Nausea makes you hurt more. Whenever you lose any Heart, you lose an additional Heart for each Nausea token you have. Remember that Blade will make you lose Heart only when unblocked, so avoid letting things hit you to avoid the extra harm! Nausea can be removed by Resting; see Rest (page 9).
Push
Some Actions Push their targets. When an action Pushes you, roll the Compass die. If a single line separates you from the adjacent space in that direction, simply move your figure to that space.
In all other cases, you will suffer additional effects from being Pushed. Check for the conditions below, and apply them in order, from top to bottom:
- From a Mountain to a Plain, you fall off a cliff. Move to the Plain space and lose Heart x1.
- From a Plain to a Mountain, you hit a rock and roll back down. Do not move, and lose Heart x1.
- Through a River, or past the edge of the board, you get dunked in the polluted water and have to climb back to shore. Do not move and Get Nausea x1.
Diagrams (page 14) show these cases: a push from a Plain into a Mountain space ("Lose Heart"), a push through a River ("Lose Heart"), and a push over the edge of the board ("Get Nausea").
Defending Yourself
When you are the target of an Attack, you can use Actions with Defend to protect yourself. Actions with Defend may ONLY be used in response to an attack, but unlike other Actions, you may use them outside of your turn. You can quickly identify these actions by their blue nameplates.
Some Actions with Defend can be paid for with Parts like any other Action; these are called Active Defenses. Other Actions trigger Automatically whenever an Attack that targets you rolls a specific part on the Aim Die; these are called Passive Defenses. For instance, an Action with Teeth as its cost, triggers whenever an attack targeting you rolls Teeth on the Aim Die, with no payment necessary!
Only one Active Defense can be used in response to an attack and this may override the effect of aim. Following the example described in the previous section, if Jessika uses a Defend Action with "Cancel [aim icon]" all aim effects are ignored, Zack's Attack doesn't get a + Blade even if it aims at Legs or Teeth and Jessika's armor does not activate even if the attack aims at Butt. On the other hand, if Jessika uses an Active Defense that does not Cancel Aim, Aim effects will still be valid, as the Attack lands where previously aimed.
Example of a Defend Action that does not cancel aim (page 14), "Trading Blood": Defend: Before attack, attacker on the same space loses Heart x2.
Block
Most actions with Defend are intended to block damage. Each Shield icon in an effect blocks one Blade in the incoming attack. Shield ONLY blocks Blade, so other effects of the attack, like Nausea and Push, are unaffected. Effects that instruct you to lose Heart without dealing Blade are also unaffected. While the effect of some defense triggers Before or After the attack effects have been resolved, Shield always trigger simultaneously to the damage in the attack (Blade).
Defending Others
If another figure in your space is the target of an Attack, you may use any Active Defense Action to change the Attack's target to you. Defense and Attack then resolves normally, with you as its target. Use this to your advantage to protect your Familio and vice versa!
Note: When an Attack targets All in a certain area, the Attack is repeated on every valid target in RON order starting from the next one after the attacker. Defend actions on the other hand, do not need to follow the same order, and the same figure may defend Attacks intended for different targets. As only one Active Defense can be used in response to each individual Attack, in the unlikely circumstance that many players try to defend the same Attack, consider only the first one in RON after the attacker.
Recharging
When bad things happen, you get frustrated. It's only natural. Use that rage to push yourself to do greater things.
When either of the following things happen to your Hero or Familio, they Recharge:
- An Attack or Push has any effect on you other than being moved or forced to spend Parts (such as losing Heart, Farz, or getting Nausea). Parts you spent to Defend, or are forced to spend by an Attack's effect, don't cause you to Recharge.
- You used an attack which may have resulted in the target losing Heart, but this didn't happen for some reason (such as being defended).
When you Recharge, move any one of your Parts one box to the left, from Used to Fresh or from Fresh to Rage. Remember that your Used box is shared between you and your Familio, so feel free to move each others' Used Parts (gross).
Sequence Order (Advanced)
In most cases, the Attack sequence is pretty straightforward: A figure, called Attacker, triggers an Attack on a Target. If necessary a die is rolled, and then the Target can decide whether to use an Active Defense or not (e.g., Attacker uses: Blade x3, Roll aim on target. The die roll gives Butt. The Target, despite having an Armor which Shield x1 when hit on Butt, decides to spend a Butt to activate a Shield x2, Cancel Aim. Target only loses Heart x1 and Recharges one Any of their choice).
Some other times, the Attack sequence is more complex. For example, if an Attack targets All figures in a certain range, it may be necessary to roll for aim, or the direction of pushes for multiple targets, and each of them may trigger a defense. Additionally, some Defense may trigger effects that take place Before or After Attack. In such situations, always use RON to determine the sequence order, starting from the next in RON after the attacker. If one or more Defense which trigger Before attack is used, the effect takes place before the Attack effects are applied to the Target which triggers the Defense Action. If the Attacker dies, the Attack Action stops before reaching the following Targets, but its effects on Targets previously hit remain. If one or more Defense Actions trigger After Attack, complete the whole Attack action on All Targets, then resolve the defensive actions following RON.
Death and Rebirth
The wondrous power of the Kabula Tree prevents living things from dying on the Island. Instead of passing on, they're zapped back to the Sanctuary and restored to life. Only a real jerk would want to screw up such a perfect system...
When a Hero, Guardian, or Monster runs out of Heart, they die. If the Kabula is still in the Sanctuary, that figure is revived and the following things happen:
- When a Hero dies, move their figure to the Sanctuary. They Rest and heal to Heart+. If they had a Familio, they lose it (move its Parts to Used, discard figure and card). If you died during your own turn, End Turn.
- When a Guardian dies, move its figure to the Sanctuary, heal it to Heart+, and remove all Nausea from it.
- When a Monster dies, the player who killed it may take it as a Familio (see page 16). If they choose not to, discard its card and remove its figure from the board.
If the Kabula has been stolen from the Sanctuary, its power of rebirth is dispelled. Anything that dies uses the following effects instead:
- When a Hero dies, they're out of the game, permanently.
- When the Guardian dies, it is out of the game, permanently and if somebody has the Kabula they win the game.
- When a Monster dies, discard its card and remove its figure from the board. It can't become a Familio.
Monsters
Our island boasts incredible biodiversity. Keep your eyes open for creatures of all shapes, sizes, colors, smells, romantic preferences, and political opinions!
Provoking Monsters
Monsters have two states: Wild and Familio. Each corresponds to one side of their card. Monsters are always Wild until they're tamed as a Familio; read on to Taming a Familio on page 18 to see how to do that!
Wild Monsters roam around three territories that each span a third of the island (The Ridge, Bluff, and The North). Each territory has a Spotted Monster in it, whose card is in that territory's slot on the side of the board. The monster card for each territory is visible, therefore players can check relevant info, such as personality trait and Parts of the monster, before deciding whether to provoke one. If your Hero is on a space with a monster Pin, you can Provoke a Monster! Perform the following steps:
- Swap the monster Pin with the figure of the Spotted Monster for that territory.
- Put its card in RON immediately before your RON token (such that it will take a turn before you do).
- Place the Parts shown on the lower left part of the card on top of it. These Parts are its Heart (see Wild Monster Parts below).
- It immediately takes a turn, flip a coin to determine its action (see monster behavior below).
- Put the top card of the Unspotted deck in the empty territory slot.
- Once the monster has completed its turn, continue with your turn as normal.
Once a Monster has appeared, it has its own spot in the RON tracker and will take turns every round until it is killed or the game ends.
Wild Monster Parts
All of the Island's creatures share a deep connection to the Kabula's energy. Hunting them allows to absorb that energy and get stronger!
Wild Monsters' Health is represented by the Parts on their card. Whenever you cause a Wild Monster to lose Heart, take that many Parts from the Monster and add them to your Used box. If a Guardian or Wild Monster caused the loss, the next player in RON order after the monster which is losing health chooses, and discards that many parts instead. When a Wild Monster runs out of Parts, it dies (see page 18). Wild monsters cannot spend Parts like Heroes and Familios do, they represent their current Heart.
Example (page 16), "Aloe Wolf": Trait #romantic. Actions: "Ball of Thorns" (Move 2 steps toward target, then Attack: Blade x2, Roll Aim, Push self and target in the same direction); "Coward Attack" (Move 2 steps in a random direction, then Attack up to 2 spaces away: Blade x1, Roll Aim); "Thorny Tail" (Defend: Before attack, attacker on the same space loses Heart x1. Then Shield x1).
Monster Behavior
The actions of Wild Monsters are controlled by a set of conditions: check these conditions whenever one of their turns begins to determine what they'll do on that turn.
- Determine an Action: Flip the Monster Coin and find the Action on that Monster's card that corresponds to the result: the first coin face (round emblem) or the second coin face (bird emblem), as printed on the page. The Monster will use that Action this turn, and then will End Turn.
- Determine a Target: Most Actions will target a specific figure. To determine the Monster's Target for this turn, check the list below. If only one figure on the board fulfils the top condition, that figure is the target; otherwise, proceed to the next condition and check again to break ties. Monsters do not target themselves.
Note (page 17): the Target conditions below are printed as one list, but in the source they are split across two columns; they are kept in the printed order.
-
Fewer Steps to this Monster
-
Fewer Spaces to this Monster
-
Has the Kabula
-
Is next in the RON tracker
-
The closest in terms of steps.
-
The closest in terms of spaces.
-
The closest to the Kabula Sanctuary.
-
The one in the N direction or first moving clockwise from the North.
-
Determine Movement: Some Actions will move the Monster toward its Target and others will move the Monster in a random direction. If instructed to move a Monster in a random direction, roll the Compass die to determine which direction to follow. When moving toward a target, monsters will skip movement when on its same space or when moving would bring them further away from target. In all other cases, Monsters will try to consume all the steps (or spaces) they are instructed to move for. Any time a Monster cannot keep moving in a single direction, such as if they're on the edge of the board, or next to a river without enough steps to cross it, choose the next direction, in clockwise order, until you find one that allows them to move. Note that some movements require moving a certain number of spaces, instead of steps. In this case, just count the spaces without concerning yourself with how many steps are required.
Example 1 (page 17): A wild ScoundrEgg is moving 4 steps in a random direction. A compass die is rolled, revealing South. The ScoundrEgg moves 1 step South before hitting the map border. The next direction clockwise after South is SouthWest, which is forbidden as well, therefore the ScoundrEgg moves its 2nd step NorthWest. Hitting again the map boundary, it is forced to change again, and the next direction available clockwise is North where it moves for its 3rd step. As no other obstacle is present North, the 4th step is North as well.
Example 2 (page 17): A Wild ScoundrEgg moves 2 steps toward target. The closest figure in terms of steps is Clayton, so he becomes automatically the target of the action. For the ScoundrEgg to reach him, the shortest path is 3 steps (going up a mountain requires 2 steps) and it is the same length whether it moves North or NorthWest. Since it is the most advanced clockwise, the ScoundrEgg moves North. (Note: It would do the same even if something dangerous, such as a Fire token, was in the space!)
Monster and Automa Advanced Behavior
When two equally long paths are available to reach a target, figures will always choose the one in the most clockwise direction.
Small directional arrows close to the compasses on the map show which direction has priority when two are equally viable.
If more figures move at the same time in RON (e.g., Automa Isolde's kids, or Shaggy's rabbits), they start moving from the closest to the Kabula sanctuary. In a tie, start from those on the North direction and proceed clockwise.
When a figure moves towards a Target not in RON (e.g., an Encounter Pin) use the same priority criteria:
Taming a Familio
In the moments before death, humans and Monsters can synchronize their energy, fusing their mind, their will, and their digestive tract.
When you kill a Monster, you may choose to take it as a Familio. If you do, perform the following steps:
- Flip the Monster's card to its Familio side and keep it next to your player mat.
- Add a Tag to your Personality card that corresponds to that Monster's trait (if you have one).
- Set the Familio Heart+ dial on your player mat to the Monster's Heart+.
- Move up to 5 Parts from anywhere on your mat to the Familio Fresh box.
- Place the Monster's figure on the Sanctuary.
- Flip your Familio RON token to its active side.
You may only have one Familio. If you decide to take a new Familio when you already have one, the first Familio desyncs; discard its card and figure. If another player kills your Familio, they can take it as their own! If you somehow kill your own Familio, you can't tame it again.
Example of a monster card on its Familio side (page 18): "Peeping Cobra", trait #creepy, Familio's max Heart+ x5. Actions: "Slithering Perv" (Move to any Hero's space, alternatively move 2 steps); "Scouting Tongue" (Attack: Target spends Any Part or gives you Farz x2. End Turn.); "Sly Spank" (Attack: Target spends Any Part Any Part or loses Heart x2. End Turn. BONUS: When you draw an Encounter, draw 2 instead of 1, and choose one to resolve (discard the other)).
Commanding Familios
Your Familio behaves like another Hero that you control. It has its own turn, its own Heart, its own Actions, and its own set of Parts.
Familios have their own Parts on your player mat that you distribute to them from your own supply. They spend their Parts to use the Actions on their card. They can also Recharge (page 15).
However, there are some things that Heroes can do that Familios can't:
- Familios can't use any Action that isn't written on their card (for example Rest).
- Familios can't lose Farz. If they gain Farz, they give it to their master.
If you and your Familio occupy the same space, you can each Defend Attacks that target the other; see page 14.
Heroes and Personalities
We're always interested in collaborations with influencers! If you have over 5,000 followers on a qualifying social media account, contact our outreach coordinator to be part of our charity challenge drive. Proceeds will go towards much-needed improvements to Sanctuary security!
Personality Cards
The Kabula tree is really important to the monks, they won't let just anyone in to see it. To get close, you're going to have to prove that you're somebody. Time to get popular!
Each Hero has three Personality cards, each of which is associated with two traits. Doing something related to one of those traits adds a Tag to that card. There are three ways to get Tags:
- Options on Encounters (Encounter icon). Whenever you make a choice in an Encounter, add a Tag to your Personality card with that choice's trait (if you have one).
- Tame Familios. Whenever you tame a Familio, add a Tag to your Personality card with that Monster's trait (if you have one).
- Use your Personality card. Each of your Personality cards has an action or bonus effect that unlocks when that card has at least one Tag on it. These effects will let you get additional tags by doing specific things.
Example (page 19), "Hello World": a card with the traits #naturelover and #violent, marked with three Tag slots (1, 2, 3). Bonus: Whenever you explore a Dungeon, you may get a #naturelover Tag.
Personality Traits
As you may notice throughout your games, personality traits may mean a variety of things on the Island.
- Romantic: Anything that has to do with romanticism or sexual intercourse. If you are participating in a pagan ritual, that's probably pretty romantic.
- Violent: Any excuse is good to beat somebody up
- Creepy: No. Just... why would you do that? That's wrong on so many levels.
- Practical: Is personal gain your main drive? Some people may call you immoral, but we prefer practical.
- Nature Lover: If your love for animals, monsters and the environment more prominent than your love for humans, you're probably a nature lover.
- Generous: Well, are you being a good person or just completely naive? Some may say you are stupid, but we'll call you generous.
- Lazy: You are always finding the solution that requires the least immediate effort, disregarding the long term consequences.
Trending
When you place your third Tag on a Personality card, you're Trending! Flip that card to its Trending side, revealing the unique ability that you just unlocked. You also cannot use any longer any action or bonus on other Personality Cards.
Once you're Trending, your Personality will no longer change. You can't gain any more Tags.
In addition to your new abilities, Trending is important because it allows you to initiate the end of the game. Only Heroes with completed Personalities can steal the Kabula from the Sanctuary.
Example (page 19), "Sorry, Not Sorry": shown with three Tags (#naturelover, #generous) placed on it, then flipped to its Trending side, "Forest Princess" (Turn a Wild Monster on your space into your Familio without killing it. Discard all [icon] on its card and set its Heart to the number of [icon] discarded this way).
Hero Automas
Hero Automas are double sided tarot cards and can be used as AI for Heroes not currently used by a human player. You can use any number of Hero Automa in your game and they are considered as regular players for player count during set up. You cannot use two cards representing two personalities of the same Hero in the same game. If you are playing solo, use AT LEAST one Hero Automa.
Hero Automa starts with their coloured face up. This shows the set up values for Heart+, Heart and Farz to be marked on an empty player mat (you can place their card on it too) and the starting position of the Hero miniature. Some of them may include special rules you need to be aware of, these are always written below the set up info, above the actions.
Just like Wild Monsters, the behavior of Hero Automa is decided by flipping one monster coin (sometimes two!) and then performing the corresponding action.
During the game, Hero Automa will collect Tags on their card. When they have three Tags, the card flips to its trending side, marked with the Kabula icon. Automa cards will flip to this side if the Kabula is stolen, even if they do not have three Tags. Once the card is flipped, the behaviour of Automa Heroes will change:
- If a Hero or the Guardian holds the Kabula, they flip coins to determine their attack action.
- If the Kabula is not currently held by another Hero/Guardian. They will move towards the Kabula. Each Automa Hero has a maximum movement value specified above the actions. If they reach the space with the Kabula, they collect it and place it on their card, becoming the Kabula owner. Then they flip coins to determine their attack action (the Guardian may attack first, if this is the first time the Kabula is stolen, see page 22).
Target Determination
Unlike Wild monsters and Guardians, Hero Automas choose their targets so as to maximize their chances of victory. Therefore, they will ignore distance when determining their target. If a Hero Automa has the Kabula, the Guardian will become their priority target. When moving toward target they will always move towards the Guardian and only afterwards change target for the attack if it is not possible at all to attack the Guardian. In order of priority, Hero Automa will attack: Guardian, Hero, Familio, Wild Monster (use RON to break ties).
If a Hero Automa does not have the Kabula, they will consider the Kabula owner as their ONLY target. This means they will never attack any other target, even in the case in which attacking the Kabula owner is not possible.
Please note: Some Hero Automa may spawn other figures on the board. Those figures still behave like Wild Monsters and the Guardian, and determine target following the rules in page 17. The only extra rule is for Baby Warriors who never target Isolde.
The Guardian
A Guardian is a Familio to the Kabula itself. While it lives, part of the Kabula's power will never be unlocked... so in order to get away with your heist, you'll need to take it out!
If the Kabula has yet to be stolen and is still safely in its Sanctuary, the Guardian will reveal a card from the Guardian Deck at the beginning of each round. That card will instruct you to place it in one of the two Guardian slots in the RON tracker either at the Alpha (alpha) or Omega (omega) spot. When you reach that spot in the RON, do what the card says. To avoid confusion, we suggest keeping all the revealed cards as a single Guardian deck and move the whole deck to alpha and omega as needed.
Note: Cards that trigger in Alpha present an immediate threat, but those triggering in Omega allow players to prepare for what is coming up. Make sure to read the cards as soon as you draw them.
When the Kabula is stolen, the Guardian begins to act like a Wild Monster with its own set of Behaviors. Perform the following steps when the Kabula is stolen:
- Add the Guardian to the RON tracker. Flip the Guardian deck and place it in RON, to the left of the Hero who stole the Kabula, to represent the Guardian's position in the RON, just like when a Wild Monster appears.
- The Guardian immediately takes a turn, just like when a Wild Monster appears. Then the current player finishes their turn.
The Guardian's turn after the Kabula has been stolen is nearly identical to a Wild Monster's turn. Do not draw more Guardian cards and instead, Flip two Monster coins to determine its Action. The rules for determining its target and movement are the same as a Wild Monster's, therefore the Kabula owner will not necessarily be the priority target each turn. The only additional behavior a Guardian has is how it reacts when the Kabula is left on a space without an owner. In such case the Guardian will move there and collect it at the beginning of its turn, before the two coins are flipped.
Example Guardian card (page 21), "Bibi & Bobu": the page labels its Health and Kabula token, RON Condition, Behavior Actions, Passive Defense Actions, Extra Rules, and Guardian Deck (example card "Spreading Peace").
The End
What is to become of our beloved Island as she drifts into the future? Will we find the will to tackle the rising pollution that chokes our rivers? Will we learn to stand up for ourselves without losing the love and trust that made our society great? Will we ever realize that the outsiders only show us the flaws in our culture that have been there all along?
...no wait, nevermind, our biggest problem is definitely these new kids with cell phones. Kill 'em!
The Last Battle
The Last Battle is the final phase of the game, when the Heroes' intentions have been made clear and the Guardian fights the hardest to protect the Kabula.
The Last Battle is triggered in one of two ways:
- A Trending Hero moves to the Sanctuary. That Hero steals the Kabula and places the Kabula token on their Fresh Box or their card, for Hero Automas.
- A new round begins and there are no cards in the Guardian's deck. The Guardian immediately moves to the Sanctuary, steals the Kabula and places it on its mat, to protect it from the Heroes.
In both cases, the Guardian will act immediately, placing itself in RON before the Hero who stole the Kabula or in alpha if it stole the Kabula itself (see previous chapter for Guardian behavior).
Remember that stealing the Kabula from the Sanctuary makes death permanent!
Conquering the Stolen Kabula
If the current owner of the Kabula is killed, drop the Kabula token on the space they occupied. Heroes and the Guardian can pick up the dropped Kabula by being in that space on their turn. If a Guardian or Hero kills the Kabula owner attacking from the same space, they become the new Kabula owner immediately. Do not modify the Guardian RON position when the Kabula is stolen after the first time.
Using the Kabula
In addition to helping you win the game, the Kabula Token is also a potent "wild card" that can be spent like a Part Token of any type.
Also, when you resolve the Action you spent the Kabula on, add the number on its token to any one number in that Action's effect. If the Kabula Owner is the Guardian or a Hero Automa, this bonus applies to all their attacks.
- If the Guardian is dead and a Hero has the Kabula, that player wins! You go on to do whatever it is you wanted to do with the Kabula, while everyone else on the island gets to die. I hope it was worth it.
- If the Guardian is killed while the Kabula has been dropped on a space, the first Hero to play a turn on that space gets it and wins the game.
- If all the Heroes are dead, nobody wins. The Guardian has stopped your schemes and restored balance to the island... until the next time you decide to open the game, anyway!
Expansions
How to use expansions
All the Expansions of the game so far available, are not stand-alone and therefore require the base game to be played. When Encounter, Dungeon and item cards are available, we suggest to shuffle them together with the core decks. All Heroes and Guardians can be played in any combination. Please note that the Heroes and Guardians included in the Conspiracy expansion are slightly more complex to use and we suggest not to start with them. Also note that you do not need to add all the content ever time, feel free to cater the experience to your taste.
Outrageous Expansion
- 25 Encounter cards
- 5 Dungeon cards
- 2 rare items
- 22 common items
We suggest mixing these cards with the original decks but please beware of the content, especially items, since they are not coded with the traffic light system. This expansion is called Outrageous for a reason, you may want to leave some of them out.
Conspiracy Expansion
- Gotzo (Hero): mini, 5 Hero cards, 9 bomb tokens
- Shaggy (Guardian): mini, standee, mat, 10 guardian cards, 10 rabbit cards, 20 rabbit tokens
- Bibi&Bobu (Guardian): mini, standee, mat, 10 guardian cards, 24 Banana Peel tokens, Bobu token
- 10 Encounter cards
- 5 Dungeon cards
The two Guardians contained in this expansion are like any other one in the game, but since some of their effects are slightly more complex, we are offering here a brief summary of their peculiarities.
Shaggy: Unlike other Guardians, Shaggy has 2 separate guardian decks. The Rabbit deck always triggers in alpha, while Shaggy's always triggers in omega. Shaggy's deck follows the same rules as other Guardian decks. The Rabbit's deck only deals with spawning, moving, flipping, and making explode the Rabbit tokens on the map. This deck is not affected by the Kabula being stolen, so players keep drawing a Rabbit card every start of a round for the entirety of the game. Rabbits are not figures and as such cannot be targeted by attacks. When unsure on which Rabbit to move first, start from the closest to the Kabula and, in a tie, from the one in the North direction or in the next direction after North clockwise.
Another peculiarity of Shaggy is swallowing Heroes. Swallowing cannot be prevented, the hero mini is placed on Shaggy's mat and will stay there until the beginning of the next Shaggy turn. Until then, the Hero will lose Heart x1 every time Shaggy loses any Heart. During their active turn, a swallowed Hero decides which of the two remaining actions from Shaggy's mat the Guardian will use and on which target. At the beginning of the next Shaggy turn, the Hero is placed 3 spaces away from it in a random direction and gets Nausea x2.
Bibi&Bobu: This Guardian has two unique features, the Bobu token, and Banana Peel tokens (BP). During set up, place the Bobu token on the Guardian mat, covering Bobu's illustration. Bobu is placed on the side showing the action "Watch Out" and representing Bobu awake. During the game, this token may flip back and forth. Any action or bonus on the Bobu token is considered active as a part of the Bibi&Bobu Guardian mat, when visible. During the game, BP will be placed on the map board:
- If targeting a space with figures, the priority target is Pushed in a random direction. Then, the BP will move in the opposite direction to the Push.
- If a BP is placed on an empty space, it stays there. When a figure moves into the space, it is Pushed in the same direction in which it was already moving. The BP moves one space opposite to the Push.
In both cases, there is a chance that the BP which just moved as a result of the Push enters a space containing figures. In this case behave as if it was the target with highest priority moving against the BP: The BP will keep moving in the same direction, while the figure is pushed in the direction from where the BP comes from. This may happen a few times until the BP finds an empty spot to stop, or ends up outside the map border, in which case it is discarded. If a BP ends up on the same space as another BP it keeps moving one step further. If more than one BP is involved in the same train of events (figures may be pushed on other BP, causing them to move) finish solving everything related to a single PB before solving effect related to the next.
Index / Glossary
-
Active Defense: A Defend action triggered by spending tokens (page 14).
-
Adjacent: One space away.
-
All: Action targeting all figures in a space or an area. Attack All excludes the attacker, unless specified (page 13 and page 15 for advanced order sequence).
-
After attack: This syntax is found on Defend actions. It indicates that part of the action will trigger after all parts of the attack have completed. If the attack affects multiple targets (see All), any after attack effect will trigger after all targets have been affected by the attack. If more than one after attack effect is triggered by the same attack, resolve them in RON order.
-
Aimed at (aim icon): Do not roll the aim die, automatically aim at a specific part (page 13).
-
Attack: (page 13).
-
Attacker: The Hero or Monster currently performing an attack.
-
Before attack: This syntax is found on Defend actions. It indicates that part of the action triggers before the action begins. If an affects multiple (see ), before attack actions will trigger individually, before the attack is applied to the activating this action. If the attacker dies during this action, the action ends, otherwise it will trigger normally after the before attack action is performed. As affects following RON, there is a chance that a before attack action kills the attacker after some of the have been affected but sparing others.
Icon Legend
The printed legend (page 28) lists each icon with its name. Icons are rendered as words throughout this transcription.
Parts and Costs
- Teeth
- Brain
- Legs
- Butt
- Guts
- Any Part
- RAGE Box
- Raging Part
- Aim at Part
- Action triggers both by spending Part or if you are hit in that Part
Commerce
- Farz
- Common Item
- Rare Item
Fighting
- HP (Heart)
- Maximum HP (Heart+)
- Damage (Blade)
- Block (Shield)
- Nausea
Map Tokens
- Encounter
- Wild Monster
- Flip Monster token to Encounter
- Level 1 Dungeon
- Level 2 Dungeon
- Flip Level 1 counter to Level 2
Other Stuff
- Familio
- Monster Coin: Heads
- Monster Coin: Tails
What if I...
- Don't know what to do? Try doing Encounters and Dungeons to get some new Items. When you're comfortable, provoke a Monster and try to tame it. Then, see which of your Personality cards has the most Tags and try to finish it.
- Run out of Parts? Use the Rest Action on your player mat.
- Need more money? Encounters and Dungeons are good sources of money and items (which you can sell in Cities).
- Need to heal my Heart? Head to a City. Each City has an action that can heal you.
- Lost all my Heart? I'm afraid you're dead, but that's not the end. Check page 15 to see what to do.
- Want to attack someone? Move into their space and use an Action with Attack in its effect.
- Get attacked by someone? Use a Defend Action to protect yourself!