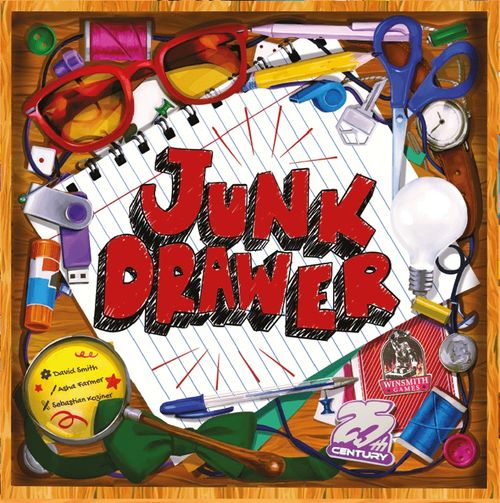
Junk Drawer
Junk Drawer Rulebook
Table of Contents
Table of Contents
Components
- 4 x Junk Drawers
- 1 x Organization Board
- 21 x Item Cards
- 1 Scorepad
- 4 Sets of 21 Item Tiles
- 24 x Organization Cards (8 x EASY, 8 x MEDIUM, 8 x HARD)
Setup
-
Place the Organization Board in the center of the play area.
-
Place 1 Organization Card on each of the 4 Compartments of the Organization Board.
You may select 4 cards at random, choose the 4 cards you want to use, or follow a suggested scenario (pgs. 6-7). For your first game, we suggest using 4 Easy level cards. Put any unused Organization Cards back in the box.
-
Shuffle the Item Cards and place them face-down next to the Organization Board.
-
Each player should take a Junk Drawer and a set of 21 Item Tiles.
Playing the Game
The game is played in rounds. Each round follows the following steps:
- Take the top 4 Item Cards and place them facedown in a line next to the Organization Board.
- Turn over the first facedown Item Card in the sequence (the card closest to the Organization Board), after which all players:
- Find their Item Tile that matches the Item Card.
- Place this Item:
- In a Compartment in which an Item Tile has not already been placed this round.
- Entirely within 1 Compartment.
- Entirely on top of uncovered spaces, without overlapping other Item Tiles.
- After all players have placed their Item Tile:
- If there are still facedown Item Cards in the row, repeat step 2, flipping over the next facedown Item Card.
- If all Item Cards in the row have been turned over, begin a new round by putting the faceup Item Cards into a Discard Pile beside the Item Card deck and repeating step 1.
Example Round:
- The first Item Card, Bag Clips, is turned over. You place the Bag Clips in Compartment (C).
- After all other players have also placed their Bag Clips, the second Item Card, Batteries, is turned over. You can now only place in Compartments (A), (B) or (D). You place the Batteries in Compartment (A).
- After all other players have also placed their Batteries, the third Item Card, Sticky Notes, is turned over. You can now only place in Compartments (B) or (D). You place the Sticky Notes in Compartment (D).
- After all other players have also placed their Sticky Notes, the fourth Item Card, Earphones, is turned over. You must place the Earphones in Compartment (B).
Game End
If any player cannot place the Item Tile following the placement rules above, then this is the final Item Tile that will be placed this game. After all players have placed this Item Tile, go to Final Scoring.
During the final turn, all other players who are able to place the Item Tile must do so. It is possible that multiple players cannot place the Item Tile.
Final Scoring
- Players record the points earned in each Compartment of their Junk Drawer on the score sheet, then add the scores for all four Compartments together to get their total score.
- The player with the most points wins. If there is a tie for first, then those players share the win.
Variant Mode - Individual
Players may want to continue placing Item Tiles, even when another player cannot. The rules are modified as follows:
- If a player cannot place an Item Tile following the placement rules, then they have finished organizing their Junk Drawer and do not place any more Item Tiles for the rest of the game.
- Other players must still place the Item Tile, if possible, and continue placing Item Tiles for as long as they are able (starting new rounds, if necessary).
- When all players are unable to place an Item Tile, proceed to Final Scoring.
Solo Mode
To play Junk Drawer on your own:
- Follow all of the normal rules of play.
- Try to beat the combined total of the example scores shown on the 4 Organization Cards.
Key Terms
- Perimeter spaces: the outer ring of spaces around the edge of a Compartment.
- Interior Spaces: the spaces not on the perimeter of a Compartment.
- Adjacent Spaces: spaces that share a side.
- Covered space: a space that has an item on it.
- Gap: a group of 1 or more uncovered and adjacent spaces.
Example: a Compartment can contain covered spaces, uncovered spaces, and gaps — e.g. 14 covered spaces, 11 uncovered spaces, and 6 gaps.
Organization Cards
Each Organization Card shows:
- Goal Description
- Scoring Details
- Example Item Layout
- Example Score
- Challenge Rating
EASY Rating: straightforward to score points. MEDIUM Rating: scoring points takes a bit more work. HARD Rating: only the skilled will score lots of points.
Suggested Goal Scenarios
1. Bring A Wheelbarrow
Scoring points will not be a problem. But can you get the most?
- A. Cover Many Spaces (EASY) — Score: 1 Point per covered space.
- B. Don't Cover Many Spaces (EASY) — Score: 1 Point per uncovered space.
- C. Don't Cover Center and Corner Spaces (EASY) — Score: 3 Points per uncovered corner space. 3 Points if the center space is uncovered.
- D. Cover Perimeter Spaces (EASY) — Score: 1 Point per covered perimeter space.
2. Slim Pickings
Points won't come easy here. How many can you get?
- A. Don't Place Items Adjacent (HARD) — Score: 4 Points per item not adjacent to another item.
- B. Create Two Large Gaps (MEDIUM) — Score: 3 Points per uncovered space in largest Gap. (can be equal size as largest gap)
- C. Cover 2 Spaces in each Row and Column (HARD) — Score: 3 Points per each row and column containing exactly two covered spaces.
- D. Create Gaps of 3 Spaces (HARD) — Score: 5 Points per Gap of exactly three spaces.
3. More More More
More Items mean more points. How many can you fit in?
- A. Place Many Items (EASY) — Score: 4 Points per item.
- B. Place Items of Different Sizes (MEDIUM) — Score: 4 points per unique Item size (number of spaces it covers).
- C. Create a Covered Rectangle (MEDIUM) — Score: 1 Point per space in largest covered rectangle.
- D. Cover Rows and Columns (MEDIUM) — Score: 4 Points per row and column containing no uncovered spaces.
4. A Sprint, Not A Marathon
Items will lose you points. How fast can you finish organizing?
- A. Don't Cover Many Spaces (EASY) — Score: 1 Point per uncovered space.
- B. Don't Cover Perimeter Spaces (EASY) — Score: 1 Point per uncovered perimeter space.
- C. Create a Large Gap (MEDIUM) — Score: 2 Points per uncovered space in largest Gap.
- D. Don't Completely Cover Rows and Columns (MEDIUM) — Score: 2 points per row and column containing at least one uncovered space.
Publisher
Winsmith Games — www.WinsmithGames.com — Follow us @WinsmithGames
25th Century Games — www.25thCenturyGames.com — Follow us @25thCG