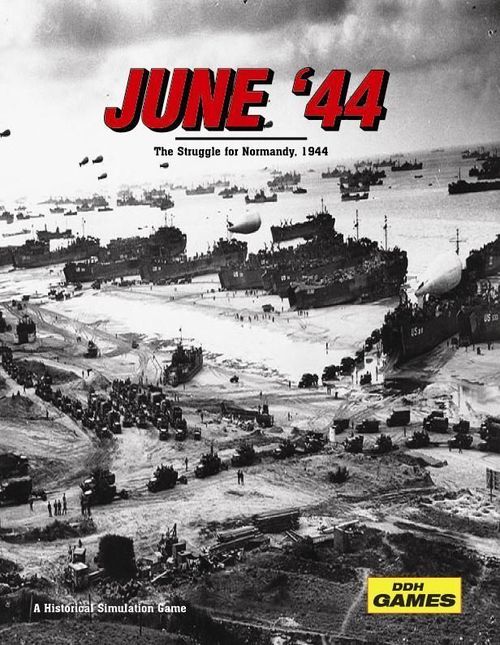
June '44: The Struggle for Normandy, 1944
June '44: The Struggle for Normandy, 1944 Rulebook
Table of Contents
Table of Contents
- 2.0 Game Components
- 3.0 Standard Procedures
- 4.0 Preparing the Game
- 5.0 The Game Turn
- 6.0 Zones of Control and Stacking
- 7.0 Supply and Time
- 8.0 Replacements and Reinforcements
- 9.0 Air Units and Naval Fire
- 10.0 The Movement Phase
- 11.0 The Combat Phase
- 12.0 Event Cards
- 13.0 The Invasion Turn
- 14.0 Solitaire Play
- 15.0 Winning the Game
- 16.0 Optional Rules
- 17.0 Design Notes
- Sequence of Play
2.0 Game Components
- 1 Rulebook.
- 1 Game map.
- 1 Counter sheet.
- 1 Cards & Tables.
- 1 Player aid card.
- (24) Event cards.
- 1 ten-sided die.
2.1 The Rules
Each major rules section is assigned a whole number (1.0, 2.0...). Subordinate rules are assigned a corresponding number to the right of the decimal point. For example 2.0.1, 2.0.2, ... fall under rule 2.0, and 2.1.1, 2.1.2, ... fall under heading 2.1.
2.2 The Game Map
The map represents Normandy, France in 1944. A hexagonal grid has been superimposed over the map to regulate the movement of combat units and to trace the various terrain types that affect play. These hexagons are called "Hexes" ("Hexs"). Each hex has a four-digit identification number, used as a reference for game effects. For game purposes, the beach side of the map is considered north, directionally, while the south is at Caumont (hex 2911).
2.3 Cards and Tables
- Combat Results Table (CRT) - resolves land combat between units.
- Terrain Effects Chart (TEC) - lists the movement and combat modifications for each terrain type and weather condition.
- Naval & Supply Point Track - shows the naval and supply points available to the Allied player for the current turn.
- Turn Track - shows the current turn and indicates the nation that receives reinforcements.
- Victory Point Track - used to record the current total of victory points.
- Weather Track - records the weather for the current turn and its effect on German movement.
2.4 Playing Pieces (Counters)
There are two basic types of playing pieces: combat units and game markers. They are called counters or units.
2.4.1 Combat Units
Counters represent historical units and formations. The numbers and symbols on the counters indicate the size, combat strength, movement capability, nationality and unit type. Many units are divisions, although some are brigades.
2.4.2 How to Read Combat Units
This is the 1st American infantry division at full strength; its basic statistics are as follows:
- Attack strength: 5
- Defence strength: 4
- Movement capability: 4
On its reverse, the values are:
- Attack strength: 3
- Defence strength: 2
- Movement capability: 4
A unit on its full-strength side is considered a two-step unit. On its reverse, or reduced side, it is a one-step unit.
Some units have only one step, such as artillery units and the KG (Kampfgruppe). Artillery units have an AS (attack strength) shown in parentheses, and they can apply their AS beyond the adjacent hex; see 11.2.1. When defending in combat, artillery units have a defence strength of one (1) and cannot apply their AS in parentheses.
2.4.3 Explanation of Unit Values
- Attack strength - the combat value printed on the counter that identifies the inherent strength in combat when attacking.
- Defence strength - the combat value used when the unit is attacked by the opponent.
- Movement capability - the maximum number of movement points (MPs) that a unit may spend to move during a movement phase.
- Unit I.D. - the identification of the unit.
- Unit size - located at the top of the unit-type box, as follows:
- Infantry: XX, Division.
- Tank: X, Brigade.
- Artillery: no size symbol is printed in the source table.
2.4.4 Unit Colour
- Commonwealth: earth/tan ("tierra" in the Spanish source).
- Germany: grey.
- U.S.A: green.
Note: the terms "Great Britain" and "Commonwealth" are both used to refer to England, Canada and the other Commonwealth nations.
2.5 Abbreviations and Terms
- AS - Attack Strength.
- CRT - Combat Results Table.
- DRM - Die Roll Modifier.
- DS - Defence Strength.
- EZOC - Enemy Zone of Control.
- MA - Movement Allowance (movement capability).
- OOS - Out of Supply.
- REPL - Replacements.
- TEC - Terrain Effects Chart.
- ZOC - Zone of Control.
2.6 Game Scale
Each turn represents 2 days and each hex represents approximately 2.5 miles.
3.0 Standard Procedures
Several standard conventions and basic concepts are used throughout the game.
3.1 The Die
The game uses a ten-sided die, called "1d10", to resolve events such as combat during play. A "0" means a roll of ten ("10").
3.2 Cumulative Effects
In all cases, except where specifically stated, modifications to the die roll are not cumulative. In combat, use the terrain feature most advantageous to the defender, and when moving through a hex, use the least advantageous one.
Exception: Hill & river; see 11.1.1.
3.3 Hex Control
Hex control is the term used to describe which side controls a given hex at any moment of the game. Hex control is important for supply and for victory conditions.
Hexes within which a unit exerts a ZOC are called "controlled hexes"; see 6.0. A unit always controls the hex it occupies. If both sides extend ZOCs into a hex, both players control the hex mutually.
The control status of a hex changes at the instant that a unit of the other player enters and/or moves through the hex, or exerts an uncancelled ZOC within it.
4.0 Preparing the Game
Place the units on the appropriate hexes, according to the June '44 order of battle. Allied units begin either on the appropriate beach shore or are placed as airborne regiments.
Before the game begins, the German player places the six beach defence markers, one on each of the six beach hexes, with their strength hidden from the Allied player; see 13.0. The turn, time and supply point markers are placed on their appropriate tracks.
The control status of each hex may change any number of times during a scenario.
5.0 The Game Turn
June '44 is divided into 16 game turns. The first turn is played differently and consists of two invasion phases (see 13.0). The game sequence shown on page 11 is strictly followed in all subsequent game turns. Once a player has completed a given phase and moved on to another, he may not go back to carry out a forgotten action, or redo an action poorly executed, unless his opponent allows it.
6.0 Zones of Control and Stacking
Zones of control are called "ZOC"; in the case of an enemy ZOC, it is called "EZOC".
Fortifications and all units (except artillery) exert a ZOC within the 6 hexes that surround them, except across prohibited terrain, e.g. the Caen Canal. It is possible for both sides to exert a ZOC simultaneously within the same hex. A friendly unit in a hex that contains an EZOC negates that EZOC for the purpose of tracing supply lines, both within and through the hex. Beach defence units are considered fortifications.
The presence of a friendly unit and/or ZOC in a hex within which an EZOC is being projected does not negate the ZOC for movement purposes, with the following exceptions:
- In the case of exploitation after combat; see 11.5, and,
- A unit may move one hex from EZOC to EZOC if a friendly unit is present in the second hex, but the movement of the unit stops at that point.
6.1 Entering an EZOC
No additional MP cost is paid for a unit to enter an EZOC. However, units must stop immediately when they do so.
6.2 Leaving an EZOC
No additional MP is spent to leave an EZOC if the unit begins the turn there. If the unit begins its turn in an EZOC and moves immediately into an adjacent hex that is in an EZOC but contains a friendly unit, it may do so, but it must stop immediately and end its movement.
Example (the diagram on page 4 of the source shows hexes A-F, a German 21st Panzer division, the Allied 34th Armoured Brigade and the Caen Canal; it is not reproduced here): It is the German player's turn. The movement options of the 21st Panzer division are very limited: it cannot move to A, since that would be moving from an EZOC to an EZOC. It cannot move to E or F, since it cannot cross the Caen Canal unless a bridge exists. Its only option is C, since it may move one hex from EZOC to EZOC provided a friendly unit is in the last hex. Note that if this were the Allied turn, the 34th Armoured Brigade could move from B to E, since E is not in the ZOC of the 21st Pz, as ZOCs do not extend across the Caen Canal.
Multiple EZOCs within the same hex produce no additional effect beyond rules 6.1 and 6.2.
6.3 Stacking
Stacking refers to placing more than one unit in a single hex. The stacking limit is in most cases two (2) units, but a brigade-size or regiment-size unit may always be stacked as a third unit with two other units of any size, except artillery. Artillery units may only stack with one unit of any size.
Artillery units may only stack with one unit of any size.
US and Commonwealth units may not stack together, although a flanking modifier may apply; see 11.3.
6.4 Overstacking
If units of either player are found overstacked at the end of the movement phase or after completing an exploitation after combat, that player must eliminate the excess unit(s).
Units may move through a hex in violation of the stacking limits. For example, a division may move through a hex that already contains two divisions. It may also move there and stop if one of the other units moves away in the same phase. Units may never end a phase overstacked.
6.5 Fog of War
A player may never inspect the units of the opponent unless those units are currently involved in combat. Likewise, a player may never inspect either the stack of counters or the discard pile of the event cards.
7.0 Supply and Time
There are two forms of supply in the game: traced supply and Allied combat supply. When it is said that a unit or units are in supply, this refers to traced supply. Allied combat supply is only used by the Allied player when conducting an attack.
7.1 When to Check Supply
Supply effects apply at all times during each game turn. Units are considered in supply only up to the point at which they are considered OOS, and vice versa.
7.2 How Units Are Supplied
A unit is in supply when it can trace a supply line through hexes to an appropriate supply source. A supply line consists of an unbroken line of contiguous, non-prohibited hexes traced from the unit in question back to a supply source. Such a line may not:
- Enter hexes occupied by enemy units, or
- Enter hexes containing EZOCs, unless a friendly unit is there to negate that EZOC for supply purposes.
Units may trace supply along a route of any length to their designated friendly supply source. These are:
- Allied: any friendly controlled beach hex.
- German: any south or east edge of the map, or the city of Cherbourg if it is controlled by the German player.
7.3 Allied Combat Supply
The Allied player must use one supply point for each attack they wish to conduct, except during the invasions. Supply points are received via the supply die roll and may be saved from turn to turn. The German player is not under this restriction. If the Allied player saves enough supply points, they turn the marker to the +10 side to show its highest value.
Important note: during a stormy weather turn, the Allied player receives a -2 DRM to their supply die roll.
7.4 Effects of Being Out of Supply (OOS)
Units that are out of supply (OOS) suffer the following penalties:
- They may not attack.
- They may not receive replacements.
- Defence strength is reduced by -1 (always a minimum of 1).
- Movement is halved, rounding up.
Units do not lose steps or get eliminated merely for being OOS. They may still defend, they exert their full ZOC, and they may still be used for a flanking bonus.
7.5 German Time and Movement
In addition to the effect of the availability of naval and air support, to represent the effect of Allied air power on German mobility and logistics, weather conditions affect German mobility. With worse weather there is a larger negative modifier to the movement of German units. Subtract the weather modifier from the base MP of each German unit. Weather never affects Allied movement. See the Weather Track.
8.0 Replacements and Reinforcements
8.1 Replacements
Replacements must be used as soon as they are received. If they cannot be used, they are lost. The Allied player applies replacements first, followed by the German player, as follows:
- A unit in supply that has suffered a step loss may be flipped to its full-strength side. It may be in an EZOC.
- A unit that has been destroyed may be returned to the game as a replacement. This costs 2 points to return a two-step unit to the game on its full-strength side.
Note: this means that the German player can never return a two-step unit to full strength directly; it must come back reduced, and then use a replacement point later to flip it to its full-strength side. Also, units with a movement allowance of zero (0) cannot be brought back as replacements.
Units re-enter the game as follows:
- US: Utah or Omaha Beach.
- CW: Gold, Juno or Sword Beach.
- German: any east or south map edge.
As with reinforcements, Allied units use all their MPs when they land on a beach, unless a Mulberry is present; see 12.1.
Airborne infantry regiments, once removed from the game by combat or by combining, may not be brought back into the game as replacements. Airborne divisions, if eliminated, may not re-enter the game and replacements may never be applied to them; e.g. airborne divisions cannot receive replacements.
8.2 Combining Units
Airborne infantry regiments may be combined into their appropriate division during the combine phase of the Allied turn only. Two of them, in the same hex, may be combined to build the corresponding division at reduced strength, while three may be combined to form the division at full strength (or the reduced division and one airborne regiment). They may not afterwards be converted back to their regiment counters at any time.
Replacement points may not be combined with airborne regiments to rebuild their parent unit. Units from different airborne divisions may never be combined.
8.3 Reinforcements
Reinforcements enter the game at the locations designated on the Order of Battle card. German units enter from the map edge with their full movement available, subject to the effects of Weather. The entry hex will be their first hex of movement. Allied units enter on a designated beach, or on any beach of the nationality if so assigned. A unit spends all its MPs upon entering the beach (unless a Mulberry is operating; see 12.1).
For example: a Commonwealth artillery unit that says "any beach" may land on Gold, Juno or Sword beach.
If a German unit is designated to enter a particular hex and that hex is occupied by Allied units, it may enter the nearest adjacent hex, or wait until a future turn, at the German player's discretion.
9.0 Air Units and Naval Fire
The Allied player begins the game with 5 air units. On their reverse, three are identified as "Mission: Success" and two as "Mission: Abort". Each turn, they are flipped to their "unknown" side and drawn at random. They are not available on the 6 June turn, but thereafter the number available for use each turn is determined by the weather roll.
The German player may receive air units via an event. These may only be used to counter Allied air units placed during combat, and may not assist any German ground attack. Only Allied air units may affect the ground combat; the German air unit can only negate this if possible. German air units are placed unknown in the same way as Allied ones.
Air units that have been committed may be placed on any hex on the map during the Allied air phase, one per hex. Do not flip the marker at that time.
If placed on an enemy unit that is attacked, it gives a +1 AS modifier to the attack if the mission is successful. If placed on any other hex, any German unit that enters that hex must stop, if the air mission is successful; this is called Interdiction. Air units are not flipped to their known side until the Allied combat phase.
Naval points are likewise used during the combat phase to give a +1 AS modifier, one per combat. Reduce the track when they are used. They may not be saved from turn to turn. They are not available for use in defence during the German player's turn; see 11.2.
Both naval and air points may both be added to an attack, but only one of each. They are removed for the turn after using them and have no ZOCs.
10.0 The Movement Phase
Movement is carried out during each turn in the movement phase of the players. A unit with a movement allowance (MA) greater than zero (0) may always move one hex in a turn even if terrain or weather does not permit it, through lack of sufficient MPs, provided it moves into a legal hex.
Each ground unit has a movement allowance (MA) printed in the lower right corner of the counter, except for naval and air units. The MA is the number of movement points (MPs) available to the unit in a single movement phase.
During a player's movement phase, that player may move friendly units up to the limit of their available movement factors. Units are moved one at a time along a route of contiguous hexes (no hex-skipping is allowed).
Once a unit has completed its movement, it has finished moving for that turn and may not move further, except as a result of exploitation after combat. Movement points may not be accumulated from one turn to the next, and may not be transferred between units. A movement may not be redone, unless the opponent allows it.
10.1 Effects of Terrain on Movement
The movement cost to enter a hex or cross a hexside is listed on the Terrain Effects Chart (TEC). If there are two types of terrain in a single hex, use the one with the higher MP cost, unless moving via a road hex to another adjacent road hex.
Note: half hexes on the map are playable.
11.0 The Combat Phase
Combat is carried out during the combat phase of a player's turn. Combat is always voluntary and is always made by the units of one player from a single hex against the units of the opponent in another single, adjacent hex. Some units in the attacking hex may attack while others "sit and wait", but all units in the defending hex must defend.
11.1 The Target Hex
A hex occupied by enemy units that is selected as the target of an attack is called the defending hex. Any terrain modification that will affect the combat is based on the terrain located in the defending hex.
Only units in one hex may attack the target hex. A hex may only be attacked once in a single combat phase. Fortifications on the map defend with their printed strength when alone or if stacked with German units.
11.1.1 Terrain and Combat
Only one type of terrain applies to a single combat; however, use the terrain modifier most advantageous to the defender. Exception: the following:
- Fortifications on the map: they add their defence strength to any German units stacked with them. They have no stacking value and exert a ZOC.
- Rivers and hills: add their modifier to the DS, for each other terrain modifier, if the defender is also on a hill and/or across a river. Note: both may apply to the same combat.
11.2 Allied Naval Points
The Allied player generally has a number of naval points available for use in combat. Naval points may be used against any defending hex which is within five (5) hexes of a hex containing ocean (not river) on the north or west edge of the map. After the 29-30 June turn, naval points are no longer available for use, as they are removed.
11.2.1 Artillery Units
Artillery units may add their AS (written "CS" in the Spanish source) to combats from within two hexes of the defending hex. A single artillery unit may be used in a combat, and an artillery unit may only be used once per player turn. Do not count the hex in which the artillery unit is located; count the target hex. US artillery units may not support CW combats, attack or defence, and vice versa.
Both the attacker and the defender have the opportunity to use artillery in combat. The attacker decides whether to use it first. They may only add to the combat strength of ground units. They may not attack enemy units alone.
Artillery units have their strength in parentheses. This means that it does not matter for their strength whether they are attacked alone or with other units; their DS is one (1). They may not "fire" with their strength in parentheses when defending in their hex. They may not take step losses in combat unless they are a defender in the defending hex. Artillery units never exert a ZOC and may not advance after combat.
11.3 Ground Combat Procedure
Resolve ground combat for each declared attack. Both sides roll the die in each attack, on the appropriate column of the CRT. Combat is considered simultaneous regardless of which side rolls first.
For each side, attacker and defender, calculate its strength as follows:
- Each player separately totals the combat strength of all ground units in the attacking and defending hex.
- Add any artillery bonus if in range, one per side (only).
- An Allied attacker may use naval support if available. Mark it off on the track and add +1 AS.
- Flip the air units. Add +1 to the Allied attack strength for an air unit showing "Mission: Successful", unless negated by a German mission that is also successful.
- Flanking support bonus (applies to both the attacker and the defender): after the other modifiers have been applied, add +1 to the combat strength for each additional hex occupied by friendly units adjacent to the enemy units involved in the combat, which are not adjacent to any enemy unit other than the one in the defending hex at that time.
- Add any terrain modifier to the strength of the defender.
The result is the total combat strength of the attacking and defending units. The difference between the two sets the column to use on the CRT. The attacker (only) rolls 1d10 and cross-references the result on the CRT, then the defender does the same.
Example of play, combat (1): the Allied attacker has an AS of 10 and the defending units have a DS of 4. The terrain is a city, granting +3 to the defence, and the attacker has an air unit in the hex on a Mission: Successful result. No naval fire is available, but the defender has a unit adjacent to the attacking hex, and this is not adjacent to any other Allied unit. This adds +1 to the defence.
Attacker: 10 AS + 1 air = 11 Defender: 4 DS + 3 terrain + 1 flanking bonus = 8
The differential is three (3), so the attacker rolls the die on the +3 column and the defender on the -3 column to find their results.
Example of play, combat (2): the US 2nd Armoured Division attacks the German 91st division. The 29th ID cannot supply flanking support, since it crosses a hexside of ocean. However, the US 1st ID can, since it only crosses a river. The US adds the artillery unit. The German unit is in swampy terrain, obtaining an additional modifier of (+2) for the river with bridge. Even if the 1st ID were in hex 2217, the modifier would still benefit the German defender, so the only terrain that matters is the terrain in the defending hex, and if there is a river between the attacking and defending hexes (not the flanking).
Attacker: 5 AS + 1 flanking + 2 artillery = 8 Defender: 5 DS + 2 swamp + 2 river = 9
Note: the flanking bonus applies against fortifications and beach defence units if applicable. A unit "at sea" could also supply flanking support to a land unit attacking a beach defence unit. Units may not supply flanking bonuses across prohibited terrain. Artillery units alone may not supply flanking support.
11.4 Combat Results
Combat results are as follows:
- - No effect.
- HIT - the opponent must lose one step from any of its units that were involved in the combat; the player decides.
- 2 - the opponent must lose two steps from any of its units that were involved in the combat. They may take it from one unit or from two different ones if possible. If there is no second step present, the second step loss is ignored.
11.5 Exploitation after Combat
The attacker may advance any of the attacking units, up to the stacking limit, into a vacant defending hex if applicable.
Exception: artillery units never exert ZOC and may not advance after combat.
12.0 Event Cards
Each player draws two cards at the start of turn 2, in the event card phase.
They may play one card immediately and either keep or discard the second. They may also keep or discard both. Some cards may be played during later phases. The German player always plays cards first, in any phase; then the Allied player. This may be crucial at certain moments.
For example: the German player plays the card "Threatening Skies" immediately after the weather die roll, changing the turn to stormy weather. The Allied player's counters with weather turns for "clear". Clear weather prevails. (Literal rendering: the source sentence is garbled at this point and is transcribed as printed.)
On each subsequent turn, players return up to two cards, depending on how many they kept. Cards are discarded face up, but players may not examine the discard pile or the deck at any time.
12.1 Card Notes
Most cards are self-explanatory and need no further information. Some are more complex and are explained in more detail below.
Crisis in Italy / Crisis in Russia
The "next unit" may be one that arrives in the turn in which the card is played. If multiple Panzer divisions arrive in the same turn, choose the first one as indicated in the OOB.
If a unit must be chosen and the next available Panzer division is due in a turn with a unit that has already been delayed by using one of the earlier crisis cards, adjust the unit that was originally due to arrive in this turn, and leave the unit that was already delayed where it is at that time.
Employment of German Fighters
The German player receives two fighter units and may use them for the rest of the game. They are played exactly like Allied air units, except that they may only be applied defensively where the Allied player already has air commitment. Remove the card from the game permanently after the event occurs.
For example: the Allied player commits all its available air units for the turn. The German player then selects, at random, only one of the two German air units and selects, before they are revealed, which Allied air unit they wish to answer. Flip the German air unit; if it is successful, it negates the Allied air unit.
Major Storm
If the Major Storm card is discarded instead of being played or kept, all cards except those the players are currently keeping are shuffled back into the deck. Remove this card from the game permanently after the event occurs.
Note: Major Storm cannot be negated by any other weather card, and when it is played, Mulberry supply is not obtained.
Complete Mulberry
Each of these, when played, allows the Allied player to place a single Mulberry on any beach it chooses. On that beach, units land with half of their available MPs, rounded up. Additionally, add +1 supply point to the total received each turn for each Mulberry in play. Remove each card from the game after the event occurs. If a German unit moves into the beach hex where a Mulberry has been placed, the Mulberry is eliminated.
Note: Mulberries cannot be built during a stormy weather turn. The Allied player also does not receive its extra supply point from any existing Mulberry during a storm turn.
If a Mulberry card is discarded instead of being played or kept, all cards except those the players are currently keeping are shuffled back into the deck.
More Cautious
No Allied unit may end the turn, or at any time move through, a hex further south than the hex in which it began the turn. In other words, they may move one hex north, then east by one or two hexes, and then one hex back south, but they may not end the turn further south.
Threatening Skies / Weather in Turns
These cards are played after the weather roll; in other words, they cannot be played in the turn in which they are drawn. As stated above, these cards cannot be played to negate a "Major Storm".
Note: It may seem strange to play a card to change the weather, but the weather in Normandy was notably changeable. This represents an abrupt change at some moment during a two-day turn.
13.0 The Invasion Turn
Turn 1 is conducted somewhat differently from the following turns. After all units have been placed and the German player has placed the beach defence units with their strength hidden, the Allied player receives 3 naval points and places combat units on the beaches, according to the order of battle. No Allied combat supply is needed or used, and there is no weather roll. Commonwealth tank brigades may stack normally with CW infantry divisions to assault the beaches.
The Allied player shuffles and then selects, at random, the US airborne regiments (three from the 101st Airborne, three from the 82nd Airborne) and places them one at a time, into the six parachute hexes as close as possible to Carentan. The Allied player may not look at them before placement. They are turned to their hidden side before the combat phase.
Now, place the two British airborne regiments on the designated hexes. Roll 1d10 to determine on which hex the third airborne regiment will land:
- 1-5: hex 2402
- 6-0: hex 2502
After the airborne placement, there are two rounds of combat to complete. The German player first flips its beach defence units to reveal their hidden side. Terrain is not taken into account on the beach, but it is in airborne attacks.
The Allied player:
- Selects which hex or beach to attack.
- Decides whether to use a naval point if available.
- Carries out ground combat (landing on beaches or airborne) for each declared attack. Both sides roll the die in any attack, on the appropriate column of the CRT, using the AS/DS differential. If a beach defence unit takes any hit, it is eliminated. Losses to Allied units are taken normally.
Continue until all beaches have been attacked. If a beach has not been cleared during the two phases, it must be attacked on turn two.
Note: beach assaults after the 6 June turn do not consume supply points. They are in addition to other attacks, until the beaches are cleared. They may also advance immediately into the beach when it is cleared.
A second round is played as above. If a beach defence unit was eliminated in the first round, the surviving Allied units on that beach may not advance into the vacant hex at this time.
The Allied player may move all of its units up to one hex, following the rest of the movement rules, after the 2nd invasion round is complete. Then the German player may move all of its units up to the limit of its printed MP, following all the movement rules.
The invasion sequence is conducted as follows:
- Flip the airborne units; roll the die for the British position.
- Flip the beach defence units.
- Conduct the phase 1 attacks (no advance onto the beaches).
- Conduct the phase 2 attacks.
- The Allies may move units one hex; units that have cleared their beach may now move into it.
- The Germans move normally; no combat.
- After the special invasion phases, the turn marker is advanced to the 7 June turn, and the game continues normally.
Example of play, Invasion (1): This is the start of the game, and the Canadians are attacking Juno beach. In the first round, they choose not to use a naval point, so it will be a 6-vs-3 attack. The Allied player rolls a 2 on the table at +3, and the German die is a 6 on the table at -3. Both miss. In the second round the Allied player has a poor roll: a 1, another miss. The German player, on the other hand, rolls a 7, which produces a hit. The Allied player chooses to flip the 2nd Canadian Armoured Brigade. The invasion turn is over; this beach will have to be taken on the next turn.
Example of play, Invasion (2): On 7 June, the 51st Infantry Division is scheduled to enter at Juno beach. Under the special stacking rules for armoured brigades, the 51st may stack with the units already on the beach. Otherwise they would have had to be placed behind the Canadian units, and wait to enter until there was space (because of losses), or until the beach had been cleared. The Allied player takes no risks on this occasion, and adds a naval point to an attack at 10 vs 3, or +7/-7. The Allied player rolls a 5 for a hit, and the German player a 4, failing the attempt. The beach is cleared, and the units advance into the beach. Note that no supply points were spent for this attack, since this was by units invading from the sea.
14.0 Solitaire Play
For solitaire play, place the beach defence units at random. During the card phase, draw one card per turn and apply its result, if applicable, during the current turn, per 16.1. If a card is intended to be played during the combat phase, apply its result to each combat in that turn, and then discard the card, even if the card would normally apply to only one combat.
15.0 Winning the Game
The Allied player wins the game when it has captured and held, through the following German turn, at least seven (7) Victory Points (VPs).
Each city hex is worth one (1) VP, except the Caen hexes, which are worth two (2) VPs each until the 21-22 June turn, after which they are worth one (1) VP each, regardless of the turn in which they are captured. If, at the end of the game, the Allies control six (6) city hexes, the game is a tie. With a lower value, the German player wins. Having a ZOC within the hex is not enough; the Allied player must capture the hex.
Note: the "City Captured!" markers are available on the reverse of the "Fort Captured" counters, if you wish to mark the cities captured by the Allied players.
For example: this is the 1-2 July turn. The Allied player controls Valognes, Bayeux, both Cherbourg hexes, Lessay and Carteret. They capture St. Lo in the current turn. If the Germans do not recapture it during the German half of the turn, the Allied player wins.
15.1 Beach Capture
For each beach hex captured by the German player, the Allied player suffers a permanent loss of 1 VP (regardless of its recapture). A beach hex is considered captured if a German unit (other than beach defence) moves through or into it at any time.
16.0 Optional Rules
16.1 Draw a Random Card
Instead of drawing cards and keeping them, the Allied player draws a single card at the start of turn 2, and at each turn from then on.
The effect of the card occurs immediately, unless the card is drawn before the date on which it may be played. For example, the card "Mulberry Complete". In this case, the card has no effect and is discarded. Combat cards affect each combat to which they apply in that turn, including those that would normally only affect a single combat, such as "Dug-In 88s".
16.2 Individual Replacement Dice
The Allied player rolls the die normally for Allied supply. However, the results of this die do not apply to the result of Allied or German replacements.
Instead, each player rolls the die individually for its own replacements. Apply the results normally. Weather never applies to replacement rolls.
16.3 Optional Combat Results
The attacker rolls normally for combat. However, instead of the defender's roll, the attacker's die roll is applied to the defender's column.
16.4 Naval Planning
Instead of using naval points as the Allied player needs them, the Allied player uses the three optional naval support markers, and designates their use by placing them in the same phase in which air attack markers are placed. The same naval-support planning method should be used during the invasion phase; e.g. before the German player reveals the strength of its beach defences.
16.5 Artillery Units
Artillery units may either fire OR move during a turn, but not both. When an artillery unit takes any action, flip it to its "Fired/Moved" side until the start of the next turn. When artillery units enter the game via a beach or map edge, they are flipped to their "Moved/Fired" side after completing movement, when using this rule.
16.6 Victory Point Adjustments
The VP track runs up to 9. This may be used as a handicap in the game. For example, if the Allied player is considered to have an advantage, the victory requirement could be adjusted to 8, or even 9 points. The same can work for the other side.
17.0 Design Notes
The designer's notes below are reproduced in part. The special-thanks paragraph and the designer's personal account of how the game came about are omitted as attribution.
I had a map and OOB done within a day or two. However, that doesn't guarantee you a good game. First, I have learned that there is not as much "give", balance-wise, in a smaller game, and secondly I was adding cards.
I'm working on a couple of other designs that use cards, but they haven't seen the light of day yet, and are primarily card games. This was my first serious attempt to incorporate them into a board wargame. I didn't want them to drive this game as in a CDG, but simply to enhance the play, especially of the defending player - in this case, the Germans. Sure, you can beef up the German OOB and give them more attack capability, but that wouldn't be historical. Instead, I did two things: First, both players participate in every combat. Second, there are the cards.
By the way, if you are concerned during play that a card is not coming out every turn - don't be! It is not the intention. The holding of a card at times can be just as important as the playing of them. But then again, holding two important cards that might help your opponent down the road, while they cycle through the deck, stopping to slam you at every opportunity might not be so great either. The result is that cards never come out the same way twice, and some plays are remarkably memorable.
Here are a few specific design notes:
Strongpoint Hillman: This was a tougher nut to crack on June 6 than expected. The position finally fell at midnight after repeated British assaults. Additionally, with almost no German defenses behind Juno after the thin defensive line at the beach, troops of the 3rd Canadian infantry division almost reached the Caen-to-Bayeux road, albeit briefly, before being pushed back. Some may notice that these moves are not possible, at least in this time frame, in the game. However, given that the scale of the game is divisional, and that neither of these goals was reached with that weight of force, it was a conscious design decision to structure the game as it is.
Hill 112: There were no actual fortifications at this position, like at Strongpoint Hillman. However, its military crest dominated every road in the area and was a key defensive position. Thus, it is afforded a similar defensive bonus for game purposes.
Recommended optional rules: I suggest using the Individual Replacement Rolls and Naval Planning (the latter especially during the Invasion phase).
Sequence of Play
The source prints this sequence on page 11 and states that it is strictly followed in all turns after the invasion turn (see 5.0).
I. Turn Interphase
- Weather die roll: the German player rolls the die for the current turn's weather. This dictates how many naval and supply points are available to the Allied player, and whether there is interdiction affecting the German player.
- Supply & replacements roll: the Allied player rolls the die for supply and replacements for the current turn, in the following order (-2 DRM on storm turns): the Allied player applies replacements; the German player applies replacements.
- Reinforcements: both sides place new units within their entry locations, as noted on the reinforcement list.
II. Event Card Phase
Each player, after drawing up to two cards if they hold fewer than in the previous turn, has the option of:
- a. playing, discarding or keeping one card; then
- b. discarding or keeping the other.
You may not play two cards during this phase, although you may play a combat-type card in a later phase; see 12.0.
The German player plays cards first, then the Allied player. Resolve the effect of any card played immediately, according to the game rules. Discard to the discard pile, face down. When the deck is finished, reshuffle the discards and draw from the new deck.
III. Allied Player's Turn
- Air phase: place any of the available air units on the desired target hexes.
- Combine phase: airborne regiments may be combined into their parent divisions.
- Movement phase: move the desired units according to the movement rules.
- Combat phase: the Allied player resolves combat against adjacent German units wherever desired, up to the limit of its available supply, according to the combat rules.
IV. Axis (German) Player's Turn
- Movement phase: move the desired units according to the movement rules.
- Combat phase: the Axis player resolves combat against adjacent Allied units wherever desired, according to the combat rules.
V. Final Phase
- Check victory.
- Advance the turn marker.