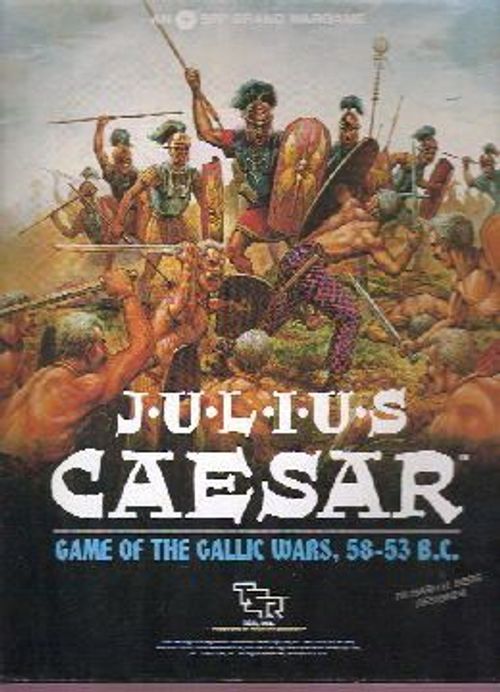
Julius Caesar: Game of the Gallic Wars
Julius Caesar: Game of the Gallic Wars Rulebook
Table of Contents
Table of Contents
- 1.0 Introduction
- 2.0 Course of Play
- 3.0 Game Equipment
- 4.0 Sequence of Play
- 5.0 Playing Cards
- 6.0 Tribal Status
- 7.0 Movement
- 8.0 Zones of Control
- 9.0 Battles
- 10.0 Sieges
- 11.0 Grain (Supply)
- 12.0 Winter
- 13.0 Leaders
- 14.0 Special Events
- 15.0 Revolts
- 16.0 Special Tribes
- 17.0 Legions and Other Roman Units
- 18.0 Britannia
- 19.0 Crossing the Rhine
- 20.0 Victory
- 21.0 The Scenarios
- Summary of Unit Types
- Charts and Tables
1.0 Introduction
The JULIUS CAESAR game pits the might of Rome against Gaul, a disorganized cauldron of unrest and shifting tribal alliances. Throughout these rules, the two players are referred to as the Roman player (Caesar) and the Gallic player (representing the myriad Tribes of the region). The Roman player's object is to subjugate and control as many Tribes as possible within the time limits set by the scenario chosen. The Gallic player's objective is to stop the Roman player from achieving his aim by rallying the Gallic Tribes while disrupting Roman movements, raiding Roman-held territories and breaking up Roman alliances with friendly Tribes. Short campaigns lasting a year or two can be played, or the entire conquest of Gaul can be undertaken.
Important Note: The game system for the JULIUS CAESAR game is new. Players should first familiarize themselves with the different states possible for Tribal and Roman units: Active, Inactive, Subjugated, and Allied Tribes (6.0); Senate-raised and Caesar-raised Legions (17.6). The Roman player should pay particular attention to the section on Garrison Zones (20.4), which defines how large areas are controlled, and to the Victory Points (20.1, 20.5). The best way to learn the game is to play a few sample turns before beginning the first game. Do not try to memorize all the rules; being aware of the possibilities of play is sufficient to start a game.
2.0 Course of Play
At the start of the game each player controls a given number of Tribes (called allied Tribes) — represented by the Tribal cards. The Roman player also receives Roman units (Legions, Auxiliaries and Garrisons). Each player can activate his Tribes at almost any time by playing that Tribe's card, and flipping the Tribe's counter over from its Inactive to its Active side.
The first player (also called the phasing player) draws a card from the deck of undrawn cards (the Tribal Deck) and either plays it immediately or holds it unrevealed in his hand. This player then conducts any sieges desired, after which he can "strip" any eligible tribal territories for grain. He then expends grain for units requiring supply, applying attrition penalties for units that are out of supply. In the Movement Phase, the phasing player moves his units (which the non-phasing player can intercept) and resolves any combat brought about by such movement. The second player now becomes the phasing player, draws a card, resolves sieges, plays through a Grain Phase, moves his units and resolves combat. The game turn (one month) is now over, and the players start another turn until they finish a full year of play. Each scenario lasts a different number of years, and has specific Victory Conditions as well.
3.0 Game Equipment
[3.1] INVENTORY OF GAME PARTS
A complete JULIUS CAESAR game includes:
- 22" x 34" mapsheet
- 200 counters
- Tribal Card Deck (59 cards)
- 24 page rulebook
- 2 six-sided dice
- plastic tray
- game box
If any parts are missing or damaged, please write:
SPI Consumer Service Dept. POB 756 Lake Geneva, WI 53147
Short rules questions should be sent with a self-addressed, stamped envelope to the above address, marked "SPI Game Questions: Julius Caesar"
[3.2] THE GAME MAP
The game map represents Gaul in the 1st century, B.C. Gaul has been divided into three parts: the Aquitani, the Celtae, and the Belgae. Each part is further divided into individual tribal territories. (Players and historians should note that the exact locations of the Tribes are open to question, and there is much disagreement amongst experts as to who was where.) The entire map has been overlaid with a hexagonal grid to regulate movement.
[3.21] Each tribal territory is a different color and is labeled with the name of the tribe. Major cities, towns, and ports are also shown. Each territory has a home base hex; either a city, a town, a port, or a hex designated by a special home base symbol.
[3.22] Each tribal territory also contains two numbers. The first is the number of Grain Points that can be stripped from the territory each year. The second is the number of Campaign Points the Roman player receives for controlling the territory at the end of the campaign year.
[3.3] THE PLAYING PIECES
The playing pieces, or counters, represent Roman Legions, Roman Auxiliaries and Garrisons, Gallic Tribes, Leaders, Grain supply and informational markers.
[3.31] Sample Counters
See pgs. 23-24.
[3.32] Counter Definitions
Legion Designation: A Roman numeral that identifies a legion; e.g. "XII" is the designation of the Twelfth Legion.
Combat Strength: A comparative rating of the combat effectiveness of Roman or Tribal unit.
Home Base Hex: The hex in which a Gallic Tribe counter is placed when it is set up on or returned to the game map, given as a four-digit number.
Combat Rating: The combat strength added to a force of one or more units by a friendly leader.
Revolt Rating: The ability of Gallic Leaders to influence Gallic Tribes during a Major or Massive Revolt.
[3.4] SAMPLE CARDS
The Tribes included in the Tribal Deck do not comprise an exhaustive list of Gallic tribes. Many smaller tribes were "clients" of others. For example, the Segusiavi were clients of the Aedui, while the Gabali were clients of the Arverni, and so on. Other tribes, such as the Rauraci, were just too small to be included on this level of play. In addition to the 59 cards in the deck, 13 blank replacement cards are also provided.
See pgs. 23-24.
[3.5] CHARTS AND TABLES
[3.51] The following charts and tables are found on the game map: Movement Allowance Table, Tribal Dispersal Chart, Interception Table, Battle Results Table, Loss Level Chart, Retreat Determination Chart, Roman and Gallic Siege Tables, the SPQR Table, and the Legion Raising Table.
[3.52] The following tracks are also found on the map (and explained in the rules) as an aid to keeping track of what's going on: the Roman Naval Track, the Roman Victory Point Track, and the Turn Record Tracks. There are also a series of boxes for holding counters and cards: the Rome Box, the Northern and Southern Alpine Movement Boxes, the Tribal Display, the Roman Subjugated—Available Box, the Roman Subjugated—Unavailable Box, the Subjugated Tribes Deck Box and the Tribal Deck Box.
[3.53] The following charts and tables can be found in the rules: Grain Expenditure Chart, Vercingetorix Besieged Table, Auxiliary Placement Table, Campaign Point Table, Penalty Point Table.
[3.6] GAME SCALE
Each hexagon represents an area approximately 20 miles across. Each game turn is one month, with the Winter period being 4 months. Each full-strength Roman Legion consists of about 4,500 men; Auxiliary units represent about 2-3,000 men (light infantry, Numidian or Gallic cavalry, Balearic slingers or Cretan archers). Tribal combat strengths are a more subjective estimate of valor, effectiveness, general population level and other factors.
[3.7] PLAYING TIME
It takes about 2 hours to complete a full year of play. To determine how long a given scenario will take to complete, multiply the number of years in that scenario by two.
[3.8] SETTING UP THE GAME
[3.81] Sort the cards and counters, placing aside any whose removal is required by the scenario instructions. Shuffle the remaining cards and place them face down in the Tribal Deck Box.
[3.82] All Tribal counters are placed, Inactive side up, in their home base hexes, unless the scenario dictates otherwise. Legions and Auxiliaries are placed as indicated by the scenario instructions.
[3.83] The Tribal cards are distributed according to the scenario instructions.
[3.84] The players activate any Tribes required by the scenario. They can also activate Tribes whose cards they hold before the actual start of play.
[3.85] Initiative: In a given Campaign Year, the same player moves first in every Monthly game turn. In the March turn of each year, each player rolls one die, adding the Combat Rating of his highest-rated Active Leader in Gaul. (Roman Leaders in Volcae, the Alpine Movement Boxes, Gallia Transalpina or Rome are not in Gaul for this purpose.) The player with the highest total is first player for the year.
4.0 Sequence of Play
FIRST PLAYER TURN
A. Card Phase
The phasing player can draw one card from the Tribal Deck according to the rules governing cards (5.0).
B. Siege Phase
-
Besieger Supply: The phasing player announces his sieges and pays any Grain Points necessary to supply the besieging units.
-
Sorties: The non-phasing player conducts sorties (10.5).
-
Siege Resolution: The siege is resolved for the turn, and the besieged City is marked with a Siege Marker to indicate the besiegers cannot move in the Movement Phase.
C. Grain Phase
-
Stripping Grain: Eligible units of the phasing player can strip grain from occupied subjugated or home Tribal Territories.
-
General Supply: Units of the phasing player that require supply (11.0) must pay sufficient Grain Points or suffer attrition.
D. Movement Phase
-
Retreats: Retreating units of the phasing player are moved.
-
Movement: Any eligible units can be moved according to the rules of movement. Interception by non-phasing units (7.6) and the resulting battles are resolved as they occur.
E. Legion Raising Phase
Once per Campaign Year the Roman player can use the Legion Raising Table (17.7) to raise new forces.
F. Combat Phase
The phasing player resolves each remaining battle in any order desired according to the rules of combat (9.0). The result of each battle is applied before the next is resolved.
SECOND PLAYER TURN
The second player now becomes the phasing player and repeats the above sequence. When both players have completed the sequence one game turn (month) is finished.
ANNUAL ENDPHASE
If the turn ends the current campaign year and the scenario is not over, then complete the listed steps in order. If the scenario ends with the current year, complete the first step only.
- Add up Campaign Points and convert to Victory Points.
- Unavailable subjugated tribes become available.
- Depleted (stripped) territories become undepleted.
- Event cards that have been played this year are returned to the Tribal Deck.
- Initiative for the next Year is determined (3.85).
Important Note: Cards cannot be played during the Annual Endphase.
5.0 Playing Cards
GENERAL RULE: The Tribal Deck contains 59 playing cards: 53 cards representing the Gallic Tribes, and 6 special Event cards. The cards are used to activate tribes, to return to play tribes that have been subjugated, to start revolts, and to trigger certain other special events. Cards can be played by either player at ANY time during the game, except when expressly prohibited.
[5.1] TRIBAL CARDS
[5.11] For historical purposes, all Tribes belong to one of the three major ethnic groupings, the Aquitani, the Belgae, and the Celtae ("Omnia Gallia in partes tres divisa est . . ."). The game map identifies their general areas, but for game purposes the cards of the Aquitani and Belgae have been combined into one group. The home base hex of each Tribe is noted on its card as well as its counter and the map.
[5.12] Each Tribal card contains, on its information side, the name of the Tribe, its Combat Strength, Grain Points available from its home territory and the number of Campaign Points (used to determine victory) it is worth. Also listed are the home base hex (and the name of any Town or City in that hex) as well as any Leader available with that Tribe. Lastly, any special rules associated with that Tribe are noted.
[5.13] The backs of the cards are marked with either an A/B (Aquitani/Belgae) or a C (Celtae). This is intended so that the players have some limited intelligence about the cards held by the opposing player. Players can freely examine this side of the opponent's cards at any time during play.
[5.2] EVENT CARDS
The six Event cards represent certain random events. They are shuffled into the deck with the Tribal cards at the beginning of the game. Once played in a given Year, however, Event cards are held out of the deck until the next year (see 14.0).
[5.3] DISTRIBUTION AND USE OF CARDS
[5.31] The number of cards distributed to the players is determined by the scenario (21.0). After the initial hands are distributed there remains a single deck of cards (the Tribal Deck) consisting of all unrevealed cards not in either player's hand.
[5.32] At the beginning of his friendly Card Phase, the phasing player can, at his option, draw one card from the deck. When he draws a card he can play it, activating a Tribe or setting in motion an event; he can keep it in his hand, unrevealed, for later use; or he can discard it. If there are no cards left in the Tribal Deck, the right to draw is forfeited.
[5.33] The Roman player cannot have more than five (5) cards in his hand at any one time. These five cards include both face-up (activated) cards and unrevealed cards. The Roman player cannot hold in his hand an unrevealed state more than two Tribal cards each of which represents a Tribe of five strength points or more (the Germans, Nervii, Aedui, Arverni, Combined Helvetians, or Helvetii). Should the Roman player select a third such Tribe he must immediately activate or discard one of those Tribes.
[5.34] The Gallic player cannot have more than twelve (12) cards in his hand, either face-up (revealed) or face-down (unrevealed) at any one time. This limit is for cards, not Tribes; it is possible through a revolt for the Gallic player to activate a Tribe without possessing its card. (The Massive Revolt, 15.32, is a special exception to this rule.)
[5.35] If drawing a card gives a player more than his maximum, he must reduce the size of his hand by playing or discarding a card, or by deactivating a Tribe, down to his allowable limit before the end of that Card Phase.
Important Note: Cards for subjugated Tribes (6.3) are not considered part of the total hand for either player.
[5.36] A player can discard a card without revealing its identity. To discard, simply place the card back into the Tribal Deck and then shuffle. Only unrevealed cards can be so discarded.
[5.37] Players can play or discard cards at any given time during the game. Exceptions: No Tribe can be activated during a Winter Turn, no SPQR card can be played during a Siege or Combat Phase and no card of any type can be played during the Annual Endphase.
[5.38] If, for any reason, a Tribe that was Active becomes Inactive, the card of the now Inactive Tribe is immediately placed back into the deck, which is then shuffled. (See 6.1, 6.4).
6.0 Tribal Status
GENERAL RULE: The Gallic Tribes are always in one of three states: Active, Inactive, or Subjugated. Further, a Tribe can be available or unavailable for activation. The status of a Tribe determines how it can be used and what it can do. Tribes are activated either by their cards or by a revolt. They are subjugated by battle. Roman Legions, Auxiliaries and Garrison units are not Tribes and cannot be subjugated or deactivated.
[6.1] ACTIVE TRIBES
[6.11] Active Tribes are Tribes whose counters are controlled by the players. The counters of Active Tribes are placed on the map with their Active faces showing. They can move, fight and do anything the rules allow them to do. Tribes activated by the Roman player are called Roman-allied Tribes. Tribes activated by the Gallic player are called Gallic-allied Tribes.
[6.12] Only Available Tribes can be activated. These include Active Tribes, Inactive Tribes on the map, and subjugated but available Tribes from the Roman-Subjugated (Available) Box or the Tribal Display.
[6.13] A Tribe is activated when the player who holds its Tribal card unrevealed in his hand places the card face-up, revealing it. That Tribe's counter is then turned Active face up on the game map. The Gallic player (only) can activate Roman-subjugated Tribes by means of a revolt (15.0).
[6.14] A Tribe can be activated at any time during play, even (especially!) during the opponent's phases. However, Tribes cannot be activated during a Winter Turn or during the Annual Endphase.
[6.15] The Tribe always becomes friendly to the player who plays its card. If the card for an Active Tribe controlled by the other player is revealed, its Tribe counter is immediately placed in its home base hex, Active side up, friendly to the player holding the card. If the home base hex is occupied, the Tribe is subject to Tribal Dispersal (see 6.7).
Exception: If the target tribe is in an enemy-controlled Fortified City, use rule 9.12 instead.
[6.16] Voluntary Deactivation: At any time during either player's turn, a player can return any one or more of his Active Tribes to Inactive status by placing that Tribe's card back into the deck (and shuffling the deck). The Tribe must be within its home territory and its home base hex cannot be occupied by another unit, enemy or friendly. The deactivated Tribe's counter is placed in its home base hex and remains available in the same Campaign Year because the deactivation was voluntary (see 6.38). The German Tribes are deactivated differently (see 16.13)
[6.2] INACTIVE TRIBES
[6.21] Inactive Tribes are those controlled by neither player. All Tribes except those that are Active or Subjugated are Inactive, including most Tribes at the start of a given scenario. The back side of the Tribal counter indicates Inactive status.
[6.22] An Inactive Tribe cannot move, intercept, nor initiate combat. An Inactive Tribe exerts no Zone of Control; however, no unit can enter a hex containing an Inactive Tribe unless it is going to attack that Tribe.
[6.23] An Inactive Tribe cannot be attacked at a differential of -3 or worse. It defends normally, but if forced to retreat from its home base hex as a result of battle or siege, it is subjugated instead (see 6.31).
[6.24] An Active Tribe cannot subjugate another Tribe. If an Active Tribe attacks an Inactive Tribe and is eliminated, the attacking Tribe is rendered Inactive and unavailable. Its card is returned to the deck (and shuffled) and its counter is placed in the tribe's Unavailable Box on the Tribal Display, Inactive face up. The tribe may be reactivated normally in the next Campaign Year.
[6.3] SUBJUGATED TRIBES
[6.31] Only Tribes can be subjugated (removed from play); Roman Legions, Auxiliaries and Garrison units cannot be subjugated. A Tribe is subjugated under the following conditions:
- The Tribe is eliminated in a battle or a siege;
- An Inactive Tribe is forced to retreat from its home base hex;
- The Tribe must retreat, disrupted, to its home base hex and that hex is occupied by an enemy force two or more strength points greater than the disrupted Tribe enters its home territory;
- The Tribe is politically subjugated (see 6.38).
[6.32] Subjugated Tribe counters are removed from play until once more available (see 6.4). If more than one Gallic-allied unit is the victor, the single Tribe having the most strength points is credited with the subjugation. In the case of ties, the Gallic player determines who gets the subjugation. If the Roman player wins with a Roman or combined force, Rome is credited with the subjugation.
[6.33] If the subjugation is credited to the Romans, the Tribes' counter is placed in the Roman Subjugated—Unavailable Box on the game map. The Tribe's card, if face-up/revealed in the Gallic player's possession, is taken and placed in the Roman Subjugated Deck Box. This deck is not considered part of the Roman player's hand and is always available for scrutiny by both players.
[6.34] If the subjugation is credited to a Tribe, the subjugated Tribe's counter is placed Inactive face up in the Subjugated—Unavailable Box belonging to the victor on the Tribal Display. The respective card, if face-up/revealed (see 6.5), is now placed under the card of that victorious Tribe (which is face-up on the table).
[6.35] The territory of a subjugated Tribe is considered as part of the territory of the Tribe (or Romans) credited with its subjugation. The conquering force can strip grain and/or survive in that territory without expending grain (unless that territory is already stripped).
[6.36] If a Tribe that has dominion over other Tribes is subjugated, eliminated, or becomes allied with the other player, its subjugated Tribes immediately revert to Inactive status: their cards are shuffled back into the deck and their counters are placed in their respective Tribal Display boxes as unavailable until the next year. The elimination of a Roman force has no effect on Roman-subjugated Tribes.
[6.37] Subjugated Tribes are out of play and the counter is removed from the map. However, they can be brought back into play by revolts or by card play, if the Tribe is available (6.4, 6.5).
[6.38] Political Subjugation: A player can purposely subjugate an Active Tribe that he controls. To do this, the home base hex of the target tribe must be occupied by another friendly force whose combat strength is two or more greater than the target Tribe's strength while the target Tribe is within its own territory. The player then voluntarily deactivates the Tribe (as per 6.16) except that the Tribe is subjugated (unavailable) and its counter is placed in his Subjugated—Unavailable Box.
[6.4] TRIBE AVAILABILITY
[6.41] No Tribal counter can be returned to play in the same Campaign Year during which it was subjugated or attacked in an Inactive Tribe and was eliminated. The eliminated tribe simply does not exist until the following Campaign Year (exception: Voluntary Deactivation, 6.16).
[6.42] In the Annual Endphase, Tribes subjugated by the Roman player become eligible for reactivation. The Roman player moves all the Tribal counters in his Subjugated—Unavailable Box into his Subjugated—Available Box.
[6.43] In the Annual Endphase, Tribes subjugated by the Gallic player become available for reactivation. The Gallic player takes the counters of all unavailable subjugated Tribes on the Tribal Display and places them in the Available Box to indicate they are available but still subjugated.
[6.44] In the Annual Endphase, tribes currently Inactive and unavailable are removed from the Tribal Display and placed in the home base hex as Inactive. If the home base hex is occupied, use the Tribal Dispersal Chart, 6.75. Such tribes cannot be Politically Subjugated (6.38) in this Phase.
[6.5] REVIVING SUBJUGATED TRIBES
[6.51] If a Tribe has been subjugated but its card has not yet been drawn by either player, and the opposing player then either holds or draws that card later on, he can then play that card and activate that Tribe, subject to the rules of activation and availability.
[6.52] If a Tribe has been subjugated and the subjugating player has or later draws the card, the player can immediately remove the card from play by placing it under a revealed Tribal card or in the Roman Subjugated Deck at any time. Alternatively, he may choose to keep it in his hand.
[6.6] TRIBAL DISPLAY
[6.61] The Tribal Display, on the game map, can be used to keep track of a variety of items. Each Tribe has its own box, and players can place, in that box, the counters of other Tribes that have been subjugated by that Tribe; Roman Control markers, indicating such; Stripped markers to indicate the territory has been stripped of grain; etc. The players should use this display to keep the actual map as free of clutter as possible.
[6.62] The Tribal Display (see map)
[6.7] TRIBAL DISPERSAL
[6.71] The Tribal Dispersal Chart is used when Tribes have to return to their home base hex, and that hex is occupied. Essentially, the chart summarizes the various rules.
[6.72] If the home base hex of a Tribe activated by normal card play (6.14) is occupied by enemy units, the Tribe may be placed in any hex in its home territory that is not occupied or in an enemy Primary Zone of Control. The Tribe is free to move in the next game turn, and can use interception during the ensuing Enemy Movement Phase. The placement of such a Tribe in a friendly Movement Phase makes it subject to possible enemy interception (see 7.5).
[6.73] If all the Tribe's home territory hexes are either enemy-occupied or in enemy Primary Zones of Control, place the Tribe in the closest hex outside its home territory that is neither enemy-occupied nor in an enemy Primary Zone of Control.
[6.74] If the Tribe was disrupted in battle or from lack of grain, and it enters or retreats into its home territory only to find an enemy Tribe and/or Roman units whose combat strength exceeds that of the disrupted Tribe by two or more in its home base hex, then the disrupted Tribe is subjugated (see 6.31). If the difference in strength is less than +2, the disrupted Tribe follows the rules of 6.72 and 6.73. Note that a mere occupation of a territory (as opposed to the actual home base hex) is not cause for subjugation here.
7.0 Movement
GENERAL RULE: Friendly forces consisting of one or more friendly units are moved one at a time through the hex-grid on the map. Each force has an allowance of movement points (called a movement allowance) that is based on the type and strength of the force and how much grain it is carrying. Each hex on the map costs one movement point to enter, and some hexsides cost additional points to cross. Each force can be moved up to the maximum of its movement allowance. Some terrain prohibits movement, and Zones of Control restrict it.
[7.1] MOVEMENT ALLOWANCES
[7.11] The movement allowance of a force — the maximum number of hexes it can move in one Movement Phase — is dependent on its type and size, as well as the amount of grain it transports. All movement allowances are listed on the Movement Allowance Table (see the game map).
[7.12] A group of more than one unit that starts in the same hex and finishes in the same hex is considered one force when computing the movement allowance.
[7.13] A combined force of Roman forces and Roman-allied Tribes is treated as a Tribal force for determining movement allowance, if they stay together (i.e., the slower rate).
[7.14] Movement Allowance Table (see map)
[7.2] HOW UNITS MOVE
[7.21] A Force moves by tracing a path through the hex-grid, from one contiguous hex to the next, until the player has either reached the maximum movement allowance for that force or he wishes to move it no further. No force can ever exceed its movement allowance (exception: see 7.4).
[7.22] All normal movement takes place in the friendly Movement Phase (interception and retreat are not considered normal movement). During a friendly Movement Phase the phasing player moves only those forces of his that he wishes to; he is not required to move a force unless it is disrupted (see 9.6) and must return to a certain hex.
[7.23] No enemy forces can move during a phasing player's Movement Phase, unless they are intercepting enemy movement (7.5).
[7.24] No force can cross a Mountain hexside, a Lake hexside, or an All-Sea hexside (except when invading Britannia, 18.0). Moreover, only the German Tribes and Roman units can cross the Rhine (19.0).
[7.25] Once a force begins movement it cannot stop to pick up other units or grain and then continue on in the same phase. Units can, however, be dropped off along the way, although such detached units cannot continue to move that phase.
[7.26] Towns and Ports have no effect on movement. Fortified Cities affect movement if they are occupied and exerting a Zone of Control (see 8.2). A unit cannot move into an enemy-occupied Fortified City except as a result of siege combat (see 9.12).
[7.27] Each hex on the game map costs one movement point to enter. In addition, it costs one movement point to cross any river other than the Rhine. However, units cannot cross an enemy-controlled River hexside (8.1). The movement costs of getting to Britannia and crossing the Rhine are covered in their respective sections (18.0, 19.0).
[7.28] No friendly unit can enter a hex occupied by an enemy or Inactive unit unless such a friendly unit wishes to engage in a battle.
[7.29] All movement occurs before any battles take place, with the exception of battles brought about by interception. Siege combat is resolved only in the Siege Phase.
[7.3] STACKING
Except as delineated below, there is no limit to the number of units that can stack in one hex. There is no limit to the number of Grain counters or informational markers that can be placed in one hex.
[7.31] Roman units cannot end their movement in the same hex as Roman-allied Tribes unless the Romans have at least four times (4x) as many strength points as the Tribes. This applies at all times, including sieges, except when one stack is simply passing through the other during movement.
[7.32] A combined Roman/Tribal stack functions as a Tribal force for the purpose of movement. Such a force cannot Rapid March (7.4), but it can Encamp.
[7.33] In battle, a combined Roman/Tribal force uses the Roman Loss Level Table; but when attempting interception it uses the Gallic range.
[7.4] ROMAN ENCAMPMENTS AND RAPID MARCH
[7.41] All Roman or combined Roman/Tribal movement (other than Rapid March) ends with all units in that hex Encamped. Encamped units have a defensive advantage in battle. Moreover, any friendly units, including those that have used Rapid March, that end their movement in an Encamped hex are also Encamped.
[7.42] Non-disrupted retreating Roman units are considered to be Encamped at the end of their retreat. Disrupted units are not Encamped, and if a disrupted force enters an encamped hex the latter units are no longer Encamped (as they are now disrupted, too, see 9.62).
[7.43] Roman units ending movement in a Town, Port, or Fortified City are not encamped. Units intercepted during movement are not encamped at the instant of battle.
[7.44] If an Encamped force is attacked, the attacker (Gallic player) subtracts 1 from his battle die roll.
[7.45] Roman units (only) can increase their movement allowance by using Rapid March. However, in so doing the Roman player forgoes his ability to construct a fortified camp at the end of his Movement Phase.
[7.46] Only those Roman units carrying five Grain Points or less and stacked with a Leader can Rapid March. The force is marked with a Rapid March Marker to show that it used Rapid March in its Movement Phase.
EXAMPLE: A Roman force with 10 Grain Points, led by Crassus, is based in Aquae Sextiae (2328). The Roman player wants to attack the inactive Ruteni Tribe at its home base hex (1625). Consulting the Movement Allowance Table, the Roman player sees he has 6 movement points available, but up to 8 if he uses Rapid March. As only Rapid March will allow him to reach the desired hex, the Roman player leaves 5 Grain Points in Aquae Sextiae and performs the Rapid March. A Force March Marker is placed on the Roman force to show that it is not Encamped at the end of its move.
[7.5] INTERCEPTION
GENERAL RULE: Friendly forces can attempt to stop phasing enemy forces from moving during the enemy's Movement Phase by intercepting such units as they move. The chance of intercepting an enemy force depends on the type of force attempting the interception, its location and its distance from the target force. Successful interception initiates a battle, which is resolved immediately.
PROCEDURE: To attempt interception, the non-phasing player notes the path of movement of the enemy force. At any time that enemy force is within range the non-phasing player can state he wishes to attempt an interception. He then notes the type of forces attempting interception, their location and the range of hexes from his forces to the target (counting the target hex but not the hex his force is in). He then cross-references that information on the Interception Table and rolls one die. If the die roll falls within the roll needed for interception he has succeeded. Otherwise, the attempt fails, the enemy continues to move as if nothing happened and the attempting force stays in its hex.
[7.51] Only non-phasing forces carrying five or fewer Grain Points can attempt interception (forces carrying more can abandon excess grain). A non-phasing force can attempt to intercept any enemy phasing force that moves into or within its interception range (7.53). However, a friendly force can attempt to intercept only enemy forces that are moving closer to the friendly force or that move into a hex that is the same distance away as the hex from which it moved. No force can intercept an enemy force that is moving toward that friendly force with the stated intent to attack or overrun it.
[7.51] Interception Diagram (figure: a hex-grid diagram showing a Roman stack with a 2-hex range; labeled YES, YES, NO and NO for hexes where interception is or is not possible)
[7.52] A friendly, non-phasing force can attempt only one interception per moving enemy force in a given Movement Phase. However, a moving force can have interceptions attempted against it by any number of different, non-phasing forces.
[7.53] Interception cannot occur:
- Across a River hexside or any normally impassable hexside;
- Into a Fortified City hex;
- Through or from any enemy Fortified City Zone of Control. Interception can occur into a Secondary Fortified ZOC (8.22).
- From an enemy-occupied hex (where, as per 9.0, a battle will take place in the ensuing Combat Phase). See also 7.55.
[7.54] Add one (+1) to the die roll if the attempt occurs during Winter. A Roman interception at one hex range during a Winter turn fails on an adjusted die roll of "7". A combined Roman/Tribal force uses the Gallic range, not the Roman range.
[7.55] If interception succeeds, the intercepting force is placed immediately in the same hex as the enemy units (which cease movement for that phase (however, see 7.58). A battle now occurs and is resolved immediately. The non-phasing player is the attacker, and all combat rules apply normally.
[7.56] If a moving enemy force enters a hex occupied by a friendly non-phasing force to attack (not overrun, 7.81), a different non-phasing force can attempt interception into that hex. If successful, the two non-phasing forces combine and the non-phasing player becomes the attacker. Such battle is resolved immediately, as if it were a normal interception battle.
[7.57] If a force wins an interception battle it remains in the hex of interception. If it loses it must retreat back to the hex from which it came, unless it is disrupted (see 9.62).
[7.58] If an intercepting force is so inferior in strength to its target that, if it were to be attacked, it would be overrun (7.8), the intercepting force is, instead, eliminated at a cost of one (1) Movement Point to the phasing force, which can resume movement if it has sufficient points remaining.
[7.6] Interception Table (see map)
[7.7] ROME
The box in the southeast part of the map represents Rome. Only Roman units (not Tribes) can move to and from Rome.
[7.71] Any Roman unit that starts a Movement Phase in Aquae Sextiae or Massilia can move directly into the Rome Box, and vice versa. Such movement uses all Movement Points. Aquae Sextiae and Massilia cannot be entered from Rome if they are enemy-occupied or besieged. If both places are blocked, the Roman player must use Alpine Movement to get to and from Rome.
[7.72] Any unit that starts a Movement Phase in the Rome Box can move directly into the South Alpine Movement Box, and vice versa, at the cost of all movement points for that turn. The same applies for Movement between both Alpine Movement Boxes.
[7.73] Roman units can move to and from the North Alpine Movement Box and the designated entry hexes in Gallia Transalpina and Sequani and Helvetii territory. Such movement costs one (1) movement point, except to and from hex 2921, which costs 2 movement points because of the River hexside. Retreats can be made into the North Alpine Box, and units can move out of the North Alpine Box into any hex occupied by the enemy other than hex 2921, initiating a battle.
[7.74] Units must expend grain whenever they are in either of the Alpine boxes during the Grain Phase (see 11.41). Units do not expend grain while in Rome.
[7.75] Each Roman force caught in an Alpine Movement Box at the end of the Winter Turn Movement Phase automatically loses one strength point for every eight strength points present, or fraction thereof, plus one half of any grain. Thus a force of nine strength points carrying five grain would lose two combat points and three grain.
[7.8] OVERRUNS
[7.81] An overrun movement represents the ability of a strong force to overwhelm a much smaller force and destroy it in passing. Overruns take place only during a friendly Movement Phase. The non-phasing player cannot overrun when conducting sorties or interception. Inactive Tribes cannot be overrun.
[7.82] If a Roman or combined Roman/Tribal force enters a hex containing Active enemy Tribes over which the Roman force has a combat differential of +8 or greater, the Tribes are automatically eliminated and subjugated at a cost of one movement point in addition to any normal terrain costs. Any grain with overrun Tribes is captured intact by the Roman force. The Roman force can continue its movement, if any, after the overrun.
[7.83] The above rule is the same for Tribal forces, except that here the combat differential for a Tribal force attempting to overrun is +10 or greater.
[7.84] A hex being overrun can be intercepted. However, such interception occurs after the overrun is completed.
8.0 Zones of Control
GENERAL RULE: Zone of Control refers to one or more hexes, adjacent to a hex occupied by a friendly unit, that inhibit the movement of enemy units. The actual hexes under control depend on the location and size of the unit exerting control, but the only time a unit has a Zone of Control is when it attempts to hold a river line or occupies a Fortified City.
Only Active, non-disrupted combat units can exert ZOCs. Active combat units of sufficient strength can control River hexsides. Those inside Fortified Cities exert Primary and Secondary ZOCs regardless of strength.
[8.1] CONTROLLING RIVER HEXSIDES
[8.11] Any Active, undisrupted unit or force with two or more strength points can control any River hexside (including the Rhine).
[8.12] To control a River hexside, a force must be in a hex adjacent to the River. That force then controls all River hexsides that are part of that hex plus any adjacent River hexsides of that river directly adjoining the River hexsides of the occupied hex. Only one such River hexside in each adjacent hex can be so controlled.
[8.12] River Hexside Control Diagram (figure: a hex diagram showing a "Controlled Hexside" along a river, with an Arverni counter in the hex)
[8.13] No unit can cross an enemy-controlled River hexside under any circumstances.
[8.14] A Fortified City Primary ZOC hex (see 8.22) is considered to be occupied by friendly units for the purposes of establishing a River-controlled hexside if a friendly force having two or more strength points occupies the City and that Primary ZOC hex is free of enemy units.
[8.14] Fortified City River Hexside Control Diagram (figure: a hex diagram showing the Fortified Cities of Gibran and Durocortorum, with "P" marking Primary ZOC hexes and "Controlled Hexside" labels along the river)
Legend: P = Primary ZOC; S = Secondary ZOC.
The Primary ZOCs of the 2 strength point unit in the City establish the controlled River hexsides.
[8.2] FORTIFIED CITY ZOC
[8.21] Any Active, undisrupted combat unit of any strength can exert a Fortified City ZOC if it occupies a City. The Cities themselves exert no ZOC.
[8.22] Two levels of control extend from an occupied City, but neither will cross a River hexside.
- The Primary ZOC consists of all hexes adjacent to the City. These may or may not control River hexsides, as per 8.12.
- The Secondary ZOC consists of all hexes adjacent to the Primary controlled hexes other than those separated by rivers.
[8.22] Primary/Secondary ZOC Diagram (figure: a hex diagram of Gorgovina, with the Primary ZOC hexes marked P and the Secondary ZOC hexes marked S around the City)
EXAMPLE: A force of two strength points occupying Gorgovina would have a Primary ZOC into hexes 1921 and 2020, with hex 1922 under Secondary control. All other possible ZOCs are negated by the rivers. However, hexsides 1819/1920, 1820/1920, 1820/1921, 1821/1921, 1821/1922, 1919/1920, 1920/2019, 2019/2020, 2020/2121, 2020/2021, 1921/2021, and 1922/2021 are all controlled River hexsides.
[8.23] Any unit entering an enemy-controlled Secondary ZOC must stop immediately, unless it announces an intention to besiege the City, or unless it is moving away from the City (from a Primary into a Secondary ZOC). A unit stopped in this manner can move again in the next friendly Movement Phase, but if it enters another Secondary ZOC it must stop again.
[8.24] A unit cannot voluntarily enter an enemy-controlled Primary ZOC unless the Fortified City is declared besieged. At least one turn of siege combat must ensue.
[8.25] Certain Fortified Cities are situated so that their Primary and/or Secondary ZOCs interlock (for example, Bratuspontum and Bribrax). In such cases, both Cities are considered to have ZOC into the mutually controlled hex. However, Secondary ZOCs do not extend into the other City, even if it is unoccupied.
[8.26] A City under siege loses all of its ZOCs, as the Primary ZOC hexes are assumed to be occupied by the besieging force.
Important Note: Not every adjacent hex is assumed occupied by the besieging units, just every Primary ZOC hex (see also sieges, 10.0).
9.0 Battles
GENERAL RULE: Battles are any conflict between opposing units, excluding sieges and overruns. When opposing forces occupy the same hex during a Combat Phase, a battle must take place. The phasing player is the Attacker; the non-phasing player is the Defender. In each battle, one side or the other loses and, if not entirely eliminated, must retreat. Leaders on the losing side can be killed.
PROCEDURE: Each player totals the number of strength points he has in the hex. The Attacker compares his total to that of the Defender to obtain a number called the battle differential. Thus, a force of 6 strength points would have a differential of +2 when attacking a force worth 4 points, but a differential of -3 when attacking a force of 9 points. The battle differential is always expressed from the viewpoint of the Attacker. The Attacker now refers to the Battle Results Table and rolls one die, adjusts for any terrain effects, presence of Leaders, etc., and determines the outcome of the battle through the Loss Level Table. All results are applied immediately, with any losing units left retreating.
[9.1] WHERE BATTLE TAKES PLACE
[9.11] Any time opposing forces occupy the same hex during a Combat Phase, battle must take place. The phasing player is the attacker, the non-phasing player the defender (exception: interception, 7.56).
[9.12] A battle cannot take place inside a Fortified City. Tribal card play (by either 6.15 or the Dumnorix event card) is not allowed if such activation would leave both players an equal number of hostile strength points in the City. Should circumstances arise (through a Revolt or card play) where hostile units do occupy the same Fortified City, the side possessing the fewer strength points inside the City must immediately move three hexes away from the City. (Players should note this particularly insidious piece of treachery for future reference, see 14.44.)
[9.13] This free move cannot end in an enemy-occupied hex or Primary ZOC, cannot be intercepted, nor can the moving units take any grain with them. If the City is under siege when this occurs, and if the units that must leave are now allied to the besieging side, they can simply join the besieging units outside the City. However, if the units that must retreat are the enemies of the besieging units they are eliminated as if it were a battle, instead.
[9.2] ADJUSTMENTS TO BATTLE DETERMINATION
[9.21] If the defending unit(s) is in a Town or Port, the Attacker subtracts one (-1) from his die roll.
[9.22] If any attacking unit crossed a River hexside directly to enter the battle hex, the Attacker subtracts one (-1) from his die roll (this can happen only when the Defender is Inactive, disrupted or has 1 strength point.)
[9.23] If an encamped Roman force is attacked, the Attacker subtracts one (-1) from his die roll.
[9.24] If the defending units are disrupted the Attacker adds two (+2) to his die roll.
[9.25] The Combat Rating of any one Leader in the hex can be added to the attacker; the Combat Rating of a Defender's Leader is subtracted from the Attacker's die roll.
[9.26] All of the above effects are cumulative. However, the final die roll adjustment cannot go below -4 or above +5. Anything exceeding those levels is considered to be at that level. However, attacks against Inactive Tribes cannot be made at -3 or less.
[9.3] BATTLE TABLES
[9.31] Battle Results Table (see map)
[9.32] Loss Level Table (see map)
[9.33] Retreat Determination Table (see map)
[9.4] EXPLANATION OF BATTLE RESULTS
[9.41] The Battle Results Table lists the results for the loser: either the Attacker (A) or the Defender (D). The side not listed is the victor; the victor takes no losses and stays where he is. (Exception: see Siege Relief, 10.5.)
[9.42] The loser of the battle must take losses according to the Loss Level Table. The number next to the losing side letter on the Battle Results Table is the Loss Level for that side. The extent of loss is determined by the type of units taking the loss.
[9.43] The Loss Level Table is divided into Roman losses and Gallic (i.e.: Tribal) losses. A combined Roman/Tribal force uses the Roman table. Thus, a Tribal force suffering a Level 2 loss must lose at least one-fourth (1/4) of its total combat strength, while a Level 2 loss applied to a Roman force would mean the Romans would lose only one (1) combat point.
[9.44] Losses received from the Loss Level Table are minimums. Thus a two-point Tribe suffering a one-half (1/2) loss would be eliminated entirely.
[9.45] A full-strength, two-point Legion that suffers a one-point loss can be flipped over to its reduced-strength, one-point side. If a reduced-strength Legion takes a loss it is completely eliminated, except as noted in 9.46. All other units taking any loss are completely eliminated, except as noted in 9.46.
[9.46] The Combined Helvetians and Germans are unique among the Gallic Tribes in that if they suffer a battle loss of one-half or less while at full strength, they are flipped over to reduced-strength (like Legions). A loss of more than half will result in their elimination, as will any loss because of a lack of grain (see 12.33). When at the reduced strength, these Tribes are eliminated upon taking a loss. Subjugation credit for the Combined Helvetians or the Germans is given to the Tribe or Roman force that destroyed the last step of that Tribe. Once reduced, the Combined Helvetians cannot be rebuilt; however, the Germans can be rebuilt (see 16.16).
[9.47] A Tribe that is eliminated in battle is subjugated (6.3). Eliminated Roman units are simply removed from the game map. These units can later be reactivated or raised when available.
[9.48] The losing player determines which of his units will absorb strength point losses, which can be distributed in any fashion as long as minimum losses are observed. When a combined Roman/Tribal force takes losses, Tribal strength losses cannot exceed Roman losses.
[9.49] If an entire force is eliminated, then one-half (rounding fractions down) of any grain left in that hex belongs to the victor. The rest is eliminated.
[9.5] RETREATS
The losing side in any battle must retreat immediately. The distance of the retreat is determined by the Loss Level incurred, as interpreted on the Retreat Determination Table.
[9.51] When Roman forces (not solely Roman-allied Tribes) incur a Loss Level of 1 or 2, the Roman player chooses the extent of their retreat. They must retreat at least one hex, and they can retreat up to their full movement allowance for their force size.
[9.52] Defeated Tribal units, regardless of their allegiance, must retreat to the home territory of the Tribal Leader of that force. If no Tribal Leader was present, each Tribe goes its own separate way — to its own home territory. Retreat is completed when the Tribe reaches any unoccupied hex in its goal territory that is not in an enemy Primary ZOC (see 9.53).
[9.53] Tribes can also retreat into a friendly or unoccupied Fortified City if that City is within the retreating units' movement allowance at the time of the battle; such retreat must be completed in that Combat Phase.
[9.54] Except for 9.51, 9.52 and 9.53, defeated forces must retreat at least their full movement allowance. This allowance is determined at the instant the retreat is to take place, after losses are extracted, and is dependent on how much grain the retreating units want to take with them. The losing player can always choose to leave some grain behind to "lighten the load" of his retreating units, and such grain is captured by the victor. Note that undisrupted Romans can use Rapid March (7.4) when retreating.
[9.55] Defeated Roman units (not allied Tribes) must retreat toward any Fortified City under Roman control; or towards Narbo, Massilia, or Rome (via an Alpine Movement Box). The direction must be announced before the retreat is started, and retreat is completed when the Romans have moved the required number of hexes (see also 9.54 and 9.63). All Roman units from that force must retreat together.
[9.56] The path of retreat must be as direct as possible; no hex can be entered more than once during the retreat. Retreating units can enter or pass through friendly-occupied hexes without affecting the latter (however, if the retreating units are disrupted, see 9.62).
[9.57] Retreating units cannot cross or enter an enemy ZOC, enter a hex occupied by enemy or Inactive units, or leave the map. If a Tribe cannot retreat at least its minimum required distance or end its retreat in a home territory hex or a friendly Fortified City, that Tribe is eliminated, but not subjugated. It becomes Inactive and unavailable for the rest of the Year. Roman units unable to retreat are eliminated.
[9.58] Retreating units that do not finish their retreats in the Combat Phase receive a Retreat Marker and are moved in the Movement Phase before any other units.
EXAMPLE #1: The Romans have a Garrison unit in Gergovia (1823). A Roman force of two legions and the Remi Tribe in hex 1721 is attacked by the Aedui and the Biturges. The combat differential is +1 (2 + 2 + 1 = 5; 5 + 1 = 6; 6-5 = 1). The Gallic player rolls a 5, inflicting a Loss Level 2 result on the Romans. One legion is reduced and the entire force must retreat at least one hex. Because the Roman player no longer has the required Roman strength to operate his stack as a combined force, the Gallic tribe must end its retreat in a different hex than the Roman units, unless the retreat ends in a hex in which the proper strength ratio can be maintained (Gergovia, for example). Both the Roman and Roman-allied Tribe are treated as Roman for purposes of the retreat.
EXAMPLE #2: The Bellovaci, the Germans and the Nervii, carrying 9 Grain Points, attack an encamped force of 17 Roman strength points led by Caesar in hex 1711. The combat differential is +1 (10 + 2 + 6 = 18; 18-17 = 1) and the die roll modifier is -4 (encampment = -1; Caesar = -3). The Gallic player rolls a 1, giving him a Loss Level of 3. He chooses to eliminate the Nervii (as opposed to eliminating the Germans) — the Nervii are thus Roman-subjugated and unavailable. The Bellovaci must retreat, disrupted, at least out of the hex occupied by the Roman forces, to any Bellovaci territory hex within its move. The Germans are also disrupted and must retreat either to 1809 (a friendly Fortified City within its move) or to Germania (see 16.15). The Gallic player chooses to move both Tribes and the grain into 1809.
[9.6] DISRUPTION
[9.61] In certain Loss Table results, losing units are disrupted in addition to retreating. Use a disruption Marker to indicate such status.
[9.62] A disrupted unit must retreat toward its required goal as outlined in the Retreat section (9.5). Should a disrupted force enter a hex containing other friendly units, then the latter units are also disrupted and they also must now retreat.
Exception: Roman units with a Leader are not disrupted by retreating disrupted units. Any encampment benefit is still lost, however, if the disrupted units stop there.
[9.63] The Disruption Marker is removed when the units complete their retreat.
[9.64] If a disrupted unit is attacked, the attacker adds two (+2) to his die roll. Any new disruption result is ignored, except that those units must still retreat after battle. Under no circumstances can a disrupted unit attack, either in battle or siege, nor can it intercept. If for any reason it is compelled to do so, it is automatically eliminated (and, if a Tribe, subjugated) by the force it was compelled to attack.
10.0 Sieges
GENERAL RULE: The only way to capture an occupied Fortified City is by siege. A besieging force must meet certain minimum combat strength and grain available limits to initiate and maintain the siege, and it must occupy the City's Primary Zone of Control. How long the siege lasts usually depends on the strengths of the units and their grain supply. Besieged units can sortie out of their City to attack the besiegers, albeit at reduced strength, and in so doing can be joined by friendly forces attempting to relieve a siege. Sieges are resolved in the Siege Phase.
[10.1] INITIATING AND MAINTAINING SIEGES
[10.11] To lay siege to an enemy-occupied Fortified City, friendly phasing units must, in their Movement Phase, enter that City's Primary ZOC with an announced intention to besiege the City (see 8.24). Upon entering a Primary ZOC hex the besieger is now considered to occupy all of that City's Primary ZOC hexes. Place a Siege Marker in the City hex. Once under siege, the units inside the City do not exert any ZOC's.
[10.12] An Inactive Tribe in a Fortified City can be besieged as described in 10.11. In such a case, the City actually has no ZOC's, although the attackers act as if there were (occupy all Primary Zone hexes, etc.).
[10.13] The minimum combat strengths required to initiate and maintain a siege are:
-
Romans: A minimum of four (4) strength points, at least one-half (1/2) of which must be full-strength Legions. No more than one-fourth (1/4) of the strength can be Auxiliaries. As for Roman-allied Tribes, see 7.32.
-
Gauls: The strength of besieging Tribes must be at least the same as the strength of the defenders.
-
Supply: In addition to the above, any force initiating a siege must have enough grain with it for at least one Siege Resolution die roll.
[10.14] Besieging units must expend grain in the Siege Phase to maintain a siege. In non-Winter game turns a Roman force must expend the number of Grain Points listed on the Roman Siege Table necessary to maintain the strength present (thus a Roman force of 8 strength points would require only 1 Grain Point to maintain a siege). These Grain Points must actually be with the besieging units, and they are expended before any die rolls on the Siege Resolution Table. Units that expend grain for sieges do not expend grain in the Supply Phase.
[10.15] In non-Winter game turns, Tribal forces must expend the number of Grain Points in the Siege Phase equivalent to their listed siege/grain multiple times the number (not strength) of Tribes laying siege. Thus, four Tribes besieging a City with a +2 differential of the defenders would need and expend four Grain Points (four Tribes times the "1" multiple on the Gallic Siege Table).
[10.16] During Winter Turns, the grain requirements for siege are tripled. Thus, during a Winter Turn six Tribes with a +5 differential would need 36 Grain Points to maintain the siege (6x2x3 = 36).
[10.17] Should a besieging force not have adequate strength or grain to maintain a Siege in the Siege Phase the siege is automatically lifted (discontinued), and any remaining grain is expended. The entire besieging force must now be placed in any one Primary ZOC hex, at that player's choice, and the Siege Marker removed. During the immediately ensuing Movement Phase, these units must move far enough away to take them out of that City's ZOC's, both Primary and Secondary, which are ignored for the purpose of such movement. The force consumes grain in the Supply Phase, as is normal.
[10.18] A siege can be voluntarily lifted using the method described in 10.17, but only after at least one Siege Phase has been resolved.
[10.19] When a besieging force first enters a City's Primary ZOC any enemy units occupying any of that City's other Primary ZOC hexes (but not those inside the City) are immediately placed in that first hex for the Combat Phase. The attacking/besieging player can also move additional forces into this hex, if he so desires. No sorties (10.5) can be attempted at this time by the defending player, although he can use interception. If the phasing player wins this battle, he can proceed with the siege in his next Siege Phase.
[10.2] HOW TO CONDUCT A SIEGE
[10.21] If a besieging force has satisfied the maintenance requirements that player can, in his Siege Phase, determine whether or not he was successful.
[10.22] The Roman player totals his strength points present and consults the Roman Siege Table, rolling one die. If Caesar is present the Roman player adds one (+1) to his die roll.
[10.23] The Gallic player totals his strength points and then compares his strength to that of the Defender, obtaining a siege differential in much the same way as he obtains a battle differential. If Caesar is inside the City with the defenders, the Gallic player subtracts one (-1) from his resolution die roll.
[10.24] The Roman Siege Table is used by Roman or combined Roman/Tribal forces. Purely Tribal forces use the Gallic Siege Table. The Roman Table lists results by the combat strength of Roman (and allies) present, with the grain requirement in parentheses. The Gallic Table lists results according to the siege differential, as well as giving the grain multiplier when using that column. (Remember to multiply by the number of Tribes, not the siege differential or the combat strength.)
[10.25] Siege results are the same for both players:
- The sortie force does not move out of the City hex; and
- The total combat strength of the sortie force is halved, rounding down.
[10.26] At the beginning of the Siege Phase either player can try to arrange terms for a Surrender. Any terms that do not violate the rules are acceptable, but any units that surrender and leave the City are disrupted and retreating when they leave.
[10.27] Units that conduct a siege (i.e., roll on the Siege Table) cannot move in the ensuing friendly Movement Phase.
[10.28] Units can always enter an unoccupied City at will.
[10.29] A City can be taken through treachery, see 14.44.
[10.3] SIEGE ATTRITION
[10.31] Siege attrition is a possible result of siege that affects only the Defender.
[10.32] On an Attrition result, the Defender rolls one die; the result is the number of Grain Points immediately expended by the Defender from the force inside the City.
[10.33] Should a defending force not have enough grain to meet the requirements of an A result, whatever grain remains in the hex is removed and the Siege Marker is flipped so the Siege Depletion face is showing. If the besieging units are able to meet the minimum requirements to maintain the siege in the very next Siege Phase the defenders are automatically eliminated (treat as an S result). Note that defenders do not expend grain in the Supply Phase; see 11.13.
[10.34] When any Roman unit (not Tribe) occupies Aquae Sextiae and is under siege, treat all A results as if they were Nothing Happens.
[10.4] THE SIEGE TABLES
[10.41] Roman Siege Table (see map)
[10.42] Gallic Siege Table (see map)
[10.5] SIEGE RELIEF AND SORTIES
[10.51] Units besieging a City are open to attack by the force inside the City (sortie), a force outside the City (siege relief) or a combination of both.
[10.52] Siege Relief: Should a force friendly to the besieged force enter any one of that City's Primary ZOC's (8.27) from outside the City, all of the besieging units — plus any phasing, friendly units later entering a Primary ZOC hex — are moved into that hex for a battle. All City ZOCs are still cancelled and the siege remains in effect unless the besiegers are driven off in battle. Siege Relief is resolved only in the Combat Phase. Relief forces are subject to interception and the provisions of 7.58.
[10.53] If the besiegers are driven off, the relieving force has the option to advance, either in whole or in part, into that City unless (and this is a particularly nasty little ploy) the immediate play of a card renders the defenders inside the City enemies of the relief force. In such a case, that relief force would either have to maintain a siege next turn, or move on.
[10.54] Sortie: Defending units inside a besieged City can issue forth from the City to attack the besiegers. Sorties take place before the enemy conducts his Siege activities in the Siege Phase (Exception: see 10.57). The sortie proceeds immediately as if it were a normal battle except as follows:
- The sortie force does not move out of the City hex; and
- The total combat strength of the sortie force is halved, rounding down.
[10.55] If the sortie force is victorious, the siege is automatically lifted and one or more of the victorious units can advance into any one Primary ZOC hex.
[10.56] If the sortie force loses, any surviving units remain inside the City hex. If no units survive, the City has fallen and can immediately be occupied by the besieging player. The sortie force ignores all Retreat results, including disruption.
[10.57] Combined Attack (the Alesia Option): This combined attack on the besiegers can occur only during the besieged player's Combat Phase. The phasing player moves his relief forces to attack, announces he is attempting a Combined Attack, and rolls one die. He adds to the die roll the Combat Rating of any one Leader inside the City. If the adjusted roll is "6" or more, the inside units fail to sortie and the relief force must attack without them. If the adjusted roll is less than "6", the inside units can sortie and the relief force attacks at half-strength.
[10.58] Combined attacks proceed in normal fashion. If the combined force loses, the relief force must retreat, while the sortie force goes back into the City. Losses can be divided between the two forces by the owning player.
[10.59] Siege relief and sorties cannot be attempted when the besieged force is an Inactive Tribe.
11.0 Grain (Supply)
GENERAL RULE: Units need grain to survive. The larger the number of units in a given hex the more grain they will need. Tribes get grain from their home territory and the territories of Tribes they have subjugated. Roman units will also get most of their grain from subjugated Tribal territories, although they can always return to Rome to replenish their supply. Both sides can capture enemy grain through victory in a battle, siege, or overrun. Tribal territories are either Full or Depleted of their grain, and, under certain circumstances, units occupying a Full territory will not have to expend any grain. A Full territory can be stripped of its grain, leaving it depleted for the remainder of that year.
[11.1] EXPENDING GRAIN
Grain supply is measured in Grain Points, represented by Grain Point Markers. Grain Markers can be freely exchanged for other Grain Markers of equal value at any time — to make change, for example. Grain can be transported by any Roman or Tribal combat unit.
[11.11] At the beginning of each scenario, both sides start with a given number of Grain Points. These are distributed between Active units as the player desires, subject to scenario restrictions. Grain Markers corresponding to the number of Grain Points allotted are placed under the combat units.
[11.12] Only combat units can transport grain; Grain Markers cannot move by themselves. There is no limit to the amount of grain a force can carry (except for interception and rapid march), but the more grain a force carries the slower it moves. A force can pick up grain only at the beginning of a friendly Movement Phase. It can drop off grain at any time during movement, at no cost.
[11.13] Grain Markers that are not stacked with combat units at the end of a Movement Phase are removed from the map, unless in a City, Town or Port (exception: 16.13).
[11.14] A force in free supply does not need to expend grain in the Grain Phase. A Tribe is always in free supply (except for sieges) when it occupies any hex in its home territory, regardless of the status of that territory or the Tribe. Similarly, Roman combat units have free supply in Rome or Gallia Transalpina (but not Volcae territory). Units in enemy, inactive, or depleted territories other than their own need grain to remain in supply. Leaders do not require grain.
[11.15] A unit in a Town, Port or Fortified City is in free supply as long as it does not move out of that hex in that turn, regardless of the status of the territory.
[11.16] A Tribe or Roman force is also in free supply under the following circumstances:
-
Roman units begin the Supply Segment of the Grain Phase in the undepleted territory of a Tribal ally.
-
Roman units begin the Supply Segment of the Grain Phase in the undepleted territory of a Tribe that that former Tribe has subjugated by Rome.
-
A Tribe (either Gallic or Roman-allied) begins the Supply segment of the Grain Phase in the undepleted territory of a Tribe that that former Tribe has subjugated.
EXAMPLE: The Helvetii, Carnutes and Namnetes occupy the undepleted Arvii territory. The Arvii have been subjugated by the Helvetii. That turn, the Helvetii would not be required to expend grain in the Grain Phase; the others would.
- Any unit that expended grain in the Siege Phase or is participating in a siege does not expend grain in the Grain Phase.
[11.17] Units not in supply meet their supply needs by expending Grain Points. Those points must be in the same hex as the force using grain. All the units in a hex use the grain in that hex communally; players cannot supply one unit in the hex and not supply others. Should there be inadequate grain for all, all grain in that hex is expended and the units suffer penalties for being out of supply (11.4). Grain requirements are as follows:
Grain Expenditure Table (see pgs. 23-24)
[11.18] A player can always voluntarily destroy his grain supply (or part thereof) at the beginning of a friendly Movement Phase. This requires at least one friendly combat point in the hex, which must be free of enemy units. The player then simply removes the grain from play.
[11.19] Roman units cannot be in free supply in Germania or Britannia.
[11.2] GATHERING GRAIN
[11.21] Either player can receive Grain Points by:
-
Stripping a Tribal territory of its grain (see 11.3).
-
Capturing one-half (rounded-down) of an eliminated opponent's Grain Points in battle or siege.
-
Capturing whatever grain a retreating opponent abandons in a hex after battle.
-
Capturing all an opponent's grain after an overrun.
[11.22] In addition to the above, every full-strength Legion that enters the game brings with it five (5) Grain Points. Each Auxiliary or reduced-strength (recruit) Legion entering the game starts with one (1) Grain Point. Moreover, any Roman units that return to Rome and spend one full turn there can receive this amount of grain (five or one Grain Point, respectively). However, the Roman player can receive grain for a given unit only once per year.
[11.3] STRIPPING GRAIN
[11.31] Each territory has a listed number of Grain Points that can be stripped — removed from that territory. That limit is listed on the map and the Tribal card.
[11.32] Only Tribal and Roman combat units can strip a territory; Roman Garrison units (see 17.5) cannot.
[11.33] Inactive Tribes do not require grain, nor can grain be stripped from their territories. No grain can be stripped from a territory any one hex of which is occupied by an Active enemy unit (including Roman Garrison units).
[11.34] A unit can strip only the following territories, and must be in that territory to strip it:
-
Its home territory.
-
A territory subjugated to it.
[11.35] When a territory is stripped, the player places the appropriate Grain Markers under any eligible units. The territory is now Depleted, and a Depletion Marker is placed in the appropriate box on the Tribal Display.
[11.36] Stripping takes place before any other actions in the Grain Phase. Therefore, units cannot draw free supply from a territory that has been stripped in that phase, unless it is a Tribe in its own territory.
[11.37] Two territories have no grain: Osismi and Vocates. These territories cannot be stripped. They will support the home Tribes, but not any other Tribes or Romans. Consider these territories as permanently depleted.
[11.38] Once a territory has been depleted that status applies immediately. A territory remains depleted until the end of the Winter Turn for that Year, at which time all Depleted markers are removed and all territories are once again available for stripping.
[11.4] LACK OF GRAIN
[11.41] An unsupplied force of Roman units in any hex or Alpine Box loses a total of 1 combat strength point each Grain Phase that it is unsupplied. The Roman player decides which unit takes the loss.
[11.42] An unsupplied Tribal unit (including any Roman-allied Tribe) is immediately disrupted and must retreat as per 9.62.
[11.43] Winter effects are more severe (see 12.3).
12.0 Winter
Unless specifically mentioned below, all previous (and succeeding) rules remain in effect.
[12.1] WINTER EFFECTS ON TRIBAL STATUS
[12.11] No Tribe can be activated through the play of its Tribal card during a Winter Turn.
[12.12] Revolts fomented by the Gallic player are limited as follows:
-
No Minor Revolts are allowed.
-
Major and Massive Revolts are limited to and affect only Roman-allied Tribes. Roman-subjugated Tribes cannot be activated by revolt.
[12.2] WINTER EFFECTS ON MOVEMENT
[12.21] The Roman player cannot use Rapid March in Winter.
[12.22] Add one (+1) to all interception die rolls. For the Roman player, this means that an interception attempt at a range of one hex is no longer automatic. Rather the range would be 1-6 (as a roll of 6 would become a 7).
[12.3] WINTER EFFECTS ON SUPPLY
[12.31] Free Supply is available only to units that stay all turn in a Fortified City, Town or Port. However, if a Tribe is in its home territory, at the beginning and end of its Movement Phase (i.e., the unit can leave its home territory as long as it ends its movement back in its territory) it is in supply. Otherwise all units expend grain.
[12.32] In Winter, normal grain requirements are doubled (reduced strength Legions and Auxiliaries require 1 Grain Point each). Grain requirements for sieges are tripled.
[12.33] The penalties for being without grain increase as follows:
-
A Roman force out of supply removes one strength point per unit.
-
Any Tribe out of supply is eliminated and placed on the map, Inactive face up, at the end of the Winter Turn.
13.0 Leaders
[13.1] LEADER UNITS
[13.11] The Roman Leader counters represent the Consul for Gaul, Julius Caesar, and his best lieutenants: Labienus, Sabinus, Publius Crassus (son of the famous M. Licinius Crassus), Decimus Brutus (a conspirator in 44 B.C., but not the infamous Marcus Brutus of "Et tu, Brute" fame), and Cicero (not the famous orator, Marcus Cicero). The sole rating on each lieutenant's counter is his Combat Rating, which is used to influence battles and sorties. Caesar has both a Combat Rating and an "S" to denote his special effect on sieges.
[13.12] The Tribal Leaders represent various chieftains, chosen for their historical value as well as the alliterative interest of their remarkable names. Not every Tribe has a Leader, and the Arverni have two. Aside from a Combat Rating, Tribal Leaders also have a Revolt Rating (see 15.23).
[13.2] HOW AND WHEN TRIBAL LEADERS ENTER PLAY
[13.21] All Leaders that start in any given scenario are noted in that scenario's initial set-up.
[13.22] Roman Leaders not present at the start of a scenario can enter the game, one each, with the seventh, eighth, and ninth full-strength Legions brought into the game through either the SPQR Table or normal Legion-raising activities (17.1). Two Recruit Legions (17.3) count as one full-strength Legion for this purpose.
Thus, if the Roman player starts a scenario with six Legions in play, he can bring in one Leader not already present when he raises his next full-strength Legion. Such Leaders are chosen randomly (drawn from a cup, etc.).
[13.23] Tribal Leaders are, with the exception of Vercingetorix (13.4), inseparably linked with their Tribes. A Tribal Leader enters the game only when his Tribe is activated. At this time, the Leader is placed on the game map with the Tribal counter. If the Tribe is Inactive or subjugated and the Leader has not been killed, the Leader counter is placed on the Tribal Display until the Tribe is brought into play.
[13.3] USE OF LEADERS
[13.31] Roman Leaders: Roman Leaders can lead and affect only Roman forces (as defined in 7.3). If a Roman Leader is commanding a combined Roman/Tribal force and a Tribe revolts, it has no effect on that Leader. Roman Leaders can move alone, without combat units.
[13.32] Gallic Leaders: Gallic Leaders can lead only Tribes; they cannot command a Roman force. A Tribal Leader can command all Tribes in a hex, as long as one of the Tribes is his. A Tribal Leader must always remain stacked with his Tribe. (Exception: Vercingetorix, 13.42).
[13.33] Multiple Leaders: Should a force have more than one Leader in that hex, the player must designate, at the beginning of his turn, which Leader will command for that turn.
[13.34] Leaders have no effect on movement or supply, nor can they carry grain by themselves.
[13.35] Combat Rating: Leaders can affect a battle (including those resulting from sorties or interception) by using their Combat Rating. The Leader of an attacking force can add his Combat Rating to the battle die roll; if the defenders have a Leader, his Combat Rating can be subtracted from that roll.
[13.36] Leaders have no combat value in and of themselves. See 13.63 for what happens to a Roman Leader caught out in the open.
[13.37] Sieges: Only Caesar affects siege resolution (10.22, 10.23). Any Leader commanding besieged forces affects attempts at a Combined Attack (10.57).
[13.4] VERCINGETORIX
Vercingetorix, the remarkable young chieftain of the Arverni, was unique amongst his Gallic contemporaries in that he made a genuine effort to unite all the Tribes of Gaul under a common, anti-Roman cause. He came quite close to succeeding.
[13.41] Vercingetorix can enter the game only under the control of the Gallic player. The Roman player cannot use Vercingetorix. He can be brought into play, if eligible, March 52 B.C. (see 13.48), but no sooner, by either one or both of the following circumstances:
-
The Arverni are Active and controlled by the Gallic player.
-
The Gallic player has initiated a Major or Massive Revolt and the Arverni are activated as a result of that revolt. In this case, Vercingetorix immediately assumes command of the revolt and his Revolt Rating is now used until the revolt's conclusion (see 15.2, 15.3).
[13.42] Vercingetorix, although an Arverni, can stack with and command any Gallic Tribe, but not the German Tribes. He is fully mobile and can move without a Tribe, much as do Roman Leaders. He can be left alone in a hex.
[13.43] Once the Gallic player places Vercingetorix on the map, he cannot voluntarily remove him.
[13.44] An added benefit of Vercassivellaunus is that if Vercassivellaunus is still around he can remain in play, although he follows the normal Tribal Leader rules.
[13.45] A Roman-played Dumnorix card (14.4) has no effect on any force commanded by Vercingetorix.
[13.46] No Roman-allied Tribe can participate in a siege against a City commanded by Vercingetorix.
[13.47] If a Gallic force under Vercingetorix is besieged, the Gallic player, in his Grain Phase, can, if desired, roll one die and consult the table below to see if Vercingetorix is available that year. Only one die roll per year is allowed, and this table should be used only in the Campaign Game. Case 13.41 still applies. When a "6" is rolled, this table cannot be used again until the following campaign year.
Vercingetorix Besieged Table See pgs. 23-24.
[13.48] Normally, Vercingetorix cannot enter the game until 52 B.C. However, if both players agree to use the following table, Vercingetorix may enter sooner. Starting with 54 B.C., before play starts for the year, the Gallic player rolls one die and consults the table below to see if Vercingetorix is available that year. Only one die roll per year is allowed, and this rule should be used only in the Campaign Game. Case 13.41 still applies.
Vercingetorix Available Table See pgs. 23-24.
[13.5] JULIUS CAESAR
All standard Leader rules apply to Caesar. His special abilities, in terms of sieges, raising Legions, etc., are discussed elsewhere. However, there is one major rule we add here: if Caesar is killed (see 13.6) the Gallic player wins an automatic, Decisive Victory. (After all, the name of the game is "Julius Caesar" — he's the only one interested in Gaul.)
[13.6] HOW LEADERS CAN BE KILLED
[13.61] In battle, usually only the losing Leader who is in command (as per 13.33 and 13.35) risks elimination. In overrun, siege and, for the Roman player, when all Roman combat units in a hex are eliminated, all losing Leaders risk death.
[13.62] Tribal Leaders can be killed as follows:
-
In Battle: If the force is defeated, the Leader commanding is killed on a die roll of "6". This roll is made before conducting any retreats. Remember that surviving leaders of subjugated tribes are removed from play until the tribe is reactivated.
-
In Overrun or Siege: Any Leader in the losing hex is killed on a roll of "5" or "6". Roll for each Leader present individually.
-
Vercingetorix Alone: If Vercingetorix is caught by himself in a hex and none of the above apply, he is killed on a roll of "1-3". If he survives, he is placed with the nearest friendly Tribe. [13.63] Roman Leaders can be killed as follows:
-
In Battle: As Gauls, except that Julius Caesar dies only on a two dice roll of "2" or "12".
-
In Overrun, Siege or Total Wipe-out: All losing Roman Leaders are killed, including Caesar.
-
When Caught Alone: If an enemy Tribe is in a hex containing only a Roman Leader (other than Caesar), that Leader is killed on a roll of 1-3. Caesar dies on a roll of 1. If the Leader survives, he is placed with the nearest Roman force, or in Rome.
[13.64] Leaders who have been killed are removed from the game permanently.
14.0 Special Events
The following cards are considered Special Event Cards: Druid cards (2), SPQR cards (2), the Minor Revolt card and the Dumnorix card.
[14.1] DRUIDS
The official religion of most of Gaul was Druidism, a fascinating mixture of naturalism and mysticism laced with liberal doses of scare tactics and, possibly, some human sacrifice. The major Druid priests exerted tremendous political control and influence over the Tribes. (By the way, the Druids had a rather interesting method to insure rapid compliance with a military call-up: the last person to arrive was tortured to death.)
The two Druid cards are multi-purpose, and their capabilities depend on which player is using them.
[14.11] If the Roman player plays a Druid card he can do one (and only one) of the following:
-
Pick another card from the top of the Tribal Deck.
-
He can examine — and then return — any three (3) unrevealed, unplayed cards in the Gallic player's hand.
-
He can take (without looking) and incorporate into his own hand, any one unrevealed, unplayed card from the Gallic hand.
[14.12] If the Gallic player plays a Druid card he can do one (and only one) of the following:
-
Pick another card from the top of the Tribal Deck.
-
He can examine — and then return — all unrevealed, unplayed cards in the Roman player's hand.
-
He can take (without looking) and incorporate into his own hand, any two (2) unrevealed, unplayed cards from the Roman hand.
-
He can initiate a Minor Revolt (15.1).
-
He can initiate a Major Revolt (15.2).
-
If he plays both Druid cards simultaneously, he can initiate a Massive Revolt (15.3).
[14.2] SPQR CARDS
S.P.Q.R. — Senatus Populus que Romanus — the Senate and the People of Rome —was the acronym for the historical (and often illusory) power of both of these factions in Republican Rome. The two SPQR cards represent political events and repercussions, possibly fomented by the Senate and/or Caesar's political rivals.
[14.21] If the Roman player plays an SPQR card he can do one (and only one) of the following:
-
Roll one die and consult the SPQR Table.
-
He can examine — and then return — any three, unrevealed, unplayed cards in the Gallic player's hand.
[14.22] If the Gallic player plays any SPQR card he can do one (and only one) of the following:
-
Roll one die and consult the SPQR Table.
-
Initiate a Minor Revolt (15.1).
[14.23] No player can make a die roll on the SPQR Table (14.24) during a Combat or Siege Phase. See, also, 14.5.
[14.24] THE SPQR TABLE (see game map)
[14.25] If, as per die roll "1" or "2" on the SPQR Table, Caesar is recalled to Rome the Roman player immediately takes Caesar and places him in the Rome Box. A die is then rolled, and the result is the number of turns Caesar must remain in Rome. While in Rome for this reason, Caesar cannot raise any Legions.
EXAMPLE: In April a SPQR die roll of "2" brings Caesar to Rome. The die is rolled again with a result of "5". Caesar must stay in Rome until September, 5 turns later.
Exception: If Caesar is in Britannia, Germania or a Fortified City under siege he is not sent to Rome. Rather, the result of the second die roll is taken as Penalty Points (20.3) for that Year (a political penalty for disobeying the Senate).
[14.26] If, as per SPQR Table die roll "3", a Caesar-raised Legion (17.6) must be removed. Any full-strength, Caesar-raised Legion can be withdrawn from the map simply by taking it off, under the following restrictions:
-
No Legion in Britannia, Germania or in a besieged City can be withdrawn.
-
If no full-strength, Caesar-raised Legion is available, the Roman player is assessed five (5) Penalty Points (20.3) for that Year.
-
The Legion withdrawn is not available for return to the game until the following campaign year. It must be raised normally.
[14.27] If, as per SPQR Table die roll "4", 20 Grain Points arrive in Massilia, the appropriate Grain Markers are immediately placed in that Town hex. If Massilia is occupied by enemy units, the grain can be placed in either Aquae Sextiae or Rome, at the Roman player's discretion.
[14.28] If, as per SPQR Table die roll "5" or "6", one or two Senate-raised Legions appear, the appropriate full-strength Legion counters (if available) are placed with 5 Grain Points each in Rome. Legions can not be rebuilt with this die roll, and if no additional Legions are available, consider this as a die roll of "4".
[14.29] The penalties and benefits possible through the SPQR cards are cumulative. For example, Caesar can be in Rome serving one penalty when an additional penalty is assessed on him by play of the second card.
[14.3] MINOR REVOLT
[14.31] The Roman player cannot play this card. He can either keep it (to deny it to the Gallic player) or discard it.
[14.32] The Gallic player, by playing a Minor Revolt card, can do one (and only one) of the following:
-
Pick another card from the top of the unused deck.
-
He can examine — and then return — any three (3) unrevealed, unplayed cards in the Roman hand.
-
He can take — without looking — and incorporate into his own hand, any one (1) unrevealed, unplayed card in the Roman hand.
-
He can initiate a Minor Revolt (15.1).
[14.4] DUMNORIX
Dumnorix, brother of Diviciacus (chief druid of the Aedui) changed sides often during the time of the Gallic Wars. He, therefore, represents the element of treachery in the game.
[14.41] Either side can play the Dumnorix card at any time, except during the Annual Endphase. That player can then choose any one (1) Active Tribe under the control of the enemy and immediately make it his own. (For example, the card can be played during a Combat Phase, so that the Tribe switches sides before the battle!)
[14.42] The Dumnorix card cannot be used:
-
When the affected Tribe is in a hex containing a Leader who is leading a Major or Massive Revolt.
-
When the affected Tribe is in a hex with Vercingetorix as commander.
[14.43] Tribes switch sides with the same effect as a Tribal switch during a Major Revolt, 15.2.
[14.44] As stated in 9.12, a Dumnorix card can be used during a siege. In addition to the possibilities listed in 9.12, the Roman player can foment a particularly potent bit of treachery. If he is besieging a City and uses a Dumnorix card for a Tribe that has more strength points than all other Tribes in that City combined, the City automatically falls to the Roman forces as if they had won the siege with an S result. (If the points are equal, remember, the Dumnorix card cannot be played.)
[14.5] SPECIAL EVENT CARD RULES
[14.51] Once one player has played an Event card, his opponent cannot play another Event card until the next Phase, at the earliest. However, the player who has played the Event card is free to play as many such cards as he has at one time.
[14.52] Each Special Event card can be played only once in a given year. As soon as that card is played, set it aside for the remainder of the year. At the beginning of the next year, shuffle any such cards back into the deck.
15.0 Revolts
GENERAL RULE: The Gallic player (only) can use certain Special Event cards to start Revolts. There are three different types of revolts: Minor, Major and Massive.
To trigger a Major or Massive Revolt, the Gallic player must have at least one Active Leader who uses his Revolt Rating to convert Roman-allied or Roman-subjugated Tribes to the Gallic cause.
[15.1] MINOR REVOLT
[15.11] To start a Minor Revolt, the Gallic player plays any Minor Revolt, SPQR or Druid event card.
[15.12] After playing the card and announcing the Minor Revolt, the Gallic player can convert any Roman-subjugated and available Tribe to Active status as a Gallic-allied Tribe. The Tribe's card, if in Roman possession, is given to the Gallic player, and the Tribe's counter is placed in its home base hex. Placement of the Tribal counter follows the general procedure in 6.15.
[15.13] Minor Revolts cannot be used to convert Active Roman-allied Tribes or unavailable Roman-subjugated Tribes.
[15.2] MAJOR REVOLT
[15.21] To start a Major Revolt, the Gallic player must have a Druid card and any Tribal Leader (except the Briton Leader, Cassivellaunus) available at the instant the Druid card is revealed. A Major Revolt can also be started when using the Vercingetorix Besieged Table, 13.47.
[15.22] To start a Major Revolt the Gallic player selects any one (1) available Roman-subjugated or active Roman-allied Tribe and makes it an active Gallic ally, as follows:
-
If the Tribe selected was Roman-subjugated, follow 15.12.
-
If the Tribe selected was Roman-allied and alone in a hex, the Tribe remains in place and the Roman player gives that Tribe's card to the Gallic player, transferring control.
-
If the Tribe was Roman-allied but stacked with other Roman or Roman-allied units, the revolting Tribe can either remain in the hex (and a battle would be fought in the ensuing Combat Phase) or take a "free move" using the procedure outlined in 9.12 (even if the Tribe is not in a City).
-
The German and Briton Tribes cannot be raised, activated or in any way influenced by a Major Revolt.
[15.23] After the first Tribe has revolted, the Gallic player notes the Revolt Rating of the Leader he has chosen to lead the revolt and rolls one die. If the die roll falls within the range of the Revolt Rating of the Leader he has chosen to lead, another Tribe revolts as per 15.22. The Gallic player continues to roll and revolt until:
-
The die roll falls outside the Leader's Revolt Rating range.
-
The 12-card maximum for the Gallic player is reached. However, the Gallic player can, at this time, choose to voluntarily de-activate some of his Tribes to keep the revolt going.
-
The Gallic player wishes to stop the revolt.
[15.24] The chieftain selected to lead the revolt is the only Leader whose Revolt Rating can be used over the entire course of that revolt, except, as noted, for Vercingetorix.
[15.25] At the end of any Major Revolt occurring in Year 54 B.C. or later, the Gallic player receives a bandwagon effect. He receives a number of die rolls equal to the revolt Leader's Revolt Rating (thus, an Ambiorix-led revolt would get three bandwagon die rolls, but an Indutiomarus-led revolt only two). The sum of the die rolls gives the number of available Roman-subjugated Tribes that the Gallic player can return to the map as Inactive. These Tribes are selected randomly (put the counters in a cup, and draw without looking). The counters are placed back on the map in their home base hexes, Inactive faces up (check the Tribal Dispersal Chart if any home base hexes are occupied). The Tribal Cards for these Tribes are placed back into the deck, which is shuffled.
EXAMPLE OF A MAJOR REVOLT
It is May, 54 B.C. The Gallic player plays the card for the Eburones, activating them and gaining their chieftain, Ambiorix, who has a 1-3 Revolt Rating. He then immediately plays a Druid card and announces a Major Revolt led by Ambiorix. The first Tribe selected is the Roman-subjugated Helvetii, whose card is taken from the Roman-subjugated Deck Box and given to the Gallic player, while the Helvetii counter is placed, Inactive face up, in its home base hex, which is presently unoccupied.
The Gallic player now rolls a die to see if the revolt continues. Throwing a "2", which is within Ambiorix's range, he selects the Active Roman-allied Suessiones, who are alone in the Fortified City of Bibrax. Again, the Tribal card is transferred and the Gallic player controls the Suessiones, who remain Active and in place. The Gallic player rolls once more, but his "5" falls outside Ambiorix's range of 1-3. The first part of the revolt is over.
However, it is 54 B.C., so the Gallic player can take advantage of the Bandwagon Effect. He notes Ambiorix's Revolt Rating of 3 and rolls the die three times: his throws of "1", "4", and "2" produce a total of "7", which is the number of available, Roman-subjugated Tribes the Gallic player can select. He does so by placing all available, Roman-subjugated Tribal counters into a cup and pulling out 7 (or less, if less than 7 are in the cup). These Tribes are now Inactive, their counters are placed on the map (assuming all their home base hexes are unoccupied) and their cards shuffled back into the deck. into the deck. The revolt is over, and play resumes.
[15.26] There cannot be more than one Major Revolt in a Game-Turn.
[15.27] If there are no Tribes left that can be taken in revolt under any of the above procedures, the revolt is over.
[15.3] MASSIVE REVOLT
[15.31] To precipitate a Massive Revolt, the Gallic player must have an Active Tribal Leader and play both Druid cards at the same time.
[15.32] The procedure for a Massive Revolt is the same as that for a Major Revolt (15.22) with the following modifications:
-
Add one (+1) to the Leader's Revolt Rating.
-
The 12-card Gallic card limit is suspended for the duration of the revolt. The Gallic player can have any number of cards in his hand. (See 15.34.)
-
The bandwagon effect is doubled; i.e., the Gallic player affects twice the number of Tribes as the total rolled. The bandwagon effect is still applicable from 54 B.C. on, only (see 15.25).
-
Any Tribes removed from Roman subjugation by the bandwagon effect in a Massive Revolt are immediately activated as Gallic-allied, not simply placed on the map as Inactive (and receive grain, see 15.35.)
-
The German and Briton Tribes are not affected by a Massive Revolt.
[15.33] A Massive Revolt ends when:
-
A die roll falls outside the Leader's expanded Revolt Rating, after which the bandwagon effect is completed and the revolt is over.
-
No more Tribes are available to affect.
-
The revolt is ended voluntarily.
[15.34] The Gallic player may still take a card in the Card Phase. However, he must immediately play or discard it as long as he has more than 12 cards in his hand. The Gallic player cannot keep a drawn card unrevealed until he reduces his hand to the 12 limit.
[15.35] Tribes entering play as Gallic-allied as a result of a Massive Revolt bandwagon effect receive Grain Points equal to their Grain Rating when they are placed on the map. This is not considered stripping, and occurs even if the territory is already stripped.
[15.36] There cannot be more than two (2) Massive Revolts during the course of any of the short scenarios; the limit is three (3) for the full Campaign scenario. (This limit is adjustable for purposes of play balance, if the players agree.)
Designer's Note: The Massive Revolt will have a spectacular effect on the game. It is the Gallic player's equivalent of the A-Bomb; used judiciously it can win the game in one stroke.
16.0 Special Tribes
[16.1] THE GERMAN TRIBES
[16.11] Germania, the territory of the Germanic Tribes, is unique. It has no distinct home base hex, and only the German Tribes can strip Germania of its 10 Grain Points. Only the German Tribes (and Romans) can cross the Rhine (19.0). The German Tribes represent a loose federation of such as the Suebi, Ubii, Sugambri, Usipetes, Tencteri, and so on. Whether at full or reduced strength (9.46), the German Tribes always consume three (3) Grain Points when not in Germania; this number is doubled in Winter to six (6). The Germans can use free supply, as per 11.16.
[16.12] When activated (by either player) the German Tribes counter is placed, at a cost of one movement point, in any eastern map-edge hex in Germania. The German Tribes can enter the game only during a Movement Phase. If Germania is not already depleted, the German Tribes can strip it of its 10 Grain Points. The player controlling the German Tribes can leave any number of Grain Points being carried by the Tribes in any one of the entry hexes (12), subject, of course, to possible capture by invading Romans (this is an exception to 11.13).
[16.13] The Germans can be voluntarily deactivated by the player controlling them. The counter must be moved from the map at one of the entry hexes (16.12) and the card is returned to Tribal Deck. They are Inactive and unavailable for the rest of the campaign Year (see 19.15). This rule is used for the German Tribes instead of 6.16.
[16.14] The German Tribes cannot stack or co-operate in battle or siege with any Tribal force whose total strength exceeds their own.
[16.15] If the Germans are operating in Gaul, they can voluntarily cross the Rhine and return to Germania only for the following reasons:
-
Stripping grain: Following this, the Tribe must return to Gaul or deactivate.
-
Retreating and/or Disrupted: Once the retreat has been completed the Tribe must return to Gaul or deactivate.
-
To deactivate (see 16.13).
-
To counter a Roman invasion (see 19.23).
[16.16] If reduced in strength (9.46), the German Tribes can be brought up to full strength only by voluntary deactivation (16.13). The Tribes are returned to play at full strength when reactivated (unless revolting, see 19.24).
[16.17] The German Tribes can only be removed from Roman-subjugated or Roman-allied status through a Minor Revolt. They are not affected by a Major or Massive revolt, and their counter cannot be included in any bandwagon effects.
[16.18] The German Leader Ariovistus is treated like any other Gallic Leader. However, if he is killed the Germans are automatically subjugated by the victor, and they cannot be reactivated. Moreover, Ariovistus can lead revolts only when he is in Gaul; he cannot lead revolts from Germania.
[16.19] The number of Campaign Points (20.1) earned for subjugating or allying with the Germans varies as follows (see also 19.14):
-
+3 Campaign Points for the Roman player if they are Roman-allied.
-
+5 Campaign Points if they are Roman-subjugated.
-
+10 Campaign Points if they are Roman-subjugated and such subjugation occurred in Germania. (This only applies to the year in which it took place; otherwise, use 2. above.)
-
-5 Penalty Points (subtracted from the Roman Total if the Germans are either Gallic-allied and Active or subjugated by the Gallic player).
No points are earned or lost if the Germans are Inactive.
[16.2] THE HELVETIANS
[16.21] "Helvetians" refers to the conglomeration of tribes from what is today Switzerland, whose initial wanderings into Gaul precipitated Roman intervention under Caesar. After Caesar's first campaign, the Helvetians dispersed into smaller groups.
[16.22] In the game, the players use either the Combined Helvetian counter and card or the counters and cards for the Helvetii and the Boii. Individual scenarios state which to use. Unless stated otherwise, the Combined Helvetian Tribe is used initially, and the Helvetii and Boii counters and cards are set aside. When using the Combined Helvetians, the Helvetii territory and home base hex are used, and Boii territory is considered part of the Arverni territory (which would be worth seven (7) Grain Points).
[16.23] If the Combined Helvetians are eliminated or subjugated, the Combined Helvetian card and counter are permanently removed from the game and immediately replaced, in the same status, with the cards and counters for the Helvetii and the Boii. (The Arverni territory, of course, reverts to its normal Grain Rating.) The Tribes enter the game and are then removed, they return as Helvetii and Boii, separately.
[16.24] If the Helvetii and Boii Tribes start in the scenario, the Combined Helvetian Tribe is never used.
[16.25] If the Combined Helvetian counter is reduced in combat strength (9.46), it cannot be returned to full strength. This does not affect the strength of Helvetii and Boii Tribes when they enter play.
[16.26] The Combined Helvetians (regardless of strength) consume two (2) Grain Points in a Grain Phase, or four (4) in Winter (see 11.16). They, too, can use free supply where applicable.
[16.3] THE AMORICAN (MARITIME) TRIBES
The Amorican, or Maritime (sea-faring), Tribes comprise all those Tribes with Ports in their territories. Whenever an Amorican Tribe engages in battle (but not siege) within its home territory it uses its parenthesized Combat strength, which is double its usual strength. Thus, the Veneti are worth 6 points at home, but 3 in any other territory. (This, rather abstractly, accounts for the naval strength of these Tribes.)
[16.4] THE AEDUI AND THE ARVERNI
These two powerful Tribes were, for most of the time covered here, bitter enemies. A player cannot have both of these Tribes Active under his command at the same time.
[16.5] THE BRITONS
[16.51] There are three Tribes of Britons: the Catuvellauni (and their chieftain/king Cassivellaunus), the Trinovantes, and the Dumnonii. There are also three "dummy" Briton counters, representing rumors or compliant Tribes in the area. Active Britons are always controlled by the Gallic player.
[16.52] The Britons need not be deployed on the map until Caesar invades Britannia (18.2). At the instant the Romans land, the three Tribes (if still around, 16.54) and unrevealed dummy counters are placed, face-down, in any of the Briton Deployment hexes at a maximum of two counters per hex. The Gallic player uses any deployment he wishes each time the Tribes are deployed. (Historically, the Trinovantes would be in 1601, the Catuvellauni in 1301, and the Dumnonii in 0403.)
[16.53] Britons cannot move until Caesar lands. They move as if they were a force of 1-10 point Tribes (see 7.14). All normal stacking rules apply as soon as the Tribes can move. The identity of a unit or force is not revealed until a battle occurs, and then only those Tribes involved are revealed (and stay revealed until the Romans leave). A dummy unit is revealed and permanently removed from play when a Roman unit occupies its hex during the Roman player's Combat Phase or intercepts it during the Gallic player's Movement Phase.
[16.54] If the Romans leave Britannia, any remaining Active Britons and unrevealed dummy counters are placed face-down in their deployment hexes, as per 16.52. Any Britons eliminated or subjugated are permanently removed from the game. If all real Tribes are eliminated, all remaining dummy counters are removed from play.
[16.55] The Britons are operated by the Gallic player as any other Tribe, except as follows:
-
Cassivellaunus cannot be used to lead revolts.
-
The Britons have no card and can only be activated when the Romans invade.
-
The Britons cannot cross the Channel to Gaul.
[16.56] Briton Tribes can voluntarily exit through any land hex on the north edge of the map (in Britannia). They are not eliminated if they do so, but they cannot return that campaign Year. For each Briton Tribe (not dummy) so fleeing, the Roman player receives one (1) Campaign Point.
[16.57] Caesar receives twenty (20) Campaign Points in the year he has finally subjugated all Briton Tribes. Fleeing Tribes are not subjugated.
[16.6] THE VOLCAE
The Volcae Tribe and their territory were part of the permanent Roman possessions in the south of Gaul at the time of Caesar's Gallic campaigns, although they were not part of Gallia Transalpina. They would later become part of Gallia Narbonesis.
[16.61] The Volcae have no counter, card, or Campaign Point value.
[16.62] The Volcae are permanently Roman-subjugated. As long as the Roman player maintains at least a one-point combat unit in Narbo, he can strip the territory of its 3 Grain Points each year.
[16.63] A Gallic combat unit can strip Volcae territory of grain if there are no Roman or Roman-allied units present and the territory is not yet depleted.
17.0 Legions and Other Roman Units
GENERAL RULE: The Roman player can bring in additional Roman forces during the game. Full-strength Legions can be raised either through the SPQR Table or by Caesar himself, using the Legion-Raising Table. By utilizing the latter the Roman player can also receive Auxiliaries, Recruit Legions or the ability to rebuild reduced-strength Legions back to full strength.
[17.1] HOW TO RAISE LEGIONS
[17.11] Caesar can raise Legions without using the SPQR Table once per year. To raise a Legion, the Caesar counter must be either in Rome (but not as a result of the SPQR Table) or in either Aquae Sextiae or Massilia (and not under siege) at the end of a Roman Movement Phase. In the ensuing Legion-Raising Phase, the Roman player announces his attempt to raise new forces, consults the Legion-Raising Table, and throws one die. If Caesar is in Rome add one to the die roll.
[17.12] When a full-strength Legion is designated to arrive, the Roman player has the choice of taking it as a full Legion, using it to rebuild reduced Legions (17.2), taking two Recruit Legions (17.3), or any combination thereof.
[17.13] Full-strength or Recruit Legions raised by Caesar appear in whatever City or Town Caesar is in.
[17.14] Each new, full-strength Caesar-raised Legion enters with five Grain Points. Each new Auxiliary unit or Recruit Legion enters with one Grain Point. The number of Legions and Auxiliaries that can be raised is strictly limited by the number of Roman unit counters available. Also, note that Caesar loses Campaign Points for personally raising too many Legions (see 17.6).
[17.15] The Roman player receives additional Leaders by raising Legions (see 13.22).
[17.16] A die roll on the SPQR Table is not an attempt by the Roman player to raise Legions for purposes of 17.11.
[17.2] REBUILDING REDUCED LEGIONS
[17.21] Roman Legions reduced in strength by battle or attrition can be rebuilt only with Legion strength points received in the Legion Raising Phase. SPQR (Senate-raised) Legions and Auxiliary points cannot be used for this purpose.
[17.22] The Roman player can take any newly-created Caesar-raised Legion (17.11) and break it down into two separate combat strength points. Each of these points can be used to rebuild a reduced Legion (or create a Recruit Legion, see 17.3).
[17.23] Any reduced-strength Legion on the map can be rebuilt to full strength in the Legion-Raising Phase if it can trace a Line of Communications (LOC) from its own hex back to Rome, Aquae Sextiae or Massilia. This line of hexes must be free of Active enemy combat units, enemy ZOC's and/or impassable terrain. Rebuilt Legions do not receive extra Grain Points.
[17.24] Legions cannot be rebuilt if they are: a) in an enemy-occupied hex; b) besieged; c) in an Alpine Movement Box (although a LOC can be traced through such a box); or d) in Britannia or Germania.
[17.25] Any rebuilt Legion is considered to be a Caesar-raised Legion (17.6), even if it was not originally so!
[17.26] Any points unused in a Legion Raising Phase are lost forever; they cannot be accumulated.
[17.3] RECRUIT LEGIONS
Whenever Caesar raises a new Legion (not the SPQR Table) the Roman player can choose to take the newly-raised Legion as two reduced-strength (or Recruit) Legions instead, as long as there are enough Legion counters to do this. Recruit Legions enter the game like any other Caesar-raised Legion, but with only one Grain Point. They can later be built up to full strength (but not in the same year) and are always considered Caesar-raised Legions.
[17.4] AUXILIARIES
[17.41] The Legion Raising Table also provides the Roman player with Auxiliaries (see 3.4). These are not Legions; simply one-point Roman combat units.
[17.42] When an Auxiliary is raised it is placed according to the table below, for which the Roman player rolls one die:
Auxiliary Placement Table See pgs. 23-24.
If placement is impossible because of enemy activity, the Auxiliary unit is placed in Rome.
[17.5] ROMAN GARRISONS
[17.51] The Roman player has six Garrison units. Three of these are named for the specific locations in which they must be placed; the others are unnamed and can be placed anywhere. Initial deployment of Garrison units is listed in each scenario, but named Garrison units cannot be placed anywhere other than the location given.
[17.52] Garrison units are immobile; if forced to retreat, they are eliminated instead. Garrison units have no reduced strength; a loss of one strength point eliminates the unit.
[17.53] At the beginning of any campaign Year other than the start of the game, the Roman player can place any Garrison units not currently in play on the map within the following restrictions:
-
No more than two (2) unused Garrison units can be placed on the map in any one Campaign Year.
-
Named Garrison units can be placed only in their printed locations.
-
Unnamed Garrison units can be placed in any unbesieged, Fortified City occupied by at least one Roman combat unit at the time of placement, and from which the Roman player can trace a line of communication (17.22).
-
Only one Garrison unit is allowed per hex.
[17.54] New garrison units are placed on the map in the Roman Movement Phase of the March Game-Turn of the new campaign Year, and only then. They cannot be brought in in any other way.
[17.6] LEGIONS AND PENALTY POINTS
Raising Legions was an expensive proposition, and Caesar was in the conquest business to make himself a tidy sum of dinares, as well as to gain some imperial clout. Therefore, raising too many Legions may imperil Caesar's financial power (as well as making him appear all too much the potential military dictator to the folks back home). The Roman player should keep a side record of which legions are Caesar-raised and which legions are Senate-raised.
[17.61] A Roman player with more than six (6) Caesar-raised Legions in play at any one time incurs a Campaign Point penalty. A Legion is Caesar-raised if brought in via the Legion Raising Table, whether at full or reduced strength or rebuilt via that table. SPQR Table Senate-raised Legions do not count against this limit.
[17.62] For each Caesar-raised Legion over the six limit that the Roman player has in play at the end of a campaign Year he must sustain minus five (-5) Penalty Points.
[17.63] Legions can be voluntarily disbanded to avoid the above penalty. Legions can be disbanded during any Roman Movement Phase regardless of where they are, as long as they are not besieged and can trace a line of communication as per 17.22. Simply remove the counter from play; it can be returned later (see 17.64).
[17.64] If Legions are disbanded in a Winter Turn, the Roman player cannot use the Legion Raising Table until the following April Game-Turn — he cannot disband and rebuild in consecutive turns.
[17.7] THE LEGION RAISING TABLE (see game map)
18.0 Britannia
The Roman player can invade Britannia. There are no galley fleets in the game; rather, the amphibious/naval capacity of the Romans has been abstracted into a Naval Capacity Rule and Track. (The naval campaign against the Veneti has also been greatly abstracted.) When the Roman player has an adequate naval capacity he can invade Britannia. If he completely subjugates Britannia he earns a hefty number of Campaign Points. Failure, however, can lose him points.
[18.1] NAVAL CAPACITY
[18.11] The Roman player's ability to move units to Britannia is determined by the number of Naval Points he has available. Naval Points represent the naval transport capacity, shipping, and so on, that can be used if the Gallic ports are captured. The points are temporarily lost whenever the Roman player ceases to control it (for example, when the port is occupied by Gallic combat units, or when the allied or subjugated Tribe's status is changed). The Naval Capacity Track is used to keep track of the number of Naval Points available.
[18.12] Each Port, with the exception of Itius Portus (1806) is worth one Naval Point. Itius Portus is worth three.
[18.13] Whenever the Roman player has twelve (12) or more Naval Points at the beginning of any game Winter, he can invade Britannia that turn. [18.2] INVADING BRITANNIA
[18.21] The Roman player can invade Britannia if he controls any Invasion Port (see Terrain Key) and if he has sufficient Naval Capacity. The invasion force can land only at a designated Invasion Hex in Britannia.
[18.22] Only Roman units (including Auxiliaries) can invade Britannia.
[18.23] A maximum of three (3) full-strength Legions, or their equivalent in strength points, may leave from any Invasion Port other than Itius Portus. Itius Portus can support a maximum of six (6) Legions or their equivalent. The Legions can sail from any Invasion Port whenever they have 10 Grain Points (per invasion force). This is a minimum requirement for each Port hex; a force can carry more than 10 Grain Points if desired.
[18.24] Caesar must accompany any invasion of Britannia, although he can leave from any Invasion Port. He must land with the first Legions to land. If Caesar leaves Britannia the invasion is considered over, and all Roman combat units must leave too.
[18.25] Invading Roman units must land in an Invasion Hex within 10 hexes of the Invasion Port from which they left. There is no limit to the number of Roman units that can land in any one Invasion Hex. To move from an Invasion Port to a Britannic Invasion Hex the force must start the Movement Phase in that Port. It costs one full turn's movement allowance to cross the channel and land, and Roman units cannot land in a Briton-occupied hex. Movement from Britannia to Gaul also requires a full move.
[18.26] Grain can be transported to and from Britannia but only when accompanied by a combat unit. All other supply rules are normal.
[18.27] If the Roman Naval Capacity falls below 12, all Roman units must immediately (next Movement Phase) return to Gaul. They can land in any Roman-controlled Port (invasion or normal), but there is still a three-Legion maximum for all Ports other than Itius Portus.
[18.28] While in Britannia, Caesar ignores any SPQR Table result that calls for him to withdraw (14.25). Also, no Legion can be withdrawn through SPQR from Britannia (14.26).
[18.29] The Roman player earns the following Campaign Points in Britannia:
-
+20 C.P.'s in the Campaign year in which all Briton Tribes are finally subjugated.
-
+1 C.P. for each Briton Tribe (not dummy) fleeing north in a given year.
-
-6 Penalty Points in any year that Caesar invades Britannia and fails to subjugate at least one Tribe that doesn't flee.
19.0 Crossing the Rhine
[19.1] ROMAN CROSSINGS
[19.11] Roman units (not Gallic Tribes) can build bridges across any Rhine hexside if the following conditions are met:
-
A bridge cannot be built across a hexside controlled by the German Tribes or active enemy Gallic tribes.
-
The Roman player must have at least two full-strength Legions and 5 Grain Points in a hex bordering the River hexside to be bridged.
The Roman units expend the 5 Grain Points and 4 movement points to build the bridge, and a Bridge Marker is placed across the river.
[19.12] Bridge Markers remain in place until the beginning of the Winter Turn, when they are automatically removed. Bridges can be destroyed by the German Tribes (but not by Gallic tribes) if they occupy either hex the bridge leads into and there are no Romans in either of the bridged hexes at the beginning of a Gallic Movement Phase (unless the Germans are Roman-allied). It costs one Movement Point to destroy the bridge.
[19.13] It costs +1 movement point to cross a bridged Rhine hexside. Constructed bridges negate river Zones of Control (see 19.21).
[19.14] The first time a Roman force led by Caesar enters Germania, the Roman Player earns +3 VP's for that year, but only if the Germans are not allied to Rome. Moreover, if a Caesar-led Roman force subjugates the German Tribes in Germania the Roman player earns +10 Campaign Points in that year.
[19.15] If the Germans are Gallic-allied and in Germania when a Roman force crosses the Rhine the Gallic player can voluntarily deactivate them at no Campaign Point penalty as per 16.13.
If the Romans invade Germania while the Germans are Gallic-allied and in Gaul, the Germans must immediately and directly return to Germania to either counter the invasion or flee off the eastern map edge.
[19.16] Roman units can enter Germania for any reason, but the Romans cannot strip grain from Germania. All other supply rules apply, except that the Romans do not receive free supply in Germania; they must always consume grain.
[19.17] While in Germania, Caesar ignores SPQR Table withdrawal rolls (14.25), as do Legions in Germania (14.26).
[19.18] The number of bridges allowed in play at one time is limited by the counter mix.
[19.2] GERMAN CROSSINGS
[19.21] The German Tribes can cross the Rhine at any point through any Rhine hexside not under enemy control at a cost of three (3) additional movement points. They cannot use bridges.
[19.22] No non-Germanic Tribal unit or Leader can cross the Rhine under any circumstances.
[19.23] If the Germans are in Germania and not allied with Rome, they must stay in Germania or flee to the east if any Roman unit crosses the Rhine. They cannot cross back into Gaul until the Romans leave.
[19.24] If the German Tribes revolt (16.17), for the remainder of the year in which they revolt their combat strength while in Germania is doubled. The Tribe is not rebuilt if reduced; the face combat value is simply doubled (that is, from 10 to 20, or 5 to 10).
20.0 Victory
GENERAL RULE: The Victory Conditions reflect the fact that Caesar, not Rome, was conducting a campaign to conquer Gaul completely. His reasons were varied but, most probably, he foresaw that to have power in Republican Rome he needed money and an army. The only way to get them was by conquest. Thus, Caesar saw Gaul as a road to Rome, and his success in the capital was predicated upon complete victory on the frontier. The Victory Conditions thus reflect the fact that Caesar must not only subjugate and control the Tribes but, also, that he must maintain order over an extended period of time. The Roman player, who is the only player who earns Campaign Points, figures his annual total at the end of each Campaign Year. He then converts the yearly Campaign Points into Victory Points. At the end of each scenario, the Roman player totals all the Victory Points he has won to determine how well he did.
[20.1] CAMPAIGN POINTS
[20.11] Each Year, the Roman player receives Campaign Points for accomplishing certain objectives and loses Penalty Points for certain conditions. These are tallied, then converted to Victory Points at the beginning of each Annual Endphase. (This is done yearly so undue weight is not given to great Roman success in a single year.)
[20.12] Only the Roman player receives Campaign and Penalty Points. The latter are subtracted from his Campaign Point total for that year (see 20.2 and 20.3).
[20.13] The Campaign Points for each Tribe are listed on that Tribe's card as well as printed on the map. For the Roman player to receive Campaign Points for subjugating a Tribe, he must maintain control over the tribal territory through Garrison Zones (see 20.4).
[20.14] Campaign Points earned in one year are converted directly to Victory Points and not carried over to the next year. However, the Roman player can gain Campaign Points for the same reason in successive years. For example, a particular tribe that has been subjugated for two years counts in each year.
[20.2] CAMPAIGN POINT TABLE
The list below gives the number of Campaign Points the Roman player wins in each year if he accomplishes the listed objective:
Campaign Points Table pgs. 23-24.
[20.3] PENALTY POINTS
The list below gives the Penalty Points that the Roman player subtracts from his Campaign Point total for the year in which these conditions or events occur:
Penalty Points Table pgs. 23-24.
[20.4] GARRISON ZONES AND VICTORY CONTROL
[20.41] In order to gain the Campaign Point value of a subjugated Tribe the Roman Player must maintain control over that Tribe's territory by using combat or garrison units to create Garrison Zones, which are determined in the Annual Endphase.
[20.42] Any force of Roman Legions or Auxiliaries in a Town, Port or Fortified City having two or more strength points can extend a Garrison Zone.
[20.43] If the required strength is in a Town or Port, the Garrison Zone extends to the territory that force is in plus all adjacent territories.
[20.44] If the required strength is in a Fortified City, the Garrison Zone extends to any territory whose home base hex is within six (6) hexes of that garrison force.
[20.45] In addition to the above, each garrison force in Aquae Sextiae, Massilia and/or Narbo extends a Garrison Zone of two hexes, up to a maximum range of six, from any hex in Gallia Transalpina up to any subjugated Gallic home base hex within range.
[20.46] Garrison Zones are blocked or negated if any of the following conditions are in effect:
-
If an active, Gallic-allied Tribe occupies a territory's home base hex, a Roman Garrison Zone cannot be traced into or through that territory.
-
Garrison Zones cannot be traced out of a besieged City.
-
Garrison Zones cannot be traced through the territory (all hexes) of an Inactive Tribe.
-
Garrison Zones cannot be traced through or into any enemy ZOC or impassable hexside.
[20.47] To earn Campaign Points for subjugating the German Tribes, the Roman Player must control, by both subjugation and Garrison Zones, at least two Tribal territories adjacent to the Rhine. This rule does not apply to Campaign Points received for killing Ariovistus.
[20.48] No Garrison Zone is needed for Britannia.
[20.5] VICTORY POINTS
[20.51] The Roman player takes his total Campaign Points (which can be a plus or minus number, depending on how well he has done that year) for the year and consults the Victory Point Chart. This gives him the number of Victory Points (VP's) he has earned for that year. He keeps track of all VP's on the Victory Point Track.
[20.52] At the end of the scenario, the Roman player totals his Victory Points and consults the Victory Level Chart for the scenario to see who has won, and what level of victory was achieved.
[20.53] Regardless of any of the above, if Caesar is killed the Gauls win.
[20.54] The Victory Point Chart
| Roman Campaign Points | Victory Points |
|---|---|
| 0 | -2 |
| 1-8 | -1 |
| 9-17 | 0 |
| 18-34 | 1 |
| 35-47 | 2 |
| 48-55 | 3 |
| 56-68 | 4 |
| 69+ | 5 |
21.0 The Scenarios
COMMENTARY: There are four scenarios in the JULIUS CAESAR game. Three of them cover specific operations during the campaign, while the fourth encompasses the whole nine-year campaign. While the game's mechanics are consistent throughout all scenarios, players would probably do best, at first, by concentrating on Scenario 1.
[21.1] SCENARIO I: Ariovistus and the Helvetians
This scenario covers the opening years of Rome's involvement in Gaul. The machinations of the German chieftain, Ariovistus, forced the Helvetians to seek land in Gaul. Their movements threatened a number of other tribes whose call for help (probably precipitated by Caesar) was answered by Rome. After disposing of the Helvetians, Caesar turned around and addressed himself to the question of the German encroachment.
[21.11] Initial Card Distribution
-
Remove the German Tribes, Boii, and Helvetii cards from the deck and set them aside. Set aside the Boii and Helvetii counters for later use.
-
The Gallic player takes the Combined Helvetians card and counter. The Combined Helvetians are Active at the beginning of the scenario.
-
The Roman player takes the cards and counters for the Aedui, Allobroges, and Mandubi. These are active Roman allies at the beginning of the scenario.
-
The deck is shuffled. The first six cards are dealt to the Gallic player, and the next two are dealt to the Roman player.
[21.12] Initial Gallic Deployment
The Combined Helvetians counter is placed in Geneva (2621), full strength face up, with twelve (12) Grain Points.
[21.13] Initial Roman Deployment
-
Place the three named Garrison units in their respective hexes.
-
Place an Auxiliary unit and the Allobroges Tribe counter in different hexes among the following: 2021, 2022, 2121, 2122, 2123, and 2220. Place 1 Grain Point with the Auxiliary unit.
-
The Active Aedui and Mandubi Tribes are placed in their home base hexes.
-
The VII, VIII, IX, XI, and XII Legions (full-strength), Caesar, Crassus, and 25 Grain Points counters are placed in Rome. The XI and XII are Caesar-raised Legions; the rest are Senate-raised.
-
The X Legion (Senate-raised), Labienus, and 5 Grain Points are placed with any one of the three Garrison units.
-
All remaining Tribes are placed in their home base hexes, Inactive face up.
[21.14] Raising Legions
Caesar cannot attempt to raise new units until the August turn of 58 B.C. This does not prohibit use of the SPQR Table.
[21.15] The German Tribes
The German Tribes are given to the Gallic Player as an Active Tribe if, and when, he throws the required die roll, as below. The die is rolled on the German Arrival Table in the Gallic Card Phase before the Gallic Player draws a card. If the Germans come in, no card can be taken by the German player that turn. Instead, he is given the German card (which was set aside) and he places that card face-up, Active. The German Arrival Table is used until the Germans arrive, although, with bad luck, it is possible they never do! The Germans must remain Active for at least one turn after the Gallic player receives them, and thereafter he can do with them as he wishes. The Roman player cannot cross the Rhine until the Germans are activated.
German Arrival Table pgs. 23-24.
[21.16] The Gallic player goes first in all turns in 58 B.C. After that, roll for Initiative.
[21.17] Length of Scenario
The scenario lasts 18 game turns, beginning with the March turn, 58 B.C., and ending at the conclusion of the Winter turn, 57 B.C.
[21.18] Victory Conditions
| Total Roman VP's | Result |
|---|---|
| 4 or more | Roman Decisive (The historical outcome) |
| 3 | Roman Substantive |
| 2 | Roman Marginal |
| 1 | Gallic Marginal |
| 0 | Gallic Substantive |
| -1 or less | Gallic Decisive |
[21.2] SCENARIO II: The Maritime Campaigns and the Invasion of Britannia
This scenario encompasses the period during which Rome truly established herself as the dominant force in Gaul, and then dealt with "threats" to its interests by mounting large-scale operations against both Britannia and Germania. The set-up below should be followed in the exact sequence given.
[21.21] The players place all Tribal counters in their home base hex, inactive face up. The Combined Helvetians card and counter are not used; remove them from play. Use the Helvetii and Boii cards and counters.
[21.22] Tribes Allied to Rome The Roman player selects any number of Tribes (excluding the Germans and Britons) whose total Campaign Point value is exactly six (6). These Tribes are Roman-allied and start the game active face up in their home base hex. The cards for these Tribes are given to the Roman player, and placed face-up/revealed.
[21.23] Tribes Subjugated by Rome
-
The German Tribes are subjugated to Rome but available. Place the card and counters accordingly.
-
The Roman player selects Tribes from anywhere in Gaul whose Campaign Point total is exactly twenty (20). These Tribes are Roman-subjugated. (Remember the Garrison Zone rules when selecting these Tribes; check with 21.26 to see what else the Romans will get.)
-
Remove the cards of the Tribes selected in Step 2, above, shuffle them, and return one-half (rounded up), without looking, into the main deck. The remaining cards are placed in the Roman Subjugated Deck Box. All Roman-subjugated Tribes counters are placed in the Subjugated/Available Box.
[21.24] Gallic Deployment
-
The remaining cards are now shuffled, and the Gallic player takes the first eleven (11) cards in his hand.
-
The Gallic player now rolls one die and adds "3" to the result, for a total of 4 to 9. He then reveals from his hand at least that number of cards. Revealed tribes are Active at the start of the game.
-
All activated, Gallic-allied Tribes, still in their home base hexes, are given Grain Points equivalent to their territory's limit.
[21.25] Roman Cards
If the Roman player now has less than five cards in his hand, he may select additional cards from the deck to bring his hand up to five, if desired. These cards cannot be revealed/played until the game starts.
[21.26] Roman Deployment
-
The VII, VIII, IX, XI, XII, XIII, and XIV full-strength Legions (of which the XI, XII, XIII, and XIV are Caesar-raised), three (3) Auxiliary units, all three named Garrison units, and two (2) unnamed Garrison units can be placed in any Fortified City, Town, or Port in any Roman-subjugated territory or Gallia Transalpina. The named Garrison units must be placed where their name indicates. The Roman player also receives 64 Grain Points to distribute as he wishes, plus Caesar, Labienus, Crassus, Brutus, and Sabinus to be deployed as desired, but not in Rome.
-
The territory each Roman unit is placed in must be within a Garrison Zone.
[21.27] Caesar cannot attempt to raise any new units during 56 B.C. Again, this does not restrict use of the SPQR Table.
[21.28] Length of Scenario
The scenario last 18 turns, starting in March, 56 B.C., and ending at the conclusion of the Winter turn, 54 B.C.
[21.29] Victory Conditions
The Roman player can do no better than a Roman Marginal, regardless of his VP total, unless he has subjugated all three Briton Tribes. The Gallic player wins an automatic Marginal Victory if the Romans do not invade Britannia with at least two full-strength Legions.
| VP's Earned | Result |
|---|---|
| 7 or more | Roman Decisive |
| 5 or 6 | Roman Substantive |
| 4 | Roman Marginal |
| 3 | Draw (The historical outcome) |
| 2 | Gallic Marginal |
| 1 | Gallic Substantive |
| 0 or less | Gallic Decisive |
[21.3] SCENARIO III: Vercingetorix and the Great Revolt
This scenario simulates the "highlight" of Caesar's Gallic Wars, the tremendous revolt of the Gallic Tribes under Vercingetorix, chief of the Arverni. The set-up sequence must be followed in exact order.
[21.31] The Combined Helvetian and German Tribe cards and counters are removed from play. The German Tribes have been permanently subjugated and cannot revolt. The Roman player automatically receives 5 Campaign Points per year for this.
[21.32] All remaining Tribal counters are placed Inactive in their home base hexes. The Gallic player now removes both Druid cards and takes them for his hand.
[21.32] Roman-allied Tribes The Roman player must select any number of Tribes whose total Campaign Point value is three (3). These are now allied to Rome and Active. Their cards are given to the Roman Player as part of his hand, face-up/revealed.
[21.33] Roman-subjugated Tribes
-
Randomly choose any one Briton Tribe as Roman-subjugated.
-
The Roman player takes the Morini, Eburones, and Treveri as subjugated. He then selects additional Gallic Tribes, other than the Arverni, whose Campaign Point value is exactly 39 points. Remember the need for Garrison Zones.
-
Remove the cards of the subjugated Tribes from the deck and blindly choose four (4) and return them to the main deck, which is shuffled. The remaining subjugated cards are placed in the Roman Subjugated Cards Box with the German Tribes card. The counters from the subjugated Tribes (but not the Germans) are placed in the Subjugated/Available Box.
[21.34] Additional Roman Cards
The Roman player can now draw additional cards from the deck to bring his hand up to a maximum of five (5). These new cards must be unrevealed and cannot be played until the game starts.
[21.35] Gallic Deployment
-
The Gallic player activates the Arverni, placing Vercingetorix in its hex. (Vercassivellaunus is unavailable this scenario.) The card is face-up, revealed, but part of his hand.
-
The Gallic player rolls one die and adds "3" to the number, giving a total of 4 to 9. He can take up to that many cards from the top of the remaining main deck.
-
The Gallic player can now activate any Tribes chosen in Step 2 above. The activated Tribes receive Grain Points equivalent to their territorial Grain Rating (without stripping the territory).
[21.36] Roman Deployment
-
The V and VI Legions (both recruit/reduced-strength and Caesar-raised) plus 6 Grain Points, with Caesar, in Aquae Sextiae.
-
The I, VII, VIII, IX, X, XI, XII, XIII, XIV, and XV full-strength Legions (the XI, XII, XIII, and XIV are Caesar-raised), 3 Auxiliary units, the 3 unnamed Garrison units, 34 Grain Points, plus 4 Leaders (see 21.37) are distributed among and placed in any Fortified City, Town, or Port in Gallia Transalpina, Volcae, or any Roman-subjugated territory. (Remember, the latter must be within a Garrison Zone.)
-
The 3 named Garrison units are placed as indicated.
[21.37] Dead Leaders
-
Ariovistus and Vercassivellaunus are dead and out of play. All other Gallic Leaders except Vercingetorix are placed in a cup. The Gallic player randomly chooses two more Leaders, who are also dead.
-
The Roman player now places all his Leaders except Caesar and Labienus in the cup, removing one as dead.
[21.38] Special Rules
-
The scenario lasts only one year: 52 B.C.
-
The Gallic player always goes first; there is no Initiative roll.
-
Caesar cannot raise any additional units, although the SPQR Table is available.
-
Important note: In the March turn, at some time in his turn, the Gallic player must play both Druid cards and initiate a Massive Revolt with Vercingetorix.
-
If a Massive Revolt occurs when Vercingetorix is besieged (13.47), the Gallic player takes all subjugated but unavailable Tribes, and randomly selects half of these (round up). These Tribes now become available for revolt.
-
The Roman player does not deduct Penalty Points for Active Gallic-allied Tribes in this scenario.
[21.39] Victory Conditions
Roman Victory:
-
The Roman player wins a Decisive Victory if Vercingetorix is killed and the Roman player earns at least 3 Victory Points.
-
The Roman player wins a Substantive Victory if Vercingetorix is killed and he earns 2 VP's. (This was the historical outcome.)
-
The Roman player wins a Marginal Victory if he earns 1 VP or more and the Gallic players have 12 or less Active Tribes at the end of the game.
Gallic Victory:
-
The Gallic player wins a Decisive Victory if the Roman player has a negative VP total at the end of the game.
-
The Gallic player wins a Substantive Victory if the Roman player has a zero VP total at the end of the game.
-
The Gallic player wins a Marginal Victory if the Roman VP total is 1 and he has more than 12 active Gallic-allied Tribes.
The Gallic player can win only if the Roman Player fails to achieve any of his listed conditions. If neither side attains their Victory Conditions, the scenario is a Draw.
Remember, the Roman player does not deduct Penalty Points for Active Gallic-allied Tribes in this scenario.
[21.4] SCENARIO IV: The Campaign Game, The Conquest of Gaul
This scenario covers the entire Gallic War and uses all rules not specifically excluded below. Even proficient players will find that the Campaign Game takes at least 15 hours to complete.
[21.41] Length of Scenario
The game begins in the March turn, 58 B.C. and ends with the conclusion of the Winter Turn, 50 B.C.
[21.42] Initial Distribution and Deployment
The following sections from the first scenario are used: 21.11, 21.12, 21.13, 21.14, 21.15 (but see 21.43), and 21.16.
[21.43] The German Tribe Option
Players can use the original method of deploying the Germans, as per 21.15, as this is the more historical method. However, if both players so desire, they can ignore 21.15, put the German card in the deck, and treat it as any other Tribe. The latter is less historical, but adds an interesting random element.
[21.44] Victory Conditions
| Total VP's | Result |
|---|---|
| 30+ | Roman Complete Victory |
| 25-29 | Roman Substantive Victory |
| 20-24 | Roman Marginal Victory |
| 18-19 | Draw |
| 10-17 | Gallic Marginal Victory |
| 3-9 | Gallic Substantive Victory |
| Less than 3 | Complete Gallic Victory |
Summary of Unit Types
Insert 3.31. The following is a reference diagram of the counters and cards, reproduced here as a list of their printed labels.
- Roman Legion (front and back): Legion designation (e.g., "XI") and Combat Strength (e.g., 2 on the front; 1 on the reduced back). Unit symbol: eagle.
- Tribe (Active and Inactive faces): Tribe name (e.g., MEDIOTRICI), Combat Strength (e.g., 1), and Home Base Hex (e.g., 2811). The Inactive face is marked INACTIVE.
- Roman Leader (e.g., LABIENUS): Combat Rating (e.g., +2) and Siege Capability (Caesar only).
- Tribe Leader (e.g., BODUOGNATUS): Combat Rating (e.g., +1/1-2) and Revolt Rating, with home base hex.
- Roman Auxiliary: Combat Strength (1), symbol (Slinger), marked ROMAN AUX.
- Markers: Bridge Marker; Stripped (Depleted) Marker (STRP); Roman Control Marker (RC); Siege Marker (SIEGE); Siege Depletion Marker (SIEGE DPLT); Victory Point Marker (VP x10); Rapid (Forced) March Marker (FM); Disruption Marker (D); Grain Marker (10 Grain Points); Retreat Marker (RETREAT).
- Sample Card: Tribal name (Senones), Campaign Point value (1), Combat Strength (2), Grain Point value (4), Leader (Acco), Capital (Vellaunodunum), Home Base Hex (2013). Card number 52.
- Sample Special Card: DRUID (card number 57). The Roman Player may: draw the top card from the Tribal Deck; examine and return any 3 Gallic cards; or randomly draw 1 Gallic card. The Gallic Player may: draw the top card from the Tribal Deck; examine and return all Roman cards; randomly draw 2 Roman cards; or start a Minor Revolt (15.1). If he has both Druid cards, start a Major Revolt (15.2) or a Massive Revolt (15.3). ONCE PLAYED, THIS CARD IS NOT RETURNED TO THE DECK UNTIL THE END OF THE CAMPAIGN YEAR.
Charts and Tables
The charts below are printed on page 24 of the original rulebook. Each is referenced by its rule number in the text above (marked "pgs. 23-24").
[10.25] SIEGE RESULTS — Siege Resolution Table
- Nothing Happens. Players can continue the siege next turn, if capable.
- A — Attrition. The siege is unsuccessful, but the Defender must roll a six-sided die for grain expenditure, see 10.32.
- S — Success. All units inside the City are eliminated (and subjugated, if Tribes). All defeated Leaders risk death (see 13.5). One-half of any grain remaining in the City is captured (round down), the rest lost. The victorious player must immediately enter the City with at least one unit.
[11.17] GRAIN EXPENDITURE TABLE
| Type of Unit | Grain Point cost (per turn) |
|---|---|
| Tribe (any strength) | 1 point per Tribe |
| Combined Helvetians (See 16.23) | 2 points |
| Germans (See 16.12) | 3 points |
| One reduced-strength Legion or Auxiliary | 0 points |
| For every two Roman strength points in hex (round fractions down) | 1 point |
See 12.3 for effects of Winter.
[20.2] CAMPAIGN POINTS
| Points Won | Event |
|---|---|
| +50** | Vercingetorix is killed. |
| +20** | Ariovistus (German) is killed by a Roman or Roman-allied force. (In the year this is awarded the Roman player does not get points for subjugating the Germans.) |
| +20** | Britannia is completely subjugated. |
| +10 | The German Tribes are subjugated by the Roman by a battle taking place in Germania (see 16.14). |
| +3** | Romans cross Rhine into non-allied Germania with Caesar present. |
| +1 | For each Fortified City (excluding Aquae Sextiae) occupied by Roman combat units (not solely allied Tribes), even if under siege. |
| +?? | The Campaign Point value of each Roman-subjugated Tribe that is within a Roman Garrison Zone (20.4). |
| +?? | The Campaign Point value of each Active, Roman-allied Tribe (but not Tribes subjugated to those Tribes). |
** This can be awarded only once per game.
[20.3] PENALTY POINTS
| Points Lost | Event |
|---|---|
| -? | In Campaign Years 56, 55, and 54 B.C. only, one half of the total Campaign Point value of all Gallic-allied Tribes (rounded up). |
| -? | For the Campaign Scenario only, for Campaign Years 53, 52, 51, and 50 B.C. only, the total Campaign Point value of all Gallic-allied Tribes. |
| -6 | Rome invades Britannia but fails to subjugate at least one Britain Tribe that does not flee north. |
| -5 | Each Caesar-raised Legion above six anywhere in play. |
| -5 | Failure to withdraw a Caesar-raised legion (14.26). |
| -1 | Each penalty turn Caesar spends in Rome (14.25). |
| -3 | Each Caesar-raised Legion eliminated, by any means. |
| -2 | Each Senate-raised Legion eliminated, by any means. |
| -1 | Each Roman combat point lost, by any means. This is in addition to the Legion losses above and includes the strength of the lost Legions. |
| -2 |
[13.47] VERCINGETORIX BESIEGED TABLE
| Die | Result |
|---|---|
| 1, 2 | Remove one grain point from the besieged Gauls |
| 3, 4, 5 | Nothing happens |
| 6 | Major Revolt! (see 15.2) |
[13.48] VERCINGETORIX AVAILABILITY TABLE
| Year | Vercingetorix Available |
|---|---|
| 54 B.C. | 1 |
| 53 B.C. | 1-3 |
| 52 B.C. | 1-5 |
| 51 B.C. | Automatically enters |
[17.42] AUXILIARY PLACEMENT TABLE
| Die Roll | Placement of Auxiliary |
|---|---|
| 1 | Any Gallic Tribal territory hex occupied by at least one Roman unit and not under siege which can trace a line of communication (17.22). |
| 2 | Aquae Sextiae |
| 3 | Massilia |
| 4 | Narbo |
| 5-6 | Rome |
[17.7] LEGION RAISING TABLE
| Die | Legions Raised | Auxiliaries Raised |
|---|---|---|
| 1 | 0 | 0 |
| 2 | 0 | 0 |
| 3 | 1 | 0 |
| 4 | 1 | 1 |
| 5 | 2 | 0 |
| 6 | 2 | 1 |
| 7 | 3 | 0 |
If Caesar is in Rome add one to the die roll.
[21.15] GERMAN ARRIVAL TABLE
| Game Turn | Die Roll Required for Activation |
|---|---|
| June | 1 |
| July | 1-2 |
| August | 1-3 |
| September | 1-2 |
| October | 1 |