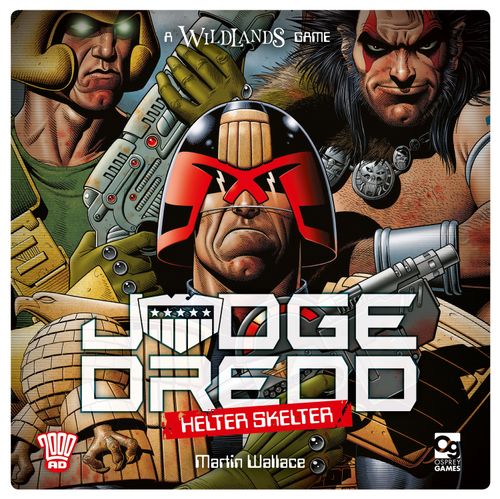
Judge Dredd: Helter Skelter
Judge Dredd: Helter Skelter Rulebook
Table of Contents
Table of Contents
Components
- 65 Health Cubes — The cubes that track your characters' health. If your characters run out of cubes, they die.
- 5 Warp Cubes — The cubes that track Sláine's warp-spasm ability.
- 20 Character Bases (5 per team) — The bases that help keep track of your team.
- 20 Character Figures (5 per team) — The characters in your team.
- 20 Character Cards (5 per team) — The cards that keep track of your characters: character symbol, name, starting health, and special ability. When a character is killed, you flip them over to their dead side.
- 120 Action Cards (30 per team) — The cards that let your characters take actions: character symbol, linked action symbol, and wild action symbol (not linked to a character symbol).
- 4 Team Cards (1 per team) — The card that summarises your team's stats and rules. The front tells you how often each action symbol appears in your deck. The back explains your team's special rules in more detail.
- 4 Reference Cards (1 per team) — The card that reminds you of the rules. The front shows you which defences work against which attacks. The back reminds you of the turn structure.
- 40 Map Cards — The cards that tell you where your characters and fragments start on the map. Each card shows a designation and a multiplayer symbol.
- 20 Fragments of Reality (5 per team) — The discs that you need to find to win the game.
The Map
When the worlds bled together, Mega-City One became a battlefield. Riots broke out everywhere and chaos ruled. Two of those places are the GRAND HALL OF JUSTICE and CITY BLOCKS DAN TANNA AND ENID BLYTON.
The Grand Hall of Justice. Once the seat of ultimate power, the Department of Justice has been stretched too thinly to defend even its own headquarters. A few balconies offer vantage points along the edges of the main plaza, but the main floor makes for dangerous crossing.
City Blocks Dan Tanna and Enid Blyton. City blocks Dan Tanna and Enid Blyton have always been connected, but the city-wide carnage has brought them even closer together. The rooftop of Dan Tanna block offers a good amount of cover, while the rooms of Enid Blyton block ensure fighting is up-close and personal.
Spaces
Both maps are divided into forty different spaces. Each space has a designation and is surrounded entirely by borders, walls, and falls.
The designation is the numbered circle on the space. When you set up the game, you'll choose the spaces your team starts on by secretly assigning them map cards. The designation on the map card will match the designation on the map.
The border is the white line surrounding the edges of the space. If two spaces share a border, they are adjacent and you can usually move between them.
Walls and falls are covered in their own sections below.
Walls
Some spaces are separated by walls. Walls are marked with a yellow outline. You cannot move through walls, and walls block line of sight. Spaces separated by walls are not considered adjacent.
Cover
Some spaces provide cover. Cover spaces have their number in a black circle. If you are in cover, you are able to use the COVER defence against SNIPE and SHOTGUN attacks. You cannot use the COVER defence if you're not in cover. Cover spaces also affect line of sight. Cover spaces block all line of sight, except from high-ground spaces.
Falls
On the CITY BLOCKS DAN TANNA AND ENID BLYTON map, there are some falls. Falls are marked with a magenta outline. You cannot move onto falls. When you calculate your range for the SHOTGUN action, falls count as a space. Characters taking the FLY action can move onto a fall as if it were a space, but they cannot end their move there. Falls do not block line of sight.
High Ground
On the GRAND HALL OF JUSTICE map, some spaces are on high ground. High-ground spaces have a double white line, with arrows pointing towards the high-ground space.
Moving to a high-ground space from a space that isn't on high ground takes extra effort. You'll need to take the CLIMB action rather than the MOVE action, which costs more cards.
High ground also affects line of sight:
- If you're not on high ground, you can't see someone on a high-ground space, and high-ground spaces block line of sight.
- If you're on high ground, cover spaces don't block line of sight. Also, if you are attacking someone on normal ground, other high ground spaces block line of sight.
Line of Sight
When you take a SNIPE, SHOTGUN, or PSI action, you'll need a line of sight to the target character.
The space occupied by your character is the source, and the space occupied by the character you're attacking is the target. Trace a line between the designations of the source and the target. You'll have line of sight unless the traced line passes through something that blocks it.
This table outlines the elements that block line of sight:
| Source \ Target | High-ground | Normal ground |
|---|---|---|
| High ground | Walls block line of sight | Walls block line of sight; High-ground spaces block line of sight |
| Normal ground | No line of sight | Walls block line of sight; High-ground spaces block line of sight; Cover spaces block line of sight (don't count source or target) |
You always have line of sight to the space you are in.
The Teams
The Judges
The Judges are the Law in Mega-City One, the last bastion of order in a world gone mad. The Judges are fierce fighters who excel when working closely together, but they are more than capable on their own.
- Judge Giant is a steadfast soldier and a fierce warrior, wielding his shotgun to deadly effect.
- Judge Anderson's psi abilities weaken her opponents, leaving her foes vulnerable.
- Chief Judge Hershey is a savvy strategist, excellent at manoeuvring herself and her team to deadly effect.
- Judge Dredd is a force of nature, firing high-explosive rounds to destroy his foes.
- Mean Machine has been drafted to join the Judges in the chaos, and his extreme capacity for violence is a welcome addition to the team.
HI-EX. Chief Judge Hershey, Judge Anderson, and Judge Dredd all have high-explosive ammo. Whenever they take the SNIPE action, after selecting a defender they may choose to make all other characters on the same space defenders too. This must include any friendly characters. All defenders decide individually whether to make a DEFLECT, PRECOG, or COVER defence or take 1 damage as normal.
The Strontium Dogs
The Search/Destroy agents, better known as the Strontium Dogs, are space-travelling bounty hunters and mutants warped by the fallout from the Atomic War. The Strontium Dogs rely on their ranged capabilities, but they aren't afraid to get up-close and personal.
- Middenface McNulty is a seasoned warrior, well-equipped and hard-headed.
- Durham Red is a powerful mutant with vampiric abilities, and a lethal up-close combatant.
- Johnny Alpha, their leader, combines the supernatural abilities of his eyes with excellent gunmanship.
- Wulf Sternhammer is a brawler through and through, and goes toe-to-toe with the strongest of them.
- The Gronk is a timid soul and not much for combat, but it's always on hand to heal its friends.
VAMPIRISM. Durham Red's vampirism lets her extract the life force from her foes. Whenever an enemy character takes damage from a MELEE action that Durham takes, Durham may return a health cube to her character card. She can never have more than three health cubes.
Nikolai Dante
Nikolai Dante and his allies are well versed in war and chaos, hardened in the battles between the Makarovs and the Romanovs. They rely on their speed to get close to their foes quickly, trading range for melee prowess.
- Viktor Romanov is a solitary warrior, with his power to transform into an eagle granting him great mobility and strength.
- Tsarina Jena Makarov is a born leader, commanding her allies on the battlefield with natural ease.
- Nikolai Dante is an expert with his sword and his rifle, the courageous leader of his team.
- Elena Kurakin, Nikolai's bodyguard, promises a swift and violent end to anybody who threatens him.
- Lulu Romanov has the power to create swarms of demons to overpower her foes, extending her reach.
DEMONS. Lulu Romanov can harness demonic forces to attack further than her own reach with vicious power. When she takes a MELEE or SMASH action, she may choose an enemy character on an adjacent space to be the defender. She can still choose an enemy on her own space.
Sláine Mac Roth
Sláine MacRoth leads a small group of his closest: his wife and son, and his chronicler Ukko. Outnumbered and outgunned, they rely on brute force and cunning play to reach victory.
- Ukko is a cunning and stealthy dwarf, who causes a lot of damage when he gets up-close.
- Sláine Mac Roth wields his massive axe Brainbiter, demolishing his foes, and is capable of transforming into a berserking hulk.
- Niamh is a vicious and strong-willed fury across the battlefield, unmatched for speed.
- Kai is trained in the druidic arts, and is able to wield his magic for rejuvenation or destruction.
SETUP. When playing as Sláine, find the Warp-Sláine character card and figure and put them aside. Through Sláine's warp-spasm ability, you may replace his card and figure with that of Warp-Sláine.
WARP-SPASM. Sláine Mac Roth has the power to warp-spasm in the heat of battle, transforming himself into a hulking bastion of destruction. Whenever an enemy character takes damage from a MELEE or SMASH action Sláine takes, place a warp cube on his character card for each damage taken. Whenever there are as many (or more) warp cubes as health cubes on Sláine's character card, immediately replace the Sláine character card and figure with those of Warp-Sláine. Warp-Sláine enters play with the same health as Sláine left with.
BERSERK. Warp-Sláine is a violent behemoth with little regard for his own defence. Warp-Sláine can use wild or linked MELEE symbols to take the SMASH action. Warp-Sláine may never make the BLOCK defence.
STEALTH. Ukko is light of foot and finger, and adept at going unnoticed. At the start of the game, assign two map cards to Ukko instead of one. When you deploy him, place him on the space designated by one of the cards. Remove both map cards from the game.
How to Play
Prep
If this is your first game, you'll need to clip a set of bases onto each team – attach them to the team of the matching colour. You can keep the bases attached between games. We recommend you play with the CITY BLOCKS DAN TANNA AND ENID BLYTON map.
Setup
- Choose which map to play on and place it in the middle of the table.
- Each player chooses a team. Take the character, action, and team cards for that team. Also take a reference card, your team's figures, and the fragments of reality of the same colour.
- Place the character cards face up in front of you so that the background matches up.
- Place the figures on the matching character cards.
- Place as many health cubes on each character card as needed to match their starting health.
- Place your team and reference card near you and shuffle your action cards into a face down deck in front of you.
- If you're playing with two players, find and remove all map cards with the multiplayer symbol.
- Shuffle all the remaining map cards and deal ten to each player.
- Secretly place a map card face down below each of your character cards. These will determine their starting locations.
- Once all players have chosen a starting location for their characters, pass your five remaining map cards to the player on your right.
- Place your fragments on the spaces designated on the map cards handed to you by the player on your left. Then remove those map cards from the game.
- Draw seven cards from your action card deck into your hand.
- The player whose fragment is on the space with the lowest number starts the game and takes the active player marker.
PLAYING AS SLÁINE. When you play as Sláine, put aside the Warp-Sláine character card and matching figure. Take the five warp cubes and place them near your character cards. When you activate Sláine Mac Roth's warp-spasm ability, you'll remove both his character card and figure and replace them with Warp-Sláine.
On Your Turn
When you take your turn, follow these steps in order:
1. Deploy a character. If all your characters are deployed, skip this step. To deploy a character, reveal the map card underneath that character card. Place the figure on the space with the same designation. Remove that map card from the game.
2. Deploy a character or take an action (repeat any number of times). To deploy a character, follow the instructions under step 1. To take an action, choose a standard or combat action and discard the card(s) required. Then perform the action. All the actions are described later in this rulebook. Always take one action at a time. You may take this step any number of times, or not at all. You may deploy and take actions in any order.
3. Declare end of turn. Declare that you wish to end your turn.
4. Draw cards and pass active player marker to your left. Draw three cards from your action card deck. You can have up to seven cards in your hand. If drawing three cards would mean you had more than seven cards, stop drawing once you reach seven. If at any point your deck runs out, shuffle your discard pile into a new deck. Pass the active player marker to the player on your left. They now take their turn.
Damage and Death
Through combat actions, characters will take damage. When a character takes damage, remove as many health cubes from their character card as the damage shown. When the last cube has been removed from a character, they have been killed – flip the character card face down.
If you take a combat action that kills another team's character, take the figure and place it in front of you as a point. You do not earn points for killing your own characters. If you kill your own character, remove it from the game.
Game End
Each enemy character you kill is worth one point. Each fragment of reality you collect is worth one point.
If you reach five points, you win. The other players don't get to take any more turns.
If all your characters are killed, you are eliminated and the remaining player with the most points wins. If it is a tie, the remaining players keep playing until one player has the most points.
Actions and Defences
To take an action, choose a standard or combat action from the following list and pay the card cost required.
For standard actions, you'll need to discard one or more cards with the character symbol of the character taking the action.
For combat actions, you'll need to discard a card with the appropriate action symbol. The symbol needs to be either wild or linked to the character taking the action.
Certain combat actions will trigger an opportunity for players to make a defence. To do so, players must discard the card with the appropriate action symbol, just as when taking a combat action (so it must be wild or linked to the defending character).
An action is only complete when all outcomes (figures moved, defences made, and damage taken) have been performed in full.
Watch out! When you discard a card to take an action or make a defence, you forfeit the chance to do anything else with that card.
Reading Action Cards
Action cards carry three kinds of symbols:
- Standard Action symbol — shows character symbols for the characters that can pay this card's cost. For example, a card showing symbols for Judge Dredd and Mean Machine can be spent as part of the cost for a standard action with either of these two characters.
- Linked Action symbol — an action symbol linked to a specific character. For example, a symbol linked to Judge Dredd means only he can use it to take the SNIPE action.
- Wild Action symbol — an action symbol not attached to a character symbol. Any character can use it to take the MELEE combat action or make the BLOCK defence.
Standard Actions
MOVE. Cost: 1 card with the character symbol. Move the character to an adjacent space (a space that shares a border). If you're not already on a high-ground space, you cannot MOVE to a space on high ground – you'll need to CLIMB. You cannot MOVE through walls or onto falls.
CLIMB. Cost: 2 cards with the character symbol. Move the character to an adjacent high-ground space. If you're moving from high ground, use the MOVE action instead.
COLLECT FRAGMENT. Cost: 3 cards with the character symbol or 3 cards with a dead character symbol. Collect a fragment of your team's colour that is on the same space as the character. Place it in front of you: it is worth one point. If you have a dead character, you can discard three cards with their character symbol to pay the cost. You cannot discard a combination of cards with the character's symbol and cards with a dead character's symbol.
Combat Actions
MELEE. Cost: 1 card with the MELEE symbol (wild or linked). Choose an enemy character on the same space to be the defender. The defender must make a BLOCK defence or take 1 damage. If there are no enemy characters on the same space, you cannot take a MELEE action.
SMASH. Cost: 1 card with the SMASH symbol (wild or linked). Choose an enemy character on the same space to be the defender. The defender must make a BLOCK defence or take 2 damage. If there are no enemy characters on the same space, you cannot take a SMASH action.
SNIPE. Cost: 1 card with the SNIPE symbol (wild or linked). Choose an enemy character in line of sight to be the defender. The defender must make a DEFLECT or PRECOG defence or take 1 damage. If they are on a cover space, they can make a COVER defence instead.
SHOTGUN. Cost: 1 card with the SHOTGUN symbol (linked). Choose an enemy character in line of sight and at most two spaces away to be the defender. The defender must make a DEFLECT or PRECOG defence or take 2 damage. If they are on a cover space, they can make a COVER defence instead.
EXPLODE. Cost: 1 card with the EXPLODE symbol (linked). Choose an adjacent space (or the space you're on) with at least one enemy character. Each character on that space is a defender. You do not need line of sight to the target space, but the space must share a border with your current space. Each defender must make a DEFLECT or PRECOG defence or take 1 damage. It is possible to damage (and kill) your own character with an EXPLODE action. You can make a defence against your own EXPLODE action as normal.
PSI. Cost: 1 card with the PSI symbol (linked). Choose an enemy character in line of sight to be the defender. The defender must discard a card with the defender's character symbol. If they are unable to do so, the defender takes 1 damage.
FLY. Cost: 1 card with the FLY symbol (linked). Move the character up to two spaces. You may move onto high-ground spaces at no additional cost. You may move over falls as if they were a space, but you may not end the FLY action on that space.
RALLY. Cost: 1 card with the RALLY symbol (linked). Choose a character in your team on the same or an adjacent space to be the ally. The character taking the action and the ally may take a MOVE or CLIMB action. You may choose to just move the ally. For each character taking the CLIMB action, you must discard an additional card. The card must have that character's symbol or the RALLY symbol linked to either character. This counts as a single action for the purposes of the INTERRUPT action.
HEAL. Cost: 1 card with the HEAL symbol (linked). Choose a character in your team on the same or an adjacent space to be the ally. You can choose the character taking the action. The ally adds a health cube to their character card. A character can never have more health cubes than their starting health.
INTERRUPT. Cost: 1 card with the INTERRUPT symbol (wild). This action can only be taken out of turn. You can INTERRUPT immediately after another player has:
- completed an action (including any defenders taking damage or making defences), or
- declared end of turn.
You cannot take this action immediately after an INTERRUPT action.
When you INTERRUPT, you take an interrupting turn. During an interrupting turn you may deploy characters and take actions as normal (see step 2 of On Your Turn). You may deploy and take actions as many times as you wish. The active player keeps the active player marker.
When you no longer want to deploy or take actions, declare end of turn. If nobody else announces an INTERRUPT action, play returns to the player with the active player marker. Do not draw any cards from your action deck.
You can also INTERRUPT another player's interrupting turn. The same rules apply: you can only INTERRUPT after they have completed an action (not including an INTERRUPT action) or after they have declared end of turn. When you declare end of turn, play returns to the active player.
After completing an action, always leave some time to allow other players to INTERRUPT. Never take multiple actions at the same time (such as taking three MOVE actions to move three spaces at once). If more than one player wants to INTERRUPT at the same time, the player whose turn is closest takes the action. Only that player discards the card required.
Defences
BLOCK. Cost: 1 card with the MELEE symbol (wild or linked). When this character is the target of a MELEE or SMASH action, make this defence out of turn to avoid all damage from that action.
DEFLECT. Cost: 1 card with the DEFLECT symbol (wild or linked). When this character is the target of a SNIPE, SHOTGUN, or EXPLODE action, make this defence out of turn to avoid all damage from that action.
PRECOG. Cost: 1 card with the PSI symbol (linked). When this character is the target of a SNIPE, SHOTGUN, or EXPLODE action, make this defence out of turn to avoid all damage from that action.
COVER. Cost: 1 card with the COVER symbol (wild or linked). When this character is the target of a SNIPE or SHOTGUN action and is on a cover space, make this defence out of turn to avoid all damage from that action.
Quick Reference Sheet
Standard Actions
- MOVE — Cost: 1 card. Move to an adjacent space.
- CLIMB — Cost: 2 cards. Move to an adjacent high-ground space.
- COLLECT FRAGMENT — Cost: 3 cards with the character symbol OR 3 cards with a dead character symbol. Collect a fragment of your team's colour.
Combat Actions
- MELEE — Cost: 1 card. One enemy on your space: BLOCK or take 1 damage.
- SMASH — Cost: 1 card. One enemy on your space: BLOCK or take 2 damage.
- SNIPE — Cost: 1 card. One enemy in your line of sight: DEFLECT/PRECOG/COVER or take 1 damage.
- SHOTGUN — Cost: 1 card. One enemy in your line of sight and within 2 spaces: DEFLECT/PRECOG/COVER or take 2 damage.
- EXPLODE — Cost: 1 card. Choose a space (same or adjacent): ALL characters DEFLECT/PRECOG or take 1 damage.
- PSI — Cost: 1 card. One enemy in your line of sight: discard a card with character symbol if possible. Otherwise, take 1 damage.
- FLY — Cost: 1 card. Move up to 2 spaces. Move to high ground at no extra cost. Can move over but not stop on falls.
- RALLY — Cost: 1 card. Choose an ally on same or adjacent space: character and ally may each MOVE or CLIMB. For each CLIMB action taken, pay extra card cost (character symbol or linked RALLY symbol).
- HEAL — Cost: 1 card. Choose an ally on same or adjacent space (can be the character taking action): restore 1 health cube.
- INTERRUPT — Cost: 1 card. This action can only be taken out of turn. After another player's action (not INTERRUPT), play to take an interrupting turn. Deploy characters and take actions. When you declare end of turn, play returns to active player (do not draw cards).
Defences
- BLOCK — Cost: 1 card with the MELEE symbol. Play out of turn to avoid all damage from MELEE/SMASH.
- DEFLECT — Cost: 1 card. Play out of turn to avoid all damage from SNIPE/SHOTGUN/EXPLODE.
- PRECOG — Cost: 1 card. Play out of turn to avoid all damage from SNIPE/SHOTGUN/EXPLODE.
- COVER — Cost: 1 card. Play out of turn to avoid all damage from SNIPE/SHOTGUN (only if on a cover space).
Line of Sight
| Source \ Target | High-ground | Normal ground |
|---|---|---|
| High ground | Walls block line of sight | Walls block line of sight; High-ground spaces block line of sight |
| Normal ground | No line of sight | Walls block line of sight; High-ground spaces block line of sight; Cover spaces block line of sight (don't count source or target) |
You always have line of sight to the space you are in.