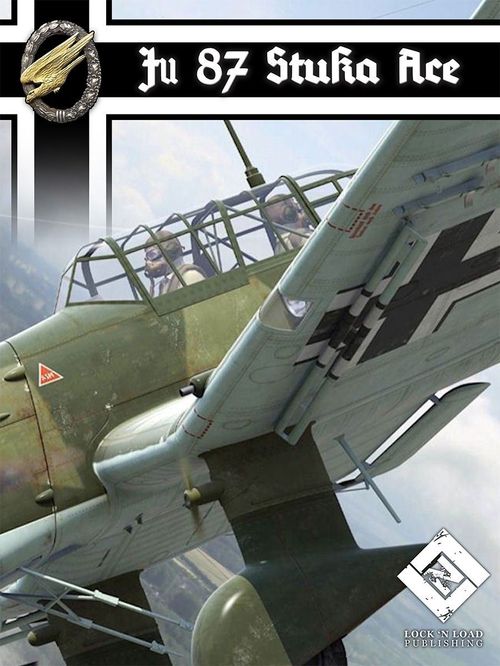
Ju 87 Stuka Ace
Ju 87 Stuka Ace Rulebook
Table of Contents
Table of Contents
- Component List
- [1.0] Introduction
- [2.0] How to play the game
- [3.0] Game components
- [4.0] Actions and Checks
- [5.0] Game Setup
- [6.0] Mission Phase
- [7.0] End Mission Phase
- [8.0] Mission Events
- [9.0] Campaign Game
- [10.0] Night Missions
- [11.0] Optional Rules
- 11.1 Spanish Civil War (optional Campaign Start variant)
- 11.2 Iron Blossom Expedition (Optional Campaign Start variant)
- 11.3 Malta 1942 historical campaign (Optional Campaign Start variant)
- 11.4 The Sevastopol 1942 historical campaign (optional Campaign Theater variant)
- 11.5 The Graf Zeppelin campaign (optional Campaign Theater variant)
- [12.0] Historical Notes
- Game Tutorial (Mission 1 walkthrough)
Component List
- Aircraft Reference Cards x 9
- Game Player Aid Cards x 5
- Counter sheet x 1
- Game Manual x 1
- Theater Manual x 1
- Pilot Player Cards x 2
- Pilot Organization Play Card x 1
- Action Cards x 28
- Altitude Cards x 11
- Flight Cards x 49
- Special Flight Cards x 36
- Objective Cards x 10
- Target Cards x 41
- Munition Cards x 3
Component Breakdown: Aircraft Reference Cards
The Aircraft Reference Card (example: Ju 87 A-1 "Anton", AC-01a) has these areas: Machine Gun Damage Area, Structural Damage Area, Engine Damage Area (three Engine boxes), Tail Area, Bomb Holding Areas (Bombs: Max 500Kg; fuselage 500* / 250; "*Gunner not carried. Apply the 'Gunner Killed' modifiers"), a Maneuver / Engine Power track (Maneuver 0, -1, -2, -3; Engine Power 1, 1), a Pilot wound track (boxes "Light Wound": -1 Hand size; "Serious Wound": -1 Hand Size, -1 ALL CHECKS; # 4-6) and a Gunner wound track (boxes "Wounded": -1 #EVADE, -1 #FIGHTER DAMAGE; "Killed": -3 #EVADE, -2 #FIGHTER DAMAGE; # 1-3).
Special Rules (Ju 87 A-1): The single MG is considered destroyed when you draw the first MG damage counter. Always place the MG damage counter face down (NO #STRAFE).
You will find that some of the aircraft cards have their names in a golden yellow color. These are Gamefound Stretch goals of alternative paint schemes for some of the aircraft. There are no gameplay mechanical differences between the aircraft that have alternative paint schemes but are provided to give the players more choices on how some of their aircraft look.
Component Breakdown: Pilot Organization Play Card
The Pilot Organization Play Card has areas for: Pilot Achievement Counter Area, Altitude Card Deck Area, Target Card Deck Area, Flight Card Deck Area, Flight Card Discard Area, Pilot Player Card Area, Flight Card Approach Area, Flight Card Return Area, Objective Card Area, and two tracks: the Fighter Support track and the Enemy Fighter track (each 3, 3, 2, 2, 1, 1, 0, 0).
Component Breakdown: Counters
Damage Counters (6.9.1): Tail, MG, Cockpit, Engine. Bomb Counter (5.2). Altitude Marker (3.2.5). Skill Counter (9.11.2). Stamina Counter (3.4.2). Target Damage Counter (6.5.3). Tracking Counter. Formation Damage (9.7.4). Cluster Bomb (9.4).
[1.0] Introduction
Stuka Ace is a solitaire game placing you in command of a German Ju 87 dive bomber (aka Stuka) during the Second World War. Your Mission is to destroy as many targets as possible, while advancing your pilot skills and increasing your personal rank and awards.
Examples of play are shown in Red Italics. All Notes will be in Green Italics.
[2.0] How to play the game
Stuka Ace is played as a series of Missions: each Mission is described by a Mission Chart that defines the Mission Objective, the Mission length, the expected enemy presence and the special rules.
Each Mission is composed of three stages:
- Approach to target
- Target
- Return to Base
Some Missions will allow several Sorties to be performed: in this case, after the Return to Base stage, you will undergo a Refuel stage and you will start a new Sortie from stage 1.
During each stage you will draw cards from the Flight Deck (stages 1 and 3) or the Objective Deck (stage 2): each card represents the progression of the Mission (the number of cards required to complete each stage is defined by the Mission Chart). Cards will potentially trigger events and encounters with enemy forces.
Once the Objective is reached (in the Target stage) you will attack it with your bombs or with a strafe attack, depending on the target type (later in the game also with your 37mm Gun). Overall victory level is determined calculating the damage inflicted to the targets.
The key game components designed to facilitate play are the Aircraft Reference Card, used to track the status of your Ju 87, and the Pilot Player Card, used to track the status of your formation. Various Player Aid Cards are used to resolve the different game functions.
[3.0] Game components
3.1 Aircraft Reference Card
The Aircraft Reference Card contains all the information regarding your aircraft including:
- Maneuver value
- Engine Power
- Damage (structural, engine, tail, MG)
- Pilot health
- Gunner health
Several Aircraft Reference Cards are included in the game: you always start with a Ju 87 B-1. During the campaign you will be able to fly the other Stuka models when requested by a specific Mission or when assigned to you by the campaign progression.
3.1.1. Aircraft Damage
Damage on your aircraft is represented by three groups of counters:
- Structural Damage
- Engine Damage
- Tail Damage
Those groups represent the main sections of your aircraft:
- Structural Damage: fuselage and wings
- Engine Damage: the propulsion system (engine, hydraulics)
- Tail Damage: the navigation system (rudder, elevator, flaps)
Several square boxes on the aircraft top view are used to keep track of the structural damage: a special section is used for the engine and a single box on the tail is used to keep track of the tail damage. In addition, one box is used to keep track of the MG on the wings.
At the beginning of each Mission you must create the three damage pools shuffling the counters and placing face down on a pile or in an opaque container/coffee mug: any reference to "Damage" should be read as "Structural Damage".
When you suffer one damage you must draw one counter of the relevant pool: some counters are directly placed on the Aircraft Reference Card while others require an additional step to be completed.
3.2 CARDS
The game includes several types of cards: each card is identified by a code and a number; here below you can find the list of card codes:
- Action: Action Cards
- FC: Flight Cards
- OC: Objective Cards
- TC: Target Cards
- ALT: Altitude Cards
Cards composing the starting Decks are identified by the presence of a red background behind the identifier.
Cards with an identifier on a grey background will be added to the relevant Decks later during the game and can be set apart for your first game.
3.2.1. Action Cards
Action Cards represent the player skills and readiness to fight: you start each Mission with five cards and this number represent the maximum hand size during the game. New Action Cards are only drawn when the instructed by the game so you need to maximize your hand play. The only exception is when you remain with no cards in hand: in this case you can always draw one card from the Action Deck. If the Action Deck is empty, reshuffle all the discarded Action Cards and create a new deck.
Action Points: Each Action Card has a base Action Point (AP) value in the upper right corner (a value from zero to three). Most of the Action Cards have a special AP value when played for a specific action: in this case you use the special value instead of the base AP.
Example: The card (Action-06) has an AP=1 and a #DIVE=2 value. If you play this card for a "#TAKE OFF" action (as an example) you will use the base AP value (one AP), while for a #DIVE action this card will be worth two APs.
Immediate Effects: Some actions include in the lower colored box an immediate effect that is applied when you play the card. Such effects can include drawing Action Cards, gaining Stamina or specific modifiers to an action.
An Action Card can be played for its Immediate Effect at any time during the game: this effect will only apply to the current Action resolution. Action Cards are played to generate AP or for their immediate effect: when played to generate AP, the card effect is ignored.
When you play an action card you must select either:
- use the AP provided by the card
- use the Immediate Effect (if any)
Play Note: The decision on how/when to play a card is one of the most important in the game. Sometimes a card providing less AP can be preferred because of the effect it can provide to the action.
3.2.2. Flight Cards
Flight Cards are used in the Approach and Return to Base stages of the Missions. Two types of Flight Cards are included:
Standard Flight Cards (Red background behind the Component number, FC01 to FC30). Those cards are divided in three sections:
- Upper Section: APPROACH. You can find the event (if any) triggered in the Approach stage.
- Middle Section: RETURN TO BASE. You can find the event (if any) triggered in the Return to Base stage.
- Lower Section: You find here two random values (d6 or d12)
Special Flight Cards (MISSION: heading, FC32 to 37 and FC56-FC79). Those cards are divided in three sections:
- Upper Section: APPROACH and RETURN TO BASE. You can find the event (if any) triggered in the Approach stage and/or in the RETURN TO BASE stage.
- Middle Section: MISSION START. You can find the event (if any) triggered at the beginning of a new Mission.
- Lower Section: You find here two random values (d6 or d12)
At the beginning your very first Mission you create the Flight Deck as follows:
- Take the thirty-seven cards from FC01 to FC37 (easily identified by a red background on the card ID).
- Shuffle those cards together and place the Deck face down to create the Flight Deck.
3.2.3. Target Cards
Target Cards describe the Objective of the Mission, and are mainly used in the Attack Stage of the Mission.
Each target defines a specific profile of bombs to use to gain the maximum effect: you will need to prepare the bomb payload accordingly to maximize your chances of success.
Two tables in the Target Cards define the bomb profile:
- Left table: You can find here listed the models of the main bombs that can be selected to attack this target
- Right table: You can find here the bonus granted when releasing a group of bombs together
Bomb model: The table on the left on the Target Card defines the modifiers for each model of bomb.
Number of bombs released: The table on the right defines the potential modifiers provided by total number of bombs selected.
Only the bombs listed in the left table can be selected as main bomb. If a model is not included in this table, the attack will cause no damage if only this type of bomb is selected. Those bombs can be instead selected to increase the effect of another bomb whose model is instead included in the table.
Example: In the "Merchant Ship" card (TAR 15; Model/DRM #HIT: 1000 = +1, 500 = 0, 250 = -1; Num/DRM #HIT: 3+ = +1), using a 1000 kg bomb is the best option since it provides a +1 modifier, while smaller bombs (250 kg) will generate a -1 modifier. You cannot select only 50 kg bombs against this target since this type of bomb is not present in the left table. Nevertheless, in addition to the main bomb (1000, 500 or 250 kg), a couple of 50 kg bombs can provide the +1 bonus ("3+" row on the right table).
3.2.4. Objective Cards
Three types of Objective Cards are included:
- Searching cards, representing the flight toward the Target. Searching cards will often include an event. (Example: OBJ 01 SEARCHING, AA DEFENSES: Execute one #FLAK)
- Target Reached cards, representing your formation finally reaching the area of the Target. When you draw one of those cards you can immediately start the Attack sequence against the Target. (Example: OBJ 08 TARGET REACHED)
- Enemy Patrol, representing the presence of enemy fighters. (Example: OBJ 09 ENEMY PATROL: If the Enemy Strength is greater or equal than zero, immediately start a Dogfight, otherwise execute one #FLAK)
"Target Reached" cards are shuffled together with the "Searching" and "Enemy Patrol" cards when preparing a Mission to represent the difficulty of precisely locating the target position.
"Enemy Patrol" cards are also added to the Objective Deck by some special rules or events.
3.2.5. Altitude Cards (Visibility)
Altitude Cards are used to keep track of the altitude of the aircraft and the overall visibility due to the weather conditions.
Each card is divided in two sections: in the upper part there are two rows corresponding to the HIGH and LOW altitude, while the bottom part is used to determine the weather changes.
The card title (Clear, Reduced, Poor) represents the overall visibility level.
Altitude represents the current level of your formation: possible altitude levels are:
- High Altitude (about 4000m). The standard altitude of a Stuka formation.
- Low Altitude (about 1500-2000m). Low altitude was required when cloud / fog reduced the overall navigation capabilities of the aircrafts
- Very Low Altitude. Was selected only for low level attacks (mostly with guns).
Altitude is tracked by placing the Altitude marker on the current Altitude Card; place the marker in the HIGH or LOW row to mark your altitude. Very Low Altitude is handled differently: see 9.9.1 for more details.
The current altitude can impact several key actions in the game, especially the DIVE action: the right box on the Altitude Card corresponding to your altitude contains all the modifiers associated to the current altitude.
Example: Current altitude is "Low": when executing a "Dive" action this Altitude will generate a -1 DRM.
Altitude changes are often caused by events triggered by the Flight or Target Cards: changes in altitude in this case are mandatory; see chapter [9.9] for additional details.
The modifiers on the Altitude Card also reflect the current visibility, i.e. the capability of your formation to observe the terrain and spot the presence of enemy fighters.
The Altitude Card title (Clear, Reduced, Poor) represents the overall visibility level: visibility changes only as a result of an event triggered by the Flight or Target Cards. When a "Visibility Worsen" event is triggered, roll one die and consult the #WORSEN table in the current Altitude Card. This will determine the identifier of the new Altitude Card to use. Similarly, when resolving a "Visibility Improves" event, roll one die and consult the #IMPROVE table to determine the identifier of the new Altitude Card. In both cases, take the new Altitude Card (using its identifier) and replace the current one on the table: place the Altitude marker on the same altitude row currently occupied.
If an event on a Flight Cards states "Set visibility to POOR", roll one die: on a result of (1-3) take Altitude Card ALT7 while on a (4-5) take Altitude Card ALT8
3.3 GAME TRACKS
The game uses several groups of boxes to track the status of different metrics (like the aircraft's damage): a group of such a boxes is also called a Track. Tracks will normally start empty at the beginning of a new game, and are filled by placing a marker on the leftmost empty box.
Some tracks are numbered, as the Maneuver track in the example below: in this case the value of the associated metric is always represented by the value in the leftmost empty box.
Example: Maneuver track (boxes: 0, -1, -2, -3; Engine Power: 1, 1) with one box already filled. MAN is now -1
Boxes on a track can have one associated effect that is triggered when the corresponding box is filled: those effects are immediately applied and will remain for the rest of the Mission.
Example: When the first box in the Pilot Wounds track is filled (box effect: -1 Hand size), the hand size is reduced by one card.
3.4 YOUR CHARACTER
Your character is represented in the game by four elements:
- A hand of Action Cards
- The Stamina points
- The Pilot Player Card
- Pilot Skills
3.4.1. Action Cards in Hand
You start each Mission with five cards and this number represent the maximum hand size during the game (during the Campaign game you will have the opportunity to increase this value). Planning the use of your card hand is one of the critical elements of the game since Action Cards are not immediately refilled after playing them.
3.4.2. Stamina points
Stamina represents the physical strength, morale and will to fight of the character. You start each Mission with a 5 Stamina points, represented by Stamina markers placed on your Pilot Player Card.
Stamina points can be spent during the Mission to play additional cards from your hand: see the Check rules (4.0) below for the details on how to use Stamina points.
Stamina is normally recovered only between Missions, or partially between Sorties on the same Missions (representing here the small time to recover between Sorties); only a few events allow you to gain some additional Stamina points, so you must plan very carefully when to use this resource.
3.4.3. Pilot Player Card
The Pilot Player Card includes the special rules and actions associated to your rank and role: in particular this sheet contains the Formation Chart, where you will determine the formation of your aircrafts during the Missions.
Four different sheets are available, corresponding to the four roles you will play during the game.
- Kette Wingman. You flight under the command of a Kette Leader. No formation is included in this sheet.
- Kette Leader. You command a Kette of 3 aircrafts
- Staffel Leader. You command a Staffel with three Kette (9 aircrafts)
- Gruppe Leader. You command a Gruppe, with three Staffeln and one Stab (30 aircrafts)
Example Pilot Player Card (PILOT - 01a), Formation Chart:
| Formation | Modifiers |
|---|---|
| Loose | -1 #DIVE, -1 #EVADE, -1 #NAVIGATION, -2 #FORMATION ATTACK |
| Echelon | +1 #DIVE, -1 #EVADE, -1 #NAVIGATION, +1 #FORMATION ATTACK |
| Tight | -2 #NAVIGATION, +1 #EVADE, -1 #FORMATION ATTACK |
| Dispersed | -2 #EVADE, -1 #DIVE, -1 #NAVIGATION, -3 #FORMATION ATTACK |
- POST TAKE OFF: Set Formation to 'Loose'
- POST ATTACK and DOGFIGHT: Set Formation to 'Dispersed'
- #FORMATION (?) CHECK (?): Success: Change Formation
- #NAVIGATION (?) CHECK (?)
- #FORMATION ATTACK D6: ? Gruppe Efficiency - AA Target - ? #HIT modifier of target - ? Visibility - ? #FORMATION ATTACK. Results: (1) -1 Efficiency. Attack ineffective; (2-3) Attack ineffective; (4) Damaged. -1 Efficiency; (5) Damaged; (6+) Destroyed
- GRUPPE EFFICIENCY track: 3, 3, 2, 2, 1, 1, 0, -1
3.4.4. Pilot Skills
Skills represent the capability of your pilot in dealing with the most critical situations: as you gain experience you will be able to purchase Skills that will be a key mechanic to improve your pilot. At the beginning of a new game you have no Skills.
3.5 RANDOM NUMBERS
Every time you need to generate a random value (d6 or d12) simply draw one Flight Card and consult the lower section to find the corresponding value: d6 results are found in the square box while d12 results are found inside the pentagonal shape. Discard the card after that.
Example. You must "draw a D6"; you draw a Flight Card and look at the d6 value found in the lower section of the card: "4" in this case, then you discard the card.
3.6 THEATER SHEET
The game includes several Theater Sheets, representing the different areas of operations of your pilot during the war.
Each Theater Sheet contains several Mission Charts (rectangular sections) and one "Mission Selection" table. When you need to start a new Mission, you will draw a number and consult the Mission Selection table in order to determine which Mission you must perform.
In addition, the Theater Sheet contains the "Secondary Targets" table to generate secondary Objectives for your Missions and the "Weather Table" to determine the initial Altitude Card.
Example (Theater Sheet "Soviet Union 1", 1941-42): Mission Selection D6: 1 = Mission #1, 2 = Mission #2, 3 = Mission #3, 4 = Mission #4, 5 = Mission #5, 6 = Mission #6. Weather Table D6: 1-2 = WE01, 3 = WE02, 4 = WE03, 5-6 = WE04. Random Target D12: 1-3 Tanks; 4-5 Field Fortifications; 6-7 Troop Convoy; 8-9 Infantry Position; 10-12 Trucks. Secondary Target D12: 1-2 Tanks; 3-4 Trucks; 5 HQ Building; 6-7 Infantry Position; 8-9 Infantry Forces; 10-11 Bridge; 12 Field Fortifications.
3.7 MISSION CHART
Mission details are described on the Mission Charts, included in the Theater Sheet. Mission information includes:
- Length of the Mission (represented by the total number of Flight Cards required).
- Number of Sorties.
- Main Objective the Mission (some Missions can include several Objectives).
- Strength of the supporting Fighters formation.
- Enemy forces (represented by the Enemy Presence and Enemy Strength values).
- Cards to use to create the Objective Deck
Example Mission Chart (Mission #1): Flight Cards: Approach 3, Return to Base 2. Objective Cards: 5 (3 x Searching, 2 x Target Reached). Special Rules: you must draw all the Objective Cards before starting the Return to Base stage. Use the same Main Objective for each Target Reached card. Sorties: 2. Support Fighters: 0. Main Objective: TANKS. Enemy Presence: None.
Each Mission is composed of one or more Sorties. Each Sortie is composed of three stages
- Approach to Target
- Target
- Return to Base
Approach to Target: In this stage you will draw a card from the Mission Deck and apply the events in the upper box (if any). Once you have drawn the number of cards specified by the Mission Chart you can proceed to the Target stage.
Target: In this stage you will draw a card from the Target Deck. If you've drawn the "Target Reached" card proceed with the attack (bombing or strafe) then proceed to the Return to Base stage.
Return to Base: In this stage you will draw a card from the Mission Deck and apply the events in the lower box (if any). Once you have drawn the number of cards specified by the Mission Chart the Sortie is complete.
3.8 FIGHTER SUPPORT AND ENEMY FIGHTERS
The presence of fighter aircraft, both enemy and friendly, is represented by two similar tracks:
- The Enemy Fighters track represents the presence of enemy fighters. The initial value on this track is determined by the Enemy Strength defined by the current Mission: at the beginning of each Dogfight reset this track to the initial value.
- The Fighter Squadron Support track represents the presence of escorting friendly fighters. The initial value on this track is determined by the Support Fighters value defined by the current Mission.
In both cases, the value on the track represents the overall strength of the fighter forces and is used in the Dogfight actions. To setup the initial value, start tracking the values using the highest box available in the track: place a tracking counter so that is positioned on the side of the highest box showing the current value.
Every time you must reduce the Fighter Support, move the counter one box down in the track.
Example: The fighters squadron set with an initial value of "1". (The Fighter Squadron Support track has boxes 3, 2, 1, 0.)
[4.0] Actions and Checks
Actions represent key moments of the Mission, like the take-off sequence or the dive before the bombing. Actions are identified by a hash sign before their name, always written in capitals (ex. #TAKE OFF).
When you find a reference to an action, search for the corresponding box for the details associated to the action. Action boxes are divided in three section:
- Action Name (topmost)
- Modifiers (if any)
- Action details (bottom), including the action effects
Example Action box: #PULL UP; Modifiers (DRM): +/-? PULL UP Modifier, -? Engine damage, -1 for each AA point; Action Details: CHECK(4+), Failure: #CRASH.
Actions can be resolved in two ways:
- Executing a Check
- Generating a random value.
In both cases, the action details will determine the result of the action.
A complete list of all the Actions is found on the player aid cards PAC 1A and PAC 1B and on the Pilot Player Cards.
4.1 Actions: Checks
Checks are one the most important mechanics of the game since it represents the ability of your pilot to perform a specific maneuver, operation or attack during the game.
The expression CHECK(X+) triggers the need to execute one check: the value between parenthesis represents the difficulty of the action.
To execute a Check, proceed as follows:
- Select one Action Card from your hand: the AP of the card will provide the base modifier for the check.
- Draw a Random d6 value.
- Apply all the relevant modifiers (see the Action box) to the random value, including the AP of the selected card.
- If the final value is greater than or equal to the Check difficulty "X" the check is successful otherwise you failed it.
- Apply the success / failure effects (see the Action box).
STAMINA can be spent during a Check as follows:
- You can spend one STAMINA point to select an additional card from your hand. This is possible only immediately after playing the first card.
- You can spend one STAMINA point to draw the first card from the Action Deck and play it. This is possible both after playing one card from the hand or after drawing the random value.
Both alternatives are optional.
Example: The player is ready to attack his target. The first action is #DIVE (Action box: Modifiers -? Visibility, -? Formation, -? Altitude; CHECK(4+), Failure: -2 to Release). This action requires a successful CHECK(4+), otherwise the player will suffer a -1 DRM on the bomb release. From his hand, the player selects the Action Card Action-06 (base AP 1, #DIVE: 2; "+1 to #MG HIT only for Ju 87 D-5 and Ju 87 D-5N"): this card provides 1 AP as a base value, but is worthy 2 AP for a #DIVE action.
Since the player feels confident, he does not spend STAMINA points to play an additional card. No modifiers apply for Visibility or Formation. One Flight Card is drawn to provide a d6 random value: the result is a '2': adding the 2 AP of the player card the final score is 4, equal to the value requested by the Check and hence the action is successful.
Open Check: A CHECK(*) is executed as a standard check but instead of being successful if you beat a specific value, the action requesting this Check will provide one or more different results depending on the final value (the higher the value the better the result)
Example: During a dogfight, the player needs to perform an #EVADE action, that requires an open Check (Action box #EVADE: -? Gunner, -? MAN, -? Altitude, +/-? Formation, +1 No bomb equipped, -1 No Fighter Squadron Support; CHECK(*): (2 or less) #DAMAGE; (3-5) No effect; (6) Enemy Hit! #FIGHTER DAMAGE. End Combat; (7+) Evasion Successful. End Combat). Controlling the action modifiers, we find that the gunner is Wounded and this provide a -1 DRM; Altitude and MAN do not provide additional DRMs while the "Loose" Formation adds another -1. The best card in hand of the player provides 2 APs: this time the player decide to spend one STAMINA points to play a second card, also providing 2 AP. The total DRM is now -1 -1 +2 +2 = +2. One Flight Card is drawn to generate the d6: the result is '2', modified to 4 by the +2 DRM. Looking at the #EVADE description, we can see that the value '4' falls in the 3-5 range, a "No Effect" result. The player escaped the enemy fire, but the dogfight must continue.
If after the Check you remain with no cards in hand, you can immediately draw one card from the Action Deck (so you will always have at least one card in hand). In any other case you are not allowed to draw replacement cards.
If you've played an Action Card for its Immediate Effect, always remember to apply it!
Note: Action Cards are not immediately replaced after play: planning the play of those cards and maximizing their effect is one of the key elements of the success in the game. In some cases, a card with a lower AP can be preferred for the Immediate Effect it can provide; in other cases, you could decide to keep a strong card (Example: 3 AP) for a later use taking some risk in the current action.
4.2 Action: Random Values
An Action name followed by 'd6' or 'd12' requires the selection of a random value to verify the result:
Example Action box: #TAKE OFF D12 (6.2): (1-11) Nothing; (12) CHECK(4+). Failure: #TAKE OFF DAMAGE.
- Draw a Random value (d6 or d12)
- Apply all the relevant modifiers (see the Action box) to the random value
- Consult the Action box to determine the effect associated to the final result.
Example: A new Mission is just started and the first step is a #TAKE OFF action; this action requires a d12 so a random value is drawn, getting a '7'. Looking in the Action box you can see that this result falls in the (1-11) range, so you've started the Mission without any accident.
[5.0] Game Setup
5.1 SELECT AND PREPARE MISSION
For your first game, select Mission #1 of the Poland 1939 Campaign, otherwise select the next Mission in the campaign (see the Campaign rules).
Objectives Deck. Each Mission will define the composition of the Objective Deck: on the Mission Chart you will find the total number of cards to include and the type of cards to add. Three types of Objective Cards are included: "Searching" cards, representing the flight toward the Target, "Enemy Patrols", representing an heavy presence of enemy fighters and "Target Reached" cards.
Shuffle the "Searching" Objective Cards and draw the number of cards required by the Mission (the "Searching" cards are different and hence you draw them randomly). Add to those cards the required number of "Target Reached" cards (and possibly "Enemy Patrol" cards) and shuffle the cards together to create the Objectives Deck.
Example: If the Missions Objective Cards are listed as 5 (3 x Searching and 2 x Target Reached) then you must draw three random "Searching" Cards and shuffle it with two "Target Reached" cards to form your Objective deck.
Flight Deck. If this is your first Mission take the thirty-seven cards from FC01 to FC37, easily identified by a red background behind the card ID, shuffle them and place them face down in the dedicated area of the Pilot Organization Play Card to create the Flight Deck.
In the following Missions of your campaign, take the thirty standard Flight Cards and the "Reshuffle" card (FC01 to FC31): in the current StG Theatres Table, search for the "Special Flight Cards" column and select the six Special Flight Cards associated to the current year (Special Flight Cards are easily identified by the "MISSION" heading and a colored band on the top). Shuffle the thirity one standard Flight Cards with the six Special Flight Cards together to create the Flight Deck for the next mission.
Mission Target: Take the Target Card(s) specified by the Mission and place it near the Pilot Organization Play Card. If multiple cards are specified in the Mission Chart, shuffle the cards together and place them face down near the Pilot Organization Play Card.
Weather: Roll on the Weather Table found in the Theater Sheet to determine the initial Altitude Card. Place the card on the Table.
5.2 SELECT AIRCRAFT AND PAYLOAD
Take the Ju 87B-1 sheet, unless the selected Mission requires a different aircraft.
Each Stuka is equipped with one main bomb under the fuselage, plus some bombs under the wings; look at the Bombs box of your aircraft for the details about the maximum bomb capacity and the possible distribution.
Example: The Ju 87 B-1 can be equipped with a maximum of 500 kg of bombs. Under the fuselage you can place one 500 or a 250 kg bomb only. Under the wings you can only place 50 kg bombs (two for each wing). Note that if you use a 500 kg bomb on the fuselage you cannot place bombs on the wings. (Bombs box: Max 500Kg; fuselage 500* / 250; *Gunner not carried.)
Select one of the available bombs, depending on the aircraft model and the Target Card (see [3.2.3]), and place the corresponding counter on the Fuselage box. If Wing boxes are available, you can also place one or two bombs under each wing depending on the type's capabilities: both wings must have an identical payload.
Note: The type and number of bombs should be defined on the basis of the Mission's target. Always look at the Target Card to determine the best payload for your Mission. A typical payload for a Ju 87 B-1 was one 250 kg bomb and four 50 kg bombs under the wings.
5.3 PREPARE Pilot Organization Play Card
Take the "Leutnant - Kette Wingman" Pilot Player Card and put it on the dedicated area in the Pilot Organization Play Card.
Take five STAMINA counters and place them on the STAMINA box of the Pilot Player Card (this value can change during the Campaign Game if you increase your max STAMINA).
5.4 PREPARE ACTION DECK
Select Action Cards Action-01 to Action-18 (easily identified by the presence of a red background behind the identifier). Shuffle those cards and then take five cards to create your initial hand (the size of the initial hand will later change with the advancements of your experience).
5.5 PREPARE FIGHTER SUPPORT
Take the Fighter Tracking Counter and set the initial strength of the supporting forces on the Pilot Organization Play Card as defined by the Mission Chart (if any).
[6.0] Mission Phase
Each Mission requires one or more Sorties to be performed; each Sortie includes the following stages:
- TAKE OFF
- APPROACH
- TARGET
- ATTACK
- RETURN TO BASE
- REFUEL
The REFUEL stage is performed only if multiple Sorties are required to complete the Mission. In this case, after the Refuel stage, you can start a new Sortie from the TAKE OFF stage.
6.1 SEQUENCE OF PLAY
Here below you can find a summary of the full sequence of play of a Mission. The following paragraphs will provide the details about each stage.
TAKE OFF
- Draw a Flight Card and check for a "MISSION START" event.
- Execute the event instructions (if any).
- Execute a #TAKE OFF action.
APPROACH
- Draw a Flight Card and check for an "APPROACH" event.
- Execute the event instructions (if any).
- If you have drawn the required number of Flight Cards you can proceed to the TARGET stage, otherwise return to 1.
TARGET
- Draw an Objective Card and check the card type:
- "SEARCHING" card: apply the event instructions (if any)
- "TARGET REACHED" card: proceed with the ATTACK sub stage
- "ENEMY PATROL": immediately start a Dogfight stage (or #FLAK)
- Return to 1.
ATTACK (Bomb, Strafe or Gun)
RETURN TO BASE
- Draw a Flight Card and check for a "RETURN TO BASE" event.
- Execute the event instructions (if any).
- If you've drawn the required number of Flight Cards you can proceed to the REFUEL stage, otherwise return to 1..
REFUEL
- Draw two Cards
- Gain two STAMINA
- Perform a REPAIR
6.2 TAKE OFF
Draw one Flight Card: if it is a Special Flight Card execute the instructions in the "MISSION START" section. You must now execute a #TAKE OFF action. See the Action box for more details.
Once the #TAKE OFF is complete, place the Formation marker on the "HIGH" row of the Altitude Card (unless specified otherwise) and proceed to the APPROACH stage.
6.3 APPROACH
To complete this stage you must draw a number of Flight Cards from the Mission Deck equal to the value specified in the Mission Chart.
Draw one Flight Card and look at the upper box: if an event is included here, execute the instructions on the Event box. Instructions can include
- Checks
- Actions to be performed
- Random/special events
Place the card on the table to track the progression.
If you've drawn the required number of Flight Cards you can proceed to the Target stage, otherwise draw a new Flight Card and execute the instructions in the Event box.
Discard the Flight Cards on the table once you are ready to proceed to the Target stage.
6.4 TARGET
To complete this stage, you must draw cards from the Objective mini-Deck until you draw one "Target Reached" card.
There are three types of Objective Cards:
- "SEARCHING" cards: apply the event described on the card then draw another card.
- "TARGET REACHED" cards: in this case you must immediately proceed with the Attack stage. After the Attack stage move to the Return to Base stage (even if additional cards are still included in the Objective mini-Deck)
- "ENEMY PATROL": immediately start a Dogfight stage. If the Enemy Strength is "none", execute a #FLAK action instead.
Draw the first Objective Card and apply the associated effects: repeat this process until you draw a "TARGET REACHED" card. Unless multiple Targets are requested by the current Mission, discard the Objective Cards once you move to the Attack stage.
6.5 ATTACK
Take the Target Card selected in the Mission Preparation phase. If multiple Target Cards are available randomly draw the first one.
Targets can require two different attack procedures:
- Bombing
- Strafe
Bombing is the standard attack procedure: Targets with no specific indication are attacked with bombs. Target Cards requiring a STRAFE attack have a STRAFE(X) text on them.
Each attack type will require a series of actions: those actions are shown on PAC01A for an easy reference.
Before attacking you can attempt to change formation (see [9.7.1])
6.5.1. Bombing Attack
The Bombing Attack sequence requires the following stages (a diagram shows the dive profile: release heights BASE: +1 to #PULL UP; NEAR: +1 to Release, -1 to #PULL UP; LOWEST: +3 to Release, -3 to #PULL UP; then the PULL-UP and the Target):
- Release height selection. You must select one of the following values: BASE, NEAR or LOWEST. Each value will provide modifiers to the following phases.
- Bomb selection. You must now select the bombs to be released: take the counters from the fuselage/wings and place them on the selected height as a reminder.
- Dive toward the target. Execute a #DIVE action
- AA fire. If the AA on the Target Card is greater than or equal to zero execute an #AA FIRE action
- Bomb release. Execute a #BOMB RELEASE action: if successful you will then execute an #HIT action to determine the damage to the Target
- Pull-up. Execute a #PULL-UP action
Once the attack is complete you can draw a number of Action Cards equal to the Engine Power of your aircraft.
6.5.1.1. Select Release Height
You must select one of the following values for the height of release:
- BASE (about 400m). This height will make it easier to pull-up the aircraft.
- NEAR (about 300m). You gain some more precision on the bomb release at the expense of some difficulties on the pull-up.
- LOWEST (about 250m). The absolute minimum height: you will gain a great benefit on the bomb release but the pull-up will be very difficult.
Game notes: Do not select the LOWEST height in your first Missions. Wait until you have gained enough experience (better Action Cards and/or Skills): only experienced pilots were capable to release their bombs so near the ground.
6.5.1.2. Bomb Selection
You must now select the bombs to be released: look at the Target Card to select one or more bombs in order to maximize your chances to hit the Target. Take the counters from the fuselage/wings and place them on the selected height as a reminder.
Historical note: The image depicts the bomb selector of a Ju 87D-1, as depicted in the aircraft manual.
6.5.1.3. Dive toward the target
Execute a #DIVE action: failing this action will produce a -2 modifier for the bomb release.
6.5.1.4. AA Fire
If the AA on the Target Card is greater than or equal to zero, execute an #AA FIRE action. Effects of the AA include negative modifiers to the bomb release and damage to your aircraft.
A few Target Cards include the text "AA DAMAGE x2": in those cases, if the #AA FIRE generates an #AA DAMAGE action, you must perform this action twice (suffering two Damage counters).
6.5.1.5. Bomb Release
Execute a #BOMB RELEASE action: remember to apply all the modifiers of the previous actions (Dive and AA Fire). The final result of this action will be used to evaluate the effect of the bomb explosion, the higher the better.
6.5.1.6. Bomb Damage
If the #BOMB RELEASE action is successful, you must now check the damage on the Target; execute an #HIT action to determine the result.
The #HIT action is a special case since it uses the final #BOMB RELEASE result to determine the bombing effect: apply to the #BOMB RELEASE result the modifiers found on the Target Card.
There are two type of modifiers on the Target Cards:
- Model of the selected bombs (left table on the Target Card)
- Total number of bombs released (right table on the Target Card)
Bomb model: The table on the left on the Target Card defines the modifiers for each model of bomb. Important: If a model is not included, the attack will cause no damage if only this type of bomb is selected (those bombs can be selected to increase the effect of another bomb whose model is instead included in the table). Add the modifiers for all the selected bombs.
Exception: Ignore a modifier between square parenthesis if other types of bombs have been selected.
Number of bombs released: the Target Card defines the potential modifiers provided by total number of bombs selected. Apply the modifiers on the basis of the bombs you've released.
Example: The player is attacking a "Docked Ship" (TAR 6; AA /; VP 1/4; Model/DRM #HIT: 1000 = +1, 500 and 250 = 0; Num/DRM #HIT: 3+ = +1) and decides to release three bombs, a 500 kg bomb and two 50 kg bombs. Looking at the Target Card, we find that the 500 kg has a modifier of "0" while the 50 kg is not listed (no modifiers associated). Since three bombs have been selected the attack gains an additional +1 (corresponding to the "3+" row in the right table). Note that selecting only 50 kg bombs is not possible against this target since the 50 kg model is not listed on the leftmost table.
6.5.1.7. Pull Up
After releasing the bomb, you now need to execute a #PULL UP action to move back in the clouds. Apply any modifier due to the Release Height and also apply a -1 DRM for each AA point of the Target (Example: a Target with AA=2 will generate a -2 DRM).
Historical note: This stage of the attack was the most dangerous for the pilot since the aircraft was essentially defenseless during the maneuver. Enemy fighters, unable to follow the Ju 87 in their dive, learned to wait to attack the dive bombers in this phase as well. The #PULL UP action summarizes both threats to the aircraft of the player on a single roll.
You can now draw a number of Action Cards equal to the Engine Power of your aircraft.
Next, move the Formation marker back to "HIGH" in the Altitude Card.
Check the Pilot Player Card for the Formation to set at the end of this attack (normally "Loose").
6.5.2. Strafe Attack
Target Cards requiring a STRAFE attack have a STRAFE(X) text on them; the number "X" represents the number of attacks you can perform against the Target.
Each Strafe attack is performed following this sequence:
- Dive toward the target. Execute a #STRAFE DIVE action
- AA fire. If the AA on the Target Card is greater than or equal to zero execute an #AA FIRE action
- Strafe Attack. Execute a #STRAFE action: if successful you will then execute an #MG HIT action to determine the damage to the Target
- Draw one Action Card. You can now repeat the sequence if additional attacks are available. Please note that once a Target has been damaged or destroyed you are not required to execute an additional strafe attack.
6.5.3. Target Damage
If you destroy the Target place a "Target Destroyed" counter on the card as a reminder. If you damage the Target place a "Target Damaged" counter on the card: if multiple Sorties are allowed you will be able to attempt to destroy it on a successive attack.
A damaged Target that is damaged for a second time is considered as Destroyed: flip the Damage marker to the "Target Destroyed" side. Exception: Battleships can only be destroyed with a direct "Destroyed" result: a damaged Battleship that is damaged for a second time is not considered destroyed.
If the main Target of a Mission is destroyed and you have additional Sorties available you must determine a new Secondary Target (see [6.7] for the details).
6.6 RETURN TO BASE
To complete this stage you must draw a number of Flight Cards from the Mission Deck equal to the value specified on the Mission Chart, applying the events in the box labeled "RETURN TO BASE (if any) of each card.
Draw one Flight Card and look at the box labeled "RETURN TO BASE": If an event is included execute the instructions in the Event box.
Place the card on the table to track the progress. If you have not drawn the required number of Flight Cards then draw a new card.
Once you have drawn the required number of Flight Cards you can proceed to the Refuel stage, if this is not the last Sortie of this Mission, otherwise the Mission is completed.
6.7 REFUEL
If the Mission requires multiple Sorties after the Return To Base stage you must complete the Refuel stage:
- Draw two cards (up to the max hand size).
- Recover two Stamina points
- Execute a #REPAIR action
- Discard all the Flight Cards on the table: place the discarded Flight Cards back in the Deck and reshuffled it.
- Discard all the Objective Cards on the table: place the discarded Objective Cards back in the Deck and reshuffled it.
If the Mission Objective has been destroyed, you must now select a Secondary Objective: roll on the "Secondary Target" table in the Theater Sheet to determine the new Target and take the corresponding Target Card. Some Missions include multiple main Targets. In this case you must first select the next Target on the list of the Main Objectives, and only when the all main Targets have been destroyed can you select a Secondary Objective.
You can now select the new payload for your aircraft: take the selected Bomb counters and place them on the payload boxes following the standard rules.
Place a multi-purpose marker on the Mission Chart as a reminder of the number of Sorties executed.
You can now start a new Sortie from the TAKE OFF stage.
6.8 DOGFIGHT
An ENEMY CONTACT event triggers the possibility of an encounter of enemy fighters.
Draw a D6: if the number is equal to or greater than the ENEMY PRESENCE value specified by the Mission Chart an encounter is started and you must start a special DOGFIGHT stage. Exception: the Objective Card "Enemy Patrol", immediately triggers a DOGFIGHT stage, without the need making this check.
6.8.1. Dogfight setup.
- Set the initial strength of the enemy forces in the Enemy Fighters Track as defined by the Mission Chart.
A dogfight is performed in series of rounds: each round is composed by three actions:
- #EVADE
- #FORMATION DOGFIGHT
- #FIGHTER BATTLE
The #EVADE action represents your attempt to escape the fighters with evasive maneuvers and of course with the support of your rear MG. If you obtain an END COMBAT event in the #EVADE action the combat for your aircraft (only) is concluded: skip the #EVADE actions in the next rounds in such a case.
The #FORMATION DOGFIGHT action represents the defensive (evasive) actions of the formation under your command.
If you obtain an "End of Dogfight" event in this action the dogfight will be concluded at the end of the current round.
The #FIGHTER BATTLE action represents the fight between the enemy fighters and the friendly support fighters while you were trying to evade the combat.
Damage to the friendly or enemy fighters is tracked on the respective tracks on the Pilot Organization Play Card: once the marker on the track is removed from the last bottom spot, the corresponding force is considered defeated.
The dogfight is over at the end of a round when one of the following events occurs:
- You obtain an "End of Dogfight" event in the #FORMATION DOGFIGHT action. Exception: If you are playing at "Kette Wingman" rank (only), an "END COMBAT" event in the #EVADE action concludes the dogfight as well.
- The enemy forces are defeated (the tracking counter is removed from the bottom spot of their track)
- Your aircraft crashes due the damage suffered.
Once the dogfight is over, unless your aircraft crashed, you must move back to the previous stage (Approach or Return to Base).
6.9 DAMAGE
6.9.1. Aircraft Damage
Aircraft damage is tracked on three damage sections: Structure, Engine and Tail. Each section is represented on the Aircraft Reference Card by labeled boxes. The MG box is treated as a special case (is not considered part of any section).
At the beginning of each Mission you need to prepare three Damage Pools, corresponding to the three sections, with the relevant Damage counters.
When you suffer one damage you must draw one counter for the relevant pool (any reference to "Damage" should be read as "Structural Damage").
Example: The #AA DAMAGE action produced an "Engine Damage" result. You must draw a Damage counter from the Engine Damage Pool and apply the effect (if any).
Damage counters are normally placed on the corresponding damage section, while a few require an additional step to be completed. Here below you can find a description of the Damage counters.
Counters with no red text are placed on the Aircraft Reference Card in the corresponding section (for example Tail counters "-1 #MAN" and "-1 #ESCAPE", and the plain Structural counter).
MG counter ("-1 #STRAFE" side / "NO #STRAFE" side): The MG Damage counter is placed on the MG box with the "-1 #STRAFE" side up if this box is empty, otherwise discard the counter currently in the MG box and place this face down (NO #STRAFE)
Cockpit counter ("ROLL"): When this counter is drawn you must execute a #COCKPIT action to determine who will be wounded (Gunner or Pilot). Place a marker in the corresponding Wound track then discard the drawn counter.
Engine counter ("DRAW"): If the counter includes a "Draw" text, draw an additional Damage counter from the pool specified and apply the result. Discard the "Draw" counter.
Structural counters showing a number on a black rectangle with a section name (Cockpit 4, Engine 4, MG 5): If the Damage counter includes a number on a black rectangle then you must immediately draw a d6:
- If the result is lower than the value on the counter, place the Damage counter on the structure boxes
- If the result is equal to or greater than the value on the counter, you must allocate the damage to the specified section:
- Cockpit: Execute a #COCKPIT action
- Engine: Draw an Engine damage
- MG: If the MG is already damaged flip the counter on the MG box otherwise place this counter on the MG box.
6.9.2. Pilot and Gunner damage
Keep track of the pilot and gunner damage (wounds) on their respective tracks: most of the boxes in those tracks will trigger modifiers to the actions and/or other effects: always look at those damage tracks before executing an action.
6.9.3. Pilot Death
If the Pilot Wounds tracks is completely filled and you must place an additional point of damage on it the Mission is over: your career and your live end here.
6.9.4. Aircraft Crash
If all the boxes of an aircraft's Damage section are already occupied by a Damage counter (Exception: MG) and you must place an additional counter on this section, your aircraft is considered to be unable to stay in the air. Proceed with a #CRASH action to determine your fate. Keep track of the wounds suffered in this stage (if any) in the Pilot Wound Track.
If you manage to reach your StG, you can now proceed with the End Mission Phase (ignore any remaining Sorties).
[7.0] End Mission Phase
If you are playing a single Mission your performance is simply provided by having destroyed or damaged the target. If you are instead playing a Campaign Game, refer to the Victory Points chapter [9.10].
[8.0] Mission Events
Draw Next Card and Reshuffle. When you draw this card, immediately draw a new Flight Card, apply the effect (if any) and then place the new card apart. Take all the discarded cards, including the "Draw Next Card and Reshuffle" card and shuffle them with the remaining Flight Cards to create a new Deck. The card just placed apart is now considered to be the first discarded card of the Mission Deck.
Enemy Contact. This event triggers the possibility of an encounter with a group of enemy fighters. Draw a d6: if the value is equal to or greater than the ENEMY PRESENCE value specified by the Mission Chart an encounter is started: proceed with a DOGFIGHT stage. Ignore this event if the ENEMY PRESENCE is none.
Flak (Anti-Aircraft fire). Execute the required number of #FLAK actions. Flak attacks can influence your formation, including your aircraft, and the escorting fighters.
Gain one STAMINA. If the current value of your STAMINA is less than the maximum, add one STAMINA point.
Set Low Altitude. Move the Formation marker on the LOW row of the Altitude Card. You cannot change altitude in the current turn.
Visibility Improves / Worsen. Roll on the #IMPROVE or #WORSEN table on the Altitude Card to determine the new Altitude Card to use.
Increase by one the length of the current stage. The number of Flight Cards required to complete the current stage is increased by one.
Opportunity Target. This event represents the sighting of a target of opportunity. If you decide to attack this target take the corresponding Target Card and proceed with a special stage. At the end of this attack, revert back to the current stage (Approach or Return to Base).
STOP reading here. You can now play Mission #1 and Mission #2 of the Poland 1939 Theater. The Campaign Game rules are not required for your first games.
[9.0] Campaign Game
Overview
You start the game as the pilot of a Ju 87B-1; as any other Stuka Ace you are assigned to one of the Sturzkampfgeschwader (St.G), the Lutfwaffe dive bomber wings. The StG Assignment Table will determine which StG you will belong to.
During WW2, StG were assigned to several areas of operations (theaters): the StG Theaters Tables will represent the deployment of the StG, and consequently the areas where you will operate. Each theater will require a variable number of Missions to be completed: after completing those Missions you will move to a new theater, progressing your campaign and flying new models of the Ju 87.
Your campaign will in any case start in Poland in the 1939, during the first phases of the Blitzkrieg.
9.1 CAMPAIGN START
Determine the StG where you have been assigned to by rolling a die and consulting the StG Assignment Table: in the same table you also find the starting year of your career.
Theater assignment
Determine the first theater you've been assigned to by looking at the first row of the StG Theaters Table: each theater is represented by a sheet where you'll find the Mission Charts detailing each possible Mission. Write the name of the theater in the Campaign Log.
Take the Theater Sheet corresponding to the name found in the first row of the StG Theaters Table. The StG Theaters Table also includes:
- The number of Missions required to complete your assignment
- The Ju 87 model assigned to you
- The Special Flight Cards to use when you create the Flight Deck
Example: In the graphic below, the first row of the StG Theaters Table determines your assignment: the year is 1939, the theater is "Poland" and you will be flying a "Ju 87 B-1". To create the Flight Deck you will need to add the cards FC32-FC37 (green background).
| STG 1 - STG THEATRES TABLE: Year | Theater | Number of Missions | Special Flight Cards | Airplane |
|---|---|---|---|---|
| 1939 | Poland | 4+AP | FC32-FC37 EUROPE | Ju 87 B-1 |
Determine the number of Missions required to complete your assignment by drawing an Action Card: add to the AP of the card the value stated in the StG Theaters Table in the "Number of Missions" column; the final number determines value for this campaign. Update the Campaign Log accordingly
Example: In the following Poland Theater, I draw one Action Card and I get 0 AP: the required number of Mission is 4+AP and hence I will need to fly 4 Missions. Since each line in the log has 6 Mission boxes, I fill the two extra boxes on the first line as reminder.
9.2 MISSION SELECTION
Mark the leftmost empty box in the "Missions" column of the Campaign Log to track your advancement. If you have completed all the required Missions (i.e. there are no empty boxes) you need to consult the next row in the StG Theaters Table to determine your new assignment: update the Campaign Log accordingly (see the previous chapter for more details on the Theater Assignment).
On the current Theater Sheet, roll one die on the Mission Selection Table and determine the next Mission. Prepare the Mission using the standard rules (Objective and Flight Cards decks).
If you are Lightly Wounded draw a d6: on a result of three or more you've fully recovered (remove the marker from the Pilot Wound Track).
If you are instead Seriously Wounded, you must skip the next Mission; set your Pilot to "Lightly Wounded" then start again with the selection of a new Mission.
9.2.1. Losing a Mission
In some cases, you will be forced to skip a Mission, for example due to serious wounds of when trying to return to the HQ after a crash in enemy territory.
When instructed to skip a Mission, you still mark one of the boxes in the Campaign Log in the "Mission" column to track your advancement but you don't fly the Mission (you score 0 VP). The Mission still counts for the total number of Missions required to complete your assignment.
9.3 AIRCRAFT SELECTION
You start a new campaign with the Ju 87B-1 aircraft: the StG Theaters Table will specify when/if a different aircraft will be available. Some Missions will require a specific aircraft to be used: in this case you always need to use the required aircraft, regardless your current assigned aircraft.
Example: Some Missions will require the use of the long range Ju 87R Stuka, to cover the distance to the target from the historical starting airport.
In some theaters you will be asked to roll one d6 to determine the aircraft model: roll once at the beginning of the first Mission in the theater. Every time you lose your aircraft due to damage, you must roll again on this table to determine the model assigned to you.
9.4 CLUSTER BOMBS
In addition to the standard bombs, always available in the payload selection, some special cluster bombs could also be available. There are three type of cluster bombs:
- Fragmentation bombs (SD 2)
- Hollow charge bombs (SD 4 HL)
- Incendiary bombs (B 1.3 EZ)
Each bomb is described by one card that contains the following information:
Example cards: AB 250 Cluster Bomb "Splitterbombe SD 2 'Butterfly'" (Anti-personnel, 2kg fragmentation bomb. The AB 250 bomb container was loaded with 114 SD 2 bombs. Availability: d12, 1943: (1-3), 1944: (1-5). Weight: 250kg. Bomb Model: 250. +2 DRM #HIT for the following targets: Infantry Position, Enemy Forces, AA Battery, Gun Emplacement); AB 500 Cluster Bomb "B 1.3 EZ Incendiary" (1.3kg Incendiary bombs. The AB 500 bomb container was loaded with 184 x B1.3 bombs. Availability: d12, 1943: (1-3), 1944: (1-5). Weight: 500kg. Bomb Model: 250. +2 DRM #HIT for the following targets: Infantry Position, Enemy Forces, AA Battery, Gun Emplacement).
Availability: To check if a bomb is available, you must draw one d12 and consult the table corresponding to the current year. If the d12 value falls in the specified range the cluster bombs can be selected for the next Mission.
Weight: The weight of the cluster bombs (required for the total payload).
DRM to #HIT: Each bomb provides a DRM to the #HIT action only for a specific group of targets. The Targets listed in the card are the only ones affected by this DRM.
In the Bomb Damage stage, when using a cluster bomb use the following rules:
- Bomb model: Always consider the "250" row on the Target Card to determine the base modifier for a cluster bomb.
- Number of bombs released: Ignore this modifier when using a cluster bomb.
- Special DRM: Apply the Cluster Bomb DRM only if the current Target is included in the list specified in the Cluster Bomb card.
9.5 STG ORGANIZATION
The basic flying formation of a StG was the Kette (Flight), a group of three aircraft with one Leader and two Wingman.
Three Ketten comprised a Staffel (Squadron).
Three Staffeln, plus a Stab (HQ) flight of three aircraft, comprised a Gruppe (about 30 aircrafts). One to three Gruppe finally composed the StG.
9.6 PILOT RANKS
Your career on the StG will be represented by your current role/rank.
Pilot (Leutnant): Your initial rank as a Wingman on a Kette. You follow the orders of the Kette Leader. (Pilot Player Card PILOT - 02a: #NAVIGATION(?) CHECK (?): Ignore any reference to Formations, including Formation actions.)
Kette Leader (Leutnant): You are now responsible for the Kette operations. (Pilot Player Card PILOT - 01B.)
| Formation | Modifiers |
|---|---|
| Loose | -1 #DIVE, -1 #EVADE, -1 #NAVIGATION, -2 #FORMATION ATTACK |
| Tight | -2 #NAVIGATION, +1 #EVADE, -1 #FORMATION ATTACK |
POST ATTACK: Set Formation to 'Loose'. #FORMATION (?) CHECK (?) Success: Change Formation. #NAVIGATION(?) CHECK (?). #FORMATION ATTACK D6: ? Kette Efficiency - AA Target - ? #HIT modifier of target - ? Visibility - ? #FORMATION ATTACK; results (1) -1 Efficiency. Attack ineffective; (2-3) Attack ineffective; (4) Damaged. -1 Efficiency; (5) Damaged; (6+) Destroyed. KETTE EFFICIENCY track: 3, 2, 1, 0.
Staffel Leader (Oberleutnant); You now have under your command nine aircrafts (three Ketten) (Pilot Player Card PILOT - 02B.)
| Formation | Modifiers |
|---|---|
| Loose | -1 #DIVE, -1 #EVADE, -1 #NAVIGATION, -2 #FORMATION ATTACK |
| Echelon | -1 #EVADE, +1 #DIVE, -1 #NAVIGATION, +1 #FORMATION ATTACK |
| Tight | -2 #NAVIGATION, +1 #EVADE, -1 #FORMATION ATTACK |
POST ATTACK and DOGFIGHT: Set Formation to 'Loose'. #FORMATION (?) CHECK (?) Success: Change Formation. #NAVIGATION(?) CHECK (?). #FORMATION ATTACK D6: ? Staffel Efficiency - AA Target - ? #HIT modifier of target - ? Visibility - ? #FORMATION ATTACK; results (1) -1 Efficiency. Attack ineffective; (2-3) Attack ineffective; (4) Damaged. -1 Efficiency; (5) Damaged; (6+) Destroyed. STAFFEL EFFICIENCY track: 3, 2, 2, 1, 0, -1.
Gruppe Leader (Hauptmann) "Kommandeur"; You now have under your command three Staffeln. (Pilot Player Card with Loose, Echelon, Tight and Dispersed formations as shown in 3.4.3; POST TAKE OFF: Set Formation to 'Loose'; POST ATTACK and DOGFIGHT: Set Formation to 'Dispersed'; GRUPPE EFFICIENCY track: 3, 3, 2, 2, 1, 1, 0, -1.)
Each rank is represented by a different Pilot Player Card: take the Pilot Player Card corresponding to your rank and place it on the table.
The running total of Victory Points you've accumulated will determine when you'll get promoted:
- 10VP: You are promoted to Kette Leader
- 25VP: You are promoted to Staffel Leader (Oberleutnant)
- 40VP: You are promoted to Gruppe Leader (Hauptmann)
9.6.1. Flight Deck
With the progression of your rank you will also need to increase your duties during the Mission: this is reflected in the game with the replacement of some standard Flight Cards with a different version.
Every time you get promoted, remove from the Flight Deck the six cards labeled with a capital letter in the upper right corner (A to F). Add to the Flight Deck the corresponding six cards corresponding to your new rank. Replacement cards are identified by the presence on the bottom of the card of one or more eagles: one eagle = Kette Leader, two eagles = Staffel Leader, three eagles = Gruppe Leader.
Example: Replacement of the "A" card when you get promoted to Kette Leader.
Standard "A" card (FC 3): APPROACH: FORMING UP. The planes must be placed back in formation. CHECK(4+) Failure: -1 STAMINA. RETURN TO BASE: VISIBILITY IMPROVES. Random values 3 (d6) and 10 (d12).
Kette Leader replacement "A" card (FC 38): APPROACH: FORMING UP. The planes must be placed back in formation. #FORMATION CHANGE(4) Failure: Formation set to 'Lose'. RETURN TO BASE: VISIBILITY IMPROVES. Random values 3 (d6) and 10 (d12).
9.7 FORMATIONS
Starting with the Kette Leader role, you will have to take care of the aircraft formation under your command. Ignore any reference to a Formation when playing as a Pilot.
The aircraft are always in one of the following Formations (those are of course abstract representations of the real flight formation; the Formation chart shows Vic, Tight and Loose connected by arrows):
- Vic This is the standard formation during the flight to the target.
- Loose The aircrafts have lost some cohesion: starting an attack is less efficient and defense against the enemy is lower.
- Tight The aircraft are flying in a more compact formation in order to improve defensive fire against enemy fighters. Navigation is more difficult
- Echelon This formation is preferred to start the dive operations.
- Dispersed This is the formation at the end of the attack of a large group of aircraft, totally lacking cohesion.
Each Formation has some impact on the game, expressed as a list of modifiers to the actions: see the Formation Chart on the Pilot Player Card for a reminder of those effects.
Example (Kette Leader): When flying in Tight formation you will have a -2 to #NAVIGATION and +1 #EVADE.
At the beginning of a Mission you are always considered in Vic formation (Exception: As a Gruppe Leader you start a Mission in Loose formation). Place a tracking counter on the Formation chart to keep track of the current Formation.
9.7.1. Changing Formation
Approach, Target and Return to Base. During a Mission, in addition to the actions requested by the Flight or Objective Cards, you can also execute one #FORMATION CHANGE(4) action to change the Formation. If successful, you will be able to change the Formation of the aircraft under your command: update the Formation Chart accordingly.
Dogfight. At the end of each Dogfight round you can execute one #FORMATION CHANGE(5) to attempt changing the Formation: update the Formation Chart accordingly if successful.
Mandatory Changes after Combat. At the end of an Attack or a Dogfight your Formation is normally set to "Loose": check your Pilot Player Card to determine the Formation you must set after those stages.
9.7.2. Formation Chart
The overall efficiency of a Formation is tracked on the Formation Efficiency Track found on Pilot Player Card.
This value represents the offensive capability of the aircraft in the Formation and the level of damage suffered.
The Efficiency value is used during the Attack stage. At the beginning of a new Mission the Efficiency value is always set to the maximum value (3): no marker is placed on the track. When an event requires to "Reduce the Efficiency", place a marker on the leftmost empty box on the track.
Place a Formation Damage counters on the target card to keep as a reminder: this value is independent from the damage that your aircraft is able to inflict, and represents the overall effect of the Formation attack.
9.7.3. Formation in Combat
The Formation is part of the following stages of the game:
- Attack Stage. The Formation will attack the Target (bombing or strafing) in parallel to the player. A simplified procedure will determine the damage inflicted by the Formation.
- Dogfight. The Formation will potentially suffer the effect of the enemy fighters' attack.
In addition, the Formation will suffer the effects of some events triggered by the Flight Cards.
9.7.4. Formation Attack (Bombing, Strafe or Gun)
At the end of the player's attack against the Mission Targets (Primary or Secondary), execute a #FORMATION ATTACK action; Formations will not attack Opportunity Targets.
Possible results of the Formation's attack are:
- Attack Ineffective. No changes
-
- 1 Efficiency. Reduce the Efficiency of the Formation by one.
- Damaged. The Target is Damaged: place a "Formation|Target Damaged" marker on the Target Card. If this marker is already present, flip it to the "Target Destroyed" side.
- Destroyed. The Target is Destroyed: place a "Formation|Target Destroyer" marker on the Target Card
Formations were of course also involved in the attacks on targets of opportunity, but the game only focuses on their role against the targets assigned by the Mission.
9.7.5. Formations in Dogfight
The Dogfight stage is composed of three actions:
- #EVADE
- #FORMATION DOGFIGHT
- #FIGHTER BATTLE
After the #EVADE action, you must now execute a #FORMATION DOGFIGHT to determine the effect of the Enemy Fighters against your Formation. The #FIGHTER BATTLE will then determine the losses on the Fighter Support and enemy squadrons.
9.8 GUN ATTACKS
The Campaign Game introduces a third type of attack, the GUN ATTACK. In order to perform a Gun Attack the aircraft Game to be at Low or Very Low altitude, but only flying at Very Low altitude won't incur negative modifiers on the attack.
Historical Note: Attacks with the BK (Bordkanone) 37mm gun of the Ju 87G required the pilot to attack the target at 100-400m range, flying at very low altitude to gain the right angle of attack.
Target Cards requiring a Gun Attack have a GUN(X) text on them; the number "X" represents the number of attacks you can perform against the Target.
Each Gun Attack is performed following this sequence:
- Select Target Location. Only required against tanks.
- Dive toward the target. Execute a #GUN DIVE action.
- AA fire. If the AA on the Target Card is greater than or equal to zero, execute an #AA FIRE Action.
- Gun Attack. Execute a #GUN FIRE action: if successful you will then execute Action. #GUN HIT action to determine the damage to the target.
- Draw one Action Card.
Repeat the sequence if additional attacks are available. Please note that once a target has been damaged or destroyed you are not required to execute an additional attack; you can of course execute the additional attacks against a damaged target to attempt to destroy it.
9.8.1. Select Target Location
When attacking tanks with the BK 37mm gun you'll have the option to select which area to target:
Example Target Card TAR 20 MEDIUM TANKS 1 (AA 0, VP 1/3, GUN (2)): LOCATION / #GUN FIRE / #GUN HIT: FRONT / SIDE 0 / 0; STERN -2 / +1.
- The Front/Side of tanks is easier to hit but is also more heavily armored (tanks will of course always attempt to present their front to the attacking Stukas).
- The Stern area is more difficult to hit but is less well protected.
The Target Card contains the details of the modifiers to apply to both the #GUN FIRE and #GUN HIT actions. Select the area you want to attack (place a marker on it as a reminder).
You can select a different area each time you perform an attack.
9.8.2. Dive toward the target
Execute a #GUN DIVE action: failing this action will produce a -2 modifier to the #GUN FIRE.
9.8.3. AA Fire
If the AA on the Target Card is greater than or equal to zero, execute an #AA FIRE action. Effects of the AA include negative modifiers to the Gun Attack and damage to your aircraft.
A few Target Cards include the text "AA DAMAGE x2": in those cases, if the #AA FIRE generates an #AA DAMAGE action, you must perform this action twice (suffering two Damage counters).
9.8.4. Gun Attack
Execute a #GUN FIRE action: remember to apply all the modifiers of the previous actions (Gun Dive, AA Fire) and the Target modifiers (tank targets only). The final result of this action will be used to evaluate the effect of the gun attack, the higher the better.
9.8.5. Gun Damage
If the #GUN ATTACK action is successful, you must now check the damage on the target; execute a #GUN HIT action to determine the result.
The #GUN HIT action is a special case since it uses the final #GUN ATTACK result to determine the attack's effect: apply to the #GUN ATTACK result the modifiers found on the Target Card (tank targets only).
9.9 FLIGHT ALTITUDE
The standard altitude for a Mission is "High" (about 4000m): some events can cause your Formation to move to "Low" altitude (2000m); this is a mandatory change and you cannot revert back to High altitude in the current turn.
Once per turn, you can move from "High" to "Low" and vice-versa with a #FORMATION (3+) check.
9.9.1. Very Low Altitude
Very Low altitude represents a height of 400m or less: this was used mainly in the final phase of an attack with the 37mm gun; flying at this altitude was more difficult for a pilot.
Very Low Altitude Card (ALT 10, <500 M): Can be selected only in the Target Phase (i.e. on the Objective Cards). On Night Missions (only) can be selected also for Approach and Return to Base. Modifiers: NO #DIVE, +1 #FLAK, +1 #EVADE, -1 #NAVIGATION, -1 #FORMATION, -1 ENEMY CONTACT, ONE STAMINA/TURN.
When you've reached the Target Phase, you can move from "Low" to "Very Low" and vice-versa with a #FORMATION check.
Take the Very Low Altitude Card and put it on top of the current Altitude Card as a reminder: remove the card when you move back to Low altitude.
When flying at Very Low altitude the following special rules apply:
- You cannot execute a Dive Bomb Attack.
- Each turn, after drawing a Target Card you must lose one STAMINA point.
See the Very Low Altitude Card for the action modifiers.
9.10 VICTORY POINTS
Victory Points (VP) are used as a generic representation of your success and career advancement; at the beginning of a Campaign you have zero VPs: during the campaign you will mainly gain VPs by inflicting damage to the Mission Targets. During the campaign you will have to keep two VP totals:
- The running total of the VP gained: this number will only increase during the game.
- The total of the VP still available to be spent ("Available" VPs); initially this will be equal to the running total, but as soon as you start spending VPs (see below for additional details) this value will decrease.
Both values are tracked in the Campaign Log.
9.10.1. Victory Points calculation
In the End Mission Phase, calculate the number of Victory Points (VP) gained in the last Mission: for each Mission Objective Target Card consult the following table to determine the VPs provided by the Target (rounding up when required):
- Select the row corresponding to the damage inflicted by your aircraft.
- Select the column corresponding to the damage inflicted by your Formation.
- Calculate the amount of VP following the instructions found in the cell of table indexed by the row/column just selected.
| FORMATION SCORE: Player | None | Damaged | Destroyed |
|---|---|---|---|
| None | 0 VP | 0 VP | 1 VP |
| Damaged | 1 VP | Halve VP | Full VP |
| Destroyed | 2 VP | Halve VP | Full VP +1 |
Example: The player scored 5 VP destroying the main Target in the last Mission while the Formation gained a "Damaged" score. Crossing in the above matrix the "Damaged" column (Formation) with the "Destroyed" row (Player) we can find an "Halve VP" result. The target VPs are 5/2=2.5, rounded to 3.
Sum all the VPs of the Main and all the Secondary Targets (if any) following the above procedure.
Sum the VPs of the Opportunity Targets (considering only the result of your aircraft) and extra VP provided by Dogfight.
If you do not damage or destroy the main Mission target, as defined by the Mission Chart, subtract one VP from the final value. In any case, the minimum number of VPs for a Mission is zero (you cannot lose VPs).
Add the VP gained in the last Mission to both the running total and the available VP total: keep both values updated in the Campaign Log.
VPs can be spent to improve your pilot capabilities (see the Player Experience paragraph) and the progression of VPs will also determine your promotions.
9.11 PILOT EXPERIENCE
During the campaign you will have to keep two VP totals:
- The running total of the VP you've scored: this number will only increase during the game.
- The total of the VP still available to be spent ("Available" VPs).
Available VPs can be spent before the start of a new Mission to improve your Pilot as follows:
- Increase the hand size to six (15 VP).
- Increase the hand size to from six to seven (40 VP).
- Increase STAMINA by one (10 VP). The absolute max for STAMINA is 8 points. This value will represent both the STAMINA available at the beginning of each Mission and the max value during the game.
- Improve the Action Deck (see here below).
- Purchase Skills (see here below).
Every time you spend VPs, remove the corresponding amount from the Available VP total (only): the running total of the VPs is never reduced.
Example: In the first Mission your pilot gains 6 VP: the running total and the available VPs are both set to 6 VPs. In the second Mission you gain 5 VP: the running total and the available VP are now set to 11 VPs. You decide to increase the STAMINA by one: the running total stays at 11 VP while the available VPs total is now set to one VP (11 initial VPs - 10 spent VPs = 1 VP).
9.11.1. Improving the Action Deck
Ten Action Cards (Action-19-Action-28) can be purchased to improve the Action Deck.
Each card has a cost, expressed in VP, found in the bottom left corner of the card: spending the requested number of VPs will allow you to purchase the new card. Update the Available VP total accordingly in the Campaign Log.
Example card: Action-20, cost 10 VP, base AP 2, #STRAFE: 3, "+1 to #HIT".
New cards are normally added to the Action Deck, increasing its size. Cards with the letter "R" (Replace) before the cost (example: R1). will instead replace one card in the Action Deck. Select the card to be replaced and place it back on the game box.
Example: After the first Mission the player has scored 3 VP. One VP is spent to purchase card Action-24: this card will replace card Action-1 (0 AP).
9.11.2. Skills
Skills represent the improvement of the flying and fighting capabilities of your character, and his ability to face the most critical situations: each Skill provides a specific benefit during game play, as listed below.
Each Skill has a cost, expressed in VP, found in the following list after the skill name (between parentheses). Update the Available VP total accordingly in the Campaign Log and track the new Skill in the "Skills box" of the same Log.
Combat Experience (10)
You can re-roll (draw a new card and apply the new random result). This skill can only be used once per Mission.
Evasive Maneuver (10)
You can add a +1 to the #EVADE action
Nerves of steel (10)
You can add a +1 to the #DIVE action
Landing Experience (10)
You can add +1 to the #EMERGENCY LANDING action
MG Precision (10)
You can add +1 to the #STRAFE action
Cold Blood (10)
You can add +1 to the #BOMB RELEASE action
Quick Reflexes (10)
You can add +1 to the #PULL UP action.
Unless specified otherwise, you can use the DRM provided by the Skill on every check associated to the Action referred in the Skill description.
Example: Your pilot purchased the "Evasive Maneuvers" skill: you can now apply a +1 DRM to every check when performing an #EVADE action.
9.11.3. Gunner Skills
Every time you acquire a Skill for your pilot, you can also select one of the available Gunner skills (at no cost): update the Campaign Log accordingly. If the Gunner is killed, those Skills are lost and must be re-acquired by the new Gunner.
In the rare case where all skills have already been purchased for your pilot, you need to spend 10 VP to gain one Gunner skill
9.12 AWARDS
In addition to the Victory Points you will also be able to gain Prestige Points (PP) during the game. PP represent your special merits and allow your pilot to gain the following awards:
Some Targets have an associated number of Prestige Points (near the Iron Cross icon) that can be awarded if you destroy the Target (damaging the target do not provide PP).
| PP | Award | Description |
|---|---|---|
| 3 | Iron Cross (2nd Class) | (German: Eisernes Kreuz 2. Klasse, abbrev. EK II). It was awarded for bravery in battle as well as other military contributions in a battlefield environment. |
| 3 | Iron Cross (1st Class) | (German: Eisernes Kreuz 1. Klasse, abbrev. EK I). It was awarded for continuous bravery before the enemy or excellence in commanding troops after being awarded the Iron Cross 2nd class. |
| 3 | Gold German Cross | (German: Deutsches Kreuz). It was awarded in gold for repeated acts of bravery or achievement in combat. The German Cross in Gold ranked higher than the Iron Cross First Class but below the Knight's Cross of the Iron Cross |
| 4 | Knight's Cross of the Iron Cross | (German: Ritterkreuz des Eisernen Kreuzes or just Ritterkreuz). It was awarded for continuous bravery before the enemy or excellence in commanding troops after being awarded all preceding classes of the Iron Cross. |
| 5 | Knight's Cross of the Iron Cross with Oak Leaves | It was awarded for continuous bravery before the enemy or excellence in commanding troops after being awarded all preceding classes of the Knight's Cross/Iron Cross. |
| 6 |
Heavy Tanks (TAR 19; AA 0; VP 2/4; GUN (2); #GUN FIRE / #GUN HIT: FRONT / SIDE 0 / -1, STERN -2 / 0) can provide PP (they have a question mark near the Iron Cross): make the sum of all the Heavy Tanks destroyed and at the end of the Mission draw an Action Card; if the AP are less than or equal to the number of Heavy Tanks destroyed you gain one PP.
In addition, every 5 Missions successfully completed (you have destroyed the main target) you gain one PP.
Keep track of the PP scored on the Campaign Log: when you have enough PPs you can spend them to gain the next medal in the list; update the PP keeping track of the available PPs.
Example: At the beginning of your career you have successfully destroyed a Battleship, gaining 5PP. This allows you to be awarded with the Iron Cross (2nd Class); 3 PP are used to gain the medal and 2PP are noted on the Campaign Log.
9.13 Career Cards
To go along with the overall Campaign gameplay we have included two Career Cards to keep track of your Current STG, Rank and medals and awards that you have received. If you wish to keep track of these then select one of the Pilot Career Cards that appeals to you.
Place the current round STG counter or unit insignia for whatever Unit you are currently flying for in the circular STG spot. This may change several times throughout your career depending on the career path you take. (Insignia counters: STG 2, STG 77, STG 1, Condor, Japan, Graf Zepplin, 239° Squadriglia, NSG.)
Place your current rank insignia on the Rank spot of the Career Card. This will change as you get promotions and rank up.
Place any medals that you receive through acquiring Prestige Points according to the following chart.
- Iron Cross 2nd class: Place in an open spot. Replace this with Iron Cross 1st Class
- German Cross: Place in an open spot
- Knights Cross with Oak Leaves: Place in an open spot. Replace this with Knights Cross with Oak Leaves and Swords
- The Knights Cross with Oak Leaves, Swords and Diamonds replaces the Knights Cross with Oak Leaves and Swords
You will also find other medals and awards you can earn through out your game play place them according to the following chart
- Spanish Cross: Place in its own slot upon completion of the 1938 Spain Theater
- Iron Lotus: Place in its own slot upon completion of the 1938 China Theater
- Poland Campaign: Place in its own slot upon completion of the 1939 Poland Theater
- Graf Zepplin: place in its own slot when you are transferred back to your STG when directed to from the 1941-1942 Mediterranean Theater
- Black Wound Badge: Place in its own slot at the end of a mission where your pilot takes a damage (wound)
- Silver Wound Badge: Replace the Black Wound badge at the end of a mission where your pilot takes a damage (wound)
- Gold Wound Badge: Replace the Silver Wound badge at the end of a mission where your pilot takes a damage (wound).
Only 1 Wound Badge may be earned per mission regardless of how much damage (wounds) a pilot takes in a single mission.
[10.0] Night Missions
Starting from 1943, several Nachtschlachtgruppen ("night battle groups"-NSGr) were formed: the Ju 87 proved itself ideally suited to the low-level slow flying needed for the night Missions. The rules here below reflect the changes required to represent the night operations of the Ju 87.
10.1 ASSIGNMENT TO THE NSG
When your campaign reaches 1944 draw one d6: on a result of (1-2) you've been transferred from the current St.G to the NSG 9, operating in Italy. Consult the "NSG 9 - Theaters Table" to determine the number of Missions and Flight Cards to use. All NSG 9 Missions will use the Night Mission special rules found in this chapter.
10.2 AIRCRAFT SELECTION
While assigned to NSG 9, you'll be always flying a Ju 87 D-5N, a Ju 87 D5 modified for the night Missions.
10.3 PAYLOAD SELECTION
Historical notes: Cluster bombs were very frequently used on the night Missions. When checking for the availability of cluster bombs, apply a -4 DRM to the check.
10.4 ALTITUDE
Night Missions were normally executed approaching the target at very low altitude (about 300-500m): only when reaching the target, the Ju 87 climbed to reach the bomb release altitude (between 1000 and 2000m); after the attack the aircraft was again moved 300-500m.
During a Night Mission you can only select a Low or Very Low Altitude: Very Low Altitude can also be selected for the Approach and Return to Base stages.
10.5 FLIGHT CARDS EVENTS
Events on the Flight Cards with a sun icon are ignored when playing a night Mission.
10.6 ATTACK PROCEDURE
The bombing attack procedure of a Night Mission is different from the standard one since the Ju 87 were not using a dive attack: for this reason, there is no height selection nor pull-up phase.
The Night Bombing Attack sequence requires the following stages:
- Bomb selection. You must select the bombs to be released: take the counters from the fuselage/wings and place them on the selected height as a reminder.
- Approach the target. Execute a #DIVE action (this represents the maneuver to reach the correct height and position for the bomb release).
- AA fire. If the AA on the Target Card is greater than or equal to zero execute an #AA FIRE action
- Bomb release. Execute a #BOMB RELEASE action: if successful you will then execute an #HIT action to determine the damage to the Target
[11.0] Optional Rules
11.1 Spanish Civil War (optional Campaign Start variant)
Roll one die at the beginning of a new Campaign: on a result of "6" your pilot was selected for the Condor Legion, operating in Spain in 1938 during the Spanish Civil War.
Your campaign starts in 1938: consult the "J/88 (Condor Legion) Theater Table" for your first assignment and proceed with the standard campaign rules (see 9.1).
After this assignment, your career continues in 1939: roll on the "StG Assignment Table" to determine your next assignment when Germany invades Poland in 1939.
11.2 Iron Blossom Expedition (Optional Campaign Start variant)
As an alternative to participating in the Condor Legion in Spain, you may instead take part in the hypothetical campaign of the Eisen Blute (Iron Blossom) Expedition. In 1938 a single Ju87 was supplied to the Japanese, with the intent to be evaluated as a carrier borne aircraft. The Japanese eventually decided to develop their own aircraft. This campaign simulates if a handful of JU87s as part of Kampfgruppen 200 were instead sent to demonstrate their potential to the Japanese in their war against China. You are only able to participate in either the Condor Legion or the Iron Blossom campaign. Not both.
Your campaign starts in 1938: Consult the "K/200 (Iron Blossom) Theater Table" for your first assignment and proceed with the Standard Campaign rules (see 91.)
After this assignment, your career continues in 1939: roll on the "StG Assignment Table" to determine your next assignment when Germany invades Poland in 1939.
11.3 Malta 1942 historical campaign (Optional Campaign Start variant)
This module simulates the operations against Malta in July-August 1942 by the Italian "Regia Aeronautica" (Royal Air Forces). The player will pilot the Italian Ju 87 B2 and Ju 87 R2 of the 102° "Gruppo Tuffatori" (dive bombers). The 102° "Gruppo Tuffatori" was created on May the 1st 1942 under the command of Captain Giuseppe Cenni. The new Group included two squadrons, the 239° and the 209° "Squadriglia".
The Malta 1942 module is composed of:
- The special rules (this document)
- One new Theatre of operations sheet: Malta 1942
- Two new aircraft sheets: Italian Ju 87 B-2 and Ju 87 R-2.
11.3.1. Campaign start
Assignment. This campaign covers the period from July the 14th 1942 to August the 14th 1942: you will play the role of an Italian pilot assigned to the 102° Gruppo Tuffatori. Due to limited timeline, the Pilot Experience (9.11) will not increase during this campaign.
Pilot Rank. Roll one die: on a result of (1-2) you will play as a Kette Leader while on a result of (3-6) you will play as a Staffel Leader. To represent your previous experience, you can now spend 15 VP to improve the Action Deck; unused VP are lost. The pilot rank will not improve during the campaign.
Campaign missions. This campaign uses only the Malta 1942 Theatres of Operations Sheet The "102° Gruppo - Theatres Table" lists the historical dates of the missions and starting bases: under the "Mission Table" column you will find the name of the table to use in the Theatres of Operations Sheet to determine the mission assigned to your pilot.
Victory points. Calculate the Victory Points using the standard rules (9.10); at the end of the campaign determine your level of success based on the total VP:
- 22 or more VP: Major Success! You're awarded a Silver Medal (Medaglia d'argento al valor militare) for your exceptional courage and leadership.
- 12 to 21 VP: Success! You have something to narrate to your grandchildren and being proud of.
- 11 or less VP: Defeat! Sad memories will haunt you for the rest of your life, even knowing that you've always made your best for your Country.
11.3.2. Awards.
If you obtain 20 VP, you will receive an Iron Cross (2nd Class) from the German command.
11.4 The Sevastopol 1942 historical campaign (optional Campaign Theater variant)
This module simulates the operations of Stg 77 against the town of Sevastopol in June 1942; the attack of the German 11th Army, commanded by Erich von Manstein and supported by the 8th Air Corps of the Lutfwaffe, ended with the capture of the soviet fortress on the on 4 July 1942.
The Sevastopol 1942 module is composed of:
- The special rules (this document)
- One new Theatre of operations sheet: Sevastopol 1942
- Two new Target Cards: "Harbour Facilities" and "Maxim Gorky I"
11.4.1. Campaign start
Assignment. This campaign covers the period from June the 2nd 1942 to June the 29th 1942; if your Pilot is assigned to Stg 77, when you reach 1942 draw one d6: on a result of (1-4) instead of proceeding with the Missions included in the "StG 77 - StG Theatres Table" use the new "StG 77 - Sevastopol Campaign Table" included with this module. At the end of the Sevastopol campaign, revert to the standard Stg 77 table on the 1943 row.
Campaign missions. This campaign uses the new "Sevastopol 1942 Theatres of Operations Sheet". The "StG 77 - Sevastopol Campaign Table" lists the historical dates of the missions and starting bases: under the "Mission Table" column you will find the name of the table to use in the Theatres of Operations Sheet to determine the mission assigned to your pilot.
11.5 The Graf Zeppelin campaign (optional Campaign Theater variant)
The first of 2 German aircraft carriers keels were laid down in 1936. The ship was 85% complete at the start of WWII but due to shifting production priorities, she was never finished. This hypothetical theater assumes that the Graf Zepplin was finished and put into operations in the North Sea. The ship's primary offensive power would have been its aircraft complement. The Graf Zeppelin would have carried 42 aircraft as designed: 30 navalized Junkers Ju 87 "Stuka-C" dive bombers and 12 Messerschmitt Bf 109 fighters
This set of optional rules simulates a hypothetical campaign of the German aircraft carrier Graf Zeppelin in the waters of the North Atlantic Sea in 1942/1943. The player will pilot a Ju 87 C-1, designed for the operations aboard the aircraft carrier.
The Graf Zeppelin optional Theater is composed of:
- These special rules
- One new Theatre of operations sheet: North Atlantic Sea 1942-1943
- One new aircraft sheet: Ju 87 C-1
- Three special target cards: the "HMS King George V", "HMS Victorious", and "Carrier"'
11.5.1. How to introduce the Graf Zeppelin campaign in your game. (Optional/Hypothetical)
Start your campaign following the standard rules, determining your initial StG assignment.
When you reach 1942, you receive the order to move to 4./Trägergruppe 186, embarked on the newly completed Graf Zeppelin carrier.
At the end of 1942 roll one die: on a result of (1-4) you continue your assignment on the Graf Zeppelin, otherwise you revert to your initial StG assignment.
At the end of 1943 you revert to your initial StG assignment.
During the assignment to 4./Tr 186 you will always fly a Ju 87 C-1.
11.5.2. Graf Zeppelin Mission Sequence
Use the revised mission sequence below.
GRAF ZEPPLIN MISSION SEQUENCE
TAKE OFF
- Draw a Flight Card and check for a "MISSION START" event.
- Execute the event instructions (if any).
- Execute a #NAVAL TAKE OFF action (See the Atlantic Sea 1942-43 Mission Sheet).
APPROACH
- Draw a Flight Card and check for an "APPROACH" event.
- Execute the event instructions (if any).
- If you have drawn the required number of Flight Cards you can proceed to the TARGET stage, otherwise return to 1.
TARGET
- Draw an Objective Card and check the card type:
- "SEARCHING" card: apply the event instructions (if any)
- "TARGET REACHED" card: proceed with the ATTACK stage
- "ENEMY PATROL": immediately start a Dogfight stage (or #FLAK)
- Return to 1.
ATTACK (Bomb, Strafe or Gun) - Formation Attack
RETURN TO BASE
- Draw a Flight Card and check for a "RETURN TO BASE" event.
- Execute the event instructions (if any).
- If you've drawn the required number of Flight Cards you can proceed to the REFUEL stage, otherwise return to 1.
Landing
- Execute a #NAVAL LANDING action (See the Atlantic Sea 1942-43 Mission Sheet).
REFUEL
- Draw two Action Cards
- Gain two STAMINA
- Perform a #REPAIR action
11.6 Landing checks.
The Stuka was generally a very safe plane to fly holding one of the lowest rates of flight accidents or issues on landing of the entire Luftwaffe. The fixed wheel system of the plane attributed to this. And generally due to the rules of the game it wasn't felt that a landing check would be required. The only real result that would have long term game effects would be the death of the pilot. A damaged aircraft will be repaired or replaced before the next mission and if the pilot is wounded you will be healed up before the next mission. The only exception to this is the occasional multi sortie mission you may fly in the game.
However, some felt that a Landing Phase needed to be implemented. So as an optional rule we have included the rules here.
LANDING
After executing a "RETURN TO BASE" event (if any), before the REFUEL stage your pilot will need to execute a #LANDING action. The revised sequence is then:
RETURN TO BASE
- No changes
LANDING
- Execute a #GROUND LANDING action
REFUEL
- No changes
#GROUND LANDING D12
CHECK (1-9) Success Plane lands just fine. Mission over unless it is a multiple sortie mission. You have the option to fly another Sortie. Continue with the Refuel step.
CHECK(10) Failure: draw one Structural Damage marker. Mission is over unless it is a multiple sortie mission. You then have the option to fly another Sortie. Continue with the Refuel step.
CHECK(11) Failure: draw two Structural Damage markers. Mission is over unless it is a multiple sortie mission. You then have the option to fly another Sortie. Continue with the Refuel step.
CHECK(12+) Failure: airplane crashes and you suffer two wounds. If you survive, the mission is over: calculate the VP.
Subtract -1 to the dice roll by spending a single Stamina point. This can be done once.
Add +1 to the die roll for every Damage marker the planes has.
Add +1 to the dice roll for every wound the pilot has suffered.
Add +1 to the die roll if the current weather is POOR.
11.7 Difficulty Levels
For players willing to play an easier game or are instead looking for a stronger challenge the following rules can be applied:
Easy Level
- Start with Six STAMINA points
- The initial hand size is composed of six cards.
Hard Level ("Rudel")
- Remove Action-24
- In the #PULL UP action, apply a -1 DRM for each strength point of the Enemy Fighters.
- Start with Four STAMINA points.
- When the Visibility on the Altitude Card is "POOR", place the special "POOR VISIBILITY" card on the table: apply its effect until the Visibility reverts to "REDUCED" or "CLEAR"
- 1800kg bombs availability: 1800kg bombs are available only if you draw one d6 and get a result of 5 or 6
- Immediate Effects can only be played before a roll
[12.0] Historical Notes
Poland - 1939
12.1 A VERY SHORT HISTORY OF THE Ju 87
When the attack on Poland started in 1939, about 220 Ju 87 (mostly from St.G 1, St.G 2 and St.G 77) were ready for the action.
The Ju 87 is surely one of the best known and distinctive aircraft of World War II: its fixed landing gear and inverted gull wings made the Ju 87 the most recognizable aircraft of the Blitzkrieg era.
The Ju 87 is more commonly known as the Stuka, an abbreviation of the German word Sturzkampfflugzeug, meaning dive-bomber.
The design of the Stuka started in 1934 under the direction of Hermann Pohlmann, one of the best engineers of Junkers: special attention was paid to the design considering the stress loads expected during the dive bombing and Pull Out phase.
After several trials, where different design options and engine models were tested, in 1936 the production of the Stuka started with the Ju 87 A ("Anton"). The first use of a Ju 87 in combat was the prototype in 1937 during the Spanish Civil War.
In 1937 a few Stukas were assigned to the Condor Legion.
About 6000 Ju 87 were produced: Stukas were used in combat from the invasion of Poland in 1939 up to 1945 in nearly all the theaters of the Second World War, including the deserts of North Africa and the frozen battlefields in USSR.
Their role was mainly to support the general assault: some of the very first bombs dropped in WWII would be from the Ju 87. Most of their action was against Polish infantry positions and defence works, but some Gruppen were also employed against ships of the Polish Navy.
In those first phases of the war, the Stukas demonstrated their flexibility in their close support role: Ju 87 were able to attack one position, refuel and receive orders to attack a new target within hours. Infantry forces quicky appreciated the support of this type of "flying artillery": contrary to standard bombers, which could not act in the vicinity of ground troops, the Stukas could instead intervene exactly where the infantry needed support.
While other aircraft types were involved, only the Ju 87 had the strength and the sturdiness required to operate so close to the front line. The Polish Air Force was unable to effectively counter the Luftwaffe, so most of the damage to Stukas was inflicted by the anti-air fire.
Norway - 1939/40
The Stukas demonstrated in this theater how dive-bombing, with its high precision, could be efficient for destroying ships by aerial attack, in contrast with the traditional bombing that was not able to sink any major warship.
The success of the Stuka attacks was helped in some operations by the narrow fjords, that precluded the ships from taking evasive Maneuvers, and the lack of efficient anti-air defences on some of the targeted ships, still Ju 87 were able to sink targets at sea protected by a strong flack barrage. The most efficient tactic was to use Stuka formations to launch attacks from different angles, forcing the anti-air defences to be dispersed on multiple targets (of course this required the commitment of a high number of aircrafts).
Belgium, France - 1940
About 310 Stukas were available at the beginning of the German offensive in the West, mostly belonging to St.G 2 and St.G 77. The plan was to use the Stukas in support of the panzer operations with a precise concentration of the forces: this combined arms approach demonstrated to be a winning one against the Allies, even if they outnumbered the Germans and had several months to prepare. Stuka dive-bombing attacks provided the advancing formations the support in the exact area where it was required and at the right moment. Using radio, the Wehrmacht forces were able to call for this type of support if the situation required it. Ju 87 were loaded with the right ordnance and could quickly drop it where needed.
Battle of Britain - 1940
After the fall of France, Stukas were moved on the French northern coast to participate in the attack on Britain. Ju 87 were assigned two target priorities: the Royal Navy ships in the ports (and in the English Channel) and the British airfields. Stukas demonstrated to be very effective against the first set of Objectives but only partially against the ground targets. British losses were heavy in both escort ships and merchantmen, and several destroyers were sunk or damaged; the ground, attacks were not always so successful.
The main difference from France was the strength and ability of the RAF squadrons and the use of the radar sites around the coast. Without proper protection, Stuka units suffered a high number of losses: one of the worst days was August the 18th when Hurricanes and Spitfires shot down eighteen Ju 87 of Stg77. With the losses mounting every day, it was decided in August to withdraw the Stukas from the ground operations, saving them for the future invasion of England that fortunately did never happen.
Mediterranean - 1941
In the Mediterranean, Stukas continued their role in attacking the enemy ships, but they also returned to their traditional role of supporting the army in the field. One of the main Objectives of the operations was the neutralization of Malta, a key base of the British air and naval forces.
Stukas were employed to attack the supply routes from Gibraltar to Malta and Egypt, targeting the Royal Navy covering forces: heavy losses were caused to the convoys, and the Ju 87 were able to sink the cruiser HMS Southampton and heavily damage the carrier HMS Illustrious (that was saved despite six direct hits).
Dive bombing confirmed to be much more efficient than the standard bombing against sea targets, but the attack against the Illustrious showed that against a 23.000 tons carrier even a PC-1000 armor piercing bomb was not sufficient.
In the attack on Crete (Operation Mercury), Stukas attacked the infantry positions and anti-aircraft gun sites, preparing the stage for the airborne landings on May the 20th. In the days just before the invasion, the Ju 87 attacked the island's landing grounds and Suda Bay, intercepting Royal Navy forces attempting to reinforce Crete.
Eastern Front - 1943
The German High Command found itself in Russia facing an enormous number of Soviet tanks.
Initially, the lack of experience of the Soviet command limited the effectiveness of this massive force, but the Soviets quickly learned to make optimal use of it.
In order to better support the ground troops, the Luftwaffe researched an anti-tank weapon to be used on an aircraft rugged enough to withstand the harshness of the Russian terrain and climate.
The choice fell on the 3.7cm Bordkanone, an anti-aircraft gun with excellent ballistics and capable of penetrating the armor of the most heavily armored tanks. This armament had a strong impact on the maneuverability and performance of the Stukas: pilots of great ability were needed to fly the new Stukas but tests proved the effectiveness of the new weapon. The Ju 87 G-1 "Gustav" model was born and it saw its first action in March 1943: in the battle of Kursk the "Gustav" played a fundamental role in ground support, destroying a very high number of tanks.
The battle tactics were revised: some Stukas armed with bombs were used to eliminate anti-aircraft emplacements, followed by the Ju 87 G that could dedicate themselves to the hunt of the tanks.
In this new role, the Stukas continued their service until the end of the war.
STUKA UNIT CODES
| Unit | Code |
|---|---|
| St.G 1 | A5+ |
| St.G 2 | T6+ |
| St.G 3 | S7+ |
| I./St.G 3 from Jul 1940 until 1942 | S1+ |
| St.G 5 | L1+ |
| III./St.G 51 | 6G+ |
| II./St.G 1 from Jul 1941 | 6G+ |
| St.G 76 until Jul 1940 | S1+ |
| St.G 77 | S2+ |
| St.G 151 | 6Q+ |
| St.G 162 | 23+ |
| St.G 163 | 35+ |
STAFFEL IDENTIFICATION
| Gruppe | Code | Staffel | Code | Staffel | Code | Staffel | Code | Staffel |
|---|---|---|---|---|---|---|---|---|
| I | B | Stab | H | 1st | K | 2nd | L | 3rd |
| II | C | Stab | M | 1st | N | 2nd | P | 3rd |
| III | D | Stab | R | 1st |
STUKA MODELS
Ju 87 A "Anton"
The first version of the Ju 87 was armed with a fixed MG 17 (front), a MG 15 (gunner) and could carry 250 kg of bombs. With the adoption of the new Jumo 210D engine the bomb load was doubled to 500 kg. The performance of the Ju 87 was considered only barely sufficient for combat and hence, with the introduction of Ju 87 B, the Ju 87 A were relegated to the Stuka training schools.
Ju 87 B "Berta"
Production of Ju 87 B started in 1937 and this model was the first mass-produced variant. The main element that distinguished the Ju 87 B from its predecessors was the installation of the Jumo 211S engine.
This allowed the Ju 87 B2 to carry a load of up to 500 kg underneath the fuselage and four 50 kg bombs on the wings (for a total of 1000 kg).
Ju 87 B were sent to several members of the Axis: the Italian Regia Aeronautica (that named them "Picchiatello"), Hungary, Bulgaria and Romania received the Ju 87 B and were used in all the fronts.
With the Ju 87 B, was also introduced one of the prominent features of the Stukas, the sirens attached to the front part of the wing or wheel struts. The wailing siren increased the psychological effect during the dive attack. These sirens had the nickname 'Jericho Trumpets'.
It is known that pilots removed them from their aircraft during the battle of Britain, since they increased drag.
For the North Africa theater, a tropical version of the Ju 87 B1 was created, designated as Ju 87 B-1/trop (and later Ju 82 B-2/trop): those versions could be distinguished by the square air intakes with dust filters.
Ju 87 R "Richard"
A long range version of the Ju 87 B, the Ju 87 R was designed primarily for anti-shipping operations. The Ju 87 R used the frame of the Ju 87 B, sacrificing the bombs under the wings to carry the 300 litres drop tanks.
With this additional fuel capacity, the range of the Ju 87 R was increased from the nominal 850 km of the Ju 87 B to 1210 km.
Ju 87 C "Caesar"
This version was designed for the Graf Zeppelin-class aircraft carriers: the project included rear folding wings, strengthened landing gear and arrestor hook. Only a few Ju 87 C were assembled: since the Graf Zeppelin carriers were never completed, the Ju 87 C production was canceled.
Ju 87 D "Dora"
The D variant featured an aerodynamically refined cockpit, and an improved Jumo 211J engine that provided a payload of up to 1800 kg of bombs.
With the D-3 model the Jerico Trumpets were removed, having lost their psychological effect, and the armor package of the undercarriage was improved, a reflection of the improving allied air defenses. The D-5 model introduce a change in the wing armament, replacing the MG17 with two MG151/20 20mm cannons.
Ju 87 G "Gustav"
After the D series, the original plans were to produce an E and F series, but neither were built: the G variant was instead introduced, fundamentally changing the Stuka's combat role to a "tank buster".
The Ju 87 G design remained unchanged from the D series, apart an improved armor package, but a radical change happened on the armament with the introduction of the BK 3.7 Flak cannons.
The weight of those cannons made impossible to load any bomb on the Ju 87 G, and due to the low (and very low) altitude of the operations, the dive brakes and oxygen systems were also removed. As a "tank buster" the Ju 87 G demonstrated to be a very effective weapon, with hundreds of confirmed tank kills since is appearance in the Soviet battlefields in 1943 (Ju 87 G were also at the battle of Kursk).
12.2 ST.G "STURZKAMPFGESCHWADER" (DIVE BOMBER WINGS OF LUFTWAFFE)
A Geschwader (the approximate equivalent of a British Commonwealth air force Group) was comprised of three Gruppen (Groups, similar to a Wing) which, in turn, was made up of three (or more) Staffeln (Squadrons) of nine aircraft each, as well as a Stab (Staff or Headquarters) of three additional aircraft. Each Staffel was divided in three Ketten.
Sturzkampfgeschwader (abbreviated St.G) were Geschwader specialized in dive bombing.
- St.G
- Gruppe
- Staffeln (9 aircaft)
- Stab (3 aircraft)
- Kette (3 aircraft)
- Gruppe
Each St.G was identified by an Arabic numeral and the Gruppen within it by a Roman one, I./St.G 77 being the first Gruppe of Sturzkampfgeschwader 77. In October 1943, most St.G were renamed to SG (Schlachtgeschwader "Fighter-Bomber wing")
St.G 1
St.G 1 was formed in May 1939 and remained active until October 1943, when it was renamed and reorganised into Schlachtgeschwader 1 (SG 1). St.G 1 operated in 1939-1940 in Poland, Scandinavia, Belgium, France and Britain. In 1940 it was transferred to southern Europe to take part to the battle of the Mediterranean and the campaign in North Africa.
After the Balkans Campaign (Operation Marita), St.G 1 was moved to the Eastern Front, supporting all three Army Groups.
Unit Code: A5+ (also L1+, J9+,6G+)
St.G 2 "Immelmann"
St.G 2 "Immelmann" was formed in May 1939 and fought in the invasion of Poland in September 1939, then in Belgium and France. In 1940 and 1941 StG2 participated in the Battle of Britain and then was transferred to southern Europe to take part in the battle for the Mediterranean and the campaign in North Africa. The bulk of St.G 2 was moved to the Eastern Front for Operation Barbarossa. In the Soviet Union St.G 2 participated in the major battles such as the battle of Stalingrad and Kursk.
Similary to St.G 1, St.G 2 was renamed to SG 2 in 1943.
Notable commanders: Oskar Dinort, Dr. Ernst Kupfer, Paul-Werner Hozzel, Hans-Ulrich Rudel.
Unit Code: T6+
St.G 77
Founded in May 1939, St.G 77 participated in every major Wehrmacht operation from the invasion of Poland in 1939 until the battle of Stalingrad in 1942. St.G 77 units supported the conquest of Belgium and France and took part in the battle of Britain. Next they moved to the Balkans where the unit took part in the battle of Greece and the airborne invasion of Crete. From 1941 St.G 77 operated on the Eastern Front, were it served in the battle of Kiev, in the Crimean Campaign, in the Second battle of Kharkov and ultimately in the battle of Stalingrad.
St.G 77 ceased to exist on 18 October 1943. II. Gruppe was redesignated as III. Gruppe, SG 10, the remaining groups renamed and sent to SG 77.
Notable commanders: Günter Schwartzkopff
Unit Code: S2+
12.3 STUKA MARKINGS
Each Ju 87 was identified by a four-letter alphanumeric code displayed on either side of the black cross (Balkenkreuz) on the fuselage.
The first pair defines the St.G assignment (Geschwader code) while the second pair indicate the individual aircraft and the Staffeln within the Gruppe.
Example: T6+AH corresponds to T6: St.G 2 "Immelmann"; A: First aircraft; H: 1 Staffel/I Gruppe
Staffel identification (up to the reorganization where the number of Staffeln was increased from three to four)
Letter A was used for the Geschwader Stab and Staffel Stab
12.4 STUKA ARMAMENT
GUNS
MG 15 machine gun (rear-firing). The 7.92mm MG 15 was used in the Ju 87 A, B and R series as a single rear-firing weapon, installed in a flexible mounting, operated by the gunner/radioman. The MG15 was capable of firing 900 rounds and was used in many Luftwaffe aircraft until was replaced by the new MG 81Z models.
MG 81Z machine gun (rear-firing). In the 1942 this 7.92mm MG was introduced in the Ju 87 D-1 as a replacement of the MG15.
Mounted in pairs in a rotating turret, the MG 81Z offered a higher rate of fire and better protection for the gunner.
Belt-fed with 1000 rounds, the MG 81Z had a theoretical rate of fire of 3200 rounds/min.
MG 17 machine gun (forward firing). The fixed mounting 7.92mm MG 17 was used as forward-firing offensive armament: one M17 was mounted in each wing and was operated by the pilot. Each gun was belt-fed with 1000 rounds, stored inside the wings.
MG 151/20 cannon (forward firing). The MG 151/20 was a 20mm cannon widely used by the Luftwaffe not only for the Ju 87 but also for their fighters and fighter-bombers.
From the 1943, the Ju 87D replaced the M17 with a couple of MG 151/20, one in each wing.
The 20mm rounds could penetrate 10-12mm of armor and the long barrel allowed an effective range of 1km: equipped on the Ju 87D, this cannon was a very effective ground-attack weapon.
Bordkanone (BK) 37 auto-cannon (forward firing). The BK 37 was based on a 3.7cm Flak anti-aircraft gun and equipped on the Ju 87 G-1 transformed the Stuka into a formidable anti-tank weapon. Each cannon weighted about 355 kg and was fed with 2 clips of 6 rounds each.
The heavy weight made it impossible to equip any bomb on the Ju 87 G, and reduced their maneuverability, but their Armor Piercing rounds demonstrated to be devastating on the Soviet tanks: hard core shells could penetrate up to 140mm of armor at an angle of 90°, and about 70mm at 60°.
BOMBS
German bombs were designated according to their weight in kilograms and type of the bomb: so the "SC 50" was a 50 kg SC (Sprengbombe-Cylindrische, general purpose) bomb.
Type of bombs: SC - general purpose; SD - fragmentation; PC - Armor-piercing.
Depending on the engine, Ju 87 models were able to carry different combinations of bombs up to their maximum.
The largest bomb was always carried under the fuselage, while under the wings a couple of racks was used to load the additional bombs.
Common bombs: SC 50, SC 250, SC 500, SD 500, SC 1000, SC 1800.
Game Tutorial (Mission 1 walkthrough)
The following walkthrough appears at the end of the manual. Card illustrations are described in brackets.
Introduction
Welcome to the Game Tutorial for Ju 87 Stuka Ace where we will play through Mission 1 of the Poland Campaign using a Ju 87B
In this mission there are no Enemy Fighters and only one Sortie is required: you will then take off, reach the target area, attack it with your bombs and then return to base.
Mission Overview (Mission #1 chart, annotated in the manual):
- Mission #1: Flight Cards: Approach 2, Return to Base 1. Objective Cards: 2 (1 x Searching, 1 x Target Reached). Sorties: 1. Main Objective: GUN EMPLACEMENT. Support Fighters: 0. Enemy Presence: None.
- Approach Phase: Two Flight Cards required.
- Return to Base Phase: One Flight Card required.
- Objective Cards: Two cards are required. One "Searching Card" One "Target Reached" card.
- No enemy fighters will be encountered. No Support Fighters are available as well.
- Mission Target: Gun Emplacement (TAR 7; AA 1; VP 2/3; Model/DRM #HIT: 50 = none, 250 = 0, 500 and 1000 = +1).
Player Setup
Start by taking the Kette Wingman Pilot Organization Play Card. Place 5 counters in the STAMINA box.
(PILOT - 02a: #NAVIGATION(?) CHECK (?): Ignore any reference to Formations, including Formation actions.)
Action Cards. Shuffle the Action cards (Action-01..Action-18) then draw five Action cards. This is my initial hand of Action Cards: Action-03 (1 AP; #PULL UP: 2; +1 to #MG HIT only for Ju 87 D-5 and Ju 87 D-5N), Action-06 (1 AP; #DIVE: 2; +1 to #MG HIT only for Ju 87 D-5 and Ju 87 D-5N), Action-16 (2 AP; CANCEL TAKEOFF EVENT), Action-09 (1 AP; #EVADE: 2 only for Ju 87 D-3, D-5, D-5N, and G-1; +1 to #MG HIT), Action-02 (0 AP).
Aircraft Setup
We start by selecting the Ju 87 A-1, It has a 500kg maximum payload. I select a single 500Kg bomb as payload to maximize my chances against the target. Since this is my only bomb, I won't be able to attack any secondary target in case I will get this opportunity. A 500Kg bomb can provide a +1 on the #HIT action.
(Aircraft card AC-01b: Ju 87 A-1 "Anton", Jumo 210 C engine, max speed 320 km/h, cruise speed 275 km/h, ceiling 7000m, range 600 km, armament 1x 7.92 MG17 in starboard wing and 1x 7.92 MG15 rear, 500kg bombs; Maneuver track 0, -1, -2, -3; Engine Power 1, 1.)
Flight and Objective Decks Preparation
Flight Deck Preparation. In this initial mission take the thirty seven cards from FC01 to FC37, easily identified by the red background surrounding the card ID. I shuffle the Flight Cards to prepare the Flight Deck.
Objective Deck Preparation. Mission #1 requires two Objective cards: 1 "SEARCHING" card and 1 "TARGET REACHED" card. I select one random "SEARCHING" card (there are several different card of this type) and one "TARGET REACHED" card. I shuffle both cards to create the Objective mini deck.
Sequence of Play overview
Each Mission requires one or more Sorties to be performed. Each Sortie includes the following stages:
MISSION SETUP (5.1)
- PREPARE FLIGHT DECK
- PREPARE OBJECTIVE MINI-DECK
- SETUP PLAYER SHEET
- SETUP AIRCRAFT SHEET (select payload)
- PREPARE ACTION DECK (take initial hand)
MISSION OVERVIEW (6.1): TAKE OFF; APPROACH; TARGET (ATTACK: BOMB, STRAFE OR GUN); RETURN TO BASE; REFUEL.
Mission #1 only requires one single Sortie. Since the REFUEL Stage is performed only if multiple Sorties are required, we will skip it on this first game. The Extended Sequence of Play for Mission #1 is:
MISSION SEQUENCE (6.1)
TAKE OFF: 1. Draw a Flight Card and check for a "MISSION START" event. 2. Execute the event instructions (if any). 3. Execute a #TAKE OFF action.
APPROACH: 1. Draw a Flight Card and check for an "APPROACH" event. 2. Execute the event instructions (if any). 3. If you have drawn the required number of Flight Cards you can proceed to the TARGET stage, otherwise return to 1.
TARGET: 1. Draw an Objective Card and check the card type: "SEARCHING" card: apply the event instructions (if any); "TARGET REACHED" card: proceed with the ATTACK stage; "ENEMY PATROL": immediately start a Dogfight stage (or #FLAK). 2. Return to 1.
ATTACK (Bomb, Strafe or Gun) - Formation Attack
RETURN TO BASE: 1. Draw a Flight Card and check for a "RETURN TO BASE" event. 2. Execute the event instructions (if any). 3. If you've drawn the required number of Flight Cards you can proceed to the REFUEL stage, otherwise return to 1.
REFUEL: 1. Draw two Action Cards 2. Gain two STAMINA 3. Perform a #REPAIR action
ATTACK SEQUENCE (6.5)
- ATTACK (Bomb): 1. Select Bomb Release Height (no: Night Missions) 2. Execute a #DIVE action 3. Execute a #AA action 4. Execute a #BOMB RELEASE action 5. Execute a #PULL UP action (no: Night Missions) 6. Draw Action cards
- ATTACK (Strafe): 1. Execute a #STRAFE DIVE action 2. Execute a #AA action 3. Execute a #STRAFE action 4. If additional attacks are available draw one Action Card and return to 1
- ATTACK (Gun): 1. Execute a #GUN DIVE action 2. Execute a #AA action 3. Execute a #GUN FIRE action 4. If additional attacks are available draw one Action Card and return to 1
DOGFIGHT SEQUENCE (6.8)
- EVASION: 1. Execute a #EVADE action 2. End Dogfight if you obtain an "End Combat"
- FORMATION DOGFIGHT: 1. Execute a #FORMATION DOGFIGHT action
- FIGHTER BATTLE: 1. Execute a #FIGHTER BATTLE action
Take Off
Take Off Sequence: 1. Draw a Flight Card and check for a "MISSION START" 2. Execute the event instructions (if any). 3. Execute a #TAKE OFF action.
TO.01 The first step of the Take Off stage is the Event check. Draw one Flight Card: if it is a Special Flight Card execute the instructions in the "MISSION START" section. I draw FC33: this is as Special Flight Cards so I check the MISSION START section: the event triggers a +1 DRM to the #TAKE OFF action
Example: I draw FC33; this is as Special Flight Card so I check the MISSION START section: the event triggers a +1 DRM to the #TAKE OFF action. (FC 33, MISSION: EUROPE. APPROACH/RETURN TO BASE: Engine not working as expected: 1-4 Nothing, 5 Lose one Stamina, 6 Place one random Engine Damage counter. MISSION START: DAMAGED AIRSTRIP, +1 to #TAKE OFF. Random values 2 (d6) and 11 (d12).)
TO.02 The second step of the Take Off is the #TAKE OFF action. Each Action is described on a dedicated box: looking at the #TAKE OFF box you can see that this action requires the roll of a d12:
#TAKE OFF D12 (6.2): (1-11) Nothing; (12) CHECK(4+). Failure: #TAKE OFF DAMAGE
Draw a Flight Card to generate the random value and consult the #TAKE OFF table.
Example (cont): I draw FC14 on the following page; the d12 result is 11. I need to apply the +1 DRM of the Mission Start event and hence the final value is 12. Looking in the #TAKE OFF action box this value results on a CHECK(4): something went wrong... (FC 14: APPROACH: VISIBILITY IMPROVE; RETURN TO BASE; random values 2 and 11.)
TO.03 I now need to execute a CHECK(4) to verify how I manage the unexpected problem during the #TAKE OFF.
CHECK() are resolved as follows:
- Select one Action Card from your hand: the Action Points (AP) of the card will provide the base modifier for the check.
- Draw a Random d6 value.
- Apply all the relevant modifiers to the random value, including the AP of the selected card.
- If the final value is greater or equal than the Check difficulty (X), the check is successful otherwise you failed it.
- Apply the success / failure effects (see the action box).
This is my initial hand: Action-03 (1 AP), Action-06 (1 AP), Action-16 (2 AP), Action-09 (1 AP), Action-02 (0 AP).
My best card can provide 2 AP, with one card providing 0 APs. I decide to play the Action-09 card (1 AP).
In theory I could spend STAMINA to add an additional card to this check but I feel confident.
I draw a random FC: the card drawn is FC29, that provides a result of 5. Adding my 1 AP I get a 6, so full success! No problem during Take Off. I discard Action-09. (FC 29: APPROACH: CLOSE CALL, You had no time to fully recover. Lose one STAMINA. RETURN TO BASE: ENEMY CONTACT (*); random values 5 and 8.)
Action Cards are not immediately refilled from the deck so your hand will slowly reduce. Managing your hand is one of the critical aspects of the game.
Approach
The second stage of the Mission Sequence is the APPROACH. This stage represents the flight from the StG airport to the target area.
To complete this stage you must draw a number of Flight Cards from the Mission Deck equal to the value specified in the Mission Chart. For Mission #1 I will need two cards.
AP.01 I draw the first Flight Card: the card is FC27. Everything's quiet: I can proceed to the next card. (FC 27: APPROACH: no event. RETURN TO BASE: NAVIGATION CHECK, CHECK(4+) or loose one STAMINA. Random values 3 and 4.)
AP.02 The second Flight Card drawn is FC28. The event is "ENEMY CONTACT": in theory I should draw one card and check if the d6 value is equal or greater than the ENEMY PRESENCE value specified by the Mission Chart. Since ENEMY PRESENCE for Mission #1 is "none" I skip this check. (FC 28: APPROACH: ENEMY CONTACT (*). Random values 4 and 9.)
Two cards have been drawn, FC27 and FC28 and hence I can now proceed to the TARGET Stage
Target
The third stage of the Mission Sequence is the TARGET. To complete this stage, you must draw cards from the Objective mini deck until you draw one "Target Reached" card.
TG.01 I draw the first Objective card: it's a "TARGET REACHED" card and then I can start the ATTACK stage.
Attack
The next stage of the Mission Sequence is the ATTACK.
The type of attack depends on the Target: targets with no specific indication are attacked with bombs. Target cards requiring a STRAFE attack have a STRAFE(X) text on them. The GUN EMPLACEMENT target has not a STRAFE text on it so must be attacked with the bombs. The Bomb Attack sequence is the following:
- Release Height Selection. You must select one of the following values: BASE, NEAR or LOWEST
- Bomb selection. You must now select the bombs to be released:
- Dive toward the target. Execute a #DIVE action.
- AA fire. If the AA on the Target Card is greater than or equal to zero execute an #AA FIRE action.
- Bomb release. Execute a #BOMB RELEASE action: if successful you will then execute an #HIT action to determine the damage to the target.
- Pull up. Execute a #PULL UP action
AT.01 Release height selection. You must select one of the following values: BASE, NEAR or LOWEST. Each value will provide modifiers to the following phases (see the diagram: Bomb Attack Sequence: 1. Select Release Height, # DIVE, # AA FIRE, # BOMB RELEASE, # PULL-UP; 2. Draw X Action Cards, X = Engine Power).
- BASE (about 400m). This height will make easier to pull up the aircraft (+1 to #PULL UP).
- NEAR (about 300m). You gain some more precision on the bomb release at the expense of some difficulties on the pull up (+1 to Release, -1 to #PULL UP).
- LOWEST (about 250m). The absolute minimum height: you will gain a great benefit on the bomb release but the pull up will be very difficult (+3 to Release, -3 to #PULL UP).
I decide to select the NEAR height: this will improve the bomb release (+1) at the expense of the Pull Up maneuver (-1). I'm planning to use Action-03 for the Pull Up (2 points) so I'm confident to succeed.
AT.02 Bomb Selection. You must now select the bombs to be released: look at the Target card to select one or more bombs in order to maximize your chances to hit the target. Since I have one single bomb the selection is easy: my 500kg bomb will provide a +1 to the #HIT action.
AT.03 Dive. I must now execute a #DIVE action, that requires a CHECK(4+). No modifiers are currently active: I don't feel confident and I play Action-06 (one AP but for a #DIVE action worth 2 AP). I draw a FC: I only get a "2", but with the +2 of Action-06 the CHECK is successful.
(#DIVE: -? Visibility, -? Formation, -? Altitude; CHECK(4+), Failure: -2 to Release.)
AT.04 AA Fire. Since the AA of the Target Card is "1" I must execute an #AA FIRE action. There is no CHECK in this case, simply a d6 to draw:
#AA FIRE D6: +AA Target, -1 Spend 2 STAMINA; (1-4) Nothing; (5-6) -1 Release; (7+) -1 Release, then #AA DAMAGE.
#AA DAMAGE D6: (1-5) Structural Damage; (6) Engine Damage.
The FC drawn gives 4, modified to 5 by the +1 of the AA on the target. I will suffer a -1 to the #BOMB RELEASE.
AT.05 Bomb Release. I must now execute a #BOMB RELEASE action, with the -1 DRM of the AA and a +1 DRM for the NEAR height. I have three Action Cards in my hand but I want to keep Action-03 for the Pull Up so I need to choose between those two cards: (Action-02, 0 AP; Action-16, 2 AP, CANCEL TAKEOFF EVENT).
#BOMB RELEASE: -? Release Modifiers (previous actions); CHECK(4+), Success: #HIT.
With a 0 DRM I decide to play Action-16 (2AP); in addition I spend 1 STAMINA to play one random card from the Action Deck. The card drawn is Action-04, that provides another point (1 AP; +1 to #PULL UP).
AT.06 I proceed with the CHECK required by the #BOMB RELEASE: the random value is 1 (ouch!), modified by the -1 (AA) +1 (Height) +2 (Action-16) and +1 (Action-04). The final value is a 4: I can proceed with a #HIT action to determine the damage. I now need to verify the amount of damage inflicted performing a #HIT action. The #HIT action is a special one since it uses the same result of the #BOMB RELEASE. The selected bomb provides a +1 DRM.
#HIT **: +/- ? Target modifiers (bomb type and number); ** use #BOMB RELEASE result; (4-5) Target Damaged; (6+) Target Destroyed.
The final value is then 5: 4 (#BOMB RELEASE result) +1 (bomb DRM). I only damage the Target with my attack, but it's not a bad result for a rookie pilot.
AT.07 Pull Up. The final step of the Attack is the Pull Up maneuverer: the target generates a -1 DRM (for the AA) and the selected Height adds another -1. I've planned to play Action-03 since provides 2 points for a #PULL UP action. I spend one STAMINA to draw a random card: I draw Action-07 (1 AP; #STRAFE: 2; +1 to #FORMATION DOGFIGHT), that adds +1.
#PULL UP: +/-? PULL UP Modifier, -? Engine damage, -1 for each AA point; CHECK(4+), Failure: #CRASH.
Finally I draw a FC: the random value is 3. The final score for the #PULL UP check is then:
- 3 (random value)
- -1 AA
- -1 Height
- +2 Action-03
- +1 Action-07
For a total of 4: barely enough to avoid a crash!
Return to Base
The next stage of the Mission Sequence is the Return to Base. To complete this stage you must draw a number of Flight Cards from the Mission Deck equal to the value specified in the Mission Chart. For Mission #1 I will need one card.
RTB.01 I draw the first Flight Card: the card is FC12, AA Defenses! I need to execute a #FLAK to determine the effect of the AA defenses. (FC 12: APPROACH: FIGHTER SQUADRON INVOLVED IN DOGFIGHT, Fighter Squadron Support Decrease by 1. RETURN TO BASE: AA DEFENSES, Execute one #FLAK. Random values 6 and 1.)
The #FLAK action has no modifiers: I draw a "4", resulting on a Structural Damage (I can ignore the Formation reference at the current rank).
#FLAK D6: -? Altitude, -? Visibility; (1-2) Nothing; (3) Formation set to 'Loose'; (4) Structural Damage. Formation set to 'Loose'; (5) Structural Damage. Reduce Formation efficiency by one; (6) Fighter Squadron Support reduced by one.
I draw the first counter from the Structural Damage pool: this counter represents damage to the Engine; to determine the effect I need to draw a new counter from the Engine Damage pool. (Engine DRAW counter, then Engine "-1 MAN" counter.)
The damage reduces the MAN of my aircraft by one: I place the counter in the Engine section of the Airplane.
I then place a tracking counter on the MANEUVER track: the MAN is now -1 (Maneuver track 0, -1, -2, -3; Engine Power 1, 1).