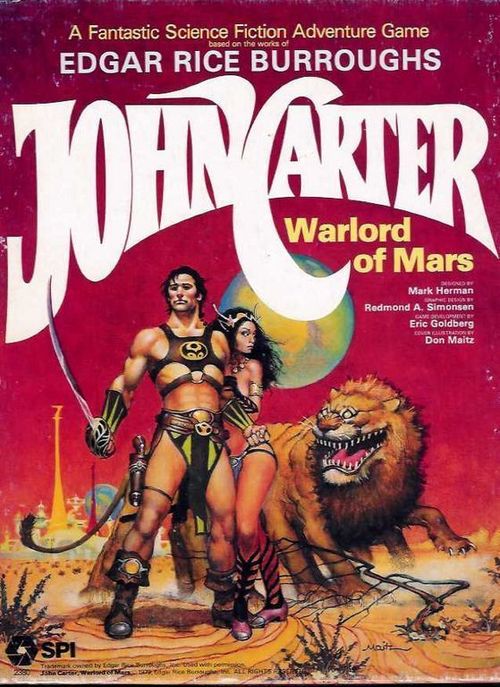
John Carter: Warlord of Mars
John Carter: Warlord of Mars Rulebook
Table of Contents
Table of Contents
- THE DUELLING GAME
- THE STRATEGIC GAME
- THE CITY SUB-GAME
- THE MILITARY GAME
- CHARTS AND TABLES
- ERRATA AND ADDENDA (SPI, November 1979)
Read This First
The rules of this SPI simulation game are organized in a format known as the Case System. This system of organization divides the rules into Major Sections (each of which deals with an important aspect of play). These Sections are numbered sequentially as well as being named. Each of these Major Sections is introduced by a General Rule, which briefly describes the subject of the Section. Many times this General Rule is followed by a Procedure which describes the basic action the Player will take when using the rules in that Section. Finally, the bulk of each Major Section consists of Cases. These are the specific, detailed rules that actually regulate play. Each of these Cases is also numbered. The numbering follows a logical system based upon the number of the Major Section of which the Cases are a part. A Case with the number 6.5, for example, is the fifth Primary Case of the sixth Major Section of the rules. Many times these Primary Cases are further subdivided into Secondary Cases. A Secondary Case is recognizable by the fact that it has two digits to the right of its decimal point. Each Major Section can have as many as nine Primary Cases and each Primary Case can have as many as nine Secondary Cases. The numbering system is meant as an organizational aid. Using it, Players can always easily tell where a Case is located in the rules. As a further aid, an outline of the Major Sections and Primary Cases is given at the beginning of the rules.
How the Section and Case Numbers Work: the number 6.53 is the number of the third Secondary Case of the fifth Primary Case of the sixth Major Section of the rules.
How to Learn to Play the Game
Familiarize yourself with all of the components. Read all of the General Rules and Procedures and read the titles of the Primary Cases. Set up the game for play (after reading the pertinent Section) and play a trial game against yourself referring to the rules only when you have a question. This procedure may take you a few hours, but it is the fastest and most entertaining way to learn the rules short of having a friend teach them to you. You should not attempt to learn the rules word-for-word. Memorizing all that detail is a task of which few of us are capable. SPI rules are written to be as complete as possible; they are not designed to be memorized. The Case numbering system makes it easy to look up rules when you are in doubt. Absorbing the rules in this manner (as you play) is a much better approach to game mastery than attempting to study them as if cramming for a test.
Outline of the Rules
1.0 INTRODUCTION; 2.0 GENERAL COURSE OF PLAY; 3.0 GAME EQUIPMENT (3.1 The Game Map, 3.2 The Counters, 3.3 The Playing Cards, 3.4 Glossary, 3.5 Inventory of Game Parts, 3.6 Dice Selection)
THE DUELLING GAME: 4.0 Introduction to the Duelling Game and Sequence of Play; 5.0 Movement and Facing of Characters; 6.0 Discovery of Attacking Characters; 7.0 Melee Between Characters
THE STRATEGIC GAME: 8.0 Sequence of Play; 9.0 Overland Movement of Characters; 10.0 Control of Villains by Players; 11.0 Adventurous Encounters; 12.0 Befriendment, Treachery, and Remorse; 13.0 Love and Romance; 14.0 Acquisition of Weapons, Fliers, or Thoats
THE CITY SUB-GAME: 15.0 In-City Hero Movement; 16.0 Information on Princess and Villain Location; 17.0 Imprisonment and Arena Duel; 18.0 Random Events; 19.0 Special Rules; 20.0 Strategic Game Set-Up and Evaluating Players' Performances
THE MILITARY GAME: 21.0 Sequence of Play; 22.0 Fleet Movement; 23.0 Fleet Combat; 24.0 Reinforcements and Neutrals; 25.0 Playing the Military Game
1.0 INTRODUCTION
John Carter, Warlord of Mars simulates the legendary world of Edgar Rice Burroughs, Barsoom (see the introduction above).
2.0 GENERAL COURSE OF PLAY
GENERAL RULE:
John Carter, Warlord of Mars simulates the heroic adventures enacted on Mars in two separate stages, which can be properly divided into the Duelling Game and the Strategic Game. In the Duelling Game, Players resolve combat at the man-to-man level, as their characters display derring-do of a high order, all the while fighting myriad Martian adversaries. The Duelling Game is very easy to learn and quick to play, and can allow for an enjoyable hour's play, or be used to introduce those unfamiliar with conflict simulations to John Carter.
For those who wish to enjoy the full spectrum of the Barsoomian experience, the Strategic Game has much more subtlety and variety. It incorporates the Duelling Game, giving the latter a purpose aside from the sheer joy of exercising swordsmanship. Each Player takes the part of a hero and his companions, and also plays the villain who opposes the other Players. Hopefully, the heroes will be able to defeat the villains and press on to their goals, but should the Heroes be defeated they will oftimes be imprisoned and be forced to languish in the pits or dungeons while the villains attempt to make good their unsavory plans. When one is not incarcerated, he may roam the Barsoomian landscape, using a well-chosen mixture of guile, fighting skill, and adherence to the Martian code of honor to achieve victory over the fauna and various-colored men of Mars. Only the bravest and smartest of characters will succeed upon the many perilous quests that a hero's life requires on Mars.
3.0 GAME EQUIPMENT
3.1 The Game-Map
The 22" by 34" game-map serves a threefold purpose: it is a representation of the surface area of Barsoom; a map to a typical city of Barsoom during the period of John Carter; and a detailed tactical map upon which duels are fought. The pieces representing characters are moved on the map of Barsoom on foot, by trained thoat, or by the ubiquitous fliers. A fuller explanation is in the Section on Overland Movement (9.0). The map itself is taken from the official Burroughs map of Barsoom, and is not drawn precisely to scale, as the astute observer will readily see. But the map before the Player is both highly utilitarian and true to the map most prevalent in use.
The city map is a schematic representation of the makeup of an "average" Barsoomian city. The city in which adventurers fare (and it is only used when a hero is in the same city as a villain) is broken down into the areas of the city that the hero will visit in his attempts to bring the villain to his richly-merited downfall and rescue the captive princess. The city map, like the map of Barsoom, is used only in the Strategic Game. Finally, the tactical map is where all battles are resolved. There are actually five distinct parts to the tactical map: the arena display, the flier display, the house display, the street display and the palace display. The last three are interconnected, because action is oftimes so fast and furious that the duellers will traverse considerable distances. The arena display serves both as the setting for all outdoor encounters, and for all battles conducted in actual arenas.
The flier display shows the position in which two boats fought most often -- grappled deck-to-deck. The house display is not typical of Martian houses; it is a composite of the nobles' houses frequented by heroes. The street display shows a common street -- most Martian streets were similar. And the palace display is representative of a typical jed's (Barsoomian prince) palace, including the throne room in which so many climactic scenes occur, several ramp-ways (John Carter was indeed justified in describing such complexes as labyrinthine!), and access to guards' quarters, the dungeons, the flier moorings, etc. It is on this map that the prowess of the Player's characters will be tested, as they silently strike down guards and confront the evil Martian nobles.
Movement on the tactical maps is governed by the boxes (see the terrain key on the map). A four by four square of sixteen boxes is the area a character's counter occupies; guidelines (see the terrain key) help delineate such areas, but in no way inhibit or prohibit character movement.
3.2 The Counters
3.21 The counters provided with the game represent all significant characters who appeared in the Barsoomian epics while John Carter was Warlord. Included in this group are all heroes, villains, minor characters, and personages. There are also counters for Martian wildlife, which the characters often encounter while travelling on foot or by thoat. Some counters represent methods of transportation, such as thoats and fliers. There are information counters, which inform the Player of how many Turns his character will be out of play, how far he has to go before he reaches a city, etc. Finally, there are counters representing navies and airfleets, but these are used only in the Military Game.
3.22 Each character and beast has Levels which indicate the physical punishment he or it can take. Levels are numbered in descending order, with the highest level being the character or beast at full strength. Each time the character or beast is reduced by one level (when he is struck during duelling), his counter is either flipped over, replaced, or removed from play (if the character has no more levels and is not a hero). Loss of a level is immediate.
3.23 Character Identification Numbers
Each character and entity in John Carter is identified by a distinct code number, which informs the Player of the type of character or entity and, in the case of characters, the order in which the character will be selected on the Character Directory (11.9). The following key explains what each code series means. All terms are explained in the Glossary (3.4), or in the appropriate Section.
| Code Series | Character or Entity Type |
|---|---|
| 001 - 010 | Hero |
| 020 - 100 | Noble or Captain of the Guard |
| 101 - 200 | Good Minor Character |
| 201 - 300 | Neutral Minor Character |
| 301 - 400 | Villain Character |
| 401 - 450 | Good Female Personage |
| 451 - 500 | Good Male Personage |
| 501 - 550 | Neutral Female Personage |
| 551 - 600 | Neutral Male Personage |
| 601 - 650 | Villain Female Personage |
| 651 - 700 | Villain Male Personage |
3.24 Sample Counters
Character counter (front): shows the Race/Color, the ID Number, the Level, the Character Name, the Strength, the Agility Rating, and the Alertness Rating. Character counter (back): shows the Reduced Level, Reduced Strength, and the Agility and Alertness Ratings. Beast counter (front and back) is laid out the same way (race, ID number, level, beast name, strength, agility rating, alertness rating; reverse shows reduced level). A Fleet counter (front only) shows Nationality, Unit Symbol, Number, and Fleet Strength Points. A Commander counter (front only) shows Name, Leadership Value, and Diplomacy Value.
Counter Errata: The Thern Personage, Phaidor (number 503) should have an Agility Rating of "A" printed on her counter.
3.25 Once a character or beast reaches level 0, the character or beast is considered dead. Remove the counter from play. Exception: Case 3.26.
3.26 Heroes never die; instead an unconscious counter is placed where the fallen hero is.
3.3 The Playing Cards
There are four types of playing cards provided with John Carter: Movement Cards, Random Events Cards, Acquisition Cards, and Maneuver/Option Cards. Each of these cards are discussed by type below.
Movement Cards (numbered 066 - 115)
When a character is moved on the map of Barsoom, the owning Player draws a Movement Card to determine how far his character is moved. The card has three different totals -- one each for flier, thoat, and walking movement. See Section 9.0 for a fuller discussion of Movement Cards.
Random Events Cards (numbered 001 - 065)
At the beginning of each Strategic Turn (during the Pursuit Sub-sequence), each Player picks a Random Event Card. Random Event Cards allow Players to directly influence action in the game. There are three types of Random Events: those employed by a Player in his capacity as a hero; those used by a Player in his capacity as a villain; and those played immediately. This distinction is so noted on the card. See Section 18.0 for a fuller explanation.
Acquisition Cards (numbered 116 - 135)
When a character is bereft of thoat, flier, and/or weapons, he will probably wish to go to a city and acquire these items, as they are extremely useful. The Acquisition Card will inform the Player whether his character must duel someone for the privilege of ownership of the item, or whether the acquisition is performed without mishap. See Section 14.0 for a more complete discussion of Acquisition.
Maneuver/Option Cards (numbered 136 - 167)
Maneuver/Option Cards serve three purposes: when playing the Strategic Game, they allow Players to duel between master Swordsmen (see Case 7.8); and when playing the military game, the Cards are necessary to perform fleet maneuvers and/or diplomatic in-fighting. See Sections 23.0 and 24.0.
3.4 Glossary
The terms explained below are either terms in the John Carter books the Players may not remember, or game terms not explained later in the rules. It should be no trouble to discern which are which.
Apt: A creature which mainly inhabits the northern polar regions. It has a white furred bear-like body, but its head was most noticeable for its insectoid eyes. While these creatures are reputed to be quite fierce, they seem to have given our heroes little trouble in the past.
Banth: Generally described as the Martian lion, the banth is in fact, nearly hairless, with the exception of its mane, and has ten legs. These creatures terrify their victims with their long rows of sharp teeth, their green protruding eyes, their low, eerie moan when hunting, and -- the coup de grace -- its paralyzing roar just before it finished off its prey.
Beast of Mars: A beast of Mars is any counter with combat values not representing a character or Fleet. Basically, beasts of Mars are creatures who figure prominently in the John Carter stories.
Black Pirate: The black-skinned First Born (so-called because their lineage went back to the Tree of Life) became known in the era of John Carter as Viking-type raiders, who preyed upon the Therns (q.v.) and the other peoples of the southern polar regions. The First Born of Kamtol are not strictly pirates, but were alluded to as such. The distinguishing feature of the Black Pirates is great physical beauty.
Calot: Calots are referred to as the Martian dog, largely because they have all the virtues Terran dogs are supposed to have: some intelligence; steadfast devotion to their masters; and aptitude for service as excellent watchcalots. Their bodies are mounted on ten squat, short legs, but they are as large as a Shetland pony and are faster than Earth greyhounds. Those calots not domesticated by the Green Martians are usually found roaming the countryside in wild, savage packs.
Character: A character is defined as a hero, villain, minor character, warrior of Mars or personage.
Entourage: The Entourage is defined as all characters travelling with a given villain. These include the villain himself, any captive personage, and all henchmen (i.e., all other characters besides those falling into the first two categories travelling with the Villain).
Flier: The main and swiftest mode of transportation for the most civilized of the Martian city-states. Designed to resemble a Terran yacht of the early twentieth century, the fliers used the Eighth Barsoomian Ray (or Ray of Propulsion) to fly in the skies of Barsoom at a speed equalling that of a modern commercial plane. Fliers come in all sizes, ranging from a one-man flier to the huge military battle vessels.
Good Character: Good Characters are those who have distinguished themselves by fighting along with one of the heroes. The Good characters were to a man (or woman) steadfastly loyal to their hero. Though there are no restrictions in John Carter on whether a neutral (q.v.) or a good character should be chosen for treachery (see Case 12.2), Players who prefer their games to be more aesthetically pleasing should betray with neutral characters before good characters.
Green Martian: Green Martians are organized tribally and are perhaps the most uncivilized of the major races of Barsoom. Fifteen feet tall, four-armed, and equipped with tremendous "tusks," a Green Man is indeed a formidable opponent in a fight. Recently, the Green Men of the eastern hemisphere have become reconciled with the Red Martians, due to the great friendship between Tars Tarkas, the greatest leader the Green Men have ever known, and John Carter. But there are still many savage tribes which prey on unsuspecting adventurers.
Hero: There are seven hero characters in the game, six of whom may be played as a Player's main character. A hero character may never be killed (he may fall unconscious), and his identity determines the Player's goals within each game. When a player initially chooses which hero he is going to play, he should weigh the various merits of the heroes and play the one best suited to his style of play. And though John Carter is obviously the "best" Hero of all, his goals are proportionately more difficult.
Hormad: After Ras Thavas retired to his laboratories to do good, he experimented with creating human simulacrums from human tissues. While he succeeded to an extent, the entire experiment backfired on him. Most of the hormads were of a low order of intelligence, but those who weren't rebelled against Ras Thavas and forced him to continue creating hormads in the hope he would create enough to overrun the entire planet of Barsoom. While their plan did not succeed, it is hard not to sympathize with the pathetic hormads. Often radically misshapen, most hormads look like horrible caricatures of the Frankenstein monster.
Invisible Warrior: The men of Invak and Onvak (in the Forest of Lost Men) discovered a great scientific secret which allowed people to become completely invisible, except when exposed to certain types of light. Each day a citizen ingests a pill to make him invisible, and the effects last through to the evening. The men of the two cities are red-skinned, but not as skilled as the cosmopolitan Heliumites at social graces or swordplay.
Kaldane: A member of a race of intelligent heads with crablike appendages. The kaldanes use their appendages to direct rykors, which are headless bodies designed to be used by the kaldanes. Most of the kaldanes were clones (though the specific word is not applied to them), and had some forms of mind control.
Minor Character: A minor character is any named character with combat (i.e., duelling) values, who is not a warrior of Mars (q.v.). Minor characters are controlled by both the villain and hero aspects of the Player (see Section 10.0).
Neutral Character: A neutral character is someone who fared with one of the heroes on his adventures, or was a stooge for one of the villains. In either case, the neutral character at some point proved untrustworthy or antagonistic to the hero.
Personage: Personages include all female characters and any other character lacking combat values. It is possible for a personage to have combat values and be female, but not possible for a personage to be male and have combat values. This is not to say Barsoomian women are not the equal of their Terran counterparts (except they are oviparous), but rather that the social mores of Barsoom at the time of John Carter were such that women were relegated to secondary roles and treated with great respect.
Plant Men: One of the four original races descending directly from the Barsoomian Tree of Life, the original plant man remained dangling from the Tree longer than any of the other races. As an indirect result, the plant men reproduce their young in their armpits until the offspring are over one foot tall, at which point the young break free, an exact replica of the parent. In appearance, plant men are around ten feet tall and a dead blue with the exception of a single white band around a solitary white eye. They have long tails and are able to leap much like a Terran kangaroo, and have two short, supple arms, at the end of which are mouths through which they ingest.
Princess: Princess is the name by which the betrothed of a Barsoomian man is called (and she in turn calls him Chieftain). However, throughout the rules of John Carter, princess refers to any woman a hero is obligated to rescue.
Red Martian: The predominant race on Barsoom is the race among whom John Carter chose to settle. Red Martians physically resemble modern North Americans with the obvious exception of their skin color.
Retinue: The retinue consists of all characters accompanying the hero. If another hero were to join the hero the Player owns, the second hero is considered part of the first hero's retinue.
Sith: The sith was perhaps the most dangerous of Martian beasts because it could not be defeated except with a weapon dipped in the venom of a (presumably previously killed) sith. It is surmised that the Martians were first able to deal with siths when a fortunate man chanced upon one dead of natural causes. A sith looks much like an enlarged version of a Terran bee, and is described as being the size of an ox and having the face of a hornet, aside from its large and deadly stinger.
Thern: A member of the white-skinned race which believed it had the right to prey on the unsuspecting Martians who would go in pilgrimage to the Valley Dor, where the Martians believed they would find heaven. Instead, the Martians were usually beset upon by plant men and White Apes (q.v.) the Therns kept to "greet" the incoming Martians. Generally, the Therns were people of despicable character, being the only race on Mars which would knowingly violate the Barsoomian Code of Honor in duel.
Thoat: The main Barsoomian steed, thoats can travel more swiftly than Terran steeds because of their eight legs. Thoats are generally a dark grey color, except for a white streak on the belly, and, as with most Barsoomian creatures, have a long row of sharp teeth. The thoats are guided by telepathic messages sent to them by their masters, but are not easy to train to the point where they will accept a master. The other beast which could be controlled by telepathic means is the zitidar, the Barsoomian equivalent of the elephant, but these are used as draft animals rather than as transport for humans in most cases.
Villain Character: Each Player controls both a villain and a hero character. The character who matters for success in the game is the hero, but the villain is used to thwart the other Player's hero and to more fully simulate the Barsoomian epics. Often a Player controls more than one villain character, but these multiple villains travel together until death do them part.
Warriors of Mars: Warriors of Mars are always identified by race rather than name. They always have only one level, and represent the countless panthans (mercenaries), guardsmen, and bystanders who figure only fleetingly in the Barsoomian tales, but pose a problem by their sheer number for even the most resourceful of heroes.
White Apes: Averaging close to fifteen feet in height, these four-armed terrors were justly feared for their tremendous brute strength and rudimentary intelligence. Unlike other Martian beasts, White Apes carried clubs and posed a huge problem even for heroes, as they could dash the brains from a man's head with one swipe. Hairless except for a shock of stiff hair around their head, the White Apes greatly resembled a humanized gorilla.
White Martians: There are several white skinned races on Mars, most of them dating back to the Orovars, the original predominant race on Mars. The term White Martians encompasses the remnants of the Orovar race located at Horz, the men of Lothar (also a relic of earlier times), and John Carter, who, though he originated on Jasoom (Earth), chose to live on Barsoom. This classification does not include the Therns (q.v.), though they are also white-skinned.
Yellow Martian: The race inhabiting the north polar regions is the Yellow Martians. Similar in physical appearance to red men (or, for that matter, any other humanoid Martian race), the yellow men were a distinctive darker yellow. Before John Carter discovered the Pole, the yellow men had made some technological progress (including the invention of their own Atmosphere Plant), but were stagnating under the rule of self-indulgent tyrants.
There are many other creatures who figure in the Barsoomian stories, but none, alas, whose place is large enough to merit inclusion in John Carter.
3.5 Inventory of Game Parts
Each game of John Carter, Warlord of Mars should include the following components: 1 rulesbook; 1 background article; 1 400-counter countersheet; 2 sets of identical Charts and Tables; 168 Cards, numbered from 001 to 168; 1 22" by 34" Map; 1 six-sided die; 1 twenty-sided die; 1 hardbox with tray.
3.6 Dice Selection
Unless otherwise noted in the rules or on a chart, the Players always roll the twenty-sided die (numbered 1 to 0 twice) to determine the outcome of any game mechanic requiring the intercession of chance. The "0" face is considered at all times to be equal to 0.
THE DUELLING GAME
The Duelling Game can be played by itself, and is self-contained for that purpose. However, it is largely intended to be an integral part of the Strategic Game, used to resolve inter-character and creature combat. Players will note passing references to rules concerning the Strategic Game; they should ignore the passages except when incorporating the Duelling Game into the Strategic Game. The Duelling Game is strictly a two-Player game.
4.0 INTRODUCTION TO THE DUELLING GAME AND SEQUENCE OF PLAY
COMMENTARY:
The Duelling Game is intended to serve as an introduction to the concept of conflict simulations. Players will be able to learn the rules easily and answer any questions by using some of the counters in a few hypothetical duels. The Duelling Game is also part of the Strategic Game, wherein it is used to resolve all Encounters and Duelling situations. Whenever the Duelling Game is to be used in the Strategic Game, it will be called for in the Strategic Game rules.
GENERAL RULE:
In the Duelling Game of John Carter, play occurs in Tactical Turns. Each Tactical Turn is subdivided into several Sub-sequences, which are a part of the greater Sequence of Play. Play proceeds in accord with the Sequence, which is the strict order in which all action within a Tactical Turn must take place. Once Players have concluded an entire play-through of the Sequence of Play, the Tactical Turn is over, and play advances to the next Tactical Turn.
Sequence Outline
Pre-Discovery Sub-sequence
A. Pre-Discovery Action Phase
The attacking Player (i.e., the Player with characters entering the Display) moves and/or melees, or may move and melee. However, a character may not melee and then move. The attacking characters move and/or melee in accordance with the rules for such (Sections 5.0 and 7.0). A character's entire actions for the Phase are resolved before the next character's actions for the Phase are resolved. Once all characters' actions are over, the Phase is concluded. The attacking Player should note where he may have given the defending Player a chance to make a discovery check (see Case 6.1).
B. Discovery Check Phase
The defending Player may now make one attempt to discover the attacking Player's character(s). The defending Player uses the discovery rules and determines which character may attempt to discover the attacking character(s).
Phases A and B are repeated until the defending Player executes a successful discovery check. Once a successful discovery check has been made, play proceeds to Phase C.
Discovery Sub-Sequence
C. Attacker Movement Phase
The attacking character(s) may now be moved in accordance with the movement rules.
D. Attacker Melee Phase
The attacking character(s) may now perform melee in accordance with the melee rules.
E. Discovering Character Action Phase
If the discovering character is still alive, he (or they) may move and melee as described in Phase A. If the discovering character(s) is dead, the Phase is skipped. Only the discovering character(s) may perform actions in this Phase; all other defending characters may not do anything.
If a discovering character is still alive, play proceeds to Phase F. If a defending character discovers the attacking character as a result of actions taken in Phase C or D, play begins again at Phase C (however the original discovering character(s) must be dead for this proviso to apply). If there are no discovering characters whatsoever remaining, play begins again at Phase A.
Post-Discovery Sub-sequence
F. Initiative Determination Phase
All characters are now free to take action. The Players determine in what order the various characters will move and/or melee. Generally, a character with an Alertness Rating preceding the other characters' alphabetically will perform his actions first. See Procedure, Section 5.0 for further elucidation.
G. Joint Action Phase
The players move and melee with all characters they wish to use, in the order determined in Phase F. The actions are performed exactly as in Phase A, but in this Phase both Players utilize their characters.
H. Turn Indication Phase
The Players note the passage of one Tactical Turn by advancing the Turn marker (if it should be necessary to record the passage of Tactical Turns in the duel they are fighting), and determine whether or not any prisoners have been freed (see escape, Case 7.7), which characters have exited the display (should that be possible within the duel), or if all characters on one side are dead, in which case the duel is over.
Unless the duel is over, play begins again at Phase F. Play continues from Phase F to Phase H until the duel is over.
5.0 MOVEMENT AND FACING OF CHARACTERS
COMMENTARY:
Movement on the tactical map during any one Phase represents the limited amount of positioning and running that can be done in the time several swordstrokes are executed. Therefore, characters are limited in the amount of movement they may perform in a Tactical Turn. Heroes may move more quickly than others due to superior reflexes. John Carter and other Jasoom-sprung persons move even more swiftly, their Earth muscles being freer to operate in the relatively light Martian gravity.
GENERAL RULE:
Characters may only move once per Action or Movement Phase, with the exception of heroes. A character may be moved up to four boxes in any direction or combination of directions as his movement. The moving character's counter must abut the lines regulating movement at the beginning and end of his movement. At no time may any part of a character's counter overlap a wall. A Player may freely change the facing of a character during his movement, but a character may only face in one of four possible directions. Once the movement of a character is completed, his facing may not be changed. Note: Movement may not be performed after melee, but does not inhibit a character from participating in melee in the same Phase. Exception: see Case 5.34.
PROCEDURE:
All characters are moved (and/or may perform melee) in strict order, regardless of which Player owns them, according to their relative Alertness Ratings, with the most alert character moving first, the next most alert character moving second, and so forth. "A" is the highest Alertness Rating, "B" the second highest and "C" the lowest. If a Player owns two or more characters with identical Alertness Ratings, he chooses which character goes first. If both Players possess characters with identical Alertness Ratings, they both roll a die. The high rolling Player moves all his characters with the given Alertness Rating before the other Player moves any of his characters with that Alertness Rating. At the end of the high rolling Player's character's actions, the other Player moves his characters with that Alertness Rating. When a character performs actions, it is considered his Turn.
CASES:
5.1 Restrictions on Movement
5.11 A movement is defined as moving a character's counter up to four boxes in any direction or combination of directions (see diagram 1 for examples of possible moves). A character must begin and end his movement with all edges of the counter abutting a straight line (such as a guideline). Since the maximum movement of four boxes is equivalent to the length or width of a counter, it can be said that movement is up to the length, width or diagonal length of a counter. (Diagram 1, "Legal Moves", shows a counter moving up to four boxes orthogonally or diagonally.)
5.12 A movement must be performed so the character's position at the beginning of movement would overlap or be orthogonally or diagonally adjacent to the original position of the counter at the end of movement.
5.13 A character need not be moved the full four box allowance during movement, but the movement must end with the counter touching four straight lines. A counter must be bounded by such lines at the beginning and end of movement. A counter not fitting these requirements has been moved illegally.
5.14 A character may not be moved more than one movement per Phase (exception: Cases 5.2 and 5.3).
5.15 A character may not be moved "through" another character, Enemy or Friendly. At no time in play may any part of a character's counter overlap another character's counter (but see Cases 5.34, 5.41 and 5.73).
5.16 Movement may not be performed through walls, whether exterior or interior. See the terrain key for examples of walls. Doors are considered open (exception: Case 5.55), and therefore may be moved through (see diagram 2). (Diagram 2, "Blocking Terrain", illustrates legal and illegal moves around walls and doorways.)
5.17 Movement is not permitted after a character has performed melee in a Phase. If a character has meleed in a given Phase, he must wait until the next Phase in which movement is permitted before moving again.
5.18 A character may not leave the tactical display unless the instructions permit it (see Cases 5.5 and 7.2). A character may exit a display in one of two ways: (1) by entering another display, or (2) by exiting a display where a large arrow points off the display. If a character exits a display via method 2, he has escaped the duel and may not melee for the rest of the Strategic Turn (unless he involves himself in another duel). A character may not escape the open/arena display, and certainly not the flier display (it's a long drop).
5.2 Hero Movement
Because the heroes who lived and loved on Mars were head and shoulders above their peers in ability as swordsmen, they were accorded respect by people everywhere. And this respect was well-earned, for the heroes could often duel many opponents at once and still emerge victorious.
5.21 A hero who does not begin an appropriate Phase adjacent to an Enemy character may engage in Hero Movement. When a hero is engaged in melee, he must first maneuver so he is not adjacent to an Enemy character (or slay the Enemy character), so he will be able to utilize hero movement in the next Phase in which movement is permitted.
5.22 Hero movement consists of performing two movements in one Phase. All the normal movement restrictions apply, and the movements must be performed consecutively (a hero could not move, melee and move again, for instance). When performing hero movement, the Player need not move the full two movements. If he does wish to, he moves the hero twice using the normal movement rules.
5.23 Though heroes are capable of moving more than once, they must perform their movements as their part of the Action Phase. In other words, a hero must perform all movements consecutively, or else forfeit the privileges of hero movement. A hero character may not "split" his move (i.e., allowing other characters to move before he moves again).
5.3 John Carter, Carthoris and Vad Varo
The man from Earth found himself at a tremendous advantage in the thin Martian atmosphere. His muscles, which were accustomed to the much heavier Earth gravity, made him a fearsome opponent and an extremely quick one at that. John Carter and Vad Varo (named Ulysses Paxton on Earth) both came from Jasoom, and Carthoris is John Carter's son. Because of their leaping abilities, the three are entitled to special movement benefits.
5.31 John Carter may perform three movements in a Turn at all times, unless engaged in melee. In addition, once per duel, he may perform four movements in a single Phase. John Carter also has the jumping ability described in Case 5.34.
5.32 Carthoris and Vad Varo may perform three movements in a Phase until they have been engaged in melee, after which they are reduced to normal hero movement for the duration of that Duel. In addition, they may for one Phase only after being engaged in melee move three movements in a single Phase (but not if adjacent to an Enemy character, of course). Carthoris and Vad Varo have the jumping ability described in Case 5.34.
5.33 John Carter, Carthoris and Vad Varo have all those restrictions of hero movement imposed upon them. See Case 5.2.
5.34 Jumping
Any time the owning Player of either John Carter, Carthoris or Vad Varo wishes one of these characters to perform jumping, and the character in question is not engaged in melee, they may do so. Jumping allows a character to move over a character's counter (Enemy or Friendly) and requires the use of at least two movements. The character may not end his movement on top of another character's counter, and may not engage in melee the turn he performs jumping. A character performing jumping may jump through doors as long as he meets all the normal movement requirements. Jumping is subject to all restrictions of hero movement.
5.4 Carrying Unconscious Characters
5.41 A character may pick up an unconscious character if he spends an entire Action Phase adjacent to that unconscious character. The carrying character may not initiate melee during this Phase. At the end of the Phase, the unconscious character counter is placed under the carrying character's counter. The carrying character may then move normally (exception: see Case 5.42), and, if initiating melee, subtracts one from his die-roll (see Case 7.3).
5.42 Any hero character carrying an unconscious character loses one of his extra movements, and the use of the jumping ability. Therefore, John Carter will only be able to perform two movements, and Carthoris and Vad Varo will presumably have no additional movement at all. In addition, John Carter, Carthoris and Vad Varo may not use their one-time movement (see Cases 5.32 and 5.33) when carrying an unconscious character.
5.43 Only one unconscious character may be carried at a time.
5.5 Special Tactical Map Movement Rules
5.51 Flier Staging Area
The Flier Staging Area is only used when a Player pulls an Acquisition Card (see Section 14.0) indicating there will be a duel on a (grounded) flier. The character who is attempting to abscond with the flier may only have one other character aiding him; any other characters accompanying the hero are simply placed off-board until the duel is resolved. Once the flier is empty of the defending side, the acquiring character possesses the flier (even if the defenders should have retreated to the other flier).
5.52 Movement Between Fliers
When duelling in the air (that is, any time duelling occurs on a flier with the exception of Acquisition), Players may wish to move characters between fliers. Unless the moving character is a hero or is moved so that the whole of his counter is within the shaded area between fliers throughout his movement, there is a chance the crossing character will fall. To cross, the character must be able to place his counter so one part of the counter touches at least one box of each of the fliers (this applies to heroes also). The owning Player of the character then rolls a decimal die. If he rolls a 1 through 3, the character is considered to have plunged to a horrible death, and is removed from play. Any other roll and the character has successfully performed the movement.
5.53 John Carter, Carthoris and Vad Varo in Fliers
As an exception to Case 5.52, the above three heroes may use their jumping ability (see Case 5.34) to cross between fliers, and may do so as long as they begin and end their movement touching any box within a flier.
5.54 Secret Passageways
Secret passageways (in the palace display) may only be used by a character whose Player possesses a Random Event Card allowing movement into the secret passageway (see Section 18.0, Random Events). Once one character has used the secret passageway, all other characters on the palace display may use it. Any character reaching the end of a secret passageway may exit it and thereby escape.
5.55 The Dungeon
On the palace display is a dungeon. Characters who are being held prisoner may be placed in the dungeon. For a hero character to get a character out of a dungeon, one with his counter abutting a manacles symbol, he must spend one Tactical Turn adjacent to the door of the dungeon, after which it is considered open, and four Tactical Turns adjacent to the imprisoned character, after which the imprisoned character is freed (and unarmed). During any of the Turns a hero remains adjacent to the door or the imprisoned character, the hero may not initiate melee.
5.56 The Tower
The Tower is in the palace display. If a character spends one Turn in the tower adjacent to the arrows without being adjacent to an Enemy character, the character escapes. In addition, the characters may choose to escape in a flier, since there are always at least two moored at the top of the tower. Characters often enter the palace display via the tower, since a good strategy is to fly onto the tower and sneak down into the palace proper.
5.57 The Open (or Arena) Display
A Player may not move a character into a restricted movement box unless the opposing Player has chosen to move a character adjacent to such a box after the first Turn. If the opposing Player does so, the Player who did not move one of his characters adjacent to a restricted box(es) may always move in restricted box(es), but the other Player may never move one of his characters there.
5.6 Facing
5.61 While facing has no relevance to movement, per se, it may only be changed during movement (or be changed in lieu of movement). During a Phase in which a character may move, the Player may freely change that character's facing in any and all legal directions.
5.62 Facing of all characters must always be clear, so the Player should take care to specify which directions his characters are facing by placing them on the lines carefully. If there is any doubt as to which direction a character is facing, the Enemy Player establishes which of the two possible facings the character assumes.
5.63 There are four ways a character may face, and these are clearly shown in diagram 3 (Possible Facings: the four sides of the counter). All characters must be facing in one of these directions at all times.
5.64 Facing has a direct effect on melee. See Case 7.4.
5.7 Positioning Personages on the Tactical Displays
5.71 Unless held captive or in the dungeon, a personage may be moved freely by the owning Player.
5.72 The Enemy Player may move a personage if he has a non-personage character adjacent to or in the same box(es) as the personage. If this is the case, the two characters are moved according to the Enemy character's Alertness Rating. The presence of a Friendly character (Friendly to the personage, that is) does not prevent movement by the Enemy character.
5.73 Personages do not affect melee (exceptions: see Cases 7.16 and 19.23) and may be moved through or onto characters to gain position in melee. Characters may likewise move through or onto personages throughout movement. It is assumed personages are not affected by melee, since even the most vile caitiff would never swing at a woman with his sword.
5.74 Personages being moved by an Enemy character who find themselves no longer adjacent to any Enemy characters are freed. If they have not moved during the Phase, they may be moved by their owning Player. Otherwise, they simply remain in place.
5.74 [sic: numbered 5.74 a second time in the original] When Llana of Gathol or Tavia become active participants in melee (see Case 19.23), they are immediately moved by their owning Player so that they would be positioned legally (one of the two Personages could not, for instance, be in the same box as a Friendly or Enemy character). If movement is necessary, the Personages may not melee in the Phase they disengage from the (now) illegal position.
5.75 If either Llana of Gathol or Tavia engage in melee, they are subject to all rules for same; thus they prohibit entry into a box occupied by their counters by an Enemy or Friendly character, for example. Until their combat values come into play, however, they could be in the same box as an Enemy character who was killed, for example, and not be affected.
6.0 DISCOVERY OF ATTACKING CHARACTERS
COMMENTARY:
Often the key to successful missions during the years of glory on Barsoom was stealth and the ability to surprise the enemy. One always has to be wary of ever alert guards, and evil villains who would be well aware that the hero would attempt to rescue captives or slay the villain. Some of the most glorious exploits related to us were performed with complete surprise on the side of the attacker, and this surprise is what every hero strives for.
GENERAL RULE:
Unless it is stated that no conditions of surprise exist (see Case 7.2), the defending Player must always discover one character of the attacking side before he may move any of his characters. Until discovery, the defending Player determines once every Discovery Phase the chance of discovering the attacking characters by the procedure below.
PROCEDURE:
Once an attacking character has entered the display the defending characters are on, the defending Player has a chance to discover that attacking character. Determine the defending character in the most favorable position to an attacking character (from the defender's point of view -- see Case 6.1). Then consult the appropriate Discovery Matrix (6.4) and see what number the defending Player must roll on a ten-sided die. If the roll is equal to or less than the indicated number on the Matrix, any and all attacking characters have been Discovered by the defending character. If the defending Player successfully rolls (i.e., rolls less than the required number) on the Discovery Matrix play proceeds to Phase C. If he does not, play returns to Phase A. Note: The defending Player may make only one discovery check during each Discovery Check Phase.
6.1 How Discovery of Attacking Characters Occurs
6.11 Discovery occurs when an attacking character fails to kill a defending character in melee.
6.12 Discovery occurs when an attacking character is within four boxes of a defending character. However, before discovery occurs, the attacking character may melee the defending character.
6.13 Discovery occurs when an attacking character kills a defending character within eight boxes of a second defending character in the same room or corridor.
6.14 The only other way discovery may occur is through the Discovery Matrices and use of the Alertness Ratings. (See Case 6.2.)
6.2 Discovery Through Alertness
6.21 Any Discovery Check Phase a defending character is eligible to attempt discovery (per Case 6.22), the defending Player may attempt one discovery check.
6.22 A discovery check may only be attempted if the attacking Player has a character in a position where a defending character could move to the attacking character's position without (1) turning two corners (2) crossing two doorways or (3) turning one corner and crossing one doorway. If an attacking character's position could be moved to a defending character without violating any of the above conditions, the defending Player may make one discovery check. (Exception: see Case 6.25). See Diagram 4 on page 10.
6.23 If a discovery check is possible, the defending Player must determine whether he must use the In Room or the Outside Room. A Player must use the In Room matrix if (1) the attacking character is within the same four walls as the defending character, or (2) the attacking character is in the same corridor as the defending character and a straight line unblocked by doorways or walls may be drawn between the two characters. If one of these two conditions are not fulfilled, the defender must consult the Outside Room matrix.
6.24 When attempting discovery, the defending Player compares his choice of defending character's Alertness Ratings to the nearest attacking character's Alertness Rating on the appropriate discovery matrix, and rolls a decimal die. If the number rolled is equal to or less than the number found on the Discovery Matrix, the attacking character is discovered. If the number rolled is higher than the number found on the Discovery Matrix, the attacking character was not discovered, and play returns to Phase A. Note: Regardless of circumstances, the defending Player may only roll once for discovery each Phase.
(Diagram 4, "Discovery Impossible", shows three examples in which no discovery check may be made: a defending character that would have to turn two corners, cross two doorways, or turn one corner and cross one doorway to reach the attacker's position.)
6.25 Should the attacking Player use a Disguise Random Event Card (see Section 18.0), then no discovery check is ever made until the attacking player has a character either melee a defending character or move into the throne room. After either of these two criteria are fulfilled, the disguise is no longer in effect.
6.3 Effects of Discovery
6.31 The turn after discovery, should the discovering character still be alive, all defending characters may be moved and engaged in melee by the defending Player. Melee continues until all defending characters are either dead or exited from the display, or all attacking characters are either unconscious, dead or exited from the display.
6.32 Discovery may be averted if the attacking Player can kill the discovering character before it is the discovering character's turn to perform his actions for the Action Phase. Should the attacking Player be able to do this without causing further discovery (and killing any other character who discovered the attacking characters) he has prevented the discovering character from transmitting the discovery by means of shouting, and play returns to Phase A. Otherwise the Sequence of Play continues to Phase F.
6.33 If at the end of the Turn the discovering character is dead, but a second discovering character is alive, the attacking Player is discovered and all defending characters may be freely moved, etc.
6.4 Discovery Matrices
(see separate sheet; transcribed in the Charts and Tables section at the end of this document)
7.0 MELEE BETWEEN CHARACTERS
COMMENTARY:
Barsoomian history in the days of John Carter indicates it was a period comparable to the finest swashbuckling days of Earth. Indeed, some of the personal combats that took place on Mars have long been written about and remembered by fighting men across Barsoom. These rules allow Players to recreate some of the great duels fought in John Carter's time.
GENERAL RULE:
Except when restricted below, any time a character is adjacent to an Enemy character, and the character is facing in the proper direction (see Case 7.4), the player owning the character may initiate melee during any of his Action or Melee Phases.
PROCEDURE:
The Player initiating the melee rolls a decimal die. To this number he adds or subtracts all relevant modifications (see Case 7.3). If the adjusted roll is greater than or equal to the defending character's Agility Rating, then the defending character is reduced by a level (see Case 7.6).
7.1 Restrictions on Melee
7.11 Melee may only be performed in the Action Phase of the Pre-Discovery Impulse, the Attacker Melee Phase, the Discovering Character Action Phase or the Joint Action Phase by a character whose turn it is (see the Procedure of Section 5.0). Melee may be performed after movement, or after change of facing, or simply by itself.
7.12 The meleeing character must be directly adjacent to (i.e., touching the same line or point and abutting) the victim of the attack. See Case 7.4.
7.13 A character may only perform melee once per Phase. A character may only melee a single Enemy character per Phase. However, a single Enemy character may be attacked by up to eight (the maximum physically possible) Friendly characters.
7.14 A hero character may not melee another hero character, nor may he melee any characters directly under the control of another hero character (obviously, this does not include those characters the player controls in his villain capacity). Conversely, a character under the control of a hero character may not melee a character under the control of another hero character. (Exception: see Case 12.2.)
7.15 An unconscious character may not be meleed.
7.16 No personages may be meleed unless the personage initiates melee (which is only possible for Tavia or Llana of Gathol).
7.17 All references to characters in the rules also apply to beasts of Mars.
7.2 How to Set Up a Duel
7.21 Open or Arena Duels
In an open or arena duel, each side's characters enter opposite ends of the display, as randomly determined by the Players. Players set up their characters in the shaded areas of the display, all normal melee rules apply, and all characters are considered discovered. In addition, characters meleeing on the open or arena display cannot move away from their opponent until melee is first initiated. All duels in the open arena display are to the death (or unconsciousness, if hero characters are involved).
7.22 Street Display
Unless stated otherwise, street battles are to the death. To set up for a street display duel, the entering (or attacking) character secretly writes down where he and any companions will enter (i.e., which end of the street). The defending player then deploys his men at least twenty boxes away from each street end. All characters are considered discovered, and no character may enter the house or palace display proper. No character may move away from his opponent(s) until melee is joined. The attacking character may escape by exiting on the opposite side of the street from the side he entered.
7.23 Flier Display
When setting up for a flier duel, the attacking Player sets up his characters in his flier first (or in the staging area, should it be acquisition causing the battle). The defending Player then sets up his characters in his flier. There is no discovery necessary when engaged in a flier duel, and flier duels are to the death. (Exception: Case 5.51.) It is possible for characters to begin a flier duel adjacent.
7.24 House Display
When setting up on the house display, the hero Player secretly writes which of the two entrances the hero and any companions will enter on. The defending player then deploys his men within the following restrictions: he must place any villains in a room, and he must place at least half of his other characters (rounding down) outside a room. Any personage must also be in a room. The attacking character(s) must be discovered before the defender may move his characters. Both sides are eligible for escape, but the hero must escape through an exit he did not enter by.
7.25 Palace Display
The palace display has extremely specific instructions on how to set up. The attacking character must write down which of the three entrances he is using (main gate, side entrance or tower). The defender must then deploy his men in the following fashion:
(1) The villain must be placed in the throne room; (2) any captive personages or characters must be placed in the dungeon or the throne room; (3) any minor characters must be placed in the throne room; (4) any captains of the guard and/or nobles must be placed in shaded area A; and (5) warriors of Mars must be placed in pairs of two (with any odd-numbered warrior being placed alone) in the shaded areas in alphabetical order (though if area A is already occupied, warriors may obviously not be placed there). Any left-over warriors should be placed in a room. However, a captive female may not be placed in the dungeon with a captive male (because of the Martian ethical code). One or the other must be held captive in the throne room. Attacking characters must be discovered before the defenders may take action, and escape is possible from this display -- but only via secret passageways if the proper Random Event Card is played.
7.3 Die-Roll Modifications to Melee
7.31 Add the meleeing character's strength rating to the die-roll.
7.32 Attacking from Behind
If the meleeing character is attacking any character but a hero from boxes 1, 7 or 8 (see diagram 5, Case 7.4) or a hero from box 8, he is attacking from behind. The attacking character adds three to his die-roll.
7.33 A meleeing character who moved in either the Phase in which he melees, or the immediately preceding Phase (which applies to only Phases C and D) subtracts two from his die-roll.
7.34 If a character is meleeing through a doorway (this only occurs when characters are on opposite sides of the doorway and both have their counter touching the doorway with an edge), or meleeing from the deck of a flier to the deck of the other (with both counters being opposite to each other), or meleeing from the staging area into the flier or vice-versa, or meleeing up a ramp (against the arrows), there is a subtraction of one from the die-roll.
7.35 If a character is carrying an unconscious character, there is a subtraction of one from the die-roll result for any melee initiated by that character.
7.36 When a character is unarmed (due to being imprisoned, interned or captured), two is subtracted from his chance to hit in melee. If a character has a strength rating of zero and is unarmed, he may not melee.
7.37 Any combination of the above conditions is perfectly permissible.
7.38 If the modifications to the die-roll cause the adjusted roll to go below one, the roll is still considered a one.
7.39 If the modifications to the die-roll make it necessary to roll higher than a ten to hit, a ten will still count as a hit. However, rare circumstances may require a "10/6" to hit the victim. In these instances, a ten must be rolled first, followed by a second roll of six or higher to score a hit.
7.4 Importance of Facing in Melee
7.41 Once a character's facing has been determined, the player should note the eight positions adjacent to him (see diagram 5). These positions are important in determining whether a character may attack an adjacent Enemy character and whether or not the Enemy character is being attacked from behind. (Diagram 5, "Eight Adjacent Positions", numbers the squares around a counter 1 through 8; position 8 is directly behind the character, and positions 1, 7 and 8 are its rear.)
7.42 If a character initiating melee is not exactly in one of the eight positions shown on diagram 5, the character is considered to be attacking from the least advantageous position (e.g., position 6 rather than position 7) as determined by the attacker. In some cases, this may prevent melee.
7.43 For a character to be able to attack an adjacent Enemy's character, the Enemy character must be in one of the appropriate numbered squares (relative to the attacking character). For a hero character, an adjacent Enemy character must be in squares 1 through 7 to be attacked; for a minor or villain character, personage or beast of Mars, an adjacent Enemy character must be in squares 2 through 6 to be attacked; and for a warrior of Mars, an adjacent Enemy character must be in squares 3 through 5 to be attacked.
7.44 When determining whether a character is being attacked from behind (see Case 7.32), determine the square from which the attacking character is meleeing relative to the defending character. If the defending character is a hero, he may only be attacked from behind from square 8; any other character may be attacked from behind from either Squares 1, 7 or 8.
7.45 As a corollary to Case 7.44, a character may never melee into a position from which he could be attacked from behind.
7.5 Killing Characters Automatically
When a Player performing melee rolls a ten (0 on the decimal die), he automatically reduces the target by one level (Exception: see Case 7.39), regardless of die-roll modifiers. In addition, there is a chance further injury has been done to the target, so the meleeing Player should roll the decimal die again.
7.51 When a Player rolls a 10/6 (ten on the first die-roll, six or greater on the second) for a meleeing hero, the hero has killed his target (remove the counter from play).
7.52 When a Player rolls a 10/8 for a meleeing villain, beast of Mars, personage or minor character, the character has killed his target, unless the target is a hero character, in which case the meleeing character has knocked the hero unconscious.
7.53 When a Player rolls a 10/10 for a meleeing warrior of Mars, the warrior has killed his target, unless the target is a hero, in which case the warrior has knocked the hero unconscious.
7.54 Any roll other than the ones indicated above have no further effect on the target.
7.55 The second die-roll is never modified.
7.6 Wounding Characters: Reducing Levels
7.61 When a meleeing character's Player rolls equal to or higher than the target character's Agility Rating (as modified in Case 7.3), the target character is immediately reduced one level. The loss of level is immediate, so the character will function at all ratings of his lower level from that moment on.
7.62 When a character is reduced a level, either substitute a counter, flip over the counter, or remove the counter from play, as appropriate. Example: If John Carter were reduced from level 4 to level 3, his counter would be flipped over. If John Carter were reduced from level 3 to level 2, his level 3 counter would be substituted with his level 2 counter. If a green warrior of Mars was reduced a level (from level 1), the counter would be removed from play.
7.63 Once a character reaches level 0, he is dead, and is removed from play. Heroes become unconscious at level 1, and so may not be reduced to level 0 and die. See what clean living does for a right guy?
7.7 Escape During Melee
In some situations, certain characters may be held prisoner. Prisoners are Friendly to the attacker, and attempt to escape every Tactical Turn after melee has been joined.
7.71 The base chance in 10 of a character escaping is his strength rating. Thus, a character with a strength rating of 3 has three chances in 10 of escaping. A roll of 1, 2 or 3 on the die indicates escape; 4 through 10 indicates no escape.
7.72 To prevent a character from escaping, the defending player must keep two warriors of Mars (or any other character Friendly to the villain) adjacent to the captured character. If there are no Enemy characters adjacent to the captured character, the character is considered to have escaped. If there is but one Enemy character adjacent, then subtract two from the escape die-roll.
7.73 For every guard (Enemy character adjacent to captured character) in excess of the two guards required to maintain the base chance of preventing the character from escaping add one to the escape die-roll.
7.74 A guard engaged in melee does not count as a guard for purposes of the Escape die-roll, regardless of whether or not the guard is adjacent to the captured character.
7.75 Regardless of the number of characters adjacent, a captured hero character always escapes on a roll of 1. It may be impossible for another character to escape. Chalk it up to good security.
7.76 A character who Escapes is unarmed until he spends one Phase adjacent to a Friendly character who was not captured at the start of the duel. The Friendly character loans him a sword. Martian warriors habitually carry a long and a short sword.
7.8 Duels Between Master Swordsmen
While duelling on the tactical map will indicate the relationship between heroes and less talented swordsmen, it cannot convey the true feeling of duelling with a master swordsman. Then a duel becomes not only a match of physical ability, but also one of outguessing the opponent.
There are three ranks among master swordsmen: Warlord, John Carter being the only hero who fits into that classification; Grand Master, in which all other heroes are ranked; and finally Master-at-Arms, who comprise the vast majority of master swordsmen heroes meet. Tars Tarkas does not have a master swordsman ranking because he is never played actively by a given Player.
7.81 When duelling a master swordsman, only the hero character takes part in the duel. Each player takes one of the Maneuver/Option decks (card numbers 136 through 155). The hero Player takes the deck marked First Player.
7.82 Master swordsman combat takes place in Rounds. During each round, the Players simultaneously reveal their Maneuver/Option cards, and compare them on the Master Swordsman Maneuver Matrix. By cross-indexing the two maneuvers, the Players determine how successful the Players have been at outguessing their opponent.
7.83 The Players read across until they locate the correct result. The hero Player applies the result listed next to the "1" to his opponent, while his opponent applies the result listed under "2" to the hero.
7.84 A result of "Miss" indicates no effect. A result of "Advantage" indicates the Player's character is at an advantage. Two consecutive advantages result in a hit (see below). Otherwise an advantage has no effect. A result of "Hit" indicates a hit. A hit immediately reduces the opponent one level. All results are applied simultaneously.
7.85 Characters play cards according to their master swordsman ranking. At the beginning of play, a Player using the Warlord plays one card face down. A Player using a grand master plays two cards face down, and a Player using a master-at-arms plays three cards face down. Once the cards are laid down, they may not be changed and must be played in the order they were laid down. At the end of a round in which the cards laid down are exhausted for one Player, he picks up all of his played cards and lays down the same number again. Thus, the Warlord will be able to play his choice of card every time, and will have the advantage of knowing one or two cards his opponent may not play (because it had been flipped over during the previous round) at least half of the time.
7.86 The Warlord has four levels, a grand master two, and a master-at-arms one. All heroes have an extra level, with the exception of John Carter (it's already factored in). If a hero is reduced to having no remaining levels, he is unconscious. He is interned or imprisoned as appropriate, and his retinue placed off-map until he becomes free. If any other master swordsman is reduced to having no remaining levels, he is dead.
7.87 For those who do not wish to play the master swordsman duelling routine, a duel with a master swordsman may be resolved on the arena display between the hero and the master swordsman. Use the master swordsman counter marked "GM" for grand master duels, and the counter marked "MA" for duels with master-at-arms.
7.88 Master Swordsman Maneuver Matrix
(see separate sheet; transcribed in the Charts and Tables section at the end of this document)
7.9 Sample Duels
The following duels are suggested for those who wish to ensure comprehension of the rules.
7.91 Ambush
Three Green Martians duel two Red Martians on the open display.
7.92 Air Battle
Kantos Kan (Red Martian) and two Red Martians duel five Black Pirates on the flier display.
7.93 Unmasking the Villain
Carthoris (Red Martian) and Kar Komak (White Martian) versus Vas Kor (Red Martian), Astok (Red Martian) and three warriors of Mars on the house display.
7.94 Rescuing the Princess
John Carter and Tars Tarkas versus Matai Shang, Thurid, a captain of the guard and four warriors of Mars. Dejah Thoris is held prisoner in the dungeon.
THE STRATEGIC GAME
The Strategic Game includes all facets of John Carter, Warlord of Mars with the exception of the Military Game (which is completely independent from the rest of the game). Players must read Sections 1.0 through 20.0 to understand the strategic game properly. Note the strategic game includes the duelling and city games. The strategic game may be played by up to six Players, but is recommended for no more than two or three Players.
8.0 SEQUENCE OF PLAY
GENERAL RULE:
Like the duelling game, the strategic game is performed according to a strict sequence called the Sequence of Play. The Players perform all game functions with the characters they control in accordance with this sequence. A full Sequence of Play is known as a Strategic Turn. As in the duelling game, Players are required to perform as opposition to another Player.
Sequence Outline
Note: The order in which the Players will move is always determined by the hero they are playing. (See Case 20.14.) This order holds for the entire game, regardless of the condition of the player's original hero.
Set-up Sub-sequence
A. Quest Determination Phase: The players choose their hero character, and choose which (if there is a choice) Quest their hero is setting out on. The players also assign each other the corresponding villain characters, as explained in the rules for villain characters (see Section 10.0). The hero characters are placed with their retinue (if any) in Lesser Helium.
B. Villain Placement Phase: Each Player rolls on the Destination Chart (10.5) to determine in which city his villain character is placed. Play is now ready to begin.
After the Set-up Sub-sequence is performed once, it is never performed again. A Strategic Turn will henceforth begin with the Pursuit Sub-sequence. The Player whose Player-Turn (defined as execution of two Sub-sequences) comes first begins his Pursuit Sub-sequence.
Pursuit Sub-sequence
C. Random Events Phase: To begin the Player-Turn, the Player picks a Random Event Card, and may choose to play it according to the rules for Random Events (Section 18.0), unless the card must be played immediately.
D. Movement Phase: The player picks a Movement Card for the hero character and retinue, and (if the original hero is temporarily befriended) a second Movement Card for the other hero under his control. Perform any movement necessary as explained in the Overland Movement rules (Section 10.0).
If the hero and retinue have not reached the city in which the appropriate villain is located, the Player executes the Encounter Sub-sequence. If the hero and retinue are in the city of the villain, the Encounter Sub-sequence is skipped and play proceeds to the City Sub-sequence.
Encounter Sub-sequence
E. Encounter Phase: The player rolls the die and refers to the appropriate Encounter Table; city if the hero is in a city, outdoor if the hero is not. The player may have to take into account special terrain, such as the Carrion Caves, etc. If the hero becomes involved in a duel due to an Encounter Table result, then the Phasing Player and the Player controlling his villain resolve combat between the hero (and retinue) and the encounter via the duelling game. Should the hero lose the duel, consult the encounter rules (see Section 11.0). Otherwise, proceed to the next Phase.
F. Acquisition Phase: If the Hero wishes to acquire a thoat, flier or weapons, and he is in a city with the required equipment (consult the City Directory, 11.7), the owning Player picks an Acquisition Card from the Acquisition Deck, and resolves any duelling required via the Duelling Game. Should the hero win, he gains the indicated item. Should he lose, consult the encounter rules.
G. Escape Phase: The owning player replaces the "Turns Remaining" counter present on his captured hero (if any) with a turns remaining counter with a value of one less. Any Turns Remaining counters with a value of 1 is removed and not replaced. All such heroes may move on the next strategic turn.
A Player who completes the Encounter Sub-sequence relinquishes his right to continue play. Unless he is the last player, the next Player begins his Player-Turn; if he is the last player, play proceeds to Phase M. A Player who has not executed the Encounter Sub-sequence because he is in his hero's villain's city performs the City Sub-sequence.
City Sub-sequence
H. Hero Movement Phase: The hero may be moved from area to area in accord with the rules for In-City Movement (Section 15.0).
I. Information Phase: The player may attempt to glean information, using the information rules (Section 16.0). Various resulting occurrences may affect the hero.
J. Duelling Phase: Should any duelling be necessary, it is performed using the duelling game.
K. Imprisonment Phase: If the hero is imprisoned, the player performs the necessary game functions to determine what happens to him as a result. All arena duels occur during this Phase, using the duelling game. Because of a hero's imprisonment, the Player will be limited to what he can do (see Section 17.0).
L. Villain Movement Phase: If the hero is discovered, and the villain is not in his final destination, the villain Player may opt to flee to his next destination. Roll on the Destination Chart and place the villain in the appropriate city. If the villain is in his final destination, see Case 16.1.
The City Sub-sequence is repeated until the hero either completes his quest, is defeated in the arena, is imprisoned, or the villain character flees to another city. Proceed to the next Player-Turn or Phase M.
M. Strategic Turn Indication Phase: The Players advance the Turn Indication marker to signal the passage of one Game-Turn, and play continues to the first Player's Player-Turn.
9.0 OVERLAND MOVEMENT OF CHARACTERS
COMMENTARY:
There are three main modes of movement in the Barsoomian world. The first is walking, which is usually insufficient to cover the great distances between cities; second is the thoat (see the glossary), which serves quite well for short journeys; and third is the flier, a comparatively recent development when John Carter arrived on Barsoom, and certainly the fleetest of all Martian conveyances.
GENERAL RULE:
In each Movement Phase, the hero Player picks a Movement Card from the Movement Deck which determines distance travelled. The distance travelled will be determined by the hero's conveyance also; consult the appropriate line of the card (walking, thoat or flier). Depending on the distance travelled, the character is considered to have arrived at his destination city, or to be in transit (somewhere between the two cities).
PROCEDURE:
The hero Player pulls a Movement Card from the top of the Movement Deck, reads off the value, moves his hero and retinue, and places the Movement Card face up in the Movement Discard Pile. Once all Movement Cards from the Movement Deck have been used, the discard pile is reshuffled and all future picks are made until the deck is again exhausted, etc.
9.1 How to Move Characters
Movement originates from the city where the Hero is located. The player chooses a city he wishes the Hero to move to prior to pulling the Movement Card. The city the hero moves to must be connected to the original city by a line unbroken by a city symbol. The player notes the distance in haads printed on the map between the two cities. Once this distance is determined, the player should place the markers for his hero on the Haads Remaining Index (9.6).
During the Movement Phase, the player picks a Movement Card for his hero character. The Player consults only the entry on the card concerning his character's mode of movement, and adjusts the appropriate markers to reflect the new distance between the character and the destination city.
If the distance on the Movement Card is less than the distance between the two cities, the hero is in transit. The Player should note the character is between the particular two cities. If the player has pulled a Movement Card with distance equal to or greater than the distance between the hero and his destination city, the hero is placed at the destination city.
9.11 As a Player draws a Movement Card, he subtracts the distance listed on the Movement Card on the Haads Remaining Index. If the new total is greater than zero, the character is in transit; if not, he has arrived at his destination city.
9.12 Certain cards read "00". These cards indicate the character made negligible progress or was sidetracked by his encounter. Note that the character is not considered to be still at his original city, should he have pulled the card there, but rather in the great outdoors.
9.13 Heroes may freely "backtrack" in movement -- that is, move back to the original city rather than continue on to their destination city. However, a character's Player must declare he wishes to change direction before the Movement Card pull, and may apply the Movement Card in only one direction.
9.14 Players should place the hero's counter on the map of Barsoom, in the position he currently occupies.
9.2 Restrictions on Movement
9.21 Movement may only be performed by a character who is not imprisoned, captured or interned.
9.22 There is no limit to the number of characters who may travel together, be present in the same city, or in transit.
9.23 At the beginning of each quest, all heroes are equipped with a flier.
9.24 Regardless of the total of haads on a Movement Card, a player must always stop at the city he has designated as his destination city. Once a character has reached the end of the line, so to speak, any excess haads are considered lost, and may not be transferred or held for future movement.
9.25 Movement Cards may not be transferred to other characters or saved for future use. Though a character need not be moved in a particular Turn, he must be moved if a card is pulled for him in a Turn.
9.26 Non-hero characters travelling with a hero character may not split off from him (in movement) unless he gives them leave to go with another hero character who is present in the same city. In other words, non-hero characters who join with a hero character must always be moved with a hero character until they either die or the game ends.
9.27 Hero characters owned by different Players may not travel together, though should they meet in the same city they may freely transfer characters under the heroes' control. They may aid each other in fighting off hostile encounters should they be in the same place. While characters may be freely transferred, they become the sole possession of the current owner. The new owner is under no obligation to return the character to the original owner.
9.28 A hero for whom a Movement Card is pulled must be moved the full distance printed on the card, if possible.
9.3 Special Restrictions on Flier and Thoat Movement
9.31 When a character possesses a thoat or flier, the owning Player should place a thoat or flier counter on the character's counter to denote possession. The absence of such a counter indicates the character is walking.
9.32 A character is always assumed to have just enough of the appropriate mode of transportation to carry himself and his companions. A character may never have a large enough flier to accommodate extra passengers, nor may extra thoats be brought along.
9.33 If two groups of Friendly characters owned by the same Player meet in the same city, they may pool together and travel with each other and thus ensure the presence of more characters to throw in the way of encounters (see Section 11.0). If this is the case, any fliers the two groups possess are considered to have magically melded into one.
9.34 Characters belonging to two different Players may never travel together.
9.4 Special Movement Cases
9.41 One Turn Movement
While travelling on any line between two cities bearing the legend "1T," the Player does not draw a Movement Card, but instead simply moves the character from one city to the other. This is the only time when there is no encounter (see Case 11.1) when travelling between cities.
9.42 Junctions
Normally, a character must travel a straight line between two cities. However, should there be a Junction between two cities, the Player may move the hero character between any of the cities connected directly to the junction. Simply total the distance between the first city and the Junction and the distance between the destination city and the Junction to determine the total number of haads between cities. The Carrion Caves Junction is an exception to this rule. (See Case 9.52)
9.43 Pulling Extra Movement Cards
As a result of an outdoor encounter (Case 11.1), it is possible for the owning Player to pull extra Movement Cards before the hero loses his flier. Each and every draw of a Movement Card is treated as a single movement, and is subject to all restrictions on movement. A character may not utilize an "extra" Movement Card(s) to backtrack across any line traversed in that Turn.
9.5 Special Terrain
9.51 The North Pole
The North Pole includes the lands of Panar and Okar. Flier travel is impossible to the North Pole, unless the player has the appropriate Random Event Card to allow travel. A giant magnet located in Kadabra ensured the quick death of anyone so foolish to try to fly to the North Pole -- for the metal fliers would be drawn to the magnet (and the surface of Mars) at fantastic speeds.
9.52 The Carrion Caves
The Carrion Caves may only be entered by walking, since thoats would not enter the caves due to fear of apts, their hereditary enemies. Characters may travel by thoat to the Carrion Caves Junction, but must treat it as a city for movement purposes. Any excess haads are lost in the switch to foot. Characters in fliers (presumably possessing a Random Event Card to make travel possible) ignore the Carrion Caves Junction, treating it as any normal junction.
9.53 The Uncrossable Ice Barrier
The Uncrossable Ice Barrier is crossable. It acquired its name by proving a formidable obstacle to weak-willed adventurers. Our heroes had no trouble due to superior willpower. The magnet (see Case 9.51) may still impede flier travel.
9.54 The Sea of Omean and The Temple of Issus
The Sea of Omean may only be entered in one of two ways: either by the flier route, which represents a vertical shaft leading directly into the sea, or by the secret underground passageway (which all hero characters are assumed to know about) between it and the Temple of Issus, which may only be traversed by walking.
9.55 Lothar
Lothar remains one of the most interesting and unusual places on Barsoom. Populated by no more than one thousand men, the city managed to repulse the constant Green Martian attacks by creating illusory men who were only effective against those who did not disbelieve them. The Green Men died in droves (which says something about the intelligence of Green Martians). The city's defense was aided by its inaccessibility. The city could only be entered by flier or by walking through a well-hidden tunnel. Thoat travel is not permitted when going to Lothar.
9.56 Ghasta
Normally, Ghasta may only be reached by flier travel, due to the mountains in the Valley of Hohr preventing walking or thoat travel. However, characters losing to an encounter in Tjanath (and it must be a city encounter) may choose to be freed and walk to Ghasta rather than be interned. It was the custom of the citizens of Tjanath to throw prisoners into a pit connecting to a long underground tunnel, which ended up in Ghasta.
9.6 Haads Remaining Index
(see separate sheet)
10.0 CONTROL OF VILLAINS BY PLAYERS
COMMENTARY:
Villains know in their heart of hearts that if they do not resort to fleeing and various nefarious schemes, the heroes will defeat them by virtue alone, not to mention strength of arms. Therefore, most villains have long since learned how to deport themselves: The males are either in love with the heroine or wish to have her torn apart for sport, and the females wish to enslave the heroine and then have her torn to pieces. The Villain Movement rules are formulated to reflect the fact that the villains invariably attempt to get as far away from the hero as possible so they might have their sport with heroines.
GENERAL RULE:
Players assume two roles when playing the strategic game: one, in which they play the hero, and second, playing a villain against another Player's hero. At the beginning of the game, villains are assigned to the various Players according to the following Procedure. Villains are placed in a city prior to the start of play (Phase B), and moved whenever the owning Player has a chance until they reach their final destination.
PROCEDURE:
After the Players have chosen which heroes they wish to play, the villains are assigned to the different Players. In a two-player game, the Players take the villain for the other Player's hero. In a multi-Player game, a Player receives control of the villain for the hero of the Player whose player-Turn immediately precedes his (the Player who moves first plays the last Player's villain).
A villain (and his entourage) is placed in the initial destination by the same procedure he is moved. The Players initially place their villains in the order they would move their heroes. (See Case 10.2)
In the Villain Placement Phase, the owning Player must determine how many destinations (including the city the villain is initially placed in) the villain travels to before arriving at his final destination. Consult the Final Destination Chart (10.43) and roll a decimal die. Read across to the hero the villain is being played against; the result will inform the Players of the number of cities the villain may be in before the last one becomes his final destination.
10.1 Conditions of Villain Control
10.11 The villain(s) remains under the control of the same Player until he is killed. It is possible for one of the two villains to be killed, and for the Player to still play the other villain should he escape death at the hands of the hero.
10.12 Should the villain(s) be killed before the hero finds his princess, and if the hero is then discovered in a non-final destination city, a surrogate villain is chosen. If there is a character with an I.D. number between 301 and 400 in that city (henceforth 300 series), he (or they) become the villain. Otherwise, a nameless noble becomes the villain. In the final destination, a villain must be chosen from the city directory. If none are present in the final destination city, a 300 series character is taken from the nearest city (in terms of the least haads distant) and immediately placed in the final destination city and played according to all rules for the final destination (see Case 10.4).
10.13 Random Events Cards usable by villains (see Section 18.0) remain playable regardless of the number of surrogate villains a Player may have run through.
10.2 Movement of Villains
When placing or moving a villain, the Player owning the villain rolls the decimal die twice, consults the Destination Chart (10.6) and places the villain in the listed city. The entourage of a given villain is always moved with him.
10.21 The villain's entourage consists of all henchmen (i.e., not the villain himself, but all characters with combat values), and all captive and friendly personages. These characters are always moved with the villain character. The entourage may be decreased by death and remorse (see Case 12.3), while it may be augmented in cities and through treachery (see Case 12.2).
10.22 The villain remains in the city where he was initially placed (or subsequently moved to) until the pursuing hero is discovered in the villain's city, or until the villain escapes from the tactical display during a duel with the hero. At this point, the owning player may opt to have the villain flee the city. The owning Player uses the procedure above to choose another city. Place the villain and his entourage in the new city immediately after rolling on the Destination Chart. Of course, the villain may opt to remain in the city, in which case play continues in the city game.
10.23 Villains are never moved by normal overland movement rules. They are always placed in a city directly without having to move linearly between the two cities. (It would be unfair for the villain to face Martian wildlife and men in addition to the heroes.)
10.3 Restrictions on Villain Movement
10.31 A villain must be moved to a different city when employing the Destination Chart. If the result on the chart indicates the city the villain is already in, roll again to obtain an acceptable result. Similarly, certain cities may not be used as final destinations (see the Chart). Roll again to determine an appropriate final destination.
10.32 A villain may not be moved again after reaching his final destination (see Case 10.4). This includes all Random Event Cards and possible rules interpretations to the contrary.
10.33 No more than one Player's villain(s) may be in a given city at one time. As in Case 10.31, the owning Player may be required to roll the die more than once to obtain an acceptable result.
10.34 A villain may be placed in a maximum of three possible cities including the city he is initially placed in and his final destination. Exceptions: The Atmosphere Plant and Exum do not count against this limit.
10.35 If the hero reaches the Atmosphere Plant or Exum while the villain is there, there is no city game. The villain simply rolls a new destination. The boundaries of the cities are in the city directory as a curiosity, only.
10.4 Final Destination Restrictions
10.41 If a hero allows (by his actions) a villain to flee the city, but the villain is in his final destination, place a "Turns Remaining" marker with the "one" face showing. If the hero repeats such an action, the counter is removed, and the villain is allowed to redeploy within the city (see Case 16.1). This may recur indefinitely.
10.42 Other than the importation of surrogate villains when necessary (see Case 10.12), there is no movement of villains after the final destination is reached.
10.43 Final Destination Chart
(see separate sheet; transcribed in the Charts and Tables section at the end of this document)
10.5 Limitations on the Villain's Entourage
Dependent on the hero the villain is facing, the villain will be limited to the number of henchmen (see Case 10.21) he may have with him at any one time. Villains opposite John Carter may have a maximum of 9 henchmen; villains facing Carthoris or Vad Varo may have a maximum of 8 henchmen; and villains facing any other hero may have a maximum of 7 henchmen.
10.51 Personages, captives and villains themselves do not count against the limit on the villain's entourage.
10.52 Often, the villain's entourage will be augmented by warriors of Mars, captains of the guard and/or nobles. Regardless of the number of "reinforcements" the villain receives, his limit may never be exceeded. Remember a minor character is equivalent to a warrior of Mars for limit purposes.
10.6 Destination Chart
(see separate sheet; transcribed in the Charts and Tables section at the end of this document)
11.0 ADVENTUROUS ENCOUNTERS
COMMENTARY:
The Barsoom John Carter roamed was an extremely dangerous place, even to one as skilled and accomplished as the Warlord of Mars. The wildlife was almost completely made up of malevolent and ferocious beasts (with plenty of teeth -- one could tell by the number of teeth how vicious a Barsoomian creature was). But, as John Carter remarked, the most dangerous animals on Mars were the two-legged sentient kind -- the various colored men of Mars. The hero who fares through the Martian landscape had well beware the myriad dangers lurking in the shadows.
GENERAL RULE:
Every time a hero travels between two cities (or within a city) not occupied by the particular villain character he is chasing, the hero Player must roll the die and consult the appropriate Encounter table. He then determines whether the hero (and any characters with him) has encountered a foe to be dealt with. If there are indeed enemies present, the characters must duel with them using the duelling game.
PROCEDURE:
While outdoors (in transit between two cities), the player notes the area where the city he is travelling to is located, and consults the corresponding part of the Outdoor Encounter Table (11.6). The player consults the line appropriate to the mode of transportation his character is using, and rolls a six-sided die.
When in a city, the Player consults the city directory to determine whether there is any modifier to the City Encounter Table (11.7). The Player then rolls a ten-sided die, adds or subtracts for the city modifier (if any), and applies any result immediately. (See Case 11.2 for further Procedures used in resolving Encounters.)
11.1 When Encounters Occur
11.11 An outdoor encounter occurs during any Encounter Phase a hero character is in between cities.
11.12 A city encounter occurs in any Encounter Phase that a character is in a city the villain character he is pursuing is not located in. (Exception: Case 11.13.)
11.13 At least one outdoor encounter must occur per trip between cities. Should a Movement Card allow the Player to move directly from one city to the other, then the player owning the hero must resolve an outdoor encounter, but not a city encounter. (Exception: Case 9.41.)
11.14 Even if a Player chooses to not move his character, he still rolls for an encounter of the appropriate type (city or outdoor).
11.15 A character does not have an encounter when travelling between any combination of Greater Helium, Lesser Helium and Hastor, or between the Temple of Issus and the Sea of Omean.
11.16 A character does not have an encounter when captured, interned, or in the same city as the villain he is pursuing.
11.2 Procedures for Outdoor and City Encounters
11.21 An Encounter Phase occurs after each Movement Phase the hero is not in the same city as the villain he is pursuing. Should a hero character's position on the map require an outdoor encounter check, the Player consults the location of his destination city on the double-globe map. The Player notes the number of the area in which the destination city is located and cross-indexes the column on the outdoor Encounter Chart with the row corresponding to the roll of a six-sided die.
11.22 Once the Player has located the area and the roll to determine his encounter, he cross-indexes it with the mode of transportation and finds the nature of his encounter. If the result is specific (e.g., "two banths attack hero"), characters should proceed in accord with Case 11.24. If the legend indicates that the Player needs to roll a ten-sided die by indicating a series of possible results prefaced by numbers, roll a die and apply the indicated result.
11.23 If the result indicates "No Encounter" or words to that effect (by not specifically stating beasts of Mars or warriors beset the character), then there is no encounter for the Turn. Similarly, should there be no duel as a result of the encounter, but should something occur to affect the character's status (such as his flier being shot down), apply the result, and end the Turn for the character.
11.24 If the encounter roll indicates the hero character and his companions have to duel an encounter, then the duel is resolved in the immediately succeeding Duelling Phase on the outdoor display. If the encounter is while flying, however, the encounter is resolved on the flier display.
11.25 All abbreviations are explained on the key to the Outdoor Encounter Table.
11.26 Any time a character is in a city bereft of the villain he is pursuing, the owning Player rolls on the City Encounter Table to determine the nature of the encounter. To this roll he adds or subtracts the city modifier (found on the City Directory) and applies the result. If the City Directory indicates special circumstances take precedence (for instance, Aaanthor is a deserted city, and an outdoor encounter takes place there), they supersede the city encounter.
11.27 The city encounter is resolved exactly as in Cases 11.23-24, except the opponents are likely to be different.
11.28 Unless otherwise specified, all city encounters take place on the street display. Duels with master swordsmen take place according to the rules for such (see Case 7.8).
11.3 Results of Outdoor Encounters
11.31 Should the hero Player's character(s) win the outdoor duel, all dead characters are immediately removed from play. All unconscious characters are revived. All wounds are healed due to the miraculous Martian healing salve the hero character carries. Every character is placed at his highest level.
11.32 If the hero character possessed a thoat (or his companions did), the hero player consults the Thoat Escape line on the Outdoor Encounter Chart and rolls a ten-sided die. If he rolls within the span of numbers indicated for Thoat Escape, it's time to start walking.
11.33 Should the hero character and his companions lose an outdoor encounter to beasts of Mars, all dead characters are immediately removed. Any Player with a card saving the character from being savaged must play the card (but should the owning Player have one, he must play his first). Should no Player have such a card, the hero character is considered out of the game, and his Player may only utilize his villain characters. (It is assumed some tribe of wild Green Martians has saved the hero from being eaten -- a hero cannot die such an ignominious death -- and has enslaved him for at least two years.)
11.34 Should the hero character and his companions lose an encounter to warriors of Mars (e.g. Black Pirates), all dead characters are removed from play. The hero character is a prisoner and is removed from play. The hero Player rolls on Table 11.35, and determines the number of Turns before his hero character escapes. At the end of the specified number of Turns, the Hero character is placed in the same location as he was when he encountered the hostiles. He is unarmed (unless he was befriended on Table 11.35) and may resume play on foot.
11.35 Delay Table
(see separate sheet; transcribed in the Charts and Tables section at the end of this document)
11.4 Results of City Encounters
11.41 If the hero wins a duel, all dead characters are removed from play, and the hero may proceed about his business, except where noted below. Characters heal as explained in Case 11.31.
11.42 If the hero is in a city with a city modifier of -2 or greater, there is a chance his actions have been taken as important by a bystander. After the hero wins a city encounter in such a city, the owning Player must roll on Table 11.45, and apply any results immediately.
11.43 Upon engaging in a duel within a city, a character will always lose any thoats he possessed, but will always retain fliers.
11.44 Should the hero lose a duel in the city, he is interned. The owning Player must roll the decimal die and consult Table 11.46.
11.45 Duel Results Table
(see separate sheet; transcribed in the Charts and Tables section at the end of this document)
11.46 Internment Table
(see separate sheet; transcribed in the Charts and Tables section at the end of this document)
11.5 Special Terrain
11.51 Carrion Caves Junction
The Carrion Caves Junction is such a nasty place to visit that two outdoor encounters must be rolled there (except when flying).
11.52 Flying Over The North Pole
There are no encounters when flying over the North Pole (presuming the hero Player plays the Random Event Card allowing him to avoid the magnet).
11.53 Kamtol (Area III-A)
While travelling through area III-A, a roll of 4 on the Outdoor Encounter Table should read "See large canyon and land to survey it," etc. Note that encounters occur less frequently in area III-A than area III.
11.6 Area Encounter Table
(see separate sheet; transcribed in the Charts and Tables section at the end of this document)
11.7 City Encounter Table
(see separate sheet; transcribed in the Charts and Tables section at the end of this document)
11.8 City Directory
(see separate sheet; transcribed in the Charts and Tables section at the end of this document)
11.9 Character Directory
(see separate sheet; transcribed in the Charts and Tables section at the end of this document)
12.0 BEFRIENDMENT, TREACHERY, AND REMORSE
COMMENTARY:
Barsoomian heroes were not too swift, but they made up for their sometimes limited intelligence by instinct, luck and the proper Barsoomian values. Let's face it, the basic Barsoomian hero is a nice guy, whether he be Red Martian, Jasoomian (Earthman) or Green Martian. So, since even in the most corrupt city there are men of honor, a hero is likely to make friends on the basis of his actions, even if he should happen to be incognito.
GENERAL RULE:
Every time a hero is befriended, the hero Player should incorporate the appropriate character or personage into the hero's retinue, and the character will be loyal to the hero for the rest of the game (exception: Treason, Case 12.2). It is possible that a hero befriended by a female personage will fall in love with her (and vice-versa). (See the rules for Love and Romance, Section 13.0).
PROCEDURE:
Friends are obtained during internment (see 11.46), when captured (see 11.35), or when the hero is imprisoned (see 17.1). Friend type is usually determined on Table 12.16.
12.1 Determining a Hero's Friend
12.11 Once the Player determines that his hero has gained a friend, he consults the appropriate table (12.16 if through encounter, 16.38 if in the villain's city, and 17.19 if during imprisonment), rolls a decimal die, and places a counter representing the new friend. The friend is always moved with the hero until death or treason do them part.
12.12 If the friend is a minor character, he will always fight at the hero's side -- or at least until he proves treacherous. If possible, the minor character should be selected from the city the hero is in (or the closest city -- in terms of haads -- should the hero be in transit), but, if necessary, he may be selected from the closest city with a character of the appropriate code series. The minor character with the lowest code number is always selected first.
(There is no Case 12.13 in the original.)
12.14 If the friend is a warrior of Mars, then the friend will never be susceptible to treachery. A warrior of Mars is always the same color as his home city (see City Directory, 11.8).
12.15 If the friend is a male personage, then he will blindly follow the hero and will ask to be returned to his home city (see the Character Directory; there is no penalty for ignoring the request). If the friend is a female personage, she will always be young and at the very least pretty, which will play all sorts of havoc with the unity of the hero's party in view of the love and romance and treachery rules. If there is not a personage of the appropriate sex in the city the hero is in, the personage is taken from the nearest city with a personage of the correct sex. Place the counter with the hero.
12.16 Encounter Friend Table
(see separate sheet; transcribed in the Charts and Tables section at the end of this document)
12.2 Treachery
12.21 There are several possible ways treachery can be triggered: by a spurned lover (see Case 13.2), by a Random Event Card causing a minor character to be treacherous, or by a minor character who has fallen in love with a female personage who is in love with the hero.
12.22 Treachery anywhere except in the city in which the villain is currently residing may occur only when there is a candidate for treachery plus a personage in love with the hero (and the hero is reciprocating that love). When a treachery card is played, the candidate for treachery immediately becomes treacherous and is placed with the villain. In addition, the treacherous character abducts the female personage who is in love with the hero, and she is also placed with the villain. Finally, one is subtracted from all discovery rolls (see Case 15.2) until the betrayed hero is first discovered.
12.23 When treachery occurs in a city the villain occupies, the hero must immediately fight five warriors of Mars alone. He is also automatically discovered. If the hero wins the resultant duel in the final destination, he must subsequently move secretly (see Case 15.3). Should there be a personage in love with the hero, the betraying character may also abduct the personage. Again, the betraying character is placed with the entourage of the villain, as is the abducted personage.
12.24 A character guilty of treachery always becomes the property of the villain Player who played the treachery card, unless a remorse card is subsequently played on that character (see 12.3).
12.25 See the love and romance rules (section 13.0) for further details on possible treachery.
12.3 Remorse
The Remorse Event Card may only be played on a character who has already betrayed the hero.
12.31 If the remorse card is played on a female personage, the female personage will save the personage the hero is in love with (place the female personage with the hero), or, should there be no such personage, will kill a minor character in the entourage of the villain character or a warrior of Mars if no minor character is present. In either case, the remorseful female personage should be removed from play, as she has killed herself after declaring her everlasting love for the hero.
12.32 If the Remorse Event Card is played upon a minor character, he will prevent an unspeakable act (see 13.4) from being performed upon a personage, and, should the hero enter the same display as the remorseful character, will join sides with him. In any event, the villain has the option to immediately duel a remorseful character who prevents an unspeakable act.
13.0 LOVE AND ROMANCE
COMMENTARY:
To every upright Barsoomian male, gaining his princess (i.e., his mate) through courtship was one of the most important events in his life. There were many intricate procedures to be observed, but the presence of these conventions served not to thwart love, but rather to test it. The honor of a Martian woman was to be treated with the highest regard (except, of course, by villains) and to trifle with a woman's honor was to bring the instant enmity of every principled man who heard of or saw the dastardly act. Every hero will gain his princess sooner or later because of their virtuousness and skill with arms, and it is an extremely precious and important occurrence to even the most hardened warriors of Mars.
GENERAL RULE:
With the exception of John Carter, who begins all quests already mated, a hero will probably fall in love with a female personage during the course of his adventures. It is also possible that a female personage will fall in love with an already mated hero (who cannot, of course, respond to her advances) which may result in treachery. The final possibility is a villain character may fall in love with a female personage who will, of course, want no part of the villain character and will have to be saved by the hero.
13.1 When a Hero Falls in Love
13.11 A non-mated hero will fall in love with the first female personage who befriends him. The female personage may not betray him until the hero character befriends another female personage.
13.12 Once the hero character has met a female personage who has subsequently befriended him in the course of his travels, he will always have one female personage who is "safe;" that is, who will not betray him. For example, if there are two female personages who have befriended a hero, only one may betray him.
13.13 A hero will never fall in love with a female character who has betrayed him. At the moment a female personage who the hero is in love with betrays him, the hero transfers his love to the female personage of his choice who has befriended him.
13.14 Once a female personage who the hero is in love with is kidnapped (i.e., removed from his presence), she becomes the destined princess of the hero. She will never betray him, and he may never fall in love with another female personage.
13.15 Any female personage a hero is in love with will automatically reciprocate the love -- unless she betrays him, in which case she is merely misguided. Once the character has settled on his destined princess, she will fall in love with him.
13.2 Hero Worship/Love and Betrayal
13.21 Any time an "engaged" (i.e., a hero who has his destined princess) or mated hero is befriended by a female personage, the female personage will eventually fall in love with him. The hero will insist the relationship is one of friendship, but the personage will know better. There is a possibility the personage will indeed convert the relationship into a friendship (realizing the hero could never transfer his love for another to her), and there is also a possibility the personage will change her love to hate or jealousy of the destined princess and betray the hero.
13.22 Two Turns after a female personage has befriended a hero, she becomes a potential betrayer (but may not betray the character before then) if the hero is engaged or mated. The Player owning the villain character opposite the hero in question may play treachery cards to influence the outcome of events, and the female personage would then automatically become a colleague of the villain character.
13.23 Should the hero character reach the city where the villain character is currently residing, the villain character may make one attempt to have an eligible female personage (Case 13.22) betray a hero. On a roll of 1 through 5, the female personage has performed treachery (see Case 12.2). On a roll of 6 through 0, the female personage becomes a permanent friend of the hero, and may aid him in gathering information, etc. In addition, a friend female personage may prevent a minor character of the hero Player's choice from betraying the hero. (A polite way of introducing a second love interest.)
13.24 A hero never falls in love with a related personage, nor vice-versa. Also, a related personage will not betray her kin hero (e.g., Dejah Thoris will not betray Carthoris). The following characters are related: John Carter, Carthoris, Dejah Thoris, Tara of Helium and Llana of Gathol. Also, betrayal can never happen between the following couples: John Carter and Dejah Thoris, Carthoris and Thuvia, Gahan of Gathol and Tara of Helium, Vad Varo and Valla Dia, Tan Hadron and Tavia, and Vor Daj and Janai.
13.3 Minor Character Love and Betrayal
The beauty of Martian women is famed. The presence of a woman possessing such Barsoomian beauty could cause weaker men to forget their code of honor and perform desperate acts ultimately resulting in shame and dishonor. And so it was that many a hero would not only have the problem of a villain who spirited away their princess, and threatened their home country besides, but also the problem of a jealous lieutenant who would desire the hero's princess for his own.
13.31 During an Encounter Phase in which the hero is not in the same city as the villain character he is pursuing, the villain character may attempt to subvert a minor character loyal to the hero, providing a female personage in love with the hero is present. The villain character can either play a Random Event Card, or attempt a die-roll once to determine whether the minor character falls in love with a female personage and therefore betrays the hero. On a roll of 1 through 3, the minor character falls in love with the female personage and betrays the hero (abducting the personage in the process), on a roll of 4 through 10, the minor character is a staunch friend (and this must be told to the hero character). The villain Player may only attempt such a die-roll once per game.
13.32 A minor character may only perform treachery (see Case 13.31) if the hero he is accompanying is in love with or mated to a female personage who is or has been in the same location as the minor character.
13.4 Unspeakable Acts
As previously mentioned, a Martian woman's honor was extremely important -- so important that any respectable woman was ready to take her life rather than let some villain besmirch her integrity. Amazingly, the female fatality rate did not increase during John Carter's heyday, for there were many villains who wished to do horrible things to unsuspecting females. Such was the heinous nature of this treatment of females that every red-blooded Barsoomian would go into a battle frenzy to defend a woman he saw being molested.
13.41 The Villain Attempts Unspeakable Act Random Event Card may only be played when a hero is in the same city as the villain character he is pursuing and the villain has a captive personage. The hero is then immediately informed of the area, house and room in which the personage and the villain character are located (which must be the room in which the female personage was deployed).
13.42 The hero has three City Sub-sequences to reach the female personage in distress before the villain may consult the Unspeakable Act Table (13.45). All standard in-city rules apply, but see below. At the end of the third turn, the hero must be on the same display as the villain to prevent the use of the Unspeakable Act Table.
13.43 When a hero character is informed of a villain's attempt at an unspeakable act, he goes berserk. For the hero to lose a level, he must be hit twice (i.e., he does not lose a level until he is hit a second time). Once the hero reaches the display upon which the villain is placed, he acts normally (is not berserk) but retains all wounds (lost levels) when duelling on the display. The hero must reach the villain by the tenth Tactical Turn after melee is joined or the villain will still be able to commit the unspeakable act.
13.44 Should the hero be knocked unconscious or not reach the woman in distress in time, consult the Unspeakable Act Table below (13.45).
13.45 Unspeakable Act Table
(see separate sheet; transcribed in the Charts and Tables section at the end of this document)
14.0 ACQUISITION OF WEAPONS, FLIERS OR THOATS
COMMENTARY:
While one would not term Barsoom a lawless planet, personal property was sometimes not respected as much as it was on Earth. But heroes never "borrowed" items except when they needed them, so Barsoomian values apparently drew a line between stealing and acquiring.
GENERAL RULE:
When a hero does not have either a flier, a thoat or weapons, he may attempt to Acquire them provided the city directory entry states the item is available in that city. To acquire the object, the Player picks an Acquisition Card and, should there be a duel necessitated by the card, resolves the duel on the appropriate display. If the character wins, he obtains the items he was looking for. If he loses, consult the Internment Table (11.46).
PROCEDURE:
Every time a Player pulls an Acquisition Card, he applies the result and then places the card face up in a discard pile. When the Acquisition Deck is exhausted, the cards are reshuffled and placed face down, and the next Acquisition Card is drawn from the top of the deck.
14.1 How to Use the Acquisition Cards
14.11 When the hero is attempting to acquire weapons and/or thoats, he consults the "Weapons and Thoats" line of the Acquisition Card. If the Hero is seeking a flier, the Player consults the "Flier" line of the Card.
14.12 Regardless of the wording of the legend, the word to look for is "succeed." If the card says the character succeeds, then the hero does not have to duel and obtains the item automatically.
14.13 Any other result will indicate the number and type of men the character must duel, and the display which must be used.
14.14 Regardless of the number printed on the card, a hero is never required to duel more than three invisible warriors in the cities of Invak or Onvak (see legend to Case 11.8).
14.2 Restrictions on Acquisition
14.21 Acquisition may only be performed in a city.
14.22 Before performing Acquisition, the acquiring Player must check the City Directory to determine whether the item his hero seeks is there. If that item is not available in the city, Acquisition may not be performed.
14.23 Acquisition duels are performed without discovery. All characters are discovered upon entry onto the display.
14.24 If a character can exit the display from the side opposite his entrance, he has successfully performed Acquisition. However, on the open display, duels are to the death.
14.25 Duels on fliers are on grounded fliers, and therefore no one can plunge to his death.
THE CITY SUB-GAME
When a hero arrives at a city in which the villain he is pursuing is located, play proceeds to the city game. The Players consult the City Directory (11.8) and determine the four corner "towers" of the city the villain is located in. A code series of four letters informs the Players where to place the tower counters; the square formed by the counters will serve as the city proper; all areas outside the boundary are considered deserted for the ensuing City Sub-game.
A hero enters the city display by either the main gate or the secret passageway (provided the hero Player possesses the proper Random Event Card), and proceeds moving about the various areas of the city in an attempt to gather information. Each area is "rated" on the Information Table as to the likelihood of anyone in the area knowing where the villain or princess might be in the city. But the road to glory is fraught with peril -- if the hero is not careful, the city guard or men friendly to the villain will discover him. If the hero is discovered, the villain will undoubtedly take to his heels. And worse yet, the hero may be imprisoned or interned. So a hero is required to be discreet when searching for his princess or the villain.
15.0 IN-CITY HERO MOVEMENT
GENERAL RULE:
Once a hero reaches the city in which the villain being pursued is located, the owning Player proceeds to the City Sub-sequence (Phases H to K), which is detailed in Sections 15.0 through 17.0. The subgame uses the city map; in each Hero Movement Phase, a character may be moved from an area to an adjacent area. Depending on which way the owning Player chooses to try and reach the center of the city, the hero (and retinue) may be discovered due to his actions.
PROCEDURE:
In a given Hero Movement Phase, a hero and retinue may be moved from the area they are located in to any adjacent area into which an arrow leads (see Terrain Key). Generally, the hero will be placed in the holding box for the area, as this is the only box in which he may gain information (see Section 16.0). However, a hero may freely move from house box to house box, or move into a house box from a different area if his owning player so wishes.
During movement between areas, there is a possibility the hero will be discovered (not to be confused with discovery described in Section 6.0). Consult the number on the entered area side of the area border (inside the "head" of the arrow); this is the chance in ten the character will be discovered during movement.
15.1 In-City Movement Restrictions
15.11 A character may move from one area to another, if a two-headed arrow extends into both areas. This is the maximum movement for each Movement Phase for one character. Of course, a character may remain in an area rather than move.
15.12 Unless the character is searching by house (see Case 16.4), or knows where his quarry is (see Case 16.1), the character and companions should be placed in the holding box for the area he is in. The houses in the area are always identified by the same code number as the area (house 1B would be in area 1, for example).
15.13 All non-hero characters must be accompanied by a hero character in the city, unless they are under the control of the villain.
15.2 Discovery During Movement
Each time a character moves on the City Map, there is a chance he will be discovered.
15.21 Between each area, within the double-headed arrow, there are a set of opposite-facing numbers. When a character moves into an area, he reads the number inside the area he is moving to. This is the chance in ten of the character being discovered. The villain Player rolls the die, and should the result be equal to or less than the number indicated, he has discovered the hero character.
15.22 Should a character be discovered, he (and all his companions) must immediately fight three warriors of Mars if they are not in the villain's final destination; four warriors of Mars and a noble minor character if they are. If the villain is not in his final destination, he may immediately flee to his next city. If he is in his final destination, the villain may be replaced using the rules in Case 10.4.
15.23 Should the hero lose the duel caused by being discovered, he is immediately imprisoned (see Section 17.0). However, if the villain should choose to flee the city, the hero is instead interned (see Case 11.4).
15.24 Should the hero win the duel and the villain flee, the hero's (and his companions') counter are placed on the map of Barsoom at the city. The City Sub-game is now over. Proceed to the Acquisition Phase.
15.25 Should the character win the duel and the villain remain in the city, the hero character must move secretly, or he will be set upon by the city guard, overwhelmed and imprisoned (see Case 15.3 for secret movement rules).
15.26 Once the villain flees, or is killed and the personage rescued, the city game is over. Proceed to the next Player's turn should the hero have no acquisition to perform.
15.3 Secret In-City Movement
When performing secret movement, the character is moved normally on the city map, but may only use the Information Chart (see 16.27) once every other Information Phase. In addition, the villain player may subtract one from his discovery die-rolls. If the hero opts to remain in an area rather than move when he would normally be required to move secretly, there is a 2 in 10 chance of his being discovered.
15.31 A player will be required to move a character secretly when the character has been discovered and wins the subsequent duel, or when the hero is of a race unfamiliar to the city he is located in and does not have a Disguise Random Event Card (i.e., if the hero's racial symbol is not identical to the racial symbol of a warrior of Mars of that city). A hero of a humanoid race (red, white, yellow, etc.) may freely pass as one of the natives in any other city populated by a humanoid race.
15.32 A hero who is discovered for the third time during a Strategic Turn is automatically imprisoned.
15.33 A hero and retinue may always remain in the deserted area of the city without fear of discovery due to secret movement.
15.34 If a hero performing secret movement is discovered, the villain is reinforced by the normal complement of warriors of Mars, etc., even if the discovery should occur during movement within an area (see Case 15.4).
15.4 Movement Within an Area
15.41 Once a Player has determined where his hero's quarry is (see Section 16.1), he must track down the room in which the quarry is located (rooms are subdivisions of the house box). A character may always move to the house box of his choice within an area (or from an adjacent area).
15.42 Once the hero moves into a house box knowing his quarry is also there, play proceeds to the duelling game. All duels are resolved on the house display unless the quarry is in the palace, in which case the duel is resolved on the palace display.
15.5 Special Final Destination Restrictions
15.51 Once a villain reaches his final destination, he is never moved out of that city, regardless of Random Event, Discovery of the Hero, etc.
15.52 If the hero is discovered in the villain's final destination, the villain may replace the quarries (see Case 16.1) at different house boxes using the procedure outlined in Case 10.4.
15.53 If a surrogate villain is imported (see Case 10.12), the owning Player may place him at any legal location in the city he wishes.
16.0 INFORMATION ON PRINCESS AND VILLAIN LOCATION
GENERAL RULE:
Before a hero may rescue his princess or confront the villain, he first must discover where they are. This is done by using the Information Chart. Every time a character is in an area holding box, he may roll on the Information Chart, which will tell him what information may be gleaned in the area. As a result of attempting to gain information, it is possible a character will have his quest interrupted by the Hand of Fate. This will result in the character's discovery, befriendment, duel with a master swordsman -- or it could just be a close call with discovery. Generally, it is more difficult to gain information in the outlying areas (such as a deserted area), while considerably easier in such areas as the palace.
PROCEDURE:
If a hero reaches the Information Phase without mishap (i.e., being discovered), the owning Player may attempt to acquire information by rolling a six-sided die and consulting the Information Chart (16.27). The first roll determines which table of the Chart the Player uses; the Player finds the line corresponding to the area the hero is in on the appropriate Table. The owning Player then rolls the decimal die, and reads across and up to determine the result of the hero's information attempt. After determining what kind of information the hero may have gleaned, the player rolls the decimal die again, and reads the "HF" (hand of fate) number. If he has rolled less than or equal to the hand of fate number, it has struck.
Example: The Player has rolled a 3 on the first die-roll. He consults Table 3 of the Information Chart, he cross-indexes it with the Slaves' Quarters (the area the hero happens to be in), and rolls a 9. This results in the hero gaining House Information (see Case 16.24). The player then rolls for the hand of fate -- the Player rolls a 4, and thus the hand of fate has intervened. On the Hand of Fate Table (16.28), he rolls an 8 -- requiring a duel with a master swordsman (see Case 7.8).
16.1 Hiding the Villain and/or Princess (Quarries)
16.11 When the hero enters the same city as the villain, the villain secretly writes down the area, house and room the villain and princess are in. These two are the Quarries. When placing the quarries, the Player writes down the code number of the area, the letter of the house, and the number of the room. For example, if the villain Player wishes to hide the princess in room 3 of area C in the deserted area (area 1) he would write "Princess in 1C3".
16.12 All characters under the control of the villain, except the princess and her guard, are placed in the same house as the villain.
16.13 Should the villain hold a princess captive, he must place her in a separate house, but he can place her in the same area.
16.14 Four warriors of Mars guard the princess if the villain is not in the final destination. There are five if the villain is. If there is no princess, there are no guards. There is also a guard of four warriors of Mars over the villain if he is not in the final destination. If he is in the final destination he receives a guard of six warriors of Mars.
16.15 If either the princess or the villain are placed in the palace, there are an extra noble and captain of the guard to augment the normal guard placed over the villain or princess.
16.16 A villain character can never be placed in the deserted area, but a Princess can.
16.2 Acquiring Information
16.21 Before the Player rolls on the Information Chart, he must state whether he is searching for the villain or the princess (should there be one). A character receives information on only one of the two quarries once per Turn.
16.22 If the result is "none," then the character has been unsuccessful in gleaning information. However, the hand of fate may have intervened.
16.23 If the result is "area," the villain Player must inform the hero which area the quarry is in.
16.24 If the result is "house," the villain Player must tell the hero which area and house the quarry is in.
16.25 If the result is "room," the villain Player must tell the hero which area, house, and room the quarry is in.
16.26 If the character gains the same information a second time, he is entitled to receive the next best level of information, except when he receives two "no informations." Thus, two area results entitle the character to house information, and two house results entitle him to room information.
16.27 Information Chart
(see separate sheet; transcribed in the Charts and Tables section at the end of this document)
16.28 Hand of Fate Table
(see separate sheet; transcribed in the Charts and Tables section at the end of this document)
16.3 Befriendment via Information in the City
While befriendment in the city is similar to befriendment as covered in Section 12.0, there are important differences. Basically, the people a hero meets in the city are dramatically different than those encountered in the wilderness.
16.31 Unless specifically contradicted below, all restrictions and provisions of Section 12.0 apply to befriendment in the city.
16.32 When a die-roll for a hero is made on the Information Table, and a hand of fate result occurs and the hero is befriended, the owning Player immediately rolls a die and consults the City Friend Table (16.38) and applies the result.
16.33 Should the result on the City Friend Table be warrior(s) of Mars, then the appropriate colored warrior(s) of Mars counter(s) of the city is placed with the hero, and are his to control entirely. Alternatively, the hero character may choose to join the army of the city, in which case the chance to discover that hero at all times is decreased by two (except for any rolls on the Information Table), but the owning Player may only use the Information Table every other Information Phase.
16.34 Should the result on the City Friend Table be passive female slave, the slave will admire the hero, but will not give him material aid of any sort.
16.35 Should the result on the City Friend Table be active female slave, the hero adds a female personage to his retinue. In addition, if the hero is not already in love or mated, automatically falls in love with the slave (who will, of course, prove to be of noble birth once the adventure is over). The female slave gained this way is not susceptible to treachery (see Case 12.2), until she is out of the city in which she was gained.
16.36 Should the result of the City Friend Table be minor character, the friend is assumed to be a noble of the city, and the hero is immediately placed in the noble area of the city map. The hero loses one Strategic Turn in the process. Basically, the hero is assumed to be the personal slave of the noble who has "befriended" him, and the noble is not placed in play. If the result is a minor character (non-noble), a counter of the appropriate code series is placed in play with the hero.
16.37 Anytime a hero cannot be accompanied by his retinue (such as imprisonment), they are placed off-map until the hero can use them again.
16.38 City Friend Table
(see separate sheet; transcribed in the Charts and Tables section at the end of this document)
16.4 Other Means of Gathering Information
16.41 It is perfectly permissible for a hero to move around within an area, and attempt to search the house boxes individually even if he possesses no information on where his quarry is.
16.42 When the hero wishes to reconnoiter by searching individual house boxes, he may search one box per City Sub-sequence. The hero Player places the hero counter in the box he wishes to search (provided he can move there legally), and asks the villain Player whether the quarry he is searching for is there. If the hero asks if the box is the location of a character, and a different character is there, he will only learn that the character he asks for is not there. The villain Player must answer truthfully. The odds of this tactic being successful are minimal.
16.43 The hero who wishes to investigate by house search takes an additional risk of discovery. For every Hero Movement Phase a character spends searching individual house boxes, there is an additional 1 in 10 chance of his meeting a city encounter suited to the city he is in. Before the villain announces whether the hero's guess is correct or incorrect, the hero Player rolls a ten-sided die. If on the first Hero Movement Phase the hero is searching by house, he rolls a 1 (or on the second Phase he rolls a 1 or 2, etc.), the character must face a city encounter before he may hear the villain's answer. If the hero loses, he does not find out the villain's answer. The chance of a city encounter is cumulative in the course of a Strategic Turn -- the Phases spent searching need not be consecutive to count towards increasing the chance of city encounter.
16.44 When searching individual house boxes, a hero may not avail himself of the usual information procedure.
17.0 IMPRISONMENT AND ARENA DUEL
COMMENTARY:
Even the most villainous of Barsoomian Jeds (princes) gave a considerable amount of thought as to how a prisoner was to be dealt with. Consequently, many opportunistic heroes used the time they were imprisoned to devise bold and daring plans of escape. Also, due to the Barsoomian custom of placing two or more prisoners in the same cell, heroes were often able to make friends who would aid them in their escape. But sometimes, before escape could be effected, heroes would be required to do battle in the arena of the city. This could be anything from being placed in a pit leading to an underground river, to a game of Jetan (Martian chess) with human pieces being killed, to fighting a huge banth.
GENERAL RULE:
When a hero is imprisoned, he may take no action during the Hero Movement, Information or Duelling Phases. During the Imprisonment Phase, the owning Player determines whether the hero is befriended while imprisoned, and, if necessary, determines the consequences of arena battles.
17.1 Hero's Companions in Prison
Once a hero has been defeated in duel (and knocked unconscious as a result), he is placed in that tower arena area the City Directory (11.8) indicates is in play. The Tower/arena area is inaccessible by any other means. The hero is imprisoned, along with any accompanying female personages (placed off-map). The princess and/or any other female personages accompanying the hero are in the dungeon in the palace, and must be recovered from there. Note: A hero is only imprisoned if he is in the same city as the villain; if the villain is not in the city, the hero is interned (see Case 11.46).
17.11 Every time a hero is imprisoned, the owning Player checks on the Prison Companion Table (17.19) once to determine who was incarcerated along with the hero. As a result, the hero may be able to avoid arena duel, gain a friend for his retinue, etc.
17.12 If the result on the Prison Companion Table indicates the other prisoner is of no consequence, then the hero receives no aid from his companion.
17.13 If the result is warrior of Mars, then the hero will be accompanied by the warrior of Mars in his arena duel (should he not escape), and may add the warrior of Mars to his retinue should they escape or survive the arena duel. As with minor characters, warriors of Mars may be foreign or resident (see Escape, Case 17.2). The warrior of Mars is of the same color as is prevalent in the City, regardless of his origin.
17.14 If the result on the Prison Companion Table is minor character, then the minor character will join the hero's retinue after the arena duel (should the hero not lose). The minor character may not join the hero in an arena duel unless the Arena Duel Chart or a Random Event specifically allows it.
17.15 If the result is hero, a hero is chosen in the following order (the first hero not in play is taken): John Carter, Tars Tarkas, Carthoris, Gahan of Gathol, Vad Varo, Tan Hadron and finally Vor Daj. The hero may be used in arena duel, and also to effect escape.
17.16 If the result is male personage, then the male personage can be used to help the hero effect escape. When characters are imprisoned, they are always imprisoned with a member of the same sex.
17.17 Some entries indicate the prison companion is a resident of the city in which he and the hero are imprisoned. If there is no minor character or male personage listed on the City Directory, the character should be "imported" from the nearest city in terms of haads. A hero will lose the benefit of a resident when importing a minor character, but all imported male personages retain resident status. In addition to the aid a resident offers in escape, he will enable the hero to find secret passageways and the secret entrance/exit to the city (should the hero not already know of its existence).
17.18 A hero who is imprisoned loses one Strategic Turn, except in the final destination, where he loses two Strategic Turns.
17.19 Prison Companion Table
(see separate sheet; transcribed in the Charts and Tables section at the end of this document)
17.2 Escape from Prison
17.21 A hero may always attempt Escape before proceeding to the Arena Duel. A hero always has a base 2 in 10 chance of escaping, which may be modified by Random Event Card or aid from Prison Companions.
17.22 A hero automatically escapes should the villain character attempt an unspeakable act upon the female personage the hero is in love with. However, the act of escaping requires one City Sub-sequence (so the hero has only two City Sub-sequences remaining to rescue her).
17.23 A hero has only one chance to escape before proceeding to arena duel. Should the hero be imprisoned again after winning the arena duel, he may again attempt to escape.
17.24 If the character is aided by a warrior of Mars who is a resident (see Case 17.19) of the city, then one is subtracted from any escape die-roll.
17.25 If the character is aided by a minor character who is a resident of the city, then three is subtracted from any escape die-roll.
17.26 If the hero is aided by a male personage, then six is subtracted from the escape die-roll.
17.27 If the hero has been befriended by a female personage who is a resident of the city (either befriended in the city, or listed on the City Directory as coming from the city), one is subtracted from any escape die-roll. This is the only modification to the escape die-roll that may be added to one listed above. However, should the villain induce the female personage into treachery (see Case 12.2) after the hero has announced his intention to have her aid the escape, then the hero may not attempt escape (the personage has informed).
17.28 If the hero (and possibly his prison companion) escapes, he is immediately moved into one of the areas adjacent to the Tower Arena area on the first Hero Movement Phase afterwards, and thereafter must move secretly (see Case 15.3). The City Sub-game continues.
17.3 Arena Duel
If the hero is unfortunate enough to be imprisoned and not successfully escape, then he must face arena duel and possibly end his involvement as a hero in the game. Should the hero character lose an arena duel, he and his retinue are removed from play, his glory and love performance evaluated (see Section 20.0), and his Player may only serve as the villain for another Player. It is assumed that the hero did not die, but rather was forced to hide out in some deep, dark pit for several years before he could show his face again, by which time the adventure of relevance to the Players of the game had long since been concluded.
17.31 In an arena duel, the hero is assumed to be armed with the necessary weapons to meet the great and ferocious beast or skilled weaponmaster. Therefore, no adjustments need be made for fighting unarmed.
17.32 Arena duels are always performed on the arena outdoor display using the Duelling Game rules.
17.33 If a character wins an arena duel, and he is not in the villain character's final destination, then the villain character may flee the city for his next destination. Should the villain choose to remain in the city, the hero may immediately challenge him to a duel in the arena which the villain may not refuse, and the hero gains his retinue and any lost levels back before that duel is resolved. Of course, if the hero should opt not to challenge a villain who remains in the city, the City Sub-game continues.
17.34 Should the hero character win a duel in the final destination, he may immediately challenge the villain character to a duel, but he does not regain any of his lost levels before such a duel (this is an exception to Case 11.41). If the hero character declines the opportunity, the City Game continues.
17.35 Arena Duel Table
(see separate sheet; transcribed in the Charts and Tables section at the end of this document)
17.4 Explanation of Arena Duels
17.41 Duel with a captain of the guard: A captain of the guard will do battle with the hero character. Standard duelling results apply.
17.42 Duel with a master swordsman: All rules of Case 7.8 apply.
17.43 Game of Jetan: If the Players wish, they may take out their copy of Chessmen of Mars, and actually play a game of Martian chess, but should they not want to do this, consult the Jetan table and apply the appropriate result:
| Die-Roll | Result |
|---|---|
| 1-2 | duel two captains of the guard and one warrior of Mars |
| 3-8 | duel one captain of the guard and one warrior of Mars |
| 9-10 | duel one captain of the guard |
Each of these duels is resolved separately, so if the character rolled a seven, he would first duel a captain of the guard and then a warrior of Mars. Note: the character is not healed between duels.
17.44 Duel with ferocious wildlife: The hero must duel with the villain Player's choice of a beast of Mars (exception: no siths) which may be obtained in the city's area on the Outdoor Encounter Table. However, the strength of the beast the character duels is increased by one due to its enormous size.
17.45 The Death: The hero is placed outside the city map with his prison companion (should he not be inconsequential) and may re-enter the city map using secret movement (he really has been dropped into an underground river).
17.46 Duel with six warriors of Mars: Exactly what it says.
17.47 Mind Battle: The hero wins (by nature of his virtue, he has better powers of concentration), but is reduced by a level for two Strategic Turns (and remember the City Game occurs within one Strategic Turn) as a result of the mental struggle he had to go through. This level loss may not be cured by Martian healing salve, as the wounds are not physical in nature.
17.48 Chained and brought to throne room: The hero character (and any female personage he is in love with) are placed in the throne room of the palace display. Play then proceeds to the next Player. Two Strategic Turns later, the hero will escape and may duel, or another hero may come and rescue him, and gain appropriate glory (see Section 20.0).
18.0 RANDOM EVENTS
COMMENTARY:
Random Events allow the Players of John Carter to recreate some of the unpredictable phenomena of Barsoom. Though the players have a choice as to when certain events occur, there are limitations. Players may only retain so many cards, and for every ploy which may be introduced by Random Event Card, there is likely to be a counterploy using another Random Event Card.
GENERAL RULE:
Random Events take precedence over the rules as written where there is a conflict; see also Case 18.2. Cards may only be played by a Player in his proper capacity as hero or villain.
PROCEDURE:
During the Random Events Phase, the Phasing Player picks a card from either the top of the Random Event Deck or the face down pile (never from the face up discard pile). Some cards must be played immediately, but most may be saved to be played at any point in the game at the Player's option. Used Random Event Cards are placed in the face up discard pile. Once all Random Event Cards have been used, the face down and face up Decks are reshuffled and placed face down, and Random Events may be picked again.
18.1 How to Use Random Event Cards
18.11 There may never be more than three Random Event Cards in a Player's hand at any time. If a Player pulls a Card which would be his fourth, he must immediately discard one.
18.12 A Player may play a Random Event Card at any time in the Strategic Turn. However, some cards may only affect play in certain Phases or Sub-sequences (see Case 18.2), and therefore play of these cards should be confined to the relevant part of the game.
18.13 A Player forced to rid his hand of cards above the limit (see Case 18.11) may place a card in the face down discard pile. The other Player(s) then have the choice of choosing that card or the top card of the original deck. A Player may be forced to discard in this fashion if he cannot play the card he is discarding.
18.14 When a Random Event Card is used, it is placed face up in the used (or face up) discard pile, and when the Random Event Deck is used up, cards from both Random Event Decks are shuffled thoroughly and made into a new Random Event Deck.
18.15 The first time the Random Event Deck is exhausted, Cards 23 and 37 are removed from the deck (the events in question are unique occurrences).
18.16 All cards are designated as playable by a Player for his hero only, his villain only, or either his hero or villain. A Player may play a card only for a hero or villain under his control. Playing a Random Event Card for a hero affects only that hero and/or retinue (or that hero's opposing villain and/or entourage). Playing a card for a villain affects only that villain and/or his entourage (or that villain's opposing hero and/or retinue).
18.17 In games involving three or more players, a Player may offer to play a card to affect another Player's character. The player who the card is being offered to may refuse or accept the offer as he wishes; unless the other player agrees, a Player may only affect his own villain and opposing hero or own hero and opposing villain with Random Events.
18.18 Random Event Cards are not drawn during the play of the City Sub-game or during play of the Duelling Game. Of course, they may be played during the course of these "games."
18.2 Explanation of Random Events
In the upper right-hand corner of every Random Event Card there is a two digit code. The Player uses the code to determine whether any cards are missing initially, and also to allow easy access to the rules concerning each card listed below.
Cards 01 through 08. A Player may use these cards if his hero is reduced to level 1. When the character effects a miraculous escape, he loses one Strategic Turn (the immediately succeeding one), but the hero and any surviving members of his retinue are immediately removed from the outdoor/arena display. A Player may be forced to play such a card (see Case 11.33).
Cards 09 and 10. No Player may perform any movement with the exception of in-city and villain movement until the beginning of the next Strategic Turn of the Player who picked the Random Event Card. Any fliers not in cities are immediately removed from play.
Cards 11 through 15. See Treachery, Case 12.2.
Cards 16 and 17. See Remorse, Case 12.3.
Cards 18 through 20. See Unspeakable Acts, Case 13.4.
Card 21. The hero who plays this card may subtract two from his chances of being discovered in the City Sub-game (e.g., a 2 in 10 chance would become a no chance). In addition, the villain Player must inform the hero of the area of one of the quarries (villain's choice).
Card 22. Has no effect unless played during the Movement Phase (Phase D). When the card is played during the Movement Phase, the hero may move one-half (rounding down) the distance printed on the Movement Card before crashing.
Card 23. The hero and his retinue are immediately placed in the Atmosphere Plant, and must remain there for one Strategic Turn.
Card 24. When a character is on the outdoor display, the street display, or adjacent to an exterior wall on the palace or house display, the hero and his retinue may opt to remove themselves from melee. The card cannot be used on the flier display. The characters or beasts of Mars controlled by the villain Player may melee the hero once before he escapes; but only if they were adjacent to the hero at the time of the card play. The flier immediately becomes visible after the escape.
Cards 25 and 26. The minor character of the villain's choice is attacked by an assassin on the street display. The assassin's counter begins adjacent to and behind the minor character's counter. In addition, the player controlling the assassin may resolve a melee attack "free" before the normal Duelling Sequence begins. No other characters are used when resolving this duel. They may only be played against a character in a city.
Card 27. Play of this card allows the Player to announce his character is invisible the first time the character comes adjacent to an Enemy character and is not in a position to attack from behind. The character is then able to deliver a "free" melee attack after which play proceeds normally. In addition, the character using the invisibility pills has a temporary (for the duration of the duel) agility of 10, and if he is John Carter or Carthoris, an agility of 10/6 (see Case 7.39).
Cards 28 through 31. If the hero has a female personage in his retinue, the villain may play this card at the instant of melee in a city (including a city the villain is not located in). The female personage counter is immediately placed with the villain counter (which does not necessarily have to be on the display), regardless of the hero Player's positioning of the female personage.
Card 32. The extra Movement Card should be treated exactly as a complete and separate movement (see Case 9.1).
Card 33. The villain Player may move the hero and retinue travelling by flier to any city directly connected to the city the hero is in. It may only be played when the hero is in a city.
Card 34. Exactly as the card says.
Cards 35 and 36. Of course, these cards may not be used in the villain's final destination. They may not be played until the hero enters the villain's city.
Card 37. The hero and his retinue are immediately placed in Lesser Helium, and must remain there for one Strategic Turn.
Cards 38 and 39. The hero employing these cards automatically escapes (see Case 17.2). They may not be played in an Imprisonment Phase in which an escape die-roll has already been made for the hero.
Cards 40 through 42. The hero playing this card may enter the city map via the secret entranceway, or use a secret passageway in the palace display.
Card 43. Whenever a hero is discovered, or must fight warriors of Mars as a result of a city encounter, he may avoid this encounter by playing this card. However, the card may not be used against the personal guard of the villain.
Cards 44 and 45. Before the hero goes to the appropriate display on an outdoor encounter, the hero Player may play this card and avoid the encounter. This card has no effect if played once the duel has started.
Cards 46 through 48. Exactly as the card says.
Cards 49 through 51. If a hero is defeated by warriors of Mars, he may use this card to avoid capture, imprisonment or internment. In addition, he does not lose his weapons (and so is not unarmed) when released.
Card 52. The hero may avoid any encounter via use of this card, or imprisonment or internment at the hands of warriors of Mars, but loses a Strategic Turn in the process.
Cards 53 and 54. Exactly as the card says. (See Case 6.25.)
Card 55. Exactly as the card says.
Card 56. The minor character must be a 100 series minor character, and it is the hero player's choice of minor character. The warriors of Mars are native to the hero's home city.
Cards 57 and 58. These cards may only be played after discovery has occurred, and apply to an entire Turn.
Cards 59 through 61. Exactly as the card says. (See Case 9.51.)
Cards 62 and 63. Exactly as the card says.
Cards 64 and 65. Exactly as the card says. The Players should note on a sheet of scrap paper the name of the "safe" character.
19.0 SPECIAL RULES
COMMENTARY:
There are certain characters and events on Mars which cannot be satisfied by a generalized hard and fast rule, and must be dealt with individually. The following rules deal with unique situations and occurrences not dealt with elsewhere in the rules.
19.1 Woola the Calot
When John Carter first came to Barsoom, he found his first friend in a calot named Woola. The devoted Woola faithfully followed the Warlord in his first days on Barsoom, and, on more than one occasion, saved John Carter's life.
19.11 Woola is always assumed to be with John Carter. His counter is never placed on the board, though, until the rules below inform the players that he is due to appear. Woola is always placed by the John Carter player in the first unoccupied sixteen box square directly behind John Carter's counter, unless this should be physically impossible. If it is impossible, Woola is placed nine to twelve boxes away from the John Carter counter, and may be moved normally by the John Carter Player.
19.12 Woola appears once John Carter is at level two or one (should the Warlord be knocked unconscious). He is immediately placed on the board and may initiate melee before any further duelling is resolved (regardless of alertness, etc.). Play then proceeds normally.
19.13 Airsickness
Woola may not duel across fliers, nor may he move between two fliers. In addition, he may only be placed in the flier John Carter begins the duel in.
19.14 Sex and the Single Calot
Though Woola is technically considered a minor character, he never falls in love and is not susceptible to treachery.
19.15 If Woola is reduced below Level 2, he becomes unconscious. Place an unconscious marker on his counter.
19.16 Ferocity
If John Carter is unconscious, Woola automatically gains one in his strength rating and must be struck twice before becoming unconscious (or hit by a 10/8 result for a minor character or a 10/10 by a warrior of Mars; see Case 7.5).
19.2 Female Personage Special Rules
19.21 Dejah Thoris, Tara of Helium, Llana of Gathol
These three lovely ladies may never be corrupted when a villain character attempts an unspeakable act (a roll of 10 on the Unspeakable Act Table). Instead, there is a Timely Interruption in the case of Dejah Thoris, and the other two take their lives. When you're incomparable, things tend to go your way.
19.22 Thuvia of Ptarth
If any hero character has the personage Thuvia of Ptarth in his retinue, he may render any encounter with banths a no encounter. Thuvia had a naturally commanding voice and was able to soothe the fearsome banths.
19.23 Tavia, Llana of Gathol
These female personages are quite well-rounded individuals. Besides learning all the skills necessary to a woman on Barsoom, they each had some ability of their own when it came to swordplay. If they love a hero who falls unconscious or to level 2, the parenthesized values on their counter come into effect. They too fall unconscious rather than die when reduced a level.
19.3 Male Personage Special Rules
19.31 Ras Thavas, Master Mind of Mars
Ras Thavas had the ability to transfer brains between bodies. Ras Thavas has the power to change a non-hero character's values to those of a warrior of Mars, and a hero's values to those of a captain of the guard. He may perform a reverse transfer only with a character who he has degraded already. Any such transfer must be performed at Morbus, Gathol or Greater Helium. The character will have the same mind, and consequently will make the same decisions (e.g., still be in love). A hero will still fall unconscious rather than die even during the time his brain is transferred. A transferred character and his retinue may thus avoid discovery checks in a city (until he performs a hostile action) because he is assumed to have the body of a warrior of Mars indigenous to the city.
19.32 Tario, Jed of Lothar and Luud of Bantoom
Tario of Lothar had experimented for untold ages with the mind, and claimed he had access to the ethereal. It is certain that he had great powers over the human mind. But even if he did have access to the ethereal, he seemed to prefer solid flesh and blood -- which is to say he lusted after human females. Luud, being a kaldane, did not lust after females, but could be pacified by their singing. Neither liked male human beings and were generally disposed to be evil toward them. Any time a villain is in Lothar or Bantoom, he may call upon Luud (in Bantoom) or Tario before the hero may duel the villain. Roll on the Tario/Luud Mind Control Table to determine what happens (see 19.33). Should the female personage fall in love with Tario, the hero may fall in love with her again (but she is not disgraced, as Tario used his mind to gain control of people). Should the result be "eaten by Luud," the female personage will indeed be eaten by Luud if her hero should lose an arena duel. Should he escape, he rescues her in time to prevent her from becoming a late night snack.
19.33 Tario/Luud Mind Control Table
(see separate sheet; transcribed in the Charts and Tables section at the end of this document)
19.34 Lum Tar O
Lum Tar O was a sterling mesmerist who survived from the Orovar, or white-skinned, race that populated Barsoom when the oceans were brimming with water. His body was embalmed by a friend possessed of such skill that Lum Tar O's body was convinced he was alive. Lum Tar O eventually became a malignant "Thing" which inhabited the supposedly dead city of Horz, hypnotizing unsuspecting transients into thinking they were dead. When in Horz, on a roll of 3 on the City Encounter Table, the hero meets Lum Tar O, defeats him, but suffers the effects of the mind battle arena duel (see Case 17.47).
19.4 Kar Komak and Ghek
Both Kar Komak and Ghek possess amazing mental powers. The application of these powers are quite different, since each of the characters were unique in Barsoomian annals.
19.41 Kar Komak may, twice per Strategic Game, materialize five Red Martian warriors of Mars who will fight for the hero in whose retinue he is. Though these are manifestations of Kar Komak's mind, the enemy will unfailingly believe them, and will fight them as if they are quite real.
19.42 Ghek may immobilize one character during a duel. This character may not move or duel until he is struck during melee. At that point, the character who was held during melee may freely perform his actions for the Action Phase. Ghek may only do this once per duel.
19.43 Neither Kar Komak or Ghek may use their mental powers, if they are engaged in melee. Neither Kar Komak or Ghek can ever be traitorous.
19.44 In addition, the presence of Ghek allows the hero to subtract one from his escape die-roll if imprisoned while travelling with Ghek. Ghek was a kaldane, and as such able to move his head (the kaldane) away from his body (the rykor). One can imagine the tricks he was able to play when guards thought him securely chained to the table!
19.45 To control Ghek, the hero must initially have a female personage, who will sing to Ghek and convince him humans are nice. Otherwise, Ghek is hostile, and will not join the hero as a friend.
19.5 Special Hero Rules
19.51 Tars Tarkas
The great Green Martian hero, Tars Tarkas, rose above his cultural background and became the good friend of John Carter. Two more fearsome fighters side-to-side there never were, what with John Carter's amazing prowess with the blade, and the Green Man's tremendous strength. It is a disappointment to readers of the Martian series that Tars Tarkas appears only fleetingly after the third book in the John Carter series. Tars Tarkas never falls in love, nor do female personages fall in love with him. He is pining for Gozava, who was brutally slain for daring to love Tars Tarkas -- but Tars Tarkas avenged her by slaying and humiliating her tormentor in combat. Because of commitments elsewhere (Tars Tarkas is chieftain of the Green Martians around Thark), Tars Tarkas will only remain three Strategic Turns with a hero he befriends, but will spend five Strategic Turns with his bosom friend, John Carter.
19.52 Vad Varo (Ulysses Paxton)
Captain Ulysses Paxton of the United States Army was an avid reader of the Barsoomian chronicles. He too felt the lure of the red planet, and longed to join John Carter in his adventures. Paxton's wish was rewarded when he thought himself dying from German fire in the trenches of World War I. When he came to Mars, he was named Vad Varo by Ras Thavas, the Master Mind, his discoverer and captor. In the course of their association, Ras Thavas taught Vad Varo his trade. Therefore, Vad Varo may use all the abilities outlined in Case 19.31.
19.53 Vor Daj
Though perhaps the most obscure of the Barsoomian heroes (which is equivalent to saying the least distinguished .300 hitter in baseball), Vor Daj in many ways exemplifies the true Barsoomian values. To gain the love of his princess, he risked his body and allowed himself to have his mind transferred to an awesomely powerful hormad named "Tor-dur-bar" (literally four million and eight). It was in this body he defended his princess' honor, and he never regretted the chance of losing her love in return for being an unsung hero. Vor Daj may choose at the beginning of the game to be in the form of Tor-dur-bar, and all hero rules still apply, but he must always move secretly in a city, and cannot complete his quest until he returns to either Helium or Morbus.
20.0 STRATEGIC GAME SET-UP AND EVALUATING PLAYER'S PERFORMANCES
GENERAL RULE:
At this point, the Player being familiar with all the rules of play, he is ready to begin play. The following Cases discuss how to begin play, and also how to assess the hero's performance at the end of the game in light of high Barsoomian standards.
20.1 Selecting a Hero
20.11 There are six heroes a Player may opt to represent in John Carter; they are John Carter, Carthoris, Gahan of Gathol, Vad Varo, Tan Hadron and Vor Daj. While a Player also plays a villain in the game, his primary focus is on his hero, who represents all the positive aspects of Barsoom.
20.12 A Player should choose which hero he wishes to play at the start of the game. If there are any disagreements as to who plays which character, the high die-roller wins the right to play the character of his choice. While it is quite understandable that a Player would wish to take the part of John Carter, the most popular and seemingly best character in the game, the character has the quests he may endeavor seriously "stacked" against him, to test the Warlord's and his Player's mettle.
20.13 All heroes begin the game in Lesser Helium (at John Carter's palace).
20.14 Players always move in the order determined by the hero they control. It is as follows: John Carter, Carthoris, Gahan of Gathol, Vad Varo, Tan Hadron and finally Vor Daj. Allow for heroes not in play.
20.2 Determining the Villain Opposite the Hero
Villains are always chosen as counterparts for the various heroes. After the Players have decided who will be which hero they assign the villains by hero.
20.21 Listings of villains in the Cases below are organized in the following format: actual villain character(s), henchmen and captives. Note the henchmen count against the limits of the entourage (see Case 10.5).
20.22 John Carter
John Carter is the main hero of the Barsoomian chronicles, and consequently has the greatest number of opposing villains. The Player who is to play the villain opposite John Carter must agree with the John Carter Player as to the identity of the villain he will play. Otherwise, roll a ten-sided die and choose the villain with the appropriate numbers in parentheses after his name. Note any captives listed will be either mated to John Carter (in the case of Dejah Thoris) or related (in the case of Llana of Gathol).
| Villain | Henchmen | Captive |
|---|---|---|
| Matai Shang, Thurid, Salensus Oll* (1-2) | 4 Therns | Dejah Thoris |
| Gar Nal, Fal Sivas, Rapas the Ulsio, Ur Jan (3-4) | 3 Red Men | Dejah Thoris |
| Hin Abtol (5-6) | 8 Red Men | Llana of Gathol |
| Doxus, Nastor (7-8) | 4 Black Pirates | Llana of Gathol |
| Ptantus, Pnoxus, Motus (9-10) | 3 Invisible Men | Llana of Gathol |
* The villain Player receives Salensus Oll only at his final destination.
20.23 Carthoris
The villain opposite Carthoris and all of the ensuing heroes is the same every time the particular hero is played.
| Villain | Henchmen | Captive |
|---|---|---|
| Astok, Vas Kor, Nutus | 3 Red Men | Thuvia |
20.24 Gahan of Gathol
| Villain | Henchmen | Captive |
|---|---|---|
| O-Tar, Luud | 6 Red Men | Tara of Helium |
20.25 Vad Varo
| Villain | Henchmen | Captive |
|---|---|---|
| Xaxa, Sag Or | 8 Red Men | Valla Dia* |
* Vad Varo must recover the personage Xaxa, and bring her back to Toonol, where he will find Ras Thavas. The body of the beauteous Valla Dia has been purchased by the villainous crone Xaxa, and Vad Varo fell in love with Valla Dia in Xaxa's body. He wished to recover her original body for his intended princess.
20.26 Tan Hadron
| Villain | Henchmen | Captive |
|---|---|---|
| Tul Axtar, Phor Tak | 6 Red Men | Sanoma Tora |
20.27 Vor Daj
| Villain | Henchmen | Captive |
|---|---|---|
| Ay-mad, Jal Had | 2 Red Men | Janai |
20.3 Friends and Lovers
20.31 With the exception of John Carter, all heroes begin the game not in love. John Carter is mated to Dejah Thoris at the beginning of each Scenario, or obliged to rescue Llana of Gathol to fulfill his "love" conditions. Note: Regardless of how the flow of play occurs, Players may choose which personage the hero ends the game in love with at the conclusion of play.
20.32 To fulfill their love interest, a hero is obligated to rescue a captive from a villain.
20.33 In any game in which John Carter is opposed by Hin Abtol, he is accompanied by the minor character Pan Dan Chee.
20.34 Carthoris begins the game accompanied by Kar Komak.
20.35 Gahan of Gathol begins the game accompanied by Ghek of Bantoom (who is not hostile; exception to Case 19.45).
20.36 Vad Varo begins the game accompanied by Gor Hajus. The first two minor characters he will befriend are Hovan Du and Dar Tarus (in that order). This is an exception to the rules concerning befriendment (Section 12.0).
20.37 Tan Hadron begins the game accompanied by Nur An. The first personage he will meet is Tavia; this is again an exception to Section 12.0.
20.38 Vor Daj must begin the game by deciding which of the options enumerated in Case 19.53 he will use. Regardless, he begins the game accompanied by Gan Had. If he chooses not to begin the game in the body of Tor-dur-bar, he is accompanied to the villain's first city and through the resultant City Game by John Carter (and hence no Player may choose the Warlord when Vor Daj is being played this way).
20.4 How to End the Game
The game is ended when all hero characters are either removed from play (by losing arena duels), or have fulfilled one of the glory or love conditions. Players should review their performances in light of the glory and love conditions.
20.5 Glory and Love: Evaluating Performances
There are two values more important to a man of Barsoom than any other; the respect of his fellow man, and the love and respect of his princess (mate).
20.51 To fulfill his glory condition, a hero must slay his villain and all henchmen.
20.52 To fulfill his love condition, a hero must rescue his villain's captive and possibly his own princess and bring her back to Greater Helium. A successful performance of an unspeakable act will make it impossible for a hero to fulfill his love condition.
20.53 A hero is considered better at his performance should he (in addition to fulfilling his love and glory conditions) rescue a fellow hero who is captive, or if he remains alive while the other hero(s) have died (see Case 17.3).
20.54 The hero who fulfills the most conditions as listed above, or, in the event of a tie, fulfills his condition(s) first is declared champion of all Barsoom.
20.55 To discover how a Player's hero has performed in comparison to the Martian ideal, consult the following chart:
| Fulfilled | Status |
|---|---|
| Love | The hero is now mated, and his princess adores him, but his home has been razed by the evil villain, and so he will be a panthan (wandering mercenary) for the rest of his life. |
| Glory | A well-respected hero in his native city, but he is missing the greatest thrill a hero can experience. |
| Glory and Love | The hero of the twelfth book in the Martian series. |
| None | Don't bother showing your face around Barsoom again. However, you may be evil at heart, try playing only a villain next time and see if your luck improves. |
THE MILITARY GAME
The Military Game is quite different from what the Players have experienced so far. It has no relation to the Strategic Game, and hence does not utilize any of the rules heretofore stated; there is no Duelling Game or City Sub-sequence in the Military Game. Also, it is not strictly faithful to Barsoomian history as recorded by Edgar Rice Burroughs. Rather, it is a simple game of maneuver, strategy and intrigue which examines some Barsoomian "what-ifs" on a grand strategic level. The Players control national fleets as well as individual naval leader characters, and engage in military and diplomatic conflicts. The Military Game is not well-suited for solitaire play.
21.0 SEQUENCE OF PLAY
GENERAL RULE:
The Military Game is played in turns called Game-Turns. The Sequence of Play for the Military Game is the strict order of events for each Game-Turn; it is divided further into two Player-Turns, where only the named Player may initiate actions. Once the Sequence has been completely performed, it is started again and a new Game-Turn begins.
Sequence Outline
A. Diplomacy Phase
The Players influence neutrals, as per the rules in Case 24.2. If both Players are attempting to influence the same neutral, see Case 24.3.
Helium Player-Turn
B. Movement Phase
The Helium Player engages in fleet movement as described in Section 22.0.
C. Combat Phase
The Helium Player engages in fleet combat as per the rules in Section 23.0, should he have a fleet in the same city as an Enemy fleet.
D. Reinforcement Phase
Every third Game-Turn, the Helium Player receives reinforcements, as do any Friendly influenced neutrals.
Dusar/Jahar Player-Turn
The Dusar/Jahar Player repeats the three Phases of the Helium Player-Turn, using the exact same procedures.
E. Movement Phase
F. Combat Phase
G. Reinforcement Phase
H. Turn Indication Phase
The Players advance the Turn marker by one space, signalling the end of a Game-Turn.
22.0 FLEET MOVEMENT
COMMENTARY:
The science of communication on Barsoom was not nearly as advanced as the science of transportation. Consequently, much time would be spent holding the fleet at home while the fleet commanders would decide where to take the fleets to wage war. Then, the fleets would be able to strike with lightning speed which would often as not catch the Enemy by surprise. Though huge groups of fliers seem to move as fast as a single flier in the Military Game, the time represented by a single Turn in the Military Game is considerably more than the time represented by a Strategic Turn. This is partly because of the limited reaction time an Enemy had, and also because a great deal of time was spent waiting for scouts to report back.
GENERAL RULE:
The movement rules are identical to those used in the Strategic Game, with the exception of any rules applying strictly to characters. There are new classes of units, but basically the same rules are used to move them. All units are deployed face down on the map when moved.
22.1 Notes on Unit Types
There are only two basic unit types in the Military Game: the Fleet and the Commander. Each fleet represents a large detachment of warships with a full complement of transport fliers loaded with troops appropriate to the nationality of the unit. A precise number of fliers per unit cannot be given because the disparity between the quality of the men who manned the fliers and technologies of different nations dictate that Heliumite (for instance) fleets represent substantially less fliers than those of any other nation. Other factors are the development of weapons such as Phor Tak's disintegrater, which gave the scoundrelous Jaharians a temporary advantage over the Heliumite war fleet. However, justice and the Barsoomian way prevailed. A commander is a character who, in the Strategic Game, was a minor character if not a hero. While the commander does not aid in the movement of fleets, he is extremely important in the resolution of fleet combat (see Section 23.0). Naturally, John Carter is the best fleet commander on Barsoom.
22.2 Movement of Fleets
22.21 Unless contravened in the rules below, fleet movement is performed as outlined in Section 9.0 using the flier column of the Movement Card.
22.22 The owning Player has the option whether to move or not when fleets begin a Turn in a city, but must move them (by drawing a Movement Card) when they are between cities.
22.23 Commander units must be moved with a fleet unit of the appropriate nationality. A commander may not be separated from his fleets (exceptions: see Cases 23.26 and 24.45).
22.24 Fleets must move forward at all times -- i.e., they may not backtrack to the city they came from once they set out on movement between cities.
22.25 Fleets may not move from a city if it has a neutral or Enemy fleet(s) in it until the neutral or Enemy fleet(s) is either defeated or (in the case of a neutral) influenced to allow Friendly Fleets to move past (see Case 24.2). Exception: Fleets may always return to the last city they were moved through.
22.26 All units (whether commanders or fleets) must be moved face down. They are only flipped up when performing fleet combat (see Fleet Combat, Section 23.0).
22.27 Obviously, fleets do not have encounters. The idea of a single flier manned by piratical men taking on a well-trained war fleet is ludicrous.
22.28 On every fifteenth Turn of the game, the Players must roll to determine whether one of the seasonal Barsoomian storms brews up. One Player rolls the die; on a roll of 1 or 2, the storm occurs. If the Player rolls a 3, 4, 5 or 6, no storm occurs; but the Player will roll on each subsequent Turn until a storm does occur. The roll for storms is made in the Diplomatic Phase.
22.29 If and when the storm springs up, it is of incredible ferocity. The storm will effectively prohibit movement of fleets. Any fleet between cities at the beginning of a Turn in which a storm occurs is removed from play, and any commander on board such a fleet returns to his country's capital (see Section 24.0) at the end of the subsequent Turn's Reinforcement Phase.
23.0 FLEET COMBAT
COMMENTARY:
When combat between air ships occurred on Mars, the quality of men determined victory in the battle. And since Helium has had, since the advent of John Carter, the best-trained and most capable men, Heliumite war parties invariably won. To make the Military Game interesting for the opposing Player, the designer has taken the liberty of supposing an alliance of forces opposed to Helium could defeat a fleet from Helium. But it would be tough. The Military Game concerns itself with the air battle only. Though the battles between ground troops (notably those involving Green Martians) were extremely exciting, most usually occurred after an attacking air fleet had already proved successful, and even the most desperate of defenses could never stave off the taking of the city. The art of siege warfare was neglected on Barsoom only because there rarely were any (the siege of Gathol being a notable exception).
GENERAL RULE:
If and only if two fleets controlled by the opposing Players are in the same city, combat may be resolved at the option of the Phasing Player. The results of any combat may be affected by the fleet maneuvers selected for each fleet (by the Players), any leaders present, and whether or not the combat occurs in a capital.
PROCEDURE:
Whenever a Fleet Combat is to be performed, the Players determine who is to be the attacker. The attacker is the Player with more Fleet Strength Points, or, if Players have equal totals, the Phasing Player.
Each Player then selects from the nine possible Fleet Maneuvers the one he wishes to have his fleet perform in the first round of combat. He places the card of his choice face down, and then the Players simultaneously compare cards. Consulting the Fleet Maneuver Matrix (23.5), the Players derive a plus or minus differential which will be added or subtracted to the die-roll in the coming combat.
Carrying over the value discovered on the Matrix, the Players compare commanders' Leadership Values. If the attacker has a greater leadership value, the difference is added to the current result; if the defender's Commander's Value is greater, the result is subtracted from the current result. The modified result is applied to the attacker's half of the round; the additive inverse of the modified result is applied in the defender's half of the round.
The attacking Player totals the number of Fleet Strength Points he has available (see Case 23.1), and compares his total to the defending Player's. This establishes which Fleet Differential column is to be used on the Fleet Combat Results Table (23.6). At the same time, the defending Player compares his total Fleet Strength Points to the attacker's, and determines his fleet differential.
Both Players roll the decimal die, add or subtract the modified result, and read across on the Table to determine whether the opponent has taken losses.
At the end of combat resolution, losses are applied. Fleet Strength Point losses occur simultaneously, so the original Fleet Strength Point totals (at the beginning of the round) is applied for all calculations.
Fleet combat continues until one fleet breaks off from combat, or one fleet is completely eliminated.
23.1 The Fleet Combat Strength
23.11 The only value printed on each fleet counter is the Fleet Combat Strength. The fleet combat strength is used for resolving fleet combat.
23.12 The fleet combat strength is sometimes augmented defensively (only) by the Intrinsic Defense Strength of a city (see Case 23.4).
23.13 Fleet units represent nothing more than a collection of Fleet Strength Points of a certain nationality. Like money, units are completely interchangeable so long as their nationality and total Strength Point value remain the same.
Example: A Player owns a fleet totalling seven Fleet Combat Strength Points. Currently, it is broken down into seven counters with a Strength Point value of 1 each. The Player may substitute so there are counters worth respectively 2, 2, 2 and 1, or so there are counter values of 5 and 2. Under no circumstances may the sum of the combat values of the counters be changed.
23.14 If the Players wish to add counters of values other than those included in the game (for example, 3 or 4 Strength Point Fleets), they should feel perfectly free to do so, but should be forewarned that testing has determined such counters will have little or no effect on the play of the game.
23.2 Resolving Fleet Combat
23.21 Fleet combats are conducted in rounds. During each round, the attacking Player and the defending Player roll on the Fleet Combat Results Table. At the end of one round, casualties are simultaneously applied.
23.22 Combat is to the elimination of one fleet, or until it is broken off. Combat is broken off if both Players agree at the beginning of a round to break it off, in which case the Player who began the combat in possession of the city retains possession of the city. Alternately, if either Player performs two consecutive Reverses, combat is broken off and the other Player ends the fleet combat with possession of the city.
23.23 When consulting the Fleet Maneuver Matrix, the result affects the attacker's die-roll only. During the defender's part of the round, he uses the additive inverse (i.e., the result used by the attacker multiplied by -1). The commander's value is added or subtracted before these calculations are made.
23.24 Results listed on the Fleet Maneuver Matrix translate into the number added or subtracted to the die-roll used to resolve fleet combat. Such die-rolls may be further modified by the presence of a commander (see Case 23.3).
23.25 The number derived as a result of fleet combat on the Table is the number of Enemy fleets destroyed and removed from play.
23.26 Should all of a Player's fleet units in a single city be eliminated, any commanders (see Case 22.1) present are captured by the opposing fleet. During the Reinforcement Phase of the third Game-Turn following the Turn in which he was captured, the commander is returned to his capital. Should there be no fleet (including reinforcements) in the capital, the commander must wait to return to play until the first one appears in the capital. A commander's return may not be voluntarily delayed.
23.3 Effect of Commanders on Combat
A good commander could singlehandedly decide a large air battle by the formulation of a good plan, or by personal valor and elan in leading the flagship. Of course, certain commanders were better than others.
23.31 When resolving combat between fleets, Players compare the leadership values of their commanders present. If a Player has more than one commander present at a given fleet combat, he may use the leadership value of any one.
23.32 A fleet with no commander has a leadership value of 0 (zero).
23.33 When determining the modifier to a given fleet combat, the Player with the commander with the greater leadership value adds the difference to the modifier if he is the attacker; he subtracts the difference if he is the defender. If the two Players possess commanders with equal values, the result remains unchanged.
23.4 City Intrinsic Defense Strength
23.41 While it has been stated earlier that once an invading fleet reduced the navy of a city to an ineffective fighting force, the city would be unable to offer appreciable resistance, the denizens of a city do offer token support in battle. Consequently, every Capital on the map is given an intrinsic defense strength.
23.42 The intrinsic defense strength may only be used when the attacker is performing his part of the combat round. When the attacking Player calculates the fleet differential, he treats the intrinsic defense strength as a Fleet Combat Strength Point. However, the intrinsic Defense Strength is always ignored when conducting the defender's portion of the combat round.
23.43 The intrinsic defense strength of all capitals is 1 (one), with the exception of Greater Helium, which had been so well-organized by the Warlord that it merits an intrinsic defense strength of 2 (two).
23.44 The intrinsic defense strength may only be used by a fleet of the same nationality as the capital. A conqueror receives no benefit when defending in a captured capital.
23.5 Fleet Maneuver Matrix
(see separate sheet; transcribed in the Charts and Tables section at the end of this document)
23.6 Fleet Combat Results Table
(see separate sheet; transcribed in the Charts and Tables section at the end of this document)
24.0 REINFORCEMENTS AND NEUTRALS
COMMENTARY:
There were two significant sources of reinforcements during a military campaign on Barsoom: (1) fleets raised at home and readied for war in the midst of a campaign and (2) neutrals influenced to join the nation's side. Though production of war ships was a long and difficult process, in times of need it could be rushed to bring needed extra fliers into the fray. And as with every war in which there are neutrals standing to the side, it was in the interest of the major powers to convince the neutrals they should risk their front-line troops to enhance the major powers' chances of winning.
GENERAL RULE:
On every third Game-Turn, each Player receives one fleet for each capital he controls. He places one fleet in each home capital (those controlled at the beginning of the game) for each such capital. To gain the aid of neutrals through influence, Players must send units to that nation's city to bring the neutral onto his side. When the neutral is influenced, his units are treated as part of the owning Player's forces. However, to retain control of neutral forces a Player must combine home fleets with the influenced neutral's units.
When two Players are vying to influence the same neutral, they engage in diplomatic in-fighting (see Case 24.3).
PROCEDURE:
Diplomatic in-fighting is resolved much like fleet combat -- except there are no warriors in the field of diplomacy -- just statesmen. Players choose the method of approach their commanders will take when engaged in diplomatic in-fighting and play a card with the diplomacy mode they wish to use printed on it. Both Players simultaneously reveal the diplomacy mode they have chosen.
The Players carry over the addition or subtraction to the die-roll (determined by comparing the diplomacy modes) onto the Diplomacy Results Table (24.6), and determine the differential between the two commanders' diplomatic values. The numbers derived are read as Influence Points accumulated -- first the Player whose portion of the round it is, and then the other Player's Points.
Note: Diplomatic in-fighting may only occur under certain circumstances (see Case 24.31).
24.1 Receiving Reinforcements in Capitals
24.11 A Player receives one fleet in each capital he controls in the Reinforcement Phase. Should an Enemy Player be in the capital but not in control of it, the reinforcement arrives. However, the Player must not have an Enemy fleet controlling a capital if he wishes to receive his reinforcements. On Barsoom, possession is not nine-tenths of the law, it is the law.
24.12 A Player may gain extra fleets by denying the Enemy control of the Enemy capital. When a Player has held an Enemy capital with one of his fleets for at least two consecutive Turns and it is a Turn the Players are scheduled to receive reinforcements, the Player receives an extra reinforcement (fleet) for each Enemy capital held for the necessary number of Turns. Capturing the capital in the Turn reinforcements are due denies the Enemy his reinforcements.
24.13 Reinforcements received via control of an Enemy capital may be placed at any of the owning Player's controlled capitals.
24.2 How to Influence Neutrals and Win Additional Fleets
The presence of foreign fleets and perhaps commanders at the city of a neutral may be used to "influence" that neutral in favor of the owning Player's nation. A neutral may at any point in time be leaning towards Helium, be absolutely neutral or be leaning towards Dusar/Jahar. This is measured in terms of Influence Points accumulated by either Player.
24.21 A neutral is completely influenced when the total Influence Points accumulated by a Player which affect that neutral equals six. The neutral's fleets and commanders then become part and parcel of the influencing Player's forces. However, see Case 24.4.
24.22 Influence Points are cumulative and may be gained in nonconsecutive Turns. Players should keep track of Influence Points on a piece of scrap paper.
24.23 In any Diplomacy Phase a Player has a fleet present in a neutral city and there are no Enemy units present, he gains two Influence Points which affect that neutral.
24.24 In any Diplomacy Phase during which a Player has a fleet and a commander present in a neutral city and the Enemy Player only has a fleet present, he gains two Influence Points which affect that neutral.
24.25 In any Diplomacy Phase during which a Player has a fleet and commander present in a neutral city and no Enemy units are present, he gains three Influence Points which affect that neutral.
24.26 Regardless of how many fleets or commanders a Player has present to influence a given neutral, he can never gain more than two or three Influence Points per neutral each Game-Turn.
24.27 A Player who has his units attack a neutral's unit, or attacks the Enemy Player's units in the particular neutral's city can never gain Influence Points which affect that neutral. The second is an unpardonable breach of the peace, and the neutral will immediately become completely influenced by the Enemy (non-attacking) Player, as per Case 24.21, regardless of any accumulated Influence Points. Note: A Player may choose not to inflict casualties upon a partly neutral force controlled by the Enemy Player to retain the chance of influencing that neutral later in play.
24.28 Should an Enemy fleet be present when a neutral becomes influenced through the accumulation of Influence Points, it is given one full Turn to leave the (previously neutral) city from the Phase the neutral was influenced before it may be attacked. Should the Player who influenced the neutral still wish to attack the Enemy fleet, the neutral's fleets immediately join the attacked Player's side.
24.3 Diplomatic In-Fighting
24.31 When both Players have equal forces for purposes of diplomacy (i.e., each has at least one fleet or each has at least one commander and one fleet), Players may attempt to obtain Influence Points through diplomatic in-fighting.
24.32 Diplomacy is resolved in rounds as fleet combat, with the exception that only one round may be performed each Turn (Diplomacy not being an overhasty process).
24.33 A Player may only claim a neutral as completely influenced in his favor at the end of any Diplomacy Phase. It is possible for a Player to have six Influence Points at one point in a Phase but lose one before the conclusion of the Phase.
24.34 In the event of both Players ending a Diplomacy Phase with over five Influence Points, the Player who achieved the total first gains the neutral. If both Players achieved the total at the same time, gaining the neutral becomes a sudden death proposition: the first Player with a total higher than the other's gains complete influence over the neutral.
24.4 Retaining Neutral Forces
Unfortunately for the lucky Player who gains the aid of a neutral, Barsoomian neutrals (like their Terran counterparts) do not wish to take grievous casualties, nor are they likely to perform well unless supervised by their allies. Players who ignore their newly found friends are likely to find them neutral again.
24.41 In order to move a neutral's fleets freely, a Player must place a home fleet with each neutral fleet; one Strength Point of home fleet will suffice for any number of Strength Points of neutral fleet. If the Player does not do so, the neutral's fleet(s) must be moved in as straight a line as possible towards the city of that neutral. Control of any such neutral fleet is regained by the influencing Player the moment he intercepts it at a city with a home fleet.
24.42 Should a Player be forced to take combat losses from an influenced neutral, the neutral becomes completely neutral again (both Players begin with zero Influence Points), and all fleets must be moved directly to the neutral's city beginning with the next Movement Phase (of either Player).
24.43 Should a Player elect to take losses from a neutral's fleets in any situation in which he could have lost his own nation's fleets instead, the neutral's fleets are considered to have left the battle at the beginning of the next round. That Player may never gain Influence Points with the (previously) influenced neutral again.
24.44 If losses are taken from a neutral's fleets because all of the influencing Player's fleets have been eliminated, then the neutral's fleets automatically perform a Reverse maneuver in the next two rounds. Obviously, at the end of two rounds, fleet combat will be broken off.
24.45 A commander who has all fleets of his nation eliminated may not command remaining neutrals. He may, however, be transported by neutral fleets away from the battle.
24.46 A commander may lead in combat as long as there is at least one fleet of his nation present (regardless of the number of influenced neutral fleets).
24.47 If an Enemy Player captures an influenced neutral's city (by owning the only fleets in the city at the end of the Turn) any neutral fleets originating from that city must be moved directly to the city, beginning with the next Movement Phase (either Player's).
24.5 Diplomacy Maneuver Table
(see separate sheet; transcribed in the Charts and Tables section at the end of this document)
24.6 Diplomacy Results Table
(see separate sheet; transcribed in the Charts and Tables section at the end of this document)
25.0 PLAYING THE MILITARY GAME
GENERAL RULE:
Each Player sets up his units face down. He selects any mix of counters totalling the number of Strength Points listed, and sets up these counters with the commander counters. The Helium Player moves first.
25.1 Set-up of Belligerents
25.11 Helium
The Helium Player begins the game with seven Strength Points, the leaders John Carter, Kantos Kan, Tardos Mors and Mors Kajak. He may place units in both Lesser Helium or Greater Helium (which are both capitals).
25.12 Dusar/Jahar Alliance
The Dusar/Jahar Alliance Player begins the game with ten Strength Points, the leaders Astok, Nutus and Tul Axtar. He may set-up in Dusar, Jahar and/or Tjanath (all of which are capitals). Leaders must be set up in the cities printed on their counters.
25.2 Set-up of Neutrals
All neutral units begin the game face up. Once a neutral is influenced, the counters are immediately flipped down.
25.21 Gathol
The Gathol neutral begins with 4 Fleet Strength Points and the leader Gahan. The units must be placed in Gathol (which is a capital).
25.22 Ptarth
The Ptarth neutral begins with 4 Fleet Strength Points and the leader Thuvan Dihn. The units must be placed in Ptarth (which is a capital).
25.23 Kaol
The Kaol neutral begins with 3 Fleet Strength Points and the leader Kulan Tith. The units must be placed in Kaol (which is not a capital).
25.24 Kamtol
The Kamtol neutral begins with 2 Fleet Strength Points and the leader Doxus. The units must be placed in Kamtol (which is not a capital).
25.3 Victory Conditions
The Player owning all the capitals at the end of any Turn is declared the winner. Influenced neutrals are considered to control their own capital for purposes of victory.
CHARTS AND TABLES
The following charts and tables are transcribed from the separate "Charts & Tables" sheet that accompanied the rulebook (SPI product 238P61). Where the printed sheet was cut off or unclear in the scan, this is noted.
6.4 Discovery Matrices
The defending Player's roll must be equal to or less than the listed number. Matrices 6.4 are used during the Discovery Check Phase whenever a defending character fits the definition of Case 6.2.
In Room (rows: Defending Character's Alertness Rating; columns: Attacking Character's Alertness Rating)
| Defending \ Attacking | A | B | C |
|---|---|---|---|
| A | 7 | 8 | 9 |
| B | 5 | 6 | 7 |
| C | 3 | 4 | 5 |
Outside Room (rows: Defending Character's Alertness Rating; columns: Attacking Character's Alertness Rating)
| Defending \ Attacking | A | B | C |
|---|---|---|---|
| A | 3 | 4 | 5 |
| B | 2 | 3 | 4 |
| C | 1 | 2 | 3 |
7.88 Master Swordsman Maneuver Matrix
Each cell shows the result for the First Player's maneuver (column) against the Second Player's maneuver (row), as "1 / 2": 1 = result obtained by the first Player (against the second Player); 2 = result obtained by the second Player (against the first Player). Hit = reduce other Player's character by one Level. Miss = No Result. Advan = Advantage. Two consecutive Advantages equal one Hit. No extra benefit is accrued for an Advantage followed by a Miss or a Hit.
| Second Player \ First Player | Thrust | High Cut | Low Cut | Slash | Disengage | Lateral Parry | Circular Parry | Sidestep | Duck | Stop Hit |
|---|---|---|---|---|---|---|---|---|---|---|
| Thrust | Hit / Hit | Miss / Hit | Miss / Hit | Miss / Hit | Advan / Miss | Advan / Miss | Advan / Miss | Advan / Miss | Miss / Hit | Hit / Miss |
| High Cut | Hit / Miss | Miss / Miss | Hit / Hit | Miss / Hit | Miss / Hit | Advan / Miss | Miss / Hit |
10.43 Final Destination Chart
At the beginning of the game, the Villain rolls a ten-sided die and finds the column corresponding to the opposing Hero. The Players note the number given by the Table; when the Villain reaches the numbered city, it is considered his Final Destination. Imp = result impossible.
| Nr. of Cities | John Carter | Carthoris | Gahan |
|---|---|---|---|
| 2 | Imp | 1-2 | 1-4 |
| 3 | 1-10 | 3-10 | 5-10 |
| Nr. of Cities | Vad Varo | Tan Hadron | Vor Daj |
|---|---|---|---|
| 2 | 1-6 | 1-8 | 1-10 |
| 3 | 7-10 | 9-10 | Imp |
10.6 Destination Chart
Roll the decimal die twice: the first die selects the column, the second die selects the row.
| Second Die \ First Die | 1 | 2 | 3 | 4 | 5 | 6 | 7 | 8 | 9 | 10 |
|---|---|---|---|---|---|---|---|---|---|---|
| 1,2 | Pankor | Raxar | Amhor | Morbus | Toonol | Kamtol | Horz | Dusar | Manatos | Manator |
| 3,4 | Manataj | Bantoom | Invak | Onvak | Torquas | U-Gor | Jahar | Xanator |
Note: The Final Destination may never be a city which has no City Encounter or the Atmosphere Plant (AP).
11.35 Delay Table
Table 11.35 is used when the character loses an Outdoor Encounter to determine the number of Strategic Turns the Hero is delayed.
| Die | Number of Strategic Turns Delayed* |
|---|---|
| 1-4 | 1 |
| 5, 6 | 2 |
| 7 | 2 and Befriended** |
| 8, 9 | 3 |
| 10 | 3 and Befriended** |
* Not including the current Turn. ** See Section 12.0.
11.45 Duel Results Table
Table 11.45 is used in conjunction with the City Encounter Table (11.7); after any Duel (but see Case 11.42) the Hero wins, roll on this table.
| Die | Result |
|---|---|
| 1-3 | Interned; go to Table 11.46 |
| 4-8 | No result; the character may go about his business |
| 9-10 | Befriended; see Case 12.1. |
11.46 Internment Table
Table 11.46 used whenever a Hero loses a Duel in a City the Villain is not in, or in conjunction with Table 11.45. All Turns are Strategic.
| Die | Escape After... |
|---|---|
| 1, 2 | 1 Turn |
| 3 | 1 Turn and Befriended* |
| 4, 5 | 2 Turns |
| 6 | 2 Turns and Befriended* |
| 7-9 | 3 Turns |
| 10 | 3 Turns and Befriended* |
* See Case 12.1.
11.7 City Encounter Table
Roll the decimal die and add or subtract the City Modifier (see City Directory 11.8) to the result. Rolls modified below 1 are still considered 1; rolls modified above 10 are still considered 10. Use Duelling Game rules to resolve all Encounters.
| Die | Encounter |
|---|---|
| 1-4 | None |
| 5 | 1 Warrior of Mars |
| 6 | 3 Warriors of Mars |
| 7 | 5 Warriors of Mars |
| 8 | Master-at-Arms (see Case 7.8) |
| 9 | Grand Master (see Case 7.8) |
| 10 | Captain of the Guard, Noble and 2 Warriors of Mars |
11.8 City Directory
For City, roll on City Encounter Table (11.7). For Open, roll on Area Encounter Table (11.6). +/- = Add or subtract number when rolling on City Encounter Table. NA = Not applicable. Reg = Regular dungeons and pits. A1 = First alternate pits and dungeons. A2 = Second alternate pits and dungeons. Auto = No acquisition pull necessary; items automatically obtained. ADMP (for example) = City configuration (where towers are placed). *Invisible Warriors only on Street, City, and Flier Displays. Treated as Yellow Warriors when in House or Palace Display (though actually Red), because of special lights countering the invisibility.
Directory 11.8 is used to determine color of Warriors of Mars, Encounter type, City Encounter modifier, Acquisition information, City and Pit configurations.
| Name | Area | Color | Encounter | City Modifier | Flier | Thoat/Weapon | City Config. | Pit |
|---|---|---|---|---|---|---|---|---|
| Aaanthor | 1 | None | Open | NA | No | No | ADMP | Reg |
| Amhor | 2 | Red | City | 0 | Yes | Yes | ACMO | Reg |
| Atmosphere Plant | 8 | None | Open |
(The city Thurd is missing from the printed directory; see the Errata section at the end of this document.)
11.9 Character Directory
Directory 11.9 is used to determine which characters are chosen at a particular City. If a character of the correct code series is in the City, then choose the character. Otherwise, one must take the character closest to the City in which the Hero is located in terms of Haads.
- Aaanthor: none
- Amhor: 101, 102, 103, 201, 301
- Atmosphere Plant: none
- Bantoom: 901, 951
- Duhor: 004, 104, 451
- Dusar: 202, 203, 204, 302, 303
- Exum: none
- Gathol: 003, 105, 106
- Ghasta: 205, 501
- Gooli: 206, 207
- Hastor: 005, 107, 108
- Greater Helium: 006, 109, 110, 111, 112, 113, 208
- Lesser Helium: 001, 002, 114, 115, 401
- Horz: 116, 209, 210, 402
- Illall: none
- Invak: 211, 212, 213, 304, 403
- Jahar: 305, 502
- Jhama: 551
- Kadabra: 214, 215, 306
- Kamtol: 117, 216, 217, 218, 219, 220, 221, 222, 307
- Kaol: 118, 119
- Kobol: 223
- Korad: none
- Lothar: 224, 404, 902, 952
- Manataj: 120
- Manator: 121, 122, 123, 124, 225, 226, 227, 308, 552
- Manatos: 125
- Marentina: 126
- Morbus: 127, 228, 229, 230, 231, 232, 233, 310, 405, 903
11.6 Area Encounter Chart
Roll a six-sided die to select the column (1 through 6) for the Area of the destination city and the line for the mode of transportation (Flying, Thoat or Walking). Where a result lists a range of numbers, roll the ten-sided die and apply the result for the range. Abbreviations are listed in the key at the end of this chart. "No Enc" = no encounter.
Note: In Area IIIA, only Flying results 3 and 4 and Thoat or Walking results 3, 4, and 5 are encounters.
Area 1
Flying: Crash into Giant Magnet; Heroes automatically unconscious, all others dead.
Thoat: Thoats cannot enter through the Carrion Caves (use Walking for Uncrossable Ice Barrier).
Walking:
- 1: 1-3 YM x 2; 4-7 YM x 4; 8-10 YM x 6
- 2: 1-3 YM x 3; 4-7 YM x 5; 8-10 YM x 7
- 3: 1-7 A x 1; 8-10 A x 2
- 4: 1-7 A x 1; 8-10 No Enc
- 5: 1-7 YM x 3; 8-10 No Enc
- 6: No Enc
Area 2
Flying:
- 1: Grappled by Enemy flier. 1-3 RM x 3; 4-7 RM x 5; 8-10 RM x 7 (fd)
- 2: Intercepted by Enemy flier and damaged. 1-5 Draw MC and crash; 6-10 Draw 2 MC and crash
- 3: Intercepted by Enemy flier. 1-3 RM x 3 (fd); 4-7 Draw MC and crash; 8-10 Escape undamaged
- 4: See female personage assaulted. Land and roll another encounter as walking
- 5: Land to obtain food and water. Roll another encounter walking
- 6: No Enc
Thoat or Walking:
- 1: Sighted by mounted patrol. 1-3 RM x 4; 4-7 RM x 6; 8-10 Escape
- 2: Attacked by banths. 1-7 B x 1; 8-10 B x 2
- 3: Sighted by Enemy air patrol. 1-5 RM x 4 (fd); 6-10 RM x 6 (fd). If you win, you may take flier
- 4: Small Green Martian patrol sights and attacks. 1-5 GM x 3; 6-10 GM x 5
- 5: No Enc
- 6: No Enc
Thoat Escape: 1: 1-5; 2: 1-8; 3: 1-5; 4: 1-5
Area 3
Flying:
- 1: Grappled by Enemy flier. 1-3 BP x 3; 4-7 BP x 5; 8-10 BP x 7 (fd)
- 2: Intercepted by Enemy flier and damaged. 1-5 Crash immediately; 6-10 Draw MC then crash
- 3: Intercepted by Enemy flier, and 1-3 Grappled (BP x 5) (fd); 4-7 Damaged (crash immediately); 8-10 Escape (No Enc)
- 4: Land in Valley Dor to investigate heaven. Roll another encounter walking
- 5: No Enc
- 6: No Enc
Thoat or Walking:
- 1: Sighted by Thern patrol. 1-3 T x 4; 4-7 T x 6; 8-10 T x 8
- 2: Attacked by Plant Men. 1-3 PM x 3; 4-7 PM x 5; 8-10 PM x 7
- 3: Attacked by White Apes. 1-3 WA x 1; 4-7 WA x 2; 8-10 WA x 3
- 4: Attacked by Banths. 1-3 B x 1; 4-7 B x 2; 8-10 Banth distracted; escape
- 5: Black Pirate patrol lands. 1-5 BP x 3; 6-10 BP x 6
- 6: No Enc
Thoat Escape: 1: 1-5; 2: 1-8; 3: 1-9; 4: 1-8; 5: 1-2
Area 4
Flying:
- 1: Grappled by Enemy flier. 1-3 RM x 2; 4-7 RM x 4; 8-10 RM x 6 (fd)
- 2: Intercepted by Enemy flier, and 1-3 Crash immediately; 4-7 Draw MC then crash; 8-10 Draw 2 MC then crash
- 3: Intercepted by Enemy flier, and 1-3 Grappled (RM x 6) (fd); 4-7 Damaged, crash immediately; 8-10 Damaged, draw MC then crash
- 4: Land to get food and water. Roll another encounter walking
- 5: See female personage being assaulted. Roll another encounter ignoring rolls of 5 and 6
- 6: No Enc
Thoat or Walking:
- 1: Sighted by Hormad patrol. 1-3 H x 5; 4-7 H x 7; 8-10 H x 10
- 2: Attacked by Giant Lizard. 1-5 GL x 1; 6-10 Escape from peril
- 3: Attacked by White Apes. 1-5 WA x 1; 6-8 WA x 2; 9-10 WA x 3
- 4: Attacked by White Apes. 1-3 WA x 1; 4-7 WA x 2; 8-10 WA x 3
- 5: Malagor patrol of Hormads lands and attacks. 1-3 H x 5; 4-7 H x 8; 8-10 H x 10
- 6: No Enc
Thoat Escape: 1: 1-7; 2: 1-8; 3: 1-8; 4: 1-8; 5: 1-7
Area 5
Flying:
- 1: No Enc
- 2: No Enc
- 3: No Enc
- 4: Land to investigate strange beings. Roll another encounter as walking
- 5: See female personage in dire straits. Roll another encounter as walking, ignore 6
- 6: No Enc
Thoat or Walking:
- 1: Sighted by Kaldane patrol that wants to eat you. 1-3 K x 6; 4-7 K x 8; 8-10 K x 10
- 2: Attacked by wildlife. 1-5 B x 1; 6-10 C x 2
- 3: Attacked by Banths. 1-5 B x 1; 6-8 B x 2; 9-10 Escape through ingenuity
- 4: Attacked by White Apes. 1-3 WA x 1; 4-7 WA x 2; 8-10 WA x 3
- 5: Challenged by Red Martians; melee begins. 1-4 RM x 4; 5-8 RM x 6; 9-10 Recognize each other (No Enc)
- 6: No Enc
Thoat Escape: 1: 1-6; 2: 1-7; 3: 1-8; 4: 1-8; 5: 1-3
Area 6
Flying:
- 1: Grappled by Enemy flier. 1-3 RM x 3; 4-7 RM x 5; 8-10 RM x 7 (fd)
- 2: Intercepted by Enemy flier, and 1-3 Crash immediately; 4-7 Draw MC then crash; 8-10 Draw 2 MC then crash
- 3: Intercepted by Enemy flier, and other encounter as 1-3 Grappled (RM x 6) (fd); 4-7 Damaged, crash immediately; 8-10 Damaged, draw MC then crash
- 4: Land to get food and water. Roll another encounter as walking
- 5: See female personage being harassed. Roll another encounter as walking, ignore 6
- 6: No Enc
Thoat or Walking:
- 1: Blindsided by Invisible Men. 1-3 IM x 2; 4-7 IM x 3; 8-10 IM x 4
- 2: Attacked by Banths. 1-5 B x 1; 6-10 B x 2
- 3: Attacked by White Apes. 1-5 WA x 1; 6-8 WA x 2; 9-10 WA x 3
- 4: Surprised by Invisible Men. 1-3 IM x 1; 4-7 IM x 2; 8-10 IM x 3
- 5: Mounted patrol of Red Martians charges. 1-3 RM x 4; 4-7 RM x 7; 8-10 RM x 9
- 6: No Enc
Thoat Escape: 1: 1-5; 2: 1-8; 3: 1-9; 4: 1-5; 5: 1-4
Area 7
Flying:
- 1: Enemy flier rams you. 1-3 RM x 3; 4-7 RM x 6; 8-10 RM x 8 (fd)
- 2: Gunfire from hostile flier damages craft. 1-3 Crash immediately; 4-7 Draw MC then crash; 8-10 Draw 2 MC then crash
- 3: Intercepted by Enemy flier, and 1-3 Grappled (RM x 5) (fd); 4-7 Damaged, crash immediately; 8-10 Damaged, draw MC then crash
- 4: Land to repair engine of boat. Roll another encounter as walking
- 5: See female personage being carried off. Roll another encounter as walking, ignore 6
- 6: No Enc
Thoat or Walking:
- 1: Cannibals are hungry. 1-3 RM x 2; 4-7 RM x 3; 8-10 RM x 4
- 2: Attacked by wildlife. 1-5 B x 1; 6-10 Elude predator
- 3: Attacked by Banths. 1-5 B x 1; 6-8 B x 2; 9-10 Escape by skin of teeth
- 4: Attacked by Spiders. 1-3 S x 1; 4-7 S x 2; 8-10 S x 3
- 5: Guard detachment attempts interrogation. 1-3 RM x 4; 4-7 RM x 6; 8-10 RM x 8
- 6: No Enc
Thoat Escape: 1: 1-7; 2: 1-6; 3: 1-8; 4: 1-8; 5: 1-5
Area 8
Flying:
- 1: Radium rifle fire fells flier. 1-3 Crash immediately; 4-7 Draw MC then crash; 8-10 Draw 2 MC then crash
- 2: Green Martian attack shreds flier. 1-3 Crash immediately; 4-7 Draw MC then crash; 8-10 Draw 2 MC then crash
- 3: Lucky shot destroys buoyancy tanks. 1-3 Damaged, crash immediately; 4-7 Damaged, draw MC then crash; 8-10 Right boat and escape
- 4: Dive to avoid air battle. Roll another encounter as walking
- 5: See female personage being tortured by Green Martians. Roll another encounter as walking, ignore 6
- 6: No Enc
Thoat or Walking:
- 1: Engaged by mounted Green Martians. 1-3 GM x 3; 4-7 GM x 5; 8-10 GM x 7
- 2: Attacked by Banths. 1-5 B x 1; 6-10 B x 2
- 3: Attacked by White Apes. 1-3 WA x 1; 4-7 WA x 2; 8-10 WA x 3
- 4: Attacked by Calots. 1-3 C x 3; 4-7 C x 8; 8-10 C x 10
- 5: Mounted patrol of Green Martians attacks. 1-3 GM x 4; 4-7 GM x 6; 8-10 GM x 8
- 6: No Enc
Thoat Escape: 1: 1-3; 2: 1-8; 3: 1-8; 4: 1-6; 5: 1-5
Area 9
Flying:
- 1: No Enc
- 2: No Enc
- 3: No Enc
- 4: Spotted by patrol that closes for battle. 1-5 RM x 7 (fd); 6-10 They let you pass
- 5: See Green Martians savaging female personage. Roll another encounter as walking
- 6: No Enc
Thoat or Walking:
- 1: No Enc
- 2: No Enc
- 3: Attacked by Banth. 1-5 B x 1; 6-10 Banth scared by patrol, no duel
- 4: No Enc
- 5: Mounted patrol of Green Martians attack. 1-3 GM x 2; 4-7 GM x 3; 8-10 GM x 5
- 6: No Enc
Thoat Escape: 3: 1-6; 5: 1-4
Area 10
Flying:
- 1: Engaged by panthan flier. 1-3 RM x 3; 4-7 RM x 5; 8-10 RM x 7 (fd)
- 2: Fierce sky battle results in ship loss. 1-5 Crash immediately; 6-8 Draw MC then crash; 9-10 Draw 2 MC then crash
- 3: Outmaneuvered by well-trained crew. 1-3 Grappled (RM x 5) (fd); 4-7 Damaged, crash immediately; 8-10 Damaged, draw MC then crash
- 4: Land to get bearings in forest. Roll another encounter as walking
- 5: Notice bound and gagged female personage. Roll another encounter as walking, ignore 5 or 6
- 6: No Enc
Thoat or Walking:
- 1: Sighted by Red Martian patrol. 1-3 RM x 3; 4-7 RM x 5; 8-10 RM x 7
- 2: Attacked by Siths. 1-5 Si x 1; 6-8 Si x 2; 9-10 Duck behind tree, escape
- 3: Attacked by White Apes. 1-5 WA x 1; 6-8 WA x 2; 9-10 WA x 3
- 4: Attacked by Banths. 1-3 B x 1; 4-7 B x 1; 8-10 Duck behind tree, escape
- 5: Mounted patrol of Green Martians. 1-3 GM x 3; 4-7 GM x 5; 8-10 GM x 7
- 6: No Enc
Thoat Escape: 1: 1-5; 2: 1-7; 3: 1-8; 4: 1-8; 5: 1-4
Key to the Area Encounter Chart
Use Chart 11.6 to determine Outdoor Encounters whenever necessary. A = Apt; B = Banth; BP = Black Pirate; C = Calot; fd = Flier Display; GL = Giant Lizard; GM = Green Martian; H = Hormad; MC = Movement Card; No Enc = No Encounter; PM = Plant Men; RM = Red Martian; S = Spider; Si = Sith; T = Thern; WA = White Ape; YM = Yellow Martian. Name x Number = duel indicated number of specified enemy. Note: Whenever a Hero "rescues" a female Personage (usually a roll of 5 on the flying line), place a female Personage counter, taken from the nearest city which has one, with the Hero.
12.16 Encounter Friend Table
Table 12.16 used when determining Friends met through Internment or Outdoor or City Encounter.
| Die | Friend Type |
|---|---|
| 1, 2 | Minor Character (200 series) |
| 3 | Minor Character (100 series) |
| 4 | One Warrior of Mars |
| 5 | Two Warriors of Mars |
| 6 | Three Warriors of Mars |
| 7 | Four Warriors of Mars |
| 8, 9 | Female Personage |
| 10 | Hero Character (if available), otherwise, Male Personage |
13.45 Unspeakable Act Table
Table 13.45 used when Villain plays Unspeakable Act Card and Hero does not reach House Box by end of third City Turn afterwards.
| Die | Result |
|---|---|
| 1-3 | Woman kills herself rather than let herself be dishonored |
| 4-7 | Timely Interruption prevents Villain from forcing his attentions on woman |
| 8-9 | Woman kills Villain character with hidden dagger (all women have hidden daggers); placed in dungeon |
| 10 | Villain character corrupts woman; she is now his and the Hero is no longer in Love with her (but see Case 19.21) |
16.28 Hand of Fate Table
Table 16.28 used when Player rolls equal to or less than number in "HF" column of Information Table.
| Die | Result |
|---|---|
| 1-3 | Discovered; See Case 15.2 |
| 4-7 | Befriended; See Case 16.3 |
| 8 | Duel Master-at-Arms (see Case 7.8) |
| 9 | Duel Grand Master (see Case 7.8) |
| 10 | Close brush with City Watch; nothing of note occurs |
16.27 Information Table
Table 16.27 is used as per Procedure, Section 16.0. Imp = result impossible. Common Pop = Common Populace. The first die-roll (1 through 6) selects the table; then find the line for the area the hero is in and roll the decimal die for the information result (None / Area / Building / Room); "HF" is the Hand of Fate number.
First die-roll 1
| Area | HF | None | Area | Building | Room |
|---|---|---|---|---|---|
| Deserted | 2 | 1-8 | 9-10 | Imp | Imp |
| Common Pop | 3 | 1-7 | 8-9 | 10 | Imp |
| Barracks | 4 | 1-6 | 7 | 8-9 | 10 |
| Palace | 7 | 1-2 | 3-5 | 6-8 | 9-10 |
| Slaves' Quarter |
First die-roll 2
| Area | HF | None | Area | Building | Room |
|---|---|---|---|---|---|
| Deserted | 4 | 1-9 | 10 | Imp | Imp |
| Common Pop | 5 | 1-8 | 9 | 10 | Imp |
| Barracks | 6 | 1-7 | 8 | 9-10 | Imp |
| Palace | 8 | 1-3 | 4-6 | 7-9 | 10 |
| Slaves' Quarter |
First die-roll 3
| Area | HF | None | Area | Building | Room |
|---|---|---|---|---|---|
| Deserted | 1 | 1-7 | 8-9 | 10 | Imp |
| Common Pop | 1 | 1-6 | 7-8 | 9 | 10 |
| Barracks | 3 | 1-5 | 6 | 7-8 | 9-10 |
| Palace | 5 | 1 | 2-4 | 5-7 | 8-10 |
| Slaves' Quarter |
First die-roll 4
| Area | HF | None | Area | Building | Room |
|---|---|---|---|---|---|
| Deserted | - | 1-10 | Imp | Imp | Imp |
| Common Pop | 2 | 1-9 | 10 | Imp | Imp |
| Barracks | 2 | 1-8 | 9-10 | Imp | Imp |
| Palace | 3 | 1-4 | 5-7 | 8-9 | 10 |
| Slaves' Quarter |
First die-roll 5
| Area | HF | None | Area | Building | Room |
|---|---|---|---|---|---|
| Deserted | 3 | 1-6 | 7-8 | 9 | 10 |
| Common Pop | 4 | 1-5 | 6-7 | 8-9 | 10 |
| Barracks | 7 | 1-4 | 5-6 | 7-9 | 10 |
| Palace | 5 | 1 | 2-3 | 4-5 | 6-10 |
| Slaves' Quarter |
First die-roll 6
| Area | HF | None | Area | Building | Room |
|---|---|---|---|---|---|
| Deserted | 1 | 1-7 | 8-9 | 10 | Imp |
| Common Pop | 2 | 1-6 | 7-8 | 9 | 10 |
| Barracks | 4 | 1-5 | 6-7 | 8-9 | 10 |
| Palace | 5 | 1-2 | 3-5 | 6-8 | 9-10 |
| Slaves' Quarter |
16.38 City Friend Table
Table 16.38 used when Friend is gained in Villain's City.
| Die | Friend Type |
|---|---|
| 1-2 | Minor Character (Hero is Slave) |
| 3 | Minor Character (100 series) |
| 4 | Minor Character (200 series) |
| 5 | Passive Female Slave |
| 6 | Active Female Slave |
| 7 | 1 Warrior of Mars |
| 8 | 3 Warriors of Mars |
| 9 | 5 Warriors of Mars |
| 10 | Male Personage |
17.19 Prison Companion Table
Table 17.19 used whenever a Hero is Imprisoned (but not when he is Interned). A Hero is always foreign, while a male Personage is always a resident.
| Die | Companion is... |
|---|---|
| 1-2 | Prisoner of No Consequence |
| 3 | Warrior of Mars -- Foreign |
| 4 | Warrior of Mars -- Resident |
| 5 | Minor Character -- Foreign (100 series) |
| 6 | Minor Character -- Resident (100 series) |
| 7 | Minor Character -- Resident (200 series) |
| 8 | Hero Character |
| 9-10 | Male Personage |
17.35 Arena Duel Table
Table 17.35 used whenever Hero is obliged to fight Arena Duel.
| Die | Hero Must Duel... |
|---|---|
| 1 | Captain of the Guard |
| 2 | Master-at-Arms (see Case 7.8) |
| 3 | Grand Master (see Case 7.8) |
| 4-5 | Ferocious Wildlife |
| 6 | Game of Jetan |
| 7 | The Death |
| 8 | Six Warriors of Mars |
| 9 | Mind Battle |
| 10 | Chained and brought to Throne Room |
19.33 Tario/Luud Mind Control Table (from the SPI Addenda, November 1979)
Hero vs. Tario/Luud
| Die | Result |
|---|---|
| 1-4 | Hero imprisoned; roll for accompanying female personage(s) |
| 5-10 | Tario/Luud flees as hero wins Mind Battle |
Female Personage vs. Tario/Luud
| Die | Result |
|---|---|
| 1-6 | Personage in love with Tario/Eaten by Luud |
| 7-10 | Personage knocks Tario/Luud unconscious; hero rescued |
23.5 Fleet Maneuver Matrix
The number in each cell is added or subtracted to the die-roll on the Fleet Combat Results Table. This may be further modified by Commanders present. NC = No Combat. Fleet Combat has been broken off and combat may be resumed next Turn (but not before).
| Attacking Player \ Defending Player | Line Ahead | Line Left | Line Right | Flank Left | Flank Right | Encircle | Reverse | Feint | Column Ahead |
|---|---|---|---|---|---|---|---|---|---|
| Line Ahead | 0 | -4 | -4 | +2 | +2 | +1 | +1 | -1 | -1 |
| Line Left | +4 | 0 | 0 | -3 | +3 | -2 | 0 | +2 | +4 |
| Line Right |
23.6 Fleet Combat Results Table
Fleet Differential = Rolling Player's Fleet minus Enemy Player's Fleets. The number shown is the number of Enemy Fleets eliminated and removed from play (do not remove until end of Round).
| Die | -3 or less | -2 | -1 | 0 | +1 | +2 | +3 | +4 | +5 | +6 | +7 or greater |
|---|---|---|---|---|---|---|---|---|---|---|---|
| 0 or less | 0 | 0 | 0 | 0 | 0 | 0 | 0 | 0 | 1 | 1 | 1 |
| 1 | 0 | 0 | 0 | 0 | 0 | 0 | 0 |
24.5 Diplomacy Maneuver Table
The number is added or subtracted from the die-roll when performing Diplomacy. * = May only be tried once on a particular Neutral.
| Second Player Maneuver \ First Player Maneuver | Cards on the Table | Stab in the Back | Appeal to Greed | Mutual Defense Pact | Bribery | Offer Daughter's Hand in Marriage* |
|---|---|---|---|---|---|---|
| Cards on the Table | 0 | +2 | +2 | +1 | -2 | -3 |
| Stab in the Back | -2 | -1 | +2 | +2 | -2 | 0 |
| Appeal to Greed | -2 | -2 | 0 | +3 | 0 | +1 |
| Mutual Defense Pact | -1 |
24.6 Diplomacy Results Table
The number to the left of the slash is the number of Influence Points added (or subtracted) to the rolling Player's total Influence Points; the number to the right is applied to the non-rolling Player.
| Die | -3 | -2 | -1 | 0 | +1 | +2 | +3 |
|---|---|---|---|---|---|---|---|
| 0 or less | -2/1 | -1/1 | -1/1 | -1/0 | -1/0 | 0/0 | 0/0 |
| 1 | -1/1 | -1/1 | -1/0 | -1/0 | 0/0 | 0/0 | 0/1 |
| 2 | -1/1 | -1/0 | -1/0 | 0/0 | 0/0 | 0/1 | 0/1 |
ERRATA AND ADDENDA (SPI, November 1979)
The following is transcribed from the two-page "John Carter Addenda, as of November 1979" sheet. These items correct, clarify and add to the rules above and take precedence over them. Eric Goldberg's closing comments are omitted.
Counters
- Nr. 053 (correction): The second Yellow Martian Captain of the Guard counter should read "y1" (instead of "y3").
- Nr. 084 (correction): There are two identical Kaldane Captain of the Guard counters marked "083." The number on one of those counters should be changed to "084."
- Nr. 116 (correction): There is no counter marked 116 in the current countermix. There are, however, two counters marked 137 (Hovan Du and Mu Tel). The Hovan Du counter should be marked 116 (see also 11.9, Charts and Tables, below).
- Nr. 312 (addition): The Sag Or counter should have a value of "1C7" on its reverse face, and should be at Level 1. All other information from the front face is repeated on the reverse face.
- Nrs. 841 through 850 (correction): All calot counters should be marked at Level 1 (instead of Level 2).
- Neutral marker (correction): There are two identical counters provided for Player 1 marked "x 1000." One of those two counters should be changed to "x 10000."
Map
- Tactical Display (clarification): Each doorway is considered to be four boxes wide; the two boxes on either side of the door hashmark are part of the doorway (see the corrected diagram 2, which shows the legal and illegal moves around doorways).
- City Display (addition): There should be a Legal Movement double-headed arrow connecting the Palace and the Nobles' Quarter ("3" to enter the Palace, "1" to enter the Nobles' Quarter). (correction) There should be arrows extending from the 2nd Alternate Pits and Arena to Areas 7B, 7C and the Palace proper.
Charts and Tables
- [11.6] (clarification): Area 9: If a 5 is rolled for a flying encounter, the player rolls again on the walking line, ignoring rolls of 1, 2, 4 or 6.
- [11.8] (omission): The city Thurd is missing -- its characteristics are as follows: (Area) 8, (Color) Green, (Encounter) Open, (City Modifier) NA, (Flier, Thoat or Weapon Availability) No, (City Configuration) ADMP, and (Pit) regular.
- [11.9] (addition): Add 116 (Hovan Du) to Morbus listings.
- [12.16] (clarification): If a 10 is rolled, the hero should be selected in the order described in Case 17.15.
- [13.45] (clarification): If an 8 or 9 is rolled when there is more than one villain, the Villain Player randomly determines which villain character dies.
- [19.33] (omission): Tario/Luud Mind Control Table -- see Table 19.33 above.
Diagrams (corrections)
Diagram 2 (Blocking Terrain) and Diagram 3 (Possible Facings) were reprinted with corrections; they illustrate the rules in Cases 5.16 and 5.63.
Rules: Corrections
- [5.44] (omission): Any character may be moved through or onto an unconscious hero counter, though the hero may not be harmed. A villain character (or a henchman) may carry an unconscious hero.
- [5.54] (addition): A villain character may use (i.e., discover) a secret passageway while on the Tactical Display by being adjacent to a secret doorway for two consecutive Tactical Turns. All characters controlled by the Hero Player automatically discover that secret passageway after the villain character enters through the secret doorway. A hero may still discover a secret doorway through play of Random Event Cards 40, 41 or 42.
- [7.24] (change): A hero character (and his entourage) may enter the House Display either through a doorway or a window. Each wall box on the House Display has a window, including the walls on the Turn Record Track side of the house; thus, a hero character may enter the display by being placed on any four box square adjacent to a wall, as long as his counter does not cover an interior wall. If there is a character controlled by the villain in that four box square (since the Hero Player must write down where his characters are entering before the Villain Player deploys his counters), the hero must fight that character as if he were fighting through a doorway (see 7.34). If that villain-controlled character is slain, he may not cause discovery to occur, regardless of the number of Tactical Turns it takes the hero to slay the villain-controlled character (exception to 6.11). No character may ever exit the house display by a window (Exception: Random Event Card nr. 24). Heroes only entered by a window when guards made it impossible to do so by any other way.
- [7.64] (addition): If a hero character kills a Beast of Mars or Villain Player-controlled character, the Hero Player may immediately advance the hero counter into the four-box square previously occupied by the hero's victim.
- [11.11] (change): A hero and his entourage may have no more than two outdoor encounters when travelling to a particular destination city. It is assumed that the hero dispatches all other beasties and savage men with his trusty radium pistol. (There is no limit to the number of city encounters a hero may have.)
- [13.4] (omission): When a villain performs an Unspeakable Act, he is placed in the same room as the princess, without his henchmen. The procedure used for the House Display (Case 7.24 and above) is employed (e.g., the hero could enter by a window), and half the warriors of Mars guarding the princess must be deployed inside rooms (rounding up).
Rules: Clarifications
- [5.0] Beasts of Mars counters are moved exactly as character counters are.
- [5.34] A character is defined as being engaged in melee, if 1) the character performed melee during the previous Tactical Turn, or 2) the character lost a Level in melee during the previous Tactical Turn.
- [5.72] An Enemy character may not move a personage if that personage is stacked with a Friendly character (i.e., the Friendly character counter shares at least one box with the personage counter).
- [6.23] If an attacking character is to be considered around a corner and through a door, the door and the corner cannot be one and the same.
- [7.21] If a player has more characters or Beasts of Mars than can fit in a shaded area, the Player places one of the excess counters on the shaded areas immediately after he moves one of his counters into a non-shaded four-box square, until all counters are in play.
- [7.25] If there is more than one villain character, the Villain Player must deploy his extra villain characters adjacent to the "Villain's Throne".
- [7.33] A character whose facing is changed but is not moved does not suffer a penalty in melee as described in this Case.
- [7.93 and 7.94] The warriors of Mars are of the same color as the villain; thus, the warriors of Mars are red in 7.93 and Thern in 7.94.
- [11.8] A hero who is moving by flier has an encounter on the "walking" line if he is in an open city.
- [12.0] A hero is befriended by any minor character he meets (who he does not have to duel). Any female personage who meets a hero falls in love with him, unless that female personage is already in love with another hero or is kin to that hero. Any male personage met by a hero will tag along with that hero (see 12.15).
- [12.23] A character must be eligible for treachery (see 12.22) before he or she can perform treachery in a city occupied by the villain.
- [13.3] The distinction between good and neutral minor characters is provided for the players' interest, and has no effect on the game.
- [13.41] An "Unspeakable Acts" Random Event Card may be played at any time during the City Sub-Game. A villain character of the Villain Player's choice is automatically placed in the same room as the princess.
New Scenario: Tars Tarkas, Hero of Mars
A reader provided the rough outline of rules to allow Tars Tarkas to be a participating hero.
20.6 Tars Tarkas, Hero of Mars
20.61 Tars Tarkas is treated as a hero, and may duel Master Swordsmen (7.8) as does the Warlord, but Tars Tarkas has only three Levels. All rules pertaining to heroes may be employed for Tars Tarkas.
20.62 Tars Tarkas begins the game accompanied by Lorquas Ptomel. Both are riding on thoats.
20.63 Tars Tarkas begins the game in Thark. He receives a City Modifier of -6 whenever he is in that city.
20.64 Tars Tarkas' "love" interest is his daughter Sola, who has been kidnapped by the cruel Tal Hajus. Tars Tarkas' conduct towards Sola will be just as exemplary as the Warlord's conduct towards Llana of Gathol. Tars Tarkas must return to Thark with Sola to win the game.
20.65 Tars Tarkas
| Villain | Henchmen | Captive |
|---|---|---|
| Tal Hajus | 6 Green Men | Sola |
Tal Hajus may have a maximum of 7 henchmen at any one time.
20.66 Tal Hajus is allowed only two destinations; the final destination must be either Warhoon or Torquas (villain's choice).
20.67 Tal Hajus and Sola may not be deployed in the Palace (on the City Display), unless they are in either Warhoon or Torquas.
20.68 Tars Tarkas may not use a flier unless accompanied by a hero, thern, invisible, red, white or black Martian.
20.69 Sola will never betray Tars Tarkas. If Tal Hajus attempts an "Unspeakable Act" upon the person of Sola, a result of 10 causes Sola to die in agony. The Green Martians thought it great sport to torture people to death (it was the principle source of humor for the savages), and did not mate for love. Any resemblance between the modern American pastime of bondage and Green Martian habits is purely the product of the reader's mind.