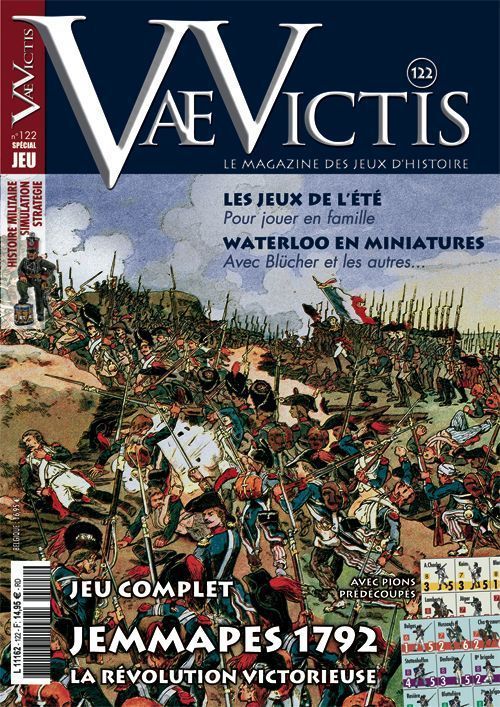
Jemmapes 1792
Jemmapes 1792 Rulebook
Table of Contents
Table of Contents
1 - Overview
1.1 Counters
Combat units are divided into infantry, cavalry and artillery units.
Commanders are either formation commanders or general commanders.
Markers
The following markers are used in the game: disorganisation (level 2); rout; formation orders (defensive, offensive, manoeuvre and demoralisation); charge; loss (-2 SS); harnessed artillery; non-commanded unit (-1 MP, -1 for morale); round marker; victory points marker.
Combat units
The counter diagram of the combat units is labelled: NAME; MORALE; MOVEMENT POTENTIAL; COMBAT POTENTIAL; FORMATION COLOUR; a symbol indicating that the unit suffered a level of disorganisation. The unit types are: INFANTRY, CAVALRY, ARTILLERY.
Commanders
The counter diagram of the commanders is labelled: NAME; TACTICAL VALUE; COMMAND VALUE; MOVEMENT POTENTIAL; FORMATION COLOUR; a symbol indicating that the formation commander has been activated. The commander types are: FORMATION COMMANDERS and GENERAL COMMANDERS.
Editor's note: the counter diagrams are not reproduced in the text layer of this PDF; the labels above are those printed on the diagrams.
1.2 Abbreviations
- LoS : line of sight
- DRM : die roll modifier
- CP : combat potential
- SS : strength step
- MP : movement point
- VP : victory point
- MT : morale test
- TeT : terrain effects table
- CV : command value
- TV : tactical value
- ZoC : zone of control
1.3 Facing
All units have three frontal hexagons (only these hex. exert a ZoC), two flank hexagons and one rear hexagon.
All combat units present in a hexagon must have the same facing. Facing has no effect on a combat unit's movement. The facing of a unit is defined at the end of its movement phase and cannot be modified until the movement phase of the following round. Exceptions: reaction, advance after combat.
1.4 Stacking
Two combat units may be stacked in a hexagon. Exception : a combat unit with a CP or three or more may only stack with an artillery unit.
The rules of stacking must be respected at the end of the movement segment and at the end of the combat segment.
Commanders and markers are not taken into account for stacking.
1.5 Organisation Levels of Units
Combat units may find themselves in one of the four following levels of organisation:
- in good order (front side of the counter)
- disorganised, level 1 (back side of the counter)
- disorganised, level 2 (back side of the counter + disorganised marker)
- in rout (back side of the counter + rout marker)
1.6 Zones of Control
A zone of control (ZoC) is exerted over the three frontal hexagons of a combat unit.
Entering an enemy ZoC costs one additional movement point (including if a friendly unit is present).
Combat units and commanders must stop when they enter an enemy ZoC, even if it is occupied by a friendly unit.
They cannot move from ZoC to ZoC.
Exception: A unit surrounded by enemy units or ZoC can always move to an enemy ZoC at the cost of an additional level of disorganisation. This movement uses up the entirety of its MP.
The lines of command are blocked by the ZoC, except if a friendly unit occupies the square.
A unit that is forced to retreat to an enemy ZoC suffers an additional level of disorganisation (or loss of a strength step if the unit is in rout).
2 - Game Sequence
The sequence of play for each round is as follows:
A - Command phase
- Voluntary order change segment
- Involuntary order change segment
B – Initiative phase
Each player rolls a die and adds the command value of his commanding general. The player with the higher roll wins the initiative (in the case of a tie, re-roll the die). The player then decides if he wants to keep the initiative, in which case he activates a formation of his choice, or if he lets his opponent activate one of his formations first.
C – Alternating activation of formations phase
For each formation that is activated, the player proceeds with the following operations:
- Command verification segment
- Movement segment
- Combat segment
- Rallying segment
The players alternate the activation of their formations, without the option to pass, until all the formations have been activated.
D - Final phase
The players check for automatic victory conditions in either of the camps. If they are not met, they turn their commander counters back to their front side and begin a new round.
3 - Command
3.1 – Line of Command
A unit is commanded if it is four hexagons or fewer from its formation commander. This line cannot pass through uncrossable terrain, a hexagon containing an enemy unit or enemy ZoC (unless it is canceled out by the presence of a friendly unit).
Verification of command takes place at the beginning of each activation of a formation.
Non-commanded units receive a marker at this time and keep it until the activation of the same formation, the following round, even if they become commanded before then.
3.2 – Non-commanded Units
A non-commanded unit does not benefit from the order capacities of its formation. In addition, it suffers a penalty of -1 for its MP and its morale.
4 - Orders
Each formation is necessarily in one of the following situations, indicated by a marker placed next to or on its formation commander:
- Offensive order
- Manoeuvring order
- Defensive order
- State of demoralisation
4.1 Description of Orders
4.1.1 - Offensive order
Number of units in reserve
- Infantry and cavalry units of the formation that are in good order must advance with all of their movement points toward the enemy units. If possible, they must finish in a hexagon adjacent to an enemy unit.
Exception: "In reserve" units are not subject to this obligation. The number of units that can be placed in reserve is specified on the offensive marker of each formation.
A unit in good order that is adjacent to the enemy can leave this hexagon if:
- it finishes its movement in a hexagon that is also adjacent to the enemy;
- or the relative limit of the number of reserve units is respected at the end of the movement segment.
Formation units that are disorganised (level 1 or 2) are free to leave or enter a hexagon adjacent to the enemy.
4.1.2 – Manoeuvring order
Units may not enter a hexagon adjacent to an enemy unit but may remain if they are already there. Each combat unit receives +1 MP.
4.1.3 – Defensive order
The movement potential of the units is divided by two (rounded up to the nearest whole number). The units cannot enter a hexagon adjacent to an enemy unit unless:
- a unit of the formation is already present;
- this hexagon is adjacent to a friendly unit that is in an enemy ZoC itself (cavalry units that fulfil these conditions may charge).
4.1.4 – State of demoralisation
Units cannot enter a hexagon adjacent to an enemy unit but may remain if they are already there. The morale of each combat unit is reduced by 1.
Note: A unit in rout does not benefit from the effects of the order of its formation.
4.2 Change of Order
A change of order occurs during the command phase; it can be voluntary or involuntary.
4.2.1 Voluntary change of order
During this segment, players may attempt to change the order of their formations. The French player carries out all of his attempts first and then the Austrian does the same. Only one attempt is authorised per round and per formation. The player rolls two dice and consults the Voluntary order change table. The general commander can use his command value as a DRM for one change of order per round.
4.2.2 – Involuntary change of order
During this segment, only the formations that have suffered at least one loss or that have a unit in rout on the map must take a test on the Involuntary change of order table to determine if they become demoralised. The state of demoralisation replaces the affected order up until then of this formation (even if this order was just accepted during the preceding segment).
The state of demoralisation is not permanent; the player may, beginning with the following turn, attempt to give a new order to this formation.
5 - Movement
5.1 Overview
All the units of the formation may be moved during each movement segment, respecting the rules of the ZoC and stacking (at the end of the movement). A unit's movement must end before the player may move another unit.
A unit may not enter a hexagon occupied by an enemy unit.
An artillery unit that moves (or changes facing in the same hexagon) takes a "harnessed artillery" marker with no cost in MP. This marker remains at the end of the movement segment. It is removed during a movement segment during which the unit neither moves nor changes facing.
Note: this marker does not prevent the unit from firing, but provokes an unfavourable DRM.
5.2 Reaction
When a unit enters a hexagon adjacent to an enemy unit that is not already in an enemy ZoC, the movement of the activated unit is suspended and the inactive player has the option of either carrying out a reaction movement or reaction fire with this unit. The reaction is also possible following an advance after combat.
- Reaction movement : the inactive player may move his unit or stack of units by one side of a hexagon. If, following this reaction movement, the inactive player exerts a ZoC on the hexagon of the active player that was moving, the movement of this unit is over.
- Reaction fire : if the inactive player exerts a ZoC on the hexagon of the active player's unit, he may fire and the fire's effects are applied immediately. The movement of the active unit must end since it has penetrated an enemy ZoC.
Note : when the units of the inactive player found in several hexagons are eligible for a reaction, they may each react freely. If units of several hexagons wish to carry out reaction fire, these units combine their CP to carry out a single fire, according to rule 6.1.
5.3 Charges and Counter-charges
5.3.1 - Conditions for a charge
A cavalry unit can charge if:
- it moves at least one hexagon before arriving in the hexagon adjacent to a targeted unit;
- the hexagon of the target and the last hexagon occupied by the cavalry must be in clear terrain;
- there is no obstacle between these two hexagons (change in elevation, river, stream, bridge, fortifications).
5.3.2 - Effects of a charge
When a charge is declared, the player places a "charge" marker on the cavalry unit. This gives a favourable DRM during the following assault.
After the combat, the unit(s) that charged take on an additional level of disorganisation.
5.3.3 - Conditions for a counter-charge
If a cavalry unit is present in the targeted hexagon, and it is not already in an enemy ZoC, it can decide to counter-charge.
5.3.4 - Effects of a counter-charge
The DRM of the charge is canceled during the resolution of the assault, but the units that charged or counter charged take on an additional level of disorganisation after the combat.
5.4 Movement of Units in Rout
Units in rout must move at the end of the movement phase of their MP toward their edge of the map indicated in the scenario, following the most direct route.
If they cross a hexagon occupied by a friendly unit, the unit that is crossed suffers an additional level of disorganisation.
The units that exit the map are considered eliminated and are taken into account for victory points.
Example of Combat
French combat sequence
The French player fires first with the artillery on the redoubt, with the goal of cancelling out the favourable DRM for the Austrian, during the following assault, when a unit attacks while it is in the ZoC of an enemy unit not engaged in another combat (fire or assault). (See Assault Table).
DRM = +2 for the range ; -3 for the redoubt. Result of the 2d6 = 7. No result.
The player then decides to attack with all the other units, except for the volunteer Belgian unit (giving him an unfavourable DRM due to its disorganisation). Strength ratio ; 8 SS for the French against 4 for the Austrians = 2/1. The French player decides to launch a bayonet charge with Miaczinski's units – chosen as head unit –, and Dampierre's. The sole Austrian unit is also the head unit.
DRM = - 2 for the attack toward the heights by some French units and -2 for the attack across fortifications (Terrain Effects Table); + 4 (strength ratio) ; - 2 for the Austrian defensive order; + 4 for the bayonet charge. The final DRM = +2. Result of the 2d6 = 7.
The result is therefore 1D for each camp. Because of the bayonet charge, Miaczinski's unit receives 2D and Dampierre's unit 1D. Jordis' unit receives 1D. The two commanders involved must also take a test on the elimination of commanders table.
6 - Combat
Activated units can combat enemy units located in their ZoC, either by fire or by assault. The order of the formation has no effect on the combat (example : a unit of a demoralised formation can launch an assault). The player resolves his fire and assaults in the order of his choice. He is not required to assign in advance all the combat units to the various fire and assaults that he intends to carry out. Each targeted hexagon can be the target of only one artillery fire, one infantry fire and one assault, in the order chosen by the active player.
6.1 Fire
Infantry units can fire from a distance of one hexagon, at full combat power.
Cavalry units may not fire.
Artillery units may fire up to three hexagons away from their frontal hexagons if they have a line of sight to their target.
Infantry and artillery units may not add up their combat values.
Units of the same type that are in different hexagons, even non-adjacent, must combine their CP to fire on the same target.
6.1.1 – Line of sight (LoS)
An artillery unit must be able to draw a LoS toward the target unit. The LoS is drawn from the centre of the hex of the artillery unit to the centre of the hex of the targeted unit. It can be blocked by obstacles or by terrain elements (see the TET), or by the presence of friendly or enemy units.
When the LoS exactly follows the edge of a blocking hexagon, it is not blocked if no obstacle exists on the other side.
If the shooter and the target are at the same elevation level, the LoS is blocked, unless the obstacle is at a lower level.
If the shooter and the target are not at the same elevation level, the LoS is blocked:
- if a hexagon is higher than both the shooter and the target;
- if the slope is not at the level of the hexagon of the shooter or the hexagon of the target.
6.1.2 - Fire resolution
The player determines the applicable DRM and rolls a die. The results are applied immediately.
6.2 Assault
Each player designates a "head unit". The difference in morale of these two units determines the morale DRM. (See the Combat Table). The players determine the other applicable DRM, which are limited to + or – 6, then the attacker rolls two dice. The results are applied immediately.
The French player, if he is active, has the ability before rolling the die, to order one or two infantry units to engage in a bayonet charge. They give him a DRM of 2 per unit, but each unit will suffer an additional level of disorganisation after the combat.
Note : in case of a charge of an infantry and/or cavalry unit, the head unit must be one of the units that charges.
An isolated artillery unit or two stacked artillery units that are attacked are automatically destroyed, with no loss for the attacker.
6.3 Combat Results
These results consist of step losses, levels of disorganisation and retreats.
- M : Morale test of the head unit (assault) or for a unit of the owning player's choice (fire): one level of disorganisation in the case of failure.
- nD : number of disorganisation levels (to be distributed among the units that took part in the combat)
- R : retreat of a hexagon by all the units
- * : 1 artillery step destroyed (if present)
- nP : number of step losses suffered (to be distributed among the units that took part in the combat)
The head unit of each camp must suffer the first loss as well as the first level of disorganisation. The other levels of disorganisation are freely distributed among the units.
If a unit reaches the rout stage, it immediately retreats one hexagon. If all the units of a player have been destroyed or are in rout although there are disorganisation levels yet to be allocated, these disorganisation levels are lost.
If a unit that is already in rout is attacked, each level of disorganisation suffered is converted into a step loss.
6.4 Advance after Combat
After an assault, if the hexagon of the defender is vacant, the head unit of the attacker must enter the square to occupy it. It can change facing by one side of a hexagon. If the stacking rules allow, another unit can advance after combat. If several units charged (cavalry or infantry), they have priority for this advance after combat.
7 - Rally
During the rallying segment, all the combat units that are not in good order may attempt to rally. The player rolls two dice, applies the DRM and consults the Rally Table.
The formation commander and the general commander can each use their TV for a unit present in their hexagon or in an adjacent hexagon (two commanders cannot cumulate their VT for the same unit).
8 - Commanders
The commanding general may only move once per round, during the movement segment of any one of his formations. The counter is also turned over on its back side. He can use his TV several times during a round, to resolve an assault or to carry out a rally.
If, during a movement, a combat unit enters a hexagon containing an isolated enemy commander, this commander must take an elimination test. If he is not eliminated, the commander is placed by his player on a friendly unit of his choice (for a formation commander, on a unit of his formation). If all the units of the formation have been destroyed, the commander is not placed on the map but is considered to have been eliminated.
Each time a unit stacked with a commander is the target of fire that brings about a result or is implicated in an assault, the commander must take an elimination test after this combat.
If a commander is eliminated, a replacement commander is immediately placed on a friendly unit (in the case of a formation commander, on a unit of that formation).
Resolution of the elimination test
The player rolls two dice, applies the applicable DRM and consults the commander elimination table.
9 – Scenarios
9.1 Game Set-up
9.1.1 – French Army
Positions itself first:
- Formation Egalité (defence order): units positioned in hex 710, 711, 811, 912, 1012, 1113, 1212 et 1313 (one unit per hex).
- Formation Beurnonville (defence order): units in hex 1412, 1513, 1612 and 1713.
- Formation Ferrand (manoeuvre order): enters the game in round 2 by the road of Valenciennes (0107).
- Formation d'Harville (inactive formation, then manoeuvre order): units positioned in hex 2115 and 2214.
9.1.2 - Austrian Army
- Formation Lilien (defence order): units positioned behind the fortifications between hex 0903 and 1006 (except the Freikorps located in 0604).
- Formation Clairfayt (defence order): units positioned behind the fortifications between hex 1106 and 1508 (except the Jäger located in a hex of the Flénu wood).
- Formation Beaulieu (defence order): units positioned behind the fortifications between hex 1409 and 1608 (except Mathesen in Berthaimont [2406] and Mihailovich in 2309).
9.1.3 – Rout movement
Southern edge for the French, town of Mons for the Austrians (if necessary, crossing the Trouille by the bridge in 1203). An Austrian unit in rout that enters Mons cannot leave and is considered eliminated.
9.1.4 – Special rules
The order of formation Ferrand cannot be changed until round 2, even if it is not on the map. It suffers the penalty for the distance of 6 hexagons from the general commander (-1: see the order change table), regardless of the position of Dumouriez at the moment.
No Austrian unit may get closer than 2 hexagons to 0107.
9.2 Historical Scenario
The game is played in 8 rounds (from 7.00 to 14.00).
Formation Égalité cannot change its defence order until round 5.
Formation d'Harville cannot be activated until round 6 unless it is attacked by the Austrians.
The tests for involuntary change of order of the French Army have a DRM of – 2 starting at round 7.
The Austrian player must leave at least one unit in each redoubt marked with a star until the end of round 6.
9.3 Victory Conditions
Victory points are accounted for on the victory points counter.
Each step loss instantly awards 1 VP to the opponent.
The elimination of the Austrian commander in chief also awards 1 VP to the French player.
Control by the French of:
- the village of Jemmapes (three hexagons) : 1 VP
- the village of Cuesmes (three hexagons) : 1 VP
- the three Austrian redoubts marked with a star: 1 VP per redoubt
A hexagon is considered controlled by the French army if a French unit is located there or was the last to cross it.
At the beginning of the game, the VP marker is placed on either side on the 0 square of the counter. When a camp wins the first VP in the game, the marker is placed in square 1 on the camp's corresponding side. If a camp wins a VP while the marker is on the side of the other camp, between squares 1 and 7 on the counter, the marker is lowered by one square.
The French player is victorious if he obtains 8 VP at any point during the game. Otherwise, the Austrian player wins.
9.4 Free Scenario
All the restrictions on activation and change of order are removed. The Mathesen and Mihailovich units (formation Beaulieu) may be placed behind the fortifications with the other units of their formation.
The French army wins if it obtains at least 8 VP by the end of round 5 at the latest. Otherwise, victory goes to the Austrian army.
Tables
Voluntary Change of Order Table (2D6)
| Result | Effect |
|---|---|
| 7 or less | Attempt to change order fails |
| 8 or more | Attempt to change order is successful |
Die roll modifiers:
-
- command value of the formation commander
-
- command value of the general commander for an order per round
- +1 if the formation commander and the general commander are stacked
-
- 1 pour passer to the offensive order
- -1 if the formation commander and the general commander are separated by more than six hexagons
Involuntary Change of Order Table (2D6)
| Result | Effect |
|---|---|
| 4 or less | Demoralisation of the formation |
| 5 or more | No effect |
Die roll modifiers:
-
- 1 per step of the unit of the formation that is destroyed
-
- 1 per unit of the formation in rout
-
- command value of the formation commander
-
- 1 if the formation has a defensive order
Orders
- Defensive order : units have a movement capacity reduced by half. They may only enter a hexagon adjacent to the enemy if a unit of the formation is already there or is in an adjacent hexagon that is itself adjacent to an enemy unit (the cavalry units that fulfil these requirements may charge).
- Offensive order : the infantry and cavalry in good order must approach enemy units with their full movement potential and if possible enter a hex adjacent to the enemy (Exception : reserve units are not required to get closer to the enemy). The units in good order in an enemy ZOC may leave it if they can be put into reserve or if they finish their turn adjacent to the adversary. Artillery units and disorganised units may freely enter and exit ZoC.
- Manoeuvre : the units may not enter a ZOC, but they may remain there if they are already present. +1 MP
- State of demoralisation : the units may not enter a ZOC, but they may remain there if they are already present. -1 Morale
Terrain Effects Table (TET)
| Terrain | Movement (MP) | Fire | Assault | Line of Sight | Various |
|---|---|---|---|---|---|
| Clear | 1 | - | - | - | - |
| Village | 2 | -2 | -2 | blocking | ZoC |
| Wood | 2 | -2 | -2 | blocking | - |
| Swamp | 2 | -2 | -2 | blocking | - |
| Citadel |
Notes:
- The DRM in fire or assault is applicable if at least one combat unit incurs this modifier.
- ZoC : The ZoC is exerted over the 6 adjacent hexagons; no flank or rear hexagons.
- Redoubts and Entrenchments : No ZoC exerted from the exterior to the interior.
- River : Absence of ZoC along the river.
- Austria : Only Austrian units may enter Mons but they may not leave.
- Movement : Cancels out all the negative terrain effects (change in elevation, waterway, etc.).
- ¹ Impassable, except by the road (1 MP).
- ² Also cancels out a retreat result in the case of a successful morale test.
- ³ +2 MP for a unit whose entire movement takes place on a road.
- ⁴ All the MP for the infantry and cavalry. Impassable for the artillery.
Commander Elimination Table (2D6)
| Result | Effect |
|---|---|
| 11 or less | No effect |
| 12 or more | Eliminated |
Die roll modifiers:
-
- 1 if the combat provoked at least one strength loss or +2 if the unit(s) with which the commander is stacked is/are destroyed.
Strength Ratio Matrix
| Strength ratio | DRM |
|---|---|
| Less than 1/4 | Combat prohibited |
| 1/4 | -8 |
| 1/3 | -6 |
| 1/2 | -4 |
| 2/3 | -2 |
| 1/1 | 0 |
| 3/2 | Plus 2 |
| 2/1 | Plus 4 |
| 3/1 | Plus 6 |
| 4/1 and more | Plus 8 |
Assault Table (2D6)
| Die | Attacker | Defender |
|---|---|---|
| 0 or less | 1P 4D R* | - |
| 1 | 1P 4D R* | 1D |
| 2 | 1P 3D R | - |
| 3 | 1P 3D R | MT (1) |
| 4 | 1P 2D | 1D |
| 5 | 3D | - |
| 6 | 2D | MT (1) |
| 7 | 1P | 1D |
| 8 | 1P |
Die roll modifiers (limited to + 6 or – 6):
- Terrain effects table (defender's hexagon)
- Strength ratio (see matrix)
- Difference between the morale of the head units in attack and in defence
-
- the tactical value of a commander in attack (maximum : one commander)
-
- the tactical value of a commander in defence (maximum : one commander)
-
- 2 if the unit in defence is attacked by a flank hexagon, or + 4 if the unit in defence is attacked by the rear hexagon.
-
- 2 if an attacking unit is adjacent to other enemy units that are not engaged in another combat (either fire or assault) in the same sequence (per non-attacked hexagon)
-
- 2 if the defending units have a defensive order
-
- 2 if one or more disorganised units of level 2 participate in the combat as attackers
-
- 2 if one or more disorganised of level 2 participate in the combat as defenders
-
- 2 per unit that charges (cavalry charge or bayonet charge by French infantry unit (maximum : + 4))
Combat results:
- M : Morale test for the head unit (assault) or for a unit of the owning player's choice (fire): one level of disorganisation in the case of failure.
- x D : number of levels of disorganisation (to be distributed among the units that took part in the combat)
- R : retreat of one hexagon
- * : 1 artillery step destroyed (if present)
- x P : number of step losses suffered (to be distributed among the units that took part in the combat)
Fire Table
| Die / SS | 1 to 2 | 3 to 5 | 6 to 8 | 9 to 12 | 13 or more |
|---|---|---|---|---|---|
| 2 | - | - | - | M | M |
| 3 | - | - | - | M | 1D |
| 4 | - | - | M | 1D | 2D |
| 5 | - | - | M | 1D | 2D |
| 6 |
Die roll modifiers:
- See Terrain effects table (hexagon of the targeted unit)
-
- 2 : if at least one artillery fires at 1 hexagon
-
- 2 : if the targeted hexagon contains two units
-
- 2 if at least one disorganised unit of level 2 fires
-
- 2 if an artillery unit bearing a "harnessed artillery" marker fires
-
- 1 if the shooter is in defensive order
Combat results:
- M : Morale test for the head unit (assault) or for a unit of the owning player's choice (fire): one level of disorganisation in the case of failure.
- x D : number of levels of disorganisation (to be distributed among the units that took part in the combat)
- R : retreat of one hexagon
- * : 1 artillery step destroyed (if present)
- x P : number of step losses suffered (to be distributed among the units that took part in the combat)
Rally Table (2D6)
| Result | Effect |
|---|---|
| 3 or less | Remove two levels of disorganisation |
| Result between 4 and the unit's morale | Remove one level of disorganisation |
| Result greater than the unit's morale | Attempt to rally fails |
Die roll modifiers:
-
- 2 if the unit is in an enemy ZoC (Note: a redoubt or an entrenchment cancels out enemy ZoC)
-
- TV of a commander present in the hex or an adjacent hex.