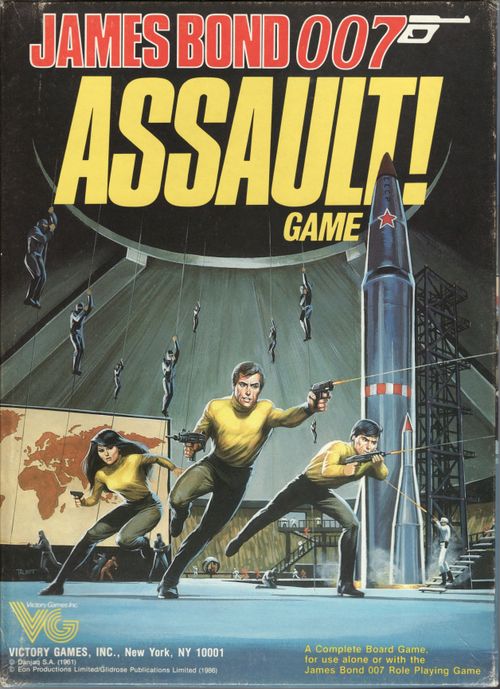
James Bond 007 Assault! Game
James Bond 007 Assault! Game Rulebook
Table of Contents
Table of Contents
Note to Role Players and Non-Role Players
Perhaps the most striking design feature of James Bond Assault is its intention to provide an introduction to wargaming for role players, as well as an introduction to role playing for wargamers. With these goals in mind, we have attempted to provide the basic elements of both types of gaming in as straightforward a manner as possible, while still delivering an exciting game.
For the benefit of wargamers who are not well acquainted with role playing, the rules are organized in large measure as a standard wargame, covering the usual topics of movement, combat, command, and so forth in the usual order. Many of the terms and actual mechanics of the game - such as resolving combat - are drawn, however, nearly intact from the James Bond 007 Role Playing Game. Do not be put off by such terms as Ease Factor and Fire Combat Primary Chance. Simply follow the procedures and refer to the charts and tables, and you will find that, despite unfamiliar terminology, the mechanics employed in this game and most wargames are essentially similar.
Note: For those wargamers who are interested in knowing more about the derivation of such terms as Ease Factor, a Glossary is included at the end of this booklet.
Role players - particularly those who play the James Bond 007 Role Playing Game - will find that a good deal of the detail normally evident throughout your campaigns has been glossed over. This apparent omission is largely intentional, so that the game can permit large scale actions that are normally too time-consuming to play out using strict role playing doctrine. In the back of this rules booklet, you will find additional data for the characters depicted in this game, together with additional information and optional rules that may help you work the James Bond Assault systems into your role playing campaigns. For purposes of playing this game for the first time or two, however, we suggest you simply use the basic rules as presented to thoroughly familiarize yourself with what we intend to be a good, solid, exciting game of commando combat.
While James Bond Assault is designed as a two-player game - perhaps ideally as a contest between a role player and a wargamer - you will find that the game can provide a great deal of enjoyment when played solitaire. On the other hand, role players in particular may be interested in enlisting the services of a gamesmaster to introduce more of the James Bond 007 Role Playing Game flavor.
However you go about the game, we hope you will find it satisfying and enjoyable.
Components
Your copy of James Bond Assault should include the following components:
- One Rules Booklet
- One 22-by-32-inch Mapsheet
- One 176-piece Countersheet
- One 88-piece Countersheet
- One 3-piece Countersheet
- One Range Stick
- Two 10-sided Dice
- One Counter Storage Tray
Also included in the game is a Feedback Card, which we urge you to fill out and return to Victory Games with your comments.
The Map
The game map represents the interior of Karl Ferenc Skorpios' secret base, hidden within a hollow volcano. It is from this base that Skorpios intends to launch his rocket, in keeping with his plans to provoke a major superpower confrontation. The interior portion of a water channel to the outside world is located on the eastern part of the mapsheet. Most of the remainder of the map is taken up with the main floor, control room, exhaust pit, and connecting corridors. It is through these rooms and byways that most of the movement and combat in the game will take place.
Other than by water, the only feasible way in or out of the complex is through the roof. This roof, which is not shown on the map, is painted on its exterior side to look like a lake from the air. The complex beneath is evident only when Skorpios slides a portion of the roof aside to allow the entry or exit of his helicopters. The area in which the roof can slide back and forth is located toward the northwest corner, in the grid coordinates G07-G20-L20-L07.
A grid system overlays the entire map, to regularize movement and range, and to help in locating various features and playing pieces once in play. Each space, defined by the grid, represents an area 20 feet across. In the center of each space is a dot which is used, in conjunction with the Range Stick, to determine Line of Sight and Range in Fire Combat.
Aside from such features (shown on the map Terrain Key) as ladders, stairs, windows, and so forth, there are four primary types of terrain you must keep in mind: Solid Rock; Water; Interior Clutter; and Clear.
- Solid Rock cannot be entered, and you cannot shoot through it; it is, quite simply, solid rock, from floor to ceiling.
- Water Spaces can be moved through only in a boat or by swimming, both of which are covered in the rules for movement. Of course, you can fire through a Water space as you could through any unobstructed space.
- Interior Clutter spaces can be moved and fired through, but your pieces' ratings are subject to modification in such a space. The Interior Clutter simply represents, in an abstract way, miscellaneous pieces of furniture, odd angles, and other minor impediments to movement and sight.
- Clear Spaces are any spaces that lack the graphic symbols shown in the terrain key for Solid Rock, Water, and Interior Clutter.
In addition to the grid system, used to locate spaces on the map surface, there are 5 Levels associated with the map, ranging from Level 0 to Level 4. These Levels, each of which represents a height difference of about 20 feet, are color-coordinated on the map Terrain Key.
To summarize the Levels:
- Level 0 represents the floor of the exhaust pit and all Water spaces.
- Level 1 represents the majority of the complex floor, represented by a light gray color.
- Level 2 represents the control room, Skorpios' quarters, and the bridge from the control room to the gantry (which is a playing piece). Note that a playing piece that is in the gantry can be at Level 1 (the main floor), Level 2 (the Level of the bridge), or at Level 3 (the top of the gantry).
- Level 3 represents the upper portion of the gantry. How to get around in the gantry is covered in the rules section dealing specifically with that playing piece.
- Level 4 is the roof of the complex, where the Ninjas begin some scenarios.
The remaining features of the map - slopes, monorail tracks, doors, and so on - are covered in specific portions of the rules as required. For now, it is important only that you recognize the various features and note their locations.
Points of Interest
- J17: Rocket launch spot. All pieces within 5 spaces of this space instantly suffer Incapacitating damage should the rocket take off.
- J25: Helicopter pad controls.
- L24/L25: Doors that are locked when the shutters are closed.
- M25: Roof (crater) controls.
- N25: Gantry controls. The other Gantry control is located on the Gantry itself.
- P25: Rocket launch controls.
- R26: Control Room shutters activation.
The Playing Pieces
There are a total of 267 playing pieces in James Bond Assault. Of these, 176 pieces represent individuals (either Leaders or Soldiers), 8 represent vehicles (either monorail cars or boats), 94 are game markers (used to indicate the status of other pieces, or to keep track of something), and 3 are movable map features (the rocket, the gantry, and the helicopter launching pad - without helicopters).
The most important pieces in the game are the Leaders. Each of these pieces has a star printed on it, together with 7 values:
[Sample Leader piece - see counter illustration]
Each Leader also has a one-letter code with a set of initials beneath it, used in the scenarios to indicate where each Leader is to be set up at the beginning of a game. These codes and initials represent the following individuals:
- A/NL through D/NL: Ninja Leaders
- E/KS: Kissy Suzuki
- F/JB: James Bond
- G/SL: Ninja Swordsmen Leader
- H/TT: Tiger Tanaka
- J/GL: Guards Leader
- K/HS: Hans Orff
- L/SK: Skorpios
- M/GL through R/GL: Guards Leaders
- S/AS through W/AS: Astronauts
The Soldier pieces (the Ninjas for M.I.6 and the guards and workers for Skorpios) are each designated with a three-digit code, similar in purpose to the single-letter code on the Leader pieces. Soldier pieces also have a silhouette of their basic weapon type printed on them (machineguns, rifles, rifle grenade launchers, swords, pistols) and 6 values:
[Sample Soldier piece - see counter illustration]
Note that all Leaders and Soldiers are printed in black on the back, to indicate their reduced wounded strength and morale side.
The specific uses of the values printed on all Leader and Soldier pieces are covered in the rules for combat, movement, and command, where required. For now, it is important only to note the location of each value on the counters.
The vehicle pieces have only one value on them, pertaining to their movement:
[Sample vehicles - see counter illustration]
The various types of markers in the game serve numerous functions, most of which represent the result of either fire or hand-to-hand combat. The applications of these markers are covered throughout the rules. The following is simply a visual summary of the marker types, for your reference.
Finally, the gantry, rocket, and helicopter pad markers are subject to special rules. Essentially, each of these is treated as a map feature that is capable of movement, within strict limits, from one position on the map to another. And, of course, the rocket is ultimately the focus of the game.
The Range Stick
In fire combat, it will be necessary to determine how far a firing piece is from a target piece, and whether or not any obstructions interfere with the Line of Sight between the pieces. The Range Stick, divided into 20-foot intervals, is provided to simplify these calculations and its specific use is covered in the section on Fire Combat.
The Dice
James Bond Assault uses two 10-sided dice. Each die has the numerals 1 through 0 printed on it. Whenever the game calls upon you to roll one die, the abbreviation D10 will be used, indicating that you are rolling for a result from 1 through 10; when rolling a single die, a roll of 0 is always read as a 10.
When the game requires a roll of two dice, the abbreviation D100 will be used, indicating that you are rolling for a result from 1 through 100. To do this, roll both dice and read them in sequence, first one colored die for the 10's digit, then the other for the 1's digit. Thus, if you are using a red die (for the 10's) and a white die (for the 1's), a roll of 6 on the red and 7 on the white die would be read as 67; a red 2 and a white 0 would be 20; a red 0 and a white 2 would be 02, or 2. A 0, when rolling D100, is always considered a 0 - not a 10 - except when you roll two 0's: a roll of 0 on the red and 0 on the white would be a result of 100.
Sequence of Play
Once you have become familiar with the components, and have read through the rules, turn to Scenario 1 to try out the game. The instructions listed under this scenario, and the other three scenarios included in this booklet, include a description of your forces and their location, your objectives, and the number of Game Turns the scenario should last.
A Game Turn represents, in scale, the amount of time it takes for your playing pieces to perform certain actions. In James Bond Assault, each Game Turn represents approximately 30 seconds of real time, although it will take you considerably (but not unbearably) longer to play out the actions represented by those 30 seconds. In order to provide some order to the game, each Game Turn is divided into 6 discrete Phases, each of which specifies, in the following descriptions, precisely what you can do during that Phase; you can never perform an action that is not listed for the Phase in progress. These Phases occur in random order, as described below, but all 6 Phases must always be completed before a Game Turn ends.
At the beginning of the game, take the 6 Phase markers and place them in an opaque container, such as a coffee cup. Also, take any unused game marker and place it on the 01 at the north or south edge of the mapsheet grid; this marker will be moved at the conclusion of each Game Turn to remind you of which Turn you are currently playing. Once all of the pieces called for in the scenario are set up, either player randomly picks one marker from the cup. Whichever marker is drawn, that is the Phase that is currently in progress. Once the player whose marker is drawn has done all he can do, or wishes to do, for that Phase, the marker is put aside, and a new marker is drawn. The player whose new marker is drawn can then perform all the eligible actions he wishes to perform. Then a third marker is drawn, and so on, until all six markers have been drawn and set aside. At the moment the sixth Phase marker is set aside, the first Game Turn is over; move the marker on the mapsheet grid to the 02 to indicate that Game Turn 2 is about to begin, and replace the Phase markers in the cup. Perform this sequence as many times as called for in the scenario you are playing. At the moment the final Game Turn is finished, the scenario is over, and both players should consult their Victory Conditions to determine who has won.
As mentioned above, only those actions specifically allowed during a given Phase can be undertaken while that Phase is in progress.
The following is a specific list of what can be done when.
M.I.6 Movement Phase
The M.I.6 player can move any and all eligible M.I.6 pieces, according to the Movement rules, in any order he wishes. Also, any M.I.6 reinforcements called for in this Turn by the scenario can be brought onto the map.
M.I.6 Fire Phase
The M.I.6 player can have any and all eligible M.I.6 pieces engage in Fire or Hand-to-Hand Combat, according to those rules, in any order he wishes.
M.I.6 Command Phase
The M.I.6 player determines the Command status of each of his pieces, and he places any Cover Fire, Bead, or Out of Command markers that he wishes or that are required. The M.I.6 player can attempt to remove Stun markers from his pieces. Any controlled movement of the gantry, roof, rocket, or helicopter pad takes place. The M.I.6 player determines the order in which he performs activities during this Phase.
Skorpios Movement Phase
The Skorpios player can move any and all eligible Skorpios pieces, according to the Movement rules, in any order he wishes. Also, any Skorpios reinforcements called for in this Turn by the scenario can be brought onto the map.
Skorpios Fire Phase
The Skorpios player can have any and all eligible Skorpios pieces engage in Fire or Hand-to-Hand Combat, according to those rules, in any order he wishes.
Skorpios Command Phase
The Skorpios player determines the Command status of each of his pieces, and he places any Cover Fire, Bead, or Out of Command markers that he wishes or that are required. The Skorpios player can attempt to remove Stun markers from his pieces. Any controlled movement of the gantry, roof, rocket, or helicopter pad takes place. The Skorpios player determines the order in which he performs activities during this Phase.
Movement
Each Leader, Soldier, and vehicle piece has a Movement Point Allowance (MPA) printed on it. This MPA, ranging from 3 through 8, is the number of Movement Points the piece can spend in each friendly Movement Phase.
Note: The terms friendly and enemy are often used to describe the relationship between pieces, players, and Phase. To the player controlling the M.I.6 side, all M.I.6 pieces and Phases are friendly, and all Skorpios pieces and Phases are enemy (and vice versa).
Whenever a piece is moved across the map, it moves from space to adjacent space in any direction desired, without skipping spaces in between. For each space the piece enters, it must spend one or more Movement Points. The costs to enter spaces of particular types are summarized on the Movement Point Cost Chart. Each time a piece enters a space, simply count off the number of Movement Points spent thus far in the piece's move, until you wish to move the piece no further, or until the piece has insufficient Movement Points remaining in its Movement Point Allowance to enter another adjacent space in this friendly Movement Phase. Note that, in some cases, there is a distinction in Movement Point cost between moving a piece orthogonally and diagonally into an adjacent space.
A player can move his pieces in any order, but he must complete all of a piece's movement before he moves another piece. Pieces that begin a Movement Phase stacked together can be moved together, as long as no piece exceeds its MPA. Once the player whose Phase is in progress announces that he has moved all the pieces he can move, or wishes to move, that Phase is over.
Stacking
At no time - even for an instant - can there be more than 6 Leaders and Soldiers in a single space at a given Level. This restriction applies to all possible combination of friendly and enemy leaders and soldiers, but not to vehicles, nor to pieces in vehicles. The upshot of this restriction is that movement into a space and Level that already contains 6 individuals is prohibited, as specified on the Movement Point Cost Chart.
Monorail Track Effect on Movement
The monorail track is a large inverted T, approximately three feet high, on which monorail cars run. When a Soldier or Leader enters a monorail space, the player must announce whether the piece is crossing the track or not. If the piece ends its movement in a monorail track space, it must be positioned to one side or the other in the space, to indicate which side of the track it occupies.
Movement in Water
Movement in Water spaces is normally accomplished in a boat (as covered in the rules for Boats). If a piece wishes to swim, it moves at 1 space per friendly Movement Phase, regardless of its MPA.
Doors and Windows
Movement through doors is always permitted, at no extra Movement Point cost, except for the Control Room door (see that rules section). Movement through windows is not allowed, unless the window has been blown out by Fire Combat (see Damage to Vehicles and Features).
Levels
In order to go from one Level to another, a piece must use a stairway, a ladder, or a slope (except in the case of Ninjas coming through the roof, which is a special case covered in the scenarios). The costs to use these map features are listed on the Movement Point Cost Chart.
Note that a piece is always considered to occupy the Level of the space it occupies unless, as in the case of descending from the roof, the piece is suspended over the space. For such cases, Level markers are provided to indicate that a piece is actually on the roof, for instance.
Monorail Car Movement
A monorail car can be moved by a player in either direction along the monorail tracks only if he has at least one friendly piece in the car, and there are no enemy pieces in the car; a car can, however, be moved only in one direction in a given Movement Phase (although it can move into one of the track loops on the map to head in the other direction in a Phase). When moving a monorail car along the track, it always spends one Movement Point per space entered. Be sure to count all spaces moved through, particularly on curves.
The monorail car's MPA is printed on the counter; when moving a monorail car, only the MPA of the car is used - not the MPA of any piece in the car.
Note: When a monorail car is damaged, its MPA is reduced.
A single monorail car can carry a maximum of 6 friendly pieces.
Note that pieces being carried in a monorail car do not count against the stacking limit of a monorail track space. Thus, a monorail car can move through or end its movement in a space that already contains 6 pieces, although the pieces in the car cannot get out if they would exceed the out-of-car stacking limit of the space.
To enter a monorail car, there must be no enemy pieces in the car, and the friendly boarding piece must occupy the same space as the monorail car, spending one Movement Point to enter the car. Place pieces that occupy the car beneath the monorail car piece. The topmost passenger is considered the driver, and he can perform no other action during a Turn.
Boat Movement
A boat can be moved by a player in any directions in Water spaces only if he has at least one friendly piece in the boat, and there are no enemy pieces in the boat. The boat's MPA is printed on the counter; when moving a boat, only the MPA of the boat is used - not the MPA of any piece in the boat.
Note: As in the case of monorail cars, a damaged boat moves with a reduced MPA.
A single boat can carry a maximum of 6 friendly pieces. Note that pieces being carried in a boat do not count against the stacking limit of any swimmers that may be in the space.
To enter a boat, it must contain no enemy pieces, and the friendly piece that is entering must spend Movement Points according to the Movement Point Cost Chart. Place pieces that occupy the boat beneath the boat piece. The topmost passenger is considered the driver, and he can perform no other action during a Turn.
Combat
In James Bond Assault, there are two types of combat: Fire Combat and Hand-to-Hand Combat. Fire Combat can be used against an enemy piece in the same space as a friendly firing piece, or against an enemy piece that is at a distance. Hand-to-Hand Combat can be used only against an enemy piece in the same hex as the attacking friendly piece. Every friendly piece that is eligible, according to the following rules, can conduct combat once - using either Fire Combat or Hand-to-Hand Combat - in a given friendly Fire Phase.
Fire Combat Procedure
To attack an enemy piece using Fire Combat, a piece must not yet have engaged in combat of any kind in the current Phase, and it must have a Fire Damage Class on its counter (which rules out the Ninja swordsmen, who can engage only in Hand-to-Hand Combat). To conduct Fire Combat for an eligible piece, conduct the following 8 steps:
-
Designate a Target. The Target of a Fire Combat is always a single piece, unless the firer is using Spray Fire (see below).
-
Establish a Line of Sight. Use the Range Stick (make sure it is straight), laying it on edge to connect the center dot of the firer's space with the Target's space. Place the stick so that the 0 is directly on the center dot of the firer's space. If any obstacle to Line of Sight falls between the center dots (that is, if it is crossed by the Range Stick), the Line of Sight is partially blocked (calling for an Ease Factor modification) or completely blocked (prohibiting the fire attack). See Line of Sight, below.
-
Determine Range to Target. While the Range Stick is still in place, assuming an LOS is established, determine whether the Target is in Short Range, Medium Range, Long Range, or Out of Range by cross-referencing the color bands for the firing piece's Fire Damage Class with the center dot in the target space. The Range to the Target will affect the Ease Factor. If the Target is beyond your piece's Long Range, the fire attack is prohibited.
Note: You must add one Range category - from Short to Medium, or Medium to Long - if firing up or down 2 or more Levels, or add two Range categories if firing to or from Level 4 to Level 0. If Range is already Long, it remains Long; Level difference alone will not put a weapon beyond fire range.
-
Determine the Ease Factor. All Fire Combat begins with an Ease Factor of 5, which is then modified to determine a Final Ease Factor according to the Ease Factor Modification Summary. Refer to this Summary and modify the Ease Factor as called for.
-
Determine the Success Chance. Once you have determined the Final Ease Factor for the fire attack, multiply the Final Ease Factor by the firing piece's Fire Combat Primary Chance. The product of this multiplication is the Success Chance. Note that a Multiplication Table is included to simplify this process.
Hand-to-Hand Combat Procedure
To attack an enemy piece using Hand-to-Hand Combat, a piece must not yet have engaged in combat of any kind in the current Phase, and it must occupy the same space (at the same Level) as the Target piece. To conduct Hand-to-Hand Combat for an eligible piece, conduct the following steps:
-
Designate a Target. The Target of Hand-to-Hand Combat is always a single piece. Once you announce the Target enemy piece, place a Hand-to-Hand Combat marker on the two pieces engaged in the combat. If there are more than two pieces in the space, the two pieces directly beneath the marker are considered the two engaged in Hand-to-Hand Combat.
Note: Leaders can elect to make a Kick attack, rather than a standard Hand-to-Hand attack. To do so, simply announce that the attack is a Kick attack. Refer to the Ease Factor Modifications Summary for the effects of a Kick attack on the Ease Factor, and to the Damage Table for the effect of damage inflicted.
-
Determine the Ease Factor. All Hand-to-Hand Combat begins with an Ease Factor of 5, which is then modified to determine a Final Ease Factor according to the Ease Factor Modification Summary. Refer to this Summary and modify the Ease Factor as called for.
-
Determine the Success Chance. Once you have determined the Final Ease Factor for the attack, multiply the Final Ease Factor by the attacking piece's Hand-to-Hand Combat Primary Chance. The product of this multiplication is the Success Chance. Note that a Multiplication Table is included to simplify this process.
-
Determine the Quality Result. Once you have determined the Success Chance, refer to the Quality Results Table. Roll D100, and cross-reference your die roll with your Success Chance. If the D100 roll is greater than your Success Chance (or if it is 100), your fire misses and is ineffective; skip Steps 5 and 6. If the D100 roll is equal to or less than your Success Chance (but not 100), the roll results in a Quality Result of 1, 2, 3, or 4 for the attack; proceed to Step 5.
-
Determine Damage. To determine the amount of damage done to the Target, cross-reference your Quality Result with the Hand-to-Hand Damage Class of the attacking piece on the Damage Table to determine damage to a Leader. For a target Soldier, the Damage Table indicates the damage done simply on the basis of the Quality Result.
Once you have resolved all of the preceding steps, the Hand-to-Hand Combat resolution is concluded. Go on to resolve further combat, or end the Phase.
Damage to Soldiers
Whenever a Soldier is attacked, through either Fire Combat or Hand-to-Hand Combat, and the Quality Result is 1 or 2, the Soldier is immediately eliminated. On a Quality Result of 3 or 4, the Soldier's counter is inverted to its reduced strength side permanently, and the owning player must check for Stun (see Stun Results, below). Any Quality Result against a Soldier piece that is already on its reduced strength side eliminates the piece. The moment a piece is eliminated, it is removed from the mapsheet, permanently.
Damage to Leaders
Whenever a Leader is attacked, through either Fire Combat or Hand-to-Hand Combat, and the Quality Rating for the attack is anywhere from 1 through 4, refer to the Damage Chart and cross-reference the Quality Result with the Damage Class of the attacking piece (using either the Fire or Hand-to-Hand Damage Class of the piece, as appropriate). The Chart will specify whether the damage done to the Leader is a Stun (ST), Light Wound (LW), Medium Wound (MW), Heavy Wound (HW), Incapacitate (IN), or Kill (KL) result. The Damage Chart explains the meanings of these various results, and describes the way in which the results are applied.
Note: After the Damage Chart is referred to, the player who owns a Target Leader can expend Hero Points (if he is M.I.6) or Survival Points (if he is Skorpios) to affect the Quality Rating. This procedure is covered under Hero and Survival Points.
If a Leader who is already wounded (that is, a Leader who has taken any damage other than a Stun) is wounded again, consult the Wound Accumulation Chart to find the new result.
Any time a Leader receives any damage result (other than Killed or Incapacitated, which eliminates the Leader), the Leader may also be Stunned. The Leader must immediately make a Stun die roll, as described below in the section on Stun Results. If the Leader passes the Stun roll, there is no further effect. If the Leader fails the Stun roll, he is immediately Stunned, and a Stun marker is placed on the piece.
Damage to Vehicles and Features
In addition to firing at Soldiers and Leaders, players can attempt to damage or destroy monorail cars, boats, doors, windows, and the steel shutters around the control room. Essentially, any Quality Result of 1 or 2 against a monorail or boat causes the vehicle to be inverted to its reduced MPA side. An additional Quality Result of 1 or 2 destroys the vehicle. When attempting to damage windows, walls, etc., refer to the Damage Table for the possible results. When a previously uncrossable space-side is destroyed - such as a window or steel shutter - use a Breach marker or other unused marker to indicate the altered status.
If boats or monorail cars collide, each takes QR1 damage; passengers are stunned; passengers on a boat that sinks must swim.
Stun Results
Unlike wounds, which indicate actual damage, a Stun result simply reflects the momentary fuzzy-headedness that can accompany a sharp blow (by hand or projectile) or a near miss. To determine whether or not a piece will be in a momentary daze after receiving a Quality Rating 3 or 4 (for a previously un-inverted Soldier) or a Stun or Wound result (for a Leader) on the Damage Table, perform the following procedure:
- Determine the piece's Willpower, which is listed near the Damage Table.
- Multiply the piece's Willpower by an Ease Factor of 5 to determine a Success Chance, using the Multiplication Table.
- Refer to the Quality Results Table, and roll D100, cross-referencing your Success Chance with the die roll. If the D100 roll is greater than your Success Chance (or if it is 100), your piece fails its Stun roll; immediately place a Stun marker. If the D100 roll is equal to or less than your Success Chance (but not 100), your piece passes its Stun roll; do not place a Stun marker.
Note: If this procedure sounds similar to that used in combat resolution, that is because virtually all action resolution in the James Bond 007 Role Playing Game uses the same procedure. The enormous detail and infinite variation in that game depends not on the use of innumerable charts and procedures, but on the simple manipulation of Ease Factors and Characteristics inherent in the characters.
The effects of a Stun are also listed near the Damage Table, but to summarize, they are as follows:
- A Stunned piece can perform no movement, combat, or other game actions, except that a Leader can use Hero or Survival Points.
- A Stunned piece is subject to Ease Factor modifications for morale.
- A Stunned Soldier who is Out of Command cannot attempt to remove his Stun marker.
Once per friendly Command Phase, each Leader and each Soldier who is In Command can attempt to remove a Stun result, using the die roll procedure detailed above.
Range
One of the most important Ease Factor modifications for Fire Combat involves Range. When determining the Range, place the 0 on the Range Stick directly on top of the center dot of the firing piece's space, and lay the Stick so that it passes directly through the center dot of the Target piece's space. Different Weapon Classes (E through H) have different Short, Medium, and Long Ranges, as identified on the Stick. Simply follow across the colored bars on the stick for the Weapon Class your firing piece is using and determine where that Weapon's color bar intersects the Target space's center dot. If the Range falls in the Medium Range span, there is no EF modification for Range. If the Range falls in the Short span, add 1 to the Ease Factor. If the Range falls in the Long span, subtract 1 from the Ease Factor. If the Range falls beyond Long Range, the fire cannot occur; the Target is beyond the Weapon's Range.
In addition to Range across the two dimensions of the map, the Levels of the firer and Target may affect Range. If the firer is 2 or more Levels away from the Level of the Target, increase the Range category by one (from Short to Medium, or Medium to Long). If the firer and Target are at Levels 0 and 4 (or 4 and 0), the Fire Combat automatically takes place at Long Range. If the Range is already Long, it remains Long; Level difference by itself will not put a Weapon out of Range.
Line of Sight
In order to engage in Fire Combat, the firing piece must have a Line of Sight to the Target piece. A Line of Sight can either be clear (which causes no difficulties for the firer), obstructed (which modifies the Ease Factor of the Fire Combat), or blocked (which prohibits Fire Combat between the firer and the Target). The Line of Sight between firer and Target is determined at the same time as the Range. Simply leave the Range Stick in place (making sure it is straight) and determine the state of the Line of Sight by examining the map features through which the edge of the Range Stick passes.
A Line of Sight is Blocked if it passes through a rock wall (not the low wall), the gantry, a Soldier or Leader at the same Level as the firer and Target, an interior wall, the rocket, a monorail car, a boat, or a door to which neither the firer nor Target is adjacent.
A Line of Sight is Obstructed if it passes through a window, stairway, low rock wall, or monorail track - provided that the obstruction is closer to the Target than to the firer. A LOS is also Obstructed (rather than blocked) if either the firer or the Target is adjacent to a door through which the fire passes. The Ease Factor modifications pertinent to these obstructions are listed in the Ease Factor Modifications Chart.
A Line of Sight is Clear if it passes through none of the features listed above.
Spray Fire
Pieces with a Fire Combat Damage Class of G have the option of using Spray Fire during a friendly Fire Phase. All prerequisites for Spray Fire - Range, Line of Sight, and so on - are identical with those for normal Fire Combat. The difference in Spray Fire is that, once the Quality Result is determined, every piece in the Target space is affected, individually - including friendly pieces, should they happen to be there. A piece must declare before rolling for a Quality Result that it is using Spray Fire.
Covering Fire
During a friendly Command Phase, any piece in Command (except Ninja Grenade-riflemen) with a Fire Combat Primary Chance can declare that it will use Covering Fire; a piece with a Fire Combat Damage Class of G can use Spray Fire in conjunction with Covering Fire. A Covering Fire marker is immediately placed on the piece.
During the next friendly Fire Phase, if the piece fires, its fire has 3 added to its Ease Factor (as listed in the Ease Factor Modification Summary). If the Cover Firing piece receives a Quality Result of 1 through 4, each piece in the Target space - enemy and friendly - is automatically considered Stunned, and must make a Stun check: no other wounds are ever inflicted by Covering Fire. As soon as the piece fires, the Covering Fire marker is removed; to use Covering Fire again, the marker must be replaced during the next friendly Command Phase.
Note: A piece with a Covering Fire marker on it cannot engage in Hand-to-Hand Combat.
Taking a Bead
During a friendly Command Phase, any piece in Command that has not moved in the current Game Turn (except Ninja Grenade-riflemen) with a Fire Combat Primary Chance can declare that it will Take a Bead on a specific Target piece; a piece with a Fire Combat Damage Class of G cannot use Spray Fire when Taking a Bead. A Bead marker is immediately placed on both the firing piece and on the Target piece (during the friendly Command Phase). In the next friendly Fire Phase, the piece must fire at the declared Target, receiving an addition of 3 to his Ease Factor (as listed in the Ease Factor Modification Summary). Immediately after firing, the Bead marker is removed from the firing and Target pieces.
Notes: A firing piece with a Bead marker on it cannot engage in Hand-to-Hand Combat, nor can it move. If for any reason the Target cannot be fired upon when the Fire Combat resolution is attempted, the firer is considered to have wasted his fire and cannot conduct combat again in the current Phase.
Specific Shot
A Leader (only) can attempt to perform a Specific Shot during either Hand-to-Hand or Fire Combat. The attempt is announced at the moment before the Leader rolls to determine his Quality Result. As listed in the Ease Factor Modification Summary, there is a negative modification of 2 to the Ease Factor when attempting a Specific Shot. Should you receive a Quality Result, however, the Damage Level is increased (moved to the right) by 2 columns on the Damage Table.
Note: The benefits and drawbacks of a Specific Shot are cumulative when used in conjunction with Taking a Bead or Kicking. A Specific Shot cannot be used in conjunction with Covering Fire.
Rifle Grenades
The Ninja Grenade-riflemen, with a Fire Combat Damage Class of I, are special cases in several ways. They can never be used for Covering Fire or Taking a Bead. And - most importantly - their weapons cause Area Damage, affecting more than the space in which they land. The procedure for Fire Combat using Grenade-riflemen requires a few extra steps for resolution:
- Determine Scatter. After following all normal Fire Combat Procedure steps normally through the determination of the Quality Result, consult the Grenade Scatter Diagram. As the Diagram indicates, on a Quality Rating of 1 or 2, the grenade lands in the space aimed at. On a Quality Rating of 4, the grenade is ineffective (either because it is a dud, or it lands somewhere out of play). If the Quality Result is a 3, roll D100 and determine whether the grenade lands in the intended space (on a roll of 9 or 0) or in an adjacent space (on a roll of 1 through 8).
- Determine Area Damage. Once the space in which the grenade lands is determined, refer to the Area Damage Diagram to determine the effect on all pieces within two spaces of the impact. Note that the effects of a grenade are imposed on all pieces - enemy and friendly.
Leaders
In order to use your forces to their best advantage, it is important that you use your Leaders wisely. The Leaders can affect the behavior of their Soldiers by giving them orders and helping their morale. Leaders can also perform exceptional feats by using Hero Points (for M.I.6 Leaders) and Survival Points (for Skorpios Leaders).
Command
Each Leader piece has a Command Radius, expressed in terms of Movement Points (and measured to include the space a commanded Soldier occupies, but not the space the Leader occupies), printed on it. Any friendly Soldier that is within the Command Radius of any Leader (exception: see Ninja Sword Leader, below) can receive orders from the Leader and can use that Leader's Morale in place of its own. Such a Soldier is considered In Command. Any friendly Soldier that is beyond the Command Radius but within double the Command Radius of a Leader can receive orders from the Leader, but cannot use that Leader's Morale. Such a Soldier is still considered In Command, despite the restrictions on Morale use. Any Soldier that is beyond double the radius of any Leader is considered Out of Command, and must have an Out of Command marker placed on it during the friendly Command Phase.
A Soldier must be In Command to receive an order to Take a Bead or to provide Covering Fire. In any one friendly Command Phase, a given Leader can never give orders in excess of the number of his Command Radius. Thus, for instance, a Leader with a Command Radius of 3 can given no more than three orders in a single friendly Command Phase.
A Soldier that is determined to be Out of Command during a friendly Command Phase can receive no orders, can perform no Fire Combat, cannot attempt to recover from a Stun result, has its Morale Rating reduced by 2 (as indicated on the Out of Command marker), and immediately has its Movement Point Allowance reduced to 2. An Out of Command soldier remains Out of Command until the next friendly Command Phase during which it is once again determined to be In Command.
Morale
Every piece has a Morale Rating printed on it. This Morale Rating is used as an Ease Factor modification (as listed on the Ease Factor Modification Summary) for all dice rolls for that piece Hand-to-Hand Combat, Fire Combat, Stun recovery, and so on. A Soldier who is within the Command Radius of a friendly Leader can use the Leader's Morale Rating in place of his own for any necessary die rolls.
As a piece is wounded, its Morale Rating declines. The back side of both Soldiers and Leaders indicates a reduced Morale Rating. As Leaders take more serious wounds, Wound markers are placed on them. These markers indicate further Morale Rating reductions. Thus, a Leader with a Medium Wound suffers a further reduction of 1 to his Morale Rating - in addition to the reduction already suffered for inverting the piece.
Note that Soldiers who are Out of Command also suffer a loss of 2 in their Morale Rating, as indicated on the Out of Command marker.
Hero and Survival Points
Each Scenario assigns a variable number of Hero Points to M.I.6 Leaders and Survival Points to Skorpios Leaders. Use a piece of scrap paper to record these Points, and to reflect their expenditure during the game.
By using a Hero Point, an M.I.6 Leader can improve the Quality Rating of any dice roll by one. For instance, if a roll would result in a failure, you can change it to a Quality Rating 4 (success) by spending one Hero Point; or you can change it to a Quality Rating 3 (a greater success) by spending two Hero Points. Additionally, the M.I.6 player can spend Hero Points to reduce the Quality Rating of any combat directed against that M.I.6 Leader by spending one Hero Point to change the Quality Rating by one. For instance, if a Quality Rating of 3 is obtained in an attack on Tiger Tanaka, the M.I.6 player can spend one Hero Point (assuming Tiger has it) to change the result to a 4; or he can spend 2 Hero Points to change the result to a failure.
The choice to use a Hero Point must be made immediately after the Quality Result dice roll is made. You can use any number of points available to the Leader at one time, but only points belonging to that Leader can be used. As Hero Points are spent, check them off on your scrap paper; a Hero Point can be spent only once per game.
The Skorpios player can use Survival Points in a manner identical to the M.I.6 player's Hero Points, except that they can be spent only in a defensive manner - that is, to change the Quality Result of a combat directed against the Skorpios Leader.
Ninja Sword Leader
The Ninja Sword Leader is used as a normal Leader in all respects except one: he can be used only in conjunction with the Ninja Swordsmen. Conversely, the only Leader that the Ninja Swordsmen can draw command benefits from is the Ninja Sword Leader.
Kick Attacks
Leaders have available to them an additional variation on Hand-to-Hand Combat that cannot be used by Soldiers. This is the Kick attack. A Kick attack is identical to Hand-to-Hand Combat, except that once a Hand-to-Hand Combat is declared as a Kick attack, the Leader's Hand-to-Hand Damage Class for the attack is increased by one column on the Damage Table (one column to the right), and the Leader suffers a negative 1 Ease Factor modification (to account for the difficulty of maintaining balance).
Specific Shot (Leaders)
Only Leaders can employ the option of the Specific Shot in Fire Combat. Use of a Specific Shot entails the reduction of the Fire Combat Ease Factor by 2, and an increase in Damage (should the attack be successful) of two levels to the right on the Damage Table. The details of the Specific Shot are covered under Combat.
Special Features
There are several extraordinary features in the James Bond Assault Game that require special treatment. Three of these features - the rocket, the gantry, and the helicopter pad - are represented by playing pieces. The control room and the roof are indicated on the mapsheet itself.
The Gantry
The gantry is a movable working platform that provides access to the rocket for Skorpios' men. Until the rocket is launched, the gantry and the rocket are inseparable. The gantry moves back and forth between the Gantry Loading and Gantry Launch positions on the map, taking the rocket with it. In order for the rocket to be launched, it and the gantry must be in their respective Launch positions.
The normal working Level of the gantry is at Level 3. To reach that Level, a piece must either enter the gantry across the gantry bridge (which is at Level 2) or take the elevator (built into the lower right-hand corner of the gantry) from Level 1. The elevator can carry up to 5 pieces from Level 1 to Level 2 in one full Turn, beginning with a Command Phase and ending with the subsequent Command Phase.
The elevator can carry up to 5 pieces from Level 2 to Level 3 in another full Turn, measured as above. Pieces occupying any Level in the gantry should have a Level marker placed on them to avoid confusion as to their whereabouts. Note that pieces cannot go beneath the gantry.
The gantry - together with the rocket - moves at a rate of one space per Turn in a straight line between Loading and Launch positions.
The controls that initiate gantry movement are located in two places: in the gantry itself in the space immediately to the left of the elevator space, and in space N25. The gantry can be operated by any piece in either space, during a friendly Command Phase, provided the piece does not currently have a Bead, Covering Fire, or Hand-to-Hand Combat marker on it. The piece must remain in the space for as long as the gantry is moving. If he leaves the space or loses control of the space, the gantry stops moving.
In order to operate the gantry, there can be no enemy pieces in the space. If opposing pieces are attempting to operate the gantry from both controls, the gantry will not move at all.
The Rocket
The rocket is a booster which will deposit in orbit a device designed to capture other orbiting spacecraft and return them to earth. Skorpios has used this spacecraft to steal US and Soviet spacecraft and to foment ill will between the superpowers.
The rocket is firmly attached to the gantry until it is launched. The control for the rocket to launch is in space P25. To launch the rocket requires a countdown. The countdown must last at least 6 Turns, and may last for as long as 9 Turns. When the countdown begins, the player in control of the rocket writes down the number of Turns the countdown will take on scrap paper. The countdown is revealed at the time of completion, or, if at any time during the countdown the player wishes to voluntarily reveal it. The M.I.6 player can discover the amount of time remaining in the countdown for himself by having a piece in space P25. The rocket will be launched during the Skorpios Command Phase of the final Turn of the countdown.
Once the rocket launches, remove it from the map.
If the controls of the rocket are turned over to the opposing player (because the opposing player takes control of space P25), that player can abort the countdown - provided there is at least one full Turn remaining in the countdown. If less than a full Turn is left, the controls cannot stop the rocket from launching. However, the rocket will not launch unless the gantry is in the Launch position and the roof is open. There is a failsafe which will abort the launch in the event either of these circumstances has not yet occurred.
At the moment the rocket does take off, all pieces within 5 spaces of space J17 instantly suffer Incapacitating damage. Any pieces on the gantry are killed. Hero and Survival Points cannot be applied to this damage.
The Roof
The roof must be open in order for the rocket to be launched. The roof automatically opens when the countdown has 3 Turns remaining (in the Skorpios Command Phase, two Turns prior to launch).
At that point, the controls in the gantry no longer function; only the controls in space P25 are functional. Normal controls for the roof are in space M25. The controlling piece could therefore leave the space once the roof has begun moving; the roof will continue to move until it is completely open or completely closed.
Once started, the roof takes 3 full Turns (Command Phase to Command Phase) to either fully open or fully close. It travels at the rate of 5 spaces per Turn (only 4 spaces in the third Turn), moving from right to left to open and from left to right to close. Once started in a direction, it will continue until it reaches the opposite side, unless stopped by someone in space M25.
As the roof moves, two Roof Edge markers are placed on the map to indicate the position of the roof within the roof opening. The Edge markers indicate the far right-hand edge of the roof as it opens leftward or closes rightward. Unless the roof is to the left of column 16, a failsafe will prevent the rocket from being launched.
Any pieces on the roof as the roof moves will move along with the roof, at the same rate. Pieces on top of the roof can plant explosives to Breach the roof, as detailed in the Scenarios.
The Control Room
The control room contains all the computers, tracking equipment, tape recorders, monitors, and other paraphernalia needed to run Skorpios' base. The entire front wall of the control room consists of steel shuttered windows, which can be closed (the control is in space R26) in any Command Phase, as long as there is a piece in the control space. This will effectively armor the control room against most forms of attack, except rifle grenades. When the shutters are closed, the door between spaces L24 and L25 is locked and cannot be forced open; it can be blown open through use of firepower (see Damage to Vehicles and Features).
Helicopter Landing Pad
The helicopter landing pad is a movable platform that slides back and forth within the boundaries indicated on the map. It allows the platform to move beneath the roof opening so helicopters can land and take off. The platform is considered Level 1, since it is barely higher than the main floor of the complex.
The landing pad moves at the rate of two spaces per Turn. The control for the landing pad is found in space J25. The pad can be operated by any piece in that space that is not engaged in combat. In order to operate the pad, there must be no enemy pieces in the space. It is activated like the gantry and is subject to the operating restrictions listed for the gantry; if the controlling piece leaves the space or loses control of the space, the helicopter pad will cease to move.
Gamesmaster Information
While some of you have bought this game looking for a stand-alone wargame, most of you probably looked for the game as a supplement to your James Bond 007 Role Playing Game campaign. As such, you will need some guidance in order to make the transition back and forth between the games. The following notes are provided to help you in that area.
For those of you who wanted a tactical man-to-man wargame in the manner of the James Bond novels, I think the game succeeds very well and stands by itself. The game does not attempt to delve into the enormous detail which a true simulation of modern man-to-man combat would, but rather it attempts to give the player a feeling of the kind of assaults and commando raids that would occur in the movies. The game also serves as a primer to the more involved set of role playing rules.
The Playing Pieces
The playing pieces are a reasonable representation of the men and women who were involved in the screen battle and their abilities. I do not intend to represent every individual who appeared on the screen; that would make the game too cumbersome for play. Try maneuvering all the counters in the Grand Assault scenario, imagining that number of counters doubled, and you will see what I mean.
A Word to James Bond Fans
We have tried to be as faithful to the content and spirit of both the Bond movies and novels as possible in both the role playing game and this board game. Where there has been conflict, the movies have taken precedence. Due to certain contractual agreements, mention of a certain organization and character from the movies is prohibited. We have done our best to invent replacements to fill the void.
The player who is familiar with the role playing rules will note that the James Bond Assault system is identical to and uses the same values as the role playing rules. This is to allow as smooth a transition for all the players as possible. For role players who have never played a wargame, this game would rate as a fairly simple game. If you enjoy it, you should try some other wargames; you will find that even though the box cover may not say so, all the good wargames are also role playing games in that the game design puts the player in the position of a commander of men, and the dearer that position is, the better the wargame design is. The wargames of Victory Games, while tending to be complex, accomplish this role playing aspect fairly well.
Using the Assault System in a Campaign
First of all, you must design an adventure in which there will be a commando assault. Then you should create a map, using the map style of Skorpios' lair included in the game as a guideline. The map may be as large or small as you want; you can draw it out on graph paper or grid out some larger piece of paper. Use colored markers to denote the levels. You can just up-scale your gamesmaster sketch map; don't labor too long over the map, since it will probably be used only once.
Then you must create the counters. Blank counters can be purchased in your local hobby store. I suggest creating counters only for the Leaders on both sides, and using the counters provided in the game for all the others involved. This will save time and effort; you can certainly create an entire original countermix if you desire.
Role Playing Characters as Counters
The biggest question you will run into when creating your counters is, how do you arrive at the values on the counters? Well, the Fire Combat and Hand-to-Hand Primary Chances and the Damage Class ratings on the counters are identical to the values in the role playing game; when you wish to use your own characters, these values translate directly. Note that the firing ranges of the various classes of weapons have been generalized. You may wish to specify the range of each weapon type, but beware of the complications that will arise. Keeping track of each weapon's range may be too much to handle if the scenario involves a large number of troops.
The Morale Ratings reflect many different role playing attributes rolled together into one EF modifier. These include the quality of the characters' weaponry (Performance Modifiers and such), applicable Fields of Experience, a character's actual combat experience, skills such as Sixth Sense, a character's Perception, and so on. The final Morale Rating is a combination of all these factors. To give you a place to start, locate the characters' Weapon Performance Modifier with his or her Perception on the following chart. This will yield a basic Morale Rating: you must then modify it up or down as you see fit due to any other factors you decide to apply.
Morale Rating Chart
| Weapon Performance Modifier | Perception -2 | Perception -1 | Perception 0 | Perception +1 | Perception +2 |
|---|---|---|---|---|---|
| 1-5 | -2 | -1 | 0 | 0 | +1 |
| 6-9 | -2 | -1 | 0 | +1 | +2 |
| 10-13 | -1 | 0 | +1 | +2 | +2 |
| 14-15 | 0 | 0 | +1 | +2 | +3 |
Leaders have Leadership Ratings; these are derived from a character's Willpower. To determine a Leader's Leadership Rating, consult the chart below.
Leadership Rating Chart
| Willpower | Leadership Rating |
|---|---|
| 1-5 | 0 |
| 6-8 | 2 |
| 9-11 | 4 |
| 12-13 | 6 |
| 14-15 | 8 |
This result can be modified by a character's Experience, at the GM's option, as I have modified Skorpios (up to 9), Hans (down to 5), and Kissy's (down to 2).
Troop Quality
You will notice that the effects of being wounded are not the same for all pieces: some lose morale while others do not; some slow down while others maintain the same MPA. This will be puzzling to the role playing veteran, since these effects do not occur in the role playing game. I added them to the board game because I felt that the non-role player would get a greater sense of the individuality of the pieces and their training if the effects are not uniform. When your players' characters are wounded, you may differentiate the effects in a similar manner, or you can simply have all the characters affected identically, whichever you desire.
Leaders and Soldiers
The way in which damage occurs is different for Leaders and Soldiers. The reason for this is related to the scale and focus of the game. In the role playing game, the reason why commando assaults were not included in the basic game was the fact that they are just too unwieldy to run using all the options the role playing game gives every character in combat. The board game focuses on the effects of the raid on the main characters, the Leaders. Thus, the ability of the Soldiers to stay in the battle and their game choices had to be curtailed in order to allow the main characters to retain their role playing game options. I expect that whenever players run their characters in an assault situation, they will be Leaders and thus retain their individuality in the combat.
Use of Vehicles
You may wish to add various vehicles to the commando raid; use the attributes listed in the Q Manual for the values. To translate movement rates, take the cruising speed and find out how many feet the vehicle could move in one Turn (30 seconds). Divide that number by 200 (rounding down) and this will be the number of spaces it can move. Depending on the vehicle, you may decide that it needs some sort of rules regarding minimum turning radius. These you will have to determine for yourself. If the Assault series becomes popular, there may be additional supplements, and complex details such as these will be included in those future products.
Other Optional Rules
Facing. Using this rule, each piece will have a front, sides, and a back, as seen in the following diagram.
A piece can trace a Line of Sight only to a target who is in the area described as being to the front or side of the sighting piece. In addition, there is a positive Fire Combat EF modification if the firer cannot be seen (i.e., is behind) the target piece.
At the end of every piece's movement, the piece must be aligned in the space he occupies so that the front of the counter unambiguously faces one of the sides of the space.
Morale. The Morale Rating of all the pieces on the same side will worsen as the side takes casualties. To use these rules, the GM or players must keep track of the number of pieces that have been either incapacitated or killed for each side. When a side reaches 33 percent casualties, each remaining piece receives an additional EF modification of negative 1; when the casualty rate is 50 percent, the remaining pieces receive an additional EF modification of negative 1 (for a cumulative total of negative 2). When casualties reach 70 percent, any piece with a current wound level of Heavy, or any Soldier who is flipped to his wounded side, will surrender and take no further hostile action against the other side.
Damage Class Adjustment. If a weapon is being fired at Close Range, increase the Damage Class by 1; if at Long Range, decrease the Damage Class by 1.
Grenades. In the movie, almost all the characters carried grenades. To reflect this in the rules proved to be a logistical nightmare and was abandoned. However, if the GM wishes to keep track of them, grenades can be used. All pieces the GM wishes can carry up to 6 grenades. They can be thrown in the Fire Phase in place of any other combat option but must be prepped in the preceding Command Phase. The GM must keep track of which piece has a prepped grenade and how many each piece has left. A grenade can be thrown up to 5 spaces and uses the rifle-grenade scatter and damage diagrams. The GM may limit grenades to Leaders. Note that each piece uses its Hand-to-Hand Primary Chance when throwing a grenade.
Falling. If a piece is on a ledge of a Level change and is wounded, he may fall off. To save himself, a piece may make a Dexterity roll at an EF of 5 to prevent the fall; success means he does not fall, and failure means that he does. All soldiers have a Dexterity of 7; all Leaders whose role playing statistics are not provided have a Dexterity of 11. The fallen piece will incur damage due to the fall according to the following chart.
Fall Wound Chart (height expressed in Levels fallen)
| Height (Levels) | Wound |
|---|---|
| 1 | Light |
| 2 | Medium |
| 3 | Heavy |
| 4 | Incapacitated |
Shaking Off Wounds. In Hand-to-Hand Combat, if the target of the attack is a Leader and has a Strength of 14 or 15, the target can lower any damage result by two levels if he succeeds at an EF 5 Strength roll. He would thus be able to ignore Stun and Light Wound results, and would receive a Stun instead of a Medium Wound and a Light Wound instead of a Heavy Wound. If this roll fails, the target receives the original wound level.
Gamesmaster's Duties
There are two ways to play James Bond Assault with a gamesmaster. The first is to have each player control his character and any Soldiers under his command while the GM controls the enemy forces. The second is to play the game two-player while the GM acts as a referee. In either case, the gamesmastered version allows for options not found in the normal two-player version.
Hidden Movement
Normally all the pieces are visible on the map at all times. With a gamesmaster, however, he can place on the map only those pieces which can be seen at that instant by the opposing player. This greatly limits the ability of the opponent to prepare for what the other side is planning, and allows for surprises galore. The GM will have to record the location and movements of all hidden pieces.
Damage Determination
In a refereed game, the results of the damage and the wound levels of all the Leaders can be rolled for in secret and recorded by the GM and not noted by the use of counters. The GM would let the player whose pieces took the damage know what the damage (if any) was, but give the opposing player only sketchy details.
Glossary
The following terms are used throughout these rules, and throughout the James Bond 007 Role Playing Game. The functions of the various terms defined here are covered in the rules, wherever they are pertinent. This glossary is provided only as a reference for gamers who are not acquainted with role playing terminology. See the Character Data Summaries in this rules booklet to see how many of these terms fit into the description of a character.
- Character: In the role playing game, a persona who appears in the game, either created by a gamesmaster, created by a player, or taken from a character appearing in the Bond movies. In a very general sense, each piece in the game represents a character. In a specific sense, however, a character in James Bond Assault represents a persona who is taken from the role playing game.
- Characteristic: Measures a character's physical and mental being; the five categories measured are Strength (STR), Dexterity (DEX), Willpower (WIL), Perception (PER), and Intelligence (INT). The board game makes direct use only of Willpower. The other characteristics are already factored into the character's skills and abilities.
- Characteristic Value: A number ranging from 1 to 15 that indicates an overall degree of proficiency in a specific characteristic, with 1 being considered poor and 15 considered superb.
- Damage Class: On each piece there are usually two letters representing how much damage that piece can do with each of its attack forms. The letters range from A through K, with A representing light damage potential and K representing devastating damage potential.
- Ease Factor: A number ranging from 1/2 through 10 that is used to measure how easy or difficult a task will be to complete. A 1/2 represents an extremely difficult task and 10 represents an extremely easy task. All tasks begin with an Ease Factor of 5, which may be modified higher or lower by the gamesmaster to reflect the ease or difficulty of the task being attempted. There are guidelines in the preceding section to aid the GM in deciding on the proper modifiers. The Ease Factors are 1/2, 1, 2, 3, 4, 5, 6, 7, 8, 9, and 10; there is no EF lower than 1/2, and none higher than 10. The Ease Factor is multiplied by the Primary Chance to find the Success Chance for completing a task. In the board game, the three primary tasks are Fire Combat, Hand-to-Hand Combat, and Stun recovery.
- Gamesmaster: The person who is in overall charge of the play of a role playing game. He creates the missions the characters will undertake, acts as rules referee, controls Non-Player Characters, and makes sure every player has a good time. He is used in James Bond Assault only when the game is being played as part of a role playing adventure.
Scenarios
The four scenarios in James Bond Assault allow the players to enjoy different games based on distinct tactical situations. Each scenario lists the set up for both sides, the list of reinforcements, the victory conditions, and the length of the game. Any special rules pertinent to the scenario are also listed. Each Leader has his Hero or Survival Points listed as well.
In the set-ups, each piece is listed - by the three-digit soldier number or by the single-letter Leader designation - together with the space in which it belongs.
Scenario 1: Introductory Scenario
This scenario is designed to play in an hour and to introduce the novice James Bond Assault player to the concepts of the game in a manageable format. The scenario depicts a small fire fight which might have taken place during the larger assault on the fortress. Bond and his allies are trying to enter the control room and gain control of space N25. Skorpios is trying to prevent that from happening. The rocket has already been launched, the gantry's northeast corner is in space G20, the helicopter pad's northeast corner is in space H11, the control room shutters are permanently frozen open (for this scenario), and the roof is closed.
Skorpios Set-Up. Skorpios' troops set up as follows. There are no reinforcements.
- H24: J; 511.
- J24: 512; 520.
- J25: 611.
- K24: 502; 503.
- N25: 612.
- O25: K with 4 Survival Points.
- P25: L with 10 Survival Points.
- R24: 408; 426.
- V23: 405; 412.
M.I.6 Set-Up. Tiger Tanaka's troops set up as follows. There are no reinforcements.
- Q17: G; 301; 303; 304; 306.
- Q18: B; 122; 132.
- Z14: E with 2 Hero Points.
- Z15: H with 10 Hero Points: 103; 108.
- Z16: F with 13 Hero Points.
Miscellaneous Set-Up.
- Z7: Monorail Car.
Scenario Length. This scenario lasts for 5 Game Turns.
Victory Conditions. The M.I.6 player wins by having control of space N25 at the end of Turn 5. The Skorpios player wins by avoiding the M.I.6 victory.
Scenario 2: The Movie Assault
This scenario most accurately duplicates the action in the movie, You Only Live Twice. It begins after Bond has escaped from the control room and the Ninjas have begun their assault. The roof has been breached, but the rocket has already been launched. The gantry is in the Load Position, the helicopter pad is in the Launch Position, the control room door and shutters begin the scenario already closed. There is lots of action, but the scenario is brief.
Special Rules. In this scenario, Ninja units will come through the roof opening. The roof is considered to be Level 4. When the roof is open, the entire space marked roof opening is open and has a clear LOS. The roof begins the scenario open to the point indicated by the Roof Edge markers. On Turn 1, it is neither in the middle of opening or closing; it is stationary.
The Breach markers note spaces in which the roof has been blown away and a man-sized hole has been opened up. Ninja can come in through those holes. The Ninjas will descend on ropes dropped from the roof. During descent, only one Ninja can occupy any given space (such as Breach spaces). This is because only one Ninja can come down the rope at once. Placing the piece on one of the open roof spaces (or the Breach spaces) means that piece is beginning its descent. The piece must be placed on the map during the M.I.6 Command Phase. At this point, he is considered to be at Level 4. In the next Movement Phase, he moves down the rope to Level 3. This is noted by using a Level marker. On the next Movement Phase, the piece reaches the ground. He may fire during that Turn if the Fire Phase follows the Movement Phase. The piece cannot fire while descending.
If the M.I.6 player wishes to breach more holes in the roof opening, he must enact the following procedure. A piece must be at Level 4 in the space he wishes to breach. He must spend one full Turn in that space (friendly Command Phase to friendly Command Phase) in order to set up the explosives (which can be used only for breaching the roof). If a Leader, he must succeed at an Ease Factor 5 Demolitions roll; if an unnamed character, he must succeed at an Ease Factor 5 roll with a Primary Chance of 12. The explosives give off an area effect Damage Class I (like grenades). The explosives will go off one Command Phase after they have been set (thus, if they were set by the M.I.6 Command Phase in Turn 2, they will go off in the M.I.6 Command Phase in Turn 4). The piece which set the explosives should attempt to be outside the blast radius when it goes off or he will suffer damage effects as if in the radius of a grenade blast.
Skorpios Set-Up.
- E7: R: 501; 506; 510.
- E19: P; 504; 505; 513; 518.
- H24: J; 511.
- J24: 512; 520.
- K24: 502; 503.
- N3: Q; 514; 519; 522.
- O3: 507; 516.
- R24: 408; 426.
- V23: M; 405; 412.
- W10: 410; 417.
- X9: 418; 419.
- X33: N; 410; 404; 415; 421.
- Y11: V.
- Y12: T.
- Y33: 406; 420.
- Anywhere in control room: K with 8 Survival Points; L with 10 Survival Points; 515; 521; 601; 602; 603; 604; 605; 606; 607; 609; 610; 611; 612; 613.
M.I.6 Set-Up.
- G11, Level 4: A; 202; 207.
- H10, Level 4: C; 201; 205; 206; 208.
- J15: D; 201; 118; 120; 122.
- L14: B; 124; 127; 132; 134.
- P19: G; 301; 303; 304; 306.
- S12: E with 6 Hero Points; 101; 109.
- S19: 302; 305; 307; 308.
- W7: H with 15 Hero Points; 117; 125; 126; 133.
- X7: 103; 104; 108; 156.
- X17: F with 7 Hero Points; 105; 155.
Miscellaneous Set-Up.
- F13: Roof Edge Marker.
- G5: Monorail Car.
- G12: Breach Marker.
- I10: Breach Marker.
- M13: Roof Edge Marker.
- Y5: Monorail Car.
Scenario Length. This scenario lasts for 10 Game Turns.
Victory Conditions. The M.I.6 player must have sole control of space J25 at the end of Turn 10. The Skorpios player wins by avoiding the M.I.6 victory.
Scenario 3: The Boat Assault
This scenario assumes that Bond and his Allies have found the underground entrance to the rocket base and have made their assault in that direction. There are no special rules. If the characters wish to breach the roof, see the rules in Scenario 2. The rocket and gantry are back in the Loading Position, the helicopter pad is in the Loading Position, the control room begins with the shutters and door open, and the roof is closed.
Skorpios Set-Up.
- Anywhere in Skorpios' Quarters: 604; 610; 611.
- Anywhere in the area bounded by X37-X31-AC34-AC31: N; 405; 408; 411; 417.
- Anywhere in the rocket exhaust pit: K with 2 Survival Points; 404; 409; 426; 431.
- Anywhere in the control room: P; 407; 419; 422; 432.
- Anywhere on ramp (S26-Y24): M; 402; 406; 414; 430.
- Anywhere in astronauts' quarters: J; 401; 403; 412; 425.
Skorpios Reinforcements. Note that Skorpios reinforcements need not be pre-plotted, as the M.I.6 reinforcements must be (see below).
- Enter from T1, O1, or J1 after Turn 5: R; 416; 420; 424; 427.
M.I.6 Set-Up. All M.I.6 forces listed enter in the M.I.6 Command Phase of Turn 1, in any water space on the eastern mapedge. All boats face west.
- Boat 1: H with 6 Hero Points; 118; 147; 153.
- Boat 2: F with 15 Hero Points; 102; 107; 150.
- Boat 3: D; 119; 122; 149.
- Boat 4: A; 115; 151; 152.
M.I.6 Reinforcements. The M.I.6 player must write down on a piece of scrap paper before the game starts the Turn on which each of these two groups of reinforcements enter the map. They can either breach the roof or enter on boats from the east edge. To do that, however, boats which brought the first wave on must leave and re-enter. If this method is chosen, the reinforcements cannot enter sooner than 3 Turns after the boats leave the map. If unforeseen circumstances prevent the M.I.6 player from exiting enough boats to allow the reinforcements to come on the map, the reinforcements are nonetheless revealed and placed just off the eastern map edge. They cannot transfer to the roof.
- Group 1: B; 112; 113; 131; 136.
- Group 2: C; 103; 111; 123; 139.
Miscellaneous Set-Up.
- F21: Monorail Car.
- O5: Monorail Car.
- Z5: Monorail Car.
Scenario Length. This scenario lasts for 15 Game Turns.
Victory Conditions. The M.I.6 player wins by having control of Skorpios' Quarters and the control room. Control of these places is defined as having more friendly pieces in the place than the enemy, and having control of the entrance spaces. Any other condition is a Skorpios victory.
Scenario 4: The Grand Tactical Scenario
This scenario is similar to the movie scenario, except that the rocket has not yet been launched and Bond was not captured by the forces of Skorpios. It uses all the counters and will probably take a few hours to play through, but it gives you the feeling for an all-out, full scale James Bond assault. The rocket and gantry are in the Loading Position, the helicopter pad is in the Loading Position, the control room begins with the shutters and door open, and the roof is closed.
Skorpios Set-Up.
- E36: 430.
- F35: 409.
- H15: 406.
- H24: 522.
- H36: 424.
- I27: 506; 512.
- J2: 503; 505; 512.
- J25: 601; 602.
- L23: 401; 404; 405; 415.
- L27: K with 10 Survival Points; 412.
- N20, at Level 3: 501; 511.
- N25: 607; 610; 611.
- O3: J; 502; 507; 515.
- O19, at Level 3: Q; 517; 519.
- O27: 508; 521.
- O33: 402.
- O36: 429; 428.
- P19, at Level 3: 603; 604; 608.
- P20, at Level 3: 606; 612; 613.
- Q33: L with 15 Survival Points.
- R15: 420.
- R20: 520.
- R24: 524.
- R27: P; 510.
- S22: 403.
- S32: 426.
- V8: 419.
- V12: N; 408; 413; 417.
- V13: 411; 418; 431.
- V16: 407.
M.I.6 Set-Up. No M.I.6 pieces begin on the map. They all arrive as reinforcements on any Turn the M.I.6 player wishes. He can send units either through the roof or through the cave openings on the eastern end of the map. Before the game begins, however, he must separate his forces into the groups that are coming in the roof as opposed to the groups that are coming through the cave. Pieces cannot be transferred between the two entrances. Hero Points are available as in Scenario 2:
- E with 6 Hero Points
- H with 15 Hero Points
- F with 7 Hero Points
Miscellaneous Set-Up.
- X37: Monorail Car.
- Z37: Monorail Car.
- AB37: Monorail Car.
Scenario Length. The scenario lasts 20 Game Turns. Turn 1 is a special case. There are no M.I.6 Phases in Turn 1. The Skorpios player can execute his Command Phase and Movement Phase (in that order) without interference from M.I.6 pieces.
Victory Conditions. To win the scenario, the Skorpios player must launch the rocket by Turn 20. The countdown cannot begin until Turn 12. The M.I.6 player wins by avoiding a Skorpios victory.
Character Data Summaries
Typographic cleanup in this section: the source's header "SKILL LEVEUPRIMARY CHANCE" is printed here as "SKILL LEVEL/PRIMARY CHANCE"; "HAND·TO·HAND" is printed as "HAND-TO-HAND"; "1bs" and "Jbs" are printed as "lbs"; "Interrogation, (10/22)" is printed without the stray comma. The source lists "Sixth Sense (14/27)" twice in Karl Ferenc Skorpios' skill list; it is reproduced as printed.
James Bond
- STR: 10 DEX: 12 WIL: 13 PER: 14 INT: 12
- Skills (Skill Level/Primary Chance): Boating (12/25), Charisma (15/28), Disguise (4/16), Diving (10/21), Driving (12/25), Electronics (7/19), Evasion (12/23), Fire Combat (12/25), Gambling (15/29), Hand-to-Hand Combat (11/21), Local Customs (12/26), Lockpicking and Safecracking (6/18), Mountaineering (9/20), Piloting (9/20), Riding (7/20), Science (6/18), Seduction (14/28), Sixth Sense (13/26), Stealth (13/26)
- Abilities: Connoisseur, First Aid, Photography
- Height: 5'11"
- Weight: 167 lbs
- Age: 35
- Appearance: Striking
- Fame Points: 148
- Hero Points: 13
- Speed: 3
- Hand-to-Hand Damage Class: B
- Stamina: 30 hours
Tiger Tanaka
- STR: 12 DEX: 14 WIL: 14 PER: 13 INT: 12
- Skills (Skill Level/Primary Chance): Charisma (12/26), Cryptography (11/23), Demolitions (8/20), Driving (10/23), Electronics (12/24), Evasion (13/25), Fire Combat (12/25), Hand-to-Hand Combat (13/25), Interrogation (10/22), Local Customs (11/24), Science (11/23), Seduction (9/22), Sixth Sense (13/25), Stealth (13/25)
- Abilities: Connoisseur, First Aid, Photography
- Height: 5'10"
- Weight: 175 lbs
- Age: 41
- Appearance: Good Looking
- Fame Points: 150
- Hero Points: 9
- Speed: 3
- Hand-to-Hand Damage Class: B
- Stamina: 32 hours
Kissy Suzuki
- STR: 7 DEX: 9 WIL: 10 PER: 10 INT: 11
- Skills (Skill Level/Primary Chance): Boating (11/20), Charisma (8/18), Cryptography (8/19), Demolitions (6/17), Disguise (4/15), Driving (10/18), Electronics (6/17), Evasion (10/18), Fire Combat (9/18), Hand-to-Hand Combat (9/16), Local Customs (7/17), Mountaineering (5/13), Piloting (4/13), Riding (4/14), Science (3/14), Seduction (5/14), Sixth Sense (6/16), Stealth (7/17)
- Abilities: Connoisseur, First Aid, Photography
- Height: 5'5"
- Weight: 116 lbs
- Age: 31
- Appearance: Striking
- Fame Points: 61
- Hero Points: 6
- Speed: 2
- Hand-to-Hand Damage Class: A
- Stamina: 28 hours
Karl Ferenc Skorpios
- STR: 12 DEX: 14 WIL: 14 PER: 13 INT: 13
- Skills (Skill Level/Primary Chance): Boating (8/21), Charisma (13/27), Disguise (12/25), Driving (12/25), Electronics (12/25), Evasion (13/26), Fire Combat (13/26), Gambling (9/22), Hand-to-Hand Combat (14/26), Interrogation (13/26), Local Customs (9/22), Lockpicking and Safecracking (10/24), Pickpocket (13/27), Piloting (8/21), Riding (8/21), Science (10/23), Seduction (11/24), Sixth Sense (14/27), Sixth Sense (14/27), Stealth (10/24), Torture (12/25)
- Abilities: Connoisseur, First Aid, Photography
- Height: 6'1"
- Weight: 175 lbs
- Age: 43
- Appearance: Good Looking
- Fame Points: 70
- Survival Points: 11
- Speed: 3
- Hand-to-Hand Combat Class: B
- Stamina: 32 hours
Hans Orff
- STR: 14 DEX: 9 WIL: 14 PER: 7 INT: 4
- Skills (Skill Level/Primary Chance): Demolitions (5/9), Driving (8/16), Evasion (10/21), Fire Combat (11/19), Hand-to-Hand Combat (13/27), Interrogation (5/9), Sixth Sense (6/11), Stealth (10/24), Torture (11/20)
- Abilities: None
- Height: 6'5"
- Weight: 220 lbs
- Age: 28
- Appearance: Normal
- Fame Points: 42
- Survival Points: 9
- Speed: 1
- Hand-to-Hand Damage Class: C
- Stamina: 32 hours
- Running/Swimming: 45 minutes
Charts
Remove these 4 pages from the Rules Booklet before playing James Bond Assault.
Weapon Ranges
Ranges are given in squares, and in yards for reference.
| Weapon Class | Short | Medium | Long |
|---|---|---|---|
| E | 1 | 2-4 | 5-6 |
| F | 1-2 | 3-6 | 7-9 |
| G | 1-3 | 4-7 | 8-10 |
| H | 1-10 | 11-15 | 16-20 |
| I | 1-17 | 18-19 | 20-25 |
Weapon Ranges (in yards)
| Weapon Class | Short | Medium | Long |
|---|---|---|---|
| E | 20 | 80 | 120 |
| F | 40 | 120 | 180 |
| G | 60 | 140 | 200 |
| H | 200 | 300 | 400 |
| I | 340 | 380 | 500 |
Ease Factor Modifications Summary
Modifications for Fire Combat
| Ease Factor Modification | Further Effects |
|---|---|
| +4 when Target is 4 Levels below firer. | Fire is automatically at Long Range.* |
| +3 when Target is 3 Levels below firer. | Fire is automatically increased by one Range category, not to exceed Long Range.* |
| +3 when using Covering Fire. | All Quality Results result in Stun on the Damage Table. |
| +3 when Taking a Bead | |
| +2 when Target is 2 Levels below firer. | Fire is automatically increased by one Range category, not to exceed Long Range.* |
| +1 when Target is at Close Range. | |
| +1 when Target is 1 Level below firer. | |
| + Morale Rating. | Add positive (+) Morale Rating, or subtract negative (-) Morale Rating, as appropriate. Morale Rating of 0 has no effect. |
| -1 when Target is at Long Range. | |
| -2 when Target is in Interior Clutter space. |
* When firing at a Target 2 or more Levels below firer, and applying these Ease Factor modifications, you must also apply usual modifications for Long Range (-1) where applicable. See optional Damage rule for further effects.
The chart prints "Close Range" for the +1 modifier; the Range rules in the main text call the same band Short Range.
Modifications for Hand-to-Hand Combat
| Ease Factor Modification | Further Effects |
|---|---|
| + Morale Rating. | Add positive (+) Morale Rating, or subtract negative (-) Morale Rating, as appropriate. Morale Rating of 0 has no effect. |
| -1 when attacker is a Leader using Kick attack. | If a Kick attack receives a Quality Result, Damage is increased by 1 column to the right on the Damage Table. |
| -2 when attacker has moved into Target's space in this Game Turn. |
Modification for Stun Check
| Ease Factor Modification | Further Effects |
|---|---|
| + Morale Rating. | Add positive (+) Morale Rating, or subtract negative (-) Morale Rating, as appropriate. Morale Rating of 0 has no effect. |
Multiplication Table
Multiply the firing or attacking piece's Primary Chance (down the left) by the Final Ease Factor (across the top) to find the Success Chance. Values are as printed.
| Primary Chance | 1/2 | 1 | 2 | 3 | 4 | 5 | 6 | 7 | 8 | 9 | 10 |
|---|---|---|---|---|---|---|---|---|---|---|---|
| 1 | 1 | 1 | 2 | 3 | 4 | 5 | 6 | 7 | 8 | 9 | 10 |
| 2 | 1 | 2 | 4 | 6 | 8 | 10 | 12 |
Quality Results Table
Find the row for your Success Chance (SC). Roll D100: the result is a Quality Rating of 1, 2, 3 or 4 if the roll falls in that rating's range; a roll above SC (or a roll of 100) is a miss.
| Success Chance Range | QR 1 | QR 2 | QR 3 | QR 4 |
|---|---|---|---|---|
| 01-10 | 01 | 02 | 03-05 | 06-SC |
| 11-20 | 01-02 | 03-04 | 05-10 | 11-SC |
| 21-30 | 01-03 | 04-06 | 07-15 | 16-SC |
| 31-40 | 01-04 | 05-08 | 09-20 | 21-SC |
| 41-50 | 01-05 | 06-10 | 11-25 | 26-SC |
SC = Success Chance.
Damage Results Table
Read the Quality Rating (QR) block, then the target row (Soldier, Leader, Vehicle, Normal Door, Control Room Door/Window), then the column for the attacking weapon's Damage Class (A through L).
Quality Rating 4
| Target | A | B | C | D | E | F | G | H | I | J | K | L |
|---|---|---|---|---|---|---|---|---|---|---|---|---|
| Soldier | INV | INV | INV | INV | INV | INV | INV | INV | INV | INV | INV | INV |
| Leader | ST | ST | ST | ST | LW |
Quality Rating 3
| Target | A | B | C | D | E | F | G | H | I | J | K | L |
|---|---|---|---|---|---|---|---|---|---|---|---|---|
| Soldier | INV | INV | INV | INV | INV | INV | INV | INV | INV | INV | INV | INV |
| Leader | ST | ST | LW | LW | LW |
Quality Rating 2
| Target | A | B | C | D | E | F | G | H | I | J | K | L |
|---|---|---|---|---|---|---|---|---|---|---|---|---|
| Soldier | KL | KL | KL | KL | KL | KL | KL | KL | KL | KL | KL | KL |
| Leader | LW | LW | MW | MW | HW |
Quality Rating 1
| Target | A | B | C | D | E | F | G | H | I | J | K | L |
|---|---|---|---|---|---|---|---|---|---|---|---|---|
| Soldier | KL | KL | KL | KL | KL | KL | KL | KL | KL | KL | KL | KL |
| Leader | LW | MW | MW | HW | HW |
Damage Results Table notes (as printed):
- Note: When referring to the Damage Results Table for damage to Leaders and Windows/Doors, remember that they accumulate damage until they reach an Incapacitated (INC) or Killed (KL) result. Refer to the Wound Accumulation Chart when damage is inflicted on a Leader or Window/Door that has already taken at least a Light Wound (LW).
- HW: Heavy Wound. For Leader, invert piece to wounded side (if not already), place Heavy Wound marker and check for Stun. For Window/Door, place Heavy Wound marker.
- INC: Incapacitated. Identical to Killed (KL) in the board game, but distinguished in the role playing game.
- INV: For Soldier, invert piece to reduced side and check for Stun. If Soldier is already inverted, treat as Killed (KL). For Vehicle, invert piece to reduced side. If Vehicle is already inverted, treat as Killed (KL).
- KL: Killed. For Leader or Soldier, immediately remove piece from the game. For Boat, immediately remove piece from the game. For Monorail Car, piece is considered "dead" but remains on the map, incapable of further movement. For Window/Door, feature is considered to have been blown away; use a Breach marker to indicate this.
- LW: Light Wound. For Leader, invert piece and check for Stun. For Window/Door, place inverted Stun marker.
- MW: Medium Wound. For Leader, invert piece to wounded side (if not already), place Medium Wound marker, and check for Stun. For Window/Door, place Medium Wound marker.
- NE: No effect.
- ST: Stun. Make Stun Check for affected piece (remember also to make Stun Check for any piece that is wounded) according to the procedure in the rules (Willpower multiplied by an Ease Factor of 5 modified by piece's Morale - or Morale of eligible Leader to reach a Success Chance; any Quality Result and the piece recovers from the Stun). The Willpower Ratings are as follows:
Source typo corrected: "p1ace" printed for "place" in the HW note.
Wound Accumulation Chart
Find the row for the NEW wound and the column for the OLD wound (the wound the Leader or Window/Door already has).
| New Wound \ Old Wound | LW | MW | HW | INC |
|---|---|---|---|---|
| LW | MW | HW | INC | INC |
| MW | HW | INC | INC | KL |
| HW | INC | INC | KL | KL |
| INC | INC | KL | KL | KL |
LW: Light Wound. MW: Medium Wound. HW: Heavy Wound. INC: Incapacitated (eliminated, in the board game). KL: Killed.
Source typo corrected: the chart's key prints "Medium Would" and "Heavy Would"; they are read here as Medium Wound and Heavy Wound.
Movement Point Cost Table
Costs are in Movement Points. Entering a space costs the listed amount. A cost with a plus sign (+) is in addition to the cost of entering the space.
| Space Entered | Cost |
|---|---|
| Clear | 1 |
| Interior Clutter (Orthogonal) | 1 |
| Interior Clutter (Diagonal)* | 1.5 |
| Up Ramp | 1.5 |
| Down Ramp | 0.5 |
| Up or Down Stairs | 2 |
| Across Monorail Track | +1 |
| Up or Down Ladder | +2 |
| Through Destroyed Window | +1 |
| Through Normal Door | +0 |
| Through Control Room Door | N/A |
| Enter Monorail Car | +1 |
* This is the only situation (Interior Clutter) in which the cost to move diagonally varies from the cost to orthogonally. N/A: Not applicable; you cannot enter through closed control room door unless it is destroyed. While control room door is open, treat it as any other door for movement.
Area Damage Diagram
The diagram is a 5 by 5 grid of spaces centred on the space where the grenade lands. Each space is marked as follows (rows from top to bottom as printed):
| ST | ST | ST | ST | ST |
| ST | LW | LW | LW | ST |
| ST | LW | HW* | LW | ST |
| ST | LW | LW | LW | ST |
| ST | ST | ST | ST | ST |
*HW: Every Leader in the space where the grenade lands suffers a Heavy Wound; Soldiers are eliminated. LW: Every Leader one space from the blast suffers a Light Wound; Soldiers are treated as though suffering a Quality Rating 4 result. ST: Every piece two spaces from the blast is subject to Stun.
Grenade Scatter Diagram
On a Quality Result of 1 or 2, the grenade lands in the space aimed at. On a Quality Result of 3, re-roll one die. On a result of 9 or 0, the grenade lands in the space aimed at; on a die roll of 1 through 8, it lands in the indicated space. Align the diagram so the top of the diagram is to the north. On a Quality Result of 4, the grenade is either a dud, or lands too far away to be effective.
The printed diagram is labelled with QR1, QR2, and QR3 entries carrying die results 1 through 8 and 9,0; its spatial layout is a graphic and is not reproduced in text here. Consult the printed diagram for positions.