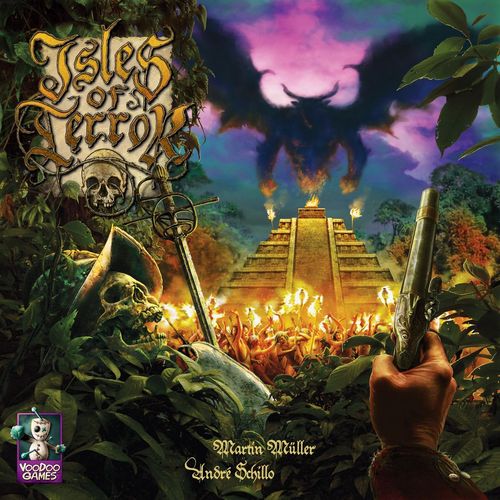
Isles of Terror
Isles of Terror Rulebook
Table of Contents
Table of Contents
- Introduction
- Game Components
- Game Overview
- Selecting an Adventure
- Setup
- Game Terms
- Determine Starting Player
- Starting a Game
- 1. Fortune Phase
- 2. Action Phase
- 3. End of a Season
- Actions
- Perform Explorations
- Combat
- Negotiating
- Camps
- Strategy Cards
- Adventure Progress
- Missions
- Victory Points
- Special Game Situations
- Solo/Cooperative Rules
- Game Summary
Introduction
In Isles of Terror, players adopt the role of a captain and lead their expedition of soldiers and pioneers into fabled adventures on mysterious isles.
Every adventure takes the players to new islands, each with their own threats and discoveries. By conquering new areas through skilled negotiations or combat you may then raise camps and strengthen your different positions on the isle.
Your journey starts with the enclosed adventure book "The Dagger of Tza'Tanosh". This first adventure is set during the Seven Years' War in North America and encompasses the years 1754 to 1762. It will take you deep into an alternative reality of that time containing occult rituals of native tribes, demonic invocations, magic artifacts and a long-lost bloodline of original conquistadores.
Players have a choice between several adventures that can either be played separately or as part of a campaign. The goal of the game is always to complete the adventure related victory conditions and to be the player with the most victory points by the end of the game.
The campaign mode also offers the chance to gain unique advantages for upcoming games and tell an intense, overarching story at the same time.
The following rules describe the competitive game. Isles of Terror can also be played cooperatively or as a solo variant. Those rules are mentioned at the end of this rulebook.
Game Components
- 12 D6 & 4 D8
- Game Board A and Game Board B
- 74 Area Tiles [erratum: should read 60]
- Terror Board
- 4 Double-Sided Player Boards
- 11 Sea Areas
- 7 Adventure Areas
- 20 Victory/Progress Tokens
- 40 Captains [erratum: should read 4]
- 40 Soldiers
- 24 Camps
- 4 Ships
- 6 Locations
- 4 Rivers, 4 Mountains, 4 Swamps
- 40 Gold Tokens
- Year Token
- First Player Token
- 40 Ration Tokens
- 10 Success Tokens
- Location Bag, Terrain Bag, Chasseurs Bag, Conquistadores Bag, Red Coats Bag, Yoruba Bag
- 24 Event Cards
- 4 Faction/Sea Cards
- 14 Mission Cards
- 6 Minion 1 Cards, 6 Minion 2 Cards, 6 Minion 3 Cards
- 36 Exploration Cards
- 6 Boss Cards
- 6 Location Cards
- 28 Strategy Cards
Game Overview
A game is played for a predetermined number of years with four seasons (game rounds) each. Each season consists of a fortune phase, an action phase and the end of a season.
Fortune Phase
Players draw strategy cards and a new event card defines the positive or negative effects for the current season.
Action Phase
During the action phase players perform one of five possible actions in turn order beginning with the starting player and continuing clockwise. Placing an action token on a player board will determine which actions may be used. Some actions may be used more often than others:
- Land: Players may hire characters and place them in an area adjacent to a sea area. In addition, you gain all resources gathered on your sea card.
- Move: By spending rations, players may move their characters on the isle to adjacent areas. This way it is possible to reveal unexplored areas through negotiations or combat, attack other players, conquer adventure areas or reinforce areas you control. Exploration cards create new situations with every exploration and you will encounter minions, bosses or rare locations.
- Recruit: Gold is used to recruit new characters and place them into areas you control to strengthen them or prepare new expeditions.
- Produce: To gain new gold and rations you may produce the resources shown on all areas you control.
- Supply: You may request any two resources of your choice that are placed on your sea card; they go into your resource pool once you perform a land action.
End of a Season
At the end of a season specific effects are resolved, such as ongoing effects from strategy cards. If it is a winter season you will also check whether the end of the game has been reached or if a new year begins.
End of the Game
Each adventure will define when it ends and who will be the winner of the game. Usually, this is the player with the most victory points, but there are also other opportunities to decide the game in your favor.
Selecting an Adventure
Before starting a game, players will need to agree on the kind of game they want to play:
- Regular Game: Players choose any one adventure out of the adventure book.
- Campaign Game: The players start a new campaign or continue with one as described in the adventure book. In this case, adventures are predefined and follow a given order.
Setup
Prepare the Game Board
As specified by the adventure, the front or back version of the game board is placed in the center of the table (A). Then place the mission cards facedown on the corresponding card field (B) and all success tokens next to it (C). Sort the area tiles by color (green, yellow, red) before placing them facedown on the area tiles pool (D). Place the terrain tiles into the terrain bag to form the pool of terrain tiles (E). Similarly, place the location tiles into the location bag (F). Then lay out the resource tokens (rations and gold) (G) as well as the dice (H). Lastly, place the year token (I) on the first-year field.
Tempt fate by shuffling all cards and area tiles during each setup!
From now on follow the adventure specific setup rules described in the "ADVENTURE SETUP" section of the chosen adventure. These rules specify which minion (J) and boss cards (K) are used, how the area tiles form the layout of the isle (L), which exploration deck is used (M), which progress tokens are laid out (N) and which event is resolved for the first season (O).
Player Materials
Each player randomly draws a faction card and places the front of the appropriate player board (1) in front of them. The back of the faction card should be placed next to the player board and is used as a sea card (2).
Each player then places their strategy cards facedown on their player board (3) and draws a mission card (4) that they put faceup in front of them.
In addition, players take the number of figures of their faction color as defined in the "Player Materials" section of the adventure. The ship figure is put on the sea card (5) and the camps on the camp fields (6). The soldiers and captain (7), as well as rations and gold (8), form a player's pool and are placed next to their player board. The victory, progress and mission tokens are put onto the starting field (9). Finally, the action tokens (10) are placed on the player boards.
Game Terms
Seasons and Years
A season defines a game round and a year describes a cycle of four game rounds. One year always consists of four seasons; spring, summer, autumn and winter.
After the winter season ends, the current year ends as well. Some adventures last several years, which means that all four seasons are repeated for each year. Use the year token to track the current year.
Even here on this cursed island a year always consists of four seasons.
Figures
Every player is in possession of their own figures, identified as follows:
- Figures refers to all kinds of figures (captains, soldiers, camps, ships).
- Characters are always only captains and soldiers.
Don't get fooled, pay attention to the exact wording of a rule to see if it affects all figures or just characters!
Areas & Area Tiles
The shape of each isle differs by the layout of the area tiles used for an adventure.
Only fields that contain an area tile are valid and are called "areas":
- Green areas have the lowest threat level
- Yellow areas are a little more dangerous
- Red areas mark dangerous regions
- Adventure areas have their own rules (as described in the specific adventure)
- Sea areas are possible landing fields for ships
Areas can adopt different states:
- A facedown area counts as an unexplored area
- A faceup area counts as an explored area
- An explored area with your own figures in it counts as a controlled area
- An explored area with enemy figures in it counts as an enemy area
Dice
Isles of Terror uses 6-sided dice (D6) and 8-sided dice (D8).
Special Rules
The special rules of event cards, strategy cards or adventure descriptions may modify or contradict the rules in the rulebook. In all cases, special rules are always prioritized and supersede those of the rulebook.
Determine Starting Player
A game round always begins with the starting player. At the start of the game the oldest and most experienced player should go first.
They receive the starting player token, which is later passed on to the player with the most camps in play at the beginning of each new season.
In case of a tie, the previous starting player must choose one of the tied players who then receives the starting player token and becomes the new starting player.
Starting a Game
To make sure everyone understands what awaits them on the next island, the starting player should read aloud the background story, adventure objectives and victory conditions, as well as the progress tasks and special rules, of the chosen adventure in a baleful voice!
It all starts with the first season and all players must resolve the fortune phase and the action phase before the season ends and a new one begins. This is repeated until all four seasons of a year have been resolved.
If an adventure lasts for more than one year, all four seasons must be resolved again for each additional year the adventure lasts.
A round always consists of the following phases in the following order:
- Fortune Phase
- Action Phase
- End of a Season
1. Fortune Phase
Resolve Events
At the beginning of a season the starting player draws an event card and places it faceup in the field for the current season.
Each event card describes special rules that are immediately applied to all players until the end of the current season:
- Green event cards: usually have a positive effect
- Red event cards: have a negative effect
- Gray event cards: have a strong negative effect
Imagine you just set sail and cannot wait to land on the shores of the mysterious isles when suddenly a maelstrom crushes your landing plans! Because of such unfavorable happenings, the first seasonal event card is always pre-defined by the adventure. But beware of possible strokes of fate in the upcoming seasons!
Develop New Strategies
During spring every year each player draws the top three cards from their strategy deck. In subsequent seasons each player draws just one of their strategy cards.
Example: Alex, Thomas, and Denise are beginning summer of the first year of their adventure. While the event card for spring was pre-defined by the adventure, the current one is drawn by the starting player. This is Alex, so he draws an event card and places it on the second season field. Its effect is applied immediately and each player draws one of their strategy cards. Then the fortune phase ends.
2. Action Phase
Turns & Their Order
During the action phase, each player possesses three turns in which they can act. The starting player always performs the first turn. Then continue in clockwise order with every player performing one of their turns. After each player has performed all three of their turns the action phase ends.
Active & Passive Players
Because of certain rules it is important to distinguish between active and one or more passive players during a turn. The active player is always the one whose turn it is. All other players are considered passive players during this turn.
Actions
In each of their turns a player may perform only one action:
- Land: Bring new troops and resources to the isle.
- Move: Allows exploring, negotiating and fighting on the island.
- Recruit: Raise new troops on the isle.
- Produce: Your controlled areas generate resources.
- Supply: Request additional seaborne resources.
To perform an action the active player must place one of their three action tokens (1) on an empty action field (2) of their player board. There are three possible actions that are linked to the chosen action field (3). The player can then perform one of those actions.
Keep an eye on where to place your action tokens as some of your actions may be used more often than others. If you are really unlucky, misplacing an action token might even block certain actions for the rest of the season.
It is mandatory to perform one action in each turn. The different actions will be detailed in upcoming sections.
Bonus Resources
Every time a player performs an action and there is a resource symbol shown on the line between the chosen action and the just placed action token, the player may immediately add one of the resources shown to their sea card from the supply.
There can be unlimited resources on a sea card but resources on the sea card do not count towards the resource pool of a player and cannot be used or otherwise spent.
Example: Alex is the active player and places his second action token on the empty action field to the left. He may now perform a move, recruit or supply action. He decides to perform a recruit action. While doing this he knows that he will not be able to perform a move action this season because he just blocked this option by placing his action token. Alex checks if there is a resource symbol between his just placed action token and the performed action and immediately adds a bonus gold resource to his sea card. After resolving the recruit action, Alex's turn ends and Thomas becomes the active player, starting his second turn.
3. End of a Season
Resolve Effects & Hoist Anchor
Some effects (e.g. effects of event cards, strategy cards, adventure areas, etc.) end or are applied at the end of a season. Resolve all such effects for all players beginning with the starting player.
Each player then places their ship, and all characters currently in the same area, on their sea card.
A New Season & End of a Year
If it is not the end of winter, continue the year with the next season's fortune phase. Otherwise the current year ends and you apply the following:
Gather New Strength The starting player rolls 4D6. The result is compared to the position of each victory token on the threat bar, just as when performing a minion attack (p. 23). For each die result that is equal to or higher than their threat bar value, a player must remove one resource from their pool to strengthen their expedition. For each resource a player is unable to remove, they must remove one character or one camp and put it back in their pool.
Review Strategies All players shuffle their used and unused strategy cards back into their strategy deck.
Check for End of Game The game ends after the last year of the adventure has been completed. Based on the victory conditions of the adventure, a winner will be determined who should then read the epilogue of the adventure aloud. Begin a New Year If the end of the game is not yet reached, begin a new year by moving the year token to the next year and placing all displayed event cards on the discard pile. The new year begins with spring and all four seasons will be resolved again.
Actions
The following is a detailed explanation of all possible actions a player can perform during their turn.
Land
A landing delivers additional resources and allows you to hire new crew members that may immediately explore an area, conquer it or just strengthen one of your own areas.
The active player transfers all resources from their sea card into their pool and may immediately use them from now on.
Then they place their ship and all characters on it (i.e. those in the same sea area or still on the sea card) into any sea area without enemy figures. If this is an unexplored sea area, flip over the sea area tile and leave it face-up for the rest of the game.
Furthermore, a player may immediately hire additional characters by spending 1 gold per soldier and 2 gold per captain up to a maximum of 3 characters in the current sea area or on the sea card.
If there are no more characters left in a player's pool they may not hire any further.
Any number of characters in a sea area may then immediately be placed in an adjacent area.
If this area is unexplored, immediately perform an exploration (p. 16). If the area is already controlled by the active player (p. 8 "Game Terms") he may place characters in it until the maximum of 3 characters per area is reached. If the characters are placed on an enemy area (p. 8 "Game Terms") immediately perform a combat (p. 18).
A sea area can only be controlled by a ship. Then it can be used for various actions (recruit, produce, move, etc.). Characters may only move onto a sea area when it is controlled by one of their ships.
Example: Denise places her ship and one soldier that was still on her sea card in an unexplored sea area. Then she hires two additional soldiers for a total of 2 gold and puts them in the same sea area. The maximum number of characters in this area is reached. The sea area is now flipped over, and she controls it. Next, she places the three soldiers in an adjacent unexplored area. This triggers an exploration of this area and the land action ends thereafter.
Move
Let your men strive through the thicket of the isle and explore it. But beware of dangers and your adversaries, whom you will have to appease with negotiations or defeat in combat.
The active player chooses a target area and may now move up to 3 of their characters into it. The following rules for moving apply:
- Your own characters may only move through or onto your controlled areas (including sea areas) and may not move through unexplored or enemy areas.
- Characters may only move onto unexplored and enemy areas if it is the target area.
- You may not move your characters across or into areas that already contain 3 of your characters.
- Moving a character costs one ration for each area it is moved. The spent rations are immediately returned to the supply.
Characters may never be moved to enemy sea areas.
If the target area is an unexplored area, immediately perform an exploration (p. 16). If the area is already controlled by the active player (p. 8 "Game Terms") they may place characters into it until the maximum of 3 characters is reached. If the characters have been moved to an enemy area (p. 8 "Game Terms") immediately perform a combat (p. 18).
Each time the consequence of moving into a target area has been fully resolved, the active player may choose an additional target area and again move up to 3 of their characters to the new area. The new target area may be the same area again and you may move characters that have already been moved this turn.
This is repeated until the active player either decides to end his move action or cannot spend any more rations on moving. In either case, the move action ends.
It is important that moving into a target area is always resolved completely before a new target area may be selected and characters are moved.
Example: Thomas selects an unexplored area for his move action (1). He spends one ration to move soldier A from an adjacent area into the target area. Additionally, he moves soldiers B and C by two areas into the target area. Moving soldiers B and C costs 1 ration per soldier and per area moved, for a total of 4 rations. Thomas then performs an exploration of the unexplored area and thus resolves moving into the target area. He then selects an enemy area as a new target (2) and spends 2 rations to move soldiers A and B into it which immediately triggers a combat. Once the combat has been resolved, Thomas could perform additional movements and only when he decides not to or when his rations are all spent does the move action end.
Recruit
Newly trained men are immediately available in your controlled areas and do not have to be painstakingly moved there.
The active player may place any number of characters in their controlled areas by spending 1 gold per soldier and 2 gold per captain.
If the player runs out of characters in their pool, they may not recruit additional characters.
There may never be more than three of your characters in an area at the same time.
Example: Denise recruits 1 captain (A) and 1 soldier (B) by spending 3 gold. She places her captain on area C and her soldier on area D. She could not place both in area C because with the captain it already contains 3 of her characters and the maximum is reached.
Supply
Don't be shy about ordering more resources from the mainland to advance your schemes on the isle.
The active player may immediately place up to 2 resources of their choice onto their sea card.
If resources are on the sea card they do not count towards the resource pool of a player and cannot be used or spent.
Example: Thomas performs a supply action and chooses to place 1 gold and 1 ration (A) on his sea card (B). The next time he performs a land action, the resources on his sea card will go into his pool and he may use them.
Produce
Your controlled areas permanently supply you with fresh resources that are essential for your survival on the isle.
The active player gains the resources shown on the area tiles of all their controlled areas:
- Gain 1 gold for each gold symbol on a controlled area tile.
- Gain 1 ration for each ration symbol on a controlled area tile.
- Choose to gain either 1 gold or 1 ration for each bag symbol on a controlled area tile.
All resources gained through a produce action are immediately put into your pool and may be used immediately.
Example: Alex controls areas A, B, C and D. By performing a produce action, area B generates 1 ration, area D 1 gold and area A and C each generate 1 resource of his choice; he chooses 1 gold and one ration. He therefore places a total of 2 gold and 2 rations into his pool.
Player Board - Competitive Side
All previously described actions are valid for the competitive play mode and are part of the competitive side of the player board. When playing the solo or cooperative modes, the cooperative side of the player board is used as described in the chapter "Solo/Cooperative Rules" (starting from p. 25). On this side of the player board you will find a new "Pacify" action that is described on page 25.
Perform Explorations
Explorations are necessary when your men move onto unexplored areas. Explored areas cannot be explored a second time.
First, the active player draws an exploration card (A) and reads out its text (B). All special rules on this card are applied to the current area for the duration of the exploration. The exploration card is then discarded face-up on the discard pile (C).
Some exploration cards have the keyword "KEEP". These are put to a player's hand and may be used at a later time (as described on the card).
The area tile is then flipped over and the colored area value determines how the area can be explored:
- White area value: The player may choose combat (p. 18) or negotiation (p. 20).
- Red area value: A combat (p. 18) is resolved.
There are the following types of area tiles:
Sea Areas
Sea areas can only be explored by ships and remain face-up as an explored sea area for the rest of the game once they have been explored.
When exploring a sea area, no exploration card is drawn.
Minions & Bosses
- The 1 scratch symbol on a green background refers to the minion on the level 1 minion field (A).
- The 2 scratches symbol on a yellow background refers to the minion on the level 2 minion field (B).
- The 3 scratches symbol on a red background refers to the minion on the level 3 minion field (C).
- The skull symbol on a purple background refers to the boss on the boss field (D).
Each minion and boss possesses their own special rules as described in their card text (E). These are applied during the exploration of the current area.
Locations
If a location tile is flipped over, it gets removed from the game and a random location tile from the location bag is drawn. This new tile is placed into the current area and the exploration continues normally. As soon as a location tile has been successfully explored it remains face-up for the rest of the adventure.
When a player controls a location they place the corresponding location card in front of them and benefit from its special effects for as long as they control it.
Terrain
If a terrain tile is flipped over it gets removed from the game and a random terrain tile from the terrain bag is drawn. This new tile is then placed into the current area and immediately counts as explored. It remains face-up for the rest of the adventure.
River: All characters in the current river area must be moved to an adjacent area immediately. This movement is free and is resolved as a new movement (select target area, resolve combats or another exploration, etc.).
This is also the case when an already explored river area is selected as the target area of a move action and characters are moved onto it (which is always possible).
All areas adjacent to a river area also count as adjacent to each other.
Swamp: When moving characters out of a swamp you need to spend one additional ration over the total of rations required for that movement.
Mountain: A player exploring a mountain may immediately raise a camp within this area. As long as a player controls a mountain area through a camp he may re-roll one attack die once per round of combat in any of their combats in adjacent areas.
Successful and Unsuccessful Explorations
An unexplored area changes to explored when a player successfully negotiates (p. 20) or wins a combat (p. 18) in this area. It automatically becomes a controlled area for that player and remains so whilst the player maintains figures in this area.
If the active player does not have any figures in a target area at the end of the exploration, the exploration failed. In this case, the current area tile is exchanged with a new face-down area tile of the same type (green, yellow or red) from the pool and continues to be an unexplored area.
Example: Thomas spends 2 rations to move 2 soldiers (A) onto an adjacent river area (B). This means they must immediately be moved to another area adjacent to the river area for free. Thomas places them on an unexplored yellow area (C) and draws an exploration card. He applies all special rules from the exploration card for the duration of this exploration. He then flips over the area tile and encounters the level 1 minion (D) with an area value of 3. As the value is in white, Thomas may now negotiate or fight. The area counts as explored if his negotiation is successful or if he wins the combat. If he is unsuccessful, the area tile is immediately exchanged with a new face-down yellow area tile from the pool.
Combat
A combat is triggered each time:
- A player moves their characters onto an enemy area or an adventure area.
- A player encounters minions, bosses or locations and a negotiation is not possible.
During a combat, the active player counts as the attacker and all others (player controlling the enemy area, minions, bosses, etc.) involved count as defenders.
1. Determine Combat Dice
Players determine their attack and defense dice as follows:
- 1D6 for each of their soldiers involved in the combat.
- 2D6 for each of their captains involved in the combat.
- 1D8 for each of their camps involved in the combat.
Minions, bosses, and locations always gain as many D6 as shown by the area value of the current area.
Attackers and bosses then exchange one of their D6 with a D8.
2. Roll Combat Dice
All involved players roll their dice.
If this is a combat against minions, bosses, locations or adventure areas, the player to the left of the active player should take on the role of the enemy and roll the corresponding dice.
The player with the highest single die result wins the round of combat. Equal dice results from the attacker and the defender cancel each other and are not considered when determining the highest dice roll.
Each dice result can only cancel one enemy dice result. If all dice cancel each other, the defender automatically wins this round of combat.
3. Remove Casualties
The loser of a round of combat must remove one of their figures from the current area and places it back into their pool.
Minions, bosses, locations and adventure areas instead reduce their area value by 1, which effectively means that you remove one of their combat dice. A D8 may only be removed when it is the last option.
4. Subsequent Rounds of Combat
If there are still figures belonging to the attacker and the defender in the combat area, or the area value of minions, bosses, locations or adventure areas have not yet been reduced to 0, a new round of combat is started. In this case, repeat all previous steps (1-3).
Please note that the loser of a round of combat also reduces his amount of combat dice due to the casualty taken!
5. End and Result of Combat
A combat ends when either:
- Only the attacker has figures in the combat area and the area value of minions, bosses, locations or adventure areas have been reduced to 0. In this case, the active player counts as victorious and the area counts as being conquered. The active player immediately places the resources shown on this area tile into their pool.
- The attacker has no figures left in the combat area. In this case, either the defenders (including minions, bosses, locations or adventure areas) have been victorious.
If the defender was successful, nothing else happens.
If minions or bosses have been victorious, the current area tile is placed face-up on the corresponding discard pile (A) and exchanged with a new face-down area tile (B) of the same type (green, yellow or red) that again counts as an unexplored area.
Retreat
At the end of each round of combat, it is possible to retreat and prematurely end the combat. First, the defender must declare if he wishes to retreat, then the attacker.
When retreating, a player must place all their remaining characters from the combat area into an adjacent area they control (including sea areas). This does not count as movement and does not cost any rations.
Camps may never retreat and count as being immediately destroyed when retreating.
If a player does not control an adjacent area they may not retreat from a combat.
Minions, bosses, locations and adventure areas never retreat.
Combat Example
Thomas explores an area with 2 soldiers and 1 captain. He encounters a boss with a red area value of 3. A red area value automatically triggers a combat.
1st Round of Combat: Thomas' characters generate 4D6. Since Thomas is the attacker, he may exchange one of them with a D8 and therefore gains 1D8 and 3D6 attack dice.
The boss gains 3D6 based on the area value. Because it is a boss, it also exchanges one D6 to a D8 for a total of 1D8 and 2D6 defense dice. Denise sits on the left side of Thomas, so she rolls the dice for the boss.
Result (C): With her first roll, Denise scores a 7 as her highest result. This result is higher than any of the dice results of Thomas' roll (5, 4, 3, 1). Denise wins the round of combat and Thomas must remove one of his characters from this area as a casualty. He places one soldier back into his pool.
2nd Round of Combat: Because of the casualty, Thomas' attack dice are reduced to 1D8 and 2D6.
Result (D): The two 6s and 5s cancel each other and since Thomas' 2 is higher than Denise's 1, he wins this round of combat. Denise removes one D6 of her defense dice to show that the area value of the boss is reduced by 1 for this combat.
3rd Round of Combat: Result (E): Denise manages to score the highest dice result by rolling a 6. Thomas places his second soldier back in his pool. Thomas feels that continuing the combat with just his captain is too risky and so he decides to retreat. He places his captain into an adjacent area he controls and the combat ends immediately. The empty area tile is exchanged with a new face-down tile of the same type and counts as an unexplored area again.
Negotiating
Each time a player explores an area with a white area value they may choose to negotiate instead of initiating a combat.
To successfully explore an area through negotiation, a player needs to spend an amount of gold equal to its area value.
Negotiating is a convenient alternative to fighting. But there is a slight drawback to it because the area will not count as conquered and you don't receive the shown resources on the area tile. Additionally, you are not able to raise a camp as you will learn in the following section.
If a player does not possess enough gold to successfully perform a negotiation, this is not an option and a combat is triggered automatically.
Example: Alex explores an area and encounters a minion with a white area value of 2. Instead of fighting it, he decides to pay 2 gold and successfully explore the area through negotiation.
Camps
Raise a Camp
Each time an area is conquered through combat, the active player may immediately place a camp in the conquered area.
The empty camp field on the player board must then be occupied by a soldier from the player's pool. A soldier occupying a camp field is not part of the player's pool and cannot be used.
An experienced captain understands the relationship between his soldiers and his camps on the isle. The more camps you raise the fewer soldiers you have available for your expeditions.
If a player does not possess any more soldiers in their pool, they may place a soldier from the current area onto the empty camp field of the player board.
Example: Denise just conquered an area through combat and immediately places a camp on it (A). To fill the empty camp field on her player board she must place one soldier from her pool into it (B). This soldier may not be used whilst it is occupying the camp field.
Destroyed Camps
Each time a camp is destroyed it is placed back into the player's pool, except when another player destroys a camp in which case it counts as raided (see below). Simply remove a destroyed camp and put it back on a camp field on the player board. The soldier currently occupying the camp field is returned to the player's pool.
Abandon a Camp
A player may abandon one of their camps at any time during their turn. To do this, treat the abandoned camp as being destroyed.
Let's assume that Denise has no more camps left that she could raise. She could immediately abandon another camp of hers to place it in the current area she just conquered.
Raid Camps
If a player destroys an enemy camp, they immediately place it on one of their raid fields on their player board (A).
Each time an active player raids a second camp both camps are returned to the pool of their controlling players.
The active player may then take one resource of their choice per returned camp from each player they returned a camp to (if they have any available).
Strategy Cards
Be wary of the other players and ensure they don't spy on you! Keep your strategy cards to yourself for the whole game!
The special rules on strategy cards can be used to manipulate specific game situations.
There are two types of strategy cards:
- Action: may be used at any time during your turn.
- Reaction: may be used at any time, even during other player's turns.
Played strategy cards are put face-up on the left side next to the player board to show which effect is currently active.
Each time a player plays a strategy card, place it on top of any card on the left that is currently still active. A player may only ever benefit from one strategy card effect at a time so by placing additional cards on top of previous ones, the old ones are clearly inactived.
After the effect of an active strategy card is complete, move all played cards to the right side of the player board where they form a discard pile.
Example: Alex plays a strategy card with an effect that lasts for his whole turn. Later in his turn, he decides to play another strategy card with an immediate effect. This one is placed on top of the previous strategy card canceling the previous effect. Once the current card effect is resolved, both cards are put on the right side of the player board to form a discard pile.
Re-roll Dice
In addition to playing them for their special rules, strategy cards may also be used to re-roll any number of your dice once after a dice roll. To do so, discard any one strategy card without using its effects and place it on your discard pile to the right.
Strategy cards may only be played whilst the captain of this player is present on the game board. This also applies to using strategy cards in order to re-roll dice.
Adventure Progress
Each adventure offers players different options on which to focus in order to earn progress points which in turn earn victory points.
Adventures always define three progress tasks (A-C) each with their own progress bar (D-F).
If a progress task is accomplished for the first time, the successful player places their progress token (G) on the first field of the respective progress bar.
If the same progress task is accomplished again, move the progress token by X fields to the right where the exact number of fields is mentioned in the adventure description.
If a progress token reaches the end of a progress bar, no more additional progress in this progress bar is possible.
Missions
Certainly you must already be asking yourself what these face-up missions are for that everyone gets at the beginning of the game.
Each time a player accomplishes a condition on their mission card (A), they may put a success token (B) on it.
If there are as many success tokens on the mission card as its mission value (C), the mission counts as fulfilled. After fulfilling a mission, the player may place their mission token (D) on the first field of the mission bar (E) and may move it up one field to the right for each additional mission they fulfil.
If the mission token reaches the end of the mission bar, no more additional mission progress is possible.
Enforce Missions
Most missions allow for placing a success token on them without accomplishing the mission task. This is possible through enforcing a mission:
After a player places their action token they may forego their action to immediately place a success marker on their current mission.
New Missions
As soon as a player fulfills a mission, they place the mission card on its discard pile (A) and draw a new one (B). The new mission is placed face-up in front of them and can be fulfilled from now on.
Your previous deeds are inconsequential for your new missions and do not count as successes. You will have to earn new successes for each new mission.
Strengthen Morale
Each time the mission token of a player hits a morale field (A), this player may move one of their progress markers by one field to the right.
Example: Denise gets a success token for her mission every time she conquers an area. Previously she enforced her mission by placing an action token on one of her free action fields without using any action. This gained her one success token for her mission. With her current action she conquered an area and gains her second success token. Since her mission card requires 2 success tokens to be fulfilled, she just fulfilled her mission. She immediately moves her mission token to the next morale field and may immediately move one of her progress tokens one field to the right as well. She discards her mission and draws a new one that says she must raise camps to fulfil it. Denise raises a camp in the area she just conquered and gains her first success token for her new mission.
Victory Points
As so often, usually the goal of the game is to be the player with the most victory points by the end of the game.
You always gain one victory point when:
- You accomplish specific adventure objectives as described in the adventure.
- You destroy the captain of another player or a boss.
- You raid two camps of any enemy players.
- A progress or a mission token hits a victory point field (A).
When a player earns their first victory point, they place their victory token (B) on the first field of the victory point bar (C). When a player gains additional victory points the token is moved on by the specific number of fields.
If a player ever reaches 16 victory points they will receive 3 resources of their choice each time they would gain another victory point.
Special Game Situations
Minion Attacks
Sometimes explorations trigger minion attacks and the more victory points a player has gathered, the worse the consequences may be!
When an exploration card with a minion attack is drawn, the active player rolls the described number of dice. For each dice result that is equal to or higher than the threat bar value (A-D) indicated by a player's victory token on the victory point bar, this player must remove one of their characters or camps from the game board and return them to their pool.
Example: During an exploration, Alex draws an exploration card with a minion that attacks with 2D6. He rolls both dice and compares the results of 5 and 6 with the threat bar. Alex's victory point token is positioned in the first row (A) and he loses one character or one camp for each die result of 6+. He decides to remove one of his soldiers. The victory tokens of Thomas and Denise are already positioned in the third row of the victory bar (C). They lose a character or camp for each dice result of 4+, so they both lose one character or one camp each for the rolled 5 and another one for the 6.
If a player's victory token is not yet on the victory point bar, they are not affected by a minion attack. In addition, when a player has no characters or camps left on the game board, they are not required to remove any due to a minion attack.
Random Movement
Certain special rules cause a random movement to be performed. If so, the active player rolls a D6 and compares the result with the compass rose on the top edge of the game board. They then move all characters that were part of the move action into the adjacent area determined by the dice roll and the compass rose. The new area is resolved as if this has been the target area for the move action (e.g. draw an exploration card, trigger a combat, etc.).
If there is no valid area in the determined direction, the characters remain in the current area and are not moved.
Trade Resources
If you should run out of rations or gold you are able to trade with the natives.
The active player can trade gold for rations and vice versa at any time during their turn:
- Pay 2 gold to gain 1 ration.
- Pay 2 rations to gain 1 gold.
Uncontrolled Explored Areas
Each time there are no more figures on an explored area (e.g. when all figures have been moved out of it or are destroyed) this area tile will be placed face-up on the discard pile (1). A new area tile of the same type (green, yellow or red area tile) is then drawn and placed face-down on the area where it counts as an unexplored area again.
Empty Card Decks and Area Tiles
As soon as the last card of a deck or the last area tile of an area pool has been drawn, the specific discard pile is reshuffled and made available as a new card deck or area pool.
Characters in Unexplored Areas
In some situations, it may happen that there are already characters in an unexplored area that they wish to explore. In such a case this can be done normally through a move action in which this area is defined as the target area. For characters already in this area, no further rations need to be spent because they do not need to be moved there.
Strategy Cards in a Combat
In a combat between two players, the attacker must decide to play action strategy cards first. Then both players may play any of their reaction strategy cards in any order.
The effects of the strategy cards stack and are resolved in reverse order, meaning that the last one played triggers first continuing with the previous one etc.
Solo/Cooperative Rules
The following paragraphs describe only the changes necessary for a cooperative game. Unless modified by the rules below, all previously explained rules for the competitive gameplay remain the same. A solo game also counts as a cooperative game. The player can choose freely whether to play with one faction or several factions at the same time.
Player Materials
When setting up the game, each player places the cooperative side of their player boards in front of them.
Actions
The order of the actions and action fields during the cooperative mode differ to those in a competitive game. In addition the move and supply actions are modified and a whole new action, pacify, exists:
Move: When performing a move action you may no longer make multiple, sequential moves as part of the same action. Instead you may only move characters to a target area once per move action. After this first target area has been resolved, the move action ends immediately.
Supply: The active player may place two resources of their choice on their sea card, just like before. However, they may instead choose to trade resources with another player. In this case the active and the target player may exchange any number of resources from their pools.
Pacify: The active player may immediately reduce the level of one terror (see Terror) to level 1.
Allies
During a cooperative game, the areas controlled by all players are considered allied areas. Players may move their characters to allied areas at any time and may also retreat to them. This will never trigger a combat. In addition there may only be a total of 3 characters in one area at the same time, even when they belong to different factions.
If there are figures of different factions in the same area, this area counts as being controlled by each player who has figures in it.
In a combat with figures of different factions, they all count as belonging to the same faction.
Players may discard their "Reaction" strategy cards to allow an allied player to re-roll any of their dice ones. However, those allies may never benefit from these card's effects.
The starting player and the order in which players act can be chosen freely. The only important rule is that all players must have performed the same amount of actions before any player may perform an additional action.
Terror
For the cooperative game the so called terror board is used. It represents the additional threat from the inhabitants of the different islands.
There are three terror tokens (A-C) on the terror board, each of them marking one of the terrors. Each terror has a name and an ability (D) that determines how the corresponding terror marker acts during the game.
In addition, all terrors have a terror level from 1-3 (E). The current level of a terror is always shown by its terror level token (E) which marks its current area value (F) and its effect range (G). Each terror begins the game at terror level 1.
Summon a Terror
Don't worry, a terror will only become a threat once its token is on the game board. Though this could be the case more swiftly than you might wish...
Each time a colored exploration card (A) is drawn, the corresponding terror token (B) is placed on top of the current area tile (C) if not already in play. The exploration card is resolved normally but the area cannot be explored further in this round and the exploration ends immediately.
Since the exploration ends immediately, it is not possible to fight the terror during the same exploration.
Fighting a Terror
Combat against a terror follows the regular rules for combat. A terror is always treated as a boss, which means it exchanges one of its D6 to a D8 and you gain a victory point whenever you defeat a terror.
The area value of a terror used for a combat is the one marked by its current terror level. In this case it would be: Level A = Area value 3; Level B = Area value 4; Level C = Area value 4.
Whenever you lose a combat against a terror you immediately lose one victory point.
You may never retreat from combat against a terror.
Raise/Reduce the Terror Level
The more you venture forth on the isle, the greater the chance you'll enrage its inhabitants!
Each time a colored exploration card is drawn when the corresponding terror token is already in the game, its terror level is raised by one. [Erratum: the terror level only rises on colored exploration cards WITH an exclamation mark, per the publisher's errata thread.]
By using the action "pacify" the level of a terror can be reset back to the level 1.
A terror level may never be raised above level 3 and may not be reduced below level 1.
Activating a Terror
I warned you... Let's hope you can escape the wrath of the isle!
As soon as the last player of a season has ended their turn (before the "end of the year" phase takes place) all terror tokens in the game activate. Terror tokens activate and resolve from left to right on the terror board. [Erratum: "end of the year" should read "End of a Season".]
As long as not stated otherwise, a terror token moves by one area in a direction determined by its ability and is then placed on top of the new area tile. Note that only one terror token may be in any area at any time.
If there are multiple movement options for a terror token, the players choose which way it goes. If a terror cannot move to a valid area it will remain where it is and its movement is skipped.
Then the rest of its ability text is resolved, after which the following terror token is activated. Once all terror tokens have been activated, the terror activation phase ends.
While a terror token is on top of an area tile this area may not be explored and no player may control it. It is still possible to move into an area with a terror token, but this will then always and immediately trigger a combat against that terror.
Effect Range
The effects of the different terrors only apply to certain areas. Which areas are affected is determined by the effect range of each terrors' level.
The center of the diagram (A) shows the area in which the terror is currently located. The affected areas are determined with respect to the current area (B). Unless all adjacent areas are affected, the affected areas are determined by comparing the diagram with the compass rose. The "1" within the diagram (C) shows the adjacent area that corresponds with the "1" of the compass rose.
Example: Denise just finished her last turn for this season and both the yellow "marauders" terror token and the red "devestators" terror token are in the game and therefore activated. Due to their ability, the marauders move into a random adjacent area and all players in effect range lose X resources. Next the devestators activate, moving one area towards the area with the most figures and inflict X casualties in effect range. Next it would be the activation for the purple "Savages" terror token, but since this terror token is not in play the activation of terrors is over and the end of the season is resolved.
Additional Activations
An angry mob is hard to control...
If a terror has already reached level 3, drawing any further exploration cards in its color will immediately trigger an additional activation of this terror. This additional activation interrupts the current turn of the active player and is resolved completely before the active player may continue with their current action and their turn.
Example: The "marauders" are on terror level 2. Alex just explored an area and drew a yellow exploration card. This raised the terror level of the marauders by 1, bringing it to level 3. In the following turn Thomas draws a yellow exploration card too, this activates the marauders as they are already at the maximum terror level. The marauders immediately move one area in a random direction and apply their ability effect. They then end their additional activation and Thomas continues his turn normally.
Destroy a Terror
Sometimes attack is the best form of defense, because you may keep the terror at a distance and even reduce its threat.
Every time a player destroys a terror, they immediately gain one victory point. In addition, the terror token is removed from play and returned to the terror board. Its terror level is reset back to level 1.
A destroyed terror will be summoned again the next time an exploration card in its color is drawn.
Escaping the Terror
Characters in the same area as a terror may not leave it. Moving out of such an area is only possible once the terror has been destroyed.
Acute Terror
Be careful as it is possible for a terror to move in secret and surprise you on your next exploration!
Each time an exploration card with an exclamation mark is drawn (A), the corresponding terror token is immediately placed in the current area, even if the terror token was already in play. When the terror was already in play, also increase its terror level by one after it has been placed.
Captains
If the captain of a player is destroyed or retreats from a combat, that player immediately loses 1 victory point.
Victory Conditions
In cooperative mode the victory conditions differ from those of a competitive game. Each adventure will detail the specific victory conditions for all game modes.
Game Summary
Areas
- A face-down area counts as an unexplored area.
- A face-up area counts as an explored area.
- An explored area with your own figures in it counts as a controlled area.
- An explored area with enemy figures in it counts as an enemy area.
Fortune Phase
- Draw an event card for the current season (p. 9).
- Players draw 1 strategy card (p. 9).
Action Phase
- Place an action token, choose a valid action and check for bonus resources, adding them to your sea card (starting from p. 12):
- Land: Place your ship in an uncontrolled sea area and transfer all resources from your sea card into your pool. Hire up to 3 characters (1 gold per soldier, 2 gold for a captain). Then place them into an adjacent area and resolve the tile.
- Move: Move characters for 1 ration per area crossed and per character.
- Recruit: Place additional characters (1 gold per soldier, 2 gold for a captain) from your pool into any of your controlled areas.
- Produce: Gain all resources shown in your controlled areas.
- Supply: Choose 2 resources and place them onto your sea card. Solo/Cooperative: exchange any amount of resources with another player.
- Pacify: Set one terror level back to level 1.
- When you move characters onto an unexplored area you draw an exploration card (excepting sea areas) and resolve it. Then flip over the area tile (p. 16):
- White area value: you may negotiate or trigger a combat. To negotiate, spend as much gold as the area value, or you must trigger a combat.
- Red area value: trigger a combat.
- In a combat, the highest die result wins, while equal dice results cancel each other out (p. 18):
- 1D6 per soldier, 2D6 for a captain.
- 1D8 for a camp.
- Minions, bosses, locations and adventure areas gain a number of D6 equal to the area value.
End of a Season
Resolve the following steps in the given order (p. 11).
- Resolve appropriate effects.
- Return all ships to their sea cards.
After winter:
- Players lose 4D6 resources (threat bar).
- Discard all strategy cards and reshuffle them.
- Check for end of game and, if so, determine the winner.
- Start a new season or, if winter, a new year.
Notes
- Use your strategy cards wisely (remember their re-roll effect).
- Don't forget about the progress bar and try to advance your progress token.
- Fulfill missions to get new ones.
- Enforce missions to automatically gain a success token.
- Don't forget that you can trade resources.