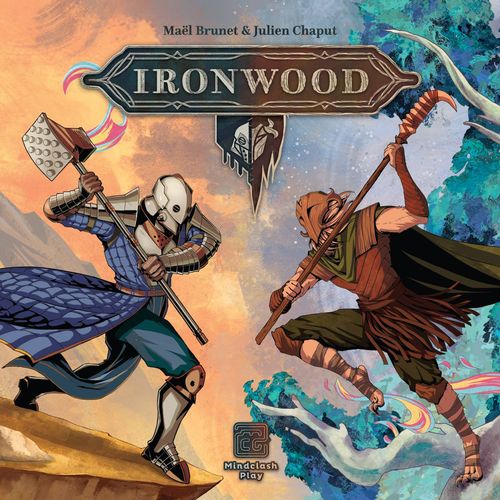
Ironwood
Ironwood Rulebook
Table of Contents
Table of Contents
- General Overview
- Components
- Setup
- Action Cards
- Round Steps
- Faction Units
- Map and Movement
- Combat
- Ironclad's Path to Victory
- Woodwalkers' Path to Victory
- Solo Mode - Against the Ironbot
- Solo Mode - Against the Woodenbot
- Beginner-Friendly Mode
- Keywords
- Iconography
General Overview
Ironwood is a highly asymmetric, card-driven tactical game for 1-2 players. Each round, you and your opponent alternate playing a total of 3 of your faction-specific cards for their action effects. These effects include positioning your warbands, initiating combat, extracting crystals, bestowing temporary passive effects, and more. When combat occurs, you will use the same cards for their combat values instead, in a simultaneous bid to gain combat bonuses, inflict and fend off casualties, and augment the Dominance value of your warbands to win the combat.
As the Commander of the Ironclad, your primary goal is to lay down the foundations of your forges in the outer mountains and, once you have collected enough crystals, build forges on the foundations. As the Chieftain of the Woodwalkers, your mission is to locate your people's ancient totems through Vision cards, clear the path to them by defeating Ironclad warbands, and finally secure them in the outer forests, beyond the Ironclad's reach. Once you have retrieved the third totem as the Chieftain, or built the third Forge as the Commander, you immediately win the game.
Components
Common Components
- Main board
- 20 crystals
- 20 markers
Solo Components
- 1 Ironbot Turn Procedure card
- 1 Magic die
- 1 Bot Control Aid
Ironclad Components
- 1 player board
- 3 base cards
- 20 Ironclad Fighter metal tokens
- 5 Forge metal tokens
- 1 Drill metal token
- 35 special cards
Woodwalker Components
- 1 player board
- 3 base cards
- 20 Woodwalker Fighter wooden tokens
- 5 Totem wooden tokens
- 10 vision cards
- 35 special cards
Players are limited by the components available. If any effect requires you to gain or place into play one of these when there are none left, simply ignore the effect.
Setup
- Choose or randomly determine who will play which faction, the Ironclad or the Woodwalkers.
- Place the main board in the middle of the playing area with the 2-player side up.
- Each player takes their faction's player board with the 2-player side up.
- Each player takes their faction's 3 base cards (indicated with a star).
- Each player shuffles their faction's deck of special cards and places it face down next to their player board as indicated.
- If you are the Chieftain of the Woodwalkers: a. Shuffle the 4 vision cards showing an inner forest (and 3 crystals in the upper left corner) and randomly draw 1 of them. Keep it secret. b. Then, shuffle the 3 remaining vision cards showing an inner forest with the rest of the vision card deck and place the vision deck face down onto your player board as indicated. c. Place 2 Woodwalker Fighters on each outer forest (forest area adjacent to the edge of the board). d. Place the Totems and the rest of your Fighters near your player board.
- If you are the Commander of the Ironclad: a. Place the Drill on Ferrum. b. Place 1 Ironclad Fighter on Ferrum and 3 Ironclad Fighters on each of the inner mountains directly connected to Ferrum. c. Place all Forge tokens onto your player board. d. Place the remaining Fighters and Golems near your player board.
- Create the common supply by placing all markers and crystals near the main board, within reach of both players.
Action Cards
The essence of Ironwood is the faction specific action cards around which the gameplay is centered.
Both factions have a deck of 38 action cards consisting of 3 base cards and 35 special cards, and they are completely different from the opponent's deck.
During the game, you will play these action cards from your hand to perform their effects and battle your opponent.
Anatomy of a card
- Title of the card.
- The combat values that are used only if the card is wagered (see Combat on page 16) in combat. a. Damage: the amount of damage this card deals to your opponent. b. Defense: the amount by which this card reduces incoming damage. c. Dominance: the amount this card contributes to the sum total of your Dominance at the end of the combat.
- Effect box including the effects that are resolved only if the card is played as an action. a. Keywords. Some basic rules appear as bold text in the description of a card effect. Explanation of the keywords can be found at the back of the rulebook. b. Icons. Some game elements appear as pictograms in the description of a card effect. Explanation of the icons can be found at the back of the rulebook.
- Solo icons: these are used only if you play solo.
Base cards
Both factions have 3 base cards. These cards have the most essential effects you will need during the game and they are always available for you to use at the start of each Action Phase.
IMPORTANT: The base cards are never shuffled into the draw deck or moved to the discard pile. If they were played as an action or wagered in battle during the Action Phase, you will recover them at the end of the round to use them again in the next one.
Base cards are distinguished from the special cards by the dark color of the title banner, the different frame around the card effect, and most of all by the star icon above the card's effects.
Special cards
The special cards have more specific or enhanced effects and they make the gameplay for each faction more unique.
Unlike the base cards, special cards will be discarded after use. When played for their effect, the majority of special cards are resolved immediately and then discarded at the end of the round. However, some special cards have ongoing effects that may remain in play after the card is played. These are discarded later on.
Ongoing special cards
Ongoing special cards remain in play for a limited time. When you play one as an action, place the indicated number of markers on the card. As long as there is at least 1 marker on it, the card is considered in play and does not get discarded at the end of the round. Once the last marker is removed, it is exhausted and is discarded.
Some ongoing special cards provide a continuous benefit as long as they are in play; others take effect only when they get exhausted.
Round Steps
A game of Ironwood is played in rounds with each round consisting of three phases. While some phase steps can be resolved simultaneously, there are a few phase steps during which players must act in a strict turn order that can never be changed.
Turn order
When a phase step must be resolved in turn order, the Chieftain of the Woodwalkers always goes first, without exception, and the Commander of the Ironclad always goes second.
I. Preparation Phase
- Gain crystals
- Draw cards
- Remove markers (in turn order)
II. Action Phase
- Play 3 action cards alternately (in turn order)
III. Round End Phase
- Recover/discard cards
- Fade Totems
- Recruit Fighters (in turn order)
I. Preparation Phase
I/1. Gain crystals
The Chieftain of the Woodwalkers gains 1 crystal and the Commander of the Ironclad gains 2 crystals.
I/2. Draw cards
Each player draws the top 2 cards from their deck of special cards.
If it's the first round, you may draw 4 special cards instead, keep 2, and shuffle the other 2 special cards back into the draw deck. (If it's your first game, we suggest you draw only 2 cards and just experience how the game works.)
In the very rare case your draw deck is empty, re-shuffle your discard pile and start a new draw deck with it.
I/3. Remove markers
In turn order, remove 1 marker from each of your ongoing special cards in play.
If there are markers on the map that you placed there, remove them as well, unless they are part of an ongoing effect still in play.
NOTE: If you have more than one ongoing card in play and therefore several effects should be resolved at the same time, you may remove the markers and thus resolve their effects in any order you like.
As soon as the last marker is removed from an ongoing special card (i.e. it gets exhausted), resolve its effects (if relevant), then discard the card immediately.
If there are no markers on the map and no ongoing cards in play, skip this phase.
II. Action Phase
In this phase, you and your opponent take turns playing action cards until you have each played 3 cards. Follow turn order (i.e. Woodwalker always goes first, then the Ironclad goes second, then continue alternating).
On your turn, select and play a card from your hand and place it on the leftmost empty action card slot of your player board. Then, resolve the effects stated on the card and end your turn.
During card resolution, the effects must always be performed in the order in which they appear on the card. You may choose to completely or partially forfeit any of the effects (i.e. move with fewer Fighters/Warbands than indicated, skip the attack, etc.) as long as you follow the order in which they are laid out on the card.
IMPORTANT: Card effects including the Spend or Burn keyword must be resolved completely in order for you to gain their benefits.
If there is more than one card with effects to resolve, the player may resolve them in any order. This usually happens when an active ongoing card is triggered by a played action card.
If a card effect allows you to play an additional action card on the same turn, resolve the original card's effects first, then play and resolve the additional card. When played, place the additional card on top of the previously played card in a way that the title of both cards remain visible. Once the second action is resolved, your turn ends.
If you have no cards in your hand or you choose not to play any of your cards, draw 1 special card instead and end your turn. Place a marker on the leftmost empty card slot of your player board to indicate you spent your turn drawing a card instead of playing one.
III. Round End Phase
III/1. Recover/discard action cards
Take all the base cards back into your hand that were played or wagered during this round.
Ongoing special cards with marker(s) on them remain in play. Carefully move these cards and their markers above your player board so the action card slots become available again for the next round.
There is no limit to the number of ongoing cards you can have in play.
Discard all other special cards that were played as an action or wagered in combat during this round by moving them to the discard pile.
If you have more than 8 action cards in your hand (including base cards), discard special cards from your hand until you have a total of 8 action cards (including base cards and excluding vision cards). You may never discard a base card.
III/2. Fade Totems
If there are Totems on the map, flip them to their fading side.
If any of the Totems on the map are already on their fading sides, remove it from the map.
III/3. Recruit Fighters
In turn order, players can recruit as many Fighters as they wish, for 2 crystals per Fighter.
Woodwalker Fighters recruited in this phase are placed on one or more outer forests.
Ironclad Fighters recruited in this phase are placed on one or more mountains with a Forge.
Faction Units
Fighter
A Fighter is the standard combat unit and the only unit type the Woodwalkers have. Most of the time you will use your faction's Fighters to control locations and battle your opponent.
In combat, each Fighter has 1 Dominance. A Fighter is removed from the combat if it takes 1 Damage.
Drill
The Drill is the Ironclad's non-combat unit that is used for collecting magic crystals and gaining extra benefits for the Ironclad. It is never considered a combat unit.
In combat, the Drill is completely ignored (it does not have any combat value and does not take any Damage). For more rules about the Drill, see page 15.
Golem
A Golem is the Ironclad's special combat unit that can be recruited only with certain card effects.
In combat, each Golem has 1 Dominance and deals 1 Damage. A Golem is removed from combat if it takes 2 Damage.
Warband
A Warband is a group of one or more combat units positioned at the same location. There is no limit to the number of units in a Warband.
The Drill is never considered part of a Warband as it is not a combat unit.
Map and Movement
Locations
Mountains
Mountains are home to the Ironclad, who built their settlements on the highest iron mountains of the land and are named after the mountain they built on.
During the game, Ironclad units are always positioned on mountains and move only from one mountain to another along the mountain ridges connecting them.
Depending on their distance from Ferrum, mountains are either called inner mountains or outer mountains. Mountains directly connected to Ferrum are the inner mountains, and the ones further away (with a Forge slot on them) are the outer mountains. Foundations and Forges can only be built on outer mountains.
Forests
Forests are home to the Woodwalkers, and they are limited and bordered by the mountain ridges connecting the mountains.
During the game, Woodwalker units are always positioned on forests and they move only between adjacent forests. Adjacent forests are connected with a small path crossing the mountain ridge.
Depending on their distance from the center of the map, forests are either called inner forests or outer forests. Forests around the edges of the main board are considered outer forests; all the other forests are considered inner forests.
The outer forests are thick and dark; only Woodwalkers dare to wander there. Since the outer forests are beyond the reach of the Ironclad settlements on the outer mountains, the outer forests cannot be attacked and no battle can be launched from there, either. Therefore, Woodwalkers can discover Totems and attack enemy units only from the inner forests, and Ironclad Warbands can attack enemy units only if they are on an inner forest.
IMPORTANT: Under no circumstances may an Ironclad unit be on a forest or a Woodwalker unit on a mountain. There is no limit to the number of units that can be present at the same location.
Controlling a location
As long as you have at least one combat unit at a location of your affiliation (Woodwalker Fighters on forests, Ironclad Fighters and/or Golems on mountains), you control that location. As soon as the last of your combat units is moved, removed, or forced to retreat from that location, you no longer control it.
The Drill alone, unaccompanied by another combat unit, cannot control mountains, as it is not a combat unit.
A single Golem without any Fighters present can control a mountain, as it is a combat unit.
Foundations and Forges can be placed only on outer mountains that are controlled by at least 1 Ironclad combat unit. Foundations and Forges already on a mountain do not control mountains on their own; at least 1 combat unit must be present.
Example: You play the Woodwalker special action card Canopy Cover that allows you to move 4 Woodwalker Fighters. This card effect also allows you to play another base card in the same turn. You play the base card Ransack and you choose to resolve the effect that allows you to move 5 Woodwalker Fighters. With this second move effect, you may move all or part of the previously moved 4 Fighters again in the same turn.
Movement basics
When you play a card including the keyword Move, you can move units from one location to an adjacent one of the same type (from forest to forest or from mountain to mountain).
Each faction unit can only be moved once per turn. The only exceptions to this are the special action cards Tunneling (which allows you to move the Drill twice in the same turn), Dashing Spirits (which allows you to move the same 4 Fighters twice), and Canopy Cover (which allows you to move the same Fighters again in the same turn by playing an additional base card with Move effect).
Unit movement
Moving a Warband
Ironclad combat units always move in Warbands. When an action card instructs you to move a Warband, select one and move it from one location to an adjacent location of the same type. When moving 2 Warbands, select 2 different ones and resolve the Move effect for each of them separately.
When moving a Warband, you can choose all or part of the combat units positioned at the same location. If you choose to move only part of your Warband, the other part remains at the starting location: it cannot be moved to another location with the same effect.
The Drill is never a part of a Warband, as it is not a combat unit.
Moving a Fighter
While Ironclad combat units always move in Warbands, Woodwalker Fighters are moved individually. When an action card instructs you to move Fighters, select as many Fighters as indicated and move them from one location to an adjacent one of the same type. Regardless of whether the Fighters started in the same Warband or different Warbands, they can move to different locations.
The only time Woodwalker Fighters must move as a Warband is the Deceptive Bait special action card, which allows the Ironclad to move all or part of a Woodwalker Warband.
Moving a Golem
Golems can be moved only as part of a Warband movement, even if there are no Ironclad Fighters in the Warband.
Moving the Drill
Since the Drill is not a combat unit and it is never considered to be part of a Warband, it cannot be moved with Fighter or Warband movement effects. The Drill requires specific card effects to navigate.
Whenever the Drill is moved to a new mountain with no Forge on it, advance on the Drill track and gain the rewards indicated by the tracker's new position. If the tracker is already at the last step but you still make additional movements, leave your tracker on the last step and gain its rewards.
Drill track
- Starting position
- First step:
- Place 2 crystals on the Cargo area of your player board.
- Second step:
- Place 1 additional crystal on the Cargo area of your player board.
- Secretly look at the top card of the vision card deck and place it back on top of the deck.
- Recruit one Ironclad Fighter to the mountain where the Drill moved from.
- Third and subsequent steps:
- Place 1 additional crystal on the Cargo area of your player board.
- Draw 1 special card.
Crystals on the Cargo area cannot be spent for action effects.
Whenever the Drill arrives at a mountain with a Forge (including Ferrum), you neither advance on the Drill track nor gain the rewards for advancing on it. Instead, you must unload the Drill at the Forge.
When you do so, move all the crystals from the Cargo area to your available crystals on your player board. These crystals can now be spent for action effects. Then, reset the tracker to its starting position.
NOTE: You don't have to move the Drill to a different Forge to be able to unload it. You may return it to the same Forge where it started from and unload it there.
IMPORTANT: If a Forge is built at the mountain where the Drill is already located, the Drill must be unloaded (the Drill is considered to arrive at that mountain).
Combat
When you play a card with the keyword Attack, choose one of your Warbands to initiate a battle with enemy units at a location that is adjacent to the location of your attacking Warband. All combat units of both Warbands must participate in the battle.
Two opposing Warbands are considered adjacent if the forest and the mountain they are located at are in contact with each other.
IMPORTANT: Ironclad Warbands can never attack Woodwalker Warbands positioned on outer forests, and Woodwalker Warbands can never attack from outer forests.
Once a battle is initiated, determine if it involves combat or not. While usually a battle is initiated against an opposing Warband, there are certain cases in which a battle can still be initiated despite there being no enemy combat unit (see Attacking Ferrum and Destroying the Drill on page 17). In these special cases, although a battle can be initiated, no actual combat takes place (for the lack of enemy combat units) and the battle is automatically won without any combat. Therefore, no damage is ever dealt during a battle without combat.
If the battle does involve a combat to resolve (there are enemy combat units present), determine the role of each player: if your Warband is attacking, you are the attacker; if you are being attacked, you are the defender. Then, resolve the combat following the steps below.
Combat resolution
I. Wager card
- First, the attacker decides whether to wager a card or not. If so, the attacker chooses a card from their hand and places it face down on the table.
- Then, the defender decides whether to wager a card or not. If so, the defender chooses a card from their hand and places it face down on the table.
- Reveal the chosen cards at the same time and compare their combat values. For an easier comparison, place the two cards so that the values on them are next to each other.
II. Calculate Damage Output
-
The damage output of both players can be calculated simultaneously.
-
The damage you deal to the enemy Warband is based on the Damage value of your wagered card. Certain card effects in play can deal additional damage; Forges (including Ferrum) and Golems that are involved in the combat deal +1 damage each. Add these to your card's damage value to calculate the total damage you deal to your opponent.
NOTE: A Forge can deal additional damage if it is on the same mountain as the Warband participating in the combat, whether they are attacking or defending.
-
Reduce the damage you deal by the Defense value of your opponent's wagered card and any relevant card effects in play.
III. Deal Damage
- If you still deal damage after the damage reduction, remove combat units from your opponent's Warband. This can be done simultaneously. For each damage you deal, remove 1 enemy Fighter. If you want to remove an enemy Golem, you must deal 2 damage to it in a single combat. The player dealing the damage always decides how it is distributed.
If a Golem takes only 1 damage during a combat, that damage is not carried over to the next one.
You cannot deal damage to Totems, Foundations, Forges, or the Drill.
IV. Determine outcome
- If all combat units were removed from one of the two Warbands, the surviving player immediately wins the combat.
- If all combat units were removed from both Warbands, neither player wins.
- If both Warbands still have at least one combat unit left, compare total Dominance. First, calculate the Dominance value of your Warband by counting your remaining combat units. Each remaining combat unit contributes 1 Dominance. Then, add the Dominance value of your Warband to the Dominance value of your wagered card. If you have card effects in play that contribute additional Dominance, add them to your total Dominance value. The player with the highest total Dominance wins the combat.
- In case of a tie, the attacker wins.
Once the combat is resolved, the battle ends.
If you wagered a special card, discard it after the battle.
If you wagered a base card, place it below the discard pile. You will recover it during the Round End Phase.
Retreat
The winner of the combat may choose to force the entire defeated Warband (if any) to retreat to an adjacent location of the same type. The defeated Warband cannot be divided.
IMPORTANT: Relocating the defeated Warband this way does not count as movement. If a Warband cannot move due to a card effect in play, they still can be forced to retreat after a battle in which they were defeated.
If a Woodwalker Warband that has a Totem with it is forced to retreat, relocate the Warband but leave the Totem behind on the forest the Warband is forced to move away from.
Attacking Ferrum
As the Chieftain of the Woodwalkers, some of the card effects specifically instruct you to attack Ferrum. You can initiate a battle against Ferrum even if there are no Ironclad combat units present. In this case, you automatically win the battle without combat resolution.
NOTE: The Forge on Ferrum deals additional damage only in combat resolution. If there are no Ironclad combat units on Ferrum when the Woodwalkers attack it, no combat takes place and the Forge does not deal damage.
Destroying the Drill
Since the Drill is not a combat unit, it does not participate in any battles. If the Drill is on the same mountain as an Ironclad Warband participating in a battle, simply ignore its presence during the combat resolution. Therefore, the Drill can never be the target of any damage dealt and does not contribute to the Dominance value of the Ironclad Warband.
However, the Drill can be destroyed as a result of a battle.
If an Ironclad Warband was defeated (or completely removed) and the Drill was present on the same mountain that was involved in the battle, the Drill is destroyed after the battle.
As the Chieftain of the Woodwalkers, it is possible for you to attack a mountain with only the Drill present. In this case, you automatically win the battle without combat resolution and the Drill is destroyed.
Whenever the Drill is destroyed, the Chieftain of the Woodwalkers may take 1 crystal from the Cargo area on the Ironclad player board and add it to their own available crystals on the Woodwalker player board. Then, take all the remaining crystals from the Cargo area and return them to the common supply. Finally, reset the Drill tracker to its starting position and place the Drill on Ferrum (without advancing on the Drill track).
IMPORTANT: The Chieftain of the Woodwalkers can only take a crystal from the Cargo area if the Drill was carrying crystals at the moment it was destroyed and there was at least 1 Woodwalker Fighter left after the battle. If there were no crystals in the Cargo area when the Drill was destroyed or there was no Woodwalker Fighter left in the Warband participating in the battle, the Chieftain cannot take a crystal from the Cargo area.
Combat example
On their turn, the Chieftain of the Woodwalkers plays Hunter's Instinct. The Chieftain discards a card from their hand without resolving its effect to move 4 Woodwalker Fighters to the inner forest right next to Plumbarum. Then, the Chieftain decides to attack the Ironclad Warband there.
Since there are Ironclad combat units on Plumbarum, the combat must be resolved. First, the Chieftain of the Woodwalkers, who is the attacker with 4 Woodwalker Fighters in the attacking warband, chooses a card from their hand and places it face down on the table. Then, the Commander of the Ironclad, who is the defender with 2 Ironclad Fighters, 1 Golem, and a Forge on the attacked mountain, chooses a card from their hand and places it face down on the table. Once both cards are wagered, the players reveal them simultaneously and place them next to each other.
The Chieftain's wagered card Children of the Forest has a Damage value of 1 and there is no additional Damage to add to it. The Commander's wagered card Warmachine has a Defense value of 0 and there is no additional Defense, so the total damage the Chieftain deals is 1.
The Commander's wagered card Warmachine has a Damage value of 2. The Golem and the Forge each deal 1 additional damage for a total of 4 damage. The Chieftain's wagered card Children of the Forest has a Defense value of 2. The card Hunter's Instinct that initiated this combat provides 1 additional Defense for a total of 3 Defense. The 3 Defense reduces the 4 damage to 1, so the total damage the Commander deals is 1.
The Chieftain removes 1 Ironclad Fighter from Plumbarum (to remove the Golem, the Woodwalkers needed to deal at least 2 damage) and the Commander removes 1 Woodwalker Fighter from the attacking warband. Now, the Chieftain adds the number of the remaining Woodwalker combat units (3) to the Dominance value of their wagered card (2) for a total of 5 Dominance. Meanwhile, the Commander adds the number of the remaining Ironclad combat units (2) to the Dominance value of their wagered card (3) for a total of 5 Dominance.
The total Dominance value of both players is 5. Since the attacker always wins in case of a tie, the Chieftain wins this battle. They choose to force the remaining Ironclad warband to retreat, moving the Ironclad Fighter and the Golem from Plumbarum to an adjacent mountain of their choice. The Forge remains as it can never be destroyed, but if the Drill had been on Plumbarum during combat, it would have been destroyed and relocated to Ferrum.
Finally, since the Chieftain won this combat, they can resolve the last effect on Hunter's Instinct and steal 1 crystal from the Commander's available crystals (if any).
Ironclad's Path to Victory
As the Commander of the Ironclad, you can win the war against the Woodwalkers if you build massive Forges to swarm the land with endless armies that will eventually crush the tribes of the woods once and for all. In game terms, you win the game if you manage to build 3 Forges on the outer mountains before your opponent meets their victory condition. Usually, this can be done in two steps.
NOTE: It is possible for a player to surrender and give up the game. If your opponent does so, you immediately win the game without meeting your victory condition.
Foundations
To build a Forge, first you need a Foundation. If you play the base card Expansion, you can place a Forge token with its Foundation side up on an outer mountain you control, that has no Foundation or Forge yet. If you do not control an outer mountain, you cannot place a Foundation there. Foundations can neither be placed on Ferrum (it is considered to have a Forge already), nor on inner mountains.
NOTE: Foundations are never involved in any combat and they do not control a mountain without a Warband present. Foundations cannot be destroyed in any way.
Forges
Once you have a Foundation, you can build a Forge on it. If you control an outer mountain, have built a Foundation there, and also have at least 5 crystals available to spend, you can play the base card Reinforcement to build a Forge by flipping the Foundation to its Forge side.
Certain card effects allow you to build a Forge in a different way, ignoring parts of the process stated above.
NOTE: Forges do not control a mountain without a Warband present, and they cannot be destroyed in any way.
In addition to bringing the Commander of the Ironclad closer to winning, building Forges provides additional benefits:
- If a mountain is involved in a combat with a Forge on it, the Forge deals 1 additional Damage.
- More Forges give you more options for where to unload the Drill.
- When recruiting new Fighters in the Round End Phase, you can deploy them more flexibly with each additional Forge.
NOTE: Ferrum is considered to have a Forge already at the beginning of the game, thus providing the benefits stated above, but it does not count towards the 3 Forges you must build.
Woodwalkers' Path to Victory
As the Chieftain of the Woodwalkers, you can win the war against the Ironclad if you successfully secure ancient Totems from the secret ritual sites up on the highest iron mountains. These magical Totems are needed to summon the Guardian of the Forest, a mystical and powerful being able to wipe out the Ironclad from Ironwood once and for all. In game terms, you win the game you discover 3 Totems and secure them by moving them to the outer forests before your opponent meets their victory condition. Usually, this can be done in two steps.
NOTE: It is possible for a player to surrender and give up the game. If your opponent does so, you immediately win the game without meeting your victory condition.
Vision cards
To secure a Totem, first you need to discover one. In addition to the deck of special cards, the Chieftain of the Woodwalkers has a second one: the deck of vision cards. Each vision card indicates a mountain on which you can discover a Totem.
You can discover a Totem if the following conditions are all met:
- You have a vision card in hand.
- You have a Warband on an inner forest that is adjacent to the mountain shown on the vision card.
- The mountain indicated on the vision card is not controlled, meaning there are no Ironclad combat units on it. If there is only a Foundation or Forge and/or the Drill, that mountain is not controlled.
If these conditions are all met and you play an action card with the keyword Discover, you may reveal a vision card from your hand and place it next to your discard pile, visible to your opponent. If there is already a vision card next to your discard pile, place the played card next to it so all vision cards remain visible. The most common action card with the keyword Discover is the base card Visions, but there are other special cards that allow you to discover Totems.
If you successfully discover a Totem, add a Totem token with its full side up to the Warband you used to discover it. If the Totem was discovered on an inner mountain, you also gain 3 crystals. This is indicated in the upper left corner on the vision cards showing an inner mountain. You never gain crystals for discovering a Totem on an outer mountain.
Totems
Once a Totem is discovered, all you have to do is carry it to one of the outer forests, but there are a few rules regarding how to secure one.
Moving a Totem
Whenever a Fighter moves from a forest that has a Totem on it, that Fighter can take the Totem with it. Each Fighter can carry only 1 Totem at a time.
If there is another Fighter on the destination forest that has not moved yet and you can still move Fighters, the Totem can be handed over to the other Fighter and moved again with the same effect. Only Fighters are limited to moving once, not the Totem.
Securing a Totem
If one of your Fighters or Warbands successfully takes a Totem to an outer forest, it is immediately secured. Remove it from the main board and place it on your player board. It can no longer be taken away from you.
All your units remain on the board and you can continue to play as usual.
Once you secure the third Totem, you immediately win the game.
Losing a Totem
When a Warband carrying a Totem loses a battle and is forced to retreat as a result, the defeated Woodwalker Warband must leave the Totem behind on the forest they are forced to move away from. They cannot take the Totem with them.
If a Warband carrying a Totem is completely destroyed either in a battle or by a card effect, leave the Totem on the forest.
However, as soon as a Woodwalker Warband or Fighter enters an uncontrolled forest with a Totem on it, that Warband or Fighter can immediately pick it up and carry it.
Fading
When discovered, a Totem is removed from the ancient ritual site on the mountain. Once the Totem loses the magical connection with the site, its power begins to fade away. The only way to preserve the Totem is to take it to a Woodwalker ritual site deep in the outer forests before it loses all its power.
In game terms, if there are Totems on the main board in the Round End Phase, they must be flipped to their fading side, showing an empty Totem. If a Totem is already on its fading side in the Round End Phase, it is removed from the main board. This means once you discover a Totem, you have a limited time (the current round and the next one) to secure it.
Solo Mode - Against the Ironbot
In these rules, "you" refers to the lone human player playing as Woodwalker, and "it" refers to the Ironclad bot.
Setup
- Place the main board in the middle of the playing area with the solo mode side up.
- Place the crystals within reach.
- Take the Woodwalker player board and set out the Ironclad board with its solo mode side up.
- Take your 3 base cards and put them in your hand. Take the bot's 3 base cards and place it in a face down deck next to its player board where indicated. For simplicity, this deck will be referred to as the "bot's hand."
- From your own deck, remove cards with reference number WW17, WW19, WW22, WW36. Then, shuffle your deck and place it on the corresponding draw deck area of your player board. Do the same for the bot's deck.
- Shuffle the 4 vision cards showing an inner mountain and randomly draw 1 of them. Then, shuffle the 3 remaining cards with the rest of the vision cards to form the vision deck.
- Place 2 of your Woodwalker Fighters on all outer forests.
- Place the Drill on Ferrum. Place 1 Ironclad Fighter on Ferrum and 3 Ironclad Fighters on each of the inner mountains adjacent to Ferrum.
- Open the Bot Control Aid so the Ironbot Stances and Action chart is visible, and place it within your reach. Place a marker on the Expansive Stance; this is the Stance the bot starts the game in.
- Place the Ironbot Turn Procedure card (with the Alert side showing), and the Magic die within your reach.
- Place all the remaining components near the board, within your reach.
Victory Conditions
The victory conditions are unchanged from the core game rules. You win if you secure 3 Totems. If the Ironbot builds 3 additional Forges (besides Ferrum), you lose the game.
Round Summary
Preparation Phase
Gain crystals
No change from the core rules. You gain 1 crystal; the bot gains 2 crystals.
Draw 2 cards
No change from the core rules on your side. Draw the top two cards of your deck. If it's the first round, you may draw 4 cards instead, select 2 to keep, and shuffle the rest into your draw deck.
For the bot, draw 2 cards from its deck and keeping all cards face down, shuffle them into its hand (the three base cards).
Remove markers
No change from the core rules on your side. Remove 1 marker from all ongoing cards you have in play.
REMINDER: As soon as an ongoing card is exhausted, discard it.
The bot does not use ongoing cards, but may mark specific mountains to track the game state. Those markers are never removed.
Action Phase
You take your turn first, then the bot takes its turn, then continue alternating.
Your turn
Play your turn as normal, with the following minor additions.
- If you attack an Ironclad Warband, use the Combat Procedure described on page 26.
- After you discover a Totem, the Ironbot marks the mountain the Totem was discovered on.
- After discarding or burning a Vision card, the Ironbot marks the mountain corresponding to the discarded/burned vision card.
Bot's turn
At the beginning of each of the bot's turns, examine the stance change conditions on the open Bot Control Aid to determine the bot's Stance for the current turn. Move the marker onto the indicated Stance box below the stance change conditions.
On the bot's turn, perform its Turn Procedure, as currently shown on its Turn Procedure card. See Keywords and key concepts to learn how to perform certain instructions.
When directed to expend a card, place it face up on the leftmost empty space on the bot's player board. If instructed to resolve the icons of an expended card, look at the solo icons shown above the effect box. First, find the entry corresponding to the left icon on the Action Chart and resolve the corresponding effect. Then, repeat this with the right icon. Some entries show multiple effects in a bullet-point list: starting from the top bullet point, resolve the first one that is possible to resolve.
IMPORTANT: If the resolution of an icon results in no change to the game state or there are no valid targets for the effects of an icon, the bot gains 1 crystal as compensation.
NOTE: For your first few games, ignore the icons that appear in red (see "Increasing the difficulty" later on page 27).
If the bot's hand is ever empty on its turn, it draws one card (without revealing it), recreating its face-down hand with it, and ends its turn.
Round End Phase
Recover/discard action cards
No change from the core rules on your side. Take all your base cards back into your hand. Ongoing cards with marker(s) are moved above the player board. Discard all other played cards. Check your hand limit of action cards (8 including base cards).
For the bot, find any base cards it expended or wagered during the turn, and place them back onto its hand, then discard the played special cards.
Fade Totem
Discovered Totems on the board are flipped to their fading side, or if they were already on their fading side, they are removed.
Recruitment
No change from the core rules on your side. You can recruit as many Fighters as you wish, for 2 crystals each. Place them on one or more outer forests.
Then, if the bot has 5 or more crystals, it recruits Fighters (spending 2 crystals each) until it has fewer than 5 crystals left.
Use the following priority list when recruiting for the Ironbot, placing an Ironclad Fighter at the indicated location:
- Ferrum, if there are less than 3 Fighters in Ferrum
- The Forge with the smallest Ironclad Warband (including Ferrum)
- In case of a tie, use the Magic die (as explained in Keywords and key concepts)
Repeat this (evaluating where to recruit at again) until the bot stops recruiting.
Keywords and Key Concepts
Drawing cards
Whenever the bot draws a special card, place the top card from its special card deck (without looking at it) on the bottom of its hand (unless explicitly instructed to put it on the top of the bot's hand). Its hand is only shuffled in the "Drawing cards" step of the round.
Tie-breaker: the Magic die
Whenever you're instructed to select a mountain, a forest, or a Warband based on a certain criteria, and after applying those criteria there are still multiple equal options remaining, roll the Magic die.
- Select the tied option with the lowest even number.
- Select the tied option with the lowest odd number.
- Select the tied option with the highest even number.
- Select the tied option with the highest odd number.
If you need multiple tie-breakers during the same bot turn, roll the Magic die multiple times, using a different roll result each time.
Smallest/Largest Warband
In the rules, smallest/largest Warband is used as a shorthand for "Warband containing the fewest/most combat units". A Warband with any number of Golems is considered 1 unit larger than a Warband of equal combat units with fewer (or no) Golems.
Marked mountain
Whenever you play, discard, or burn a vision card, the Ironbot marks the corresponding mountain so it will "know" that you will never try to discover there again. To mark a mountain, place a marker on the marking slot at the relevant mountain.
Attacking
Warband in focus
When the bot plans to attack you, it focuses on one of your Woodwalker Warbands following this priority list:
- Select a Woodwalker Warband with a Totem (unless the Totem is fading and it is the last turn of the round).
- If multiple Woodwalker Warbands have a Totem, break ties in the following priority order:
- Select one with a fading Totem (unless it is the last turn of the round).
- Select one closer to an outer forest.
- Use the Magic die.
- If no Woodwalker Warband has a Totem, select the largest Woodwalker Warband closest to a Totem.
- If no Totem is on the main board, select the smallest Woodwalker Warband available to select.
If it's tied for multiple options, select the one where the differential in combat units is more favorable to the bot. If still tied, use the Magic die to select one (based on their forest's numbers). The differential of combat units must be at least 0 or higher, otherwise the Ironbot will not attack.
The selected Woodwalker Warband will be the Warband in focus.
IMPORTANT: As in the core game, Woodwalker Fighters on the outer forests cannot be attacked.
Select the Warband in focus, ignoring any Woodwalker Warband that has absolutely no Ironclad Warbands adjacent to them. The bot attacks the Warband in focus with the largest adjacent Ironclad Warband. To resolve, use the Combat Procedure (see below). If the Ironclad would initiate a combat, but does not have cards left in its hand to wager, then it skips the attack and draws a special card instead.
Combat Procedure versus the Ironbot
I. You play (or skip playing) a wagered card first, regardless who the attacker is. II. Then, draw and reveal the top card of the bot's hand as the bot's wagered card. If the bot's hand is empty, it does not wager a card. III. Calculate damage as in the core rules, making sure to include the bot's stance bonus listed below. Determine the victor.
- In Expansive stance, it has +1 Damage.
- In Aggressive stance, it has +1 Dominance.
- In Defensive Stance, it has +1 Defense. IV. If the bot wins and forces you to retreat, it forces you to move away from the mountain that was involved in the combat (so your retreating Warband is no longer adjacent). It moves you to or towards a forest with a smaller (or no) Woodwalker Warband, but it never moves you towards a forest with a Totem. Use the Magic die if multiple forests are tied. V. If there is no unit on Ferrum after a battle, the bot recruits 1 Ironclad Fighter to Ferrum after the battle is resolved.
Moving Ironclad Warbands
There are three keywords serving as a shorthand for the bot's priorities when moving. These movements never move the Drill.
Chase
Target of the movement:
A mountain adjacent to the Warband in focus, where the Ironclad can use a single Warband movement to form the largest possible Warband. (If tied, select a mountain that is unmarked. If still tied, use the Magic die.)
However, if the Ironclad already has more units in the Warband adjacent to the Warband in focus, it does not move at all.
Source of the movement:
The mountain with the largest Ironclad Warband adjacent to the target. If this is Ferrum, ignore 3 Ironclad Fighters there (as they would be left behind to protect Ferrum) and re-evaluate the source of the movement. Use the Magic die if multiple mountains are tied.
Move combat units from the source to the target until there are more units in the Ironclad Warband than the number of Woodwalker Fighters in the Warband in focus, or until the source mountain empties (but it does not move out the last 3 combat units from Ferrum). Golems always move before Fighters.
Protect
Target of the movement:
- Ferrum, if there are fewer than 3 units in Ferrum.
- A mountain with a Foundation, where there is a larger adjacent Woodwalker Warband than the Ironclad Warband present. Target an unmarked mountain first, prioritizing the one with the smallest Ironclad Warband.
- An unmarked inner mountain, where there is a larger adjacent Woodwalker Warband than the Ironclad Warband present.
Use the Magic die if multiple are tied in any of the above choices.
Source of the movement:
A mountain without a Foundation and the largest Ironclad Warband adjacent to the target. If this is Ferrum, ignore 3 Ironclad Fighters there (as they would be left behind to protect Ferrum) and re-evaluate the source of the movement. Use the Magic die if multiple are tied. In the unlikely case of no viable source, the move is forfeit.
Move all of the combat units except one (or three in case of Ferrum) from the source mountain to the target mountain. Golems always move before Fighters.
Expand
Target of the movement:
- An uncontrolled and unmarked outer mountain without a Forge and with the fewest total Woodwalker Fighters adjacent, prioritizing a mountain with a Foundation over one without a Foundation.
- An uncontrolled outer mountain with a Foundation and with the fewest total Woodwalker Fighters adjacent.
- An uncontrolled and unmarked inner mountain with the largest adjacent Woodwalker Warband.
Use the Magic die if multiple are tied in any of the above choices.
Source of the movement:
The mountain with the largest Ironclad Warband adjacent to the target. If this is Ferrum, ignore 3 Ironclad Fighters there (as they would be left behind to protect Ferrum) and re-evaluate the source of the movement. Use the Magic die if multiple are tied.
Move all of the combat units except one (or three in case of Ferrum) from the source mountain to the target mountain. Golems always move before Fighters. If no Ironclad Fighter would be moved to the target mountain, re-evaluate to a different target mountain (if possible).
Moving the Drill
If there are at least 3 crystals in the Drill's cargo area, it moves towards the closest Forge; otherwise it moves to a mountain without a Forge (if possible). If there are multiple eligible mountains, it moves to the one with a larger Ironclad Warband and/or with the smaller Woodwalker Warband adjacent. If there are no adjacent mountains with an Ironclad Warband on it, the Drill moves to a mountain that is adjacent to a larger Ironclad Warband. In case of a tie, use the Magic die.
When moving to a mountain without a Forge, advance on the Drill track with the bot gaining the indicated benefit.
When the bot resolves this reward, it does not survey your vision deck. Instead, if you have more than one vision card in your hand, you must select one of them randomly and shuffle it back into the vision deck. If you have one or no vision cards in your hand, nothing happens.
When moving to a mountain with a Forge: reset its tracker to the starting position, and reset its crystals accumulated by the Drill, and the bot gains all crystals accumulated by the Drill.
Building Forges
If the Ironbot is about to upgrade a Foundation to a Forge and it has multiple controlled Foundations, it chooses the Foundation with the smallest Ironclad Warband, using the Magic die in case of a tie.
Increasing the Difficulty
Once you can beat the bot using the described rules, consider the following options to increase the difficulty on a scale of 1-15 levels:
- Do not ignore, but resolve the action icons in red when instructed (2 levels).
- During setup, place a Golem into Ferrum (3 levels).
- During setup, select two random outer mountains (using the vision cards) and place a Foundation on each of them (3 levels).
- During setup, shuffle 4 special cards (instead of 2) into the bot's hand. (2 levels).
- During setup, select one of the following options and add additional Ironclad Fighters to the Ironclad Warbands:
- 1 Ironclad Fighter to a random inner mountain (1 level).
- 1 Ironclad Fighter to two different random inner mountains (2 levels).
- 1 Ironclad Fighter to three different random inner mountains (3 levels).
- 1 Ironclad Fighter to each inner mountain (4 levels).
- 1 Ironclad Fighter to each inner mountain and 1 Ironclad Fighter to Ferrum (5 levels)
Solo Mode - Against the Woodenbot
In these rules, "you" refers to the lone human player playing as Ironclad, and "it" refers to the Woodwalker bot.
Setup
- Place the main board with numbered locations in the middle of the playing area with the solo mode side up.
- Place the crystals within reach.
- Take the Ironclad player board and set out the Woodwalker board with its solo mode side up.
- Take your 3 base cards and put them in your hand. Take the bot's 3 base cards and place them in a face down deck next to its player board where indicated. For simplicity, this deck will be referred to as the "bot's hand."
- From your own deck, remove cards with reference number IC13, IC17, IC27, IC33, IC36. Then, shuffle your deck and place it on the corresponding draw deck area of your player board. Do the same for the bot's deck.
- Shuffle the 4 vision cards showing an inner mountain to create the vision deck. Place the six remaining cards face up on the right side of the bot's player board, creating the vision discard pile.
- Place a marker on all four inner mountains' marking slots.
- Place 2 Woodwalker Fighters on all outer forests.
- Place the Drill on Ferrum. Place 1 of your Ironclad Fighters on Ferrum and 3 of your Fighters on each of the mountains adjacent to Ferrum.
- Place the closed Bot Control Aid and the Magic die within your reach.
- Place all the remaining components near the board, within your reach.
Victory Conditions
The victory conditions are unchanged from the core game rules. You win if you build 3 additional Forges (besides Ferrum). If the Woodenbot secures three Totems, you lose the game.
Round Summary
Preparation Phase
Gain crystals
No change from the core rules. You gain 2 crystals, the bot gains 1 crystal.
Draw 2 cards
No change from the core rules on your side. Draw the first two cards from your deck. If it's the first round, you may draw 4 cards instead, select 2 to keep, and shuffle the rest into your draw deck.
For the bot, draw 2 cards from its deck and shuffle them into its hand (keeping its hand face down).
Remove markers
No change from the core rules on your side. Remove 1 marker from all ongoing cards you have in play.
REMINDER: As soon as an ongoing card is exhausted, discard it.
The Spirits of the Forest (see Bot Control Aid) can also have markers placed next to it, but these are not removed in this step. They are used during the combat resolution steps of the Woodenbot.
IMPORTANT: Markers placed on mountains (to track the Woodenbot's search for Totems) are not removed in this step.
Action Phase
The bot takes its turn first, then your turn, then continue alternating.
Bot's turn - Locate a Totem
At the beginning of each turn in which Woodenbot is using the Disruptive Turn Procedure, do the following:
- If there is exactly one card left in the vision deck:
- Reveal that vision card (and remove the marker from the corresponding mountain).
- Discover a Totem near it, even if the shown mountain is controlled by the Ironclad (See Keywords and key concepts on how to resolve a discovery).
- Then, expend the top card of the bot deck (to indicate a turn spent).
- Flip the closed Bot Control Aid (as indicated on the bottom of the Disruptive Woodwalker Turn Procedure).
- End the bot's turn.
- If there is more than one card left in the vision deck:
- Reveal and discard the top vision card.
- Remove the marker from the corresponding mountain.
IMPORTANT: If the resolution of an icon results in no change to the game state or there are no valid targets for the effects of an icon, the bot gains 1 crystal as compensation.
NOTE: For your first few games, ignore the icons that appear in red (see "Increasing the difficulty" on page 34).
Bot's turn - Turn Procedure
On the bot's turn, perform its Turn Procedure (unless it discovers a Totem during the "Locate a Totem" step), as currently shown in the Turn Procedure box on the Bot Control Aid. See "Keywords & key concepts" to learn how to perform certain instructions.
When directed to expend a card, place it face up on the leftmost empty space on the bot's player board. If instructed to resolve the icons of an expended card, look at the solo icons shown above the effect box. First, find the entry corresponding to the left icon on the Action Chart and resolve the corresponding effect. Then, repeat this with the right icon. Some entries show multiple effects in a bullet-point list: starting from the first bullet point, resolve the first one that is possible to resolve.
If the bot's hand is ever empty on its turn, it draws one special card instead (without revealing it), recreating its face-down hand with it, and ends its turn (after resolving the "Locate a Totem" step if Disruptive).
IMPORTANT: Don't forget to check the condition at the bottom of the Woodwalker Turn Procedure when to flip the card. If there are markers next to the Spirits of the Forest when flipping the Bot Control Aid, position the flipped Aid so that the markers will be next to the Spirits of the Forest again.
Your turn
Play your turn as normal.
If you attack a Woodwalker Warband, use the Combat Procedure described on page 32.
Round End Phase
Recover/discard action cards
No change from the core rules on your side. Take all your base cards back into your hand. Ongoing cards with marker(s) are moved above the player board. Discard all other played cards. Check your hand limit of special cards (8 including base cards).
For the bot, find any base cards it expended or wagered during the turn, and place them back onto its hand. Discard the played special cards.
Fade Totem
Discovered Totems on the board are flipped to their fading side, or if they were already on their fading side, they are removed.
Recruitment
No change from the core rules on your side.
If the bot has 2 or more crystals, it recruits Fighters (spending 2 crystals each) using the priority list below, until it has 0 or 1 crystals left. Then, you can recruit as many Fighters as you wish, for 2 crystals each. Place them on one or more Forges.
Use the following priority list when recruiting for the Woodenbot, placing a Woodwalker Fighter in the indicated outer Forest with the smallest number (including zero) of Woodwalker Fighters:
- Adjacent to a Totem.
- Adjacent to a controlled Foundation.
- Adjacent to a (preferably uncontrolled) possible outer mountain, preferring one without a Forge.
- Closest to the Drill.
- Use the Magic die if tied.
Repeat this (evaluating where to recruit at again) until the bot stops recruiting.
Keywords and Key Concepts
Drawing cards
Whenever the bot draws a special card, place the top card from its special card deck (without looking at it) on the bottom of its hand (unless explicitly instructed to put it on the top of the bot's hand). Its hand is only shuffled in the "Drawing cards" step of the round.
Smallest/Largest Warband
In the rules, smallest/largest Warband is used as a shorthand for "Warband containing the fewest/most combat units". A Warband with any number of Golems is considered 1 unit larger than a Warband of equal combat units with fewer (or no) Golems.
Marked/Possible mountain
If a mountain has a marker on its marking slot, it is considered to be a possible mountain. A mountain should be marked if its corresponding vision card is still in the vision deck, therefore the Woodenbot might be planning to discover there.
Tie-breaker: the Magic die
Whenever you're instructed to select a mountain, a forest, or a warband based on a certain criteria, and after applying it there are still multiple, equal options remaining, roll the Magic die.
- Select the tied option with the lowest even number.
- Select the tied option with the lowest odd number.
- Select the tied option with the highest even number.
- Select the tied option with the highest odd number.
If you need multiple tie-breakers during the same bot turn, roll the Magic die multiple times, using a different roll result each time.
Attacking
The Woodenbot will only attack an Ironclad Warband if it is at least equal in size (remember, a Warband with a Golem or a Warband with a Forge is larger than a Warband of just Fighters if their numbers are equal), otherwise the effect cannot be resolved. If there are multiple targets the Woodenbot could attack, it will attack the one where the difference is the largest - i.e. where the Woodwalker Warband is bigger than the target Ironclad Warband by the most number of Fighters. In case of multiple tied options to target or to attack from, use the Magic die.
If the Woodenbot would initiate a combat, but does not have cards left in its hand to wager, then it skips the attack and draws a special card instead.
If the Drill is destroyed while carrying crystals, the Woodenbot gains 1 crystal, and the Drill is reset to Ferrum as described in the core rules. If attacking the Drill while there are no Ironclad combat units present, the attack is automatically successful. The Woodenbot will not try to target and/or attack the Drill if there are 0 crystals in the Cargo Area.
If any attack against Ferrum is successful, the Woodenbot steals half of your crystals (round up).
Combat Procedure versus the Woodenbot
I. You play (or skip playing) a wagered card first, regardless of who the attacker is. II. Then, draw and reveal the top card of the bot's hand as the bot's wagered card. If the bot's hand is empty, it does not wager a card. III. Calculate damage and the victory as described in the core rules, however include the Spirits of the Forest bonus: if there is at least one marker next to the Spirits of the Forest, it has combat bonuses depending on which side of the closed Bot Control Aid is face up (either +1 Defense or +1 Damage, in addition to 1 Dominance). IV. If Woodenbot deals more than 1 damage and you have at least 1 Golem, Woodenbot prioritizes removing Golems first. It never deals only 1 damage to a Golem; instead the bot deals that 1 damage to remove an Ironclad Fighter. V. If there is at least one marker next to the Spirits of the Forest, remove one. VI. If the bot wins, and forces you to retreat, it forces you to move to an adjacent mountain with the fewest (including zero) Ironclad combat units, preferring a mountain without a marker (i.e. not a possible mountain). In case of a tie, use the Magic die.
Moving Woodwalker Fighters
There are three keywords serving as a shorthand for the bot's priorities when moving. Check the first condition applicable and resolve it.
Plunder
Target of the movement, if there are 5 or more Crystals in the Ironbot's available crystals:
- An inner forest adjacent to Ferrum with the largest number of Woodwalker Fighters adjacent
- An inner forest adjacent to a controlled Foundation with the largest number of Woodwalker Fighters adjacent
Target of the movement, if the Drill has 2 or more Crystals in its Cargo area:
- An inner forest adjacent to the Drill with the largest number of Woodwalker Fighters adjacent
- An inner forest adjacent to Ferrum with the largest number of Woodwalker Fighters adjacent
Target of the movement otherwise:
- An inner forest adjacent to an outer Mountain with the largest number of Woodwalker Fighters in outer forests adjacent
- If there are no Fighters on outer forests, skip the movement.
If multiple forests are tied, use the magic die.
The Woodenbot always prefers adjacent forests as the source of the movement. It moves the indicated number (on the Action chart) of Woodwalker Fighters into the targeted forest (if there are fewer Fighters than indicated in the adjacent forests, the bot moves as many as it can). The bot prefers to move Fighters from outer forests first (if applicable), then from smaller Warbands. In case of a tie, use the Magic die.
REMINDER: If the Woodenbot is instructed to move any number of Fighters, then is instructed to move more Fighters, (not the same Fighters multiple times), remember that the same Fighters cannot be moved more than once in the same turn (according to the normal rules).
Secure
Target of the movement, if a Woodwalker Warband has a Totem:
- An outer forest adjacent to the Totem (carrying the Totem with them)
- An inner forest adjacent to an outer forest with the smallest number of Ironclad Fighters adjacent (carrying the Totem with them)
Target of the movement, if a Totem is present on the board:
- A forest with a Totem with the largest number of Woodwalker Fighters adjacent
- An inner forest adjacent to a Totem with the largest number of Woodwalker Fighters adjacent
Target of the movement, if no Totem is present on the board:
- An inner forest adjacent to an outer forest and adjacent to a possible (preferable uncontrolled) mountain with the largest number of Woodwalker Fighters adjacent
If multiple forests are tied, use the magic die.
Interfere
Target of the movement:
- An inner forest adjacent to a controlled Foundation with the largest number of Woodwalker Fighters adjacent
- An inner forest adjacent to Ferrum with the largest number of Woodwalker Fighters adjacent
- An inner forest adjacent to the Drill (if the Drill has 2 or more crystals in the cargo area) with the largest number of Woodwalker Fighters adjacent
- An inner forest adjacent to a possible Mountain with the largest number of Woodwalker Fighters in outer forests adjacent
If multiple forests are tied, use the magic die.
Discovering a Totem
The Woodenbot might discover a Totem, either as a result of a Discover action, or during the "Locate a Totem" step of its turn if the last vision card of the vision deck is revealed. Either way, resolve the following steps:
- Place a Totem on an adjacent inner forest with the largest Woodwalker Warband. If no Woodwalker Warband is adjacent, place it on the inner forest closest to a Woodwalker Warband (prioritizing the larger one). If there are multiple equal options, use the Magic die.
- If the vision deck is not yet empty, find the vision card corresponding to the target mountain in the vision deck.
- Woodenbot gains crystals equal to the amount shown on the card.
- Unmark the corresponding mountain of the vision card, then remove the vision card from the game.
- Rebuild the vision deck by randomly adding cards from the vision discard pile to the vision deck until the vision deck has 5 cards (if the total number of vision cards remaining is less than 5, use all of them). Mark every mountain corresponding to a vision card selected from the discard pile, making them possible mountains again.
- Shuffle any remaining cards in the vision deck with the selected vision cards from the discard pile to create a new vision deck.
- Discovering a Totem always ends the bot's turn. If it is the "Locate a Totem" step, expend the top card of the bot deck (to indicate a turn spent) and remember to flip the closed Bot Control Aid.
NOTE: Unlike a human player, the Woodenbot can discover a Totem without a Woodwalker Warband adjacent to the Mountain on the vision card and can even discover from a controlled mountain (only in the "Locate a Totem" step). When discovering during an action, it still needs a Warband, and can only do so from an uncontrolled mountain. If the Totem is discovered during the resolution of the first icon of an action card, skip the second Icon.
Securing a Totem
When a Woodwalker Fighter carrying a Totem is moved to an outer forest, the Totem is secured. Place it on the bot's player board. If this is the third Totem to be secured, you have lost the game.
Increasing the Difficulty
Once you can beat the bot using the described rules, consider the following options to increase the difficulty on a scale of 1-15 levels:
- Do not ignore, but resolve the action icons in red when instructed (2 levels).
- During setup, place 2 markers next to the Spirits of the Forest card (3 levels). (Do not remove a marker in the first preparation phase.)
- During setup, shuffle 4 special cards (instead of 2) into the bot's hand. (2 levels).
- During setup, remove 2 foundations from your player mat and put them back in the gamebox (3 levels).
- During setup, select one of the following options and add additional Woodwalker Fighters to the Woodwalker Warbands:
- 1 Woodwalker Fighter to a random outer forest (1 level).
- 1 Woodwalker Fighter to two different random outer forests (2 levels).
- 1 Woodwalker Fighter to three different random outer forests (3 levels).
- 1 Woodwalker Fighter to four different random outer forests (4 levels).
- 1 Woodwalker Fighter to each outer forest (5 levels).
Beginner-Friendly Mode
If you and your opponent are playing Ironwood for the first time, we suggest using a curated deck of the special cards. Organize your faction's special cards in ascending order based on their reference number shown at the bottom right corner, so that you draw the lowest numbered cards first from the face-down deck.
With this optional setup rule, you will experience the less complicated card effects first, so you can focus more on the game rules.
You can also use a curated deck sorted this way against the Ironbot or the Woodenbot.
If it's your first time playing Ironwood but your opponent already has some experience with the game, you may optionally add starting Fighters:
- If you are playing the Ironclad, add 1 Fighter to up to 4 inner mountains.
- If you are playing the Woodwalkers, add 1 Fighter to up to 4 outer forests.
Keywords
Attack
Choose one of your Warbands to initiate battle with your opponent's units at an adjacent location.
Build
Flip a Foundation to its Forge side on a mountain you control.
Burn
Discard the indicated number of special or vision cards from your hand. If you burn a special card, discard it without resolving its effect. If you burn a vision card, discard it without adding a Totem to any of your Warbands. Place your discarded vision card face down. Some Woodwalker special cards have a specific effect that can be resolved when the card is burned.
Discover
Play a vision card by placing it from your hand next to the discard pile of your special cards, visible to your opponent. Then, add a Totem token with its full side up to a Woodwalker Warband that controls an inner forest adjacent to the mountain shown on the vision card. This mountain must be uncontrolled or you cannot discover a Totem.
Draw
Take the indicated number of special cards from the top of the draw deck to your hand. Same applies to the vision cards.
Gain
Take the indicated number of crystals from the common supply and add them to your available crystals on your player board.
Mark
Place the indicated number of markers from the common supply where indicated.
Move
Take the indicated number of Fighters or Warbands of your affiliation from one location and place them at an adjacent one of the same type. You may move them only once per move action, unless stated otherwise. You may move less than the indicated number. There's no number indicated for the Drill as there is only one of it.
The number next to the keyword means how many Fighters or Warbands you can move, not how many times.
Ongoing
This effect lasts as long as this card has at least 1 marker on it.
Recruit
Place the indicated number of Fighters (or Golems if stated so) from the common supply where indicated.
Remove
Take the indicated number of combat units from the indicated Warband or location and place them back in the common supply.
Resolve
Choose the indicated number of options from the list of effects stated on the card and resolve them in any order. You may not resolve the same choice more than once.
Spend
Take the indicated number of available crystals on your player board and place them back to the common supply.
Steal
Take the indicated number of available crystals from your opponent's player board and add them to your available crystals. You may never Steal from the cargo area.
Victory:
Resolve this effect only if you won the battle that was initiated by the same card this keyword is part of.
This Combat:
This effect applies only for the combat that was initiated by the same card this keyword is part of.
Each Combat:
This effect applies to each combat while the card is in play.
This Round:
This effect remains in play until the next Round End Phase, when the card with this keyword is discarded.
Iconography
- Woodwalker Fighter
- Base card
- Woodwalker Warband
- Special card
- Ironclad Fighter
- Ongoing card
- Ironclad Warband
- Draw deck of special cards
- Golem
- Vision card
- Drill
- Mountain
- Crystal
- Forest
- Cargo area
- Damage
- Totem
- Defence
- Foundation
- Dominance
- Forge
- Marker