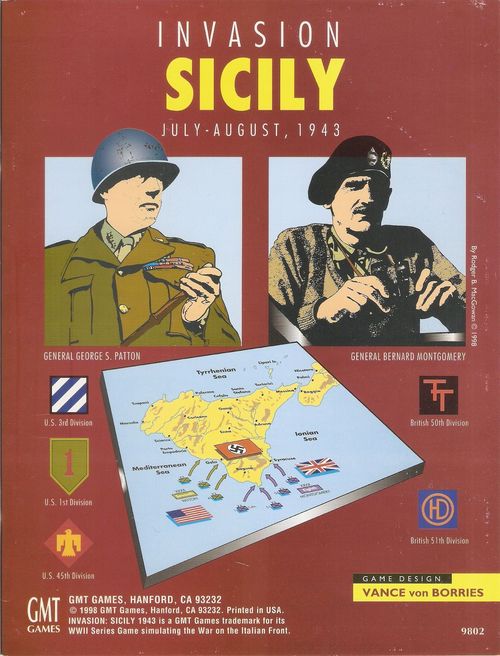
Invasion Sicily
Invasion Sicily Rulebook
Table of Contents
Table of Contents
- 2. Game Equipment
- 3. Basic Concepts
- 4. Sequence of Play
- 5. Supply
- 6. Allied Beach / Port Units
- 7. Ground Unit Movement
- 8. Pre-Combat Actions
- 9. Combat
- 10. Combat Support
- 11. Air Operations
- 12. Naval Operations
- 13. Amphibious Invasion
- 14. Special Rules
- 15. Replacements
- 16. Strongpoints
- 17. How To Win
2. Game Equipment
2.1 See Play Book for:
- Game equipment inventory
- Game map
- Player aid cards
- Game set-up and preparation
- Unit/informational counter explanations
2.2 The Playing Pieces
2.2.1 There are two types of playing pieces in Invasion: Sicily: First, markers are informational pieces used to assist and enhance game play. Second, units are playing pieces that represent the combat units that fought (or could have fought) in Sicily.
2.2.2 For an explanation of unit values, see the How To Read Units player aid card.
2.3 The Die
2.3.1 The game uses a ten-sided die. The number "0" is read as ten (10), not zero (0).
2.3.2 To perform many game functions, you will roll one die to determine a result. Often, you will modify the actual die roll result plus (+) or minus (-) as explained in the rules below; these are called Die Roll Modifiers (DRM's).
3. Basic Concepts
Rulebook and Playbook references to rules sections or charts/tables are bracketed [].
3.1 Friendly/Enemy
A player's own units, supply sources, and turn phases are termed "friendly"; his opponent's are described as "enemy". All hexes At Start are friendly to the Axis player.
3.2 Controlled Hexes
A hex is controlled by the last player to move a combat unit through it or to have a uncontested Zone of Control [3.4] projected into it.
3.3 Contiguous Hexes
An unbroken series of connected hexes (used for movement and supply routes).
3.4 Zones of Control
The hex a unit occupies and the six hexagons immediately surrounding it constitute that unit's Zone of Control (ZOC). Hexes into which a unit a unit exerts a ZOC are called controlled hexes.
3.4.1 A ground combat unit always controls the hex it occupies, even if it does not exert a ZOC into any of the six surrounding hexes [3.4.2 and 3.4.3].
3.4.2 Inherent ZOC projection capability. Units exert a ZOC into surrounding hexes unless:
a. they are marked with a colored "No ZOC" band across the top, or b. they bear a Disrupted marker [11.4.2.b.7].
If at least one unit in a hex exerts a ZOC into an adjacent hex, then that hex is a controlled hex.
3.4.3 Terrain Restrictions. A unit possessing a ZOC exerts that ZOC into any adjacent hex it can enter directly from the hex it occupies [Terrain Effects Chart (TEC)].
Exception: ZOC's never extend into city hexes, even though such hexes can often be easily entered.
3.4.4 ZOC is not affected by other units, enemy or friendly, except when tracing a Supply Route [6.1] or during retreat.
3.4.5 If both enemy and friendly units project a ZOC into a hex, the hex is mutually controlled by both players.
3.4.6 A friendly ZOC can slow, but not stop, enemy movement [7.2.1].
3.5 Stacking
Stacking refers to placing more than one unit in a hex. The position of a unit with a stack has no effect on play.
3.5.1 Each ground unit has a stacking point value printed on it. A maximum of eleven stacking points can occupy a hex at the end of any phase of the game-turn or any retreat after combat. During all other times units can freely enter and pass through stacks of friendly units.
3.5.2 If a stack of units exceeds the stacking limit at the end of any phase or retreat [9.6.2], the owning player eliminates the excess.
3.5.3 Those units with zero stacking value and all play aid markers can stack freely without limit.
3.6 Efficiency
3.6.1 The efficiency rating (ER) on each unit represents that unit's level of training, cohesion, and effectiveness in combat. The higher the ER, the better the unit.
Note: The reduced-step side of most, but not all, units shows a reduced ER. Port/Beach units are two distinctive units printed on the same counter. Neither has a reduced-step size.
3.6.2 A number of game procedures require a unit to pass an ER check, sometimes individually for each affected unit and sometimes for an entire stack. The owning player rolls one die an compares the die roll result to the unit's ER. If the adjusted die roll result is equal to or less than the unit's ER, the unit passes. If the adjusted die roll result is greater, it fails.
3.6.3 Unit ERs can be reduced by combat loss, airborne assault disruption, out of supply status and (for Italian units) Italian Demoralization, but no ER can ever be reduced below zero.
3.6.4 Italian CCNN unit ER's can be increased if Fascist Revival is rolled on the Fall of Mussolini Table [14.3.4].
3.7 Weather
Weather conditions can affect some operations in Sicily such as supply, movement, and air/naval availability.
3.7.1 The Weather Table. During the Strategic Segment of every game-turn, the Allied player rolls one die and consults the Weather Table. The result applies immediately to the entire map for that entire game-turn. There are two possible weather results: Dry or Mud.
3.7.2 Certain results on the Weather Table include Storm. A list of Storm (and Mud) effects is included with the Weather Table.
3.8 Unit Steps
3.8.1 Steps represent the durability or staying power of combat units. Most units in Invasion: Sicily have two steps, with the front side representing a full strength unit, and the back representing a reduced strength unit.
3.8.2 When a full strength unit loses a step, it is flipped to its reverse (reduced strength) side. If it suffers a second step loss, it is eliminated and removed from play.
3.8.3 Several types of units contain only one step of combat strength. They are:
a. Allied Port/Beach units [6.1.3]. b. Italian Coast Defense units [14.1.1]. c. German Ersatz units [15.3.2]. d. Small battalion-sized units and artillery units for both sides.
3.9 Common Abbreviations
- AS/DS = attack/defense strength
- CRT = combat results table
- ER = efficiency rating
- GT = game turn
- MA = movement allowance
- MP = movement point
- OoS = out of supply
- TEC = terrain effects chart
- ZOC = zone of control
4. Sequence of Play
Invasion: Sicily is played in successive game-turns, each composed of the Segments outlined below. [See also the Expanded Sequence of Play on the game map for a detailed explanation of each Phase.]
A. Strategic Segment (both players)
- Special Events Phase
- Weather Phase
- Supply Determination Phase
- Air/Naval Readiness Phase
B. Allied Operations Segment
- Allied Transport Phase
- Allied Movement Phase
- Axis Reaction Phase
- Allied Combat Phase
- Allied Motorized Movement Phase
C. Axis Operations Segment
- Axis Transport Phase
- Axis Movement Phase
- Allied Reaction Phase
- Axis Combat Phase
- Axis Motorized Movement Phase
D. Reorganization Segment (both players)
- Replacements Phase
- Special Movement Phase
- Engineering Phase
- Victory Conditions / Turn Record Phase
5. Supply
A unit's supply status affects its actions throughout the entire game turn.
5.1 Off-Map Supply
5.1.1 Axis units are always in supply in the Italy Holding Box and the Axis Emergency Evacuation Box.
5.1.2 Allied units are always in supply in the Africa Holding box, Amphibious Invasion Box, Follow-Up Box, and Emergency Evacuation Box.
5.2 On-Map Supply Effects
To be in supply, a unit must be able to trace a Supply Route through a path of contiguous hexes from the unit to a supply source. Judge the supply state for all units of both sides during the Supply Determination Phase. A unit's supply state remains the same for the entire game-turn. A unit judged Out of Supply (OoS) during this phase is OoS for the rest of the game turn, even if it moves back into supply later.
Exception: Air Supply [11.2.2c]
5.2.1 A unit is in supply if, during the Supply Determination Phase, it can:
a. trace a Supply Route to a supply source and b. the supply source has the unit capacity available to supply the unit.
If both conditions cannot be met, the unit is out of supply.
5.2.2 To indicate a unit's supply status:
a. Remove OoS markers from units that meet both conditions of 5.2.1 a and b. b. Place (or retain) OoS markers on all units judged to be out of supply.
5.2.3 Each unit carrying an OoS marker is affected as follows:
a. Reduce its printed MA by half (drop fractions) during its Movement and Motorized Movement Phases (if motorized). b. It cannot conduct Combat Refusal or Reaction Movement (if motorized). c. Reduce AS by half (rounding down), and ER by two (-2) during combat (only). d. If artillery, it cannot contribute its support strength on attack or defense.
5.3 Tracing On-Map Supply
5.3.1 An on-map unit can trace supply through five non-road hexes to a supply source [5.3.3 and 5.3.4] or to a road net [5.3.5] leading to a supply source.
5.3.2 You cannot trace supply:
a. across sea hexsides; b. into or through non-destroyed enemy strongpoints [12.0]; c. into or through alpine hexes unless:
- tracing units are mountain or commando types, or
- supply can be traced into or through such hexes along a Road Net for all other unit types; d. through hexes occupied by enemy ground combat units or vacant hexes in an uncontested enemy ZOC.
5.3.3 Axis on-map supply sources are:
a. Sicily: any Axis-controlled ports. b. Calabria: any Axis-controlled ports and any north map edge land hex of the Calabria playing area (Scenarios 3 and 4).
5.3.4 Allied on-map supply sources are:
a. any Allied-controlled port occupied by a Port or engineer unit. b. any coastal hex occupied by a Beach unit.
5.3.5 Road Nets
a. A friendly road net is any continuous series of connected main or minor road hexes which lead to a friendly supply source (note differences between main and minor road movement). b. The Allied road net cannot be more than 40 road movement points in length. Exception: Allied units cannot use Road Nets to trace supply to Beach units [5.5.5b]. c. The Axis road net can be of unlimited length.
5.3.6 Weather and Tracing Supply
a. Mud weather reduces traceable non-road hexes from five to four. The Road Net is not affected by Mud. b. Storm conditions do not affect tracing supply.
5.4 Supply Sources
5.4.1 A source friendly to one player is not friendly to the other player.
5.4.2 Any number of Allied-controlled ports can be made operational on a given turn (subject to Port or Engineer unit availability) [6.2.4]. Any port can be deactivated and made operational any number of times during a scenario.
5.5 Supply Source Capacity
5.5.1 Excess supply capacity at one supply source cannot be transferred to another supply source, nor can it be saved for use on future game turns.
5.5.2 Allied Beach and Port units are always in supply and do not count against Allied supply capacity.
5.5.3 For an Allied-controlled port to be operational (function as a supply source), an Allied Engineer or Port unit must occupy the port hex during the Supply Determination Phase.
a. Port Capacity is the maximum number of units that can be supplied through that port in any one Supply Determination Phase.
b. A port can supply only as many units as its current augmented capacity allows. Players must trace to another supply source for the excess units or they will be judged OoS and receive OoS markers.
c. The Port Supply Capacity of any friendly operational Allied port is composed of:
- the printed port supply capacity number
- less any Axis Port Demolition marker totals [5.5.7a]
- plus Allied Port unit port supply capacity augmentation values [5.5.3f].
d. Storms do not reduce port capacities.
e. The Allied player can rebuild ports. During each Engineering Phase, the Allied player can remove one Port Demolition marker (or replace a -4 marker with a -2 marker) from one port containing an Allied engineer or Port unit. Even if several ports qualify for demolition removal, only one port per turn can have a marker removed.
f. Each Allied Port unit can increase a port's supply capacity by using its port supply capacity augmentation value (the port engineering and rebuilding capabilities contained in each unit). As many Port units as desired can be added (over time) to the same port, but their combined augmentation values cannot exceed that port's printed capacity (modified by Port Demolition markers). Excess port capacity augmentation points are ignored.
Example: It is now the Supply Determination Phase of GT 8. The port of Palermo (hex 2407) is Allied-controlled. The US 20 and 531 Port units occupy the hex. Palermo has a printed port supply capacity of eight; however one -2 and one -4 Axis Port Demolition marker remain in the Palermo hex, which reduce Palermo's printed port capacity to an adjusted level of two.
The US 20 and 531 Port units have a combined port supply capacity augmentation value of +4 (each Port unit has a +2 value). Only two of those four points could be used to augment Palermo's adjusted supply capacity of two, allowing Palermo to serve as a supply source to four Allied ground combat units. The two excess port supply capacity augmentation points are ignored for this turn.
The Allied player will probably elect in the GT 8 Engineering Phase to remove the -2 Port Demolition marker from Palermo because the port units are there to make removal possible. If removed, on GT 9 Palermo's adjusted supply capacity would be four, and all four of the Port unit's port supply capacity augmentation points could be utilized, so that Palermo could serve as a supply source for eight Allied ground combat units.
g. On the turn following the Allied capture of Catania or Palermo, during the Supply Decision Phase flip the British 6 Port unit and US 1051 Port unit from their +4 Port Capacity Augmentation sides to their +5 sides.
Design Note: The increase represents Allied use of local Sicilian port labor.
5.5.4 Allied Beach Units
a. Subject to their printed supply capacity numbers, Beach units convert the coastal hexes into supply sources for Allied ground combat units of either nationality able to trace valid LOC's to them.
b. Units can only trace a five-hex LOC (only four hexes during Mud weather) to Beach units, because Beach units cannot support a road net. When tracing the LOC, count the coastal hex, but do not count the unit hex.
c. Storm turns reduce the printed supply capacity of all Beach units by one-half (rounded down).
d. Only one Beach unit can occupy any given coastal hex.
5.5.5 Axis Supply Capacity
a. Calabria north map edge hexes: Unlimited supply.
b. Axis friendly operational ports: Printed supply capacity number. Port units aren't required (local Italians provide the necessary labor and materials).
Exception 1: In Scenarios 3 and 4, if the port of Reggio Calabria cannot trace supply to the north map edge, reduce all Sicily port capacities to two and Reggio Calabria port capacity to four (because almost all Axis Supply arrived via the overland routes).
Exception 2: Axis Sicily Evacuation [13.6.2f] reduces all Axis Sicily port capacities to zero.
5.5.6 Axis Port Demolition
a. On each game turn the Axis player can place one Port Demolition marker per Engineering Phase on a port occupied by a German ground combat unit. Each Port Demolition marker reduces that port's supply capacity by two units. More than one marker may be placed on a German occupied port; however, a port's printed supply capacity cannot be reduced to less than minus one. The -4 Port Demolition markers may be used only to consolidate -2 Port Demolition markers. The Axis player can intentionally place Axis units out of supply through port demolition.
b. The Allied player can remove Port Demolition markers [5.5.3e].
6. Allied Beach / Port Units
6.1 Description
6.1.1 Beach and Port units represent the logistics system the Allies developed to keep their combat units supplied. These units re vital. They must be present before a coastal or port hex can become an operational Allied supply source.
Note: US engineer units also make ports operational.
6.1.2 All Beach and Port units contain one step each.
6.1.3 In most cases, Beach and Port units occupy the front and back sides of the same counter.
a. Beach units occupy the front of the counter. They represent the amphibious lift capacity to bring troops and supplies ashore, plus engineering capabilities to improve and defend beach sites. b. Port units occupy the back of the counter. They represent the same historical unit, only now their function changes to port defense, repair, and expansion.
Exception One: the US 4 Naval/540 and 5 Naval/40 Beach units have no port unit on their reverse side. (We chose these engineer regiments to serve as beach support units for Navy amphib landing craft battalions.)
Exception Two: the BR 6 Port and US 1051 Port units each occupy both sides of their counters. Both units remain one-step Port units when flipped; only their port capacity augmentation values change [5.5.3g].
6.1.4 Each Beach/Port unit possesses:
- stacking value,
- ER,
- zero attack strength,
- defense strength,
- printed supply capacity (Beach units only),
- port supply capacity augmentation value (Port units only),
- no ZOC,
- no MA (but units can be placed or removed)
6.2 Placement
6.2.1 Beach units can only occupy coastal hexes targeted by invasion hexes. Only one Beach unit can occupy a coastal hex.
Note: A Beach unit may remain in Beach unit mode and serve as a source of supply even if it occupies a coastal hex containing a port. One or more Port units may also occupy the hex to make the port operational.
6.2.2 Off-map Beach units may enter the map only during the Allied Transport Phase of an Invasion Turn and must be located in the Amphibious Invasion box to enter.
6.2.3 A Port unit can only be placed on an Allied-controlled port hex. Only one Port unit may be placed in any port per turn, but (over time) more than one Port unit can occupy a port.
Note: Port units may be placed on Allied controlled ports that are not yet operational, but no combat units can land at such a port until the following turn when the port has been made operational.
6.2.4 Off-map Port units may only enter the map during the Allied Transport phase from the Africa Holding Box. The do count against Allied Naval Transport Capacity.
6.3 Removal
6.3.1 A Beach/Port unit may be forced to withdraw from a coastal/port hex due to combat. It must then undergo Emergency Evacuation [13.3].
6.3.2 During the Allied Transport Phase, Beach/Port units can be withdrawn from the map to the Africa Holding Box at a cost of one naval transport point per Beach/Port unit transported.
Note: Port units which re-enter the Africa Holding Box from any other location can be flipped back to their beach sides or vice-versa.
6.3.3 Repositioning
6.3.3.1 During the Engineering Phase, pickup any on-map Port units or flip an on-map Beach unit [6.5] and place it on the desired friendly port.
6.3.3.2 There are no range or air superiority zone limitations.
6.3.3.3 There are no limits on number of Port units that can be moved, but only one Port unit can be added to a given port per turn.
6.3.3.4 Repositioning does not against naval transport capacity [12.0].
6.3.3.5 No port unit repositioning is allowed during Storm turns.
6.3.4 Conversion
6.3.4.1 During the Engineering Phase of any non-Storm turn, Beach units can be converted into Port units. Flip Beach units to their Port unit sides and reposition them to other Allied controlled ports. This action does not count against Allied Naval Transport Capacity.
6.3.4.2 Once converted, the "new" port unit must reposition immediately to an Allied controlled port (unless it can remain in the hex it occupies because an Allied controlled port is also there).
6.3.4.3 The only limit to the number of Beach units converted during a turn is the number of Allied controlled ports, but not no more than one newly converted Port unit can be repositioned to any port [6.3.3.3].
6.3.4.4 Once converted, on-map Port units cannot convert back to Beach units.
6.4 Subsequent Invasions
During the Allied Special Movement Phase, Beach units may be moved from the Africa Holding Box to the Invasion Box for a subsequent invasion operation.
Note: This is the only way for any Beach unit in the Africa Holding Box to re-enter the map. Port units, of course, may always re-enter using Allied Naval Transport [6.2.4].
7. Ground Unit Movement
During his Movement Phases, a player can move qualifying non-Beach/Port units. Move units or stacks one at a time, tracing a path of contiguous hexes through the hex grid. Each unit expends a number of MPs from its MA to enter each hex or cross certain hexsides [TEC].
7.1 Movement Restrictions
Eligible units may move during the Movement, Motorized Movement, and Special Movement Phases, or when executing Reaction Movement. These are the only times when "movement", as described below, is conducted. During the Combat Phase, units of either side may advance or retreat after each combat is resolved; this is not considered movement for the purposes of these rules, and uses no MPs.
7.1.1 Move units from hex to adjacent hex. A unit cannot jump over a hex.
7.1.2 There is no limit to the number of friendly units that can pass through a single hex during a game-turn. Stacking limits apply only at the end of each phase and at the completion of retreats.
7.1.3 At the discretion of the owning player, units can be moved together as a stack [3.2]. The MA of stacked units is that of the slowest unit in that stack, but faster units can be moved off at any time with the remainder of their MA. Stacks cannot pick up or add units while moving. Once a stack has ceased moving, other units may be moved into or through its hex (subject to stacking limits at the end of the phase).
7.1.4 A unit can move only once in a Phase. It can never expend more MPs than its total MA in any one Phase.
7.1.5 A unit is never forced to move.
7.1.6 Unused MPs cannot be saved for later use or transferred to other units.
7.1.7 A friendly unit can never enter a hex containing an enemy ground combat unit. It can move through friendly occupied or controlled hexes (those not in an enemy ZOC) at no extra cost.
7.1.8 You may not move a unit off the edge of the map or onto terrain prohibited to it. Units forced to retreat off the map or onto prohibited terrain are eliminated.
Exception: Calabria north map edge for the Axis [7.6.5a]
7.2 ZOC Effects on Movement
7.2.1 Units spend one additional MP to enter an enemy ZOC. There are no MP penalties to leave an enemy ZOC. Units need not stop moving upon entering enemy ZOC and can move directly from one enemy-controlled hex to another, during the same phase, as long as they have sufficient MPs.
7.2.2 Friendly ZOCs do not affect the movement of your units.
7.3 Terrain Effects on Movement
7.3.1 Each hex contains one or more terrain types. The Terrain Effects Chart (TEC) identifies the terrain and lists the movement point costs a unit expends to enter various terrain types during Dry or Mud weather [5.1]. Where a hex contains more than one type of terrain (for example, clear and hill), units moving through the hex pay the highest movement cost, except when moving on roads under certain weather conditions [TEC].
Example: In Dry weather a unit would pay 2 MPs to move through a hex containing both clear and hill terrain.
7.3.2 A unit cannot enter a hex if it does not have sufficient MPs remaining to pay terrain and enemy ZOC costs.
Exception: Amphibious Invasion units can always enter their targeted coastal hexes [13.2.3].
7.3.3 A unit that enters a hex through a road hexside expends MPs according to that road's rate regardless of the other terrain in the hex. A road hex does not negate the cost to enter an enemy ZOC.
Example: A non-clear hex contains a minor road. A unit entering this hex through a minor road hexside would pay one MP to enter. If the road in the hex were a main road, the MP cost to enter would be 1/2 MP, regardless of terrain.
7.3.4 A number of terrain features (such as rivers) are found only on hexsides. A unit expends MPs to cross these hexside features, in addition to the cost of entering the terrain in the hex itself. Units crossing river hexsides on a road crosses a river hexide) move at that road's rate and do not expend the additional hexside cost for the river.
7.3.5 Armor and artillery units cannot enter mountain or alpine hexes through non-road hexsides.
7.4 Weather Effect on Movement
Use the column on the TEC that corresponds to the current turn's weather condition.
Example: If the weather condition for the current game-turn is determined to be Mud, use the Mud column on the TEC to find the correct cost to enter or cross the various terrain types.
7.5 Movement Phases
7.5.1 The Movement Phase
a. During each player's Movement Phase, all friendly combat units with MAs greater than zero may be moved if desired (subject to limitations of 7.1).
b. Units carrying an OoS/Disrupted marker or in enemy ZOC can still be moved during this phase.
7.5.2 Motorized Movement Phase. Although nearly all units have some vehicles, only those units marked as motorized (those with red boxes around their MA) have both the vehicles and the tactical doctrine for this special movement phase.
a. During his Motorized Movement Phase the phasing player can move, all, some or none of his motorized units at up to half their MA (drop fractions). A unit moved in this phase obeys all rules of movement, ZOC and supply.
b. Units carrying an OoS/Disrupted marker or in enemy ZOC can still be moved during this phase.
Note: Certain units, primarily artillery, have orange MAs. Although these units must pay motorized movement cost (and cannot enter terrain prohibited to motorized and armor units), they cannot move during the Reaction and Motorized Movement Phase.
7.6 Holding Boxes
A holding box represents a region adjoining the game map used for storage of units pending entry onto the game map.
7.6.1 There are two holding boxes. The Africa Holding Box is friendly to the Allied player, the Italy Holding Box is friendly to the Axis player. Each holding box acts as an operational port and airfield.
7.6.2 Units in a holding box are always in supply. Stacking and port capacity is unlimited. Your units cannot enter an enemy holding box. Units in a holding box can regain lost steps through replacements procedure [15.0].
7.6.3 Allied and Axis airborne units must be located in their respective holding boxes to be air transported or to conduct an Airborne Assault.
7.6.4 Allied units enter the Africa Holding Box in several ways:
a. They setup there at the start of a scenario. b. During the Transport Phase, Allied Beach units, Port units and combat units located in ports may use available Naval Transport capacity to move from the map to the Africa Holding Box. c. During the Special Movement Phase, Allied units in the Amphibious Invasion and Follow-Up Boxes can be moved into the Africa Holding Box [7.7.1 and 7.7.2]. d. Allied units in the Emergency Evacuation Box may also enter if they pass their ER checks [7.7.3].
Note: Port units that re-enter the Africa Holding Box from any other location can be flipped back to their Beach unit sides or vice-versa.
7.6.5 Only units in the Africa Holding Box can be moved into the Invasion or Follow-Up boxes for subsequent Invasion Operations.
7.6.6 Axis units enter the Italy Holding Box in two ways: a. Exiting the north map edge by expending one MP during a movement phase (or motorized movement phase if allowed) or by being forced to retreat. b. By successfully passing an ER check in the Axis Emergency Evacuation Box during the Special Movement Phase [13.3].
7.6.7 Axis units exit the Italy Holding Box in three ways:
a. Exiting the north map edge by expending one MP during a movement phase (or motorized movement phase if allowed) or by being forced to retreat. b. By Air Transport mission (if airborne). c. By Naval Transport (if Sicily Evacuation [13.6] has not been declared).
7.7 Allied Transit Boxes
The Allied Player has three additional Transit Boxes. There are no stacking limits in any of these boxes, and units in these boxes are always in supply. No units in these boxes count against Allied Naval Transport Capacity.
7.7.1 The Amphibious Invasion Box. Units enter this box as part of Invasion Planning [13.1]. They exit the box through Amphibious Assault or by transfer to the Allied Africa/Follow-up boxes [13.2.8].
7.7.2 The Invasion Follow-Up Box. Units enter this box as part of Invasion Planning [13.1] or from the Amphibious Invasion Box [13.2.8]. Units exit the box as part of Invasion Follow-up [13.4] or when they are returned to the Africa Holding box [13.4.7].
7.7.3 The Emergency Evacuation Box. This box holds all surviving Allied units that were forced to conduct Emergency Evacuation [13.3].
Note: In some scenarios, the Axis player also has a Sicily Evacuation Box identical to the Allied Emergency Evacuation Box except that units enter during Sicily Evacuation and may attempt to move to the Axis Italy Holding Box [13.6].
8. Pre-Combat Actions
Combat resolution is preceded by a series of actions that set the stage for actual combat. These steps are:
- Combat Declaration
- Combat Refusal
- Defender Reaction
8.1 Combat Declaration
8.1.1 During his Movement Phase, the moving player declares which enemy hexes he will attack and designates which adjacent friendly units/stacks will attack each enemy hex. Individual units in a stack may attack different adjacent units. No more than one enemy hex may be attacked in any single combat. He then places a Declared Combat marker on each of his attacking unit/stacks, with the arrow pointing toward the hex that will be attacked (the defender hex). Once the Declared Combat markers have been placed, the decision to attack is irrevocable, and the defender hex must be attacked by all units that declare combat against it.
8.1.2 An enemy-occupied hex can be attacked by as many units as can be brought to bear in the six adjacent hexes, with possible additional artillery fire support [10.1], air support [10.2], and naval support [10.3], all subject to Attack Coordination [9.2].
8.1.3 Units with an attack strength of zero cannot declare or participate in attacks. Any unit or stack of units whose total attack strength has been reduced to less than one because of halving cannot attack.
8.1.4 A unit cannot declare combat into a hex or across a hexside into/through which it could not move.
Exception: Although artillery does not attack, it can provide support in hexes it cannot enter.
8.2 Combat Refusal
8.2.1 After all combats have been declared, the opposing player has the option to conduct combat refusal with eligible stacks of units. To be eligible, all units in the hex must be motorized, have an ER of 5 or greater, have no OoS markers, and occupy a defender hex.
8.2.2 Conduct an ER check of the unit in the stack with the highest ER. If it fails, the stack remains in the defender hex. If it passes, retreat the entire stack two hexes [9.6]. Now the "attacking" player has the option to advance up to eleven stacking points into the original vacated hex. Note that these units cannot participate in combat during their Combat Phase because no longer have a combat declaration. Combat Refusal is not movement; it is a retreat [9.6].
8.2.3 A stack that succeeds in refusing combat cannot end its retreat in a hex that itself is the target of a declared attack, although it may pass through such a hex during its retreat.
8.2.4 Combat Refusal cannot occur if the retreat path must pass through a vacant hex in an enemy ZOC.
8.3 Reaction Movement
After all Combat Refusal attempts have been resolved, Reaction Movement can be attempted.
8.3.1 The defender can move all, some, or none of his eligible units that are within two hexes of a defender hex up to half their movement allowance (drop fractions). A motorized unit is eligible for reaction only if it:
a. does not bear an OoS marker, b. is not in an enemy ZOC (if Italian or Allied; German units may be in Allied ZOCs), c. passes an ER check, d. has not refused combat this turn, e. does not occupy a defender hex.
Note: This phase gives the defender the opportunity for local reaction to combat. Thus, if the other player has declared no combat at the end of his Movement Phase, no reaction movement is possible.
8.3.2 If a unit fails to react, it remains in its original hex. No further attempts may be made during the Reaction Phase by that particular unit.
8.3.3 During reaction movement a unit cannot move into an enemy ZOC unless it has sufficient movement points and a friendly unit already occupies that hex. If it enters an enemy ZOC, it does not pay the MP cost to enter enemy ZOC, but it stops immediately for the remainder of that phase. Reaction Movement need not be into the hex that triggered it, or even toward any combat.
8.3.4 Additional Reaction Limitations
a. Stacking limits may not be violated by reacting units at the end of a reaction movement. b. A unit cannot react into a hex or across a hexside containing terrain that is prohibited to that unit for movement.
9. Combat
Combat occurs between adjacent opposing units where Declared Combat markers have been placed. The player who declared the combats is the Attacker, the other player is the Defender. Attacks are resolved individually according to the procedure in 9.4.
9.1 Attack Parameters
9.1.1 Units can attack only during a Combat Phase.
9.1.2 Units not bearing Declared Attack markers cannot attack.
Exception: Adjacent and non-adjacent artillery units may be able to provide support [10.1].
9.1.3 The only enemy units that can be attacked during a Combat Phase are those against which combats have been declared.
9.1.4 A unit can remain in an enemy ZOC without attacking, even if that enemy occupied hex is attacked by another unit.
9.1.5 No unit can attack more than once or be attacked more than once per Combat Phase.
9.1.6 A unit's attack strength cannot be divided among different attacks.
9.1.7 Remove Declared Combat markers before Attack Coordination for each combat.
9.2 Terrain Effects on Combat
9.2.1 Only defending units benefit (receive favorable DRM's) from the terrain in the hex they occupy and from that hex's hexsides. Terrain in hexes occupied by attacking units has no effect on combat [see TEC].
9.2.2 The defender receives only one DRM for terrain in the defender hex, but always receives the highest DRM available if more than one terrain type exists in the defender hex.
9.2.3 Mountain and alpine terrain will halve attacking armor unit attack strength.
9.2.4 In addition to a defender hex terrain DRM, the defender may receive a hexside terrain DRM, the defender may receive a hexside terrain DRM if all attacking units are attacking through that type of hexside.
Exception: Units in coastal hexes defending against Amphibious Assault always receive a +1 DRM even if also being attacked from other adjacent coastal or inland hexes.
9.2.5 A unit cannot attack across a hexside that it is prohibited from moving across.
Example: Armor units cannot attack alpine or mountain hexes through non-road hexsides.
9.3 Coordination
Coordination between units is essential to the success of any attack or defense. There are many coordination checks required during combats. As players are required to make them, refer to the Combat Coordination Table on the player aid card. Air and naval support points pass coordination by rolling successfully against specific numbers on the table. Artillery units provide support if they make successful ER checks. Non-artillery units attack at full strength if they make successful ER checks, but not all non-artillery units must make these checks [9.3.1 and 9.3.3].
9.3.1 Single hex attacks. The attacking player selects one unit in the attacking stack to be the lead unit. This unit will use its ER later in the combat sequence to determine the ER differential DRM. There is no ER check for coordination in single hex attacks. All attacking units use their full attack strength going into the combat sequence.
9.3.2 Multiple hex attack. The attacker selects a lead hex that automatically attacks at full strength, but all non-lead hexes must pass an ER check to do so. The attacker selects a lead unit in the lead hex that uses its ER for ER differential determination.
Exception 1: When selecting a lead hex, stacks without OoS/Disrupted markers must be chosen for lead hex before stacks containing such markers.
Exception 2: Stacks occupying Invasion hexes are automatically the lead hexes in multiple hex combats.
Exception 3: When Armor Effects shift is declared against a clear terrain defender hex, the lead unit in the lead hex must be an armor type (yellow unit box) unit.
9.3.3 Non-lead hexes in multiple hex attacks must each make an ER check for the coordination. The attacking player selects a lead unit in each hex and makes an ER check against that unit. If the unit passes, the stack is coordinated and contributes its full attack strength to the combat. If the unit fails, the stack is not coordinated and contributes one half of its total attack strength (rounded down) to the combat. Units (or stacks) reduced to less than one attack strength point do not participate in the combat.
9.3.4 The Allied player cannot use Allied airborne or commando units as Lead units in any non-lead hex unless all of the units in that non-lead hex are airborne or commando units.
Design Note: Allied leaders rarely risked their elite units in "ordinary" assaults (note the VP penalties for doing so). Having elite units make non-lead hex coordination almost a certainty at virtually no risk of loss is a gaming tactic that flies in the face of historical realities.
9.3.5 An artillery unit can never be the lead unit in the attack.
9.3.6 The defending player can designate any unit in the defender hex to be the lead defender unit except for artillery units contributing their support strengths to the combat (that is, an artillery unit contributing its defense strength in a defender hex could be the lead defender unit).
9.4 Combat Resolution Procedure
The attacking player resolves all declared combats in any order desired, using the following sequence for each attack.
I. Compute Attack Strength
a. Attacker flips all untried units in hexes bearing Declared Combat markers. b. Attacker totals the attack strengths of all non-artillery units in each hex bearing a Declared Combat marker. Some units or stacks may be halved. Halving is cumulative (some units/stacks may be halved more than once). Fractions are always dropped after each halving operation. Halving is done in the following order:
- Armor units attacking through road hexsides into mountain or alpine hexsides.
- Units bearing Disrupted or OoS markers.
- Units/stacks in non-lead hexes that fail ER checks for combat coordination [9.3.2]. c. Attacker designates qualifying artillery units [10.1.2 and 10.1.3]. d. Attacker makes necessary artillery ER checks. One artillery unit stacked in the lead hex may contribute support strength without making an ER check. All others that pass their required ER checks will have their support strength added to the total attack strength [10.1.1c]. Place Fired markers on all designated artillery units [10.1.1.d].
Note 1: Placing a Fired marker on an artillery unit indicates its support has been dedicated to one combat. It cannot provide support to any subsequent combats in the Combat Phase.
Note 2: Terrain does not halve artillery support strengths. Artillery can fire over terrain impassable to it.
e. Attacker allocates available air support points, makes a coordination die roll for them, and receives all allocated points if allowed by the die roll [10.2]. f. Attacker (if Allied) allocates available naval support points, makes a coordination roll for them, and receives all allocated points if allowed by the die roll [10.3].
Note: The total of artillery/air/naval support points eligible to support a given combat cannot exceed the total attack strength committed to that combat. Excess support points are lost.
II. Compute Defense Strength
a. Defender flips all untried units in the defender hex. b. Defender totals the defense and support strengths of all units in the defender hex. Place Fired markers on all designated defender artillery units.
Note: Any artillery units contributing their support strength in the defender hex cannot also contribute their defense strength (and vice-versa).
c. Defender designates other qualifying artillery units to provide support strengths and makes ER checks for them [10.1.2] and [10.1.4]. Units that pass their required ER checks can provide support [10.1.1c]. Place a Fired marker on each artillery unit after making its ER check [10.1.1d].
Note: Terrain does not halve artillery support strengths. Artillery can fire over terrain impassable to it.
d. Defender allocates available air support points, makes a coordination die roll for them, and receives all allocated points if allowed by the die roll [10.2]. e. Defender (if Allied) allocates available naval support points, makes a coordination die roll for them, and receives all allocated points if allowed by the die roll [10.3]. Note: The total of artillery/air/naval support points eligible to support a given combat cannot exceed the total defense strength committed to that combat. Excess support points are lost.
III. Combat Odds Ratio
Divide the total attacking strength by the total defending strength to arrive at a combat odds ration. Always round off the ratio in favor of the defender to the nearest ratio listed on the CRT.
Example: 29 to 10 is 2:1 odds.
IV. Armor Effects Shift
When the lead unit of a declared attack is armored, the attacker receives a one column shift to the right on the CRT (that is, a 2:1 attack would become a 3:1 attack) if the defender hex:
a. is in clear terrain, b. contains no strongpoint, c. contains no armor or antitank unit, and d. no attacking armored unit is attacking across a river hexside.
V. Determine DRMs for
a. Terrain [9.3 and Terrain Effects Chart] b. Amphibious Assault [13.2.4d] c. Differing Allied Nationalities [14.2.2] d. Strongpoint in defender hex [16.1.1] e. ER Differential Calculation. Compare the ER of the lead in the lead attack hex to the lead unit in the defender hex. If a lead unit bears a Disrupted marker, its ER is reduced by two. If an Italian unit is the lead unit after the fall of Mussolini, its ER is reduced by one. These two reductions are cumulative: an Italian lead unit could conceivably have its ER reduced by three. If defender lead unit ER is better than attacker lead unit ER, a positive (+) DRM results; if Defender is less than Attacker, a negative (-) DRM results.
Example: Attacker lead unit has ER 5 and defender lead unit ER is 7. Subtract Attacker (5) from Defender (7). This results in a +2, meaning a +2 DRM, so the Attacker must enter plus two (+2) into his DRM computations.
f. High Odds Attacks. Those attacks made at odds greater than 8 to 1 receive favorable DRMs [see CRT].
VI. Netting DRMs
Net out all the Attacker and Defender DRMs. Each +1 DRM offsets a -1 DRM. The positive or negative DRM total remaining after offsetting is the final DRM. Final DRMs can never be greater than +3 or -3; disregard final DRM value beyond these limits.
VII. Roll One Die
Cross-index the numerical result with the odds column on the CRT. If the attacker receives armor effects [9.4.1 section IV], shift the odds column one column to the right. Adjust the die roll by the net DRM. Apply the combat result to the involved units before going on to any other combat.
In any combats with final odds worse than 1:3, the attacking units are automatically eliminated ("E" result); the defending force suffers nothing. Combat odds greater than 8:1 are resolved at 8:1. The attacker cannot voluntarily reduce combat odds.
Example: He cannot declare 2:1 odds when he has 3:1 odds.
9.5 Combat Results [CRT]
9.5.1 Non-adjacent artillery units suffer no combat results; they are not reduced, retreated, or advanced after combat.
9.5.2 Extracting losses. When called for on the CRT, a unit takes losses in the form of combat strength levels (also called "steps"). A combat unit possesses either one or two steps. A unit loses steps in this order: Full Strength Level, Half Strength Level (inverted). Full strength level printed on the front of the unit. Half strength level is the (lower) value on the reverse side of the unit. Many units have only a Full Strength level. A unit eliminated or obliged to lose more steps than it has available is removed from play and set aside.
9.5.3 When a loss of combat strength is required, the owner removes the indicated number of combat strength levels from the total force, not from each unit in that force.
Note 1: The lead unit of the land attacking stack and the lead defender unit must take the first step of any combat step loss required by the CRT. Additionally, the lead defender unit must take the step loss for No Retreat if the CRT did not mandate a combat step loss.
Note 2: If one side has fewer steps to lose than required by the numerical step loss, any step loss required for the other side is reduced by one.
9.5.4 Some eliminated units may later be returned to play on the map through the replacement procedure [15.0].
9.6 Retreats
When the combat result requires units to retreat, the owning player immediately moves the affected units individually (or as a stack [9.6.9]) one or two hexes from their defender hex. If the unit is unable to retreat within the following restrictions, it is eliminated.
9.6.1 A unit cannot retreat across prohibited terrain hexside, off the edge of the mapsheet, or over enemy units. A unit cannot retreat to a hex that it could not normally enter during its Movement Phase.
Exception: Emergency Evacuation [13.3] and Calabria north map edge [7.6.5a].
9.6.2 A unit can retreat through a hex containing friendly units if it means (temporarily) a violation of stacking limits; however, a unit cannot end its retreat in violation of stacking limits. If it does, it is eliminated.
Design Note: Elimination represents destruction of combat units due to disorganization rather than outright combat loss.
9.6.3 Units can end retreat in friendly occupied hexes in enemy ZOCs.
9.6.4 Units can end retreat in defender hexes where combat has not yet been resolved; they contribute no defense strength to that combat, nor can they act as lead defender units. They do, however, suffer all adverse defender combat results when the new combat is resolved.
9.6.5 A unit cannot retreat to an out-of-supply position unless no alternate position exists within stacking limits.
9.6.6 If both Emergency Evacuation and an allowable land retreat path are available to a retreating ground combat unit, the Allied player chooses which option to take. Port/Beach units must always undergo Emergency Evacuation.
9.6.7 No Retreat Option. In some cases, units would not retreat.
a. The No Retreat option is limited to one specific situation for each side. Axis: A unit or stack occupying a strongpoint when attacking or defending may attempt the No Retreat option. Allied: Beach/Port units plus any other Allied units stacked with them may attempt the No Retreat option. b. A player always has the option to retreat his force normally rather than attempt the No Retreat procedure. c. If the No Retreat option can be exercised, perform the following procedure:
- First, remove any numerical step losses mandated by the combat result. If necessary, flip the lead unit to its reduced strength side.
- If the lead unit is eliminated instead of being reduced, the player exercising the No Retreat option designates a new lead units.
- Make an ER check against the lead units.
- If the lead unit passes the ER check, then the unit/stack does not retreat. That unit/stack must, however, lose one additional step (If the lead unit did not lose a step as a result of combat, it must take this step loss. Otherwise, any unit in the stack can take the loss). If the additional step lost is the last step in the hex, the attacker cannot advance after combat into the vacated hex.
- If the unit fails the ER check, conduct retreat/emergency evacuation normally.
9.6.8 Retreat Through Enemy ZOC. All units as their first option must choose not to retreat through any sort of enemy ZOC, contested or non-contested, unless no alternate path exists. A unit can retreat through a hex occupied by one or more friendly units even if enemy units are projecting a ZOC into that hex (because your unit controls the hex it occupies). Your unit can end its retreat in a friendly occupied hex even if that hex is an an enemy ZOC.
9.6.9 Special Retreat Through Enemy ZOC
a. Units are automatically eliminated if their only path of retreat is through tow or more vacant hexes in enemy ZOCs. However, a unit that must retreat through one vacant hex in an enemy ZOC may do so. It must retreat two hexes and may be reduced or eliminated in the process.
b. Artillery units cannot conduct this procedure. A player may choose to eliminate his artillery to allow his remaining units to conduct this retreat.
Exception: Allied armored artillery can conduct special retreat through enemy ZOC.
Procedure
I. Conduct the two hex retreat. Retreating stacks must remain stacked together. II. When the retreat is completed, the owner conducts an ER check on the retreating unit. If it is a stack, he conducts an ER check on the lead unit of that stack. III. If it fails, that unit (or lead unit of the stack) takes a one step loss. If it passes, there is no loss. Add two (+2) DRM to the ER check if the retreating stack has any unit with a Disrupted marker.
9.7 Advance after Combat
When the original defender hex has been vacated as a result of combat, the attacking units can advance into the vacant hex.
9.7.1 A player must exercise the option to advance immediately, before resolving any other combats. A player is not forced to advance a unit. After advancing, units cannot attack again in that phase, even if their advance places them adjacent to enemy units.
9.7.2 Only victorious attacking units that participated in that combat can advance. Artillery units cannot advance. Units can advance from any of the hexes from which the attack was made.
9.7.3 The advance must be into the hex that was attacked. Advancing units ignore enemy ZOC to enter the hex. Advance after combat is not movement and uses no movement points.
9.7.4 Units cannot violate stacking limits at the end of an advance after combat.
9.7.5 Three can be no advance into any defender hex where the last remaining step was lost due to No Retreat [9.6.7.c4].
9.8 Counterattack
Whenever the defending units are retreated just one hex after a combat (not combat refusal) and the attacker has advanced units into the vacated hex, the defender immediate option to attack with those units that just retreated. This is called a Counterattack.
9.8.1 The stack of retreated units becomes the lead stack in any counterattack.
9.8.2 Other friendly units now adjacent to the victorious attacking enemy units can participate in the counterattack but must first pass non-lead hex coordination ER checks [9.2.2](to fight at full strength) and cannot themselves be under attack declaration.
Exception: Artillery units and air and naval support points cannot participate.
9.8.3 The option to counterattack must be made immediately. It is then resolved before any other declared combat is resolved.
9.8.4 Counterattack is entirely optional. Apply all regular combat procedures except:
a. If it is an Axis counterattack, the Axis player doubles the attack strength of any German units in the lead stack (only Germans - Italians do not double). Allied units do not double. b. Both sides disregard terrain DRMs in their counterattack.
Note: The counterattacking units know the ground they are trying to recover; the new defenders don't; nor have they had time to dig in and organize.
9.8.5 Units used in one counterattack cannot participate in subsequent possible counterattacks during the same Combat Phase.
10. Combat Support
A large proportion of combat power applied on the battlefield (especially by the Allies) came from supporting artillery, air, and naval units.
10.1 Artillery Fire Support
10.1.1 The attacker declares artillery support during attacker odds computation of each Declared Combat.
10.1.2 The defender declares artillery support during defender odds computation of each Declared Combat.
10.1.3 Conduct ER checks on all eligible attacker and defender artillery units that require them [10.1.2 through 10.1.4].
10.1.4 General Eligibility
a. Any artillery unit with an Artillery Fired marker on it when attacker/defender support is declared cannot provide support. b. Any artillery unit bearing a Out of Supply marker cannot use its support strength on attack or defense. It can use only its defense strength while occupying a defender hex. c. Each artillery unit has a range box with its range expressed in hexes. Count range from the artillery unit hex to the defender hex (enemy or friendly) by including the defender hex but not the artillery unit's hex. There is no limit to the number of in-range artillery units that can combine to support any one combat. d. No in-range artillery unit has to contribute its support strength. e. One artillery unit in the lead attack hex, or any artillery unit in the defender hex, provides its support strength without an ER check. All other artillery units must each conduct an ER check. Units that pass contribute their support strengths to the combat; units that fail do not. f. A defending artillery unit can use its support strength or its defense strength in a single combat, but not both.
10.1.5 Specific Attacks Eligibility. Attacker artillery units in defender ZOCs are eligible to provide support strength for a declared combat against an adjacent defender hex only. They are also subject to all attacker loss/retreat results.
10.1.6 Defender Artillery
a. If defending alone in a hex, or if defending in a hex containing only artillery units, an artillery unit must use its defense strength for that combat. Other artillery not in the hex but within range may provide defensive support. b. Artillery units stacked with one or more non-artillery units in a defender hex may use support strength or defense strength (defending player's choice) and are subject to defender loss and/or retreat combat results. c. Defender artillery not in the defender hex cannot provide support during the combat phase if in an enemy ZOC.
10.1.7 Place a fired marker on each artillery unit (attacker or defender) after making its coordination check. Such units cannot contribute their support strength for the remainder of the Combat Phase eve if those support strengths remain unused due to failed coordination checks. Both players removed Fired markers at the end of each Combat Phase.
Design Note: It is important to remember that (for better or worse), WWII artillery was still very much tied to tactical fire nets that took time to setup or change. Guns tasked to support a given attack couldn't be turned quickly to support other units.
10.2 Air Support
10.2.1 When allocating air support points to a given combat, the Allied player consults the Allied or Axis Air Points Available marker on the Points Record Track [11.1] to determine the number of friendly points available. Each point used reduces the number available by one. A player may use more than one point at a time; he may use any number up to the total number available. If all are used, set the marker to zero.
10.2.2 To apply air support points to a combat, determine first that those points pass their Coordination roll on the Combat Coordination Table. Roll once for the entire number applied to that combat, not for each point. Points not applied to a combat cannot be returned to the track for re-use. They are lost.
10.2.3 Air support points that participate are added to the combat as artillery fire support points.
10.3 Naval Support
10.3.1 When allocating air support points to a given combat, the Allied player consults the Naval Support Points Available Marker on the Availability Track [12.1] to determine the current number available. Each point used reduces the number available by one. The Allied player may use more than one point at a time; he may use any number up to the total number available. If all are used, set the marker to zero.
10.3.2 To apply naval support points to a combat, determine first that those points pass Combat Coordination. Roll once for the entire number applied to that combat, not for each point. Use the Combat Coordination Table. Points not applied to a combat cannot be returned to the track for re-use. They are lost.
10.3.3 Naval support points can be used at a range of up to two hexes inland from a sea hex (or an invasion hex); thus most hexes adjacent to a coastal hex can be fired upon by naval support. Note the DRMs on the Combat Coordination Table for the inland hex whenever the sea (or invasion) hex is in Axis air superiority zone.
10.3.4 Naval support points that participate are added to the combat as artillery fire support points.
11. Air Operations
Both sides committed large air forces to the battle for Sicily. The air support points used in this game represent tactical air forces that both sides used to support ground combat and, for the Allies, to interdict Axis shipping. Other air operations include air assault, air transport and air supply.
Note: Air Support is covered in 10.2.
11.1 Air Support Points
11.1.1 As many of the available air support points as the owning player desires may be used during the game-turn, subject to availability and passing Coordination die rolls. Check the Turn Record Track for the number available each game-turn. Unused points are lost. They cannot be accumulated from turn to turn.
11.1.2 There are no units to represent individual air support points. Just move the Air Support Points Available marker up or down the Points Record Track to show the current number available and not yet used. Each point used reduces the number available by one. A player may use more than one point at a time; he may use any number up to the total number available. If all are used, place the marker at zero.
11.2 Allied Air Interdiction
11.2.1 Air support points can also be allocated to interdict Axis Naval Transport and Sicily Evacuation. Points are allocated at the start of the Allied Transport Phase, and remain allocated for the entire turn. Reduce the Allied Air Points Available marker by one for each air point allocated to Interdiction.
11.2.2 Each air point allocated can be utilized in both Air Superiority Zones, but at differing levels of effectiveness.
a. Each air point allocated provides a +1 DRM against each Axis Naval Transport or Sicily Evacuation die roll within the Allied Air Superiority Zone. b. For every two air points allocated to interdiction, add +1 DRM to each Axis Naval Transport or Sicily Evacuation die roll in the Axis Air Superiority Zone.
Example: If the Allied player allocates one air point to interdiction while the Axis Air Superiority Zone still exists, the Axis player would add a +1 DRM to any Naval Transport/Sicily Evacuation die roll in the Allied Air Superiority Zone, but no DRM in the Axis Air Superiority Zone (because each +1 DRM in this zone requires two Allied air support points)
11.2.3 The size of the Axis DRM is limited only by the number of Allied air points committed.
11.2.4 The Air Interdiction DRM in either Air Superiority Zone can be reduced by one for each Axis air point allocated against Allied Air Interdiction.
11.2.5 The Allied Naval Interdiction DRM and the net Allied Air Interdiction DRM can be combined into one larger DRM for each Axis die roll.
11.3 Air Transport
Both players have an air transport capability, and both can execute air transport missions during their respective Transport Phases.
11.3.1 Air transport capacity is always expressed as the number of eligible units that can be transported (or supplied) per turn.
a. Consult the scenario Set-Up Card for the maximum air transport capacity available each game-turn. Air transport capacity cannot be accumulated. b. Capacity is reduced during Storm to only one Allied or one Axis unit per turn.
11.3.2 Air Transport Missions
a. Air Transfer. Only parachute or glider units qualify.
- Units move from any friendly airfield to another friendly airfield. There are no range limitations. Missions can be run between the map and the Africa / Italy Holding Boxes. Friendly airfields in enemy ZOCs (including ZOCs of untried units) may be used if the airfield is occupied by another friendly ground combat unit at the time the transfer mission occurs.
- There are no air transport units. Just pick up qualifying units and place them at their destinations.
- All units that conduct air transfer are subject to the Air Assault/Transfer Table. Adjust the die roll for all applicable DRMs.
- Units entering the map through air transfer may move in the movement phase during the turn they enter.
- No Air Transfer missions are allowed during Mud weather turns.
b. Air Assault
-
Only parachute and glider units can conduct air assault procedure. Each unit can conduct only one air assault per scenario. Qualifying Allied units must be in the Africa Holding Box. Qualifying Axis units must be in the Italy Holding Box.
-
Each scenario on the Set-Up cards specifies how many qualifying units can conduct air assault per turn.
-
No air assaults can be conducted during Storm turns.
-
To conduct an air assault, place your unit(s) on any hex except city, alpine, or all-sea hexes or on any hex occupied by an enemy ground combat unit. Up to two units can be designated for air assault on the same hex (if there are no Storms and scenario instructions allow).
-
Once all air assault units have been placed, the owner resolves the Air Assault/Transfer Table separately for each unit. Allied player: untried Axis units are ground combat units: they project ZOCs that may create an unfavorable DRM on the table.
-
Modify the die roll with all applicable DRMs and apply the result [Air Assault/Transfer Table]. Place a Disrupted marker on any unit receiving a disrupted result.
-
Disrupted effects on Units:
- Reduce its printed MA by half (drop fractions) during its Movement Phase.
- Reduce AS by half (rounding down), and ER by two (-2) during combat (only).
- Remove its ability to project a ZOC.
-
Remove any Disrupted markers during the Game Turn Record Phase.
c. Air Supply
Eligible ground combat units on Sicily or Calabria that are unable to trace a valid Supply Route can be returned to In Supply status by air supply. (This is the only exception to rule 6.4.1, which states that units judged OoS during the Supply Determination Phase remain OoS for the entire turn.)
-
Each unit supplied counts as a unit transported against available Air Transport Capacity.
-
Conditions for Air Supply:
- Units receiving air supply must be non-motorized.
- Units must be within their side's Air Superiority Zone.
- Units cannot be air supplied during turns with Storms.
- If all conditions are met, immediately remove OoS markers from the unit(s) designated to receive air supply. These units function as In Supply units for the remainder of the game turn (though they may be judged OoS again during the next turn's Supply Determination Phase).
11.4 Air Superiority
11.4.1 At Start of play for all scenarios both players have an Air Superiority Zone. The Axis zone consists of all hexes of Calabria, all see and invasion hexes adjacent to Calabria and all sea and coastal hexes along the north coast of Sicily up to hex 2505, plus Sicily coastal hexes 4324 and 4225 (Messina). The Allied zone is everything else, nearly all of Sicily.
11.4.2 The Allied zone is extended to include the entire game map and the Axis zone is eliminated on every game-turn (during Strategic Segment) the Allied player controls at least eight airfields (Sicily and Calabria).
11.4.3 A summary of Air Superiority effects is included in the on-map Charts and Tables section.
12. Naval Operations
Only the Allied player has naval support points. Naval support points represent groups of warships used to provide naval artillery fire support or to interdict Axis Naval Transport/Emergency Evacuation. Naval operations also include movement of ground units by naval transport from port to port, amphibious invasions, and emergency evacuations.
Note: Naval Support is covered in the Combat section [10.3].
12.1 Naval Support Points
12.1.1 As many naval support points as desired of those available can be used during one game-turn, subject to range and Combat Coordination. Check the Turn Record Track for the number available each game-turn. Naval support points cannot be accumulated.
12.1.2 There are no units to represent individual naval support points. Just move the Naval Support Points Available Marker up or down the Availability Track to show the current number available and not yet used. Each point used reduces the number available by one. The Allied player may use more than one point at a time; he may use any number up to the total available. If all are used, set the marker at zero.
12.2 Naval Interdiction
12.2.1 Naval support points can also be allocated to interdict Axis naval transport and for Emergency Evacuation. Points are allocated at the start of the Allied Transport Phase and remain allocated for the entire turn.
12.2.2 Each point allocated provides a +1 DRM against each Axis Naval Transport or Emergency Evacuation die roll.
12.2.3 The size of the Axis DRM is limited only by the number of allied naval points committed.
12.2.4 Allied naval and air support points can be combined to provide a larger DRM for each Axis die roll.
12.3 Naval Transport
During his Transport Phase a player can move ground units by naval transport from port to friendly port subject to port and transport capacity. Allied units moving by naval transport cannot land on coastal hexes occupied by Beach units.
12.3.1 A unit can be moved only once during the friendly Transport Phase. A unit cannot remain "at sea".
12.3.2 A unit to be transported must start the Phase on a friendly operating port (the Allied player may also move Beach units from the coastal hexes they occupy back to the Africa Holding Box). Just pick it up and place it at the destination port. A unit arriving at a friendly operating port can move normally during the subsequent friendly Movement Phase that same Operations Segment; it does not pay the terrain cost of the port hex because it begins its Movement Phase there. Units moving to the Italy Holding Box stay there for the remainder of the game-turn. Units moving to the Africa Holding Box can be moved during the Special Movement Phase into the Amphibious Invasion or Follow-Up Boxes after any Follow-Up movement takes place.
12.3.3 Transport is limited by port supply capacity (which also doubles as port landing capacity). No more units can arrive or leave a port during a single Transport Phase than the port's current supply capacity [5.5.3c].
12.3.4 Allied Transport Capacity. The Allied player can move up to four units per Transport Phase. Storm reduces transport capacity to three units.
12.3.5 Axis Transport Capacity
a. The Axis player can always move units by naval transport between Messina and Reggio Calabria. Normal transport capacity between these two ports is six units per Transport Phase. b. Transport capacity to/from any other Axis port is two units per non-storm Transport Phase, and each unit transported to/from any other Axis port reduces the Reggio-Messina transport capacity by two units. c. Maximum Reggio-Messina transport capacity is reduced to five units per Transport Phase on Storm turns, and transport to/from other ports is reduced to one unit. d. All Axis Naval Transport/Sicily Evacuation is subject to successful arrival on the Axis Naval Transport Table. e. Before any Axis Naval Transport takes place, the Allied player must commit any air/naval support points to be used as DRMs on the Axis Naval Transport Table [11.3 and 12.3]. f. Allied Naval Operations in the Axis Air Superiority Zone.
- On each turn in which any Allied naval operation takes place in the Axis Air Superiority Zone, the Allied player loses one VP (increased naval losses due to Axis air attacks).
- At the end of any Allied Transport Phase where Allied ground units have used Naval Transport (or are present) in the Axis Air Superiority Zone, the Axis player rolls the die. On a roll of three or less, the Allied player must reduce his Replacement Points available by one (to cover increased personnel and equipment losses) or must lose one VP to buy a RP if none are left.
13. Amphibious Invasion
Amphibious Invasion involves various special procedures. Many Allied units enter play only through amphibious invasion procedure. Only the Allied player can conduct amphibious invasions.
13.1 Invasion Planning
There are five possible amphibious invasion operations, each identified by a code-name. There is also a sixth "No Invasion" dummy operation the Allied player can use for deception purposes.
13.1.1 The planning time and unit allocation for initial operations has already been built into the Allied scenario set-ups. Place the applicable marker(s) (face down) on Turn One of the Turn Record Track and reveal it after Axis set-up is complete.
13.1.2 All subsequent amphibious invasion planning is done during the Strategic Segment. Once the Allied player has decided on making a subsequent amphibious invasion, he places the Invasion Code Marker representing it upside down on the Turn Record Track at least five game-turns ahead of the current game-turn. It can be cancelled by removing the marker. The marker can be moved ahead [13.1.4], but once the Game Turn marker reaches the turn box containing the Invasion marker the operation must be executed.
Exception: The invasion must be delayed one turn if weather includes Storm on the turn of invasion.
The Axis player may not examine the marker until revealed.
13.1.3 The Allied player decides which units will make any subsequent invasions, but each subsequent invasion must be made by units of the same nationality [14.2]. All units must start in the Allied Africa Holding Box.
13.1.4 Once a Subsequent Operation marker has been placed, during the Special Movement Phase of that turn, the Allied player should move all desired units into the Amphibious Invasion Box. Starting on the next turn, no new units can be added to the Amphibious Invasion Units Box without moving the Invasion Operation marker ahead five game-turns from the current game-turn.
13.1.5 Once a Subsequent Operation marker has been placed, units may be moved into or out of the Follow-On Box (as soon as all units from any prior operations have exited) during any Special Movement Phase prior to the turn on which the operation is conducted.
13.1.6 Units in the Africa Holding Box can use naval transport to land at friendly operating ports secured by subsequent amphibious operations.
13.1.7 Once an amphibious invasion operation has been conducted, it cannot be conducted again.
13.2 Invasion Procedure
Each amphibious invasion consists of picking up units from the Amphibious Invasion Box and placing them onto special hexes called invasion hexes. Each invasion hex has an arrow pointing toward the targeted coastal hex where units in the invasion hex must land.
13.2.1 During his Transport Phase, the Allied player places Amphibious Invasion units on invasion hexes allowed by the operation. Unless specified by scenario setup instructions, units designated for an invasion operation can be placed on any invasion hex designated with the codename for that invasion [Allied Set-Up Card]. Not all invasion hexes need to be used. Place no more than eleven stacking points per invasion hex.
13.2.2 Combat units (except for Commando units) cannot be placed on an invasion hex without a Beach unit.
13.2.3 During the Allied Movement Phase, units on invasion hexes that face no opposing enemy units in their targeted coastal hexes automatically move ashore at one-half MA (rounding down), paying the non-road MP cost to enter that hex. Units may always occupy their targeted coastal hex regardless of MP cost to enter (an exception to rule 7.3.2, which requires a unit to have sufficient MPs to enter any hex).
a. Once ashore, each unit makes an ER check. Those that pass may continue moving (if possible) with any remaining MPs in their one-half MA. Each ER die roll is modified by the off-road terrain cost (+1, +2, +3) of the coastal hex the unit entered. b. Those failing their ER checks stop all remaining movement for the rest of the Movement Phase and remain on the coastal hex. c. Regardless of whether units remain on their coastal hexes or advance from them, they are eligible to participate in declared combats against adjacent enemy units (including Amphibious Assaults made by units still occupying invasion hexes).
13.2.4 Units on invasion hexes that face enemy units in their targeted coastal hexes remain there during the Movement Phase and must attack those enemy units during the Combat Phase.
a. They cannot participate in combat against any other adjoining hex. The arrow in the invasion hex acts as a Combat Declaration Marker point to the targeted coastal hex. b. Units already on land can join invading units in combat but must pass Combat Coordination. c. The invasion hex is always the Lead hex in a multi-hex declared combat. d. Any declared combat (single or multi-hex) involving Allied units on invasion hexes automatically receives a +1 DRM.
13.2.5 Amphibious Invasion units (including Beach units) that fail to clear the opposing coastal hex of enemy units must conduct Emergency Evacuation [13.3]. An Emergency Evacuation from one coastal hex or invasion hex does not affect combat from another invasion hex.
13.2.6 The Beach unit and combat units on the invasion hex must move into the targeted coastal hex if the attack is successful.
13.2.7 If a zero strength Coast Defense unit is revealed during combat resolution, up to eleven attacking Allied stacking points (starting with those units on the invasion hex) can be moved into the vacant coastal hex, but none of the units involved in the declared attack against the zero strength unit can participate in any other declared attacks.
13.2.8 During the Special Movement Phase of the Invasion Turn, combat units still in the Amphibious Invasion Box move to the Follow-up Box or the Africa Holding Box. Beach units move to the Africa Holding Box.
13.3 Emergency Evacuation
Only Allied units can conduct Emergency Evacuation. Storms do not prevent emergency evacuation.
Emergency Evacuation is special naval movement from an invasion hex, coastal hex with a Beach unit, or a friendly operating port. It occurs at the conclusion of a combat or at the end of the Allied Movement or Motorized Movement phases.
Exceptions:
-
Allied commando and airborne units can evacuate from any coastal hex without need for a Beach unit.
-
Each evacuated Allied unit is subject to an ER check. Reduce it by one step if it fails.
-
Allied evacuation in an Axis air superiority zone is subject to a +2 DRM for each ER check.
Example: During the Combat Phase, an Allied unit on an invasion hex attacks an Axis unit on the targeted coastal hex but fails to force the Axis unit from the hex. Because the Allied unit cannot advance after combat onto the coastal hex, it and its Beach unit must evacuate. They immediately conduct ER checks, and the surviving steps are placed in the Emergency Evacuation Box.
Evacuated units are picked up and placed immediately in the Allied Emergency Evacuation Box. During every Special Movement Phase, each unit in the Emergency Evacuation Box can make an ER check and move into the Africa Holding Box if it passes. The ER checks take place after all movement from the Africa Holding Box to the Amphibious Invasion and Follow-Up Boxes is complete. Units in the Allied Emergency Evacuation Box cannot receive replacements.
13.4 Invasion Follow-Up
13.4.1 Some units in each invasion are designated as Follow-Up units. They are placed in the Follow-Up Box of the appropriate Allied scenario.
13.4.2 Follow-up units cannot invade; they will land during the Special Movement Phase of any Reorganization Segment.
13.4.3 Place Follow-Up units on any Invasion hex with an arrow pointing toward a coastal hex occupied by a Beach Unit. There is no MP cost for placement on the invasion hex. Follow-Up units cannot land without a Beach unit and cannot be diverted to a port (except back to Africa Holding box). They move ashore by paying the non-road terrain movement point cost of the targeted coastal hex.
13.4.4 Once ashore, Follow-Up units do not have to make ER checks before moving further. They may move at one half MA (less the MPs paid to enter their targeted coastal hexes).
13.4.5 Stacking limits are not enforced during Follow-Up movement, but do apply after all Follow-Up movement has ceased.
13.4.6 No more than six Allied Follow-Up units can be landed during any non-Storm turn. Reduce this capacity to two units during Storm turns. Unless specified by scenario instructions, within the six unit per turn limit there are no nationality quotas [14.2].
13.4.7 At the end of the second turn of Invasion Operation being conducted, units remaining in the Follow-Up Box are returned to the Africa Holding Box.
13.5 Allied Commandos
Allied commandos operated as very special invasion troops. The Axis commando unit cannot conduct amphibious invasion.
13.5.1 Commando units do not require Invasion Planning to conduct an amphibious invasion. They are available on any non-Storm turn and in any number. A commando unit must start on any operating port (including the Africa Box) to conduct an amphibious invasion. Commando units do not count against Naval Transport capacity.
13.5.2 Commando units can conduct an amphibious invasion onto any coastal hex; they are not limited to invasion hexes and do not need Beach units. They are, however, subject to all other invasion restrictions.
13.6 Axis Sicily Evacuation
13.6.1 During the Special Events Phase of any game turn following the fall of Mussolini [14.3] or an Allied invasion of Calabria, the Axis player can declare an evacuation of Sicily.
13.6.2 The Axis player retains the normal Naval Transport capacity available during the Axis Transport Phase and gains the ability to evacuate additional units during the Axis Movement and Motorized Movement Phases.
a. Unit Sicily Evacuation is declared, no Axis-controlled port can be used for movement/motorized movement phase evacuation. b. Once declared, normal Axis naval transport limits remain in effect, but there can be no naval transport into Sicily. Axis-controlled ports on Sicily no longer act as supply sources for the remainder of the game.
Design Note: Transport and port capacity normally used for supply is diverted to evacuation.
c. For the remainder of the game, three Axis units per movement/motorized phase may attempt evacuation from Axis-controlled ports on Sicily. Destinations for evacuating units are either Reggio or the Axis Emergency Evacuation Box.
Note: If the Allies have invaded Calabria, Reggio is counted as an Axis-controlled Sicily port.
d. Sicily Evacuation attempts occur before any movement in either Axis movement phase. Only Axis units that occupy port hexes before movement are eligible to be chosen (however, units chosen can be motorized or non-motorized regardless of the movement phase about to be performed. For each unit chosen, roll on the Naval Transport Table. Use the Naval Transport die roll procedures, DRMs, and results just as if this were occurring in the Transport Phase. e. Units successfully entering the Sicily Evacuation Box follow the procedures of 7.7.3 (plus Note). f. Units successfully evacuated to Reggio can move once the movement phase starts (unless the unit is non-motorized and the Motorized Movement Phase is starting).
Play Note: Once evacuation is declared, Axis units may become eligible for two or more evacuation attempts per turn. An Axis unit occupying a port hex at the start of a turn could make three attempts (once during the Transport Phase and again during the Axis movement phase). An Axis unit entering a port hex in the Axis Movement Phase could make but one attempt (before the Axis Motorized Movement phase). A unit entering a port hex during the Axis Motorized Movement Phase would have to wait until the Transport Phase of the next turn before it could make its first attempt.
14. Special Rules
14.1 Italian Coast Defense Units
14.1.1 All Coast Defense (CD) units have Tried and Untried sides. The back (Untried) side is where the unit values are not known. The front (Tried) side shows known unit values.
14.1.2 Begin with all CD units in an opaque cup. The Axis player draws them at random during Prepare for Play. Unless specified by scenario instructions, CD units are placed Untried at Start. Neither player is allowed to know the exact strength of an untried CD unit until it is flipped.
14.1.3 CD units can be turned from their Untried side to their Tried side during any Axis friendly Movement Phase by the Axis player and they must be turned to their Tried side if they participate in combat. Remove Tried zero defense strength units from play immediately.
14.1.4 The Axis player places his CD units only on hexes with coast defense position symbols. They are placed one per hex.
14.1.5 CD units in Untried mode cannot move, but each exerts a ZOC. They are treated as ground combat units and sure subject to supply restrictions.
14.1.6 Once in Tried mode, a CD unit cannot return to Untried mode. It can move only if it has an MA greater than zero. Those with zero MA cannot move at all and are eliminated if forced to retreat as a result of combat.
14.2 Allied National Restrictions
Many Allied nationalities participated in the Sicilian and Italian campaigns; all were integrated, to varying degree, into either American or British commands.
14.2.1 For combat purposes there are only two Allied nationalities: American (US) and British (Br). The French unit is under American command. The Canadian units are under British command.
14.2.2 Whenever mixed nationalities are attacking the same defender, the Allied player adds one (+1) to his combat die roll result, cumulative with all other combat effects.
14.2.3 American Beach units cannot be used to allow British ground units to conduct amphibious invasion, or vice versa. Beach units can, however, allow landing of follow-up units or an evacuation of units of the other nationality, and can serve as supply sources for either nationality.
14.3 The Fall of Mussolini
Various groups plotted the overthrow of Mussolini and fascism, but the dissent on the Fascist Grand Council proved decisive. Mussolini was voted out on 25 July 1943 and was arrested and imprisoned the next day. In the face of powerful Allied armies and with political dissent at home, the Italian military increasingly lost effectiveness.
14.3.1 The Allied player can resolve the Fall of Mussolini Table no more than twice during a scenario. Only one attempt can be made on any allowed game-turn [Turn Record Track]. He makes it during the Special Events Phase of the Strategic Segment. If Mussolini falls on the first roll, do not use the Table again.
14.3.2 Allies Bomb Rome. If the Allied player declares that he will bomb Rome when he resolves the Fall of Mussolini Table, no Allied air support points are available for the current game-turn. He adds two (+2) to his die roll resolving the Fall of Mussolini Table if this is the first time he has bombed Rome; if this is the second time, he adds one (+1). Rome cannot be bombed if the weather result for that game-turn includes Storm.
14.3.3 Italian Demoralization. If this result occurs, all Italian units lose one point of their ER for all game purposes (cumulative with other effects) for the rest of the scenario. No Italian unit can be sent to Sicily. Remove any surviving CCNN units immediately.
14.3.4 Fascist Revival. If this event occurs, all surviving CCNN unit ERs are raised by two points for all game purposes for the rest of the scenario. Return any one eliminated CCNN unit (if available) to play (an exception to rule 15.2.4a) by placing it in a friendly Axis city during the Replacements Phase. Reduce available Allied naval support points by two per turn for the rest of the scenario.
14.4 Allied Theater Reserves
The Allied player suffers VP penalties if he commits units to combat that were earmarked for future employment in Italy [Play Book].
15. Replacements
As units fight, their strength may be depleted by combat results. Expending Replacement Points (RPs) enables them to recover their strength fully or partially.
15.1 Restrictions
15.1.1 Many combat units can be rebuilt with RPs (even if eliminated).
15.1.2 Replacement Points
a. RPs are set by scenario instructions. b. Original or additional RPs are received during the Strategic Segment. Each player records his replacement points arriving in play on the Availability Track by using his Replacement Points marker. Unused replacement points can be saved for use during a future game-turn. c. Both players can add to their total RPs at a rate of one RP per game-turn. For each Allied RP added, the Allied player loses one VP. For each Axis RP added, the Allied player gains one VP.
15.1.3 Each player may expend RPs during the Replacement Phase, subject to the number of RPs available (as shown by the marker on the Availability Track).
Exception: The Allied player may be forced to expend an RP during the Transport phase if operating in the Axis Air Superiority Zone [12.6.b].
15.1.4 Allied RPs do not count against Allied Naval Transport or Port Capacities.
15.2 Replacement Procedure
The current strength and status of a unit affects how it receives replacements. Note that Axis RPs must be used in the form of Ersatz Units [15.3].
15.2.1 No units can recover more than one step of strength per turn.
Note: Allied Armor, Artillery, and Engineer (but not Beach/Port) units require two RPs to recover each step.
15.2.2 A unit on the map that is at Reduced Strength can receive one (or two) RPs to regain its Full Strength level (the next higher step), according to the following restrictions:
a. A qualifying Allied unit must be in supply, cannot have attacked or have been attacked this game-turn, and cannot be in enemy ZOC. It can move during its (ground) movement phases but cannot have been transported. b. A qualifying German unit must be in supply and cannot have participated in any Axis declared attacks or counter-attacks during the game turn. It can defend, and it can be in an Allied ZOC. It can move during its (ground) movement phases but cannot have been transported.
Design Note: War on the Eastern Front had taught the Germans how to rebuild their units quickly (even while in the front line). The Allies were still far behind on the learning curve.
c. During the Engineering Phase, add one step to the unit by turning it over to its Full Strength side. Reduce RPs available by one (or two) for each unit so increased.
15.2.3 An eliminated unit can receive RPs to recover its lowest (or only) strength level. Spend one (or two) RPs. Place it either:
a. If Allied, in the Africa Holding box. b. If Axis, at any friendly city hex then in supply or in the Italy Holding Box.
15.2.4 The following unit types cannot recover steps lost:
a. All Italian (regardless of unit type, due to collapse of the war effort) b. German Armor plus the I-2/HG (equipped with halftracks) and Artillery (scarcity of replacement equipment) c. Allied Parachute/Glider (could not absorb replacements and retrain in this game's time frame) d. Allied Commando (as above) e. Allied Beach/Port (in addition to replacements, specialized landing equipment was in short supply)
15.3 German Ersatz Units
The Axis player must bring all his RPs into play as Ersatz (Replacement) units. He combines them with reduced units during replacements phase.
15.3.1 The Axis player draws each Ersatz unit at random from an opaque cup and may not examine its Tried side. Ersatz units are placed face-down so that their Untried side is showing. Place each Ersatz unit so created in Italy Holding Box where they may be used [15.3.4b], or enter the map by Naval Transport or by entering the north mapedge (in Scenarios 3 and 4). Ersatz units are not flipped to their tried sides until odds computation during combat, or until any Axis Movement Phase where they start the phase on-map.
Design Note: Tried Ersatz MAs may vary from the standard untried Ersatz MA of 4. German replacements were culled from any available source, and were as much a mystery to the German commanders on Sicily as they were to Allied Intelligence.
15.3.2 One Axis RP can create one Ersatz unit; however, there must be an Ersatz unit available in the opaque cup for each RP to be expended.
15.3.3 Ersatz units set up on-map for scenarios are also drawn randomly from an opaque cup and set up on their untried sides.
15.3.4 If an Ersatz unit is to be used as a replacement step during the Replacement Phase it must be:
a. Stacked with the reduced qualifying German combat unit that is to receive it as a replacement step, or b. Located in a friendly Axis on-map city or in the Italy Holding Box to reform a qualifying eliminated German unit at its lowest strength level.
15.3.5 No more than one Ersatz unit per turn can be expended to reform or strengthen a qualifying German unit, but more than one Ersatz unit per turn can be expended if more than one German unit qualifies for receiving replacements [15.3.4].
16. Strongpoints
Strongpoints represent field fortifications that benefit only the Axis player. Strongpoints must be built.
16.1 Strongpoint Construction
16.1.1 Only the Axis player can construct strongpoints.
16.1.2 One strongpoint may be constructed during each turn in the Engineering Phase.
16.1.3 Construction can take place on any friendly Axis hex that can trace a supply route to an Axis supply source.
16.1.4 Only one strongpoint is allowed per hex.
16.1.5 The Axis player declares which qualifying hex is to receive the strongpoint, and places a strongpoint marker there. The hex does not have to be occupied by an Axis ground combat unit.
16.2 Strongpoint Effects
16.2.1 If a defender hex includes a strongpoint, the attacker adds one to his combat die roll result.
16.2.2 An Axis strongpoint blocks the tracing of an Allied supply route through the hex it occupies.
16.2.3 A unit spends one additional MP to enter a hex containing an enemy strongpoint.
16.2.4 Axis units have the No Retreat option when occupying a strongpoint on attack or defense.
16.2.5 Strongpoints continue to function in all respects until destroyed.
16.2.6 An Axis strongpoint is destroyed when any Allied ground combat unit occupies that hex during the Engineering Phase. Remove it from the map at the conclusion of the Phase.
17. How To Win
The Allied player wins the game by scoring sufficient Victory Points (VPs) to achieve the desired Level of Victory as shown on the Level of Victory Chart. The Axis player wins by preventing the Allied player from achieving his minimum Level of Victory. Players win a higher or lower level of victory depending on the final Allied VP total. Refer to the Playbook or Map VP charts for VPs and VP categories.