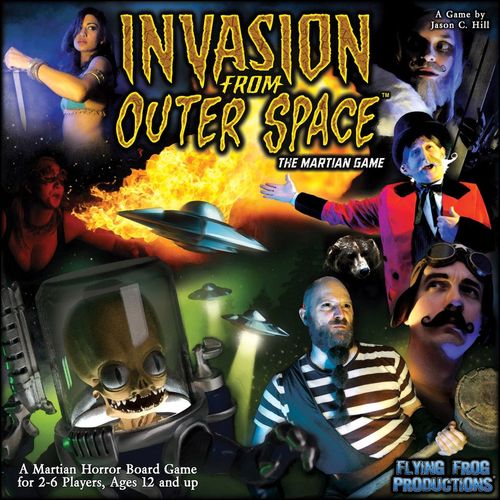
Invasion from Outer Space: The Martian Game
Invasion from Outer Space: The Martian Game Rulebook
Table of Contents
Table of Contents
- Game Overview
- Players
- Game Components
- Card Types
- The Game Board
- The Basic Game
- Setting Up
- The Game Round
- The Martian Turn
- The Hero Turn
- Fights
- Death of a Hero or Champion
- Playing Event Cards and Timing
- Rolling a Random Building or Board Section
- Winning the Game
- The Advanced Game
- Fire
- Crowds
- Martian Leader
- The Fun House
- Destroyed Saucers and Buildings
- Scenario Special Rules
- Scenario Specific Notes
- Crossover with Last Night on Earth
- Hero Profiles
- FAQ
- Glossary
Game Overview
Invasion From Outer Space™, The Martian Game is a fast-paced game of fiendish Martians, Big Top Heroes, and Sci-Fi Movie Action. Players take on the role of either the Carnival Heroes, using their special talents and working together to fight off the Martian Invasion; or as the invaders themselves, waves of Martian Soldiers and Flying Saucers, blasting Humans with Ray Guns and unleashing their vile alien technologies upon the Earth.
Featuring a modular game board, eight Carnival Heroes to choose from (such as the Fire Breather, Strongman, or Jo Jo, the Dancing Bear), an army of Martian Invaders (including Martian Champions such as the dreaded Zard Beast™), dynamic new game mechanics like Fires breaking out and Crowds of helpless civilians running in terror, and several different Scenarios to play that drastically change the game; Invasion From Outer Space™ is designed to create a cinematic feel as the story and game unfolds.
Invasion From Outer Space™ is built using the Last Night on Earth® game engine, so the two games are compatible. Players can now have their Martians invade the small town of Woodinvale, Zombies attack the Carnival, or even play a massive game with up to three independent factions (Heroes, Zombies, and Martians). The possibilities are endless.
So drop those roasted peanuts, strap on your jumpsuit, and step into the spotlight…the Martians are coming and the Invasion From Outer Space has begun!
Gameplay Breakdown
Each Game Round is split into two turns, the Martian Turn and the Hero Turn. During the Martian Turn, the Martian Player(s) get to Command their invasion force and move their Martians around, blasting everything in sight. During the Hero Turn, the Hero Player(s) get to Activate each of their Heroes, taking a Move Action (move, or Search if in a building), and attacking, in any order they wish. The game ends when either the objectives of the current Scenario being played are complete, or when the Invasion Track Marker reaches the end of the track.
Mature Theme and Learning Curve
Invasion From Outer Space contains some graphic horror-movie imagery (though it is most often depicted in a tongue-in-cheek fashion). For this reason, the game is aimed at an audience aged 12 and up. It is also worth mentioning that playing as the Heroes generally has a slightly steeper learning curve than playing as the Martians. Don't get discouraged. The more you play, the better your Hero strategies will become and the more likely you are to send those Martians back to whatever planet they came from. The most important thing is for the Heroes to always work as a team and support one another.
Game Contents
- 1 Full Color Rulebook
- 1 Double-sided Big Top Center Board
- 6 L-Shaped Outer Boards
- 8 Unique Hero Figures (Grey)
- 18 Martian Soldier Figures (9 Blue/9 Purple)
- 1 Martian Leader Figure (Dark Grey)
- 1 Giant-Size Zard Beast Figure (Dark Grey)
- 60 Card Hero Deck
- 60 Card Martian Deck
- 8 Large Hero Character Sheets
- 1 Large Martian Command Console
- 5 Large Game Scenario Cards
- 6 Reference Cards
- 10 Small Dice
- 6 Small Green Power Dice
- 1 CD Soundtrack of Original Music
- 4 Sheets of Full Color Die-cut Counters
- 1 Invasion Track
Players
Invasion From Outer Space, The Martian Game can be played by 2-6 players (there is always at least 1 Hero Player and 1 Martian Player). The total number of players determines how many will play as Heroes and how many will play as Martians. Consult the chart below:
| Players | Setup |
|---|---|
| 2 Players | 1 Hero player with all four Heroes; 1 Martian player |
| 3 Players | 2 Hero players with two Heroes each; 2 Martian players |
| 4 Players | 2 Hero players with two Heroes each; 1 Martian player |
| 5 Players | 4 Hero players with one Hero each; 2 Martian players |
| 6 Players | 4 Hero players with one Hero each; 1 Martian player |
Note that there are always 4 Hero characters, regardless of how many players are playing as the Heroes.
Game Components
Dice
The game comes with 16 standard six-sided dice. Some are white dice and some are green dice. These dice should be divided between the players (though each Hero should have at least 1 white die and 1 green die – more on this later). Often cards will refer to the terms D6 and D3. D6 is just another name for a six-sided die. D3 means to roll a six-sided die and consult the following chart:
| D6 Roll | Result |
|---|---|
| 1–2 | 1 |
| 3–4 | 2 |
| 5–6 | 3 |
Wound Markers
Several red Wound Markers are included to keep track of damage that characters take during the game. These markers are placed on the Hero Character Sheet or Martian Champion Token to show when they have been wounded.
Invasion Track
This track marks the turns of the game and counts down to 0 which is shown as the Earth at the bottom of the track.
Power Tokens
These tokens are a resource that the Heroes need to spend in order to use their powerful special Talents. Each Hero starts the game with 1 Power Token, but can get more as the game progresses.
Martian Command Points
The Martians get these Command Points to spend using the Command Console in order to manage their invasion of Earth.
Objective Trackers
These donut-shaped markers are used to mark the current turn on the Invasion Track and to track Scenario Objectives when needed.
Landing Site / Flying Saucer
The Martians have come to Earth in Flying Saucers. These Landing Site markers represent a saucer floating above the tabletop and are spots that Martians can teleport into play. As they are Flying Saucers, these Landing Site markers can be moved around the board during the game (this is covered in detail later).
Cone of Light and Lights Out
Sometimes during the game a building will have the power go out or have a saucer descend on it with a cone of light. These markers show which buildings are affected by such things.
Cannon / Death Ray Template
This double-sided template has a Martian Death Ray on one side and the Cannon shot on the other.
Spare Cannon (Advanced Game Only)
Occasionally the Heroes will gain an extra circus cannon that can be positioned on the board. This is covered in the Advanced Game.
Fire Markers (Advanced Game Only)
These markers are used when a Fire breaks out or when a Scenario calls for the use of Crowds to be in play. These are covered in the Advanced Game.
Kerosene Marker (Advanced Game Only)
Highly flammable, these Kerosene Markers can be positioned around the board to set off a chain reaction of fire and destruction. This is covered in the Advanced Game.
Crashed Saucer (Advanced Game Only)
Some Scenarios call for a Martian Flying Saucer to have crashed.
Assorted Counters (Advanced Game Only)
Several additional counters have been provided. These are not needed for the main game but can be used for house rules, extra content, or future official Scenarios.
Playing Pieces
There are 8 unique Hero figures (Grey), each matching one of the Hero Character Sheets. There are also 18 Martian Soldiers (9 Blue, 9 Purple) with clear plastic helmets, as well as 2 Martian Champions (Dark Grey) – the Martian Leader and the dreaded Zard Beast.
If there is one Martian Player, all of the Martian Soldiers form a single Martian Pool. If there are two Martian Players, each player gets their own Martian Pool of 9 Martian Soldiers each (one player gets Blue, one player gets Purple) and the 2 Martian Champions are shared.
Invasion from Outer Space Soundtrack
Invasion From Outer Space, The Martian Game comes with its own CD Soundtrack of original music to listen to while you play the game. It is not necessary and does not affect the game play, but you may find it helpful in setting the mood and immersing the players.
Card Types
There are two decks of cards in the game, Hero Cards and Martian Cards. Each of these is a 60 card deck. In the Basic Game, only 40 cards from each deck are used; the other 20 Advanced Game cards for each deck are set aside for later (this is covered in the Basic Game section).
Hero Cards
Hero Cards represent Items and Weapons that the Heroes can find throughout the game as well as Events used to surprise your opponents. Just below the card image are the Keywords. The first Keyword is always either Item or Event.
Items (Green bordered, or Grey-Blue bordered for Weapons) are cards that are played face-up on the Hero who found them. These are discussed in greater detail later on.
Events (Gold bordered) are taken into the player's hand and kept secret from the Martians. They can be strategically played on any Hero to give them an edge or to save them from serious trouble. When played, Event cards are discarded after they take effect.
Martian Cards
Martian Cards work a little bit differently than the Hero Cards. The Martian Player(s) have a hand of cards at their disposal to use against the Heroes as they see fit. At the beginning of each Martian Turn, they get to draw 2 new cards into hand for free. There are two types of Martian Cards - Martian Events and Martian Tech.
Martian Events (Gold Hex-metal bordered) are Martian Cards that are played for a variety of different abilities that the Martians can use to attack, torment, and generally terrorize the Heroes. When played, Martian Event cards are discarded after they take effect.
Martian Tech (Silver Hex-metal bordered) are Martian Cards that have a Command Point Cost in a large green circle, just below the card image. These represent various bits of advanced Martian technology that can be built and brought to bear against the Humans. Martian Tech cards stay in play, face-up on the table once they have been built, and continue to benefit the Martians.
Play Immediately
Some Event cards are marked as Play Immediately. As it sounds, these cards must be played as soon as the player is finished drawing cards. If more than one 'Play Immediately' card is drawn at the same time, the player may choose in what order they resolve.
Remains in Play
Event cards marked Remains in Play at the bottom of the text box, are set out on the table face-up when played. These cards continue to have their game affect until they are canceled somehow (usually by another card or ability). They do not count as being in a player's hand of cards, and there is no limit to the number of 'Remains in Play' cards that can be in play at one time.
Keywords
All Hero and Martian Cards have Keywords listed just below the card image. Hero Character Sheets and Martian Champion Tokens also have Keywords listed. Keywords generally do not have any inherent meaning to them, they are just there to let you know the type of the card or to be played off of by other cards or abilities. Some Hero Cards have an icon in the upper right corner of the text box to emphasize a certain Keyword (like Gun or Fire).
Hero Character Sheets
Each of the different Heroes is represented by a Hero Character Sheet that lists their unique abilities and information.
Martian Command Console
The Martian Command Console is used by the Martian Players to help run their invasion.
Martian Champion Tokens
Each of the two Martian Champions is represented by a Martian Champion Token that lists their unique abilities, cost, and information.
Scenario Cards
There are five different Scenarios to play, each represented by a large Scenario Card that lists all of its important information and objectives.
The Game Board
There are two types of board sections, the square Center Board and the L-shaped Outer Boards.
The Center Board
The Center Board is placed in the center of the table and has larger spaces to allow for faster movement across the middle of the board. These spaces work just like the smaller spaces on the other board sections, there are just fewer of them. Also, the Center Board has two different sides, the Big Top and the Fair Grounds. As a default, Scenarios use the Big Top side of the Center Board, unless the Scenario is specifically marked as using the Fair Grounds board.
Outer Boards
There are 6 L-shaped Outer Boards. These boards represent the various structures and tents that make up the carnival. At the start of each game, 4 of the Outer Boards are chosen at random and placed around the outside of the Center Board to form the complete, square game board.
Spaces
The board is divided up into a number of spaces that the Heroes and Martians move through. Every space is either an Outdoor Space or a Building Space (those within the walls of a Building). Note that even though tents are really temporary structures, they are treated the same as any other building for game purposes.
There is no limit to the number of Heroes that can be in a space, and Heroes and Martians may be in the same space. The only restriction is that there may not be more than one Martian Pack in a space at a time (this is described in more detail in the Martians section of the Basic Rules).
Walls
Walls run along the edge of certain spaces to show the border of a building. Walls block Hero and Martian movement as well as Line of Sight for Ranged Attacks (more on that later).
Some Walls are marked with Red and Black striped lines; these are Hard Walls. Hard Walls are covered in the Advanced Game. For now, treat them as any other Wall.
Doors
Doors are marked by a break in the Wall and allow Heroes and Martians to move through that Wall in a given space. When moving through a Door, models must always go directly through from one side to the other, they may not move diagonally through the Door.
Pinch Points
Because of the random board set up, sometimes there will be situations where two buildings are adjacent to one another and only touching at corners; this is called a Pinch Point. Pinch Points are covered in the Advanced Game. For now, treat them as any other adjacent Outdoor Spaces.
Big Top Tent
The Big Top Tent is the large building on the Big Top side of the Center Board.
Unlike normal buildings, Heroes may NOT Search in the Big Top Tent.
Instead, the Big Top has a special ability listed on the board that allows any Hero inside to use a Power Token to draw a card. This may be used multiple times per turn.
Another unique aspect of the Big Top Tent is the four grayed out corner Blockers of the building. These mark the large bleachers and tent poles and provide a certain amount of protection for anything in the center space of the Big Top Tent.
Nothing may ever cross these Blockers. No movement, Ranged Attacks, the Human Cannonball, or even Martian Flying Saucers are allowed to move through these Blockers.
Carnival Cannons
You'll notice that there is a Cannon on each of the L-shaped Outer Boards. These Carnival Cannons do not have any built-in abilities, but rather are used in conjunction with a Hero's Special Rules or Cards.
Landing Site Start Spots
On each of the Outer Boards there is a faded circular area with a swirl pattern and surrounded by a dotted line; these are Martian Landing Site start spots. At the start of the game, place a Landing Site marker on each of these spots (as noted before).
The Fun House
The Fun House is a special building that has additional text and numbers in each of its rooms. This is covered in the Advanced Game. For now, treat the Fun House as any other normal building.
Pick Up:
Although the Heroes can Search in any building to draw a Hero Card, some buildings are noted as having a 'Pick Up:' ability that can be used instead of simply drawing. If a specific card is listed (or type of card), that card may be pulled from the Hero Cards discard pile if it is there.
For example, the Animal Pens building has Pick Up: Cabbage. A Hero Searching there could either draw a card from the top of the Hero Deck as normal, or they could instead take Cabbage from the discard pile if it is there.
It is important to note that for a Hero to use a Pick Up: like this, the card must already be in the Hero Cards discard pile (you do not get to pull it out of the deck).
The Basic Game
For your first couple of games we suggest that you start by playing the Basic Game described in this section. The Basic Game focuses on the core rules and is a good introduction for new players. This allows players to get used to the fundamentals of how the game mechanics work before moving on to the more advanced aspects of the game.
Remove Advanced Cards
Sort through the two card decks and set aside the 20 Advanced Cards from each deck that have the Advanced Card Symbol in the lower Right corner (40 cards total). These cards are listed below and will be used later in the Advanced Game. (Note that there are multiple copies of some of these cards and that some of them have copies that are NOT marked with the Advanced Card Symbol. Only set aside copies of cards that actually have the Advanced Card Symbol on them).
Advanced Martian Cards
- 4x Saucer Blast
- 2x Call Forth the Leader
- 2x Crossfire
- 2x Clash of Egos
- 1x Invasion From Outer Space
- 1x "Your World is Ours!"
- 1x Proto Bomb
- 1x Qua'to Duplicator
- 1x Supreme Intelligence
- 1x Struggle For Survival
- 1x "They're Here!"
- 1x "Run For Your Lives!"
- 1x "I've Got To Get To The…"
- 1x "This Could Be the End"
Advanced Hero Cards
- 4x Just What I Needed
- 3x Water Bucket
- 2x Bomb
- 2x Fire the Cannon
- 2x Matches
- 2x Kerosene
- 1x "Get Off My Planet"
- 1x Encore
- 1x Heroic Attack
- 1x Heroic Resolve
- 1x Spare Cannon
Scenario
In the Basic Game there is only one Scenario, Invasion. Set aside the other Scenario Cards and place the Invasion Scenario face up on the table near the Hero Players, where everyone can see it.
In this Scenario, the Heroes have 13 Turns to kill 20 Martians. The Martians win by killing 2 of the Heroes. If neither side has completed their goal by the time the Invasion Track Marker reaches the end of the Track (the Earth), whichever player is in the lead wins (as described on the Scenario Card). Keep count of Martian kills using the Track provided.
Setting Up
Create the Game Board
Place the Big Top Center Board on a large table and randomly (face down) choose four of the six L-shaped Outer Boards to be placed around the Center Board. Once placed, flip these boards over to create the full game board as shown in the set up diagram. Place the Invasion Track near the board where everyone can see it.
Choose Heroes
The Hero Players then randomly draw 4 Hero Character Sheets to form the Hero team. Note that the Hero team is always made up of 4 Heroes, regardless of the number of Hero Players. Place these character sheets face up on the table so everyone can see them and take the appropriate Hero playing pieces out of the box. Note that Cassidy, The Trickshooter starts the game with the Brace of Pistols card. If she is drawn, look through the Hero Deck and find that card to place face up next to her character sheet. Be sure to shuffle the Hero Deck afterwards.
Each of the Hero playing pieces is now placed on the board in their Start location, listed in the upper right corner of their character sheet. The model may be placed in any space of the listed building (Hero Player's choice). If a Hero's Start location is not present on the board, the model is instead placed in the center space of the Big Top Tent and, as a bonus, they start with a free Hero Card drawn from the top of the Hero deck. If it is an Item, it is placed face up near the Hero's character sheet. If it is an Event, it is taken into the Player's hand as normal.
Heroes start the game with 1 Power Token each. Place this Power Token on the Hero's Character Sheet.
Shuffle and Place the Card Decks
Shuffle the Martian and Hero Card decks and place them near their respective players. It is very important to thoroughly shuffle each deck of cards before every game.
Prepare the Martian Pool
If there is only one Martian Player, take all 18 Martian Soldiers (Blue and Purple) and set them in a group off to the side. This is the Martian Pool. You may go through any number of Martian Soldiers during the game, but may not have more than 18 on the board at once.
When Martian Soldiers are removed from the board, they are placed back into the Martian Pool.
If there are two Martian Players, each of them has a separate Martian Pool of 9 Martians each. One player takes all of the Blue Martians and the other takes all of the Purple Martians. Players may never use Martians from the other player's pool (only their own color of Martian Soldiers).
Prepare Command Console and Champions
Place the Martian Command Console face up on the table near the Martian Player(s). If there is only one Martian Player, use the standard side of the Console (with the Orange glowing lights). If there are two Martian Players, use the Two Martian Player side of the Console (with the Blue glowing lights).
Place the Zard Beast model and Champion Sheet off to the side. The Zard Beast is a Martian Champion and may be unleashed by the Martian Player(s) during the course of the game. Return the Martian Leader and his Champion Sheet to the box; he is only used in the Advanced Game.
Place Starting Martians and Landing Sites
Place a Martian Landing Site marker on the Landing Site Start Spot on each of the four Outer Boards. These Landing Sites represent a Flying Saucer hovering above the tabletop and are where the Martians land to attack. Landing Sites may move over the course of the game.
The Martian Player starts the game with 2 D6 Martian Soldiers on the board (or 1 D6 each if two Martian Players). Place the rolled number of Martians onto the board from the Martian Pool.
Prepare Counters and Dice
Place all of the Wound markers, Power Tokens, Martian Command Points, and other counters in a pile near the board that all of the players can reach. Also distribute the dice between the players. You'll notice that there are two colors of dice, Green and White. The Green dice are mostly used to roll for Power Tokens each turn, so each Hero Player should have one White and one Green die.
You are now ready to begin the game.
The Game Round
Each Game Round is split into two Turns, the Martian Turn and the Hero Turn. During the Martian Turn, the Martian Player(s) get to Command their forces, move around the board, and blast away with their Ray Guns. During the Hero Turn, each Hero is Activated in any order they wish. Once the game is set up, the first Game Round begins and the Martians take their Turn first. The game ends when either the objectives of the Scenario are completed or when the Invasion Marker reaches the Earth at the end of the Invasion Track.
Game Round
I) Martian Turn II) Hero Turn
The Martian Turn
Each Martian Turn has 8 Phases that must be completed in order.
- Move the Invasion Track Marker
- Draw New Martian Cards
- Roll for Reinforcements
- Command Phase
- Move Martians
- Ray Gun Attacks
- Fight Heroes
- Land New Martians
1) Move the Invasion Track Marker
In the first turn of the game, instead of moving the Invasion Track Marker, simply place it on the track at the number listed for 'Turns:' on the Scenario card. So for instance, in the Invasion Scenario, place the marker at number 13 on the track.
At the start of each of the following Martian Turns the Invasion Track Marker is moved one space forward on the track (counting down). If this moves the marker off of the last space of the track (the number 1) and onto the Earth at the bottom of the track, the game immediately ends. This usually represents the rest of the invasion force reaching the Earth and conquering all (though for some Scenarios, this represents the Heroes holding off the Invasion until the last of the ships has been defeated).
2) Draw New Martian Cards
During this phase, the Martian Player draws 2 new Martian Cards from the top of the Martian Deck to add to his hand (if there are two Martian Players, then each of them only draws 1 new Martian Card).
The Martian Player may have up to a total of 6 cards in hand at a time (or up to 3 cards each for two Martian Players). New cards are drawn one at a time and while a Martian Player has their max number of cards in hand, they may not draw any more.
These cards are secret from the Hero Players, but if there are two Martian Players, they may show each other what cards they have so that they can plan their fiendish strategy.
Before drawing new cards, each Martian Player may discard up to 1 card from hand if they wish.
3) Roll for Reinforcements
To see if you may Land New Martians this turn, roll 2 D6 and add them together.
If the roll is higher than the total number of Martian Packs (all of the Martians in a space are called a Martian Pack) you currently have on the board, you may Land New Martians at the end of the turn.
If there are two Martian Players, then each of them should roll only 1 D6 and are trying to roll higher than the number of Martian Packs on the board that contain Martians that they control (Martians of their color and the Zard Beast if it is in play and they control him this turn). This roll should be made after any Play Immediately cards are played as it may affect the number of Martian Packs on the board.
4) Command Phase
During the Command Phase, the Martian Player gets to decide what he wants to focus on this turn using the Martian Command Console. Note that there are two sides to the Console, one for a single Martian Player and one for two Martian Players. This is described in more detail below.
5) Move Martians
During the Move Martians Phase, each Martian Soldier may move up to one space. They have no facing and may move in any direction, including diagonally.
Martian Packs – Martians like to move around the board in packs as they get extra benefits from staying together. There may never be more than 3 Martian Soldiers total in a space. All of the Martian Soldiers in a space are considered a single Martian Pack and if there are 3 Martian Soldiers in the space, it is called a full Martian Pack.
There are three things that prevent a Martian from moving into a space:
- Martians may not move through Walls, they must go around them. They can however move through a Wall using a Door (the openings cut into the Walls). Martians may NOT move diagonally through a Door, they must go straight through.
- A Martian may not enter a space if it already contains a full Martian Pack (3 Martians). This even includes if they are just passing through the space and not ending there. You can never have more than 3 Martian Soldiers in a space at any time. There are some exceptions to this with Martian Champions, but those are covered later.
- And lastly, if a Martian is in a space with a Hero, the Martian may NOT move away from that space. They are locked in the space with the Hero.
6) Ray Gun Attacks
Once all Martian movement has been completed, each Martian Pack may fire their Ray Guns. A Ray Gun Attack may target the Martian Pack's own space, or it may target an adjacent space (including diagonally). If a Martian Pack is in the same space as a Hero, they may only fire their Ray Guns into their own space (not an adjacent one). The Martians must have Line of Sight to the chosen space (Line of Sight section). For now, you can consider that Martians will nearly always have Line of Sight to an adjacent space. They can even shoot through building Walls that they are touching as it is assumed that there are windows and holes that can be seen through.
All of the Martians in a Pack must fire their Ray Guns at the same space; they may not split up their Ray Gun Attack. A Ray Gun Attack like this is called a Blast.
To make a Ray Gun Attack, roll one die for each Martian in the Pack firing. Martian Ray Guns Hit on the roll of 5 or 6 each, or on the roll of 4, 5, or 6 each if it is a full Martian Pack of 3 Martians that is firing (due to their use of pack tactics).
Once you have determined how many Ray Guns have Hit in the target space, any Heroes there must divide up those Hits between them as they see fit (this allows Heroes in the same space to help protect each other). Ray Gun Hits do not automatically cause a wound, the Hero still has a chance to Dodge and get out of the way (avoiding the Hit by ducking behind cover or dodging the shot altogether).
To Dodge each Ray Gun Hit, the Hero must pass an Agility Test. Each Hero has an Agility listed on their Hero Character Sheet. To make an Agility Test, roll a die. If the roll is equal to or higher than the Hero's Agility value, they have passed the test and avoided that Ray Gun Hit. Any Agility Test that is failed means that the Ray Gun Hit has struck home and the Hero takes one wound. Place a wound marker in one of the Hero's Health Boxes to show this.
7) Fight Heroes
After all Ray Gun Attacks are complete, any Martians that are in a space with one or more Heroes, must Fight them. All of the Martians in a Pack Fight together against each Hero in the space. Fights are covered in greater detail later.
8) Land New Martians
Finally, after any Fights have been resolved, the Martian Player(s) may Land New Martians. If you rolled high enough during the Roll For Reinforcements Phase toward the beginning of the turn, you may now roll a D6 and place that many Martians from your Martian Pool onto the board at any Landing Sites you choose (or D3 Martians if there are two Martian Players). Remember that you may not have more than 3 Martians in a single space.
It is important to note that you may never have more than one Landing Site (Flying Saucer) in the same space at a time. They may move through a space with one another, but they may not end their move in the same space.
Note that the terms Flying Saucer and Landing Site are interchangeable as they represent the same thing.
The Martian Command Console
As noted above, during the Command Phase, the Martian Player(s) use the Command Console to manage the invasion. The Console has several buttons on it that control various aspects of the Martian attack force. Each of these buttons has a Command Point cost listed in a green circle.
At the start of each Command Phase, the Martian Player gets 2 Command Points to spend for the turn (or 1 Command Point each for two Martian Players).
These Command Points are placed on the buttons of the Console to show what the Player is utilizing this turn. Command Points may be spent one at a time (resolving each before spending the next), and may be used for the same button more than once. Any Command Points that are not spent are lost at the end of the Command Phase. Note that any Command Points spent on Build Martian Tech or Call Martian Champion flow through to be placed directly on the individual Tech card or Champion Token.
The buttons on the Martian Command Console have the following effects:
Draw 1 Martian Card – The Player draws 1 new Martian Card from the top of the Martian Deck. Note that this button may not be used if the Player already has a full hand of cards.
Move a Saucer up to 2 Spaces – As noted earlier, the Martian Landing Sites actually represent Flying Saucers hovering over the battlefield. Command Points may be spent to move these Landing Sites around the board. This has no effect on models that are in the Landing Site space. Landing Sites generally ignore all models, walls, Fires, etc while moving and can move up to 2 spaces for each Command Point spent. The only things that a Landing Site may not cross during this move are the grayed-out corner Blockers of the Big Top Tent (as noted before). It is important to note that you may never have more than one Landing Site (Flying Saucer) in the same space at a time. They may move through a space with one another, but they may not end their move in the same space.
Immediate Reinforcement - 3 Martians – The Player immediately places up to 3 Martians from their Martian Pool at any one Landing Site on the board. These Martians may move and fight normally this turn. Note that this is the only button on the Console that costs 2 Command Points to use. On the Two Martian Player Command Console, this button is slightly different in that it only costs a single Command Point to use, but only generates D3 new Martians (rather than a full 3).
Build Martian Tech – Some Martian Cards are listed as keyword Tech and have a Command Point cost right on the card (in the same green circle as those on the Console). Unlike Martian Events, these Martian Tech cards require Command Points to build and use and so may only be played during the Command Phase.
To play a Martian Tech card, put it face down on the table next to the Console and place at least one Command Point on it (using the Build Martian Tech button). Once there are Command Points on the Tech equal to or higher than the cost printed on the card, it may be revealed by the Martian Player during the Command Phase to bring it fully into play (face up on the table next to the Console. All Command Points used to build it are then returned to the counter pool). The Martian Player may look at these face-down Tech cards until they are completely built.
Martian Tech cards that are on the table like this do NOT count as being part of the Player's hand of cards, regardless of whether they are face-up or face-down.
Note that many of the Martian Tech cards have a Command Point cost higher than 2 and so will likely take multiple turns to build. Any Command Points on a face down Tech card remain from turn to turn, and can be added to over time. There is no limit to the number of face down Tech cards the Martian Player has, or to the number of Command Points placed on those cards to build them. When revealed to be complete during a Command Phase, all Command Points on the card are removed.
If there are two Martian Players, they may both build on the same Tech cards and both Players gain the advantages of any Tech Cards that are in play.
Martian Tech cards that must be discarded to use such as Death Ray, may only be discarded in this way during a Command Phase.
Call Martian Champion – Calling a Martian Champion works just like Building Martian Tech, except that the Champions are always available to Call (you do not need to wait to draw a specific card). Martian Champions have their Command Point cost printed on their Martian Champion Token (in the same green circle). When Command Points are spent to Call a Champion, they are placed on that Champion's Token. While a Champion is in play, no Command Points may be spent to Call it (it may not be pre-built again just in case it is killed). In the Basic Game, only the Zard Beast Martian Champion is available.
When a Martian Champion is Called (their Command Point Cost has been fully paid) they are immediately placed on the board at a Landing Site (during the Command Phase) and may move and attack normally this turn.
If there are two Martian Players, they may both build on the same Martian Champions and both Players will get to control them once they enter play. The player controlling the Blue Martians has control of all Martian Champions on Odd numbered turns and the player controlling the Purple Martians has control of all of the Martian Champions on Even numbered turns.
The Death Ray
One powerful Martian Tech card is the Death Ray that can be fired from a Flying Saucer. Like several of the Martian Tech cards, the Death Ray must be discarded to use. In this way, it is a one use only piece of Tech and may only be fired during the Command Phase of the Martian Turn. This attack uses the Death Ray Template (covered later) and can hit multiple targets with its one large Blast attack.
Once the template is placed over the board, roll a D6 to Hit each Hero (and Crowd in the Advanced Game) in a space touched by the template. To Hit a Hero, you must roll equal to or higher than the number printed on the section of the Death Ray Template that touches the space the Hero is in (if more than one section touches the space, the Martian Player may choose which section of the template to use). So for example, if there is a Hero in a space touched by the 3+ section of the Template, you will need to roll a 3, 4, 5, or 6 on the die to Hit that Hero.
Any Hero Hit by the Death Ray takes one wound. Unlike Ray Gun Attacks, a Hero may NOT Dodge the Death Ray.
The Zard Beast
In the Basic Game the Martians have access to one of their Martian Champions, the dreaded Zard Beast. The Zard Beast may be Called into play during the Command Phase of the Martian Turn as noted in the section above.
The Zard Beast is a giant creature that is deadly in combat and can charge across the board with terrifying speed. It may move 2 spaces each turn and rolls 3 Fight Dice in a Fight (more on Fights later). It also has 3 Health Boxes meaning that it must be wounded several times to actually kill it. Unlike normal Martian Soldiers though, the Zard Beast does NOT have a Ray Gun.
The Zard Beast has several Special Abilities listed on its Martian Champion Token.
Rage - The Zard Beast always moves first during the Move Martians Phase and any Martians moved over are automatically crushed and returned to the Martian Pool (this even includes other Martian Champions). Rage also means that the Zard Beast must move into a Hero's space if they are adjacent to it (if more than one adjacent, it is the Martian Player's choice) and if the Zard Beast is already in a space with a Hero, it may not leave that space.
Giant - The Zard Beast is considered a Full Martian Pack (no other Martians may be in the same space – as they clearly would be crushed or eaten). It can also move through Walls (it may not move through the Big Top Tent's corner Blockers however) and Wins Fights on a Tie result (more on this later in the section on Fights).
Toughness – Anytime the Zard Beast would take a wound, the Martian Player rolls a D6. On the roll of 4, 5, or 6, that wound is simply ignored. This may even be used if the Zard Beast takes multiple wounds at the same time, just roll for each wound that the Zard Beast would have taken.
Roar – At the start of any Fight with the Zard Beast, the Hero it is Fighting must immediately lose 1 Power Token. If they don't have any Power Tokens, then they lose nothing. This just represents the fearsome terror the Zard Beast instills in those that come face to face with it, making it difficult to act heroically.
The Hero Turn
During the Hero Turn, each Hero is Activated once to go through the following Phases. The Heroes may be Activated in whatever order you wish, and it may change from turn to turn. When a Hero is Activated, they must complete all of the Phases below, in order, before the next Hero can be Activated.
- Move Action and Roll for Power Token
- Exchange Items
- Ranged Attack
- Fight Martians
1) Move Action (Move or Search) and Roll for Power Token
The Hero's Move Action allows them to either move around the board, or Search if they are already in a building. Also at the start of the Hero's Move Action they get to roll and see if they gain a Power Token.
At the start of a Hero's Move Action Phase, roll one White die for movement and one Green die to see if the Hero gains a Power Token. If the Green die rolls a 5 or 6, the Hero gains one Power Token.
Move - A Hero may move a number of spaces up to the number rolled on the White movement die (you do not have to move the full amount). Heroes have no facing and may move in any direction or combination of directions (forward, back, sideways, or diagonally).
Note that the Hero always rolls the White movement die to see how far they could move before deciding if they want to Move or Search.
Only two things stop a Hero's movement - Martians and Walls.
If a Hero enters a space with one or more Martians in it, the Hero's Move immediately ends. A Hero who starts their Move in a space with one or more Martians may move away, they are not trapped in the space.
Like Martians, Heroes may not move through Walls except where there is a Door. Also, Heroes may NOT move diagonally through a Door, they may only go straight through.
Instead of moving, a Hero that is already in a Building Space may use their Move Action to Search. Searching allows the Hero to draw a Hero Card from the top of the deck. If the card is an Event, the Player keeps it secret and may play it whenever it is appropriate. If the card is an Item, it is placed on the table face-up next to the Character Sheet of the Hero that found it.
Note that Events are NOT associated with any one Hero, but are instead held by the Player to be played when appropriate. Some Events are marked as Play Immediately. These cards often have an effect that is used for the Hero currently being Activated.
2) Exchange Items
After a Hero has completed his Move Action, he may give and/or receive any number of Items with other Heroes in the same space. This does not have to be a one for one exchange, and may simply be one Hero giving or taking a number of Items from the other. Power Tokens may not be exchanged.
One important note is that no copy of an Item card may be used by more than one Hero in the same turn.
3) Ranged Attack
If the Hero has one or more Items or Abilities with a Range: listed on it, they may now use one of them to make a Ranged Attack. Choose a target within a number of spaces equal to or less than the Range: of the Item being used and that is within Line of Sight (as detailed below). Follow the instructions on the card to see if the attack is successful. Range may always be counted using the shortest possible number of spaces.
A Hero may make a Ranged Attack with an Item that they got this turn, either through Searching or Exchanging. It is important to note though that a Hero may only make one Ranged Attack per Activation, regardless of the number of Items or Abilities with Range: that they possess.
When a Ranged Attack is successful, the Item or Ability will say whether the target is Hit or Killed. These are defined as follows:
Hit - The Target Takes one Wound (Enough to remove a normal Martian Soldier from the board).
Killed - Fills up all remaining Health boxes of the Target with Wound markers. (This only matters if the Target has more than one Health box).
4) Fight Martians
If there is a Martian Pack in the Hero's space, they must now Fight those Martians in hand-to-hand combat. See the section on Fights below for details of how combat is resolved.
Line of Sight for Ranged Attacks
A model must be able to see the enemy or space that they are going to target with a Ranged Attack; this applies to both Hero Ranged Attacks as well as Martian Ray Gun Blasts. Other models do NOT block Line of Sight, but building Walls do (even if there is a Door – as shown in the Line of Sight diagrams). A model may however see through any building Wall they are touching (it is assumed that there are windows or holes in the Wall that the model can see through if close enough).
A Hero or Martian Pack may always make a Ranged Attack at a target in the same space as they are.
A Hero may see out of any wall they are touching. Only walls not touched block line of sight. Note that doors block line of sight just like any other walls.
A Hero at the exterior corner of a building is not touching either wall, so may not see through either.
For example, the Hero in a building can see Martian 1 through wall A, Martian 3 through wall B, and Martian 2 through either wall A or B. The Hero cannot see Martian 4 as he is not touching wall C (even though there is a door). This Hero, touching wall A, can see into the building as well as off to either side.
Each Hero has an Agility listed on their Character Sheet. As noted above in the Martian's Fire Ray Guns section, Agility is used by Heroes mainly to Dodge Ray Gun Blasts.
Items
Items are found in the Hero Card deck and represent different weapons and gear that a Hero can use to fight the Martians.
When a Hero finds an Item (usually through Searching), it is placed on the table face-up next to the Hero's Character Sheet. Any player may examine a card that is face-up on the table like this at any time (they are fully public).
A Hero may only carry up to 4 Items at a time. Only 2 of these Items may be Weapons (Hand Weapon and/or Ranged Weapon).
If a Hero ever has more Items than they can carry (or more than 2 Weapons), they must immediately discard down to their limit. If there is another Hero in the same space, they may exchange Items (out of the normal turn sequence) first before discarding.
Double-Handed Items - Some Items are marked as Double-Handed. These Items count as 2 Items toward a Hero's carrying limit (or 2 Weapons if the Double-Handed Item is a Weapon).
Break Tests - Some Items require the Hero to make a Break Test after each use. This means the Hero will need to roll a separate D6 and if the numbers listed on the card are rolled, the Item Breaks, meaning that it must be discarded.
Power Tokens and Talents
Power Tokens are a resource that the Heroes have and must spend to use their most powerful abilities. Each Hero has one ability listed on their Character Sheet that requires spending a Power Token to use. These character abilities are called Talents.
Each Hero starts the game with 1 Power Token. Each Hero also gets to roll a Green die at the start of each of their Move Actions to see if they gain an additional Power Token this turn (on the roll of 5 or 6).
A Hero may never have more than 3 Power Tokens at one time.
When a Hero spends a Power Token to use a card or ability, simply remove that token from their Character Sheet and return it to the counter pool.
Carnival Cannons
As noted above, each L-shaped Outer Board section has a Carnival Cannon on it. These Cannons may be used for certain card effects or Hero abilities. One such card is called "Fire the Cannon!". This allows a Hero that is in a space with a Cannon to fire that Cannon as a Ranged Attack. It also requires that the Hero pay 1 Power Token to use. All of the details for firing Cannons in this way are listed on the card itself.
Archibald, The Human Cannonball also has a Talent called Fire Me! that allows him to fire himself out of a Cannon, moving across the board to crash down in a space some distance away. This ability uses the Cannon Template to determine the distance traveled by Archibald. The Cannon Template is described in detail below.
A Cannon may not be used in any way while there are one or more Martians in its space.
When Archibald rolls for distance using the Cannon Template, he may be positioned in any space touched by a section of the template, up to the distance rolled. If a 6 is rolled, he may be placed in any space on the board. He must always move at least one space though. As noted below, the Cannon Template ignores all Walls, Fires, and other models. It does NOT require Line of Sight like a normal Ranged Attack.
So for example, if Archibald fired himself out of a Cannon and rolled a 4 for distance, he could land in any space touched by the Cannon Template sections marked 1+, 2+, 3+, or 4+.
The Death Ray / Cannon Template
Some cards and abilities call for the Death Ray Template or Cannon Template to be used. This is the long, double-sided Template that has a small hole in one end. Use the side with the flying cannonball on it when a card or ability requires the Cannon Template and the side with the green energy blast on it when a card calls for the Death Ray Template.
To use the Cannon/Death Ray Template, position it over the board so that one corner of the firer's space (usually either a Flying Saucer or Carnival Cannon) can be seen through the small hole in the template (so that the template is not crossing its own space). The Template may be swiveled around and positioned at any angle desired by the firing player. Once they have it positioned exactly as they want, any space touched by the Template may be affected by it (depending on the card or ability being used). The only exception is that the space that the Template is being fired from is never considered to be touched by the Template.
The Cannon/Death Ray Template ignores all Walls and Fires, but may NOT be positioned so that it touches the grayed-out corner Blockers of the Big Top Tent (as nothing can cross these Blockers).
Fights
The term 'Fight' is only used to refer to hand-to-hand combat, not Ranged Attacks. It also always means one Hero versus a Martian Pack (all the Martians in the space). As noted above, if a Hero and a Martian Pack are in the same space at the end of their turn, they are going to have to Fight one another. This happens in both the Martian Turn and the Hero Turn.
Who has to Fight?
During a Hero's Activation, that Hero must Fight the entire Martian Pack that is in his space during the Fight Martians Phase. In the Martian Turn, a Martian Pack will Fight EVERY Hero in its space individually. These models are NOT paired off in any way, but rather the entire Martian Pack always Fights as a single unit (part of their Pack Tactics). The larger the Martian Pack, the more dangerous it is to Fight. If there are more than one Hero in the space during the Martian's Fight Heroes Phase, the Hero Players may choose in which order they Fight.
The Fight
To Fight, both players roll a number of dice for their model(s) involved as listed below. These are called Fight Dice. When Fight Dice are rolled, they are NOT added together, but rather players select their highest individual roll to determine who has won the Fight.
- Heroes roll 2 Fight Dice
- Martians roll 1 Fight Dice for each Martian Soldier currently in the Pack
- Martian Champions roll a number of Fight Dice listed on their Token.
Many cards and abilities can be used during a Fight to add more Fight Dice, Re-roll, etc.
Unless stated otherwise, cards and abilities may always be used after the Fight Dice have been rolled to change the outcome before the Fight is Resolved.
Martian Fight: Cards – Some Martian Event cards are listed as Fight: in their game text. These cards may be used by a Martian Pack or Martian Champion during a Fight to gain a bonus. There is no limit to the number of these cards that may be played per Fight.
Hero Combat Bonus: Cards – Many Hero Cards (usually Hand Weapons) have a Combat Bonus: as part of their game text. A Hero may use any number of these cards that they have for the listed Combat Bonus: effects. Unless stated otherwise, a Combat Bonus: may only be used once per Fight.
Resolving the Fight
A Fight is only Resolved after all players have chosen their highest single Fight Dice rolled and decided not to use any more cards or abilities to modify the Fight. The Fight is Resolved as follows:
- If the Martian Pack wins (has a higher roll), the Hero takes one wound.
- If the Hero wins (has a higher roll), one Martian in the space is wounded (Hero's choice) and the Fight ends. A wound is usually enough to remove a normal Martian Soldier from the board.
- If the Hero and the Martians Fight Dice rolls are tied, the Fight is a Draw and neither side wins or loses. Note that the Zard Beast Martian Champion actually wins on a Tie.
If both sides have something that would let them win on a Tie, then it is returned to just being a Tie result.
Martian Soldiers only have a single Health Box so anytime they take a wound; they are simply removed from the board and returned to the Martian Pool. Heroes and Martian Champions on the other hand have multiple Health Boxes. Anytime a Hero or Champion takes a wound, place a Wound marker in one of their Health Boxes. When the last Health Box is filled, the Hero or Champion is killed and removed from the board.
Sometimes an ability or card effect will 'Kill' a target outright. This means that the target takes a number of Wounds equal to their remaining number of Health Boxes. This is especially effective against Martian Champions that usually have more than one Health Box.
Sometimes a Hero or Martian Champion will be able to Heal a wound. When this happens, just remove a Wound marker from their Character Sheet or Champion Token. If they are allowed to Fully Heal, remove ALL Wound markers instead. It is important to note that a model may not Heal during a Fight or Blast (such as a Ray Gun Attack). They may however Heal before or after a Fight or Blast attack. This can be important as a Hero does have the opportunity to use a card or ability to Heal after one Ray Gun Attack finishes, but before the next one is rolled.
Death of a Hero or Champion
If a Martian Champion is killed, it is removed from the board and MAY be Called again by the Martian Players by simply using Command Points to pay for its cost again in future turns.
When a Hero is killed, they are removed from the board and will take no further part in the game. The Hero Player that controlled the killed character may immediately draw a new Random Hero from the unused Hero Character Sheets to enter play. As a bonus for defeating a Hero character, the Martian Player gains an extra 2 Command Points in their following Command Phase (or 1 extra Command Point each if two Martian Players).
Any Items a killed Hero had are immediately discarded. Any Event cards the player has in hand are unaffected.
When a new Hero enters play mid-game, they do NOT use the new Hero's Start location, but rather have the choice to either enter play in the center space of the Center Board with a bonus free Hero Card, or in any space of a Random Building (without a bonus Hero Card). The Hero also enters play with 1 Power Token as normal.
A Hero entering play mid-game like this does not participate in the current Phase of the turn. Once the current Phase is over though, the new Hero fully participates in every way from that point forward. They may even be Activated this turn if it is currently the Hero Turn.
For example, if a Hero is killed during the Martian Ray Gun Attack Phase, the new Hero that enters play may not be the hit by any Ray Gun Blasts this turn. They would however, need to Fight any Martians in their space during the Martian Fight Heroes Phase that comes next.
Playing Event Cards and Timing
Event cards (whether Hero or Martian) should be fairly clear as to when they should be played. Cards listed as Play Immediately should be played as soon as they are drawn. Some other cards say to 'play at the start of a turn'.
'Start of the Turn'
The Start of a Turn is defined as: Any point up until the first model moves in the Move Martians Phase or takes a Hero Move Action.
Thus, in the Martian Turn, Moving the Invasion Track marker, Drawing Martian Cards, Rolling for Reinforcements, and the Command Phase are all part of the 'Start of the Turn'. And in the Hero Turn, the 'Start of the Turn' lasts until the first Hero is Activated and either Moves or Searches as part of their Move Action.
Instantly
Sometimes a card effect or ability will happen instantly. This means that no other card effects or abilities may interrupt it. The only exceptions to this are cards and abilities that prevent wounds may be used to prevent damage from an instant effect.
If a Martian Soldier is Killed instantly during a Fight, he is not only immediately removed, but the Hero may also choose any one of the Martian Pack's Fight Dice to instantly cancel (that die no longer counts as part of the Fight).
Using Cards and Abilities
Unless stated specifically otherwise, cards and abilities may always be used or played after the fact to alter the results of a roll, Fight, Agility Test, etc. The only exception to this is that a card may NOT be canceled after it has already caused dice to be rolled (or Re-rolled).
Canceling Cards and Blasts
Many times a card will allow you to cancel another card or ability. When a card is canceled, it is immediately discarded without further effect. If a card marked Remains in Play is canceled, any markers on the board placed by that card are also removed.
As noted above, a card may not be canceled after it has already caused dice to be rolled or Re-rolled.
Martian Tech cards represent advanced technology and are generally a little harder to cancel because of it. Most things that cancel cards will also allow you to instead attempt to cancel a Martian Tech card on the D6 roll of 4+. This may be used on Tech cards that are fully built, or on Tech Cards that are still face-down being built. If this roll is passed, the Tech is canceled and discarded from play. Any Command Points currently on it are removed and placed back into the counter pool. If the roll is unsuccessful, the Tech stays in play and the effort was wasted.
If a Fight is canceled, the Fight immediately ends without being Resolved. There is no winner or loser of the Fight.
If a Blast is canceled, the entire Blast immediately ends and has no further effect.
Rolling a Random Building or Board Section
Frequently a player will need to roll a Random Building or a Random Board Section. To do this, roll a die and look at the arrows arrayed around the edges of the Center Board. This roll determines the random L-shaped Outer Board Section. If looking for a Random Building, roll another die. Each building on the board section has a set of numbers in one corner. The building number that corresponds to the second die roll is the Random Building.
Note that if the initial roll is 1, it is Hero's Choice, while if it is 6, it is Martian's Choice as listed on the Center Board. This allows the Heroes or Martians to choose the Random board section or specific building. Only a building with a 'random number' set may be chosen as a valid target.
If the Random Building rolled cannot be used for any reason, roll another building on the same board section. If none of the buildings on the board section may be used, roll again entirely.
Winning the Game
When one side completes their Objectives as listed on the Scenario Card (Heroes or Martians), they win and the game immediately ends. It is now time to cackle at the inevitable conquest of this puny planet or to breathe a sigh of relief as the invasion force turns tail and runs.
In addition to the normal Objectives in any Scenario (unless specifically stated otherwise), the Martians automatically win the game if:
- They kill 4 Hero characters.
- They discard the last Hero Card from the deck.
The Heroes automatically win the game if:
- There are ever no Martians at all on the board (not including Flying Saucers).
Running Out of Cards
If the Martian Deck ever runs out of cards, simply reshuffle the discard pile to reform the deck. Unlike the Martians, if the Hero Deck runs out of cards, the Heroes do NOT get to reshuffle. Also as noted above, the Heroes automatically lose if the Martians discard the last Hero Card (or try to discard a Hero Card while there are none remaining).
You are now ready to play your first game using the Basic Game Rules.
The Advanced Game
During the Advanced Game there are a few changes and additions to the Rules and Game Setup.
Advanced Game Setup
Setup for the Advanced Game works just like the Basic Game, but with a few additions. Shuffle all of the cards into the Martian and Hero Decks (including all of the Advanced Cards that were previously removed). Also, any of the game Scenarios can now be played (including the Invasion Scenario), and the Martian Player(s) now have access to the Martian Leader Champion as well as the Zard Beast.
Generally Heroes should be chosen randomly, but if all players agree, the Hero Players may choose their starting Heroes instead.
Advanced Game Round
In the Advanced Game there are two additional phases to the Game Round; the Fire Phase and the Crowd Phase. The Fire Phase only needs to occur if there are one or more Fires on the board and the Crowd Phase only needs to occur if there are one or more Crowd markers in play.
Game Round
I) Martian Turn II) Fire Phase III) Hero Turn IV) Crowd Phase
Scenario Search Cards
Some Scenarios have Scenario Search Cards listed at the bottom of the Objectives text box. These are cards that are important for the Heroes to find as they relate to the objectives of the Scenario. Some cards (such as 'Just What I Needed') refer to this as they help you find these cards in the deck or discard pile during the game.
Scenario Search Cards and Starting Cards – You may find that occasionally Heroes will get one or more of the Scenario Search Cards for the Scenario in their starting Cards (for not having their Start Location on the board, etc). If a Hero gets a Scenario Search Card (or a card that lets them take a Scenario Search Card from the deck such as 'Just What I Needed') in their starting cards, they must shuffle it back into the deck and draw again. If one of them is drawn a second time as part of the re-draw, the Hero may keep it as normal.
Hard Walls
As noted before, Hard Walls are marked with Red and Black striped lines. Hard Walls work exactly the same as normal Walls, except that models cannot see through them, even if they are adjacent to the Hard Wall. The only exception to this is that a model may draw a Line of Sight straight through a Door that they are adjacent to in a Hard Wall.
A Hero cannot see through a Hard Wall, but may draw Line of Sight straight through an adjacent Door.
Note that neither Heroes nor Martians are allowed to see through Hard Walls, so Martians may NOT fire their Ray Guns at an adjacent Hero that is on the other side of a Hard Wall (unless firing straight through a Door in that Hard Wall as noted above).
Pinch Points
A Pinch Point is where two buildings meet at a diagonal corner. Martians may move diagonally through a Pinch Point with no problem (they are small and the Zard Beast can easily smash his way through walls anyway). Heroes however have a slightly harder time fitting through. If a Hero wants to move through a Pinch Point, they must first pass an Agility Test. If successful, the Hero may move through the Pinch Point without problem and continue on their way. If the test is failed though, the Hero's move immediately ends in the space before passing through the Pinch Point.
Fire
In the Advanced Game, after each Martian Turn there is a Fire Phase. With all of the Saucer Blasts and explosives going off, Fires often break out and spread around the board causing havoc.
Explosives
In the Advanced Game, the Heroes have a new type of Item called Explosives. These are Bomb and Kerosene. These can be very powerful, but usually require other cards to make them work (usually a Fire Item like Matches or a Circus Torch).
Bomb – A Bomb is a very effective Item with a Ranged Attack that can blow up whole Packs of Martians at a time. The only downside is that you must have something to light it with.
Kerosene – Kerosene allows the Hero to place Kerosene markers on the Board which can be lit on Fire. There is a limit of one Kerosene marker per space. Kerosene markers use the following Rules:
A Kerosene marker may be ignited as a Ranged Attack using a Gun (roll to Hit as though it were a Martian), or by using a Fire Item to light it from an adjacent space (the Fire Item does not need to be discarded, but this counts as a Ranged Attack). A Kerosene marker will also automatically be lit by any Fire marker in the same or adjacent space.
When a Kerosene marker is lit, it is immediately replaced with a Fire marker. In this way, you can create a chain reaction by placing several Kerosene markers in adjacent spaces so that once one of them is lit, it will immediately light all of them in sequence down the row.
Fire Markers
Fire markers have two sides, a 'New' Fire side which is plain with the word Fire printed on it, and an existing Fire side that has a set of directional arrows (these arrows are used when the Fire Spreads as detailed below).
Fire markers do NOT block Line of Sight and have no effect on Searching or Fighting in their space (though the models will still have to roll to take damage as noted below).
There may never be more than one Fire marker in a single space.
Starting Fires
When a Fire starts in a space, place a 'New' Fire marker in that space (the side of the marker that does NOT have the directional arrows should be face-up to show that it is a 'New' Fire). 'New' Fires usually start during either the Hero or Martian Turns, or if existing Fires spread during the Fire Phase itself.
Hero Fire Items
Any Hero Item with the Keyword Fire may be discarded by a Hero in the Ranged Attack Phase to automatically start a Fire in an adjacent space. This is a good way to attack a whole group of Martians at once, but is a little dangerous as Fires can easily spread out of control over time. Heroes that have an ability that lets them always count as having a Fire Item (such as Hannah, the Firebreather) may NOT 'discard' their ability in this way.
Damage From Fires
Anytime a Fire starts in a model's space, or when a model enters a space with a Fire or ends their move in a space with a Fire, they must roll a D6. On the roll of 4, 5, or 6, the model immediately takes 1 wound from that Fire.
So for example, if a Martian Pack moved into a space with a Fire marker, each Martian in the Pack would have to roll to see if they are wounded for moving into the Fire space, but also any survivors of that would have to roll a second time for ending their move in the Fire space.
The Fire Phase
In the Fire Phase, the Martian Player should roll a D6 for each existing Fire on the board that has its directional arrows side up (do NOT roll for any of the 'New' Fires on the board).
| D6 Roll | Effect |
|---|---|
| 1 | Fire Goes Out. |
| 2-4 | No effect. |
| 5-6 | Fire Spreads. |
Fires Going Out – When a Fire Goes Out, simply remove its marker from the board.
Fires Spreading – When a Fire Spreads, this means a 'New' Fire will be added to the Board. Roll another D6 and use the simple directional chart on the Fire marker itself to determine the direction the Fire Spreads to. Note that the only way that a Fire may Spread diagonally is if either Hero's or Martian's Choice is rolled. Place a 'New' Fire into the space in the direction rolled. Fires may Spread through Walls, but are stopped by other Fires and Board Edges (in these cases, it simply doesn't add a 'New' Fire to the Board).
If there are more than one possible space to Spread to in the direction rolled (for example if the Fire Spreads from one of the large Center Board squares to the smaller Outer Board squares), the Martian Players may choose which of the possible squares the 'New' Fire is placed in.
Fire Limit – There may never be more than 8 Fires on the Board at any time (there are only 8 Fire markers in the game). If all 8 Fire markers are already on the Board and a 'New' Fire needs to be placed, the Player who started the Fire may choose any existing Fire marker on the Board that has its directional arrows side up (not a 'New' Fire) to remove. This marker is then used for the 'New' Fire that needs to be placed. The Martian Players always choose which Fire marker is removed if this occurs during the Fire Phase.
Flipping Over 'New' Fires – At the end of each Fire Phase, any 'New' Fires currently on the Board should be flipped over to show their directional arrows side. It is generally best to rotate these Fire markers so that the arrows on the marker line up to the same orientation as the Random Board Number Arrows on the Center Board. This helps to avoid confusion later when the Fires start to spread out in Random directions.
Burning Down Buildings
If there is ever a Fire marker in every space of a building, that building is immediately Destroyed in a fiery blaze and all of those Fires are removed from the Board. See the section on Destroyed Buildings below for details.
Explosives and Fires
If a Hero has an Explosive Item with a Ranged Attack that requires a Fire Item to use (such as a Bomb), but they do not have a Fire Item, they may attempt to light the Explosive by throwing it into or through a space with a Fire marker! If thrown into a Fire marker's space, the Explosive will automatically be set off in that space. If the Hero is feeling more risky, they may instead throw the Explosive through the space with the Fire marker in the hopes that it might be lit along the way. If a Ranged Attack Explosive travels through a space with a Fire marker on its way to the target space, the Explosive will be lit on the D6 roll of 4, 5, or 6, exploding when it reaches the target space. If not lit, the Explosive does not go off and is simply discarded.
Crowds
Crowd markers are used in some Scenarios to represent the hordes of screaming civilians running about in terror, trying not to be vaporized by the Martian invaders. When Crowds are being used in a game, there is a Crowd Phase at the end of the Hero Turn.
There can never be more than one Crowd in a space at a time and Crowds do stop Martian movement, just like a Hero would.
Each Crowd marker is considered to have 4 Health Boxes.
Crowd Movement
During the Crowd Phase, roll a D6 for each Crowd marker on the Board to see what it does.
| D6 Roll | Effect |
|---|---|
| 1 | Crowd Heals. |
| 2-4 | No effect. |
| 5-6 | Crowd Moves. |
Crowd Heals – When a Crowd Heals, remove one wound marker from that Crowd.
Crowds Moving – If the Crowd moves, roll another D6 and use the simple directional chart on the Crowd marker itself to determine the direction moved. Note that the only way that a Crowd may be moved diagonally is if either Hero's or Martian's Choice is rolled.
Crowds ignore Walls when moving, but are stopped by Fires, Board Edges, and other Crowds (in these cases, it simply doesn't move).
If there are more than one possible space to be moved to in the direction rolled (for example if the Crowd is moving from one of the large Center Board squares to the smaller Outer Board squares), the Hero Players may choose which of the possible squares the Crowd moves to.
If a Fire starts or spreads into a Crowd's space, the Crowd will take 1 wound on the D6 roll of 4+ (like any other model), and will then automatically move one space in a Random direction.
Martians Attacking Crowds
Crowds may be attacked by Martians in the same way as a Hero would be. However, because a Crowd includes many individual people, the Martians need to vaporize several of them for it to actually count as a wound. Therefore, Crowds are only Hit by a Martian Ray Gun on the roll of 6+, or in a Fight on each Fight Dice roll of 6+. Crowds do NOT attack back in a Fight (they do not roll Fight Dice) and do not get to Dodge Ray Gun Hits. Every Hit done to a Crowd causes 1 wound.
Any Automatic Ray Gun Hits a Crowd would take (such as taking 2 Automatic Ray Gun Hits for a Saucer Blast) will instead each wound the Crowd on the D6 roll of 3+. Crowds do not Fight in the Hero Turn or Crowd Phase, they are only attacked in a Fight during the Martian Turn.
So for example, if you had a full Martian Pack move into a Crowd's space, they could fire their Ray Guns at the Crowd (3 rolls, each needing a 6 to hit) and then in their Fight Phase, the Martians would roll their 3 Fight Dice against the Crowd, each hitting again on the roll of 6.
Each time a Crowd is destroyed (takes 4 wounds total), the Martians gain a bonus 2 Command Points in the following turn (or 1 Command Point each for two Martian Players) similar to when a Hero is killed.
Protecting and Hiding in a Crowd
A Hero in the same space as a Crowd may choose to either Protect the Crowd or Hide in the Crowd (choose before each attack occurs). While Protecting the Crowd, it may not be targeted by Martian Ray Guns and any Fight in the space will ignore the Crowd. While Hiding in the Crowd, the Hero may not be targeted by Martian Ray Guns and will not take part in any Fight in the space (leaving the Crowd vulnerable).
Each Hero in the space with a Crowd may make their own individual choice for a given attack. Anything that targets all Heroes and Crowds in a space (such as a Saucer Blast) may not benefit from Protecting or Hiding.
Martian Leader
In the Advanced Game, the Martians have access to another powerful Martian Champion, the Martian Leader. Unlike the massive Zard Beast, the Martian Leader uses cunning and tactical maneuvering to his advantage rather than brute strength.
The Martian Leader MAY be in the same space as a Martian Pack. This means that with the Martian Leader, you can actually have up to 4 Martians in the space (a Full Pack of 3 and the Martian Leader himself). The Martian Leader may NOT be in the same space as the Zard Beast though.
The Martian Leader's stats and Special Rules are listed on his Champion Card. Of note are that he has a Ray Gun the same as any normal Martian Soldier, but he and any other Martians in his space always Hit with their Ray Guns on the roll of 3+ each (regardless of if it is a Full Pack or not). Also, the Martian Leader moves up to 2 spaces each turn, and any Martian Pack in his space may move along with him instead of their normal movement. This allows him to lead a Pack around the board much faster than they normally could move on their own.
Also notice that the Martian Leader rolls 2 Fight Dice. This is added to the Fight Dice of any Martian Pack he is with.
The Fun House
The Fun House is a large, special building on one of the L-shaped Outer Boards that is comprised of several small, colorful Rooms that all have Hard Walls. Each Room has a large number in it as well as a potential special bonus for Heroes Searching there.
Whenever a Hero Searches in a Room of the Fun House, they must first roll a D6 and immediately move to an empty space of the Room rolled. They may then complete their Search as normal (drawing a Hero card). This represents the Hero slipping through secret passages behind the mirrors and trapdoors as they explore the Fun House. If the Hero rolls the Room number that they are already in, they do not move, but instead immediately gain the special bonus of that Room in addition to their normal Search.
For example, if the Hero is in the Room numbered 5 and they roll a 5 on the D6, they do not move, but instead immediately get the bonus for Room 5 as well as drawing a Hero Card for their normal Search.
There is one drawback however. If the Hero rolls a Room number that currently has no empty spaces (each space of that Room already has one or more models in it), the Hero's Search is immediately canceled (they do not get to draw a Hero Card) and they are automatically moved to the Outdoor Space with the large Clown Head at the front of the building.
Destroyed Saucers and Buildings
Destroyed Flying Saucers
On occasion a Flying Saucer will be destroyed somehow (currently this only happens in the "Blow 'em Out of the Sky!" Scenario). When a Saucer is destroyed, it immediately crashes. Roll a D6. On the roll of 1 or 2, the Saucer comes straight down in the space it was hovering over. Each model in that space immediately takes a wound on the D6 roll of 3+ and is then moved to an adjacent space of their choice. A Fire is also automatically started in this space. On the roll of 3, 4, 5, or 6, the Saucer instead crashes into a Random Building. Any model in that building automatically takes a wound on the D6 roll of 3+ and the entire building is destroyed (see below).
Destroyed Buildings
Sometimes an entire building will be destroyed. When this happens, place one of the large circular counter (Lights Out / Cone of Light / Crowds) face down in the building to show that it is destroyed. No models or Crowds may enter a destroyed building. Any models or Crowds already there are immediately pushed to an adjacent space of their choice that is not inside a destroyed building (if there are none, the model is pushed two spaces to get out). If the building destroyed had any cards or Fires played on it, they are discarded. If the building was part of an objective, roll a new Random Building for that objective. Fires may not start or spread into a destroyed building.
Scenario Special Rules
Some Scenarios in Invasion From Outer Space use one or more of the following Scenario Special Rules. These are listed in red text at the top of the Scenario Objectives box on the Scenario Card and are a convenient way to standardize recurring special rules as well as to make it easier for players to make their own new Scenarios.
Fair Grounds Board – Scenarios with this Special Rule simply use the Fair Grounds side of the Center Board instead of the Big Top Tent side.
Crowds (5) – The Scenario uses Crowd markers (as described above). The number in ( ) indicates the number of Crowd markers placed at the start of the game.
Hero Starting Cards (1) – All of the Heroes start the game with an extra free Hero Card each in addition to any that they would normally start with (for Hero Abilities or if their Start Location is not on the board etc.). This also applies to Heroes that enter play mid game.
Hero Starting Cards are drawn from the top of the Hero Deck so abilities like Crafty may be used. These do NOT count as a Search however, so you may not use a building's 'Pick Up' ability.
As noted above, if any Scenario Search Card is drawn as a Hero Starting Card, shuffle it back into the deck and draw again.
Scenario Specific Notes
Unleashed
In the Unleashed Scenario, a Crashed Saucer is placed in the center space of the Center Board. This is purely for thematic reasons and has no game effect.
Although Fire Items may be one of the Super Zard Beast's Weaknesses, Fire markers that are on the board do NOT count toward this (it is assumed that the Fire must be specifically wielded by a Hero for them to use it against the Beast's weak spot and gain the benefit). Also note that Hannah the Firebreather has a built in Fire Item that may be used as a potential Weakness of the Super Zard Beast.
Because the regular Zard Beast may not be Called during the game, the Martian Event Release the Zard Beast may instead be played on the Super Zard Beast to move him D6 spaces instead of his normal move.
Blow 'em Out of the Sky!
Although the Heroes must fire cannons at the Saucers to destroy them, Archibald the Human Cannonball may NOT fire himself at a Saucer (his thick skull just isn't hard enough to knock a Flying Saucer out of the air I'm afraid).
Abduction
At the start of the game, the Hero Player(s) place the 6 Ally markers in any space of the Random Buildings rolled. If an Ally marker ever finds itself in a space with a Fire and no Heroes or Martians, it will immediately move to an adjacent space (Hero's Choice), ignoring Walls.
Crossover with Last Night on Earth
Because Invasion From Outer Space (IFOS) uses the Last Night on Earth (LNOE) Game Engine, the two games can be crossed over with one another. This allows players to have Zombies attack their carnival, Martians invade the small town, or even play larger group games with Martians, Zombies, and Heroes.
The following are suggested changes and adaptations that need to be made to crossover the two games. Because each game is designed and balanced to work well on its own, crossing over elements is not an exact science. That being said, you will find that crossover games are very exciting and entertaining.
New Rules for LNOE
The rules for Fires and Pinch Points found in this rulebook can be used directly for any game of Last Night on Earth as well.
Pinch Points and Agility – Though the LNOE Small Town Heroes do not have an Agility printed on their Character Sheets, the Agility value is simply based on the starting number of Health Boxes (+) that a Hero Character has.
For example, Johnny the High School Quarterback has 2 Health Boxes so his Agility value is 2+ whereas Sam the Diner Cook has 4 Health Boxes so his Agility value is 4+.
Note that Agility is only really used for moving through Pinch Points and for Dodging Ray Guns.
Fires – Just as in Invasion From Outer Space, any Fire Item can be discarded as a Ranged Attack to start a Fire in an adjacent space. The Fire Phase should take place in the Game Round after the Zombie Turn (if Martians and Zombies are both being used in the same game, the Fire Phase should remain after the Martian Turn).
Zombies are only wounded by a Fire on the D6 roll of 5 or 6 (instead of the normal 4, 5 or 6 – on a 4, part of them simply catches fire or burns off. They don't really notice).
There are a few additions to existing Last Night on Earth cards when using Fires. The Fire Extinguisher Hero Item has the additional ability – 'Discard to remove any number of Fires from the same and/or adjacent spaces to the Hero.'
Also, while the Zombie Card Heavy Rain is in play, Fires will Go Out during the Fire Phase on the roll of 1 or 2 (instead of only on a 1).
Zombies at the Carnival
The following are rules for using Zombies to attack the Carnival in Invasion From Outer Space instead of Martians. Simply replace the word Martian on any Hero card or ability with the word Zombie.
Zombies vs. Carnival Heroes (or Martians) – Regardless of the Board Set/Hero Deck being used, anytime that Zombies are in the same game as Carnival Heroes or Martians, they automatically get the Zombies Autospawn (Spawn every turn, no need to roll over the number of Zombies on the board) and Always Zombie Heroes (any Hero killed is automatically turned into a Zombie Hero) scenario special rules in addition to any other rules they would use based on the Scenario being played.
Also note that Zombies may move through Walls as normal (including Hard Walls), but may not move directly through the Big Top Tent corner Blockers.
Scenarios – Most of the Last Night on Earth Scenarios can be used for fighting Zombies at the Carnival. Some of them may need slight tweaks, while others will, unfortunately, not be easily usable (mostly due to Scenario Search Cards not being in the Carnival Hero Deck). Any LNOE Scenario that would use the Manor House instead uses the Big Top Tent Center Board, while any other Scenario just uses the Fair Grounds Center Board.
All of the LNOE Scenarios currently available should be usable as written with the following exceptions:
Burn 'em Out – In addition to the normal rules for this Scenario, when Kerosene is the Explosive used to blow up a Spawning Pit, roll a D6 afterward. It only needs to be discarded on the roll of 1 or 2. Note that Fire on a Spawning Pit has no Scenario effect here; the Heroes still need to use Explosives to blow up the Pits.
Burn it to the Ground – As there is no Gasoline in the Carnival Hero Deck, the Objective for the Scenario is changed so that the Heroes must instead destroy the Big Top Tent by burning it down (having a Fire marker in every space of a building at the same time destroys that building as noted in the Advanced Game section). Kerosene is also considered a Scenario Search Card for this Scenario. Also, to help balance things a bit, anytime a Kerosene card is used to place a Kerosene marker, it runs out (is discarded) on the roll of 1, 2, or 3 (instead of 1 or 2).
Supply Run – Manor Deck (10) works exactly the same, only it is considered Big Top Deck (10).
Save the Townsfolk and Stock Up! – In Invasion From Outer Space, Ally Events are the equivalent of Townsfolk Events and Cabbage is the equivalent of First Aid Kit.
Escape in the Truck and Search for the Truth – These two Scenarios won't really work easily as there are no Gasoline or Keys cards in the Carnival Hero Deck and the Scenario Objective buildings for Search for the Truth do not appear on the Carnival Boards.
Martians in the Small Town
The following are rules for using Martians to attack the Small Town in Last Night on Earth instead of Zombies. The changes needed for this are fairly minimal. Firstly, replace the word Zombie on any Hero card or ability with the word Martian.
Small Town Heroes vs. Martians – Regardless of the Board Set/Hero Deck being used, anytime the LNOE Small Town Heroes are in the same game as Martians, they automatically get the Heroes Replenish (a killed Hero is always replaced with a new one) and Hero Starting Cards (1) scenario special rules in addition to any other rules they would use based on the Scenario being played. If the Scenario already uses Hero Starting Cards, this is in addition.
Rules Changes – Most card text and character abilities for the Small Town Heroes work exactly the same whether fighting Zombies or Martians. The following are some additional changes and clarifications to help keep things balanced and exciting.
Canceling Fights and Blasts – Any card or ability that cancels a Fight can also be used to cancel the effects of a Blast attack for that Hero. Note that this does not cancel the entire Blast for something like a Death Ray, but will cancel all of the Hits from an attack on a specific Hero.
Canceling Martian Tech – Anything that cancels a Zombie card or cancels a Zombie card that 'Remains in Play' can also target a Martian Tech card. The Martian Tech Card will only be canceled on the D6 roll of 4+ though (if the card or ability requires a roll just to work, such as Strength of Spirit, that roll will have to succeed and then you will need to roll again to get the 4+ to cancel the Tech card).
'Except During a Fight' – Any card or ability that may not be used during a Fight (such as Healing) may also NOT be used during a Blast attack.
'Kill a Zombie beaten in a Fight, even if no doubles were rolled' – Any card or ability that 'Kills a Zombie beaten in a Fight, even if no doubles were rolled' will actually wound every Martian Soldier in the Pack instead of just one Martian (alternatively, this can be used to Kill a Martian Champion beaten in a Fight).
Fended Off – For any card text that references a Zombie being Fended Off, this translates to 'if there are still Martians in the space'.
Instantly Killed – Cards that instantly Kill a Zombie in a Fight (such as the Meat Cleaver) work as described in the IFOS rules above.
The Cornfield – The Cornfield Special Rules apply to Martians trying to Fight a Hero in a Cornfield space as well as to Ray Gun Attacks on a Cornfield space. Martians must first roll a 4+ on a D6 before they can make a Ray Gun Attack on a Cornfield space. If failed, the Ray Gun Attack is canceled. Note that this has no effect on other forms of Blast like a Death Ray or Saucer Blast.
Scenarios – Most of the Invasion From Outer Space Scenarios can be used for fighting Martians in the Small Town. Some of them may need slight tweaks, while others will unfortunately not be easily usable (mostly due to Scenario Search Cards not being in the Hero Deck). One change to all of the Scenarios is that the open Town Center Board is used for all of them (no Manor House for any of the current Scenarios). Also, the Escape in the Truck LNOE Scenario may be used when fighting Martians rather than Zombies (consider the Truck itself to be immune to any damage or Fire).
All of the IFOS Scenarios currently available should be usable as written with the following simple changes:
Invasion and Wipe Them Out – These two Scenarios should work fine as written.
Abduction – In this Scenario, the Heroes normally can move Ally markers by collectively spending Power Tokens. As the Small Town Heroes don't have Power Tokens, they instead can move an Ally marker in the exact same way by collectively doing any mix of taking 2 wounds and/or discarding 2 Hero Cards from play or from hand.
For example, you could have Sally take 1 wound on herself and Billy discard an Item to move one of the Ally markers.
Unleashed – In the Unleashed Scenario the Heroes must find the Elements that are possible Weaknesses of the Super Zard Beast. The Elements listed are intended for use on the Carnival Board Set. When playing on the Small Town Board Set, these Elements should be changed to – Any Fire Item, Fire Extinguisher, and Gasoline. These all become Scenario Search Cards. Also, just for this Scenario, the High School building is considered to have 'Pick Up: Fire Extinguisher'.
Blow 'em Out of the Sky! – This Scenario won't really work easily as there are no Carnival Cannons in the Small Town of LNOE.
Mixing Game Elements
The following are general rules for mixing elements from the two games. All of the rules listed above for Zombies at the Carnival and Martians in the Small Town should also be observed where appropriate.
Board Sets – The sets of boards are not intended to be mixed with one another, but rather to have a game either take place at the carnival (from IFOS) or in the Small Town (from LNOE). There are several reasons for this, but not the least of which is that it would be thematically very strange to have the Bear Tent right next to the Hospital or the High School. There is the potential to use both boards side by side with one another, but that will be saved for homemade Scenarios or new Official Scenarios later. For now the intent is that a game will take place either at the Carnival OR in the Small Town.
Card Decks – The Hero Deck used in a crossover game is based on the Board Set being used. Games that take place at the Carnival should use the IFOS Carnival Hero Deck, while games in the Small Town should use the LNOE Hero Deck. In this way, the cards in the deck will match the location of the game (for Pick Ups and Townsfolk/Allies etc).
The Martian or Zombie Deck is always used with the appropriate faction (Martian Deck with Martians and Zombie Deck with Zombies) for obvious reasons.
Scenarios – As noted above, in general the Scenarios should go along with the 'evil' faction being used. So LNOE Scenarios should usually go along with Zombies and IFOS Scenarios should usually go with Martians.
Hero Characters – You will likely find it easiest to use the LNOE Heroes on the Small Town Board and the Carnival Heroes on the Carnival Board because those Hero decks are designed to match the proper characters. That being said, you can cross them over and use the Carnival Heroes for games set in the LNOE Small Town Board (perhaps the circus was in town) or have the LNOE Heroes on the Carnival Board (it was a nice day out at the circus when trouble struck). It is also possible, if all players agree, to mix the Heroes together and draw your Hero team from the mixed group of both Carnival and Small Town Heroes. This will create some strange combinations though.
Three-Sided Game: Earth Overrun
Earth Overrun is a Scenario designed for three separate factions to take part; Martians, Zombies, and Heroes (either Carnival Heroes or Small Town Heroes), and can be played on either the Small Town Boards or the Carnival Boards.
Game Setup – This Scenario uses as an alternate board arrangement rather than the standard square board. It requires the Center Board (use the Town Center/Fair Grounds side) as well as all 6 of the L-shaped Outer Boards. Position the boards randomly in the arrangement shown here.
Random Board Section – When rolling for a Random Board or Random Building, roll a D6 and use the diagram above to determine the Board Section (instead of the arrows along the outside of the Center Board).
Number of Players – This Scenario requires at least 3 players (one per faction), but can support up to 8 players (1-2 Zombie Players, 1-2 Martian Players, and 1-4 Hero Players).
Small Town Heroes at the Carnival – When using LNOE Small Town Heroes on the Carnival Boards, occasionally they will get Power Tokens (through card effects or game board Pick Ups etc). Normally only the IFOS Carnival Heroes can get and use Power Tokens, but if a Small Town Hero finds themselves with one or more Power Tokens, they may be used for any card or board abilities as normal (such as drawing cards in the Big Top Tent). Alternatively, the Small Town Hero may use a Power Token to Re-roll any Move roll, To Hit roll with a Ranged Attack, or a single Fight Dice the Hero just rolled in a Fight. Note that the Small Town Heroes do NOT start with a Power Token and are still limited to no more than 3 Power Tokens on a Hero at one time.
Also, because all of the Hero Start Locations will not be present, all of the Heroes should instead start in Random Buildings.
Carnival Heroes in the Small Town – When using IFOS Carnival Heroes on the Small Town Boards, if Archibald the Human Cannonball is being used, he will always bring 2 Spare Carnival Cannons with him wherever he goes. At the start of the game, the Heroes place 2 Cannon markers in any Outdoor Space on 2 Random Board Sections.
Also, because all of the Hero Start Locations will not be present, all of the Heroes should instead start in Random Buildings.
For an updated list of Scenarios and specific card rules for crossover play, visit the official Web Site at WWW.FLYINGFROG.NET
Expanded Game Round – As there are three independent factions in this Scenario, the Game Round is slightly expanded.
Game Round
I) Zombie Turn II) Martian Turn III) Fire Phase IV) Hero Turn
No Invasion Track/Sun Track – This Scenario does not have a time limit and so does not use the Invasion Track or Sun Track to mark Turns.
Zombie Spawning Pits – All Spawning Pits on the Board are used by the Zombies. As normal, they must split newly spawned Zombies between all Pits equally. If using the Carnival Board Set, each of the Landing Site Start Spots counts as a Zombie Spawning Pit instead (you may want to place a New Spawning Pit marker on each of these to help remind players where they are on the Board).
Martian Landing Sites – Martians do not use the standard Landing Site Start Spots, but rather place their Landing Sites in the four inner corners of the Board as shown in the diagram.
Hero Starting Position – As shown in the diagram, all 4 Heroes start in the center space of the Center Board, at the Truck (the Truck has no effect on the game, it is simply there for thematic purposes).
Scenario Objectives – Earth Overrun is more or less a straight battle Scenario. Whichever faction gets enough Victory Points first wins.
Victory – As soon as one faction has completed their Objective, the game immediately ends.
Multiple Opponents – As there are three factions in this Scenario, any cards that target an opponent's Deck or discard pile actually target ALL opponents' Decks and discard piles. So a card that discards the top 10 cards from an opponent's Deck will discard the top 10 cards from both opponents' Decks. The only exceptions to this are cards that target an individual card in a discard pile (such as the Martian Event Vaporize).
Martians, Zombies, and Heroes in a single Fight – If there is a Martian, Zombie, and Hero in the same space during a Fight Phase, the models whose turn it is will have to Fight each opponent sequentially. The player whose turn it is may choose the order to resolve the Fights within a given space. For example, say there is a space with 3 Zombies, a Full Martian Pack, and 2 Heroes. The Zombies would be paired off with the Heroes as normal for the Fights, but each Zombie would still need to Fight the Full Martian Pack.
Scenario Special Rules – Hero Starting Cards (1), Fair Grounds Board (if using the Carnival Board Set). This is in addition to the normal bonus Scenario Special Rules that Zombies and Small Town Heroes get for playing in a game with Martians - as noted above.
Zombies – The Zombies must get 3 Victory Points to win. To get a Victory Point, they must kill a Hero/Martian Champion, or kill a full 6 Martian Soldiers. Use the track on the back cover to keep count of Martian Soldiers killed until a Victory Point is gained, then reset the track to 0.
Martians – Just like the Zombies, the Martians must get 3 Victory Points to win. To get a Victory Point, they must kill a Hero/Zombie Hero, or kill a full 6 Zombies. Use the track on the back cover to keep count of Zombies killed until a Victory Point is gained, then reset the track to 0.
Heroes – The Heroes must get 25 Victory Points to win. Heroes gain 1 Victory Point for each Martian Soldier killed, 2 Victory Points for each Zombie killed, and Victory Points equal to the Command Cost for Martian Champions or number of Health Boxes for Zombie Heroes (or Zombie Martian Champions) killed. Use the track on the back cover to keep count of Victory Points gained by the Heroes.
Martians vs Zombies – There are some additional rules for Martians and Zombies battling one another as follows:
- Martians may move away from a space with Zombies. Zombie Hunger does apply to all Martians as well as Heroes. The Zard Beast's Rage does apply to Zombies.
- Zombies 'Dodge' Ray Gun Hits on 5+ on a D6 (counts as an Agility Test, though really the Zombie is absorbing the damage).
- Zombies win a Fight on a Tie unless their opponent would win on a Tie.
- The Cornfield special rules apply to Zombies trying to find Martians just like Heroes. It does not apply to Martians attacking Zombies.
- Martian Soldiers killed by a Zombie in a Fight are replaced with a Zombie from the Pool or from anywhere else on the board (becoming a Zombie Martian). These new Zombies do NOT Fight in the same Phase they entered play. Martian Champions killed automatically become Zombie Martian Champions (they lose all special rules, but have the same number of Health Boxes and move D3 spaces – just like Zombie Heroes – they do retain their original number of Fight Dice though).
The back cover of the rulebook carries the three Earth Overrun trackers referenced above: the Martian Victory (Zombie) Tracker, the Zombie Victory (Martian) Tracker, and the Hero Victory (Victory Point) Tracker.
Hero Profiles
R.J. Flannigan, Ring Master – A veteran of the circus life, R. J. Flannigan's family has been part of a traveling carnival for over eight generations, having first brought their show to the Americas around 1790. As the ringmaster, he is a father-figure to the performers in the troupe, offering sage wisdom and a helping hand.
Lucrezia, The Contortionist – Left at the stoop of the ringmaster's wagon as an infant, the only life Lucrezia has ever known is that of the circus. As the youngest performer, her exotic nature and fantastic abilities only further her desire to discover the truth of her mysterious past...and her terrible nightmares.
Hannah, The Firebreather – With a love of fire and flame, Hannah finds comfort in the waves of heat and dancing orange flicker. Both dead now, her parents were renowned performers in the show and she strives each day to live up to their legacy. Touched by madness, Hannah sometimes has difficulty discerning her colorful dreams from reality.
Archibald, The Human Cannonball – Once a champion boxer at Oxford, Archibald fled in disgrace after failing to prevent the death of a friend at the hands of his rival. He now lives in obscurity, seeking redemption in faith and at the bottom of a bottle. Soaring through the air from the mouth of a cannon is the only time he truly feels alive.
Cassidy, The Trickshooter – Growing up in the faded glory of the American west, Cassidy learned to shoot before she could walk. Not one to be content with society's role for her, she has always pushed herself to be faster and more accurate than any man around. Now she works hard to keep the spirit of the 'Wild West' alive.
Angelica, The Bearded Woman – Shunned by her family and friends when she developed a full beard at age 13, Angelica fled her home to join the circus passing through town. Since discovering her new family, she has seen things most people wouldn't believe existed, and found strength in being unique.
Carl, The Strongman – Having fought in the Great War at age 16, Carl has seen life's horrors first hand. He now leads a simple life, using his uncanny strength and endurance to astound and amaze crowds of all ages. But his inner demons can never truly be banished.
JoJo, The Dancing Bear – Not just an animal in the show, JoJo is a beloved member of the family and would do anything to protect them. Content with a barrel of fish and the freedom to ride his unicycle, any who threaten the troupe are likely to meet with a 'Grizzly' fate.
FAQ
Q - Does a Fire inside a building negate the effects of Lights Out on that building? A – No. Any benefit of being able to see slightly better where you are going is offset by the out of control blaze that is threatening to burn you alive.
Q - Are Martians affected by Lights Out at all? A – No.
Q - Does the card Just a Scratch work on a Crowd? A – No. A card only works on a Crowd if it says so on the card itself.
Q - Does the facing of a Carnival Cannon matter? A – No. The Cannons are assumed to rotate.
Q - Does the Death Ray have any effect on Martians crossed by it? A – No.
Q - If the Human cannonball rolls a 6 and can land anywhere, is this affected by the Big Top Tent Blockers? A – No. Imagine that he lobs himself straight up in the air and comes down anywhere he likes.
Q - Does a Hero with Stilts have to roll to be wounded if a Fire starts in their space or if they end in a Fire Space? A – Yes, they must still roll in those two cases. They are only allowed to move through a Fire space without being hurt.
Glossary
Cancel - When a card is Canceled, it is immediately discarded without further effect. If a Remains in Play card is canceled, any markers on the board placed by that card are also removed.
Natural Roll/Natural Doubles - An unmodified roll.
Fight - A single hand-to-hand combat between a Hero and a Martian Pack.
Blast - Any Martian Ranged Attack including a Death Ray, Saucer Blast, or the Ray Gun Attacks from a single Martian Pack.
Martian Pack - All of the Martian Soldiers in a single space (there is a limit of up to 3 Martians in a Pack).
'Except During a Fight or Blast' - May be used between individual Fights or Blast attacks.
'New' Fire - A Fire marker that has been created since the previous Fire Phase ended. Plain Fire side face up (no arrows showing).
Existing Fire - A Fire marker that has been flipped to show its side with arrows. All 'New' Fires are flipped at the end of the Fire Phase.
Hit - Causes a single wound (enough to remove a Martian Soldier).
Kill - Placing a Wound Marker in all remaining Health Boxes of a target. This only matters if the target has more than one Health Box.
Pick Up - The ability in some Buildings to take a specific card from the Discard Pile rather than draw from the top of the Hero Deck.
Scenario Search Card - Specific Cards or Card Keywords needed by the Heroes to accomplish their objectives in a Scenario.
Start of the Turn - Any time until the first model moves in the Move Martians Phase or takes a Hero Move Action.
Hard Walls - Walls with red and black stripes. Block Line of Sight for Heroes and Martians, even when adjacent.
Agility Test - D6 roll to get equal to or higher than a Hero's Agility value. Used for Dodging Ray Gun Attacks.
Command Point Cost - Number of Martian Command Points needed to Build a Martian Tech or Call a Martian Champion into play.
Crowds - Crowds have 4 Health Boxes. Any time a Crowd is killed, Martians gain a bonus 2 Command Points in the following turn. Roll for each Crowd during the Crowd Phase.
| D6 Roll | Effect |
|---|---|
| 1 | Crowd Heals. |
| 2-4 | No effect. |
| 5-6 | Crowd Moves. |
Fires - Roll a D6 for any model when a Fire starts in its space, the model Moves into a Fire space, or if the model ends its Move in a Fire space. The model takes a wound on the roll of 4, 5, or 6. Roll for each Existing Fire during the Fire Phase.
| D6 Roll | Effect |
|---|---|
| 1 | Fire Goes Out. |
| 2-4 | No effect. |
| 5-6 | Fire Spreads. |
At the end of the Fire Phase, flip over any 'New' Fires.