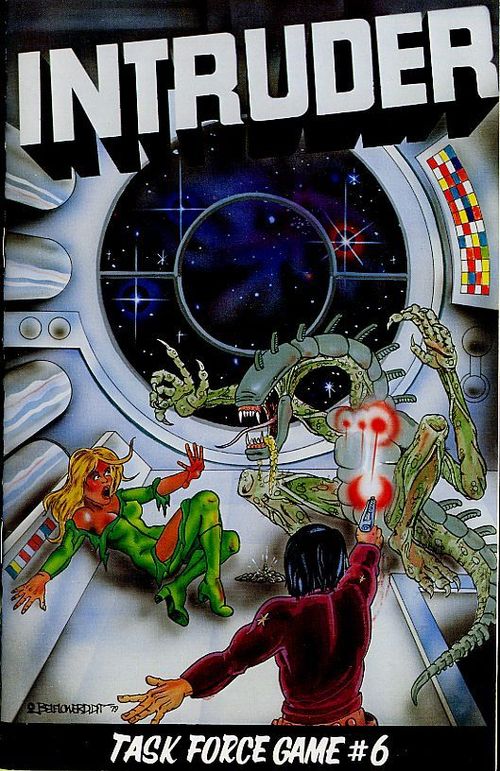
Intruder
Intruder Rulebook
Table of Contents
Table of Contents
Game Equipment and Situation
INTRUDER is a Science-Fiction game representing the actions on board Deep Space Station Prometheus after a small and relatively harmless alien creature brought aboard for study began metamorphosing into the most horrible creature ever encountered by man.
A complete copy of INTRUDER includes one rules book, one 16 x 20 mapsheet, and 54 die-cut playing pieces (referred to as "counters" or "markers"). Required for play, but not included, are two six-sided dice.
INTRUDER is designed primarily as a solitaire game (there is only one player). The rules are written from this standpoint. If desired, several players may participate in the game by using one of the multi-player scenarios (Multi-Player Scenarios) or by playing the solitaire game "by committee".
The player acts as the Commander of the station. He has at his disposal the crew (consisting of 9 men and women, including the Commander) along with various weapons and equipment. NOTE: The concept of the player actually being personally represented on the playing map by one of the pieces is rather nebulous. It is not necessary to designate a specific counter as such, and even if this were done there is no advantage or disadvantage resulting therefrom. If the counter representing the player were to be killed or to leave the station, the player would then become the senior crewman remaining on board. In a sense, the player is more the entire crew than any specific individual.
Players will find it helpful to read the Solitaire Game Set-up to become familiar with the game equipment and layout.
GAME SCALE. There is no specific game scale in INTRUDER. The station is approximately a half mile across. The counters represent individual crew members, lab animals, and alien monsters (the "intruders"), as well as weapons and other articles. Each turn represents an indefinite period of time from a few minutes to, perhaps, an hour. During the periodic "panic" sequences (see Panic) several hours of "real time" may elapse.
GENERAL COURSE OF PLAY. During the set up, an unknown number of lab animal counters will be mixed with Dummy counters and a single Intruder counter. These counters are then distributed around the station. During each turn, these counters (which are face down so that the exact location of the Intruder is not known) will be moved by a random process. The player will then maneuver his crewmen to attempt to, initially, secure critical areas and distribute weapons (which are kept locked up in normal circumstances). Once the initial crisis is over, the player will use his crewmen to hunt down the Intruder, which will then be captured or killed. During this time, the Intruder will be attempting to avoid capture, occasionally slaughtering members of the crew.
During the course of the game, the Intruder will "metamorphose" into a more powerful form, gaining new special powers. Needless to say, the longer the monster roams free the harder it will be to subdue.
COUNTER LISTING
- 3 Command Officers
- 3 Science Officers
- 3 Engineering Technicians
- 3 Blasters
- 3 Sleep Dart Pistols
- 3 Gas Canisters
- 3 Flamethrowers
- 3 Electric Prods
- 4 Cages
- 6 Dummy counters
- 6 Lab Animals
- 7 Intruder Power markers
- 5 Intruders
- 1 Intruder Life Stage marker
- 1 Self Destruct marker
The mapsheet includes a plan view of the Station (this is the major playing area) and two Shuttles. Additionally, various charts and tables are on the mapsheet.
Sequence of Play
INTRUDER is played in turns, of which there are an indefinite number. During each turn, the player will execute the following steps in the precise order given. Note that during the two Interaction Phases, a special Sub-routine may be executed (possibly several times). Also note that several times during the game the sequence will be interrupted by Panic.
Sequence of Play (Outline)
- Intruder and Hidden Counter Movement Phase
- First Interaction Phase
- Crew Movement Phase
- Intruder Metamorphosis Phase
- Second Interaction Phase
- Self-Destruction Sequence Phase
Explanation of the Sequence of Play
-
Intruder and Hidden Counter Movement Phase. The various hidden counters (including Lab Animals, Dummies and one or more Intruders) are moved according to the procedure given in the Random Movement System.
-
First Interaction Phase. If there are any compartments that contain both crew counters and hidden counters (or Lab Animals, which may not be hidden in some cases) the situation must be resolved using the Interaction Sub-routine.
-
Crew Movement Phase. The player may, in this phase, move the counters representing his crewmen in accordance with the rules on crew movement. Note that several functions may be performed by the crew members during this phase.
-
Intruder Metamorphosis Phase. During this phase, the player rolls a single die. If the result is equal to the number or numbers shown in the "Probability of Metamorphosis" column of the Intruder Life Stage Chart (on the mapsheet) for the current Life Stage then the Intruder has metamorphosed to the next higher Life Stage. Action is taken in accordance with the rules on metamorphosis.
-
Second Interaction Phase. This phase is resolved using the Interaction Sub-routine in the same manner as the First Interaction Phase.
-
Self-Destruction Sequence Phase. If the Self-Destruction Sequence has been activated, the Self-Destruct marker is moved one box to the right on the Self Destruction track (on the mapsheet). If this moves it to the last box on the track (the one marked "0") the system detonates the Nuclear Destruction charges, and the ship is destroyed. As is stated in the Self-Destruction rules, the Deep Space Station is destroyed, and the Escape Shuttle procedure is used to determine whether the player has won or lost the game.
Interaction Sub-routine
During each of the two Interaction Phases, the player should examine the mapsheet to determine if there are any compartments which include both crew counters and unknown (or Lab Animal) counters. If so, each such compartment must be resolved using the procedure below. The player goes through the sub-routine once and only once for each such compartment, and the routine for each compartment must be completed before that for any other compartment can be begun.
-
Combat Segment. Turn all face down counters in the compartment containing crewmen face up. Remove any Dummy counters and place them in the "Dummy Counters Discovered" box on the mapsheet.
-
Intruder Action Segment. If there is an Intruder counter in the compartment, this segment must be executed. If not, skip to segment 3.
- A. Determine if the Intruder will attack, and if so, which crewman in that compartment will be attacked.
- B. Determine any unknown powers of the Intruder.
- C. Resolve Self-Defense attacks.
- D. If the Self-Defense attack resulted in "No Effect", resolve the attack by the Intruder against the crewman.
-
Crew Action Segment. Each crewman in the compartment may then take one "action" as listed under Actions.
The Station and the Crew
The Station is portrayed in a plan view on the playing map. It consists of a Command Module, three "secured compartments" adjacent to it (the Arms Room, Freezer, and Computer), six Corridors (B-1 for example), six storage compartments, six "working compartments" (Living, Mess, Lab, Infirmary, Power, and Maintenance), three Access Shafts, one main Airlock (used to dock interstellar starships), and two Shuttle docks (each containing one Shuttle).
The working and storage compartments are connected to the Corridors, and to each other, by short "passageways". These are for artistic benefit only. No action takes place, and no counter can remain, in a passageway. The three secured compartments are connected to the Command Module by passageways.
The blue colored numbers in some of the compartments are used in the random movement system used by the Intruder.
The crew, during the game, consists of 9 crewmen. Three are designated "Command", three are designated "Engineer", and three are designated "Science Officer". Each of these three types has certain abilities and limitations, which are described under Actions and Functions.
NOTE: At the time the Intruder first broke out of his Lab cage, a tenth crewman (another Science Officer) was in the Lab. He was killed in the first attack, and as such is not included in the game. Eleven other crewmen and women (of all three specialties) were on various exploratory missions within the system in four Shuttles assigned to Prometheus. They were unable (or unwilling) to return until the situation had been resolved.
The designation "compartment" is used in the rules to denote one of the areas in which counters may be placed and events in the course of the game may occur.
All compartments are rather large, and equipped with self sealing devices. Pressure (breathable atmosphere) is never lost in any compartment (except when Airlocks are opened).
The Intruder
The alien creature that invaded Deep Space Station Prometheus was brought onto the station in one of the earliest of its life stages, when it was a harmless looking, and even affectionate creature. While in one of the Lab cages, it metamorphosed into a small but vicious predator, which broke out of the cage and killed a Science Officer. During the remainder of the incident, it continued to metamorphose, growing larger and more powerful at each stage.
During the game set up, the Intruder is shuffled with Lab Animal and Dummy counters, and placed on the playing map face down (its exact location is thus unknown) as detailed in the Solitaire Game Set-up. It will be moved in accordance with the special random movement procedure (see Movement).
When the game starts, the Intruder is presumed to be in "Life Stage 1". The Life Stage marker is placed on the Intruder Life Stage Chart in the "1" box. The Life Stage marker is moved down one box each time that the Intruder undergoes metamorphosis. The Intruder Life Stage Chart provides several items of information about the Intruder. These are:
- Number of Powers.
- Probability of Metamorphosis.
- Probability Intruder will attack (refer to Combat).
- Number of Clones (refer to Clones).
- Probability of Gaining Control (refer to Gaining Control Using Electric Prods).
- Are Humans Allowed to Kill?
- Probability of Kill.
INTRUDER LIFE STAGE CHART. (See mapsheet.)
Metamorphosis
Each turn, during the Intruder Metamorphosis Phase, the player rolls a single die. If the result of that die roll is listed in the Probability of Metamorphosis column of the Intruder Life Stage Chart then the Intruder is assumed to have metamorphosed into the next Life Stage. In such case, move the Life Stage marker down one box, and add one unknown power to the Intruder Powers Display. It may also be necessary to add a Clone to the Clones Not Yet in Play box, see the Clone Rules.
Powers and Properties of the Intruder
The Intruder is, as the game begins, an unknown quantity. It possesses from two to seven powers and abilities, depending on its Life Stage. The number of powers and abilities for each Life Stage is shown on the Intruder Life Stage Chart.
Included in the game are seven "Power" markers. These are used to designate which powers the Intruder has. At the start of the game, the Intruder has two powers, both of which are unknown. Two Power markers are placed in the "Unknown Powers" box of the Intruder Known Powers display.
Each time the Intruder undergoes metamorphosis, one power is gained. Place an additional Power marker in the Unknown Powers box each time the Intruder undergoes metamorphosis.
The nature of any known powers is determined in Step C of the Intruder Action Segment of the Interaction sub-routine. For each unknown power, roll two dice, and cross-index the result with the chart below. In the event of duplicating a known power, roll again until a different power results. EXAMPLE: Two unknown powers are to be determined. The player rolls two dice, and the result is "5" (Immune to Cold). For the second power, another "5" is rolled. Since the Intruder is already known to have this power, the dice must be rolled again. This time the result is a "7" (Clone).
When an unknown power is determined, move the Power marker from the unknown power box to the appropriate power box.
INTRUDER POWERS CHART
| Die Roll | Power |
|---|---|
| 2 | IMMUNE TO SHOCK. Prod weapons will not be effective. Intruder cannot be controlled. |
| 3 | FAST REFLEXES. If expelled from an Airlock, it will grasp the edge and hold it open. It will then move back inside on the next Intruder Movement Phase. |
| 4 | IMMUNE TO VACUUM. Intruder cannot be harmed by vacuum. If expelled from Airlock, it will not die and the human player cannot win the game. |
| 5 | IMMUNE TO COLD. Intruder cannot be frozen in Freezer compartment. |
| 6 | VERY FAST. The Intruder (and all face down counters) will move two compartments per turn in random movement, instead of the usual one. If a face down counter enters a compartment occupied by a human, it will cease movement immediately. |
| 7 | CLONE. See the Clones rule for detailed description. |
| 8 | EXTRA STRONG. The Intruder can break out of any Cage. |
| 9 | IMMUNE TO FLAME. Flamethrowers have no effect on the Intruder. |
| 10 | IMMUNE TO GAS. The Intruder is immune to poison Gas. |
| 11 | IMMUNE TO SLEEP DARTS. The Intruder is immune to Sleep Darts. |
| 12 | BLASTER RESISTANT. The Intruder is much harder to kill with a Blaster than he would be otherwise. |
Clones
The Clone rules are explained here instead of the chart above because of the space required.
It may be discovered that the Intruder has the ability to "Clone" himself into several identical individuals, all of which will have identical powers. In the event that the Intruder is found to have the Clone power, extra Intruder counters are introduced into play during the next Panic Interval. The total number of Intruders in play (counting those previously destroyed or captured by the crew) is shown on the Intruder Life Stage Chart.
EXAMPLE: Well into the game, the human player locates the Intruder. It is in Life Stage 3, and two of its powers are unknown (the other two are IMMUNE TO GAS and IMMUNE TO FLAME). The unknown powers are rolled, and determined to be IMMUNE TO VACUUM and CLONE. The player immediately checks the Intruder Life Stage Chart and determines from it that in the third Life Stage there should be a total of 2 Intruders in play. He takes another Intruder counter from those not used, and places it in the Clones Not Yet in Play box. During the next Panic Interval this extra Clone is added to the game.
If the Clone power has been rolled, then additional Clone Intruder counters must be added to the Clones Not Yet in Play box each time the Intruder undergoes metamorphosis.
EXAMPLE: Later in the game detailed above, the player notes that one Clone is still on the map, but the other has been frozen. The metamorphosis die roll indicates that the Intruder has advanced to the fourth Life Stage. The chart indicates that, at this level, there should be three Clones in the game. One is added to the Clones Not Yet in Play box and will later be added to the game.
If one of the several Cloned Intruders is killed or frozen, then the metamorphosis of that particular individual is assumed to halt at that point. The later development by another of immunity to what killed the first one does not "resurrect" the first one.
EXAMPLE: There are two Clones in the game. One is trapped in the Freezer and frozen. Later, the other one metamorphoses and gains the power "Immune to Cold". This has no effect on the frozen Intruder since his development was stopped before the metamorphosis that gave him (or would have given him) that power.
The number of Clones on the playing map (including killed, frozen, not yet in play, and those on the map of the ship itself) must ALWAYS be exactly equal to the number of Clones specified by the Intruder Life Stage Chart. At the time of any metamorphosis, the number must be adjusted by adding additional counters to the Not Yet in Play box.
During a Panic Interval all Intruders in the Clones Not Yet in Play box must be added to the game.
If the Clone power is used, the human player cannot win the game until all Clones are killed or captured.
In the case of two Intruders being in the same compartment during an Interaction Phase, the various decision steps (whether the Intruder will attack, and if so, who) are taken independently for each Intruder. The restriction on three attacks is applied to each of the Intruders (each could be attacked up to three times, assuming there are enough crewmen to fire).
INTRUDER KNOWN POWERS DISPLAY. (See mapsheet.)
Capturing the Intruder
The Intruder may be captured in one of several ways.
The Intruder may be "controlled" by electric Prod, forced into the Freezer, and frozen. If the Intruder is immune to cold, but in the freezer, it is considered "caged" and may (if it has extra strength) break out of the cage.
The Intruder may be caged. If extra strong, it may break out of the cage. A Cage containing an Intruder may be placed in the Freezer. A caged Intruder may not move or attack, but will continue to roll for metamorphosis. A Cage containing an Intruder may be transported by one crewman if the Intruder is in Life Stage 1 or 2, by two crewmen if it is in Life Stage 3 or 4, and by three crewmen if in Life Stage 5 or 6.
Lab Animals
As the purpose of the Deep Space Stations was research, extensive laboratory space was provided, including space for the storage of various Terran and non-Terran animals. When the Intruder first broke out of the lab section, an unknown number of Lab Animals escaped with it.
Lab Animals may not be intentionally killed by the crew.
Lab Animals may be captured (see Attempt to Catch Lab Animal). If captured, they may be caged. After being caged, they may be transported back to the Laboratory and returned to the built-in cages.
The Intruder will never attack a Lab Animal. If a caged Lab Animal is found by the Intruder, the Intruder will release the Lab Animal.
NOTE: As is detailed in the set up, the total number of Lab Animals and Dummy counters in play is not known to the player at the start. See Panic for details of why Lab Animals should be recaptured.
Lab Animals are never killed during the course of the game, except in a self-destruction situation, or by Marines (see Optional Marines rule).
A Lab Animal that has been caught and caged remains in the Cage until released or transferred to the permanent cages in the Lab. Caged Animals cannot move. Only one Lab Animal (or one Intruder) may be in a given portable Cage at any given time.
Movement
There are two movement systems in the game, each being separate and distinct from the other. One is used to move the various face down counters (which include the Intruder, and Clones, Lab Animals and Dummy counters). The other is used by the player to move the crewmen.
Random Movement System for Inverted Counters
During the Intruder and Hidden Counter Movement Phase, the player will move each of the inverted counters using the following procedure:
- Indicate each counter in turn and roll a single die.
- The die roll result, when compared to the small numbers printed in that compartment on the map, will indicate which, if any, of the adjacent compartments the inverted counters is to be moved into.
EXAMPLE: An inverted counter is in the Crew's Mess. If the die roll were a "1", the counter would be moved to Corridor A-1 since the small blue "1" on the map is adjacent to the passage leading from the Crew's Mess to Corridor A-1. Similarly, a die roll of "2" or "3" would move the counter into Access Shaft #2, while a die roll of "4" would move the counter into the Living Quarters. A die roll of "5" or "6" would indicate that the counter does not move in the current turn.
The Intruder can never move through the doors into the Arms Room, Freezer, or Computer Room unless these have been opened by the crew for the express purpose of entry by the Intruder.
It is presumed that there are many passages between a given compartment and the ones adjacent to it. Only one is shown on the map for clarity. It is impossible to "block" the passages from one compartment to another.
Crew Movement
Each turn, during the Crew Movement Phase, the player may move each of his crewmen within the limits of these rules.
Each turn, each crewman has three "movement points". Each of these points may be used to move the crewman counter from one compartment to any adjacent compartment, or to perform one "function" (see Functions). Thus, a crewman could move a maximum of three compartments during one turn.
EXAMPLE: A crewman in the Infirmary could move to the Lab, Corridor B-1, and then to the Command Module.
Because of the cramped space, movement into one of the three "Access Shafts" costs two movement points.
While moving, a crewman can carry objects with him. (Picking the objects up is a function. Dropping them costs no movement points.) A crewman may carry a maximum of one large object and one small object, or three small objects. The list of objects, by size, is as follows:
- SMALL: Blaster, Sleep Dart Pistol, Gas Canister, Electric Prod.
- LARGE: Cage, Flamethrower.
NOTE: While a crewman could conceivably carry three weapons, he could only fire one in a given Interaction Phase.
The human player may, at his option, move his crew counters in any order so long as none of them expends more than three movement points in the Crew Movement Phase. Movement points may not be accumulated from turn to turn, or transferred from one crewman to another.
When a given crewman is carrying an object, the counter representing that object is placed under the counter representing the crewman.
Combat
Combat between the Intruder and the crewmen takes place in the Intruder Action Segment and in the Crew Action Segment of the Interaction Sub-routine, if there is a compartment containing one or more Intruders and one or more crewmen.
Intruder Attacks on Crewmen
The Intruder conducts attacks on crewmen during Step D of the Intruder Action Segment of the Interaction Sub-routine.
To determine if the Intruder will attack, roll a single die and compare the result with the numbers listed in the Probability Intruder Will Attack column of the Intruder Life Stage Chart. If the die roll result is listed in this column (for the appropriate Life Stage of the Intruder) then the Intruder will attack one of the crewmen in that compartment.
To determine which of the crewmen the Intruder will attack, use the following procedure:
- If there is only one crewman in the compartment, he will be the one attacked.
- If there are two crewmen in the compartment, arbitrarily assign one of them the numbers 1-3, the other 4-6. Then roll a single die to determine which is attacked.
- If there are three crewmen in the compartment, arbitrarily assign one of them 1-2, the second 3-4, and the third 5-6. Roll a single die to determine which is attacked.
- If there are four to six crewmen in the compartment, assign each a number, and if the die roll result is an unused number roll again.
- If there are seven to nine crewmen in the compartment, assign each a single number, but do not assign numbers to Science Officers. They will not be attacked if more than six crewmen are in a single compartment.
In almost all cases, the crewman under attack or one of the other crewmen in the compartment will be allowed to attack the Intruder immediately prior to the Intruder's attack being carried out. This is resolved in Step C. Such attacks are known as "Self Defense Attacks" and are conducted in accordance with the Crew Attacks on the Intruder rules.
If the result of the Self Defense attack is "No Effect", the Intruder's attack on the crewman is carried out. To determine the result of the attack, roll a single die and compare it with the numbers listed in the Probability of Kill column of the Intruder Life Stage Chart for the appropriate Life Stage. If the die roll result is listed, the crewman has been killed (permanently removed from play).
Crew Attacks on the Intruder
Crew attacks on the Intruder are considered to be an "Action" and are marked in the Interaction Sub-routine. Combat is resolved using the Combat Results Table, and is dependent on the weapon used and whether the attack is a Self Defense attack or a regular attack. Note that the Intruder may be invulnerable to some weapons (by virtue of his acquired powers) and that there are two columns on the CRT for Blasters (one is used against a "Blaster resistant" Intruder).
In the Crew Action Segment crewmen may use weapons that they are carrying to attack the Intruder using the standard combat procedure. Note that firing a weapon (or making another form of attack) at the Intruder is considered to be an "Action" and that crewmen may take only one action during the Crew Action Segment of the Interaction Sub-routine.
COMBAT RESULTS TABLE (CREW vs. INTRUDER)
| Die Roll | Sleep Dart | Blaster | Blaster* | Gas | Improvised Weapons | Flame Thrower |
|---|---|---|---|---|---|---|
| 1 | S/S | K/K | K/IR | K/K + CK | K/IR | K/K + CK |
| 2 | S/S | K/IR | K/- | K/IR | -/- | K/IR |
| 3 | S/- | K/- | -/- | K/- | -/- | K/IR |
| 4 | -/- | -/- | -/- | -/- | -/- | -/IR |
| 5 | -/- | -/- | -/- | -/- | -/- | -/CK |
| 6 | -/CK | -/CK | -/CK | -/- | -/- | -/CK |
* Use this column against a Blaster resistant Intruder.
- K = Intruder killed.
- CK = Crewman under attack killed.
- S = Intruder put to sleep by dart.
- IR = Intruder Retreats, does not attack crewman, proceed to Crew Action Segment.
- - = No Effect.
When using this chart, cross-index the weapon fired with the die roll result (one six sided die) and read the result. Results to the left of the slash are for attacks made in the Crew Action Segment of the Interaction Sub-routine. Results to the right of the slash are for attacks made in self defense, or in defense of another crewman under attack in the Intruder Action Segment of the Interaction Sub-routine.
If it is determined that the Intruder will attack a crewman, the crewman selected to be attacked may use whatever weapons he has with him to attack the Intruder. This is known as a Self Defense attack, and is conducted using the standard combat procedures and the Combat Results Table. Alternatively, the human player may designate any other crewman present in the compartment to make the Self Defense attack in behalf of the crewman being attacked. Regardless of which crewman makes the attack, a CK result indicates that the crewman selected to be attacked by the Intruder is the one killed. The crewman making the Self Defense attack is assumed to have conducted one Action and cannot conduct another activity during the Crew Action Segment.
No crewman may make more than one attack (use a weapon as an activity) during the Crew Action Segment, regardless of the number of weapons that crewman is carrying. No more than three attacks may be made (including Self Defense attacks) against any single Intruder in any given Interaction Phase.
PROCEDURE: To resolve an attack by a crewman against an Intruder, roll a single die and cross-index the result on the CRT with the weapon used. Results to the left of the slash are used in the case of normal attacks, while results to the right of the slash are used in the case of Self Defense attacks.
Weapons
There are six basic types of weapons used in the game. These are listed below:
- SLEEP DART PISTOL — This is a compressed air weapon firing a dart tipped with a powerful sleep agent. If successfully used, the Intruder falls asleep and will remain asleep for one complete turn (until the beginning of the next Crew Action Segment). (During this period, the crew will probably attempt to cage the Intruder.)
- BLASTER — Basically an energy bolt weapon, this is the standard combat sidearm. If used successfully against the Intruder it is fatal.
- GAS CANISTER — A poison gas weapon (one of the nerve agents), this weapon can also be lethal against the Intruder.
- FLAMETHROWER — This weapon must be manufactured by the Engineers (see Construct Weapons). It is the most powerful one available to the crew.
- IMPROVISED WEAPONS — These are not formal weapons but various tools and odd pieces of metal. Any time a crewman has no other weapon (or none that will be effective) he may attack using improvised weapons. As improvised weapons are found at the point where they are used, it is not considered necessary to carry them. To use improvised weapons, however, the crewman may not be encumbered with a large object or more than one small object.
- ELECTRIC PRODS — These must be manufactured by the Engineers, but are not used as weapons per se. They are used to attempt to "gain control" of the Intruder.
Restrictions and Modifications to Combat
If the Intruder has acquired a power rating granting immunity to a certain type of weapon, then all results for that weapon will be read as "No Effect" on the CRT. Note, however, that Blaster Resistant does not grant an out and out immunity, it only reduces the chances of the Intruder being killed by a Blaster. This is reflected by different columns on the CRT.
If the Intruder is in Life Stage 1 or 2 the crew can take no action to kill it except in Self Defense. (Their options are to use Sleep Darts to capture it, or the Electric Prods to control it.)
Science Officers may never fire any weapon at the Intruder if there is any possibility of killing the Intruder as a result of such an attack, even in Self Defense.
Gaining Control Using Electric Prods
If, in the Crew Action Segment of the Interaction Sub-routine, a crewman with an Electric Prod is in the same compartment with the Intruder, that crewman may attempt to "gain control" of the Intruder, using the Electric Prod.
PROCEDURE: Roll a single die and cross-index the result on the Intruder Life Stage Chart with the appropriate Life Stage. If the result is shown there, the crewman has gained control.
A crewman "in control" of the Intruder may move with him in the Crew Movement Phase one compartment per turn. The crewman in control may take no other Action or Function while in control.
The Intruder that is under control of the crewman would continue to roll for metamorphosis. The crewman must roll again to re-establish control AFTER the Intruder advances to the next Life Stage.
COMBAT EXAMPLE
During a given turn, there are two crewmen (one Command and one Science Officer) in a particular compartment. During the Intruder Movement Phase, two inverted counters move into the same compartment.
During the Interaction Phase, the human player turns both counters over. One is a Dummy and is removed from play. The other is the Intruder, which is in Life Stage 3. Dice are rolled for the four powers, which are: Fast Reflexes, Immune to Cold, Extra Strong, and Immune to Flame.
A die is rolled to determine if the Intruder will attack. The result is a "2". Since 1-3 is listed in this column of the Intruder Life Stage Chart the Intruder will attack. The human player arbitrarily assigns the Science Officer 1-3, and the Command Officer 4-6, and rolls a die. The result is 2, and the Science Officer is the target of the Intruder's attack.
The Science Officer has a Sleep Dart Pistol and the human player decides to have him execute a Self Defense Attack. He rolls a "3" (no effect on the CRT since this is a Self Defense Attack). The Intruder now attacks. The Intruder Life Stage Chart indicates that a die roll of 1-4 will result in the Science Officer being killed. The die roll is "2" and the Science Officer is killed.
Play now continues to the Crew Action Segment. The Command Officer has both a Flamethrower and a Blaster, but has just learned that the Flamethrower is useless against the Intruder. He fires his Blaster, rolling a "1". This is increased to "2" because of the other crewman's death, but still scores a "kill" result on the Intruder.
Actions and Functions
Activities of the crew, other than movement, are broken into two groups: "Actions", which take place in the interaction phases, and "Functions", which take place during the movement phases and sometimes consume movement points.
A crewman performing an action or function must, obviously, be in the same compartment as everything else involved in that action. An Engineer in the Command Module could not (obviously) work on a flamethrower in the maintenance compartment, fire at an Intruder in Corridor B-2, capture a lab animal in the Infirmary, or pick up an object in the Main Airlock.
Actions
Actions take place during the interaction phases, in the Crew Action Segment of the Interaction Sub-routine. Each crewman may execute one (and only one) action per Interaction Phase. The actions crewmen may take are listed below. Unless specifically indicated otherwise, all actions may be taken by all crewmen during any Crew Action Segment.
ATTEMPT TO CAGE INTRUDER. The crewman attempting this action must have a Cage in his possession. If the Intruder is asleep, this action will be successful (result in the Intruder being caged) on a die roll of 1-5. If the Intruder is not asleep, the Intruder can only be caged if it is in Life Stage 1, and only on a die roll of 1-2.
ATTEMPT TO CATCH LAB ANIMAL. Any crewman not encumbered by more than one small object (no large objects) may attempt to catch a Lab Animal that is in the same compartment. (The crewman may "drop" any excess items to participate in this action.) A single die is rolled, with a result of 1-3 indicating the Lab Animal has been caught, and a die roll of 4-6 indicating it has not been caught.
If the Lab Animal has been caught, the crewman that caught it may not move or take any other Action or Function until or unless the Lab Animal is caged or released. It may be voluntarily released at any time.
CAGE LAB ANIMAL. In order to cage a Lab Animal, one crewman must be in possession of a Cage, and another in the same compartment must have previously caught, and still be holding, a Lab Animal. The action is automatically successful, resulting in a caged Lab Animal.
START (OR STOP) THE SELF-DESTRUCT SEQUENCE. This action may ONLY be taken in the second Interaction Segment. Only a Command Officer may start the Self-Destruct Sequence. Only a Command or Science Officer can stop it. Refer to the rules on Self-Destruction for details.
OPEN AIRLOCKS. The Airlocks in the Main Airlock Compartment and the two Shuttle Docks may be opened by a crewman in the adjacent Corridor compartment. The result of this action is that everything in the "opened" compartment is swept into space (except an Intruder with fast reflexes). If this action is taken and the Intruder has unknown powers, use the procedure described under Powers and Properties of the Intruder to determine these powers.
ATTACK THE INTRUDER. Any crewman may attack the Intruder, subject to the rules on Combat. Note that a Science Officer may not make a potentially lethal attack on the Intruder.
PROD THE INTRUDER / ATTEMPT TO GAIN CONTROL. Any crewman may attempt to gain control of the Intruder by use of an Electric Prod.
INVENTORY LAB ANIMALS. Science Officers (only) may perform this action, and only in the second Interaction Phase. The result of this action is to turn one counter in the Lab Animals and Dummies Not Used box face up. This action will assist the player in determining his situation, in that he will eventually know how many Lab Animals, and how many Dummy counters, are in play.
LEAVE IN A SHUTTLE. This action may be taken only in the second Interaction Phase, and uses the special procedures outlined under Escape via Shuttle.
TURN ON THE FREEZER. This action may be taken only in the second Interaction Phase, and results in the freezing of anything inside the Freezer compartment. Normally this is done to freeze/capture the Intruder, but he may be immune to the cold.
TRANSFER A LAB ANIMAL TO A PERMANENT CAGE. Only Science Officers may perform this action, and only in the second Interaction Phase. A Lab Animal that was captured and is held inside the Lab compartment, or that was caged and transported into the Lab compartment, may be transferred to the permanent cages built into this compartment. The action is automatically successful, and the caged or captured Lab Animal is removed from play and placed in the Caged Lab Animals box on the map.
Functions
The following activities are performed during the Crew Movement Phase. Most cost a number of movement points. These activities are defined as Functions. Unless specifically stated otherwise, any crewman can perform any Function.
PICK UP AN OBJECT. This activity costs 1 movement point, regardless of the number of objects picked up. To indicate that a particular crewman has picked up and is now carrying an object, place the counter representing that object under the counter representing the crewman. Carrying an object during movement does not cost movement points. Note that there is a maximum number of objects that can be carried.
UNLOCK ARMS ROOM. Only Command Officers may perform this function. The Arms Room may not be entered by any crewman unless it has been unlocked by a Command Officer during the same Crew Movement Phase.
UNLOCK FREEZER. Any crewman may unlock the Freezer. It is considered to operate in a manner identical to that of the Arms Room.
OPEN COMPUTER ROOM. Only Command and Science Officers may open the door to the Computer Room. Like the Arms Room and Freezer, no one may enter the room unless the door has been opened during the same Crew Movement Phase.
CONSTRUCT WEAPONS. This function requires three movement points and can only be performed by an Engineer, and only in the Maintenance compartment. Electric Prods and Flamethrowers are the only weapons that must be constructed. Two turns work by a single Engineer are required to construct an Electric Prod, and three turns are required by a single Engineer to construct a Flamethrower. Two Engineers may not work on the same weapon during the same turn, but they may work on the same type of weapon. During the initial set up, the three Electric Prods and the three Flamethrowers are set up on the Engineering Weapons Construction Track (see mapsheet). Each turn that an Engineer works on a given weapon, the counter for the specific weapon that he worked on is moved one box to the right. When the counter reaches the end of the track, it is assumed completed and the counter is moved to the playing area of the mapsheet, and either placed under the counter of the Engineer that built it, or placed in the Maintenance compartment where it may be picked up by another crewman.
DROP AN OBJECT. This action requires no movement points and may be taken by any crewman. Simply remove the counter representing the object from under the counter representing the crewman, and place it in the same compartment.
Note that there is no specific procedure for transferring an object from one crewman to another. One would "drop" the object in question, and the other would pick it up.
Panic
On certain occasions during the course of the game, the Sequence of Play will be interrupted by PANIC INTERLUDES. Generally, these will occur when some major psychological shock has been inflicted on a large part of the crew. In real terms, the crew will return to the Command Module and discuss the situation, perhaps attempting to formulate new plans to trap the Intruder.
When Panic Occurs
A Panic Interlude will interrupt the Sequence of Play at the end of any Interaction Phase in which a crewman or an Intruder has been killed, UNLESS a crewman has an Intruder "in control" with an Electric Prod or trapped in a Cage.
Effects of Panic
All crewmen are moved to the Command Module, taking with them all objects they are carrying, but leaving all other objects where they are. If there is a Lab Animal in a Cage, and the Cage is left behind, the Lab Animal will remain in the Cage. All objects brought to the Command Module are presumed to be "dropped" there and may be "picked up" again at the start of the next Crew Movement Phase.
All uncaptured Lab Animals, all face down counters, all Dummy counters in the Dummy Counters Discovered box, and all Intruders are removed from the map. All Intruder Clones not yet in play are added to the group. All such counters are turned face down and shuffled. The shuffled counters are then placed, one counter per compartment, in the following compartments (in this exact order):
Access Shaft #1, #2, #3, the Storage compartments adjacent to Corridors A-1, B-1, C-1, A-2, B-2, C-2. If there are fewer than nine, some will be left empty. If there are more than nine, simply start over again placing counters. (Some of the access shafts will have 2 counters, in this case.)
Roll twice for metamorphosis.
Begin a new turn with the Intruder and Hidden Counter Movement Phase.
Lost Crewmen - Optional
Players may, if they wish, use this rule to simulate the type of hysterical panic that can result from close contact with the Intruder.
During the Panic Interlude, select one crewman at random (it is suggested that you turn all crewmen counters face down, shuffle, and select one) and add that counter to the group of inverted counters which includes the Lab Animals, Dummies, and Intruders. While it is possible that the lost crewman might be in a compartment with an Intruder and the human player would not know it (both being inverted) it can be assumed that the crewman is "hiding" so well he can not be found. The crewman would return to normal use and control when found in an Interaction Phase. The crewman is not actually "lost" (all know the station very well) but running in a blind panic. This rule cannot be used in the Intelligent Intruder scenario.
During any turn in which the Self-Destruct System is active, there are no panic interludes. The rules of panic are ignored in such turns.
Self-Destruction and Escape
Should the player determine that his chances of killing the Intruder are minimal or non-existent, he may use this option. It involves destroying the Station and escaping in the Shuttles.
Self-Destruction
The Self-Destruction System involves a nuclear device built into the station. If activated, there is an eight turn countdown, following which the station is destroyed. The Self-Destruct System may be stopped at any point up to half way along the count down.
The Self-Destruct System is activated as an Action taken during any Second Interaction Segment. ONLY a Command Officer may start the Self-Destruct System. During the Second Interaction Segment, the player would simply announce that a given Command Officer (who MUST be in the Command Module) is starting the Self-Destruct System. The Self-Destruct counter is placed in the Active box on the Self-Destruct System track. Thereafter, it is moved one box across the track during each Self-Destruct Sequence Phase. Move the counter directly from one box to the next. Do not skip boxes, or return to a higher numbered box. The Self-Destruct counter is NOT moved into the "8" box during the Self-Destruction Sequence Phase immediately following the Interaction Phase in which it was initiated. It does move on the Self-Destruction Sequence Phase of the next turn.
When the Self-Destruct counter reaches the "0" box, the station is destroyed and everything on it is presumed to have died (or been destroyed). Note the possible escape of the crew (and the Intruder) in the Shuttles.
During any Second Interaction Phase before the Self-Destruct counter has been moved into the "4" box on the track, the Self-Destruction Sequence can be stopped. ONLY a Science or Command Officer in the Command Module can do this. If the Self-Destruct System is deactivated (stopped) the Self-Destruct counter is removed from the map and the system is considered "not active". It may NOT be activated again. If the Self-Destruct counter has been moved into the "4" box (or lower) it cannot be stopped.
Any time that the Self-Destruction System is active there are NO PANIC INTERLUDES.
Escape via Shuttle
There are two Shuttles on the station, one in either Shuttle Dock. The crew may use these to leave the station.
Because of the quarantine rules, a Shuttle may not be used to leave the station until the Self-Destruct System is armed, and the counter has proceeded into or past the "4" box.
Once a Shuttle has left the station, it may never return.
A Shuttle may carry a maximum of 4 crewmen. The crewmen may be carrying any number of objects.
PROCEDURE: Leaving in a Shuttle is an Action, and occurs in the Second Interaction Phase ONLY. The crewmen designated to leave in a given Shuttle must be in the Shuttle Dock for that particular Shuttle (Shuttle #1 is in Shuttle Dock #1, etc.). The crewmen counters are moved from the Shuttle Dock Compartment in the main area of the playing map, to the appropriate Shuttle (also on the playing map). Escape is then assumed to have been successfully completed.
POSSIBILITY OF INTRUDER STOWAWAY: Any time a Shuttle leaves the station, there is a possibility that the Intruder may have managed to get aboard in the confusion (which inevitably follows as a result of Self-Destruction). Determine, at the instant of Shuttle departure, the number of Intruders that are on the station (not counting any Frozen or Caged). Add one to this number to yield the Intruder Stowaway Index (ISI). Roll a single die. If the result of the die roll is equal to or less than the ISI, one Intruder is on board the Shuttle. Place an Intruder counter in the appropriate Shuttle, and play as many Interaction Sub-routines as are necessary to resolve the situation (either the Intruder or all crewmen killed). The crew may "open the hatches" with the intent of allowing the vacuum of space to pull the Intruder out, but ONLY after spending one entire Crew Activity Segment "preparing" for this (putting on pressure suits and strapping down). In the event that both Shuttles are leaving during the same Interaction Phase, one Shuttle is resolved for possible Intruder Stowaway, and the second is resolved based on a possibly revised number of Intruders on board.
If the Self-Destruct System has been activated, and then deactivated, the crew may leave in the Shuttles without restriction.
If an Intruder is on board of a Shuttle and kills the entire crew of it, the Shuttle is presumed to crash on his home planet, releasing him unharmed.
The Solitaire Game
Intruder is designed primarily as a solitaire game, pitting one player against the Intruder (which moves by automatic rules).
Set Up
Take the six Lab Animal counters and the six Dummy counters. Turn these face down and shuffle them thoroughly. Select eight of these (do not look at them) to be used in the game and place the other four in the Lab Animals and Dummies Not Used box on the mapsheet (do not examine any of these counters, leave them face down). Add one Intruder counter to the eight face down counters and, again, shuffle them thoroughly. Then place these nine counters on the mapsheet, one each in each of the six Storage compartments, and one in each of the three Access Shafts.
Set up the nine crewmen as follows:
- One Command Officer in each of the Command Module, Mess, Living Quarters.
- One Science Officer in each of the Lab, Infirmary, and Mess.
- One Engineer in each of the Power, Maintenance, and Living Quarters.
Place three Blasters, three Gas Canisters, and three Dart Pistols in the Arms Room compartment. Place three Electric Prods and three Flamethrowers on the Engineer Weapons Construction Track.
The Intruder Life Stage marker is placed in the Stage box of the Intruder Life Stage Chart. Two "power" counters are placed in the Unknown Powers box on the mapsheet.
The game is now ready for play. Proceed with the first turn.
How to Win
The game is scored on a point system, with the human player gaining or losing points for various events and results. The game is over when all nine crewmen are dead, or when all Intruders are dead, frozen in the Freezer compartment, or permanently trapped in Cages. (Note that an Intruder can only be considered permanently trapped if it is in Life Stage 6, all powers have been determined, and extra strength is not one of them.)
| Event | Points |
|---|---|
| Each crewman dead* | -5 |
| Each Intruder Killed | +7 |
| Each Intruder Captured** | +15 |
* Does not include the "10th crewman", presumed to have been killed before the game begins.
** Frozen or permanently caged.
The human player totals his score. If it is a positive number, he has won the game. If it is a negative number, he has lost the game.
Scoring the game in the event of Self-Destruction becomes, philosophically, rather complex. While destruction of the station must be assumed to be a tremendous catastrophe (all of the research will be lost, and the crew forced to struggle for survival for years on an unfriendly world that might contain more of the Intruders) escaping with their lives would probably be considered (by the crew) to be no worse than a draw. There is also the problem that, given a fixed point value for such an event, some players might tend to use the Self-Destruct option at times when a real crew on a real station would not consider it a viable option. Players are advised to consider Self-Destruction (with the survival of at least three crewmen) to be an automatic draw.
Multi-Player Scenarios
While INTRUDER is intended to be played solitaire, it can, with only slight modifications, be played by more than one player. Three possible scenarios are suggested here.
The Intelligent Intruder
In this scenario, one player represents the crew (the human player in the above rules) while the other represents the Intruder. While semi-intelligent, the Intruder cannot use weapons, pilot Shuttles, or take any Action or Function. The various "automatic" rules of the solitaire game are dispensed with, allowing the Intruder player to make some basic decisions. These are:
- A. The Intruder player moves all face down counters (he may examine them) one compartment per Intruder Movement Phase at his own discretion, instead of using the die rolls.
- B. The Intruder player may decide if he will attack during an Interaction Sub-routine and if so, which crewman he will attack.
- C. The Intruder may open Cages (including those in the Lab) and destroy any "object" he finds laying in a given compartment.
- D. All other rules (including powers, Clones, metamorphosis, etc.) remain as in the Solitaire game. (The Intruder player may determine his actions, but not his biology.)
Winning the game is determined by the point system under How to Win.
Return to Prometheus
This scenario presumes that the crew abandoned the station without destroying it.
SET UP: Assume the Intruder to be at Life Stage 6 and roll for seven powers.
Then take ALL Dummy and Lab Animal counters and one Intruder (use all five if the Clone rule is in effect) and distribute them in the station as shown in Panic. Play three complete turns of the Intruder and Hidden Counter Movement Phase.
CREW ARRIVAL: The crew is assumed to arrive in three Shuttles, one at each of the three airlocks. Each Shuttle includes one each Command Officer, Engineer, Science Officer, Blaster, Sleep Dart Pistol, Flame Thrower, Gas Canister, and portable Cage. Play proceeds as the crew attempts to clear the station of the Intruder. The player may discard any weapons the Intruder is immune to.
HOW TO WIN: Use the victory point system under How to Win.
The scenario, at the option of the player or players, may be played solitaire, by three players (each commanding one team), or by two players (one controlling the Intruder).
OPTIONAL: Assume that the Command Officers and Engineers are special "marines". Marines may shoot Lab Animals (use the charts you would use in shooting the Intruder). Marines are assumed to be armed with Blasters, Flamethrowers, Gas Canisters and Sleep Dart Pistols. Counters are not required for these objects, all marines are presumed to have all four weapons at all times. Marines may carry no other objects.
The Science Officer
In this scenario, one player controls the three Science Officers and the other player controls the remaining six crewmen. The Intruder is operated by the automatic rules of the solitaire game, or perhaps by a third player (using the rules of the previous scenario).
Each of the two human players will move, act, and function during the human phases simultaneously with each other. They are not, in fact, competing with each other so much as they are working against the Intruder, by different means. Each of the two human players scores points against the Intruder separately, but using different point values.
| Event | Science Officer | Command/Engineer |
|---|---|---|
| Each crewman dead | -3 | -5 |
| Each Intruder Killed | -5 | +7 |
| Each Intruder Captured | +20 | +15 |
Each of the two human players determines his score. Each counts only his own crewmen for casualties, but any Intruder killed or captured by either player counts for both. If only one of the human players has a positive score, he wins the game. If both do, the higher one wins the game. If neither does, the Intruder wins the game.