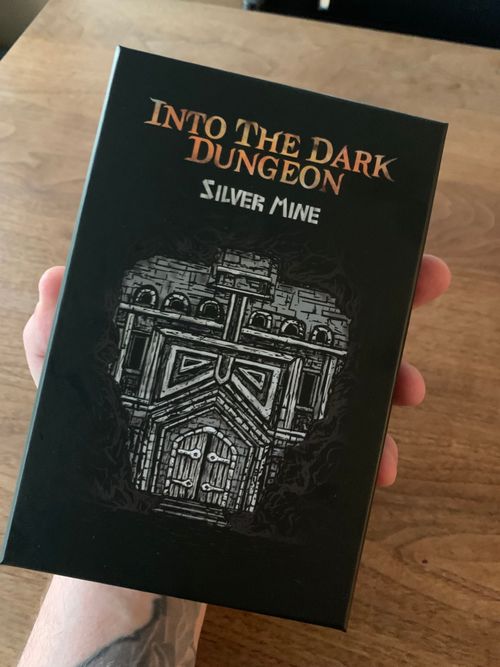
Into The Dark Dungeon: Silver Mine
Into The Dark Dungeon: Silver Mine Rulebook
Table of Contents
Table of Contents
Components
- This rulebook (V1.2).
- 63 poker size cards (63x88mm): 30 dungeon cards, 4 characters, 4 stash/map cards, 4 guides, 5 NPCs, 16 enemy cards (2x4 goblins, 2 rats, 2 spiders, and 4 bosses).
- 123 mini size cards (41x63mm): 16 books (2x8), 16 quests, 6 rumors, 6 path cards, 8 weapons, 4 backpacks, 12 runes (6 runes + 6 great runes), 12 potions, 6 master keys, 6 lost maps, 6 tools, 15 torches, 10 coin-cards (3x1 coin, 4x2 coins, 3x3 coins).
- 30 Dungeon cards (4 Gates, 26 Halls).
- 120 wooden cubes (8mm): 32 character cubes (8 orange, 8 blue, 8 green, and 8 purple), 33 black cubes (enemies), 40 white (containers and items), 10 gray (traps), 5 red (campfire). [20 of which have a symbol print].
- 56 tokens (16mm): 34 coins (6x1, 10x2, 6x5, 6x10, 6x20), 7 locked/unlocked doors, 4 goblin tokens, 1 first player token, 1 turn token, 1 campfire, 4 poison, and 4 disease tokens.
- 2d6 dice (14mm).
- Bags for the dice, cubes and cards.
- 4 Guide cards, 4 Stash/Map cards, 4 Character cards, 12 Enemy cards, 4 Boss cards, 6 Path cards, 5 NPC cards, 16 Quest cards, 79 Item cards, 16 Book cards, 6 Rumor cards.
Introduction
Into the Dark Dungeon is a dungeon-crawling tabletop game that you can play solo, cooperatively, or competitively. Explore randomly generated dungeons, overcome challenging encounters, and fight to survive as you strive to complete your quest.
Embark on an adventure to acquire forgotten knowledge, gather valuable loot, and trade for the supplies you'll need for your next exploration. When you're ready, delve Into the Dark Dungeon once more to take on new quests, uncover hidden treasures, and claim your place as a legendary hero.
Designed for 1–5 players: enjoy solo play or team up with 2–4 players in cooperative or competitive modes. An additional player can even take on the role of controlling dungeon encounters, adding a unique layer of challenge.
Its exploration mechanics are dynamic, offering countless possible combinations and endless replayability.
Game Preparation
Choose the game mode.
- Session: single dungeon exploration.
- Campaign: multiple quests.
Solo
- Take one or more characters for a single or multiple quests.
- Aim to achieve your highest score by collecting as many coins as possible.
Cooperative
- Session: Help each other complete all quests and then exit the dungeon.
- Campaign: Continue for consecutive quests until a hero emerges.
Competitive
In competitive mode, players can keep their item cards hidden until used.
- Session: The player who has the most coins wins.
- Campaign: Once a hero is declared, the player with the most coins wins.
Arena
Keep your item cards hidden until used. All players are opponents.
- Sudden Death (Session): Compete against each other until only one character remains.
- Tournament (Campaign): Multiple rounds (e.g., a set of 5). The player with the most wins (last one standing) is crowned the champion.
The arena ends instantly when only one character remains or when one team defeats the other.
Player Configurations:
- 2 players: 1v1, 2v2
- 3 players: 1v1v1
- 4 players: 1v1v1v1
Game Overview
Your objective is to complete the quests you acquire and earn titles as you progress. Silver coins are always valuable—they will help you grow stronger along the way.
- Crossroads Town
- Visit the Questmaster to accept a quest (starting with an Easy one is recommended).
- Receive your starting items (only at the beginning of your first exploration).
- Into the Dungeon
- Move.
- Explore new halls.
- Encounter any enemies.
- Interact, use, or equip items.
- Try to complete your quest.
- Exit and return to the town.
- Crossroads Town
- Visit the Questmaster to deliver a completed quest and accept a new one.
- Visit the Merchant to sell and buy items.
- Visit the Mystic to acquire knowledge.
- Visit the Innkeeper to rest and hear rumors.
- Visit the Tree to choose a path of special power.
- Into the Dark Dungeon once again.
Setup
Place cards in piles with a designated area for discarded cards. Create piles for the Item, Rumor, and Dungeon Cards. Create two separate piles: one for Enemy cards and one for Boss cards. All the decks from which you draw cards, are placed face down.
In front of you, place the character, quest, starting items, guide, and stash card.
The first player takes the 1st player token (torch token). This serves as a reminder for the dungeon turn or for the player who controls the monsters in the dungeon.
Take a random Gate card and shuffle the remaining three into the dungeon deck. Place the character cube (with the printed symbol) on the Gate card. Your first step starts after the Gate, counting squares as you move. You can escape the dungeon by exiting through a Gate.
For each dungeon card revealed, place the corresponding cubes:
- White cubes for containers and items.
- Black cubes for enemies.
- Gray cubes for traps.
- Red cubes for campfires.
In cooperative or competitive mode, start at the same Gate of the dungeon.
In arena mode, set up a predetermined size of the dungeon, including the number of cards and Gates. You can use the following arena ideas or create your own shapes (p.22). Each character starts from a different Gate. While revealing the dungeon cards, if the paths are not connected, replace them with the top card from the dungeon card pile.
Objective
Become the Hero of the region by acquiring titles, wealth, power, and occasionally vanquishing your antagonists.
Cooperative or Competitive: The player who collects the most coins wins.
Arena: Be the last one standing (or have the most wins).
Acquiring Titles (Titles must be acquired in order):
- Vagabond: Requires the completion of an Easy difficulty quest.
- Seeker: Requires the completion of a second Easy difficulty quest.
- Pathfinder: Requires the completion of a Medium difficulty quest.
- Adventurer: Requires the completion of a second Medium difficulty quest.
- Explorer: Requires the completion of a Hard difficulty quest.
- Hero: Requires the completion of a second Hard difficulty quest.
Initiative
Multiple characters. Roll to determine which player goes first. You can use the torch token to mark the first player. Players take their turns in clockwise order. After all characters have taken their turns, it is then the dungeon's turn (enemies are played last). Roll for initiative before each new dungeon exploration.
Characters
Select one of the four characters, either by choice or at random. Each character performs better in one of the four attributes compared to the others. Select one of the four sets of character cubes and place them on the attributes marked with circles. Then, place the cube with the printed symbol on the Gate card and another on the Quest card if needed. Reserve one cube for the Path and the last cube for tracking Titles.
Types
There are three categories of characters: Magic, Strength, Precision.
Character categories are essential for Books and Paths, where the further differentiation of characters comes into play.
Attributes
Every character and enemy has four attributes: Attack, Move, Torch, and Life.
Attack: Add your attack attribute to your combat rolls. The sum is referred to as your Hit score. Attack + Combat Roll = Hit score. If your Hit score is higher than your enemy's, you inflict 1 damage.
Move: Indicates the number of squares you can move. Run: Increase your movement by up to 2 squares if you take no other actions (Torches are required).
Torch: Use to Explore new Halls and Loot containers. If all Torches are spent, a random boss enemy enters the dungeon from the Gate where the player who used all Torches previously entered.
- Exploring: When revealing a new dungeon card, you must spend 1 Torch, if available. Without Torches, you can still explore new Halls but cannot Run or see what items enemies are carrying.
- Looting: Add your current Torch attribute to your loot rolls. The sum is referred to as your Loot score. Torch + Loot Roll = Loot score. If your Loot score is equal to or greater than the required container's value, you can loot it. If your attempt fails, you find nothing.
- Item Card Torch: It can be used to increase the Torch attribute or kept in your inventory for future use.
Life: Indicates the number of wounds you can withstand before defeat.
Attributes can exceed the maximum value listed on the character card with bonuses from weapons and runes. When an attribute increases beyond the maximum, place the cube on the weapon/rune card to track the excess. For example, if the Wizard has 4 Torches as an attribute and equips a weapon that adds 1 Torch, place the attribute's cube on the weapon card's square.
Inventory
Each hero can carry up to 3 items beneath the character card. They can equip 1 weapon to the right of the character card (the ribbons with the icon will connect). Runes can be attached to the weapon. Inventory capacity can be increased with a backpack.
Weapons and Runes are items that can be equipped. While placed beneath the character card, each one occupies 1 of the 3 inventory spaces. When equipped on the right side of the character card, they no longer occupy inventory space and are considered equipped. Equipped weapons and runes don't count in the inventory capacity.
Choose from the following starting item cards: Tools, Master Key, Torch (players can choose to take the same starting item card). Starting items are only available at the beginning of your first exploration.
According to the number of characters in play, take the corresponding number of items:
- 1 character: Take 3 item cards.
- 2 characters: Take 2 item cards each.
- 3 characters: Take 1 item card each.
- 4 characters: Take no item cards.
When choosing one character, you select 3 items to fill your inventory. It's up to you to decide if these items will aid your exploration or if you'll drop them to get other items.
Stash
The Stash is located in Crossroads Town. Keep your Coins and Books in your Stash. If you die in a dungeon, you lose all items and coins you are carrying, but not what is in the stash. If you start with a new character, use what is in the stash. Books are the knowledge that you have acquired, not items, and once obtained, they can be kept in your stash.
Quests
Choose a quest from the quest board (start with an Easy quest in campaign mode), or select one at random (for a single session). All quests are available. Place the quest card to the left of your hero card (the ribbons with the icon will connect). You can track the progress of the quest with a cube.
If you exit the dungeon and enter again with the same quest, continue from where you left off. As if you had the Alchemist quest and already have a potion in your inventory.
Once you meet the requirements of your quest or need to escape the dangers of the dungeon, exit it by moving past the Gate. If there are no more enemies in the dungeon, you can instantly leave.
Visit the Questmaster (p.32) and complete the quest when its requirements are met (deliver any items if required) to gain the reward and Title.
Quest categories:
- Easy: Cartographer, Head Hunter, Crates, Lockpicking.
- Medium: Alchemist, Scholar, Barrels, Campfire.
- Hard: Warmaster, Gates, Rogue, Tombs.
- Personal: Silver Touch, Chests, Goblin Bane, Wayfinder.
Personal quests don't grant a Title, and you are not required to deliver items. They are more of a last resort—for example, to accompany a friend or to continue playing after the Hero Title has been acquired.
Titles are acquired in order by completing quests of increasing difficulty:
- Vagabond: Complete one Easy difficulty quest.
- Seeker: Complete a second Easy difficulty quest.
- Pathfinder: Complete one Medium difficulty quest.
- Adventurer: Complete a second Medium difficulty quest.
- Explorer: Complete one Hard difficulty quest.
- Hero: Complete a second Hard difficulty quest.
Easy
- Cartographer: Explore 6 Halls by revealing 6 dungeon cards.
- Head Hunter: Defeat 4 goblins.
- Crates: Successfully loot 3 crates.
- Lockpicking: Unlock 2 doors.
Medium
- Alchemist: Collect all 3 potions (strength, speed and health potion).
- Scholar: Collect all 3 runes, you can mix both types, simple or great (rune of attack, defense and speed).
- Barrels: Successfully loot 4 barrels.
- Campfire: Discover 3 Halls with a campfire.
Hard
- Warmaster: Collect 3 weapons.
- Gates: Find all 4 Gates in a single dungeon exploration.
- Rogue: Disarm 3 traps.
- Tombs: Successfully loot 3 tombs.
Personal
- Silver Touch: Collect 10 silver coins.
- Chests: Successfully loot 4 chests.
- Goblin Bane: Defeat all 4 types of goblins. Place the corresponding tokens on the card to track it.
- Wayfinder: Collect 3 keys.
Actions, Character Turn
On your turn, you can choose to perform all actions, some actions, or none at all, and skip your turn. You can take actions in any order.
Players take their turns in a clockwise order and enemies are played last (p.13).
Move
You can move as many squares as the character's current speed allows. If you don't take any other actions, the character can Run, adding +2 to your movement (Torches are required for running).
You can move in any direction but not diagonally. Characters can pass through other characters but not through enemies. Enemies can pass through other enemies but not through characters. Movement cannot end on a space occupied by another character, or enemy.
You can split your movement, perform other actions, and then continue with the rest of your movement.
Interact
- Loot: If your Loot score is equal to or greater than the required container's value, you can loot it; otherwise, you find nothing of value after a quick search. If successful, draw the top card from the item deck (p.29).
- Unlock: Use a Master Key (one of its two charges is used) or Tools (discard the Tools card afterwards) to unlock a door. Place the unlock token on the dungeon card as a reminder.
- Disarm/Trigger: Disarm a trap with Tools (discard the Tools card afterwards), or trigger it and roll for the outcome.
- Attack: Make an attack against an adjacent enemy (p.25).
- Short Rest: End your turn adjacent to a Campfire to gain 1 Life and 1 Torch. The benefit from the Campfire is granted only to the character who triggers it.
Use/Equip
- Use an item: After using an item, place it on the discard item pile.
- Equip a weapon and/or a rune.
Pick up/Drop/Trade
- Pick up item: If you are on the same square as an item, you may place the card in your inventory if there's space.
- Drop item: Drop an item where you are. Place a white cube on the same square and the item card next to it. Anyone can pick up a dropped item. There can even be multiple items on the same square.
- Trade: Trade with other characters by being on adjacent squares. Exchange an item or more for free or agree on a price.
After searching a container (p.24), you may choose to leave the item where you stand, allowing other characters to pick up the item.
Special Power
You can use the special power described in the Path you have chosen, provided it is charged (p.35-36).
The only actions limited to once per turn are attacking and ending your turn adjacent to a campfire. All other actions can be performed multiple times, and you can even split your movement. For example: move 2 squares, loot, then move again.
Exploring
Exploration occurs when revealing new dungeon cards. While moving from a square on the edge of a card take a new card from the dungeon card pile and place it adjacent to your dungeon card your character is on, matching one side (you can choose which one of the two). Moving from the current dungeon card to a new one requires using a Torch, if available. The first Gate, the one you use to enter the dungeon, doesn't require a torch.
You cannot place a dungeon card to block a Gate card. There is a possibility of a dead end, where you won't be able to explore further. In that case, exit the dungeon and start a new exploration.
There may be times when the odds are against you. It is better to exit the dungeon through a Gate instead of continuing to search for a specific item. The longer you stay in the dark dungeon, the more dangerous it becomes.
In games with multiple characters, there may be situations where one character needs to exit before the others. That player's session ends, and play continues normally for the remaining characters until the last player leaves or dies.
When you escape a dungeon, the current session is over. Enemies don't follow you. That means you return to the town (p.31). You can deliver your quest if it's completed, sell or buy items, acquire a Title, recover, etc.
Arena
Characters keep their items and coins after the end of the Arena. Defeating a character in the Arena gives you 10 coins.
Arena layouts are shown for Example 1 (1v1), Example 2 (1v1v1) and Example 3 (2v2 / 1v1v1v1).
Place the Campfire token in the centermost dungeon card. The first player to explore this Hall gains 1 Torch and 1 Life.
Dungeon
You can interact with the following (afterward, remove the cube):
Enemy
Draw the top card from the Enemy pile and place it nearby. Then, place a black cube with the corresponding symbol on the dungeon card. Initiate combat when adjacent to an enemy.
Trap
Place a gray cube on top when revealed. When stepping on a square with a trap, you can either disarm it if you have Tools or roll 1d6 for the trap outcome (see afflictions p.28):
- Roll 1: Lose 1 Life.
- Roll 2: Poison. Take the Poison token.
- Roll 3: Disease. Take the Disease token.
- Roll 4: Lose 1 Torch.
- Roll 5: Snared: you can't do anything else. You were caught in a trap and lose also your next turn escaping.
- Roll 6: Evade the trap and continue your turn.
Traps can only be used once. After a trap is triggered or disarmed, remove its cube. Goblins can pass through traps unharmed, as they are the ones who set up those traps.
Campfire
Use red cubes. When adjacent to a campfire, you can heal 1 Life and increase your Torch count by 1. This cannot be used if there are enemies on the same dungeon card. The campfire is for one use and for the character who triggers it, afterward, the campfire's wood is exhausted. Characters and monsters can step on a square with a campfire after it has been used.
Loot
White cubes. To loot a container you need to be adjacent to it and have a Loot score equal to or greater than the container's requirement. Loot score = roll 1d6 + Torch attribute. If your attempt fails, you find nothing.
- Sack: Roll a die. If the outcome is 1 or 2, take 1 coin. If it is 3 or 4, take 2 coins. If it is 5 or 6, take 3 coins.
- Crate: Roll 1d6 + Torch attribute. If the result is 5 or higher, take 1 item from the top of the item deck.
- Barrel: Roll 1d6 + Torch attribute. If the result is 6 or higher, take 1 item and increase the Torch attribute by 1, if space is available.
- Chest: Use a Master Key or Tools to unlock it. Take 2 item cards, keep 1, and place the other one on the discard pile. Then take 1 coin.
- Tomb: Roll 1d6 + Torch attribute. If the result is 8 or higher, take 2 items.
Neither characters nor monsters can stop on a square with a container, nor can they move over one.
Combat
Combat is initiated when you are adjacent to an enemy (up, down, left, or right).
Attacking
When attacking an enemy, roll both dice. One die represents your attack, and the other represents the enemy's attack. Add the respective attack attributes to each die. The combatant with the higher total wins the fight, and the loser decreases their Life by one.
You can make one attack per turn.
Multiple characters or enemies can engage in combat with the same target. When facing multiple enemies at the same time, each character and enemy takes their turn to attack. You can choose which enemy to attack on your turn.
Hit Score = Attack attribute + die roll.
Flee Combat
Combat continues until one combatant reaches 0 Life, unless you choose to flee. In that case, declare that you want to flee instead of attacking. Roll both dice:
- If your roll is higher than the enemy's roll, you successfully leave combat and may move up to your full movement.
- If your roll is lower than or equal to the enemy's roll, you take –1 Life damage and then flee.
The flee roll is done without adding either your attack attribute or your enemy's. You can choose to flee combat only on your turn. You can't flee in your enemies turn/attack. You can flee from any enemy, including a boss.
During combat, you can use items and special powers on your turn. A tie in combat means no one takes damage. Thematically, it can represent a clash of weapons, a parry, or a dodge.
Combat Example
The Warrior rolls 1d6 and gets 5, then adds the attack attribute, which is currently 1. The Hit Score is 6. The Goblin rolls 3 plus the attack attribute, which is 1. The Hit Score is 4. The Goblin Shaman loses 1 Life. Continue until one of the two reaches 0 Life.
Loot from Combat
Item cards and/or Coins (the enemy card shows its loot: 1 Coin, 2 Coins, 1 Item Card or 2 Item Cards). The winner of the combat gains the defeater's items if there is space in their inventory; otherwise, the items drop to the ground. When a character enters a Hall with enemies and has available Torch(es), they can see the items the enemies carry (face up). Otherwise, the items remain hidden until the enemies are defeated (face down).
As your character grows stronger and you choose a path, more strategic options become available when facing enemies.
Enemies
Upon revealing a new dungeon card with an enemy, draw an enemy card. If it carries an item card, also draw the top item card from the item pile and place it beneath the enemy card. Additionally, place the corresponding black cube on the dungeon card. You can pick up the item card after defeating the enemy. When the pile is empty, reshuffle the discarded cards to create a new pile.
When placing an enemy, check its card to see whether its Torch attribute is 1 or higher. If so, one or more enemies will appear next to it on the dungeon card during the Dungeon Turn. This triggers only once.
Goblins
Special power of the goblins: If there are 2 or more goblins in the same Hall, they gain +1 on their attack attribute. If the number of goblins drops to 1 in the Hall, they lose this attack bonus.
Goblins can pass through traps unharmed, as they are the ones who set up those traps. However, they cannot unlock any locked doors. Defeated goblins count toward the boss reveal.
Rats
If a plague rat damages you take a disease token.
Spiders
If a venomous spider damages you take a poison token.
Boss
A boss will appear when a character loses all Torches or when the last, 8th goblin is placed in the dungeon, whichever occurs first. The boss enters the dungeon from the Gate where the current player originally entered. The boss will always target the closest character in the entire dungeon and chase them using the shortest available (non-diagonal) path. More than one boss may appear.
Upon defeating the boss, collect the loot. The game continues until you complete the quest or decide to escape the dungeon. Reshuffle the Enemy discard pile to form a new deck whenever you need to draw a card and the deck is empty.
Afflictions
- Disease: Makes you weak, your attack attribute is 0 for 2 turns.
- Poison: You are poisoned and lose 1 Life per turn for 2 turns.
- Snared: You were caught in a trap and lose 1 turn escaping.
When Diseased, Poisoned, or Snared, take the corresponding token to track the turns of the affliction.
Afflictions take effect at the start of your next turn. If you become Diseased, you reduce your Attack attribute to 0 at the start of your next turn, even if you are in combat. If you become Poisoned, you lose 1 Life at the start of your next turn for 2 turns.
Poison and disease do not stack. For example, if a rat successfully hits you twice, you won't take two tokens, you simply restart the affliction.
Dungeon Turn
When the characters' turn ends, the dungeon's turn starts. All remaining enemies will move toward the nearest character and attack. The closest enemy to a character goes first. When an enemy is equal distance from two or more characters, it will target the one with the least Life. Otherwise, the attack is random.
When leaving a dungeon card while goblins remain, they will chase you and attempt to attack you. When a Lost Map is used to reveal a new dungeon card that contains enemies, they will remain stationary until someone enters the Hall.
If there are no enemies left, nothing happens on the dungeon turn. You may freely move to any location or exit the dungeon.
Items
When you obtain an item, remove the white cube from the dungeon. All used items are placed in the discarded items pile next to the items pile. When the item pile is empty, reshuffle the discarded pile and place the cards face down on the item card pile. When equipping a weapon or rune, increase the corresponding attribute accordingly. The items you need to collect for a quest count toward the total number of items you can carry.
- Potion (12)
- Strength Potion (4): When used, this potion grants +2 to combat roll on your current turn.
- Speed Potion (4): When used, this potion grants +3 to movement on your current turn.
- Health Potion (4): When used, restore +1 to Life.
- Rune (12): 2x3 Simple Runes and 2x3 Great Runes. Runes must be attached to a weapon to further increase your attributes. Each rune gives a bonus to one attribute. When the rune is removed, you must lose that bonus. Great runes can be combined with a simple rune allowing you to have a maximum of 2 runes (one great and one simple) attached to a weapon.
- Coins (10): You collect the corresponding number of coin tokens; then place the item card on the discard item pile. Coins can be used at the town or traded between characters.
- Master Key (6): The master key can unlock all doors and chests. It has 2 charges.
- Tools (6): Tools can be used to unlock a door or chest, or disarm a trap. They have 1 charge.
- Weapon (8): Each weapon, when equipped (only one at a time), increases an attribute and the maximum reach of that attribute. Runes can be attached to it to further increase attributes. Weapons are placed on the right side of a character card. If you unequip a weapon and move it to your inventory or drop it, immediately decrease the attribute(s) gained through the weapon and runes attached to it. Runes must be placed in the inventory or dropped. You can choose which items to hold in your inventory.
- Torch (15): Use to increase your Torch attribute. Torches are important for exploring and looting. Spend 1 Torch when exploring a new Hall. If you don't have any more Torches, you explore in the dark and cannot Run or see what items the enemies carry.
- Lost map (6): A scroll of a lost map of the Silver Mine. When used, reveal an adjacent dungeon card without exploring it (you don't have to move onto it) and without losing a torch. Goblins on the revealed card don't move to attack.
- Backpack (4): Takes one of the 3 spaces in your inventory but provides an additional 3 spaces, allowing you to carry a maximum of 5 items. Only one backpack is permitted per character for use.
Completing a Dungeon
Once you meet the requirements of your quest or need to escape the dangers of the dungeon, exit it by moving past the Gate. If there are no more enemies in the dungeon, you can instantly leave. Collect all cubes, and shuffle all item, enemy, and dungeon cards (excluding 1 Gate to use for the next dungeon) to create new item, enemy and dungeon piles.
After each arena, all characters get 20 coins.
Crossroads Town
In Crossroads Town, you can visit the Questmaster, the Merchant, the Mystic, the Innkeeper, the Tree, and use the Stash (p.16) in any order and as many times as needed.
In cooperative and competitive mode, the player who finishes their quest first and exit the dungeon will be the first to visit the town, followed by the other players in the order they finished their quests. In the arena mode the winner will go first.
The Questmaster
Deliver the completed quest (not personal), along with any required items, to receive your reward and accept a new quest (p.17-18). The Questmaster announces available quests and shares information about them. He also collects the required items, if needed, and gives the rewards. In arena mode you don't visit the Questmaster.
Each quest must be completed by the character who accepted it. For example, the character who accepted the Head Hunter quest must defeat those goblins to fulfill it. Some quests, such as the Alchemist, may be easier in a cooperative game, since other characters can trade potions they find (either for free or for coins).
Questmaster Rewards:
- Easy difficulty quest: 5 coins.
- Medium difficulty quest: 5 coins and 1 random item.
- Hard difficulty quest: 5 coins and 1 book of your choice.
- Personal quest: 5 coins.
Take the next quest and delve back Into The Dark Dungeon! Shuffle the cards and form new piles.
While choosing a new quest, if you already have the required items, you can instantly deliver it, even if they were found in the dungeon or bought from the merchant.
The Merchant
Sell unnecessary items and buy new ones if you have the available coins. The traveling merchant deals in various goods but does not accept partially used items. The items available for purchase are all items in the item card pile. The Merchant will not buy back items that he just sold to you. You can trade items with other characters.
The Mystic
Buy books of knowledge from the Mystic that match your character type (p.13). She has a vast collection of books containing powerful knowledge that grants various abilities to use in the dungeon.
- Tier 1 books cost 20 coins.
- Tier 2 books cost 25 coins.
- Tier 3 books cost 30 coins.
- Tier 4 books cost 35 coins.
Books
Books (2x8) don't take up space in your inventory. Each character can hold up to four books in their stash (p.16). You cannot possess the same book twice.
- Flee Combat (Tier 1): You can flee combat without receiving damage.
- Trader (Tier 1): When selling items to Merchant, you gain extra 2 coins per item. When buying items you get 2 coin discount per item.
- Favored Enemy (Tier 2): Cooperative/Competitive Mode: Choose a goblin type and take the corresponding token. You gain a +1 bonus to combat rolls against that type of goblin. Arena Mode: Choose another character and place their colored cube. You gain a +1 bonus to combat rolls against that specific character.
- Giant Strength (Tier 2): You have 3 charges of +2 to combat rolls to use in your turn. After you exit the dungeon the 3 charges are restored.
- For The Loot (Tier 3): You have a free reroll when failing a loot roll.
- Opportunity (Tier 3): While you are the one to engage in combat you have an attack of opportunity, you roll a d6. If greater or equal to 3 you inflict your enemy 1 damage, otherwise it is a miss. Continue combat as normal.
- Mirror Image (Tier 4): Activate this ability to create an illusory duplicate of yourself. Flip your main cube (with the symbol) upside down and place a second cube of your color on your character's space. Only you know which cube represents your character and which is the illusion. Both cubes can move independently during your turn, sharing your character's movement abilities and attributes. The illusion dissipates if it triggers combat or a trap—remove that cube.
- Second Wind (Tier 4): Whenever you roll a 1 during a combat roll or loot roll you can reroll once more.
The Innkeeper
Recover: You can choose to spend 5 coins to rest and restore your attributes, Life and Torch, to the original starting values (indicated by the circles). Then add the bonus attributes from the equipped weapon and/or rune(s). Otherwise, your character's attributes will remain unchanged.
Rumors: You may pay for a beer (2 coins), and the innkeeper will share rumors (mostly with positive effects). Rumors only affect the character who paid. The hourglass and the three spaces on the Innkeeper card are for counting the turns of the rumors. Use a cube to track turns for two rumor cards that require tracking. Only one rumor will be revealed per dungeon exploration, and if a player reveals one, it becomes mandatory for that character.
The Tree
The Tree is the place to choose your path. Earning experience by completing quests and gaining titles will reveal a path. Take a path based on your character type (p.13). Paths become available after earning a title: first, the title Vagabond, and then the title Pathfinder (p.12).
Path to Branch: You can swap between the two special powers once both are acquired, but you will lose progress (if any). Paths charge during specific actions. Once charged, you can choose when to use the special power.
Special Powers
Place the path card above your character card and use a cube to track the charges and Special Power. You can have one Path active per dungeon run. When the prerequisite occurs, the Special Power gains a charge. The first time it happens, place a cube on the first square of the card, then move it to the next square each time the prerequisite is met until you reach the star icon. At that point, you can use the Special Power at any time. Once used, the charge resets to zero.
Prerequisites (icons):
- When you successfully attack.
- When you take damage.
- When you defeat an enemy.
- When new Hall is explored.
- When you spend a Torch.
End Game
Campaign: Continue completing consecutive quests until a hero emerges (gains the Hero title). The first character to gain the Hero title also receives 20 coins.
Session: Complete your quest.
Defeating a boss does not count as an endgame goal.
If you die in the dungeon, you lose everything you are carrying and the quest is failed. Coins and books in your stash cannot be lost in any way. A new character will inherit whatever is in the stash.
[Insane mode: take the role of a goblin (or group of goblins) and explore the Dark Dungeon. No quest, just survival, you against all. Adjust the inventory to carry 3 items and equip a weapon.]
Reference Guide
Enemies are the inhabitants of the dungeon. In arena mode, enemies are also the other characters. In insane mode, if you choose to play as a goblin, enemies are everyone else.
- Gate = Entrance/exit dungeon card.
- Hall = Dungeon card (not entrance/exit).
- Dungeon = The complex of Dungeon cards revealed.
- Container = Sack, Crate, Barrel, Chest, Tomb.
You will find Torch as both an attribute and an item card. The Torch item can increase the Torch attribute if it's not at its maximum value; otherwise, it can be stored in the inventory for future use.
The use of the Torch attribute:
- When looting containers, your current Torch attribute value is added to your roll.
- You spend 1 Torch attribute when exploring a new dungeon card.
You can regain Torch attribute in the following ways:
- Using a Torch item card.
- Successfully looting a barrel.
- Resting next to a campfire.
- Recovering at the Innkeeper in the town.