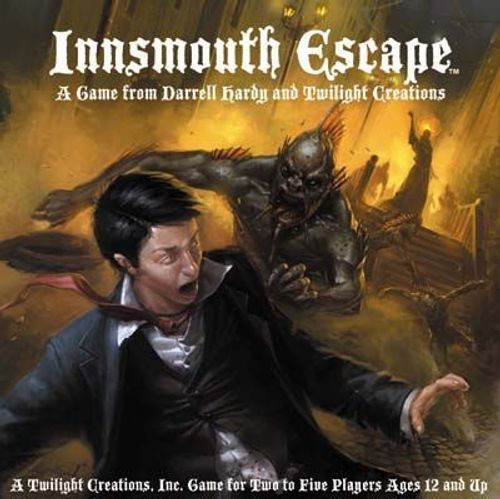
Innsmouth Escape
Innsmouth Escape Rulebook
Table of Contents
Table of Contents
Overview
In the Innsmouth Escape game, one of the players takes on the role of the escaped student. He is the Human player, and he is trying to rescue his friends and escape Innsmouth. By playing movement cards, he moves his pawn around the board to visit various locations, fights any Deep Ones there, then searches those locations for his friends and equipment to help in their escape.
The other players play groups of Deep Ones. They are trying to prevent the Human player from escaping. The Deep One players take turns moving their pawns around the board trying to trap the Human. Certain locations on the board also allow them to draw cards, spawn additional Deep Ones, or even summon a terrible Shoggoth.
Innsmouth Escape is a game for 2-5 players ages 10 and up. The game is playable in 30-60 minutes.
Object of the Game
The Human player wins if he begins his turn with his pawn on the western or southern edge of town (see the map on the next page) and he has at least 8 victory points.
The Deep One players win if the Human is killed. Deep Ones inflict wounds while in combat with the Human. If the Human takes enough wounds, he is killed, and the game is over. The number of wounds it takes to kill the Human is based on the number of players, as detailed below.
Components
Below is an overview of the components used in the game.
Human Pawn: This represents the Human on the board.
100 Deep One Pawns: There are four different colors of Deep Ones, 25 in each color. Each Deep One player controls one color of Deep Ones. A Deep One player may not have more pawns in play than are provided with the game.
4 Dice: These dice are used to resolve combat and other dangerous situations that come up during the game.
Game Board: The board represents the town of Innsmouth. It is divided into columns (labeled A through F) and rows (labeled 1 to 6). Each space on the board is a location, and each location may have one or more of the following icons, which are explained in detail later in these rules.
- Captives: The Human player may search this location for captives to rescue.
- Equipment: The Human player may search this location for equipment to help him rescue the captives or escape.
- Encounters: The Human player may have a strange encounter in this location which can help him in unusual ways.
- Spawn: Deep One players may spawn additional Deep Ones at this location, as explained below.
- Draw Cards: Deep One players may draw Deep One cards at this location.
- Shoggoth: Deep One players may summon a Shoggoth at this location.
Note that Captive, Equipment, and Encounter icons are called "Human" icons. Spawn, Draw Cards, and Shoggoth are "Deep One" icons.
Game Board Overview diagram labels: "Western Column," "Shoreline Column," and "Southern Row" (the western and southern edges are referred to by these names in the rules). Deep One icons: Draw Cards, Spawn, Shoggoth. Human icons: Encounter, Captive, Equipment.
Captive, Equipment, and Encounter Tokens: These tokens are placed on the board on locations with the corresponding icons. Once the Human player has drawn cards at these locations, the tokens are discarded.
4 Shoggoth Tokens: These tokens represent horrible Shoggoths, which serve the Deep Ones and lurch their way around the board trying to devour the Human.
12 Location Tokens: The tokens are labeled 1-6 and A-F, corresponding to the rows and columns on the board. The Human player uses these tokens to secretly record the final location of his pawn after moving.
20 Wound Tokens: When the Human is wounded (usually in combat), he receives some number of wound tokens. When he has received enough wound tokens, he is killed, the game is over, and the Deep One players win the game. Wound tokens can be discarded when the Human is healed.
39 Captive, Equipment, and Encounter Cards: These cards represent what the Human finds when he searches a location. When the Human player searches a location, he draws one or more of these cards.
46 Deep One Cards: These cards represent the Deep Ones' tactics and tricks. Each Deep One player has a hand of these cards, and can play them when indicated on the card.
9 Movement Cards: The Human player uses these cards to secretly plot where he will move his pawn during his next turn. Six of these cards indicate a number of spaces the pawn can move (1, 2, or 3 spaces). Three of them are "rest" cards, which allow the Human to heal rather than move.
Game Setup
-
Randomly choose one player to be the Human player. All other players are Deep One players. Each Deep One player chooses or is assigned a color.
-
The Human player receives the Human pawn, the nine Movement Cards, and the 12 location tokens.
-
Each Deep One player receives all the Deep Ones in his color, which are placed in a pile in front of him. Each Deep One player also receives a Shoggoth token in his color. Unused Deep One pawns are put back in the box. They will not be used in the game.
-
Shuffle the deck of Deep One cards. Deal three cards to each Deep One player. These cards should be kept secret from the Human player, but Deep One players may show their cards to each other. Shuffle the Captive, Equipment, and Encounter cards into their own decks. (That is, one deck of Captive cards, one deck of Equipment cards, and one deck of Encounter cards.)
-
Lay out the board between all the players. Place the deck of Deep One cards where all the Deep One players can reach it. Place the Captive, Equipment, and Encounter decks where the Human player can reach them. Place all the wound tokens in a pile where all the players can reach them.
-
Place the Captive, Equipment, and Encounter tokens on the board. Place the tokens onto their corresponding icons. (The icons on the board are faded versions of their corresponding tokens.) Make sure that the rank of each token corresponds to the rank of the icons on which it is placed. For example, if a location has a "Captive 2" icon, the Captive token that is placed on it should also be rank 2.
-
Starting with the first Deep One player to the left of the Human player, each Deep One player in turn places three Deep Ones of his color on the board. You may place your Deep One anywhere on the board except a location with one or more Deep One icons in it (this restriction only applies during setup). There may be any number of Deep Ones in a location. But there can never be more than four Deep Ones of any one color in a location.
-
The Human player places his Human pawn on the board. The Human player may place the Human pawn anywhere on the board except a location with one or more Human icons in it.
Playing the Game
Innsmouth Escape is played over a series of rounds. Each round is divided into two turns. First, the Human player takes his turn, then the Deep Ones players take their turn. (Note: All Deep Ones take each part of their turn simultaneously.) Thus, a round of play is played in this order:
- Human Turn
- Deep Ones' Turn
- Deep One Movement
- Deep One Card Drawing
- Deep One Shoggoth Summoning
- Deep One Spawning
Human Turn
During your turn as a Human player, you play through each of the following steps once, in order:
- Reveal Current Location
- Draw Cards
- Resolve Combat
- Plot Secret Movement
The heart of your turn is the fourth step, "Plot Secret Movement." It is during this step that you secretly choose two Location Tokens to establish where your pawn will be moving on your next turn, and play three Movement Cards to determine how your pawn will get there.
Note: On your first turn of the game, your current location is already revealed, there are no cards to be drawn, and no Deep Ones to fight. Therefore, you can skip steps 1-3, and go directly to Step Four: Plot Secret Movement.
Step One: Reveal Current Location
Your "current location" is actually established at the end of your previous turn, during the "Plot Secret Movement" step (as detailed below). Therefore, at the beginning of this step, you have two face-down Location Tokens that determine your pawn's location. You also have up to three face-down Movement Cards that reveal how your pawn moved to its location.
To reveal your current location, follow the steps below:
- Turn your two Location Tokens face-up. One of them has a letter code (A-F) corresponding to a column on the board. The other has a number code (1-6) corresponding to a row on the board.
- Place your Human Pawn on the location indicated by the row and column of the Location Tokens. (For example, if your Location Tokens are "C" and "4," you place your Human at the intersection of column C and row 4.)
- Turn your Movement Cards face-up. If necessary, show the other players how you used the cards to plot your movement. (See "Plot Secret Movement" for details.)
- If one or more of face-up Movement Cards is a "Rest" card, discard one Wound Token for each such card, then take those "Rest" cards back into your hand.
- Discard any remaining Movement Cards face-up so the other players can see which Movement Cards you have already played. (Ideally, the used Movement Cards are spread out so everyone can see them, but if there isn't room, you can put them into a small discard pile which the other players can look through at any time.)
- If you have discarded all your Movement Cards, and have only "Rest" cards in your hand, take all the discarded Movement Cards and put them back into your hand.
Step Two: Draw Cards
If your Human pawn is in a location with a "Captive," "Equipment," or "Encounter" token, draw cards from the corresponding deck. Draw a number of cards equal to the rank of that token, then discard the token back into the box. For example, if your location has a "Captive 2" token, draw two "Captive" cards. (Note: If the location has multiple tokens, draw all the corresponding cards, then resolve them all at the same time.)
Look at the cards you've just drawn. If any say "Place in front of you" or have any Deep One "Spawn" icons on them, then place them face-up in front of you. All other cards go into your hand to be played later.
Spawning Deep Ones: If the cards have any Deep One "Spawn" icons on them, total up the number of icons and place that number of Deep One pawns in your current location. The Deep Ones you spawn may come from any Deep One player's pool (it doesn't matter who they belong to), though there may never be more than four Deep Ones of a single color in a location.
Equipment Cards: Note that Equipment cards can provide first aid kits (which remove wounds) and weapons (which help fight off the Deep Ones). Unless otherwise indicated, Equipment cards are put into your hand, and can be played when indicated in the text of the card.
Some Equipment cards are labeled as "Weapons." When you play a weapon card, it is "equipped" and placed face-up in front of you. You may equip a weapon at any time during your turn, and may only have one weapon equipped at a time. You may "swap out" one weapon for another by equipping a new weapon from your hand, and putting the previous weapon back into your hand.
Captive Cards: Captive cards are always played face-up in front of you. Many of them spawn Deep Ones (as described above), and most provide victory points, though a few do neither. Make sure that your opponents can see what captive cards you have in front of you, and how many victory points they're worth. Remember, in order to win the game, you must begin your turn on the southern or western edge of the board with at least 8 victory points.
Encounter Cards: Encounter cards are usually helpful, and may provide equipment, victory points, or other benefits – though some spawn Deep Ones.
Step Three: Resolve Combat
After drawing cards, if there are any Deep Ones in the location with the Human, there must be combat. Combat is resolved by playing through the following steps in order: (Note: It doesn't matter if the Deep Ones were spawned by the Human player, or spawned or moved there by a Deep One player. If there are any Deep Ones in the location, combat ensues.)
- Human Attack Roll
First, the Human player makes an attack roll based on the weapons he is using. At the beginning of the game, the Human is carrying nothing but a crude club, which means he rolls one die, and has the result below:
- For each "5" or "6" he rolls, he chooses and kills one Deep One.
- For each "4" or less he rolls, he misses.
The specifics of the Human attack roll change depending on which weapon or weapons the Human is using. The number of dice, and what roll you need to hit, are listed on the weapon cards themselves.
- Deep One Attack Rolls
Each Deep One player counts up how many Deep One pawns he has in the location. This number is how many dice he will roll for his attack roll. Starting with the Deep One player to the left of the Human player, each Deep One player rolls his dice to attack. Apply damage based on the following results:
- For each "6" he rolls, the Human takes 2 wounds.
- For each "4" or "5" he rolls, the Human takes 1 wound.
- For each "3" or less he roll, he misses; the Human takes no wounds.
- Deep One Casualties
While the young Deep Ones of Innsmouth can rely on their overwhelming numbers to take down their prey, they are slow, shambling and weak as individuals – especially against desperate lone heroes fighting to rescue their friends.
After the Deep Ones' attacks are resolved, they are killed. The pawns are removed from the board and placed back into their players pools. They can be spawned back onto the board later in the game.
- Human Casualties
If the Human has received enough wounds, he is dead. The Deep One players win the game, and the game is over.
The number of wounds necessary to kill the Human is determined by the total number of players:
| Players | Wounds |
|---|---|
| 2 | 8 |
| 3 | 10 |
| 4 | 12 |
| 5 | 14 |
Example: It is a four-player game. At the end of his turn, the Human player's pawn is in a location with four Deep Ones: one blue, and three green. At the beginning of combat, the Human player rolls a die. He get a "3," which is a miss. Nothing happens. Now it's the Deep One players' turn to attack.
First the blue player rolls his one die. He rolls a "6," which inflicts 2 wounds. He takes two wound tokens from the pile and hands them to the Human player.
Next, the green player rolls his three dice. He rolls a "3, 4, 5." The "3" does nothing, but the "4" and "5" each inflict 1 wound. The green player hands another two wound tokens to the Human player.
(There is another Deep One player, but he has no pawns in that location, so he doesn't participate in the combat.)
Now that the Deep One attack is over, all the remaining Deep Ones in that location are killed. The green and blue players remove their pawns and place them in their respective piles.
The Human player totals up the wounds he has received (four), and adds it to any wounds he already had (let's say two), so he has a total of 6 wounds. Since there are four players, he needs 12 wounds to be killed, so he's still in the game.
Step Four: Plot Secret Movement
During this step you must secretly choose where your pawn will be moving on your next turn, play three Movement Cards to determine how your pawn will get there, and choose two Location Tokens that correspond to your final location.
Location Token Overview: The tokens are labeled 1-6 and A-F, corresponding to the rows and columns on the board. After determining where you want to go, you will secretly choose two of these tokens (one for the column and one for the row) that correspond to that location.
Movement Card Overview: There are two types of Movement Cards: those with numbers and "Rest" cards.
"Number" cards are used to plot your Human's movement on the board. The number on each card represents the number of spaces your Human can move in a straight line. For example, a "3" Movement Card will allow your Human to move exactly three spaces to the north, south, east, or west. You cannot move fewer spaces than those listed on the card, and cannot move diagonally. To continue the example, if your Human is two spaces from the bottom ("south") edge of the board, he cannot move in that direction with a "3" Movement card.
When plotting your movement, you must play three Movement cards, and resolve each card's number individually. For example, if you play a "3" and a "2," your first move must be three spaces straight one direction, and your second move must be two spaces straight in one direction. Both moves may be in the same direction (for a total of 5 spaces).
When plotting movement with multiple cards, you cannot back-track. That is, you cannot create a path that touches the same location twice. For example, if you play a "3" and a "2," if your first move is three spaces west, your second move cannot be two spaces east.
"Rest" cards do not move your Human on the board. Instead, they help you by discarding wounds (as detailed earlier under "Reveal Current Location.") However, "Rest" cards are always played face-up, so your opponents know that you are resting, and not moving, with that card.
Plotting Secret Movement
To plot your movement, follow the steps below in order:
- Choose a Location
Based on your strategy and what Movement Cards you have available (see below), choose a location on the board where you want your Human pawn to be.
- Choose Movement Cards
Following the rules for Movement Cards detailed above, trace a path from your Human's current location to where you want to go, and determine which Movement Cards in your hand you can use to get there. Remember:
- You must play three cards (either to move or to rest).
- You can only use the Movement Cards in your hand. You can't use the number cards from previous turns until you have played all the number cards in your hand.
- You must move the full movement listed on the card, and only in a straight line.
- "Rest" cards must be played face-up.
- Your path cannot "back-track."
- Your path cannot end in or pass through a location occupied by a Shoggoth (as detailed later in these rules).
If you cannot trace a legal path following the rules above, you must choose a new location. (The only way you can intentionally stay in the same location two turns in a row is by playing three "Rest" cards.)
Once you have chosen your three Movement cards, place them face-down in front of you in the order in which they take effect. (Exception: If any of the Movement Cards are "Rest" cards, they must be placed face-up.)
- Choose Location Tokens
Secretly choose two Location Tokens. One must correspond to the column of your final location (letter A-F) and the other must correspond to the row of your final location (number 1-6).
Place the two tokens face-down in front of you. Place the unused tokens to one side without revealing them.
Note: If the Movement cards you have chosen do not get your pawn to the location indicated by the chosen Location Tokens, your Movement Phase is forfeit. You DO NOT get to move this turn.
Plotting Secret Movement Example
The Human Player wants to plot his secret movement to location C3. He chooses three movement cards (a "2," a "1" and another "1.") These cards will move his pawn two spaces east (to C1), then one space south (to C2), then one more space south (to C3). He places these cards face-down in front of him in this order. Finally, the Human Player secretly chooses the "C" and the "3" Location Tokens and places them face-down in front of him.
The Human Pawn begins its Movement in location A1.
Deep One Turn
The Deep One turn is divided into four steps. All the Deep One players play through each step at the same time. Once all the Deep One players have completed a step, the next step begins.
During the Deep One turn, play through each of the following steps once, in order:
- Movement (each player moves his Deep Ones and Shoggoth)
- Draw Cards
- Summon Shoggoth
- Spawn
All the Deep One players play through each step simultaneously. That is, all the Deep One players may move their pawns at the same time, then draw their cards at the same time, then summon their Shoggoths at the same time, then finally spawn their new Deep Ones at the same time. All the Deep One players must complete one step before moving onto the next step.
Step One: Movement
Each Deep One player moves his pawns and Shoggoth according to the rules below:
- You may move each of your Deep One pawns up to two spaces.
- You may move your Shoggoth token up to one space.
- You may not move them diagonally.
- You may not have more than four of your Deep One pawns in a single space.
- You may move them into a space occupied by the Human, another player's Deep One pawn, or a Shoggoth.
Step Two: Draw Cards
You may draw a number of Deep One cards equal to the number of "Draw Card" locations your Deep Ones occupy on the board. (That is, count up the number of "Draw Card" locations on the board in which you have Deep One pawns in your color, then draw that number of Deep One cards and add them to your hand.) You may play these cards when indicated on the cards themselves, but may only play one card per round. (Rules for playing Deep One cards are detailed later in these rules.) You may not have more than 5 cards in your hand. If you have 5 cards in your hand, you may not draw cards.
Step Three: Summon Shoggoth
If you have three Deep One pawns in a "Shoggoth icon" location, you may sacrifice them (discard them to your Deep One pile) to place your Shoggoth token in that location. (Shoggoth movement and combat is described later in these rules.)
Step Four: Spawn
Count up the number of "Spawn icon" locations on the board in which you have one or more Deep One pawns. This number is how many new Deep Ones you can bring into play. Take this number of Deep One pawns from your pile and place them on the board in any location already occupied by one or more Deep One pawns (either yours or another Deep One player's). You may place all your new Deep Ones in one location, or you may split them up as you wish, but cannot have more than four of your Deep Ones in the same location.
End of Round
After the last Deep One player's turn is over, the round is over. A new round begins with the Human player's turn.
Game End
The game ends immediately if either of these things happen:
- The Human is Killed (Deep One Victory), or
- The Human Escapes (Human Victory)
The Human is Killed
If the Human takes enough wounds to be killed, the game is over and the Deep One players win. The number of wounds necessary to kill the Human is determined by the total number of players:
| Players | Wounds |
|---|---|
| 2 | 8 |
| 3 | 10 |
| 4 | 12 |
| 5 | 14 |
The Human Escapes
The Human player wins if, at the beginning of his turn, he is in a location on the western border of the board (column A) or the southern border of the board (row 6) and he has at least 8 victory points.
Other Rules
Shoggoth Movement
Once a Shoggoth has been summoned it may be moved one space for free by the player playing the corresponding color of Deep One per movement phase. Shoggoths cannot move diagonally. Shoggoths can move into an location occupied by a Human, Deep One, or another Shoggoth.
Shoggoth Combat
If there is a Shoggoth in the same location as the Human pawn during the Human player's "Resolve Combat" step, that Shoggoth is involved in the combat. Shoggoth combat is resolved as follows:
- Shoggoths cannot be harmed by the Human attack.
- During (and ONLY during) the Deep One attack, the Human receives 3 wounds for each Shoggoth in his location.
- When Deep One casualties are removed, any Shoggoths are not removed.
- Shoggoths cannot be killed or otherwise removed from the board without the use of special cards.
Playing Deep One Cards
As a Deep One player, you may only play one card per round. You may play your card during your turn, or another player's turn, as indicated by the text of the card.
After playing your card, you may wish to leave it in front of you, instead of putting it directly into the discard pile, as a reminder that you have played your card for this round. At the end of the round, all Deep One cards that have been left in front of their players are discarded. (Note that some Deep One cards remain in play permanently after being played.)
Deep One Players with no Pawns
In the unlikely event that a Deep One player has no pawns on the board, he may spawn one Deep One during his Spawn Step, as per the normal spawning rules.
Quick Reference Sheet
The following is the game's printed Quick Reference Sheet, transcribed as the final page of the rulebook.
Round Sequence:
- Human Turn
- Deep Ones' Turn
- Deep One Movement
- Deep One Card Drawing
- Deep One Shoggoth Summoning
- Deep One Spawning
Human Turn:
- Reveal Current Location: Reveal cards, heal one wound per "Rest" card.
- Draw Cards: One per rank of any token in that location, spawn Deep Ones if necessary.
- Resolve Combat: Human attacks first, based on weapon.
- Plot Secret Movement: Use three cards, can't re-use a "number" card until they've all been used.
Deep Ones Turn:
- Movement: Two spaces per Deep One, not diagonally, no more than four per color per location. One space per Shoggoth. Players may only move pieces that match their color.
- Draw Cards: One for each "card" icon you occupy.
- Summon Shoggoth: Sacrifice three Deep Ones in a Shoggoth icon location to place a Shoggoth there.
- Spawn: One for each "spawn" icon you occupy, place anywhere with another Deep One.
Combat:
- Human Attack Roll: Based on weapon. Base is 5+ to kill 1 Deep One.
- Deep One Attack Roll: One die per Deep One. 4-5=1 wound; 6=2 wounds.
- Deep One Casualties: All remaining Deep Ones are killed.
Wounds needed to kill the Human:
| Players | Wounds |
|---|---|
| 2 | 8 |
| 3 | 10 |
| 4 | 12 |
| 5 | 14 |