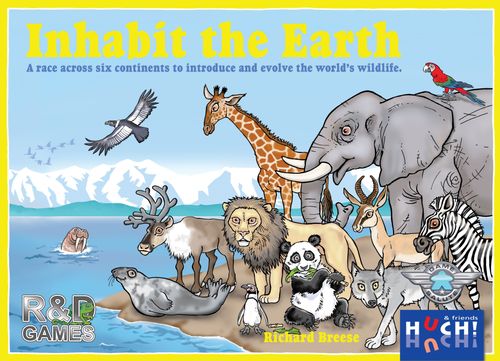
Inhabit the Earth
Inhabit the Earth Rulebook
Table of Contents
Table of Contents
Introduction
Inhabit the Earth is a race game for two to four players lasting approximately 90 minutes. The player with the most points wins the game.
The game is played on six continent boards. Players create their own menagerie of up to six creatures, each of which is represented by up to six cards, by using cards to introduce, multiply, evolve and adapt their creatures. Each of the 162 unique cards identifies a creature's class, a continent and terrain that the creature inhabits and a special or scoring ability. Each class of creature is also represented by a counter. The cards are also used to trigger the movement of the counters along the trails on the boards and migration from one board to another. Breeding, achieved by flipping over a creature's counter, generates new cards. Movement facilitates further breeding and the chance to secure tokens for additional icons and point scoring.
At the end of the game points are scored from the abilities on the creature's cards, the position of the creatures' counters on the boards and from tokens. The player with the most points wins the game. Rules for an introductory game for up to three players are included. See blue type and page 12.
Components
6 Continent Boards
The game is played on six continent boards, each featuring a trail of spaces, with each space depicting one of seven terrain types or space for a token. Each board is also divided into three regions, numbered 1 to 3 from south to north. Start of the trail.
Each continent board shows that continent's coloured continent icon (green for Europe) for easy identification. The arrows on the trail on the board are of a matching colour.
There is also an introductory game which is played on four boards, see page 3. Use the side of the board that depicts the egg if you are playing the quicker introductory game.
162 Creature Cards
There are three decks of 54 cards in English. The cards in each deck are numbered 1, 2 or 3 on the back to identify to which deck the card belongs. The numbers correspond to the region numbers on the boards. This region number is also the first digit of the three digit reference number on the front of the cards.
Each card represents a different type of creature and shows the creature's name, reference number, class, a continent it inhabits, a terrain in which it lives and important text describing either a special ability (square icon) or point scoring ability (round icon).
There are six classes of creature. Each class contains 27 types of creature, 9 in each of the decks 1, 2 and 3. Each class is identified by a footprint of one of the creatures from that class and by the second digit of the three digit reference number:
1 = Predators (including bears, cats and dogs). 2 = Herbivores (including camels, cattle, deer, elephants, giraffe, hippopotamus, kangaroos, okapi, pigs, rhinoceroses and tapirs). 3 = Birds. 4 = Smaller mammals (including armadillos, badgers, bats, egg laying mammals, marsupials (excluding kangaroos), pandas, pygmy hippos, racoons, etc.). 5 = Primates (but also including hares, rabbits and rodents). 6 = Reptiles (but also including water creatures such as seals).
There are six continents in the game. The continent icon identifies a continent that the creature inhabits. The icons are colour coded and match the icons of the corresponding boards: Africa - brown, Asia - red, Australasia (the continent comprised of Australia, New Zealand, New Guinea and neighbouring islands in the Pacific Ocean) - yellow, Europe - green, North America - purple and South America - light blue.
There are seven types of terrain. The terrain icon identifies a terrain that the creature inhabits: coniferous forest, deciduous forest, desert, grassland, mountains (including polar regions), tropical forest and water (including wetlands and coastal regions).
The creature cards have either square icons or round icons.
Cards with square icons indicate that the creature has a special ability and are available in decks 1 and 2. Where a special ability relates to a particular turn action, the action is typed in bold. To benefit from the creature's ability, the creature's card must be in the player's menagerie and be visible, i.e. the top card of that class of creature, before the ability is available.
A creature's special ability can be used once every turn (e.g. #111 lion, #121 dromedary, #123 ibex) or, if applicable, when the ability is triggered (e.g. the Sloth #149). The special abilities become active as soon as the card is played and can be used later in that same turn. If using an ability, a player can use that ability to play over the creature that gives that ability (as the ability was visible in the menagerie when it was selected). E.g. the dromedary (#121), could evolve itself into another creature.
Cards with round icons are available in decks 2 and 3 and indicate that the creature has a scoring ability which may score points at the end of the game end.
In deck three only some of the icons have a black background. The black background indicates that other players may influence whether that creature scores or not. Deck 2 contains the most valuable scoring cards. Deck three scoring cards are generally easier to achieve than those in deck 2.
The creature card must be in the menagerie and visible (on the top) of the cards of that class of creature for the creature's scoring ability to count.
Only the cards that show an egg symbol next to the card number are used in the introductory game. If the egg is coloured red, green or blue, then it forms one of the starting hands in the introductory game.
Example card: Lion (#111) — footprint icon Predator, continent icon Africa, terrain icon grassland. Lion: When introducing a creature you may introduce one creature without having to discard a card. (Red text on the card number indicates a starting card. An egg symbol indicates a card used in the introductory game.)
24 Wooden Creature Counters
There are 6 in each of the four player colours: blue, green, red and yellow. The counters represent the position of a player's creatures on the boards.
Sticker Sheet
Each sticker shows a representative footprint for one of the six different classes of creatures. (Before playing the game, place one of each type of footprint with a white background on one side of each colour of counter and then put the matching footprint with the black background on the other side of the counter, facing the same direction.)
58 Tokens
26 green hedgehog and bobcat tokens, 26 blue robin and swift tokens and 6 red tokens.
In the introductory game the green bobcat and blue swift tokens are not used (as these include icons for North and South America).
24 Black Wooden Movement Markers
24 Coloured Wooden Trigger Cube Markers
6 in each of the four player colours: blue, green, red and yellow (for use in recording triggered creatures and for player identification).
30 Transparent Yellow Plastic 'Sun Markers'
These are placed on a player's menagerie animals to easily identify which continent the creature's counter is in and, if there are fewer than four players, on the boards at the beginning of the trails.
4 Token Racks
2 Rules Booklets
One in English and one in German.
Grip Seal Storage Bags
4 Turn Option Summary Cards
One in each of the player colours.
TURN OPTIONS - Choose one of the three actions numbered 1 to 3.
1. MENAGERIE. You may perform any number of the following (a-d) multiple times. Discard one card for each action taken.
- a. Introduce a new class of creature. Place the creature's counter onto the matching continent board.
- b. Multiply. Place a creature of the same class underneath one of your existing creatures.
- c. Evolve. Place a creature of the same class on top of one of your existing creatures.
- d. Adapt. Place a creature of any class underneath one of your existing creatures. Rotate the card so that the creature's class icon is not visible.
2. BREED.
- a. Discard any cards from your hand you wish to.
- b. Flip one counter to its black background side.
- c. Draw cards equal to the number of that type of creature in your menagerie plus the region number the creature is inhabiting. You may draw cards from any deck where that region is inhabited. e.g. 4 = 1 + 1 + 2.
- d. Hand limit. Do not draw extra cards above your hand limit.
3. MOVEMENT.
- a. Play any card or token as a trigger. Then from left to right, each creature triggered may do any or all of the following:
- b. Move its counter forward on a continent board.
- c. Migrate its counter once from one continent to another at start or end of movement.
- d. Flip the counter to its white background side.
- e. Collect any tokens passed over.
Notes:
- a. You may not have more creatures of one class than you have classes of creature in your menagerie at the end of your turn.
- b. You may not have more than two counters on any one continent board at the end of your turn.
- c. Tokens may be added to your menagerie creatures at any time.
The Players' Turns Summarised
On their turn a player must choose one of the three available actions: menagerie to add cards into their menagerie, breed in order to obtain additional cards or movement to move the player's counters along the continent trails.
Menagerie action. In the menagerie action a player may add cards to their menagerie in the following ways: introduce, multiply, evolve and adapt. Introduce adds a new class of creature to the menagerie. Multiply adds more creatures of the same type. Evolve changes the creature into another creature from the same class and adapt adds more icon abilities to existing creatures.
Breed action. A player may breed creatures by turning one of their counters over to show the black background side, allowing the player to draw additional cards.
Movement action. Counters are moved along the trails from a starting space in region 1 in the south of a continent, through region 2 to region 3 in the north of a continent. Movement of the counters is generated by playing a card/token as a trigger card/token. Each creature in a player's menagerie that has one or more icons that match the icons on the trigger card/token may be moved one space for each matching continent or terrain icon. Creatures may also migrate from one continent to another.
When a counter is moved it is flipped back to the white background side, if applicable, allowing it to be used for breeding again later in the game.
Tokens. As counters progress along the trails they may pass over and collect tokens which are available to use immediately. These tokens can be added to the creatures in the player's menagerie, used to trigger movement or kept until the end of the game to score points.
End of the game. When a creature's counter moves to the finishing space on a continent a three point red token is passed over and collected. The counter cannot be moved again. The game finishes immediately when counters have reached the finishing spaces in two continents. Points are scored based on the region that a player's counters are in, the tokens that have been collected and the scoring cards that are visible in a player's menagerie. The player with the most points is the winner.
Set Up
The set up instructions below are for the full game. Where the rules differ for the introductory game the changes are given in the blue boxes.
Place the six continent boards in the centre of the playing surface in easy reach of all of the players. (See box bottom for illustration.)
Introductory game: use the four introductory boards: Africa, Asia, Australasia and Europe only. These boards are identified by an egg symbol in the bottom right of the board. These boards have fewer spaces than the boards for the full game.
Boards may be placed in any order, but for consistency a geographically 'correct' arrangement is recommended, with the continent you are gaming in placed in the centre column.
Place a green token face down on each of the square black bordered token spaces. Place a blue token face down on top of each green token. Place a red token face down on each of the square red bordered token spaces. The surplus tokens are not used.
Do not use the green bobcat and blue swift tokens.
Sort the cards into three decks based on the numbers on the backs of the cards: 1, 2 or 3. Use either the English cards or the German cards, not both.
Separate the deck 1 predator cards numbered 111 to 116 in red. Deal one of these to each player. Shuffle the remaining deck one cards, including the undealt predator cards. Then deal five additional cards from deck one face down to each player so they have a total of six cards each, which is the usual hand limit. The remaining deck one cards become a draw pile.
Only the cards with an egg symbol next to the number are used in the introductory game. In the introductory game each player is dealt one of the three sets of 4 starting cards: Green coloured eggs: 111, 121, 131, 141. Red coloured eggs: 112, 122, 132, 142. Blue coloured eggs: 113, 123, 133, 143. (In the introductory game ignore the red colouring of the card numbers 111 to 116. The red colouring is only relevant in the full game.)
Separately shuffle the deck two cards and deck three cards so there are three separate draw piles. Place the three decks face down by the side of the boards.
Each player also receives a set of 6 counters, a tile rack and a turn option summary card in their chosen player colour, plus 6 sun markers.
Place the 24 black cube markers by the side of the boards in easy reach of all the players.
If there are only two or three players, place sun markers at the beginning of the trail over the first three or two spaces respectively, in order to indicate that these spaces are not in use.
Turn Actions
During the game, each player will create their own menagerie of creatures, which may include exactly one type of creature from each of the six different classes of creature: birds, herbivores, predators, primates, reptiles and smaller mammals.
Each type of creature in a player's menagerie may be represented by up to six cards, which are placed above or below each other, but with the icons on one side of the cards below the top card being visible to the left of the top card. The type of creature is represented by the top card of that class. All the cards beneath the top card (which depict other types of creatures of the same class) are considered to be the same type of creature as the top card.
The number of creatures of a particular type is represented by the number of cards showing the icon of that class of creature. The visible class, continent and terrain icons on the top card and the supporting cards may increase the creatures' movement or breeding capabilities. (In this example there are six weasels.)
On their turn a player may choose any one of the three types of action: menagerie, breed or movement. Each type of action allows a player to do several individual actions. A summary of these is given on the turn option card. A player's first turn will always be the menagerie action.
1. Menagerie
A player may perform any number of the four menagerie actions: introduce, multiply, evolve and adapt, any number of times and in any order.
A player must discard one card for each action taken, unless the player already has a card face up in their menagerie with a relevant special ability. If a player is performing more than one menagerie action, the later cards can benefit from the special abilities on the earlier cards played in that same turn.
Discarded cards are placed face up, so that the discard pile is easily distinguished, onto the relevant discard pile (1 to 3).
A player may not have more cards relating to one class of creature in their menagerie than they have different classes of creature. For example, if a player has three classes of creatures in their menagerie, each creature may only be supported by a maximum of two additional cards.
It follows that the maximum number of one class of creature is six (four for the introductory game), as that is the maximum number of different classes of creatures.
Supporting cards cannot be repositioned – i.e. subsequently moved to become the top card, which would change the type of the menagerie creature. They will always remain supporting cards and their special ability or scoring ability will not be used or become available. A player cannot discard cards from their menagerie.
1a. Introduce
A player may introduce one or more classes of creature during their turn. Any creature can be introduced as long as there is not already a creature of the same class in the player's menagerie. For each creature a player introduces the player:
i) Places the creature card into their menagerie face up, to the right of any cards already in their menagerie.
ii) Places their counter for that class of creature onto the corresponding continent board as indicated by the continent icon on the creature's card, with the white background side face up. It is suggested that the player places a sun marker on top of the continent icon, so that the player can keep track of and easily identify which continent the creature is in during the game.
The counter is placed in the first available space at the start of the trail in that continent, corresponding to the number of players. If this space is already occupied the creature's counter is placed in the first available space along the trail. Move over and ignore any spaces that already contain a counter. (Note, this means that the players playing later may move further, which compensates for them not going first.)
Example. In a four player game the platypus is introduced to the right of blue's existing menagerie creatures. Blue's smaller creatures counter is added to the first available space (for four players) in Australasia. A sun marker is added to the platypus card. (Shadow creatures indicate the starting spaces for 2, 3 and 4 players.)
Note: A player may only have a maximum of two of their creatures' counters in one continent at the end of their turn. So if a player already has two counters in a continent they cannot introduce a third counter (as it is not possible to migrate a creature out of the continent during a menagerie action).
Note: Tokens (see 3e. Collect token, page 10) can be used at any time. Therefore a player may add a continent token when a creature is being introduced, enabling the creature to be introduced into the continent shown on the token.
1b. Multiply
A player may multiply one or more creatures and may multiply the same creature more than once. For each creature a player multiplies the player places a creature card of the same class of creature underneath the card of the creature multiplying, but so that the icons of the card being placed are showing to the left of the previous card(s).
The player now has an additional creature of the type and class of creature shown on the top card. This creature has now 'adapted' to any new continents and/or terrains shown on newly visible icons and increased its movement ability on any continents and terrains that the creature could already access. (Example: the wombat card is placed underneath the platypus card creating a second platypus. The platypus can now move twice as quickly in Australasia and has also adapted to moving in the mountains spaces.)
1c. Evolve
A player may evolve one or more creatures and may evolve the same creature more than once. For each creature a player evolves the player places a creature card of the same class of creature on top of the card of the creature being evolved, so that the icons on the previously played card(s) are showing to the left of the new card.
The player has evolved one type of creature into a new type of creature of the same class and also added an additional creature of the new type. This creature has now also 'adapted' to any new continents and/or terrains shown on the new card, increased its movement ability in any continents and terrains that the creature could already access and changed the creature's special or scoring ability to that shown on the new creature's card. (Example: the bandicoot card is placed on top of the platypus card. The two platypus have evolved into three bandicoots. The bandicoots can now move more quickly in Australasia. They have also adapted to moving in deciduous forest spaces and could potentially score 4 points at the end of the game.)
1d. Adapt
A player may adapt one or more creatures and may adapt the same creature more than once. For each creature a player adapts the player places a creature card, usually of a different class of creature, upside down and underneath the card of the creature adapting, so that the continent and terrain icons (but not the class of creature icon) of the card being placed are showing to the left of the previous card(s).
This creature has now adapted to any new continents and/or terrains shown on newly visible icons and increased its movement ability on any continents and terrains that the creature could already access.
When adapting the player does not create an additional creature of the type of creature shown on the top card, as the creature class icon is not visible. The new card does however count toward the maximum number of cards (six for the full game, four for the introductory game) that a menagerie creature can have.
A player may wish to adapt a creature by using a card with a creature of the same class if, for example, the player has the ability to adapt without having to discard a card. However, usually a player would multiply a creature of the same class, not adapt, as to multiply would also increase the number of that class of creature, which is advantageous. (Example: the thorny devil card is placed underneath the bandicoot card (and its supporting cards). There are still only three bandicoots (as indicated by the three smaller creature icons), however they can now move even faster in Australasia and they have now also adapted to moving in the desert spaces.)
Note: A player may only have a maximum of two of their creatures' counters in one continent at the end of their turn. So if a player already has two counters in a continent they cannot introduce a third counter (as it is not possible to migrate a creature out of the continent during a menagerie action).
Note: Tokens (see 3e. Collect token, page 10) can be used at any time. Therefore a player may add a continent token when a creature is being introduced, enabling the creature to be introduced into the continent shown on the token.
2. Breed
The breeding action allows a player to gain additional cards to put into their hand. In order to breed a player must normally be able to flip over one counter which currently displays a white background side so that the black background is showing. A player may normally breed only one creature per turn.
2a. Discard
Firstly a player may discard any cards from their hand that they wish to in order that they can accommodate additional new cards and stay within their hand limit. A player cannot discard cards after they have started to draw cards.
Place the discarded cards face down on the corresponding discard piles 1 to 3.
2b. Flip
The player flips over one of their counters on the continent boards from the side which shows a white background to the side that shows the black background.
If the black background side of a counter is already showing a player cannot draw any more cards using that creature until it has moved again (see movement), which will return the creature's counter to its white background side.
Exception. If all of a player's counters are showing the black background side a player may breed any one of their menagerie creatures for one card only. The counter remains on its black background side.
2c. Draw
A player draws cards equal to the number of that type of creature in the player's menagerie plus the number of the region that the creature has reached.
Example: Red's menagerie bird has two supporting bird cards plus one upturned reptile card used for adaptation. The bird counter is in region two. The red player draws three cards for the number of birds (but no card for the reptile card) plus two cards for the region the counter is in. A total of five cards. (1 + 0 + 1 + 1 = 3; + 2 = 5 cards.)
A player may draw cards from any of the decks 1 to 3 where any creature (of any player's) has reached that numbered region, but a player may not look at any of the cards until they have drawn them all.
Example: If all players only have counters in the region ones, then players can only draw from deck one. If any player has a counter in a region two, then all players can draw from decks one and/or two. If any player has a counter in a region three, then all players can draw from any deck.
For further examples refer to the green and red player's turns described on the South American side of the box bottom.
If a number deck is exhausted, then reshuffle the discarded cards from that deck and form a new deck. If there are no discards for that deck then a player may draw cards from any adjacent number deck, e.g. if a deck 2 card is required and there is no card available, then the player may draw from any of the decks 1 to 3.
2d. Hand Limit
The normal hand limit is six cards. A player may only draw cards up to their hand limit. Do not draw any extra cards. However a player may discard any number of cards before they start to draw cards (see 2a above).
3. Movement
The movement action allows a player to advance their counters along the trails on the continents and to migrate from one continent to another.
3a. Trigger
Play (and then discard) any card or token as a trigger card or token.
From left to right compare the icons on the trigger card or the icon on the token to those on each of the player's menagerie creatures. The creature's cards include the supporting cards and tokens placed on those cards (remember that tokens can be added at any time to a card).
Any menagerie creature which has one or more matching icon(s): class, continent and/or terrain, may move forward on the continent boards and/or migrate. Note that movement is only triggered once, even if there are more than one matching icons.
It is suggested that players (i) place one of their a coloured wooden trigger marker on top of each of their menagerie creatures that have been triggered, so as to easily identify which creatures are able to move and then (ii) place the trigger card to one side, face down (to avoid confusion, especially to new players, when moving).
It is recommended that a player does not place the trigger card onto the discard pile immediately, but waits until they have finished moving. A player may need to refer to the trigger card again as additional creatures may be triggered during the movement phase if a token matching a trigger card icon is added to a menagerie creature. This can include a token that has been newly acquired during that turn. Note that a token will only trigger movement during the same turn if it is applied to a creature which is to the right of any creatures that have already been moved.
Example: Blue moved using the red deer as a trigger card. Four creatures were triggered by their matching icons and marked with blue cubes for identification. From left to right, the puma has a matching coniferous forest icon, the wombat has no matching icons so does not move, the thorny devil has a matching Europe icon, the white rhinoceros has a matching class of creature icon, the gibbon has no matching icons so does not move and the bald eagle also has a matching coniferous forest icon. (Blue's turn can be seen in the context of a game on the box bottom.)
Important. Note, the icons on the trigger card do not enable the creature to move on the boards, they only determine which creatures may move.
From left to right, each menagerie creature that has been triggered may do all of the following:
3b. Move
Move a counter forward on a continent board. (Forward means in the direction of the arrows, from the start of the trail in the south of the continent toward the end of the trail in the north of the continent.) A creature's counter cannot be moved backwards.
The left most triggered creature in a player's menagerie always moves first. The remaining triggered creatures move in order from left to right. A player must complete the movement of one creature's counter before moving their next creature's counter.
When moving a creature's counter, consider the next space along the trail on the continent board(s) that the creature is moving on (or migrating to). If the terrain icon on the next space matches an icon on the creature's card(s) then the creature's counter may be moved one space forward in the direction of the arrows onto the matching space. If the terrain icon does not match then consider whether a continent icon on the card(s) matches the continent the creature is on (or migrating to). If the continent matches an icon on the creature's card(s) then the creature's counter may again be moved one space forward in the direction of the arrows onto the next space. When the counter has been moved one space then consider the terrain icon on the next space and the continent in the same way. Continue the procedure until there are no more matching icons to consider. Icons may be considered in any order and independently. Each icon can be used only once during movement.
Note that a creature whose movement has been triggered will always be able to move at least one space forward as the creature will have always have at least one continent icon which matches the continent it is in.
Movement example 1: In a four player game, the lion's movement has been triggered. The lion has two matching icons so it can move two spaces forward. Its first move is to the deciduous forest space (1) using the Africa icon (as the lion does not have an icon matching the deciduous forest space). Now that the lion is on the deciduous forest space the next space on the Africa board, which is grassland (2), matches the grassland terrain icon on the lion card. So the lion can now move onto the grassland space. The lion has no more unused icons so finishes its move on the grasslands space (2).
If a creature has a number of supporting cards and matching icons it can get tricky keeping track of which icons have been used. In this situation it is recommended that players use the black wooden movement markers to identify which icons have been used.
Movement is to visible (unoccupied) spaces. Move over and ignore any spaces that already contain a counter. Only one counter can occupy each space, so only one type of creature can reach the finishing space in each continent.
Counters move over and do not stop at the token spaces. (See Collect tokens page 10.)
Movement example 2: The cassowary's movement has been triggered. The cassowary does not have a mountain icon so the red player uses an Australasia icon to move to the mountain space (1) and then places a black movement marker over one of the Australasia icons (and similarly places black movement markers over the relevant icons for subsequent movements). The next visible space is a desert space (3). The cassowary does have a desert icon so it can use that for the next move. The cassowary moves over the token space (2) as it does not stop there. If there had still been a token on that space then the red player would have taken the top token (which the red player could then have played immediately onto the cassowary to facilitate further movement of the cassowary) but still would not have stopped. Having reached the desert space (3) the next visible space is a grassland space (6). The cassowary does not have a grassland icon but it does still have unused Australasia icons, so the cassowary can continue moving. The cassowary jumps over both the green smaller mammals counter (4) and then the token space (5), taking the green hedgehog token as it does so, and lands on the grassland space (6). The next space (7) is a desert space. The cassowary's desert icon has already been used (at space 3), but it still has an unused Australasia icon, so it uses that. The next space (8) is a deciduous forest space. The cassowary does have a deciduous forest icon so it can use that. The following space (9) is another desert space. The cassowary does not have any remaining unused Australasia or desert icons so its movement finishes at the deciduous forest space (8).
After all of the movement is completed, remove the coloured and black wooden movement marker cubes from the cards, if used. Place the trigger card on the corresponding discard pile 1 to 3.
A player may have a maximum of two counters on a continent at the end of their turn. If after the player has finished their turn it is noticed that this rule has been broken, then the player must move one of the counters to a different continent the next time they chose the movement action. If a player ends the game with three counters in one continent then the player must remove one of those counters (their choice) from the board and the corresponding cards from their menagerie and that creature will not score or give rise to any points.
If the counter has reached the finishing space in a region 3, then it cannot be moved or migrate again. The counter can still be used to breed once. However after breeding the counter will remain on its black side and cannot then flip back to its white side as it will be unable to move again.
Movement is always optional. A player may choose not to move a creature that has been triggered or to move it for some of the icons only. (Note that the upside down icons on the right side of the top card do not generate any movement.) For example a player may wish to halt a counter on the most advanced space of region one so that the player can still use special abilities specific to region one only, or a player may wish to not to end the game by not moving a creature's counter to the end space of a trail. If a counter can be moved, but the player chooses not to move it, the creature's counter can still be flipped to its white background side. (This does not include the finishing space as the counter cannot be moved there.)
3c. Migrate
Migration is part of the movement action. Migration is the movement of a creature's counter from one continent to another.
A creature can migrate into a different continent only if the creature card and/or its supporting cards contain an icon of the target continent. The creature's counter may arrive in the new continent by first using the terrain icon, but must also have the continent icon in order to make the migration possible.
A creature can only migrate from one continent to another once per turn. Migration must either be the first movement of the creature's counter or the last movement. A creature cannot migrate during the middle of that creature's movement.
If a special ability allows a creature to move one space, this can include migrate.
When migrating, a creature's counter is always placed in the first unoccupied space in the same numbered region in the continent the creature has migrated to as the region it migrated from in its previous continent. Consequently migration will only normally be considered when a creature's counter has reached the beginning of a new region. Very rarely, if a creature migrates and there are no spaces in the corresponding region in the target continent, then when the creature migrates the creature's counter is placed in the first available space in the region above.
Migration example: The raccoon's movement has been triggered. The raccoon does not have a deciduous tree icon (2) so the yellow player uses the Europe icon to move over the green token (1), which it takes, to reach the deciduous tree space (2). The yellow player then places a black movement marker over the raccoon's Europe icon (and further black movement markers after subsequent moves). The next space (3) is a coniferous forest space. The raccoon has two coniferous forest icons so it can be moved to that space (3), which is also the first space in Europe in region three. The raccoon also has a North America icon so it is able to migrate to North America. This can only be done as the first or last move of that creature. As the raccoon's last move it then migrates to the first space (4) of the same region, region 3, in the continent it has migrated to. The raccoon cannot move again even though the raccoon has an unused coniferous forest icon which matches the next space (5).
A reminder that a player may only have a maximum of two counters in any one continent at the end of their turn. Additional creature's counters may migrate to a continent during the course of a player's turn, but only if the total number of counters is reduced to two or fewer by further migration before the end of the player's turn.
3d. Flip
Flip the creature's counter to the white background side.
If the black background side of the counter was face up, then the counter may be flipped over so that the white background side is showing. This will enable the creature to breed again (see action 2b). Occasionally a player may not want to flip over the counter for scoring purposes. E.g. Fennec fox (#217).
3e. Collect Token
Collect a token passed over by a creature counter.
There are four spaces for tokens on each continent board. A creature's counter never stops on these token spaces. The counter moves over the token space straight onto the next space.
In the first three token spaces along the trail there are initially a blue token stacked on top of a green token. When a player's counter passes over the token(s) the player takes the top (blue) token if available. The player does not look at the other (green) token. If there is only a green token left the player takes that token. If there are no tokens remaining then the player does not receive a token and the counter moves straight over the token space to the next space on the trail. A player may take both the blue and green tokens if two of their counters move over the tokens.
In the fourth space there is a red token. Only one creature's counter can be moved over this token space as the following space is the finishing space of that continent's trail and only one counter may be present in any space. When a player's counter passes over the red token the player takes the token.
The green carnivore counter's movement has been triggered. On its first move it will move directly to the desert space and take the blue token when it moves. Leaving the green token for the next counter to pass that space.
The player places the tokens they take face up on their token rack.
If a token is not 'used' in the ways described below, then the token will score points at the end of the game if there are points indicated on the token.
Tokens may be used as follows:
- To trigger movement (see 3a), using the continent or terrain icon on the token.
If a token is used to trigger movement it is subsequently discarded and no longer scores points at the end of the game.
- To add face up (showing the continent/terrain side) to a menagerie card at any time during a player's turn. A player may place a token on a menagerie creature immediately after picking the token up. Tokens may not be added after the end of the game.
If the icon on a token that was just added matches an icon on the trigger card or the trigger token, then this will trigger the creature's movement in the usual way. A creature's movement can be triggered in the current turn, but if any creatures have already moved, only a creature to the right of the creatures that have already moved can be triggered.
A creature that is currently moving, or a creature to that creature's right, can have their movement increased in the current turn if the token matches a relevant terrain space or the continent. If a token is placed on a creature that has already moved this turn, then it will not generate additional movement.
A player may place any number of tokens onto a menagerie card. Once placed the token cannot normally be removed. If a creature is subsequently evolved and therefore a card is placed on top of that creature's current top card, then any tokens are repositioned on top of the new evolved creature.
If a token is placed on a menagerie creature it no longer scores points at the end of the game.
Red tokens cannot be used to trigger movement.
Game End
The game ends immediately when there are counters on the finishing space on two different continent boards. The player who places the second counter does not finish their turn.
(Note that the player's playing later had the advantage of moving over the counters of the player's playing earlier.)
Scoring
Points are scored as follows:
- Each counter scores points equal to the number of the region that it is in.
- Each unused token scores 0 to 3 points, as stated on the token.
- Each scoring creature card is evaluated and scored accordingly.
The player with the most points is the winner.
If the scores are level compare the position of the players' counters. The player with a counter at, or closest to the finish, of a continent trail is the winner. If equal compare the position of the players' second closest counters, and so on.
Further Explanation of Cards
Below, in numerical order, is clarrification of the text on some of the cards where this is considered helpful.
111, 112, 113, 114, 115, 116: A player cannot use this creature's ability to introduce this same creature (as the creature was not already in the player's menagerie at the time the creature was introduced).
117, 118, 119: This movement ability is instead of the normal icon trigger.
131: A player does not gain two cards for introducing this creature (as the creature was not already in the player's menagerie when the creature was introduced).
132, 133: If playing two trigger cards, play both then move.
134, 135, 136, 137, 138: A player does not gain two cards for introducing this creature (as the creature was not already in the player's menagerie when the creature was introduced).
139: If playing two trigger cards, play both then move.
142, 143, 147, 148: Instead of just one creature in any region.
149: A player may take immediately from any deck they are currently permitted to draw from. A creature may be moved over the sloth when that creature is being introduced. If a creature moves over the sloth on another player's turn, the player who has the sloth may first discard a card if they already hold the maximum number of cards permitted by their hand limit.
151, 152, 153, 154, 155: If you evolve this creature, then immediately discard down to new hand size if necessary.
167, 168, 169: Moving 1 space can include migrate.
223, 224: If twice, play both evolves together. If you evolve this creature you can only evolve it once as after the first evolve, the ability is no longer visible.
227: Only consider counters that have been introduced.
241, 242, 243: These are additional to any points on the token.
244: Note the game ends immediately a second creature reaches the finishing space of a trail. One of the advantages of this ability is to reposition the creature likely to achieve this feat to the right of the other creatures in a player's menagerie.
245, 246, 247: These are additional to any points on the token.
248: See 244 above.
256, 257: If you evolve this creature, then immediately discard down to the new hand size if necessary.
261, 262, 263: Moving 1 space can include migrate.
264, 265, 266: Note these creatures also inhabit the terrain of the supporting cards.
324: Includes terrains on tokens played on that creature.
325: Creatures equals cards, not counters.
329: Includes continents on tokens played on that creature.
349: Cards, not counters.
361, 362, 363, 364, 365: Creatures equals cards, not counters.
Introductory Game
The rules for the introductory game are the same as for the full game except as follows:
Continent boards. Use the reverse sides of the Africa, Asia, Australasia and Europe boards only. These are marked with an 'egg' icon. The trails are shorter on these boards than in the main game.
Tokens. Do not use the green bobcat and blue swift tokens.
Creature cards. Each player is dealt one of the three sets of 4 starting cards: Green 111, 121, 131, 141. Red 112, 122, 132, 142; Blue 113, 123, 124, 134.
The hand limit is four cards.
Menagerie creatures. There are only four different classes of creature in the introductory game: birds, herbivores, predators and smaller mammals. As a player may not have more creatures of one class than they have different classes of creatures in their menagerie, the maximum number of cards that can represent each creature is four (not six as in the full game).
Note. The introductory game is included to enable players to familiarise themselves with the mechanics of the game. It is not 'balanced' to the same extent as the full game. Due to the shorter trails on the boards players do not have the same time and scope for developing their creatures and their strategy as in the main game.
Acknowledgements
Game design by Richard Breese.
Illustrations by Juliet Breese.
Box lid based on a design by Gerhard Schmid.
Graphics and realisation by Richard Breese.
German translation by Ferdinand Köther.
Special thanks to Gerhard Schmid and Wolfgang Kramer for their permission to base the image on the box lid on the image used for Wolfgang and Ursula Kramer's famous Wildlife Adventure game and to Ravensburger for allowing the reproduction of a representation of the cover of Wildlife Adventure on the side of the box bottom. As explained on the box sides the idea was to pay tribute to Wolfgang and Ursula's wonderful family game on its thirtieth anniversary.
The designer would like to thank the following playtesters and contributors for their assistance: Jonathan Badger, Ulrich Bauer, Tim Berry, Rüdiger Beyer, Sebastian Bleasdale, Anthony Boydell, Jenny Bradbury, David Brain, Dawn Breese, Jonathan Breese, Mark Breese, Stuart Breese, Bernd Brunnhofer, Moritz Brunnhofer, Peter Burley, Derek Carver, Richard Clyne, Paul Crogan, Carl Crook, Si Cullimore, Barbara Dauenhauer, Gary Dicken, Caroline Elliott, Rob Fischer, Andreas Frank, Paraskevi Frank, Paul Fuller, Howard Goble, Andrew Harding, Richard Harris, Rob Harris, Mikko Heikelä, Mike Hibbert, Eve Hicks, Tom Hilgert, Ben Hodgson, Dieter Hornung, Alan How, Seth Jaffee, Robert Jones, Simeon Jones, Steve Kendall, Christian Klein, Tina Landwehr, Tom Lehman, Ray Livingstone, Paul Mansfield, Bob Mesrop, Alan Paull, Charlie Paull, Pete Piggott, Jon Pizzey, Adam Porter, Mark Ratcliffe, Emily Ross, Toby Ross, Tony Ross, Bruce Schlickbernd, Jennifer Schlickbernd, Christof Schröder, Lotte Schüler, Rob Scovell, Iain Shirley, Mike Siggins, Graham Staplehurst, Juliet Swift, Christof Tisch, Andy Unwin, Hans van der Velden, Bart van Spaendonck, Rob Thomasson, Ian Vincent, Neil Walters, Clive Warries, Hanne Weber, Simon Weinberg, Andy Williams, Andy Willis, Ian Wilson, Stuart Woodsford and John Yianni.
The designer is a regular user of the Boardgamegeek website and will endeavour to respond to any rules queries on that forum on a regular basis so that the responses are readily available to all gamers.
http://www.boardgamegeek.com/boardgame/181797/inhabit-earth
Published in October 2015 by:
R&D Games, 6 Denne Close, Stratford upon Avon, Warwickshire, CV37 6XL, United Kingdom. e-mail: [email protected]
Co-publishers:
Game Salute LLC, 10 Tinker Avenue, Londonderry, NH 03053, USA. www.GameSalute.com
Hutter Trade GmbH + Co KG, Bgm.-Landmann-Platz 1-5, D-89312 Günzburg, Germany. www.hutter-trade.com
Whilst the manufacturers make every effort to ensure that your copy of Inhabit the Earth is complete and in good condition, the large volume of units and components means that occasionally errors will arise. In these circumstances please contact: [email protected] or visit www.GameSalute.com/Replacements if you acquired your copy of the game in the U.S. or [email protected] or visit www.hutter-trade.com if you acquired the game elsewhere in the world.