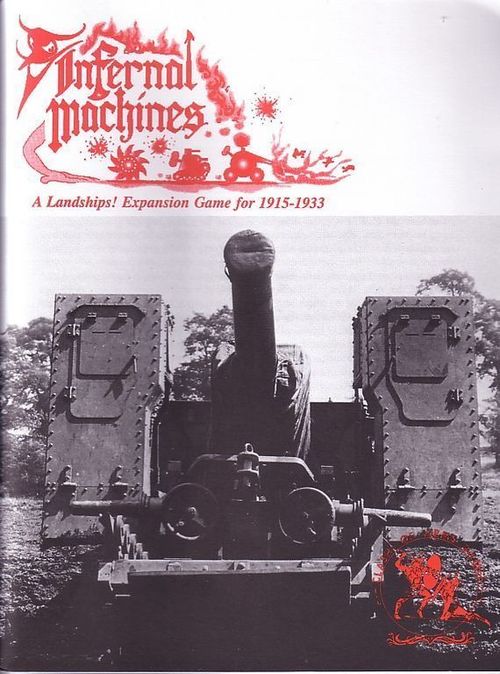
Infernal Machines: A Landships! Expansion Game 1915-1933
Infernal Machines: A Landships! Expansion Game 1915-1933 Rulebook
Table of Contents
Table of Contents
- Introduction
- Environmental Conditions
- Additional Tank Rules
- New Vehicles
- Self-Propelled Guns (SPG)
- Armoured Personnel Carriers (APC)
- New Armoured Cars (AC)
- Light Vehicles (changed)
- Armoured Trains
- Naval Units (changed)
- Artillery Options
- New Support Weapons
- Infantry Options
- Advanced Infantry Movement Rules (Optional)
- Advanced Infantry Combat Rules (Optional)
- Cavalry Options
- Scenarios
Introduction
1.11 Using This Expansion
Infernal Machines uses essentially the same rules found in the original Landships! rulebook. Some rules have changed, and new rules and new concepts are found only in this expansion. Most rules are only minor changes or additions, with the exception of the artillery rules, which have been completely rewritten. New rules, meaning rules that are not found in Landships!, are marked with the suffix "(new)". Changes and optional rules are marked with the corresponding suffix. The new counters and new cards are self-explanatory and use the same terrain codes and the same unit layout as in Landships!
NOTE: all new tables, new charts and new rules supersede the earlier ones published with Landships!
1.13 Components
A complete copy of Infernal Machines contains the following components:
- Two double-sided maps, 28 cm by 43 cm
- One sheet of 280 double-sided die-cut counters
- A 48-page rulebook
- One 21 cm by 28 cm sheet with the tables and charts
If any of these components are missing or defective, write to the publisher's address for replacements.
Environmental Conditions
In Landships!, the weather is almost always hot and sunny. In reality, troops were often forced to face the elements as much as the enemy.
Note: regardless of any obstacles introduced below in module 2.0, a vehicle may always move at least one hexagon per Vehicle Movement Phase, and a foot or cavalry unit may always move at least one hexagon per turn, whatever happens.
General Weather Rules (new)
If the scenario does not specify a particular weather condition, roll a ten-sided die at the start of the game. On a result of 1 to 5 the weather is bad; on 6 to 10 it is fair. Fair weather has no effect on play. Bad weather reduces visibility (spotting range) and affects the movement of all vehicles by doubling the cost to enter a hexagon. On road, the cost of 1/2 movement point per hexagon becomes 1 movement point per hexagon. Only vehicle movement is affected by bad weather.
Terrain States (changed)
Terrain state now has five types, as follows:
- Good terrain: all normal Landships! costs are in effect.
- Difficult terrain: as before, difficult terrain increases the chance of a vehicle breaking down but imposes no additional movement point cost.
- Mud or snow: these conditions adversely affect the movement of vehicles and cavalry units, as shown below. However, roads crossing these types of terrain cancel the movement point costs below, and all units pay just 1 movement point per hexagon instead. High-explosive artillery ammunition is slightly less effective in muddy conditions (+1 on the Barrage Combat Results Table (BCRT)).
Movement point costs in mud and snow:
| Terrain | Tracked vehicles (Clear / Wood) | Wheeled vehicles (Clear / Wood) | Cavalry units (Clear / Wood) |
|---|---|---|---|
| Mud | 2 MP / 6 MP | 4 MP / 8 MP | 2 MP / 6 MP |
| Snow | 3 MP / 5 MP | 5 MP / 9 MP | 3 MP / 5 MP |
EXAMPLE: a tracked vehicle moving through a clear hexagon filled with snow pays 3 movement points per hexagon entered.
Deep snow conditions limit foot units without skis to a total movement of one hexagon per turn, and that movement may only be made during the second foot movement phase. Cavalry units move at a speed of 6 MP, not 10, when galloping. Cavalry units may not conduct a charge in deep snow. Roads disappear in deep snow; treat them as if they were not there. High-explosive artillery ammunition is slightly less effective in deep snow (+1 on the Barrage Combat Results Table (BCRT)).
Terrain with Shell Holes and Vehicles (changed)
When moving, if at any point a vehicle passes through two consecutive hexagons that contain shell holes (or part of them), halve the vehicle's movement allowance (rounding down) for the rest of the phase, in addition to any other effect. This also applies to road hexagons, even if the shell holes do not physically touch the road.
EXAMPLE: if the weather is bad and a vehicle moves through two consecutive hexagons containing shell holes, its speed is halved and it pays double the movement point cost.
NOTE: because shell holes are placed irregularly, it can be difficult to agree when a vehicle is moving through shell-holed terrain. If the players cannot agree, roll a six-sided die; the player who rolls the higher result uses his interpretation.
Additional Terrain Types (new)
Several new cards are included in this expansion. The effects of each are detailed below.
Multi-storey buildings: map 10 represents an urban environment depicting a typical European town. Road width has no effect on movement, whatever the unit. On this map, town hexagons that occupy more than one hexagon are considered massive buildings of one storey (or more). Otherwise, all other town hexagons on map 10 are considered groups of buildings without storeys. As windows and doors are not relevant in this game, infantry may enter a map 10 town hexagon simply by moving into it, and may fire its weapons without regard to windows. Whereas buildings without storeys have the same height as wood hexagons for line of sight, multi-storey buildings block any line of sight traced through them. In buildings spanning several hexagons, if there is a building hexagon located between two enemy units on the same level, small arms fire is not permitted. Two enemy units adjacent to each other, in the same building and on the same level, both receive the +2 town modifier on the Small Arms Combat Resolution Table (SACRT) when they are fired upon. In general, enemy units may not occupy the same storey of the same town hexagon after movement, except in the case of close combat. Cavalry units may enter multi-storey buildings only if they have first dismounted.
Storeys: units may occupy the upper floor of any multi-storey building and climb onto the roof. Going up or down one level costs a unit +1 MP per level. Place a "2nd Story" marker on it to show that it is on level 2. Units without this marker are automatically considered to be at ground level. Units on different levels but in the same building hexagon may not fire through the ceiling. Units on an upper floor are immune to enemy close combat launched against friendly units located directly beneath them, but may be the target of close combat in a later turn by enemy units placed directly above or below them.
NOTE: units on an upper floor receive the spotting range bonus that units on a hill receive if you are playing with optional rule 16.23 of Landships!
Roofs: units on a roof are indicated with a "RoofTop" marker. Units that are not on a roof but are in the same building hexagon may not fire through the roof. Units on a roof are immune to enemy close combat launched against friendly units located directly beneath them, but may be the target of close combat in a later turn by enemy units placed directly below them. Units firing from a roof toward lower elevations receive a -1 modifier to the die roll on the SACRT. Units on a roof under air attack have their morale value reduced by 1 if they are hit (Hit) during that attack only (so add +1 to the result of the morale check).
NOTE: units on a roof receive the spotting range bonus that units on a hill receive if you are playing with optional rule 16.23 of Landships!
Rubble markers ("Rubble"): all town hexagons (whether on one or several levels) on map 10 are made of stone or concrete. Unlike the ordinary town hexagons of Landships!, these stone/concrete town hexagons can be "destroyed" by reducing them to rubble. The following conditions create a Level 1 rubble state in a stone/concrete building hexagon:
- two successive attacks (defined as at least one "hit" result of any kind on the SACRT) on the same hexagon by vehicle guns of 47 mm or greater, or by direct-fire artillery guns, or
- an off-map artillery barrage against the hexagon with a "hit" result, of whatever type, obtained on the BCRT (even if the off-map artillery fire may scatter outside the hexagon), or
- an aerial bombing against the hexagon with a result other than "-" on the Air Bombardment Combat Results Table.
If any of the above cases occurs, place a "Rubble Level 1" marker. There is no effect on units occupying the hexagon if a Level 1 rubble state occurs. Another successful attack on the same hexagon meeting the above conditions creates Level 2 rubble. At that point the hexagon is destroyed and all units located in the Level 2 hexagon are automatically eliminated. For the rest of the scenario, no unit, except aircraft overflying, may enter Level 2 rubble hexagons.
Fighting in ruins: when attacked by enemy small arms fire, units defending in a Level 1 rubble hexagon may still receive the town hexagon die modifier (+2) on the SACRT. During close combat, units defending in a Level 1 rubble hexagon receive a one-column shift to the left and a +2 die modifier on the close combat resolution table.
NOTE: anti-tank rifles, small arms fire by infantry or machine guns have no effect on reducing stone/concrete buildings to rubble from outside (although units inside may be affected).
Units defending in a Level 1 rubble hexagon may still receive the town hexagon die modifier (+2) on the barrage combat resolution table. Units defending in a Level 1 rubble hexagon are always subject to the town hexagon die modifier penalty (-1) on the air bombardment combat resolution table.
Ridgelines: ridgelines represent undulations in the ground sufficient to block visibility but without any real defensive bonus. To simulate this, units at ground level (or lower) may not spot or observe over a non-adjacent ridgeline. They may do so if they are adjacent to the ridgeline. Non-adjacent ridgelines do not block the line of sight of aircraft or of units occupying hills and multi-storey buildings. Enemy units behind a ridgeline may not be the target of fire across the ridgeline unless they are themselves adjacent to the ridgeline and become spotted themselves by firing first. Ridgelines have no effect on movement. See hexagons 4715/4845 of map 9 for an example of a ridgeline hexside.
Stone walls: stone walls represent solid but low linear obstacles. Units may freely spot or observe through stone walls. Wheeled vehicles may not cross stone walls. Tanks may do so at a cost of one movement point (+1 MP), and in doing so destroy the stone wall along that hexside. Cavalry units may cross a stone wall at a cost of two movement points (+2 MP). Infantry suffer no movement point penalty for crossing a stone wall. Units attacked by enemy small arms fire across a stone wall apply a +2 modifier to the attacker's die roll on the SACRT and impose on the attacker a one-column shift to the left on the CACRT. Stone walls provide no defensive benefit against artillery barrages or aerial bombing. See hexagon 2811 of map 10 for an example of a stone wall.
Ditches and low-altitude areas: treat these as depressions in Landships! See hexagon 6008 of map 9 for an example of a ditch hexagon and hexagon 6329 of map 11 for a low-altitude hexagon.
Obstacles (new)
The Landships! rules, with their emphasis on weapons technology, generally treat all obstacles in the same way, but this is a simplification. Just as there were several kinds of armoured vehicles, there were several kinds of artificial conditions present on the battlefields. The rules below take these factors into account. Markers are now included to account for the variety of artificial obstacles found on the battlefields.
Trenches: there are now three types of trench in Infernal Machines: hasty, prepared and communication trenches. Each has distinct characteristics given below. Each scenario states the status of trenches for that scenario. Trench markers are provided to indicate where the additional trenches required by the scenario are to be placed.
Hasty trenches: a line of hasty trenches is, as its name indicates, a hurried work giving some small benefits to the units inside. In reality, a hasty trench may take the form of a shallow, irregular line of trench connecting existing shell holes. Typically their depth does not exceed waist height and they run parallel to the enemy front. Most trenches in 1914 and early 1915 are best simulated by hasty trenches. Hasty trenches also simulate the "command" trenches and the parapets that both sides (particularly the British) were forced to build in Flanders, where the water table was too high to dig truly deep ones. Units in hasty trenches receive a +1 die modifier against indirect barrages and a +1 modifier against small arms fire conducted from any direction, and may freely conduct small arms fire in any direction. Likewise, units in hasty trenches may conduct small arms fire against enemy units located in adjacent hasty trench hexagons. Vehicles with poor trench-crossing capability do not suffer this penalty when crossing hasty trenches.
Prepared trenches: a line of prepared trenches is the "classic" illustration of trench warfare. Lines of prepared trenches are up to three metres deep and up to two metres wide, and run parallel to the enemy front. Lines of prepared trenches have firing steps on the front (the parapet) facing the enemy, allowing fire to be delivered while minimising the exposed area of the target. The rear of the trench (the parados) is also raised to minimise the silhouette of the soldiers' heads and to provide protection to the rear against artillery explosions. The majority of both sides built rectangular firing bays (projecting outward) and traverses (projecting inward), and never in a straight line. You may get an idea by studying the trenches printed on the map. This approach reduced the effects of enfilade fire and artillery explosions. The French preferred a truly zigzag form for their trenches. Inside the trench, each side built underground shelters for maximum protection from heavy artillery. Units in prepared trenches receive a +2 die modifier against all indirect barrages (this becomes +3 if you are playing with optional Landships! rule 16.24). Units in prepared trenches are invulnerable to small arms fire conducted from their rear by units that are not trench mortars. Defenders receive a +2 die modifier against small arms fire if the enemy fire comes from the front. Units may only fire outward from prepared trenches toward the front (the direction of the enemy front). Units in prepared trenches may not conduct small arms fire toward adjacent hexagons connected to other prepared or communication trenches. Units must instead engage in close combat to clear such hexagons. This rule obviously does not apply to units outside the trenches, nor does it prevent them from firing into the trench.
OPTIONAL RULE: prepared trenches may also be designated as "extra wide" for a scenario. Extra wide trenches completely prevent crossing by tanks with poor trench-crossing capability (the = indicator), and all other tanks are treated as having poor trench-crossing capability (see Landships! rule 6.22) when they encounter an extra wide trench.
Communication trenches: communication trenches are dug perpendicular to the enemy front and connect the front-line trenches with the rear. Their depth also approaches 3 metres or more and provides maximum cover to anyone inside. Communication trenches are not fitted with firing steps and so cannot be used to fire outward. Units in communication trenches also receive a +2 die modifier against all indirect barrages (this becomes +3 if you are playing with optional Landships! rule 16.24). Units in communication trenches are completely invulnerable to small arms fire conducted from any direction by units that are not trench mortars, but may also not conduct small arms fire outward in any direction. Units in communication trenches may not conduct small arms fire toward adjacent hexagons connected to other prepared or communication trenches. Units must instead engage in close combat to clear such hexagons. This rule obviously does not apply to units outside the trenches, nor does it prevent them from firing into the trench. Vehicles with poor trench-crossing capability do not suffer a penalty when crossing a communication trench.
Barbed wire: barbed wire first appeared during the American Civil War. Although the war of mobility envisaged in 1914 assumed it would not be needed, once static conditions were established, demand for barbed wire exploded. All sides quickly became experts in using it as an obstacle to slow and channel enemy attacks. Barbed wire could be strung just far enough from friendly trenches to be out of reach of enemy grenades, or deeper into no man's land to paralyse assaults. Barbed wire could be cut by high-explosive shells, and the strongest defensive positions kept their barbed wire hidden from the view of forward observers. There were two patterns of wire obstacles:
- Low-pattern wire was designed to slow an attack. Perhaps 50 centimetres high and 3.5 metres deep, these belts could be penetrated by infantry, but only at the cost of prolonged exposure to enemy fire. A single barbed wire counter in a hexagon simulates low barbed wire obstacles in Infernal Machines. Use the existing barbed wire rules (see 7.13 of Landships!) to simulate low barbed wire obstacles.
- High-pattern wire was about 2 metres high and 6 metres deep. Units could not hope to penetrate it without lucky artillery fire or tanks clearing a passage through. High barbed wire obstacles are indicated by stacking two barbed wire counters on top of each other. Foot and cavalry units may not move through high barbed wire obstacles at all. Instead, a tank must clear the wire, or it must be cut by an artillery barrage (roll the die separately for each counter).
Roadblocks: only one Roadblock counter may be placed in a road hexagon. Roadblocks prevent vehicles from passing through the hexagon until the roadblock is destroyed. Tanks (and only tanks) may destroy a roadblock by entering the hexagon and then spending 5 movement points in the hexagon (or all their movement points during a single Vehicle Movement Phase if they have fewer than 5), which removes the marker. Roadblocks may also be destroyed in the same way as barbed wire, by a successful artillery barrage (an "asterisk" result on the bombardment table).
Strongpoints: strongpoints continue to use all the original Landships! rules. This expansion provides several additional strongpoint markers. The scenario states where they are placed.
Minefields: minefields continue to use all the original Landships! rules. This expansion provides several additional minefield markers. The scenario states where they are placed.
Spotting (changed)
Normally, before an anti-tank or artillery gun, a vehicle or infantry units can conduct direct fire (not indirect fire with artillery/mortars), the firing unit must first be able to spot the target. Rather than having units automatically spotted at fixed distances as in Landships!, spotting is now a matter of chance, with the possibility of ambushing uninformed units. To spot, consult the revised Spotting Table and roll a ten-sided die. The number obtained (with modifiers) must be less than or equal to the number shown for that distance in hexagons to spot the enemy unit. Choose the appropriate row to cross with the column representing the unit's status (fair or bad weather, hatch open, etc.).
Buttoned-Up Hatches (new)
All tanks and armoured cars are normally considered to be operating "buttoned up" during the scenario. Vehicles with buttoned-up hatches must use the "buttoned up" column of the Spotting Table. To indicate that a vehicle is not operating with its hatch buttoned up, place an individual counter of any kind (a forward observer, a replacement leader, etc.) on the vehicle. These vehicle commanders can be killed. There is a chance of this happening with any small arms fire directed against this vehicle that obtains a "hit" result. A second result of 1 or 2 on a six-sided die following a successful to-hit roll on the SACRT indicates that the commander has been seriously wounded. If the commander is wounded, determine what the rest of the crew decides to do by following Landships! rules 15.11 and 15.12.
All reinforcement vehicles entering play are considered to have their hatches buttoned up.
DESIGNER'S NOTE: typically, vehicle commanders guided their driver by putting their head out of the turret, and could thus be hit by a bullet. In general, a vehicle commander would instantly duck inside (close the hatch) at the moment enemy fire was directed against his vehicle or when he spotted an enemy vehicle. The main advantage of this is that the vehicle commander is protected, since he is inside the vehicle. The disadvantage, when it comes to spotting something through the small vision slits, is that the probability of estimating the correct distance is greatly reduced.
Additional Tank Rules
DESIGNER'S NOTE: until the Russo-Finnish War of 1939, the armour of all tanks was thin, on average about 20 mm. This was too thin a protection against any kind of field artillery piece, or the 37 mm or larger guns, which would fry any tank unlucky enough to be hit. This is why tanks have no armour value and any "hit" on a tank caused by an anti-tank weapon simply destroys it. It was only from the Second World War onward that the thickness of armour would have an impact on a tank's survival. The fact is that the early tanks were well armed but poorly protected by their armour.
Main Gun Blast Power (changed)
In Landships!, all guns mounted on vehicles are considered to have an exaggerated firepower of 8 in order to dramatise their effects. Instead, use the revised blast powers printed on the play aid against light targets located in the targeted hexagon, whether or not enemy vehicles are present. Blast powers are used in the same way as the firepower values of small arms fire. Add several blast powers together into a total blast power, along with any SAFA toward the hexagon.
EXAMPLE: a friendly tank and a platoon occupy the same hexagon. During the defensive anti-tank fire phase, an enemy tank armed with a 47 mm gun fires at the hexagon, destroying the tank. Even though the tank was the target, an automatic SAFA is also immediately conducted against the infantry group in the hexagon. Using the same ten-sided die result, the blast power of 3 (for a 47 mm gun) is cross-referenced on the SACRT and the result immediately applied.
If only infantry had been present in the hexagon and, during the defensive small arms fire phase, two enemy tanks had both fired at the hexagon with their 47 mm guns, each would have added the blast power of their main gun (3) (plus any vehicle machine gun) for firing at the same hexagon, but the attack would have been resolved on the SACRT using a six-sided die.
Anti-Tank Capabilities (changed)
Only vehicles armed with a 20 mm or larger gun possess an anti-tank fire capability (ATFA). Vehicles armed only with machine guns cannot destroy other armoured targets unless those targets have the "!" indicator (vulnerable to machine gun fire).
Tanks and Fascines (new)
This rule applies only if the scenario states that certain trenches are extra wide. A fascine was a large bundle of wood carried on top of British tanks. It allowed infantry and other tanks to cross "extra wide" trenches. When a tank falls into an extra wide trench, the tank pauses during the Vehicle Movement Phase and attempts to drop the fascine into the trench. On a result of 3 to 6 with a six-sided die, the fascine drops into the trench and the tank may continue to move over it (costs +0 MP), and any other tank may cross the extra wide trench at that point. On a result of 1 to 2, the fascine is jammed. If it is jammed, the tank cannot cross the trench but may continue to move. The following turn, the crew may attempt to unjam the fascine during the Vehicle Movement Phase by not moving and rolling a six-sided die instead. On a result of 1 to 4, the crew succeeds and may attempt again to drop it the following turn with the same chance of success. Otherwise, it remains jammed for the rest of the scenario. Once the fascine has dropped, it cannot be picked up again during the scenario. For simplicity, fascines cannot be destroyed by enemy fire. The tank carrying the fascine, however, is not hindered in any way.
EXCEPTION: the British Mk. V and Mk. VIII tanks may cross extra wide trenches without using a fascine.
Tank Breakdowns (changed)
When a tank breaks down, roll a second six-sided die. If the result is even, the tank in question breaks down for the next turn only and, after that turn, is considered automatically repaired. Odd results always follow rule 6.16 of Landships!
Tanks as Cover (changed)
Tanks no longer automatically block a line of sight. If infantry or cavalry units are in the same hexagon as the tank, they now receive a +1 die modifier on the SACRT due to the presence of the tank protecting them.
New Vehicles
The Great War greatly encouraged the development of armoured fighting vehicles. Experimentation was widespread, but so were mistakes, the biggest being to find oneself stuck with huge stocks of models that quickly became obsolete. There was little money for new vehicles, and production often reached fewer than 25 examples of a type. Now here are the new "infernal machines". The counter layout is the same as for Landships!. A carrying capacity is now indicated by a figure in a circle in the lower left corner. If this figure is red it shows how many squad-sized units can be carried; if it is black, the number of platoon-sized units.
New Tanks
All new vehicles have a breakdown modifier of +0 unless specifically stated otherwise. Unless specifically stated otherwise below, each machine gun mounted on a tank has a firepower of 2.
The British Mk. IV "Tadpole" (1918): the Mk. IV "Tadpole" is one of the most interesting First World War variants of the Mk. IV tank. It was simply a male Mk. IV with a mortar installed at the rear of the tank. Little is known about it, and it seems to have reached only the experimental stage. The mortar crew would ride at the back and, when the tank stalled or stopped, the mortar would fire. The tank would stay near friendly forward infantry since the mortar crew was very exposed. The type was probably of the Stokes type. The following are the new rules for this unit.
A Lt. MTR (light mortar) counter and a Crew counter are placed under the tank's counter. The mortar may only fire at spotted targets located in front of the tank, in the direction the tank faces (use rule 8.12 on anti-tank and artillery fire arcs of Landships!) and within range. The mortar unit may only fire when the tank does not move, and the fire automatically scatters one hexagon from the targeted hexagon. A light mortar may fire a total of six times per turn (see section 6.2 of Infernal Machines for additional rules on mortars), as long as the crew is not pinned. A pinned crew cannot fire the mortar. The ammunition for the mortar consists of only enough for 20 shots.
EXAMPLE: if the mortar fired four times in one turn, its ammunition would be exhausted in five turns; if only twice per turn, exhausted in ten turns, and so on. It is suggested that you place a marker on the artillery scatter diagram to keep track of the number of shots fired.
It is also assumed that the crew counter has an inherent forward observer, but one that can spot only for the mortar. The firepower of the mortar applies only against infantry-type or cavalry-type units. If mortar fire scatters onto a tank or armoured car, the result is automatically "no effect".
The mortar crew was relatively exposed in its rear position. To simulate this, enemy units conducting small arms fire on the tank from the side or rear automatically target the crew and inflict the normal SACRT results. If enemy small arms fire is made directly from the rear of the tank, apply a -2 modifier to the die roll on the SACRT. If enemy small arms fire is directed against the crew from the rear only, there is also a chance that the ammunition is hit. On a six-sided die, a result of 1 or 2 disables the tank and destroys the "mortar" and "crew" counters. Small arms fire originating from the front half of the tank has no impact on the mortar crew, which cannot be hit.
NOTE: the crew cannot "crawl" inside the tank to protect itself.
The Tadpole continues to use the firing arcs of the standard male Mk. IV. The range of its main gun remains 9 and the speed of the tank remains 3/5. However, a Tadpole tank in play may never end its Vehicle Movement Phase more than two hexagons away from the nearest friendly infantry or machine gun platoon.
The Mk. IV "Mine Clearer" (1918)
Another experimental idea that never went into production, the mine clearer is a modified Mk. IV with a pair of huge, prominent steel wheels at the front. It was designed to roll over enemy minefields and set them off with the pressure of its wheels.
In general, this tank behaves in every respect like a female Mk. IV, except that its breakdown modifier is increased by +1. This simulates the strain caused by the enormous weight of the apparatus that sets off the mines.
The mine clearer removes enemy minefields by moving through them. The mine clearer is not affected by enemy minefields. The tank simply has to enter a minefield hexagon to clear it. Friendly units may then enter the hexagon safely with no further effect.
OPTIONAL RULE: purists will note the entry and exit hexagons of the mine clearer and will allow friendly units to follow only these "paths" through the minefield created by the mine clearer.
The Mk. V** "Bridge Layer" (1918)
Another "almost there" idea that came late in the First World War. The basic concept is a tank carrying a portable bridge laid across its top in the manner of a fascine. This tank is represented by placing the bridge counter on a standard male Mk. V tank. The tank behaves in every respect like a male Mk. V, except that:
- it loses 1 movement point from its normal movement allowance when carrying the bridge;
- the tank may not fire its weapons toward the front of the tank (use rule 8.12 on anti-tank and artillery fire arcs of Landships! to determine this "blind spot"), because the bridge is laid outside the tank in a raised position at the front;
- its breakdown modifier is increased by +1 compared with the standard Mk. V while it carries the bridge, to simulate the pressure of the weight of the bridge.
When the tank reaches a river or trench hexagon, it may stop and deploy the bridge across the hexagon during the same Vehicle Movement Phase. The bridge may also be dropped at any point in an emergency. Friendly units and vehicles may cross the bridge, treating the hexagon as clear terrain. Once placed, the bridge cannot be picked up or reused in any way.
Once the bridge has been dropped, the tank becomes a standard male Mk. V again with none of the penalties indicated above.
The "Elephant" Tank (1918)
Call it the heavy tank of the First World War. It was first proposed in 1917 and a prototype was built, but the tank never entered production. A truly gigantic tank based on the Mk. IV chassis but much taller, longer and heavier. It would have been the slowest of the tanks of the First World War. The Elephant was armed with a 6-pounder (57 mm) gun in a rotating turret (use the firing arc of the Renault FT 17) with a single machine gun (firepower 2) firing straight ahead (this uses rule 8.12 on anti-tank and artillery fire arcs of Landships!). Its armour reached a thickness of 4 cm, so anti-tank rifles had no effect on it. Likewise, when hit by an anti-tank fire other than that of a flamethrower, the Elephant is not automatically destroyed. Instead, a second confirming result of 1 to 5 on a ten-sided die is required. Otherwise, the anti-tank fire has no effect. Flamethrowers act against the Elephant under the normal Landships! rules. The Elephant's breakdown modifier is +1.
The A7V(54) (1919)
In 1919, the Germans improvised new units (the "Freikorps") from their defeated army, plus a modified version of the A7V. This new tank (No. 54) was given the name "Heidi". The Freikorps was in fact composed of former units of the defeated army, which now operated like mercenaries to counter the communist influence spreading through German cities. "Heidi" belonged to the "Korting" tank detachment, commanded by Captain Georg Korting. This detachment had five tanks in all: a Whippet, three female Mk. IVs and the new A7V(54). These tanks were used to suppress the uprisings in Berlin in January and later in Leipzig in May. The Whippet tank stopped operating permanently during the Berlin uprising. Only at Leipzig did the A7V(54) and two Mk. IVs take part in combined operations to suppress the workers' uprisings.
The new tank was armed with a total of eight machine guns (firepower 2 each), four in revolving turrets at each corner of the chassis and four in the area of the central upper turret. This gives the unusual lower and upper firing arcs drawn below:
NOTE: each lower chassis corner machine gun partially overlaps another, as the firing arcs show. Targets located in the double-hatched zone may be attacked by two machine guns, for a total firepower of 4. The upper turret machine guns each cover a quarter circle and overlap the lower machine guns. A target located in this combined zone may be attacked with a firepower of up to 6 (two lower machine guns and one upper machine gun).
As with all A7Vs, this tank has a size modifier of -1. If you are playing with optional rule 16.31 of Landships!, reduce the A7V(54)'s firing range to 6 hexagons.
Vickers Mk. IA Medium (1923)
Designed in 1922 and entering production in 1923, the Vickers Mk. 1 medium tank had five crew members and was armed with a 47 mm gun and up to 6 machine guns! The gun and four machine guns were in a rotating turret, and the gun could penetrate 2.5 cm of armour at 500 metres. No high-explosive ammunition was carried for the gun. Most importantly, the tank included an internal radio. The armour thickness was 0.5 cm and the tank was powered by an air-cooled 90 horsepower engine giving it a top speed of 40 km/h (rarely reached) on road. A total of 160 tanks were produced, and this tank remained in service with the British Tank Corps until the Second World War! A broadly very successful concept.
The firing arcs of the machine guns (all have a firepower of 2) on the Mk IA reflect influences from older designs: one machine gun pointed forward just below the gun, another machine gun was fixed on each side of the turret, and one machine gun at the rear of the turret. To simulate this, use the Whippet's firing arc for the Mk. IA, but the gun and the forward machine gun may fire in any direction, as on the FT-17. This choice determines the firing arcs of the remaining turret machine guns. An additional (fifth) machine gun was located in the hull and may fire to one side or the other, but to only one side at a time (again use the Whippet's firing arcs). The Mk. IA may fire in at most three directions per fire phase. As it carries no high-explosive ammunition, the gun has a blast power of 1.
Although there were several variants of this tank, the most interesting was an infantry close support (ICS) version on which a 94 mm mortar capable of firing a 15-pounder shell to 1800 metres was mounted. This weapon has the same firing arcs as a standard Mk. IA, but with full blast power and the capability of firing smoke rounds (place a smoke marker in the targeted hexagon) to a distance of 20 hexagons if it has a line of sight to the targeted hexagon.
Carden-Lloyd Mk. VI Tankette (1927)
A post-war design, the C-L Mk. VI was a small, fast, open vehicle (note its speeds of 9/18). The C-L was armed with a machine gun (firepower 2) with a wide firing arc (180°) shown below:
The CL Mk. VI has a size modifier of +2 on the anti-tank fire table when rolling the die that determines whether it is hit. Machine gun small arms fire may be directed against this vehicle as if it were a lightly armoured tank, with the same results. The C-L's crew are also vulnerable to small arms fire, but add +2 to the to-hit die roll to account for the protection of the armour and machine guns. If a "Hit" is recorded on the SACRT, the C-L's crew must take a morale check. The C-L and its crew are eliminated if the crew fails its morale check, but ignore "pinned" results if the crew passes.
Vickers Mk. E Tank (1932)
The Mark E tank was produced in England in the early 1930s and, although it was rejected by the English authorities, it was successfully exported to various countries, such as Bolivia and Poland. The Mk. E had armour about 12 mm thick. Its main weapon was a 12.7 mm heavy machine gun (it has a firepower of 5) in a fully rotating turret (use the FT-17 firing arc). This heavy machine gun could penetrate thin armour - up to about 12 mm with anti-personnel ammunition - so it may conduct small arms fire against enemy vehicles (add +1 to the die roll). The single machine gun carried does not allow the Mk. E to benefit from the machine gun bonus on the SACRT when it engages infantry or cavalry on its own.
An export variant of the Mk. E had two turrets, each armed with a standard machine gun (firepower 2 each and no anti-tank fire capability). Use the Austin armoured car's firing arc to simulate this variant.
OPTIONAL RULE: reduce the Mk. E's firing range to 8 if you are playing with optional rule 16.31 of Landships!
Italian CV 29 Tankette (1929)
Using the Carden-Lloyd Mk. VI tankette as a base, the Italians improved it by protecting the driver and gunner with armour of 4 to 9 mm. It was fast, at 42 km/h, but prone to breakdowns (breakdown modifier of +1). Its armament consisted of a 6.5 mm Breda machine gun (firepower 2) on a fixed mount (use rule 8.12 on anti-tank and artillery fire arcs of Landships!). The CV 29 cannot be damaged by small arms fire. The CV 29 first appeared in Libya in 1939. A few years later the CV 33-35 appeared, differing in thicker armour (from 6 mm to 13 mm) and two 8 mm machine guns, plus a flamethrower version. This model appeared in 1935, again against another tribe, the Ethiopians.
Self-Propelled Guns (SPG)
No, the German Sturmgeschütz of the Second World War was not the first self-propelled gun, as we shall see.
Mk. I Gun Carrier (1917)
During the First World War, the need for a more mobile artillery piece became apparent and the British quickly designed the Gun Carrier. It was large, with 4 crew members. The chassis was that of a Mk. IV with a 105 horsepower engine, and 47 were built. It carried a 60-pounder gun or a 6-inch howitzer (the source reads "hotwizer") placed in its centre, plus 64 rounds, but no other weapons. In more modern terms, it was not a true self-propelled gun. To fire the weapon, the crew first had to detach the gun from the chassis, a slow and difficult process. It was therefore not engaged in fluid situations. In practice, these units followed the advances of tanks. Without the gun, these units were often used as ammunition carriers for the mounted units at the front.
To simulate the use of this weapon, drive it to the desired location and place a crew marker on the Gun Carrier counter. During each following friendly Vehicle Movement Phase, roll a six-sided die, adding +1 to the die for each previous failed die roll. On a result of 10 or more, the gun is now ready to fire and the player places an artillery gun in the hexagon (facing chosen by the player). The crew marker must remain on the Gun Carrier counter during the opposing player's turn(s) for as long as necessary and may be attacked normally using small arms fire, etc. If the crew is pinned or leaves the hexagon, the unloading process must begin again in its entirety.
Once the gun is in place, treat it like any artillery gun in play. Nevertheless, as it is so large, it has a firepower of 20. Doctrine required this weapon to fire indirectly most of the time, so it may fire directly only at enemy units that have fired directly at it. Once the artillery gun is in place, the Gun Carrier is free to move elsewhere.
To reload the gun at the rear of the carrier, the carrier must be in the same hexagon as the artillery gun. Follow the unloading procedure, except that a result of 12 or more is required to put the gun back onto the chassis.
OPTIONAL RULE: this self-propelled gun was printed with a range of 10 in case players wish to try arming it with machine guns.
French Self-Propelled Gun (late 1918)
This was nothing more than a standard 75 mm artillery gun mounted on a wooden platform and towed by a small tractor. It proved highly successful, being small and extremely manoeuvrable. Lighter than the British Gun Carrier above, this weapon allowed artillery to be moved quickly over appalling terrain.
This weapon is simulated by the vehicle counter plus a crew. While it is in the tractor, the crew is invulnerable to small arms fire. To operate the gun, the crew must dismount from the tractor and be stacked on the gun counter. The crew may be targeted normally. The gun cannot fire if the crew is pinned or eliminated. The artillery gun is treated as a standard French 75 mm artillery gun in every respect, except that it has a 360° firing arc (use the FT-17 firing arc). This vehicle has no other weapons.
OPTIONAL RULE: increase the gun's range to 20 to reflect it being mounted on a raised platform.
Armoured Personnel Carriers (APC)
Although they are also seen as an invention of the Second World War, the development of types of armoured personnel carriers was in fact the source of inspiration for the first tanks.
British Mk. V* (1918) and Mk. IX (1919) Tanks
These tanks had the unique capacity to carry squads and drop them off, in the manner of modern armoured personnel carriers. The Mark V* could carry only one squad, and the Mark IX could carry up to two squads. These squads may be dropped off or picked up by the moving tank at no extra cost. A squad may move up to a tank and enter it at no extra cost for transport. [SOURCE GARBLED: the French sentence here reads "Ils peuvent durant le tour où ils sont déposés", which is incomplete as printed; it is transcribed literally and no completion has been supplied.] However, during the turn in which they are dropped off, their morale value is reduced by 1 (due to the nausea caused by heat and transport). Their morale returns to the printed value the following turn. If a squad fires while in "sick" mode, the SACRT die roll is modified by +1. The Mark V* carries all the weapons and uses all the firing arcs of a standard male Mk. V. The Mark IX is larger (-1 to-hit modifier) but is armed with only a single machine gun at the front (use rule 8.12 on anti-tank and artillery fire arcs of Landships!). As these two vehicles are fundamentally tanks, treat them as tanks for all purposes of the rules.
Benz Armoured Personnel Carrier (late 1918)
Developed by the Germans, this unique creation, named the Benz Brauer semi-tracked vehicle, was the first armoured personnel carrier. Only a few were built and engaged in a battle. It was only a little faster than a tank. This open vehicle was not armed but, like those of the Second World War, it could carry a squad-sized unit across mud and hills thanks to its rear tracks, and it was largely immune to rifle fire (small arms fire is ineffective against them). Treat this vehicle as a tank for movement and as an armoured car for combat (so small arms fire by machine guns affects it in the same way as a normal armoured car). Passenger units may not fight from the Benz; they must first dismount.
New Armoured Cars (AC)
The new armoured cars introduced below remain vulnerable to damage to their wheels from non-small-arms fire, as under the standard Landships! rules. Unless specifically stated otherwise below, each machine gun has a firepower of 2.
Ehrhardt Armoured Cars (1915 and 1917)
The Germans created these new armoured cars, which were widely used on the Eastern Front. This armoured car had eight crew members and was lightly armoured (3.5 to 5 mm), enough to protect the crew from fire. An 85 horsepower engine gave a speed of 47 km/h.
The 1915 model carried three mobile machine guns (firepower 2 each) and firing positions (including one fixed turret), and so allows two machine guns to engage the same target while the third must fire at another. Not many were built.
The 1917 model has four machine guns (firepower 2 each) in the hull (use the Whippet's firing arc) and two machine guns (firepower 2 each) in a rotating turret on top, oriented 180° from each other (therefore, allow one of the turret machine guns to fire together with a hull-mounted lower machine gun while the other fires in the opposite direction).
British "3-Pounder" Armoured Car (1916)
This idea consists only of a standard Rolls Royce armoured car towing a 3-pounder gun. You may create one by placing a 75 mm artillery gun counter under a standard Rolls Royce armoured car. The armoured car has its movement allowance halved to account for the weight of the gun. To use the gun, the car must stop. The artillery gun and crew counters are placed on the armoured car. The gun then operates as any artillery gun, and the crew is vulnerable to small arms fire, pinning, elimination, etc. This arrangement was not produced in large numbers because of the strain it placed on the car.
OPTIONAL RULE: increase the artillery gun's range to 30 hexagons if you are playing with optional rule 16.23 of Landships!. The "3-pounder" had an effective range of 2750 metres (assuming it could be seen).
American Mack Armoured Car (1916)
Based on the success of the Mack truck, the Mack armoured car made its first appearance in mid-1916 and was first used by Pershing in Mexico. These huge beasts (5.8 metres long) were also used in New York after the war to control riots. The Mack was a wholly American creation consisting of a Mack truck covered with armour that left the roof open. There were two machine gun shields pivoting on the roof, each armed with a Colt machine gun (firepower 2 each). Use the Austin armoured car's firing arcs for the Mack armoured car. In addition to the normal vulnerabilities of armoured cars, the Mack armoured car's crews are also vulnerable to small arms fire, but add +2 to the to-hit die roll to account for the armour and machine gun shields. If a "hit" is recorded on the SACRT, the Mack armoured car's crew must take a morale check. The Mack and its crew are eliminated if the crew fails its morale check, but ignore "pinned" results if the crew passes the morale check.
Pierce Arrow 3-Pounder Armoured Car (1917)
A highly effective, innovative but heavy car, armed with a 3-pounder (57 mm) gun plus one machine gun (firepower 2). The crew firing the gun was enclosed in a kind of fixed turret with the gun facing rearward with limited firing angle (use the firing arc of artillery and anti-tank guns of Landships!). The machine gun was mounted to face forward and had a limited angle to the left (use the Schneider firing arc but to the left). Its armour was thin, between 5 mm and 7.5 mm. The British used it extensively in Russia during the intervention and the Civil War.
OPTIONAL RULE: increase the Pierce Arrow's range to 30 hexagons if you are playing with optional rule 16.23 of Landships!. The "3-pounder" had an effective range of 2750 metres (assuming it could be seen).
47 mm Armoured Car (1917)
This armoured car (in reality a truck) had a 47 mm gun inside a turret mounted on the rear platform. Immune to small arms fire, the turret had a restricted firing arc to the rear (use rule 8.12 of Landships! on the firing arc of artillery and anti-tank guns). As regards movement, treat this vehicle as a truck, with all the restrictions of trucks on movement and terrain, rather than as an armoured car.
Italian Lancia Armoured Car (1917)
Famous for its role in the capture of Malaga during the Spanish Civil War some twenty years later, the Lancia was first built in 1917. The Lancia required 6 crew members, had a maximum speed of 56 km/h and carried 15,000 rounds of ammunition plus 20 grenades. Armed with two machine guns (each with a firepower of 2), one in a rotating turret on top (use the FT-17 firing arc), the second facing directly to the rear (use rule 8.12 of Landships! on the firing arc of artillery and anti-tank guns).
Spanish Latil Armoured Car (1921)
The Spanish also created an armoured car based on a French truck chassis. It was called the "Latil". It carried 8 men and was mainly used for convoy protection in Morocco. The armour was some 12 mm, more than enough to keep out rain (and bullets). It weighed 8 tonnes and was armed with three machine guns (each with a firepower of 2), one in a fully rotating turret (use the FT-17 firing arc) and one on each side (use the Whippet's flank firing arcs). By combining the hull and turret machine guns, the Latil could project a firepower of up to 4 to the left or right, but only a firepower of 2 to the front or rear.
British Naval Armoured Car (1916)
Another attempt to put more punch on an armoured car chassis, this car was distinguished by a 57 mm gun in a rear turret with a full firing arc (use the FT-17 firing arc). Because of a high centre of gravity, it is not certain that firing sideways to one side or the other is a good idea, so purists may wish to restrict the firing arc to straight ahead or behind (use rule 8.12 of Landships! on the firing arc of anti-tank and artillery guns in that case). The machine gun mounted at the front uses the anti-tank and artillery firing arc of Landships!)
Light Vehicles (changed)
Light vehicles do much of the dirty work of bringing supplies and troops to the battlefield. They are extremely vulnerable to enemy fire of all kinds. As in Landships!, do not place a crew counter on light vehicles until they are attacked.
Light vehicles in combat: each time a light vehicle suffers a "hit" result of any kind on the SACRT or BCRT (and is not directly eliminated), its crew must take a special morale check to determine the effects. Place a crew counter on the light vehicle. The crew and vehicle counters are automatically eliminated on a natural result of "1" and removed from play. Otherwise, if the crew fails its morale check, it becomes pinned in the hexagon and the light vehicle may not move. If the crew passes its morale check, the light vehicle must always automatically move during its next Vehicle Movement Phase toward the nearest hexagon (counted using movement points) that contains cover (any hexagon other than clear terrain).
A light vehicle loses 5 movement points during its next movement phase each time small arms or barrage fire is directed against it, whether or not a "hit" result is obtained (the drivers become cautious).
Trucks (changed)
Trucks are light vehicles. The generic truck counters provided in Landships! now each represent about three trucks (a platoon of trucks). Each truck counter may carry up to one platoon of infantry or machine gunners, or up to four squads, or four crews, plus the weapons carried by these units. Otherwise, all the normal Landships! rules concerning trucks continue to apply.
Motorcycles (new)
Motorcycles are light vehicles. Motorcycle counters represent about three motorcycles each. They are treated as trucks in most cases, but have a better cross-country movement allowance. Using their cross-country movement allowance, motorcycles may only enter clear terrain hexagons.
Motorcycles may be armed or unarmed. The counter shows an unarmed motorcycle. Each unarmed motorcycle counter may carry one squad-sized unit. It is assumed that armed motorcycle counters carry three machine guns (each with a firepower of 2, range 9) and may engage up to three different hexagons within their firing arc (use the firing arc of the Schneider gun extended to 9 hexagons). Engaging the same target to obtain the machine gun bonus requires two machine guns.
Armoured Trains
The origin of armoured trains dates back to 1862 and the American Civil War. Outside the gates of Richmond, the Confederate forces mounted a simple gun protected by a shield on an open wagon pushed by an engine. The weapon succeeded in frightening the Union army commander, McClellan, although its potential destructive power was low. Armoured trains were largely ignored over the following three decades but asserted themselves once again during the Second Boer War (1899-1902). The British used them with great effect to patrol the vast open spaces of South Africa (although Winston Churchill disparaged them in his memoirs - perhaps because he was captured in one of them!). At the time of the Great War, armoured trains were firmly established in the arsenal of every great power. Indeed, were it not for their fatal limitation of being able to operate only where railways existed, armoured trains might well have become the "land ships" of popular imagination. Naturally, we could not resist including them in Infernal Machines.
General rule: armoured trains are considered simply as wide vehicles for most rules. They have a facing indicator printed on the counter. The position of an armoured train is simulated on the map through the use of the armoured train counter. Because the equipment, armament and protection of armoured trains varied greatly, a separate template (printed inside the cover) is used to track the status of each armoured train. Photocopy the template before beginning to play. A typical armoured train consists of a locomotive plus one to three cars, so make additional copies to line up larger armoured trains.
Movement: armoured trains move during the Vehicle Movement Phase. They may only move along road hexagons designated as railways in the scenario's special rules. Armoured trains may not change facing except to follow the natural course of the railway line (they do not turn on the spot!), but they pay no additional movement points for this. Armoured trains may reverse and run back along the railway line in exactly the same way. Any armoured train that reverses from one turn to the next may only move half of its printed movement allowance that turn. An armoured train that loses its locomotive may not move at all. Armoured trains may never leave railway lines to enter other types of terrain. Armoured trains never suffer breakdowns. An armoured train may not move if the locomotive's crew (see below) is pinned.
Layout and Design: on the template, players will note that each armoured train is made up of a locomotive and a number of cars, all with boxes printed on them. The template is kept hidden by the owning player until the armoured train is spotted by one of the opposing player's units. One of the cars on the template must be designated as the locomotive, and only a crew counter may be placed on it; no support weapon and no platoon may be placed on the locomotive. Each other car, on the other hand, has three boxes. A player may place up to one artillery, anti-aircraft or anti-tank gun plus one crew counter, or up to three machine gun platoons, or one infantry platoon, or any combination of these, per car. Rifles and flamethrowers may also be carried.
Note that the rear and centre cars on the template have different firing arcs. Firing arc restrictions must be observed at all times, including by machine gun/infantry platoons stacked aboard. All support weapons are considered mounted on mounts traversable through 360° when on the train; they may fire in any direction permitted by the car's firing arc without suffering the +1/+2 penalty for firing outside the covered arc. Note that anti-aircraft guns have 360° firing arcs when firing at aircraft, regardless of any firing arc restrictions shown.
Protection: for each armoured train, the scenarios give a protection value of +1 to +3, reflecting the degree of protection offered against small arms fire, barrage fire and anti-tank fire. The defender may add this protection value as a modifier to the die roll on the SACRT, BCRT and ATCRT, but receives no additional benefit from the terrain the armoured train occupies.
Combat: during offensive or defensive fire phases, players may fire any support weapon or machine gun/infantry platoon aboard the armoured train. All support weapons and machine gun/infantry platoons aboard have a direct fire range of 10 (if their normal range is less than 10), because of the raised platform on which they are located.
OPTIONAL RULE: support weapons with a printed range of 10 may fire up to 12 hexagons.
Players may not conduct indirect barrage fire using artillery guns carried aboard, but may conduct anti-aircraft fire at any distance up to the printed range of their anti-aircraft weapons. Crews and platoons may not fire if pinned.
Small arms fire and barrage fire against armoured trains are handled in the normal way. Combine all small arms fire values into a total, except that each crew and machine gun/infantry platoon is subject to a separate die roll on the SACRT (using the armoured train's protection value as a modifier) to see whether it is hit. If hit, it is subject to the normal morale check to see whether it is pinned or eliminated. Units forced to retreat outside the armoured train are eliminated instead.
Anti-tank fire may also be conducted against armoured trains. Anti-tank fire is directed randomly against one of the cars of the armoured train; roll a six-sided die to determine which car is hit. Anti-tank fire against armoured trains receives a -1 die modifier because of the size of the cars, while the armoured train's protection value is treated as a positive die modifier. If a "hit" result is recorded, all support weapons and crews in that car are eliminated (the platoons are unharmed). If a "hit" result is recorded on the locomotive, the crew is eliminated and the armoured train may no longer move.
Players may conduct barrage fire against railway lines in the hope of cutting them. This is accomplished in the same way as cutting barbed wire and has the same chances of success. Armoured trains may not enter a hexagon with cut rails.
Armoured trains may not initiate close combat but may be attacked by enemy units using close combat. The armoured train and the machine gun/infantry platoons all count in the total of units; support weapons and crews (whatever their number) do not count in determining close combat.
Aircraft may attempt to bomb armoured trains; treat them as tanks (an "E" result is needed to eliminate them).
Miscellaneous: armoured trains may unload their passenger platoons (but not the support weapons carried aboard), but may never pick them up (or other units) during the scenario unless the scenario rules exceptionally allow it.
Naval Units (changed)
These rules expand on those of Landships! concerning the gunboats found in some scenarios. The naval dimension is now more developed.
Movement of naval units: steamboats and gunboats move once per turn during the Vehicle Movement Phase, with movement allowances of 7 and 10 respectively. Barges may only be towed by steamboats (place the barge in the hexagon beneath the steamboat) because they have no motive power of their own. Boats may only move along rivers (costs 1 movement point per hexagon) and generally act as vehicles moving along a road. They spend 1 movement point to change facing. Boats never suffer breakdowns, and there may be no more than one ship per hexagon. Steamboats and gunboats have crews included in the counter, and they never take morale checks.
Carrying units: each barge or steamboat may carry up to two or four platoons respectively. Non-pinned platoons may board barges or steamboats from any hexagon during the second foot movement phase by being adjacent to the steamboat or barge at the start of the Vehicle Movement Phase. The steamboat may move on the following turn (barges of course need a steamboat to tow them). Platoons may disembark from their transport during the second foot movement phase if the ship is adjacent to land.
Combat: gunboats have the armament indicated for them in each scenario. Basically, a gunboat is simply a large weapons platform carrying 3-inch and 6-inch artillery guns [source reads "de 3 et pouces", which is incomplete; the following text gives 6-inch and 3-inch guns], plus machine gun batteries. These weapons are indicated by placing artillery guns or machine gun platoons in the boxes (machine guns may go into the boxes for artillery, but not the reverse) of the gunboat template printed on the next page. Photocopy the template for each ship in play.
NOTE: when designing scenarios, gunboats may not have more than 40 points of firepower from artillery guns or 8 machine gun units (otherwise it is a destroyer!).
Gunboats may conduct direct and indirect fire with their artillery guns and machine gun batteries. Targets must be spotted by the gunboat in order for it to use direct fire against them, or observed by an aircraft for indirect fire. These attacks are resolved on the SACRT or BCRT as appropriate. Gunboats and steamboats block any line of sight traced through their hexagon; barges do not.
Each 6-inch gun has a firepower of 20, each 3-inch gun a firepower of 10. Machine gun batteries use their printed firepower. All weapons have a range of 10 hexagons in direct fire when mounted on a gunboat. Indirect fire by artillery guns may reach any point on the map. Artillery guns and machine guns are combined when firing at the same target, even though all artillery guns or all machine gun batteries may fire at different hexagons.
Small arms fire alone has no effect on boats or their passengers. Only direct fire by enemy artillery guns (including those on enemy gunboats) or aerial bombing may damage them. Artillery guns use the ATCRT as if they were vehicles. Subtract 1 from the die roll to hit to account for the large size of the boats. Aircraft units may attempt to bomb boats, any "P" or "E" result being a "hit".
If a boat is hit by an enemy artillery gun or aerial bombing, it is not automatically eliminated. Instead, roll a six-sided die on the Naval Combat Results Table (NCRT) to determine the effect.
Artillery Options
Because of the considerable changes made to the artillery rules in Infernal Machines, this module is completely rewritten and wholly replaces the original module 5.0 of Landships!
Editorial note: the source sometimes abbreviates the Artillery Fire Mission Table as "AMFT"; it is written "AFMT" here. The charts this module relies on (the Artillery Fire Mission Table, Barrage Type Table, Fire Order Table, Barrage Combat Results Table, Spotting Table, the impact-zone and scatter diagrams, and the Naval Combat Results Table) are on the separate table sheet and are not in the source text, so they are not reproduced here.
General Rule
In Landships!, artillery is simulated in two ways: in an abstract manner by off-map elements ("OBM") and, more rarely, by counters on the map representing artillery guns ("ART"). Nevertheless, depending on the scenario, each side may have both off-map artillery elements (OBM) and artillery guns (ART). Only OBMs may use forward observers (FO) and liaison officers (LNO) and conduct the artillery fire missions (AFM) and barrage types (BAT) indicated below, in sections 5.3 and 5.4. On-map artillery guns represent artillery pieces taken in fluid situations and are thus limited to direct fire roles using small arms fire and anti-tank fire.
Who may fire: generally, off-map elements only conduct indirect barrage fire during this phase, against hexagons they could not normally see, by means of a forward observer. All indirect barrage fire must take place during this phase. While an indirect barrage is resolved during the player's own barrage phase, the impact area and all effects associated with it continue to exist during the opponent's turn until the player's next barrage phase.
On-map artillery guns within spotting range of an enemy unit and with a direct line of sight to it may conduct direct anti-tank fire if it is a vehicle (use the ATCRT), or small arms fire if it is a light target (use the SACRT), during one of the direct fire phases.
Artillery firepower: each off-map artillery element has a firepower of 5 (low) to 40 (high), as stated in each scenario. This firepower is applied uniformly to each hexagon of the impact area of the artillery fire mission during an indirect barrage. Each on-map artillery gun conducting small arms fire has a firepower of 10.
Indirect Barrage Fire Procedure
This section covers the use of off-map artillery in indirect fire. Ignore this section if an on-map artillery gun is within spotting range of an enemy unit or hexagon and has a direct line of sight. Such units are said to be conducting direct small arms fire (see section 5.7).
Use of the forward observer: forward observers (FO) represent individuals equipped with a telephone and unrolling a telephone cable as they advance. Their sole purpose is the observation of hexagons that off-map artillery cannot see itself, so as to conduct indirect barrage fire against them. To conduct indirect barrage fire, a forward observer that is not pinned to the ground must be able to observe the hexagon chosen as the target, name which off-map artillery element will fire and with what type of ammunition, and then establish "communication" with its off-map artillery elements conducting the indirect barrage. The forward observer must then make a die roll on the Fire Order Table (FOT) to find out whether its artillery fire request is accepted.
A forward observer that is not pinned to the ground may observe any hexagon within a radius of 10 hexagons (the hexagon it occupies is excluded from the calculation). To do so, it must also have a clear line of sight (see section 8.23 of Landships! for the line of sight rules) between itself and the targeted hexagon. Forward observers may not observe through a hexagon affected by smoke, nor more than 5 hexagons behind the line formed by a creeping barrage. Forward observers do not use the spotting ranges shown on the Spotting Chart. When a hexagon is observed by a forward observer, simply place a "Barrage Impact" marker on it to indicate that it is the hexagon of the primary impact area.
NOTE: "observe" (observe) for indirect barrage and "spot" (spot) for direct fire are two different concepts and are not interchangeable.
After observing the hexagon (or hexagons) chosen for the barrage(s), the player must declare aloud the number of off-map artillery elements used and their firepower, the mission (AFM), the barrage type (BAT) and the chosen ammunition. Once declared, these choices may not be changed during the same barrage. There are eight types of mission and two different barrage types. Not all combinations may be used together, and only one mission and one barrage type may be designated for each specific barrage. There are also four types of ammunition: high explosive, shrapnel, smoke and gas (see section 5.5). Only one type of ammunition may be used when attacking the same hexagon.
The forward observer must then check that it is "in communication" with its off-map artillery elements. Once the target hexagon has been chosen and successfully observed, and the mission, barrage type and ammunition selected, roll a die for each targeted hexagon. On a result of 1 to 3, the forward observer is not "in communication" with its off-map artillery elements assigned to the barrage on that hexagon. The indirect barrage mentioned does not take place against the targeted hexagon(s) for that turn. All of the potential of the off-map artillery allocated to attacking that hexagon is lost for the rest of the turn, but not expended. The artillery may fire in a later turn. For each hexagon it targets, a forward observer that is not pinned to the ground may, once per turn, attempt to establish communication with its off-map artillery elements, in the hope of seeing at least one of its fire requests satisfied.
Finally, before resolving the barrage, determine for how many turns the targeted hexagon has been subjected to small arms fire (by units other than artillery) without resulting in elimination or retreat (whatever "pinned to the ground" results were obtained). Counters indicating the number of turns of resistance are provided to help players keep track of the number of turns elapsed. Count the number of turns, not the number of times per turn, during which a hexagon has been attacked. Then, make a die roll on the Fire Order Table (FOT) under the column corresponding to the number of turns for which the hexagon has resisted, and apply any useful modifiers shown below the table. If the result is an "F", the rear artillery command agrees that artillery fire is needed and the barrage takes place. Naturally, only hexagons that were previously targeted by an aircraft or a forward observer may be attacked. Where an "F" result is not obtained, the player must continue the same procedure for any other scheduled barrages.
EXAMPLE: we are on turn 1 of a scenario. A hexagon containing enemy units is observed by a forward observer and comes under fire from an off-map artillery element. Suppose that no effect results from this attack. During the rest of turn 1, the enemy units located in the hexagon are still attacked by the opposing player, who this time uses his small arms, again without result. Place a "resisted 1 turn" marker on the hexagon. On turn 2, the same hexagon is once again observed (by an aircraft). No communication check is necessary. As the hexagon was subjected to small arms fire that caused neither retreat nor elimination on turn 1, this counts as one turn of resistance toward the total of ineffective fire conducted against it. Thus, to conduct a barrage, the player must make a die roll on the Fire Order Table using column "1" (with a -1 die modifier for using an aircraft). Suppose a lucky "F" occurs, the artillery units may fire and do so. After checking the scatter, suppose the fire hits its target, but with no effect. (If an "F" had not been obtained, the potential of the artillery pieces assigned to the barrage would have been wasted.) The player does not conduct small arms fire against this hexagon during the rest of turn 2 (he is busy elsewhere). The marker is therefore not replaced by a "resisted 2 turns". Thus, on turn 3, during the barrage phase, if the hexagon were observed by a forward observer and targeted again and a fire order requested, column "1" would still be used (since the hexagon was subjected to small arms fire only on turn 1 but not on turn 2).
If the player had still conducted small arms fire on turn 2, but still without result, then the marker would have been turned to its "2" side and, on turn 3, column "2" would have been used, and so on. If small arms fire on turn 2 had caused an elimination or a retreat, that would then have counted as a success. The resistance marker would have been removed and any small arms fire made during that turn or the preceding ones would have been erased from the count. In that case, a fire request on hexagon turn 3 would have used column "0". If a "pinned" result had occurred at some point, then the fire (and the turn) would have counted in the total number of turns for which the hexagon has been attacked without result, since the enemy is still in the hexagon and therefore still in a position of resistance.
Liaison officer (LNO): the original Landships! only partially reflected the role and reality of forward observers. In reality, forward observers followed about 400 metres behind the main assault. It was in fact the liaison officer who accompanied the assault. The liaison officer was a key player and the only one able to request immediate artillery support by means of flares or through the forward observer.
To reflect this, in any of the scenarios, a player may automatically choose to have a liaison officer for each forward observer he has for the scenario. The existing "communication test" remains in effect and is in fact extended, since an additional communication test is required (a result of 1 to 3 is always a failure) between the liaison officer and the forward observer. Normally, the communication tests between the liaison officer and the forward observer on the one hand, and between the forward observer and the off-map artillery elements on the other, must both be passed for the off-map artillery to fire.
Emergency situations arise when a targeted hexagon occupied by an enemy has been attacked by friendly forces three or more times, all of which have failed to produce a "pinned" or "eliminated" result. If the communication test fails at that moment, the liaison officer (and he alone) may send up a flare signalling an immediate request for a barrage. A result of 1 or 2 on a six-sided die indicates that the off-map artillery sees the flare and a barrage with a destruction mission is then directed into any hexagon at a distance of 4 hexagons from the liaison officer (at the player's choice) during the friendly barrage phase. The hexagon occupied by the liaison officer may never be part of the impact template (but the fire may scatter onto that hexagon - accidents happen). If an emergency situation arises and the liaison officer is pinned or eliminated, then (and only then) the forward observer may send up a flare requesting an immediate barrage with the same effects as above.
Forward observers and liaison officers in combat: forward observers and liaison officers are individuals as far as combat is concerned. A forward observer or liaison officer alone in a hexagon into which enemy cavalry or platoon-sized infantry or an enemy vehicle moves is eliminated. Forward observers and liaison officers are vulnerable to small arms and barrage fire directed against the hexagon they occupy and follow the normal combat resolution procedures.
Use of aircraft and balloons: very quickly, everyone realised how wonderful it would be to have "eyes in the sky" to observe where shells fell and to see enemy units (no annoying line-of-sight problem). Aircraft and balloons tethered to cables were quickly put into service.
Aircraft: during the common air combat phase, the player's CS-type aircraft on artillery observation mission may also act as forward observers, but only with respect to indirect barrage fire. They may not spot instead of ground units attempting to conduct small arms or anti-tank fire. During the common air combat phase, place the aircraft directly on the hexagon targeted by the barrage. The aircraft may automatically observe any hexagon at a distance of two hexagons from the hexagon it occupies (once again, in this case, ignore the spotting distances printed on the chart). Then, during the actual barrage phase, place a barrage marker on any hexagon at a distance of two hexagons from the aircraft to designate the central hexagon of the primary impact area. Unless the aircraft is forced to abort its mission, the barrage will take place around the impact hexagon and will be resolved during the barrage phase of the owning player's next turn. Aircraft acting as forward observers are always considered in communication with the off-map artillery elements; no test is required. The Fire Order Table is nevertheless always used, but with the indicated unfavourable die modifier, and the off-map artillery always tests the scatter.
NOTE: because they do not need to check whether they are in communication, and they have a greater chance of receiving a favourable result on the Fire Order Table, plus an "adjustment function" of two hexagons to prevent units from "fleeing" to escape the coming barrage, aircraft are powerful force multipliers for each side's artillery.
Balloons: despite their innocent appearance, balloons are deadly enemies in static war situations. Perched high in the sky day after day, the observers in their balloons soon developed an intimate knowledge of the terrain on their front, and little could escape their attention. To simulate this, during the barrage phase, balloons also act as forward observers, but only with respect to indirect barrage fire. Balloons automatically observe all hexagons on the map from their fixed position for indirect barrage fire (unlike the two-hexagon limit for aircraft). During the barrage phase, place a barrage marker directly on any hexagon to designate the central hexagon of the primary impact area. This barrage is resolved during the current turn. Balloons acting as forward observers are always considered in communication with off-map artillery elements; no test is required. The Fire Order Table is nevertheless always used, but with the indicated unfavourable die modifier, and the off-map artillery elements called in by balloons always test the scatter. Balloons may not spot instead of ground units attempting to conduct small arms or anti-tank fire. Balloons may not move once deployed at the start of the scenario. Balloons may only be attacked by enemy aircraft (during phase 4.7b of the game sequence). Balloons may not be the target of small arms or anti-tank fire by enemy ground units, or of barrage fire by enemy off-map artillery elements. Each balloon counter is considered to have three inherent anti-aircraft gun ground units stacked in the same hexagon, which defend it when it is attacked by enemy aircraft. These inherent anti-aircraft guns may return fire against each of the enemy aircraft during phase 4.7c of the game sequence. They may not attack other enemy aircraft or ground troops.
Automatic observation: in all scenarios, certain types of terrain are always automatically considered "observed" when they are the target of an indirect barrage by off-map artillery elements. These include hexagons containing:
- the first (or only) line of enemy trenches nearest your starting positions on the map,
- all hexagons of your own side's trenches,
- the first row of hexagons in front of your own trench line nearest the enemy,
- all bridge hexagons,
- all town hexagons, and
- all road junction hexagons on the map.
A forward observer or aircraft/balloon does not need to observe these particular types of hexagons for the player to conduct an indirect barrage against them. No communication test is required. However, the player must always still use the Fire Order Table to find out whether the command of his off-map artillery elements agrees on the need to fire, and always test the scatter.
First-turn barrages: in all scenarios, during the first turn (only), any observed hexagon may be attacked by off-map artillery elements without testing whether the forward observer or liaison officer is in communication, and without making a die roll on the Fire Order Table before attacking the hexagon. The player must still test the scatter. When this rule is combined with rule 5.14 above, it means that an indirect barrage requested during the first turn against a town hexagon behind enemy lines takes place automatically, without the observation of a forward observer or aircraft, without testing communication status or using the Fire Order Table (this simulates fire orders prepared in advance). During subsequent turns, use the normal procedure (observe the hexagon, check communication status, use the Fire Order Table and test the scatter).
Sustained fire option: during a scenario, once a hexagon has been successfully observed, communication tested, the Fire Order Table consulted, and a barrage has actually fallen on the desired hexagon, players may automatically target the same hexagon(s) in each consecutive turn without going through the elaborate artillery procedures above, until the target is destroyed or the player wishes to change target. The player simply declares that he is conducting sustained fire, and must obtain a result of 1 to 5 on a six-sided die each turn to confirm that the barrage repeats. The forward observers and aircraft/balloons used to initially observe the targeted hexagon must continue to do so, but no communication test or Fire Order Table check is required. The player must actually have off-map artillery elements available each turn to conduct sustained fire. Any pause or change of target means the player must restart the artillery fire procedure from the beginning.
Artillery Fire Missions
There are three types of artillery fire mission (AFM): destruction, suppression or neutralisation. The frequency of use of each of the missions changes as the First World War dragged on (and as the post-war belligerents became more sophisticated). To reflect this, before beginning a scenario, the players must roll a die on the Artillery Fire Mission Table (AFMT) under the year of the scenario. Once the mission is determined, it in effect remains until the end of the scenario, whatever the barrage type (BAT) or ammunition used. For each artillery fire mission, different barrage types are used with additional effects. Each mission has a different "impact zone" (IZ).
Artillery Fire Mission Table: roll a die on the Artillery Fire Mission Table at the start of each scenario to determine the mission in effect.
Destruction mission: the destruction mission is the most compact and lethal of the artillery fire missions. Players may always choose a destruction mission whatever the result on the AFMT above (it is the simplest mission for the gunners to execute). Off-map artillery elements conducting a destruction mission may only choose "hurricane" or "drumfire" barrages, and this choice slightly varies the size of the impact zone. Off-map artillery elements on a destruction mission may also only choose high-explosive or shrapnel ammunition. The impact zones of the destruction mission are reproduced below:
[Impact zone diagram for the destruction mission: not included in the source text.]
The effects of a destruction mission vary with the ammunition used and according to whether units are located in the primary or secondary impact zones. See section 5.5.
Counter-battery mission: the counter-battery mission (CB) is a specialised form of the destruction mission above. As they do not really fall within the scope of the game, counter-battery missions are simulated using a simplified procedure.
A player may choose a counter-battery mission against enemy off-map artillery elements only when all of the following conditions are met:
- The scenario takes place during the First World War. No counter-battery mission may take place before July 1915 for the Germans and January 1917 for the Allies. Players may not conduct counter-battery missions after the First World War.
- The enemy player has at least one off-map artillery element in the scenario and used it during the previous barrage phase.
- If you are playing with the weather conditions, the weather must be fair.
- The player conducting the counter-battery mission does so during his barrage phase. He must have at least one forward observer (or liaison officer) not pinned in play, or a CS-type aircraft or a balloon on the map. (These are assumed to observe the flashes from enemy guns. As the location may be discovered by sound, a direct line of sight off the map is not required.)
When the above conditions are met, the player may conduct a counter-battery mission with one of his off-map artillery elements following the normal barrage procedure. Counter-battery missions always use "drumfire" barrages and high-explosive ammunition. Test the scatter and add +2 to the result; if there is scatter, the counter-battery mission automatically fails. If the fire does not scatter, one enemy off-map artillery element is eliminated by the counter-battery mission.
Neutralisation mission: the neutralisation mission is one of the more useful missions. Off-map artillery elements conducting the neutralisation mission may choose a barrage of either "hurricane" or "drumfire" type. Off-map artillery elements may also only choose high-explosive or smoke ammunition. The impact zone of the neutralisation mission is reproduced below:
[Impact zone diagram for the neutralisation mission: not included in the source text.]
The effects of a neutralisation mission vary with the ammunition used and according to whether units are located in the primary or secondary impact zones. See section 5.5.
Suppression mission: the suppression mission is the least lethal of the missions. Off-map artillery elements conducting the suppression mission may only choose the "drumfire" barrage type. Off-map artillery elements may also only choose high-explosive or smoke ammunition.
The effects of a suppression mission vary with the ammunition used and according to whether units are located in the primary or secondary impact zones. See section 5.5.
Interdiction mission: the interdiction mission is a specialised form of the suppression mission above, used to oppose the enemy's use of roads or bridges or to slow his advance. Off-map artillery elements conducting the interdiction mission may only use "drumfire" barrages using high-explosive ammunition.
Simple creeping barrage: a simple creeping barrage (SBC) is a specialised form of the suppression mission above. Here the artillery fire precedes the advance of infantry by 100 to 300 metres to protect it. Once the infantry had reached the bombarded line, the artillery adjusted its fire a few hundred metres ahead of the infantry.
If either player begins a First World War scenario with at least three off-map artillery elements and obtains a suppression mission, he may decide to use all of them to give a simple creeping barrage across the width of a map (a scenario on two maps would therefore require six off-map artillery elements, and so on). The off-map artillery elements are not available for other mission types during the scenario. The simple creeping barrage must be selected before the scenario begins.
When a simple creeping barrage is selected, it is assumed that the player creates a wall of artillery fire three hexagons deep along the whole length of the chosen hexagon row. Place the barrage line marker in the map-edge hexagon to indicate the primary impact zone. The initial hexagon row chosen must be five hexagon rows away from the nearest friendly unit. The simple creeping barrage moves during the barrage phase as if it were a normal unit. The simple creeping barrage continues each turn (do not test communication or the Fire Order Table) until friendly units become adjacent to the rear of the impact zone. When this happens, roll a six-sided die. On a result of 1 to 3, advance the primary impact zone of the barrage five further hexagon rows forward (ahead of the friendly units). When this happens, all units located between the five hexagon rows are NOT attacked. On any other result, the hexagon row under barrage stays the same and friendly units may move through it but are subject to attack. Each unit moving through or caught in a primary or secondary impact zone row is subject to a suppression mission attack with high-explosive ammunition (see section 5.5) with a firepower of 10. This attack applies to all units, friendly or enemy.
The Germans were the first to use simple creeping barrages, in the middle of 1915 on the Eastern Front, so allow them to use one in any scenario from July 1915 onward if the German player obtains a suppression mission. The Allies may only use the simple creeping barrage by first obtaining a suppression mission, then obtaining a number between 1 and 3 on a second six-sided die AND if the scenario is dated June 1916 or later. From 1917, both sides may freely use a simple creeping barrage if they have first obtained a suppression mission.
In scenarios from January to June 1918, all simple creeping barrages move at the speed of three hexagon rows, and at the start the creeping barrage row may begin three hexagon rows from the starting positions of the friendly units.
From July 1918, all simple creeping barrages move at the speed of two hexagon rows, and at the start the creeping barrage row may begin two hexagon rows from the starting positions of the friendly units. Simple creeping barrages may now be cancelled once in a scenario by choosing to do so and rolling a six-sided die. The off-map artillery elements may then conduct normal suppression missions. If the cancellation roll fails, the simple creeping barrage continues.
Direct-fire weapons may not fire through the rows of a simple creeping barrage, but indirect fire may take place using a forward observer to observe through the bombarded hexagon row. The forward observer may only observe up to 5 hexagons beyond the hexagon row under the other side's primary barrage.
NOTE: the Germans nicknamed creeping barrages "fire waltzes" or "rains of steel".
Double creeping barrage: the double creeping barrage (DCB) is a specialised type of suppression mission, similar to the simple creeping barrage, and requires the use of at least six off-map artillery elements per map panel under barrage. Only the German player may use a double creeping barrage, and only during First World War scenarios from January 1916 onward.
At the start of the scenario, the German player designates "near" and "far" hexagon rows. Place a barrage line marker on the map edge to indicate where the bombarded "near" and "far" hexagon rows are. The template for the "near" and "far" hexagons is the same as for a simple creeping barrage. The "far" hexagon row must be (exactly) six rows from the starting position of its nearest friendly unit. The other line is called the "near" line and consists of three further hexagon rows. The "near" line is two rows from the German starting positions. This fire continues in all following turns (do not test communication or the Fire Order Table). The "near" line advances two hexagons toward the "far" line at each friendly barrage phase, at two hexagon rows per turn, until it reaches the "far" line. When the primary "near" and "far" rows overlap, the "far" line advances six hexagon rows forward, and the complete cycle repeats. Each unit moving through or caught in a primary or secondary impact zone "near" or "far" row is subject to a suppression mission attack with high-explosive ammunition (see section 5.5) with a firepower of 10. This attack applies to all units, friendly or enemy.
From July 1917, the increased sophistication allows the "near" line to advance two hexagon rows toward the "far" line only when advancing German units become adjacent to the rear of the "near" line.
Gas missions: gas missions are a separate type of mission and may only be used when indicated by the scenario, or if obtained on the Artillery Fire Mission Table (AFMT) and gas is not strictly forbidden by the scenario, and never before April 1915 in any case. If permitted, an off-map artillery element must use a "Drumfire" barrage (only) to conduct a gas mission, and only gas ammunition may be used. Gas missions require the normal indirect barrage fire procedure to succeed (observe the hexagon, check communication status, use the Fire Order Table and test the scatter).
Place a gas marker in the final impact hexagon. All hexagons within a radius of three hexagons of the marker are considered gassed. All light units, open vehicles, trucks or motorcycles present within this three-hexagon radius are "gassed" (see rule 5.54). Tanks, armoured cars and boats are invulnerable to gas attacks (for simplicity). Gas remains effective for two turns; remove the marker at the end of the last phase of the opposing player's turn.
Types of Artillery Barrage
There are two types of indirect barrage (BAT). Only one barrage type may be conducted per turn against a given hexagon. The barrage types are detailed below.
Barrage Type Table: players must roll a die on the Barrage Type Table at the back of the rulebook to determine which barrage type is permitted during the scenario.
"Drumfire" barrage: a "drumfire" barrage is a methodical, constant hammering administered by a player's off-map artillery elements. "Drumfire" barrages have fewer chances of scatter, and any type of ammunition may be used with a "drumfire" barrage. "Drumfire" barrages combine all the firepower of all the off-map artillery elements attacking into a total to be cross-referenced on the Barrage Combat Results Table (BCRT). Find the appropriate column on the BCRT to resolve the attack, then roll a single six-sided die to determine the effects against all units attacked in the primary and secondary impact zones.
OPTIONAL RULE: players who enjoy rolling dice may determine the effects against each of the targeted hexagons in the primary and secondary impact zones individually.
"Hurricane" barrage: a "hurricane" barrage simulates a rapid and intense fire. "Hurricane" barrages scatter more easily but may be more effective. Only high-explosive ammunition and shrapnel may be used with "hurricane" barrages. If a player has several off-map artillery elements conducting a "hurricane" barrage against a hexagon, and none of the off-map artillery elements scatters, then each of them will individually attack all units in the primary and secondary impact zones. Off-map artillery "hurricane" barrages are resolved using column "10" of the BCRT (whatever the actual firepower of the given off-map artillery element in the scenario) and applying the results before the next off-map artillery element's "hurricane" barrage is resolved, and so on. All die modifiers on the BCRT for the attack apply separately for each resolution.
EXAMPLE: the British player has four off-map artillery elements with which to attack. He selects a neutralisation mission and a "hurricane" barrage with high-explosive ammunition. Assuming no scatter, the four artillery elements all successively attack all targeted hexagons inside the primary and secondary impact zones. Each attack is resolved individually on column "10" of the BCRT, for a total of four separate attacks, all on the targeted hexagons in the impact zones.
With "hurricane" barrages, if an attack should eliminate units or force them to retreat out of the impact zone, all subsequent attacks on the hexagon are ignored. The remaining off-map artillery elements may not select a new hexagon to attack.
EXAMPLE: a targeted hexagon with an enemy unit inside lies within the primary impact zone of a "hurricane" barrage from four artillery elements. The first of the attacks manages to pin the unit after it has undergone a morale check. The second attack pins the unit again, which is therefore forced to retreat two hexagons. The third attack is lost on the (now) empty hexagon.
Selection and Effects of Ammunition
Each player must designate one of the four types of ammunition before resolving the barrage on a hexagon. Only one type of ammunition may be designated to attack a hexagon during a barrage.
High explosive (HE): high-explosive ammunition is a basic type of ammunition. High-explosive ammunition may be fired by both "drumfire" and "hurricane" barrages. This type of shell was more effective than shrapnel in that it was suited to any type of terrain. Thus, high-explosive ammunition may be used against any type of hexagon containing any type of terrain and any composition of units. High-explosive ammunition affects tanks, armoured cars and trucks. In all cases, simply roll the die on the Barrage Combat Results Table without modifier.
Effects of a destruction mission with high-explosive ammunition against infantry: a destruction mission using high-explosive ammunition against infantry has the following effects:
- Primary impact zones: all infantry in the primary impact zone hexagon(s) are automatically eliminated if an "H" result, of any kind, is obtained on the BCRT, and automatically pinned on a "miss" result. If a unit already pinned suffers another "pinned" result, it must retreat two hexagons instead and remains pinned.
- Secondary impact zones: all infantry in the secondary impact zone hexagon(s) must take a morale check if an "H" result, of any kind, is obtained on the BCRT. This morale check is made after a "hit" is obtained. "H+X" results or other applicable die modifiers apply to this morale check. Only one morale check is made for the whole hexagon (no separate check for each infantry unit in the hexagon). The result applies to all infantry in the hexagon (including crews or individuals, except tank leaders). Infantry that roll a die result less than or equal to their morale value pass the morale check and automatically become pinned. Infantry that roll a result higher than their morale value fail the morale check and are eliminated. If an infantry unit already pinned suffers another "pinned" result, it must retreat two hexagons instead and remains pinned.
EXAMPLE: a hexagon with two enemy infantry platoons inside ends up in the secondary impact zone of an indirect barrage with a destruction mission. An "H+1" result is recorded. One unit has a morale value of 4, the other a morale value of 5. A single morale check is made for both units. Suppose it is a 4, modified to 5. The unit with a morale value of 4 is eliminated, and the other unit is pinned.
Movement restrictions: infantry units may freely enter or leave destruction mission impact zones, but on entering, or beginning their movement in, a destruction mission impact zone, their movement allowance is reduced to one hexagon per turn, movement which is executed during the second movement phase.
Effects of a destruction mission with high-explosive ammunition against cavalry: a destruction mission using high-explosive ammunition against cavalry has the following effects. Mounted cavalry units subtract 1 from their die roll on the BCRT. In an indirect barrage, cavalry units never benefit from die modifiers for the terrain they are in, except if they are in wood or town hexagons. Moreover, no other die modifier applies.
- Primary impact zones: all cavalry units in the primary impact zone hexagon(s) are automatically eliminated if an "H" result, of any kind, is obtained on the BCRT, and automatically pinned on a "miss" result. If a unit already pinned suffers another "pinned" result, it must retreat two hexagons instead and remains pinned.
- Secondary impact zones: all cavalry units in the secondary impact zone hexagon(s) must take a morale check if an "H" result, of any kind, is obtained on the BCRT. This morale check is made after a "hit" is obtained. "H+X" results or other applicable die modifiers apply to this morale check. Only one morale check is made for the whole hexagon (no separate check for each cavalry unit in the hexagon). The result applies to all enemy cavalry units in the hexagon. Cavalry units that roll a die result less than or equal to their morale value pass the morale check and automatically become pinned. Cavalry units that roll a result higher than their morale value fail the morale check and are eliminated. If a cavalry unit already pinned suffers another "pinned" result, it must retreat two hexagons instead and remains pinned. In addition, if a cavalry unit is not directly eliminated as a result of this barrage, roll a six-sided die a second time for each cavalry unit in the hexagon. On a result of "1", enough of the cavalry unit's horses have been killed to "dismount" the unit. Replace this cavalry unit with the equivalent infantry or machine gun platoon (obviously pinned).
Movement restrictions: no movement (other than retreat) is permitted for cavalry units into or out of an active destruction mission impact zone hexagon.
Destruction mission with high-explosive ammunition against support weapons: a destruction mission using high-explosive ammunition against support weapons has the following effects:
- Primary impact zones: all support weapons in the primary impact zone hexagon(s) are automatically eliminated if an "H" result, of any kind, is obtained on the BCRT. Otherwise, there is no effect.
- Secondary impact zones: all support weapons in the secondary impact zone hexagon(s) may be eliminated if an "H" result, of any kind, is obtained on the BCRT. Roll a second die for each support weapon. A result of 1 or 2 destroys that support weapon. Otherwise, there is no effect.
Effects of a destruction mission with high-explosive ammunition against vehicles: a destruction mission using high-explosive ammunition against vehicles has the following effects:
- Primary impact zones: if a tank or armoured car in the primary impact zone hexagon(s) suffers a "hit" result of any kind, roll a six-sided die again for each vehicle. A result of "1" on this second roll destroys it. Otherwise, there is no effect. If a truck or motorcycle (or any other light vehicle) in the primary impact zone suffers a "hit" result of any kind, its inherent crew must take a morale check. If the crew fails this morale check, the light vehicle and its crew are destroyed. If the crew passes this morale check, the crew and vehicle are pinned. Turn the crew counter to its "pinned" side and place it on the vehicle. No movement is permitted until the crew has recovered, after which the crew counter is removed and the vehicle may move normally.
- Secondary impact zones: tanks and armoured cars in the secondary impact zone hexagon(s) ignore "hit" results of any kind; treat them as having no effect. Trucks and motorcycles (or any other light vehicle) caught in the secondary impact zone hexagon(s) follow the procedure for the primary impact zone above.
Movement restrictions: no movement is permitted for light vehicles into or out of an active destruction mission impact zone hexagon.
Destruction mission with high-explosive ammunition against obstacles: if the final firepower of a barrage is 31+ or greater, and the primary impact zone hexagon contains an obstacle marker (barbed wire, roadblock, etc.), then on a natural result of "1" on a six-sided die, one (not all) marker is removed. Additional markers require additional "hits" with a result of "1". Obstacles in secondary impact zones are automatically unaffected by destruction missions.
OPTIONAL RULE: historically, one side could conduct a barrage for a week without all of the barbed wire being destroyed. If they wish, players may require a second "confirmation" roll. On a result of 1 to 3, the barbed wire marker is indeed removed following the artillery destruction mission.
Effects of a neutralisation mission with high-explosive ammunition against infantry: a neutralisation mission using high-explosive ammunition against infantry has the following effects:
- Primary impact zones: all infantry in the primary impact zone hexagon(s) are automatically pinned (but not eliminated) for two full turns if an "H" result, of any kind, is obtained on the BCRT. There is no effect if a "miss" result is obtained. If a unit already pinned suffers another "pinned" result, it must remain pinned for two more turns. If it is not pinned, it must take a morale check by rolling a die. If it fails, it is pinned for two further complete turns. If it [SOURCE TRUNCATED: the French text for this paragraph ends at "Si elle" and the rest of the rule is not in the source; nothing has been supplied.]
- Secondary impact zones: all infantry in the secondary impact zone hexagon(s) must take a morale check if an "H" result, of any kind, is obtained on the BCRT. This morale check is made after a "hit" is obtained. "H+X" results or other applicable die modifiers apply to this morale check. Only one morale check is made for the whole hexagon (no separate check for each infantry unit in the hexagon). The result applies to all infantry in the hexagon (including crews or individuals, except tank leaders). Infantry that roll a die result less than or equal to their morale value pass the morale check and are not affected. Infantry that roll a result higher than their morale value fail the morale check and become pinned. If an infantry unit already pinned suffers another "pinned" result, it must remain pinned for two more turns.
EXAMPLE: it is 1918 and, before the game begins, the German player rolls a die on the Artillery Fire Mission Table and obtains an "N". All of his off-map artillery elements therefore have the mission of neutralising the enemy. On turn 1, the German selects a "hurricane" barrage with high-explosive ammunition against an enemy unit. The targeted unit ends up in a secondary impact zone and receives an "H+1" result. If the unit is already pinned, it remains pinned for two more turns. If it passes, there is no further effect.
Effects of a neutralisation mission with high-explosive ammunition against cavalry: a neutralisation mission using high-explosive ammunition against cavalry has the following effects: mounted cavalry units subtract 1 from their die roll on the BCRT. In an indirect barrage, cavalry units never benefit from die modifiers for the terrain they are in, except if they are in wood or town hexagons. Moreover, no other die modifier applies.
- Primary impact zones: the same as for infantry above (see case f.1 above).
- Secondary impact zones: the same as for infantry above (see case f.2 above).
Effects of a neutralisation mission with high-explosive ammunition against support weapons: a neutralisation mission using high-explosive ammunition has no effect against support weapons (but it may affect the crews serving the weapons).
Effects of a neutralisation mission with high-explosive ammunition against vehicles: a neutralisation mission using high-explosive ammunition against vehicles has the following effects:
- Primary impact zones: tanks and armoured cars in the primary impact zone hexagon(s) ignore all BCRT results. They are not affected by neutralisation missions. If a truck or motorcycle (or any other light vehicle) in the primary impact zone suffers a "hit" result of any kind, its inherent crew must take a morale check. If the crew fails this morale check, the light vehicle and its crew are destroyed. If the crew passes this morale check, the crew and vehicle are pinned for two turns. Turn the crew counter to its "pinned" side and place it on the vehicle. No movement is permitted until the crew has recovered, after which the crew counter is removed and the vehicle may move normally.
- Secondary impact zones: tanks and armoured cars in the secondary impact zone hexagon(s) ignore "hit" results of any kind; treat them as having no effect. Trucks and motorcycles (or any other light vehicle) caught in the secondary impact zone hexagon(s) follow the procedure for the primary impact zone above.
Effects of a neutralisation mission with high-explosive ammunition against obstacles: a neutralisation mission using high-explosive ammunition has no effect against obstacles.
Effects of a suppression mission with high-explosive ammunition against infantry: a suppression mission using high-explosive ammunition against infantry has the following effects:
- Primary impact zones: all infantry in the primary impact zone hexagon(s) are automatically pinned (but not eliminated) if an "H" result, of any kind, is obtained on the BCRT. If a unit already pinned suffers another "pinned" result, it must retreat two hexagons and remain pinned. There is no effect if a "miss" result is obtained. Whatever the final outcome, all non-pinned infantry caught in the primary impact zone of the suppression mission may only conduct small arms fire at half their firepower (round fractions up) during the next complete turn (both the first and second phases). Crews may not fire at all during one complete turn (both the first and second phases).
- Secondary impact zones: all infantry in the secondary impact zone hexagon(s) must take a morale check if an "H" result, of any kind, is obtained on the BCRT. This morale check is made after a "hit" is obtained. "H+X" results or other applicable die modifiers apply to this morale check. Only one morale check is made for the whole hexagon (no separate check for each infantry unit in the hexagon). The result applies to all infantry in the hexagon (including crews or individuals, except tank leaders). Infantry that roll a die result less than or equal to their morale value pass the morale check and are not affected. Infantry that roll a result higher than their morale value fail the morale check and become pinned. If an infantry unit already pinned suffers another "pinned" result, it must retreat two hexagons and remain "pinned". Whatever the final outcome, all non-pinned infantry caught in the secondary impact zone of the suppression mission may only conduct small arms fire at half their firepower (round fractions up) during the next complete turn (both the first and second phases). Crews may not fire at all during one complete turn (both the first and second phases).
Effects of a suppression mission with high-explosive ammunition against cavalry: a suppression mission using high-explosive ammunition against cavalry has the following effects: mounted cavalry units subtract 1 from their die roll on the BCRT. In an indirect barrage, cavalry units never benefit from die modifiers for the terrain they are in, except if they are in wood or town hexagons. Moreover, no other die modifier applies.
- Primary impact zones: same as for infantry above (see case j.1 above).
- Secondary impact zones: same as for infantry above (see case j.2 above).
Effects of a suppression mission with high-explosive ammunition against support weapons: a neutralisation mission using high-explosive ammunition has no effect against support weapons in themselves (but it may affect the crews serving the weapons, see case j. above). Crews may not fire at all during one complete turn (both the first and second phases). [SOURCE NOTE: the French text names a "neutralisation" mission in this suppression heading and paragraph; it is transcribed as printed, and the reading is most likely a suppression mission, as the heading says.]
Effects of a suppression mission with high-explosive ammunition against vehicles: a suppression mission using high-explosive ammunition against vehicles has the following effects:
- Primary impact zones: tanks and armoured cars in the primary impact zone hexagon(s) ignore all BCRT results. They are not affected by suppression missions. If a truck or motorcycle (or any other light vehicle) in the primary impact zone suffers a "hit" result of any kind, its inherent crew must take a morale check. If the crew fails this morale check, the light vehicle and its crew are destroyed. If the crew passes this morale check, the crew and vehicle are pinned. Turn the crew counter to its "pinned" side and place it on the vehicle. No movement is permitted until the crew has recovered, after which the crew counter is removed and the vehicle may move normally.
- Secondary impact zones: tanks and armoured cars in the secondary impact zone hexagon(s) ignore "hit" results of any kind; treat them as having no effect. Trucks and motorcycles (or any other light vehicle) caught in the secondary impact zone hexagon(s) follow the procedure for the primary impact zone above.
Effects of a suppression mission with high-explosive ammunition against obstacles: a suppression mission using high-explosive ammunition has no effect against obstacles.
Effects of an interdiction mission with high-explosive ammunition against infantry: an interdiction mission using high-explosive ammunition against infantry has the following effects:
- Primary impact zones: if an "H" result, of any kind, is obtained on the BCRT, no infantry in the primary impact zone hexagon(s) may move on their next turn. They are not pinned or eliminated. Infantry also become pinned if they occupy a bridge hexagon at the moment the attack occurs. If a unit already pinned suffers an "H" result, it remains "pinned" and may not recover its normal status the following turn. There is no effect if a "miss" result is obtained.
- Secondary impact zones: infantry in the secondary impact zone hexagon(s) are not affected by an interdiction mission.
Movement restrictions: infantry must stop their movement on entering a primary or secondary impact zone hexagon and may not move further that turn. They are free to move into another hexagon of the impact zone the following turn, but must stop again if they enter another primary or secondary impact zone hexagon under the effect of the interdiction.
Effects of an interdiction mission with high-explosive ammunition against cavalry: an interdiction mission using high-explosive ammunition against cavalry has the following effects. Mounted cavalry units subtract 1 from their die roll on the BCRT. In an indirect barrage, cavalry units never benefit from die modifiers for the terrain they are in, except if they are in wood or town hexagons. Moreover, no other die modifier applies.
- Primary impact zones: same as for infantry above (see case p.1 above).
- Secondary impact zones: same as for infantry above (see case p.2 above).
Movement restrictions: cavalry units must spend 2 movement points more than the normal terrain cost to enter a primary or secondary impact zone hexagon. However, cavalry units must stop their movement on entering a primary or secondary impact zone hexagon containing a town hexagon and may not move further that turn. They are free to move into another hexagon of the impact zone the following turn, but must stop again if they enter another primary or secondary impact zone hexagon under the effect of the interdiction.
Effects of an interdiction mission with high-explosive ammunition against support weapons: an interdiction mission using high-explosive ammunition has no effect against support weapons in themselves (but it may affect the crews serving the weapons, see case p. above).
Effects of an interdiction mission with high-explosive ammunition against vehicles: an interdiction mission using high-explosive ammunition against vehicles has the following effects:
- Primary impact zones: tanks and armoured cars in the primary impact zone hexagon(s) that suffer a "hit" result, of any kind, are destroyed on a second result of 1 to 3 on a six-sided die. Otherwise, there is no effect. All light vehicles that suffer a "hit" result of any kind are automatically destroyed. On a "miss" result, the inherent crew and vehicle are automatically pinned. Turn the crew counter to its "pinned" side and place it on the vehicle. No movement is permitted until the crew has recovered, after which the crew counter is removed and the vehicle may move normally.
- Secondary impact zones: all vehicles ignore combat results if they are in the secondary impact zone of an interdiction mission.
Movement restrictions: vehicles must spend 1 movement point more than the normal terrain cost to enter a primary or secondary impact zone hexagon. However, vehicles must stop their movement on entering a primary or secondary impact zone hexagon containing a town hexagon and may not move further that turn. They are free to move into another hexagon of the impact zone the following turn, but must stop again if they enter another primary or secondary impact zone hexagon under the effect of the interdiction.
Effects of an interdiction mission with high-explosive ammunition against obstacles: an interdiction mission using high-explosive ammunition against obstacles has no effect, except that bridge hexagons in primary impact zones (only) are destroyed on a result of 1 to 3 on a six-sided die.
Shrapnel
The second type of ammunition is shrapnel (similar to shotgun ammunition that scatters before impact). Shrapnel may be fired using either "drumfire" or "hurricane" barrages. Deadly against troops in the open, it was almost of no use against enemy units under cover. To reflect this, when conducting an artillery mission using shrapnel, increase any "H" result obtained on the BCRT against enemy infantry or cavalry units by +1, but a "miss" is always a "miss". But, as a penalty, modify the initial die roll on the BCRT by +3 when firing shrapnel at enemy units located in woods, towns, trenches or strongpoints.
EXAMPLE: a clear terrain hexagon is attacked using a destruction mission and shrapnel, and the result on the BCRT is "H+1". It is adjusted to "H+2". Units which test their morale will have their die result modified by +2 and not the +1 indicated. An "H" result would have been adjusted to "H+1", and so on.
Effects of a destruction mission with shrapnel against infantry: a destruction mission using shrapnel against infantry has the following effects:
- Primary impact zones: same effects as a destruction mission with high-explosive ammunition (see rule 5.41a.1), with the shrapnel effects developed above.
- Secondary impact zones: same effects as a destruction mission with high-explosive ammunition (see rule 5.41a.2), with the shrapnel effects developed above.
- Movement restrictions: same as for a destruction mission with high-explosive ammunition (see rule 5.41a.3).
Effects of a destruction mission with shrapnel against cavalry: a destruction mission using shrapnel against cavalry has the following additional effects. Mounted cavalry units subtract 1 from their die roll on the BCRT. In an indirect barrage, cavalry units never benefit from die modifiers for the terrain they are in, except if they are in wood or town hexagons. Moreover, no other die modifier applies.
- Primary impact zones: same effects as a destruction mission with high-explosive ammunition (see rule 5.41b.1), with the shrapnel effects developed above.
- Secondary impact zones: same effects as a destruction mission with high-explosive ammunition (see rule 5.41b.2), with the shrapnel effects developed above.
- Movement restrictions: same as for a destruction mission with high-explosive ammunition (see rule 5.41b.3).
Effects of a destruction mission with shrapnel against support weapons: a destruction mission using shrapnel has no effect against support weapons.
Effects of a destruction mission with shrapnel against vehicles: a destruction mission using shrapnel against vehicles has the following effects:
- Primary impact zones: tanks and armoured cars in the primary impact zone hexagon(s) ignore "hit" results of any kind. Treat them as having no effect. If a truck or motorcycle (or any other light vehicle) in the primary impact zone suffers a "hit" result of any kind, its inherent crew must take a morale check (include the shrapnel bonus above). If the crew fails this morale check, the light vehicle and its crew are destroyed. If the crew passes this morale check, the crew and vehicle are pinned. Turn the crew counter to its "pinned" side and place it on the vehicle. No movement is permitted until the crew has recovered, after which the crew counter is removed and the vehicle may move normally.
- Secondary impact zones: tanks and armoured cars in the secondary impact zone hexagon(s) ignore "hit" results of any kind; treat them as having no effect. Trucks and motorcycles (or any other light vehicle) caught in the secondary impact zone hexagon(s) follow the procedure for the primary impact zone above.
Movement restrictions: no movement is permitted for any light vehicle into or out of an active destruction mission impact zone hexagon.
Effects of a destruction mission with shrapnel against obstacles: a destruction mission using shrapnel has no effect against obstacles.
Neutralisation mission with shrapnel: this combination is not permitted.
Suppression mission with shrapnel: this combination is not permitted.
Interdiction mission with shrapnel: this combination is not permitted.
Allied use of shrapnel: thanks to enormous pre-war stocks and a mistaken idea of what the next war would be like, the Allies used shrapnel extensively in their artillery units. To reflect this, in First World War scenarios, Allied units must obtain a 6 or more on a six-sided die to select ammunition other than shrapnel. Add +1 to the die roll in 1915 and +2 in 1916. The Allied player has a free choice from 1917.
Smoke
When stated by the scenario, smoke shells may be used to produce smoke screens. If this is permitted, each off-map artillery element may use a suppression or neutralisation mission combined with a "drumfire" barrage (only) to fire smoke shells to produce a smoke screen instead of firing to cause damage to enemy units. The player declares this before firing. If a smoke screen is selected, the player must observe the targeted hexagon and check communications (unless the hexagon is automatically observed), but ignores the rules concerning the Fire Order Table. Test the scatter individually for each off-map artillery element, but do not make a die roll on the BCRT. Place a smoke marker in the central hexagon of the impact zone for each off-map artillery element that fired. All hexagons of the impact zone are considered part of the smoke screen. Units in smoke screens may be neither spotted nor observed and may therefore not be targeted by indirect barrage fire, small arms fire or anti-tank fire. Units caught in a smoke screen may neither observe nor spot targets located outside the hexagon, and so may not conduct small arms or anti-tank fire. Smoke has no effect on close combat. Smoke screens have no other effects on enemy units. Multiple smoke markers in the same hexagon have no additional effect. Smoke markers are removed during the opposing player's turn, in the "pin removal" phase.
Gas
When stated by the scenario, shells containing toxic gas may be used to produce gas zones. If this is permitted, each off-map artillery element may use a gas mission combined with a "drumfire" barrage (only) to fire gas shells to produce a gas zone instead of firing to cause damage to enemy units. The player declares this before firing. If a gas mission is selected, the player must observe the targeted hexagon and check communications (unless the hexagon is automatically observed), and rolls a die on the Fire Order Table. Test the scatter individually for each off-map artillery element, but do not make a die roll on the BCRT. Place a gas marker in the central hexagon of the impact zone for each off-map artillery element that fired. All hexagons of the impact zone are considered part of the gas zone. The first "hit" caused by a gas mission automatically pins all infantry located inside the gas zone. Terrain and the unit's morale value have no effect on a gas attack. Thus, gassed units may not fire or move until the gas marker is removed. Cavalry units are likewise automatically pinned and immediately "dismounted" for the rest of the game. If a subsequent "hit" of any kind occurs on a gassed unit, the defender's printed morale value is reduced by 1 if it is forced to take a later morale check. Gassed units forced to retreat are eliminated instead. Gas has no effect on obstacles, support weapons, tanks or armoured cars, but it affects open vehicles and light vehicles (trucks and motorcycles) in the same way as cavalry units above.
Gas effects last only as long as the gas marker is present in the hexagon. Gas effects also apply to enemy units that enter a gas zone, which become pinned there. Friendly units that enter a gassed zone suffer no effect (once again, it is assumed that they have been informed).
Double gas attack: from January 1916, the Germans used a double salvo of gas types. The Allies never did. The German player has two types of gas: green (choking) and blue (vomiting). When the outcome of a gas mission is determined, roll a six-sided die for each enemy unit in the impact zone affected by the gas to determine the effectiveness of the Allied gas masks. Allied units are assumed to all possess effective masks against green gas. On a result of 1 to 3, the unit survives the double gas type used. On a result of 4 to 6, the unit fails this test and is pinned for 4 turns; place two "pinned" markers to indicate this. This simulates how many units did not possess the special gas mask to protect them from blue gas.
Resolving Off-Map Artillery Barrages
After observing the hexagon to be attacked and determining the mission, barrage type and ammunition to be used, the player conducting the barrage resolves the attack using the rules below.
Scatter test: all barrages, of "drumfire" or "hurricane" type, are subject to a scatter test before determining whether a "hit" is recorded. Ignore this rule for direct small arms or anti-tank fire conducted by on-map artillery guns. Before rolling the die on the BCRT, roll a six-sided die to see whether the attack scatters into an adjacent hexagon.
A "drumfire" barrage is more carefully planned, so roll the die only once for all the off-map artillery elements attacking (not one die roll per element aimed at the hexagon). All off-map artillery elements scatter if a 5 or a 6 is obtained.
EXCEPTION: roll the die individually for each off-map artillery element when firing smoke.
If the "drumfire" barrage of an off-map artillery element scatters, one of the six adjacent hexagons will become the new central hexagon of the primary impact zone, onto which all off-map artillery elements fall, whether or not friendly units are present. A second die is rolled and compared with the scatter diagram printed on each map to indicate which adjacent hexagon becomes the new centre of the primary impact zone template. Any enemy (or friendly) unit located in the adjusted impact zone is subject to the result of the artillery mission.
EXCEPTION: if a "drumfire" barrage with a gas mission scatters onto friendly units, there is no effect (they are assumed to be prepared for this eventuality).
A "hurricane" barrage is a series of rapid salvos, more likely to scatter. Again, roll the die only once for all the off-map artillery elements planning to conduct the "hurricane" barrage (and not one die roll per element aimed at the hexagon), and on a result of 4 to 6 it scatters. Off-map artillery elements conducting a "hurricane" barrage scatter two hexagons in a random direction using the procedure detailed in case a. above.
Firepower of barrages: add up the number of off-map artillery elements conducting a barrage on the impact zone. With high-explosive and shrapnel ammunition, the off-map artillery elements attack with the firepower indicated by the scenario.
EXAMPLE: two off-map artillery elements using a "drumfire" barrage striking the same impact zone with a firepower of 20 each (as stated in the scenario rules) project a total firepower of 40 into each hexagon of the impact zone.
Determining results: when targeting an impact zone with a "drumfire" barrage, add the total firepower falling on the impact zone and find the column on the Barrage Combat Results Table (BCRT) corresponding to this number. Roll a die, adjust the result according to the terrain modifiers, and see whether a "hit" was recorded.
EXAMPLE: the British player has chosen to conduct a "drumfire" barrage against a target located in a clear terrain hexagon in the primary impact zone of his artillery mission with three of his available artillery elements. Each has a firepower of 20 (3 x 20 = 60). Locate the 31+ column (that is too much) on the BCRT and roll the die once with no modifier for the clear terrain hexagon.
When targeting an impact zone with a "hurricane" barrage, each off-map artillery element fires and resolves four attacks separately using column "10" of the BCRT (whatever its printed firepower).
In all the cases above, the terrain modifiers shown by the BCRT apply to the die rolls.
Restrictions on indirect fire: a hexagon that is observed by a forward observer, a liaison officer or an aircraft/balloon may only be attacked in the barrage phase by indirect barrage fire from off-map artillery elements. A pinned forward observer or liaison officer may not observe any hexagon. If all forward observers or liaison officers of a side are lost, indirect barrages may only be directed against the hexagons indicated in rule 5.15 (automatic observation), unless an aircraft/balloon is available to observe (see rule 5.14).
Direct Fire by Artillery Guns
If an on-map artillery gun has a non-pinned crew counter, is within spotting range of an enemy unit, has a line of sight to the unit and is facing in the right direction, it may conduct direct anti-tank or small arms fire in the appropriate fire phase (but not during the barrage phase). No forward observer is needed, no communications test is made, mission, barrage type or ammunition need not be declared, the Fire Order Table is not used and no scatter occurs. The player simply follows the anti-tank or small arms fire procedure. All artillery guns conduct direct anti-tank fire against vehicles independently, but they combine their firepower values when firing at light targets and use the small arms combat resolution table and its procedure. All artillery guns operating in direct fire mode have a small arms firepower value of 10.
On-map artillery guns that conduct direct fire must also have the targeted hexagon within their firing arc (see rule 5.12). On-map artillery guns that conduct direct fire during the offensive fire phase may still conduct anti-tank or small arms fire against enemy vehicles or units during the defensive fire phases of the opposing player's turn (and vice versa).
NOTE: pre-war strategists extolled the virtues of the rapid-firing artillery gun on the battlefield as the decisive weapon of the next war. Players will encounter formidable resistance when trying to assault in the open a battery of four guns with only infantry.
On-map artillery guns may also fire smoke shells if these are available in the scenario. This projects a smoke screen only into the targeted hexagon, with the same effects as in rule 5.43 above.
Barrage Combat Results Table
Use the revised Barrage Combat Results Table when conducting an indirect barrage.
Optional Rule: Artillery Ammunition Consumption
This rule reflects the enormous quantity of ammunition consumed by artillery during the First World War. In a single game turn, 50 shots will be used. It is assumed that each off-map artillery element consists of about four guns and is limited to a consumption of 25 artillery points (2,500 shots). Players must keep track of artillery points on paper. Conducting certain actions costs artillery points. Once artillery points are spent, the off-map artillery element fires and checks the scatter, etc., according to the normal rules.
| Action | Cost |
|---|---|
| Destruction mission to destroy a strongpoint | 4 artillery points per turn |
| Destruction mission to destroy a barbed wire hexagon | 2 artillery points per turn |
| Destruction mission to destroy an anti-tank or artillery gun in a hexagon | 1 artillery point per turn |
| Suppression/neutralisation mission to provide a smoke screen for one turn | 5 artillery points per turn |
| Interdiction mission | 1 artillery point per turn |
| "Drumfire" or "hurricane" barrage (whatever the mission) | 2 artillery points per turn |
If the targeted hexagon containing the objective lies within the primary impact zone after scatter, the objective indicated above is automatically considered destroyed (unless you are firing smoke).
EXAMPLE: in a First World War scenario, the German player targets an observed enemy on-map artillery gun. A destruction mission is selected (it is not necessary to specify the barrage type for this action). The German player then spends 1 artillery point for each element firing. The mission is conducted and the scatter tested. If there is scatter, the artillery point is wasted. If the targeted hexagon lies inside the primary impact zone of the destruction mission, the enemy anti-tank gun is automatically destroyed.
Simple and double creeping barrages, gas missions and all other artillery fire are exempt from the ammunition consumption rules.
New Support Weapons
If tanks were rapidly improved during the Great War, the same was true of the new and deadly toys invented for the infantry.
Anti-Tank Rifles (changed)
The rules concerning the anti-tank rifle are exaggeratedly simplistic. In reality, an anti-tank rifle could cause a critical hit or no damage at all. To reflect this, in addition to the normal to-hit die roll, if a "hit" is recorded, roll a second six-sided die:
- on a result of 1, nothing happens and the shot fails;
- on a result of 2 or 3, the tank's driver is hit. If the driver is hit, the tank immediately stops its movement and will then remain in the hexagon for one turn. Roll the die a third time and on a result of 1 or 2, the driver is killed. In this case, the tank is considered driven by an inexperienced driver, and all subsequent movement is reduced to half the tank's normal movement allowance, but not less than one hexagon per turn;
- on a result of 4 or 5, the engine is hit. If the engine is hit, a third die result of 1 or 2 indicates a permanent halt until repaired. The crew has two consecutive turns to repair the tank. Each turn, the player rolls a die and succeeds in repairing on a result of 1 to 3. Any other result has no effect. After the second turn without effect, the engine is considered permanently broken;
- on a result of 6, the tank is destroyed (lucky shot).
Trench Mortars (new)
One of the major weapons of the First World War not represented in Landships! is the trench mortar, which provided support to troops attacking or defending. Although it was not a very precise weapon, when employed in sufficient numbers it did the job effectively. The Germans used three types: light, medium and heavy mortars. The light mortar weighed about 30 kilos and was manned by four crew members or could be carried by an infantry platoon. It had a range of 13 hexagons and could fire 2-pound shells at a rate of more than 200 in five minutes. The medium mortar weighed 97 kilos, had a range of 10 hexagons and could fire three 25-pound shells in five minutes with its 17 crew members. The heavy mortar fired two 46-pound shells in about five minutes, had 21 crew members and weighed 113 kilos. Their high-angle fire made mortars ideal trench weapons at the start of an assault. In response, the British put into service the famous "Stokes" light mortar.
Layout of mortar counters: the large number at the top left is the barrage firepower of the unit. The small number at the top left is the maximum rate of fire of the weapon per turn. The number printed in the upper right corner is the range of the mortar. The number printed in the lower right corner is the movement allowance of the mortar. Only the light mortar may be carried by friendly crews or friendly infantry platoons. Once a medium or heavy mortar is placed, it may no longer move.
OPTIONAL RULE: players wanting a little more unpredictability may roll a six-sided die each turn for light mortars and multiply the result by two to obtain their rate of fire.
Mortar fire procedure: despite their high-angle fire, treat mortars as direct-fire weapons. All mortar fire must therefore be directed against spotted targets. Forward observers may not observe for mortars. Mortars may not fire in the barrage phase. Instead, each mortar conducts and resolves its multiple small arms fire individually (up to its printed rate of fire) during the defensive or offensive small arms fire phases.
Each mortar may attack only one hexagon per fire phase. Mortar small arms fire is always resolved first, before any other small arms fire against the hexagon is resolved. A mortar's small arms fire is never combined with other small arms fire not made by mortars, nor with its own small arms fire or that of another mortar. Each mortar small arms shot must first individually test the scatter. On a result of 5 or 6 (using a six-sided die), the mortar's small arms fire scatters into an adjacent hexagon according to scatter rule 5.51. Roll a die on the SACRT individually for each mortar small arms shot attacking the final targeted hexagon, once for each attack, up to its printed rate of fire. Find the appropriate column on the SACRT and roll the die. The mortar fire receives a favourable die modifier of -1 against clear terrain, woods, trenches, stone walls and ditches to account for its high-angle fire.
Medium and heavy mortars may also fire smoke shells if these are available in the scenario. This projects a smoke screen only into the targeted hexagon, with the same effects as in rule 5.43 above.
Submachine Guns (new)
Submachine guns (SMG) were developed during the First World War to provide troops with greater short-range firepower. Most soldiers loved them. Units equipped with an SMG in addition to their other weapons (it would take the Second World War before troops were armed solely with submachine guns) are indicated by placing an SMG marker (one at most) on the infantry platoons so armed. Neither machine gun platoons nor cavalry units of any kind may carry a submachine gun. An infantry platoon equipped with a submachine gun may add +10 to its firepower up to a distance of two hexagons. At a distance of three hexagons, it may add +5. Submachine guns have no effect on targets more than three hexagons away. An SMG marker may not be reused or captured if the unit carrying it is eliminated.
Medium Machine Guns (new)
The First World War saw all sides armed with an excellent heavy machine gun, generally weighing about 65 kilos and which had to be fitted with wheels. Eventually, the Germans developed lighter weapons (20 kilos) striking with roughly the same force but which could be carried more easily, unlike the heavy Maxims. The latest developments in this area included the air-cooled MG 08/18, which eventually gave rise to the famous MG 34 used in the Second World War. Units equipped with a medium machine gun (MMG) in addition to their other weapons are indicated by placing an MMG marker on a crew marker so armed (maximum of one per crew counter). An MMG marker adds +3 to the firepower of the crew and has a firing range of 8. Neither infantry or MG platoons nor cavalry units of any kind may use a medium machine gun without a crew counter. When conducting small arms fire, crews firing medium machine guns may claim the bonus granted to machine guns.
Light Machine Guns (new)
The Allied answer to the hauling about of heavy machine guns was to develop a series of light machine guns (LMG), some excellent, others less so. The most famous were of course the Lewis and Browning automatic rifles. Each LMG counter represents between two and five light machine guns, depending on the type. Units equipped with light machine guns in addition to their other weapons are indicated by placing an LMG marker on the infantryman so armed. An infantry platoon may carry and fire up to four LMG markers in addition to its own printed firepower, but may not claim the machine gun bonus. Machine gun platoons may not carry light machine guns. Each type of light machine gun (Lewis, Madsen, Benet, BAR) adds a different amount of firepower to the unit, and each has a different firing range. Some light machine guns have special restrictions, as follows:
The Benet light machine gun was particularly prone to jamming, so each turn during which it is used, roll a die. On a result of 1 or 2, the Benet light machine gun breaks. Remove the counter from play.
The BAR is available only to American troops and from March 1918.
Grenade Launchers (new)
The firepower of a unit may be increased by adding a grenade launcher marker. A grenade launcher marker adds +3 to the firepower of a unit and has a firing range of 3 hexagons.
Units equipped with a grenade launcher in addition to their other weapons are indicated by placing a "Grenade Launcher" support weapon marker on the infantry platoon so armed. A simple infantry platoon may carry and use up to four grenade launcher markers in addition to its own printed firepower. Neither machine gun platoons nor cavalry units of any kind may carry grenade launchers. Grenade launchers may fire smoke grenades. These do not damage units in the targeted hexagon. Instead, place a smoke marker in the hexagon. This smoke marker behaves exactly like a smoke marker (see rule 5.33 of Landships!) except that the smoke screen occupies only the hexagon in which the marker lies.
French 37 mm Anti-Tank Gun (new)
Although both sides had primitive anti-tank guns from the start, these could not easily be brought into action by infantry. With a Gallic flair, the French created in 1916 a light 37 mm gun for their infantry. This gun allowed anti-tank fire in places where the terrain was accessible only on foot. Usually manned by two to three crew, it could reach some 2,300 metres, although its effective range for hitting a tank was about 900 metres. For one reason or another, the French failed to make full use of their gun, whereas the Americans adopted it without reserve.
The French 37 mm anti-tank guns are provided with the original Landships! game. This anti-tank gun may be freely stacked with an infantry or machine gun platoon and may move up to one hexagon per turn during the second foot movement phase. No crew counter is required to operate the anti-tank gun. As it was equipped with high-explosive ammunition, the player may also use this anti-tank gun against enemy infantry or cavalry troops (blast power of 2).
Infantry Options
Although the theme of Infernal Machines is precisely that - weapons and technology - the infantry remained the queen of battle throughout the period. Here are new rules to keep the foot soldier in the running. Most are optional.
Advanced Infantry Units
Squad-sized formations now exist to simulate the improvement of doctrines.
Infantry squads (new): some scenarios require squads or allow platoons to split into squad-sized units. Squads comprise about eight men and generally follow all the Landships! rules concerning infantry. Squads have a standard morale value of 4 (whatever their parent unit or the other units on the map). It is assumed that each squad contains an inherent light machine gun with a firing range of 9, the remaining men being armed with rifles with a firing range of 6. All this gives each squad a firepower of 1. This firepower of 1 is standard and may not exceed 1 when firing. The machine gun only extends the squad's firing range to 9 hexagons (still with a firepower of 1) as long as it has not jammed. Squads may not benefit from the machine gun bonus when they attack. Before rolling the die on the SACRT, roll a six-sided die. On a result of 1, the inherent machine gun jams while attempting to fire. If this happens, only targets within a radius of six hexagons may be attacked. Once the machine gun jams, it remains jammed for the rest of the game. If the target lies within a radius of six hexagons and the machine gun has not jammed, the firepower remains 1.
Infantry leaders (new): infantry leaders are exceptional individuals whose function is similar to that of tank leaders. Infantry leaders behave like normal light targets, moving like other foot troops. They have no firepower value or firing range of their own and never need to take a morale check. They are immune to "Hits" on the SACRT or BCRT. They may be eliminated only by being alone in a hexagon that is then occupied by enemy infantry or cavalry units (either following movement or close combat). Infantry leaders provide three benefits:
- infantry leaders provide a one-column shift on the CACRT in favour of the side that possesses one in the hexagon, but may not themselves be eliminated to satisfy a result on the CACRT;
- any small arms fire conducted by units stacked with an infantry leader receives a die modifier of -1. Only units stacked with the infantry leader may benefit from this bonus. If friendly units located in other hexagons join the fire, the bonus for small arms fire is lost;
- units stacked with an infantry leader have their morale value increased by +1 if they must take a morale check.
Sturmtruppen (changed): these units first appeared at the front in August 1915 and from late 1917 were fully integrated into the German combat system. These units became as legendary as the SS units of the Second World War. They were elite units with different uniforms and weapons, including many new weapons. The subunits of the battalion operated in platoons and squads, and the non-commissioned officers were allowed to make decisions and show initiative. This was very different from the old regimental skirmish line still used during the First World War. The concept was new, but by the end of the First World War almost all combatants had adopted some form of it. Sturmtruppen were able to move rapidly, to bypass points of resistance, or to use their enormous firepower in a coordinated way to suppress them, and to call on heavy mortars if necessary. Indeed, their most striking characteristic was that a single Sturmtruppen battalion was more heavily armed than a regular line infantry regiment! A single battalion was armed with:
- K98 rifles and MP18 submachine guns
- 20 to 30 Lewis or Madsen light machine guns
- twelve medium machine guns
- Mauser Broomhandle pistols
- Eight 76 mm light mortars
- Four 76.2 mm artillery guns
- Four to eight flamethrowers
- Four grenade launchers
- Numerous bulletproof vests
The Sturmtruppen would stop their advance only if enemy resistance prevented them from continuing to their assigned objective. It was at that moment that their firepower would be used. The Allies called this "infiltration" fire, while the Germans used the term "coordination" fire. Once the obstacle was destroyed, the advance resumed quickly. The Sturmtruppen were not supermen and often suffered frightful losses during their assaults.
General rule: the scenario set-up instructions will indicate whether a side has Sturmtruppen units. There is no specific counter for Sturmtruppen units in the game. Instead, ordinary infantry platoons are used and their abilities are modified in several ways.
Sturmtruppen movement bonus: Sturmtruppen units move at a speed of two movement points during the first foot movement phase and one movement point during the second foot movement phase, for a total of three movement points per turn. This represents their rapid and aggressive approach to the objective.
Exception: Sturmtruppen units move one movement point per foot movement phase (or two hexagons) through road or trench hexagons, like any other unit.
Sturmtruppen units may not run (see rule 6.32 of Infernal Machines) in combination with their increased movement allowance. Sturmtruppen units may run instead of using their increased movement allowance.
Sturmtruppen firepower: Sturmtruppen platoons have their firepower modified at the distances shown below:
| Distance (hexagons) | Firepower |
|---|---|
| 0-1 | Printed x3 |
| 2 | Printed x2 |
| 3 | Printed +2 |
| 4 | Printed +1 |
| 5 | Printed |
| 6 | Printed -1 |
| 7 | Printed -2 |
| 8 | 1 |
| 9 | 1 |
These values simulate the inherent machine guns of each Sturmtruppen platoon (representing either a Madsen or a Lewis) and a large number of automatic weapons at shorter range. Sturmtruppen units may use their full firepower against a single hexagon and are limited only by their firing range. Thus, if a target lies eight hexagons away, only the firepower of 1 may be used. If the target lies in an adjacent hexagon, the unit's firepower is tripled (a printed 4 thus becomes 12). If the target were five hexagons away, only the printed firepower would be used (4 in this case).
Increasing Sturmtruppen firepower: the firepower of a Sturmtruppen unit may be increased by adding grenade launchers and light mortars according to the standard rules for those units. In general, a German Sturm Bataillon will be provided with three to six grenade launchers. The only mortars issued to a Sturm Bataillon were the 76 mm light mortars, eight to ten in number. One of them could be assigned to a Sturmtruppen platoon. These additional support weapons increase the firepower of a Sturmtruppen unit. Again, a Sturmtruppen platoon may choose to concentrate all of its increased firepower against a single hexagon or against several hexagons within firing range.
NOTE: doctrine called for concentrating all weapons of this type on a defensive point [printed "poison" in the source, evidently a typo for "point"] when they supported the advance.
NOTE: bear in mind that flamethrowers and light mortars both fire during the player's small arms fire phase. Medium and heavy mortars fire during the friendly barrage phase.
Sturmtruppen morale bonus: the morale value of a Sturmtruppen unit is always 5, whatever is printed on the counter, and is never reduced, except by the presence of barbed wire in the hexagon.
Breaking up Sturmtruppen platoons: during a scenario, the German player may break up the specified number of his Sturmtruppen platoons into four squads each. Simply remove the Sturmtruppen platoon and replace it with four Sturmtruppen squads. These may move independently of each other but must always end their movement within a maximum distance of two hexagons of another Sturmtruppen squad belonging to the same platoon. To be reconstituted as a platoon, the four Sturmtruppen squads must be non-pinned and be in the same hexagon at the start of the friendly foot movement phase. Apart from this, these Sturmtruppen squads behave as ordinary squads (see rule 7.11 of IM) and have all the powers of the Sturmtruppen platoons listed above (triple the firepower at 0-1 hex., etc.).
Infiltration bonus of Sturmtruppen squads: because of their small size, Sturmtruppen squads possess infiltration capabilities. Platoon-sized Sturmtruppen units do not have this capability. Infiltration simply allows a Sturmtruppen squad to enter a hexagon occupied by the enemy and pass through it without having to stop and conduct close combat. However, Sturmtruppen squads that infiltrate (pass through) an enemy-occupied hexagon may not end their movement in a hexagon containing an enemy unit (except individuals) but must instead end their movement in a hexagon held by a friendly unit or unoccupied. If this is not possible, the Sturmtruppen squad may not enter the enemy-controlled hexagon unless it intends to engage it in close combat.
EXAMPLE: suppose the Allied player has a unit in hexagon 6613 of map 5. A German Sturmtruppen squad, if it were in hexagon 6713, could enter hexagon 6613 or 6712 and end its movement in hexagon 6612, 6512 or another hexagon with no Allied unit inside.
Count three Sturmtruppen squads as one platoon for the purposes of close combat.
Additional Equipment for Infantry (new)
The maxim "dress for success" is not new. The infantry adopted the principles from the start to cope with the variety of situations encountered.
German bulletproof vest: from May 1917, the Germans were issued some 500,000 bulletproof vests, called "Infanterie Panzer". These items weighed twelve kilos and most were distributed to machine gun and Sturmtruppen units. To reflect this, if the scenario introduces them, the German player places a "bulletproof vest" marker on the unit. The bulletproof vest has the effect, in the case of enemy small arms fire directed from a distance of five or more hexagons, of modifying the to-hit die roll on the SACRT [printed "SCART" in the source] by +1, in addition to all other modifiers. If a unit equipped with a bulletproof vest is located within five hexagons, it may claim no modifier. This modifier also applies to ground units attacked by aircraft conducting small arms fire. If a barrage attack hits a hexagon containing units equipped with bulletproof vests, also add +1 to the die result on the BCRT. Units with bulletproof vests may not run (see rule 7.32 of IM).
Smocks: Red Army troops, in their battles of 1918-1919 against outside intervention forces, often used white smocks (similar to those the Finns wore in 1939) as camouflage. The effect of the camouflage was twofold: the Reds were able to approach very close before being spotted, and if they were spotted, enemy fire was less effective. If they were not seen at all, the Reds were able to launch a total surprise attack. To simulate the effect of troops equipped with smocks, use the following rules:
There is no marker for smocks. The scenario states whether either side is equipped with them. Troops equipped with smocks may be neither spotted nor observed if they are more than five hexagons from enemy troops. A forward observer or an infantry leader is required to spot them. A forward observer or infantry leader will spot smock-equipped units at a distance of 4 or 5 hexagons on a result of "1" on a six-sided die. If they are spotted, smock-equipped troops may only be attacked using area small arms fire. Area small arms fire procedure is the same as for normal small arms fire, except that you apply a +3 modifier on the SACRT, and the other terrain modifiers are not cumulative.
If smock-equipped troops are located at a distance of 2 or 3 hexagons from enemy troops, a forward observer or infantry leader may spot them on a result of 1 or 2 on a six-sided die. A +2 modifier is then applied during area small arms fire.
If smock-equipped troops are adjacent, a forward observer or infantry leader may spot them on a result of 1 to 3 on a six-sided die, and the normal small arms fire rules apply; no special die modifier is used. Normal infantry and cavalry units may spot them on a result of 1.
When smock-equipped troops conduct small arms fire while located 5 hexagons or less from an enemy unit, the firing unit is automatically spotted; and no special area modifier applies when enemy units conduct subsequent small arms fire against it. If smock-equipped units that have been spotted move 6 hexagons or more away from the nearest enemy unit, they automatically become unspotted again.
Smock-equipped units may conduct close combat with complete surprise by becoming adjacent to hexagons containing enemy units while remaining unspotted by forward observers or infantry leaders. If this occurs, apply a -2 modifier to their die roll on the CACRT when resolving the close combat, in addition to all other applicable modifiers.
Skis
A scenario may state that units are equipped with skis. Use the ski counters included in the game. Only forward observers, infantry leaders, and infantry and machine gun platoons may use skis. No cavalry platoon, crew or vehicle may do so. Units on skis may move at a speed of three hexagons per foot movement phase, but climbing an elevation takes two entire friendly movement phases. At the start of either friendly foot movement phase, non-pinned units may put on or take off their skis at no movement point cost. Units are unable to conduct small arms fire while on skis, but a unit's morale value is not affected by the presence of skis. When units on skis are the target of fire and are hit, if they are pinned they must remove their ski counter.
NOTE: consider skis as a kind of "strategic" movement factor for moving through deep snow.
In scenarios with snow, deep snow or ice involving Finnish or Russian troops, it is assumed that skis are always available and that the units are always equipped with them (treat them as inherent to the units).
Advanced Infantry Movement Rules (Optional)
The rules in this section may be considered optional and used at the discretion of the players. Both players must agree at the start of a scenario which they will use.
Going Prone
Infantry units may choose to dodge a danger by going prone. Units may only go prone in hexagons other than trench or strongpoint hexagons, and only if they are not pinned. Place a "Prone" marker on the unit. Cavalry units and machine gun platoons may not go prone. Going prone takes place either before the first foot movement phase, OR after moving during the second foot movement phase. If it is before the first foot movement phase, the unit crawls and may only move a maximum of one hexagon this turn (the actual movement takes place during the second foot movement phase). Units that begin the first foot movement phase prone may choose to stand up by removing the marker before moving the unit. Prone units are subject to the following advantages and penalties:
- a +1 modifier when small arms fire is directed against them and no standing unit is in the same hexagon. This is in addition to any other modifier. The unit's printed morale value is increased by +1 as long as it is prone.
- a prone unit may not spot except in adjacent hexagons. It may spot enemy units that fire on it, up to ten hexagons. Its printed firepower is reduced when the unit is prone: subtract 1 from the printed firepower. The printed firepower is used normally when the unit is not prone.
Being pinned has the same effects for prone units until that status is removed.
Running
Even with speed, an average infantryman could run at least three or four hexagons in five minutes. Although faster than a tank, after their run the men were tired and out of breath and had to rest. The tank, by contrast, remained in motion. In terms of game turns, a platoon could run three or four hexagons and rest for one turn, or walk two hexagons each turn.
To reflect this, at the start of either the first or the second foot movement phase, infantry units (and only they) may choose to run. Units that do so may not move during the other foot movement phase of that turn. Only infantry platoons (not machine gun platoons) may run - up to four movement points. After running, the unit may decide to go prone (even if this takes place during the first movement phase) or to remain standing, but may not move again until a complete turn has passed. After the run, place a fatigue marker on the unit.
EXAMPLE: an infantry platoon runs during the first movement phase of turn 1 and goes prone. It may not conduct small arms fire that turn nor move again during the second movement phase of turn 1. On turn 2, the unit may not move at all but could stand up or conduct small arms fire. On turn 3, it could run again or move normally. This example will also apply if the unit had run at the start of the second foot movement phase of turn 1.
Units may only run through clear and road hexagons. They may not pass through trench, marsh, town, wood, barbed wire or minefield hexagons. They may start or finish their run in these hexagons. The movement point cost for entering these hexagons remains the same when running.
While running, units may not conduct small arms fire or have support weapons fire. When firing at enemy units that are running, the player may conduct fire against any hexagon within firing range traversed by the enemy units. This is true even if the running units have reached cover at the end of their run (move them back to the targeted hexagon). If fired upon during a defensive fire phase, running units suffer a -1 penalty modifier on the SACRT in addition to all other applicable die modifiers. If a running unit is fired upon, is hit and passes its morale check, it becomes pinned in the chosen hexagon (this stops its run) and a fatigue marker is placed on it. It must still wait one turn before resuming movement, whatever the number of hexagons actually crossed during the run.
Sturmtruppen units may not claim that they are running in order to obtain movement points beyond their normal bonus.
Advanced Infantry Combat Rules (Optional)
Each rule in this section is also considered optional and may be used at the discretion of the players. Both players must agree at the start of a scenario which they will use. Taken collectively, they make the slaughter even more realistic! Does anyone want to desert?
Small Arms Resolution Table
Use the revised SACRT instead of the normal Landships! SACRT when conducting small arms fire, of whatever type. Roll the die separately for each unit in the targeted hexagon.
Pre-Set Rifle Ranges
The pre-set ranges of rifles varied between nations. The pre-set range was the optimal range. Units firing within this distance do so without additional modifier. If they fire beyond this range, add +1 to the die roll on the SACRT for every two hexagons, to reflect the decrease in accuracy. This rule applies only to the printed firepower of infantry platoons (which reflects the firepower of their rifles) and not to the support weapons with which they fire (which ignore this rule). This rule has no effect on machine gun platoons or the fire of support weapons. The pre-set ranges are:
| Nationality | Range |
|---|---|
| French/Germans/Russians | 4 hexagons |
| Americans/British | 2 hexagons |
| All others | 3 hexagons |
Non-Automatic Removal of Pinned Markers
Instead of a player automatically regaining control of his pinned units, roll a six-sided die during the pinned marker removal phase for each unit or stack. Interpret the results as follows:
| Die roll | Result |
|---|---|
| 1-2 | All units in the hexagon immediately become non-pinned |
| 3-5 | All units in the hexagon remain pinned. Test again during the next "pin removal" phase |
| 6 | All units in the hexagon remain pinned, but if you are using the heroism rules below, roll a die on this table instead |
Infantry Heroism
To give infantry and cavalry platoons unusual reactions, roll a die on this table when a 6 is obtained on the table above. The result affects all units in a stack.
| Die roll | Result |
|---|---|
| 1 | Charge |
| 2 | Hardening |
| 3 | Demoralisation |
| 4 | Retreat |
| 5 | Panic |
| 6 | Surrender/Rally |
Charge: a unit or stack immediately becomes non-pinned. If it is a cavalry unit, it must charge the nearest enemy unit during the next foot movement phase. If it is infantry, they must move toward the nearest enemy unit by the shortest route (counted in movement points) until they eliminate it in close combat, after which the effect ends.
Hardening: the stack or unit immediately becomes non-pinned and is replaced by units of the same type with a morale value one level higher.
Demoralisation: as Hardening, but the stack is replaced by units with a morale value one level lower.
Retreat: the unit or stack retreats two hexagons and remains pinned.
Panic: the unit or stack immediately becomes non-pinned and moves toward a friendly map edge using the fastest mode enabled (it runs if the "run" rule is used, for example) until it is outside the range of direct small arms fire of all enemy units. Units that panic may not conduct small arms fire while panicked.
Surrender/Rally: if an enemy unit (except an individual) is within five hexagons of the unit or stack that surrenders, remove the latter. It is considered destroyed. Otherwise, the unit or stack immediately becomes non-pinned and is free to operate normally.
Unpredictability of the Red Army
Red Army units had an unpredictable morale. Many broke as soon as they faced fire, others fought with tenacity. To simulate this, during a Russian Civil War scenario, each time a Red Army unit suffers a "hit" result on the SACRT, roll another six-sided die to see whether it routs. On a result of 1 or 2, it routs and is immediately and permanently removed from play. If the unit does not rout, follow the normal procedure for "hit" results. This rout test may take place an unlimited number of times for the same unit during the game.
EXCEPTION: if a Red Army infantry leader is present in the hexagon, a Red Army unit that suffers a "hit" result on the SACRT is simply pinned in place; no rout test is needed and the unit does not retreat either.
Additional Column Shifts in Close Combat
The new Close Combat Resolution Table may generate favourable column shifts in addition to those indicated in Landships!. Add together the firepower of the attacking units (and only them) attempting close combat against a hexagon, and average the morale values of the attacking units (and only them) involved. Round fractions to the nearest whole number (3.5 will be rounded to 4, for example). Cross-reference the attacker's firepower with the average morale value to obtain a range of die results that generates a favourable column shift on the CACRT. Then roll a six-sided die to see whether this takes place.
Cavalry Options
Although horse meat was in decline during this period, mounted units were widely employed during the Russian Civil War and in colonial operations.
Mounted Cavalry Small Arms Fire (new)
Contrary to what one sees in a multitude of westerns, firing from a horse moving at speed is a complete waste of ammunition. Thus in Landships!, mounted cavalry platoons have no firepower. In reality, mounted troops moving more slowly could probably generate some firepower with their secondary weapon and their carbines. To reflect this, cavalry units may now also trot. A cavalry platoon that moves a maximum of five hexagons (not movement points) during its movement phase is considered to be trotting. Each cavalry platoon (other than machine gun platoons) that trots has an inherent firepower of 1 and a range of 2. Mounted cavalry conducts small arms fire at the trot under the normal rules. Cavalry units that charge or gallop still have no firepower or firing range.
Scenarios
Infernal Machines offers twenty-two different scenarios covering different battles from 1915 to 1935.
[The scenario list and the scenarios themselves are not in the source text. The French file ends at this heading and one introductory sentence, so no scenarios are reproduced here. The box and game title give the period as 1915-1933, while the source sentence says 1935; the sentence is transcribed as printed.]