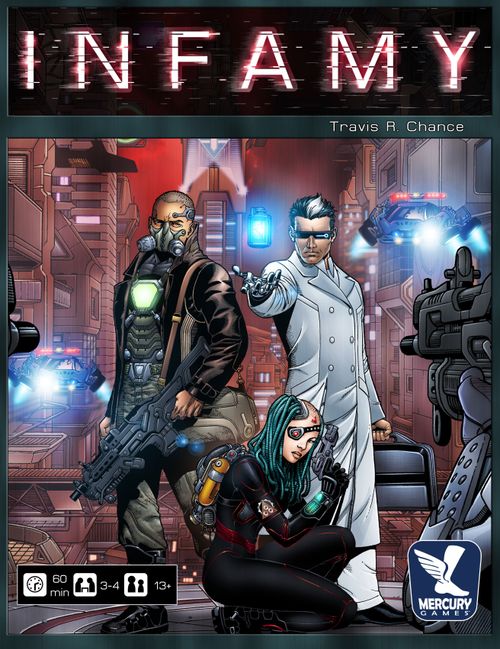
Infamy
Infamy Rulebook
Table of Contents
Table of Contents
Game Overview
Infamy is a strategic board game in which 3 to 4 players take on the role of up-and-coming criminals known as freelancers, each eager to become the most powerful and feared person in the Martian mining colony ARES-6. Each of you is striving to either take over one of the powerful factions controlling the colony, or better yet, become infamous enough to start your own. To accrue this kind of power, freelancers must establish seedy connections, complete dangerous missions, and outwit rival freelancers. There are two ways to win: be the first to gain 15 Infamy points OR earn 5 Reputation points (also known as 'rep') in one of the three factions.
Factions
In Infamy, three factions vie for control of ARES-6:
Harada Cartel – Highly organized criminals, the Harada Cartel operate from within the shadows of ARES-6. They alone hold the formula and refinement process to manufacture the powerful substance known as 'compound.' Their black market monopoly and penchant for violence has not only made them rich in this dangerous new world, but formidable as well.
Trust Megacorp – When Mars was first colonized, the Trust Megacorp was merely an ambitious mining company. Today, they exert sovereignty over everything and everyone within ARES-6. Their influence over the Terran Watchdogs, an elite Earth-based police force, has made them virtually untouchable. Deception, misinformation, and manipulation are their weapons of choice.
PKD Militia – The last few years of harsh conditions and draconian law enforcement have led to frequent violent uprisings among the miners. After the Phobos Kepler Dig Incident, the scattered revolutionaries found a common cause. The PKD Militia, as they are now called, have embraced a new mission: rid the colony of Trust control and Harada corruption. They've proven themselves willing to go to incredibly violent lengths to achieve this goal.
Components List
The following components are included in this box:
- 1 game board depicting the 6 sectors of ARES-6
- 4 Freelancer Sheets for tracking Rep points and detailing the associated advantages
- 1 color-coded set of pieces for each freelancer (pink, turquoise, brown, yellow):
- 4 Freelancer Cubes
- 1 Pawn
- 6 numbered Sector Cards
- 12 Bribe Tokens
- 1 black Accomplice Pawn
- 6 black Accomplice Sector Cards
- 2 Terran Watchdog Tokens
- 4 Hazard Tokens
- 1 Triggerman Marker
- 1 Day/Night Marker
- 13 Contact cards
- 60 Scheme cards (20 per Faction)
- 30 Mission cards
- 4 Turn Order and Setup Reference Cards
- 54 Resource Tokens, including:
- 18 Compound Tokens
- 18 Data Tokens
- 18 Weapon Tokens
- 20 Henchman Tokens
- 6 Favor Tokens
- This rule book
Quick Glossary
Before you get too far into this rule book, there are a few terms you'll want to know.
- Freelancer – Any player in the game
- Rival – A freelancer who isn't you (i.e., an opponent). If an effect refers to a rival, the freelancer playing the effect may choose which rival it effects, unless otherwise indicated.
- Contact – Any of the characters in the game you can bribe during the Contact Phase
- Resources – Weapons, Data, and Compound Tokens
- Assets – Henchmen, bribe, and favor Tokens
- General Supply – All resources and assets that are not currently owned by a freelancer are held in a common pool called the General Supply. Whenever a freelancer loses a resource or asset, it is returned to the General Supply.
- Infamy – A victory condition of the game. Infamy is often abbreviated as "i" as in "Gain 2i."
- Reputation – Also referred to as "Rep". Also a victory condition, Reputation in a given faction is often abbreviated as "r" as in "Gain 1r in Militia."
Resources
One of the common means to victory in Infamy is completing missions. In order to do so, freelancers must accumulate three basic kinds of resources. Note that any time the generic term resource is used in the game, the freelancer affected may choose a type unless otherwise specified.
Weapons – While some missions require cunning and stealth, others demand brute force and intimidation. ARES-6 is far from safe. So it's always better to be armed than not.
Data – Information is power, especially in the corrupt world of Infamy. Many missions require careful planning; knowing where and when your target is vulnerable is crucial.
Compound – Preliminary exploration missions to Mars uncovered the exotic mineral geodesite. Beyond its multitudinous industrial and technological applications, geodesite's true value comes in its synthesized form 'compound.' The unusual effects of this substance on human physiology in low gravity environments has elevated it to black market currency on Mars.
Assets
In addition to the basic resources of the game, freelancers have access to a few more important tools. Sometimes these will be required to perform missions, but they also have unique uses of their own.
Bribes – Bribes are used during the Contact Phase to temporarily hire criminal connections. Each freelancer has a budget of Bribes that he is allowed to use over the course of a Turn. Note that Bribes have two states: available (Briefcase side) and spent (X side). Spending a Bribe means flipping an available Bribe over to its spent side. Recovering a bribe means flipping a spent Bribe over to its available side.
Henchmen – What would a fledgling criminal mastermind be without some loyal muscle to do his dirty work? When good help is hard to find, local RapidVAT cloning labs can always supply a few extra bodies. Many missions require freelancers to pay henchmen for completion. At the end of every Turn, freelancers gain 1i for every 2 henchmen they control (see Scheme Phase).
Favors – Favors are extremely hard to obtain, but offer powerful advantages. In addition to serving as a requirement for some of the most lucrative missions, favors offer a special ability during the Contact Phase (see Bribing).
Game Structure
Infamy proceeds in a series of Turns. Each Turn consists of two Rounds, called "Day" and "Night." Certain cards have effects that only occur in one of these two Rounds. Any effects that are limited in this way will be preceded by "Day" or "Night" to indicate in which Round they are available. Each of the two Rounds has three distinct Phases:
- Contact Phase: Freelancers bribe Contacts on the Contact Track.
- Sector Phase: Freelancers attempt missions and accrue resources.
- Scheme Phase: Schemes are played and the next Round is prepared.
NOTE: As a Reminder, Day and Night are separate Rounds that make up one full Turn.
Day and Night
Some cards (and Sector 2 on the board) have different properties depending on whether it is currently Day or Night. They will be marked with Day and Night icons.
Game Setup
- Place the board face up on a flat surface.
- Shuffle all 30 Mission Cards to form the Mission Deck. Place missions equal to the number of freelancers along the bottom of the board faceup. Missions that are faceup are referred to as "available" missions.
- Shuffle all 13 Contact cards to form the Contact Deck and place the deck in their designated space on the board.
- Separate the 60 Scheme Cards into three Scheme Decks (indicated by the faction icons on the back of the scheme cards). Shuffle each Scheme Deck and place them face down in their holding place on the board.
- Place the 4 Hazard Tokens near the board within easy reach.
- Place the Day/Night Marker with "Day" facing up on top of the Contact Deck or another easily seen location.
- Each freelancer takes 1 Freelancer Sheet. Each Freelancer Sheet has tabs on the borders to indicate where freelancers should place their components and cards.
- Each freelancer chooses a color: pink, turquoise, brown, or yellow. (NOTE: No freelancer may choose black, which represents the Accomplice.) Each freelancer takes the following in his color: a. 4 Freelancer Cubes. On the Freelancer Sheet, place one cube on the "0" spot on each of the three Rep tracks. Place one cube on the "0" spot of the Infamy Track on the board. b. 6 Sector Cards c. 1 Pawn d. 12 Bribe Tokens
- Each freelancer takes 1 Compound Token, 1 Data Token, and 1 Weapon Token, and then places them by their appropriate tab as indicated on the Freelancer Sheet such that they are visible to everyone.
- Randomly determine a freelancer to receive the Triggerman Marker (starting player marker). Whoever holds the Triggerman Marker is considered the Triggerman for the start of the game.
- The Triggerman places 1 Watchdog Token by drawing 1 of his sector cards at random and placing the Watchdog in that sector.
Contact Phase
During the Contact Phase, freelancers use their bribes to bid for the services of criminal Contacts and receive their support for the Round.
Anatomy of a Contact
Contacts represent criminals whom a freelancer can bribe to help him for a Round.
- Name – Each Contact has a name describing his or her general role in ARES-6.
- Contact Reward – Many Contacts reward you by providing resources or assets. After bidding is complete, each freelancer gains any resources or assets provided by the Contacts he won that Round. Some Contacts offer special abilities that can only be used by the freelancer who won it, and can only be used that Round.
- Faction – Some Contacts are allied with one of the three factions, as identified by the faction logo on the Contact. These Contacts are referred to as Faction Contacts, or specifically by their Faction name (i.e., "Militia Contact").
During each Contact Phase, the following steps take place in order:
-
Prepare the Contact Deck (Day Contact Phase only). Shuffle all Contact cards into a face down deck. The cards not drawn during the Day Contact Phase make up the Contact Deck for the upcoming Night Round.
-
Reveal 5 Contacts. Draw the top 5 cards of the Contact deck and place them face up above the board in a single row. This row is called the Contact Track. The order of Contacts on the track determines who will place first during the Sector Phase.
NOTE: This means freelancers will be bidding on 10 out of the 13 Contacts each Turn (5 during the Day, and 5 at Night), and will have the opportunity to bid on all 10 before recovering their bribes at the end of the Turn.
-
Move a Watchdog. The current Triggerman must choose exactly 1 Watchdog Token that is in a sector and move it to a new sector of his choice.
NOTE: This step is skipped on the first Round of the game.
-
Bribe Contacts. Freelancers bid on the Contacts on the Contact Track (See "Bribing" Below).
Bribing (Contact Phase Step 4)
Bidding on Contacts during the Contact Phase is a key part of Infamy. Each freelancer possesses a limited number of Bribes that can be used to bid on Contacts. Freelancers only Recover their Spent Bribes at the end of the Scheme Phase of each Night Round.
All freelancers use the following rules for bidding.
- Spend a Bribe to initiate or increase a bid. This is called paying "Expenses". The Bribe token is placed in the Spent Bribes section.
- Then, start a bid or increase a current bid by placing Bribe Tokens on a Contact.
At the beginning of any Contact Phase, the Triggerman has the opportunity to bid on the first (left-most) Contact. In order to bid, that freelancer must first spend one of his available Bribes for the right to bid (the Expenses). The freelancer then places any number of available Bribes on the Contact to indicate his bid. Once he has bid, each freelancer in clockwise order has the opportunity to exceed the current highest bid on that Contact. Just like before, in order to bid, each freelancer pays Expenses by spending one of his available Bribes, and then places a number of available Bribes higher than the current highest bid on the Contact. Once everyone has had a chance to bid, bidding continues in clockwise order. Anyone (including anyone who passed on the chance to bid the first time around), may either join the bidding or increase his existing bid. In order to increase his bid, a freelancer must pay Expenses again and then place a number of available Bribes on the Contact that would make him the highest single bidder on the Contact. Bidding continues in this manner until all freelancers pass in succession. All freelancers then take back any available losing Bribes to the Available Bribes section of their Freelancer Sheet (Expenses are not Recovered when a freelancer fails to win a Contact; they remain spent until the end of the Turn). The winning freelancer removes all but one of his winning Bribes on the Contact, turning it over to indicate that it has been spent. All other Bribes used to win the Contact are spent and placed in the Spent Bribes section alongside the Freelancer Sheet.
Once a Contact has been won, the winning freelancer resolves all Contact Rewards. The winner also receives the Triggerman Marker. The Triggerman then begins bidding on the next Contact by either bidding or passing. Bidding continues in this way until freelancers have had the opportunity to bid on all Contacts. Not all Contacts may end up being won in a given Round. If all freelancers pass on a Contact, flip it face down. No one may bid on this Contact again this Round.
If a freelancer is ever instructed to recover Bribes (turn them back to their available side), he may only recover those currently in his Spent Bribes section. Spent Bribes on Contacts cannot be recovered until the end of the Turn (at the conclusion of the Night Round), are stored in the Spent Bribes section until that time.
Favors: Favors can be used to pay for contacts. To use a Favor, a freelancer pays Expenses when their turn to bid comes up and then uses a Favor instead of placing a bid. Playing a Favor automatically wins the Contact. He must return the Favor to the General Supply and places his spent Expenses on the Contact to mark the player who won the Contact. As usual, all losing freelancers get their available Bribes back as well.
NOTE: You may only use a Favor the first time you have the opportunity to bid on the Contact for which you're using it. You may not use a Favor to bribe the Fixer.
Contact Order: When freelancers bid on Contacts, they're not only bidding for the unique services or benefits of each Contact, but also bidding on initiative based on that Contact's position above the board. Once the Sector Phase begins, each freelancer will place his Pawn, starting with the winner of the Contact on the Contact 1 tab on the game board and proceeding to the next Contact on the right. This order of play is referred to as Contact Order. If one or more freelancers did not win any Contacts during the Contact Phase, they will still get to place during the Sector Phase. Those freelancers will place after Contact Order is complete, clockwise starting with the Triggerman.
Important notes to remember:
a. Only available Bribes may be used to bid on Contacts b. Every time you want to bid or increase your bid, you must first pay Expenses c. If you win, all your winning Bribes are spent and you must place one Bribe token on the Contact to show ownership d. If you lose, your losing Bribe(s) are returned to you immediately (except Expenses) e. All Spent Bribe(s) are flipped back (Recovered) at the end of each Night Round f. All Expenses remain spent until the end of each Night Round g. If you want to use a Favor, it must be on your first opportunity to bid on that particular Contact and you must first pay Expenses
Sector Phase
During the Sector Phase, freelancers secretly choose which of the colony's six sectors they wish to enter this Round. By entering a sector, freelancers can acquire resources, visit Faction Headquarters (HQs), and complete missions.
Anatomy of a Sector
- Sector Name – The colony is divided into six named sectors.
- Number – Each sector is numbered 1-6. Mission Cards and their freelancer sector cards refer to sectors by their number.
- Mission Zone – Each sector has a mission zone. A freelancer who wants to complete a mission in a given sector needs to place his Pawn on the mission zone of that sector as described under "Completing a Mission" below.
- Resupply Zones – Each sector also has two resupply zones. These zones are either (4a) Faction Headquarters or provide resources or assets (also referred to as (4) non-HQ resupply), as described under Resupplying.
The following steps take place in order during each Sector Phase:
-
Select Sectors. Each freelancer has 6 numbered sector cards, one for each of the 6 sectors represented on the board. Freelancers secretly and simultaneously choose one of the 6 sectors to enter this Round, each by placing the corresponding sector card face down in front of him. No freelancer may select a sector that contains a Watchdog unless a card specifically allows them to. When a freelancer is done selecting his sector, he places his Pawn on the face down sector card.
-
Reveal Sectors. Once all freelancers have chosen and placed their sector cards, all freelancers flip over their cards to reveal their chosen sectors.
NOTE: Unless specifically instructed otherwise (by winning the Sector Chief, for example), a freelancer that attempts to place in a sector that contains a Watchdog fails to place and does nothing during the Sector Phase.
-
Enter Sectors. In Contact Order each freelancer places his Pawn in any available zone in the sector he revealed in Step 2. Each sector has three zones: a mission zone and two resupply zones. A zone is considered available only if it does not contain a Hazard or Pawn, and if the sector does not contain a Watchdog. As soon as a freelancer places his Pawn on an available zone, he completes the action appropriate to that sector (Resupplying or Completing a Mission). Once a freelancer has placed his Pawn, the zone and sector on which he has placed are considered his current zone and current sector. If a freelancer is not able to place his Pawn due to these restrictions, he has failed and cannot place his Pawn.
Once he has completed the appropriate action, the next freelancer in Contact Order places his Pawn until all Pawns have been placed. Even if a freelancer has bribed multiple Contacts, he can only place one Pawn a Round (see The Accomplice in Contacts below for an exception to this rule). A freelancer must place his Pawn the first time one of his Contacts occurs in Contact Order. If a freelancer cannot enter an available zone, he does not place his Pawn this Round and has failed.
Resupplying
When a freelancer places his Pawn on the resupply zones of a sector, he immediately receives the benefit.
- Resources: Freelancer receives 1 resource of the type shown on the zone.
- Henchman: Freelancer receives 1 Henchman.
- Special: Sector 2 has a special resupply zone. During the Day, a freelancer resupplying here may Recover up to three of his Spent Bribes. During the Night, a freelancer resupplying here gains 1 Infamy.
- Faction HQ: If the freelancer has zero Rep in the faction indicated by the faction logo, he gains 1 Rep (1r) in that faction. If he already has 1 or more Rep in the indicated faction, he draws 1 Scheme from that faction's Scheme Deck instead.
NOTE: Visiting the Megacorp HQ for the first time will trigger the Stringer effect and result in the Freelancer gaining a data.
Completing a Mission
Missions are the primary way to earn Infamy and Rep, and consequently, to win the game. Each mission has a set of requirements and a Sector Number (as described in "Anatomy of a Mission" below).
In order to complete a mission, a freelancer must first place a Pawn on the mission zone of the sector identified on one of the available mission cards and then pay (return to the General Supply) all of the requirements listed on the mission card. Once he has done so, the freelancer gets to claim all rewards listed on the mission card, starting with the Reward section and THEN receiving any Infamy/Rep rewards listed. A freelancer receives both the Infamy and the Rep listed. The freelancer must gain the Rep in only ONE of the factions shown on the card. If the mission card shows more than one faction, the freelancer chooses in which faction to gain Rep. If multiple missions are available in a particular sector, a freelancer may only complete one of the available missions. Completed missions should be placed under their player sheet for future reference.
NOTE: A freelancer must have the requirements to complete a mission in order to enter the mission zone. If a mission cannot be completed the freelancer must choose a resupply zone in that sector. If all resupply zones are occupied then no action may be taken.
Anatomy of a Mission
Each mission card has the following attributes:
-
Mission Name – A short descriptive name of the kind of criminal enterprise being conducted.
-
Mission Type – Each mission may have any number of these three types: Carnage, Influence, and Underworld. While these don't matter for meeting the mission requirements, they will affect some other missions and schemes.
-
Sector – Each mission takes place in one of the six sectors on the board, identified by the Sector Number on the mission card.
-
Requirements – Each mission requires some combination of resources and/or assets to complete. In order to complete the mission, a freelancer must pay (return to the General Supply) all noted resources and assets.
-
Reward Text – After completing a mission, a freelancer must perform all actions listed in the Reward section.
-
Flavor Text – This has no effect on game play.
-
Infamy and Rep – All missions offer some amount of Infamy, Rep, or both. After completing all actions corresponding to the Reward Text, that freelancer gains the Infamy and Rep listed on the mission card.
IMPORTANT: The freelancer must gain the Rep in only ONE of the factions shown on the card, if the Rep value of the reward is one or greater. If the mission card shows more than one faction, the freelancer chooses in which faction to gain Rep.
-
Faction – Each mission will have one or more faction icons. The faction icon(s) determines in which faction(s) a freelancer may gain Rep.
Hazards and Watchdogs
Hazards: Sometimes schemes, missions, or effects will instruct a freelancer to add a Hazard Token. If instructed to do so, a freelancer must add a Hazard Token to a resupply zone of his choice. Hazards represent unsafe conditions in that zone. Hazard Tokens are taken from the General Supply and added to a resupply zone that does not already contain a Hazard. Until the Hazard Token is removed (through a mission or scheme), no freelancer can resupply in that zone. Hazards cannot be added to the mission zone of a sector. Hazards cannot be added to any zone if none are available in the General Supply.
Watchdogs: The Terran Watchdogs are the last vestiges of Terran influence on ARES-6. They act as the only police force in the colony, albeit with little official sanction, and are constantly on the lookout for criminal activity. As such, a Watchdog prevents any freelancer from placing his Pawn in any zone of the sector the Watchdog occupies. If a freelancer is instructed to move a Watchdog (e.g., at the beginning of the Contact Phase), he must only move one Watchdog to a different sector.
NOTE: Multiple Watchdogs may occupy the same sector.
Scheme Phase
During the Scheme Phase, freelancers can play ONE Scheme from their hand, unless a card or ability allows for more. After all freelancers have had an opportunity to play a Scheme, begin the next Round. At the end of the Night Round freelancers gain Infamy for their Henchmen, and all Bribes are Recovered. If one or more freelancers have achieved victory conditions, a winner is declared (see Scoring and Winning below).
Anatomy of a Scheme
Freelancers in Infamy aren't just working for the three factions; each freelancer has their own agendas. These are represented by Scheme cards.
- Card Name – Each Scheme represents a unique opportunity based on insider faction information.
- Faction – Indicated by the logo on the back of the Scheme card. When instructed to draw a Scheme, a freelancer may choose from any of the three faction Scheme Decks unless specifically told otherwise.
- Scheme Text – A description of the effects of playing a Scheme. A freelancer playing a Scheme must carry out all of the effects listed, in the order they are listed.
- Flavor Text – This has no effect on game play.
The following steps take place during each Scheme Phase:
- Play Schemes. Starting with the Triggerman and going clockwise, each freelancer may play exactly ONE Scheme from his hand, resolve it, and place it in the appropriate faction's scheme discard pile. This is the only time that Schemes can be played during a Round.
- Gain Henchman Infamy. -NIGHT ONLY- Freelancers, starting with the freelancer with the Triggerman Marker and going clockwise gain 1 Infamy for every 2 Henchmen they currently have (rounding down fractions).
- Check for Winner. At the end of the Scheme Phase, all freelancers determine if they have met the conditions for victory (15 Infamy or 5 Rep in one or more factions). If anyone has, the game is over! Otherwise, continue playing!
- Retrieve Bribes. All freelancers retrieve any Bribes they have on Contacts, and place them in the Spent Bribe sections of their Freelancer Sheets.
- Recover Bribes. -NIGHT ONLY- All freelancers Recover any Spent Bribes.
- Replace Missions. Deal missions from the Mission Deck faceup at the bottom of the board to replace any missions that have been completed or removed.
- Flip the Day/Night Marker. Turn the Day/Night Marker over to indicate the switch from Day to Night, or vice versa.
Winning the Game
In Step 3 of the Scheme Phase, a freelancer wins the game if he has accumulated at least 15i or 5r in any one of the three factions. Infamy point wins represent gaining enough power to start a new faction worthy of competing for control of Mars. Rep wins represent a freelancer's usurping of power in one of the three factions of ARES-6.
In the case of a tie, the following tiebreaker rules apply:
-
In the event that two or more freelancers have both earned 15 or more Infamy by the end of a Round: a. Whoever has the most Infamy wins. b. If more than one freelancer is tied for most Infamy, then whichever of them has the most Rep in a single faction wins. c. If the highest number of Rep in a faction is equal, whoever has the highest total number of Rep wins. d. In the event that the game is still tied, whoever has the most henchmen wins. e. In the event that the game is still tied, it's a draw.
-
If no freelancer has more than 15i but multiple freelancers achieve 5r simultaneously: a. From amongst the tied freelancers, the one who has the most Infamy wins. b. If more than one tied freelancer is tied for most infamy, then whichever of them has the most total Rep in all faction wins. c. In the event that the game is still tied, whoever has the most henchmen wins. d. In the event that the game is still tied, whoever has the most completed missions wins. e. In the event that the game is still tied, it's a draw.
-
If one freelancer achieves 5r and other freelancers achieved 15i exactly, the freelancer who achieved 5r wins.
-
If one freelancer achieves 5r and other freelancers achieved more than 15i, the freelancer with more than 15i wins.
Factions and Rep
Each freelancer has a Freelancer Sheet that openly tracks his progress in the game. When a freelancer earns Rep, he tracks that progress on his Freelancer Sheet with his scoring cubes. Terms like "Gain 2 Infamy" or "Gain 1 Reputation" are often abbreviated as "Gain 2i" or "Gain 1r".
As a freelancer gains Rep in any of the three factions, he also gains certain special benefits (described on the Freelancer Sheet). Freelancers may have Rep in multiple factions and receive the benefits of that Rep. A freelancer with higher levels of Rep in a faction always has all of the benefits of the lower levels as well (for example, a freelancer with 3 Rep in Cartel has the Enforcer, Pusher, and Hood benefits).
NOTE: Visiting the Megacorp HQ for the first time will trigger the Stringer effect and result in the Freelancer gaining a data.
New Terms
Now that you are familiar with the rules, there are a few terms to discuss.
Spend/Recover
If a freelancer is instructed to Spend one or more bribes, he flips the indicated number of Bribes from his Available Bribes section to their spent side and moves them to his Spent Bribes section. Similarly, if a freelancer is instructed to Recover one or more Bribes, he flips the indicated number of Bribes from his Spent Bribes section to their available side and places them in his Available Bribes section. A freelancer may only recover Bribes currently in their Spent Bribes section.
Steal
Occasionally a card will instruct one freelancer to Steal a resource or scheme from a rival. The card will instruct the freelancer as to who makes any choices regarding the type of item stolen.
Sabotage
Some cards have an effect written as Sabotage X. When a freelancer plays this effect, he chooses X number of available missions (those currently on the Mission Track) and puts them on the bottom of the Mission Deck. If more than one mission is Sabotaged at once, the freelancer playing the effect decides what order to put them on the bottom of the Mission Deck.
Contacts
NOTE: Some contacts have a special icon in the upper left hand corner. This icon indicates that they have an effect that matters later in the round ("ongoing"). This icon reminds freelancers to pay attention to those effects as they play the rest of the round.
Accomplice: The Accomplice is a special Contact who has his own (black) Pawn and sector cards. The freelancer who successfully wins the Accomplice treats him as an additional freelancer that he controls for that round. The freelancer plays a sector card and places the Accomplice Pawn. The freelancer places both his Pawn and the Accomplice Pawn in whichever order he chooses (though still in Contact Order). The Accomplice Pawn is treated as though it represents his freelancer the same way the freelancer's own Pawn does. Anything that could affect a freelancer can affect the Accomplice Pawn (and the freelancer who won him this round).
NOTE: A freelancer who wins the Accomplice is not allowed to gain Rep on the Round in which he won the Accomplice. A freelancer is still allowed to gain Rep prior to winning the Accomplice.
Arms Dealer: The freelancer who wins the Arms Dealer gains 2 Weapons. The Arms Dealer is a Militia Contact.
Chemist: The freelancer who wins the Chemist gains 2 Compound. The Chemist is a Cartel Contact.
Cloner: The freelancer who wins the Cloner gains 1 Henchman.
Fixer: The freelancer who wins the Fixer gains 1 Favor. A freelancer may not use a Favor to Bribe the Fixer.
Hacker: The freelancer who wins the Hacker gains 2 Data. The Hacker is a Megacorp Contact.
Informant: The freelancer who wins the Informant draws 2 schemes (from any combination of Factions). He then discards any 1 scheme from his hand. That freelancer may play 1 additional scheme during the Scheme Phase this Round. The Informant is a Megacorp Contact.
Liaison: The freelancer who wins the Liaison chooses to gain either 2 Infamy or 1 Reputation in a faction of his choice.
Peddler: The freelancer who wins the Peddler gains 1 resource of his choice. The Peddler is a Cartel, Megacorp, and Militia Contact.
NOTE: If winning Peddler triggers multiple effects, the freelancer who won him may choose the order to resolve those.
Saboteur: The freelancer who wins the Saboteur chooses an available mission and Sabotages it (places it on the bottom of the Mission Deck). He may then place a Hazard on any non-HQ resupply zone of the sector shown on the mission card. In the event that no Hazard Tokens are available in the General Supply, no Hazard Token is placed.
Sector Chief: The freelancer who wins the Sector Chief adds 1 Watchdog Token to a sector of his choice. The freelancer who won the Sector Chief may place his Pawn (including the Accomplice Pawn) on sectors containing Watchdogs during the Sector Phase of this Round. At the end of the Round, the freelancer removes 1 Watchdog Token from a sector of his choice prior to the Replace Missions step of the Sector Phase.
Smuggler: The freelancer who wins the Smuggler gains a special ability for the remainder of this Round. If it is Day, the freelancer may choose to not place his Pawn during the Sector Phase to gain 1 resource and draws 1 scheme. This choice is made when the freelancer would place his Pawn that Round. If it is Night, the freelancer duplicates any resupply action he takes this Round.
NOTE: If a freelancer wins both the Accomplice and the Smuggler, he may also choose not to place his Accomplice Pawn during the Day in order to get the Smuggler ability twice. At Night, the Accomplice's resupply action is also doubled if the Smuggler was also won by that freelancer.
Thug: The freelancer who wins the Thug steals a resource of his choice from a chosen rival. That rival may Spend 3 Bribes to cancel this ability. The Thug is a Cartel Contact.