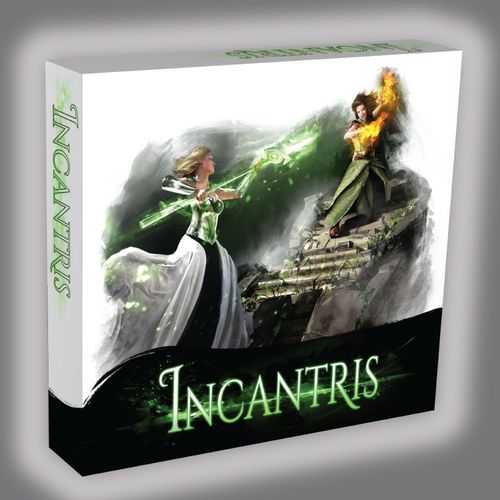
Incantris
Incantris Rulebook
Table of Contents
Table of Contents
Game Components
- 8 Double-Sided Tiles with Hexagonal Grids
- 6 Double-Sided Half Tiles with Hexagonal Grids
- 12 Wizard Miniatures in four colors (two Shamans, two Druids, two Sorcerers, two Sorceresses, two Shadow Weavers, and two Arcane Knights)
- 12 Wizard Reference Boards
- 12 Life Point Sliders
- 5 Eight-Sided Casting Dice
- Punch out Trees, Walls, Turn Tokens, and Spell Effects
- 1 Rulebook
(Figure 1: Game Components — see the printed rulebook, p. 1.)
Introduction
For decades the Kingdom of Aldramere has been locked in a vicious war with its foes. The magical energies released during the war are threatening to rupture the fabric of the world. To bring final resolution to the conflict, both sides have agreed to a battle of three champions. To choose its champions, the leaders of Aldramere have summoned contenders from around the Kingdom to the mystical ruins of Orleal. There they will engage in magical combat to decide which of them is worthy to be Aldramere's champions.
Incantris is a game of magical combat set in the Kingdom of Aldramere. Players control teams of three wizards, each with unique spells and abilities. Rain down fiery meteors with the Sorceress, call upon the bear spirit to unleash destruction with the Shaman, strike from afar with the Shadow Weaver, or pummel foes with the Druid's tempest. Decide how best to use these abilities to defeat the other players and become the champion of Aldramere.
Set Up
-
Distribute Game Components - Each player chooses a team of wizards by color. Each team is suited to a different style of play. For information on the teams, see the Selecting Your Team sidebar below.
Important note: Throughout this rulebook the term "wizard" is used to refer generically to the Arcane Knight, Druid, Shadow Weaver, Shaman, Sorceress, and Sorcerer.
Each player takes the three wizard miniatures of his or her team's color, associated wizard reference boards, life point sliders, and the wizard turn tokens. Players should also take any associated spell effect tokens that belong to their wizards. If less than four players are playing, set aside the wizard miniatures and reference sheets for the unselected teams. Clip the life point sliders to each wizard reference board so they cover the highest value along the left side of the board. This indicates the wizard is at full life. Place the white casting dice within easy reach of all players.
-
Choose the Game's Scenario - Incantris can be played according to four different scenarios. Players should mutually agree on one of the following:
- Battle Royale - Players fight one another. The last player to have at least one wizard in the arena wins.
- Crystal Sap - Players try to sap energy from their crystals while keeping other players from doing the same. The first player to sap all their crystals is the winner.
- Capture the Crystal - The first player to pick up a crystal positioned opposite their team's starting zone and move it off the arena through their own starting zone is the winner.
- Shifting Arena - Similar to a Battle Royale, but players fight in an arena that shifts beneath their feet. The last player to have at least one wizard in the arena is the winner.
See Scenarios (p. 11) for more information and special rules.
Arena Set Ups
(Figure 2: Arena Set Up by Scenario and Player — Areas shaded orange indicate player starting zones. Hexes shown in blue indicate the locations of crystals for those scenarios that use them. The tiles used above are only suggestions for setups. Players may use any tiles they mutually agree upon. Players may also place trees and walls on the arena as they choose.)
See the printed rulebook, p. 5, for the arena diagrams.
Selecting Your Team
Each team of wizards has different spells and magical abilities that make playing with them a unique experience.
- Red: The Shaman controls the movement of his foes with Bear Presence, while the Druid slows enemies and heals her friends. The Sorceress delivers vicious area of effect magic while her hydra wreaks havoc.
- Blue: This well-balanced team features the Arcane Knight who dominates at close range, while the Shadow Weaver strikes from afar. The Sorcerer supports them and enhances their spells.
- Purple: The Shadow Weaver and Shaman control movement in the arena with Bear Presence and Fog Wall. The Sorceress can use her spell totem to harass the enemy while keeping herself safe from harm.
- Grey: The Arcane Knight and Druid are a fearsome close-quarters duo. The Sorcerer must anticipate when to use his Guardian Hydra and Blaze for maximum impact on the battle.
Sequence of Play
Incantris is played in a series of rounds. Each round is made up of turns played sequentially around the table. On a turn, a player may activate only one of his or her wizards. The player selects a wizard to activate and flips the corresponding turn token over to indicate that wizard has been activated this round. The active wizard may move and cast a spell or cast a spell and then move. Some wizards have magical abilities that may be used in lieu of casting a spell. Movement may not be "split" before and after spell casting. (Note: The Shadow Weaver's Shadow Dance magical ability is an exception to this rule.) A wizard may only cast a single spell per turn. If a player has wizards remaining he or she must activate one on his or her turn, but movement, spell casting, and use of magical abilities are always optional.
When the player has completed movement, spell casting, or using magical abilities with the active wizard, play passes to the player on the left. That player chooses a wizard to activate using the same procedure. Play proceeds around the table in this way until every player has activated each wizard he or she has in the arena. A player may only activate one wizard per turn, and wizards may only be activated once per round.
Once all wizards in the arena have been activated, a round is complete. The turn tokens are flipped back to the portrait side, and the sequence begins again. Importantly, as the game progresses and wizards are killed, players must skip turns at the end of the round if they have fewer living wizards than the other players. Turn tokens are not flipped back over until every living wizard in the arena has been activated, not just the player's own.
Movement & Terrain
Wizards have a number of movement points as shown at the bottom of the character illustration in a hexagon on their reference board. See The Wizard Reference Board on page 13 for an overview of the reference boards. This is the maximum number of movement points a wizard may expend on a turn, though he or she is free to expend fewer, or none. Wizards expend movement points to move across the arena. Generally, it costs one movement point to move from the hex the wizard is in to an adjacent hex. The hexes occupied by wizards of opposing teams are impassable. Wizards may freely move through the hexes occupied by wizards on their team, but two wizards may never occupy the same hex at the end of movement. Wizards may not enter, pass through or stop in partial hexes. Movement points return to full at the start of the wizard's turn. Hexes in the arena are either open ground, stream, or ocean.
- Open Ground - A wizard must expend one movement point to enter an open ground hex.
- Stream - A wizard must expend two movement points to enter a stream hex. If a wizard does not have at least two movement points remaining, he or she cannot enter the hex. However, it only costs one movement point to move from a stream hex into an open ground hex. Any hex that is more than 50% water is a stream hex. The stream's bridge is open ground. Neither the stream nor the bridge block line of sight.
- Ocean - Wizards may not enter, pass through, or otherwise occupy ocean hexes. (Note: The Druid's Water Walk special ability is an exception to this rule.) Ocean hexes do not block line of sight. Any hex that is more than 50% water is an ocean hex.
The road and rocky areas are artistic elements and have no effect on gameplay.
All hexes that are neither stream, ocean, nor otherwise impassable are open ground.
Obstacles
Hexes that contain obstacles are always impassable. Wizards may not enter, pass through, or otherwise occupy the same hex as an obstacle at any time. Incantris comes with a variety of obstacles that can be included in the arena: low walls, high walls, and trees.
- High Walls - High walls are obstacles and block line of sight. They are two hexes long.
- Low Walls - Low walls are obstacles, but do not block line of sight. They are one or two hexes long.
- Trees - Trees are obstacles and block line of sight. They occupy a single hex.
Casting Spells
A wizard may cast one spell from the list on the wizard's reference board per turn. To cast a spell, the player uses the following sequence:
-
Declare the spell and its target. The player declares which spell the wizard is casting and its target. Spells have one of three valid targets:
- Single Hex - One hex unoccupied by a wizard.
- Single Wizard - Any wizard on his or her team, another team, or on himself or herself.
- Area - A single hex that may or may not be occupied by another wizard. The spell also affects all six hexes surrounding the target hex. Area effect spells are permitted to extend into partial hexes or even off of the arena, but the central targeted hex must always be a whole hex in the arena. See Figure 3 for an illustration.
(Figure 3: Area of Effect Spells — see the printed rulebook, p. 7.)
-
Confirm range. The players confirm the target is within the spell's range. The range of a spell is the maximum number of hexes away from the caster the target of the spell can be (i.e. the target of a spell with a range of four can be up to and including four hexes away). See Figure 4 for an illustration. (Figure 4: The gray Druid can target either the blue Shadow Weaver or the red Shaman with her spell, Tempest, which has a range of three. The purple Sorceress is out of range.)
-
Confirm line of sight. The players confirm the casting wizard can "see" the target. A wizard can see another hex if a straight line can be drawn from any part of the hex the caster occupies to the center of the target hex and the line does not pass through any part of a hex that blocks line of sight. The hexes occupied by other wizards (regardless of their team) always block line of sight. Wizards can always see the hex they occupy. The outside edge of the arena also blocks sight. See Figure 5 for an illustration. Note that although the purple Sorceress can see the blue Shadow Weaver, the blue Shadow Weaver cannot see the purple Sorceress.
While most spells are resolved instantaneously, others have persistent effects that endure from turn to turn. Persistent spells are marked on the arena with a corresponding spell effect token. A wizard may only have one persistent effect created from a single spell at a time in the arena. The wizard is free to recast the spell, but if it is successfully cast again, its spell token is moved from the previous position to the new position. The spell's effects are not duplicated. If the wizard attempts to cast the spell again but fails, the first instance of the spell's effect remains.
A wizard may cancel one of his or her own persistent spells on his or her turn in addition to moving and casting a spell. This may be done at any point during the wizard's turn, even after the wizard has moved and cast a spell.
Strategy of Spell Casting
Each wizard has different strengths and vulnerabilities when warding against magic from different power sources. The Sorceress and Sorcerer ward best against elemental spells. The Shaman and Arcane Knight ward best against spirit spells. Conversely, the Shaman and Arcane Knight are most vulnerable to the elemental spells of the Sorcerer and Sorceress. Likewise Sorcerers and Sorceresses are most vulnerable to spirit magic. The Shadow Weaver and the Druid ward moderately well against all types of magic, and all wizards ward moderately well against their astral spells. Players should consider which wizards will be most vulnerable to their spells when they choose a target.
Magical Abilities
Each wizard has a magical ability as shown in gold on the wizard reference boards. Some of these are passive abilities the wizard may take advantage of at any time during his or her turn (such as the Druid's Water Walk and the Shadow Weaver's Shadow Dance). Others may be used instead of casting a spell (such as Cleansing Fire). Others allow the wizard to act on other turns or influence the movement of other wizards. Consult the wizard reference boards and the Spell & Magical Ability Reference (p. 20) for the effects of each.
Damage and Death
Whenever a wizard suffers points of damage, he or she loses the same number of life points. Players use the life tracker on the wizard reference board to track current life point totals for their wizards. Slide the life point indicator on top of the new life point total. The life point totals for each wizard are considered public information and must be accurately disclosed to the other players at their request. When a wizard reaches zero life points, he or she is dead and is removed from the arena. The wizard's corresponding turn token is also removed from play. Players with dead wizards must skip turns if other players still have wizards to activate in a round.
Winning the Game
The criteria for winning depends on which scenario is being played.
- Battle Royale - The last player with at least one living wizard wins.
- Crystal Sap - The first player to sap all of his or her crystals wins.
- Capture the Crystal - The first player to move his or her crystal off the edge of his or her starting zone wins.
- Shifting Arena - The last player with at least one living wizard wins.
See Scenarios for more information.
Scenarios
Unless otherwise specified, all scenarios are played according to the rules specified above, but with exceptions and special rules as noted below.
Battle Royale
The Battle Royale scenario is the basic game. The player with at least one wizard in the arena when all other wizards have died is the winner.
Crystal Sap
In this scenario, players try to sap the energy from crystals located in the other players' starting zones. Each player takes one crystal of every other player's color and places them in a stack in his or her starting zone as shown in Figure 2 (p. 5). This hex cannot contain an obstacle. Crystals occupy the hex they are in and make the hex impassable. However, they do not obstruct line of sight. Players do not place a crystal of their color in their own starting zone. A wizard must be in a hex adjacent to a crystal to sap its energy. A wizard may not sap a crystal and cast a spell on the same turn. Wizards may only sap crystals of their own color. When a crystal is sapped, it is placed beneath the wizard who sapped it. That wizard may now ward with an additional 1D against all power sources for each crystal he or she has sapped. The first player to sap all of their crystals wins the game. Wizards who have sapped the energy from a crystal do not have to remain alive to win. If they die, the crystal token is removed from the arena as well.
Capture the Crystal
To win this scenario the players must use their wizards to capture a crystal across from their starting zones and carry it off the arena by stepping out of their starting zone. It takes one movement point to step off the edge of the arena. A wizard with the crystal may step into a partial hex in their starting zone, so long as he or she has at least one movement point still remaining to move the wizard completely off the arena and win the game. See Figure 2 (p. 5) for an illustration of arena setup and crystal placement.
A wizard may pick up a crystal by being in a hex adjacent to it. Wizards may only pick up crystals of their own color. Place the crystal token under the wizard's miniature to indicate that he or she is carrying it. There is no penalty for picking up a crystal. Wizards may continue movement and may cast spells on the turn they pick up a crystal. If a wizard carrying a crystal dies, the crystal remains in the hex where the wizard died. It may then be picked up by another wizard on the team. Wizards may not voluntarily drop a crystal. Crystals occupy the hex they are in and make the hex impassable. However, they do not obstruct line of sight. A wizard carrying a crystal receives an additional 1D ward against magic from all power sources.
Shifting Arena
In this scenario, the battlefield arena magically shifts during the game. The center tile of Shifting Arena setups must always be open ground. Walls and trees should not cross the edge of a tile.
Following the conclusion of each round, tiles are shifted as shown in Figure 7. Note that the edge of the shifting tile or tiles that was in contact with the center tile remains in contact with the center tile after the tile's shift.
If a wizard occupies a hex created by two or more tiles when one of the tiles shifts, the player who controls the wizard immediately moves the wizard into an adjacent open or stream hex on a single tile. In this way, the player may choose whether the wizard moves with the tile or not. If a single-hex persistent spell effect token occupies a hex created by two or more tiles, the player whose wizard cast the spell may move it just as if it were one of his or her wizards. An area of effect spell token will shift if its center is on the shifting tile. If its center is on a hex created by multiple tiles, the player may move it one hex as if it were a wizard. This may mean that the spell effect token may hang off the arena after the shift.
(Figure 7: Valid Tile Shifts. (A) Tile shifts for 2 and 3 player games. One tile is shifted at the end of each round in a clockwise direction. Note that in a two-player game, the first shift brings the players' starting zones together. (B) Tile shifts in a four-player game. Two tiles are shifted at the end of each round in a clockwise direction. The blue line illustrates keeping the same side of the shifting tile in contact with the center tile before and after the shift. They continue to shift in this pattern at the end of each round until the end of the game.)
The Wizard Reference Board
The wizard reference boards provide information on the characteristics, spells, and abilities of the wizards. They are also used to track the number of life points each wizard has using the life tracker. For complete information on each spell and magical ability, see the Spell & Magical Ability Reference (p. 20). All information on the wizard reference boards is public information and may be viewed by the other players upon request.
(Figure 8: Understanding the Wizard Reference Boards — labels the wizard name, power source, casting dice, spell range, spell name, brief spell description, magical ability, life tracker, movement points, warding rolls, and the sorceress's associated turn token. The per-wizard values, including life, movement points and warding rolls, are printed on the reference boards themselves and are not restated in this text.)
Campaigns
Four games of Incantris can be chained together to form a campaign to simulate the variety of matches the wizard teams play before the champions of Aldramere are chosen. Players are awarded victory points in each game. The player with the most victory points at the end of the four games wins the campaign. Additionally, wizards gain experience which can be used to increase their effectiveness in later games. To play a campaign, the four scenarios are played in the following order:
- Game 1 - Sap the Crystals: Players are awarded one victory point for each crystal sapped.
- Game 2 - Battle Royale: Players are awarded victory points by place. In a four-player game, the winning player receives three victory points, the second-place player two victory points, and the third-place player receives one victory point. The fourth-place player receives none. In a three-player game, the winner receives two victory points, the second-place player receives one, and the third-place player receives none. In a two-player campaign the winning player receives two victory points and the losing player zero.
- Game 3 - Capture the Crystal: The winning player receives three victory points in a four-player game and two victory points in three- and two-player games.
- Game 4 - Shifting Arena: Victory points are awarded according to the same method for the Battle Royale scenario.
Players use the victory point counters to keep track of the number of victory points he or she currently has.
(Victory Point Counters — see the printed rulebook, p. 14.)
Experience
A player receives an experience star for his or her team every time one of the player's wizards kills a wizard on another team. In the Sap the Crystals scenario, the player also receives an experience star for each crystal sapped. When an experience star is earned, the player should immediately take an experience star token.
The player may spend experience stars to purchase equipment for the team's wizards between games, or may save their experience stars to make purchases later. Importantly, experience stars are assigned to teams, but the items purchased with them are assigned to individual wizards. As soon as an item is purchased it must be assigned to a wizard. Place the item token on the wizard's reference board to indicate that it has been assigned to him or her. Items cannot be transferred to other wizards once they are assigned. Items can only be used once and are discarded after they are used. The items are as follows:
- Crystal Coin - Use this coin any time after rolling the casting dice (either casting or warding) for the wizard who carries it. The player may immediately reroll the dice and may select which of the two rolls he or she would like to use. A Crystal Coin costs one experience star.
- Power Ring - Use this ring before the wizard who bears it rolls the casting dice to cast a spell. This ring grants +1 to the roll. A Power Ring costs two experience stars.
- Amulet - Use this amulet before the wizard who bears it rolls the casting dice to ward against a spell. The amulet grants +1 to the roll. An amulet costs two experience stars.
- Red Potion - The wizard who bears the red potion may choose to drink it instead of casting a spell. It immediately restores two life points to the wizard. The wizard may still move as normal on the turn the potion is drunk. A red potion costs two experience stars.
- Winged Boots - Use these boots on the wizard's turn who bears them. They provide one additional movement point to the wizard on that turn only. Winged boots cost three experience stars.
(Experience Star Token, Power Ring Token, Amulet Token, Red Potion Token, Winged Boots Token — see the printed rulebook, p. 15.)
Solo Play Rules
Incantris can be played by a single player in "solo mode". In it, the player controls a team of wizards in the arena that is surrounded by a second team — called the attacking team — that is controlled by specified rules. The player wins by killing all the attacking wizards. The player loses if the attacking wizards kill all of the player's wizards. Familiarity with the game's standard rules is assumed here. All rules for the standard game apply, except in the cases specified below.
1-Player Set Up
The player selects his or her team of wizards and takes the three wizard miniatures of that color, associated wizard reference boards, and the wizard turn tokens for his or her team. The player then selects another team to be the attacking wizards. Take its wizard miniatures, wizard reference boards, and wizard turn tokens as well. Attach the life point sliders to the wizard reference boards to indicate that all wizards are at full life.
Construct the arena from three tiles arranged as shown in Figure 9. Up to three trees, two low walls, and one high wall may be placed on the arena as the player chooses. However, they may not block the attacking wizards' entry to the arena or otherwise pen them in. The player takes the attacking wizards and places them at each corner of the arena, positioned off the tiles in the locations shown in Figure 9. The player then positions his or her wizards in the arena. The player's wizards may not be placed in impassable hexes. Only one of the player's wizards may be placed on a single tile. Player wizards may not be placed in hexes that are created by two or more tiles.
(Figure 9: One-Player Set Up — Create the arena by placing any three tiles as shown. One attacking wizard is placed in each location indicated with a red circle.)
Attacking Wizard Rules
Attacking wizards may move and then cast a spell, but they have a limited selection of spells and operate according to a specified ruleset. The spells available to the attacking wizards are listed in Table 1 (p. 17). Attacking wizards never roll the casting dice when casting these spells. Instead, the number of wands they roll for each spell is also given in Table 1.
Attacking wizards always attempt to cast a spell against a player's wizards according to the following order of priority:
- The wizard will try to cast against his or her "favored foe" on the player's team (see Table 2). If the favored foe is out of range (even after moving) or otherwise cannot be cast against, then the wizard will attempt to cast against,
- the player's wizard with the least amount of life points remaining. If this wizard is also out of range, then the wizard will cast against,
- the player's wizard closest to the active attacking wizard.
If the wizard can cast his or her spell against the foe without moving, then the wizard will only cast the spell and not move. If the target is out of range, but the wizard can move within range and to a hex where he or she can see the target, the wizard will move directly to that hex, and only move far enough to the target wizard to bring him or her to within range of the spell. Then the wizard will cast the spell. If two of the player's wizards have the same number of life points and are equidistant, then the wizard will attack the target that uses a power source different from his or her own. If an attacking wizard cannot cast a spell against any of the player's wizards, then he or she will move as far as possible toward the highest priority target by the most direct route possible.
Example 3: It is the attacking team's turn, and its Sorceress has been activated. The player has a Shaman, which is the Sorceress's favored foe. The Sorceress is 10 hexes away from the Shaman. This is beyond Meteor Storm's range of 8, but the Sorceress can move within range and to a hex where she can see the Shaman. She moves toward the Shaman two hexes, just far enough to come within range of the spell, and then casts Meteor Storm on him.
Example 4: It is the attacking team's turn and its Sorceress has been activated. The player has a Shaman, which is the Sorceress's favored foe. However, the Sorceress is currently 14 hexes away from the Shaman. Meteor Storm has a range of 8. The Sorceress only has four movement points, and so she cannot move within range to cast Meteor Storm on the Shaman. Therefore, the player must check to see if the Sorceress can cast against her secondary target—the player's wizard that has the least life points remaining. In this case, the player's Sorcerer has the least on the team. She is only four hexes away from the Sorcerer and within line of sight. Therefore, the attacking Sorceress will not move and will cast Meteor Storm on the Sorcerer.
Attacking wizards never use Cleansing Fire or Shadow Dance, but the Shaman's Bear Presence, the Arcane Knight's Retribution, and the Druid's Water Walk are in effect. If the attacking Arcane Knight's Retribution is triggered, it is assumed to roll 3 wands.
Attacking wizards do not roll to ward. The number of wards they roll is fixed according to the ward roll the wizard would receive if they were a player's wizard. See Table 3.
Table 1 - Attacking Wizard Spells
| Wizard | Spell | Wands |
|---|---|---|
| Shaman* | Eagle Talon | 4 |
| Shaman* | Primal Reach | 3 |
| Arcane Knight† | Phantom Blast | 4 |
| Arcane Knight† | Spectral Rush | 5 |
| Druid | Tempest | 3 |
| Shadow Weaver | Gloom Strike | 2 |
| Sorcerer and Sorceress | Meteor Storm‡ | 4 |
- * The Shaman will always use Eagle Talon against his target if possible. If he cannot, he will cast Primal Reach and move the target directly toward him if he inflicts damage.
- † The Arcane Knight will always cast Spectral Rush against her target if possible. If she cannot, she will cast Phantom Blast.
- ‡ The attacking Sorcerer and Sorceress will always center Meteor Storm on the target unless he or she can affect more of the player's wizards by centering it in another hex.
Table 2 - Attacking Wizard Favored Foes
| Wizard | Favored Foe |
|---|---|
| Shaman | Sorcerer/Sorceress |
| Arcane Knight | Sorcerer/Sorceress |
| Druid | Player Wizard with Least Number of Life Points* |
| Shadow Weaver | Player Wizard with Least Number of Life Points* |
| Sorcerer | Shaman/Arcane Knight |
| Sorceress | Shaman/Arcane Knight |
* In the case of the Druid and Shadow Weaver, their highest priority target is the player's wizard with the least number of life points, the same as other attacking wizards' secondary target.
Table 3 - Attacking Wizard Wards
| Standard Ward | Attacking Wizard Ward |
|---|---|
| 2D+1 | 2 |
| 2D | 1 |
| 1D | 0 |
Gameplay
The attacking wizards always take the first turn. Flip their turn tokens upside down and randomize them. Draw one turn token. That is the attacking wizard activated this turn. That wizard steps into the arena in either of the two available hexes, expending one movement point to do so. Attacking wizards that have not yet entered the arena may not be targeted by spells or otherwise affected by them. They may not cast spells from outside the arena. They must move into the arena to cast their first spell. Once a wizard enters the arena they may not move outside of it again. The player's wizards may never step outside the arena.
The player must play the active attacking wizard according to the "Attacking Wizard Rules" given above. When the turn is complete the wizard's turn token is set aside. It is now the player's turn to activate a wizard according to the game's standard rules. When play returns to the attacking wizards, the active wizard is again chosen by randomly selecting one of the two remaining upside-down turn tokens. After the third turn, the attacking wizard's turn tokens are reshuffled so the next round can begin.
Play continues in this manner until all the wizards on one side have been killed.
Spell & Magical Ability Reference
Bane
- Range: 6
- Target: Single Wizard
- Casting Dice: 3D
If the caster scores at least one hit on the target, the target's warding rolls against all power sources drop to 1D. Place the Bane token under the affected wizard to indicate the effect. A wizard may only be affected by a single Bane spell at a time. Bane is a persistent spell.
Bear Presence (Magical Ability)
Wizards from opposing teams must immediately stop and end their movement upon entering a hex adjacent to the Shaman. An opposing wizard who begins his or her turn adjacent to the Shaman may not move directly into another hex adjacent to him.
Blaze
- Range: 6
- Target: Area
- Casting Dice: Auto
The caster creates a blazing circle of fire in the area of effect. Place the blaze token on the arena to represent the effect. The blaze does not inflict damage immediately. Instead, on future turns the caster may roll 1D+2 with an elemental power source against any wizard that enters a hex occupied by the blaze or that ends his or her turn in a hex occupied by the blaze. Blaze does not block line of sight. Blaze is a persistent spell.
Breath of Life
- Range: 4
- Target: Single Wizard
- Casting Dice: 1D+2
The target regains 1 life point for each wand rolled. Life points cannot exceed the wizard's starting number.
Cleansing Fire (Magical Ability)
The Sorceress/Sorcerer may cancel any persistent magical effect affecting him/her, in the hex he/she occupies, in an adjacent hex, or affecting an adjacent wizard. This ability may be used before or after movement. If this ability is used, the Sorceress/Sorcerer may not cast a spell on the same turn.
Eagle Talon
- Range: 1
- Target: Single Wizard
- Casting Dice: 3D+2
Target suffers 1 point of damage per hit.
Entanglement
- Range: 6
- Target: Single Wizard
- Casting Dice: 3D
If at least one hit is scored on the target, the target's movement points are reduced to only two per turn. Place the Entanglement token under the affected wizard to indicate he or she is entangled. A wizard may only be affected by a single Entanglement spell at a time. Entanglement is a persistent spell.
Flame Darts
- Range: 8
- Target: Single Wizard
- Casting Dice: 1D+2
Target suffers 1 point of damage per hit.
Fog Wall
- Range: 6
- Target: Up to Two Adjacent Hexes
- Casting Dice: Auto
The caster conjures a wall of fog two hexes long on the arena. Wizards on opposing teams may not move through the wall and it blocks their line of sight. The fog wall may be placed in empty open ground or stream hexes. The caster and other wizards on his or her team may move through the fog wall, but no wizard may occupy a fog wall hex for any reason. Place the Fog Wall token to indicate its presence. Fog Wall is a persistent spell.
Gloom Strike
- Range: 12
- Target: Single Wizard
- Casting Dice: 2D+1
Target suffers 1 point of damage per hit.
Guardian Hydra
- Range: 6
- Target: Single Hex
- Casting Dice: Auto
The caster places a hydra in the target hex. The hex must be an unoccupied open ground or stream hex. Hydras may not be placed in the ocean. On the caster's subsequent turns, the hydra casts Flame Darts with an elemental power source, but with 2D+1. Hydras block line of sight, cannot move, are indestructible, and impassable. If the caster is killed, Guardian Hydra remains in the arena but may no longer cast Flame Darts. Guardian Hydra is a persistent spell.
Healing Warmth
- Range: 4
- Target: Single Wizard
- Casting Dice: 1D+2
The target regains 1 life point for each wand rolled. Life points cannot exceed the wizard's starting total.
Inferno
- Range: 4
- Target: Single Wizard
- Casting Dice: 3D+2
Target suffers 1 point of damage per hit.
Meteor Storm
- Range: 8
- Target: Area
- Casting Dice: 2D+1
Affected wizards suffer 1 point of damage per hit. Roll casting dice separately against each wizard in the target area. All wizards ward as normal.
Phantom Blast
- Range: 1
- Target: Single Wizard
- Casting Dice: 2D+2
Target suffers 1 point of damage per hit.
Power Circle
- Range: 5
- Target: Area
- Casting Dice: Auto
All spells cast within the Power Circle that require the roll of casting dice receive an additional "+1" to casting rolls. Place the Power Circle token on the arena to indicate its presence. Power Circle does not block line of sight and is a persistent spell. If the wizard who cast Power Circle dies, it remains on the board and continues to grant its bonus.
Primal Reach
- Range: 4
- Target: Single Wizard
- Casting Dice: 1D+2
Target suffers 1 point of damage per hit. If the caster inflicts at least one point of damage, he or she may move the target one hex for each point of damage inflicted. The caster may not move the target into or through any impassable hex. Streams do not slow down the target for the purpose of this movement.
Retribution (Magical Ability)
The Arcane Knight uses this ability immediately and automatically whenever a wizard from an opposing team moves out of a hex adjacent to her, even though it is not her turn. The player who controls the Arcane Knight rolls a 2D+1 spiritual spell against the target. Target wards as normal and suffers 1 point of damage per hit.
Anytime a wizard moves out of a hex adjacent to the Arcane Knight, Retribution is triggered. Therefore, Retribution may be triggered more than once a round. For instance, if a single wizard moves through multiple hexes adjacent to the Arcane Knight, the wizard would trigger the ability each time he or she left an adjacent hex. However, Retribution is not triggered when the Arcane Knight moves away from other wizards, nor is it triggered if a wizard leaves a hex adjacent to the Arcane Knight by way other than movement, such as by Teleport or Primal Reach.
Scorching Chain
- Range: 5
- Target: Single Wizard
- Casting Dice: 2D+1
Target suffers 1 point of damage per hit. If the target loses at least one life point, the fiery chain may jump to another wizard of the caster's choice. The chain can jump up to three hexes away to a new target within the damaged wizard's line of sight. If it damages that wizard, the chain may jump to a third, etc. Scorching Chain may not affect the same wizard twice in a single casting.
Shadow Dance (Magical Ability)
The Shadow Weaver may move, cast a spell, and then move again so long as he expends no more than five movement points in total on the turn.
Spell Totem
- Range: 10
- Target: Single Hex
- Casting Dice: Auto
The caster places a spell totem in an empty open ground or stream hex. On future turns the caster may cast spells or use magical abilities from the totem's location as if he or she is standing in that hex. Place the spell totem on the arena to indicate its presence. Spell Totem blocks line of sight, cannot move, is indestructible, and is impassable. Spell Totem is a persistent spell.
Spectral Rush
- Range: 1
- Target: Single Wizard
- Casting Dice: 2D+3
This spell may only be cast if the caster began the turn at least three hexes away from the target. Target suffers 1 point of damage per hit.
Teleport
- Range: 6
- Target: Single Wizard
- Casting Dice: 3D/Auto
The caster may move the target wizard up to four hexes from his or her current location in any direction if at least one hit is scored on the target. The target may not be teleported to an impassable hex (though he or she may be teleported through them). The caster does not need to see the hex to which the wizard is teleported. Teleport is automatically cast successfully if the target is the caster or a wizard on the caster's team.
Tempest
- Range: 3
- Target: Single Wizard
- Casting Dice: 2D+2
Target suffers 1 point of damage per hit.
Water Walk (Magical Ability)
The Druid treats all stream hexes as if they are open ground for the purposes of movement. Further, the Druid may move through ocean hexes as if they are streams.
FAQ
1. Can a wizard move around the Shaman with his Bear Presence Magical Ability?
Yes. Although a wizard from an opposing team in a hex adjacent to a Shaman may not move directly into another hex adjacent to the Shaman, he or she may move "out and around" the Shaman to another hex adjacent to him.
2. Can the Sorcerer/Sorceress cancel an entire Blaze or Power Circle even if he or she is only in, or adjacent to, a part of it?
Yes. The entire Blaze and Power Circle is a single effect. If the Sorcerer or Sorceress is eligible to cancel any part with Cleansing Fire, then the entire effect is canceled.
3. Can a wizard suffer the effect of Blaze multiple times on a single turn?
Yes. A wizard moving through the Blaze would suffer its effect for each hex he or she tried to move through. However, a wizard can only suffer the effects of Blaze once per hex per turn. Therefore, if a wizard moves into a hex filled with Blaze but then stays there, he or she only suffers the Blaze when the hex is entered, and not again at the end of the turn. If a wizard is already in the hex filled with Blaze at the start of his or her turn, and chooses to stay there, he or she suffers the effect of Blaze at the end of the turn. Blaze has no effect on a wizard moving out of a hex filled with Blaze.
4. Can I Teleport a wizard through a fog wall?
Yes. Wizards may be teleported into hexes the caster cannot see.
5. Is the damage caused by Blaze increased if it occupies the same hex as a Power Circle?
No. Blaze only receives the +1 bonus if it is cast by a wizard standing in the Power Circle.
6. I have a dead wizard and would like to skip my first or second turns in the round rather than my third. May I do this?
No. Players must always activate a wizard on their turn if they have one to activate. This means that turns skipped because of dead wizards will always occur at the end of rounds.
7. May I use Primal Reach or Teleport to move enemy wizards into a Blaze to damage them?
Yes, but remember Blaze only affects wizards when they move into a hex with the Blaze. While the Primal Reach spell moves the target wizard through multiple hexes on the way to the final hex, a teleported wizard never occupies the intervening hexes between his or her original position and the hex into which he or she is teleported.