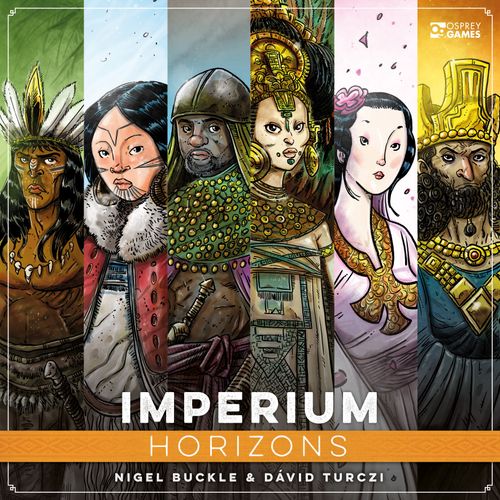
Imperium: Horizons
Imperium: Horizons Rulebook
Table of Contents
Table of Contents
- Historical Note
- Introduction
- Using this Rulebook
- Core Concepts
- Components
- Setup
- Flow of Play
- Reshuffling Your Draw Deck
- Solstice
- Game End
- Example Turn
- Optional Rules & Gameplay Variants
- Solo Ruleset
- Keywords
- All Players / All Other Players
- Abandon
- Acquire (Uncivilised / Civilised / Region / Tributary)
- Action (Gaining and Spending)
- Attack
- Barbarian
- Break Through (Uncivilised / Civilised / Region / Tributary)
- Choose
- Develop
- Discard
- Draw Card(s)
- Draw Card(s) If Able
- Empire
- Exhaust
- Exile
- Find
- Free Play
- Gaining Goods From Merchants / Trade Route in Play
- Garrison
- Give a Card
- History
- In-Play Cards ("Remains in Play" / "Affects Other Players")
- Look
- Nation Deck
- Passive
- Pay (Materials / Population / Progress)
- Place Cards on Your Deck
- Recall
- Return an Unrest Card
- Return an Exhaustion Token
- Solstice
- Steal Resources
- Swap
- Take
- Treat As
- Card-specific Notes
- Nation Descriptions
- Abbasids (Trade Route) — Complexity 2/5
- Aksumites (Trade Route) — Complexity 2/5
- Arthurians — Complexity 5/5
- Atlanteans — Complexity 3/5
- Carthaginians — Complexity 2/5
- Celts — Complexity 2/5
- Cultists (3 Exhaustion tokens) — Complexity 5/5+
- Egyptians — Complexity 3/5
- Greeks — Complexity 3/5
- Guptas (Trade Route) — Complexity 2/5
- Inuit (3 Exhaustion tokens) — Complexity 4/5
- Japanese — Complexity 2/5
- Macedonians — Complexity 1/5
- Magyars — Complexity 1/5
- Martians — Complexity 5/5
- Mauryans — Complexity 2/5
- Mayans (Trade Route) — Complexity 4/5
- Minoans — Complexity 2/5
- Olmecs — Complexity 4/5
- Persians — Complexity 1/5
- Polynesians (3 Exhaustion tokens) — Complexity 5/5
- Qin — Complexity 2/5
- Romans — Complexity 1/5
- Sassanids (Trade Route) — Complexity 4/5
- Scythians — Complexity 2/5
- Taino (3 Exhaustion tokens) — Complexity 3/5
- Tang (Trade Route) — Complexity 3/5
- Utopians (3 Exhaustion tokens) — Complexity 5/5+
- Vikings — Complexity 3/5
- Wagadou (Trade Route) — Complexity 3/5
- Rules to Remember
- Campaign Logs
- Solo Mode Trade Route Tables
Historical Note
Imperium is a game that is based heavily in the history of peoples from all across the world in the time period 3000 BCE – 1000 CE. Historical accuracy has been a core value throughout development of this game, but the very mechanic of deck-building is inherently abstract, and the notion of a linear and inexorable rise of nations into empires is a knowing misrepresentation of actual events.
The original Imperium (Classics and Legends) games used identical Barbarian/Empire State cards for all nations. In Horizons, we introduce a number of new nations who, for a variety of thematic and historical reasons, fit even less into that overly simplistic paradigm than the ones before. However, in order to maintain mechanical and rules compatibility between all versions of the game, we have continued to use the original blue and red symbols, even when the words 'Empire' and 'Barbarian' would not correspond to the historical context depicted.
It is our hope that all versions of Imperium help to spark interest in the ancient world, and the peoples who lived in it. It is mechanically useful for a card game to make sweeping generalisations with words like 'Barbarian', 'Civilised', 'Nation' or 'Advance' – but real history is much more nuanced and complicated, and our game terms are most certainly never meant to pass judgement on others. Where possible we have used names, places, people, and thematic elements lifted directly from historical records – but every deck in this game falls well short of capturing the richness and complexity of real people and real history. So, if the themes and references in Imperium interest you, we highly encourage you to pursue that interest in other forms outside of the game!
Introduction
Welcome to Imperium: Horizons. In your hands lies the destiny of one of the most storied peoples of history. As new opportunities open up, you must explore new lands, preside over dramatic scientific and cultural advances, and lead your people to become a cultural force. Expand too rapidly and unrest will bring your civilisation to its knees; build up too slowly and you might find yourself a mere footnote in the annals of history.
Theme & Mechanics
Playing Imperium is meant to parallel the way in which leaders – despite being powerful and in charge – are constantly forced to deal with shifting challenges and opportunities. You can't simply harvest when it's convenient – you need to wait for the proper season. You can't simply invent something on demand – you must wait until your thinkers have the idea. You can't meet new people or explore new lands until those opportunities arise – and you might be competing with other nations for them. These themes are represented both by the effects of the cards and by where they are played.
In Imperium, the cards available to you in your nation's deck represent your current civilisation state. Your nation's higher-powered cards, which you slowly unlock through the game, represent your potential in the future.
The internal disorder in your civilisation and opposition to the current leadership are represented by Unrest cards that have no function and clog up your deck during the game. One way they are added to your deck is through adding new cards from the Market, as change and new ideas always result in some resistance which you must deal with. In other cases, Unrest might represent general malcontents or troublemakers sent by your opponent.
The cards in your Play area in front of you are the focus of your current leaders or government. The most prominent part of your Play area is usually the Regions in which your civilisation has settled. When a Region goes from your deck to your Play area, it becomes something that is in active use, as opposed to Regions still in your deck or hand, which are yours to claim but you have yet to develop.
Abandoning or Recalling a region doesn't remove it from your civilisation – it just means that it is no longer available to tax or improve. When you play the Glory card, which requires you to Abandon three Regions in play, it represents your government focusing on some new (glorious) activity – such as building statues or hosting celebrations – as opposed to productive governance. Hence your regional infrastructure suffers from lack of attention and Resources.
Regions can also have cards Garrisoned in them by tucking cards underneath. That doesn't constitute a military defence – it represents your civilisation pushing something (a problem, or something you can't yet use) out into the provinces and leaving it to be addressed later (if at all). History is like a permanent Garrison under your Power card. With very few exceptions, cards in History can never be used again, though they are still counted during Scoring. Most civilisations place cards into History to thin their decks, and cards with powerful effects are often limited to a single use by putting themselves in History once they've been played – thematically representing a great leader who achieved a lot in one lifetime but, compared to the length of a civilisation, vanished rather quickly.
Of course, it is very possible to play Imperium without considering how the mechanical actions of the game might be interpreted as a historical sandbox. But we think it's a good deal more fun that way. And if you notice the parallels between theme and effects on cards, you might find it easier to conceptualise a strategy too.
Using this Rulebook
Imperium is a game meant to be played many times. It has a large number of possible game combinations available in each box (especially Horizons) and it can be daunting to learn the rules while also choosing between so many options and reading so many exceptions to the rules.
The best way to learn to play is to select a simpler civilisation deck which interests you (see their Complexity rating: the lower, the simpler). With that deck selected, go through the Player setup sequence, and then do the Commons setup. Next read the How to Play section – including Clean-up and Scoring – and finally the Core Concepts section. You might need to refer back to the Clean-up and Reshuffling sections a few times, and certain unique civilisation elements might seem confusing at first, but it's always better to press on through to get a sense of the game start-to-finish. If you teach the game to new players, we suggest you let them read the Core Concepts first (or walk them through the concepts yourself), and then guide them through a few turns with open hands, to understand their options. You might also enjoy playing along with the Example Turn, to get a sense of the strategic considerations.
Once you understand the basics, the Keywords section is designed to be the chapter of this book that you turn to for specific rules questions and clarifications. Words that are underlined, bold, and in italics are always Keywords, and we encourage you to look them up when encountering them for the first time. Even something as simple as Look (see page 38) or Take (see page 40) can have rule clarifications attached. All players should be able to refer to the Keywords section during play.
If you're learning the game solo, we recommend you try the Practice Mode variant to start (see page 24). This is a solo game variant with a streamlined opponent. The full Solo Mode (see page 28) has opponent-specific rules that add a lot of flavour and unique challenges once you understand the mechanics. The Practice Mode can also be used later, to familiarise yourself with a civilisation you have never played before.
The Classics and Legends boxes each come with a set of Commons cards. Horizons has its own set of new Commons cards, some of which have trade-unfriendly or trade-friendly icons. The trade-unfriendly icon indicates which cards should be removed for a Lowered Aggression game (see page 24). Keeping them in play preserves the distribution of cards found in Classics and Legends. The trade-friendly cards are "trade friendly" alternative cards, allowing players to create different sorts of games. When using the Commons cards from Horizons, include either the cards marked trade-unfriendly or the cards marked trade-friendly but not both! For your first game you should use the trade-unfriendly cards, as the trade-friendly cards rely on new rules and concepts introduced as part of the Trade Routes expansion.
The Trade Routes expansion, included in Horizons (see page 26), introduces even more ways for players to interact and gain Resources. Some of the new civilisations require that Trade Routes be used, but any civilisation (even those from Classics & Legends) may use Trade Routes. We think you'll eventually want to use the expansion more often than not.
Rules pertaining only to the Trade Routes expansion are highlighted with a blue background throughout these rules.
Rules pertaining to the solo mode are highlighted with a pink background throughout these rules.
For owners of Imperium: Classics and Legends
Welcome back. Imperium: Horizons is the same Imperium game you learned before. The rulebook has been rewritten for clarity, so you might want to give it a read, but our intention is that no rules have fundamentally changed – there is nothing you have to unlearn. We have however added some REMINDERS for those rules that players tend to miss or forget.
A new Resource, Goods, has been added; the restrictions on when you can Develop your cards have been adjusted to fit the new civilisations; a new keyword 'End of Solstice' appears on a few cards; and for solo players a new keyword 'Resolve' appears on some Bot State cards, but we are confident you will pick these up in no time. Once you have had a chance to familiarise yourself with the new Commons deck, check out the new Trade Routes expansion included in this box, which will introduce a lot of new mechanisms and is compatible with everything that came before.
You can use all Classics and Legends civilisations with the Horizons Commons deck. You can use all Horizons civilisations with the Classics and Legends Commons decks, but some may require the Trade Routes expansion (see page 26).
If you should find minor contradictions between this rulebook and (especially earlier printings of) the Classics/Legends rulebook, this rulebook reflects our current intentions and should be used going forward.
Replacement Cards
Important! Before you play for the first time, identify all the 49 replacement cards included in Horizons. Their card numbers start with 1 or 2 (since they're meant to replace cards in Classics and Legends) and are identical to the reference number of the card they are meant to replace (even if the card's name might have changed) except with an extra 'X' in their code. For example, 2REG3X/14 Peak is meant to replace 2REG3/14 Mountain in the Legends box, while 1CAR2X/23 City of Carthage is meant to replace the card of the same name in the Carthaginians deck in the Classics box.
- If you do not own Classics and/or Legends, keep these cards in the box, as you do not need them (for now).
- If you do own Classics and/or Legends, replace the matching cards with these, permanently. (You can throw away the originals if you want; you will never need them again.)
Most of these cards serve to integrate new icons and strategies introduced in Horizons to the Commons decks of Classics and Legends, while some cards are meant to adjust the balance of certain nations or strategies both in isolation and when mixed with Horizons.
Core Concepts
Imperium is a complex game, but it is built up from a collection of less complex core concepts. Understanding these core concepts will not only help you learn and teach the game, but it also will provide you with a solid foundation for understanding how the more complex civilisations break or adjust these expectations. Take all text on cards literally, and don't assume things not mentioned on the cards (or explicitly mentioned in these rules). When in doubt, refer to the keywords section.
Concept One: Deck Cycling
Imperium is a deck-building game, which means that each nation begins with the same, roughly ten cards every game. Over time you add or remove cards from your deck, reshuffling your Discard pile when your deck is empty so that you can always Draw a new hand of cards at the end of each turn.
Imperium gives most civilisations a deck of Nation cards, the bottom card of which is their Accession card. Usually when you are about to reshuffle your Discard pile to form a new deck, you put the top card of your Nation deck into your Discard pile first – effectively increasing your deck size by one each time you shuffle (see 'Reshuffling Your Draw Deck', page 16).
Contrasting with the Nation deck is your stack of Development cards. Once your Nation deck is empty and you need to reshuffle again, you have the opportunity to Pay the Development cost on any of the cards in your Development area, and add it to your Discard pile. These are often big point cards or strategy-defining advantages, so adding the right Development card to your deck at the right moment (and being able to Pay its Development cost!) is a big deal, strategically.
Most civilisations are desperate to get some or all of their region and tributary cards, so cycling through your deck as fast as possible is often an important focus of the game. However, each civilisation in Imperium is unique, and all of the guidelines here are bent and/or broken in at least a few cases.
Concept Two: Resources
The game has four Resources: Materials, Population, Progress, and Goods. In most cases, Region cards are the source of Resources, either directly or through card effects as with the card Prosperity. The various icons on region cards thematically representing the properties of lands you hold are frequently tied to Resource generation effects.
Resources may be located in the Supply shared by all players, a player's Resource pool, or on cards in the players' areas. Resources may be moved around in a number of ways through the keywords Gain (see page 38), Place (see page 39), and Pay (see page 39). Resources on cards (whether yours or the Market's) are not available to be paid or moved, and do not count as yours during Scoring (unless explicitly noted otherwise).
Resource tokens are not meant to be limited. You may use the higher denomination tokens (5s and 10s) to make change any time as convenient. When resolving the Pay keyword, some Resources may be converted for others (see page 36). This is however not true for the Move keyword, or any other time that is not explicitly permitted by an effect.
Concept Three: Actions and Exhausts
During most of your turns, you will take a number of Actions and Exhaust abilities depending on the number of action and exhaustion tokens you have. This will normally be 3 action tokens and 5 exhaustion tokens but can vary.
Your 3 action tokens are used to track Actions as you take them. The most common Action is simply playing a card from your hand. Putting a region into play, using an Attack card (see page 36), and Returning an Unrest card are all examples of Actions.
Exhaustion tokens are used to track Exhaust effects that trigger only once per turn, found on cards that stay in play in front of you (see In-play cards on page 38). Exhaust effects often generate Resources, interact with icons, or Draw cards. Some civilisations change the default number of exhaustion tokens you use during play.
Exhaustion tokens are also used to mark if you add a new card to your deck during a reshuffle – this prevents players from repeating the effect and thus adding multiple cards to their deck in a single turn. But remember that it also ties up one of your exhaustion tokens, thus reducing your available exhaustion tokens for the rest of your turn. At the end of your turn you remove all exhaustion tokens before Drawing a new hand of cards – so there is always a full set of exhaustion tokens available during your end-of-turn Draw/Reshuffle, when it is most common to add a new Nation or Development card to your deck. (See 'Reshuffling Your Draw Deck' on page 16.)
Concept Four: Gaining New Cards
In Imperium, new cards almost always go directly into your hand. It is very common to spend an Action adding a new card into your hand, and then spend your next Action playing that card! There are four ways to gain cards.
The most common method is using the Acquire effect (see page 36) to gain a card from the face-up Market row of five cards. Some Acquire effects specify that only certain suits may be Acquired, and others might allow you to Acquire any of the five cards. In all cases, when you Acquire a Market card you also Take any Unrest underneath it and any Resource tokens placed on it. All Market cards except Unrest cards will have an Unrest card underneath them. Cards Acquired from the Market are immediately replaced, such that there are always five available.
The second most common (and more powerful) method to gain cards is via a Break through effect. This can be used in two distinct ways:
- Gain a card and any Resources from the Market row (just like Acquire), but any Unrest is put back on the Unrest pile instead of taking it into your hand.
- Dig into one of the face-down Small decks and take the first card of the appropriate suit you find.
Take and Find (see page 38) are effects which directly move cards into your hand (or elsewhere, as specified).
Concept Five: Fame and Glory
Many cards give victory points, but the largest gains come from cards in the Fame deck. Deciding how often you want to access that deck for points is a core decision for all players of Imperium. Some Fame cards are worth ten victory points or more, but taking them often comes at a heavy cost, which can set you back several turns.
The most common way to gain Fame cards is with the card Glory, which requires that you Abandon (place in your Discard pile, see page 36) three region cards in play. Those lost regions require Actions to be put in play again, thicken your deck and make it take longer to cycle in new Nation/Development cards, and do not provide you Resources while they are out of play. Weighing up when to play Glory is then a tough choice to make.
Components
Commons Cards
- 9 Fame cards, including King of Kings (1 Uncivilised)
- 18 Civilised cards (3 Uncivilised, 2 Civilised)
- 25 Uncivilised cards (4 Uncivilised, 3 Civilised)
- 14 Region cards (1 Civilised)
- 13 Tributary cards (2 Uncivilised, 1 Civilised)
- 12 Unrest cards
14 New Civilisation Decks
- 23 Abbasids cards
- 23 Aksumites cards
- 29 Cultists cards
- 24 Gupta cards
- 25 Inuit cards
- 24 Japan cards
- 27 Magyars cards
- 29 Martians cards
- 28 Mayans cards
- 29 Polynesians cards
- 24 Sassanids cards
- 24 Taino cards
- 27 Tang cards
- 23 Wagadou cards
Additional Cards
- 4 State cards
- 32 Bot State cards
- 49 Updated cards for replacing cards in Classics and Legends
14 Trade Route Expansion Cards
- 1 Fame card (Welcoming)
- 4 Merchant/Merchant Empire cards
- 9 Trade Route cards
261 Tokens
- 21 Exhaustion tokens
- 18 Action tokens
- 6 Slot markers
- 48 Materials tokens
- 48 Population tokens
- 48 Progress tokens
- 36 Goods tokens
- 4 King of Kings tokens
- 1 Solstice token
- 20 Cultist tokens
Other Components
- 1 Market board in three parts
- 4 Player organisers in two parts (Development Area / State / Accession and Nation / Power card / Tokens / Draw Deck / Discard)
- 1 Six-sided die
Card Element Breakdown
- Card name: the name of the card.
- Suit icon: most cards have a suit icon. These are essential when you gain new cards from the Market and are frequently referenced by other cards.
- Banner: the colour of the banner behind the card's name matches the card's suit. These are particularly important during setup. Cards without a suit have a grey banner. Cards with multiple suits use the banner colour appropriate for setup.
- Header icon: the "remains in play" and "affects other players" icons indicate cards that remain in play, or that affect other players. Power cards have an A side and a B side.
- State symbol(s): many cards have a state symbol. The Polynesians and Cultists have their own unique symbols. You cannot play a card that has a state symbol unless your current State card matches (at least one of) the symbol(s) shown on the card. Some cards show two state symbols, meaning your current State cards must match at least one of the symbols shown.
- Card type icon: some cards have card type icons that have no innate effect but may be referenced by other cards. For example, the card River Raiders grants 2 VP for each River icon in your possession at the game's end.
- Effect text: details what the card does and when it is activated. See page 14 for how to read this text.
- Development cost: Power cards have a Development cost, usually a quantity of Materials, Population, and/or Progress tokens that you have to spend to Develop it.
- Nation colour: the colour of this corner indicates that the card is part of a specific Nation's deck. Cards without a coloured corner are part of the "Commons" cards used in every game. (This is useful for sorting your cards after each game.)
- Starting location: the symbol on the nation colour indicates where the card starts during setup:
- Player count: cards with a "3+" icon aren't used in a solo or two-player game. Cards with a "4" icon aren't used in a solo, two-, or three-player game.
- Expansion: cards with a Trade Route icon are only used when playing with the Trade Routes expansion (see page 26). Cards with both a Commons and a Trade Route symbol cannot be used in the same Commons deck (see step 3 of the Commons setup on page 13).
- Card number: a number reference for the card. If the first digit of the reference is a 1, the card is from the Classics box. If it's a 2, it is from the Legends box. Cards from the Horizons box begin with a 3.
- Victory points: how many victory points the card is worth at the end of the game, if any. Cards with an "X" icon are worth X points. Cards with a "?" or "*" icon are worth a variable number of victory points, as specified on the card. Cards with a circled "X" icon are worth negative X points.
Suit Icons
- Region: areas under your nation's control.
- Uncivilised: traditional cultural technologies and customs.
- Civilised: highly structured or centralised technologies and customs.
- Tributary: peoples who have pledged loyalty to your nation.
- Fame: memorable deeds of your nation.
- Unrest: internal strife and disorder in your nation.
- Gadget: dangerous items of curious origins, brought by the Martian civilisation.
- Power: the fundamental rules of the nation you are playing. Side A is Advanced, side B is Basic.
Card Type Icons
City, Mask, Ocean, Fertile, Merchant, Production, Hunt, Metropolis, River, Knight, Miracle, Scroll.
Starting Locations
- In play: in your Player area
- Nation: in the Nation deck
- Accession: at the bottom of the Nation deck
- Development: in the Development area
- Supply: in the Unrest pile
- Chaos: a deck of special havoc for the Cultist player
Note that if this is your first-time learning Imperium, don't be intimidated by references to more complicated civilisations, or civilisations that are not even in this box! Just ignore them, along with any mention of the Trade Routes expansion, as it is intended for experienced players.
Setup
Player Setup
Each player takes the following steps:
- Choose a nation and take all the associated cards, as indicated by the colour in the bottom left corner. Before choosing a nation, you should look at the 'Nations' chapter for an overview of the different decks.
If you are not playing with Trade Routes, you may not choose one of the 6 nations with the Trade Route icon.
-
Take a Player organiser, slot the pieces together and lay them in front of you.
-
Place your single Power card in front of you, underneath your Player organiser. You can place it either side up, but you cannot change this later in the game. This is your Power card. For new players, we recommend playing with the B side up (B for Basic, A for Advanced).
-
Place any other in-play cards below your Power card, if you have any. Only the Arthurians, the Cultists, the Polynesians, and the Utopians have additional in-play cards.
If you're playing as the Arthurians, place King Arthur's Court face up below your Power card. If you're playing as the Cultists, put Research the Ceremony on top of Ceremonial Gathering and place them below your Power card. The top card in this pile is your ceremony card. If you're playing as the Polynesians, place Mana face up below your Power card. If you're playing as the Utopians, put Visions of Shangri-La on top of Gates of Shangri-La and place them below your Power card. The top card in this pile is your journey card.
- Place a State card with the Barbarian side up underneath your Player organiser.
If you're playing as the Atlanteans, instead place your State card with the Empire side up. If you're playing as the Cultists, place your State card with the Empire side up, on top of your custom State card that has the Corrupted side up. If you're playing as the Inuit, use their custom State card with the Summer side up. If you're playing as the Martians, use their custom State card with the Alien side up. If you're playing as the Polynesians, use their custom State card with the Isle-bound side up. If you're playing as the Taino, use their custom Free Tribes State card (it's identical on both sides). If you're playing with the Inuit, the Martians, the Polynesians, or the Taino, return your regular (Barbarian/Empire) State card to the box.
- Take 3 action tokens, and 5 exhaustion tokens (unless your Power card indicates otherwise). Place these tokens on your State card.
If you're playing as the Cultists, Inuit, Polynesians, Taino, or Utopians, use a base of 3 exhaustion tokens instead of 5 exhaustion tokens, as indicated on their Power card. If there is a Martian player, give them an additional 20 or 25 progress tokens, as indicated on their Power card.
If playing with Trade Routes, give each player an additional exhaustion token, and 1 goods token instead of the 1 progress token.
-
If playing with Trade Routes, take a Merchants Power card (they are identical) and place it face-up (with the Merchants side showing) below your State card.
-
Place all the Development cards face up above the Player organiser. This is your Development area. For most nations, the Development cards are your Development cards.
For the Arthurians, these are your Quest cards. When quest cards are in the Development area, they are considered to be impending quests for your Quest area. The Cultists and the Utopians do not have any Development cards.
- Place the Accession card face up above your Player organiser. For most nations, the Accession card is your Accession card.
The Atlanteans, the Cultists, the Inuit, and the Utopians don't have an Accession card.
- Shuffle the Nation cards into a face-down deck and place it perpendicular across the top of the Accession card. This is your Nation deck.
The Atlanteans, the Cultists, the Inuit, and the Utopians do not have a Nation deck.
-
Take a King of Kings token, 3 materials tokens, 2 population tokens, and 1 progress token. The materials, population, and progress tokens form your initial Resource pool (goods tokens may also be added here). The King of Kings token should be placed next to your Resource pool with the lighter side facing up.
-
Put aside any Unrest-supply cards. They will be used in step 6 of the Commons setup. Only include 3+ and 4-player cards if playing with that many players or more, otherwise return them to the box. All Unrest-supply cards are Unrest cards.
The Arthurians, Celts, Cultists, Guptas, Inuit, Magyars, Martians, Mayans, Olmecs, Polynesians, Qin, Tang, Utopians, and Vikings have Unrest-supply cards.
-
Shuffle all remaining cards (the cards from your civilisation which have no icons in the lower left corner) into a face-down deck and place it below your Player organiser. This is your Draw deck.
-
If you're playing as the Cultists, place all Chaos cards below your Draw deck to form the Chaos pile. Only include 3+ and 4-player cards if playing with that many players or more, otherwise return them to the box.
-
Leave a space next to your Draw deck for a face-up Discard pile, and a larger area to the right for your Play area where your In-play cards will be placed.
-
Draw (see page 37) five cards from your Draw deck to form your starting hand.
Commons Setup
-
Place the remaining materials, population, progress, goods, exhaustion, and action tokens on the table, easily accessible to all players. This is the Supply.
-
Place the Market board in the middle of the table, easily accessible to all players. For a normal game, place it so that the side without Trade Route icons is showing.
If you are playing with Trade Routes, place the Market board so that the side with the Trade Route icon is showing.
- Select a set of Commons cards (all cards without a Nation colour). You may use the cards from Classics, Legends, or Horizons.
If you are playing with Trade Routes, you must use the cards with the Trade Route icon in the Horizons Commons deck. To do so, you must remove all cards with the trade-unfriendly icon from the deck.
-
Sort all the Commons cards by the colour of their banner. In most cases a card's banner colour corresponds to the suit icon at the bottom: Uncivilised, Civilised, Tributary, Region, Fame, Trade Route, Gadget, and Unrest. Some cards use multiple suit icons, and during the game they count as cards of both suits. During setup however, the banner colour takes precedence.
-
If you are playing with three players, remove all 4-player Commons cards from the game. If you are playing with two players, remove all 3+ and 4-player Commons cards from the game.
-
Place all the Unrest cards face up, below the Unrest icon on the Market board. This is the Unrest pile. Include any Unrest-supply cards put aside by the players during step 10 of their player setup. These can be in any order. Leave space to the right of the Unrest pile for the Exile pile.
-
Place the Fame card King of Kings with the Advanced side showing, above the Fame icon on the Market board.
-
Shuffle the remaining Fame cards into a face-down deck and place it on top of the King of Kings card, perpendicular to it. This is the Fame deck.
If playing with Trade Routes, shuffle the Welcoming Fame card into the Fame deck. (The Trade Routes expansion increases the size of the Fame deck by one card!)
- Remove cards from the top of the Fame deck and return them to the box unseen until the Fame deck has the indicated number of face-down cards (excluding King of Kings), appropriate for the player count, as listed below.
If playing without Trade Routes: 2 players – 6 cards | 3 players – 7 cards | 4 players – 8 cards
If playing with Trade Routes, increase the final deck size by 1.
When creating the Region deck, Uncivilised deck, and Civilised deck (steps 10–12), the number of cards in each depends on the number of players: 2 players – 6 cards | 3 players – 7 cards | 4 players – 8 cards
-
Shuffle the Region cards. Place the appropriate number of cards in a face-down Small deck above the Region icon on the Market board. This is the Region deck. Set aside the other Region cards for now.
-
Shuffle the Uncivilised cards. Place the appropriate number of cards in a face-down Small deck above the Uncivilised icon on the Market board. This is the Uncivilised deck. Set aside the other Uncivilised cards for now.
-
Shuffle the Civilised cards. Place the appropriate number of cards in a face-down Small deck above the Civilised icon on the Market board. This is the Civilised deck. Set aside the other Civilised cards for now.
- Shuffle the Trade Route cards. Place one Trade Route card face up on the bottom of each of the Small decks (Region, Uncivilised, and Civilised, created in steps 10–12). Then, if playing with 3 players, remove one of the remaining Trade Route cards (without looking at it) from the game. If playing with 2 players, remove two. Set aside the remaining Trade Route cards for now.
- Shuffle all the remaining Region, Uncivilised, Civilised, and all the Tributary cards to form the Main deck. Place the Main deck face down to the left of the Civilised deck, above the Uncivilised/Civilised/Region/Tributary icons on the Market board. Placing the deck horizontally helps to make it distinct from the other decks.
If playing with Trade Routes, shuffle the remaining Trade Route cards into the Main Deck.
-
Draw one card from each of the Region, Uncivilised, and Civilised decks and place each card face up, below the Market board opposite its respective deck. Draw two cards from the Main deck and place them face up side-by-side below the Market board opposite the deck. Together, these five cards form the Market.
-
Place an Unrest card from the Unrest pile underneath each card in the Market that is not a Region card.
-
Place a progress token on each card in the Market with a white banner.
-
Decide which player will go first. Play passes to the left. Place the Solstice token as if it were a player between the last player and the first. The position of the Solstice token acts as a reminder that everyone simultaneously resolves their Solstice effects (see page 16) after the last player's turn, but before the first player begins a new round.
Flow of Play
The game is played over an indeterminate number of rounds. Each round starts with the player to the left of the Solstice token taking the first turn. Turn order proceeds to the left. Play continues until either Scoring or Collapse is triggered, which signals the end of the game (see page 17).
In each turn, you will declare what type of turn you are taking:
ACTIVATE or INNOVATE or REVOLT
Once you have finished resolving one of the above turns, you will Clean-up (see next page).
After you have cleaned up, the player to your left takes their turn. If the Solstice token is between you and the player to your left, all players resolve all their Solstice effects before beginning the next round. Solstice is always the last thing to happen each round (see page 16).
The 'Activate' Turn
When you take an Activate turn, you can take Actions (see page 36) and use Exhaust abilities (see page 37) in any order and in any combination. When you cannot or no longer want to take Actions or use Exhaust abilities, you will move on to Clean-up. Players typically Activate on most turns of the game, unless very specific circumstances make it beneficial to Innovate or Revolt.
Taking Actions
To take an Action, first set aside an action token from your State card. If you have no action tokens on your State card, you may not take an Action. (For the main exception, see Free play on page 38.)
The most common type of Action is to play a card from your hand into your Play area and resolve its effects according to the card text. Any other effect that costs an Action will be explicitly noted.
If a card has a State symbol such as Barbarian or Empire, you can only play it from your hand if your State card shows the same symbol.
A few cards in the Cultists' deck show two State symbols; your State card needs to show one of them to be allowed to play such a card.
Cards where the first line of text starts with Exhaust, Passive (see page 39), or Solstice have no immediate effects when played. These are all "remains in play" cards.
Trade Route cards have a Commerce effect, which resolves when you play the card (see page 37).
When a card is played, resolve all effects as much as possible (see below for guidance), including resolving any responding triggered effects such as Exhaust abilities or deck reshuffling (see 'Reshuffling Your Draw Deck' on page 16). Afterwards, place the card in your Discard pile unless the card indicates that it should be placed elsewhere. If a card has the "remains in play" icon it remains in your play area after you play it.
The Trade Route cards have the special "affects other players" icon instead of "remains in play". Like "remains in play" cards, cards with "affects other players" remain in your play area after being played. However, they are NOT "remains in play" cards, and are not affected by things which specify "remains in play".
Many cards have keywords. These are explained in detail in the Keywords section (see page 36) and are denoted in-text as bold, italics, and underlined.
Resolving and Interpreting Card Text
When resolving card text (whether from a played card, Passive effect, Solstice effect, or Exhaust effect) there are a few important principles which should help you make sense of even the most complex cards.
- Each sentence should be resolved individually, starting with the first sentence.
- Each sentence should be resolved as much as possible. Text immediately following MAY is always optional, everything else is always mandatory.
- If no part of a card's text can be resolved, you cannot play that card.
- If a card does not explicitly state where it should go after resolving, it goes to your Discard pile. This does not apply to "remains in play" cards.
This also does not apply to Trade Route cards.
- Anything that comes before "to" is a cost. As in "Do X to gain Y" (X is the cost, Y is the result). You may Pay (see page 39) a cost, even if the text's effect cannot be resolved or the resolution is uncertain.
- Anything involving "Pay" or "Move Resources" is a cost, even if not followed by a "to".
- If some or all of the mandatory costs on a card cannot be resolved, you cannot play that card or trigger that effect.
- Always fully resolve the cost(s) before beginning to resolve the rest of the effect.
- If you Pay a cost (optional or not), you must resolve the result (as much as possible).
Some Resources can be substituted for others. See the keywords section, page 36, for rules on substitutions.
Using Exhaust Abilities
You can only use an Exhaust ability on your own Activate turn, unless the card specifies otherwise. You can never use Exhausts during Solstice, or during Revolt or Innovate turns.
To use an Exhaust ability, choose a card with the Exhaust keyword that does not have an exhaustion token on it. This can be an In-play (see page 38) card, or it can be your Power card. Move an exhaustion token from your State card onto that card. If you have no exhaustion tokens on your State card, you may not use an Exhaust ability. If a card already has an exhaustion token on it, you may not use the Exhaust ability shown on that card.
You may use an Exhaust ability on an In-play card with a state symbol such as Barbarian or Empire, regardless of which symbol is showing on your State card.
Once you have placed your exhaustion token, fully resolve the effect indicated after the Exhaust keyword. Some Exhaust abilities specify a cost. If you cannot Pay the specified cost, you may not use that Exhaust ability.
If an Exhaust ability responds to an effect you or another player resolves (such as "when an opponent Takes Unrest…"), the Exhaust ability happens as soon as the triggering effect is finished. If that effect is triggered by a card with multiple sentences, the response ability happens after the sentence with the triggering effect is finished, but before the next sentence begins.
The 'Innovate' Turn
An Innovate turn allows you to Break through (see page 36) for a card, at the expense of not doing anything else. During an Innovate turn you take no Actions and may not use any Exhaust abilities. Instead, do the following:
- Place all the cards in your hand into your Discard pile.
- Break through for a Civilised, Uncivilised, Region, or Tributary card (see page 36).
Note that you may not use the Innovate turn to Break through for a Trade Route card.
- Move on to Clean-up.
Note that cards with Passive abilities will still trigger on an Innovate turn.
The 'Revolt' Turn
A Revolt turn allows you to permanently remove a number of Unrest cards from your deck without spending Resources, at the expense of not doing anything else. During a Revolt turn you may take no Actions and use no Exhaust abilities. Instead, do the following:
- Return (see page 39) any number of Unrest cards from your hand to their proper pile(s). This will normally be the Unrest pile.
- Move on to Clean-up.
Note that cards with Passive abilities will still trigger on a Revolt turn.
Clean-Up
At the end of your turn, complete the Clean-up steps in order. Once you've completed step 1, the next player can start their turn while you complete the rest of your Clean-up.
- Add 1 progress token from the Supply to any card in the Market. This represents the natural development of ideas and general progression of time.
If you're playing as the Carthaginians, Cultists Power B, Guptas, Qin, Tang or the Wagadou, add the token(s) indicated on your Power card, instead of 1 progress token.
- Remove all of your action and exhaustion tokens from all cards in your Play area, your Nation deck, your Development area, and your Power card. Then reset your State card to have 3 action tokens and 5 exhaustion tokens on your State card.
If you're playing as the Cultists, Inuit, Polynesians, Taino, or the Utopians, only place 3 exhaustion tokens.
If you're playing with the Trade Routes expansion, place an additional exhaustion token (6 or 4, depending on the nation).
-
You may Discard (see page 37) any number of cards from your hand into your Discard pile.
-
Draw (see page 37) cards from your Draw deck up to your hand size. Your default hand size is five, but it can be modified by effects in the game. If you already hold cards equal to or exceeding your hand size, don't Draw any cards. However, you are never forced to Discard down to your hand size.
As cycling through your deck is your main way of gaining access to your nation's Nation, Accession, and Development cards, it's often a good idea to Discard most or all leftover cards at the end of your turn.
Reshuffling Your Draw Deck
If you need to Draw a card and your Draw deck is empty, shuffle your Discard pile to make a new Draw deck. Resolve this immediately when triggered, even on another player's turn. Before you reshuffle, determine whether you should add a new card from your Nation deck or Development area to your Discard pile.
In order to add new cards to your deck when reshuffling, you must have an exhaustion token available and at least one card in your Nation deck or Development area. The exhaustion token is used to mark that you have added a card via reshuffle this turn.
If you already have an exhaustion token on your Nation deck or Development area, or if you have no exhaustion tokens left on your State card (because you have already used them all during your turn), you may not add a card during reshuffle, and should begin at step 3 below.
Note that you will always have unused exhaustion tokens if the reshuffle happens during Clean-up, as the second step of Clean-up is to return all your exhaustion tokens to your State card. This is when most reshuffles happen.
-
If you have at least one card (including your Accession card) in your Nation deck: Place the top card of your Nation deck in your Discard pile, then move an exhaustion token from your State card onto your Nation deck (or into your Development area, if your Nation deck is now empty).
If you placed your Accession card into your Discard pile: Flip your State card to its other side. Move on to step 3.
-
If you have no cards in your Nation deck (not even your Accession card) but at least one card in your Development area: You may Pay the Development cost shown on any one of your face-up Development cards to Develop it (see page 37). Place that card in your Discard pile. If you do, move an exhaustion token from your State card into your Development area. If you cannot Pay the Development cost of any remaining card, you cannot Develop.
-
Shuffle your Discard pile to form a new Draw deck.
-
Resolve any "when you reshuffle" effects now – see the Cultist and the Utopian Power cards.
-
Draw cards until you reach your hand limit as normal.
Some cards instruct you to "Draw the top card of the deck if able". These effects never trigger a reshuffle. If your Draw deck is empty when you use an "if able" effect or it becomes empty during an "if able" effect, do not Draw further cards and do not reshuffle your deck.
Some civilisations never have a Nation deck (so they never resolve step 1), or never have a Development area (so they never resolve step 2), or never have either (so they always go to step 3)!
Solstice
When all players have finished a turn, Solstice begins. The Solstice token sits between the last player and the first player to remind you of this.
During Solstice, each player must resolve all Solstice effects in their Play area, their Power card, and possibly their State card. These effects can be resolved simultaneously by all players.
Note that in those extremely rare situations when the order of resolution does matter (usually this is possible when the game is nearing a Collapse), the players resolve their Solstice effects in turn order.
Solstice effects must be resolved as much as possible unless the card specifies that it is optional.
If you have multiple effects which need to resolve simultaneously, you choose the order in which to activate or resolve them. This will most frequently happen with Solstice effects but can happen at other times as well.
If a card has a Solstice effect which allows or forces "each other player" to do something, each player resolves that effect independently, as part of their own Solstice phase, in the order of their choice relative to their own effects.
If you have a card marked 'End of Solstice', that effect must be resolved last, after all your other Solstice effects.
Once all players have resolved all their Solstice effects, the next round of player turns begins.
REMINDER: All players should perform their Solstice effects simultaneously.
REMINDER: You may never spend Actions or use Exhaust effects during Solstice.
Game End
The game ends when either Scoring or Collapse is triggered. Scoring is triggered if one of the following conditions is met:
- There are no more cards in the Main deck
- A player Develops the last card in their Development area or meets the Scoring condition of their Nation
- The King of Kings card is flipped face down (see below)
- A player uses a card effect that "TRIGGERS GAME END"
Collapse is triggered immediately if there are ever no cards left in the Unrest pile, even if Scoring has already been triggered!
Scoring
When Scoring is triggered, complete the current round and Solstice as normal. Then play one final round, including resolving the Solstice.
All players add up their victory points.
Leave cards where they were when the game ended as you score, as some conditional-VP cards and variable-VP cards score differently depending on their location.
Score every card in your Hand, Play area, Draw deck, Discard pile and History (see page 38)/Legends (see page 46)/Flooded (see page 42) pile, as well as for your Power card. Do not score for un-played cards still in your Nation deck or your Development area.
If you have multiple cards that score for having certain card types or Resources, they can all score on the same cards or Resources.
A card with an "X" or negative-"X" icon scores or subtracts victory points equal to the number indicated.
A card with a "?" icon scores the number of victory points indicated if the condition specified has been met. Otherwise, it scores no points.
A card with a "" icon scores a variable number of victory points, as specified on the card. You can never score more than 10 points from a "" card. Resources on cards do not count towards "*" cards such as Moneylenders or Mercenaries.
After checking your cards, count the number of progress tokens in your Resource pool. Every progress token in your Resource pool is worth 1 victory point. Progress tokens on cards are not scored.
The player with the most victory points wins.
In the case of a tie, the tied players share the victory.
REMINDER: "*" cards are limited to a maximum of 10 victory points each, even your Power card.
Collapse
When Collapse is triggered, the game ends immediately, without completing the current Action. In the rare case of Collapse triggering during an effect where multiple players receive Unrest, and there is not enough Unrest to be given out, the player who triggered the effect (active player, or the card's owner during Solstice) decides who gets them.
Count the number of Unrest cards in your Hand, Play area, Draw deck, Discard pile, and History. The player with the fewest Unrest wins. (Cards still in your Nation deck, or the Cultist's Chaos pile do not count.)
Exception: if a Cultist player has an empty Chaos pile at the time Collapse is triggered, they win immediately.
In the case of a tie, the tied players calculate their scores as per normal Scoring. The highest score wins.
The Fame Deck
When an effect (such as Glory) allows you to manipulate the Fame deck, King of Kings always remains on the bottom. So long as there are any cards above King of Kings, Look, Gain, and Draw effects refer only to those face-down cards and not King of Kings.
When returning a card to the Fame deck after completing one of these actions, return it to the top of the deck without shuffling.
If King of Kings is the only Fame card left, then any effect which would Draw or Gain a Fame card resolves King of Kings instead. You can never resolve King of Kings until this point.
King of Kings is always placed Side A up during setup. The first time it is resolved during a game, it is flipped to the B side. No player may resolve King of Kings more than once per game. The player who resolved the A side cannot resolve the B side. To track this, any player who resolves King of Kings should flip their King of Kings token as a reminder.
Example Turn
You are playing as Japan in a three-player game against a Taino and a Magyar player. At the moment, you are a Barbarian state. It is the start of your third turn, and you are the last player in the round (before Solstice). You have three Actions to plan out, so let's examine your five cards in hand.
Glory is a very strong card, but it requires you to have three Regions in play, and you have only one. You do have a second region in your hand – Kansai – which you can plan to play this turn. Still, it's unlikely that you'll be able to use Glory soon.
Prince Shotoku Taishi is a uniquely powerful card which is placed into History after just one use, so let's make the most of him: he can Find one of two very strong cards from your Nation deck as well as Return Unrest or allow you to Free play a late-game, Empire-only card. Looking at the Metropolis in the Market, a plan involving this second option forms…
Your Market contains: Goryeo, Lagoon, Metropolis, Oracle, Rift Valley, and an Unrest card. Your Player area contains Heian-kyo (Kyoto) in your Development area, Emperor Kanmu as your Nation deck, your Resource pool of materials/population/progress tokens, a Barbarian State card, your Japanese Power card, your Draw deck, and an Unrest card in your Discard pile. Your Cards in Play are Appeal to China, Shinto, and Kyushu. Your Cards in Hand are Prince Shotoku Taishi, Advance, Glory, Kansai, and an Unrest card.
You select an 'Activate' turn, so that you can play cards and use Exhaust effects normally.
-
You Exhaust Appeal to China and choose to place 1 progress token onto Metropolis.
-
Then you use an action token to play Advance, Paying 3 materials to Acquire the Metropolis, along with all three tokens currently on it and the Unrest underneath it. (In the future you could spend this progress token as 2 materials through substitutions (see page 39) – so in effect the net cost of this Action was only 1 materials!)
A new card is placed in the Market – Mercenaries – and a new Unrest is placed underneath it. This leaves only 1 Unrest in the Unrest pile, so the game is in danger of Collapse!
Finally, you add Advance to the discard pile.
-
You decide to use an action token to play one of your Unrest cards, in order to keep away from Collapse. You can Pay 3 materials, or 1 population, or discard 2 cards to Pay for its Return. You choose to Discard Glory and the other Unrest card.
-
Now you are ready for your big move! You use your third action token to play Prince Shotoku Taishi and choose the second option.
-
You then Free play the Metropolis, ignoring its state symbol. And since Metropolis is a Civilised card, you might as well also Exhaust Shinto to gain 1 population and Draw 2 cards. You Draw Clans and another Unrest.
-
You then Find Kanji out of your Nation deck, adding it to your hand and shuffling the rest of your Nation deck – except your Accession card – afterwards. Finally, you place Prince Shotoku Taishi in your History.
-
With so many cards left, it seems reasonable to Exhaust your Power card's ability to Pay 2 population and Discard Kanji in order to gain another Action to use this turn!
-
You could play another Unrest, Discarding your final two cards to Pay for it, to be on the safe side far from Collapse. Or you could play Clans, allowing you to grab another materials token. But instead you opt to use your bonus action token to play the Region Kansai, gaining 1 materials and getting you closer to the 3-Region threshold necessary for a future play of Glory. You have the option to Garrison (see page 38) Clans or an Unrest, but you choose not to.
-
Your turn is over, so let's begin Clean-up. First you place a progress token into the Market – you decide it should go on the Lagoon, which you hope to grab next turn via Clans. Then you remove all your exhaustion tokens from Shinto, Appeal to China, and your Power card. 5 exhaustion tokens and 3 action tokens are returned to your State card, and the extra action token is returned to the Supply.
-
Next, you need to decide which cards to Discard before Drawing back up to your hand size of 5. There are 3 cards still left in your deck, so you opt to Discard Unrest and keep only Clans in your hand. This means you need to Draw 4 new cards, but after Drawing the last three of your Draw deck you need to reshuffle your Discard pile: you place an exhaustion token on your Nation deck and flip the top card (Nara) into your Discard pile. Then you shuffle the Discard pile and create a new Draw deck from which you take your final card.
Optional Rules & Gameplay Variants
Practice Mode (Solo)
If you are learning the game, or you wish to familiarise yourself with a new Nation, Practice mode is the streamlined way to do that. It is a type of Solo mode (see page 28), but with no Bot to play against. This allows you to concentrate on understanding your own play, and not have to worry about possible distractions (like running the solo opponent). New players should try a 1-star or 2-star Nation first – in Horizons the Magyars and the Japanese are the most suitable for this.
- Perform your Player setup (see page 10) and the 2-player Commons setup (see page 13) normally.
- Exile (see page 37) the top 15 cards of the Main deck.
- Place 12 progress tokens next to the Market.
- Take your turn normally.
- During Clean-up, first place a progress token from the pool created in step 3 on a card in the Market. Then, you may choose to Exile a card from the Market. (This simulates the 'Market churn' of a second player.)
- Perform any Solstice effects (see page 16).
- Repeat steps 4–6 until you have played 12 turns (when the special pool of progress tokens runs out), or you trigger game end through any normal card effect, such as Collapse.
If you score at least 50 victory points, you understand the rules and basic strategies enough to play "for real". If you score at least 90 victory points, you did something really well. If you want, you can challenge yourself to score even more.
Lowered Aggression Variant
If you want a less aggressive game but do not want to include the added complexity of the Trade Routes, we recommend this alteration to the Commons setup:
After step 5 (removing cards for lower player counts) add a new step:
5a. Find all the remaining Commons cards with a trade-unfriendly icon in the bottom corner and put them aside for now. Proceed with the remaining cards to step 6 (placing the Unrest pile).
After step 15, once the Market is set up, shuffle the cards you put aside into the Main deck. This way, Attack cards (see page 36) only enter the Market from the Main deck, delaying their appearance in the game.
This variant can be combined with the short variant below. This variant can also be applied to Imperium Classics/Legends, by setting aside all Commons cards with the equivalent icon in a similar fashion.
Quick Setup Variant
For experienced players only. Instead of separating Market cards by suit, simply shuffle all Market cards together, create Small decks of the appropriate size, and deal an initial Market line-up. This variant can make it very difficult to find the specific suits that some civilisations rely upon in the early game (mostly Region).
Precious Cards Variant
During your Clean-up, you may not Discard any cards from your hand (see page 37). This variant changes the dynamics of Unrest management and card draw in interesting ways and makes increased hand size less beneficial.
Short Variant
If you want to reduce the playing time of Imperium, then the following variant will cut the duration of the game by about 15 minutes per player. This is not suitable for the Utopians nor the Cultists and there are special rules for the Atlanteans, Arthurians, Inuit, Martians, and the Polynesians.
Setup Changes
- After setting up the Market, Exile the top 10 cards of the Main deck.
- Put the top 2 cards from your Nation deck into your Discard pile (except for Atlanteans and Inuit, see below).
Nation Specific Setup Changes
- Atlanteans: choose a Development/Region card to Develop (you do not have to Pay the Development cost), then choose one of your Development cards to remove from the game.
- Arthurians: choose an impending Quest (not the Graal), Garrison it under King Arthur's Court, and add the top Nation-deck card to your starting deck. This is in addition to the 2 cards from your Nation deck added to your Discard pile detailed above.
- Inuit: remove all your starting Resources (progress, materials, population, goods). Choose a Winter Development card and a Summer Development card and put both in your Discard pile.
- Martians: remove 4 of your starting progress tokens.
- Polynesians: gain one of the cards added to your Discard pile as mana (choose randomly).
Solo Bot Setup Changes
- Remove the bottom card of the Dynasty deck (see Solo mode setup, page 29). This is the card with the lowest victory point value.
- Put the top card of the Dynasty deck into the Bot Discard pile.
- If playing against the Arthurians, put a random Development card (not the Graal) into the Bot Discard pile.
Gameplay Changes
- When you add your Accession card to your Discard pile, look through your Development cards and choose one to remove from the game. (Skip this if playing with the Arthurians or the Polynesians.)
- When Scoring is triggered, play the current round, including Solstice, then end the game (do not play another round).
Trade Routes Expansion
Imperium: Horizons contains an optional expansion, Trade Routes. We recommend learning and playing the game without Trade Routes first, especially if you're not already familiar with Imperium: Classics/Legends. Games with Trade Routes will tend to be longer, more complicated games with higher average scores and more explosive combos.
The Trade Routes expansion makes use of the new Resource, Goods, as well as new ways to spend your action and exhaustion tokens during your turn – and an extra exhaustion token to spend! You use Trade (see page 40) abilities to manipulate Goods, Commerce (see page 37) abilities to exchange Goods for other benefits, and Profit (see page 39) abilities to Profit from other players trading with you. New Trade Route cards in the Market can be Acquired or Broken through for in new ways. All players begin with a powerful Merchants card, which gives access to many of these interactions.
The Trade Routes expansion may be used with any set of Commons cards. But remember that the Trade Route cards are designed around Trade Route interactions, and thus can only be played when Trade Routes are being used. To play with the Trade Routes expansion, include the following five elements into your regular game setup (they are in blue Trade Routes text boxes in the setup sections of this rulebook):
- Give each player a Merchants card, which begins Merchants side face up in the Player area.
- Give each player an additional exhaustion token, and 1 goods token instead of the 1 progress token.
- Add the Welcoming Trade Route to the Fame deck before selecting the correct number of cards. Note that games with Trade Routes have one more Fame card.
- Remove all cards with the trade-unfriendly icon from the Commons cards used.
- Shuffle the Trade Route cards (remember to remove any 3+ or 4-player cards if necessary) and add them to the Main deck and Small decks as described in Commons setup step 13 (see page 13).
REMINDER: When using Trade Routes, all players gain an extra exhaustion token!
All existing civilisations (from Classics, Legends, and of course Horizons) support playing with the Trade Routes expansion, including playing solo. Some Horizons civilisations with the Trade Route icon on their Power Card are designed around Trade Route interactions, and thus can only be played if the Trade Routes expansion is used. These are:
- Abbasids
- Aksumites
- Guptas
- Sassanids
- Tang
- Wagadou
Merchants
The Merchants card is the primary source of the Trade keyword (see below). This card may be upgraded to its Merchant Empire side, to provide progress icons, a way to Trade for Market cards, and another method of access to the Fame deck.
Note that while the Merchants card can Exhaust to Acquire Trade Routes, the Merchant Empire card cannot!
Trade Routes
Some Trade Route cards are shuffled into the Main deck during setup, and others are placed face up under the Civilised, Uncivilised, and Region decks. Some civs even have their own Trade Route cards.
Trade Routes cards may be Acquired from the Market with your Merchants card, or with other cards which specify that you may Acquire or Break through for Trade Route cards. As with all non-Region cards, Acquiring a Trade Route card requires you to Take an Unrest into your hand.
When you play a Trade Route card from your hand, you may immediately resolve its Commerce effect. Doing so does not require a Goods the way activating Commerce effects via the Trade keyword does.
Trade & Commerce
When you activate the Trade keyword (usually through placing an exhaustion token on your Merchants card) you may do one of the following:
- Pay 1 progress to gain 1 Goods.
- Move 1 of your Goods to a Trade Route card in your Play area with fewer than 3 Goods on it already, and resolve its Commerce effect.
- Place 1 Goods from the Supply on a Trade Route card in an opponent's play area with fewer than 3 Goods on it already, perform its ability for yourself, then gain 1 Goods.
Profit
When a Trade Route card has 3 Goods on it, no player may Trade with it until the Goods are removed. This is done through the Profit effect, which can be triggered by the owner of the card as an Action during their Activate turn. When they do, they spend an action token and move the 3 Goods on the card into their Resource pool, resolve the Profit effect's text, and then place the Trade Route card into their Discard pile unless otherwise specified.
Note that it is not mandatory to trigger Profit when a Trade Route card is full with 3 Goods tokens; you may keep it in play holding onto the Goods if you don't have the Action to spare, but it will be effectively useless.
Solo Ruleset
In solo mode, you play your own civilization against an opponent, called the Bot. The Bot's turn is substantially different than your own, as it moves through a series of cards and responses dictated by its oversized State card. It also has new keywords, and some keywords work differently for the Bot.
If this is your first time playing the game, you need to read the multiplayer rules first. If you don't want to bother with running the Bot on your first play, check out the 'Practice Mode (Solo)' under Gameplay variants on page 24.
Player and Commons setup is identical to the multiplayer rules. Use the 2-player setup for the Commons decks. The Bot does not use action tokens, exhaustion tokens, or a (regular sized) State card.
Setup
-
Place Slot markers 1–5 below the cards in the Market, so that each card has one marker below it. The markers should be placed in ascending order, from left to right. Slot marker 6 can be returned to the box unless playing in Supreme Ruler mode (see page 33).
-
Choose a nation for the Bot and take all the associated cards, as indicated by the colour in the bottom left corner, placing them in a Bot area next to your Play area. Place the Solstice token inbetween your Player area and the Bot area.
-
Add any Unrest-supply cards to the Commons cards. Return any 3+ and 4-player cards to the box.
-
Place the Bot's Power card in its play area. The only function of the Bot's Power card is to store the Bot's History. All symbols and text on the Bot's Power card (including Scoring) are ignored.
Note that the Bot always has a History, even if the corresponding nation has special rules about it, such as the Atlanteans, Inuit, Polynesians, and Vikings.
-
Create the Bot's Dynasty deck:
a) Sort the Development cards in victory point order and place them in a face-down pile near the Power card, with the higher value cards at the top. Treat all "*" cards as having a value of 5 and treat all "?" cards as being worth the highest value. If multiple cards have the same value, determine their order randomly.
b) Place the Accession card face up on top of the stack of Development cards.
c) Shuffle the Nation cards and place them in a face-down stack on top of the Accession card.
-
Shuffle the remaining cards (i.e., the Bot's unmarked starting cards) and place one card face down below each Slot marker. The rest forms the Bot deck. Place the Bot deck next to the Power card.
-
Find the oversized Bot State card corresponding to the nation you're playing against. Place it next to the Bot's deck with the S side face up.
-
Depending on Bot difficulty level, it either will or will not get starting Resources. Check difficulty levels on page 32 for what these are.
If playing with the Trade Routes expansion, place the Merchants card besides their State card to indicate its Merchant state. You will also need the Trade Routes table (see back page).
If you are playing against the Arthurians, Atlanteans, Cultists, Inuit, Martians, Mayans, Polynesians, Utopians, or Vikings refer to their nation description for specific changes to their Bot setup.
How to Play
As with a multiplayer game, the solo game is played in a variable number of rounds. In each round you take your turn normally, the Bot takes a turn, then the round ends and you resolve Solstice (the Bot ignores the Solstice effects).
Bot Turns
First, roll the die and place it on top of the face-down Bot card in the corresponding Slot. You won't resolve that card this turn. If you roll a number that does not correspond to a Slot, set the die aside.
Then resolve the remaining face-down Bot cards, moving from the lowest- to the highest-numbered Slot.
Resolving Bot Cards
To resolve a card, flip it face up and consult the table on the Bot's State card. Do not resolve any of the text on the card itself.
When resolving a card, complete the topmost effect in the table that matches the card. A card matches if the name, type, or suit is the same as the trigger listed in the table.
Note that every table starts with a row to resolve Unrest, usually by Returning it, but some civilisations perform additional effects while Returning it.
- All the contents of the row are considered part of the same effect.
- Any part of the effect written in bold refers to you. All other text refers to the Bot.
- If no part of the effect can be resolved, find the next matching trigger instead. If some or all of the effect can be resolved, resolve as much of the effect as possible. If any part (even if just putting the resolved card into History) is resolved, the effect is considered resolved.
- Unless the effect specifies otherwise, place the card in the Bot's Discard pile once an effect has been completed.
- You will only ever resolve one effect for a card, even if it matches multiple triggers.
- The Bot can resolve Empire or Barbarian cards regardless of their current State card. Simply follow the chart and use the relevant text.
- The Bot never spends progress or goods in place of materials or population.
Bots and Trading
If playing with the Trade Routes expansion, once all the cards in the card Slots have been resolved, the Bot resolves the first applicable effect shown on the bottom of the Trade Routes table. There are two separate lists depending on whether the Bot currently has Merchants or Merchant Empire face up.
- When instructed to "resolve Profits, where able", resolve the effect shown on the right column of the Trade Routes table for every Trade Route card the Bot has in play that has 3 Goods tokens on it. The Bot gains those Goods tokens and the card is put into the Bot's History. If multiple cards meet this requirement, resolve the one that was played most recently first.
- If instructed to Trade, see the Trade keyword's resolution for the Bot on page 27.
- You may Trade with Trade Route cards the Bot has in play normally. You use the Commerce effect printed on the card (as if it was in play by a human opponent), instead of the effects in the Bot's Trade Routes table.
Bot Clean-Up
- Once all effects have been resolved, add a progress token to the market card above the unresolved card. If you rolled a 6, do not place a token.
If you're playing against the Carthaginian Bot, add 2 materials instead. If you're playing against the Gupta Bot, add 1 goods instead. If you're playing against the Qin or Tang Bots add 1 population instead. If you're playing against the Wagadou Bot, add 1 materials instead.
-
Move the unresolved card and any tokens on it to Slot 1, keeping it face down.
-
Fill the remaining Slots with cards from the Bot deck, face down.
If you're playing against the Inuit, refer to their nation description for special Clean-up rules.
- If the Bot deck is empty and you would normally add a card from the Bot deck to a Slot, move the top card from the Dynasty deck into the Bot Discard pile and then shuffle the Bot Discard pile to form a new Bot deck. Then continue adding cards to Slots as normal. This might happen multiple times on a turn (typically if both the Bot deck and the Bot Discard pile are empty).
If you're playing against the Cultists or Utopians, there are special rules for resolving their reshuffles. See pages 42 and 48 for details.
- When the Accession card is added to the Bot Discard pile, flip its State card to the other side (except where noted otherwise – Arthurians, Polynesians, Taino, Vikings). From this point forward, use the table on the other side of the State card.
Changes to Gameplay During Solo Play
All rules in the multiplayer game for taking your turn, end of round, and resolving cards apply, except for the changes listed in this section.
New Keywords
Place a Resource on Die Position
Take the indicated Resource from the Supply and place it on the card in the Market in the Slot corresponding to the rolled number. If the slot does not exist, no Resource is placed.
Play
The Bot only has Region cards and Trade Route cards in play.
When instructed to play such a card, put it in the Bot's Play area and do not Discard it at the end of the action's resolution. The text effect of the card is still ignored for the Bot's purposes.
Resolve
When resolving a card, complete the topmost effect in the table on the Bot State card with a matching trigger, the same way as if the card were revealed in the Bot's card row. Discard the card at the end of the resolution if it does not instruct you otherwise (by putting the card into play or into History).
If an effect instructs you to resolve the top card of the Bot deck or the Dynasty deck and the deck in question is empty, do not reshuffle the deck (since the Bot never reshuffles outside of its Clean-up). Instead, the Bot gains 2 progress tokens (similarly to how it would as a result of a "failed" Break through).
Trigger: Trade Route
When triggering a Trade Route card, the bot resolves the Commerce effect in the second column of the Trade Routes table (see back page) rather than the effect printed on the Trade Route card. The Trade Route card remains in play afterwards.
Changes to Card Effects
If the Bot is forced or permitted to Draw a card by your effects, take the top card from the Bot deck if able and place it into the Bot Discard pile. However, unless indicated otherwise by its Bot State card, it is only during its Clean-up step that the Bot reshuffles its deck or adds cards to its deck or its Discard pile from the Dynasty deck.
The Bot ignores any of your effects that would make it Discard a card, even if the card to be Discarded was given to the Bot as an earlier part of that same effect.
The Bot ignores any of your effects that would allow it to Return Unrest cards.
If any of your effects Gain the Bot Resources, they are Gained normally. If Resources would be placed on the Bot's Region cards in play, they are immediately put in the Bot's Resource pool instead.
Any effect the Bot resolves that Gives (see page 38) you Unrest, Steals (see page 39) from you, causes you to Discard cards, or forces you to Abandon or Recall (see page 31) anything, is considered an Attack, regardless of any icons on the card. If you have an ability that allows you to cancel or ignore an Attack, you can use it to stop the negative effect.
If the Bot's effect requires the top card of its Bot deck to be Discarded when the deck is empty, that part of the action cannot be resolved, since as mentioned above, the Bot only reshuffles during Clean-up.
Changes to Keywords for Bots
Abandon
If the Bot Abandons a Region card, put one of its Region cards in play into the Bot Discard pile. If there are multiple Regions in play, the Bot Abandons the one that was played most recently.
Acquire and Break Through
When the Bot Acquires or Breaks through for a card, it will always choose the card in the Market that is worth the most points. In the case of a tie, it chooses the card with the most total tokens (progress, goods, population, and/or materials). If there is still a tie, it chooses the card in the lowest-numbered Slot.
If the Bot Breaks through and there are no eligible cards in the Market, it takes the top card from the appropriate deck. If it Breaks through for a Tributary card or a suit for which the appropriate deck is empty, reveal cards from the Main deck as normal. If there is no card of the appropriate suit in the Main deck, the Bot instead gains 2 progress tokens.
Gaining Cards
When the Bot gains cards (including through Acquire, Break through, Taking Fame or Unrest, or as a result of your Attack), add them to the top of the Bot deck in the order they were gained, with the card gained first at the bottom. If the Bot Acquires a card and Takes an Unrest card as a result, it gains the card first and the Unrest card second.
Exile
If the Bot Exiles a card from the Market, it places the card from the lowest-numbered Slot in the Market into the Exile pile.
The Bot will never Exile a card with one or more tokens on it. If all cards in the Market have tokens on them, it does not Exile a card.
Recall
If the Bot Recalls a Region card, put one of its Region cards in play on top of the Bot deck. If there are multiple Regions in play, the Bot Recalls the one that was played most recently.
Swap (Martian Bot Only)
When the Martian Bot Swaps (see page 39) a Gadget with a matching suited card from the Market, use the tie-breaking rules from above ('Acquire and Break Through') to choose between multiple possible options. The Bot does not Gain Resources nor Take an Unrest card from the Market during the Swap. The Gained card is resolved and then placed in the Bot's Discard pile (as explicitly mentioned in the row's instructions).
Trade
The Bot selects a Trade Route card to Trade with. It ignores any Trade Route card that already has 3 Goods on it. If multiple Trade Route cards are in play (yours or its own) and available to trade with, it uses the following priority list to choose:
- It selects the Trade Route card with more tokens on it.
- It selects its own Trade Route card over yours.
- It selects the Trade Route card listed earliest on the Trade Routes table (see back page).
If it selects one of your Trade Route cards, place 1 Goods on the card from the Supply, the Bot gains 1 Goods and triggers the card.
If it selects one of its own Trade Route cards, place 1 Goods on the card from the Supply, and the Bot triggers the card.
If no Trade Route card is available to Trade with, it spends 1 progress, if able, to Gain 1 Goods.
If no Trade Route card is available to Trade with, and it has no progress, nothing happens.
REMINDER: When the Bot triggers a Trade Route card, it uses the effect in the Trade Routes table's middle column, ignoring the card's text.
Changes to Specific Cards
King of Kings
If the Bot would gain the King of Kings card (regardless of which side is showing), and is a Barbarian state, it instead gains 6 progress tokens.
If the Bot is an Empire state, it instead gains 3 progress tokens and Draws the top card from the Dynasty deck, placing it on top of the Bot deck. This triggers the end of the game. If the Bot would gain a Fame card after it has already triggered the King of Kings, nothing happens.
Victory Points
Whenever determining the victory point value of a card from the Bot's perspective (which card to Acquire, sorting the Dynasty deck, and final Scoring):
- Cards with fixed "X" or negative-"X" values are worth the indicated value (including possibly negative values).
- Treat all "*" cards as worth 5 victory points.
- Treat all "?" cards as being worth the higher value. For example, a card noting "8 VP if in History, 3 VP otherwise" scores 8 victory points for the Bot, regardless of where it is found, while a card noting "-4 VP unless in History" scores 0 victory points regardless.
- For cards in the Market, treat each progress token on cards as adding one victory point to the card's value.
Game End
The game ends when either Scoring or Collapse is triggered.
You trigger Scoring via the same mechanisms as in the multiplayer game. In addition, Scoring is triggered if one of the following criteria is met:
- There are no more cards in the Bot's Dynasty deck.
- There are no more cards in the Main deck.
- The Bot would gain King of Kings.
- The Cultist Bot successfully triggers the Clean-up step of its Empire State card.
- The Utopian Bot successfully triggers the Shangri-La line of its journey table.
Note that other end game conditions that certain civilisations may have when played by a human player (for example the Polynesians gaining the last Development before their Accession card is gained, the Arthurians playing the Graal, etc.) are not used when those civilisations are played by a Bot.
Collapse is triggered if there are ever no cards left in the Unrest pile.
Scoring
When Scoring is triggered, complete the current round as normal. Then play one final round, including resolving Solstice effects.
Add up your victory points in the same way as in the multiplayer game. Then calculate the Bot's victory points:
- Every progress token is worth 1 victory point for the Bot.
- Every 10 population and materials in any combination is worth 1 victory point for the Bot. Each goods counts as 5 materials for the purposes of this counting.
Tokens left on the Bot's Trade Route cards are not included in this count.
- Score every card in the Bot's hand, Play area, Bot deck, Discard pile, and History (see the previous page for counting victory points). Do not score for cards in the Bot's Dynasty deck. Do not score the Bot's Power card.
The Cultist Bot scores +1 victory point for each Unrest card, instead of -2 each.
If you scored more points than the Bot, you win.
If you scored equal to or less than the Bot, the Bot wins.
Collapse
If the game end is triggered by Collapse, you lose – even if the Bot has more Unrest cards than you.
If you are playing as the Cultists, and the Chaos pile is empty when Collapse is triggered, you win as usual.
Difficulty Levels
Each Bot can be played against on five separate difficulty levels, listed below from easiest to hardest. Each difficulty level changes some of the rules described in this rulebook. We recommend you start with Chieftain level for your first game.
Chieftain
During the Bot's setup, do not place the Slot 5 or Slot 6 markers. If the die roll is 5 or 6, set the die aside.
On Chieftain difficulty, the Bot resolves 3 or 4 effects on each turn.
If playing against the Cultist, the Bot scores 0 victory points for each Unrest card.
Warlord
The same as Chieftain level, but at the end of the Bot's turn, after refilling the Slots, place the top card of the Bot deck in the Bot Discard pile.
On Warlord difficulty, the Bot resolves 3 or 4 effects each turn.
Imperator
No change to the normal Bot rules.
On Imperator difficulty, the Bot resolves 4 or 5 effects each turn.
Sovereign
The same as Imperator level, but during setup give the Bot 3 materials, 2 population, and 1 progress.
If playing with the Trade Routes expansion, give the Bot 1 goods instead of the 1 progress.
The Bot scores 1 victory point for every 5 materials and population in any combination, rather than for every 10.
The Bot scores 1 victory point for every goods.
If playing against the Inuit, do not place an exhaustion token under the number 4 Slot marker at the end of Summer turns.
On Sovereign difficulty, the Bot resolves 4 or 5 effects each turn.
Overlord
The same as Sovereign level, but during Bot setup, add Slot marker 6 to the right of Slot marker 5. During setup and during the Bot's turn, place a card face down below this Slot marker. If you roll a 6 at the start of Bot's turn, place the die on the card in Slot 6 as normal, but do not add any tokens to the Market during the Bot's Clean-up (see page 30).
If playing against the Cultist, the Bot scores +2 victory points for each Unrest card.
On Overlord difficulty, the Bot resolves 5 effects each turn.
Campaign Mode
Campaign mode allows you to play a series of linked solo games against Bots that increase in difficulty. Your objective in campaign mode is to win five games before you lose four games.
To start a campaign, choose a nation; you will play as this nation in every game in the campaign.
Write your name and the name of your nation on an empty campaign log (see page 50).
Play your first game against a Bot on Chieftain difficulty.
You may not choose to play against a nation you have already won against. However, you can play multiple campaign games against the same nation until you win against it.
If You Win a Campaign Game
Record the date and your score in the campaign log. Then, do one of the following:
Select one non-Fame Commons card in your History, Deck, Discard pile, or Hand that you gained during this game. Write the name of the card in the campaign log and add it to your starting deck for the rest of the campaign.
or
Select one card in your Starting deck. Write the name of the card in brackets in the campaign log and return it to the box. It will not be used for the rest of the campaign.
Regardless of your choice, on your next campaign game, play against the Bot at a difficulty level that is one higher than in the game you just played.
If you win against a Bot on Overlord difficulty (your fifth win), you win the campaign.
If You Lose a Campaign Game
Record the date and your score in the campaign log and increase your number of losses by one. On the next campaign game you play, start with twice as many Resources as normal (6 materials, 4 population, and 2 progress)
If playing with the Trade Routes expansion, you will start with 2 goods instead of 2 progress.
If you win the next game, go back to your normal Resources.
If you lose the next game, do not double this bonus.
If you ever reach 4 losses, you lose the campaign.
Adjusting Campaign Difficulty
If you wish for a more challenging campaign, try starting on a difficulty higher than Chieftain.
Supreme Ruler Mode
If you are regularly winning campaigns and wish for a more challenging mode, try Supreme Ruler Mode.
Instead of playing against Bots of increasing difficulty, all bots are at the Supreme Ruler difficulty level.
Supreme Ruler level works in the same way as Overlord level, but every time the Bot Returns an Unrest card it also gains a progress token.
When setting up the game add 2 more Unrest cards to the Commons deck (i.e., 10 Commons Unrest cards instead of 8 for the first game of the campaign).
If you win, set aside an Unrest card from the Commons deck for the remainder of the campaign. If you win against the Bot on the Supreme Ruler difficulty five times, you win a grand campaign!
If you lose, return one set-aside Unrest card to the Commons deck if able, then follow the normal procedure for losing a game.
This difficulty level was considered too hard to be included in the standard rules.
Example Bot Turn
You are playing against the Mayan Bot on Imperator difficulty. Its play is controlled by the row of cards and its State card, which gives specific detailed instructions for resolving each of the 5 face-down cards dealt to the Bot.
At the start of the Bot's turn, you roll for the Bot: the result is a 2, so you place the Bot's die on the card in Slot 2 – that card will be ignored during resolution. Had you rolled a 6, then all five cards would have been resolved, as no card would have been covered by the die.
The Mayan Bot State card table reads:
| Trigger | Effect |
|---|---|
| Unrest | Return this card to the unrest pile. |
| Trade Route | Play this Trade Route card and trigger it. |
| Patolli | Reveal the top card of the main deck. If a Fame card is revealed, exile it and gain 1 goods; if the card is not a Fame card, put the revealed card and an Unrest card in bot discard. |
| Stone Mask | Discard the top card of the bot deck. |
| Region | Discard the top 2 cards of the bot deck. Return an Unrest card from bot discard. Gain 1 progress. |
| City/Metropolis | Gain 1 progress. |
| Tributary | Exile a card from the market. Gain 1 progress. Put this card into history. |
| Nation | Put a set-aside Headpiece on top of the bot deck and put a Stone Mask from bot discard into history; if unable, resolve the top card of the bot deck. |
| Remains-in-play | Return an Accession card from bot discard to the top of the bot deck to acquire a Tributary/Civilised/Uncivilised/Region card; if unable, discard the top card of the bot deck. Put this card into history. |
| Other | Acquire a Uncivilised/Region/Civilised card; if unable, discard the top card of the bot deck and return an Unrest card from bot discard. Put this card into history. |
-
Slot #1 is revealed first: it's Caracol. The first row it matches is the City/Metropolis row, so the Bot gains 1 progress token, and Caracol is placed in the Bot's Discard pile. Slot #2 is covered by the die, so it is not revealed.
-
Slot #3 is next: it is an Unrest card. This is the first row on every Bot State card, and you're instructed to simply Return it to the Unrest pile. Easy.
-
Slot #4 is revealed to be a Stone Mask. This has its own line near the top of the Bot State card, instructing you to Discard the top card of the Bot deck. However, it just so happens that the Bot deck is empty at present, and thus no part of the instructions on this row can be performed.
It is fine to only resolve part of a line, but if the entire line cannot be resolved you must move down the list to find the next row which is valid for the card. In this case it is the very next row, because Stone Mask is also a Region card.
The first sentence of these new instructions tells you to Discard the top 2 cards of the Bot deck – which is still impossible.
The next sentence says to Return an Unrest card from the Discard pile, if able – but there is no Unrest card in the Discard pile!
The third sentence says the Bot gains 1 progress token, and at least that can be done – so there is no need to move to another row, as you were able to resolve at least part of the instructions. The Bot gains 1 progress token and the Stone Mask is placed in the Bot's Discard pile.
- Slot #5 is revealed to be Chultuns. This card triggers the Remains-in-play row near the bottom of the Bot State card. This requires an Accession card to be returned from the Discard pile – which is certainly possible. The Stone Mask that was Discarded earlier is now returned to the top of the Bot deck – the deck was empty, and now contains exactly 1 card: the Stone Mask.
Now the Bot must Acquire a Uncivilised/Civilised/Region/Tributary card. To do this, you must look at all matching card types (in this case all cards) in the Market and calculate their victory point value for the Bot. So, looking at the Market the options are (once their progress tokens are included in the count):
The Market shows: Golden Mask (2 victory points), Scrubland (1 victory point), Metropolis (2 victory points), Elders (2 victory points), Lagoon (0 victory points), and an Unrest card.
When there is a tie, the first tiebreaker is to favour the card(s) with the most tokens (of any type) on them. In this case that means that Elders is the preferred choice, so the Bot Acquires Elders. You move the progress token to the Bot's Resource pool, then place Elders on top of the Bot deck. The Bot also Takes the Unrest that was beneath it in the Market – placing that Unrest on top of Elders.
Having finished the Acquire instruction, the final instruction for this line is "Put this card into History." So Chultuns is placed into the Bot's History, and a new card is dealt to the Market to replace Elders.
Now that all of the Bot's cards have been resolved, it is time to move on to the Bot's Clean-up.
- A progress token is placed onto Scrubland in the Market above Slot #2, as this is the unresolved card.
- The card in the #2 Slot is slid into the #1 Slot.
- The empty Slots are filled with new cards from the Bot deck. Although they are dealt face-down, you can know that the #2 Slot will get Unrest, the #3 Slot will get Elders, and the #4 Slot will get the Stone Mask card.
- The Bot deck is now empty again, so at this point you add the top card of the Bot's Dynasty deck to the Discard pile, shuffle, and form a new Bot deck to Draw from. The identity of that #5 card will be unknown to you until the Bot's next turn!
Keywords
All Players / All Other Players
Cards that refer to "all players" or "each player" include you as well.
Cards that refer to "all other players" or "each other player" do not include you.
Abandon
Only "remains in play" cards can be Abandoned.
Note that while Trade Route cards (which have the "affects other players" symbol) remain in play like "remains in play" cards, they are not "remains in play" cards, and thus cannot be Abandoned.
To Abandon a card, place it in your Discard pile.
If the card has a Garrisoned card underneath it, that card is also Abandoned. If the card has Resource tokens on it, move those Resource tokens to your Resource pool before Abandoning the card. If a card with an exhaustion token is Abandoned, do not move the exhaustion token back to your State card.
Some cards let you Abandon a Garrisoned card. In that case simply place the card in question into your Discard pile, without Abandoning the card it was Garrisoned under.
REMINDER: Only "remains in play" cards may be Recalled or Abandoned. NOT "affects other players" cards!
Acquire (Uncivilised / Civilised / Region / Tributary)
Select a card from the Market of the indicated suit. Gain any Resource tokens from that card and add them to your Resource pool. Add the card to your hand. If there is an Unrest card underneath it, add that card to your hand as well.
After Acquiring the card, draw the top card from the appropriate deck (or the Main deck, if the appropriate Small deck is empty) to replace it. Unless it's a Region card, place an Unrest card from the Unrest pile underneath it.
If a card allows you to Acquire multiple cards, fully resolve the Acquire effect, including replacing the card in the Market, for each card you Acquire. You may Acquire newly drawn cards if they are of the indicated suit.
Note that face-up Trade Route cards above the Market board are not in the Market. They are moved into the Market (in lieu of drawing a new card) when the last card of their respective Small deck is taken from the Market.
Some cards will allow you to include cards in the Exile pile when selecting a card to Acquire. If you Acquire any card except a Region card from the Exile pile this way, you must Take an Unrest card from the Unrest pile. Some cards will limit your options to only cards in the Exile pile (e.g. "Acquire an Exiled …").
REMINDER: If you Acquire a card from Exile, you also Take an Unrest card (unless it was a Region card).
Action (Gaining and Spending)
When a card effect lets you Gain an Action, place an action token from the Supply on your State card, even if that would take you above 3 action tokens on your State card. (During Clean-up, you always reset to 3 action tokens.)
When a card effect requires you to Spend a number of Actions, remove that many action tokens from your State card. If you do not have enough tokens, you cannot resolve that card effect.
Attack
When you play a card with an Attack symbol, it will have a detrimental effect on all other players. If you are unable to resolve this effect in full, resolve it as much as possible.
Some cards protect players against Attack cards. They let their owner choose to ignore some or all of the effects of an Attack card that targets them.
Barbarian
You can only play Barbarian cards if your State card shows the Barbarian symbol.
You can have a Barbarian card in your Play area and use its Exhaust ability, even if your State card shows another symbol, such as Empire.
You can Acquire and Break through for Barbarian cards, even if your State card shows another state symbol.
When a card refers to "if Barbarian", that effect can only be resolved (or that option can only be chosen) if your State card shows the Barbarian symbol.
Break Through (Uncivilised / Civilised / Region / Tributary)
If more than one suit is listed, first declare the suit you will Break through for. Then do one of the following:
Option 1: Select any face-up card of that suit from the Market and add it to your hand. If you choose this option, first place all Resource tokens from that card in your Resource pool. Next take the card into your hand and put any Unrest card underneath it back in the Unrest pile. Then Draw the top card from the appropriate Small deck (or the Main deck, if the appropriate Small deck is depleted) to replace the card you have taken. Place an Unrest card from the Unrest pile underneath it unless it's a Region card.
Note that face-up Trade Route cards above the Market board are not in the Market.
Option 2: If Breaking through for a Civilised, Uncivilised, or Region card, take the top face-down card of the respective Small deck and add it to your hand.
Option 3: If Breaking through for a suit when the respective Small deck contains no face-down cards, or for a Tributary card (which do not have their own deck), reveal cards one by one from the top of the Main deck until you find a card of your declared suit. Take that card and add it to your hand, then shuffle all the other revealed cards into the Main deck. If you do not find a card of the declared suit, gain 2 progress tokens.
Option 4: If Breaking through for a Trade Route card, and one or more Trade Route cards are visible above the Market board (i.e. they are not covered by their appropriate decks), take one of these cards and add it to your hand. If no such cards are available, search the Main deck as described in Option 3.
Cards that trigger when you Acquire them do not trigger when you Break through, even if you choose Option 1 from above.
Some cards will allow you to include cards in the Exile pile in Option 1. Some cards will limit your options to only cards in the Exile pile (e.g., "Break through for an Exiled …").
REMINDER: If you Break through for a Civilised, Uncivilised, or Region card, you may NOT do so from the Main deck until the corresponding Small deck has run out.
Choose
Resolve one of the options following this keyword. The options are all listed as part of a single sentence, separated by capital OR. Any full sentence following the list of options is resolved regardless of your choice.
Commerce
All Trade Route cards have a Commerce effect, which can be triggered in one of two ways:
- When you play a Trade Route card from your hand, trigger the card's Commerce effect immediately.
- When you trigger a Trade ability, you may trigger the Commerce effect of a Trade Route card that is in play with fewer than 3 Goods tokens on it instead of Playing 1 Goods to gain 1 Goods.
To trigger a Commerce effect of your own Trade Route card, move one of your own Goods to that card.
To trigger a Commerce effect on an opponent's Trade Route card, add 1 Goods from the Supply to the opponent's card, and gain one Goods for yourself.
Develop
Pay the Development cost shown on a chosen Development card in your Development area and put it in your Discard pile. There is no order to the cards in your Development area; you may Look through the cards there and select any of them.
When this keyword appears as a card effect, you may resolve it even if there is an exhaustion token in your Development area, and resolving it does not require you to place an exhaustion token in your Development area.
The Arthurians, Utopians, and Vikings have no Development area and thus may never Develop.
Discard
Place the card in your Discard pile.
Draw Card(s)
Draw the indicated number of cards from your Draw deck. If you need to Draw more cards than you have left in your Draw deck, Draw as many as you can, then reshuffle your Draw deck (see page 16) and continue Drawing cards.
If the Draw ability specifies a location other than your Draw deck, all Drawn cards come from that location instead. Cards Drawn from face-down decks always come from the top, but when Drawing cards from a face-up pile (Exiled cards, Discard, etc.), you can select which of the cards to Draw.
Draw Card(s) If Able
When an effect specifies that a player Draws cards "if able", that means that the effect does not trigger a reshuffle. When the Draw deck runs out, you simply stop Drawing cards and move on to the next effect. If your Draw deck is empty, you do not Draw any cards.
Empire
You can only play Empire cards if your State card shows the Empire symbol.
You can have an Empire card in your Play area and use its Exhaust ability, even if your State card is showing another symbol, such as Barbarian.
You can Acquire and Break through for Empire cards, even if your State card is showing another symbol.
When a card refers to "if Empire", that effect can only be resolved (or that option can only be chosen) if your State card shows the Empire symbol.
Exhaust
You can only use an Exhaust ability on your own turn, unless the card specifies otherwise. You can never use Exhaust abilities during Solstice or during Revolt or Innovate turns. Putting a card into play does not trigger its Exhaust ability.
Note that when playing with the Trade Routes expansion all players receive an additional exhaustion token on their State card during setup.
To use an Exhaust ability, move an exhaustion token from your State card onto the card with the Exhaust keyword. If you have no exhaustion tokens on your State card, you may not use an Exhaust ability.
If a card already has an exhaustion token on it, you may not use the Exhaust ability shown on that card.
Fully resolve the effect indicated after the Exhaust keyword. Some Exhaust abilities specify a cost. If you cannot Pay the specified cost, you may not use the Exhaust ability.
You may use an Exhaust ability on a card already in your play area with a state symbol such as Barbarian or Empire, regardless of which symbol shows on your State card.
If an Exhaust ability responds to an effect you or another player resolves (such as "when gaining Fame from a Power card" or "when an opponent Takes an Unrest card") the Exhaust ability happens as soon as the triggering effect is finished. If the current effect is on a card with multiple sentences, the Exhaust ability is resolved after the current sentence is finished but before the next sentence begins.
Exile
Choose an eligible card from those specified by the effect and place it in the Exile pile, next to the Exile symbol on the Market Board.
If you Exile a card from the Market, return any Unrest cards underneath it to the Unrest pile. Then draw a new card from the appropriate Small deck (or the Main deck, if the appropriate deck is depleted) to replace it. Place an Unrest card from the Unrest pile underneath it, unless it's a Region card.
You may never Exile a card with one or more tokens on it but such a card may be Swapped into Exile.
Some cards let you Acquire or Break through for cards in the Exile pile. If you Acquire a non-Region card in this way, also Take an Unrest card from the Unrest pile.
Find
Search the following areas for the card(s) specified in this order:
- Your hand
- Your Discard pile
- Your Draw deck
- Your Nation deck (excluding your Accession card).
Some cards may explicitly instruct you to only search in some of these areas, or to include "remains in play" cards in play or cards in your History.
If you do not Find the specified card, nothing happens. If you Find the specified card, stop searching and reveal it. The original card will tell you where you should place it.
If the card indicates a choice (for example, "Find a Region card"), you may search all four of the areas listed above and choose one eligible card to reveal. Return the other cards to the places where you found them.
Whenever you finish searching your Draw deck or your Nation deck, you must shuffle it. When shuffling your Nation deck, leave the Accession card at the bottom of the deck.
Free Play
Do not remove an action token from your State card to play this card. You can play this card even if you have no action tokens left on your State card. You cannot Free play the same card more than once in the same turn.
Cards without the Free play keyword may be Free played via effects on other cards only once in a turn, but may be played normally (for an Action cost) any number of times.
Note that Free play does not make the effect of the card free, it merely removes the Action cost. For example, if an effect allows you to Free play an Unrest card, you still have to Pay 1 population or 3 materials, or Discard 2 cards to Return said Unrest card.
REMINDER: You cannot Free play the same card more than once in the same turn.
Gaining Goods From Merchants / Trade Route in Play
On your turn, you can Exhaust a card with this text when a Merchants/Trade Route card in play is used to Gain Goods. This may be through its own or another card's effect (even if the Merchants/Trade Route card is not relevant to that effect).
This is most likely to trigger when you use Prosperity, Nomads or similar cards that generate Goods from Trade Route cards which may have the indicated icon. However, it can also be triggered from cards with the indicated icon in play (e.g. Port, Bohio, Qarmaq), or cards Recalling/Abandoning the indicated icon as a cost (e.g. Boats, Water Mill, Altar) in order to Gain Goods, even if the Goods comes from the Market (Trading Ships, Dredging the Tigris).
When using the Trade Routes expansion, it may be triggered if Trading with or Profiting from a Trade Route card that has the indicated icon like Nile Corridor or using Trading Post to Trade with any Trade Route card as long as these Gain you a Goods in any way.
Garrison
Take a card from your hand and place it in your play area face up underneath the card with the Garrison keyword. The card underneath is now considered Garrisoned. Some effects might let you Garrison a card underneath a third unrelated card that is already in play.
A card can have multiple cards Garrisoned underneath it. Some effects might specify the type of card that can be Garrisoned.
A Garrisoned card is not considered to be in your Play area, though it is still scored at the end of the game. You cannot Discard or play a Garrisoned card, and you cannot use its Exhaust or Solstice abilities.
If a Garrisoned card is underneath a card that is Abandoned, Recalled, Exiled, put into History, Sunk, put into Legends, etc, do the same to the Garrisoned card. However, if the Garrisoned card itself is specifically targeted by such an effect, the card under which it was Garrisoned remains in play.
Garrisoned cards are public information.
Some cards explicitly note that they cannot be Garrisoned under Region cards, or at all.
Give a Card
Choose a card in your hand and Give it to an opponent. The opponent puts the given card into their hand.
History
All cards underneath your Power card are considered your History. When an effect instructs you to place a card into your History, place a card (from your hand, unless indicated otherwise) underneath your Power card.
Cards in your History are out of play, and they cannot be interacted with unless a card effect specifies otherwise. They still score victory points.
You may always look at the cards in your History, but other players may not.
The Inuit and the Vikings do not have a History (representing that these civilisations do not rely on written records), while the Atlanteans and the Polynesians have other keywords acting similarly (but not interchangeably) to History (see their nation-specific notes for details). If a card would be placed in their History, it is Discarded instead.
In-Play Cards ("Remains in Play" / "Affects Other Players")
When you play a "remains in play" card, it stays in your Play area until it is removed by another effect. If a "remains in play" card is removed from play (Abandoned, Recalled, Exiled, put into History) while it has Resources on it, move those Resources to your Resource pool. If a "remains in play" card is removed from play while it has an exhaustion token on it, you do not move the exhaustion token back to your State card.
All Trade Route cards have a Signpost icon ("affects other players") to indicate that they stay in play like regular "remains in play" cards. However, effects referencing, counting, Abandoning, or Recalling "remains in play" cards do not affect "affects other players" cards. The only way "affects other players" cards leave play is by resolving their Profit effect.
Look
Pick up and examine the indicated card(s) without showing other players. Unless instructed otherwise, return the card(s) you Looked at to their original location.
If you are instructed to Look at multiple cards and there are fewer eligible cards available to Look at than specified, Look at as many as possible.
If you Look at multiple cards, return them to their original deck in any order.
If you Look at Fame cards, ignore King of Kings unless it's the only card in the Fame deck.
If you Look at cards in your Nation deck, ignore your Accession card unless it's the only card in your Nation deck.
Nation Deck
Your Nation deck is built up of your Nation cards in a face-down deck placed perpendicularly on top of your Accession card. If a card effect lets you manipulate cards in your Nation deck in any way, your Accession card always remains on the bottom. Never place a Nation card underneath your Accession card or shuffle your Accession card into your Nation deck.
Passive
As long as a card is in your Play area, its Passive ability is in effect.
The Passive ability of a Merchants card is in effect for the entire game, including Innovate turns, Revolt turns and Solstice resolutions, and may affect final Scoring.
Pay (Materials / Population / Progress)
Return the indicated number of tokens of the specified type to the Supply. If you are unable to do so, you may not take that Action or use that Exhaust ability. If the Action or ability has multiple options, you must Choose another option instead.
When Paying population, you may spend any amount of progress as if it were 1 population each.
When Paying materials, you may spend any amount of progress as if it were 2 materials each. No change is given when you do so.
You cannot convert Resources into each other, unless explicitly permitted by an effect.
When Paying population, you may instead spend any amount of goods as if it were population.
When Paying materials, you may instead spend any amount of goods as if each were 2 materials. No change is given when you do so.
You cannot spend progress as if it were a goods, nor vice versa.
REMINDER: You may spend 1 progress to Pay for 1 population or 2 materials of cost.
Place Cards on Your Deck
Place the card face down (from your hand, unless indicated otherwise) on the top of your Draw deck.
Profit
If you have a Trade Route card in your play area with 3 Goods tokens on it, you may spend an Action on your turn to resolve the card's Profit effect. Move all the Goods tokens on the card into your Resource pool and place the card into your Discard pile (or elsewhere if the effect explicitly instructs you to).
Recall
Only "remains in play" cards can be Recalled.
Note that while "affects other players" cards remain in play like "remains in play" cards, they cannot be Recalled.
When a "remains in play" card is Recalled, return it to your hand.
If the card has one or more Garrisoned cards, the Garrisoned cards are also returned to your hand. If the card has Resource tokens on it, move those Resources to your Resource pool.
If a card with an exhaustion token is Recalled, you do not move the exhaustion token back to your State card. However, if you replay the same card later on the same turn, you may use another exhaustion token to resolve the same Exhaust effect again (since the card does not "remember" being Exhausted before being Recalled).
REMINDER: Only "remains in play" cards may be Recalled or Abandoned, not "affects other players" cards!
Return an Unrest Card
Return an Unrest card from your hand to the Unrest pile.
This is most often done by playing the Unrest card that you wish to Return from your hand. This requires spending an Action, along with Paying Resource tokens or Discarding cards, as detailed on the card.
Some card effects on other cards allow you to "Return an Unrest card" from your hand or Discard pile. To do so, take the Unrest card (from the appropriate place) and add it to the Unrest pile. The text on the Unrest card is ignored in this case.
Some cards allow you to "Free play an Unrest card". In this case you can play an Unrest card from your hand without spending an action token. However, you must still Pay the cost of Returning the card by Paying Resource tokens or Discarding cards.
Return an Exhaustion Token
Take an exhaustion token from one of the cards in your Play area and Return it to your State card. You may use this exhaustion token to activate any Exhaust ability on the same turn.
Solstice
For detailed rules about the Solstice and how to resolve Solstice effects, see page 16.
Steal Resources
Take the indicated number of tokens of the specified type from the specified players' Resource pools.
If you are unable to resolve this effect in full, resolve it as much as possible. You may never substitute Resources when Stealing. Players who cannot give the full amount, are considered 'unable to Pay', but must Pay as much as they are able.
Swap
Some card effects let you Swap cards between the Market and elsewhere.
To do so, take the card from the Market, setting aside any tokens on it and returning any Unrest cards beneath. Then place the card being Swapped into that Market Slot, returning the set aside tokens to the new card and placing a new Unrest card from the Unrest pile underneath it unless it's a Region card. Finally, put the card which started in the Market to wherever the Swapped card came from (Hand, a deck, etc.).
If a card lets you Swap a card in your hand with a matching-suited card in the Market, the Market card you choose must have a suit icon (Unrest / Tributary / Uncivilised / Civilised / Region) which is also on the Swapping card. If no such Market card exists, you may not Swap.
Take
Take the specified card and add it to your hand.
Unrest cards are Taken from the Unrest pile and added to your hand.
Trade
When you activate the ability to Trade do exactly one of the following:
- Pay 1 progress to gain 1 Goods.
- Move 1 of your Goods to a Trade Route card in your Play area with fewer than 3 Goods on it already and perform its Commerce ability.
- Place 1 Goods from the Supply on an opponent's Trade Route card with fewer than 3 Goods on it already, perform its Commerce ability for yourself, and gain 1 Goods from the Supply.
When playing without the Trade Routes expansion, you might still find a few cards that give you the option to Trade. Simply ignore this option.
Treat As
When a card effect instructs you to Treat icon X As icon(s) Y, you temporarily Treat X As Y until the end of the current turn. Treat As effects always expire before Solstice or Scoring.
Card-specific Notes
Acclaimed (2FAM8/9). When you Break through for an Acclaimed card, follow the normal rules for Breaking through, but you may either choose a card from the Market or to reveal cards from the Main deck.
King of Kings (1FAM9/9, 2FAM9/9, and 3FAM10/10). If an effect allows you to manipulate the order of cards in the Fame deck, King of Kings always remains on the bottom. So long as there are any face-down cards in the Fame deck, any effect which allows players to Look, Gain, or Draw cards refers only to those face-down cards and not King of Kings.
If King of Kings is the only Fame card in the deck when an effect instructs you to Draw or Gain a Fame card, resolve King of Kings instead.
King of Kings is always placed Side A up during setup. The first time each game that King of Kings is resolved, flip it to side B. Each player can resolve King of Kings (either side) only once in total per game. When they do so, they should flip their King of Kings token to remind them that they are unable to do so again.
Utopians and Cultists (except if in Empire or Corrupted state) can gain progress from resolving King of Kings if their State card matches the relevant icon, but they ignore the Develop keyword as they have no Development area. A Cultist in Empire or Corrupted state receives no benefit from King of Kings.
REMINDER: Each player may trigger King of Kings only once in a game.
Miyabi (3JPN6/24), Sumerians (1TRI7/11). These effects return Unrest cards at the end of the game, when Scoring is triggered. They may return Unrest cards from any area which is scored – including your Hand, Play area, Discard pile, Draw deck, History, or nation-specific alternative.
If the game ends in a Collapse (and thus not a Scoring), these effects do not trigger. If a tie during a Collapse results in Scoring between tied players, then those players may still trigger these effects if they have them, but returning those Unrest cards does not prevent Collapse (nor break their original Unrest tie).
If playing against the Cultists, they may be used to return Chaos during Scoring, but not to prevent a Chaos victory for the Cultist player.
Sacred Pass (1REG14/14). You may not use this card to add the Accession card to your deck.
Supreme (3FAM1/10 and 3FAM2/10). This card has no effect when played, but it can still be played as an Action to just to Discard it. It can also be Discarded as a cost on Actions, Exhaust effects, Solstice effects, etc. Only Discarding it during Clean-up is forbidden.
Nation Descriptions
You don't have to read this section to learn how to play, but reading your nation's entry will give you a sense of the key cards in your deck.
When you play with a nation for the first time, take a moment before completing the player setup to look through its pool of cards. Each nation is unique, so it is worth familiarising yourself with the cards that will come up from your Nation deck, and the Development cards that will become available once you become an Empire. You will always have multiple routes to victory, but an awareness of your nation's strengths and weaknesses will help you form a strategy and identify cards in the Market that will help your game plan.
Each nation has a complexity rating, ranging from relatively straightforward (one star) to very unique and challenging (five stars). This is an indicator of how easy it is to discover "how this deck should be played", and can be used as a guide to the recommended order of trying them out for a new player.
Nations marked with the Trade Route icon require the Trade Routes expansion to be played. While some of them might be of lower complexity, they assume familiarity with the Trade Routes expansion, and thus are meant for advanced players.
Each nation also has an aggression rating from Peaceful to Ruthless. Higher aggression means more innate Attack cards, thus playing against them often results in a feeling of being disrupted. If your playgroup doesn't enjoy the occasional negative interaction, we recommend playing with peaceful, or mostly peaceful civilisations. This is reflected in our Bot designs: more aggressive nations' bots tend to disrupt your plans more.
Abbasids (Trade Route) — Complexity 2/5
Aggression: Peaceful
Your Power card has one of the strongest Acquiring methods in the game, and you should be looking to maximise it as much as possible. You have 2 Trade Route cards in your Nation deck, so you might try to flip your Merchants card early. This will allow you to Acquire even more cards and to unlock the full power of Turkish Mercenaries to grab trade-based Fame cards. You would love a few Goods or materials cards to fuel the Great Mosque of Damascus. Exile cards liberally to ensure that the Market always has cards for you to Acquire on your turn.
Aksumites (Trade Route) — Complexity 2/5
Aggression: Peaceful
As historically appropriate, your Salt Mines are worth more than gold: Your Conquer and Advance cards are so cheap to use that you want to use them as often as possible. Beware of the deck bloat: instead of looking for cards to play, try to focus on cards that earn you maximum VP in the endgame. You can History away cards you can't use early game using Ge'ez Script and cycle quickly through your Development cards. Enjoy staying Barbarian for a while to make use of the majority of your direct Acquisition abilities, or rush to become an Empire to start minting your own Coinage as soon as able.
Arthurians — Complexity 5/5
Aggression: Aggressive
The Arthurians never even try to become an Empire, instead pursuing quests and chasing after the legendary Graal. Your knights are vital, granting powerful boons as they are Garrisoned. Send them on quests for Myrddin Wyllt or take a darker path and use Morigena's powers. Looming over you is the Battle of Camlann, Gwaith Camlan, which will see your knights fall and your kingdom suffer mounting Unrest.
Arthurian Special Rules
As the Arthurians, you never become an Empire. Your Accession card is your nadir card. When it would be added to your Discard pile from your Nation deck, (generally during reshuffle) instead immediately place it into your Play area. Do not flip your State card when doing so.
In addition, you do not have a Development area and cannot use Develop effects. Instead, your Development cards are impending quests. By using the Solstice effect on King Arthur's Court, one impending quest is Garrisoned and thus becomes the active quest. You may only have one active quest at a time. By using Morigena or Myrddin Wyllt, you may Gain the active quest into either your hand or your Discard pile. Graal may only become the active quest if there are no other impending quests. Removing Graal does not trigger game end. Instead, it triggers game end when the quest is accomplished and played.
Arthurian Bot
When setting up the Arthurian Bot, replace step 5 with the following:
5a. Place the Development card Graal face up. 5b. Shuffle the remaining Development cards and place them face down on top of the Graal card. These are the impending quests. 5c. Place the Accession card face up next to the impending quests. 5d. Shuffle the Nation cards and place them in a face-down stack on top of the Accession card. This is the Dynasty deck. 5e. Remove King Arthur's Court from the game.
Atlanteans — Complexity 3/5
Aggression: Ruthless
As the Atlanteans, you begin as an Empire, which means you can use the powerful Civilised cards from the start of the game. However, it also means you have to ensure a constant Supply of materials, population, and progress to develop further.
Atlantis is under the constant threat of Floods and Unrest, and you'll need to choose between managing your own regions, terrorising the high seas with your mighty Fleet, or prioritising finding new Region cards lest you risk your nation sinking entirely. But with the rising waters come rewards, which if used wisely will see your nation become the true stuff of Myths and Legends.
Atlantean Special Rules
As the Atlanteans, you begin with your State card on Empire, and never flip. You do not have a Nation deck (and thus no Accession or Nation cards), and thus can begin developing the very first time you reshuffle.
Atlanteans do not have a History – whenever an effect would put a card into History, you Discard it instead. Instead, you have a Flooded pile under your Power card. Cards are added to the Flooded pile through the Sink keyword. Cards in your Flooded pile still score victory points, but they are not "in History" for the purposes of conditional-VP effects. Flooded cards cannot be interacted with unless a card effect specifies otherwise. You may always Look at the cards in your Flooded pile, but other players may not.
If a player other than the Atlanteans triggers the Sink keyword, the specified cards are simply Discarded.
Atlantean Bot
When setting up the Atlantean Bot, replace step 5 with the following:
5a. Set aside all Development cards that are Region cards. 5b. Sort the remaining Development cards in victory point order and place them in a face-down pile, with the higher value cards at the top. Treat all "*" cards as having a value of 5. If multiple cards have the same value, determine their order randomly. 5c. Shuffle the set-aside Region cards and place them face down on top of the pile. This is the Dynasty deck.
Carthaginians — Complexity 2/5
Aggression: Aggressive
As the Carthaginians, your main concern is control of the Market and the amassing of materials. Use your unique power alongside your Caravans and Trading Ships to manipulate the Market in your favour. Once an Empire, continue your expansion with your famous Elephants led by Hannibal, or dominate trade using a Monopoly to export Unrest and other unwanted cards to your opponents. Try to gain access to oceans, as your ships and your own City of Carthage will both benefit from them.
Carthaginians Special Rules
During Clean-up, place 2 materials onto a card in the Market, instead of 1 progress.
Celts — Complexity 2/5
Aggression: Ruthless
As the Celts, you will want to adopt an aggressive playstyle, concentrating on Acquiring Uncivilised cards and spreading Unrest through your powerful Druids. Without the Prosperity available to other nations, you will need to collect materials using Cattle Raids and grow your population with your Druids and the Cauldron of Cerridwen.
Spreading Unrest to your opponents can help you win a forced Collapse, but don't overlook the more subtle advantages of simply clogging your opponent's hand, or forcing them to spend Actions and Resources getting rid of it. As the Celts, you want games to go long enough to develop all five of your Development cards, while slowing your opponents down enough to prevent them from doing the same.
Celts Special Rules
While the effect on the A side of their Power card negatively affects other players, it is not an Attack card, therefore cannot be defended against.
Cultists (3 Exhaustion tokens) — Complexity 5/5+
Aggression: Ruthless
Playing as the Cultists is an experience like no other, with your ceremony cards taking you on a dark journey to reaching a Corrupted state. Once Corrupted, you gain access to new powerful cards and abilities, including the ability to instantly end the game by summoning an eldritch horror. But beware: should you choose to sacrifice everything to do so, this will stop many of your ways of Acquiring. Your game will always centre on managing Unrest: get too many and you risk getting bogged down, get too few and your opponents can brush the threat of your Chaos victory aside. You can Acquire cards from Exile using Frozen Waste, and Cursed Library can remove Resources from the Market to facilitate unexpected Exile opportunities. Your "remains in play" cards are very situationally powerful, so make sure to have them in play when they are useful, and remove them when they become a liability.
Cultists Special Rules
Cultists use only 3 exhaustion tokens, instead of the normal 5.
The Cultists have a second double-sided State card, with unique symbols. Some of your initial cards have the Corrupted state symbol. You may only play those cards once you have the Corrupted State card, and not before. Furthermore, your Corrupted State card means that you can no longer play any Barbarian or Empire cards, though you may continue to use such cards already in your Play area.
Additionally, the Cultists have a special, stronger form of Unrest called Chaos that they prefer handing out to other players (especially via their ability once they reach Corrupted state). If Collapse is triggered and the Chaos pile is empty, you win immediately.
Cultists use two double-sided ceremony cards, which begin stacked, with Research the Ceremony on top. Only the top (visible) ceremony card is considered to be in play. Your ceremony card functions like an additional Power card with a potent Exhaust or Passive ability, as well as a Solstice effect that will let you progress on to the next step of your ceremony. Your ceremony card cannot leave play except through its Solstice effect. When a new ceremony card enters play during Solstice, the newly revealed card's Solstice effect is also resolved.
The last two stages of the ceremony show one and two Unrest icons respectively: this matters for the Scoring of the B side of the Power card (where it scores you additional points), or in case of a Collapse where you did not win via Chaos (where it counts against you)!
To trigger the Solstice effect of the final ceremony stage, you need 13 different icons on cards Garrisoned under your ceremony card. Possible icons include: production, city, miracle, tributary, unrest, fertile, knight, satellite/gadget, materials, civilised, river, mask, uncivilised, region, hunt, handshake, materials-mountain, gadget, ocean, metropolis, fame, and Trade Route.
You may use the icon tokens provided with the game to keep track of icons you've already Acquired and/or Garrisoned in whatever way is convenient for you.
Note that "remains in play", "affects other players", Attack, and State symbols like Barbarian, Corrupted, or Empire are not "icons" for the purpose of this victory condition.
Cultist Bot
When setting up the Cultist Bot, you don't construct a Dynasty deck in step 5. Remove the Ceremony cards (Research the Ceremony, Ceremonial Gathering) from the game.
During step 7 of Bot setup, place the Barbarian State card on the bottom and the Empire card (with the S side face up) on top of it.
Egyptians — Complexity 3/5
Aggression: Aggressive
As the Egyptians, you are empire builders. With so many opportunities for Development, you'll want to carefully consider the best order in which to expand your deck. With your infrastructure located around Egypt's famous river, the frequent Flood of the Nile can bring new opportunities for growth, and you'll want to keep an eye out for key Empire cards in the Market. You become an Empire sooner than anyone else in written history, but this also means you'll often have to find solutions to your problems from within your deck.
Egyptians Special Rules
Egyptians use their Embalming card to help keep their deck trim and uncluttered. Passive abilities are always in effect, so Embalming may be used whenever you Pay materials during an Action, Exhaust ability, Solstice effect, or while developing! It is not triggered if the materials cost is entirely paid by spending progress or goods instead.
Greeks — Complexity 3/5
Aggression: Aggressive
As the Greeks, your main advantages are your cities and technology, and you will want to lean into those strengths. In the early game, your Settlers and Greek Mercenaries are powerful cards of expansion, while as an Empire, Science will enable you to continue to Advance and the Olympic Games will keep your nation manageable. Your Lighthouse will let you manipulate Exiled cards, so it may be worth bearing in mind which cards you Exile during the game.
Guptas (Trade Route) — Complexity 2/5
Aggression: Peaceful
The Guptas' true strength is in the immense flexibility of their Goods-based economy. Use Ayurveda to balance your Resources and Acquire Trade Route cards. You can shift smoothly between massive wealth, strong Market control, or even a classic Fame rush. Your Accession card and Sri Gupta, both give you a Break through for Trade Route cards, allowing you to not linger on the starting side of your Merchants card waiting to Acquire one, and instead start using the more powerful Merchant Empire side as soon as possible.
Guptas Special Rules
During Clean-up, you place 1 goods onto a card in the Market, instead of placing 1 progress.
Inuit (3 Exhaustion tokens) — Complexity 4/5
Aggression: Peaceful
At the end of your Summer turns (during which you may play Empire cards), your hand size is decreased by 2, meaning that at the start of Winter turns you usually have only 3 cards to play. While you have many ways to gain new cards, only Advance can earn you new Civilised cards during Winter for the upcoming Summer. Challenges like this will frequently require you to retain a few cards in your hand turn-to-turn, unlike most other civilisations. As a trade-off for these challenges, you have access to your (rather cheap) Development cards from the beginning of the game.
Will you be remembered as a fearsome Harpoon-wielder on the hunt for fame, or will you use Oral History and Bone Carving to turn the lack of written history into a great advantage?
Inuit Special Rules
The Inuit use only 3 exhaustion tokens, instead of the normal 5.
As the Inuit, your unique State card flips at the end of each turn. You do not have a Nation deck (so no Accession or Nation cards), and thus can begin developing the very first time you reshuffle.
The Inuit do not have a History – whenever an effect would put a card into History, you simply Discard it. In Winter you also take an Unrest card when Discarding in this way.
Nunavut has two Region symbols, and counts as 2 Region cards for the purposes of card effects such as Qarmaq, Iglu, the Khmer Empire Tributary card (Horizons), and the Macedonians Tributary card (Legends).
Inuit Bot
When setting up the Inuit Bot, replace step 5 with the following:
5a. Collect the Development cards, setting Imaq and Nunavik aside. 5b. Place Kayaks face down, then alternate placing Barbarian and Empire cards on top in ascending victory point order, with a 3-point Barbarian card on top. 5c. Place Nunavik and Imaq on top of this deck (with Nunavik on top). This is the Dynasty deck.
When playing against the Inuit Bot, at the end of its Summer turns, place an exhaustion token in Slots 4 & 5. Do not add cards to these Slots. Flip the Bot State card to its Winter side. At the end of its Winter turns, remove the exhaustion tokens from Slots 4 & 5, and flip the Bot State card to its Summer side.
Japanese — Complexity 2/5
Aggression: Peaceful
Japan is perfect if you can be patient, as your cards require a touch of finesse to create opportunities to thrive on. You'll want to move smoothly into Empire, so beware early Glory plays, or increasing your deck size too much in the early game – if your Clans follow the teachings of Shinto, your deck can speed up while you can build up your Uncivilised Play area. Combine this with the subtle benefits of Kanji in keeping your deck-cycling speed at a perfect hum. Once you reach Empire, you will learn to live with Shinto and Tendai Buddhism in peace side-by-side, especially when combined with Jingu-Ji and the fabled Tea Ceremony.
Macedonians — Complexity 1/5
Aggression: Mostly Peaceful
The Macedonians, more than any other nation, are focused on expansion. Grabbing and keeping Region cards in play is likely to be a central element of your victory plan. Macedonians can continue to Conquer even after they become an Empire, thanks to Alexander and his Companion Cavalry. Of course you want to play Glory early and often, which creates a natural synergy with the powerful Macedonian Phalanxes. But don't forget to also acquire a few key cards from the Market, which you can garrison under your excess regions to keep your deck small and focused, while still amassing enough victory points to win.
Magyars — Complexity 1/5
Aggression: Ruthless
As the Magyars, your strongest cards are your uniquely powerful leaders: Emese, Álmos, Árpád. While their strict historical sequence gives you guidance, you're bound by a Blood Oath that makes both gaining and managing Unrest cards very desirable. Be on the lookout for tributary regions, and manipulate your Nation deck to make best use of your long Barbarian period, as once you hit Empire, you'll be forced to settle down, and your Glory becomes useless to you.
Magyars Special Rules
While the effect on the A side of their Power card negatively affects other players, it is not an Attack card, therefore cannot be defended against.
Martians — Complexity 5/5
Aggression: Mostly Peaceful
As the Martians, you have plenty of powerful options, but your foreign attitude to Earth will pose many challenges on your quest to permanently settle on this planet and blend into the local populace. Your Gadget cards are worth negative victory points, but can be incredibly powerful when used at the right time. Your Nation deck is quite large, but burning through it will cause the calamitous Reactor Explosion, and you won't survive that radiation for long! Eliminating all your progress tokens can allow you to Go Native, which fixes many of your problems, but makes many of your starting cards unplayable. The B side of your Merchants card is meant for Martian players who want to eschew the goal of Going Native and instead preserve their Martian ways, despite the challenges that presents. It's not easy being green!
Martians Special Rules
Your Accession card (Reactor Explosion) is your nadir card. When it would be added to your Discard pile from your Nation deck, (generally during reshuffle) instead immediately place it into your Play area. Do not flip your State card when doing so. As printed on your Alien State card, Reactor Explosion can only be removed from play if you have zero progress tokens.
The Martians use a special State card, with Alien on the starting Empire side and Gone Native on the Barbarian side. Alien Martians score only 1VP for every 3 progress tokens, instead of for every 1. In addition, you must Take an Unrest card for every progress token you spend. While some cards in the Martian deck allow you to convert progress into population, this does not count as spending for this purpose.
Martian Gadget cards are your greatest tool. They gain progress tokens as a mandatory effect, and penalise you during Scoring if not Exiled, put into History, or Swapped into the Market via Sharing Our Secrets. These tools are so removed from Earth-based technologies that they seem to be dangerous (but enticing!) magic.
Note that the default Trade Action to gain 1 goods involves Paying 1 progress and thus Martians are penalised for that.
Martian Bot
When setting up the Martian Bot, include Cryostasis in the Nation deck, as if it was a Nation card, instead of the Bot deck as part of step 6.
Mauryans — Complexity 2/5
Aggression: Aggressive
As the Mauryans, you will want to open with aggressive tactics as you expand your nation with Region and Tributary cards, using the mighty Indian Elephants you have at your disposal. (And yes, it's deliberate that only one has the Attack symbol!) As you become an Empire, you'll need to choose whether to keep expanding and seeking Glory with control of the great Grand Trunk Road, or to follow Ashoka instead and take a peaceful path to victory.
Mauryans Special Rules
Grand Trunk Road has two Region symbols, and counts as 2 Region cards for the purposes of card effects such as Glory, the Khmer Empire Tributary card (Horizons), the Macedonians Tributary card (Legends), or the Mauryans' own Power card.
Mayans (Trade Route) — Complexity 4/5
Aggression: Mostly Peaceful
As their culture is related to the Olmecs', it is no surprise that the Mayans use Exhaust abilities extensively, in combination with managing Mask cards. As great city builders, you have a Nation deck full of City cards, and cards like Halach Uinic or the Mayan Traders reward you for gaining more of them. This will naturally keep your deck small, and cycling quickly. Once you make it to Empire, the unique Popol Vuh will turn the temptation of Unrest into an avenue to Fame, but to get there, you'll have to manage your Headpieces well.
Mayan Bot
When setting up the Mayan Bot, set aside all 3 copies of Headpiece, and do not include them in the Dynasty deck's creation. Put them near the Dynasty deck, as the Bot's effects will refer to these cards explicitly.
Minoans — Complexity 2/5
Aggression: Mostly Peaceful
As the Minoans, you will probably focus on progress, as you will need it to Develop. Carefully manage your supply of materials to create beautiful Pottery but beware of its Barbarian symbol – if you Abandon it after you become an Empire, you won't be able to play it again. Keep your nation running efficiently with a discerning eye for important cards, and use your Writing Systems to consign unimportant cards to History. Your biggest advantage is how fast you get to your Empire, so especially be on the lookout for powerful Civilised cards, or cards that allow you to Acquire for free even during Empire.
Olmecs — Complexity 4/5
Aggression: Mostly Peaceful
As the Olmecs, your game will look different from that of many of the other players. You won't find any Prosperity, Conquer, Advance, or Glory cards in your deck; instead, you'll need to rely on your Stone Masks. Masks are a tricky resource – they let you Draw more cards and power your "remains in play" cards, but they score you points only when they are in your History. Managing them carefully will be key to your success. With your "remains in play" cards like Ball Games and Lodestone Compass you'll be able to Acquire new cards as often as you want, but if you succumb to the siren call of the deck bloat, you might never make it to Empire!
Persians — Complexity 1/5
Aggression: Aggressive
As the Persians, you will want to subjugate other nations to your will and use them to your advantage. Conquer as many Tributary cards as you can and expand your territories. Once an Empire, you have several strategies you could pursue. You can start striking your opponents with your mighty Battering Ram and spreading Unrest with your Persian Gold. Alternatively you could take advantage of your Satrap card for additional Actions, but you'll probably want your Windmills developed to ensure a steady supply of materials.
Polynesians (3 Exhaustion tokens) — Complexity 5/5
Aggression: Peaceful
The Polynesians and their incredible feats of exploration across the Pacific Ocean are very much based in history. The unique way in which their society expanded, spreading over unfathomable distances with only the stars and currents to guide them, translates to a very different gameplay experience. As Polynesians, your challenge is in controlling your own state, between Isle-bound (filling up the islands you already populate) and Voyaging (sailing the open waters), and collecting enough Mana to power your strongest moves, such as Explorers and the Development costs of the islands you need to discover. Gaining Mana is sometimes a cost (you have to give up a card from your hand, after all), sometimes a benefit (you need to get a lot of Mana to be able to explore and Develop often).
Polynesians Special Rules
Polynesians use only 3 exhaustion tokens, instead of the normal 5.
Polynesians use a special State card, with unique symbols.
Polynesians have a special always-in-play card, Mana, which Garrisons cards to fuel strong effects. Many cards gain Mana from your hand or Discard pile. (If not specified, the Mana is gained from hand.) Some effects require you to discard cards that were Garrisoned as Mana (this is referred to as 'spending Mana').
The Polynesians do not have a History – whenever an effect would put a card into History, you simply Discard it and Take an Unrest card. Instead, you have a Legends pile under your Power card. Cards in your Legends pile still score victory points, but they are not "in History" for the purposes of conditional-VP effects. Cards in your Legends pile cannot be interacted with unless a card effect specifies otherwise. You may always Look at the cards in your Legends pile, but other players may not.
Whakapapa's Passive ability allows you to Pay 3 materials to Return an Unrest card whenever one or more cards are put into Legends. As a Passive, this can be used anytime, including during Solstice effects such as Rapa Nui (Easter Island).
If a player other than the Polynesians attempts to put a card into Legends, the specified card is simply be Discarded.
Polynesian Bot
When setting up the Polynesian Bot, replace step 5 with the following:
5a. Place the Development card Aotearoa face down. 5b. Shuffle the remaining Development cards and place them face down on top of the Aotearoa card. This is the Discovery deck. 5c. Place the Accession card face up next to the Discovery deck. 5d. Shuffle the Nation cards and place them in a face-down stack on top of the Accession card. This is the Dynasty deck. 5e. Remove the Mana and Overpopulation cards from the game.
Qin — Complexity 2/5
Aggression: Mostly Peaceful
Playing as the Qin is a game of challenging decisions. Powerful leaders must rule with the Mandate of Heaven, but is that leadership worth the burden it brings? How will you choose between the competing systems of Confucianism and Legalism? And as an Empire, will you invest the time needed to construct Long Walls or focus on other goals? With population being a key to your plans, you have many ways to build a lasting legacy.
Qin Special Rules
During Clean-up, place 1 population onto a card in the Market, instead of 1 progress.
Romans — Complexity 1/5
Aggression: Aggressive
As the Romans, your path to dominance will likely be through rapid expansion. Conquer Region cards and use them to declare your Glory and earn Fame cards. With your mighty Legion, your conquest can continue well into your Accession to Empire. Do not overlook the City of Rome though; you'll want this in play and then upgraded to Rome the Eternal City, and Acquiring a few more cities along the way can help your deck cycling or population growth too.
Sassanids (Trade Route) — Complexity 4/5
Aggression: Aggressive
When playing this spiritual and thematic descendant of the Persian civilisation, you will have a host of powerful Attack cards at all stages of the game. Your first main challenge will be to manage your Knights, cards capable of exploiting the strongest of your Region cards repeatedly while providing you with access to Tributary cards. Your second challenge will be the religion of Zoroastrianism, to keep feeding the holy fire of Atar and the purifying waters of Aban. It might be difficult at times, but if you can keep them going, you will be rewarded plenty. And finally, thanks to Huzistan and the Shah, you have some special tricks related to the Fame deck too.
Scythians — Complexity 2/5
Aggression: Aggressive
As the Scythians, you will want to focus on expanding your territory and grabbing Region cards that you can exploit for their materials. As Nomads (one has the Attack symbol and one does not…), you'll be making use of Tents for shelter and Mounted Archers for protection, but your true Glory won't be recognised until you become an Empire. Your deck is one of the thinnest, and extremely fast when raiding and using your Tamga, but has a low innate Scoring potential, so be on the lookout for good "*" cards to capitalise on your Region cards.
Taino (3 Exhaustion tokens) — Complexity 3/5
Aggression: Mostly Peaceful
As the Taino, you will be the master of food production: use your Bohio to collect from all manners of regions, maximise production using Soil Rotation, and feed your people with Fishing. You will be Acquiring cards using "remains in play" cards (similar to other Central American civilisations), like Batey and Canoes. Your first challenge will be to manage allocating your Resources onto your cards, and your second will be to have enough Region cards that playing Migration and Sol de Jayuya several times becomes possible.
Taino Special Rules
Taino use only 3 exhaustion tokens, instead of the normal 5.
Unlike all other civilisations, the Taino consider all Resource tokens on their cards as Resources in their pool during Scoring. This means that placing (for example) materials tokens on Zemi does not reduce the points you score for cards like Moneylenders.
Your State card shows Free Tribes on both sides, so there is no need to flip it when you place your Accession card in your Discard pile.
Tang (Trade Route) — Complexity 3/5
Aggression: Peaceful
As the Tang, you will be leading your people through some interesting times: while you start with no Unrest, you Take one Unrest card each Solstice! Like the Qin many centuries before the Tang, you will have to manage the double-edged Mandate of Heaven, the ebb and flow of the population in and out of the Market, and deal with the philosophies of Taoism and Confucianism. Meanwhile, you will have access to the largest cities of the world of their time – Chang'an and Luoyang – to aid you.
Tang Special Rules
During Clean-up, place 1 population onto a card in the Market, instead of 1 progress.
Utopians (3 Exhaustion tokens) — Complexity 5/5+
Aggression: Peaceful
The Utopians are unlike any other nation – everything about them is different. You uniquely have to manage the Scrolls, you have no Nation deck and no Development cards, and you won't want to go through your deck quickly. Instead, you will be realising your Visions of Shangri-La and spending your Resources to Advance towards the fabled city of Shangri-La itself. Study your cards – and your opponents – carefully, as you'll need to decide which will serve you and which will hinder you on your path to Utopia. Will you sacrifice everything for a speedy journey, or will you learn all forms of warfare known to man, only to find your inner peace in your Monastery?
Utopian Special Rules
Utopians use only 3 exhaustion tokens, instead of the normal 5.
Utopians use two double-sided journey cards, which begin stacked, with Visions of Shangri-La on top. Only the top (visible) journey card is considered to be in play. Your journey card functions like an additional Power card with a potent Exhaust or Passive ability, as well as a Solstice effect that will let you progress on to the next step of your journey. Your journey card cannot leave play except for through its Solstice effect. When a new journey card enters play during Solstice, the newly revealed card's Solstice effect is also resolved.
Utopian Bot
When setting up the Utopian Bot, do not construct a Dynasty deck. Instead, put Visions of Shangri-La on top of Gates of Shangri-La, both face up. The top card in this pile is the Bot's journey card.
During step 7 of Bot setup, find the Utopian Journey table, and place it next to the State card.
Vikings — Complexity 3/5
Aggression: Ruthless
The Vikings never become an Empire and have no History, which confers its own advantages and challenges. Your Nation deck will keep providing you with cards at no cost, but you won't be able to control the order in which they enter your deck. Use Gothja and other cards to help you adapt, and make full use of your ability to keep playing cards that would normally go into your History. To keep your deck under control, remember to Garrison cards using your "remains in play" cards and your Sagas.
Vikings Special Rules
As the Vikings, you never become an Empire. You do not have a Development area and cannot use Develop effects. Your Accession card is your zenith card. When this card is added to your Discard pile from your Nation deck, (generally during reshuffle), it triggers the end of the game. Do not flip your State card when doing so.
Vikings do not have a History – whenever an effect would put a card into History, you simply Discard it.
Viking Bot
When setting up the Viking Bot, skip step 5a. The Accession card is the bottom of the Viking Nation deck.
Wagadou (Trade Route) — Complexity 3/5
Aggression: Peaceful
As the Wagadou, you will be presiding over the richest gold mines of the known world, potentially having access to 100 or more materials during the course of a game. The price of these riches are the infertile lands on the southern edge of the Sahara, which is why to raise your head in Pride (your version of Glory), you'll need to get your hand on more fertile lands besides a steady stream of progress, possibly via your trade cities of Koumbi Saleh and Aoudaghost. Your other challenge will be to Pay the cost of the Pact with Bida, until you can reach Empire, and your Adoption of Islam allows you to move past it.
Wagadou Special Rules
During Clean-up, place 1 materials onto a card in the Market, instead of 1 progress.
Rules to Remember
- You may spend 1 progress to Pay for 1 population or 2 materials of cost.
- A card may not be Free played more than once in a turn.
- Each player may trigger King of Kings only once in a game.
- You may never spend Actions or use Exhaust effects during Solstice.
- "*" cards are limited to a maximum of 10 victory points each. Even your Power card.
- All players should perform their Solstice effects simultaneously.
- If you Break through for Civilised, Uncivilised, or Region cards you may NOT do so from the Main deck until the corresponding Small deck has run out.
- The Market always contains 5 cards. Slots are filled from Small decks when possible – then filled from the Main deck. Always refill empty Slots immediately.
- When filling from the Main deck, it is entirely acceptable to place any suit in any Slot.
- If you Acquire a card from Exile, you still Take an Unrest card unless it was a Region card.
- When an icon is Treated As (see page 39) another icon via any effect, the original icon is no longer present.
- At the end of your turn, do not forget to place 1 progress token from the Supply (not one of your own!) on a Market card.
- Only "remains in play" cards may be Recalled or Abandoned, not "affects other players" cards.
- When using Trade Routes, all players gain an extra exhaustion token.
- When activating the Trade keyword, you can Pay 1 progress to gain 1 Goods.
- You may spend Goods to Pay for 1 population or 2 materials of cost.
Campaign Logs
Printable log sheets for tracking a Campaign Mode playthrough (see page 33). Each entry records: Player Name, Player Nation, Player Score, Bot Nation, Bot Score, Win/Lose, and Card Added (Removed).
Solo Mode Trade Route Tables
| Trade Route | Commerce Effect | Profit Effect |
|---|---|---|
| Welcoming (Fame) | Resolve the top card of the Dynasty deck. The owner of this Trade Route card MAY draw a card. | Resolve the top card of the Main deck. If it is a 0 VP card, gain 1 progress. |
| Andes Highway | Gain 2 population and 1 progress. | Put the top card of the Discard pile onto the top of the Bot deck. Gain the top card. |
| Baltic Amber Road | Return an Unrest card from discard; if unable, gain 2 progress. | Break through for a Trade Route card and discard it. |
| Cornwall Tin Road | Acquire an Uncivilised card; if unable, discard the top two cards of the Bot deck. | Discard the top card of the Dynasty deck. |
| Eastern Silk Road (Tang) | Discard the top card of the Bot deck. Acquire a Civilised card. | Break through for a Trade Route/Civilised/Uncivilised/Region card. |
| Hopewell Exchange System | Discard the top card of the Bot deck. Discard the top card of the Dynasty deck. | Gain 3 materials and 2 population. |
| Lapis Lazuli Trade | Acquire a Trade Route card; if unable, gain 4 materials. | Break through for a Civilised card. |
| Maritime Spice Road (Abbasid/Aksumite) | Acquire a Tributary card (including from Exile); if unable, gain 1 progress. | Resolve the top card of the Bot deck. |
| Philippines Jade Trade | Acquire a card in Slot #1 or Slot #2 of the Market. | Break through for a Region card and resolve it. |
| Swahili Coast | Discard the top card of the Bot deck and gain 1 progress. | Break through for an Uncivilised card. |
| The Nile Corridor | Resolve the top card of the Bot deck. | Break through for a Civilised card. |
| Trans-Saharan Trade (Wagadou) | Acquire a card in the Market with materials on it; if unable, gain 3 materials and add 1 materials to the market card in the #3 Slot. | Gain 1 progress per Region card the Bot has in play. |
| Western Silk Road (Abbasid/Sassanid) | Return an Unrest card from discard. Gain 1 progress. | Resolve the top card of the Bot deck. Discard the top card of the Bot deck. |
End of Turn Effect (Resolve First Applicable)
| Merchants | Merchant Empire | |
|---|---|---|
| 1 | Acquire a Trade Route card, if able. | Acquire a Trade Route card, if able. |
| 2 | Pay 5 progress to gain the top Fame card and flip to Merchant Empire. | Resolve all Profits, where able. |
| 3 | Resolve all Profits, where able. | Pay 3 population to acquire a Civilised/Uncivilised card, if able. |
| 4 | Trade, if able. Pay 1 progress for 1 goods. | Trade, if able. Pay 1 progress for 1 goods. |
Bot's Trade Route Priority
- Trade Route card with most Goods (but fewer than 3).
- Own Trade Route card.
- Where tied, first available Trade Route card on the Trade Route chart above.