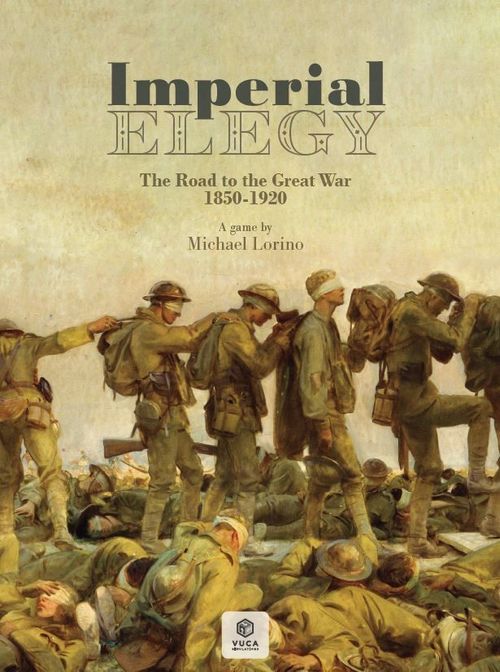
Imperial Elegy: The Road to the Great War 1850-1920
Imperial Elegy: The Road to the Great War 1850-1920 Rulebook
Table of Contents
Table of Contents
- 1.0 Abbreviations
- 2.0 Introduction and Overview
- 3.0 The Map
- 4.0 Key Concepts and Terminology
- 5.0 Units
- 6.0 Miscellaneous Counters
- 7.0 Player Displays
- 8.0 The Alliance System
- 9.0 Action Cards
- 10.0 Prep Phase
- 11.0 Diplomacy Phase
- 12.0 Action Phase
- 13.0 War Aim Step
- 14.0 Alliance Step
- 15.0 Maneuver Step
- 16.0 Victory Step
- 17.0 Demobilization step
- 18.0 Land Battles
- 19.0 Naval Affairs
- 20.0 End Phase
- (1) 20.1 Militarism
- (2) 20.2 Degrade forts
- (3) 20.3 Non-Player Power Build Step
- (4) 20.4 Naval Units Go to Port
- (5) 20.5 Set manpower
- (6) 20.6 Industrialization
- (7) 20.7 Progress truces
- (8) 20.8 Progress Wars of Independence (WoIs)
- (9) 20.9 Conduct an Alliance Resolution Step [8.6].
- (10) 20.10 Decrease World Tension
- (11) 20.11 Draw NGs
- 21.0 Rebels
- 22.0 Italy and Poland
- 23.0 The Crisis Table
- 24.0 The Great War
- 25.0 Outbreak Step
- 26.0 Planning Step
- 27.0 Maneuver Step
- 28.0 GW Combat
- 29.0 Winter Step
- 30.0 Stability and Elimination in the GW
- 31.0 Ending the GW
- 32.0 GW Special Rules
- 33.0 National Characteristics
- 34.0 Bots
- Index
1.0 Abbreviations
1.1 Player Abbreviations
- AU - Austria/Austria-Hungary
- FR - France
- GE - Germany/Prussia
- OT - Ottomans
- RU - Russia
- UK - United Kingdom
1.2 Other Abbreviations
- ABM - Arab Battle Modifier*
- AMP - Arab Manpower*
- BDRM - Battle Die Roll Modifier
- BM - Battle Modifier*
- BMPIT - Bot Major Power Influence Track
- CP - Command Points
- CRT - Combat Results Table
- CSA - Confederate States of America
- Dn - Dreadnought
- DRM - Die Roll Modifier
- EF - Expeditionary Force
- EC - Elite Corps
- FP - Firepower
- GoE - Graveyard of Empires
- GW - Great War
- IE - Imperial Elegy
- LoC - Line of Communication
- MP - Manpower*
- MPIT - Major Power Influence Track
- NAR - Naval Arms Race
- NG - National Goal
- NMP - Naval Movement Point
- PAC - Player Aid Card
- SoP - Sequence of Play
- Sq - Squadron
- TA - Triple Alliance
- TE - Triple Entente
- TSRR - Trans-Siberian Railroad
*Abbreviations found only on player displays
2.0 Introduction and Overview
IE is a Card Driven Game that takes place over 7 turns, with each turn representing a decade. If a Great War (GW) occurs, the game can be extended by, at most, 6 additional shorter GW turns (numbered 0-5). Each of the 7 game turns consists of numerous player impulses, during which players play action cards for their Command Points (CP) or events. The structure of the GW turns are dealt with in 24.1. Players will use CP and events to colonize, conduct diplomacy, fight wars, as well as hinder their opponents. A turn is over once all players have consecutively passed or when all players are out of cards. Players take on the role of either Germany/Prussia, the United Kingdom, France, Austria/Austria-Hungary, Russia, or the Ottoman Empire. Italy, should it unify, is not controlled directly by a player and instead interacts with the game using special rules. IE was designed primarily as a 6 player game, but it can accommodate smaller player counts, including solitaire.
2.1 Sequence of Play
Each turn is composed of the following 4 phases, which are in order:
- Prep Phase [10.0]: (1) add new cards to the deck, (2) reshuffle deck, (3) deal cards. (4) Optional: players can each discard a random card to gain 1 stability, cannot discard home card or mandatory events
- Diplomacy Phase [11.0]: (1) make deals, (2) announce deals in turn order, (3) select home card
- Action Phase [12.0]: in turn order, players perform impulses by playing cards to conduct actions and events
- End Phase [20.0]: (1) militarism: gain one army step or prevent a fort from degrading, (2) degrade forts, (3) non-player power build step, (4) all naval units go to port, (5) set manpower, (6) industrialize, (7) progress truces, (8) progress WoIs, (9) alliance resolution step, (10) decrease the WTT by 1, (11) on turns 1, 3, and 5 players draw three NGs keeping one, (12) advance the turn marker
Important: during wartime and the GW, the game shifts to a different SoP as described at 12.17.2 and 24.1 respectively.
2.2 Game End and Victory
When teaching games I find it useful to start with explaining the goals of each player and how to win. If you prefer to learn how to play the game before learning how to win it, feel free to skip this section and then come back.
How the game ends determines how victory is decided. The game will end in one of the following ways:
- At the end of turn 7 (or the end of the scenario)
- An alliance wins the GW
- At the end of GW turn 5 (there is a GW turn 0)
- Auto-Victory
2.2.1 The End of Turn 7
This is the simplest way for the game to end. If the game reaches the end of turn 7 all players reveal their National Goals (NGs) [2.4] and total their VPs. A player's score can be modified by their current stability, national characteristics (in the case of GE and RU), and penalties from certain events. The player with the highest VP total wins the game. The vast majority of VPs are scored through NGs, although the GE and RU players can score special VPs as described on their player displays. Players can also lose VPs for having low stability.
2.2.2 An Alliance Wins the GW
The alliance that wins the GW does not automatically win the game. First, check if there are any neutral players. If there are no neutral players, then the alliance that won the GW wins the game as a team regardless of their individual VP totals. Exception: if a player was eliminated during the GW [30.0], they automatically lose the game even if their alliance wins the GW.
If there is a neutral player (or players) at the end of the GW, the team that wins the GW scores bonus VPs equal to 4 minus the current GW turn (yes it is possible to get zero or negative VPs for winning the GW). Compare the highest VP total of a single player in the victorious alliance to the highest VP total of a single player amongst neutral players. If the alliance member's total is higher, their alliance wins the game. However, if a neutral player's VP total is higher, that player wins the game. The previous exception about eliminated players still applies.
Design Note: A neutral player that stays out of the carnage of the GW can win the game if the GW drags on for long enough.
Play Note: Do not neglect VPs prior to the GW! Scoring VPs earns players invaluable bonuses should the GW occur [25.6].
2.2.3 The End of GW Turn 5
The game will automatically end after GW turn 5 has been completed, if neither alliance has won, regardless of the current board state. If this occurs, follow this procedure to determine which player wins the game:
- The neutral player with the highest VP total wins
- If there are no neutral players, the player with the highest stability wins
2.2.4 Auto-Victory
If a player takes control of a certain number of territorial keys, as indicated on their player display, they immediately win the game.
Important: occupying a space in wartime is not the same as controlling a space [15.3].
Design Note: auto-victories are extremely rare, and are not a recommended strategy goal.
2.3 VP Ties
There are no tie breakers, if there is a tie for first those players win together. It is entirely possible for multiple players to win the game. In theory, it is possible for all players to win the game.
2.4 National Goals (NGs)
Each player has a small deck of eight NG cards. These represent the possible objectives each player can have over the course of the game. Some objectives only appear on the cards of one player. Other objectives will appear on the cards of more than one player, meaning that (depending on their card draws) players might find themselves fighting with other players to achieve the same goal. During the End Phase of every odd turn, except turn 7 (meaning turns 1, 3, and 5), players will shuffle their NG deck, draw three NG cards, keep one card, and return the other two to their NG deck. This is also indicated on the turn track. When players select an NG card they keep it as one of the three NG cards they score at the end of the game or before the GW [25.5].
Special: AU has 9 NG cards, but one of them is only used in the 1870 and 1880 scenarios. This is also explained both in the scenario rules and on the ninth NG card.
2.4.1 NG Secrecy
Players can never show their NG cards to other players unless a card or national characteristic [33.0] instructs them to reveal it. Players are allowed to tell other players about the NGs they've drawn, but they do not have to tell the truth. Players are allowed to inspect their own NG deck at any time, just remember that players must reshuffle their NG decks before drawing cards.
2.4.2 NG Types
There are two types of NG cards: achievement NGs and ranked NGs. Achievement NGs give players a specified amount of VPs (3 or 4) if that player completes the goal on the card. Ranked NGs are marked with an asterisk (*); when selecting these NGs players can earn 0, 1, 2, or 3 VPs based on the goal described on the card when compared to the other players. The player(s) in first place receives 3 VPs, 2 VPs for second, 1 VP for third, and 0 for any other place. There are no tie breakers, and if two players are tied for a place the next place VP reward is skipped. Similarly if three or more players are tied for a place all subsequent VP rewards are skipped.
Important: only the player who selected the ranked NG can actually receive VPs for it.
Example: the German player selects the European Keys NG, At the end of turn 7, they control 9 keys in Europe putting them in second place behind the French player who controls 10. The German player is in second place so they receive 2 VPs for this NG. The French player did not select the European Keys NG and scores no VPs for their total.
NG Design Note: The system is designed so that players who are doing well on their NGs will try to avoid a GW as they have a good chance of winning the game without it, but players behind on their NGs will see the GW as their only chance at victory. This dichotomy is modeled off Germany's geopolitical position during the early twentieth century. Despite their dominant economic position, Germany's leaders were obsessed with the idea that if they didn't fight a war soon they would be surpassed by the Entente powers and would be unable to win a war in the near future. Additionally, each power has a NG card which can only be scored (as is written on the card) if "the GW does not occur.” This means that some, none, or possibly all the powers will be trying to avert a GW at all costs.
3.0 The Map
3.1 The Main Map and the Submaps
All spaces in Europe, North Africa, and most of the Middle East are considered part of the main map. There are submaps for North America, Africa, Asia, and the South and Central Pacific. Certain cards and rules refer to specific submaps.
Design Note: The following clarifications are designed to address some questions that arose through play testing, and we thought new players might find these helpful.
3.1.1 Europe Clarifications
All Russian home spaces in the Caucasus are in Europe. All Balkan spaces are also in Europe.
3.1.2 Africa Clarifications
Morocco, Algeria, Tunis, Tripoli, Benghazi, The Great Sand Sea, Egypt, and all spaces on the Africa submap are in Africa.
3.1.3 Asia Clarifications
Spaces on the Asia submap are considered to be part of Asia. Players should be aware that OT have home spaces in Asia as well as Africa and the Balkans. Kuwait is also in Asia.
3.1.4 North America Clarifications
All spaces on the North America submap are in North America.
3.1.5 South and Central Pacific
For the purposes of NGs, all spaces in the South and Central Pacific box are in Asia. However, they are not part of the Asia submap.
3.2 Map Spaces
There are five kinds of spaces: keys, capitals, territories, naval bases, and naval boxes.
Map Breakdown Chart (legend of space types on the map):
- Keys: left example is an AU home space, right example is a non-player (Greek) home space
- Capitals: left example is a FR capital, right example is an OT subcapital. Capitals and subcapitals are also keys
- Territories: left example is a RU home space, right example is an OT home space and Arab and Egyptian nationality
- Naval Bases: left example is a UK naval base, right example is an uncontrolled naval base
- Ports: left example is an Eastern Mediterranean port, right example is a North Atlantic port
- Naval Box
- Dardanelles Special Space
- Flashpoint spaces are indicated by dashed lines behind them and the dot next to each space's name. Left example is the Italian unification pace, right example is the German unification space. All unification spaces are also part of the Germany and Italy flashpoints respectively
- Event Box
3.2.1 Keys
Square and star spaces are keys. Keys give players manpower, and they are crucial when completing most NGs. All keys will contain trenches during the GW. There are two different types of keys: territorial and colonial.
- Territorial Keys: keys with a contiguous land connection back to a player's capital. The land connection cannot be traced through neutral or allied spaces. Territorial keys are usually on the main map.
- Colonial Keys: keys which do not have a contiguous land connection back to a player's capital. Colonial keys are usually located on the Africa and Asia submaps.
- RU, AU, and OT colonial keys: these three powers don't track colonial keys, only territorial keys. RU, AU, and OT count all their keys as territorial keys. Exception: OT and Arab keys [33.6].
Design Note: this distinction may seem semantic, but because manpower is so closely tied to how many keys a player controls (and in many cases what kind of keys they control) the distinction is very important.
3.2.2 Capitals and Subcapitals
Capitals and subcapitals are keys with special mechanics which mostly come into play during a war. Capitals are represented by star-shaped spaces. AU, RU, and OT players have a capital and a subcapital. Subcapitals only matter during the GW [30.1] and are represented by star-shaped spaces with a diagonal stripe.
3.2.3 Territories
Territories are circular spaces with little significance other than they are controlled by a power, they may be used to deploy reserve armies, and they may be used to trace a Line of Communication (LoC) [5.6].
3.2.4 Land Connections
There are four different types of land connections:
- Clear: solid lines
- Difficult: dashed lines
- Severe: red lines
- Dashed red lines: these function the same as severe connections except they indicate that the connecting space is on a different map.
Example: moving from Egypt to Sudan moves the units to the Sudan space on the Africa submap
- Trans-Siberian Railroad: red lines highlighted in yellow. These connections have some special rules [33.5, 17.1].
3.2.5 Home Spaces
These are spaces that are considered home territory by their respective power. They are marked dark gray for GE, red for UK, blue for FR, yellow for AU, white for RU, green for OT, and purple for non-player. Non-player spaces are home spaces for powers with a flag icon that matches the flag icon on the space. Some spaces contain flags and are player home spaces, for more on these spaces see 3.2.6. Certain actions such as building units are limited to home spaces.
Colonial home spaces are home spaces but are not territorial keys. They include Algeria, Canada, South Africa, India, Bengal, Singapore, Australia/New Zealand, and (possibly) Egypt. Certain cards and game effects refer to colonial home spaces.
3.2.5.1 Special Home Spaces
The status of certain home spaces can change over the course of the game in the following ways:
- When the GE player gains control of a space marked for German unification, that space becomes a permanent GE home space, and if the space belonged to a German minor power (Hanover, Saxony, and Bavaria), that minor power ceases to exist.
- All spaces marked for Italian unification become Italian home spaces after Italy unifies, and, at the moment of unification, all Italian minor powers cease to exist.
3.2.5.2 Dual Home Spaces
When a player's home space with a minor nationality [3.2.6] gains independence [4.7.1], it becomes a dual home space. It remains a home space for the player it once belonged to (who may hope to regain control of it) and a home space for the non-player power. This affects the type of war players can declare to regain control of these spaces [13.1].
Lombardy and Alsace-Lorraine may become dual home spaces, but they do not start the campaign game as such. Alsace-Lorraine becomes a GE home space when annexed by GE, but it also remains a FR home space. Similarly, after Italian unification, Lombardy becomes an Italian home space, but it also remains an AU home space.
Design Note: Egypt starts the campaign game as a dual home space, and more can be created by player actions (or inaction in the case of rebellions) over the course of the game.
3.2.6 Nationalities
Many spaces on the board have a large flag/flags in the center of them. These flags represent nationalities that live in those spaces.
If the large flag is in a non-player controlled space it denotes that the nationality that lives in the space controls that space (for example Mexico).
If the flag is in a player's home space, it denotes that there is a minority nationality that lives there. Some spaces have more than one flag showing that more than one minority nationality lives there. Minority nationalities can gain independence [4.7.1] from the players and become minor powers through either a War of Independence (WOI), or a war of liberation which can result from a WOI.
There are a number of action cards and game mechanisms that affect spaces containing minority nationalities. They are mostly negative for the player controlling that space. Exception: Cards do not affect AU controlled spaces with a minority nationality if that minority nationality has full citizenship (nationalities having full citizenship is an AU special rule [33.4.1]).
3.2.6.1 Italy and Germany
Spaces in Italy and Germany are marked by a special Italian or German unification symbol (their flags in the bottom right hand corner). These symbols indicate three things: (1) that these spaces can be targeted in wars of Italian and German unification respectively, (2) these spaces are part of the Germany and Italy flashpoints respectively, and (3) these spaces contain Italian or German nationalities.
3.2.7 Ports
Ports connect land spaces to naval boxes. Ports are represented by anchors. Port anchors come in different colors to indicate which naval box (sea) they are connected to. For example, ports that are connected to the North Atlantic Box have blue anchors. Some ports have two anchors (e.g. Gibraltar) meaning that space is a port connected to two different naval boxes.
3.2.8 Naval Bases
Triangle spaces. These spaces are all ports and can only be entered by naval units and expeditionary forces (EFs). Armies can never enter naval bases.
3.2.9 Naval Boxes
Naval boxes represent a particular sea, which they are named after (e.g. Black Sea Box). They are connected to ports (and vice versa) indicated by sharing the same color of the anchor on the naval box and the port. Naval Boxes can also be connected to each other. There are two kinds of naval boxes: European waters and non-European waters. European waters naval boxes are marked with a yellow anchor in their lower right hand corner and have their titles highlighted on yellow. Non-European waters naval boxes do not have these features. European waters naval boxes have special naval movement characteristics, whilst moving to or from a non-European waters naval box always costs one NMP [12.3]. Connections into or out of European waters are labeled on the various naval boxes. The following list explains how European waters naval boxes are connected:
- The Baltic Sea is connected to the North Atlantic.
- The North Atlantic is connected to the Western Mediterranean and the Baltic.
- The Western Mediterranean is connected to the North Atlantic, the South Atlantic, and the Eastern Mediterranean.
- The Eastern Mediterranean is connected to the Western Mediterranean, the Black Sea, and the Indian Ocean.*
- Black Sea is only connected to the Eastern Mediterranean.
*The Suez Canal must be built to allow for this connection, additionally the owner of the Suez Canal can deny access to other players at any time.
Play Note: The Indian Ocean naval box is located on the Asia submap. Note that ports in East Africa, located on the Africa submap, are adjacent to the Indian Ocean. Similarly, after the Suez Canal is built Egypt is also adjacent to the Indian Ocean. This is represented by the smaller Indian Ocean box near these ports on the map.
Moving between naval boxes within European Waters costs 1 Naval MP to move an unlimited distance through European Waters. Non-European Waters connections (Pacific Ocean, Indian Ocean, South & Central Pacific, South Atlantic, North Atlantic) each require 1 NMP per box entered, as noted on the naval movement diagram.
Important: For the purposes of dominating flashpoints, spaces controlled by minor powers allied with a player count as controlled spaces for that player.
3.3 Flashpoints
Flashpoints represent areas of contention between players. Each individual flashpoint space has a small grey dot next to its name to indicate that it is a flashpoint space. Additionally, most flashpoints are enclosed within a shaded area marked "FP" around its perimeter, with these exceptions:
- Germany: noted by spaces containing the German unification symbol.
- Italy: noted by spaces containing the Italian unification symbol.
- The Suez Canal: after the Suez Canal is built the Egypt space becomes a flashpoint (this is in addition to Egypt already being a space in the Africa flashpoint).
Players do not control flashpoints, they dominate them. A player dominates a given flashpoint when they take control of a specified number of spaces in that flashpoint. The number of spaces needed to dominate a flashpoint is indicated on the Flashpoint Track and on player aid card page 2. When a player dominates a flashpoint they take the associated flashpoint marker from the Flashpoint Track and place it in the Events Holding Box on their player display. Dominating most flashpoints provides a +1 or +1/2 card bonus (in IE always round up [4.1.1]). Players take the flashpoint counter immediately upon dominating it, and players can dominate a flashpoint at any point during a turn.
Design Note: the term dominate is used to differentiate flashpoints from controlling spaces.
Play Note: players are by no means obligated to fight over flashpoints, however, dominating flashpoints can give you (or your opponents) a significant advantage.
3.3.1 Power Projection
Power Projection is a unique flashpoint with the following special rules:
- Dominating Players: Up to two players can dominate the Power Projection flashpoint. The two players with the highest Power Projection values are considered to be dominating the flashpoint.
- Tiebreakers: If two or more players are tied for second place with Power Projection, neither of them dominate that flashpoint and no rewards are granted.
- Industrialization Bonus: Players dominating the Power Projection flashpoint receive a +1 DRM to their Industrialization roll [20.6].
- Card Bonuses: Dominating Power Projection does not inherently grant card bonuses. However, the mandatory event "The Influence of Sea Power" enables players dominating the flashpoint to gain a +1 card marker.
- UK-Specific Rule: The UK player only gains a +1 card marker for dominating Power Projection if: a) They have the highest Power Projection of all players. b) Their Power Projection value is at least double that of the next highest player.
How do Players Get Power Projection?
Players gain power projection by controlling ports connected to individual naval boxes, and players can gain a maximum of two power projection per naval box. If a player controls a port space adjacent to a naval box they increase their power projection by one. If a player controls a port space (either a key or territory) and a naval base adjacent to a naval box they increase their power projection by two [3.2.7, 3.2.8, 3.2.9].
Power Projection Restrictions
- Players can only gain power projection from a maximum of three European waters naval boxes.
- A player's power projection cannot be greater than the number of naval units they control multiplied by two. This includes naval units belonging to allied minor powers.
Example: At the start of the campaign game the UK player has 8 power projection. 2 in the North Atlantic (Gibraltar gives them an extra point), 1 in the Western Mediterranean, 1 in the South Atlantic, 1 in the Indian Ocean, 2 in the Pacific (Hong Kong gives them an extra point), and 1 in the Central and South Pacific. They also start the campaign game with 4 naval units, meaning they have a maximum power projection of 8. It's important to remember that players do not get +1 power projection per port they have, rather players gain power projection by spreading out and controlling ports across different naval boxes. Mechanically, naval bases make a big difference.
3.3.2 Flashpoint Ties
For all flashpoints other than power projection, if two players are tied for control, no one receives the reward.
3.3.3 Italy Flashpoint
If Italy unifies, the Italy flashpoint ceases to exist for all purposes. Remove the Italy flashpoint marker from the game. This is signified by the Italian Unification marker being on its "check" side.
3.4 Special Spaces
3.4.1 The Dardanelles
The Dardanelles space has four special rules:
- The player that controls Istanbul also controls the Dardanelles.
- Units moving between Black Sea and the Eastern Mediterranean Sea Box must pass through the Dardanelles (they must also, therefore, receive permission from the controlling player to do so).
- Any fort that exists in the Istanbul space is also considered to exist in the Dardanelles space so long as both spaces are OT controlled.
- An army attempting an amphibious landing via the Eastern Mediterranean must first land in the Dardanelles before moving to Istanbul.
3.4.2 Denmark
While Denmark is at war, the player who controls Denmark can prevent units from moving between the North Atlantic Box and the Baltic Sea Box.
3.4.3 Egypt and the Suez Canal
The Suez Canal is built by an event card, it has four effects:
- Egypt becomes a port in the Indian Ocean.
- The Egypt key now constitutes the Suez Canal Flashpoint.
- The Eastern Mediterranean Sea box becomes connected to the Indian Ocean.
- The player who controls Egypt dominates the Suez Canal flashpoint and can prevent players from moving between the Eastern Mediterranean Sea and the Indian Ocean. This applies in peace time and wartime. If Egypt is controlled by a minor power, the player allied with that minor power dominates the Suez Canal flashpoint.
3.4.4 Egypt and Tripoli
The power that controls Egypt also gains control of the other two Egyptian spaces: Sinai and the Great Sand Sea. Similarly, the power that controls Tripoli always controls Benghazi. In both of the above cases, place control markers in all the relevant spaces to indicate this control. These spaces are marked with a triangle to signify their special status.
3.4.5 The South
The South space is out of play except during the American Civil War and when the US enters the GW.
3.4.6 Japan
Japan comes into the game through the play of the Meiji Restoration card. Once they are in the game, Japan may attempt to take control of Korea and Manchuria. If a player controls one of those spaces Japan will fight them for it. Do not underestimate the Japanese!
3.4.7 Special Map Indicators
There are four numbered circles in various locations around the map. These indicate special map rules for nearby spaces are all explained in more detail on player aid card page 2.
Example: The circled "4" is a reminder for the following rule: Units supporting to or from a RU home space have their FP halved.
3.5 End Phase Build Box
This is a holding box for the various minor powers and Italy who build units during the end phase [20.3]. Minor powers not listed do not gain an army step during the end phase.
3.6 Event Boxes
There are several event boxes around the map. Most event boxes are associated with specific action cards [9.0], while the "Italy Unified?" event box is associated with the Italian unification rules [22.2]. Each event box comes with an associated counter to track whether an event has occurred. Example: the counter for the "Italy Unified?" event box is on its "X" side while Italy is not unified, but when Italy unifies the counter is flipped to its "check" side.
3.7 Turn Track and World Tension Track (WTT)
This section of the board is used to track the current turn, the current GW turn (which will be on GW turn 0 for much of the game), and the WTT. Use the associated counters to track these.
3.8 Polish and Italian Reserve Holding Box
Place Polish and Italian reserve armies [5.1.2] in these holding boxes.
4.0 Key Concepts and Terminology
4.1 Dice
All rolls in IE are made with six-sided dice. Most rolls require players to roll one die. The exception is pacification attempts, where players roll two dice.
4.1.1 Rounding Rule
Round up. When counting multiple ½ values in a stack of units, do not round each individual ½ value up, add them together and then round the total up for the whole stack. This rule also applies to any card effects.
4.2 Counter Limits
Players and non-player powers are limited to the number of counters they have. The GE, AU, and OT players have a counter limit of 2 squadrons and 2 dreadnoughts until an event or ability grants them additional units (the additional AU and OT units are marked with NAR to indicate that they are only brought into play via the Naval Arms Race event).
4.2.1 No Counter Limits
There are no counter limits on the following:
- Control counters, players can place an unlimited number of control markers.
- Pacification counters
- Independent minor power markers
- WoI markers
- Trench battle markers
Important: control markers are distinct from "ally" markers as players are allowed a maximum of five minor power allies.
4.3 Turn Order
When instructed to do so, play proceeds in the following order:
- GE
- UK
- FR
- AU
- RU
- OT
4.4 Active Player
The player who is currently taking an impulse is the active player.
4.5 Impulses vs. Turns
An impulse refers to the actions players take when they are the active player during the action phase. A player can have any number of impulses during the action phase, but most players will have four to seven. A turn refers to completing one sequence of play. Certain actions can be taken once per impulse whilst others can be taken once per turn.
4.6 Powers
There are two different kinds of powers in IE: players and non-player powers. Non player-powers are further defined as either major or minor powers.
4.6.1 Players
Players are defined as either GE, UK, FR, AU, RU, and OT. This distinction is important when playing a game with less than 6 players, in which case when a card says "choose a player" player bots can be chosen.
4.6.2 Non-player Powers
The United States and a unified Italy are major powers. All other non-player powers are considered minor powers (Denmark, Bavaria, etc.)
Design Note: Historically, the countries controlled by the players were major powers. However, for game purposes, they are always referred to in the rules and on the cards as 'players.'
4.7 Control
Control on the map is usually determined by the color of the given space: dark gray for GE, red for UK, blue for FR, yellow for AU, white for RU, and green for OT. All non-player spaces are purple, with the large flag in the center of the space determining which non-player power controls the space. If there is no flag in a purple space it is considered to be uncontrolled. When a player takes control of a space that's not their color they place a control marker in that space. Additionally, the two major powers and certain minor powers have their own control markers as they can expand in various ways.
Important: While a space contains rebel units it cannot be controlled. See 21.0 for more on rebels.
4.7.1 Independence
Over the course of the game, spaces originally belonging to players may become independent and create new minor powers. Use independent minor power markers to designate non-player control in player home spaces. In spaces with multiple flags use an associated non-player control marker to designate control. Exception: the three Egyptian spaces (Egypt, Great Sand Sea, and Sinai) only contain Arab flags to signify that they are Arab spaces for the OT player (see 33.6). If an independent minor power marker is in an Egyptian space it is controlled by the Egyptian minor power.
Example: In the following image, Romania begins the game as a Romanian home space, hence its purple color with the Romanian flag, no independent minor power marker is needed to indicate Romanian control. On the other hand, if Serbia gains independence, an independent minor power marker must be placed to indicate Serbian control. If Serbia were to take control of Macedonia, a Serbian control marker would be placed in Macedonia to indicate Serbian control. Bulgaria is controlled by OT because it is a green space, the Bulgarian flag indicates that there is a Bulgarian minority nationality [3.2.6] in the space. If Bulgaria gains independence during the game, an independent minor power marker is placed in the space.
Example: Qajar Persia contains a flag indicating that it is a home space for that non-player power. Afghanistan and Balochistan, on the other hand, contain no flags indicating that they are uncontrolled spaces.
4.7.2 Uncontrolled Spaces
Uncontrolled spaces are purple spaces without flags. Such spaces begin the game not controlled by any power. Players, and occasionally non-players, can take control of uncontrolled spaces through pacification actions [12.11] and events.
Design Note: In reality "uncontrolled" spaces were actually controlled by local governments and tribes. The term is used to help understand the game mechanics and for ease of play.
4.7.3 Control Minor Power Allies vs. Control
Players do not control spaces controlled by their minor power allies. This means that such spaces do not increase that player's keys or manpower [7.2]. However, for the purposes of dominating flashpoints, spaces controlled by minor power allies count as controlled spaces for that player [3.3].
Example: The UK is allied to the Netherlands and Belgium. The UK does not control these spaces, they are controlled by the Netherlands and Belgium respectively. However, the UK does dominate the Low Countries flashpoint per rule 3.3. Note that in this example GE controls Hanover, which does increase their keys.
4.8 Other Foreign Affairs Markers
Foreign affairs markers are used to designate diplomatic relations between powers. There are several different types of foreign affairs markers:
Diplomacy markers represent close diplomatic ties with minor powers. Mechanically, diplomacy markers are also a stepping stone to a minor power alliance. When flipped, diplomacy markers become ally markers and are used to designate minor power allies.
Influence markers represent a major power's influence in an uncontrolled space. Mechanically, they are a stepping stone towards pacifying and controlling uncontrolled spaces [12.12]. When flipped influence markers become control markers.
Strictly Neutral markers are not used until the GW, and their function is explained on the card that places them.
Major Power Influence Track (MPIT) markers (Triple Entente, Triple Alliance, and Neutral influence) are used on the Major Power Influence Track (MPIT) [8.5].
Alliance Track markers, used to designate if a player (or major power) is in an alliance or is neutral.
4.9 War and Peace
There are three basic game states: peacetime, wartime, and the GW. The game state indicates where players can move their units and who is hostile, allied, or neutral to one another.
4.9.1 Peacetime
Peacetime is the game state where no power is actively fighting a war against another power. While at peace players can only move units into spaces that they control and uncontrolled spaces where they have influence. For the purposes of movement during peacetime, controlled spaces include:
- Spaces containing your control marker (or your home space) and a pacification marker.
- Spaces containing your control marker (or your home space) and rebel armies.
Important: players can still attack rebels and conduct pacification actions during peacetime.
4.9.2 Wartime
Wartime is defined as whenever a player is fighting another power (including minor powers). Over the course of a turn, powers may declare war on other powers. In wartime play shifts to a special SoP wherein only players participating in the war conduct actions [12.16.2]. During wartime, players can move units into friendly and enemy spaces, including uncontrolled spaces containing friendly and enemy influence. When the war is over, play reverts to the standard SoP.
4.9.3 The Great War
Certain events and player actions will increase the WTT. When the WTT reaches 5 a crisis roll [23.0] is made and the GW may occur. The GW is very similar to wartime and follows many of the same rules, but the GW also has many unique rules including its own SoP [24.1].
4.9.4 Friendly, Enemy, and Neutral
In wartime and during the GW, spaces and units belonging to other powers are defined as either friendly, enemy, or neutral. Friendly spaces are those that are controlled or occupied (see 15.3) by a power or any of its allies that are also involved in the war. Enemy spaces are those that are controlled or occupied by a power they are at war with. Neutral spaces are defined as all spaces that are controlled or occupied by powers that are not participating in the war.
During wartime there are also friendly, enemy and neutral units. A friendly unit is any unit controlled by a power or any of its allies that are involved in the war. Enemy units are any units that are controlled by a power and its allies that are at war with that power. Neutrals are all units that are controlled by powers that are not participating in the war.
4.9.5 Naval Boxes in War and Peace
Naval boxes can never be controlled by a power, as such players can always move into all naval boxes in peacetime, wartime, and during the GW; however, moving into a naval box containing enemy units can result in a naval battle.
5.0 Units
5.1 Land Units
5.1.1 Standing Armies
Standing Armies are represented by large square counters. They have two statuses: full strength and reduced, a full strength army has 2 firepower (FP) and a reduced army has 1 FP. FP gives a power positive modifier in battle. Armies adjacent to the embattled units can provide supporting FP [18.3].
5.1.2 Reserve Armies
Reserve Armies are represented by large square counters with an "R" in the lower left hand corner. Reserve armies function identically to standing armies except: (1) they are always in their respective player's reserve armies holding box during peacetime, (2) they can only be deployed during wartime, and (3) they return to their respective player's reserve armies holding box during the demobilization step at the end of a war.
Important: OT and UK have different types of armies. See 12.2, 33.2, and 33.6 for more on the differences between their armies.
5.1.3 Elite Corps (EC)
Elite Corps (EC) are represented by circular counters. They may provide a +1 DRM in land combat. They can move on their own but must always begin and end their movement stacked with (attached to) an army. More than 1 EC can attach to a single army. If an EC is stacked with a single army and that army moves, the EC must move with it. If an EC is ever alone in a space at the end of a combat or at the end of a movement, it is eliminated.
5.1.4 Expeditionary Forces (EF)
Expeditionary Forces (EF) are represented by small square counters. EFs are always considered to be at full strength, but they have different FP ratings depending on who they are fighting:
- Versus rebel armies and/or other EFs: 2 FP
- Versus non-rebel armies: 0 FP
Play Note: Typically, EFs are used to pacify uncontrolled spaces as they move around the board more easily than armies in peacetime.
5.1.5 Elite colonial EFs
Units with this icon only have one step and are eliminated if they suffer a loss. Elite colonial EFs are special EF units that can only be brought into play via an event card. They function the same as normal EFs except:
- They provide a +1 modifier to pacification rolls and may provide a +1 modifier to land battles.
- They may move an unlimited distance through naval boxes during redeployment actions if they end their move stacked with a friendly army.
- When an elite colonial EF is destroyed it may be rebuilt for 1 CP in a controlled colonial key.
5.1.6 Zouaves
The Zouave unit functions identically to elite colonial EFs, but (1) it can only be built by the FR player, (2) it must be rebuilt in Algeria, and (3) it may be rebuilt (in Algeria) for free during the Prep Phase.
Design Note: Armies represent formations of 50,000-200,000 men (depending on the game turn). ECs represent a part of an army that is particularly well trained, highly motivated, and/or well equipped. EFs represent formations of 10,000-20,000 men that were typically used in imperial expeditions. Elite Colonial EFs represent certain exceptional colonial troops such as Gurkhas or Senegalese Tirailleurs, but can inflict a step loss on a non-rebel army that is at full strength. The Zouaves were a colonial unit that were so effective that they get their own counter.
5.2 Naval Units
5.2.1 Squadrons
Squadrons are rectangular units labeled Sq. They have two statuses: full strength and reduced. A full strength squadron has 2 FP and a reduced squadron has 1 FP.
Important: If at least one dreadnought is part of the opposing fleet in naval battle, squadron FP is halved.
5.2.2 Dreadnoughts
Dreadnoughts are rectangular units labeled Dn. They are state of the art warships with devastating firepower. They have two statuses: full strength and reduced, a full strength dreadnought has 3 FP and a reduced dreadnought has 2 FP. Dreadnoughts also reduce the FP of enemy squadrons [12.4].
5.3 Steps and Step Losses
Armies, squadrons, and dreadnoughts each have two steps. If a full strength unit suffers a step loss it becomes reduced, and if a reduced unit suffers a step loss it is eliminated.
5.3.1 EC Losses
ECs do not have steps and cannot take losses. Instead, when a player takes losses, if they eliminate an army, they must also eliminate an EC in that army's stack if one is present.
Important: The Machine Guns and Hydraulic Recoil mandatory events add a permanent addendum to this rule. After one of those events is in effect, ECs are automatically eliminated if their combat bonus is used against a non-rebel army.
5.3.2 EFs and Losses
EFs only have 1 step. If they suffer a step loss they are eliminated. EF losses are affected by the following:
- A force comprised exclusively of EFs cannot eliminate non-rebel armies but can inflict a step loss on a non-rebel army that is at full strength
- A force comprised of EFs and armies cannot take losses on the EFs, however
- When a force comprised of EFs and armies takes a step loss on an army they must also eliminate an EF
Exception: Elite colonial EFs (and the Zouaves) are not subject to the third bullet point. Instead, in such cases, they are treated as ECs for the purposes of elimination.
5.4 Rebels
Rebels are forces that are actively rebelling against the faction that controls their space, however, the instant a space contains rebel units it can no longer be controlled until the rebels are eliminated. Most rebel armies are placed under a WoI marker, however, there are some events that place rebel armies without WoI markers. See 21.0 for more details on rebels.
5.5 Stacking
Stacking refers to how many units a player can have in a single space.
5.5.1 Army Stacking
Land spaces on the main map can hold 3 armies, all other land spaces can hold 2 armies. Exception: all Ottoman home spaces (including those in Europe) can hold 2 armies. ECs never count against this limit.
5.5.2 EC, EF, and Fort Stacking
There is no limit to the number of ECs and EFs in a space. Each space can only contain 1 fort.
5.5.3 Overstacking
Overstacking refers to having units in a space in excess of that space's stacking limit. Stacking can be violated during movement, but units cannot end their movement overstacked.
It is possible for units to become overstacked by retreating. However, stacks in overstacked spaces suffer a step loss at the beginning of their owning player's impulse. If multiple players have units that are overstacked, the space will suffer a step loss at the beginning of each player's impulse so long as units in the space exceed the space's stacking limit. Additionally, if an overstacked space is attacked, the number of units that can contribute FP is limited to the space's stacking limit.
Clarification: the stack suffers one step loss total, not every unit in the stack suffers a step loss.
5.5.4 Naval Stacking
There is no stacking limit in naval boxes, however ports can hold a maximum of 4 naval units. Similarly, players can only attack a port space with a maximum of 4 naval units.
5.6 Lines of Communication (LoC)
LoCs refer to the ability of a formation to draw supply and be in communication with their high command and/or government. LoCs are required for (1) placing influence markers in uncontrolled spaces and (2) for armies to fight effectively.
The requirement to be able to trace a LoC is always in effect. However, only armies need to check for a LoC; Naval units, ECs, EFs, and Elite Colonial EFs do not check for LoCs.
Play Note: in practical terms, players really only need to check for LoCs at the start of their impulse during wartime. In the rare cases where units have a broken LoC during peacetime refer to 5.6.3.
A LoC is established by tracing an uninterrupted chain of land connections and/or naval boxes back to a supply source (the length of the chain is irrelevant). This trace can only pass through a power's controlled spaces during peacetime, and through friendly spaces during wartime. Remember that naval boxes are never controlled; they can always be traced through, provided they don't contain enemy units in wartime. LoCs can never be traced through neutral spaces.
A supply source is any home key controlled by that player that can trace a LoC to at least one other of their home keys they still control.
5.6.1 Non-Player Supply Sources
Non-player supply sources are any home keys controlled by the associated non-player power, their supply sources are not required to trace to a second key. Non-player powers may also trace to a supply source of an allied player.
Italian Exception: After Italy is unified, Italian units use the same rules for tracing a LoC as player powers [5.6]. A supply source is any Italian controlled home key with a LoC to another Italian controlled home key.
5.6.2 Broken LoCs
If, at any point, an army cannot trace to a supply source it has a broken LoC. In wartime and during the GW armies with a broken LoC suffer three penalties: (1) the stack suffers one step loss at the start of the player's impulse, (2) they have a -1 land battle modifier, and (3) they cannot provide support. If multiple players have units in the stack, at the beginning of each player's impulse their unit in that stack will lose a step.
5.6.3 Broken LoCs in Peacetime
If a unit has a broken LoC in peacetime it immediately displaces to a friendly space with a LoC.
5.7 Displacement
Some rules require units to be displaced. Displacement usually occurs at the end of a war or as a result of an event.
Displaced land units are moved to the closest friendly controlled space with a LoC. There are no restrictions around this. They are just picked up and moved (teleported). Naval units displace to an adjacent naval box.
6.0 Miscellaneous Counters
There are many miscellaneous counters used to track various game functions. They include:
- CP Chain [9.0]
- Plus and Minus Card [10.2, 10.3]
- Pacification [12.11]
- Forts [12.12]
- Industrialization [12.13]
- War Aim [13.0]
- CP War Budget [14.3]
- Italian Stability - GW rule [32.2]
- Wartime Initiative [14.3]
- Italian Manpower - GW rule [32.2]
- Join Your Country's Army - UK special rule [33.2]
- Joint Naval Operations [15.2.2]
- Truce markers [16.3]
- WoI Markers [20.8]
- India Stability [33.2.2]
- Land Battle [18.1.1]
- City of Lights - FR special rule [33.3]
- Trench Battle - GW rule [28.1.1]
- Rights and Citizenship - AU special rule [33.4.1]
- US Ally CP - GW rule [32.1]
- TSRR - RU special rule [33.5]
- US Stability - GW rule [32.1]
- Jihad - OT special rule [33.6]
- US Manpower - GW rule [32.1]
- Player Display Trackers (see next rule)
- Italian Ally CP - GW rule [32.2]
7.0 Player Displays
Each player receives a player display to track their keys, manpower, industry, stability, and special events. Each player display also explains that power's national characteristics, which are positive or negative traits (see 33.0 for more details of national characteristics). All information on player displays is public knowledge.
Players should use the relevant markers for each of their tracks (for example place the GE stability counter on the stability track on the GE player display). The circled numbers on each track indicate where that player's track starts at the beginning of the campaign game. See the playbook for the starting positions for other scenarios.
Important: both UK and OT have two manpower markers because they have two different kinds of manpower.
7.1 The Stability Track
The Stability track on the player display represents the current government's effectiveness and the level of unrest in a nation. Stability ranges from 6 to 0. Players receive penalties for low stability whilst they benefit from high stability. If a player participates in the GW and their stability reaches 0, a revolution occurs, and that player is eliminated from the game.
Important: the negative VP penalty on the stability track is only applied at the moment of scoring. In other words, players do not receive negative VPs when their stability track reaches 1 or 0; they only incur this penalty if their stability is at 1 or 0 when VPs are scored.
7.1.1 Increasing and Decreasing Stability
All players have a home card that can increase stability. Player's may discard a random card (cannot be a home or mandatory card) during the Prep Phase to gain stability, and certain events can increase a player's stability. There are several ways to lose stability in IE. Players will lose stability from card events and as a result of player actions. The chart below denotes some special ways players can gain and lose stability prior to the GW. Note: the GW has its own stability table [30.0].
| Cause | Stability Effect |
|---|---|
| A space gains independence through a WoI | -1 |
| Declaring a war of conquest | -X* |
| Major defeat in a war | -1 |
| Major victory in a war | +1 |
| Losing a dreadnought | -1 |
*X equals the current space on the WTT after it is increased as a result of the declaration of war.
7.2 The Manpower track
The Manpower track on the player display represents a power's pool of able bodied, military age men and has three functions:
- During peacetime, a player's total on map standing armies can never be greater than the current position of their marker on the manpower track.
- Limits the number of reserve armies a player can have in their reserve armies holding box (see 7.3).
- Building new armies during the GW costs manpower.
Most players increase their manpower by taking territorial keys, although some players can gain manpower through special mechanics as noted on their player display.
7.3 Reserve Armies Holding Box
While players are at peace their reserve armies are held off map in their reserve armies holding box on their player display. Players can hold reserve armies equal to their industry or manpower, whichever is lower.
Design Note: reserve armies represent trained reservists ready to be mobilized in the event of war.
7.4 The Industry track
The Industry track on the player display broadly represents a power's industrial output and railroad infrastructure. Industry gives players action cards, CP to spend during wars, reserve armies, and improves their ability to move land units via rail in wartime. Players increase their industry through the industrialization action [12.13] and through the play of certain events.
8.0 The Alliance System
Design Note: The motivation that drove me to design IE was the possibility of a Great War with different alliances. Naturally then, the alliance system within the game received a lot of attention.
Each power receives one alliance chit, which are all placed on the Alliance Track. Moving an alliance chit to an adjacent box on the Alliance Track is called a shift.
What causes an alliance to shift?
- Declarations of war
- Imposing harsh terms after a war
- Certain events
- The Alliance Resolution Step
8.1 Alliance Track Spaces
8.1.1 Neutral Box
All players start in the Neutral Box at the beginning of the game. Players in the neutral box:
- Cannot be invited to join wars during the alliance step of a war. Exceptions: The UK can invite neutral powers if they are the defender and a primary belligerent [14.1 and 33.2]. The FR homecard Aux Armes Citoyens may also allow neutral players to join a war.
- Can declare war on any other player.
- Will remain neutral at the start of the GW (if it occurs).
8.1.2 Alliance Boxes
All other boxes on the alliance track are alliance boxes. Players in an alliance box:
- Cannot declare war on members of their alliance.
- Cannot declare war on a minor power allied to or having an diplomacy marker on it which belongs to a member of their alliance.
- May join wars involving their alliance members, but are not required to do so. However, there can be consequences for not aiding an ally [14.0].
- Will automatically join the GW with their alliance if it occurs.
8.1.3 Aligned vs. Committed Alliance Boxes
Committed alliance boxes function the same as aligned alliance boxes except the consequences for not aiding an ally are more severe [14.0]. Additionally, players in a committed box must first shift to the aligned alliance box before shifting back into neutrality.
8.2 Alliance Shifts and Declarations of War
A declaration of war causes the defending power to shift away from the attacker one space on the Alliance Track. If both powers are in the neutral box, the defending power chooses which alliance box to shift into. If a unified Italy is attacked by a neutral player and it is not aided by a player [13.4.2], randomly determine where Italy shifts by rolling a die (1-3 Triple Entente, 4-6 Triple Alliance).
8.3 Harsh Terms
If the victor of a war imposes two treaty options on the loser it is considered imposing harsh terms.
When the victor imposes harsh terms on the primary belligerent both the attacker and the defender shift away from each other. If both powers are in the neutral box, randomly determine where each power shifts.
Play Note: the latter scenario is rare and only possible through the play of the UK home card, Balance of Power.
8.4 Alliance Maximum
Only three player powers can ever be in an alliance. Exception: when a defender is forced to shift after a declaration of war, the defender can shift into an alliance that already has three players.
Play Note: Naturally, this isn't ideal so it is advised that players keep this rule in mind when declaring war.
Important: Italy is not a player power and hence they are not subject to this rule.
Design Note: To put it simply, it isn't fun for players to get ganged up on during the GW, hence this rule.
8.5 The Major Power Influence Track (MPIT)
The MPIT tracks how players and a unified Italy have attempted to manipulate the Alliance Track over the course of a turn. Each player (and a unified Italy) has a track on the MPIT with three counters: Triple Entente Influence, Triple Alliance Influence, and Neutral Influence. The more influence a marker has the more likely it is that power will shift in that direction during the alliance resolution step (see next rule).
Important: Every power's markers (Triple Entente, Triple Alliance and Neutrality) are reset to 0 after an alliance resolution has been completed, except for the marker matching their current position on the Alliance Track. This will be set to a value of 1 on the MPIT.
Play Note: At the beginning of the campaign game all players are neutral. This means all players will start with 1 neutral influence on the MPIT.
8.6 The Alliance Resolution Step
During this step all players and a unified Italy determine if they shift on the alliance track. This step always occurs during the end phase, but it will also occur during the action phase if the Shifting Alliances or Alliance System events are played.
Important: since both these events could be played during the same action phase, players should be aware that alliances could be resolved three times in the same turn. Twice during its action phase (with the two event cards) and then a third time during the end phase.
During the alliance resolution step, each player totals the amount of influence their power has accumulated on the MPIT (by adding together the influence from Triple Entente, Triple Alliance, and Neutrality). Alliance resolutions are then carried out for each power, starting with the power with the highest total and working downwards. Ties are broken by turn order. The order is important because of the maximum of three players in an alliance [8.4]. A shift during the alliance resolution will not take place if there are already three players in the respective alliance.
If a power only has one type of influence ≥1, it automatically is shifted in that direction on the alliance track. If it has 2 or 3 types of influence ≥1, a die is rolled for each marker. The influence is added to the die roll as a DRM. For example if a power's track has 2 Triple Entente influence, 4 Triple Alliance influence, and 1 neutral influence, that power adds a +2 DRM to their Triple Entente roll, a +4 DRM to their Triple Alliance roll, and a +1 DRM to their neutral roll. Shift the power's alliance marker in the direction of the highest result, providing a shift is possible. In the case of a tie the player chooses how they shift. Reroll the dice if the Italian result produces a tie.
Play Note: As long as the values are mathematically equivalent, players are free to simplify Alliance Resolution rolls however they please. Using the same values as the previous example, players could simplify the +2 TE DRM, +4 TA DRM, and +1 neutral DRM to +1 TE, +3 TA and +0 neutral. Likewise, players could change it to +0 TE, +2 TA and -1 neutral (I'm weird and like to do it this way).
Important: Influence is always worked out and rolled for separately. A player in an alliance box whose roll means a shift towards the other alliance, will move closer to neutrality first. This does not mean that their neutrality and other alliance influence are combined before the rolls are made.
After a player's alliance is resolved, place the MPIT influence marker representing that player's current position on the Alliance Track in the "1" space of their column on the MPIT. Then place their other two MPIT influence markers rolls (don't forget to add influence) is ≥ 10, that alliance is shifted twice if possible.
Example: GE is resolving their alliance. They are in the committed box of the Triple Alliance. They have 10 neutral influence and 1 Triple Alliance influence. They roll 2 dice adding +9 to their neutral roll. Their Triple Alliance roll is 4 and their neutral roll is 5 (+9 = 14). With a differential ≥ 10 GE shifts twice towards neutrality. If they had been in the aligned box, they would have stopped once they reached the neutrality box. The second shift would be ignored.
8.7 Alliance Resolution Step Example
The situation at the start of the alliance resolution step is this: GE, UK, RU, and OT are in the Neutral Box; FR and AU are in the Triple Entente Aligned Box. Influence on the MPIT is shown in Image 2.
GE's alliance is resolved first because their track has the most influence (four in total). Two dice are rolled, one for neutrality and one for the Triple Alliance. The neutrality roll is 4 (+1 to 5) and the Triple Alliance roll is 2 (+3 to 5): the GE player breaks the tie by choosing to shift into the Triple Alliance.
Both the UK and RU have 3 total influence on their track, the UK resolves first because they are first in the turn order. The UK rolls a 2 (+1 to 3) for neutrality and a 4 (+2 to 6) for the Triple Entente; the UK shifts into the Triple Entente. RU is next, however, since the Triple Entente now has 3 players in it RU cannot shift into the Entente; no roll is needed, RU remains neutral.
AU resolves next, they roll a 6 (+1 to 7) for neutrality and a 5 (+1 to 6) for the Entente; AU shifts to Neutral. Neither FR nor OT need to roll a die, because both powers only have 1 marker ≥1. FR automatically shifts into the committed box of the Triple Entente, and OT will remain neutral.
The final result is GE in the Triple Alliance; AU, RU, and OT neutral; and FR and the UK in the Entente. Note that if RU resolved their alliance after AU there was a chance they might have shifted into the Entente, demonstrating that the order in which alliances are resolved is important.
8.6.1 Double alliance shift
During the alliance resolution step, if the differential between a player's highest and second highest alliance rolls (don't forget to add influence) is ≥ 10, that alliance is shifted twice if possible.
Once all alliances are resolved, whether in the action phase or the end phase, play continues as normal unless the WTT reaches 5 (which can happen through the play of certain cards), in which case make a crisis roll [23.0].
9.0 Action Cards
Action cards are at the core of gameplay in IE. Players use cards to conduct actions and events. Essentially, there are two ways to use an action card: (1) for its event or (2) for its command points (CP). Players can only play cards for their event or their CP. Exception: mandatory events are always played for both their event and their CP.
CP: Playing a card for CP gives the active player that card's CP value to spend on actions.
Events: When playing a card for its event follow the instructions on the card. Some events can only be played by certain powers while others require other cards to have already been played. Certain cards have two event options, which is signified by the lower event option being shaded in grey. Players can only choose one event option, never both (including for mandatory events [9.1.4]). Events marked with the remove symbol are removed from the game when played for their event. Some events allow players to draw a replacement card, this card draw is always done after resolving the event (note: playing such a card for CP does not give a card draw). Certain events have permanent effects, keep these cards by the board after they have been played to remind players of their effects, and flip the event markers on the board when appropriate [3.6].
Example card — "Balance of Power" (a UK card): the card anatomy includes a title, a CP value, a national goal card icon, a response card marker, a "1870s" turn-entry indicator, and the owning power's nationality icons (GE UK FR AU RU OT). The card text reads: "Balance of Power — Option A: Gain 1 stability. If the defender agrees, you become the primary belligerent and you enter the war on the defending side. Use this card's CP value for your CP war budget. If you enter the war, draw a card at the end of the war. One player (your choice) that you invited (and that joined) also draws a card at the end of the war. Additionally, if intervening to help the Ottomans, take control of an Ottoman naval base in the Eastern Mediterranean as soon as you enter the war. If the defender does not agree draw a card. Option B: Playable as an event to gain 1 stability. Draw a card. Play Requirements: Play when another player declares war. Cannot be played in response to Otto von Bismarck."
Card symbol key:
- M: Mandatory
- R: Response
- G: National Goal
- C: Combat
- Draw: Draw a card
- Remove: Remove after play
- 1870s: Turn entry indicator
- Bot Box: only used when playing with a bot
9.1 Card Types
9.1.1 Home Cards
Each player has two home cards. During the Diplomacy Phase players choose one of their home cards to play during a turn. Home cards are returned to the player at the end of turn, so they can be used again and again. Home cards have powerful events and high CP values ensuring that every player gets at least one strong card every turn.
9.1.1.1 Discards and Home Cards
Whenever a player is instructed to randomly discard a card, they do not have to include their home card as one of those to be discarded.
9.1.2 Combat card events
Combat card events are played prior to a battle but only by a player involved in that battle.
9.1.3 Response card events
Response card events all have specific conditions which must be met in order to be played. Some can only be played on another player's impulse while others can be played during a player's own impulse (as the active player).
9.1.4 Mandatory event cards
Mandatory event cards must be played for their events. However, when playing a mandatory event card, players trigger the event and receive the CP to spend on actions. The events on mandatory event cards are always resolved first. If a mandatory event card is discarded, the event immediately triggers. The player that discarded the card resolves the event as if they were the active player. If two mandatory events are discarded in the same impulse the events are resolved in turn order.
Play Note: the latter case is rare, but certain events may result in multiple players discarding mandatory event cards.
9.1.5 Mandatory Response
There is only one mandatory response card in the game (Impulsive Ruler). It must be played as a response card when its conditions are met. Once its event is resolved, the player who played it does not get any CP to spend (as it would with a mandatory event) but instead draws another card.
9.2 Bot Box
The bot box is located under the CP value of certain action cards. This box is only utilized when playing with a bot(s). The function of the bot box is explained on the bot PAC and in rule 34.3.4.
Sequence of Play
Each turn in IE is composed of the following 4 phases, which are in order:
- Prep Phase [10.0]
- Diplomacy Phase [11.0]: (1) make deals, (2) announce deals in turn order, (3) select home card
- Action Phase [12.0]: Players perform impulses by playing cards to conduct actions and events
- End Phase [20.0]: (1) militarism: gain one army step or prevent a fort from degrading, (2) degrade forts, (3) non-player power build step, (4) all naval units go to port, (5) set manpower, (6) industrialize, (7) progress truces, (8) progress WoIs, (9) alliance resolution step, (10) decrease the WTT by 1, (11) on turns 1, 3, and 5 players draw three NGs keeping one, (12) advance the turn marker
Important: during wartime and the GW the game shifts to a different SoP as described at 12.16.2 and 24.1 respectively.
Turn Order Reminder: When instructed to do so, play proceeds in the following order: (1) GE, (2) UK, (3) FR, (4) AU, (5) RU, (6) OT.
10.0 Prep Phase
During the prep phase players prepare for the upcoming turn by resetting the deck and drawing cards.
10.1 Prepare the deck
First add new cards to the deck. Many cards do not start in the deck. Instead, these cards are marked with the turn/decade they come into play. Then shuffle the discard pile in with the draw deck.
Important: each turn the discard pile is always reshuffled into the draw deck before new cards are dealt.
10.2 Deal Action Cards
Deal cards to each player based on their current industry level, their domination of flashpoints, any plus or minus card markers, their current stability level, and certain conditions such as India being stable. The minimum number of cards a player can be dealt is always 3, regardless of how many negative card modifiers they have.
10.3 Plus or minus cards
All plus and minus card markers are discarded after all the cards for the turn have been dealt out.
10.4 Prep Phase Stability
After cards are dealt, players may increase their stability by 1 if they discard a random card. They cannot discard a mandatory event (note: players remove any mandatory events from their hand before they discard a random card). Players can only do this once per prep phase. The UK player may also, at this time, choose to discard a random card to flip the Indian Stability counter to its stable side [33.2.2].
11.0 Diplomacy Phase
During the diplomacy phase players negotiate deals and select which home card they will be using for the action phase. The purpose of the Diplomacy phase is to give players a chance to plan out their turn and make deals with other players.
All deals made during the diplomacy phase are non-binding (exception 11.1). While players can agree to cooperate or to create a temporary alliance these deals are not official. Deals made during the diplomacy phase do not affect the alliance track in any way.
Players are allowed to show other players their action cards to encourage cooperation or to back up a threat. Players are even allowed, and encouraged, to walk away from the table to make deals, but players are forbidden from asking other players to leave the table to be collectively schemed against.
Design Note: I've always found such requests unsportsmanlike.
11.1 Giving Action Cards
Players can give other players a number of cards in the diplomacy phase. This must be a formal agreement between both players and it is done at the end of the diplomacy phase. Players cannot give other players specific cards, all card draws must be random and home cards can never be drawn from a player's hand.
Once all negotiations have been concluded players announce the card draws they will be giving and/or receiving in turn order. An announced card draw must be confirmed by the other player in order for it to take place. The random card draw is done in full view of all players.
11.2 Select Home Card
At some point before the end of the diplomacy phase all players must select their home card. A player's home card is always taken in addition to the cards they received in the Prep phase. It does not matter if they select it at the beginning, middle, or just before the end of the diplomacy phase but ensure all players have made their decision before moving on to the action phase.
Design Note: I always actively encourage players to make deals involving the play, or preventing the play, of certain event cards. A common deal is, "I'll play this event card if you give me a card draw." A fair trade, although remember that the other player is not bound to actually play the card they said they'd play. It's best for the diplomacy phase to be capped at a certain time limit to avoid players dragging out negotiations, my group caps the diplomacy phase at 10 minutes.
12.0 Action Phase
This is the meat of the game. During the action phase players fight wars, colonize, build industry, and play events.
During a player's impulse they either play a card for its event or its CP, or pass (this ends their turn early but they can still play any remaining cards on a future impulse), meaning players can still play their one remaining card on a future impulse.
Important: each player can hold a card for the next turn. This card, however, cannot be a home card or a mandatory event as those always have to be played.
Play Note: It's usually best to pass when you have one remaining card so you can react to an event or declaration of war that occurs late in the turn.
Ending the action phase: the action phase ends when either: (1) all players consecutively pass or (2) when all players have no remaining cards.
12.1 Playing a card for CP
When playing a card for CP players can spend them on any combination of actions. Players can take the following actions during peacetime by spending CP:
- Recruitment: 1-4 CP
- Naval Movement: 1 CP
- Construct Fleet: 1-3 CP
- Place Influence or Diplomacy: 1 CP
- Remove Influence or Diplomacy: 1 CP
- Influence Great Power: 1-4 CP
- Minor Power Alliance: 3 CP
- Remove Minor Power Alliance: 4 CP
- Expeditionary Force: 1-2 CP
- Pacification: 1 CP
- Construct Fort: 1-2 CP
- CP Chain: 1 Card
- Industrialize: 1 Card
- Redeployment: 1 CP
- Land Battle (against rebels): 1 CP
- Declare War: 1-4 CP
Important: actions change during wartime and the GW see 15.2 and 27.5, respectively, for more details.
12.2 Recruitment
1-4 CP. Recruitment actions allow players to build army steps and ECs. Players can build new armies and flip reduced armies to full strength.
Any number of CP may be spent on recruitment actions; the costs for each recruitment action are listed below:
- Standing Army - 1 CP per step
- Reserve Army - 1 CP per step
- Elite Corps - 2 CP
Play Note: players can build full strength armies for a total of 2 CP, they are not limited to building 1 step per impulse.
Standing armies are placed directly onto the map in a home territorial key whilst reserve armies are placed into a player's reserve armies holding box on their player display. During peacetime, standing armies cannot exceed a player's manpower, and reserve armies cannot exceed a player's manpower or industry, whichever is lower.
Exceptions: Indian armies must be built in either India or Bengal. The UK Commonwealth (CW) army must be built in Australia/New Zealand or Canada (emphasis added by one of our Canadian playtesters). However, the CW army cannot be built prior to the GW.
The Ottomans have two different types of armies: Turkish armies must be built in spaces that do not contain a minority nationality, while Arab armies can only be built in spaces with Arab nationality.
Newly built ECs are placed with an army that has LoC. Players may use recruitment actions to build land units for their minor power allies. Such units must be built in a home space of the respective minor power.
12.3 Naval Movement: 1 CP.
Each naval movement action allows a player to move all their naval units plus one land unit by sea for 1 CP. The land unit can move through naval boxes as if it was a naval unit (they are considered to be on transports), and they are not required to be escorted by friendly naval units. Each individual stack of units must complete its movement before moving the next stack, and all units must finish their movement before another naval movement action can be conducted. The same units can be activated each time a player uses 1 CP for a naval movement action, so they can move multiple times with the same card play.
When activated, all naval units (plus the one land unit) receive one naval movement point (NMP). Which can be spent in the following ways:
- Naval Movement within European Waters: for one NMP, units can move an unlimited distance through European Waters.
- Naval Movement Outside of European Waters: Entering a naval box that is not in European waters costs one NMP. Additionally, entering European Waters from a non-European naval box costs one NMP.
- In order to enter the South Atlantic from the main map, the moving units must start their move in the North Atlantic or the Western Mediterranean. In order to enter the Indian Ocean from the main map, the Suez Canal must be complete, and the moving units must start their move in the Eastern Mediterranean or Egypt.
- Moving into and out of ports:
- Upon entering a naval box a unit using naval movement can move from that naval box to one of its connecting ports for free.
- However, leaving a port and moving to a naval box always costs a NMP (they may continue moving if they enter a European Waters naval box).
During peacetime, multiple powers can have units in the same naval box. However, once at war, moving into a naval box containing enemy units can trigger naval combat. Finish all movement before resolving any battles. Additionally, units moving by sea can be intercepted during wartime [19.1]. Also during wartime, land units cannot enter enemy controlled ports using naval movement, this can only be done using land battle action. See the amphibious assault rules [19.10].
Naval Movement Examples
Example 1: The RU player plays a 2 CP card for two naval movement actions (1 CP each). With the first action, her 2 squadrons from St. Petersburg each spend their one NMP to move to the Baltic Sea, then to the North Atlantic, then to the Western Mediterranean, and finally to the Eastern Mediterranean. As these boxes are all in European Waters, there is no additional NMP cost. The 1 squadron from Sevastopol then spends its NMP to move to the Black Sea and then (with the permission of the OT player) through the Dardanelles to the Eastern Mediterranean to meet up with the 2 squadrons from St Petersburg. Again, these are all European Waters, so the move only costs one NMP. This concludes her first naval movement action, as all of Russia's naval units have now been moved. In her second action, RU moves her 3 naval squadrons (now gathered in the Eastern Mediterranean) through the Suez Canal (with the permission of its owner) to the Indian Ocean and finally to Russian controlled port of Aden. Each squadron paid one NMP to do this.
Example 2: The UK player wants to redeploy most of his fleets to the North Atlantic. 3 of his naval squadrons are in London, however the other 2 are in Singapore and the Suez Canal is not complete. He plays a 3CP card for three naval movement actions (1 CP each). Each of these actions gives all of his naval units one NMP. With his first naval movement action, the 3 squadrons in London each spend their one NMP to move to the North Atlantic. His 2 squadrons in Singapore each spend their one NMP to move to the Indian Ocean. With his second naval movement action, he moves his 2 squadrons from the Indian Ocean to the South Atlantic. For his final naval movement action, he moves them to the North Atlantic. He could have also moved his other 3 squadrons (now in the North Atlantic) with these last two actions, but they were already where he wanted them.
12.4 Construct Fleets: 1-3 CP.
At the beginning of the game only naval squadrons can be built. Players can build dreadnoughts after the play of the Dreadnought event card, which is added to the deck on turn 6. Newly built fleets must be placed in a controlled, territorial home key on the main map with a port. Remember the building naval units increases a player's power projection limit. Reduced naval units still count towards this limit.
Players may use construct fleet actions to build naval units for their minor power allies. Such units must be built in a home space with a port of the respective minor power.
The cost of fleet units is listed in the following chart:
| Unit | Cost |
|---|---|
| Full Strength Squadron | 2 CP |
| Reduced Squadron | 1 CP |
| Full Strength Dreadnought | 3 CP |
| Reduced Dreadnought | 2 CP |
| Refit Naval Unit | 1 CP |
*Refitting a naval unit refers to flipping it from its reduced side to its full strength side. Naval units cannot refit if they are in a naval box; they may only refit if they are in a friendly territorial home space with a port.
Dreadnoughts: in naval combat, the presence of even a single dreadnought halves the total FP of all enemy naval squadrons. If both sides have a dreadnought(s) then both sides' naval squadrons half their FP.
12.5 Place Influence or Diplomacy: 1 CP.
Place an influence or a diplomacy marker. Players can only take this action once per impulse.
12.5.1 Place Influence
Influence markers can only be placed in uncontrolled spaces. A LoC is required to place an influence marker. Only one player can have an influence marker in a given space. For the purposes of placing influence, players can trace LoCs through allied minor power spaces.
12.5.2 Influence in Africa
Until the play of the Berlin Conference, each player can only have 1 influence marker on the Africa submap. Note that influence markers are not the same as control markers. This rule does not apply to spaces in North Africa, which are on the main map.
12.5.3 Place Diplomacy
Diplomacy markers can only be placed in minor power spaces. Only one player can have a diplomacy marker in a given space. If a minor power controls multiple spaces, place the marker in the space that shares the name of the minor power (the Serbia space for Serbia), if the minor power controls that space. Otherwise the player decides. Below are some special cases:
- Italy: At the beginning of the campaign game there are four minor powers in Italy. Prior to unification, diplomacy markers can be placed normally in these spaces. However, once Italy is unified it receives its own marker on the Alliance Track and influence markers on the MPIT.
- Qing China: Players cannot place diplomacy markers in Qing spaces. Qing China is defined as all spaces containing the Qing flag.
- The South: Players cannot place diplomacy markers in the South space unless the American Civil War event in in effect.
12.6 Remove Influence or Diplomacy: 1 CP.
Remove an influence or diplomacy marker from the map. Players are allowed to remove their own markers using this action. Players cannot remove influence in a space that contains a unit belonging to another player. Exception: After the Berlin Conference event is played, players cannot remove influence in Africa.
Important: players can only remove 1 influence marker per impulse.
12.7 Major Power Influence Track (MPIT): 1-4 CP.
Advance a power's Triple Alliance influence, Triple Entente influence, and/or Neutrality influence on the MPIT equal to the number of CP spent on this action. This influence will be added as a DRM during the alliance resolution step [8.6].
Players can move their own MPIT markers or MPIT markers belonging to other powers. Players are not limited to influencing a single power, likewise players can influence powers in any direction. Players can only add influence, and adding one type of influence does not reduce their other markers.
Important: influence on the MPIT is not the same as an influence on the map: meaning (1) it cannot be removed by the remove influence action, and (2) it is not subject to the "players can only place 1 influence marker per impulse" rule.
12.8 Minor Power Alliance: 3 CP.
A player may place an ally marker with a minor power provided they already have a diplomacy marker on that minor power. Each minor power can only be allied with one player. If a minor power controls multiple spaces, place the marker in the space that shares the name of the minor power. For example, placing it in the Serbia space for Serbia. This is providing that space is currently controlled by the minor power. Otherwise, it's the player's choice.
Minor power alliances have the following effects:
- The allied player can build more of that minor power's units. This includes armies in excess of those in the End Phase Build Box. However, the amount of armies and naval units a minor power can have is limited by the counter mix.
- Players can build generic ECs for their allied minor powers; these units are marked MP for minor power, minor powers can only have 1 EC
- The allied player controls the minor power's units during wartime
12.9 Remove Minor Power Alliance: 4 CP.
Flip any one ally marker on a minor power to its diplomacy side.
12.9.1 Naval Supremacy: 3CP
Players may conduct the remove alliance action for 3 CP in port spaces adjacent to a naval box where they have more naval units than the player allied to the minor power.
12.10 Expeditionary Force (EF): 1-2 CP.
The EF action sends an EF unit to a friendly controlled space, a friendly home space, or any space with a friendly influence or control marker. Moving an existing EF costs 1 CP. New EFs can be built for 2 CP and may be placed in any of the aforementioned spaces. When an EF moves using this action it is simply picked up and placed in the chosen space, there is no need for EFs to follow land or sea connections and no LoC is required.
Play Note: for lack of a better term EFs essentially teleport to the chosen space.
12.11 Pacification: 1 CP.
Pacification is required to gain control of uncontrolled spaces. Players must have a land unit in a space to pacify it. When a land unit is placed in (or moved to) an uncontrolled space, a 0 pacification marker is also placed in that space if it did not already contain one. Exception: if the space is a naval base, place a 2 pacification marker instead.
Design Note: The reason why a 2 pacification marker is placed in naval bases is because they are smaller land masses and thus easier to pacify.
When a pacification action is taken the player rolls two dice and adds the value of the pacification marker in the space; players also receive a +1 DRM if they have at least one naval unit in a naval box adjacent to the space being pacified. If the roll is ≥ 10 the space is successfully pacified, replace the player's influence marker with a control marker. If the attempt fails, increase the space's pacification value by one. Pacification actions can only be taken once per space, per impulse; meaning if the attempt fails you must wait until a future impulse to roll again in that space. If all a player's units leave an uncontrolled space with a pacification marker, remove the pacification marker. A space's pacification value is not limited to 3, and players can use multiple pacification markers to represent the total pacification value in a space.
Certain events will cause pacification markers to be placed in player controlled spaces. When this occurs, do not flip that player's control marker to its influence side. Instead, reduce the controlling player's associated keys (colonial or territorial) by one until the space is pacified and the marker is removed. The same effect occurs when a pacification marker is placed in a player's home space (both Algeria and Dagestan begin the campaign game with a pacification marker).
Design Note: When a pacification marker is placed in a player controlled space it represents local tribes and/or kingdoms rebelling against colonial rule. When a pacification marker is placed in such a way the space itself is still acknowledged to be "controlled" for diplomatic purposes. Mechanically, this is important because if the marker was flipped to its influence side it could be removed using CP. However, the space must be pacified in order to count as a controlled space for all other purposes.
12.12.1 Rebel armies in colonial spaces
If a rebel army occupies a space with a pacification marker, it must first be eliminated in a land battle before a pacification roll can be attempted (see 18.0 for more on land battles).
Play Note: a rebel army begins the game in Ethiopia.
12.11.2 Graveyard of Empires (GoE) and the Boers
These events increase the difficulty of pacifying certain spaces and there are two special counters to indicate this. Remove the counter once the space is pacified.
12.12 Construct Fort: 1-2 CP.
The amount of CPs spent (up to a maximum of 2) gives the player that level fort. Forts are represented by hexagonal counters, and the level (the number) on the fort is the amount of FP it provides to the defending player in a land battle. Additionally, defending a space with a fort space negates the -1 DRM penalty for having all reduced armies in your main defense force. Forts do not provide supporting FP.
Forts are not units. They cannot move, and they cannot take hits. A fort is eliminated if enemy units enter its space. However, players cannot move into a space containing an enemy fort during wartime, instead they must attack the fort in a land battle.
Forts can only be built on the main map (exception: the Indian fort [33.2.3]), and each space can only contain one fort. Each player is limited to a maximum of 3 forts in play at the same time.
All forts will reduce their level by 1 during the end phase due to obsolescence, however players may choose to maintain one fort during the end phase [20.0]. Upgrading a fort to a higher level costs 1 CP.
Level 3 forts can only be built through the play of the Impregnable event card. Players cannot upgrade a fort to level 3, and level 3 forts always degrade to level 2 during the End Phase (they cannot be maintained during the end phase).
12.13 Industrialization: 1 card.
Each player (except OT [12.13.1]) can play a maximum of 1 card into industrialization. The card may have any CP value, but higher CP values increase the chance of successfully industrializing during the end phase. The card is played faceup, placed next to the player display of the active player, and an industrialization chit is placed on the card.
Important: mandatory events that are played into industrialization still trigger, and CP chained cards [12.14] cannot be used to industrialize.
During the end phase each player rolls a die and adds the CP value of the card they played into industrialization. If the total is ≥ 5 (≥6 for RU and OT) that player successfully industrializes, and they increase their industry by 1.
If a player fails to industrialize they then flip their industrialization chit to its auto industrialization side and place it in their events box on their player display. This chit means that they will automatically industrialize during the next end phase if they play a card of any CP value into industrialization. After a player successfully industrializes they discard their auto industrialization chit. All players discard their industrialization cards after the industrialization step during the end phase.
12.13.1 Ottoman Industrialization:
The OT player does not industrialize like the other players; they can only industrialize through the play of their Modernization home card. When this card is played, each player can offer the OT player a card. To do so they tell the OT player the CP value of the card they will give them (and they cannot lie). The OT player accepts one of these cards and places an industrialization chit on it, the gifting player then draws a card. If a player gives OT a mandatory event, the OT player conducts the event. If no player gives OT a card they may use their home card for 3 CP worth of actions instead. This sequence is also explained on the card itself.
Play Note: The cost of spending an entire card for the chance of increasing a player's industry may appear steep but is well worth the investment. A player with higher industry gets (1) more cards, (2) more CP to spend in war, (3) more reserve armies, (4) the ability to deploy more reserve armies, and (5) better rail movement. To put it simply, a player with low industry is often a target prior to the GW and a liability during the GW.
12.14 CP Chain:
Playing a card into CP chain saves the CP on that card for a future impulse to conduct a single action. When cards are played into CP Chain they are placed faceup, and that player's CP Chain chit is placed on the card. Players may spend the CP in their CP Chain when they play a card for CP on a future impulse. Below is a list of special rules that apply to CP Chained cards:
- A maximum of 2 cards can be played into a player's CP Chain (this max of 2 cards does not include the card played expend CP in the chain).
- The spent CP can only be used to conduct a single action which cannot exceed 4 CP.
- CP chained cards cannot be used to industrialize.
- Mandatory events played into the CP chain still trigger their event, and the active player controls the event.
- Cards played into CP Chain are always discarded at the end of the action phase (so don't forget to use them).
Play Note: Playing a card into CP Chain is useful when a player doesn't have any high value cards and wants to take a high cost action.
12.15 Redeployment: 1 CP.
Enables a player to move all their land units an unlimited distance by land. Units may move through spaces that the player controls and through uncontrolled spaces where that player has influence. Likewise, this movement must end in spaces that the player controls (or uncontrolled spaces with influence). Remember that going into or through allied spaces is never allowed outside of wartime. For the purposes of movement during peacetime, controlled spaces include:
- Spaces containing your control marker (or your home space) and a pacification marker.
- Spaces containing your control marker (or your home space) and rebel armies.
Special Redeployment: ECs, Elite colonial EFs, and the Zouaves may move an unlimited distance through naval boxes during redeployment actions if they end their move stacked with a friendly army.
During redeployment actions, players can move units into spaces containing rebels, however, units must stop when they enter such a space (see 21.0 for more on rebels).
Play Note: in general, it is very easy to move your troops in peacetime, in wartime units move much slower.
12.16 Land Battle Actions Outside Wartime: 1 CP.
Land battle actions are how players attack. Most land battle actions are conducted during wartime against enemy powers. However, players can attack rebel armies and only rebel armies, outside of wartime. See 18.0 for more on land battles.
Important: during wartime, enemy units can never occupy the same space, and thus land battles are always conducted from adjacent spaces. However, rebel armies and non-rebel units can occupy the same space, meaning that battles against rebel armies can be conducted from adjacent spaces or from the same space.
12.17 Declare War: 1-4 CP.
By far the most comprehensive action in IE, declare war actions represent entire wars through the play of a single card. This is meant to simulate the short, yet brutal, conflicts that occurred prior to the GW such as the Russo-Turkish Wars and the Wars of Unification. As such, wars are essentially mini turns within a normal game turn, with play resuming normally once the war ends.
A war can be declared for any number of CP, and all the CP spent from a given card must be spent to declare war. The more CP a player spends the more they can do during the war, and higher CP cards give players a better chance of going first during the war.
12.17.1 Cannot Declare War
Players cannot declare war if the WTT is 3 or higher. However, this restriction only applies to player home cards and players spending CP to declare war. Events that simulate wars (such as the Balkan Wars event, card # 100) still function as normal. Players can never declare war on the US or the CSA.
Design Note: The WTT is supposed to represent the build up of the international tensions that finally led to the GW. Any war declared by a player power whilst the WTT is at 3 or 4 would likely be the GW. In historical terms, this restriction is deliberately designed to prevent players from using the very gamey tactic of fighting a quick war to weaken their opponents prior to the outbreak of a GW (which will decide who wins the game).
12.17.2 Wartime Sequence of Play
Once war is declared, play switches to the wartime SoP for the entirety of the war. Note that this is different from the GW SoP [24.1]. The wartime SoP is:
- War Aim Step [13.0]: choose war aim, defender may surrender or defender may play card for CP war budget
- Alliance Step [14.0]: both sides may ask player allies to join them. Allies must play a card to join the war while all minor power allies may join for no cost.
- Alliance Shift Step [14.2]: shift defender's alliance chit
- Initiative and Budget Step [14.3]: set initiative order, set war budget (= CP spent + industry level)
- Maneuver Step [15.0]: take 1 CP actions in initiative order
- Victory Step [16.0]: check for victory and impose treaty options
- Demobilization Step [17.0]: check for blockade, demobilize reserve armies, displace armies [5.7], free redeployment action, free naval movement action
13.0 War Aim Step
First, the player declaring war must choose the power they are attacking and announce a war aim. The war aims are as follows: liberation, unification, and conquest. What follows is a breakdown of each war aim, including their purpose, objectives, and any special rules that apply. The objectives in a war are very important. Barring one side taking the other's capital, occupying the objective spaces determines who wins the war. Targeting two spaces may yield more rewards, but it also makes winning the war more difficult as the attacker will need to occupy both spaces (or the opposing player's capital) to win the war. When choosing objectives, the targeted spaces do not have to be adjacent. Mark the targeted spaces with a war aim marker as a reminder of which spaces were targeted.
13.1 Liberation
Purpose - retake home spaces* or liberate spaces that are controlled by the defender and are in rebellion. Spaces "in rebellion" are spaces that contain rebel units and a WoI marker [20.8].
Objectives: the attacker chooses up to two spaces controlled by the defender. Those spaces must either be in rebellion or they must be original home spaces of the attacker (Players can only choose spaces that meet one of these conditions, not both).
*Exception Dual Home Spaces: players cannot liberate dual home spaces [3.2.5.2]. Those must be taken by a war of conquest. Example: if GE takes Alsace-Lorraine, FR must launch a war of conquest to retake it.
13.1.1 Liberating Minor Powers
When a minor power is liberated it gains independence. Rebels in a war of liberation are friendly to and may support the attacking player if that player's war aim is to liberate them. Rebels that the attacking player is not trying to liberate are hostile to all warring powers (See 21.0 for more on rebels). At the end of a war all minor powers liberated by a player immediately become allied to that player.
13.1.2 Special Liberation Wars
As an exception to [13.1], the AU and RU players can liberate spaces in Italy and the Balkans (respectively) that are not in rebellion [13.1]. However, RU can only do so by playing their Russo-Turkish Wars home card, and AU can only do so before Italy unifies.
13.2 Unification
Purpose - unify nationalities. Only the GE player can declare wars of unification targeting German unification spaces. The AU player may declare wars of unification targeting spaces that contain nationalities with full citizenship in the Austrian Empire [33.4.1].
Objectives: the attacker chooses up to two spaces controlled by the defender, those spaces must contain German nationality in a German war of unification or nationalities that have AU citizenship (only AU can do this).
13.2.1 Italian Wars of Unification
Any player with a diplomacy or ally marker with either Sardinia-Piedmont or the Kingdom of the Two Sicilies (or both minor powers) may declare a war for Italian unification. First, the attacking player must declare which Italian state they will give any conquered land to (this must be either Sardinia-Piedmont or the Kingdom of the Two Sicilies), then the attacking player gains an alliance with that power if they do not already have one.
Players target up to two adjacent spaces that contain Italian nationality. Any land gained in such a war must be given to either Sardinia-Piedmont or the Kingdom of the Two Sicilies (whichever was chosen at the start of the war). If the attacking player wins the war they must choose the territorial cession treaty option. Additionally, if the attacking player wins, roll for Italian unification [22.2.6].
13.3 Conquest
Purpose - take control of land that is controlled by a foreign power. A war of conquest automatically increases the WTT by one. Declaring a war of conquest then decreases the stability of the attacking power by the current level of the WTT.
Objectives: the attacker chooses up to two spaces controlled by the defender, only one of these spaces can be a key.
Design Note: The penalty for declaring war of conquest may seem harsh but wars of conquest were rarely declared in this period. The penalty is meant to model the international condemnation that would follow a war of aggression.
13.3.1 Targeting Capitals in Wars of Conquest
Capitals and subcapitals cannot be targeted as objectives in wars of conquest.
13.4 Attacking a Non-Player Power
Declaring war against a non-player power that has a player ally is treated as declaring war against that player. Meaning, all normal alliance rules apply, and the defending player will shift away from the attacker on the alliance track [8.2].
Additionally, players cannot: (1) attack non-player powers they are allied with, (2) attack non-player powers they have a diplomacy marker with, or (3) attack non-player powers allied with a player ally or containing a diplomacy marker belonging to a player ally.
13.4.1 Abandoning a Non-Player Power Ally
Players are not required to fight with their minor power allies if the latter is attacked. A player ally can decline to enter a war after the attacker announces their war aim thus abandoning the minor power. If a player abandons the minor power the following occurs:
- That player loses 1 stability
- That player shifts away from the attacking player on the alliance track [8.2]
- Skip to the initiative and budget step [14.3] on the wartime SoP and proceed from there
If Italy is attacked and a player refuses to join the war Italy gains 10 neutral influence on the MPIT per player that refused to join. This is in addition to the normal penalties incurred per rule 14.0.
13.4.2 Seeking Aid
If the attacked non-player power does not have an ally, it will immediately try to find a player ally.
The first player with the option to ally with the non-player power is the player who has a diplomacy marker with it. If no player does, or that player declines, the Non-Player Alliance Table is consulted. The "1st Choice" player has the option to ally with the minor power, followed by the "2nd Choice," and then the "3rd Choice." Some columns have two players listed. If two players are listed the players roll off (re-roll ties) to see who gets the first chance to ally with the non-player power.
If a player chooses to aid the attacked non-player power that player immediately gains an alliance with it. The attacking player cannot ally with the non-player power, for obvious reasons. Likewise, a player allied to the attacking power cannot choose to ally with the defending non-player power.
If no player chooses to aid the non playing power, proceed to the initiative order and war budget step.
Exception: In playing the Bismarck event the GE player may choose to forbid other players from joining the war, in doing so they prevent unaligned minor powers from seeking an ally.
13.4.3 Non-Player Alliance Table
| Nation | 1st Choice | 2nd Choice | 3rd Choice |
|---|---|---|---|
| Netherlands/Belgium | UK/GE* | France | - |
| Denmark | UK/FR* | GE/RU* | Austria |
| German State | AU/GE* | Russia | France |
| Balkan State | RU/AU* | France | UK |
| Greece | UK/RU* | FR/AU* | - |
| Italy/IT Minor | FR/AU* | Germany | UK |
| Egypt |
*Both players roll a d6 to see who the minor power turns to first for aid, the higher roll wins, reroll ties.
**Poland and Ireland do not start as independent nations, but they can become independent.
13.4.4 Attacking China
If China is attacked in a war of conquest, place the Qing army at full strength in the targeted key. The player that aids the Qing in the war of conquest gains a +1 card marker regardless of the war's outcome.
13.4.5 Bismarck
The Bismarck event allows the GE player to forbid other players from joining the war. However, Bismarck cannot prevent a player from aiding a minor power they were already allied to because when a player attacks a minor power with a player ally it is treated as an attack on that player.
The Bismarck card also allows the GE player to attack two different powers. If GE attacks one minor power with a player ally and one without a player ally, the player allied to the minor power immediately allies with the unaligned minor power. This occurs even if that player already has five minor power allies.
Example: Denmark and Hanover are attacked by GE using Bismarck. Hanover is allied with AU so the attack is treated as an attack against AU who becomes a primary belligerent. GE chooses to forbid other players from joining the war. Denmark does not have an ally. Denmark does not look for an ally using the ally table and instead immediately allies with AU.
13.5 Truces
Players exchange truces at the end of a war. Truces can last, at most, until the end of the current turn and the end of the next turn. Players cannot break truces. In other words, players cannot attack a player they have a truce with or join a war against a player they have a truce with.
13.6 Defender Surrender
After hearing the attacker's war aim the defender has the option to immediately surrender. This triggers a major victory for the attacker. Shift the defender away from the attacker on the Alliance Track (if possible) and proceed to the victory step [16.0]. Minor powers defending alone without the aid of a player will never surrender.
13.7 Defender plays card
At this point the defender may play a card to add CP to their war budget [14.3].
Important: The defending player cannot play a mandatory event to add to their war budget. Minor powers defending alone without a player ally do not play a card and receive no war budget.
14.0 Alliance Step
Starting with the attacker, players may ask their player allies to join the war. This is optional, players are not required to ask their allies to join the war. However, there are consequences if a player refuses a call to war.
Important: Players cannot ask an ally to join a war if the ally has no valid cards to play for their war budget (because they cannot join if they don't have a card).
If a player ally refuses to join a war apply the following effects to them:
- If the refusing player is an aligned alliance box, they immediately receive 5 neutral influence on the MPIT.
- If the refusing player is in a committed alliance box, they lose 1 stability and immediately receive 10 neutral influence on the MPIT.
Exception: if joining a war could cause a player ally to break a truce, they must decline to join the war with no penalties, this also cancels any penalties for refusing to aid Italy [13.4.1].
Allied players that choose to join the war must play a card, the card's CP value will be added to their CP war budget.
Important: Allied players cannot play a mandatory event to join a war.
Additionally, all minor power allies, and a unified Italy, join the war at the primary belligerent's discretion.
14.1 Primary Belligerents
The original attacker and the original defender in a war are considered primary belligerents. This is important because occupying the opposing primary belligerent's capital will immediately end the war, remember that only players and a unified Italy have capitals. Exception: the UK becomes the primary belligerent if the defender accepts their aid when the UK home card Balance of Power is played.
It is possible for the GE and FR player, through the play of one of their home cards, to attack two different powers. This could result in GE or FR attacking two different players. If this occurs the defending players determine, between the two of them, who the primary defender is, and, if they cannot agree, the attacker decides.
Remember that declaring war on a minor power with a player ally counts as declaring war on that player.
14.2 Alliance Shift Step
The defender shifts their alliance chit away from the attacker on the alliance track [8.2]. This includes a player ally that just agreed to aid a minor power. Special: After unification, if a neutral Italy is attacked and a player chooses to aid Italy [13.4.2], both Italy and the aiding player will shift away from the attacker on the alliance track.
14.2.1 The UK and Balance of Power
This home card allows the UK to enter a war. Playing this does not cause the UK to shift on the alliance track, likewise, players that joined the UK will also not shift. Only the power that was initially attacked will shift.
14.3 Initiative and War Budget Step
Wartime initiative order is the order in which players take actions for the duration of the war. The player who played the higher CP card goes first during the war. The GE player wins all ties, then the player with the higher industry, then players roll off to break further ties for initiative. Mark the initiative order by placing wartime initiative markers on the Wartime Initiative Order Track.
Players then set their CP War Budget. Players track their CP war budget on any track on their player display using their war budget marker. A player's CP war budget is equal to the CP value of the card they played to join the war plus their industry level.
Play Note: these are all the CP players will have for the entire war, so spend them wisely.
Italy receives a 2 CP war budget chit to use during the war. Italy will always go last in initiative order, and they are controlled by their aligned primary belligerent. Minor powers fighting alone do not have a war budget.
15.0 Maneuver Step
The maneuver step is where the vast majority of a war takes place. During the maneuver step players move their forces and fight battles. Only players participating in the war may conduct actions at this time. Player's take actions in initiative order. During a wartime impulse, players can either: (1) spend 1 CP from their war budget to conduct an action or (2) pass. Players can only pass if their war budget is ≤ 2. There is no "hard passing" in wartime, meaning a player can pass and then take an action on a future impulse. If all players consecutively pass the war is over. Players should go to the Victory Step [16.0].
15.1 Special Naval Actions
At the start of the maneuver step, if opposing units occupy a naval box a naval battle is immediately fought (players are still allowed to attempt to avoid battle). The player higher in initiative order is considered the attacker in these battles. After all these naval battles are resolved, the UK player may conduct their free naval movement action per their national characteristics [33.2].
15.2 Wartime Actions
During the maneuver step, players are limited to the following wartime actions:
- Naval movement
- Joint naval operations
- Deploy reserves
- March
- Rail movement
- Land battle
Play Note: players cannot perform recruitment or refit actions in wartime, meaning all losses in battle will persist for the remainder of the war.
15.2.1 Naval Movement in Wartime: 1 CP.
This functions mostly the same as the standard naval movement action. However, units using naval movement must stop when entering a naval box containing enemy naval units, which can cause a naval battle [19.2]. Wartime naval moves can also be intercepted [19.1]. Finish all naval movement before resolving any naval battles.
During wartime players can also use naval units to occupy enemy naval bases. When a player's naval unit(s) enters an unoccupied enemy naval base they immediately occupy it [15.3]; the moving naval unit may then move to an adjacent naval box but must then stop.
Players can also attack naval bases containing enemy units using naval movement. If the naval base contains only EFs, the EFs are automatically eliminated and the base is occupied, but the attacking naval units must end their movement in the base. If the naval base contains naval units, a battle is fought in the space. If the attacker wins the battle, they occupy the base, but the attacking naval units must then end their movement in the base.
15.2.2 Joint Naval Operations: 1 CP.
Taking this action allows you to take a naval movement action with an ally. Essentially, when a player takes this action they spend a CP, announce what they're doing, they place their joint naval operations marker on any of their naval units, and play passes to the next player. If an allied player takes a joint naval operation action in a future impulse, any allied players who have also taken this action may remove their markers and then they can conduct their naval movement together. A player and that player's allies can still conduct other naval movement actions as normal whilst waiting for an ally to take a joint naval operations action. At the end of a war (or at the end of a GW turn) all joint naval operations markers remaining on the map are removed and the 1 CP is lost.
15.2.3 Deploy Reserves: 1 CP.
Allows players to deploy reserve armies equal to half their industry (with a minimum of 1 and a maximum of 3) from their reserve armies holding box to the map. Reserve armies must be deployed to a controlled or occupied space on the main map with a LoC.
Important: this space cannot be controlled or occupied by an ally, it must be controlled or occupied by the active player.
For the purposes of this action, this LoC must be traced using only land connections. An army that was placed using the "deploy reserves" action cannot attack, support, or move during the impulse it was placed. This is important because some events and national characteristics allow players to take two wartime actions in a single impulse, such as the free GE deploy reserve action [33.1, Superior Staff Work].
15.2.4 March: 1 CP.
The active player can move all land units they control (this includes units belonging to allied minor powers that they control) two spaces, if both spaces have clear connections, or 1 space via difficult or severe connections. Players cannot march into spaces containing enemy land units, an enemy fort, or neutral spaces; but players can march through enemy spaces that do not contain enemy land units (or fort). If players enter a space containing enemy naval units, the naval units immediately displace [5.7].
If players want to enter a space containing enemy land units (or fort), they must take a land battle action. Exception: As in peacetime, players can march units into spaces containing enemy rebels, but units must stop when they enter such a space.
15.2.5 Rail Movement: 1 CP.
Players can move armies equal to half their industry (round up) an unlimited distance by land to friendly controlled (or occupied) spaces. Units using rail movement cannot move through enemy or neutral spaces. Players can rail units into friendly spaces containing enemy rebels, but units must stop when they enter such a space. ECs attached to armies rail for free if they end their move attached to the same army. Players can rail individual ECs and EFs but doing so counts as railing an army. Units using rail movement cannot move along severe connections.
Exception: If the Trans-Siberian Railroad (TSRR) is completed the RU player, and players allied to RU, may move 1 army via the TSRR per impulse using rail movement.
15.2.6 Land Battle: 1 CP.
Choose one space to be the attacking space and choose an adjacent space containing enemy units (and/or an enemy fort) to be the defending space. The attacking space must contain at least one unit controlled by the active player (this includes units belonging to allied minor powers). Point the land battle marker at the defending space. Then resolve a battle [18.0].
Exception: A player can attack enemy rebels from adjacent spaces or from a space that contains both the active player's units and the enemy rebels.
Important: friendly and enemy units adjacent to the attacking and/or defending space may provide support to the battle at varying effectiveness [18.3]. Land battle actions are also the only way to conduct amphibious assaults [19.9].
15.3 Occupied vs Controlled
Players can only officially take control of spaces at the end of a war, until then these spaces are considered occupied. In wartime, the last player to solely be in a space occupies it. Use control markers to identify which spaces are occupied. Occupied is an important game term that refers to its status. An occupied space does not need to contain a land unit to remain occupied, and players can trace a LoC through friendly occupied spaces.
It is possible for two allied players to enter a space at the same time. If this occurs, the main attacker [18.1.2] occupies the space.
15.4 Non-Player Powers in Wartime
Minor powers that are allied to a player move as a part of their controlling player's march, rail, and naval movement actions. Clarification: Railing a minor power's unit counts towards that player's rail limit [15.2.5], and moving a minor power's land unit during naval movement actions counts as the one land unit allowed to move during that action.
Minor power units will attack in a land battle with any allied power that activates their space to attack. It does not have to be the player controlling them that initiates the action. However, such a player must have a land unit stacked with the minor power's units to initiate a land battle while the player allied to the minor power may do so without their units in the space. (Example: Serbia is allied with RU and has an army stacked with a FR army. When the FR player launches a land battle from that space the Serbian army will attack with the FR). Likewise, minor powers can advance after combat even when the battle wasn't initiated by the player controlling them.
Minor power units support their controlling power normally but supporting an allied power halves support [18.3.2].
15.4.1 Italy in Wartime
Italy is controlled by their player ally who is the primary belligerent. Italian units move and attack during the Italian wartime impulse, which is always last. They use the Italian budget, which always starts at 2. They will, however, attack normally when an allied power in their space conducts a land battle action and do not need to spend a CP from the Italian budget to do so. Likewise, units allied to Italy, including player units, will attack when Italy activates a space to attack. Allied units may also advance following an Italian initiated battle. Treat Italy as though it has 1 industry for the purposes of rail movement and deploy reserves actions.
15.4.2 Minor Powers Defending Alone
Minor powers defending alone without the aid of a player will remain in their space and defend themselves, however they will never move or attack. They may retreat following the normal retreat rules.
Design Note: In this case the minor power(s) is treated as fighting a purely defensive war.
15.5 Ending the Maneuver Step
The maneuver step ends when either:
- A primary belligerent's capital is occupied by enemy units, which triggers a major victory (see 16.1.1). Important: Remember that subcapitals serve no purpose prior to the GW. Likewise, their capture neither ends a war nor does it trigger a major victory.
- All participating players consecutively pass.
- A primary belligerent surrenders. A player can surrender at the beginning or end of any player's wartime impulse. This counts as a major victory for their opponent. The defending primary belligerent may choose to refuse the attacker's surrender, and if they choose to do so the war continues.
- All players agree on a negotiated peace (see 16.1.4).
- All players agree on a white peace (see 16.1.5).
15.6 Knocking Out Wartime Allies
Occupying the capital of a player who is not a primary belligerent immediately knocks that player out of the war and grants the occupying player a special treaty option during the victory step (see 16.1.6). Italy can be knocked out of a war if Rome is occupied, but minor powers are never knocked out of a war.
When a player ally (or Italy) is knocked out, displace any allied units in their territory. Do not displace any enemy units in occupied spaces, those units will displace at the end of the war. Likewise, occupied spaces will remain occupied until the end of the war. When a player is knocked out they are, effectively, out of the war. They can no longer act during the maneuver phase, their unoccupied spaces are considered neutral, and their armies immediately displace to an unoccupied home space and are allowed to overstack in that space with no penalty until the end of the war. If there is no such space, the player who occupied their capital chooses a space to place all their units in until the end of the war.
16.0 Victory Step
First, players must determine what type of victory, if any, was achieved. The victorious player imposes treaty options on the loser based on the type of victory they achieved.
16.1 Types of victory
The types of victory are as follows:
16.1.1 Major victory
A player wins a major victory by occupying their opponent's capital OR if the other primary belligerent surrendered. A major victory awards the winner two treaty options [16.2]. Additionally, the attacker gains one stability whilst the defender loses one stability. Major victories cannot be achieved against non-player powers.
16.1.2 Normal victory
Check if the attacker accomplished the war aims they set out at the beginning of the war. In order to achieve their war aims the attacking side must control all, not some, of the spaces they targeted during the war aim step. Meaning if players target more than one space they'll have a harder time winning. A normal victory awards the attacker one treaty option.
16.1.3 Defensive Victory
The attacker did not accomplish their war aims and the defending side either: one occupies a space controlled by the attacker at the start of the war, or (2) is blockading the attacker [17.1]. The defender receives one treaty option.
16.1.4 Negotiated Peace
Both primary belligerents agree to end the fighting with one side conceding one treaty option. If players agreed on a specific treaty option to end the fighting, that agreement is binding.
16.1.5 White Peace
Both primary belligerents agree to end the fighting with no treaty options OR none of the above conditions are met. No treaty options are awarded. This is the only case where neither side wins the war.
16.1.6 Special - Ally Knockout
This kind of victory only occurs if a player ally is knocked out of the war. This awards one treaty option. This treaty option can only be imposed upon the power that was knocked out of the war. Regardless of the war's outcome, an ally knockout still occurs. It is possible to win (or even lose) a war against the primary belligerent and still impose treaty options on the ally that was knocked out. If a player lost a war but knocked out the winner's ally before the war ended, the loser chooses their treaty option after the winner.
16.2 Treaty Options
There are five treaty options. Each option can only be chosen once, regardless of how many options were awarded to the victorious player. The victorious primary belligerent can impose treaty options on any enemy players as long as that treaty option does not prohibit doing so (for example, in order to impose war reparations on a player, you must occupy a space they control). However, the victorious player cannot impose more than one treaty option on a player who is not a primary belligerent.
16.2.1 Territorial Cession
Gain control of or, in the case of a liberation war aim [13.1], liberate the targeted spaces. During an Italian war of unification or during a war of liberation this option must be selected by a victorious attacker.
16.2.2 Realignment
There are two different types of realignment treaty options:
- Choose a minor power allied with your opponent, remove their alliance marker and replace it with your own. The minor power does not need to participate in the war to be targeted by realignment.
- This option is only available to the GE player in a war of unification. All German minor powers that were allied to the losing power become GE allies.
16.2.3 War Reparations
The winner of the war gains a +1 card marker and the loser gains a -1 card marker [10.0 and 10.3]. The attacker must occupy at least one home that is controlled by the losing power to impose war reparations. War reparations can only be imposed on players.
16.2.4 Righteous Defense
Only available to the defender. Choose one of the following options:
- Take control of one occupied enemy key or territory. The space does not have to be occupied if the defender achieved a major victory. The defender must be able to trace a LoC to chosen space during peacetime to take it.
- Give a home space controlled by the attacker back to its owner. The space does not have to be occupied to choose this option.
- Liberate a minority nationality in a space occupied by the defender. The defender then immediately gains an alliance with the newly independent minor power.
16.2.5 Colonial Cession
Gain control of one colonial key or a naval base controlled by the losing player. This space does not have to be occupied by the winner.
Exception: a colonial home space can only be taken if it is occupied by the winner.
Clarification: a colonial key in this case is defined as a key that does not have a contiguous overland LoC to a player's capital, meaning the winner can take AU, RU, and OT colonial keys even though those players do not track colonial keys.
Important: If multiple players are on the winning side, the primary belligerent has the final say on who gets what during the victory step. Spaces and war reparations may be awarded to any of the victorious player's allies, including independent minor powers.
When the victor imposes harsh terms on the primary belligerent both the attacker and the defender shift away from each other on the Alliance Track. If both powers are in the neutral box, randomly determine where each power shifts.
16.3 Exchange Truces
At this point, all players (and a unified Italy) involved in the war exchange truces. If the war ended in a white peace, 1 turn truce markers are exchanged. All other outcomes result in the players exchanging 2 turn truce markers.
17.0 Demobilization step
All players involved in the war do the following:
- Check for blockade [17.1].
- Remove all reserve armies from the map and place them in their respective reserve armies holding box.
- Displace any units in enemy controlled territory [5.7].
- Displace any units that are not in friendly controlled home spaces [5.7]. For the purposes of this rule, also displace units in ally controlled or occupied spaces.
17.1 Blockade
Remember that enemy naval units in a naval box block a player from tracing into that box. A player is blockaded if they cannot trace a LoC from their capital to any naval box except the Baltic Sea or Black Sea. Clarification: Players can trace through the Baltic Sea and Black Sea, but ending their trace in either box counts as being blockaded.
If a player is blockaded when the war ends, they gain a -1 card marker. Blockading is always optional, the blockading player is not required to enforce a blockade. Major Victory Exception: a player (or players belonging to an alliance) that won a major victory can never be blockaded.
Players cannot trace through neutral spaces, but they can trace through allied spaces.
Important: for the purposes of this rule, the RU player (and RU allies) can only trace a LOC to the Pacific Ocean if the TSRR is completed.
18.0 Land Battles
18.1 Land Battle Sequence
Resolve land battles using the following sequence:
- Place Battle Chit and choose main attacker/defender
- Calculate the BDRM (battle die roll modifier) a. Total land combat modifiers b. Declare support (attacker first) c. Commit elite unit (attacker first) d. Play combat cards (attacker first)
- Each side rolls a die, with one side adding the BDRM to their die roll
- Determine the differential between the two rolls
- Consult the CRT and apply the results
18.1.1 Place Battle Chit
The attacking player places the battle chit to designate which space is attacking and which space is defending. Make sure the arrow on the battle chit is pointing at the defending space. The units in the attacking space comprise the main attack force, and the units in the defending space comprise the main defense force.
18.1.2 Main Attacker/Defender
Multiple powers can be in the main attack/defense force, but only one power can be the main attacker/defender. The active player is always the main attacker. If multiple factions are defending in a space the defender(s) chooses which power is the main defender. Non-player powers can only be the main attacker/defender if they have the majority of armies in the main attack/defend force (note that exactly half is not a majority).
Play Note: Working out which power is the main attacker/defender is important as armies that are not from the same power as the main attacker/defender only contribute half their FP in support [18.3.2].
18.2 Calculate BDRM
Players calculate the BDRM by determining the differential between each side's strength. A side's strength is equal to their land combat modifiers plus their support. The differential between each side's strength is the only thing players need to account for. As such, players total their strength and the differential between the two gives one player a BDRM. Example: the attacker's strength is +8 and the defender's strength is +6. The attacker receives a +2 BDRM.
18.2.1 Land Combat Modifiers
Apply the following modifiers to units in the main attack/defense force. They do not apply to supporting armies.
- Firepower (FP): +X, X = a side's total FP in the main attack/defense force. They do not apply to supporting armies.
- Elite Corps/Elite Colonials: +1 DRM, players with elite units do not have to use them. Each side can only commit one elite unit in a given battle, and the elite unit must be in the main attack/defense force.
- Low Stability: -1 or -2. Lower stability incurs negative modifiers in battle, players check for the stability modifier on stability track of their player display. Note that UK Indian armies are affected by this modifier if India is unstable [33.2.2], and that OT Arab armies receive this modifier earlier than OT Turkish armies. Modifiers from different types of armies are not cumulative, take the worst stability modifier and apply it to the combat. Clarification: the stability DRM only applies to units in the main attack/defense force, supporting units do not incur this penalty. Additionally, minor powers fighting a battle alone never incur this penalty.
- Attacking along a difficult/severe connection: -1
- There are only reduced armies in the main attack/defense force (ignore if defending in a fort): -1 for the side the armies belong to. Clarification: the presence of ECs or EFs in the attack/defense force does not negate this penalty.
- Amphibious Landing: -1
- Broken LoC: -1
- Jihad: -1 [33.6]
- Manpower exhausted (GW only): -1
18.3 Support
Armies adjacent to the main attack force and/or the main defense force may contribute their FP to the battle, as support. Support is always optional, armies are never required to support. A maximum of two spaces, per side, can provide support.
18.3.1 Number of Supporting Armies
The number of armies that can support from a given space is determined by the following:
- The supporting armies are adjacent to both the attacking and the defending space: all armies from the space can support
- The supporting armies are adjacent to the attacking OR the defending space: 1 army from the space can support
- Supporting armies that are only adjacent via red connections cannot provide support
18.3.2 Half Support
Armies under the following conditions support battles at ½ their FP. However, regardless of the number of conditions that occur, the FP is only ever halved once:
- The supporting armies are only adjacent to the attacking/defending spaces via difficult connections. Clarification: If the supporting units are adjacent via a clear and a difficult connection they are not halved
- The supporting armies are from a different power than the power leading the attack/defense
- The supporting armies are supporting into or from a RU home space
- (GW only) The supporting armies are currently involved in a trench battle
18.3.3 Support Clarifications
Some important things to remember about support:
- When counting multiple ½ values in a stack, do not round each individual ½ value up, round the total up for the whole stack
- Armies placed via the "deploy reserves" action cannot support during the impulse they were placed
- Forts never provide support
18.4 Combat Results Table (CRT)
After calculating the BDRM each side rolls a die with one side adding the BDRM to their total. Players then determine the differential between the two rolls, consult the Combat Result Table (CRT), and apply the results (there is a reference to naval battles because the same CRT is used for naval battles).
| Differential | Losses: Att/Def | Victor |
|---|---|---|
| Att + ≥4 | 0/2* | Att (decisive)† |
| Att + 3 | 1/2* | Attacker |
| Att + 2 | 1/1* | Attacker |
| 0 or Att +1 | 1/1** | Attacker |
| Def + 1 | 1/1** | Defender |
| Def + 2 | 1/1* | Defender |
| Def + 3 | 2/1* | Defender |
| Def + ≥4 | 2/0* | Def (decisive)† |
Only apply the * and ** portions of the combat results if the Hydraulic Recoil event has been played
** Both sides take +1 loss
- The victor may opt to inflict +1 loss to both sides
† In naval battles, the losing side doubles its losses
During the GW: all forts reduce their level by 1 at the end of a battle in their space, and trenches inflict an additional loss on the attacker.
18.5 Machine Guns and Hydraulic Recoil
Over the course of the game the hydraulic recoil and machine guns mandatory events may be played (they will most likely be played, but it is possible that they are not). These cards permanently change combat. Machine guns give non-rebel units a minimum die roll of a 3 in land battles (in other words, rolls of 1 or 2 are now 3s). Hydraulic recoil applies asterisk and double asterisk results on the CRT.
Design Note: big guns equipped with new hydraulic recoil mechanisms were, by far, the number one killer during the Great War, and machine guns made most pre-war tactics obsolete. Coupled together these two technologies made combat much more deadly and far less "swingy." These mechanics are meant to model these technological shifts on a strategic level.
18.6 Losses
Both sides suffer step losses equal to the number of losses indicated by the CRT result. The attacker applies their step losses before the defender. These step losses must follow these priorities:
- The first step lost must be applied to a unit in the main attack/defense force (subsequent losses may be applied to supporting armies).
- Non-player (purple) units cannot be eliminated unless all player units in their stack are reduced.
18.6.1 Steps and Step Losses
Armies, squadrons, and dreadnoughts each have two steps. If a full strength unit suffers a step loss it becomes reduced, and if a reduced unit suffers a step loss it is eliminated.
18.6.2 EC Losses
ECs do not have steps and cannot take losses. Instead, when a player takes losses, if they eliminate an army, they must also eliminate an EC in that army's stack if one is present.
Important: The Machine Guns and Hydraulic Recoil mandatory events add a permanent addendum to this rule. After one of those events is in effect, ECs are automatically eliminated if their combat bonus is used against a non-rebel army.
18.6.3 EFs and Losses
EFs only have 1 step. If they suffer a step loss they are eliminated. EF losses are affected by the following:
- A force comprised exclusively of EFs cannot eliminate non-rebel armies (full strength armies can still suffer losses)
- A force comprised of EFs and armies cannot take losses on the EFs
- When a force comprised of EFs and armies takes a step loss on an army they must also eliminate an EF
18.7 Retreats
When the attacker wins a battle the defender must retreat (trenches may negate a retreat during the GW [28.1]). In land battles the attacker never retreats (this is different in naval battles [19.7]). Defenders retreat one space, and they must retreat to a friendly controlled or occupied space. Units do not have to retreat to the same space. A force that cannot retreat is eliminated. If the defender has a fort and is forced to retreat, the fort is eliminated.
Important: units can become overstacked due to retreating [5.5.3].
18.7.1 Advance After Combat
If the defender retreated, the attacker must advance into the defending space with at least one unit. All other units in the main attack force, including units belonging to a different faction, may also advance. Supporting units cannot advance.
18.8 Decisive Battles
As noted on the CRT, a differential of four or more triggers a decisive battle. If the attacker wins a decisive battle the units that advanced after combat may immediately take another land battle action or move one additional space for free. This can only happen once per impulse. Decisive battles in naval battles double the losing side's losses and allow the victor to continue moving through European Waters [12.3 and 19.8].
Land Battle Example — The Austro-Prussian War
In this example GE declared a war of unification against AU. Bavaria, Saxony, and Hanover are all allied with AU. GE has no allies and goes first. At the start of the maneuver step GE played the New Rifles card for a +1 DRM in all land battles during the war (in the actual war the Prussians had breechloading needle rifles and the Austrians had outdated muzzleloaders).
Image 1: GE wants to go on the offensive. One of GE's national characteristics gives them 1 free "deploy reserves" action during their first impulse in a war. GE uses their free "deploy reserves" to place a third army in Berlin; this army cannot do anything else this impulse, but it will protect Berlin. GE then spends 1 CP from their CP War Budget to take a land battle action attacking Saxony from Berlin. GE is the main attacker, and the Saxons are the main defenders.
Remember that the newly deployed GE army cannot attack, but the other two can. So the initial GE firepower (FP) without support is 4, and the Saxon FP is 2. No other land battle modifiers apply. So currently it's 4 - 2 without support. The GE army in Silesia is adjacent to both the attacker and the defender, it is also from the same power as the main attack force so it provides its full 2 FP to the attack. The total GE strength is 6.
The Saxon support seems good on paper, but is bad in reality (just like it was in real life):
- The Hanoverian army is adjacent to the attacker, but it's halved because they're not Saxon: 1 FP
- AU has two armies but only one can provide support (because they are only adjacent to the defender and not the attacker) and again they're from a different power, so they're halved: 1 FP
- The Bavarians can help; but they're also not Saxon so they're halved: 1 FP
- Keep in mind that only 2 spaces can support so the AU player chooses to support the Saxons with the Austrians and the Hanoverians.
This brings the total FP to 6-4 in favor of GE. Adding in the New Rifles modifier for the GE (which gives them a +1 DRM for all land battles in the war) and their total BDRM is +3. Dice are rolled... (drum roll) AU rolls a 2 and GE rolls a 5 (+3 to 8). The result is a decisive battle for the Prussians! With a differential of 6 AU's side takes 2 hits and the Prussians take none. Hydraulic Recoil has not been played yet so the asterisk does not apply.
At least one hit must be assigned to a unit in the main defending force, so the Saxon army takes a step loss. For the other step loss, the AU player chooses to reduce 1 of their armies in Bohemia. The Saxon army must then retreat, so they retreat to Bohemia.
At least one attacking unit must advance, and GE chooses to advance with both attacking units. Because GE won a decisive battle they may immediately conduct another land battle action or move one additional space with the advancing units (remember that this can only happen once per impulse). The example continues in Image 2.
Image 2: GE won big and now they want to press their advantage. They launch another land battle from Saxony targeting Bohemia! GE is the main attacker, and AU is the main defender.
GE FP remains 6 (+4 for the two attacking armies +2 for the supporting army in Silesia), the army in Berlin still cannot support because it was placed via a "deployed reserves" action during this impulse.
AU FP is as follows: +3 for the two AU armies (one is reduced), +1 for the reduced Saxon army. Different powers are only halved if supporting. This does apply to the Bavarians, who therefore only give a +1 in support despite being full strength.
The initial strength is +1 in favor of GE, but GE gains an additional +1 BDRM for their new rifles. The dice are rolled and... (drum roll) AU-1 and GE-4 (+2 to 6). Another decisive battle for GE. AU takes 1 loss on their full strength army and the other on the Bavarian army. They then retreat to Vienna, very disheartened, whilst both GE armies advance.
Image 3: End of the GE wartime impulse. This position is similar to where the Austrians historically sued for peace.
19.0 Naval Affairs
Unlike land battles, naval battles occur when a player moves naval units into a space containing enemy units. In other words, naval battles occur as a result of naval movement, not through a special action. Additionally, naval movement can be intercepted by units in adjacent ports, and naval units can avoid battle.
Remember that the naval movement action allows players to move all their naval units and a land unit. Players can bring a land unit with them during an attack against enemy naval units.
19.1 Naval interception
During naval movement, when the active player's units move into a naval box that is connected to a port containing enemy naval units, those enemy naval units may attempt to intercept them. Interception rolls interrupt naval movement actions and take place immediately. The active player will be able to finish their naval movement after the interception attempt and subsequent battle (if one occurs).
A successful interception causes the intercepting naval units to move into the naval box, and then a battle is fought between the opposing sides. The active player is always the attacker during battles that result from interceptions. Multiple players and spaces are allowed to intercept the same move. Each intercepting port makes its own roll. Intercepting units can never be intercepted.
Units using naval movement in European Waters [12.3] that were intercepted may continue moving in European Waters if they win a decisive victory.
19.1.1 Naval Interception Modifiers
The intercepting player must roll ≥ 5 on one die to intercept the active player's units. Apply the following DRMs when intercepting:
- Intercepting player has three or more friendly ports adjacent to the naval box: +1
- Moving naval units have no friendly ports adjacent to the naval box: +1
- Friendly naval units are already present in the naval box: +1*
- UK naval units intercepting into the North Atlantic: +1
*This DRM only applies if the units started the impulse in the naval box
19.2 Avoiding Naval Battle
Prior to a naval battle the defender may choose to attempt to avoid battle. Similar to interception, all avoid battle attempts are made at the conclusion of a naval movement action.
Important: units that were intercepted (or who just intercepted enemy units) cannot avoid battle.
Players must choose the space they are avoiding battle to before attempting an avoid battle roll. This must be a friendly port or a naval box. When avoiding battle into a port, the port stacking limit of 4 still applies. If avoiding battle would cause a player to be overstacked they may choose to avoid battle into two or more ports (they still only make a single roll). When avoiding battle, players cannot choose a space that would take them through the straits of Gibraltar, the Dardanelles, or a canal unless those spaces are friendly controlled. Players cannot avoid battle into a naval box containing enemy units or into a space they were attacked from.
Players must roll ≥ 5 on one die to avoid battle. Apply the following DRMs when avoiding battle:
- Units avoiding battle are in an ocean box: +1*
- Attacking player has no friendly ports adjacent to the naval box: +1
- Attacker has two more ports than the player avoiding battle: -1
*For the purposes of this rule an "ocean box" is any naval box that is not the Western Mediterranean, Eastern Mediterranean, Baltic Sea, or the Black Sea.
A force that successfully avoids battle moves to the chosen space. After a force successfully avoids battle the attacking force cannot continue moving. Additionally, a force that successfully avoids battle cannot be intercepted.
19.3 Naval Battles
A naval battle occurs when hostile units occupy the same naval box or port. Follow these steps to resolve a naval battle:
- Check for Mines!
- Calculate the BDRM (battle die roll modifier)
- Each side rolls a die, one side adds the BDRM
- Determine the differential
- Consult the CRT and apply the results
19.4 Mines!
All keys that are ports inherently have mines. During naval battles in keys that are ports, the defending player will roll for mines.
When rolling for mines players roll dice equal to the current turn (the current game turn, not the current GW turn). All rolls of 4+ inflict one hit on the attacker. However, after suffering the first two hits the attacker may ignore any remaining hits if they choose to immediately retreat.
Dreadnought Losses: the majority (more than half) of step losses from mines must be taken by dreadnoughts if any are present.
19.5 Calculate BDRM
Similar to land battles, while there can be several modifiers for each side, the differential between the modifiers is the only thing players need to account for. As such, Players add together their strength modifiers and the differential between the two gives one player a BDRM. Example: the attacker's modifiers are +8 and the defender's modifiers are +6. The attacker receives a +2 BDRM.
Below is a list of all the naval battle modifiers:
- Firepower*: +X, X = a side's total FP. Only naval units and defending forts can contribute FP in a naval battle
- Stability: -1 or -2. Lower stability incurs negative modifiers in battle, players check for the stability modifier on stability track of their player display.
- No friendly ports adjacent to embattled area: -2**
- ≥ 2 more ports than your opponent adjacent to embattled area: +1**
- Only reduced units in battle: -1
- Failure to avoid battle (only apply if an attempt was made): -1
- Manpower exhausted (GW only): -1
- Check for dreadnoughts
** if the battle is in a port, treat the embattled area as taking place in an adjacent naval box for the purpose of these DRMs; if the port is adjacent to two naval boxes the attacker chooses the naval box
After calculating the BDRM each side rolls a die with one side adding the BDRM to their total. Determine the differential between the two rolls, consult the Combat Result Table (CRT), and apply the results.
19.6 Naval Losses
Both sides suffer step losses equal to the number of casualties they suffered in the battle. Non-player (purple) units cannot be eliminated unless all the player units are reduced. Dreadnought Losses: the majority (more than half) of step losses in naval battles must be taken by dreadnoughts if any are present.
19.6.1 Land Unit Losses in Naval Battles
Land units in a naval box are eliminated if:
- all the naval units accompanying the stack of land units are eliminated
- if the land units are caught alone in a naval box without any accompanying naval units
- if they cannot retreat
If none of these conditions apply, and the player was forced to retreat, the land units retreat with their accompanying naval units back to an adjacent friendly port space or an adjacent naval box that does not contain enemy units.
19.7 Naval Retreats
Winning a naval battle forces the loser to retreat. Losers must retreat to an adjacent friendly port or to an adjacent naval box that does not contain enemy units. Attacking units must retreat to the naval box(es) that they attacked from. Defending units cannot retreat to a naval box that the attacker attacked from. Units that cannot retreat are eliminated.
Like in land battles, naval units can become overstacked by retreating (remember that port stacking is limited to 4 naval units). A space that is overstacked suffers a step loss at the beginning of the owning player's impulse. If an overstacked space is attacked, the number of units that can contribute FP is limited to the port stacking limit.
19.8 Movement After Naval Battles
After the loser retreats, if the active player won the naval battle, the active player may move any of their units that participated in the naval battle (including an accompanying land unit) into an adjacent friendly port space(s). In the case of a Joint Naval Operation there may be multiple active players (all the players that moved units during the impulse). Clarification: Units that fought in a naval battle in a European Waters naval box [3.2.9 and 12.3] may continue moving in European Waters if they won a decisive victory.
Naval Battle Example:
RU is at war with GE. RU is allied to Denmark who is also at war with GE. RU takes a naval movement action and moves a dreadnought, 2 squadrons, and an army from St. Petersburg into the Baltic Sea. In addition to this the RU player also moves the Danish squadron into the Baltic. Since the Baltic contains GE naval units a battle occurs.
GE attempts to intercept RU's move with its force at port in Prussia. GE needs a 5 to successfully intercept; GE gains a +1 modifier for already having naval units in the Baltic, none of the other modifiers apply. GE rolls a 2 (+1 to 3), which is a failure.
GE faces a daunting fight without aid from their other naval forces. GE attempts to avoid battle. GE declares that they will avoid battle into Prussia. GE needs a 5 to successfully avoid battle; GE gains a -1 modifier because RU controls 2 more ports in the Baltic than GE (Denmark and Schleswig-Holstein count as ports for RU because Denmark is an RU ally), none of the other modifiers apply. GE rolls a 5 (-1 to 4), which is a failure.
The battle commences. First players check for mines; there are no mines in the Baltic so this is skipped. The modifiers are not good for GE. GE has a total of 2 FP, their 2 squadrons have half FP because RU has a dreadnought. GE also receives a -1 modifier for failing to avoid battle. GE's total strength is 1.
RU has a total of 9, 6 for their squadrons and 3 for their dreadnought. RU also gains a +1 modifier for having 2 more ports than GE adjacent to the Baltic. RU's total strength is 10. RU gains a +9 DRM for the battle in the Baltic.
GE rolls a 4 and RU rolls a 3 (+9 to 12). RU wins a decisive battle. GE takes 4 losses because decisive naval victories double the losses for the loser. RU takes 0 losses. Both GE naval squadrons are eliminated.
After the battle RU moves their army in the Baltic into Denmark. This is possible because moving into a friendly port space from an adjacent naval box is always free. RU's other naval forces remain in the Baltic.
19.9 Forts and Naval Battles in Ports
Forts contribute their FP to a naval battle if the battle is taking place in their space (remember that any fort in Istanbul is also considered to be in the Dardanelles).
If the defending player loses a naval battle in a port containing a fort, the fort is eliminated. Victorious attacking naval units will always displace back to the naval box they attacked from after the battle.
Play Note: Why use naval units to attack a port with a fort if you cannot occupy it? Because amphibious assaults are difficult. Eliminating the fort means your land units can land in the port safely in a subsequent impulse.
19.10 Amphibious Assaults
Land units cannot move into enemy controlled (or occupied) ports using naval movement. Landing in an enemy port, even if the port does not contain enemy units, can only be done through a land battle action. In order to land in an enemy port the attacking units must begin their impulse in a naval box adjacent to the port space. Additionally, if the defending port contains naval units the attacking player must have twice as many naval units in adjacent naval boxes than the defender has in the port in order to conduct an amphibious assault.
A maximum of two armies can attack in an amphibious assault, and both armies must begin the impulse in the same naval box adjacent to the port space. If the port does not contain enemy land units (or an enemy fort) the attacking units move into the port and the action is over. If the enemy port does contain enemy land units (or a fort) the landing forces attack the space from the naval box and a battle is fought (the attacker will incur the amphibious assault modifier). If the attacking units lose the battle, they remain in the naval box they attacked from.
19.10.1 Amphibious Assaults and Support
In amphibious assaults the attacker's space is considered to be the naval box. In practical terms, this means that during amphibious assaults only armies adjacent to the defender can support, and only one army from each of those spaces can provide support.
Play Note: without support amphibious assaults can be quite risky. There are two important things to remember about amphibious assaults: (1) the threat of an amphibious assault is, in many cases, more powerful than the assault itself, and (2) naval movement only allows you to move one army per impulse, meaning if you want a large landing force it will take multiple impulses to assemble such a force.
Amphibious Assault Example:
The UK is at war with FR, it is the UK's impulse. The UK takes a land battle action and makes an amphibious assault against Brittany. The UK player can do this because (1) the British 1st army began its impulse in a naval box adjacent to Brittany (the North Atlantic), and (2) because the UK has twice as many naval units in the adjacent naval box than FR has in Brittany (4 to 2 respectively).
The battle is an even roll. The UK has 2 FP and gains a +1 DRM for the British 1st army [33.2, Professional Army], but a -1 DRM for conducting an amphibious assault. FR has 2 FP with no additional modifiers. The UK rolls a 4 and FR rolls a 2. Both sides take 1 loss (Hydraulic Recoil is not in effect). FR retreats to Paris, and the British 1st army advances into Brittany.
The FR naval squadrons then immediately displace into the North Atlantic and a naval battle is fought.
19.11 Displaced Naval Units During Wartime
If a player moves land units into an enemy port containing enemy naval units, those naval units are immediately displaced to an adjacent naval box. This displacement may result in a naval battle, if it does the displaced units are considered the attackers. This displacement can be intercepted, and displacing naval units cannot attempt to avoid battle if moving into a naval box containing enemy naval units. Finish the active player's action before resolving any naval interception attempts and/or naval battles that result from such a displacement.
20.0 End Phase
During the end phase players do the following:
(1) 20.1 Militarism
Players gain one of the following benefits: gain one army step (either reserve or standing) or prevent a fort from degrading in the next step. Players cannot prevent level 3 forts from degrading.
Treat the "gain 1 army step" like a 1 CP recruitment action [12.2], applying all relevant rules.
(2) 20.2 Degrade forts
Players degrade all forts (except forts maintained during step prior) on the map by one level, this also removes level one forts.
(3) 20.3 Non-Player Power Build Step
If Italy is unified they automatically rebuild all their units at full strength and flip all reduced units to full strength. Then conduct an Italian redeployment [22.4].
Design Note: The main function of the End Phase Build Box is to serve as a reminder of which minor powers can build armies. Strictly speaking, the box really isn't necessary, but I added it because I tended to forget which powers needed to build units. It also serves a reminder for minor powers that do not build armies (Mexico, the Papacy, etc.)
Each independent minor power in the build box builds one army step. This step increase cannot place a second army for a given minor power (exception: Poland, rule 22.5). For eligible minor powers, move a reduced army from the box to the map or flip a reduced army to full strength. The minor powers listed in red begin the campaign game with an army in the end phase build box (meaning they do not start that game with an army on the map).
Clarification: Some minor powers can build 2 armies. They can only acquire their second army through player actions [12.2] and events.
Place new minor power armies in their home space. If the minor power controls multiple spaces, place the army in the space that has the name of the minor power.
Example 1: The Papal States neither has an army nor is it displayed in the end phase build box, hence it doesn't build an army.
Example 2: Serbian units are placed in Serbia.
(4) 20.4 Naval Units Go to Port
All naval units (and land units at sea) return to the nearest friendly port space. If possible, this port space must be adjacent to the naval box they currently occupy. Players may move into uncontrolled spaces where they have influence. If a power does not control a port their naval units are eliminated.
(5) 20.5 Set manpower
Players set their manpower based on how many keys they control [7.2]. Armies in excess of a player's new manpower limit are eliminated.
Example: At the start of the end phase, FR has 4 standing armies on the map and 4 manpower. During the turn FR lost a territorial key dropping their total to 8. At 8 territorial keys FR only has 3 manpower. During the set manpower step on the end phase FR decreases their manpower by one and eliminates one standing army of their choice.
(6) 20.6 Industrialization
All players that played a card into industrialization, roll one die adding the CP value of the card they played into industrialization. If their roll is ≥5 (≥6 for RU and OT) they successfully industrialize. All players that successfully industrialize increase their industry by one. All players with auto industrialization chits automatically industrialize if they played a card, of any CP value, into industrialization.
If a player fails to industrialize they then flip their industrialization chit to its auto industrialization side and place it in their events box on their player display. All players discard their industrialization cards after this step.
(7) 20.7 Progress truces
Players return one turn truces to their respective players and then flip 2 turn truces to their one turn side.
(8) 20.8 Progress Wars of Independence (WoIs)
At this point players progress all WoIs on the map by one step. WoIs have two steps: 0 and +1.
- If a space contains a WoI marker that began this phase on its +1 side that space gains independence.
- If a space gains independence all units, except those belonging to the newly independent minor power, are immediately displaced [5.7], and the player who lost the space decreases their stability by 1.
- All 0 WoI markers are flipped to their +1 side.
(9) 20.9 Conduct an Alliance Resolution Step [8.6].
(10) 20.10 Decrease World Tension
Decrease World Tension by 1.
(11) 20.11 Draw NGs
On turns 1, 3, and 5 players shuffle their NG decks, draw three NG cards, keep one, and return the rest to their decks. This is a one time decision, selected cards constitute the main way players earn victory points during the game. At this time, if a player has more than 3 NG cards, they choose one and return it to their NG deck.
Play Note: Players do not start the campaign game with any NGs (players start with 1 NG in the 1870 and 1880 scenarios). The only times players draw NGs are during the end phase or via the New Administration event. The New Administration event card allows players to draw an NG card during the action phase.
(12) 20.12 Advance Turn
Advance the turn marker or, if turn 7, end the game.
21.0 Rebels
Rebel armies are usually created as a result of events, and most rebel armies are placed under a WoI marker. There are some exceptions: the Zulu, Mahdi, Ethiopian, and Boxer armies. These armies are placed on the board without a WoI marker and are always treated as rebels. They cannot become a minor power. Armies that are always treated as rebels are marker with a dagger to signify this.
Design Note: Historically, the Ethiopians, Mahdists, and Zulu were not actual rebels. They were independent states that fought against colonial powers, and, in the case of Ethiopia, they were able to defeat the Italians and remained independent! For rules purposes, however, they are treated as "rebel" armies.
21.1 Rebels and Control
While a space contains rebel units it cannot be controlled. When rebel armies are placed, decrease the controlling player's keys by the appropriate amount on their player display until the rebels are eliminated.
Play Note: For Example, this means that when the Sepoys are placed in India from the Sepoy Mutiny event, the UK player does not control India and does not get India's additional card until the Sepoys are eliminated. Likewise rebels can negate player domination of flashpoints, hamper player manpower, and so on.
However, while rebels are in a space, the player that controlled the space can move their units into it. However, this ends the movement of those units. They cannot do this if the space also contains units belonging to an enemy power during a war of liberation. It is possible for the placement of rebels to cause armies to have a broken LoC. When this happens immediately displace the armies to the nearest controlled space with a LoC [5.6.3].
If a rebel army under a WoI marker is ever eliminated, the WoI marker is also removed, and the player regains control of the space.
21.2 Rebel Armies
Rebels Armies have the following special characteristics:
- They cannot move.
- They do not benefit from machine guns.
- They cannot retreat and are eliminated if forced to retreat.
- Rebel armies and player units can coexist in the same space.
- In land battles during peacetime rebel armies will only support other rebel armies of the same nationality.
- In a war of liberation rebels are friendly to and may support the attacking player if that player's war aim is to liberate them. Rebels that the attacking player is not trying to liberate are considered enemies to all embattled players.
- In a war of liberation, if the attacking player is trying to liberate them, rebel units are considered to occupy spaces for the attacker if that space solely contains rebel units. Clarification: the rebels still can't move, this only applies if a space solely contains rebel units.
- At the end of a war of liberation, rebels liberated by a player become a minor power (where eligible) and are automatically allied to the player that liberated them.
21.3 Fighting Rebels with Allies
Allies (including non-player allies) can provide support during land battles against rebels, even in peacetime. However, such support is always optional, and there is no penalty for denying support.
21.4 Attacking a Space Containing Rebels and Enemy Units
During wartime it is possible for spaces to contain rebels hostile to both sides. When attacking such spaces players must first attack the units belonging to enemy powers. If the attacking power wins, they may attack the rebels on a subsequent impulse (or from a resulting decisive battle). Importantly, the space cannot be occupied until the rebels are eliminated, unless the rebels are friendly to the attacker [13.1.1].
21.5 Rebels in the GW
At the start of the GW if a space contains rebels and player units, the player units immediately displace [5.7]. Unlike rebels prior to the GW, rebel and non-rebel units cannot coexist in the same space during the GW. Additionally, active rebels are hostile to all embattled powers, and they will never join the GW. Rebel spaces never contain trenches [28.1].
22.0 Italy and Poland
Italy is not directly controlled by a player and instead interacts with the game through a series of special rules and the Italy mandatory event card. The Italy event card begins the game in the deck and has the potential to be played 7 times over the course of the game. When the Italy card is played one of two things happens: (1) if Italy is not unified the active player rolls on the Italian Minor Power Table, or (2) if Italy is unified the active player rolls on the Kingdom of Italy table. As a quick reference, both tables are located on page 3 of the PAC.
22.1 Italian Minor Power Table
| Roll | Result |
|---|---|
| ≤ 0 | A Lost Dream - remove the Italy card from the game, end this procedure |
| 1 | Uprising |
| 2-3 | Italian state petitions foreign power for aid |
| 4-5 | Internal Italian War |
| 6 | Nationalist wave! |
DRMs: The player who dominates the Italy Flashpoint may apply a -2 DRM
22.1.1 Uprising
Place a rebel Italian army and a WoI marker in a player controlled space in Italy. If rebels gain independence, either Sardinia Piedmont or the Kingdom of the Two Sicilies (whichever is closer) takes control of the space. If there are no player controlled spaces in Italy, this result causes Italy to immediately unify.
22.1.2 Petition for Aid
If Sardinia-Piedmont or the Kingdom of the Two Sicilies are allied with a player that controls an Italian unification space, the active player removes that player's ally marker from one of those powers. Place a +1 card marker in the Italian unification box if one is not already there. After a player wins an Italian war of unification they gain the +1 card marker.
Clarification: Note that the AU player does not gain this +1 card marker if they win a war of unification using their Incorporate national characteristic [33.4]. This rule only applies to Italian wars of unification [22.1.6].
22.1.3 Internal Italian War
Choose either Sardinia-Piedmont or the Kingdom of the Two Sicilies. That power gains 1 army, 1 naval squadron, and takes control of a neighboring Italian key that is not controlled by a player (there will only ever be one). Eliminate all minor power armies in the conquered space. If Sardinia-Piedmont or the Kingdom of the Two Sicilies now controls 3 or more Italian keys, roll for Italian Unification.
22.1.4 Nationalist Wave!
Choose either Sardinia-Piedmont or the Kingdom of the Two Sicilies. That power immediately takes control of 2 keys in Italy that are not controlled by a player. The active player chooses which keys are taken. Roll for Italian Unification.
22.1.5 Unification Die Roll
Roll a die. On a result ≥ 7 Italy immediately unifies. Add the following DRMs:
- +2 if there are no player controlled spaces in Italy
- +1 per key controlled by the Italian minor power with the most keys
If the result < 7 Italy does not unify, end this procedure.
22.1.6 Italian Wars of Unification Reminder
Any player with a diplomacy or ally marker in either Sardinia-Piedmont or the Kingdom of the Two Sicilies may declare a war for Italian unification. First, the attacking player must declare which Italian state they will give any conquered land to (this must be either Sardinia-Piedmont or the Kingdom of the Two Sicilies), then the attacking player gains an alliance with that power if they do not already have one.
Important: Any land gained in such a war must be given to either Sardinia-Piedmont or the Kingdom of the Two Sicilies (whichever was chosen at the start of the war). If the attacking player wins the war they must choose the territorial cession treaty option. Additionally, if the attacking player wins, roll for Italian unification [22.1.5].
22.2 Italian Unification
If Italy unifies the following immediately occurs:
- All Italian unification spaces that are not controlled by a player become part of the new Kingdom of Italy.
- Remove all player influence and ally markers from Italian spaces.
- Remove all Italian minor power units.
- Italy gains three standing armies and one naval squadron.
- Conduct an Italian redeployment [22.5].
Flip the Italy Unified marker to its check side, this indicates the following:
- All Italian minor powers cease to exist.
- All Italian spaces without a player control markers are controlled by Italy.
- The Italy Flashpoint ceases to exist. Remove the Italy flashpoint counter from the game.
Place the Italian alliance marker in the neutral box of the alliance track, and place the Italian MPIT markers on the MPIT. Then, if Italy unified immediately after an Italian war of unification, the primary belligerent that won the Italian war of unification may spend 2 free CP to influence Italy on the MPIT.
Design Note: the Italian unification procedure went through a lot of revisions during the design. The key was finding a balance between giving Italy flexibility in how it unifies, giving players a chance to prevent unification, and allowing for results where Italy can quickly, and unexpectedly, unify. Actual Italian unification was quite sudden and was, by no means, a foregone conclusion.
22.3 The Kingdom of Italy
Once Italy is unified, playing the Italy card makes the active player roll on the Kingdom of Italy Table.
22.3.1 Kingdom of Italy Table
| Roll | Result |
|---|---|
| 1-2 | The King Vacillates - Italy gains 2 neutral influence on the MPIT |
| 3-4 | The active player places an Italian control marker in an uncontrolled naval base. |
| 5-6 | Italy permanently gains an additional reserve army and an additional naval unit. Italy must build all its squadrons before building its dreadnought. |
| 7+ | If Italy and OT are allied, shift Italy into the neutral box and end this procedure. Otherwise, Italy declares war on OT to conquer an Eastern Mediterranean naval base and either Tunisia or Libya (active player's choice). Do not increase the WTT. Roll a die, on a result ≥ 4 Italy wins. Add the following modifiers: +1 DRM for each Italian naval unit on the main map, -1 DRM for each OT naval unit on the main map, -2 DRM if OT has an army in Africa. If OT does not control any of the above spaces OR Italy and OT have a truce, treat this result as a 5. This is a self contained war that no other player can interfere with, and it causes no shifts on the alliance table. |
DRM: +1 DRM if turn 5 or later
22.4 Italian Military
When Italy unifies an Italian redeployment occurs. When Italy redeploys, one Italian standing army is placed in Rome and the other two Italian standing armies are placed in spaces that are adjacent to player controlled spaces (usually Piedmont and Lombardy). If there are two such spaces, place an Italian army in each space. Italian naval units are always placed in Naples or Piedmont if Naples is not Italian controlled. Italy can gain more units through the play of the Italy mandatory event.
In wartime, Italy is controlled by the allied player who is earliest in the wartime initiative order. Treat Italy as though it has 1 industry for the purposes of rail movement and deploy reserves actions.
If Italy is defending alone with no allies, their standing armies not in Rome automatically displace to the targeted war goal space(s) at the start of the war. During the Italian impulse they will always deploy a reserve army to defend or support (in that order) the goal space(s). If Italy ever has to choose between two spaces, roll a die to determine the space.
Place destroyed Italian units in the Minor Power Build Box space marked Italy. During the end phase Italy automatically rebuilds all their units at full strength and places them using Italian redeployment.
22.5 Poland
An independent Poland follows all normal minor power rules, however they have 3 special rules:
- Poland can build armies equal to the number of Polish spaces they control +1 (the Polish 4th and 5th armies are reserve armies and must be placed in the Polish reserve armies holding box during peacetime),
- during wartime when the player controlling Poland takes a deploy reserves action they may also deploy 1 Polish reserve army in addition to their own armies,
- during the end phase an independent Poland builds 2 army steps (instead of 1).
23.0 The Crisis Table
Design Note: If you're still learning the game I recommend stopping here and jumping to section 33.0 on National Characteristics. The intervening sections are rules on the GW, which aren't used for the majority of the game. When teaching the game, I also recommend skipping the GW rules until it occurs.
The Crisis Table is on the back of the playbook. When the WTT reaches 5, the active player rolls on the Crisis Table to check if the GW occurs. All Crisis Table results except "International Conference" cause the outbreak of the GW. If the GW occurs play proceeds to the Outbreak Step of the GW SoP [25.0]. Most Crisis Table results are purely narrative and do not affect the game state in anyway. However, special Crisis Table results [23.3] will cause additional powers to join the GW.
23.1 Crisis Roll Sequencing
When the play of an event causes the WTT to increase to 5, a roll is made on the Crisis table. This event is called the inciting event. The text of the inciting event must be followed carefully. Everything that is stated on the event before increasing the WTT to 5, still occurs. Then the crisis roll is made. If GW breaks out the rest of the text on the event is ignored. If it doesn't break out, the rest of the text is followed.
23.2 Crisis Table Results
Before rolling, consult the incident column of the table. Most incidents are purely narrative and have no game effects; however, the Balkan Wars and Powder Keg events have players randomly select an independent Balkan State by rolling on the Balkan State Table. If the result is a Balkan state that is not independent, reroll the die until you get a result for one that is.
After consulting the incident column, the active player rolls on the row matching the inciting event. Some events require two rolls. These events are labeled with a "step 1" and "step 2." Again, most of these results are purely for the narrative and have no effect on game play, such as a colonial proxy war breaking out as a result of the naval arms race. If any of these results occurs, play simply proceeds to the Outbreak Step of the GW [25.0]
23.3 Special Crisis Table Results
Special Crisis Table Results are results that draw non-player powers into the GW. They are marked with a double asterisk. These results are significant because they draw minor powers into the GW when it starts (otherwise no minor powers enter the war when it starts regardless of who is their current ally).
When a "bordering nation" result is rolled the active player selects a power that borders the targeted player. In this case, the targeted player is the player the inciting event affected or the player determined by the Crisis Table result. The active player cannot choose a bordering power that is allied to the targeted power, and a unified Italy can only be chosen if there are no other options (but Italy still can't be chosen if it is allied to the targeted power). If a minor power was selected, any player in the alliance opposing the targeted power places an ally marker in the minor power's space if one was not already present (if Italy was chosen it shifts into the alliance opposing the targeted player).
Example: the Assassination event is played on AU, the "bordering nation" result is rolled, and the active player selects Serbia as the nation blamed. Serbia then enters the war in the alliance opposing AU. An ally marker does not need to be placed in Serbia because it already contains an RU ally marker, and RU is in the alliance opposing AU.
23.3.1 Balkan Table Crisis Table Results
When the "Balkan Table" result is rolled, one or two Balkan states will enter the GW. To represent the dynamic and volatile politics of the Balkans in the period, the "Balkan Table" result can cause Balkan states to switch alliances. The Balkan Table result can be rolled if the Bosnian Crisis, Balkan Wars, or Powderkeg was the inciting event.
23.3.2 Bosnian Crisis
If the "Balkan Table" result is rolled on the Bosnian Crisis row, the Balkan states will enter the alliance opposing AU.
23.3.3 Balkan Wars and Powderkeg
If the "Balkan Table" result is rolled on the Balkan Wars or Powderkeg row, players on the Balkan States Table to determine who is threatening the other Balkan state as determined in the "incident" column. Then roll on the "step 2" row to determine who the threatened Balkan appeals to (henceforth called the respondent). The threatened Balkan state will join the respondent's alliance. While the threatening powers will join the alliance opposing the respondent. Players then place ally markers in the appropriate Balkan powers to determine who will control those powers during the GW (remember that Balkan powers can switch allies at this time).
Example: the Balkan Wars card is played and the WTT reaches 5. The active player rolls a die to determine which Balkan state is threatened. Serbia is rolled but does not exist (because it never gained independence from OT) so another die is rolled and Bulgaria is rolled as the threatened state. The active player then rolls on step 1 of the Balkan Wars row and a "Balkan Table (Roll twice)" result is rolled. The active player rolls on the Balkan state table twice: Bosnia and Greece are rolled (it doesn't matter if Bosnia doesn't border Bulgaria). So Bosnia and Greece are threatening Bulgaria. In step two the "Ally (Austria if no ally)" result is rolled. Bulgaria is allied to RU, so RU is the respondent. At this point, Bulgaria will join RU's alliance in the GW, while Greece and Bosnia join the alliance opposing RU. Prior to the crisis roll: Bulgaria was allied to RU, Greece was allied to RU, and Bosnia was allied to AU. Bulgaria appealed to RU so its alliance does not change. However, since RU is the respondent, both Greece and Bosnia must join the alliance opposing RU. A player from the alliance opposing the respondent then places an alliance marker in Greece, AU is in the alliance opposing RU so Bosnia's alliance marker is not replaced.
23.4 Impossible Crisis Table Results
Some Crisis table results will be "impossible." An example would be if the "bordering nation" result is rolled and all the powers bordering the targeted power are allied to that power. If any "impossible" result like this occurs a member of the opposing alliance is blamed and the GW still occurs. Such results are purely narrative and do not affect the game state.
23.5 Neutral Players Joining an Alliance During the Crisis Roll
Under certain circumstances neutral players will be forced to enter an alliance as a result of a crisis roll. This occurs whenever a neutral player is targeted by the inciting event, or if they are involved in the Crisis Table result. Specifically, those circumstances are:
- If a neutral player is targeted by the assassination event
- If a neutral player threatened the Balkan state during the Balkan Wars or Powderkeg crisis roll
- If a neutral player is the respondent during the Balkan Wars and Powderkeg crisis roll
- If a neutral player was targeted in the Black Hand crisis roll
- If a neutral player was involved in Bosnian Crisis event or Crisis roll
- If a neutral player was involved in the Moroccan Crisis or 'Urabi Revolt events
- If a neutral player's result was rolled on the Impulsive Leader crisis roll
At the end of the crisis roll procedure shift the associated neutral player into their alliance. If only one neutral player is drawn into the GW, the player freely chooses which alliance they shift into. They cannot, however, choose an alliance that has more players than the opposing alliance, they also cannot choose an alliance that already contains three players. If multiple neutral players are drawn into the GW at this time, randomly determine which players go into which alliances.
Design Note: The WTT and the Crisis Table are meant to show that events have gotten out of hand, and that war, despite how much the actual players might not want it to occur, is now unavoidable. The Crisis Table is not meant to provide a definitive account of the outbreak of the war. Doing so would add a great deal of mechanics and time to the game. Players may find the outbreak of the GW to be quite sudden. In that regard, the events that led to the outbreak of the real GW were also quite sudden. The general consensus among historians is that war may have been averted if different decisions were made or, at the very least, the major powers communicated better with one another. Unfortunately, this system cannot account for every fringe game state, but, for the most part, it does a good job transitioning play to the GW and giving players a reason for why the war occurred.
24.0 The Great War
24.1 GW Sequence of Play
Once the GW occurs the game switches from the standard SoP to the GW SoP. Below is a simplified GW SoP:
- Outbreak Step: (1) Discard all cards, (2) form alliances, (3) place US in neutral box, (4) reveal and score NGs, (5) national will step, (6) set the GW turn order
- Planning Step: (1) draw GW card, (2) flip facedown GW combat cards, (3) set war budget (industry + colonial war bonus CP), (4) give 1 CP to an ally
- Maneuver Step: in GW turn order, players conduct up to 1 CP worth of actions
- Winter Step: (1) check for Blockade (US blockade?), (2) the Colonial War, (3) Neutrals may join or give 1 CP to another player, (4) go back to Planning Step
25.0 Outbreak Step
This step is only done once at the beginning of the GW, it is never repeated.
25.1 Discard Remaining Action Cards
First, all players discard their remaining action cards, including their home card, they will not be used during the GW. Discarded mandatory events will not trigger during this step.
25.2 Alliances and the US
Players then determine the opposing alliances. All players in an alliance automatically join the GW with their fellow alliance members regardless of whether they are aligned or committed. Neutral players will not immediately join the GW, but they may join later. Place the US alliance chit in the neutral box of the Alliance Track. Exception: do not place the US alliance chit if the CSA won the American Civil War. Likewise, if the American Civil War is currently ongoing (which is unlikely but possible), do not place the US alliance chit.
25.2.1 Minor Power Allies in the Outbreak Step
Minor power allies will not join the GW at this time. They will only join the GW via certain special crisis table results or the Minor Power Entry GW card.
Design Note: Historically, no minor powers joined WWI when it began (with the obvious exceptions of Belgium and Serbia who were attacked). Japan's early entry into the war is modeled by the Minor Power Entry GW card.
Play Note: This does not make minor power allies useless in the GW. The Minor Power Entry GW card cannot allow a minor power to attack its pre-GW player ally, unless it is a Balkan minor power.
25.2.2 No Players in an Alliance
Use this section in the rare event that no players are in an alliance(s).
If one alliance has players in it but the other does not, the alliance with players declares war on a player of their choice that is not in their alliance (roll a die to break a dispute). Shift the chosen player into the opposing alliance committed boxes and proceed with the outbreak step.
In the unlikely event that neither alliance has a player in it, roll a die and use the following results:
- 1 - GE and FR go to war
- 2 - FR and UK go to war
- 3 - UK and RU go to war
- 4 - RU and OT go to war
- 5 - OT and AU go to war
- 6 - AU and GE go to war
Shift the two powers into opposing alliance committed boxes and proceed with the outbreak step.
25.3 Italy in the GW
If Italy is in the neutral box it does not join the GW during the Outbreak Step. If Italy is in an aligned alliance box a die is rolled to see if Italy joins the war during the Outbreak Step. On a roll of 4 or higher Italy joins the GW, but if the roll is 3 or less Italy immediately shifts to the neutral box and does not join the war at this time. However, if Italy is in a committed alliance box, it automatically joins the GW with its alliance. If Italy is not unified this rule does not apply. Exception: if Italy is blamed for the inciting incident based on the Crisis Table Result, it will automatically join the GW.
25.4 Entering the GW at 0 stability
If a player enters the GW at 0 stability that player immediately gains 1 stability.
25.5 Score NGs
All players reveal and score their NGs. Their score can be modified by their current stability, negative VP markers, national characteristics (in the case of GE and RU). If the GW occurs early, it is possible for players to have less than 3 NGs. If this happens, all players with less than 3 NGs draw 3 NGs and choose one to keep. They repeat this process until they have 3 NGs to score.
25.6 National Will Step
At this point players receive the bonuses for the GW based on their VPs. Players receive the following based on their total VPs:
- 0-2 VPs - no bonus
- 3-4 VPs - 1 EC
- 5-6 VPs - 1 EC and 1 display track boost
- 7-8 VPs - 1 EC and 2 display track boosts
- 9-10+ VPs - 1 EC and 3 display track boosts
ECs gained during this step are attached to (and likewise deployed with) reserve armies in players' reserve armies holding box. Each "display track boost" increases that player's stability, manpower, or industry by one; players can boost any track but cannot boost the same track twice. Players receive these bonuses during the national will step, in turn order. Each time a player boosts a track that is already maxed out they immediately place a bonus reserve army in their reserve armies holding box.
Important: These bonus reserve armies can exceed players' reserve armies holding box limit.
Example: AU's reserve armies holding box limit is 4, and they have 4 reserve armies. They gain a track boost and boost stability, stability is maxed so they gain a bonus reserve army in their reserved armies holding box. Even though their limit is 4 reserve armies, these bonus armies can exceed that limit.
25.6.1 UK Special National Will Rules
A UK EC gained during the national will step is attached to an on map army of their choice. Since the UK does not have reserve armies, each "reserve army" gained by the UK is placed in London at the start of the GW turn 1 Planning Step. Until that point those armies are placed in the UK player's event holding box on their player display. Place the UK's Join Your Country's Army counter on these units as a reminder.
25.6.2 Remove Pacification markers
At the end of the National Will Step players remove all pacification markers from the board. They will no longer be needed for the rest of the game.
25.7 Set GW Turn Order
A new turn order is set for the GW with the alliances alternating impulses. Each alliance sets their turn order for the entirety of the GW, the alliance with the GE player always goes first (although GE does not have to get the first impulse). The alliances set their turn order secretly and then reveal them simultaneously. Alliance members can, and are encouraged to, consult each other when determining GW turn order. If players cannot decide, use a die roll to determine the order. Mark the GW turn order by placing wartime initiative markers on the Wartime Initiative Order track.
If the GE player is neutral the alliance with the UK always goes first, then the alliance with FR, then AU, and then RU. Neutral powers go after all those participating in the GW [27.4].
25.7.1 GW Bonus Impulses
If one alliance has fewer players, that alliance gets a bonus impulse(s). Any alliance member can act during a bonus impulse, but only one player is allowed to act. Additionally, during a bonus impulse players are always allowed to pass without spending any CP in their CP war budget. To mark this, place a bonus impulse chit in the appropriate slot.
Example Turn Orders: Triple Alliance player 1, Entente player 1, Triple Alliance player 2, Entente player 2, Triple Alliance player 3, Entente player 3.
Example Turn Order with a bonus impulse: Triple Alliance player 1, Entente player 1, Triple Alliance player 2, Entente player 2, Triple Alliance bonus impulse, Entente player 3.
Design Note: Yes, bonus impulses give a lot of power and flexibility to outnumbered player(s). However, it was either this or allow the larger alliance to pummel the outnumbered alliance with successive impulses.
26.0 Planning Step
The standard action card deck and player home cards are not used during the GW, instead players use the GW deck. At the start of the planning step reshuffle the GW discard pile into the GW card deck, then deal all players, including neutral players, one GW card. GW cards function differently than standard action cards, and all players have a GW hand limit of 1. Players are allowed to hold their GW card until the next GW turn, but if they choose to do so they will not draw a new GW card next turn.
26.1 Flip Facedown GW Combat Cards
There are two GW combat cards, and they function exactly the same. When played for their event, GW combat cards are not placed in the discard pile; instead they are placed facedown in front of the player they were played against. Once GW combat cards have been played for their event, they will never be discarded or added back into the GW deck. GW combat cards in front of players never count towards their GW hand limit of 1, and a single player is allowed to have both GW combat cards in front of them. During the planning step of each GW turn, GW combat cards in front of players are flipped faceup (if not already faceup) and may be used by the player who has them during the turn. After GW combat cards are flipped faceup, players may give their GW combat card(s) to another player(s) in their alliance. GW combat cards in front of players are public information, even when facedown, that can be seen and inspected by all players; the only reason they are facedown is to signify that they can't be used until the following turn.
Design Note: The First World War was a constant seesaw of each side implementing a new tactic or a new "technological terror" in an effort to break the deadlock. Importantly, once one side thought they had an advantage the other side, often very quickly, developed something to counter or even surpass their opponent's advantage. Perhaps the best example of this is the incredible development of airplane technology over the course of the war. The two GW combat cards are meant to model this constant back and forth between the two alliances, with each side learning from the other.
26.2 Set CP budget
All players set their CP budget equal to their industry level. Exception: during the GW, all players have a minimum CP budget of 2.
Italy has a 2 CP war budget and the US has a 4 CP war budget. All belligerent players, and the US if it's in the war, can also transfer 1 CP to an ally, but they must be able to trace a LoC to that power [5.6].
26.3 Non-Player Powers in the GW
Should they join the war, the US and a unified Italy always go after all player powers in the following order: US and then Italy. Similar to wartime actions, all minor powers are moved by their controlling players. Players may not conduct actions with US or Italian units with CP from their personal war budget, however, these units may still participate in a player-launched land battle.
27.0 Maneuver Step
During this step players move armies and fight battles. Most of the GW rules are similar to the wartime rules, however, there are some very important differences.
27.1 GW Impulses
In their impulse, players can:
- Spend up to 1 CP from their CP war budget to conduct an action, and they have the option of playing their GW card in addition to their action (see below). Or:
- They may pass.
Important: players can only pass if their CP war budget is ≤ 2 and they do not have the GW mandatory event card in their hand.
27.2 GW Cards
In addition to their action, players can play their GW cards in one of two ways:
- For a bonus action that must be conducted immediately.
- For the card's event, which will occur after the player conducts their action.
Unlike during a normal turn, GW cards are played in addition to an action taken using CP from their war budget. Exception 1: GW combat cards that are faceup in front of players can never be played for a bonus CP and must always be played for their event. Exception 2: GW combat events are played at the start of a battle by a player involved in that battle, and GW response cards have specific conditions which must be met in order to be played.
Play Note: in other words, GW combat and response cards work the same as normal combat and response cards.
When using their GW card for a bonus action, players are not allowed to (1) conduct the same action twice or (2) conduct a land battle action during their impulse. Exception: the free GE "deploy reserves" action [33.1] does not count for the purpose of this rule. In other words, the GE player may deploy reserves twice per impulse provided one of these actions is using GE's national characteristics.
27.3 GW Mandatory Events
There is only 1 mandatory event in the GW deck: Exhaustion. Similar to normal mandatory events, playing Exhaustion triggers its event and grants the active player a bonus CP to spend. Additionally, similar to a normal turn, players cannot pass with the Exhaustion card in their hand. However, players are not obligated to immediately play Exhaustion; but they must do so at some point during the turn, and it must be played in addition to their GW action.
Play Note: you must play it before your budget reaches 0.
27.4 Neutral Player GW Impulses
After all belligerent powers have gone, Neutral players, in normal turn order, may play their GW card for its event.
27.5 GW Actions
During their impulse, players can take the following actions:
- Deploy Reserves [15.2.3]
- Land Battle [15.2.6]
- Rail Move [15.2.5]
- March [15.2.4]
- Naval Movement [15.2.1]
- Joint Naval Operations [15.2.2]
- Refit Fleet* [27.5.4]
- Refit* [27.5.1]
- Draft* [27.5.2]
- Elite Corps* [27.5.3]
Actions marked with an asterisk(*) can only be taken during the GW and are not standard wartime actions. All actions not explained below follow the same rules as normal wartime actions.
27.5.1 Refit: 1 CP.
Flip an army, with a LoC, from its reduced side to its full strength side.
27.5.2 Draft: 1 CP and 1 Manpower.
Gain 2 reduced armies. This is the only way to build new armies during the GW. These armies must be placed in:
- Controlled home keys, no more than one per space, following normal recruitment restrictions [12.2].
- They cannot be placed in spaces containing a trench battle marker.
When a player takes a draft action, instead of placing two reduced armies they can substitute 1 EF for an army. That EF may be placed in a controlled home key or in a controlled colonial home key with a LoC (in both cases the spaces cannot contain a trench marker). Players can also rebuild Elite Colonial EFs in this manner. Likewise, the FR player can rebuild the Zouaves in this manner.
Play Note: Substituting an EF for an army is usually not a good idea, however, in certain cases (especially when taking into account the Colonial War rules [29.2]) it can be beneficial.
Players may also substitute an allied minor power army for 1 of their own armies during a draft action. Allied minor power armies must be built in a home space belonging to that minor power.
Special: the UK player may draft armies under their Join Your Country's Army marker, but doing so brings these units in at reduced strength.
27.5.3 Elite Corps: 1 CP.
Gain 1 EC. The EC must be placed with a friendly army with a LoC. It does not need to be placed in a home space.
Play Note: Yes, it's cheaper to build an EC during the GW than during the action phase.
27.5.4 Refit Fleet: 1 CP.
Flip a naval unit that is in a friendly port from its reduced side to full strength.
27.6 Manpower in the GW
Manpower is a finite resource during the GW. When a player's manpower reaches zero it becomes exhausted. A player with exhausted manpower cannot build any new armies and receives a permanent -1 modifier for both land and naval battles for the rest of the GW.
Play Note: Players should weigh their options carefully when choosing step losses in the GW. Consider this, having all reduced armies in a space incurs a -1 modifier in battle. Eliminating a reduced army to preserve a full strength army (and thus avoid the negative modifier) may be a wise decision at the time, but refitting armies doesn't cost manpower, building new armies does.
Important: Remember that the number of a player's on-map standing armies is limited only by their manpower during peacetime. In other words, players on map armies, both standing and reserve, are not limited by a player's manpower during the GW.
27.7 Ending a GW turn
A GW maneuver step ends when all players consecutively pass or when all players' CP war budgets reach 0.
28.0 GW Combat
GW combat follows most of the same rules as wartime combat. Therefore, all such instances not explained below follow the same rules as normal wartime combat.
28.1 Trenches
At the start of GW turn 1 all keys automatically contain trenches (Play Note: remember that there is a GW turn 0). Players are only allowed to attack a trench if they have a full strength army in their main attack force. Additionally, regardless of the outcome of the battle, the attacker will suffer an additional step loss for attacking a trench space.
28.1.1 Trench Battles
From GW turn 1 onwards, trench battles will occur in spaces containing trenches. During a trench battle, special rules apply. A trench battle is initiated by an army/armies attacking into a space containing trenches. If that initial attack is successful, instead of the defender retreating, the attacker advances into the space and a trench battle marker is placed on the attacker's stack, flipped to its attacker advantage side.
Trench battles have three statuses: These are marked with counters (see illustration) and are Attacker Advantage, Deadlock and Defender Advantage.
For clarity in this section of rules, the term Defender (with a capital D) will always refer to the power(s) that occupied the hex before the trench battle was initiated. The term Attacker (with a capital A) will always refers to the power(s) that attacked into the space. This is important because, after the Attacker has entered the space, both the Attacker and the Defender can launch attacks. If either the Attacker or Defender force the other to retreat by launching a successful attack, the status is shifted in favor of their side. An unsuccessful attack does not alter the status of the trench battle. A Deadlock occurs when the power/s who had the advantage are forced to retreat.
If the Attacker or Defender have the advantage and force their opponent to retreat, their opponent must retreat from the space. To help players keep track of who the Attacker was, the status counter should be placed on top of the Attacker's armies. Alternatively, players can use the trench battle holding boxes to help track and reduce clutter on the board.
Important: as with normal land battles the power(s) initiating the attack (whether the Attacker or Defender) still win ties.
28.1.2 Land Battle Actions and Trench Battles
Only units in a given trench battle space can initiate a land battle in that space. Adjacent armies cannot initiate a battle in trench battle spaces.
28.1.3 Support and Trench Battles
If supporting units are in a trench battle, their supporting FP is halved. Remember that a unit's FP can only be halved once. Additionally, all units supporting a trench battle are automatically adjacent to both the attacker and the defender because they're both in the same space.
28.1.4 Decisive battles and Trench Battles
Decisive battles in trench battles have no further effect apart from stability loss for the losing side [30.0]. Exception: if the attacker won a decisive battle and the main defense force is completely eliminated, the attacker may then conduct the normal decisive battles bonuses [18.8].
28.1.5 Movement and Trenches
In wartime players must win a land battle to enter spaces containing enemy units, however when a space contains a trench battle marker it may be moved into and out of using March and/or Rail move actions. However, when units leave a trench battle space the first space they enter cannot be an enemy controlled (or occupied) space (unless it also contains a trench battle marker). When a side completely vacates a trench battle space, the trench battle marker is removed and the opposing player immediately occupies (or retains control of) the space.
If a port space contains a trench battle marker, players can use naval movement actions to move a land unit directly into or out of the space, they do not need to conduct an amphibious assault.
28.2 Forts in GW Combat
Forts still provide FP to the defender as in pre-GW combat. Forts can defend trench battle spaces even if no other friendly units are present. During a trench battle, forts can defend a space even if no other friendly units are present.
Additionally, prior to GW turn 1, if a player is forced to retreat they may remove a friendly fort from the space to cancel the retreat. A fort cannot cancel a retreat if the space contains no units (remember that a fort is not a unit), likewise, if all defending units are eliminated the defender cannot cancel the retreat.
During the GW, if a defending fort remains in a space after a battle, it automatically reduces by one level.
Important: This fort level reduction happens after the decision to remove the fort to cancel a retreat.
Exception: The Indian fort [33.2.3] cannot be removed to cancel a retreat.
Trench Battle Example - The Battle of Verdun
It is GW turn 2, the situation on the Western Front is shown in image above. GE is the active player and attacks Champagne from Belgium. GE needs at least one full strength army to conduct this attack because Champagne contains trenches. Machine Guns and Hydraulic Recoil are both in effect.
The modifiers are as follows: GE: 5 FP in the main attack force, plus 4 supporting FP for a total strength of 9. Support breakdown: 2 from Picardy - both armies can support but they are halved because they are also currently involved in a trench battle; 2 from Alsace-Lorraine - this army supports at full strength.
FR: 4 FP in the main defence force (3 from armies and 1 from their fort), plus 4 supporting FP for a total strength of 8. Support breakdown: 2 from Burgundy; 2 from Paris; both armies support at full strength because they are the same power as the main defending force (FR). In this case, the UK armies in Picardy cannot also support because only two spaces can provide support.
GE has a +1 BDRM but they also choose to play their faceup GW combat card Technological Terror [GW #4] for an addition +2 to their roll for a total of +3. The players roll: GE 5 (+3 to 8) and FR 2 (changes to a 3 per machine guns). GE wins with a differential of 5, a decisive battle.
Hydraulic Recoil is in effect, and the result has a single asterisk meaning the victor (GE in this case) may choose to inflict an additional loss to both sides, GE chooses to do so. The base losses are 2 for FR and 0 for GE, however, FR takes an additional loss due to Hydraulic Recoil while GE takes two additional losses (1 for attacking a trench space and 1 due to Hydraulic Recoil). In total, FR takes 3 losses and GE takes 2.
GE eliminates their reduced army in Belgium and takes a step loss on their army in Alsace-Lorraine. FR eliminates their reduced army in Champagne and takes a step loss on their army in Burgundy and their army in Paris. The fort in Champagne is reduced by one level, which eliminates the fort. FR does not retreat from the space because it contains trenches. GE advances one of their armies from Belgium into Champagne and places a Trench Battle Attacker Advantage marker on their army in Champagne.
Lastly, FR reduces their stability by 1 (for losing decisively), and FR places the Technological Terror card facedown in front of them.
29.0 Winter Step
29.1 Blockade
A player is blockaded if they cannot trace a LOC from their capital to any naval box except the Baltic Sea or Black Sea. Clarification: players can trace through the Baltic Sea and Black Sea, but ending their trace in either box counts as being blockaded.
At the end of each year of the GW (not GW turn 0), decrease the maximum industry level of every blockaded player by one. This cannot reduce a player's industry level below three. Exception: for the purposes of this rule, the RU player can only trace a LOC to the Pacific Ocean if the TSRR is completed.
29.1.1 The US and Blockade
If the US is fighting in the GW, check if the North Atlantic naval box is occupied by enemy naval units, if it is the US loses 1 stability.
29.2 The Colonial War
The war in Africa and Asia is abstracted to two die rolls at the end of a GW turn. The African and Asian colonial wars are resolved separately. Both alliances make an opposed die roll with the following modifiers:
- +1 per EF on the continent*
- +1 per elite unit on the continent (elite colonial EFs provide a total of +2)*
- +1 per army on the continent*
- +2 for naval supremacy
- An alliance has naval supremacy in Africa if the South Atlantic Box and Indian Ocean only contain units from their alliance.
- An alliance has naval supremacy in Asia if the Pacific Box and Indian Ocean only contain units from their alliance.
*Only count units on the Africa or Asia submaps
Like in a battle, players only need to calculate the differential between each others' modifiers and then give one alliance a beneficial DRM. Apply the following results:
Colonial War Results
- One alliance's total is greater than their opponents' total: the losing players eliminate one of their units (or one army step) on the respective submap, the winning player may then take control of one unoccupied space on the respective submap (they must be able to trace a LoC to the chosen space).
- One alliance's total is greater than their opponents' total by 4 or more: the losing players eliminate two of their units on the respective submap (or two army steps), the winning player may then take control of two unoccupied spaces on the respective submap (they must be able to trace a LoC to the chosen spaces).
If an alliance controls (see next rule) a colonial continent, treat the other alliance's roll as a 0 during this step. A roll is still made, however, as the colonial war has important stability effects for certain players (see next point).
29.2.1 Colonial War Stability
UK: If the UK's alliance loses a colonial war roll, the UK loses 1 stability.
RU: RU's alliance checks the following spaces: Central Asia, Qajar Persia, Manchuria. If at least two of those spaces are enemy controlled, RU loses 1 stability.
If one alliance controls all the spaces on either the Africa or Asia submap, they gain one bonus CP during the Planning Step. If one alliance controls all spaces on both submaps, they gain three bonus CP during the Planning Step. Do not count neutral spaces when determining control. These bonus CP must be divided up amongst alliance members who are not blockaded; every alliance member does not receive 1 or 3 bonus CP. If players cannot come to an agreement on how to allocate bonus CP, all bonus CP are lost.
Design Note: Players are in no way prevented from conducting actions on the submaps, and, in many cases (especially for the UK and RU), it may be advantageous to do so. The colonial war rules are meant to ensure that the war in the colonies is resolved without players needing to commit valuable CP to do so. Additionally, the bonus CP from the colonial war are meant to model the extra resources coming in from players' vast overseas empires, which can (and did) seriously affect the outcome of the war.
29.3 Neutral player powers in the GW
At this point neutral players may shift their alliance chit into an alliance space. If there are multiple neutral players they each roll one die to see who chooses first (the highest roll chooses first, reroll ties). Players cannot shift into an alliance that has 3 players or into an alliance that contains more players than the opposing alliance.
Once a player shifts into an alliance they immediately join that alliance and are no longer considered neutral. If a neutral player joins an alliance they may immediately conduct a free redeployment action, a free deploy reserves action, and they are placed in the next available spot in the GW turn order. The next available spot will always be the lowest number in the GW turn order not occupied by a player.
Important: if a player is eliminated from the game during the GW they no longer count as being in an alliance, meaning player elimination may affect which alliance neutral players are allowed to join. Additionally, a neutral player entering the GW will cause the opposing alliance to gain a bonus impulse if that alliance is now outnumbered by the number of players in the alliance the neutral player joined. Conversely, if a neutral player joins an alliance that has a bonus impulse, the bonus impulse marker is removed.
If a neutral player chooses to not join an alliance they may take a free redeployment action. Neutral players may then give a bonus CP to a belligerent power if they can trace a LOC to that power's capital. This LoC cannot be traced through enemy controlled spaces, neutral spaces, or naval boxes containing enemy naval units. In this case, "enemy" refers to the enemies of the player receiving the CP, not the neutral power.
30.0 Stability and Elimination in the GW
Players and Italy adjust their stability during the GW in the following ways:
- Losing a controlled territorial key on the main map or losing a home key on the Asia or Africa submaps: -1 stability
- Recapturing one of the above keys: +1 stability
- Suffering a defeat in a decisive battle in a battle*: -1 stability
- Losing a dreadnought in battle: -1 stability
- Certain Colonial War Results for the UK and RU: -1 stability
*Decisive battles only cause a stability loss if the defeated force contained at least 2 armies (including supporting armies) or 2 naval units. The lead defender/attacker suffers the stability loss.
Design Note: The term "decisive battle" is used here purely for consistency within the ruleset. The historical GW, and the GWs modeled in this game, arguably featured no truly decisive battles.
30.1 GW Surrender and Elimination:
When a player surrenders they are eliminated from the game. A player immediately surrenders when their stability reaches 0 or if their capital is occupied. Exception: AU, RU, and OT players have a capital and a subcapital, both must be occupied to force them to surrender.
If any of the eliminated player's allies were actively fighting in the GW, replace the eliminated player's ally marker with an ally marker belonging to a member of their alliance (that player now controls the minor power's units). If there are two remaining powers in the alliance and they cannot agree which receives the minor powers, use a die roll to resolve it. When a player surrenders, remove the following markers from play: all their units, their marker on the Alliance track, their wartime initiative marker, and all their ally markers on minor powers. Lastly, replace the eliminated player's space on the wartime initiative track with a bonus impulse for their alliance. Exception: only one alliance can have a bonus impulse on the wartime initiative track. If a player elimination would cause both alliances to have a bonus impulse on the wartime initiative track, instead remove both bonus impulse markers and move all player initiative markers up the track to fill the newly vacated spaces.
After a player is eliminated, other players may freely march through their territory, but all spaces formally controlled by the eliminated power must be occupied (including by that power's former allies) before players may rail through them.
30.2 Non-Player Power GW Surrender
Minor Powers do not surrender during the GW. However, if all their troops are eliminated and their home space(s) is occupied, they are effectively eliminated from the war.
Major powers (Italy and the US) are different and follow the rules below:
- The US and a unified Italy: their stability starts at 3, and they surrender when their stability reaches 0.
- Italy also surrenders if Rome is taken.
Surrender occurs immediately, not at the end of the turn. When either of these major powers surrenders, remove all their units from play.
31.0 Ending the GW
The GW ends immediately when an alliance is defeated. An alliance is defeated when one of the following occurs:
- All powers in an alliance are eliminated
- There is only one power remaining in an alliance and there are no neutral players
If neither alliance has won the GW it automatically ends at the end of GW turn 5. If this occurs, follow this procedure to determine victory:
- The neutral player(s) with the highest VP total wins
- If there are no neutral players, the player(s) with the highest stability wins
32.0 GW Special Rules
32.1 US in the GW
When the US joins the GW, add 3 US armies and all 4 US naval units to the South space (only add 2 naval units if the dreadnoughts card has not been played). The US only receives 1 CP to spend on the turn it enters the GW.
If Mexico and/or Canada are now enemies of the US, the US (or US allies) must first occupy both Mexico and Canada (or one of them if only one is enemy controlled) before US armies can leave the North America submap. Only the US can have units in the South space, thus the US can never be invaded. The US has 3 stability, 3 manpower, and 4 CP to spend per turn (except the turn they enter). Decrease US stability by 1 whenever a US army is eliminated, a US led force suffers a defeat in a decisive battle, or if the North Atlantic naval box contains enemy units during the winter step. Once the US joins the GW it will not switch sides or leave the war unless forced to surrender.
32.2 Italy in the GW
When Italy enters the GW, set Italy to 3 stability, 3 manpower, and they receive 2 CP to spend per GW turn. Decrease Italian stability by 1 whenever an enemy power occupies an Italian home key or whenever an Italian led force suffers a defeat in a decisive battle. Increase Italian stability by 1 if an Italian home key is retaken by a friendly power. Once Italy joins the GW it will not switch sides or leave the war unless forced to surrender.
32.3 Attacking Neutral Players
Players cannot attack neutral players. They can, however, attack minor and major powers (see next point).
Design Note: The prospect of attacking a neutral major power in the middle of the GW is an unlikely historical alternative. However, this rule is mainly meant to balance the game by preventing players from attacking neutral players merely because the neutral player is winning on VPs. Yes, RU and the UK attacked the Ottomans at the end of 1914, but this was after the Ottomans sheltered German warships and, effectively, decided to join the Central Powers.
32.4 Attacking Neutral non-player Powers
Players can declare war on non-player powers at any point during their impulse. When this happens a player from the opposing alliance immediately places an alliance marker in the minor power's space. If the alliance members cannot agree which receives the minor power as an ally, use a die roll to resolve it.
If a neutral player is allied to or has a diplomacy marker in the attacked power's space, that neutral player has the option to immediately join the GW with the opposing alliance (the opposing alliance in this case is the alliance that didn't attack the minor power).
32.5 Rebels in the GW
At the start of the GW if a space contains rebels and player units, the player units immediately displace. Unlike rebels prior to the GW, rebel and non-rebel units cannot coexist in the same space during the GW. Additionally, active rebels are hostile to all powers involved in the GW, and they will never join the GW. Rebel spaces never contain trenches.
32.6 GW Information Sideboard
The GW information sideboard contains trench battle holding boxes. It also contains the Italian and US stability and manpower tracks. Using this sideboard is up to the players' discretion and is not mandatory.
33.0 National Characteristics
33.1 German Characteristics
- Bewegungskrieg: win all ties when determining initiative at the start of a war. Additionally, during the GW, Germany's alliance always goes first.
- Superior Staff Work: During GE's first impulse of a war or the GW, they may conduct one free deploy reserves action.
- German Confederation: After GE wins a war of unification, they may take control of one of their German minor allies (including one they just gained through the realignment treaty option). Eligible minor powers include: Bavaria, Saxony, and Hanover. When GE takes control of a German minor power in such a way the following happens: GE places a control marker in the minor power's space, the minor power's units are removed, and the minor power is permanently eliminated from the game. Whenever GE takes control of a German unification space it becomes a permanent home space.
- Blood and Iron!: During the end phase of turn 1 instead of drawing NGs, Prussia may search their NG deck for the Unification! card. If they do this the NG must be played faceup.
- Imperial Germany: When Germany unifies, GE gains +1 Manpower during the end phase. This is a one time bonus, and it can occur regardless of whether GE took the Unification! NG.
- Continental Focus: Until GE unifies, their naval counter limit is two squadrons and two dreadnoughts, and pacification actions cost 2 CP.
- Zollverein: German Unification spaces are always considered territorial keys to the GE player.
33.1.1 German Unification
The GE player begins the game as Prussia and can become the German Empire over the course of the game. GE becomes the German Empire by unifying Germany. Germany unifies the instant GE controls all German spaces. For the purposes of German unification, alliance and diplomacy markers count as control. When Germany unifies GE immediately takes control of all German unification spaces where they have alliance and diplomacy markers.
Whenever GE takes control of a German minor power (Saxony, Bavaria, and Hanover), that minor power is permanently removed from the game. Return all its pieces to the game box. This includes when GE uses their German Confederation national characteristic.
Design Note: The unification procedure is meant to give GE a lot of flexibility in how they go about unifying Germany. They can try to go the diplomatic route, but, as was the case historically, the most reliable way to unify Germany is through "blood and iron" (wars of unification [13.2]).
33.2 UK Characteristics
- Professional Army: The UK player can never build reserve armies. Until the GW the UK cannot build any British armies except the 1st British Army. Prior to the GW, the British 1st Army has an innate +1 DRM if it is in the main attack/defense force. The British 1st Army counter is marked with an asterisk to indicate this.
- Join Your Country's Army!: The UK places all armies gained during the Outbreak Step of the GW in London during the Planning Step of GW turn 1, place the UK's Join Your Country's Army counter on these units as a reminder. This still happens if the UK is neutral at this point.
- The Indian Army: The UK player can build Indian armies equal to their colonial manpower. Indian armies automatically displace [5.7] to Bengal or India: (1) at the end of a turn, or (2) the conclusion of a war the UK participated in.
- Maintaining the Status Quo: If the UK is the primary belligerent and the defender in a war (including after playing Balance of Power), it can ask allied players and neutral players to join the war during the alliance step.
- Rapid Deployment: When the UK enters a war (including the GW) they may immediately conduct one free naval movement action. Land units using this movement must end their movement in a friendly port.
- Crown Jewel: Controlling India counts as controlling two colonial keys. Place the Indian Stability marker in the UK's Event Holding Box.
- British Banking: the UK can pass with two cards in their hand. Likewise, they can save two cards for the next turn.
33.2.1 UK Manpower and Armies
The UK tracks British and Colonial manpower separately. British manpower is determined by their total territorial keys while colonial manpower is determined by their total colonial keys. Colonial manpower is used to determine how many standing Indian armies the UK player can have during peacetime. The number of British armies the UK player can field prior to the GW is limited by their Professional Army characteristic, and the UK player does not have reserve armies.
During the GW building new British armies consumes British manpower while building new Indian armies and the CW (Commonwealth) army consumes colonial manpower. The CW army can only be built during the GW, and it must be built in Australia/New Zealand or Canada (emphasis added by one of our Canadian playtesters).
Important: the free British armies the UK player received during the Outbreak Step do not cost manpower.
33.2.2 India
Only the UK player can control India. Internal issues in India are abstracted through the Indian Stability marker. The marker has two sides. The front side is labeled "India Stable" and grants the UK player +1 card during the draw phase so long as the UK controls India. The backside is labeled "India Unstable." While the marker is on its India Unstable side, the UK player does not receive a +1 card bonus, and UK Indian armies receive a -1 DRM if they are in the main attack/defense force in a land battle.
The Indian Stability marker can be flipped between its sides via event cards, including a UK home card. It is also flipped to its unstable side if either India or Bengal are occupied by enemy forces during wartime, including the GW. Additionally, if both spaces are occupied India immediately gains independence. While India is unstable there is also the danger of India gaining independence via an event card.
If India gains independence apply the following effects:
- Displace [5.7] all units in India (skip this step if India gains independence during the GW).
- The UK player eliminates the Indian Fort and all their Indian armies, except 1, and they are now limited to 1 Indian army for the remainder of the game.
- India cannot be controlled by any player for the rest of the game.
Important: For the purposes of the game, Bengal is treated as a separate space to India and thus these rules do not apply to the Bengal space.
33.2.3 Indian Fort
The UK player can place the Indian Fort marker in India using one of their home cards. The Indian Fort marker cannot be placed or upgraded using the standard Construct Fort action. It's maximum level is 2 and it never degrades during the end phase. The Indian fort cannot be removed to cancel a retreat during the GW.
Design Note: This fort represents imperial troops garrisoning the subcontinent rather than actual fortifications. Rules-wise, however, these troops function like a fort.
33.3 French Characteristics
The Zouaves: An elite colonial EF unique to the French. It provides +1 modifier to pacification rolls and may provide +1 modifier land battles. It may be rebuilt in Algeria for 1 CP during the action phase, it is also rebuilt for free (in Algeria) at the start of any Prep Phase.
France starts as Second Empire, if FR loses a war OR if FR stability ever reaches 1, it immediately becomes the Third Republic. This switch cannot happen during the GW. Each government's special ability is as follows:
- Second French Empire: After FR calculates their CP war budget (including during the GW) they automatically increase it by 1 (effectively a free bonus).
- The Third Republic: Once per turn, at the beginning of the alliance resolution step, FR gains 2 free CP that may immediately spend on alliance track actions [12.7].
Cultural Symbol: if FR has at least four City of Light points FR gains +1 card per turn. Reduce the FR player's City of light points by 1 when Paris is occupied by an enemy power in wartime. This can happen multiple times per game. The FR player can have a maximum of 6 City of Light points. FR gains City of Light points via one of their home card and/or the Eiffel Tower event.
33.4 Austrian Characteristics
- Metternich's Legacy: at the end of the diplomacy phase of turn 1 AU gains an alliance with two minor powers of their choice that do not contain an opponent's diplomatic marker.
- A Compromise Needed: During the prep phase of turn 2, add the Dual Monarchy card to the Austrian hand if it was not played for its event on turn 1.
- Special Actions: Reforms - 3 CP: grant one eligible nationality their rights [33.4.1]. Expand Citizenship - 3 CP: Attempt to grant one eligible nationality full citizenship [33.4.1]. Roll one die, a roll ≥ 3 succeeds. Increase the difficulty of the roll by one for each nationality that already has citizenship. Before rolling, you may decrease your stability by 1 to apply a +2 DRM.
- Incorporate: this ability has two effects - as a special 3 CP action AU gains control of a minor power that is (1) allied to AU and (2) has a nationality that has been granted full citizenship. Additionally, AU can launch wars of unification targeting spaces that contain nationalities with full citizenship.
- Unstable Situation: whenever AU decreases stability, roll a die. Add a +1 DRM for each minority nationality with rights. On a roll of a 6 or higher AU passes and there is no further effect. If AU fails, they must either discard a random card or take a minus one card marker (if they cannot discard a card, they must take the minus one card marker). This has no effect during the GW.
- Continental Power: pacification actions cost 2 CP.
- Arbiter of Italy: Until Italy unifies, when AU declares a war of liberation they can target spaces with Italian nationalities that are not currently in rebellion. In other words, AU can liberate Italian minor powers even if their space doesn't contain rebels.
- A New Way Forward: AU receives +1 manpower when 4 nationalities have citizenship, AU must control a space with that nationality in order for it to count towards this bonus. AU gains this manpower during the end phase, this is a one time bonus.
33.4.1 Rights and Full Citizenship
There are eight nationalities that can be granted rights and full citizenship by the AU player. They are shown by having their flags and names on the AU player's display next to the Event Holding Box. A nationality must be granted rights before it can be granted full citizenship. A nationality retains the benefits of having rights when it has full citizenship. AU may still grant rights and full citizenship to these eight nationalities even if they become a minor power, or if they are a minor power allied to an enemy of AU, or if they are in a home space of another player.
Granting a nationality rights helps AU with their Unstable Situation trait as more nationalities with rights improves AU's chances to not lose a card when they lose stability. Granting a nationality full citizenship gives two benefits to the AU player. First, AU can use its Incorporate ability to take control of a minor power provided that minor power has full citizenship and is allied to AU. Second, AU can declare wars of unification targeting nationalities that have been granted citizenship. In both of the above cases, this includes a nationality that became a minor power over the course of the game. Additionally, a nationality with full citizenship is no longer considered a minority nationality to the AU player.
33.5 Russian Characteristics
- Russian Steamroller: RU's reserve army limit is equal to either their manpower or their industry, whichever is lower, +1.
- Scorched Earth: The first key RU loses during the GW does not lower RU stability (this can only happen once).
- Endless Space: Armies supporting a battle into or from a Russian home space only contribute ½ their FP. Remember that armies' FP can only be halved once. Clarification: if the supporting armies are supporting into a RU home space and a non-RU space they are halved. For example, if an army in Pomerania is supporting an attack from Prussia into Poland, its support is halved.
- Trans-Siberian Railroad: Completing the TSRR gives the RU player +1 card per turn and increases their total keys by 2. Additionally, the RU player (and RU allies during wartime) can rail 1 army along the railroad per impulse.
- Agrarian: Russia needs a roll of 6 (after DRMs) to industrialize.
- The Second Rome: If RU occupies Istanbul at the end of a war that they won, they automatically take control of the space. Controlling Istanbul at the end of the game and/or the start of the GW gives Russia 2 VPs.
Important: If RU takes Istanbul, Ankara becomes the OT capital.
- Tsarist Repression: RU receives +1 card at stability 5. This is not cumulative with the additional card received at stability 6.
33.6 Ottoman Characteristics
- Local Autonomy: Keys with Arab or Egyptian nationality only count towards OT's total Arab keys. Tunisia and Tripoli neither count as keys nor for power projection unless OT can trace a LoC to the keys by land. Additionally, during the GW, OT does not lose stability for losing Tunisia or Tripoli.
- Ottoman Manpower: OT has two different types of armies: Turkish and Arab. Turkish armies must be built in keys that do not contain a minority nationality, while Arab armies can only be built in keys with Arab nationality (this includes Egypt). OT tracks Arab and Turkish manpower separately. Arab manpower is based on your number of Arab keys, whilst all other keys contribute to Turkish manpower.
- Europeanization: OT cannot play their own card for industrialization, and they need a roll to 6 (after DRMs) to advance their industry level.
- Poor Infrastructure: all OT home spaces, including those in Europe, have a maximum stacking value of 2.
- Jihad: Gain 3 Jihad markers at the start of the GW. Jihad markers are placed in the OT event holding box. When OT fights a battle in an OT home space, a Caucasus space, or a Great Game space they may discard a Jihad marker to give their opponent a -1 modifier in that battle. Discard all Jihad markers at the end of a war (Jihad markers can also be gained through OT's Jihad home card).
Special: If RU takes Istanbul, Ankara becomes the OT capital.
34.0 Bots
When playing with less than 6 people, players can be controlled by IE's bot system. Any number of "players" can be bots, and bots can be substituted for any "player." (Real life) players use the bot PAC to determine what a bot does on its impulse.
Design Note: Some may find the bot rules to be a bit "loose." This is intentional. I find complicated flowcharts with "if-then" statements to be overly taxing when playing a game. I opted instead for a general framework in which bots play the game. To this end, (real life) players will be constantly rolling dice to randomly determine what bots do on their impulse.
34.1 Bot Difficulty
Bots in IE have a difficulty rating, this difficulty does not make the bots play inherently better, but it does make it easier for them to score VPs. Bots do not draw NGs when player's draw NGs, instead bots draw all their NGs at the end of the game (if there has been no GW) or the start of the GW. At the start of the game, set a difficulty level for the bots (in theory, players can set difficulty level for each bot, but this may be hard to keep track of). A bot's difficulty level determines how many NGs they draw. The bot difficulty levels are:
- Easy: 3 NGs
- Normal: 4 NGs
- Hard: 5 NGs
Important: a bot's difficulty level also determines how many armies they get to redeploy for free at the start of a war.
Design Note: Yes this means bots cheat, and yes, in theory, a hard bot may be impossible to beat. Keep in mind that bots are not actually trying to accomplish their NGs over the course of the game. Instead bots follow a list of priorities that will improve their game state but may not exactly align to their NGs. Plus the hard bots are supposed to be exactly that, hard.
34.2 Bot SoP
All bot actions are listed on the Bot PAC, and are not explicitly laid out here. Bots will act in the following ways in each phase of the turn:
- Prep Phase: Bots are dealt their cards as normal. Each bot's cards are shuffled into a pile. Bots will take the optional stability increase [10.4] if their stability is ≤ 2.
- Diplomacy Phase: Bots do not participate in the diplomacy phase. Do not choose a home card for bots, instead each bot adds a random home card to their pile. When a bot home card is revealed, use the "Home Card Revealed" section in the PAC to determine which home card is played. Add home cards to the piles as follows:
- GE and OT on top of their pile
- FR, AU, and RU shuffled in
- UK on bottom of their pile
- Action Phase: Bots will never pass. On a bot's impulse reveal the top card of their pile and conduct a priority 1 action or roll a die to conduct priority 2 actions.
- End Phase: Bots will always build an army step instead of maintaining a fort (unless they cannot build an army step).
34.3 Bots in the Action Phase
For the most part the bot priority 1 and 2 actions on the bot PAC detail what the bot will do on their turn. The priority 1 actions are listed in priority order. In other words, playing a bot home card for its event takes priority over playing a 2 or 3 CP card into industrialization. Additionally, if a bot ever has to make a decision that isn't explicitly laid out on the bot PAC, roll a die to determine the result.
If a bot cannot play an event or has excess CP it will build armies. Then they will spend any additional excess CP on the Major Power Influence Track using BMPIT. Bots will always spend all their CP to influence a single power.
Exception: Neutral bots may split their CP, see below BMPIT on bot PAC.
34.3.1 Building Bot Units
When bots build land units they place them in their capital if their capital does not contain a land unit. If their capital has a land unit, place bot units on a space adjacent to another player. Prioritize spaces that do not border players who are in an alliance with the bot. Apply the same process to building forts. Bot naval units will be placed in a random port they control until that port has reached its stacking limit.
34.3.2 Automatic Bot Pacification
When performing a priority 2 action, unless a 5 or 6 is rolled, a bot will automatically spend 1 CP to pacify a space if able. In this case "if able" means if they currently have a land unit in a space with a pacification marker.
34.3.3 Bot Home Card Special Cases
A bot will not play its home card for its event if their stability is at 6 and their home card event would have less of an effect than playing the card for CP. Example: The GE bot plays German General Staff but already has 6 stability and had 3 elite corps in play. The bot will instead spend the card for CP following the standard priority 1 and 2 actions.
34.3.4 Bot Box
The bot box is located under the CP value of certain action cards. This box is only utilized when playing with a bot(s). If bot plays a card and that bot's player-power is listed in the bot box, that bot will automatically play that card for its event if able. For example, GE bots will always play events marked GE in the bot box. However, bots will never play a card that (1) hurts the bot or (2) hurts one of the bot's allies.
Bot Example Action 1: The UK player reveals the Diplomatic Incident event. The UK is listed on the bot box (as is everyone else), meaning they will always play it for its event. Piedmont has a FR ally marker, both Bavaria and Saxony have an AU ally marker, and Romania has an RU ally marker. The UK and FR are in an alliance so the UK will not remove the FR marker in Piedmont. A die is rolled to determine which of the other ally markers is removed (1-2 Bavaria, 3-4 Saxony, 5-6 Romania). A 1 is rolled and the AU ally marker in Bavaria is removed.
Bot Example Action 2: The GE bot reveals a 2 CP card. No priority 1 actions are available so a die is rolled to conduct a priority 2 action. The die result is a 2. Since 2 CP is not sufficient to gain a minor power ally, GE rolls on the BDIT to determine which region they will use diplomacy on and roll a 5, GE will place a diplomacy marker in the Low Countries. Both Belgium and the Netherlands are independent. Players roll a die to determine where GE places the diplomacy marker. The (real life) player(s) determine that on a 1-3 GE will choose Belgium and on a 4-6 the Netherlands. The result of the die roll is 4 so GE chooses the Netherlands.
Bot Example Action 3: The RU bot reveals their home card. A die is rolled and the result is a 3. Since RU and OT do not have a truce, RU plays the Russo-Turkish Wars and declares war on OT. When choosing the RU war aims, first roll a die to determine if it'll be a war of conquest (1-3) or a war of liberation (4-6). The result is a 6, so it's a war of liberation. War aims are always the closest possible targets, so Serbia and Bulgaria are selected.
34.4 Bots in Wartime
34.4.1 Bot Declarations of War
Bots only declare war using their home card. Bots will not declare war on a power that has ≥4 more army steps than them (including minor power allies).
34.4.2 Bot War Aims
Bots will always target the closest spaces. If a bot has 0 industry they will only target a single space, otherwise they will target two spaces.
34.4.3 Bot War Budget
Bots will always play their top card, unless it's their home card, for their war budget. If their home card is their top card, draw the next card to use it as the bot's war budget. If a mandatory event is drawn, draw another card. In both of the above cases return the unplayed card to the bot's card pile.
34.4.4 Bot Alliances
Bots will always call allies. Committed bots will always join their allies if called. Aligned bots will join a war on a roll of 3+, one bot invited to join via Balance of Power will join on a roll of 3+ provided they are given the card for entering the war. Bots will use their top non home card to join a war. Bots will aid minor powers.
34.4.5 Free Bot Redeployment
At the beginning of the maneuver step of a war, or the GW, bots receive a free redeployment action based on their difficulty. Treat this action as if it were taken during peacetime, in other words the bot's units can only move through spaces they control.
- Easy: redeploy 1 army
- Normal: redeploy 1/2 of all their armies
- Hard: redeploy all armies
Design Note: Again, this may seem unfair, but keep in mind that bots do not benefit from combat or response cards. Additionally, as previously stated, the hard bots are supposed to be hard.
34.4.6 Bot Behavior in Wartime
In wartime, bots are controlled by a player ally. If the bot is in the neutral box, use the Bot Wartime Action Priorities list on the Bot PAC (Ideally, any player with interests contrary to the opposing player should control a bot).
34.4.7 Bot ECs
Bots will use their EC if the differential after support is between -2 and +2 in their favor.
34.4.8 Bot Treaty Options
Bots will never give land or +1 card markers to other players, they will always give treaty options [16.2] to themselves.
34.5 Bot Response and Combat Cards
Bots will never play response cards or combat cards for their events. Additionally, bots will never play the Impulsive Ruler card for its event. Exception: a UK bot might play Balance of Power after a war is declared, see bot PAC.
Index
- Abbreviations — pg. 5
- Action Cards — pg. 20
- Combat — pg. 22
- Home Cards — pg. 21
- Response — pg. 22
- Mandatory Event — pg. 22
- Mandatory Response — pg. 22
- Action Phase — pg. 23
- Construct Fleet (action) — pg. 24
- Construct Fort (action) — pg. 27
- Declare War (action) — pg. 28
- Expeditionary Force (action) — pg. 26
- Industrialize (action) — pg. 27
- Auto-Industrialization — pg. 27
- Ottoman Industrialization — pg. 27
- Land Battle (peacetime) — pg. 28
- Major Power Influence Track (action) — pg. 26
- Minor Power Alliance (action) — pg. 26
- Naval Movement (action) — pg. 24
- Pacification (action) — pg. 26
- Place Influence or Diplomacy (action) — pg. 24
- Recruitment (action) — pg. 23
- Redeployment (action) — pg. 27
- Remove Influence or Diplomacy (action) — pg. 26
- Remove Minor Power Alliance (action) — pg. 25