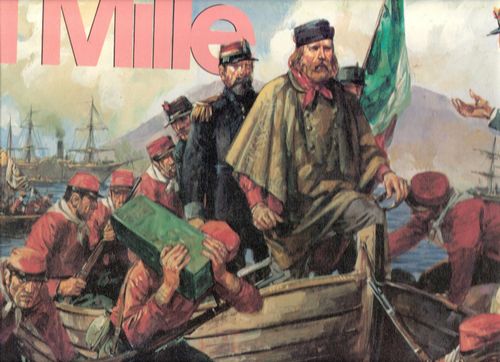
I Mille
I Mille Rulebook
Table of Contents
Table of Contents
- 2.0 Introduction
- 3.0 Scale and Game Components
- 4.0 Combat Units
- 5.0 The Game Map
- 6.0 Initial Set-Up
- 7.0 The Calendar
- 8.0 The Armistice
- 9.0 Sequence of Play
- 10.0 Movement
- 11.0 Combat
- 12.0 Attrition
- 13.0 Determination of Victory Points
- 14.0 Victory Conditions
- 15.0 Combat Unit Set-Up
- 16.0 Commander Initial Set-Up
- Figures
- Counter Key
2.0 Introduction
The revolutionary army demonstrated, at least in the early stages, their inability to oppose the advance of The Thousand. These rules model the lack of initiative of the Bourbon commanders. To win the game, the Garibaldine player must obtain the historical result; the Bourbon player wins if he prevents the historical result. The choice of the cities appearing on the map derives from the requirements of the game.
3.0 Scale and Game Components
- Number of players: 2.
- Playing Time: 2 to 4 hours.
- Game Turns: 14.
- Units: All the game pieces represent battalions, with the exception of The Thousand, which was organized in companies.
- Map: The map represents the Kingdom of the Two Sicilies.
- Commanders: each unit represents a leader.
- Game pieces: a game map (42 cm x 58 cm); 41 Garibaldine units (light blue fronts and dark blue backs); 10 Piemontese units (yellow fronts and orange backs); 67 Bourbon units (white fronts and ivory backs); 8 units representing picciotti/insurgents; 4 batteries (white fronts and blue backs); 12 city/trench markers; 20 point markers and 1 turn marker.
4.0 Combat Units
4.1 Infantry Unit Values
Every unit has two values: combat and quality. The first represents the combat strength of the unit. In combat, this is the number of dice rolled. The second represents the quality of training and armament of the unit. It provides a die roll modifier in combat. As an example, if a unit with a combat value of 2 and a quality of 1 is involved in a combat, two dice are thrown and 1 added to the result when determining if a hit is scored on the opposing unit.
Infantry units can be reduced through combat or attrition. These reduced values are shown on the backs of the units.
4.2 Artillery Unit Values
Artillery units have no reduced sides. If the combat result calls for an artillery unit to be reduced, it is considered captured by the enemy. On the next turn, the opposing player can use the artillery unit as his own.
4.3 Commanders
Commanders have two values: command value (VC) and rank.
The VC represents the commander's initiative and command ability; a higher number indicates a higher command ability. It also impacts the commander's ability to move troops under his command during a game turn (see "the calendar") or to participate in combat (see the paragraph "combat).
Commanders have one of four ranks, in order of importance: Colonel (Colonello), Brigadier General (Generale di Brigata), Major General (Generale di Divisione) and General of the Army (Generale di Corpo d'Armata). Francesco II and Garibaldi are the Commanders in Chief and have a higher rank than all others (even higher than General of the Army).
If more than one Commander is present in a zone, the highest ranked Commander will command. If all Commanders in the zone have the same rank, the player can choose which will command.
At the beginning of the game, the Bourbon player must set up his commanders on their reduced side. They remain reduced until the armistice. Francesco II cannot move from Napoli until the armistice. After the armistice, the Bourbon player flips the leaders to their full-strength side. This simulates the reform of the Bourbon army after the armistice.
5.0 The Game Map
The map represents the Kingdom of the Two Sicilies before the landing of The Thousand. It is divided into geographic zones, showing the principle cities and shipping routes.
5.1 Stacking
Any number of units can occupy a zone. No more than eight units can occupy a city, with the exception of Palermo, Napoli and Gaeta. Sixteen units can occupy these cities. (See the paragraph, "The Cities.")
5.2 Cities
The most important cities in the Kingdom of the Two Sicilies — and those in which combat took place historically — are shown on the map. Cities are considered independent zones at the end of the game. Therefore, occupying a zone that contains a city is not the same as occupying a city.
The cities can hold a maximum of 8 units, with the exception of Napoli, Palermo and Gaeta which can contain 16 units.
In combat, cities offer defensive bonuses. (See "Combat.") Only the Bourbon player can entrench in Calatafirmi. At the end of the game, cities are considered independent zones.
5.2.1 Recruiting Insurgents
When the Garibaldine player enters a city, he rolls 1d6 to determine if he has successfully recruited insurgents. The rolls needed are given in the table below. On a successful roll, place one insurgent unit in the occupied city. The number of insurgents is limited by the counter mix. If no insurgent markers are available, the Garibaldine player may rebuild a reduced unit to full strength. Note that picciotti/insurgents are recruited immediately after entering the city. He need not wait until he has claimed the city for Victory Point purposes.
| City | Recruiting Successful (1d6) |
|---|---|
| Palermo | 4–6 |
| Napoli | 4–6 |
| Messina | 5–6 |
| Reggio Calabria | 5–6 |
| Bari | 5–6 |
| L'Aquila | 5–6 |
| All Others | 6 |
Note: Insurgents are recruited on a roll of 4-6 after the armistice.
6.0 Initial Set-Up
The initial set-up is shown in the Set-Up Table (Tabella dello Schieramento). The Bourbon player can place units under the command of Colonel Von Mechel anywhere, with the exception of Marsala. All Boubon leaders are initially set-up reduced to represent the initial inertia of their commands.
Transcriber's note: the Set-Up Table referred to above is not reproduced in this section. The printed set-up tables appear in full in section 15.0 (Combat Unit Set-Up) and section 16.0 (Commander Initial Set-Up).
7.0 The Calendar
The calendar (Il calendario) is the game turn chart. Game turns are not of uniform duration, but represent several days. The calendar is used to determine the arrival of reinforcements and which commanders are activated for the turn. The numbers in the left column represent the number of VC's necessary for a general to become active and give orders during that turn. (Example: In game turn 2, only commanders with a VC of 3 or greater can become active on that turn.)
Transcriber's note: the calendar chart itself is not part of the rulebook text and is not reproduced here.
8.0 The Armistice
During the first four turns of the game, the Garibaldine player can compel the Bourbon player to ask for an armistice. The Garibaldine counts his Victory Points at the end of each turn. (For a city to count for Victory Point purposes, it must be occupied for a complete turn.) If he has more than 5 VP's, the armistice occurs.
If the armistice occurs, the Bourbon player must abandon Sicilia, with the exception of Messina. (This, of course, assumes the Bourbon player already controls Messina. If the Garibaldine player controls Messina when the armistice occurs, he keeps it.)
The Bourbon player can maintain 12 units in Sicilia. All others are moved to the continent, to locations chosen by the Bourbon player. Commanders do not count as units.
The armistice remains in effect until the Garibaldine player breaks it by attacking Bourbon units. During the armistice, the Bourbon player can move, but cannot come in contact with the Garibaldine units. The Garibaldine player will receive reinforcements on the turn following the beginning of the armistice. After the armistice has occurred, the Garibaldine player can recruit piccioti/insurgents on a roll of 4 – 6.
9.0 Sequence of Play
Each player turn has five phases, which are conducted in order. The Garibaldine player is always the first player. Once he has completed his turn, play turns over to the Bourbon player. The sequence of play is:
- Place reinforcements.
- Movement
- Combat
- Attrition Phase
- Assign Victory Points
At the end of the last Bourbon phase, advance the turn marker on the calendar one space.
9.1 Placement of Reinforcements
Only the Garibaldine player receives reinforcements. They enter the game when provided for on the calendar, after the armistice or as a follow up to the occupation of a city after a successful die roll which resulted in recruiting of insurgents (see the paragraph on "The Cities"). The Garibaldine reinforcements are placed in Palermo, the Piemontesi troops enter from the zone indicated on the map. The insurgents are positioned in the city where they were recruited. The Garibaldine reinforcements arrive only after the armistice occurs.
10.0 Movement
10.1 Commanders and Movement
To move, a unit must be stacked with an activated Commander. Not all Commanders can be activated in any given turn. Only Commanders with the VC equal to or higher to that listed on the Calendar (Calendario) in the Command Value (Valore Commando) column can be activated in any given turn.
10.2 Rank and VC
If there are two or more commanders in any given zone, it is the highest ranking Commander who determines the VC used for activation. For instance, Lanza (a three-star General with a VC of 2) and Ritucci (a two star General with a VC of 3) occupy a zone. For purposes of activation, it is Lanza's VC of 2 which is used. Ritucci must follow the lead of his superior in this case.
10.3 Moving Units
To move, a unit must be stacked with an activated commander. Any number of units can be moved by a Commander, but he must have a high enough VC to move units in any given turn. Units may be moved as follows in one turn:
- From a zone to an adjacent zone.
- From a zone to a city in an adjacent zone.
- From a zone to a city within the same zone.
- From a city to another city within the same zone.
- From a city to another in an adjacent zone.
- Via shipping route from Sicily to a zone or city at the end of a shipping route. Units may not move from the continent to Sicily, however.
10.4 Movement into Occupied Zones
If a unit moves into a zone occupied by an enemy unit, it must attack that unit during the Combat Phase. If the moving force has more than one active commander, it may attack more than one defending unit.
11.0 Combat
Combat occurs when two opposing forces occupy the same zone.
11.1 Combat within zones and cities
Units can be attacked in zones or besieged in cities. If a Commander is present in the city, those forces defend normally. If there is no Commander present, the besieged units roll on the Retreat and Attrition Table (Tabella per la Ritirata e per l'Attrito) on Column 1.
11.2 Combat Procedure
Combat is conducted on the Combat Table (Tavola dei Combattimenti) printed on the game map. The Combat Table consists of a rectangular grid of 96 cells, 8 lines and 12 columns, where the opposing forces are set up. The Garibaldine forces are set up on one side (Campo di Schieramento dell'Armata "Garibaldina"). The Bourbon forces are set up on the opposing side (Campo di Schieramento dell'Armata "Bourbonica"). When combat is initiated, combat units are set up on Line D, the commanders on Line B and any Reserves on Line A. No units are initially set up in Line B, which is used for maneuver. Up to four units can be stacked in a cell. Units stacked in a cell are referred to as a stack (from one to four units).
11.3 Commanders and Combat
A Commander can command a number of units equal to his Command Value (VC). The highest ranking Commander can employ part or all of his points to command allied Commanders in order to extend the line of the initial set-up (see Figure 1). Units situated in a city are an exception to this rule (see the section about Seiges).
11.4 Combat Sequence
Combat is resolved as follows:
Both players resolve the first three actions simultaneously:
- Units are set up on the Combat Table.
- Entrench units.
- Resolve artillery combat.
The following actions are completed by the attacking player first, then the defending player:
- Movement of units not adjacent to an opposing unit.
- Declaration of combat.
- Resolution of combat.
- Positioning of the relative damage points.
- Retreat from combat (sees Retreat and Attrition Table).
- Defending player completes steps 4 – 8.
The first three actions are completed simultaneously and take place only once during any combat. The other actions are repeated in until the combat is decided.
11.4.1 Unit set-up
To determine which player sets up first, roll a die and add the command value of the highest ranking Commander present. The attacking player adds one to the die roll. The player with the lowest adjusted die roll sets up first. Reroll in case of ties. The player setting up second must ensure that every unit is adjacent to any opposing units. Any units not facing another unit do not participate in the combat until ordered to do so.
Units entrenched in a city have their combat values reduced to 1, but if attacked endure only one hit. Entrenched units have a combat value of 1, but if attacked receive only one hit in any given attack. (see figure 2). Entrenched units cannot be moved unless under orders from the senior Commander (for entrenched units there is no initiative benefit). Units placed in a city defend against attackers as if entrenched.
Every artillery unit must fire at the opposing stack. They hit on a roll of 6 on 1d6. Add one to the roll if the opposing stack is in a city or entrenched. If hit, all units in a stack are reduced immediately. Units hit twice are eliminated. If an artillery unit is alone in a space and is hit by counterbattery fire, it is eliminated. This is the only case in which an artillery unit is eliminated. In all other cases, the artillery unit is captured and becomes part of the opposing forces.
11.4.2 Flanking
Once placed on the Combat Table and involved in combat, stacks cannot ordinarily move. If a unit is initially set up on Line D, but is not adjacent to an enemy unit, the attacking player can attempt to move around the flank of an opposing unit with an order from the senior Commander (see figure 3). Moving a unit in this manner is allowed only one time for each unit during any given combat. Procedure: the flanking player rolls 1d6, adding the VC of his senior Commander. The opposing player does the same. If the flanking player obtains a higher adjusted roll, the attempt is successful. The flanking player can then move one if his stacks adjacent to an enemy stack. If unsuccessful, the stack cannot move in the current turn, but may attempt the flanking move during the next turn.
11.4.3 Moving Reserve Stacks
Stacks not adjacent to an enemy unit can be moved from the reserve (line A on the Combat Table). This move can be made one time per reserve stack per turn. Reserve stacks can be under the command of the Commander set up in Line B or another Commander set up in Line A with the Reserves or, finally, by no Commander at all. To determine if a stack in Reserve can move into the Battle line (Line D), the phasing player rolls 2d6 and adds the following modifiers:
- +VC of the general set up in the Battle line (Line D) if the stack is under his command.
- +1 if the stack is under the command of a Commander set up in the Reserve line (Line A).
If the result is greater than 11, the attempt is successful and the phasing player can move one stack from the Reserve line adjacent to an enemy stack. Note: all units in the stack must move. If the attempt is unsuccessful, a stack must be removed from the Reserve and cannot participate in combat for the remainder of the turn.
11.4.4 Zones of Control (ZOC)
Every unit has one zone of control (ZOC) composed of the four cells adjacent to it. A unit is considered engaged in combat if adjacent to at least one enemy unit. A unit is considered adjacent to all enemy units in its ZOC. Opposing batteries are an exception. An artillery unit is considered adjacent to another artillery unit only if it is directly across from it.
11.4.5 Stacks in Combat
If at any time, there are more stacks on one side than the other — a longer front — the side with the greater number of stacks gets a +1 die roll modifier when resolving individual attacks. In attack, the combat value of a stack of units is the combat value of the unit placed on top. Similarly, the modification of the quality value is constituted exclusively of the quality value of unit on top. To resolve an attack, take into account only the top unit in the stack. The player rolls the number of dice equal to the combat value of the unit on top of the stack, adding the quality value. Any result of 6 or more is a hit, doing a point of damage to the opposing stack.
After the third hit on the stack, the player reduces all the units by flipping them to their reduced sides. In the case of a unit that is already reduced, after having taken three points of damage, it is eliminated. The damage points taken are marked as they occur on the stack. The points of damage taken in excess of the three necessary to reduce remain active until the end of the combat. Anytime the player considers it valuable to retreat from the combat he can, eliminating the damage on the unit.
Only the top unit in a stack can participate in an attack, but any other unit can be used in defense. Such defensive support is measured in the this way:
- every full strength unit contributes 1 point
- every reduced unit contributes 0.5 points
The sum of these values determines the defensive value, always rounding in favor of the defense (example: a stack is composed of 4 units, 3 units not on top of the stack are 2 full strength while the third is reduced, therefore the defensive value is 2.5 and is rounded down). Every point of support gives the top units in the stack a die roll to find if the stack is hit. If the die roll is 5 or higher, no hit is scored. In the example, the stack has a defensive value of 2. The defensive player rolls two dice. A roll of 5 or higher on either die reduces the number of hits on the stack by one.
A unit set-up on the Combat Table is "free" if it does not have units in its ZOC or if more than one unit is opposing an opposing unit (see figure 5). If, during the combat phase, a unit eliminates all opposing units in its ZOC, it gains "un buon impeto," an opportunity to realign the stacks. In this case, the unit must be positioned opposite a free, enemy unit, or if no such unit exists, it can be placed to engage a unit already in combat (see figure 4).
11.5 Retreat from Combat
All players are free to retreat from combat at any time. Units must retreat to zones not occupied by enemy units and adjacent to that in which the battle occurred, a city in the same zone or an adjacent zone. If it is not possible to retreat, the combat continues unit one side is completely eliminated. Retreating only part of the units which participated in the combat while others continue or to subdivide the units withdrawn to more zones is also allowed.
To be able to retreat, it is necessary to determine the difference between damage that has been taken and inflicted, remember to also consider reduced and eliminated units. (Example: A stack begins at full strength and is reduced gives three points; a full-strength stack which is eliminated gives six points; a stack starts out reduced and is then eliminated gives three points). Roll 1d6 and consult the Retreat and Attrition Table. A reduced artillery unit is considered captured and can be used by the opposing player on his next turn.
Commanders are withdrawn to their own units. If the withdrawal is not allowed or if all the units of his command have been eliminated, the Commander may be captured. In this case, to determine if a Commander was captured roll 1d6. On a result of 1, 2 or 3, the Commander was taken prisoner, otherwise, he managed to save himself and after one turn is free to position himself in any zone on the map. This procedure must be repeated for every Commander that may be captured. In the case in which a Commander is captured, it is acceptable to substitute another Commander with a lower command value. Flip the counter of the eliminated general and position it on another unit under his command. Francesco II and Garibaldi can never be captured, in the case where this happpens, total victory is granted to the player who takes them him prisoner.
At the end of combat, the damage points are eliminated.
11.6 Seiges
The rules for seiges are similar to those shown previously, the only exceptions regards the command capacity of the Commanders set up inside the city, the fact that units in cities are considered entrenched and that the armament that defends a city is set up first on the Combat Table.
On the Combat Table, a city is represented by 4 cells on Line D, they make an exception for the cities of Palermo, Naples and Gaeta, which are represented by 8 cells.
Units set up inside a city can all be commanded by one Commander at the cost of a single command point. He can spend the rest of his Command Points commanding stacks or Commanders outside the city. In this case, he must spend two Command Points for every stack or Commander. (see figure 5).
12.0 Attrition
A unit is isolated if it cannot trace a path to non-isolated units, a path that must not cross zones containing enemy units (see figure 6). Units situated in cities containing a port are never considered isolated.
Isolated units cannot receive reinforcements. They suffer attrition progressively. This is represented by a roll on the Retreat and Attrition Table on column 1.
13.0 Determination of Victory Points
The Garibaldine player gains points for attaining strategic objectives:
- 1 point for every city conquered, with the exception of Marsala and Calatafirmi, which are worth 0 points. The Sicilian cities taken to bring on the armistice do not count for Victory Points;
- 3 points for every battle won in Sicilia;
- 6 points for the conquest of Palermo (taken by seige, not as a consequence of the armistice);
- 6 points for the conquest of Naples;
- 2 points if Francesco II escapes from the Kingdom of the Two Sicilies. The escape must occur at any time during the Bourbon turn but only after the Garibaldine player has taken the capital of the Kingdom: Napoli. In order for Francesco II to escape, the counter that represents the Bourbon sovereign must go to a city with a port or a city inside a zone neighboring the State of the Church or a zone neighboring with the State of the Church.
The Boubon player obtains Total Victory if at the end of Turn 14 the Garibaldine player has less than 20 points.
Table 1: Retreat and Attrition Table (Difference between damage taken and inflicted)
| Die | <-1 | 0 | 1 | 2 | 3 | 4 | 5+ |
|---|---|---|---|---|---|---|---|
| 1 | 1 | 1 | 2 | 2 | No 1 | No 1 | No 2 |
| 2 | Yes | 1 | 1 | 2 | 2 | No 1 | No 1 |
| 3 | Yes | Yes | 1 | 1 | 2 | 2 | No 1 |
Legend:
- Yes = Retreat is allowed without any consequences/attrition.
- # = Number of units reduced to continue the retreat/of the attrition phase.
- No # = Retreat is not permitted. Number of units reduced. The combat continues. The points received to this point remain.
In order for a city to count for Victory Point purposes, it must be occupied for one full turn.
14.0 Victory Conditions
The game consists of fourteen turns. In every turn the Garibaldine player obtains points by gaining strategic objectives.
If the counters representing Garibaldi or Francesco II are ever captured, the game ends with Total Victory for the player who successfully makes the capture.
The Garibaldine player obtains a Total Victory if at the end of Turn 12 he possesses at least 22 points.
The Garibaldine player obtains an Historical Victory if, at the end of Turn 14, he posses at least 22 points.
The Garibaldine player obtains a Partial Victory if, at the end of Turn 14, he has between 20 and 21 points.
15.0 Combat Unit Set-Up
Initial Set-Up
Bourbon Forces
| Unit | Position |
|---|---|
| 1st FL-a | Palermo |
| 1st FL-b | Gaeta |
| 2nd FL-a | Reggio Calabria |
| 2nd FL-b | Cosenza |
| 3rd FL-a | Palermo |
| 3rd FL-b | Gaeta |
| 4th FL-a | Palermo |
| 4th FL-b | Napoli |
| 5th FL-a | Messina |
| 5th FL-b | Gaeta |
| 6th FL-a | Napoli |
| 6th FL-b | Napoli |
- Units marked with a * enter after the armistice, piemontesi units enter on Turn 12.
- Note: Abruzzo is the zone in which L'Aquila is located.
Garibaldine/Piemontesi Forces
| Unit | Position |
|---|---|
| I Gar | Marsala |
| II Gar | Marsala |
| III Gar | Marsala |
| IV Gar | Marsala |
| V Gar | Marsala |
| VI Gar | Marsala |
| VII Gar | Marsala |
| VIII Gar | Marsala |
| IX Gar | Marsala |
| X Gar | Marsala |
| I CC | Marsala |
| 1st Gar | Palermo* |
Legend
- FL = Line Infantry (Fanteria di Linea)
- CA = Hunters (Cacciatori)
- GR = Grenadiers (Granatieri)
- US = Ussari Cavalry (Cavalleria Ussari)
- CV = Cavalry (Cavalleria)
- AR = Artillery (Artiglieria)
- GA = Garibaldi
- CC = Police (Carabinieri)
- BR = Bersaglieri
16.0 Commander Initial Set-Up
Front
| Side | Commander | Position | VC | Rank** |
|---|---|---|---|---|
| Bourbon | Francesco II | Napoli | 3 | Commander in Chief |
| Bourbon | Von Mechel | 3 | Brigadier General | |
| Bourbon | Ritucci | 3 | Major General | |
| Bourbon | Clary | 3 | Major General | |
| Bourbon | Lanza | Palermo | 2 | General of the Army |
Back
| Side | Commander | Position | VC | Rank** |
|---|---|---|---|---|
| Bourbon | Francesco II | Napoli | 3 | Commander in Chief |
| Bourbon | Von Mechel | Enna | 3 | Colonel |
| Bourbon | Ritucci | Napoli | 2 | Major General |
| Bourbon | Clary | Gaeta | 2 | Major General |
| Bourbon | Lanza | Palermo | 1 | General of the Army |
- * The Commanders marked with a * arrive after the armistice. The Piemontesi commanders arrive on Turn 12.
- ** Before the armistice.
Transcriber's note: the rank column headed "Rank*" is printed on both tables; the Back table's Garibaldine rows are printed without commander names or positions in some cells, and those cells are left blank here.*
Figures
Transcriber's note: the diagrams are omitted; their printed captions and labels are kept.
Figure 1. Garibaldine has a VC=4. Therefore, he can command four infantry or artillery units. With him are two other Commanders, Gen1 with VC=3 and Gen2 with VC=2. Garibaldi decides to employ two of his four points to give orders to his Commanders. As a result, the combat line contains 7 instead of 4 activated units. P3 and P4 are under the command of Garibaldi, P1 and P2 are under the command of Gen2 and P5, P6 and P7 are under the command of Gen1.
Figure 2. The Bourbon stack B2 is entrenched. If, during the combat phase, the Garibaldine units (G2 and G3) obtain 3 hits on the stack, the stack will endure only 1 point of damage as a result of the entrenchments.
Figure 3. An example of combat where the Bourbon army consists of 3 units, under the command of Francesco II, across from 4 units commanded by Garibaldi. The Garibaldine unit G4 is not involved in the battle, therefore Garibaldi can attempt to flank the Bourbon stack. Roll 1d6 and add Garibaldi's Command Value (4+4=8). The Bourbon player does the same (5+3=8). The flanking attempt has failed. The Garibaldi player will be able to retry during his next turn. The Garibaldi player gains a +1 modifier as a result of his larger front.
Figure 4. The Bourbon units B1, B4 or B5 are free. (Initial Phase) During the combat, the Garibaldine unit G2 eliminates the Bourbon unit B3, becoming free and earning the initiative. The Garibaldi player can choose to position G2 across from Bourbon unit B1 or to go in support of G3, attacking one of the units or B4 or B5, avoiding the flanking of the Garibaldi unit. In either case, the Bourbon player will always have the +1 modifier having the larger front (4 units against 3). Thus the units must be positioned if there is to be no flanking.
Figure 5. The city of Napoli is under seige by Garibaldine troops. The Bourbon player must set up first. The city contains 16 units and three commanders: Francesco II with a Command Value of 3, Clary with a command Value of 3 and another Commander with a Command Value of 2. Francesco II has command. The city of Napoli is restricted to 8 units inside. Since they are in the city, they are considered entrenched. (grey cells). The Bourbon player wants to extend his front in order to carry out any counter attacks. He decides to use the two remaining points of Francesco II's Command Value (one is being used to command the units in the city) to give orders to Clary. Clary can then command 3 stacks (forming all the units placed at the beginning of the battle in the city) and extend the Bourbon front (units B9, B10 and B11). These units are not entrenched and they can move freely under orders from Clary. Francesco II has exhausted his command points and the third Commander (General, VC=2) will be placed in the Reserve. In this case, at least 6 stacks will have to be composed of single units.
Figure 6. The Bourbon units in the city with the port are not considered isolated while the units in the other city are. This is because the Garibaldine player controls the zone and blocks reinforcements.
Diagram labels: "Bourbon units are inside the city which contains a port"; "The city with Bourbon units"; "Garibaldine units control the zone."
Counter Key
Transcriber's note: the key sheet's counter illustrations are graphics; only their printed labels are kept.
- Unit Type
- Guard Unit
- Combat Value
- Quality Factor
- Rank
- Command Value
- Artillery Unit
- Turn Marker
- Entrenchment Marker
- City Marker
- Damage Point Marker