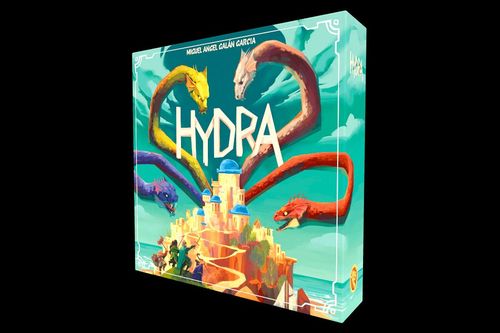
Hydra
Hydra Rulebook
Table of Contents
Table of Contents
Game Concept
Together, you face off against the many-headed Hydra. But in this epic battle, each of you not only strives for the city's welfare, but also for the sole glory awarded to the triumphant victor in the end. Each of you will choose from available actions, block crucial cards with action tokens, and formulate tactics - be it in combat against the Hydra, constructing defensive barricades, or advancing into optimal attack positions. Yet, the Hydra retaliates, drawing immense power from remaining action cards and the darkening moon.
The city's fate is in your hands. By standing united, you'll be hailed as true heroes. But only the best among you will go down in the city's history as an epic hero, weighed in gold - fail and one of you will become the tragic hero, responsible for the cities downfall. Are you this much-sung hero? Will you stand shoulder to shoulder, only to stab your comrade in the back when it counts? Beware, for they too are waiting for that moment.
Coordinated Game
Hydra is a coordinated game. This means you're fighting both alongside your allies against the Hydra and also for yourself to emerge victorious. To win, the city must be successfully defended. You always have the option to discuss and plan actions together. You can also reveal information about your cards in your hand. Cooperating and coordinating actions might be crucial, but no one is obliged to share information or stick to plans. If your best efforts are not enough though, and the city falls, everyone tries to put the blame on the hero that helped the least.
Game Components
2 game boards
- 1 compass board
- 1 game board
42 wooden components
- 4 heroes
- 4 sets of 6 action tokens in player colors (teal, purple, green, orange)
- 10 wall tokens
- 4 barricades
8 hydra head components & assembly
- 4 hydra heads in 4 colors, each with a head counter dial numbered 0 to 4 (the dial is rotated to set the number of heads)
54 cardboard components
- 40 neck tiles in 4 colors
- 4 shield tokens
- 4 turn order tokens (marked 1st to 4th)
- 6 two-sided moon phase tokens (light / red side)
112 cards
- 56 hydra cards (light and red backs)
- 44 action cards
- 12 scenario cards
Game Setup
General Setup
A. Place the game board in the center of the table.
B. Attach the compass to the top of the game board.
C. Sort hydra cards by their back into light and red. Shuffle each deck separately and place them face down to the left and right of the compass.
D. Shuffle the action cards and place them face up as display. The remaining cards form the action deck.
E. Place neck tiles, barricades, and shield tokens beside the board as general supply.
F. Randomly place the 4 hydra heads on the 4 maelstrom spaces.
G. Choose the scenario card you want to play.
Individual Setup
H. Choose a color and take the corresponding hero and action tokens (amount as indicated by the scenario).
I. Place your hero in the inner city.
Extended Setup
J. Take the chosen scenario card and place it next to the compass, setup side up.
K. Move the 4 hydra heads towards the city as indicated. Turn the head counter on each hydra head to the corresponding number of the scenario card. Fill the spaces behind the hydra heads with matching neck tiles, up to the maelstrom space.
L. Place the indicated number of wall tokens on the city wall. Return any excess wall tokens to the box.
M. Now, flip the scenario card to the game side.
N. Position the indicated number of moon phase tokens on the round track on the compass, with either their light (easy) or red (hard) side up.
Final Preparations
O. Take 1 action token from each player and randomly arrange them on the order track on the compass. The first action token is put on the starting space (North), subsequent ones on the spaces that follow counterclockwise. Return any excess action tokens back to the box.
P. The hero who is last on the compass gets the 1st turn order token, the one before gets the 2nd turn order token, and so on. This means the hero with the least glory goes first.
Now, the game can begin!
Scenario Cards
The setup side of a scenario card shows:
- Difficulty
- Player count
- Wall token by difficulty
- Hydra head counter*
- Hydra position
The game side of a scenario card shows:
- Hydra cards in hand
- Action cards in hand
- Action cards in display
- Action tokens for each player
- Moon phase start and difficulty
- Hydra cards in Hydra phase
*The number on the dial in the front of the hydra's head indicates the number of heads. To reduce or increase the number, the dial is rotated accordingly.
Two Player Game
If you play with only 2 players, try the hard scenario (#7), where teamwork is essential for victory. Communicate, coordinate, and strategize together - only through true cooperation can you defeat the relentless Hydra.
Difficulty Level
You can make your game experience harder by reducing the number of wall tokens or easier by increasing them. The difficulty levels are shown as stars below the wall token.
Welcome, hero. Moving forward on the order track always means in a clockwise direction. These action tokens mark acquired glory. Quite easy, wouldn't you agree?
Gameplay
The game spans over multiple rounds equal to the number of laid-out moon phase tokens. The moon phases are played from left to right. Every round consists of 6 phases. The game can end prematurely through a victory by the heroes or the Hydra. Otherwise, after the last round, check if the city was saved. If the Hydra is defeated, the hero leading on the compass is the winner. (game end: see Page 8)
Phase Overview
| Phase | Name | Summary |
|---|---|---|
| Phase 1 | Preparation | Prepare for the new round. (Page 6) |
| Phase 2 | Action | All heroes perform their actions. (Page 7) |
| Phase 3 | Hydra | The Hydra strikes back. (Page 7) |
| Phase 4 | Support | The heroes gain glory as support from the city. (Page 8) |
| Phase 5 | Playing Order | Redistribute the turn order tokens. (Page 8) |
| Phase 6 | Clean Up | Regain spent tokens and reshuffle action cards. (Page 8) |
The Compass, the Path to Glory
The compass shows your hero's standing amongst the citizens in comparison to the other heroes. It increases with every action you take for the betterment of the city. If you have the highest glory after successfully battling the Hydra, you win.
The compass has 16 spaces on its order track. You move your action token around these spaces, with each space accommodating only one action token. Place it in the inner circle of the order track.
Whenever you gain glory, your token advances the corresponding number of spaces clockwise. If you lose glory, it moves counterclockwise accordingly.
Occupied spaces are skipped and don't count. It's possible that with just 1 glory earned, your action token could move several spaces, as you skip taken ones. If you lose 1 glory, move your token back 1 space, again, skipping any taken spaces.
At the end of each round, the hero order for the next round is determined by the reverse order on the compass.
At game's end, the position on the compass determines the winner/tragic hero.
If you get lapped, have the courtesy to move your action token to the outer part of the order track. Lapped action tokens are also not counted when other action tokens move. By my honor, you can do better!
How Do You Earn Glory?
- Through the actions: sword (Page 10), harpoon (Page 10), and barricade (Page 11).
- During the support phase (Page 8).
How Do You Lose Glory?
- By getting wounded (Page 12).
- By "buckle up"-rule (card redrawing) (Page 6).
- By shoving another hero (Page 9).
"Buckle up"-rule: Once you've drawn your cards, you may pay 1 glory, place all your action cards in the action card discard pile and redraw the same amount of action cards from the action deck (only once per round). Swapping action cards happens in hero order if necessary. You can never exchange the Hydra cards in your hand.
Example for moving on the compass: +2 glory.
Round Sequence
Phase 1 - Preparation
In this phase, you prepare for the new round. The scenario card sets the guidelines for the round:
- Draw the corresponding number of hydra cards into your hand. Draw from the hydra deck specified by the current moon phase token (either light or red).
- Draw the corresponding number of action cards from the action deck into your hand.
- Draw the corresponding number of action cards and place them face-up. You should sort these face-up cards by action, giving everyone a better overview of the possible actions. (Skip this step in the first round, since you already have an action card display.)
- Draw the corresponding number of hydra cards from the specified hydra deck and place them as a face-down stack above the display. If the hydra deck is empty, shuffle the respective discard pile and use it as the new hydra deck.
Phase 2 - Action
In this phase, all heroes perform their actions.
This phase consists of several turns, determined by the number of action tokens. During each turn, every hero, in sequence, performs one action.
Turns go by the order token given, not some silly clockwise rule. Who falls behind is left behind!
Place an action token from your supply and perform the corresponding hero action. You can:
- A. Place the action token on an unoccupied action card in the display.
- B. Lay 1 of your action cards from your hand face-up in front of you and place the action token on it.
- C. Or place the action token on a city action space.
Every single action needs an action token. No token? No action! Simple as that!
Only 1 action token can be placed on any action card.
In the city action space the actions move, sword, harpoon and shield token can be taken only once by each hero, while portal and pass can be taken multiple times.
A hero can use city actions from anywhere. Your glorious deeds will shine from far away!
If you cannot perform the action, you can't choose it. You can forgo possible bonuses for the selected action, but not the full execution of the action. A detailed explanation of the individual actions follows on Page 9.
During this phase, you must also play the hydra card(s) in your hand and perform the hydra action depicted on it. This action is performed in addition to your regular action. It can be done before or after your regular move. No action token is required for the hydra action. It's possible that the hydra action harms your own hero. If the hydra action cannot be performed, it is forfeited. Afterward, place the hydra card on the corresponding discard pile.
A good time to play a hydra card is when the hydra action cannot be performed. Be aware of your so-called friends - they might have other plans.
If a hydra action shows multiple colors, perform the actions from left to right and top to bottom. Arrr, ye are bound by the code!
Phase 3 - Hydra
In this phase, the Hydra strikes back.
- Collect all unused action cards. Meaning all action cards in the display without an action token, and all unused action cards in the players' hands.
- Shuffle these action cards and place them as a face-down stack next to the game board.
- Reveal all action cards one by one and perform the hydra action depicted on them.
- Reveal the hydra cards placed in Phase 1 in sequence and perform their effects.
If all the action card's effects cannot be performed, perform as many as possible. The remaining effects of the card are forfeited. Easy enough, my dear!
Phase 4 - Support
The citizens support you. Thus, depending on your position on the compass, you receive some free glory (in the current order on the compass) as motivation and encouragement for your fight:
- the second place gets 1 glory,
- the third place gets 2 glory,
- and the fourth place gets 3 glory.
Not to be a rules-stickler, but during this phase, action tokens cannot overtake each other. Meaning, an action token remains behind the token placed before it, the remaining glory is forfeited. The order of the action token does not change in this phase, only the distances in between. No jumping, laddie!
Example for support: +1 glory; +2 glory (does not overtake); +3 glory (does not overtake).
Phase 5 - Playing Order
(Not applicable in the last round.)
Create the new playing order according to the reversed order on the compass. The hero at the last place on the compass obtains the 1st turn order token. The penultimate hero gets the 2nd turn order token, and so on.
Example for playing order: 1st player on order track, 2nd player on order track, 3rd player on order track, 4th player on order track.
Phase 6 - Clean Up
The game ends when the last moon phase token is removed. The remaining steps in this phase are skipped. Proceed to game end.
- Take the leftmost moon phase token away to indicate the progress of rounds.
- Take back your action tokens from the action cards and the city actions.
- Shuffle all action cards, including those from the action deck, and place them face-down next to the game board as the new action deck.
- Place the hydra cards on the respective discard piles.
- Turn all head counters with 0 heads to 3.
Game End
The game ends immediately when one of the following four situations occurs:
Defeat
- The last wall token is removed. You have lost, and the game ends immediately.
The hero who is last on the compass is declared the losing tragic hero.
Read aloud: "The Hydra triumphantly breaches the last of the city walls. Its many heads destroy the once proud city of Arizont and its ruins will be a reminder of the ineptitude of your group of heroes, led by the infamous
Victory
- All heads on the 4 necks of the Hydra are cut off (0 hydra heads). You have triumphantly won. Finish the current turn, but no more hydra cards may be played from this point on.
- After the last round. If at least one wall token still is left, you have won.
The hero who is first on the compass is declared the winning epic hero.
Read aloud: "Thank you, oh brave heroes! You saved our city from certain doom. We will forever be in your debt. You,
Hero Actions
You cannot choose hero actions that you cannot fully perform! One must commit to the task!
You can carry out the city actions even if your hero is not inside the city. That is the true art of it!
Movement Action
With the movement action, you can move to adjacent spaces. The action specifies how many steps you must take.
- Movement distance: 1. Bonus area: +1.
- You may move to any free adjacent space with each step. Spaces occupied by a hydra head or another hero aren't considered free. However, spaces with a barricade or a neck tile are considered free.
- Adjacent spaces are directly horizontal, vertical, or diagonal.
If you move onto a space with another hero, you must shove them first (see Shoving another Hero).
Example movement action: Allowed are free spaces, barricades or hydra necks. Allowed when shoving another hero (-1 glory). Not allowed if hydra head.
Ye cannot end yer movement on the space where ye started. And why would ye? There is no progress in it, I say!
You can move from any space of the wall area to the inner city, and vice versa. Multiple heroes can be in the inner city.
Example inner city: A. Witch is moving to the inner city. B. Witch is moving from the inner city to the wall area. The barricade does not count as an obstacle.
Mind the Bonus! If the Action Card Bonus shows the same Area Icon as your Hero starting space, you can use these additional bonus steps. We dwarves have natural short legs, so we are always aware of these shortcuts.
Shoving Another Hero
Since only one hero can stand on each space, you must shove the other hero first. This applies even when passing through the space of another hero.
To shove another hero, you must give up 1 glory in addition to the movement or portal action.
The shoved hero must then move to an adjacent free space. The player of the shoved hero decides. If no space is available, the shoved hero is placed in the inner city, but does not lose any glory.
It is possible that two heroes exchange place during shoving.
Being protected does not keep you from being shoved.
Example shoving another hero: A. Witch enters the space of berserker. B. Witch player loses 1 glory. C. Berserker moves to witch's old space.
Attacking a Hydra
There are 2 ways to harm the Hydra and drive it back. One needs the use of a sword on a head or the harpoon on a neck. If the hero's action allows more than 1 point of damage, these are performed all at once, not in separate consecutive actions. You earn corresponding glory, even if part of the points of damage are wasted.
While I wish it was different, you cannot use sword and harpoon actions against anything but the Hydra!
Sword Action
With the sword action, you deal damage specified on the card to the Hydra. To perform this action, you must stand horizontally or vertically adjacent to a Hydra head.
- Damage points: a single sword is 1 damage; a double sword is 2 damage. Bonus Hydra: +1.
For each point of damage, the number of heads on the affected Hydra head is reduced by 1. If the head counter drops below 0, the affected Hydra retreats by one space for each damage point (see harpoon action).
Each damage point dealt with a sword earns you 1 glory, regardless of whether the number of heads is reduced or the Hydra retreats. If the bonus matches the Hydra, you deal 1 extra damage.
If your hero is in front of a retreating Hydra head, your hero is allowed to follow for free.
Example sword reach: Red and white Hydra head can be attacked. Yellow Hydra head can't be attacked, since it's not within the sword's range. Neck tiles can't be attacked when the Hydra still has heads on its head counter. Free spaces can't be attacked.
Example sword action: A. Play sword action with bonus (damage 3). B. Damage 1: Set Hydra head to 0. C. Damage 2: Move neck tile. D. Damage 3: Move neck tile. E. Hero can follow the Hydra head.
Harpoon Action
With the harpoon action, you inflict damage to the neck upon which you're standing. The card indicates the number of damage dealt.
This action can only be initiated when your hero stands on a neck tile.
- Damage points: 1. Bonus Hydra: +1.
For every single inflicted point of damage, the corresponding neck retracts by 1 space. The neck tile on the maelstrom space is removed, moving all the other tiles, both neck and Hydra heads, back by the amount of damage. Heroes on the affected neck are moved accordingly.
If an unprotected hero ends up on the maelstrom space due to this movement, they're wounded, placed in the inner city, and lose 1 glory. If they are protected, they may move to a valid adjacent space instead (see protect action).
Each damage point inflicted by a harpoon action earns you 1 glory. If the bonus matches the Hydra, you deal 1 extra damage.
Example harpoon action: A. No bonus for the white Hydra head. B. Play harpoon action to inflict 1 damage. C. Remove the farthest neck tile. D. Move Hydra head. E. Move all heroes on neck.
It is futile to attack a Hydra head without active heads on a maelstrom space and thus, does not earn you any glory.
Be clever, little one. If the action card's bonus matches the color of the affected Hydra head, you may deal 1 additional damage point (you also receive corresponding glory for this). Knowing the weakness of your opponent can be a powerful tool.
Barricade Action
With the barricade action, you raise a barricade that stops the Hydra's forward movement. If your hero is on a space without a barricade or neck tile, place a barricade on your space. The barricade action earns you 1 glory. As soon as the Hydra hits a barricade, its movement stops at the previous space, and any further movement points are lost. The barricade is then removed. A hero on the barricade's space is safe and takes no damage.
Any hero can enter a space with a barricade, regardless of which player raised it. On a barricade, a hero can move or fight as usual, even across the barricade.
If a barricade is destroyed by the Hydra, it is put back into the common supply.
If you run out of barricades during the game, just take any existing barricade and move it to your hero's space. Surprise, I needed that!
If your hero is in the inner city, you can use the barricade action to rebuild a destroyed wall token. For this, place a wall token back on the city wall.
Example placing a wall token: A. Play barricade action. B. Instead of placing a barricade a wall token is placed. C. Gain 1 glory.
Portal Action
With the portal action, you move your hero to a portal space where neither neck nor Hydra heads are present. Three portal spaces align with the three pairs of fire pillars next to the paths while one is located in the inner city.
If you teleport to a portal space occupied by another hero, you have to shove them (shoving another hero, see Page 9).
With the portal action, you can also teleport to the inner city.
Portal actions are available both on action cards and as a city action. Any number of heroes can use the city action portal as often as desired. Keep 'em portals busy!
Portal spaces are found in these areas: boat area portals, reef area portals, beach area portals, and inner city portal.
Protect Action
With this action, you protect your unprotected hero. To indicate this, take a shield token from the general supply and place it visibly in front of you. You can only have 1 shield token at any time. A protected hero:
- may evade a Hydra's bite. If the Hydra would bite the hero, you instead move them to an adjacent space, out of the Hydra's reach, to avoid the attack.
- may evade a Hydra which is about to overrun them. If the Hydra would move onto the space of the hero, they may instead move to a valid adjacent space to avoid being wounded.
- may avoid being moved to a maelstrom. If the Hydra would move the hero to a maelstrom space, they may evade to a valid adjacent space instead of being wounded.
After this evasive movement, the protection is lost and you return your shield token.
Shoving another hero while evading is allowed as in the rules of shoving.
Pass Action
With the pass action, you skip your turn. Place your action token on the pass city action. By doing this, you forfeit the current turn, but can perform other actions in subsequent turns of this phase. You lose only 1 action this way. Any number of action tokens can be put on the pass city action. Even if you pass, you can still play your hydra card from your hand.
Wounded Heroes
If a hero is wounded, they are moved to the inner city and instantly lose 1 glory.
Hydra Actions
Hydra Movement
Using the movement action, the corresponding colored Hydras either move towards the city in a straight line or deal damage to the city wall. The card indicates the number of moved spaces.
- Movement points: the number on the card.
- Bonus area: +1.
- A Hydra head does not move if the head counter is 0.
- The Hydra head and its corresponding neck tiles are moved forward.
- If the card bonus matches the landscape of the starting space of the Hydra head, the Hydra moves 1 additional space.
- Fill the spaces up to the maelstrom space with neck tiles.
- Heroes on the neck tiles are moved accordingly.
There are differing scenarios in the event that the space to which the Hydra is moving is not free:
- If the Hydra encounters a barricade, its movement is halted on the tile before the barricade, and it loses any remaining movement spaces. The barricade is destroyed in the process (Barricades, Page 11). The Hydra movement ends here.
- If the Hydra moves onto a space with a protected hero, the hero loses their shield token and must now move to 1 adjacent space (they may shove another hero if needed). The Hydra continues its movement (Protect Action, Page 11).
- If the Hydra moves onto a space with an unprotected hero, the hero is considered wounded and the Hydra continues its movement (Wounded Heroes, Page 12).
- If the Hydra moves beyond the city wall, the Hydra deals damage to the city wall instead. For every space moved 1 wall token is removed. If no wall tokens are left, the game ends with a defeat (Game End, Page 8).
Example Hydra movement: A. Yellow Hydra: no movement because the head counter is 0. B. White Hydra: runs over berserker. Berserker moves wounded to inner city (-1 glory). C. Blue Hydra: runs over witch. Witch was protected by a shield token and moves to a valid adjacent space. D. Red Hydra: stops at barricade. Barricade gets destroyed.
Hydra Growth
The growth action causes new heads to grow. The card specifies how many heads grow on which Hydra head. Increase the number of heads by turning the head counter by the indicated number of points.
The maximum number is 6; any additional growth is ignored.
The number in the front of the Hydra's head indicates the number of heads. In the example shown above, the number of heads is 0.
Hydra Bite
All the heads on the respective Hydra head bite their surroundings. This means that all adjacent spaces (horizontally, vertically, and diagonally) around the Hydra head suffer damage.
Follow these steps:
- A Hydra head does not bite if the head counter is 0.
- A protected hero who is not on a barricade loses their shield token and must move to an adjacent space (Protect Action, Page 11).
- An unprotected hero who is not on a barricade is wounded (Wounded Heroes, Page 12).
- A hero on a barricade space remains unwounded and stays in place.
- All affected barricades are destroyed (Barricades, Page 11).
- Multiple bites on a card are treated as separate bites in sequence.
- A bite that affects multiple heroes is resolved in turn order.
- The Hydra doesn't injure itself with a bite.
Example Hydra bite: A. Paladin: is in safe distance. B. Berserker: moves wounded to city. C. Witch: shield token gets destroyed. D. Pirate: barricade gets destroyed. Pirate is safe.
Hydra Rage
The rage action combines movement and growth in one card. Both effects work exactly as previously described. The growth is indicated by the upper left number on the card. The movement is indicated by the lower left number on the card.
Example rage: A. The Hydra has 0 heads. B. A rage card is played. C. The Hydra grows 1 head. D. The Hydra moves 1 space.
City Wall Damage
The Hydra can damage the city wall either through its movement or its bite. However, only when the Hydra head stands directly in front of the city wall.
First, determine the damage points from the Hydra's action. Each movement point counts as a damage point, and with a bite, heads of the corresponding Hydra count as damage points as shown below. If the Hydra head counter shows 0, both the movement and the bite action are ignored.
For 1 damage point, remove one wall token; for 2 damage points, two wall tokens; and for 3 damage points, remove a third wall token. Any extra damage points are discarded.
If all wall tokens are removed, the heroes lose immediately (Game End, Page 8).
Movement damage
- 1 movement = 1 damage point (1 wall token removed).
Example: hydra damaging the city wall by movement. A. The red Hydra would move 1 space into the city wall and therefore deals 1 damage. B. 1 wall token is removed.
Bite damage
- 1-2 heads = 1 damage point.
- 3-5 heads = 2 damage points.
- 6 heads = 3 damage points.
Example: hydra damaging the city wall by bite. A. The yellow Hydra is biting. Since it has 5 heads it deals 2 damage to the city wall. B. 2 wall tokens are removed.
Game Example: Last Game Round of a 2 Player Game
Turn order: 1st turn order token: witch; 2nd turn order token: berserker.
1st Turn - Witch: The witch starts by using a harpoon action (+1 vs red Hydra) on the red Hydra. The Hydra retreats 2 spaces, and the witch earns 2 glory. She moves 1 space on the compass and then skips over the berserker, thus advancing 3 spaces altogether.
1st Turn - Berserker: The berserker plays a movement card (+1 wall area) and, thanks to a bonus, moves adjacent to the yellow Hydra. This demonstrates that starting in the inner city doesn't limit movement, and the bonus allows him to reach the safety of a barricade.
2nd Turn - Witch: The witch plays a double sword card (+1 vs. blue Hydra). She reduces the white Hydra to 0 heads, causing it to retreat 1 space. The witch earns 2 glory and advances accordingly on the compass.
2nd Turn - Berserker: The berserker uses his double sword card (+1 vs. yellow Hydra). He reduces the yellow Hydra to 0 heads, leaving it harmless in the Hydra phase. He gains 3 glory, overtaking the witch on the compass.
3rd Turn - Witch: Without an appropriate card, the witch uses the sword city action to attack the red Hydra, reducing it to 0 heads. She earns 1 glory, surpassing the berserker once again. The witch decides to play her Hydra bite card now, as the red and yellow Hydra have no heads and cannot harm anyone.
3rd Turn - Berserker: The berserker uses a movement card (+1 beach area) to position himself in front of the blue Hydra.
4th Turn - Witch: The witch uses harpoon city action, causing the red Hydra to retreat 1 more space, earning her 1 additional glory.
4th Turn - Berserker: The berserker erects a barricade, earning 1 glory and protecting himself from the advancing Hydra. He then plays the Hydra movement card from his hand, but the red Hydra has no heads and does not advance.
5th Turn - Witch: The witch moves using a movement card (+1 reef area) from her hand, positioning herself upon the yellow Hydra. She dismisses the movement bonus.
5th Turn - Berserker: The berserker equips a shield token, preparing for the Hydra's assault.
Hydra Phase:
A. The blue Hydra grows 2 heads (already at 6). B. The blue Hydra smashes into the barricade, destroying it. C. The red Hydra, with 0 heads, remains inactive. D. The red Hydra grows 2 heads. E. The red Hydra moves 1 space. F. The blue Hydra moves and the berserker uses his shield token to evade. G. The red Hydra bites the witch, who loses 1 glory and retreats to the inner city. She is now again behind the berserker! The yellow Hydra doesn't bite as it still has no heads. H. The white Hydra, also 0 heads, does not move. I. The white Hydra grows 1 head and moves 1 space. J. The blue Hydra grows no heads (as it already has 6 heads) and moves 1 space into the city wall, destroying 1 wall token.
The game concludes with the Hydra withdrawing its attack, and the berserker basks in eternal glory, raising a cold, frothy brew in triumph.
Solo Mode
Here are the rules for the solo mode. You play with the base game rules and materials without any expansions. The changes from the base game are explained here.
Modified Setup for Solo Mode
A. From the Hydra cards, find the 10 light and 20 red Hydra cards with the solo mode symbol (you find it in the lower right corner on the card).
B. Shuffle them separately and set up the red Hydra cards followed by the light Hydra cards as the face-down Hydra deck. Remove the remaining Hydra cards from the game.
C. Shuffle the action cards and set them face down as the action deck. If the action deck runs out at any point, shuffle the discard pile to form a new action deck. The action cards aren't shuffled after every round.
D. Take 1 hero and 5 action tokens in 2 colors each for your supply.
E. Place your hero in the inner city.
F. Set up the Hydra according to the solo scenario, and the specified number of wall tokens.
Modified Game Play for Solo Mode
The game lasts for 6 rounds until the Hydra deck (30 cards) is used up. Each round consists of 6 phases:
1. Preparation Phase
Lay out 2 rows of 5 face-up action cards each, and 1 row of 5 face-down Hydra cards. This forms a 3x5 grid, which will be called display.
2. Action Phase I (green action tokens)
Carry out 5 hero actions (from the display or the city actions).
- In the display, only one action per column can be taken.
- Each city action can be used only once.
- The city actions portal and pass can be used any number of times.
Use one color of action tokens to indicate used actions in Action Phase I.
3. Oracle Phase
Reveal the 5 Hydra cards, but don't perform them.
4. Action Phase II (blue action tokens)
Perform 5 more hero actions, either from the display or the city actions. Or, place 1 action token on a Hydra card to block its execution during the Hydra phase.
In this phase, you can take multiple actions from one column, but only unused actions, and unused city actions (except portal and pass). Use the other color of action tokens to track those in Action Phase II.
5. Hydra Phase
Perform all Hydra actions on the unoccupied cards in order, from left to right, top to bottom (both action and Hydra cards).
6. Cleanup Phase
Discard all action cards (except those marked in the Action Phase II) and all Hydra cards to their respective discard piles. Action cards activated in the Action Phase II remain for the next round. They remain in their positions. During the next preparation phase, only the vacant spots are filled with action cards. Return all action tokens to your supply.
Game End (Solo Mode)
The game ends after 6 rounds when the Hydra deck is exhausted. The game ends prematurely if all 4 Hydra heads are directly in front of the city wall, or the last wall token is removed. In this case, you've lost the game.
If the city still stands, subtract the number of neck tiles and the number of heads from 100 points. If your hero is on the city wall at game end, subtract another 5 points. Add the number of remaining wall tokens. Try to achieve the highest score.
Evaluate your score:
| Score | Result |
|---|---|
| Below 45 | The city was saved, but that's all that can be said. |
| 46 to 59 | There's room for improvement. |
| 60 to 69 | Heroic, the city thanks and rewards you. |
| 70 to 79 | What a victory, they'll name a holiday after you. |
| 80 to 89 | You'll be weighed in gold, and a towering statue will be erected in your honor. |
| 90 to 100 | The gaming world bows to you, noble and mighty slayer of Hydras. |
| Above 100 | You seem to be my equal! |
Example of Solo Play (Solo Mode)
Setup and Action Phase I: In this solo mode example we choose the pirate. The pirate chooses her first 5 actions (green) from the display or the city actions. She may only use 1 action of a column in this phase.
A. The pirate first teleports herself next to the red Hydra. B. Then she uses the double sword card (+1 vs. red Hydra), reducing the heads by 3. C. The pirate slashes again, using the single sword card (+1 vs. red Hydra), reducing the heads by 2 more. D. The pirate then moves onto the neck of the red Hydra. E. Afterward she harpoons it for 1 damage.
Oracle Phase: Now all Hydra cards get revealed!
Action Phase II: The pirate can now use her action tokens on any unused actions, city actions or block the Hydra cards.
A. The pirate now uses the portal to get in front of the yellow Hydra. B. She then builds a barricade. C. She portals back next to the red Hydra. D. She uses the sword city action to reduce its head counter to 0. E. The pirate's last action is blocking the Hydra head growth card by claiming it.
Hydra Phase:
A. The first card is a bite from the yellow and red Hydra. Since the red Hydra has no head it does not bite. The yellow Hydra destroys the barricade. B. The blue Hydra moves 1 space. C. The yellow Hydra moves 1 space. The red Hydra does not move as it has no heads left. D. The blue Hydra grows 1 head and moves 1 space. E. The white Hydra grows 1 head and moves 1 space. F. The yellow Hydra grows 1 head and moves 1 space.
Cleanup Phase: Now take any unused action cards as well as used action cards from Action Phase I (green action tokens) and any Hydra cards into their respective discard piles. All action cards with action tokens from Action Phase II (blue action tokens) stay and can be used next turn.