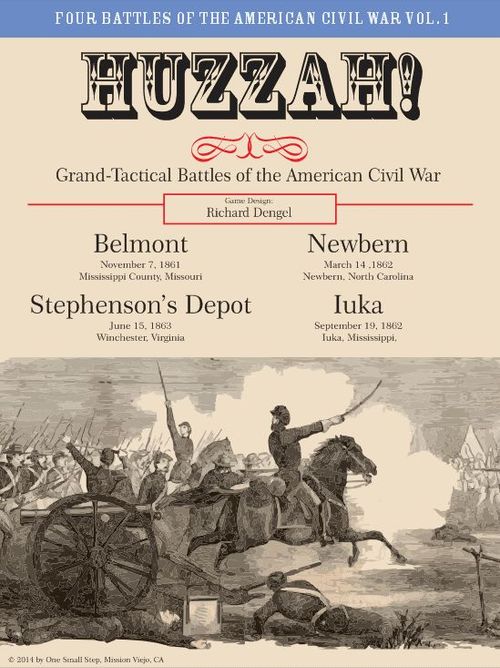
Huzzah! Four Battles of the American Civil War Vol. 1
Huzzah! Four Battles of the American Civil War Vol. 1 Rulebook
Table of Contents
Table of Contents
- 1. Introduction
- 2. Glossary
- 3. Game Components
- 4. The Game Turn
- 5. Leaders
- 6. Combat Unit Type – Infantry
- 7. Cavalry – Default Rules
- 8. Artillery
- 9. Zero-Strength Units
- 10. Unit Action – Movement
- 11. Fence Lines
- 12. Streams
- 13. Unit Action – Fire
- 14. Line of Sight
- 15. Advance and En Passant (In Passing) Fire
- 16. Unit Action – Assault
- 17. Unit Action – Charge
- 18. Unit Action – Regroup
- 19. Morale
- 19.1. Disorganized
- 19.2. Calculating the Average Base Morale of a Stack
- 19.3. Calculating the Average Modified Morale of a Stack
- 19.4. Leader Effects on Average Morale
- 19.5. Failed Morale Checks – Small-Arms Stacks (Infantry and Cavalry)
- 19.6. Failed Morale Checks – Artillery
- 19.7. Effects of Disruption
- 19.8. Effects of Rout
- 20. Unit Action – Rally
- 21. Conditional Rules—General Guidelines
- 22. Conditional Cavalry Rules
- 23. Conditional Leader Initiative
- 24. Conditional Deployment: Column
- 25. Conditional Rule – Formation Stragglers
- 26. Conditional Rule – Twilight
1. Introduction
Huzzah! is a tactical simulation of American Civil War combat. This booklet provides rules for the Huzzah! system of games. Hayfoot! Strawfoot!, The Battle of First Bull Run debuts as the first game in this system.
Games in development for this series include:
- A Fight or a Footrace. The battle of Prairie Grove.
- No Such Blood including:
- Smash 'Em Up! The battle of Belmont
- I Fights Mit Sigel. The battle of New Market, Virginia.
- KilCavarly. The battles of Aldie and Hanover, cavalry action during the Gettysburg campaign.
- The Devil's Due. The battle of Brice's Crossroads.
2. Glossary
A few notes about this glossary:
- The table sorts the terms alphabetically. They do not appear in the order of the referenced rule.
- A player should refer to this section as he reads this manual.
- As they play the game, the players should refer to this glossary first for the quick definition of a term.
Action Segment (4.2) - A segment where the player commits Unit Actions. During a Friendly Action Segment, a unit may execute ONE Action. These are:
- Move
- Fire
- Assault
- Charge
- Rally
- Reorganize
Advance Fire - Occurs when an enemy unit enters a friendly Minimum Fire Zone (MFZ) or exits a friendly Zone of Control (ZoC). Within restrictions, a friendly combat unit may fire at an enemy as soon as he enters or exits that friendly MFZ or ZoC. Notes and References: Section (15.3, 15.4). Place Advance Fire on firing units. Also see En Passant fire.
Army Leader - The overall commander of a force. The first link in a Chain of Command. See (5.1).
Assault - A form of Combat resolved in 3 rounds (or less if one side Routs). In Assault, both sides simultaneously fire and inflict casualties. Neither side may voluntarily terminate an assault once it has been declared. Section (16).
Assault Initiative - A type of Leader Initiative enabling subordinate units to perform all Actions. Conditional Rule. Section 23.
Average Base Morale (ABM) - See Base Morale. The Average Base Morale of a stack is the sum of the base morale of all units divided by the number of units in the stack. Round fractions down. Notes and References: A stack contains 3 units, 2 at full strength (base morale of 5) and 1 reduced unit (base morale of 2). The ABM of the stack is 4, 12/3 = 4. Section (19.2).
Average Modified Morale (AMM) - See Modified Morale. The Average Modified Morale of a stack is the sum of the modified morale of all units divided by the number of units in the stack. Round fractions down. Notes and References: A stack contains 3 units, 2 at full strength with one O hit apiece (base morale of 5-1 = 4) and 1 reduced unit with no O hits (base morale of 2 unmodified). The AMM of the stack is 3: 10/3 = 3.33 rounded to 3. Section (19.3).
Base Morale - The printed morale of a unit unmodified by O hits. Note the Base Morale of reduced units. Notes and References: A unit with a Base Morale of 5 has suffered two O hits. Its Base Morale remains 5. Section 19.2.
Brigade Leader - A type of leader subordinate to a division leader and who directly commands combat units. See (5.1).
Chain of Command - A command structure proceeding from an Army Leader through one or more Divisional leaders, and from the Division Leader to one or more of his brigade leaders. Notes and References: Combat Units are subordinate to their brigadier. See (5.1).
Charge (4.2) - A typed of Unit Action enabling a Stack to both Move and Assault. A Stack must be exactly 2 hexes from the charged enemy unit(s), must contain at least 2 non-zero strength-point units, and must face the enemy stack. Section (17).
Clear hex - A terrain feature generally free of woods or other features defined by a scenario. Contrast to Non-Clear hex.
Combat Unit - Any unit with a strength of zero, one, two, or three. Infantry, Cavalry, and Artillery. Also called a Unit.
Command Isolation - A unit or leader surrounded by enemy units or their Zones of Control. See (5.4).
Command Radius - For Combat Units or leaders, the maximum number of hexes that the unit may be from their superior to retain command. Notes and References: Leaders have a command radius of equal to their Command Value. (5.2)
Command Source - An on-board hex, typically on a thoroughfare exiting the map on a friendly board edge. Usually, a Division Leader must be within 5 hexes of a command source or within 5 hexes of a thoroughfare leading back to that command source. Notes and References: A scenario's custom rules identify Command Sources. Army leaders are their own Command Sources. Treat like on-board command sources.
Command State - A leader or combat unit will be in one of two Command States, In Command or Out of Command. See (5.3).
Command Value - The number printed on a leader unit. The value indicates the leader's command radius and his morale modifier. The higher the number, the more effective the leader.
ComS - Command Source.
Counter Charge - The ability of a mounted cavalry unit to charge an assaulting unit. Conditional rule (22.4).
Crossing - A Thoroughfare crossing a stream hex. Treat the hex as clear terrain. Notes and References: 12.4
Deployment - Related to Artillery and Cavalry. Each has two deployments. Artillery can be limbered or unlimbered. Cavalry can be mounted or dismounted.
Disengaged - Place a Disengaged marker on enemy units that begin their Action in an enemy fire zone and ends their move beyond the Fire Zone of all enemy units. Notes and References: 10.6. Placement is optional. In most cases they will not be needed.
Dismounted Cavalry - A cavalry deployment. Treat dismounted cavalry like infantry. Notes and References: A Conditional rule. Implement only when instructed by a given scenario. (22).
Disorganized - A combat unit that is Disrupted or Routed. Section (19.1).
Disrupted - A form of Disorganization. Disrupted units may not initiate a charge or assault. They have reduced combat capabilities. Section (19.7).
Division Leader - A type of officer directly subordinate to his Army Leader. See (5.1).
EFZ - Enemy Fire Zone. See Fire Zone.
En Passant Fire - A type of Advance Fire that occurs when a unit exits an EZoC. The fire takes place before the target moves (but after any facing change). Section (15.4).
Enemy Zone of Control (EZoC) - A Zone of Control exerted by an enemy unit. Also called an EZoC. Section (10.3).
Facing - Position combat units so that the top of it faces the vertex (point) of a hex. The two hexes split by the vertex is its front. All other hexes are flank hexes.
Fence Lines - Some hexes may be Protected by a fence line, whether wooden rail or stone fence. Each has their own advantages. See Protected Hex, below. Section (11).
Fire Zone (FZ) - A unit's fire zone extends out frontal hexes to their maximum range, subject to Line of Sight. Section (13.1).
Good Order - A combat unit that is not disrupted or routed. Section (19.1).
Horse Artillery - Artillery differentiated with a vertical stripe. Has 3 movement points every friendly Horse and Action segment.
Horse Segment - The ability of leaders, artillery, and cavalry to Move (only). Cavalry, Leaders and Horse Artillery have 3 MPs in a Horse Segment. Regular Artillery has 1 MP every Horse Segment. Section (4.3).
In Command - See Command States. Both leaders and combat units have a command state.
Initiative - See Leader Initiative.
Isolation - See Command Isolation.
Leader - A non-combat unit that applies morale advantages to a stack and places other units and/or leaders in command. Also see Command Value, above.
Leader Incapacitation - A leader checks incapacitation when stacked with units that suffer an O hit. Incapacitate the leader on a second roll of 9 during fire combat, and an 8 or 9 during an assault. See (5.9).
Leader Initiative - Leaders have 1 of three types of Initiative, Failed, Skirmish, and Assault. The type of initiative determines the Actions available to subordinate units. Section (23).
Limbered Artillery - An Artillery deployment. See (8.1). Limbered Artillery can move but not fire. Place a Limbered marker on limbered artillery.
Line of Sight (LoS) - The ability of a combat unit to "see" another unit. LoS is affected by terrain and elevation. Section (14).
Minimum Fire Zone (MFZ) - A stack's kill zone that enables it to fire at an enemy stack executing a Movement Action. It is usually 1 hex but may be extended to two hexes or three hexes. Section (15.1).
Modified Morale - A combat unit's base morale, less any O hits. Section (19.3).
Morale - Morale represents a unit's ability to withstand combat, avoid straggling, and rally. Section (19).
Morale Bonus - A modifier equal to a leader's Command Value. Add a leader's command value to the Base Morale of a stack. See (19.4).
Mounted Cavalry - A Cavalry deployment. This is the default deployment of cavalry in the standard game. Mounted cavalry may move in a friendly Horse Segment. (4.3).
MPs - Movement Points.
Non-Clear Hex - Any hex containing Woods or Light Woods. Contrast to a Clear Hex. A scenario's custom rules may define other non-clear hexes. Section (14.2).
Non-Sabered Cavalry - Note Mounted Cavalry by an asterisk ( * ) between its strength and morale. When involved in an assault with sabered cavalry (whether attacking or defending), increase the sabered cavalry's fire line by one. (7.1).
Organization (O) Hits - Losses due to fire, assault, routing, and straggling. Indicate O hits with O hit counters. When a full-strength unit suffers 3 O hits flip it to its reduced, or depleted, sided. Remove a reduced unit after its 3rd O hit. Section (13.4).
Out of Command - See Command States. A units or leader beyond the Command Radius of a superior leader. See (5.3).
Protected hex - Fence lines generally follow the sides of a hex but are fully enclosed in that hex. A unit is Protected if it faces a fence line enclosed in a hex. A small arms stack in a Protected hex may have an MFZ of two hexes. A small arms stack receives a +1 line modifier firing through a protected hex side. Section (11).
Rally - The process of recovering from Disruption or Rout. Section (20).
Reduced - A full-strength unit suffering its third O hit is flipped to its Reduced side. Sections (3.2).
Regular Artillery - Non-Horse artillery. Artillery without a vertical Segment. (8.1). [Source prints "Segment" here; the Horse Artillery entry says the marking is a vertical stripe, so "stripe" is presumably intended. Transcribed as printed.]
Regroup - A Unit Action. The limited ability of a unit to recover O hits. Section (18).
Retire by Prolong - During an assault, artillery has the option to avoid further combat by retreating one hex. Artillery beginning a friendly Action segment in an EZoC may also retire. Section (8.7).
Retreat Priorities - The path a routing unit must follow during its retreat. Generally, must be away from enemy units and towards a friendly board edge or Command Source. Section (19.8).
Rifled ( - ) Units - Distinguish units with rifled weaponry by a dash ( - ) appearing between their strength and morale. This applies to infantry, artillery, and dismounted cavalry. A dash on mounted cavalry indicates sabered cavalry (cavalry whose primary weapon was the saber during an assault).
Routed - A Routed stack may only Rally and must Retreat when it suffers any combat result or when it fails to rally. A Routed stack suffers an O hit each time it retreats beyond the first time it routs. Section (19.8).
Sabered Cavalry ( - ) - When mounted, saber-armed cavalry fight with the blade. When involved in an assault (attacking or defending) against non-sabered cavalry, increase the fire line of sabered cavalry by 1. Section (7.1).
Skirmish Initiative - A type of Leader Initiative that prohibits subordinate units from Assaulting or executing a Charge. Section (23.5).
Small Arms - Infantry and Cavalry weaponry, smoothbore or rifled weapon type. When Mounted Cavalry fires use the printed weapon type on the counter. When Assaults, it is either sabered ( - ) or non-sabered ( * ).
Smoothbore Armed ( * ) - Distinguish units armed with smoothbore weaponry by an asterisk ( * ) appearing between their strength and morale. This applies to infantry, artillery, and dismounted cavalry.
Stack - A stack consists of one or more combat units from the same regiment in a hex.
Step Counters - Counters representing reduced cavalry. Replace the full-strength unit with its step counter when it suffers its third O hit.
Stragglers - A stack may Straggle when it exits a non-clear hex. Section (10.5).
Thoroughfare - Pikes, Roads, and Trails are collectively called Thoroughfares. Section (10.7).
Unlimbered Artillery - Unlimbered Artillery may fire but not move except to Retire by Prolong. Place an Advance Fire marker (15.1) on unlimbering artillery. See 8.1.9.
Unlimber Marker - Place an UNLIMBER marker on artillery that unlimbers. Remove the marker at the end of the next friendly artillery segment. See 8.1.9.
Unit - Indicates a Combat Unit not a Leader.
Unit Actions - See Action segment, above.
Unit Type - There are three types of units: Infantry, Cavalry (whether mounted or not), and artillery (whether limbered or not).
Zero Strength Units - Infantry and Cavalry with zero strength points. Does not apply to zero-strength artillery Units do not have a ZoC and receives no positive line modifiers. Apply negative modifiers as appropriate. (9.1).
Zone of Control (ZoC) - All un-routed units with a strength >0 exert a ZoC into all adjacent hexes. A ZoC affects movement, retreat, and leadership. Section (10.3).
3. Game Components
3.1. The Map Board
- 3.1.1. A multi-colored hex map regulates movement and portrays the area of battle for each game.
- 3.1.2. The area each hex represents varies according to the game being played. Refer to the game's custom rules for the specifics of game scale. Also, refer to the Terrain Effects Chart (TEC).
- 3.1.3. Various elevations on a map are usually indicated either in different colors, slope iconography, or both. See the specific key on the map.
- 3.1.4. Slope hex-sides signify a change in elevation. To derive a benefit from a slope, a combat unit must be adjacent to and on the "high" side of the slope hex side. The effect of slopes may differ between scenarios.
- 3.1.5. Clear terrain is open space, devoid of obstructions to the Line of Sight.
- 3.1.6. Non-clear hexes are light woods, woods, i.e., anything not Clear. The game being played may include additional non-clear terrain (e.g., cornfields) and their effects.
- 3.1.7. Refer to the scenario's custom rules for other details about the map board.
- 3.1.8. Buildings or other landmarks are not a terrain type, per se. They are provided for historical interest only. Sometimes they help locate victory point or other important hexes.
3.2. Playing Pieces
- 3.2.1. Three types of counters comprise the mix: Combat units (or just Units, interchangeably called Stacks), leaders and informational counters.
- 3.2.2. The terms unit or stack strictly refer to a Combat piece. A Stack may comprise one or more combat units. Even a single unit in a hex is a Stack.
- 3.2.3. In game terms, a Leader is not a combat piece and hence not a Unit.
- 3.2.4. Combat units include Infantry, Cavalry, and Artillery. Usually a unit represents a battalion (approximately) of infantry and cavalry, or a section (approximately) of artillery.
- 3.2.5. Two numeric values, separated by a dash ( - ) or an asterisk ( * ) appear on a combat unit.
- The first value on a combat unit, reading from left to right, is its BASE FIRE FACTOR. Sometimes the rules refer to this value as unit STRENGTH POINTS or SPs.
- The second value is its BASE MORALE FACTOR.
- The dash ( - ) or asterisk ( * ) indicates a unit's weapon class. For infantry, artillery, and dismounted cavalry a ( - ) denotes RIFLED weapons (whether small arms or artillery), while ( * ) signifies smoothbore weapons.
- When mounted cavalry fires use the character to denote the small arms weapon type. When involved on an assault, the characters indicate sabered or non-sabered cavalry, respectively.
- Note that base strength and morale values vary depending upon a unit's EFFECTIVENESS, Full-Strength or Reduced.
- 3.2.6. Leaders represent individual commanders. There are three types of commanders: Army, Division, and Brigade. The games differ in the types of leaders portrayed. Some games feature only Brigade leaders, some include Division leaders, and others feature all three types. A scenario defines the specific use of each leader type.
- An Army Leader commands a side's entire force.
- A Division Leader commands all Brigade leaders in his division.
- A Brigade leader commands all regiments in his brigade.
4. The Game Turn
Each game-turn of Huzzah! is broken down into Segments. One turn represents approximately 30-45 minutes of real time.
4.1. Abbreviated Game Turn Segments
For a full explanation of the game turn segments, see Huzzah v4 Charts and Tables.
- a) US Artillery Segment
- b) US Small Arms Segment
- c) US Horse Segment
- d) CS Horse Segment
- e) CS Artillery Segment
- f) CS Action Segment
- g) US Action Segment
- h) CS Artillery Segment
- i) CS Small Arms Segment
- j) CS Horse Segment
- k) US Horse Segment
- l) US Artillery Segment
- m) US Action Segment
- n) CS Action Segment
- o) Game Turn Segment. Advance the turn marker one click on the Turn Track.
4.2. Action Segments
- 4.2.1. During a player's Action Segment, the appropriate units perform ONE action.
- 4.2.2. Each unit may perform different Actions, but no unit may perform more than one. These actions are:
- Move (10)
- Fire (13)
- Assault (16)
- Charge (17)
- Regroup (18)
- Rally (20)
4.3. Horse Segments
- 4.3.1. During a friendly Horse segment only horse-driven units may move: Cavalry, Leaders, Limbered Regular Artillery, and Limbered Horse Artillery.
- 4.3.2. Regular artillery has 1 MP during this segment, and 2 MPs if spending the entire segment on a Pike/Road.
[Figure 1 is a map example and is not reproduced here.]
At various points in the rules, examples of play punctuate the game's key concepts. In some instances, the examples provided do not stand alone but are embedded in a broader narrative. Sometimes the narrative references concepts before their elaboration in the rules. Consider these instances as teasers for what is to come. Consult the Glossary as necessary for a brief definition of a term (e.g., O Hit). North is up.
The Situation. It is the first USA Action segment (segment g) of the turn (4.2). Hoping to contain the coming storm, Frost deploys elements of 2 brigades from his division. General Fagan's 22nd AR holds the CS right. Deployed behind a post and rail fence (11.0), Parson's 10th MO stakes the left. An 8th MO unit stacked with Parsons has two Organization (O) Hits (13.4) and shakily guards the center. The Winding Road, between 1301 and 0802 connects Frost with his Command Source (5.3.5), south of 0802 and off-map.
The Yankee approach has begun with Dye's Brigade leading the way. The 26 20th IA has already swamped the Rebel right at hex 0804. The 37th Ill and the second battalion of the 20th IA (16) lock the Arkansans in place. Meanwhile the 21st WI and 51st IL approach the butternut's left in echelon. The 21st has declared a Charge (section 17) against the 14 10th MO unit. Colonel Bertram and his 20th WS has just arrived, marching to the sound of the guns.*
First, let's check Command…
5. Leaders
5.1. Chain of Command
- 5.1.1. A combat unit is subordinate to its Brigade leader.
- 5.1.2. That brigade leader is subordinate to a specific Division leader as defined by a scenario's Order of Battle.
- 5.1.3. That division leader is subordinate to the Army leader.
- 5.1.4. In Figure 1, Blunt is the Union Army Leader. Huston, the division leader, reports to Blunt. The Dye and Bertram brigade leaders subordinate to Huston.
- 5.1.5. For the Confederates, Frost is the Division leader. Fagan and Parsons (Brigade leaders) report to Frost. In the narrative, the Rebels do not have an on-board Army leader.
5.2. The Leader Command Value
- 5.2.1. The number printed on a leader is his Command Value (CV). The higher the number, the better the leader.
- 5.2.2. A CV indicates his Morale Modifier as well as his Command Radius.
- 5.2.3. A leader's command radius specifies a range of hexes he projects in all directions. To be influenced by a leader, a subordinate must be no further than that value from his superior.
- 5.2.4. A Command Radius may not be traced through an Enemy Zone of control unoccupied by a friendly unit nor through an enemy occupied hex.
- 5.2.5. In Figure 1, Blunt's Command Value is 5 for example, Frost's is 2, etc.
5.3. Command States
- 5.3.1. A leader and his subordinates will be in one of two states: In Command or Out of Command.
- 5.3.2. When within the Command Radius of his superior, a Subordinate assumes the Command State of that superior leader.
- 5.3.3. A combat unit is in command if within the command radius of his in-command Brigade leader or is adjacent to a unit in his brigade that is in command.
- 5.3.4. A Brigade leader is in command if within the command radius of his in-command Division leader.
- 5.3.5. A Division leader is in command when he satisfies any one condition below.
- He is within the command radius of the Army leader.
- He is within 5 hexes of a Command Source. Each scenario designates a Command Source. This is typically the hex on a Thoroughfare that exits a friendly board edge. That path may not be traced through an Enemy Zone of Control unoccupied by a friendly unit nor through an enemy unit.
- He is within 5 hexes of a Thoroughfare hex (10.7) leading back to a Command Source. This path must be contiguous; it may not vary from the Thoroughfare. That path may not be traced through an Enemy Zone of Control unoccupied by a friendly unit, nor through an enemy occupied hex.
- 5.3.6. Referring to Figure 1 above:
- Huston is within the Command Radius of Blunt. Dye and Bertram are within the Command Radius of Huston. All blue leaders are in command and confer this status to their respective units. Note that the 26, 20th IA unit is technically beyond the Command Radius of Dye, its brigade leader. However, since the adjacent 16 unit is in command it places the 2*6 unit in as well (5.3.3, above).
- On the Rebel side, Frost, the Division Leader is in command by virtue of the Winding Road and its lead to an off-board Command Source (5.3.5, second bullet, above). Since Parsons is in Frost's command radius (2), his brigade is also in command. Fagan is not so lucky. He is beyond Frost's Command Radius, so he and both his units are out of command. See 5.3.11.
- 5.3.7. Determine an Artillery's command state as Division leaders above. Additionally, artillery is in command if within the command radius of any in-command leader, whether brigade, division, or army.
5.4. Out of Command
A Subordinate that is out of command suffers the following effects:
- 5.4.1. Reduce unit morale by 1. If a leader, reduce his command value by 1. A stack containing both a unit and a leader have both values reduced.
- 5.4.2. It may not enter an EZoC.
- 5.4.3. Disrupt combat units (not leaders) that do not end their move at least three hexes from the nearest enemy unit. Previously Disrupted units suffer no additional effect.
- 5.4.4. A combat unit within two or fewer hexes of an enemy is not compelled to move and maintains its current state of organization (Disorganized or not).
5.5. Command Isolation
- 5.5.1. Determine Isolation at the beginning of every friendly Action Segment.
- 5.5.2. A Subordinate is Isolated when it is surrounded by a combination of enemy units or EZoCs unoccupied by friendly units.
- 5.5.3. A unit beginning a friendly Action segment surrounded by enemy units (not just their ZoCs) surrenders.
- 5.5.4. Incapacitate isolated leaders unstacked with a subordinate combat unit or a superior leader.
- 5.5.5. Isolated leaders or stacks may move 1 hex maximum.
- 5.5.6. Isolated combat units, or leaders stacked with those units, may enter the EZoC of an Isolating stack (i.e., a stack contributing to the friendly unit's isolation). Isolated combat units check morale before any Advance Fire.
- 5.5.7. Isolated Combat units do not have a Zone of Control.
- 5.5.8. Isolated leaders or stacks may never be placed in command.
- 5.5.9. Reduce the morale of combat units and the Command Value of leaders by two.
- 5.5.10. Isolated Combat units may not Rally even when stacked with a leader.
- 5.5.11. Isolated Combat units that fail any Disorganization check suffer 2 O hits and Rout. Incapacitate any leader stacked with them.
5.6. Brigade Leader Stacking Requirements
- 5.6.1. To command his units, an In-Command brigade leader must begin a friendly Action segment stacked with:
- some unit in his brigade or
- the Division or Army leader in his Chain of Command or
- any artillery unit
- 5.6.2. A brigade leader that does not fulfill these requirements may not place any of his units in command regardless of his own Command State.
- 5.6.3. Division and Army leaders do not have this requirement. They may be alone in a hex or stack with any friendly unit in their chain of command.
5.7. Leader Movement
- 5.7.1. Leaders have 3 MPs in a friendly Horse or Action segment.
- 5.7.2. When moving along a Thoroughfare, i.e., Pike, Road, or Trail, the leader expends ½ movement point.
- 5.7.3. A leader may only enter an EZoC when:
- It accompanies a friendly unit in its Chain of Command.
- It ends its move stacked with a friendly unit in its Chain of Command.
- Leaders may move through EZOCs if they enter a friendly unit's hex.
5.8. Leader Effects on Unit Morale and Rally
- 5.8.1. Add the leader's Command value to a stack's Base Morale (19). This affects both Morale and Straggle (10.5) checks.
- 5.8.1. Disorganized units stacked with a leader in their Chain of Command automatically Rally (20) during an Action segment, or during an Artillery segment if Artillery only. [Source prints 5.8.1 twice; numbering as printed.]
- 5.8.2. Stacks with a leader may automatically Regroup (18).
5.9. Leader Effects on Assault
- 5.9.1. A leader stacked with units in an assault gives that stack a +1 fire line modifier.
- 5.9.2. If both attacking and defending stacks contain a leader, both sides receive the modifier.
5.10. Leader Incapacitation
- 5.10.1. A stack with a leader that suffers an Organization (O) Hit (i.e., casualty) (13.4) during fire combat is incapacitated on a roll of 9.
- 5.10.2. A stack with a leader that suffers an O Hit during assault combat is incapacitated on a roll of 8 or 9.
- 5.10.3. Any unstacked leaders in an EZoC must make an incapacitation check. Treat as 5.10.1, above. Check for Incapacitation at the beginning of every friendly Action segment.
- 5.10.4. Replace incapacitated leaders at the end of the next friendly Action segment after incapacitation.
- 5.10.5. Deploy the replacement on any combat unit in his chain of command or any superior leader.
- 5.10.6. Flip incapacitated leaders to their reduced side.
- 5.10.7. When a reduced leader is again incapacitated return it as above with no further effect.
6. Combat Unit Type – Infantry
General Notes: Unit Types. There are four types of combat units: Infantry, Cavalry, Artillery, and Zero-Strength Units. This section, and the following ones describe the unique capabilities of each type. The sections sometime reference the term Deployment. A Deployment is a unit configuration enhancing its movement or combat capability. Infantry, Cavalry and Zero-strength units (infantry or cavalry) have only one Deployment: Line or Mounted, respectively. The Conditional rules introduce additional deployments for these arms. Artillery has two deployments: Limbered or Unlimbered.
6.1. Infantry
- 6.1.1. Infantry is always Line, i.e., a formation most suited for combat. But see Thoroughfares, (10.7).
- 6.1.2. The conditional rule 22 provides for Column Deployment.
7. Cavalry – Default Rules
7.1. General Rules
In this section, Cavalry can only be Mounted and operates within the restrictions below. The Standard cavalry rules (for games without Dismounted Cavalry) applies to all previous releases of Huzzah and sometimes to new games in the series (e.g., Hayfoot! Strawfoot!). The Conditional Cavalry Rules (22) provide expansions of this section. Implement the Conditional Cavalry rules only when instructed by a scenario.
7.2. Mounted Cavalry and Combat
- 7.2.1. When mounted cavalry of any type fires (except during an assault), do not implement positive fire line modifiers, even when targeting opposing cavalry. Do apply negative modifiers.
- 7.2.2. During an assault, mounted cavalry receives all line modifiers as appropriate.
- 7.2.3. When mounted sabered ( - ) cavalry fires, implement a -1 modification to their fire line. Do not apply this modification in an Assault. Smoothbore ( * ) cavalry does not suffer this modification.
- 7.2.4. Mounted Cavalry has a maximum range and MFZ of 1 hex.
- 7.2.5. Mounted Cavalry may execute ranged fire into an adjacent flank hex.
- 7.2.6. For fire and assault purposes, mounted cavalry derives no benefits from slopes or fence lines of any type. Do not adjust cavalry's fire line based on the presence of these hex sides.
- 7.2.7. When assaulting across a fence line of any type, modify the fire line of mounted cavalry by -1.
- 7.2.8. Mounted cavalry in a wooded hex and involved in an assault (whether attacking or defending) suffers a -1 fire line modifier.
- 7.2.9. Mounted Cavalry may not charge from, through, or into a woods hex of any type.
- 7.2.10. Mounted Cavalry Defending in an assault may change facing immediately before the first round. It may do this only one time prior to the first assault against it. That cavalry may not advance fire.
- 7.2.11. During an assault, sabered cavalry has the advantage over the non-sabered. Modify the fire line of sabered cavalry +1 against a non-sabered type. This applies regardless of whether the sabered cavalry is defending or attacking.
- 7.2.12. Mounted Cavalry may always charge mounted cavalry and zero-strength units of any type.
- 7.2.13. Mounted Cavalry may charge infantry and artillery with restrictions. See 17.1.6.
- 7.2.14. When mounted cavalry charges, its target may only Pre-Assault fire (16.2); the charged unit may not advance fire.
- 7.2.15. When targeting mounted enemy cavalry, the firing unit gains an additional +1 line modifier (see the Line Modifiers Chart for Target Status – Mounted Cavalry). Do not apply this case when mounted cavalry targets enemy mounted cavalry (refer to case 7.2.1, above).
7.3. Mounted Cavalry and Action/Horse segments
- 7.3.1. Mounted cavalry has full movement in both the Action and Horse Segments.
- 7.3.2. Mounted cavalry may only enter an Infantry/Dismounted cavalry EZoC or MFZ during an Action Segment. It may not enter that EZoC/MFZ during a Horse Segment.
- 7.3.3. Mounted cavalry may fire and rally only during an Action segment. It may also fire during a Small-Arms Segment. Cavalry may not Rally in a Horse Segment.
- 7.3.4. During a friendly horse segment, routed mounted cavalry may, at the owning player's option, retreat 3 hexes within the guidelines of Retreat in the Morale section of the rules. It does not suffer the O hit for Rout movement during a Horse Segment.
7.4. Cavalry and Retreat from Assault
- 7.4.1. In some instances, mounted cavalry may Retreat after the first round of assault.
- 7.4.2. Mounted cavalry:
- may not retreat from assaulting enemy cavalry.
- may not retreat into or through EZoCs.
- must follow the retreat priorities specified in (20.3).
- may retreat through friendly stacks, disrupting or routing those stacks.
- 7.4.3. Retreating mounted cavalry follows this procedure:
- Retreat the cavalry 3 hexes.
- Check moral applying all modifiers.
- Disrupt Cavalry in Good Order (see Morale section (19.1) that fails the check.
- Rout Disrupted Cavalry when failing the check and apply an O hit.
8. Artillery
8.1. General Rules
- 8.1.1. The generic term Artillery refers to both Regular and Horse Artillery. A vertical stripe identifies Horse Artillery. Horse artillery moves as cavalry.
- 8.1.2. Unlimbered artillery may only Fire, Rally, or with, restrictions, move via Artillery Retire by Prolong, (8.7) below.
- 8.1.3. Limbered Artillery may only move, including retire by prolong.
- 8.1.4. Artillery may only limber/unlimber (aka Change Deployment) during a friendly Action segment. It must change deployment before it executes any other Action.
- 8.1.5. Only artillery of the same battery may stack in a hex. That stack may include both limbered and unlimbered artillery.
- 8.1.6. When targeted by fire (both ranged and assault) a stack of mixed deployments is flanked. The firing unit gets the +1 modifier for firing at a flanked unit.
- 8.1.7. It costs artillery 1 MP to limber. Place a Limbered marker on limbering artillery.
- 8.1.8. It costs all an artillery's MPs to unlimber.
- 8.1.9. Place an Unlimber marker on artillery when it unlimbers. Effects of an Unlimber marker:
- Artillery so marked may not fire in an Artillery segment.
- Artillery so marked has an MFZ (15.1) of one hex.
- It may execute Advance Fire (section 15) as appropriate but suffers a -2 fire line modifier.
- Remove Unlimbering markers at the end of the first friendly Artillery segment after placement. For example, an unlimbering marker placed in segment f, CS Action segment, is removed on segment h, CS Artillery. Disrupted artillery may remove an Unlimbering marker.
- 8.1.10. Artillery is in command if within 5 hexes of a friendly command source, within 5 hexes of a road leading to a command source, or within the command radius of ANY in-command leader.
- 8.1.11. Artillery may not enter an EZOC. Artillery starting its segment in an EZoC is not compelled to move.
8.2. Changing Artillery Deployment and Enemy Units
- 8.2.1. To unlimber, Arty must be at least 3 hexes from the nearest non-zero enemy unit. If, at the beginning of its move, limbered Arty is two hexes away, it cannot unlimber. It must increase its distance from the enemy to at least 3 before it can unlimber. However, see 8.2.3, below.
- 8.2.2. Exception: Artillery is allowed to unlimber at a two hex distance if there is intervening blocking terrain. Blocking terrain, for example, includes woods or other map features blocking LoS. Intervening friendly units do NOT count as blocking terrain in this case. See 8.2.3, below.
- 8.2.3. Artillery changing deployment two or three hexes from non-zero strength enemy units, whether limbering or unlimbering and regardless of enemy LoS, must check morale. Artillery failing the check has two options:
- Either maintain its original deployment and terminate its move,
- Or take an O hit and complete its deployment change. It may continue to move as appropriate.
- 8.2.4. Artillery may limber, only, in an EZoC.
- 8.2.5. Artillery limbering in an EZoC may be fired upon by adjacent eligible enemy units. Treat the fire as Advance Fire and place an Advance fire marker on the firing units. Do NOT apply case 8.2.3 in this instance.
- 8.2.6. Also, see the effects of Unlimbering markers, above (8.1.9).
8.3. Artillery and Horse Segments
- 8.3.1. When moving on a non-thoroughfare hex or on a trail, regular artillery has 1 MP during a friendly Horse segment.
- 8.3.2. Regular Artillery following the exact path of a Road/Pike has 2 MPs during a friendly horse segment.
- 8.3.3. Horse artillery has 3 MPs during a Horse Segment.
8.4. Artillery and Straggle
- 8.4.1. Artillery following the exact path of a Thoroughfare (see 10.7) does not straggle.
- 8.4.2. Artillery exiting a non-clear, non-thoroughfare hex rolls for Stragglers as appropriate.
- 8.4.3. Review the Terrain Effects Chart (TEC) for other movement limitations to Artillery movement.
8.5. Artillery and Morale
- 8.5.1. Limber artillery when it routs.
- 8.5.2. Disrupted artillery (whether limbered or unlimbered) that fails a morale check from enemy fire (including during an assault), at the owning player's discretion may either:
- Remain in place, retain the Disruption, and suffer an 0 hit (in addition to casualties from enemy fire). [Source prints "0 hit"; read as "O hit".]
- Rout and execute a retreat according to the normal rules (20.3).
8.6. Artillery and Combat
- 8.6.1. Artillery firing directly down a slope into lower terrain have their MAX Range increased by 2. See the Combat Reference tables.
- 8.6.2. Artillery may not Charge nor initiate an Assault.
- 8.6.3. During an Assault artillery suffers twice the losses specified.
- 8.6.4. During an Assault, artillery that suffers a "D" result suffers an O hit and is Disrupted.
- 8.6.5. During an Assault, artillery may, in some instances, Retire by Prolong. See Artillery and Retire by Prolong, below.
8.7. Artillery and Retire by Prolong
- 8.7.1. After the first round of an enemy Assault, friendly artillery may retreat 1 hex in any direction. The artillery may be in any deployment.
- 8.7.2. Similarly, artillery beginning a friendly Action segment in an EZoC may retire. They may be subject to En Passant fire in this case. See section 15. The artillery must then terminate its move.
- 8.7.3. It may not enter an EZoC.
- 8.7.4. It may not enter a woods or stream hex unless following the exact path of a thoroughfare.
- 8.7.5. It makes a morale check after retiring whether from an Assault or from an EZoC.
9. Zero-Strength Units
9.1. Effects and Restrictions
- 9.1.1. Apply the following effects to zero-strength infantry and zero-strength cavalry. Artillery and sometimes mounted cavalry are exempt from these cases.
- 9.1.2. Zero units beginning an Action stacked with a non-zero unit are exempt from the cases below if they remain stacked with that same non-zero unit their entire segment.
- 9.1.3. Do not apply positive fire line modifiers to zero-strength units (except artillery). Apply negative modifiers as appropriate.
- 9.1.4. Zero units may not enter an EZoC.
- 9.1.5. Zero units may not assault.
- 9.1.6. Zero units executing a Movement action must end their move at least three hexes from the nearest enemy unit or suffer a Disruption. A unit within two or fewer hexes of an enemy is not compelled to move and is not Disrupted for remaining in place.
- 9.1.7. Do not apply case 9.1.6, above, to zero-strength artillery or in command mounted cavalry. These unit types are not required to end their move three hexes from the nearest enemy unit.
- 9.1.8. Zero units (except artillery) may fire into an adjacent flank hex.
- 9.1.9. Zero units (except artillery) have an MFZ into an adjacent flank hex.
- 9.1.10. Zero units (except artillery) have a maximum range of 1.
- 9.1.11. Enemy units may enter and move through the EZoCs of a zero-strength unit unhindered. However, for each EZoC ENTERED or EXITED during that Action, the enemy stack may be subject to Advance or En Passant fire from that zero-strength unit.
- 9.1.12. Exception to 9.1.11: Treat the ZoC of enemy zero-strength mounted cavalry and artillery normally. Do not apply 9.11.
10. Unit Action – Movement
10.1. General Rules
- 10.1.1. All units and leaders, regardless of command state, have 3 Movement Points (MPs) per Action segment. Exception: Isolated units and leaders may move 1 hex maximum. See Command Isolation, 5.4.
- 10.1.2. A unit moves by physically tracing a line of contiguous hexes.
- 10.1.3. It costs all units 1 MP to enter a clear hex. It costs nothing extra to move "up" or "down" an elevation.
- 10.1.4. Its costs infantry 1 MP to enter a woods hex.
- 10.1.5. It costs Artillery 3 movement points to enter a woods hex of any type.
- 10.1.6. It costs Cavalry 1.5 movement points to enter a woods hex of any type.
- 10.1.7. It costs Artillery and Cavalry +1 MP to cross a fence line of any type.
- 10.1.8. A unit may always move 1 hex regardless of MP cost. Exception: Artillery may not enter a combination of woods (any type) and streams except at a ford, bridge, or thoroughfare.
- 10.1.9. Units that exit a woods hex must check for straggler regardless of the terrain being entered. See Stragglers (10.5). Artillery moving along a thoroughfare is exempt from this check.
- 10.1.10. Units may never enter an enemy-occupied hex.
- 10.1.11. A player that has ceased moving one piece and has begun moving a different piece may not re-position the original piece.
- 10.1.12. Bridges and Fords. Bridges or Fords collectively are Crossings.
- Treat a crossing as clear terrain regardless of the actual terrain in the hex.
- A Stack may move from a non-thoroughfare and non-river hex directly onto a crossing hex. They need not follow the course of a thoroughfare.
- A stack in a crossing hex need not follow a thoroughfare when exiting it. It may move into any adjacent hex.
- Units may charge or assault from a crossing. There is no negative modifier for assaulting from a crossing and charging units will receive a charge bonus. When charging, a stack must follow the exact path of a thoroughfare; they must begin their charge on a thoroughfare.
10.2. Unit Facing
- 10.2.1. All combat units, except Routed ones, have a facing. Position a stack so that its front, or top, faces the vertex (point) of a hex. The two hexes split by the vertex is its front. All other hexes are flanks.
- 10.2.2. A stack may only move, assault, or charge out its frontal hexes.
- 10.2.3. Generally, a stack may only fire out its front with exceptions for cavalry (7.2), zero-strength units (9.1.5), and stacks protected by a stone fence (11.3).
- 10.2.4. During an Action Segment a stack may not change facing and then fire or assault. Changing facing during an Action Segment is considered movement.
- 10.2.5. Changing a stack's facing will not by itself trigger Advance Fire from enemy units.
- 10.2.6. Units Assaulting (16) or Charging (17) must be facing their targets at the beginning of their move. They may not change facing before assaulting or charging nor during the Assault or Charge.
- 10.2.7. All units in a stack must face the same direction.
- 10.2.8. Disrupted units may change facing. However:
- Disrupted units that change facing may NOT rally.
- Disrupted units that fail to Rally (20.2) may not change facing.
- Disrupted units that rally may change facing after the successful attempt.
- 10.2.9. A stack may freely change facing during movement. However, a stack suffering Advance Fire may be fired upon before or after they change facing at the firing player's discretion.
- 10.2.10. During a Small-Arms Segment, small-arms units may change their facing once before firing. Only units that are firing may change their facing in this segment.
- 10.2.11. During an Artillery Segment, artillery units may change their facing once before firing. Artillery units that have rallied may also change facing after they have rallied.
- 10.2.12. Units that advance after an assault may change their facing.
10.3. Zones of Control (ZoC)
- 10.3.1. The six hexes adjacent to a unit is its ZOC.
- 10.3.2. All combat units, except Routed (19.8), zero-strength infantry, and Isolated units (5.4), exert a Zone of Control (ZoC). However, zero-strength artillery and mounted cavalry do exert a ZoC.
- 10.3.3. A unit must cease movement immediately upon entering an enemy zone of control (EZoC) of non-Zero strength infantry, or artillery and mounted cavalry of any strength. It may change facing AFTER entering the EZoC, however it may be fired upon BEFORE that facing change. See Advance Fire, case 15.
- 10.3.4. A stack beginning an Action or Horse segment in an EZoC and that exits that EZoC may not subsequently enter an EZoC in that same segment. Exception, see directly below.
- 10.3.5. A unit beginning a segment in an EZOC may move directly into another EZOC by expending all its MP.
- 10.3.6. Artillery may not enter an EZOC.
- 10.3.7. See 5.6, Leader Movement, for the restrictions of Leader movement and EZoCs.
- 10.3.8. A combat unit may be subject to both Advance and/or En Passant fire when it enters/leaves an EZOC. See 15.3 and 15.4.
10.4. Disengagement
- 10.4.1. This section attempts to reflect the inability of units to scurry back and forth in the face of the enemy.
- 10.4.2. During a friendly Action segment units of the friendly player may become Disengaged.
- 10.4.3. A stack becomes Disengaged when:
- It begins the friendly Action segment in an enemy small arms Fire Zone, (EFZ). NOTE: A Fire Zone extends out the frontal hexes of a unit to its maximum range, subject to Line of Sight. See sections 13 and 15.1.
- And it ends its move beyond the small arms Fire Zone of all enemy units.
- 10.4.4. The players may optionally place disengagement markers to identify enemy stacks so moving. In most cases this will not be necessary, however.
- 10.4.5. A stack, or any unit in a stack, which re-enters an EFZ in the very next Action Segment after placement must check morale using its Average Modified Morale (AMM).
- 10.4.6. For example, the Union player moves a stack beyond an EFZ in segment (g), US Action segment. If it re-enters any small-arms EFZ in the following friendly Action Segment, segment (m) in this case, it must check morale using its AMM.
- 10.4.7. Disrupt or rout the stack as appropriate if it fails this check. A Disrupted stack must cease movement.
- 10.4.8. Remove Disengagement markers at the end of the next friendly Action segment after placement.
10.5. Stacking
- 10.5.1. A STACK consists of ONE or more units in a hex. Even ONE unit in a hex is a STACK for game purposes.
- 10.5.2. Units of distinct types (Infantry, Cavalry, Artillery) may not stack in a hex. Infantry may not stack with Artillery, for example.
- 10.5.3. All units from the same regiment or battery may stack in a hex. Units from different regiments or batteries may not stack.
- 10.5.4. Routed units may not enter a friendly occupied hex except during rout movement. See (19.8).
- 10.5.5. A stack may not enter the hex of a friendly routed stack unless there is no other hex available. Immediately execute rout movement with the routed stack and disrupt the moving stack. A previously Disrupted stack suffers no additional effect.
- 10.5.6. Leaders do not count against stacking limitations.
- 10.5.7. A stack may not move through another friendly unit or stack.
- Exception: Infantry/Cavalry may move through artillery and vice-versa.
- Exception: See Retreat Priorities, (20.3), in the Morale section of the rules.
- 10.5.8. A stack may "drop off" a unit as it moves. A unit dropped off may not move the rest of the segment. This rule is in effect only after a stack moves at least one hex. A stack may be freely broken up before it moves, but once it does, it is subject to this "drop-off" rule.
- 10.5.9. A stack may pick-up an unmoved unit as it moves if it conforms to (10.5.3) and continue moving.
- 10.5.10. A stack suffers O hits proportionately.
- Regardless of how they are accrued, apportion losses evenly in a stack.
- A unit cannot suffer a 2 O hit loss until all units in that hex have suffered at least one O hit.
- Where there is a mix of units at varied effectiveness (Full-Strength or Reduced), a Reduced unit cannot suffer an O hit until all units in the hex have also been Reduced.
[Example of drop-off rule, 10.5.8, as printed in the source: A 22 AR stack (2 units) moves from hex Red to hex Blue. One unit continues to hex Green. The dropped unit in Blue must cease movement. It may not, for example, move to hex X in the same Action.]
10.6. Stragglers
- 10.6.1. A Stack exiting a wooded hex (of any type) must make a Straggler check. The check occurs before the stack moves.
- 10.6.2. Exception: Artillery following the exact path of a thoroughfare (below) does not check for stragglers.
- 10.6.3. Roll a d10 for the stack.
- 10.6.4. Modify the Average Base Morale of the checking stack (these are also on the Huzzah reference sheet):
-
- Command value of accompanying leader
-
- 1 when following exact path of any type of thoroughfare. Artillery does not check.
- +1 if entering clear terrain.
- +1 if entering/exiting EZoC.
- +1 if artillery (when not following the path of a thoroughfare).
- -1 if stack out of command
-
- 10.6.5. Morale Modifiers are cumulative, but for Straggle purposes only, a stack cannot have a modified morale greater than 8 nor less than 2. A stack always fails on an unmodified roll of nine.
- 10.6.6. A roll greater than the Average Base Morale of the Stack suffers a straggler. A roll <= the modified morale has no effect.
- 10.6.7. A stack cannot suffer more than 1 O hit from a given straggle check.
- 10.6.8. Leaders modifying a stack's morale must begin and end the segment with some unit in that stack. A leader may pick up other units as it moves with a stack.
- 10.6.9. A stack may defer the loss if it remains in place and terminates its move. If may freely change facing in this instance.
- 10.6.10. Note: It behooves a player to concentrate his units when moving through non-clear terrain. A stack can suffer 1 O hit maximum for each hex entered. Moving stacked units individually exposes them to additional loss since each unit must make a separate Straggle check.
10.7. Thoroughfares
- 10.7.1. Line units following the exact course of a Thoroughfare (i.e., Pike, Road, or Trail) may apply the following affects. It is a player's option to apply or not the benefits for Thoroughfare movement.
- 10.7.2. The term Thoroughfares is a generic term describing two types of Thoroughfares:
- Roads (including Railroads, and Pikes),
- and Trails
- 10.7.3. Road Bonus Hex. A stack that spends its entire move on a Pike/Road receives a 1 movement point bonus. It must begin and end its movement on a Thoroughfare.
- The stack must spend that MP on a thoroughfare.
- Units moving that one bonus hex may not enter an enemy zone of control or MFZ. They must begin and end their movement on a road to receive the bonus hex of movement.
- A stack does not check for Stragglers when applying the Road Bonus.
- 10.7.4. Units moving along a Trail do not receive the bonus hex.
- 10.7.5. Stacks that follow the exact course of a Thoroughfare of any type add 1 to their Average Base Morale for Straggle Checks. Artillery does not check for stragglers.
- 10.7.6. Leaders moving along a Thoroughfare expend ½ MP, not 1.
- 10.7.7. Stacks not starting on a Thoroughfare, but which move onto and then along it are not eligible for the bonus hex. However, they are eligible for the morale bonus if they move along that thoroughfare. Stacks may combine Thoroughfare and non-Thoroughfare movement in this instance.
- 10.7.8. Treat a thoroughfare hex as clear terrain when a stack, using the Thoroughfare for the straggle modifier, enters an Enemy MFZ. Apply this to Advance fire only.
- 10.7.9. Units may always elect to ignore the Road when moving; however, they will not receive the Straggle Roll modifier described above.
- 10.7.10. See Conditional Deployment -- Column (24) when directed by a scenario.
11. Fence Lines
11.1. Fence Line General Rules
- 11.1.1. Fence lines (whether wooden rail or stone) align with a hex side but are wholly enclosed inside that hex side. A hex side with a fence line so aligned is Protected.
- 11.1.2. Only units that direct or receive fire across a protected hex side receive its benefits.
- 11.1.3. Fence hex sides do not by themselves make a hex unclear.
11.2. Effects of Post and Rail Fence Lines
- 11.2.1. Infantry has an MFZ of 2 through a protected hex side.
- 11.2.2. Infantry receives a +1 fire line modifier if its fire is through a protected hex side.
- If the fire is traced between a protected and unprotected hex side, it receives the +1 modifier.
- A stack does not get this advantage during an assault, though it does for Pre-Assault fire.
- Infantry does not get this modifier if the fire is also directed down a slope hex side. The maximum fire line modifier is 1 in this case.
- 11.2.3. Artillery and mounted cavalry accrue no fire or MFZ advantage from fence lines and do not get the +1 modifier. Exception, see 11.3, below.
11.3. Effects of Stone Fences
- 11.3.1. Treat a stone fence as a Post and Rail fence with additions below.
- 11.3.2. Units protected by a Stone Fence hex side (this includes artillery but excludes mounted cavalry):
- Decrease the fire line by 1 when enemy fire is directed across a protected hex side.
- Infantry and artillery may fire into an adjacent flank hex if that fire is directed across a protected stone fence (not rail fence).
- A stack's MFZ extends into an adjacent protected flank hex.
- Units assaulting across a stone wall, in either direction, suffer -1 fire line modification.
- Stacks cannot be flanked by enemy fire across a hex side protected by a stone wall. They can be flanked in an assault.
- Increase the base morale of infantry and artillery by 1 when enemy fire is directed across a protected hex side. During an assault, the friendly stack does not get this advantage.
12. Streams
12.1. Streams and Line of Sight
- 12.1.1. Units in a stream hex are one elevation lower relative to non-stream hexes.
- 12.1.2. Use the other terrain in the hex to determine fire line modifiers. But see 12.2, Streams and Combat, below.
- 12.1.3. Units in a stream hex may be seen from non-adjacent hexes subject to the general Line of Sight rules. Units may not "hide" in a stream hex to avoid enemy fire.
- 12.1.4. Units in a stream hex do not block Line of Sight between units in non-stream hexes.
12.2. Streams and Combat
- 12.2.1. Mounted cavalry may not assault from or into a stream hex.
- 12.2.2. Units assaulting from a stream hex suffer a -1 fire line modifier. Disregard this modifier if a stack assaults along a thoroughfare or across a ford or bridge.
- 12.2.3. Infantry may charge from or across a stream hex but lose their charge bonus.
12.3. Streams and Movement
- 12.3.1. It costs mounted cavalry 2 MPs and artillery 3 MPs to enter a stream hex.
- 12.3.2. Units check for straggler when moving from one stream hex directly into another stream hex.
12.4. Streams, Thoroughfares, and Crossings
- 12.4.1. A Crossing is a hex containing both a stream and thoroughfare.
- 12.4.2. Treat a Crossing as Clear terrain.
- 12.4.3. A stack may move from a non-thoroughfare and non-stream hex directly on to a Crossing hex. They need not follow the exact course of a thoroughfare.
- 12.4.4. A stack on a crossing hex need not follow a thoroughfare when exiting it. It may move into any adjacent hex.
- 12.4.5. Units may charge or assault from a crossing. There is no negative modifier for assaulting from a crossing and charging units will receive a charge bonus. When charging, a stack must follow the exact path of a thoroughfare; they must begin their charge on a thoroughfare.
[Figure 2 is a map example and is not reproduced here.]
The Yankees Prepare. The right flank of the 22nd AR hangs in the air. The stack is also out of command (see above). This lowers Fagan's Command Value and the 22nd's base morale by one (5.3). Compounding Arkansas's misery, the 20th IA (26) sits squarely on its flank, spoiling for the Assault.*
Meanwhile, the 20th WS, with Bertram, marches toward the guns. However, the regiment risks Straggling (10.6) traipsing through the woods.
The Union player makes a Straggle check before the stack enters (a). It's Average Base Morale (ABM, see Glossary and 19.2) is 5. With an additional 2 lent by Betram [sic; the source spells the leader's name this way in this example, and "Bertram" elsewhere], its modified ABM is 7. Unluckily, the Yankee rolls an 8. Now he has an option: Take the O hit and enter (a) or terminate its move in the original hex. The Yank takes the O hit and pushes on. He tries to enter the hex at the tip of the arrowhead. This time he adds an additional one to the stack's morale for entering clear terrain (10.6.4). Its ABM is 8. The 20th passes the check with roll a 5. The Yank moves and ends its Action.
Dye's flawed disposition of the 20th IA (26) now becomes apparent: It's facing the wrong way! To lend its strength to the attack requires a facing change. The Iowans pivot 60 degrees, finally exploiting the open flank of the Arkansans. This is technically movement (10.2.4), so the 26 Action is over.
In the 22nd's front, the 20th IA (16), cocks their muskets. The adjacent unit, the 37th IL, has two best options: Stay put and fire or move to hex (b). While the latter would flank both the 10th MO and 22nd AR, the 37th could suffer significant damage from the Reb's En Passant fire (see the Glossary and 15.4). The battalion stands to, ramming their Minies home.*
13. Unit Action – Fire
13.1. General Rules
- 13.1.1. Combat units have a Fire Zone (FZ) that extends out their front hexes to their maximum range.
- 13.1.2. A unit's FZ is determined by its Weapon Class, smoothbore ( * ) or rifled ( - ), and by its Line of Sight (LoS) (14.1). Be sure to differentiate between a Fire Zone and a Minimum Fire Zone (MFZ) (15.1).
- 13.1.3. Fire beyond a unit's maximum range is not allowed. See the Combat Reference for weaponry ranges.
- 13.1.4. The examples at the right illustrate the FZs and Range Factors (13.2.2) of Rifled/Smoothbore weaponry. For Mounted Cavalry and Zero-Strength units refer to 7.2 and 9.0, respectively.
- 13.1.5. A unit may be subject to more than 1 fire attack per segment.
- 13.1.6. See the Terrain Effects Chart (TEC) for terrain constraints on a stack's firepower.
- 13.1.7. The appropriate units may fire every friendly Artillery, Small Arms and Action Segment, or when triggered by enemy movement (see Advance and En Passant Fire, (15)). Stacks with an Advance Fire marker may not fire in a small-arms or artillery segment.
- 13.1.8. Stacked units may NOT fire separately.
- 13.1.9. Only stacked units may combine for fire. Different stacks may never combine in a single fire.
- 13.1.10. One firing unit in a stack does not commit other units in the stack to also fire. The other units may not fire separately. They may execute a Move Action, only, before or after the fire. Important: see Assault and Charge for exceptions to this rule (16.1 and 17.1 respectively).
- 13.1.11. Fire effects are applied immediately against a target.
- 13.1.12. Combine all strength points firing from a hex into a single total. If a stack contained 3 units totaling 4 SP, their Base Fire Factor would be 4. This Base Fire Factor may be modified by the Range Factor (see below).
[Source diagrams: "Rifled Small Arms Fire Zone", "Smoothbore Small Arms Fire Zone", and "Zero Strength Units (9) and Mounted Cavalry (7.2) Fire Zones" are not reproduced.]
13.2. Fire Procedure
- 13.2.1. Count the hexes from the firing stack to the target stack (count the target's hex, but not the firing stack's hex). This is the Firing Range.
- 13.2.2. Proceed to the RANGE FACTOR TABLE, beneath the Combat Results Table.
- 13.2.3. Cross-reference the firing range to the stack's weapon class, Rifled ( - ) or Smoothbore ( * )
- 13.2.4. The resulting number is the Range Factor.
- 13.2.5. Multiply the base strength of the firing stack by the Range Factor.
- 13.2.6. The result is the stack's Fire Factor.
- 13.2.7. O hits do not count against a stack's Fire Factor.
- 13.2.8. A stack can never have a Fire Factor of less than zero.
- 13.2.9. When calculating a stack's Fire Factor, round all fractions DOWN, i.e., drop all fractions.
- 13.2.10. The formula for determining a stack's fire factor is printed on the Combat Tables Reference.
- 13.2.11. Proceed to the Combat Results Table. Find the line that corresponds to the stack's Fire Factor. Modify the line according to the Line Modifiers Schedule under the heading FIRE ONLY on the Combat Table References card.
- A negative modifier decreases the Fire Factor line (move UP the combat table).
- A positive modifier increases the Fire Factor line (move DOWN the Combat Table).
- All modifiers are cumulative.
- In situations where additions and subtractions must be made to the fire line, make additions before subtractions.
- 13.2.12. Do not apply positive line modifiers for ranged fire from Zero-Strength units and mounted cavalry. Assault is unaffected.
- 13.2.13. Roll the d10. Move across the fire factor line until you come to the column in which the number rolled lies. The column heading is the Combat Result.
13.3. Combat Result Definitions
- 13.3.1. Combat Result
- NE: The fire has had no effect
- D: the stack is DISRUPTED. See Notes on Disrupted Results, below.
- 1: The stack suffers 1 Organization (O) hit. See Notes on Numeric Results, below.
- 2: The stack suffers 2 O hits See notes below.
- 3: The stack suffers 3 O hits. See notes below.
- 13.3.2. Notes on Disrupted Results
- A stack in Good Order (not Disrupted or Routed) may attempt to take an Organization (O) Hit in lieu of the Disruption by checking its Average Modified Morale (19.3). Roll a d10.
- If the roll is less than or equal to the roll, the stack takes the O Hit and remains in good order. [Source prints "less than or equal to the roll" with no value named; the sense is the stack's Average Modified Morale, as in the next bullet. Transcribed as printed.]
- If the roll exceeds the stack's Average Modified morale it must take the Disruption.
- The only time a stack may attempt to take an O hit instead of the Disruption is when it receives a "D" combat result. If it is Disrupted for any other reason, it must take that Disruption.
- A Disrupted unit receiving a D combat result treats that result as 1 O hit and checks Morale. See (19).
- A Routed unit receiving a D combat result takes an O hit and conducts rout movement.
- A Reduced unit with 2 O hits suffering a "D" result must take that Disruption. See section (19) for more detail about Morale Checks.
- 13.3.3. Notes on Numeric Results
- After applying the hit the stack checks for Disorganization by rolling a d10.
- If the result is less than or equal to the stacks Average Modified Morale (See Morale and Rally, (19, 20) ) there is no further affect to the stack.
13.4. Recording Casualties
- 13.4.1. Record casualties by using the O hit chits.
- 13.4.2. Every time a unit suffers an O hit, place a number counter equal to the total number of O hits taken beneath it. For example, a unit that receives 1 O hit will have a "1" O hit counter beneath it. If it suffers another O hit, flip the O hit counter to its "2" side.
- 13.4.3. When a unit at full effectiveness suffers its third O hit, remove the O hit counter, and flip it to its reduced effectiveness side.
- 13.4.4. Remove units at reduced effectiveness that suffer a third O hit.
13.5. Artillery vs Infantry and Cavalry
- 13.5.1. Refer to the Range Factor Table under the Artillery section as you read this section.
- 13.5.2. All artillery regardless of weapon type ( - or * ) firing at a range of 4 or more applies the parenthesized results on the Combat Results Table (CRT).
- 13.5.3. All artillery regardless of weapon type apply the non-parenthesized results when firing at a range of 3 or less.
- 13.5.4. Rifled ( - ) artillery firing at a range of 3 or less receives the +1 clear line modifier.
- 13.5.5. Smoothbore ( * ) artillery firing at a range of 2 or less receives the +1 clear line modifier. Smoothbore artillery firing at a range of 3 or more does not receive the +1 clear line modifier.
13.6. Artillery vs Artillery
- 13.6.1. When Artillery fires at Artillery, use the non-parenthesized combat results.
- 13.6.2. Do not apply the -1 line modifier when artillery is targeted by other artillery.
14. Line of Sight
14.1. Determining the Line of Sight (LoS)
- 14.1.1. A line of sights extends through frontal hexes of a firing unit, only. See Combat Unit Facing, 10.2.
- 14.1.2. To determine LoS, trace a straight line between the center of the firing and target hexes. Use any straight edge to do this (a rubber band or string stretched between the sighting units works best).
- 14.1.3. As you interpret LoS, be liberal. If there is reasonable doubt whether a LoS exists, then it does. Refer to the Terrain Effects Chart as you read this section.
- 14.1.4. The possible non-elevation Obstructions to a LoS are:
- wooded terrain,
- personnel units
- other map features defined by the scenario's rules.
- 14.1.5. Elevations also factor into a LoS but are distinct from the Obstruction list above.
- 14.1.6. A line of sight is not necessarily mutual; it depends upon the facing of the sighting units. See 14.1.1.
- 14.1.7. In cases where the LoS runs along a hex side between a blocked and un-blocked hex, then the LoS is not blocked.
- 14.1.8. LoS may be traced INTO but not THROUGH a blocked hex.
- 14.1.9. A unit may always see into an adjacent hex subject to its facing.
14.2. Obstructions to the LoS
- 14.2.1. Refer to the scenario map key to determine elevation levels. Usually there will be two to four elevations on a given map. In all cases, the lower the elevation number, the lower the hex.
- 14.2.2. An elevation between the sighting units and higher than both blocks LOS.
- 14.2.3. When sighting between units on different elevations, any hex higher than the lower unit blocks LoS if that hex is closer to the lower unit or is equidistant between them. Exception: See Generally Descending Elevations, below.
- 14.2.4. If units are on different elevations, any non-personnel obstruction on the same or higher elevation as the lower unit blocks LoS if it is closer to the lower unit than the higher or is equidistant between them.
- 14.2.5. At a range of 3 or more hexes, friendly intervening units do not block an Artillery's LoS if:
- The Artillery is higher than its target.
- The personnel unit is at least 2 hexes from the target.
- Note: Artillery does not receive the +1 elevation advantage against its target in this case.
- 14.2.6. When a unit and a target are both on a higher elevation than the obstruction or any elevation between them, a LoS generally exists, but see directly below.
- 14.2.7. A friendly unit, regardless of elevation, adjacent to a target and along the LoS, blocks the LoS of the firing unit only.
- 14.2.8. Enemy units anywhere along the LoS to the target do not block the LoS of the firing unit unless the enemy units are on the same elevation as the firing unit.
[Source diagram "Line of Sight Examples" not reproduced. Its captions, as printed: i. No LoS between units 1) and a). See 14.2.2. ii. LoS between units 1) and b). See 14.1.7. iii. No LoS, between units 2) and c). See 14.2.3. iv. No LoS from unit 2) to unit e). See 14.2.7. v. LoS from unit e) to unit 2). See 14.2.8. vi. No LoS between unit 3) and unit d. See 14.2.4. vii. LoS from unit 3) to unit f). See 14.2.8. viii. No LoS from unit f) to unit 3). See 14.2.7. ix. LoS between units 3) and unit h). See 14.2.6.]
14.3. Generally Descending Elevations
- 14.3.1. Generally Descending Elevations describe terrain that generally moves "downhill." All intervening hexes between a higher unit and a lower one must show a general progression of descent. See the provided examples.
- 14.3.2. Always trace Generally Descending Elevations from the higher unit to the lower one regardless of who is the target.
- 14.3.3. Generally Descending Elevations must meet two conditions:
- The higher unit must be adjacent to a lower elevation along the LoS. That is, the LoS must be traced through a Slope hex side.
- All elevations between the sighting units must be lower than the higher unit.
- 14.3.4. When these conditions are met, an elevation higher than the lower unit does not block LoS.
- 14.3.5. Exception: Elevations that descend, rise, then descend again are NOT generally descending.
- 14.3.6. Woods hexes along a LoS negate Generally Descending Elevations.
- 14.3.7. See illustration at right for examples of Generally Descending Terrain.
14.4. Line of Sight Effects of Woods, Light Woods, and Streams
- 14.4.1. A Woods hex:
- Block LoS between units on the same elevation.
- Potentially blocks LoS between units on different elevations. If there is a woods hex along the LoS that is closer to the lower unit than the higher or is equidistant, the LoS is blocked.
- Ignore the woods if it is lower than both units.
- 14.4.2. Light Woods.
- Units may sight through 1 light woods hex into an adjacent hex and beyond if that hex is clear. Treat a second light woods hex along a LoS as Woods.
- Fire directed through a light woods hex suffers a -1 fire line modifier if the firing unit and its target are on the same elevation.
- When the firing unit and its target are on different elevations apply the -1 line modifier only when that first light woods hex is closer to the lower unit than the higher or is equidistant between the two.
- Ignore Light Woods on a lower elevation than both units.
- [Source caption, "Light Woods and Line of Sight": The 51st Illinois (max range 3) sights through Light Woods. It can see through one light woods hex into all hexes marked a. It cannot see hexes marked X.]
- 14.4.3. Streams. See Section 12, Streams, for LoS effects of Streams.
15. Advance and En Passant (In Passing) Fire
15.1. Minimum Fire Zones
MFZ -- Rifled and Smoothbore Small Arms Units; MFZ -- Smoothbore and Rifled Artillery. (Source diagrams not reproduced.)
- 15.1.1. Players should note the difference between a Fire Zone (13.1) and a Minimum Fire Zone or MFZ.
- A fire zone extends out a unit's front to its maximum range.
- An MFZ extends out a unit's front, and possibly out its flank, into selective hexes.
- Movement into a unit's MFZ will usually trigger Advance fire from it.
- 15.1.2. Routed units do not have an MFZ.
- 15.1.3. Unrouted units have an MFZ of 1, 2, or 3 hexes.
- 15.1.4. The following unit types have an MFZ of 1:
- Disrupted Units.
- Units out of Command.
- Zero-Strength units (section 9), flank hexes included.
- Infantry (but see 15.1.5 below).
- Mounted Cavalry, flank hexes included.
- Any unit with an Advance Fire marker on it.
- 15.1.5. The following units have an MFZ of 2
- Artillery in Good Order (but see 15.1.6, below).
- Infantry sighting down a slope and its target is lower than that firing unit.
- Infantry sighting through a Protected hex side (see Fence Lines, section 11).
- 15.1.6. Artillery has an MFZ of three hexes if it is:
- protected by a Stone Fence (not a Rail Fence) or.
- sighting directly down a slope and its target is lower than that firing artillery.
15.2. General Guidelines, Advance and En Passant Fire
- 15.2.1. There are two types of fire triggered by enemy movement: Advance and En Passant fire.
- 15.2.2. Advance/En Passant Fire occurs during an enemy Action or Horse segment.
- 15.2.3. Apply the results of the fire immediately.
- 15.2.4. A unit may Advance/En Passant fire as many times as it is eligible in a segment.
- 15.2.5. All units that had declared fire against an enemy unit may fire at it even if the first fire caused it to rout.
- 15.2.6. Apply fire effects sequentially.
- If a fire caused a target to disrupt, apply all following fire against that target in its disrupted status.
- Similarly, if a fire causes a unit to Rout, keep the unit in place until resolving all additional fire against it. Apply all fire against that target in its routed status.
- 15.2.7. A player must declare all units firing Advance/En Passant at an enemy stack. A player cannot wait to see the effects of his fire before declaring other fire at that stack.
- 15.2.8. Advance/En Passant and normal fire procedures are identical. See the Fire rules, section 13.2, for particulars about the fire routine.
- 15.2.9. In a situation where a stack must check for stragglers (10.6), that stack checks for stragglers then suffers the fire. If it elects to remain in place the fire does not occur. Exception: See En Passant Fire.
- 15.2.10. Apportion losses inflicted by Advance/En Passant fire proportionately in a stack as per (13.4).
- 15.2.11. A unit may both Advance and En Passant fire in a particular segment, but never against the same stack. If it can fire both Advance and En Passant against a target it may do only one or the other.
- 15.2.12. Place Advance Fire markers on stacks firing Advance/En Passant.
15.3. Advance Fire
- 15.3.1. Resolve Advance fire as soon as an enemy unit or stack enters a hex in a friendly MFZ.
- 15.3.2. A unit declining advance fire at a unit in one hex DOES NOT forfeit the privilege to fire at that same unit if it moves into a different and closer hex.
- 15.3.3. A moving stack suffers advance fire before or after making any facing changes at the firing unit's discretion. Changing the facing alone does not trigger Advance Fire.
- 15.3.4. The firing unit receives the +1 Advance Fire line modification on the Combat Table.
- 15.3.5. A stack may execute Advance Fire as many times as it is eligible in a segment. It may fire at different stacks in the same segment.
- 15.3.6. A unit entering a hex that had already been subject to Advance Fire may be fired upon by the original Advance Firing units.
- 15.3.7. Retreating units are not subject to Advance Fire. Units must be advancing (that is, be moving closer to the enemy unit) to be subject to Advance Fire.
15.4. En Passant Fire
- 15.4.1. A unit that exits an EZOC may be subject to En Passant Fire. This fire, unlike Advance fire, is executed before a unit moves.
- 15.4.2. Only a stack whose ZOC is exited may En Passant fire at a moving enemy stack.
- 15.4.3. If a moving unit changes its facing before it moves, then it is flanked for En Passant Fire purposes. Remember that units may only move out frontal hexes.
- 15.4.4. A stack retreating out of an EZoC due to ROUT may not be subject to En Passant fire.
- 15.4.5. Units executing En Passant do not receive the Advance Fire line modification. [Source prints "Unis"; read as "Units".]
- 15.4.6. An enemy stack in a friendly ZoC that straggles and elects to remain in place may be subject to En Passant fire.
15.5. Effects of Advance Fire Markers
- 15.5.1. Place an Advance Fire (AF) marker on a stack the first time executes Advance or En Passant Fire.
- 15.5.2. Units with AF markers receive a -2 fire line modification.
- 15.5.3. Units with ADVANCE FIRE markers on them may not fire in the next friendly Artillery or small arms segment after the segment in which they are placed. Thus, Advance fire markers placed on CSA units in segment G, USA Action Segment, would not allow fire by those units in segment I, CSA Small Arms Segment.
- 15.5.4. Small Arms Units with AF markers may fire in a friendly Action segment following placement suffering the -2 modifier.
- 15.5.5. Units with AF markers on them have an MFZ of 1 hex.
- 15.5.6. Remove Advance Fire markers at the end of every friendly Action, Small-Arms or Artillery segment as appropriate.
16. Unit Action – Assault
16.1. General Rules
- 16.1.1. During an assault, combat occurs in 3 or fewer rounds between adjacent stacks.
- 16.1.2. Only stacks in good order and adjacent to an enemy stack at the beginning of a friendly Action segment may assault.
- 16.1.3. A unit may not assault more than one hex; a unit may assault 1 hex per segment.
- 16.1.4. A hex may be assaulted more than once per segment by different units.
- 16.1.5. Consult the v4 Range Factor table to determine the Assault range factor of units by Type: Infantry, Cavalry, or Artillery.
- 16.1.6. Stacks in different hexes may assault the same hex in a particular segment, but never as a combined strength; they must assault separately.
- 16.1.7. One assaulting unit in a stack commits the entire stack to that assault. Stacked units may not execute different Actions. Combine the strength of all units in a stack.
- 16.1.8. Defending units assaulted from a flank hex are Disrupted BEFORE the first round.
- 16.1.9. Disrupted units assaulted in their flank suffer no additional effect. These units may fire during an assault suffering the -3 modifier for Disruption.
- 16.1.10. Disrupted and Routed units may never initiate an assault.
- 16.1.11. Artillery may never initiate an assault.
- 16.1.12. Units with zero strength points may not initiate an assault.
- 16.1.13. Attacking units are automatically Disrupted at the conclusion of the assault. Attacking units that had been previously disrupted suffer no additional effect.
- 16.1.14. Assaulting stacks have their Base Morale temporarily increased by 1 for the assault.
- 16.1.15. The morale bonus is in effect for both the Assault and for any Advance Fire effects suffered by the Assaulting unit.
- 16.1.16. A maximum of 4 small-arms SPs may assault from or into a non-clear hex. That number may defend in a non-clear hex. Ignore any SPs above that maximum for calculating the fire factor.
16.2. Pre-Assault Fire
- 16.2.1. Before the assault begins, the defending stack may attempt Pre-Assault Fire. Refer to the general fire procedure (13.2).
- 16.2.2. Units making pre-assault fire DO receive the +1 ADVANCE fire line modifier.
- 16.2.3. Disrupted units may Pre-Assault Fire.
- 16.2.4. Routed units may not Pre-Assault fire.
- 16.2.5. Generally, a stack may only Pre-Assault Fire through its frontal hexes.
- 16.2.6. Exception: A stack may pre-assault fire into an adjacent flank hex if that fire is directed through a protected stone wall hex side.
- 16.2.7. A unit may Pre-Assault Fire as many times as eligible.
- 16.2.8. Pre-Assault fire does count as Advance fire. Place Advance Fire markers.
- 16.2.9. Advance Fire markers have no effect upon a stacks fire factor once the assault rounds begin.
- 16.2.10. A stack disrupted by pre-assault fire must continue its assault.
16.3. Assault Procedure
- 16.3.1. Conduct an assault is in 3 or fewer rounds.
- 16.3.2. Both attacker and defender fire during an assault. All fire is simultaneous.
- 16.3.3. Use the fire procedure outlined above and the line modifiers under the ASSAULT ONLY heading on the Combat Table Reference (13.2).
- 16.3.4. When both the attacking and defending unit must check morale due to an assault result, the attacker checks first.
- 16.3.5. An attacking stack disrupted during the assault may not break off the assault. It must continue all three rounds unless it or the defender routs.
- 16.3.6. It is possible for both the attacker and the defender to rout due to assault combat.
- 16.3.7. See Artillery Type, Artillery and Combat and Artillery Retire by Prolong (8.6, 8.7), for assault effects on Artillery.
16.4. Routing From Assault
- 16.4.1. An infantry or cavalry stack routing from an Assault, whether attacking or defending, suffers an additional O hit.
- 16.4.2. Artillery routing from an Assault suffers 2 O hits.
16.5. Advance After Assault
- 16.5.1. An assaulting stack must advance into a hex vacated by the defender. A defending unit may never advance after an assault.
- 16.5.2. A stack that advances after an assault may freely change its facing.
- 16.5.3. A stack may not be subject to Advance or En Passant fire when advancing after an assault.
- 16.5.4. A Stack need not check for Stragglers (10.5) when advancing after an Assault.
17. Unit Action – Charge
17.1. Declaring a Charge
- 17.1.1. A Charge combines Movement and Assault Actions (in that order), enabling a friendly stack to move adjacent to an enemy and assault it during that same Action.
- 17.1.2. Use charge markers to designate charging stacks.
- 17.1.3. Charges occur during a friendly Action segment. All Charges must be declared before any friendly stacks commit actions.
- 17.1.4. Eligible infantry may charge an enemy stack of any Type.
- 17.1.5. Mounted Cavalry may charge enemy cavalry (mounted or not) and zero-strength units of any type.
- 17.1.6. Full strength (unreduced) Mounted Cavalry may Charge disrupted or reduced infantry and artillery stacks. Regarding reduced stacks, all units in that stack must be reduced. Cavalry may also charge flanked infantry and artillery of any strength (i.e., the cavalry must be assaulting from a flank hex). Mounted Cavalry may not charge infantry or artillery unless meeting these conditions.
- 17.1.7. To declare a charge, at least two eligible units from the same regiment must be stacked together.
- 17.1.8. Ineligible units include:
- Reduced Units with 2 O hits.
- Zero-Strength units of any type.
- Disrupted units.
- 17.1.9. Declaring a Charge commits all units in a stack to that charge. They may not execute different actions.
- 17.1.10. The owning player must designate a target, enemy occupied hex for the charging stack.
- 17.1.11. This hex must be two hexes from the stack initiating the charge.
- 17.1.12. Stacks adjacent to an enemy may not declare a charge. They may assault normally, however.
- 17.1.13. Stacks in different hexes may designate the same target, but these charges must be resolved separately.
- 17.1.14. A stack may only charge a hex to which it is faced at the beginning of that friendly Action Segment. It may not first change facing.
17.2. Charge Movement
- 17.2.1. When it moves, a charging stack must proceed in the most direct manner possible toward its target, following one of two charge paths.
- 17.2.2. Units may not charge over other units, friendly or not. Their path may not be obstructed by other stacks.
- 17.2.3. The charge path must be through the easiest terrain. A unit may not charge through a non-clear hex or hex side when it could charge through a clear one.
- 17.2.4. For purposes of this rule, non-Clear hexes and hex sides include:
- Any type of woods
- Any hex containing a stream.
- Any path crossing a fence line.
- Other terrain features defined in a scenario.
- 17.2.5. The above list defines non-clear hexes/hex sides in no order. It is not sorted by precedence. A hex/hex side is either clear or it is not.
- 17.2.6. A player may follow any charge path if all hexes or hex sides are non-clear.
- 17.2.7. Charge movement may be resolved at any point in a friendly Action Segment, before or after other units conduct actions.
- 17.2.8. Charging units may be subject to both advance and pre-assault fire. Units firing at a charging unit receive a +1 line modification. This is in addition to the +1 modification for advance and/or pre-assault fire.
- 17.2.9. Charging units cannot suffer stragglers. Do not make a Straggle check for charging units.
[Source diagram caption: "The 21st WI declares a charge against the 8th MO. The 21st may not enter hex X. It may only execute charge movement into hex OK." (Diagram not reproduced.)]
17.3. Charge and Assault
- 17.3.1. Charging units must assault their target hex.
- 17.3.2. The assault occurs as soon as the charging unit comes adjacent to its target but after the resolution of any Advance or Pre-Assault fire.
- 17.3.3. Charging units receive a +1 fire line modification during the assault.
17.4. Remaining in Place
- 17.4.1. A stack may elect to remain in place rather than execute the charge.
- 17.4.2. Remove the charge marker. Its action segment is over, and it is Disrupted.
- 17.4.3. A charging stack that cannot complete its charge for any reason remains in place and is Disrupted.
17.5. Charging a Non-Targeted Hex
- 17.5.1. Charging stacks that have had their target hex vacated by enemy units must charge any hex adjacent to that stack's original target unless it declines to charge.
- 17.5.2. The new target hex must be one that could have been charged at the beginning of the friendly segment.
- 17.5.3. A stack declining to charge remains in place and is Disrupted as above.
- 17.5.4. A charging stack whose target has routed and has no other eligible targets is free to conduct Actions normally.
17.6. Charges and Disruption
- 17.6.1. Stacks Disrupted during the charge must continue to charge. The operation terminates only after the third round or when the charging stack or its target routs.
- 17.6.2. Units disrupted while charging have their charge marker removed. They lose the +1 assault fire line bonus for Charging.
- 17.6.3. Non-reduced units with less than 2 O hits may always take an O hit in lieu of a D combat result; they need not check morale when receiving this result.
- 17.6.4. Charge markers are removed at the end of a unit's assault, and it is automatically disrupted. Units that had been disrupted during the charge suffer no additional effect.
Figure 3 is a map example and is not reproduced. Its worked example of play follows, as printed in the source.
The Yankee Assault. (NOTE: For this part, the throw of a d10 generated all Combat and Morale results. The player should refer to the CRT as needed.) Previously, the 20th IA (26) changed facing. While navigating a patch of woods, the 20th WS Straggled suffering an O hit. Their Actions are complete.*
The 20th IA (16) fires at the 22nd AR (stacked with Fagan). Resolve combat on the 3-4 line of the CRT (Range Factor of 2, +1 fire line for a target in Clear terrain, case 13.2). A die roll of 2 Disrupts the 22nd AR. The unit attempts to take an O hit in lieu of the Disrupt by checking morale (13.3). Its Average Base Morale is 3. Remember, Fagan and the 22nd are Out of Command lowering the stack's morale (4) and Fagan's Command Value (also 4) by 1 (see case 5.3) to 3, respectively. Adding the Command Value of Fagan (+3), the stack's modified moral is 6. The morale check roll = 5. The 22nd accepts the O hit. The Yank rolls for Fagan's Incapacitation (see 5.10). Fagan survives.*
Now the 37 IL takes a crack. Its fire line is 8-11 (Fire Factor = 3x2, or 6, +1 line shift for target in Clear). A roll of 2 inflicts a second O hit on the 22nd. Each unit now has 1 O hit (see 13.4, recording and apportioning casualties). Fagan dodges the bullet with a second incapacitation check of 7. The loss requires another morale check for the 22 nd. Its Average Modified Morale (AMM) is 2 (the 22nd's casualties decrease its morale to 3 combining with a -1 for being out of command). Adding Fagan's Command Value of 3, the 22nd's final morale is 5. The Rebel rolls a 4. No wavering for Arkansas.
On to Billy's right. The commander of the 51st IL regiment (two 2-5s) has a decision, to Move or Fire. He must place covering fire against the 14 prepping for the charge. Alternately, moving and perhaps provoking Advance Fire from the 14 has advantages too. He splits the difference; he does both. (NOTE, the non-firing unit in the stack may execute a MOVE Action, only, before or after the other units fire; see 13.1.10).
First, the Yank fires with a battalion of the 51st IL. His target: the 14 MO battalion. The 51st's range factor is halved to 1. He gets a +1 line shift because the target is in clear. Final fire line = 2. The Yank rolls a five, NE.*
He advances the second battalion to hex 1304, a move that could trigger Advance Fire (15) from either or both 10th MO units. The Minimum Fire Zone of the Missouri units is 2 hexes for being behind a fence (15.1). The 14 unit holds its fire, the 24 takes a shot. Resolve the fire on the 5-7 fire line: 2 x ½ = 1 with a line shift of +3 (+1 each for Advance, Clear, and Fence Line). The fire is NE. Illinois braves on to 1203. The 14 still holds. The 24 fires again. Its fire line is 3 (calculate as above, but with an Advance Fire -2 line shift). The Reb rolls a Disrupt against the 51 st. It tries to take an O hit, and checks morale. Successful, it accepts the casualty.
Climax: Charge of the 21st WS. The Yanks enter 1104. Missouri 14 fires and it becomes evident why it held its fire. The Rebs get a blast on the 12-15 line (1x2=2, with a +4 line shift (1 each for Advance, Clear, Charge, and Fence)! MO rolls a zero. Each unit in the Yankee stack suffers an O hit and checks morale. The stack's AMM is 5 (-1 for the O hit suffered by each unit, and +1 for the Charge). The Yank is unlucky and becomes Disrupted (13.3). Remove the Charge marker. MO fires Pre-Assault fire, this time on the 5-7 line (12-15 line, -2 for the Advance Fire). It inflicts another O hit. One WS unit has 1 O hit, and the second has two O hits. Its AMM is four (although the 21st is Disrupted, it retains the assault morale bonus of +1). The morale check roll is a 4. Wisconsin holds by a thread.*
The Assault: MO fires on the 3 line (1x3). WS is also on the 3 line (4x3= 12, -3 line shift for Disruption). Round 1: Reb's fire is NE, the Yanks inflict an O hit. The 10th checks morale (AMM=3) and passes. Round 2: both sides NE. Round 3: Reb's roll NE; Yanks cause a second O hit. Rebs check morale (its AMM is 2), fails, and becomes Disrupted.
US Action segment ends.
18. Unit Action – Regroup
18.1. General Rules
- 18.1.1. Units with 2 O hits may attempt to recover 1 O hit by Regrouping.
- 18.1.2. Units with 1 or no O hits (in the case of Reduced units) are not eligible to regroup.
- 18.1.3. Routed/Disrupted units may not Regroup.
- 18.1.4. To Regroup, a unit must be at least 3 hexes from the nearest enemy unit when out of an enemy Line of Sight, or 4 hexes within one.
18.2. Procedure
- 18.2.1. When regrouping, refer to the stack's Average Base Morale (ABM) Base Morale.
- 18.2.2. A stack automatically Regroups if stacked with any Leader in his Chain of Command.
- 18.2.3. Other stacks must roll to Regroup.
- Roll a die and compare the number roll to the stack's ABM.
- A stack cannot have an ABM greater than 8 (i.e., a nine always fails)
- 18.2.4. If the roll is less than or equal to the stack's ABM it recovers 1 O hit for each eligible unit in the hex.
- 18.2.5. A stack that attempts to Regroup may change facing after its attempt whether successful or not.
19. Morale
19.1. Disorganized
- 19.1.1. Define a Disrupted or Routed stack as Disorganized.
- 19.1.2. When not Disorganized, refer to a stack as in Good Order.
- 19.1.3. A stack in Good Order becomes Disrupted, and a Disrupted one routs, when:
- It fails a morale check due to combat.
- A Routing or Disrupted stack enters its hex.
- It enters the hex of a Disrupted stack.
19.2. Calculating the Average Base Morale of a Stack
- 19.2.1. An Average Base Morale, or ABM. is the sum of the base morale's of each unit in a stack divided by the number of units in that stack.
- 19.2.2. O hits do not affect a stack's ABM.
- 19.2.3. Example of an ABM calculation:
- 2 units are stacked in a hex.
- One unit has a Base morale of 5.
- The second unit is reduced and has a Base Morale of 2.
- The Average Base Morale of the stack is 3 ((5+2)/2 = 3.5 rounded to 3).
19.3. Calculating the Average Modified Morale of a Stack
- 19.3.1. An Average Modified Morale, or AMM, is the sum of the base morale of each unit in a stack minus any O hits, divided by the number of units in that stack When calculating an AMM, round fractions down.
- 19.3.2. Example of an AMM calculation:
- 2 units with a Base Morale of 5 are stacked in a hex.
- One unit has suffered an O hit. Its modified morale is 4 (5-1=4).
- The other is clean. Its modified morale is 5 (5-0=5).
- The Average Modified Morale (AMM) of the stack is 4 ((4+5)/2 = 4.5, rounded to 4).
19.4. Leader Effects on Average Morale
- 19.4.1. Add the Command Value of a stacked leader when calculating the Average Base Morale (ABM) or the Average Modified Morale (AMM) of a stack.
- 19.4.2. The ABM and AMM of a stack may never be more than 8 nor less than 0. Exception, see Straggler checks, 7.5.4. [Source cross-reference "7.5.4" as printed; no such case appears in the source.]
19.5. Failed Morale Checks – Small-Arms Stacks (Infantry and Cavalry)
- 19.5.1. Disrupt a stack in Good Order failing a Morale Check.
- 19.5.2. Rout a Disrupted stack failing a Morale Check.
19.6. Failed Morale Checks – Artillery
See the Artillery section of the rules. (8.5)
19.7. Effects of Disruption
- 19.7.1. Disrupted units may not initiate an assault.
- 19.7.2. Disrupted units defend in an assault with a -3 fire line modification.
- 19.7.3. Disrupted units fire with a -3 fire line modification.
- 19.7.4. A Disrupted stack receiving an additional D result suffers a 1 O hit loss instead (i.e., 1 O hit for the stack, not for every unit in the stack). The stack must check morale.
- 19.7.5. Disrupted units that fail a morale check due to a combat result rout. However, see Artillery exceptions for other considerations (8.5).
- 19.7.6. Disrupted units have an MFZ of 1 hex.
19.8. Effects of Rout
- 19.8.1. Routed stacks may not regroup, fire, assault, or charge.
- 19.8.2. Routed stacks do not have a ZOC.
- 19.8.3. Routed stacks are always considered flanked for fire purposes.
- 19.8.4. A stack of routed units must retreat together. The stack may not be broken up.
- 19.8.5. When forced to check morale, the stack automatically routs and suffers an O hit.
- 19.8.6. Routing stacks move 3 hexes towards a friendly board edge. See Retreat Priorities, below.
- 19.8.7. Routed units never check for stragglers.
- 19.8.8. Routed units never inhibit enemy movement. When an enemy stack enters a hex adjacent to that Routed stack, retreat it 3 hexes and apply an O hit to the stack.
20. Unit Action – Rally
20.1. General Rules
- 20.1.1. Disorganized units must Rally to resume normal function.
- 20.1.2. A stack is never compelled to Rally.
- 20.1.3. A stack may not Rally in the same segment it became Disorganized.
- 20.1.4. A stack may not rally in the same segment it executed Rout movement.
- 20.1.5. Routed units recover directly to Good Order. There is no intermediate stage between Routed and Disrupted.
- 20.1.6. Rallied stacks may change facing after a successful recovery attempt.
- 20.1.7. Artillery and mounted cavalry may not Rally in a Horse segment.
- 20.1.8. Artillery may attempt to Rally in an Artillery segment in lieu of firing.
- 20.1.9. Enemy Zones of Control do not affect a stack's ability to rally.
20.2. Rally Procedure
- 20.2.1. To Rally a stack, the owning player rolls a d10 and compares the roll to the stacks Average Modified morale (see 19.3, above).
- 20.2.2. If the roll is equal to or less than the stack's average modified morale, it recovers Good Order. Remove the Routed or Disrupted marker.
- 20.2.3. If the die roll exceeds its morale, it fails to recover from Disorganization.
- Disrupted stacks remain Disrupted.
- Routed stacks lose an O hit and execute Rout Movement (see 20.3).
- 20.2.4. Disorganized units stacked with a leader in its Chain of Command (5.1) automatically recover. There is no need to roll the die.
20.3. Retreat Priorities
- 20.3.1. A unit executes a Retreat when it is ROUTED.
- 20.3.2. A Routed stack must retreat 3 hexes within these restrictions:
- It must, if possible, move away from enemy units. It may not move closer to enemy units than when it began its retreat.
- It must generally move towards a friendly Command Source. It must end its retreat closer to a friendly command source than when it began its move.
- 20.3.3. Retreating units may swerve around friendly units, but only if they conform to the conditions listed above.
- 20.3.4. Eliminate units unable to legally retreat.
- 20.3.5. Retreating units immediately stop on a friendly board edge, ceasing movement. These units have one more segment in which to rally.
- 20.3.6. Eliminate routed units that begin a segment on a friendly board edge and that fail to rally.
- 20.3.7. For every EZOC a unit or stack retreats out of after the first one, it suffers an additional O hit. For this purpose, an EZOC exerted by more than one unit counts as a single EZOC. A stack can never suffer more than 1 O hit for retreating out of a given hex.
- 20.3.8. Units may never end a retreat in an EZOC. Retreat them an additional hex, or more if necessary.
- 20.3.9. Retreating units that enter a hex containing friendly units in good order over-stacks that hex and causes those units to be Disrupted.
- 20.3.10. When a stack ends a retreat over-stacked in a hex, retreat that stack an additional hex.
- 20.3.11. Over-stacking does not occur if the hex retreated into contains Disrupted units. These unit would immediately rout so the original routing unit would not have to retreat the additional hex.
- 20.3.12. A stack may retreat more than once a segment. It is certainly possible for a unit to retreat 6 or more hexes a given segment. A unit or stack that is forced to retreat more than once in a segment suffers an O hit each time it retreats.
Figure 4 is a map example and is not reproduced. Its caption and the narrative that follows are reproduced as printed in the source.
Aftermath. The hazard of Dye's advance against an enemy with a clear field of fire becomes evident. With an MFZ of 2 hexes (because of the fence line), the 24 10th MO fired at Illinois during its whole advance and could have reasonably caused more carnage than it did. Coupled with the losses from charge, the Yanks suffered 2x as many losses as Johnny.*
During the charge, gray and blue traded fortunes. The Rebs spun a lucky one-in-ten shot (2 0 hits on the 21st). It got (a little) lucky again when the blues Disrupted. That set-up the 21st's second loss. The scales leveled a bit when the Yanks got (a little) lucky and refused to rout. That preserved Dye's center and fired up the assault.
During the assault Yankee luck won out. He inflicted 2 O hits on the 10th and suffered none in return. Though Disrupted and bleeding, the 10th MO refused to budge. The 21st is in similar shape, but once Dye arrives during the US Horse segment, he'll be able to rally them (20) in a subsequent Action segment.
A Confederate small arms segment follows this Yankee Action. The 10th MO units may not fire since they already took their shots at the Union advance. The 22nd AR may fire, however. But which target to choose?
It could pivot to face and fire at the 26 20th IA. This would remove the danger from that flank but would expose it to a greater flank threat from the 37th IL. Fagan leaves well enough alone and decides to pop at the 37th. Not a bad shot on the 12-15 fire line either.*
Apparently, the Rebs are about to be overwhelmed. A fretful glance over his shoulder and Frost sees dust clouds rolling toward the rear of his line. He exhales, settling back into his saddle. His second brigade at last. Maybe with a counterattack…
21. Conditional Rules—General Guidelines
The following sections (22 Cavalry, 23 Leader Initiative, 24 Column, 25 Formation Stragglers and 26 Twilight) are conditional; apply these rules only when directed by a scenario. Implementing them in a game without specific instructions may have unintended consequences. A player may elect to skip these sections for now.
In the cases where a Conditional rule contradicts a Default one, the Conditional rule takes precedence.
22. Conditional Cavalry Rules
22.1. Cavalry Step Counters
- 22.1.1. In the Conditional Cavalry Rules two counters comprise a Cavalry unit: Full Strength and Reduced. Replace a full-strength cavalry unit with the reduced one after is has suffered its third O hit.
- 22.1.2. The front side of a cavalry unit, whether full-strength or reduced, is its mounted side. The reverse of the counter represents dismounted cavalry.
- 22.1.3. Distinguish mounted cavalry by Weapon Class.
- Sabered cavalry has a dash ( - ) between their base strength and morale. During an assault, its primary arm is the saber.
- Non-Sabered cavalry have an asterisk ( * ) between their base strength and morale. During an assault, its primary weaponry is small arms (musket, pistols and the like).
- When mounted cavalry fires, treat its class as either Rifled ( - ) or Smoothbore ( * ).
- 22.1.4. In an assault involving sabered and non-sabered units, increase the fire line by 1 for sabered cavalry. Implement the modification regardless of who is assaulting or defending.
22.2. Conditional Cavalry Deployments – General Rules
- 22.2.1. Cavalry, mounted or not, may fire and advance fire into an adjacent flank hex. They have an MFZ into an adjacent flank hex.
- 22.2.2. Mounted and Dismounted cavalry may not end their move stacked.
- 22.2.3. Mounted Cavalry may charge dismounted enemy cavalry.
22.3. Mounting/Dismounting Cavalry
- 22.3.1. Cavalry may mount/dismount only in a friendly Action segment.
- 22.3.2. Mounting/Dismounting costs a unit 1 MP.
- 22.3.3. Units may not mount/dismount in an EZOC or MFZ.
- 22.3.4. Units mounting or dismounting in an enemy small-arms fire zone may be fired upon by eligible enemy units including those with an Advance Fire marker. This counts as Advance Fire for the firing units.
- 22.3.5. Units Disrupted by that fire may not mount/dismount, they retain their previous deployment.
22.4. Dismounted Cavalry
- 22.4.1. Treat dismounted cavalry as infantry with the exceptions below.
- 22.4.2. Decrement the fire line of dismounted cavalry by 1 when firing to account for Horse Holders.
- 22.4.3. Decrement the fire line by 1 when dismounted rifled ( - ) cavalry is a target of enemy fire (dismounted rifled cavalry are armed with breech-loaded carbines and by training took maximum cover from terrain). Do not apply this modifier for advance/pre-assault fire or during an assault.
- 22.4.4. Dismounted smoothbore ( * ) cavalry may charge any type of stack subject to normal charge restrictions.
- 22.4.5. Dismounted rifled ( - ) cavalry may not Charge or Assault enemy stacks except through that stack's flank hex.
22.5. Cavalry Counter Charge
- 22.5.1. Unreduced Cavalry of 1 SP or more Assaulted through a frontal hex may execute a Counter Charge.
- 22.5.2. A countercharge commits an entire stack to that operation.
- 22.5.3. Declare the Countercharge before the first assault round.
- 22.5.4. The counter-charging cavalry may not be Disrupted.
- 22.5.5. It may not have an Advance Fire marker.
- 22.5.6. A counter-charging unit may not Advance or Pre-Assault fire.
- 22.5.7. During a countercharge calculate the fire factors normally for each side.
- 22.5.8. Both sides receive the +1 morale modifier.
- 22.5.9. The counter-charging unit receives +1 fire line modification for Charging. If the enemy unit is executing a charge, it receives the fire line modifier as well.
- 22.5.10. Counter-Charging cavalry may not retreat from an assault (7.4).
23. Conditional Leader Initiative
23.1. Command Initiative
- 23.1.1. Leaders have 1 of 3 Initiative types, Failed, Skirmish or Assault.
- 23.1.2. Out of Command leaders do not check Initiative and are automatically Failed. In Command leaders determine their initiative implementing the process below.
23.2. When to Determine Leader Initiative
- 23.2.1. During the Game Turn segment of each turn, in-command Division leaders (DL) must check their Initiative for the upcoming turn.
- 23.2.2. A DL's initiative remains in effect till the following Game Turn Segment.
- 23.2.3. By default, a subordinate Brigade leader (BL) has the same initiative as its DL.
- 23.2.4. When its ordinate DL has Skirmish Initiative, a Brigade Leader may attempt to acquire Assault Initiative. This occurs at the beginning of each Action segment and applies to the end of that segment. A given BL, then, checks twice per turn.
- 23.2.5. Combat units assume the status of their brigade leader.
23.3. Army Leader Effects
- 23.3.1. Army Leaders do not have Initiative per-se. Rather, they can increase the Command Value of any one Division leader. The DL affected may vary from turn to turn.
- 23.3.2. The affected DL must be within the command range of the army leader.
- 23.3.3. Increase the command value of that 1 DL by the command value of the Army leader. This is in effect for the DL's initiative roll only.
- 23.3.4. Army Leaders do not affect a Brigade leader's Initiative roll.
23.4. Determining a Leader's Initiative
- 23.4.1. A player rolls a d10 for the leader in question. If the roll is less than or equal to that leader's command value it has Assault Initiative. On a failed roll the leader has Skirmish Initiative. [Source prints "=<" for "less than or equal to".]
- 23.4.2. At the beginning of each friendly Action Segment, a player rolls for each Brigade Leader with Skirmish Initiative. Roll before any unit conduct actions.
23.5. Initiative Effects
- 23.5.1. Units with Assault Initiative have all Actions available to them.
- 23.5.2. Units with Skirmish Initiative may conduct all actions with these exceptions:
- They may not assault/charge.
- They may not enter an EZoC. Units already in an EZoC are not compelled to move.
24. Conditional Deployment: Column
24.1. General Considerations
- 24.1.1. This section does not apply to dismounted cavalry. Dismounted cavalry may not deploy into column.
- 24.1.2. Mounted Cavalry and infantry may increase their movement capability and mitigate the risk of Straggling by deploying into Column. Place Column markers on units so deployed.
- 24.1.3. Limbered Artillery does not have a column formation per se.
- During a friendly Action segment, artillery moves on a Thoroughfare exactly like column units (see below).
- Up to 4 SPs of artillery may stack and receive the enhanced thoroughfare movement.
- 24.1.4. Units in column may stack with other column units subject to stacking restrictions.
- 24.1.5. Column units may not enter a non-thoroughfare hex.
- Units starting in a non-thoroughfare hex may assume column if the first hex they enter contains a thoroughfare.
- NOTE: Some scenarios or games may make an exception to this restriction. See the game's Custom Rules.
- 24.1.6. Columns must remain at least 3 hexes from the nearest enemy unit of 1 or more strength points. Columns beginning their move closer than 3 hexes are not compelled to move, but they may not move closer to enemy units than when they began their move.
- 24.1.7. Reinforcements may enter in Column.
- 24.1.8. Columns may not end a friendly segment stacked with non-Columns.
- 24.1.9. Column units do have a ZoC.
- 24.1.10. Column units may not enter an enemy MFZ.
- 24.1.11. Column units do not have an MFZ.
- 24.1.12. Disrupted Columns maintain the Column marker. It is possible for a stack to be both in Column and Disrupted.
24.2. Deploying to Column
- 24.2.1. Units may deploy into/from column at the beginning of a friendly Action segment, only. It costs 1 MP to change deployment.
- 24.2.2. Units in an EZoC may not deploy from/into column.
24.3. Column Effects for Unstacked Units
- 24.3.1. This section applies to unstacked units (i.e., units alone in a hex). A unit going to column may begin the segment stacked but must conform to the stacking requirements when it moves.
- 24.3.2. Unstacked column units moving along a road or pike have 6 MPs. Up to 4 SPs of Limbered artillery also have 6 MPs. These units must remain unstacked their entire move.
- 24.3.3. Unstacked column stacks, or limbered artillery moving along a trail, or that combines trail and road movement, have 5 MPs. Limbered artillery has 5 MPs whether stacked or not.
- 24.3.4. Unstacked column units moving along a thoroughfare do not check for stragglers.
24.4. Column Effects for Stacked Units
- 24.4.1. When a stack of 2 or more column units checks for stragglers, add one to their Average Base Morale. Also apply the thoroughfare bonus as appropriate (10.7).
- 24.4.2. A stack of two or more column units may move the 4th thoroughfare bonus hex regardless of the type of thoroughfare (10.7).
24.5. Columns and Combat
- 24.5.1. Columns are flanked for all combat.
- 24.5.2. Units deploying into or out of column in an enemy small arms fire zone may be targeted for Advance Fire.
- 24.5.3. Column units may not fire, except during an assault. In a stack of column units, only 1 unit may fire during the assault (owning player's choice). Disrupt the assaulted Column before the first round of assault.
25. Conditional Rule – Formation Stragglers
25.1. Formation Stragglers Defined
During the game units will likely have to check for Stragglers as per case 10.6. However, units may also have to check for stragglers by Formation (Division or Brigade). The Formation Straggle check occurs as directed by a scenario's rules. Players make the formation check at either the beginning of the game (for units starting on-map) or when a formation arrives as a reinforcement. These losses represent a formation's casualties due to a previous engagement or for forced marching to the scene of battle. Do not roll for a formation not identified in the scenario's special rules.
- 25.1.1. When directed by a scenario, roll on the table below. The scenario rules determine whether to check by brigade, division, or both.
- 25.1.2. Apply modifiers to the roll as per a scenario's instructions. See 25.2, below.
- 25.1.3. Cross reference the modified result found in the d10 column of the table to the O Hits column. The result is the number of O hits suffered by the entire formation, whether division or brigade.
- 25.1.4. Do not apply the O hits to each unit in a formation. Spread that result across the entire formation. See 25.3, Applying O Hits.
Formation Straggle Table (as printed in the source; the table's column headings are "d10" and "O Hits"):
| d10 | O Hits |
|---|---|
| < 0 | 0 |
| 0-4 | 1 |
| 5-9 | 2 |
| 10+ | 3 |
25.2. Formation Straggle Check Modifiers
- 25.2.1. Occasionally the rules instruct a player to apply a modifier to a given formation check. This can be a positive modifier, negative modifier, or zero modifier. If there is no modifier listed apply a zero modifier.
- 25.2.2. Reinforcements may list two modifiers separated by a slash, e.g., +1/0. Apply the first modifier (left of the slash) if the formation enters on the turn-segment shown in the reinforcement schedule. If the formation delays its entrance by 1 segment, apply the second modifier (right of the slash).
- 25.2.3. Example: The CS player is scheduled to receive a brigade Formation reinforcement on segment (n) of a turn. The brigade's formation Straggle Table straggle modifier is 0/-1. If the player brings the brigade on segment (n), as scheduled, apply the zero modifier to the formation straggle check, i.e., do not modify the roll. If he delays the reinforcement until his next Action segment (in this example, segment (f) of the following turn) he applies a -1 die roll modifier, i.e., subtract 1 from the formation straggle check.
25.3. Applying O Hits
- 25.3.1. A player may apply formation O hits at his discretion. However, no unit in a formation may receive a second O hit until all units in the that formation have received at least one.
- 25.3.2. Never apply O hits to Artillery. They are exempt from losses due to Formation Straggle Checks.
- 25.3.3. Example 1: A scenario set-up directs a player to make a Formation Straggle check for each brigade beginning the game on-map. He has deployed 2 brigades. He rolls the d10 twice, once for each brigade. For the first brigade he rolls a 6. That brigade suffers two O hits. He apportions the hits to any 2 units in the brigade, one O hit each. For the second brigade he rolls a 0. He applies 1 O hit to any single unit in the second brigade.
- 25.3.4. Example 2: The scenario directs the CS player to make a formation straggle check for a division entering the map as a reinforcement. The division arrives segment (f) of a turn. During the segment of arrival, the CS player makes a formation straggle check for the division. Make the check before the division enters the map. In this example, the player rolls a 9. He apportions two O hits to any 2 units in that division, 1 O hit apiece.
26. Conditional Rule – Twilight
Sometimes a scenario spills into the night hours. Most games end well before this period but for games that do not, implement this section.
26.1. Effects of Twilight
- 26.1.1. Twilight consists of two periods, Sundown and Dusk. Sundown occurs when the sun begins to set behind the horizon. At Dusk, the sun has fully set, but the sky still reflects enough light to continue the combat. [Source numbers both this and the next paragraph 26.1.1; numbering as printed.]
- 26.1.1. The Game Turn track displays Twilight turns differentiated by Sundown and Dusk.
- 26.1.2. Apply the effects to a game turn according to the Twilight table below.
- 26.1.3. The Twilight Table:
The Twilight Table (as printed in the source; the text layer does not show which column some single entries fall under, so each entry is given with its printed values only)
- a. Max Fire Zone (in hexes): Sundown 3; Dusk 1
- b. Fire Line modification (regular fire only, advance fire exempt): Sundown -1; Dusk -2
- c. Maximum MFZ: Sundown 2; Dusk 1
- d. Charge allowed?: Sundown "Yes (no bonus)"; Dusk "No"
- e. Assault allowed?: "Yes" (single printed entry; the column it applies to is not shown in the text layer)
- f. Charge fire line modification: "0, Charging stack does not receive the Charge Bonus during Assault"; "Charge not allowed" (both printed; the column of the second is not shown in the text layer)
- g. Assault Fire Line modification (attacker only): "-1" (single printed entry)
- h. Straggler modifier: "Base Morale -1 (Straggle checks only)" (single printed entry)
- i. Stack requires a leader to rally: Sundown "No"; Dusk "Yes"
- j. May stacks Regroup (case 18)?: Sundown "Yes"; Dusk "No"
End of the Huzzah! series rules, version 2024.08.15.