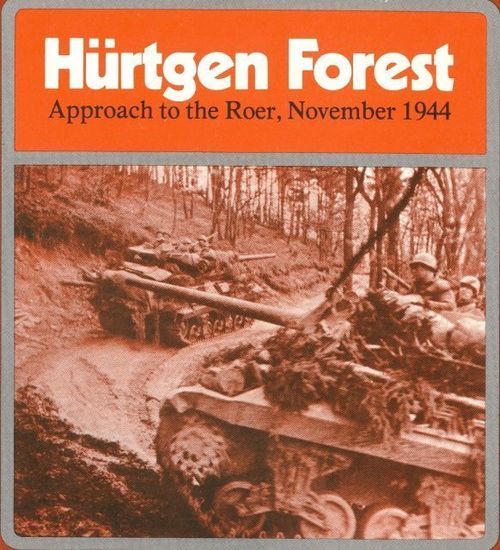
Hurtgen Forest: Approach to the Roer, November 1944
Hurtgen Forest: Approach to the Roer, November 1944 Rulebook
Table of Contents
Table of Contents
- 1.0 Introduction
- 2.0 Game Equipment
- 3.0 Setting Up the Game
- 4.0 Sequence of Play
- 5.0 Movement
- 6.0 Zones of Control
- 7.0 Combat
- 8.0 Artillery
- 9.0 Ground Support
- 10.0 Introduction
- 11.0 Special Artillery Rules
- 12.0 The 116th Panzer Division
- 13.0 Reinforcements
- 14.0 Exiting the Map
- 15.0 Victory Conditions
- 16.0 The Scenarios
- 17.0 Game Notes
1.0 Introduction
The WestWall game system is an operational simulation of the battles on the frontiers of the Reich in 1944-45. Each game in the system represents a clash between the German Army and the American and British Armies, which had pursued it across France to the barrier of the WestWall fortifications. The Playing Pieces represent the actual units which participated in the battles and the maps represent the actual terrain over which those units fought. Two rules folders are provided. The first contains Standard Rules, which are common to all the games in the WestWall system. The second contains Exclusive Rules for each game in the system and the Initial Deployment and Reinforcement Rules.
The game has been designed to insure maximum playability and maximum reality (in that order). In order to achieve these goals, the physical components, as well as the game rules, have been designed to make the game easier to understand and play. The components include a smaller, more compact playing map, never more than a hundred playing pieces and standardized rules.
The standardization makes it easier for the gamer to go from one game to another within the series. It also enables the games' designers to concentrate on the realism aspect of the games (the standardization generally takes care of any playability problems).
2.0 Game Equipment
2.1 The Game Map
Each of the 22" x 17" mapsheets portrays the battle area. A hexagonal grid is superimposed over the terrain features on the mapsheet in order to regularize movement and positioning of the playing pieces.
To make the map lie flat, back-fold it against the creases. Small pieces of masking tape may be used at the corners of the map to hold it taut.
2.2 Game Charts and Tables
Various visual aids are provided for the Players in order to simplify and illustrate certain game functions. These are the Combat Results Table, the Terrain Effects Chart and the Reinforcement Charts.
2.3 The Playing Pieces
The cardboard pieces represent the actual military units that took part in the historical battles. The numbers and symbols on the pieces represent strength, movement capability and type of unit represented by the piece. These playing pieces will hereafter be referred to as "units."
2.31 How to Read the Units
Non-Artillery Unit: The unit's size is shown at the top (the number of Roman numerals denotes the unit size). The designation is shown at the left (the unit's identification). The type is shown at the right (the unit type symbol). The attack strength is shown at the lower left, the movement allowance at the lower right and the defense strength at the bottom center.
Artillery Unit: The FPF strength is shown at the top, the barrage strength at the left, the range allowance at the right, the designation at the left below the barrage strength, the type at the right, the movement allowance at the lower right, and the defense strength at the bottom.
Unit Types (symbols): Armor; Mechanized; Reconnaissance; Self-Propelled Artillery; Infantry; Airborne Infantry; Artillery; Engineer; Glider (airborne); Airborne Artillery.
Unit Sizes: I = company; II = battalion; III = regiment; X = brigade.
Unit Designations: Units may be identified by a single number or by a multi-part designation. In multi-part designations, the number to the right is the unit's superior formation. This may be either a division, regiment or brigade. Battalion-sized units are numbered consecutively within the regiment. As a general rule, there are three battalions per regiment, and three brigades or regiments per division. Numbers to the right of the unit type symbol denote divisional identity.
2.32 Definition of Terms
Attack Strength is the relative strength of a non-artillery unit with regard to attacking other units, expressed in terms of Attack Strength Points.
Defense Strength is the relative strength of a unit with regard to defending against the attacks of Enemy units, and is expressed in terms of Defense Strength Points.
Barrage Strength is the relative strength of an artillery unit when attacking Enemy units, and is expressed in terms of Barrage Strength Points.
Final Protective Fire (FPF) Strength is the relative ability of an artillery unit to add to the Defense Strength of Friendly units, and is expressed in terms of FPF Strength Points.
Movement Allowance is the maximum number of clear terrain hexes through which a unit may be moved in a single Movement Phase; each such hex requires one Movement Point of the Movement Allowance. More than one Movement Point may be expended for some hexes.
Range Allowance is the maximum number of hexes from the hex of an artillery unit using its FPF or Barrage Strength (exclusive), to the defending unit's hex (inclusive).
2.4 Game Scale
Each hexagon on the mapsheet represents from 500 to 2000 meters of real terrain from side to side. Each Game-Turn is the equivalent to twelve to 24 hours of real time.
2.5 Parts Inventory
| Component | Folio Game | QuadriGame |
|---|---|---|
| Game Map | 1 | 4 |
| Die-Cut Counter Sheet | 1 | 4 |
| Standard Rules Folder | 1 | 2 identical |
| Exclusive Rules Folder | 1 | 4 different |
| Die (or Randomizer) | 1 | 1 |
| Game Box | 0 | 1 |
| Folio (Folder) | 1 | 0 |
If any parts are missing or damaged, please write to Customer Service, Simulations Publications, Inc., 44 East 23rd Street, New York, N.Y. 10010.
Questions regarding the rules of the game (stated in a "yes" or "no" or multiple choice manner) will be answered, if accompanied by a stamped, self-addressed envelope.
3.0 Setting Up the Game
The cardboard playing pieces should be punched out of the Unit Counter Sheet. The differently colored units represent forces of the opposing sides. The mapsheet should be unfolded and then back-folded against the creases to make it lie flat. Players should determine which side each will play. The Players then consult their respective Initial Deployment Charts. These charts tell the strengths of each unit which is in play (on the map) during the First Game-Turn. Unit values are listed as follows: Attack Strength - Defense Strength - Movement Allowance. For artillery units: Barrage Strength - Final Protective Fire Strength - Range Allowance/Defense Strength - Movement Allowance.
Units may be assigned specific set-up hexes or Players may be instructed to choose the set-up hexes for their units, in which case, one Player or the other will be instructed to "deploy first." After all the units in the Initial Deployment have been set-up, all remaining units should be placed aside and brought into play according to the Reinforcement Schedule.
The Scenario Special Rules indicate which Player is the First Player. The Victory Conditions tell how the game is won. Play proceeds according to the Sequence of Play for the number of Game-Turns specified in the Scenario. The Turn Marker is placed on the Turn Record Track in the first space (unless otherwise specified).
4.0 Sequence of Play
This game is played in successive Game-Turns, composed of alternate Player-Turns. During each Game-Turn, the Players maneuver their units and resolve combat in sequence, according to the following outline and within the limits provided by the rules which follow. At the conclusion of the last Game-Turn, the Victory Conditions are consulted and a winner is determined.
4.1 Sequence Outline
The Game-Turn is divided into a First Player-Turn and a Second Player-Turn. The Player whose Player-Turn is currently in progress is termed the "Phasing Player." The activity which may take place during each Phase is outlined below.
1. FIRST PLAYER-TURN
A. Movement Phase: The Phasing Player may move all, some or none of his units as he desires, within the limits and restrictions of the rules of Movement, Zones of Control, Terrain Effects and Exclusive Rules of the game. The Phasing Player may bring Reinforcements onto the map as allowed by his Reinforcement Schedule and the Reinforcement Rules. The non-Phasing Player may not move his units.
B. Combat Phase: The Phasing Player uses his units to attack the non-Phasing Player's units. The Phasing Player may execute his attacks in any order he desires. Each attack follows this sub-sequence, where appropriate:
a. The Phasing Player states the number and strength of his attacking ground units.
b. The Phasing Player allocates Barrage Strength Points (if he wishes) from both Artillery units and Ground Support Points.
c. The non-Phasing Player allocates Final Protective Fire Strength (if he wishes) from non-adjacent Artillery units and Ground Support Points.
d. The Combat Differential (total attacking strength minus total defending strength) is calculated, the terrain type occupied by the defending unit is found and the combat differential column from that line is consulted. The die is rolled under that heading (see Combat Results Table) and the indicated result is immediately applied.
During the Combat Phase, neither Player may move his units, except when called for as a result of combat.
2. SECOND PLAYER-TURN
The Second Player now becomes the Phasing Player and executes Movement and Combat in the sequence described above.
3. GAME-TURN RECORD INTERPHASE
The Turn Marker is advanced one space along the Turn Record Track, signaling the start of a new Game-Turn.
5.0 Movement
GENERAL RULE:
During his Movement Phase, the Phasing Player may move as many or as few of his units as he desires. The units may be moved in any direction or combination of directions.
PROCEDURE:
Units are moved one at a time, tracing a path of contiguous hexes through the hex grid. As each unit enters a hex, the unit pays one or more Movement Points from its Movement Allowance.
CASES:
[5.1] MOVEMENT RESTRICTIONS AND PROHIBITIONS
[5.11] Movement may never take place out of sequence. A Player's units may be moved only during his own Movement Phase. During the Combat Phase, a unit which is either attacking or defending may be called upon to advance or retreat after combat is resolved. During the Enemy Player's Movement Phase and during both Players' Combat Phases, except when advancing or retreating as a result of combat, Friendly units must not be moved.
[5.12] A Friendly unit may never enter a hex containing an Enemy unit.
[5.13] A unit may never expend more Movement Points than its total Movement Allowance in any one Movement Phase. A unit may expend all, some or none of its Movement Points in any one Game-Turn, but unused Movement Points may not be accumulated until another Movement Phase or transferred to another unit.
[5.14] A unit may never exit an Enemy-controlled hex during any Movement Phase. An Enemy-controlled hex may be left only during a retreat or advance as a result of combat (unless otherwise noted in the Exclusive Rules).
[5.15] Once a unit has been moved and the Player's hand taken from the piece, it may not be moved any further during the Player-Turn nor may it change its move without the consent of the opposing Player.
[5.16] There are no supply rules (unless otherwise noted in a specific game's Exclusive Rules). Units are considered to be "in supply" at all times. Isolation has no effect on movement or combat.
[5.2] EFFECTS OF TERRAIN
[5.21] A unit must expend one Movement Point to enter a clear terrain hex. To enter other types of hexes, a unit must expend more than one Movement Point. When the Terrain Effects Chart calls for a Movement Point expenditure to cross a terrain hexside, this cost is in addition to the terrain cost for entering the hex. Movement Point costs are summarized on the Terrain Key on the map. Movement Point costs are cumulative.
[5.22] A unit which moves from one road hex directly to an adjacent road hex through a road hexside expends only 1/2 Movement Point, regardless of other terrain in the hex.
[5.23] A unit which moves from one trail hex directly into an adjacent trail hex through a trail hexside expends one Movement Point, regardless of other terrain in the hex.
[5.24] Armored, reconnaissance, mechanized and self-propelled artillery units may never enter a rough, broken or forest hex, or pass through a river or stream hexside, except through road or trail hexsides. If forced to retreat through a non-road, non-trail hexside into a rough, broken or forest hex or across a river or stream hexside, units of the type listed above are eliminated instead.
[5.25] A unit may not enter a hex if it does not have sufficient Movement Points remaining to pay the Movement Point cost to enter the hex itself and the hexside being crossed.
[5.3] EFFECTS OF OTHER FRIENDLY UNITS
[5.31] A Friendly unit may move through hexes occupied by other Friendly units (at no extra Movement Point cost), but may not end the Movement or Combat Phases stacked in the same hex with another Friendly unit. Stacking is prohibited.
[5.32] There is no limit to the number of Friendly units that may pass through a single hex in a Game-Turn.
[5.33] Friendly-controlled hexes never interfere with Friendly movement.
6.0 Zones of Control
GENERAL RULE:
The six hexagons immediately surrounding a hex constitute the Zone of Control (ZOC) of any unit in that hex. Hexes upon which a unit exerts a Zone of Control are called Controlled Hexes and inhibit the movement of Enemy units: All units must cease movement when they enter an Enemy-controlled hex.
CASES:
[6.1] EFFECTS OF MOVEMENT
[6.11] All units exert a Zone of Control at all times, regardless of the Phase or Player-Turn, during the entire Game-Turn. The presence of Zones of Control is never affected by other units, Enemy or Friendly.
[6.12] Units do not pay any additional Movement Points to enter an Enemy-controlled hex.
[6.13] There are only two ways to exit a hex in an Enemy Zone of Control: Either by retreat or advance as a result of combat, or by removal of the Enemy unit exerting the Zone of Control as a result of combat.
[6.2] MULTIPLE ZONES
[6.21] If there are both Enemy and Friendly Zones of Control cast over a given hex, they have no affect on each other; both Zones co-exist and the hex is mutually controlled by both Players.
[6.22] There is no additional effect when more than one unit casts its Zone of Control onto a given hex.
[6.23] Obviously, if a given unit is in an Enemy-controlled hex, the Enemy unit is also in its controlled hex. The two units are equally and mutually affected.
[6.3] EFFECTS OF TERRAIN
[6.31] Zones of Control extend into all types of terrain hexes and across all types of terrain hexsides, except those prohibited to all unit types.
[6.32] Zones of Control of armored, reconnaissance, mechanized and self-propelled artillery do extend into broken, rough or woods hexes, and these units may attack into these terrain types, even though they may not enter them.
[6.33] Zones of Control never extend through non-bridge river hexsides, and non-Artillery units may never attack across non-bridge river hexsides. All Zones of Control do, however, extend across non-bridge stream hexsides, and units may attack across them. (Ferry's are non-bridge hexsides.)
Example: [Diagram omitted. It shows a 4-3-10 unit in the centre of a hex cluster; the hexes adjacent to it are marked "ZOC", and two hexes on the left are marked "NO ZOC" because the river hexside blocks Zones of Control from extending across it.]
7.0 Combat
GENERAL RULE:
Combat between adjacent opposing units is mandatory. Artillery units (8.0) are the only units which may attack units to which they are not adjacent. See also Ground Support Rules (9.0).
The Phasing Player is termed the attacker; the other Player, the defender, regardless of the overall strategic situation.
PROCEDURE:
Total the Attack Strength, Barrage Strength and Ground Support Strength of all attacking units involved in a specific attack; total the Defense Strength and the Final Protective Fire of all units which are the object of a specific attack. Subtract the total Strength of the defending units from the total Strength of the attacking units. The result is the Combat Differential expressed in Points. It may be either a positive or a negative number.
Consult the Combat Results Table, and find the terrain-type which the defending unit occupies. Directly across that line, find the appropriate Combat Differential Column. Roll the die under that column heading, and then apply any Combat Results immediately, before resolving any additional attacks that are being made in the same Combat Phase. Example: If thirteen Strength Points were attacking a unit with four Strength Points in a Town hex, the Combat Differential would be +9. The attack would be resolved at +9-11 on the line corresponding to Town terrain. (A die roll of five would result in a D-1.)
Having determined the proper column on the Combat Results Table (7.61), the attacker rolls the die. The result indicates a line which is cross-indexed with the proper column. The intersection of line and column yields a Combat Result. This should be immediately applied to the involved units, before going on to resolve any other combat. Separate combats may be resolved in any order that the attacker wishes, so long as all combats are resolved during that Combat Phase.
CASES:
[7.1] WHICH UNITS ATTACK
[7.11] Every non-Phasing unit that has a Phasing unit adjacent to it must be attacked by some Phasing unit during that Combat Phase. The Phasing Player may resolve these attacks in any fashion desired, as long as all adjacent units are attacked within the requirements of Case 7.2.
[7.12] All of the Phasing Player's units which end the Movement Phase in an Enemy-controlled hex must attack some Enemy unit during the ensuing Combat Phase. The Phasing Player may choose which units will attack each defending unit, as long as all adjacent Friendly units participate in an attack.
[7.13] A defending unit may be attacked by as many as six adjacent units, with possible additional Artillery Barrage Strength (see 8.0) and Ground Support (see 9.0).
[7.14] No unit may attack more than once per Combat Phase, and no Enemy unit may be attacked more than once per Combat Phase.
[7.15] Non-Artillery units may only attack if in a hex adjacent to the defending unit(s).
[7.2] MULTIPLE UNIT AND MULTI-HEX COMBAT
[7.21] If a Phasing Player's unit is in the Zone of Control of more than one Enemy unit, it must attack all those adjacent Enemy units which are not engaged by some other attacking unit.
[7.22] Units in two or more different hexes may combine their Combat Strengths and attack a single hex, if all the attacking units are adjacent to (or within range of) the Enemy-occupied hex.
[7.23] Attacks may involve any number of attacking or defending units. For the attacks to be resolved as a single combat, however, all the attacking units must be adjacent to all the defending units, with the addition of Barraging Artillery units, which need not be adjacent.
[7.3] COMBAT STRENGTH UNITY
A given unit's Attack and Defense Strengths are always unitary. That is, a unit's Strength may not be divided among different combats, either for attack or defense.
[7.4] EFFECTS OF TERRAIN
[7.41] Defending units, only, benefit from the terrain in the hex they occupy and/or that hex's perimeter hexsides. Terrain in hexes occupied by attacking units has no effect on combat.
[7.42] Defending units do not benefit from Stream hexsides unless all units attacking that defending unit are attacking across Stream hexsides.
[7.43] The effect of terrain (on combat) has been integrated into the Combat Results Table. Simply find the terrain which the defending unit benefits from, trace over to the proper Combat Differential Column, and roll the die under that column heading.
[7.44] A defending unit always benefits from the most advantageous terrain to which it is entitled. Example: An attack against a unit in rough terrain behind a stream hexside would be resolved on the rough terrain line of the Combat Results Table.
[7.45] When two or more defending units are being attacked in a single combat and are on two different types of terrain, each having a different Combat Differential, then all defending units benefit from the applicable terrain most favorable to the defender.
[7.5] DIVERSIONARY ATTACKS
[7.51] In making a series of attacks, a Player may allocate his attacking units so that some attacks are made at "poor" Differentials, so that adjacent attacks may be made at more advantageous Differentials (by allotting most of the attacking force to the major objectives). These attacks are known as diversionary or holding attacks.
[7.52] The Phasing Player may never voluntarily reduce the Differential of any given attack.
[7.6] COMBAT RESOLUTION
[7.61] Combat Results Table (See Exclusive Rules.)
[7.62] Explanation of Combat Results
D1, 2, 3 or 4 = Defender Retreats the indicated number of hexes (1, 2, 3, 4). Each Player retreats his own units. He must retreat his units in accordance with the Retreat Rules (See Case 7.7). Units may not retreat across prohibited hexsides (see Terrain Key).
A1 or 2 = Attacker Retreats the indicated number of hexes.
Br = Both the attacking and defending units must retreat one hex. The defender retreats first [Thus, if the defending unit is surrounded by units or Zones of Control, it is eliminated.] The attacking units then retreat.
Ae = Attacker Eliminated. All attacking units are eliminated. Defender may advance into the hex.
De = Defender Eliminated. All defending units are eliminated. Attacker may advance into the hex.
[7.7] HOW TO RETREAT
When the Combat Result requires a Player's units be retreated, the Owning Player must immediately move those units the indicated number of hexes away from their combat position. This movement is not normal movement and is subject to the following restrictions. If the unit is unable to retreat within these restrictions, it is eliminated instead.
[7.71] In retreating, a unit may initially leave an Enemy-controlled hex; thereafter, it may not enter an Enemy-controlled hex. Friendly units do not negate Enemy Zones of Control for purposes of retreat.
[7.72] A retreating unit may not cross a prohibited hexside (see Terrain Key and Case 5.24).
[7.73] Where possible, a retreating unit must retreat into and through vacant hexes. If no other route is available, the retreating unit may move through Friendly occupied hexes, displacing every Friendly unit whose hex it moves through or into (see Case 7.8).
[7.74] In all cases, the retreating unit must terminate its retreat the Combat Result-indicated number of hexes away from its former combat position. If it cannot, and can retreat only a portion of the number of obligated hexes, it is eliminated in the last hexes to which it is able to retreat. The retreat path (see Case 7.91) terminates in the hex a unit is eliminated in.
[7.8] DISPLACEMENT
[7.81] If Friendly units occupy hexes in the only possible retreat route available to a retreating unit, those Friendly units are displaced (moved out of their hexes) by the retreating unit. The displaced unit is moved one hex (by the Owning Player) as if it were itself retreating. Then, the retreating unit enters the vacated hex and, if necessary, continues its retreat. The retreating unit may displace as many units as necessary to retreat the indicated number of hexes.
[7.82] If the displacement would cause any of the displaced units to be eliminated, the retreating unit is eliminated instead. Displaced units can themselves displace other Friendly units in a sort of chain reaction of displacement, if that is the only permitted path of displacement open to them. A unit may be displaced more than once per Combat Phase, if that is the only alternative. Displaced Artillery units which have not yet engaged in combat, may not fire during that Combat Phase. Units may not displace other Friendly units if they have other paths of retreat open to them.
[7.82] [Printed as 7.82 in the source; the second paragraph of case 7.82 is numbered identically in the printed rules.] If a retreating unit displaces a unit in a hex which the Phasing Player had intended to Barrage Attack, the attack against that hex may not take place. Of course, the displaced unit may be Barrage Attacked in its new hex.
[7.9] ADVANCE AFTER COMBAT
[7.91] Whenever an Enemy unit is forced to retreat (or is eliminated) as a result of combat, it will leave a path of vacant hexes behind it called the Path of Retreat (this includes hexes vacated pursuant to Case 7.74). Any or all Friendly victorious units which participated in the combat and were adjacent to the retreated unit are allowed to advance along the Enemy Path of Retreat.
[7.92] The advancing victorious units may cease advancing at any hex along the Path of Retreat.
[7.93] Advancing victorious units may ignore Enemy Zones of Control.
[7.94] Only victorious units which were adjacent to the retreating unit during the combat and participated in that combat may advance. Non-adjacent Artillery units may not advance after combat.
[7.95] An advancing unit may not stray from the Path of Retreat.
[7.96] The option to advance must be exercised immediately, before any other combat resolution. Units are never forced to advance after combat. After advancing, units may neither attack nor be attacked in that Phase (see Case 7.14), even if their advance places them next to Enemy units whose battles are yet to be resolved, or who were not involved in combat. However, advances are useful in cutting off the retreat of Enemy units whose combat has not yet been resolved.
[7.97] Example: A defeated unit retreating three hexes may be followed by up to three victorious units in its Path of Retreat.
[Diagram omitted: a seven-hex cluster showing a retreat path of three hexes, with the victorious units' advance shown along it.]
8.0 Artillery
GENERAL RULE:
Artillery units may participate in combat from adjacent and non-adjacent hexes. The artillery unit's Barrage Attack Strength may be used to attack Enemy units. The Artillery unit's Final Protective Fire Strength may be used to supplement the Defense Strengths of other Friendly defending units. In either case, Artillery units need not be adjacent to, but must be in range of the defending unit. An Artillery unit may use both its Barrage Strength and Final Protective Fire Strength in a single Game-Turn. When attacked, an Artillery unit defends itself with its own Defense Strength.
CASES:
[8.1] BARRAGE ATTACKS
[8.11] Artillery units may attack non-adjacent Enemy units up to the extent of their Range Allowance, but they are never forced to attack an Enemy unit merely because it is within range.
[8.12] Range from the Barraging Artillery unit to the defending unit is counted by including the target hex (defending unit's hex), but not the Barraging unit's hex.
[8.13] Artillery units may only attack a single Enemy-occupied hex when Barraging, except when making a Combined Attack with other units attacking from adjacent hexes (see Case 8.2).
[8.14] Barraging Artillery (Artillery attacking from non-adjacent hexes) suffer no Combat Results; they are never destroyed or retreated as a result of their own attacks. Of course, other units cooperating with the Barraging Artillery units from an adjacent position would be affected by Combat Results.
[8.15] In attacks made solely by Artillery and/or Ground Support Points, only Combat Results of D2, D3, D4 and De affect the defending unit.
[8.2] COMBINED ATTACKS
[8.21] Artillery units may attack alone, in concert with other Barraging Artillery and/or Ground Support, or in concert with any Friendly units making adjacent attacks, adding their bombarding Combat Strength to the attack. These attacks are called Combined Attacks.
[8.22] When Friendly units are attacking adjacent Enemy units in more than one hex, the Barraging Artillery units need be within range of only one of the defending units to add their Barrage Strength to the attack.
[8.3] ADJACENT ATTACK
[8.31] When adjacent to an Enemy unit, Artillery units must participate in an attack against adjacent Enemy units (exception: see Case 8.34). In making this attack, the Artillery unit uses its Barrage Strength.
[8.32] When attacking from an adjacent hex, Artillery units may attack as many units as they are adjacent to, but may not attack non-adjacent units.
[8.33] Artillery units attacking from adjacent hexes must suffer all the Combat Results of their attacks.
[8.34] Friendly Artillery units that are adjacent only to Enemy units across river hexsides are not forced to attack adjacent units and may attack non-adjacent Enemy units. When attacking across a River hexside, Artillery units suffer no Combat Results.
[8.4] FINAL PROTECTIVE FIRE
[8.41] A non-Phasing Artillery unit, which has not yet been subject to a successful attack in the current Combat Phase, had suffered no adverse Combat Results in the previous Combat Phase, had not been displaced, and is not adjacent to an Enemy unit (except across a River hexside), may use its Final Protective Fire Strength (FPF) to supplement the Defense Strength of a Friendly unit which is under attack. If a non-Phasing Artillery unit has been displaced, had suffered a Combat Result in the current or previous Combat Phase, or is adjacent to an Enemy unit, it may not use its FPF during the current Enemy Combat Phase.
[8.42] The Friendly defending unit receiving Final Protective Fire must be in range of the Artillery unit providing the FPF. This range is computed to the hex occupied by the defending unit [the Friendly unit], not to the hex occupied by the attacking unit [the Enemy unit].
[8.43] FPF Strength Points are simply added to the Defense Strength of the unit receiving Final Protective Fire.
[8.44] When an Artillery unit supplies FPF, it neither benefits nor suffers from the Combat Result.
[8.45] FPF may not be used to supplement the Defense Strength of a Friendly unit which is under attack solely by Enemy Artillery (either adjacent or non-adjacent) and/or Ground Support.
[8.46] Each Artillery unit may use its Final Protective Fire only once per Game-Turn.
[8.5] DEFENSE
When an Artillery unit is attacked in any fashion, it uses its Defense Strength not its FPF.
[8.6] TERRAIN EFFECTS
[8.61] An Artillery unit may use its Barrage or FPF Strength anywhere within its Range Allowance, regardless of intervening terrain or units (either Friendly or Enemy).
[8.62] Defending units benefit fully from terrain in the hex they occupy when attacked by Artillery (regardless of range). Defending units do not receive any hexside benefits if attacked solely by artillery and/or Ground Support. Defending units do receive hexside benefits if they are subject to a Combined Attack involving non-Artillery units, all of which are attacking across the terrain hexside type in question.
9.0 Ground Support
GENERAL RULE:
Some Artillery and/or Air Power in the game are not represented by units, but rather by the allocation of Ground Support Points on a Game-Turn by Game-Turn basis. These Points are allotted in the Scenario. The Players must record (on scratch paper) the allocation and expenditure of Ground Support Points. Ground Support Points are presumed to come from off the playing area and do not have any range limitations (unless otherwise stated in the Exclusive Rules).
PROCEDURE:
Ground Support Points may be used during any Combat Phase, exactly as if they were Artillery, and can function as Barrage and FPF. Example: A Player has ten Ground Support Points allocated in a given Game-Turn. When he is the Phasing Player, he may use these Points as Barrage Strength Points. When he is the non-Phasing Player, he may use these same Points as FPF.
CASE:
[9.1] RESTRICTIONS AND PROHIBITIONS
[9.11] One Ground Support Point equals one Artillery Strength Point (both Barrage and FPF).
[9.12] A Player may assign all available Ground Support Points to one target unit, or he may split them up between as many targets as he sees fit.
[9.13] Ground Support Points have unlimited range. They may attack any Enemy unit on the map.
[9.14] Ground Support may not be accumulated from Game-Turn to Game-Turn. If they are not used in the Game-Turn allocated by the Scenario, they are lost.
The following is the Hurtgen Forest Exclusive Rules folder (sections 10.0-17.0), which follows the WestWall Standard Rules above.
10.0 Introduction
Hurtgen Forest is a simulation, on the battalion/regiment level, of combat between U.S. and German forces near the Belgian-German border in November of 1944.
11.0 Special Artillery Rules
GENERAL RULE:
Both Players are restricted in their use of Artillery units for both Barrage and FPF during each individual combat.
CASES:
[11.1] GENERAL USE
[11.11] During every Combat Phase, both Players are limited in the number of Artillery units that may engage in each single, individual combat.
[11.12] Both adjacent and non-adjacent Artillery units count toward the maximum allowed usage per individual combat.
[11.13] Ground Support Points do not count toward the Artillery unit restrictions.
[11.2] U.S. ARTILLERY UNIT RESTRICTIONS
[11.21] The U.S. Player, as the Phasing Player, may use a maximum of four Artillery units when attacking per individual combat.
[11.22] The U.S. Player, as the non-Phasing Player, may use a maximum of three Artillery units for FPF per individual combat.
[11.3] GERMAN ARTILLERY UNIT RESTRICTIONS
[11.31] The German Player, as the Phasing Player, may use a maximum of two Artillery units per individual combat when attacking.
[11.32] The German Player, as the non-Phasing Player, may use only one Artillery unit for FPF per individual combat.
[11.4] GROUND SUPPORT POINTS
[11.41] The U.S. Player receives a maximum of 20 Ground Support Barrage Strength Points per Game-Turn to help supplement his attacks.
[11.42] The U.S. Player can only use up to five Ground Support Barrage Strength Points per individual combat.
[11.43] The U.S. Player may not use his Ground Support Points for FPF.
[11.44] Ground Support Points are not restricted in range. They may be used in any hex on the map.
12.0 The 116th Panzer Division
GENERAL RULE:
In order to refit in time for the Ardennes Offensive the 116th Panzer Division had to break off and pull out of the line. All units of the 116th Panzer Division must exit the map by the specified Game-Turn. These units' divisional designation appears to the right of their unit type symbol. All units with 116th Divisional designations must exit the map.
PROCEDURE:
All units of the 116th Panzer Division must exit either the east or south edge of the map by Game-Turn Four (see Section 14.0). Otherwise, the German Player is subject to penalties.
CASES:
[12.1] PENALTIES
[12.11] For each German unit of the 116th Panzer Division that does not exit the map by Game-Turn Four, the U.S. Player receives five Victory Points for each succeeding Game-Turn that the unit begins on the map.
[12.12] U.S. Player does not receive this Victory Point bonus for destroyed units of the 116th Panzer Division. (Of course, the destroyed units count as destroyed units for Victory Point purposes).
[12.13] Example: Four units of the 116th Panzer Division exit on Game-Turn Four, two units of the 116th exit on Game-Turn Five, and one unit of the 116th exits on Game-Turn Six; the U.S. Player would receive twenty Victory Points.
13.0 Reinforcements
GENERAL RULE:
Both Players receive Reinforcements. These appear during the Owning Player's Movement Phase on the Game-Turn indicated on the Reinforcement Schedule. The Reinforcement Schedule states the Game-Turn of appearance, the number of units, the Strength and Movement Allowance and the specified hex on which they enter.
PROCEDURE:
During his Movement Phase, the Owning Player places a Reinforcing unit in the scheduled hex. The Owning Player may place them at any time during his Movement Phase.
CASES:
[13.1] MOVEMENT OF REINFORCEMENTS
[13.11] Reinforcements are presumed to be poised adjacent to the map. When placed on the map a Reinforcing unit expends Movement Points to enter the entry hex according to the Terrain Key. In almost all cases, the Reinforcements are entered onto a hex which has a road leading off the map; these units expend Movement Points at the road movement rate to enter the map.
[13.12] In several cases, more than one unit is scheduled to appear in the same Game-Turn. These units are deployed off map, one behind the other, with the lead unit poised adjacent to the map entry hex itself. If the entry hex is a road hex, a hypothetical road may be presumed to stretch off the map, away from the entry hex.
[13.13] As each unit enters the map, it will pay the cost for entering the entry hex, plus any additional cost for any hypothetical clear terrain hexes that it would have to traverse to reach the entry hex. If units are entering on a road hex, they are considered to be moving through hypothetical road hexes until they reach the map. Example: The lead unit in a column would pay 1/2 Movement Point to enter the map, the second unit would pay 1 Movement Point to enter the map, the third 1 1/2 Movement Points, etc.
[13.14] Once on the map, Reinforcements may be moved normally. The Owning Player may begin the arrival of his Reinforcements at any time during his Movement Phase.
[13.2] RESTRICTIONS
[13.21] Reinforcements may not enter a hex which is, at that point, occupied by an Enemy unit. A Reinforcing unit may enter an Enemy-controlled hex (but it must cease movement therein).
[13.22] If, and only if, a scheduled entry hex is occupied by an Enemy unit, or a Friendly unit in an Enemy Zone of Control, the Reinforcing unit may enter the nearest unblocked map edge hex to the scheduled hex, in the direction of the nearest Friendly unit.
[13.23] A Player may deliberately withhold Reinforcements from Game-Turn to Game-Turn, bringing them into play (if at all) on some later Turn.
[13.24] Regardless of whether a Reinforcement unit is brought into play on its scheduled Turn, it must appear in its scheduled hex or alternate (see Case 13.22).
[13.25] Until they enter the map, Reinforcements have no effect on play; they do not cast a Zone of Control onto the map, nor may they attack Enemy units until they enter the map.
14.0 Exiting the Map
GENERAL RULE:
Only the German units of the 116th Panzer Division may exit from the map. An exiting unit must expend Movement Points to enter an imaginary hex presumed to be adjacent to the map edge. The terrain in this imaginary hex is presumed to be similar to the terrain in the hex from which the unit exited.
CASES:
[14.1] RESTRICTIONS
[14.11] Once a unit exits the map it may not return.
[14.12] Exited units are not considered eliminated (but see Case 14.13) and are kept separated from eliminated units.
[14.13] A unit may not exit the map as a result of combat. If it does so, then it is eliminated. Units may only exit the map during the Owning Player's Movement Phase.
15.0 Victory Conditions
GENERAL RULE:
Victory is judged at the end of a Scenario on the basis of Victory Points scored by the Players. Victory Points are awarded to Players for eliminating Enemy units and for seizing territorial objectives.
PROCEDURE:
There is no Victory Point record track. Players must keep track of Victory Points on a piece of scratch paper.
CASES:
[15.1] VALUE OF UNITS IN VICTORY POINTS
[15.11] Each unit has a numerical Victory Point Value equivalent to its total Combat Strengths (Attack plus Defense Strengths for non-Artillery units; Barrage, FPF and Defense Strengths for Artillery units). Thus, a 3-2-12 armored battalion is worth five Victory Points.
[15.12] Victory Points are awarded to the Player when he eliminates Enemy units. If the U.S. Player eliminates a German 3-2-12, the U.S. Player would receive five Victory Points.
[15.2] TERRITORIAL OBJECTIVES
[15.21] Only the U.S. Player receives Victory Points for territorial objectives. These objective towns need not be physically occupied by the U.S. Player's units; but every hex in the town (not just the identifying hex listed below) must be free of German units and their Zones of Control and there must be a complete Line of Communication from the hexes in the town to the western mapedge. If these conditions are not met for any specific town, the U.S. Player receives no Victory Points for that town. Victory Points for towns are awarded at the end of the game if the conditions are met.
[15.22] VICTORY POINT VALUES FOR TERRITORIAL OBJECTIVES
| Objective | Identifying Hex Nr. | Points |
|---|---|---|
| Kommerscheidt | 1524 | 5 |
| Vosenack | 1120 | 5 |
| Germeter | 0819 | 5 |
| Hurtgen | 1214 | 5 |
| Kleinhau | 1410 | 5 |
| Grosshau | 1408 | 5 |
| Brandenburg | 1717 | 5 |
| Gey | 1805 | 25 |
| Bergstein | 2118 |
[15.3] LINE OF COMMUNICATIONS
[15.31] In order to receive Victory Points for towns on the map, the U.S. Player must be able to trace a Line of Communications from the hexes in the town back to the west edge of the map.
[15.32] A Line of Communications is defined as a series of contiguous hexes not blocked by Enemy units or their Zones of Control.
[15.33] A Line of Communications may not be traced through more than two rough terrain hexes.
[15.34] A Line of Communications may only be traced across a stream via a bridge hexside. It may not enter or cross prohibited terrain.
[15.35] U.S. and German units are not subject to the Line of Communications rule.
[15.4] LEVELS OF VICTORY
Victory is determined by comparing the total Victory Points won by each Player, stating the comparison as a ratio (U.S. Player to German Player) and evaluating this ratio against the schedule below.
| Ratio | Victory Level |
|---|---|
| 4.0 or more to 1 | U.S. Decisive |
| between 3.0 and 3.99 to 1 | U.S. Substantive |
| between 2.0 and 2.99 to 1 | U.S. Marginal |
| between 1.5 and 1.99 to 1 | German Marginal |
| between 1.0 and 1.49 to 1 | German Substantive |
| 1.0 or less to 1 | German Decisive |
16.0 The Scenarios
GENERAL RULE:
Each Scenario specifies each Player's Initial Deployment and Reinforcements. Units must be deployed on the map in the specific hexes listed.
PROCEDURE:
Place a unit of the specified type on each of the hexes listed for that type. Hex numbers are shown in parentheses following each unit's designation. Unit designations are provided for historical reference only; Players may ignore them.
CASES:
[16.1] HISTORICAL SCENARIO
[16.11] HISTORICAL NOTES
The Scenario covers the U.S. Offensive through the Hurtgen Forest in an effort to breakout into the Roer Plain to the east. The U.S. 1st Army's offensive, which began on November 15, 1944, runs into stiff resistance from patchwork German units from various understrength divisions and almost impossible terrain. The Germans must hold while units are stripped all along the front to refit and prepare for the Ardennes Offensive.
[16.12] U.S. INITIAL DEPLOYMENT
Unit Type: 2-3-7. Hexes: 1/8 (0402), 2/8 (0505), 3/8 (0606), 1/22 (0508), 2/22 (0510), 3/22 (0512), 1/12 (0514), 2/12 (0515), 3/12 (0516), 1/121 (0617), 2/121 (0718), 3/121 (0818), 1/28 (0819), 2/28 (1019), 3/28 (1120), 1/13 (1121), 2/13 (0922), 3/13 (0723).
Unit Type: 1-2-16/2-7. Hexes: 20 (0203), 29 (0310), 42 (0315), 45 (0720), 43 (0721), 28 (1020).
Unit Type: 3-1-20/1-7. Hexes: 44 (0322), 56 (0108).
[16.13] GERMAN INITIAL DEPLOYMENT
Unit Type: 1-2-7. Hexes: 1/983 (0702), 2/983 (0803), 1/984 (0805), 2/984 (0807), 1/985 (0709), 2/985 (0712), 275F (0714), 253(-) (0716), 31MG (0917).
Unit Type: 2-3-7. Hexes: 1/1055 (1118), 2/1055 (1317), 3/1055 (1520), 1/1056 (1522), 2/1056 (1423), 3/1056 (1224), 89F (1025).
Unit Type: 2-2-12. Hexes: 60 (0914), 156 (1518).
Unit Type: 3-2-12. Hex: 16 (1014).
Unit Type: 1-3-12. Hex: 116 (1718).
Unit Type: 2-3-16/1-7. Hexes: 275 (1002), 89 (1623).
Unit Type: 2-3-16/2-12. Hex: 116 (1213).
Unit Type: 2-1-18/1-7. Hexes: 116 (1411), 275 (2117), 89 (1725).
Unit Type: 1-2-12/2-7. Hex: 116 (1716).
[16.14] U.S. REINFORCEMENT SCHEDULE
On Game-Turn Four:
Unit Type: 3-2-12. Hex: 10 (0123).
Unit Type: 2-3-12. Hex: 47 (0123).
Unit Type: 1-2-16/2-12. Hex: 56 (0123).
[16.15] GERMAN REINFORCEMENT SCHEDULE
On Game-Turn Two:
Unit Type: 1-2-7. Hexes: 1/854 (2907), 2/854 (2907), 1/855 (2907), 2/855 (2907), 1/856 (2918), 2/856 (2918).
Unit Type: 2-3-16/1-7. Hex: 344 (2907).
Unit Type: 2-1-18/1-7. Hex: 344 (2918).
On Game-Turn Nine:
Unit Type: 1-2-7. Hexes: 1/941 (2907), 2/941 (2907), 1/942 (2907), 2/942 (2907), 1/943 (2907), 2/943 (2918), 344F (2918).
Unit Type: 2-3-16/1-7. Hex: 353 (2907).
Unit Type: 2-1-18/1-7. Hex: 353 (2918).
On Game-Turn Eleven:
Unit Type: 2-3-7. Hexes: 1/980 (2918), 2/980 (2918), 1/29 (2918).
Unit Type: 1-2-16/1-7. Hex: 272 (2918).
[16.16] SPECIAL RULES
- The U.S. Player is the First Player. His Player-Turn is first in every Game-Turn.
- The Scenario Length is fourteen Game-Turns.
[16.2] FREE DEPLOYMENT SCENARIO
Quantity of units is shown first, followed by unit strengths in parentheses; unit designations may be ignored.
[16.21] U.S. INITIAL DEPLOYMENT
The following units may be deployed anywhere west of, but not adjacent to the Front Line: 18 (2-3-7), 6 (1-2-16/2-7), 2 (3-1-20/1-7).
[16.22] GERMAN INITIAL DEPLOYMENT
The following units may be deployed anywhere east of, but not adjacent to the Front Line: 9 (1-2-7), 7 (2-3-7), 1 (3-2-12), 2 (2-2-12), 1 (1-3-12), 1 (1-2-12/2-7), 3 (2-1-18/1-7), 1 (2-3-16/2-12), 2 (2-3-16/1-7).
Note: All units of the 116th Panzer Division must be included in the German Initial Deployment.
[16.23] U.S. REINFORCEMENT SCHEDULE
Same as in Case 16.14.
[16.24] GERMAN REINFORCEMENT SCHEDULE
Same as in Case 16.15.
[16.25] SPECIAL RULES
- The German Player deploys first; the U.S. Player is the First Player; his Player-Turn is first in every Game-Turn.
- The Scenario Length is fourteen Game-Turns.
17.0 Game Notes
17.1 Designer's Notes
The battle for Hurtgen Forest got under way in September and didn't conclude until December. Because of the need for all the games in the Westwall QuadriGame to fit into the same system, the full battle could not be successfully simulated. So, the game only covers the major aspect of the long engagement, and this one best typifies the type of battle it was.
In order to show the operational radius in the dense forest, the scale used was 500 meters per hex. This meant that only certain areas of the Forest could be encompassed. A decision was made to omit the areas of operation of the 1st U.S. Infantry Division. The inclusion of this unit would create other problems, in that those and the German units opposing them would have to be included. Obviously, the limited counter mix was a factor. Also, it would force a change in scale of the unit sizes and this would directly have an effect on the "feel" of the simulation.
An interesting aspect of the battle was the withdrawal of the 116th Panzer Division. This unit was recalled from the battle so that it could refit and reequip for the impending German Ardennes Offensive.
The Germans, though already pushed east of the Siegfried Line, were able to utilize the dense forest and rugged terrain well. They used log emplacements, mines and barbed wire extensively, and, when forced to retreat, began to dig in again quickly. Though greatly understrength and full of over- and under-age troops, the handful of veteran NCO's held the German units together defensively. Also, fortunately for the Germans, their generals were always able to find a division to throw into the fight when things were getting rough.
On the other side of the ledger, the Americans found that the Forest almost totally neutralized their firepower advantage. The tanks that were distributed among the infantry battalions were almost useless. In addition, the heavy fog that blanketed the area put an end to any possible ground support. It was a true infantryman's slugfest.
There are a few good reference sources that were consulted in doing the game. The best of these was The Siegfried Line, which is part of the U.S. Army in World War II Series, put out by the Office of Military History. The information is fairly detailed and there are good maps. Another excellent source is Hurtgen Forest, written by MacDonald, who contributed to the Office of Military History's book. There are also the histories of the individual units that took part in the fighting. Available from Ft. Knox was a privately-done study on armor in the Hurtgen Forest, with emphasis on the 5th Armored Division's CCR.
Nothing was discovered on the Germans, but the German Army Handbook, put out by the U.S. Army, was consulted to reveal information on German doctrine and tactics.
17.2 Players' Notes
The U.S. Player
At the outset, the U.S. Player must study the terrain and his objectives carefully to decide where he should put his offensive emphasis. The U.S. cannot afford to make too many wide-spread attacks. They must concentrate their efforts on two or three areas only. The off-board artillery is a great asset and must be used to its maximum to guarantee a successful offensive.
The major areas to concentrate on should be the southern and possibly western approaches to Hurtgen. From there, the U.S. Player should drive northward along the main road and adjoining open plain towards the other towns. The CCR armored units should combine in this thrust.
The other area of assault should be in the northern area, 4th Divisional sector, where the effort should be to drive towards Grosshau and the open plain. The going here was and most likely will be slow.
Secondary efforts could be made from Vossenack eastward. But this is dangerous and would drain resources from the major move against Hurtgen. Otherwise, Schmidt may be considered. Though it looks relatively close, it is a tough nut to crack. In most cases, its not worth the effort.
The U.S. Player should also pay close attention in trying to engage units of the 116th Panzer Division. If the U.S. can delay their withdrawal, it will mean Victory Points.
The German Player
The overall mode of the Germans is a defensive one, though they must keep an eye towards local counterattacks. The terrain should be used to its utmost, both as a benefit to defense and as a hindrance to U.S. mobility.
An attack on Vossenack can be contemplated as it is a most vulnerable position. Success here could force the U.S. to divert reinforcements to the area placing a drain on the U.S. offense elsewhere.
The German Player must make an important decision in the game and that is to what extent should the 116th be committed. It is the most powerful German force in the game. If the German Player sees a good opportunity to eliminate a few U.S. units or make a key counterattack, then by all means use the units, though it will delay their departure. The German Player must also proceed with caution, since he cannot afford to delay these units too long.