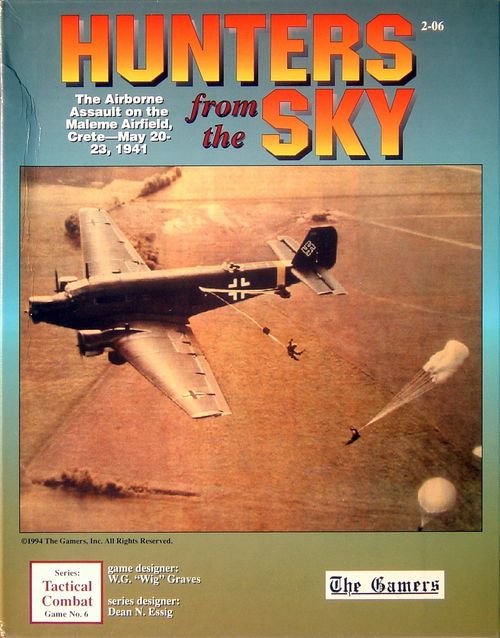
Hunters from the Sky
Hunters from the Sky Rulebook
Table of Contents
Table of Contents
- Part 1: Tactical Combat Series Rules, version 3.1
- Introduction
- 1.0 General Game Concepts
- 2.0 Sequences of Play
- 3.0 Units
- 4.0 Modes
- 5.0 Stacking
- 6.0 Command
- 7.0 Visibility and Weather
- 8.0 Line of Sight (LOS)
- 9.0 Fire Combat
- 10.0 Losses
- 11.0 Area Fire Combat
- 12.0 Point Fire Combat
- 13.0 The Suppressive Fire Action
- 14.0 Overwatch
- 15.0 AT Rolls
- 16.0 Morale
- 17.0 Artillery
- 18.0 Indirect Fire vs. Point Targets
- 19.0 Smoke
- 20.0 Movement
- 21.0 Minefields
- 22.0 Assault Combat
- 23.0 Overrun Combat
- 24.0 Consolidated Assault
- 25.0 Special Units
- 26.0 Aircraft
- 27.0 Night
- Designer's Notes (Version 3.1)
- Chart of Common Graphic Symbols (for Op Sheets)
- Part 2: TCS Charts and Tables (version 3.1)
- Part 3: Hunters from the Sky Game Rules (TCS #6, The Battle for Maleme, 20-23 May 1941)
- Part 4: Hunters from the Sky Revisions (Errata and Additional Rules)
- Part 5: Update for TCS v4.0 Rules (July 2009)
Part 1: Tactical Combat Series Rules, version 3.1
Introduction
Version 3.1
This is an update of the 3.0 rules to accommodate your comments and suggestions. The changes will stick out to people who are familiar with the 3.0 rules; those who aren't will be learning them fresh anyway. These rules are now set in stone and will hit version 3.2 only if some errata needs inclusion. You will find the game plays faster and cleaner as a result.
This rules version does not support the Modern Expansion rules presented in Force Eagle's War. Please use the 2nd Edition rules when playing that game. Otherwise, these rules are compatible with all earlier TCS games.
The Components
I. The Map. The map included in this game depicts the area in which the battle was fought. To eliminate troublesome folds, carefully backfold each crease. Secure the map to the playing surface with drafting tape or play it under Plexiglas to help protect your gaming investment.
A. The Hex Numbering System. Every hex on the game map is identified by a hex number (e.g. 29.17). The digits before the decimal point (29.xx) indicate the vertical hex column, reading along the map from left to right. The digits after the decimal point (xx.17) identify the exact hex in the column, reading from bottom to top. To reduce map clutter, hex numbers are printed only on every fifth row of hexes (xx.05, xx.10, xx.15). To find hex 29.17, for example, follow the xx.15 row until you find the 29.xx column, then count up two hexes to 29.17. If the game uses more than one map, any reference to a hex number will include the appropriate map letter, as in B29.17.
B. Map Edge Hexes. Only hexes with at least 1/2 hex showing are playable.
C. Off Map Movement and Fires. Unless specifically allowed in a given game, units cannot conduct any sort of off-map movement. Destroy units forced off the map. Artillery Fires which scatter off the game map have no effect on units on it.
II. The Rules. Every Gamers' Brand game contains separate Series and Game rulebooks. The Series rulebook contains the rules generally applicable to all the games in the series. The Game book gives the details needed for a specific game, including any special rules, scenarios, and set up information.
A. Organization. Section and Case numbers outline the rules. Each major grouping of the rules is a section; a paragraph within a rules section is a case. The number 4.2 would, for example, refer to section 4, case 2. A specific case can contain a number of related statements. Statements within a case are numbered as in 4.2a, 4.2b, etc.
B. Repetition. Once stated, a rule is repeated only if needed for clarification.
The rules use the term "Assault-style Combat" to replace the more tedious "Assault, Consolidated Assault, and Overrun Combats" with the same meaning.
III. Set Up Notes
- "w/i X" means set up the unit at or within X hexes of the listed hex.
- Units can set up in any mode and can be mounted or dismounted.
- Units can never start the game overstacked.
- Unless noted otherwise, units start at full strength.
- Where given, spread losses as equally as possible within the listed organization. If Losses are by type, eliminate the losses from that type.
- Historical orders are for informational purposes only. The player is free to create his Op Sheets before the game begins. All Op Sheets created before the game start play implemented. Unless the scenario requires otherwise, these can be of any type. Players cannot begin the game with unimplemented Op Sheets - these must be drawn up no earlier than turn one.
- In older games where an at-start value for "Company Morale" is given do the following: average the Company Morales of all the companies in the battalion (ignore companies which did not have Company Morale before), and divide the result by 5 (round normally). That is the Battalion Morale for that battalion at start.
Beginner's Note
If you are new to wargames, WELCOME! This is an exciting and challenging hobby that allows for more intellectual competition than almost any other game form. Each wargame, in addition to being a competitive activity, also gives players a glimpse of history in action unavailable elsewhere.
To learn to play, browse through the rules and other components to become familiar with them. Try to develop a good idea of what exists in the game and where to locate it. Then read through the rules lightly. Never attempt to memorize game rules! Set up a few units and run through the individual sequences with the rules handy to follow how they work. Allow the game to teach itself to you as you look up things you're unsure about. If something still confuses you or doesn't seem right, feel free to call or write to ask.
After learning the various procedures using a handful of units, set up the smallest or shortest scenario available in the game. Play it with a friend with the rules readily available. It will probably be best to not use the Command Rules in your first battle.
When you feel comfortable with the major game rules and the game's mechanics, read more closely the main Command Rules (6.0) and experiment with them. This system adds greatly to the game's realistic portrayal of WW II combat by imposing the limitations unavoidable in real battle.
By this time you will have mastered this game series and will be able to play any game in it with a minimal amount of rules learning. Good luck and good fighting!
Playing Solitaire
You can easily enjoy this game series solitaire. While such playings will lack the tension of not knowing the enemy's plan, this can be made up for by rigidly following the orders you give as intended at the time you wrote them.
Playing solitaire is best using the command system. You do not have to "forget" what the enemy is doing, etc. Play each side (orders and all) the best way you can. Do not write Op Sheets that directly counter the other side's intentions not yet shown by movements on the map. If you do, you will only destroy your own fun. Remember, the command system was not designed as a limited intelligence tool, but as a limitation on responsiveness. Play out the Op Sheets you've made up as you intended when you wrote them. Make no modifications to them because of changing circumstances. Assign any Op Sheets you want and force yourself to live with the consequences. The result will be a game that tells you its battle's story, and you can enjoy the fun. Playing solitaire with a scenario's optional historical orders can yield insights into how the actual commanders fought the battle.
1.0 General Game Concepts
1.1 Scale
Each turn is 20 minutes (one hour at night) and each hex 125-yards with a 20 meter contour interval. Some early games had a 10 meter contour interval. Most personnel units are generally platoons. Most weapons units (AT guns, etc.) represent a single gun, mortar, or artillery piece, and all vehicle units (tanks, recon vehicles, etc.) are individuals. Carriers (trucks, halftracks) represent sufficient vehicles to carry a full infantry platoon.
1.2 Retreat Rule
Players retreat their own units. A retreat must begin with the hex opposite the enemy action that caused it. If that first hex is blocked, you can substitute another. Following the first retreat hex, the retreat path can be anywhere, provided the unit does not circle back to its original location. If the unit is unable to retreat as required, destroy it. Retreating units do not generate Overwatch Triggers. Units must end their retreat further from all enemy units than when they began the retreat. Units which cannot do so are destroyed.
1.3 Standard Rounding Rule
Round .00 to .49 down, round .50 to .99 up.
When rounding must occur, do so only after making all modifications (before final application). In no case should you round a number before another manipulation.
Example: Three fires of 3 points each fire at a target. Each Firer is suppressed (meaning they fire at half strength). The total fire strength is 5.
1.4 Fog of War
To increase realism, a player should not be aware of the enemy's Op Sheets, Battalion Morale values, task organizations, artillery availability or ammunition, nor any future plans that might be converted into Op Sheets. It is OK to look at enemy stacks in this system.
1.5 Dice Rolls
Many two-dice rolls in this game system are sequential (in the 11..66 format). For those unaccustomed to sequential rolls, roll two dice. Read the red die as the tens digit and the white die as the ones. For instance, a roll of 3 on the red die and 4 on the white one would be 34.
2.0 Sequences of Play
In all cases requiring a die roll to determine the sequence of events, each player rolls two dice. The player with the higher roll chooses to be first or second. Reroll any ties.
2.1 Outline Sequence of Play
- Command Phase
- Aircraft Fire Phase
- Action Phases
- Clean Up Phase
- Turn End
2.2 Narrative Sequence of Play
Command Phase
Both players do the following:
- Accrue Weighted Turns.
- Make any implementation checks.
- Create new Op Sheets.
- Make any Task Organization changes.
- Make any Reserve or Alternate Die Roll Check attempts.
Do these only in the order above. When weather needs to be determined, do so on hourly turns (0600, 0700 etc.). Where aircraft sorties need to be determined by dice rolling, do so for the turn at this time.
Aircraft Fire Phase
Roll to determine which player fires first (see 2.0). One player at a time resolves all his available sorties in a single batch.
Action Phase
Roll to determine who conducts his phase first (see 2.0). Each player has his own separate Action Phase. Conduct them one right after the other.
Remove your own Battery and Battalion Barrage Markers from your last Action Phase, and place reinforcements on the appropriate map edge at the beginning of the phase. If an enemy Artillery Barrage Marker or an enemy unit blocks the precise hex of reinforcement entry, shift the reinforcements along the map edge anywhere at or within 10 hexes of the assigned entry hex. Reinforcements cannot be withheld until later turns.
In his Action Phase, a player can conduct Mode Change, Movement, Artillery Missions, Suppressive Fire Actions, Assault-style Combats (Overruns, Assaults, Consolidated Assaults), Overwatch Fires, Save Yourself Retreats (SYRs), Minefield Breaches, and By-Force Minefield Crossings. In either Action Phase both players can conduct appropriate Overwatch Fires.
Conduct these actions in any desired sequence or order.
At the end of your Action Phase, remove any Bad Shoot Barrage Markers from the map.
Clean Up Phase
Both players work together to do all of the following, ORDER is important:
- Remove all Suppressed, Buttoned Up, Illumination (Illum) and Fired Markers.
- Reduce all Paralyzed Markers to Suppressed Markers.
- Remove all regular smoke markers and Level 1 Smoke Barrage Markers.
- Flip all Level 2 Smoke Barrage Markers to Level 1 Smoke Barrage Markers.
- Both players recover their Battalion Morales simultaneously. Roll one die separately for each battalion with a non-zero Battalion Morale. If the roll is equal to or less than the battalion's current Battalion Morale, reduce that Battalion Morale by 1. On any other result, there is no effect.
Turn End Phase
Advance the Turn Marker ahead one space and, for another turn, proceed again from the beginning of the sequence.
2.3 Assault Sequence of Play
- Attacker announces intention to Assault a given hex
- Defender's fight or flee decision
- Attacker moves into hex
- The Defender Fires, followed by the Attacker
- Each target checks Morale right after being fired upon (perhaps before returning fire, depending on the firing order) EVEN if the Area Fire Table result does not call for a Morale Check - the unit MUST check Morale.
- The Attacker decides if he wants to continue the combat.
- If the combat continues, the attacking units must enter Fire Mode.
- Repeat above fire steps until the combat ends.
- No Overwatch Trigger is generated.
2.4 Overrun Sequence of Play
- Attacker enters hex (at a +3 MP cost)
- The Defender Fires, followed by the Attacker
- Each target checks Morale right after being fired upon (perhaps before returning fire, depending on the firing order) EVEN if the Area Fire Table result does not call for a Morale Check - the unit MUST check Morale.
- Attacker must exit hex.
- Exit hex is an Overwatch Trigger.
2.5 Consolidated Assault
- Attacker enters hex (at a +3 MP Cost to vehicles and carriers, no cost for infantry)
- Mounted attacking units may dismount
- The Defender Fires, followed by the Attacker
- Each target checks Morale right after being fired upon (perhaps before returning fire, depending on the firing order) EVEN if the Area Fire Table result does not call for a Morale Check - the unit MUST check Morale.
- The Attacker decides if he wants to continue the combat.
- If the combat continues, the attacking units must enter Fire Mode.
- Repeat above fire steps until the combat ends.
- No Overwatch Trigger is generated.
2.6 Artillery Fire Resolution Sequence
- Announce Target Hex, caliber of shells, ammunition type, type of fire (battery, battalion, fast fire, etc.) and spotter.
- Place Target Hex Marker.
- Use the Adjustment Table to determine if a Good, Bad, or No Shoot occurs. Scatter if appropriate.
- Replace the Target Hex Marker with the appropriate Barrage Marker.
- Resolve all fire combats in or adjacent to the Barrage Marker's Attack Zone.
3.0 Units
The game's playing pieces - the counters - represent combat units, vehicles, and informational markers. The word "unit" often denotes any counter representing troops or vehicles - as opposed to informational markers. Each unit belongs to one of the following categories: infantry, weapons, vehicle, or carrier.
3.0a Infantry Units. The infantry unit category includes not only infantry platoons, but also engineers, military police and other troop units. Infantry units are area-type targets and firers. They have Morale and make Morale Checks. Only this unit type can breach minefields or attack in Assault Combats and make AT Rolls.
3.0b Weapons Units. These units represent heavier weapons systems that require a crew of three or more. They generally have one step (MG units and mortar platoons have two). They have Morale and make Morale Checks. These units can never attack in Assault-style Combat, conduct minefield breaches, or make AT rolls.
3.0c Vehicle Units. A vehicle is an individual combat vehicle, such as a tank, assault gun, tank destroyer, or SP artillery, not specifically designed to carry passengers. These are generally Point targets armed with Point weapons. They can tow weapons. They do not have Morale and are capable of Overrun Combat. These units can carry other units using special rules.
3.0d Carrier Units. Carriers have a white box around their silhouette. These are trucks, halftracks, and other vehicles whose purpose is the transportation of men and equipment. They function like vehicles above, except that they can use the carrier rules to transport other units. They can tow weapons. They have no Morale and are capable of Overrun Combat.
3.0e The counters are coded for firing class and type. A box around the range number indicates an Area-type direct fire weapon. A circle around the range number indicates an Area-type indirect fire weapon. A white range number blocked in red indicates a Point-type firer's nominal range.
(Counter-anatomy diagram, "TCS Unit Explanations": An infantry platoon's Fire Mode side shows unit type/size symbol (a Platoon is indicated by three dots, a Section by two; Company and Battalion, Regiment and Division symbols are shown for higher units), Area Firepower, Range (a red square outline indicates direct fire), Firer Type (P = Point, A = Area), and Morale (white on red). Its Move Mode side shows the Movement Allowance (TO = Tow Only) and Target Type (P = Point, A = Area, B = Both). A typical vehicle shows Attack Rating, Nominal Range (white on red), and Point Defense (black in yellow). A carrier has a white box showing Carrier status. A mortar platoon shows caliber, Firepower, Range (a red circle indicates indirect fire) and Morale. Basic weapons symbols: AT Gun, MG (machine-gun), Infantry Gun, Mortar. Game markers shown: Turn, Day, Weather, Step Loss (one step down), Fired, Buttoned Up, Suppressed, Paralyzed, Illum Round, Mines/Minefield, Mine Breach, Smoke (Level 1, Level 2), Target Hex, Battery/Battalion Good Shoot and Bad Shoot, and Dug In.)
3.1 Target and Firer Types
There are two classifications on a unit's Move Mode side which give a unit's firer and target characteristics.
3.1a The target and firer types are Area-type (A-type) and Point-type (P-type), plus the combination target type called Both-type (B-type). A- or P-type firers engage A-type targets on the Area Fire Table. P-type firers engage P-type targets on the Point Fire Table. P-type firers can engage B-type targets on either table. A-type firers can fire only on the Area Fire Table, while P-type firers can fire on either table.
3.1b The abbreviations on the unit's back are: "A" for Area, "P" for Point, and "B" for Both. A "dash" in the firer type's place indicates a unit without a weapon or with a special classification (such as on-map artillery).
3.1c Whenever directing fires against a B-type target, the firing player must select the fire resolution method (Area or Point) before resolving his fire. B-type units are not subject to "double-jeopardy" whereby the same fire is used against them on each table in turn. The Artillery Point Fire Table does not affect B-type targets.
4.0 Modes
All units in the game have two modes: Fire and Move. Modes determine many of a unit's capabilities. The side of a counter facing up shows that unit's Mode.
4.1 Mode Change
A player can change unit modes during his Action Phase. Units can change from Move Mode to Fire Mode at NO Movement Point (MP) cost. It requires 1/2 of a unit's Movement Allowance (round normally immediately) to switch from Fire Mode to Move Mode. Tow-only units have an assumed Movement Allowance (MA) of two for this purpose. A unit may also be required to change mode, at no MP cost, when it conducts a Save Yourself Retreat (SYR), suffers a Suppressed or Paralyzed Morale result, or during an Assault-style combat.
4.1a Restrictions on Mode Change. Suppressed, Paralyzed, or Fired-marked units cannot change mode. Units required to change Mode (due to Morale results or Assault-style Combat) can do so even if Suppressed or Fired-marked. Units being towed or mounted on a carrier must remain in Move Mode. Being Buttoned Up has no effect on Mode Change ability or the MP cost to enter Move Mode.
4.2 Mode Effects
Units in Fire Mode can fire Suppressive Fire Actions or Overwatch. Move Mode units can move, conduct Assault-style Combats, Mount or Dismount carriers, and breach minefields. In Assault-style Combat, mode has no effect on the ability to fire. EXCEPTION: Even then, Move Mode Mortars and towed units CANNOT fire. Mode has no effect on the ability of a unit to spot for Mortars, BUT, in order to spot for Artillery Missions, a unit must be in Fire Mode and have been that way since the beginning of the current Phase.
5.0 Stacking
Stacking is the placing of more than one unit in a single hex. Enforce stacking limits at the end of each Action Phase and during the execution of Assault-style Combats (both sides can stack to the limits during Assault-style combats, count up each side independently of the other). The owning player destroys the excess in any overstacked hexes. The two stacking rules below do not affect each other in any way.
5.1 Stacking Limits
5.1a Vehicles and Carriers. No more than 5 vehicle and/or carrier units can stack in one hex.
5.1b Other Units. A maximum of 30 steps of other unit types can stack in a single hex.
5.1c Combinations. A single hex can hold the maximum of both 5.1a and 5.1b at the same time.
5.2 Handling Rules
5.2a Stacking and unstacking have no Movement Point cost. Stacks need not move together. Players can freely create and break up stacks during movement.
5.2b Units in a hex can be in any mode or Morale condition.
5.2c Friendly and enemy units can occupy a hex together only during an Assault-style combat. Units can never end a phase stacked with an enemy unit. Destroy units forced to enter an enemy occupied hex for reasons other than Assault-style attacks.
5.2d Unlike in some other Gamers brand games, both sides can examine the contents of any enemy stack at any time anywhere on the map.
6.0 Command
The command rules impose realistic limits on the player's ability to rapidly change missions. Create Op Sheets to define your objectives. The units on an Op Sheet must execute the mission on that sheet until they accomplish the mission, are reassigned, or the player cancels it.
6.1 Playing without Command (optional)
You can easily play without the formal command system. Skip all the rules in section 6. Players can easily choose between realism and simplicity to suit their tastes. The game design works with or without the Command Rules.
Some Tactical Combat Series games (such as Hunters from the Sky) do not make use of the main Command Rules. For those games, ignore all of the rules from 6.0 through 6.16. Special rules will cover Digging In in those games as section 6.16 would not be used. Check with the Game Specific rules to determine if the Command Rules apply. Unless the game rules specifically state they don't, the main Command Rules do apply.
6.2 Unit Actions Unaffected by Command
Op Sheets show only the functions of higher level units (battalions, etc.). Much of what unit counters do, while part of a higher plan, need not be mentioned or controlled by Op Sheets. These items include (but aren't limited to) fire combats (Overwatch or Suppressive Fire Action), exact unit movements, Assault-style attacks, minefield operations, and artillery fires. Play proceeds along Op Sheet frameworks, but Op Sheets do not control precise unit actions - as would be the case in games featuring plotted movement.
6.3 Units without Orders
Units not listed on a current implemented Op Sheet's Task Organization are in a "No Orders" Status and Unassigned. Only when a new Op Sheet which contains them implements does such a unit become "assigned" and leave No Orders Status.
6.3a Unassigned units must remain at or within 5 hexes of a specific center hex. The owning player chooses and records this center hex. He cannot change that hex unless the units become assigned and then unassigned again later or if 6.3c or 6.14a applies. Each center hex can be for as many units as the player wants.
6.3b Important: Unassigned units are never Dug In and CANNOT fire Suppressive Fire Actions (SFAs); they can fire Overwatch Fires. Otherwise, Unassigned units can freely move and fight within their 5 hex radius.
6.3c The player must give each unassigned unit group (those within the radius of a common hex) a contingency plan. They can be told to defend in place, but they can do so for no more than 3 turns. Such a group must also be told what to do upon reaching the time limit. Such instructions cannot be more complex than "retreat quickly to X" (X must be at least 10 hexes from the earlier center hex). Upon reaching X, the player must record a new center hex and the process begins again.
6.4 Higher Commander's Intent
The higher commander's intent drives the player's operations. These intents appear in the game rules. The intent is a battlefield vision that your commander wants you to create. You can freely use your units to make his intent come true. Your success on the game map will be judged by your success in achieving that intent. It will determine your victory or defeat.
6.5 Op Sheets
Each Op Sheet contains all the instructions for its Task Organization. An Op Sheet can be implemented or non-implemented. An Implemented Op Sheet has passed its Command Prep (see 6.9) and its units must now follow its instructions. Non-implemented Op Sheets are still in their Command Prep and cannot control their units.
(The rulebook shows several example Op Sheets - an Attack, a Prepared Defense, a Hasty Defense (elastic, and zone/sector) - each a form with Time, Type, Size, Task Organization, a map-sketch graphic, Written Notes, and Failure Instructions. Their diagrams are omitted.)
6.5a The Graphic. The graphic is a reduced version of the game map on which players draw up their operations. Other than the use of alternates, reserves, and the addition of new units to the Task Organization, make no changes to the graphic after creating it. We recommend the use of standard US Army (NATO) symbols. A list of useful symbols is on the back of the series rulebook. Players can use custom symbols as long as both players agree to their meaning. The graphic alone should provide much of the information needed for another person to understand the Op Sheet.
6.5b Written Notes. The written notes give the information needed to cement together the graphic's logic and order. Written notes should be as short as possible. They should explain the execution details for the graphic so another person can fully understand the Op Sheet.
6.5c Failure Instructions. Every Op Sheet must give instructions of what to do if it fails. The determination of failure is up to the owning player. These instructions must include where the units are to withdraw to await further orders. Failure instructions can only entail a rapid movement to a rear position, avoiding enemy contact on the way. Any parts of a Task Organization that execute failure instructions become unassigned.
6.6 Op Sheet Types
Each Op Sheet can entail a number of actions (movements, attacks, etc.). The number and type of "sub-missions" is unlimited. While a sheet can contain any number of sub-mission types, a given set of units on an Op Sheet can only have one. In other words, a company could never be ordered to attack a hill - and then defend it - on the same Op Sheet. That would take two separate Op Sheets. (For instance, a player can have an attack Op Sheet. Simultaneously he draws up a Prepared Defense Op Sheet. The defense accrues time while the attack is underway and the player doesn't roll for it until the objective is secured.)
Multiple sub-missions here refers to having a single Op Sheet which deals with a large number of units, say a regiment, in which one battalion is doing one job, and another is doing something else - no single batch of units (such as a battalion) is trying to pull off two successive tasks on the same Op Sheet.
It is OK to assign one element the job of attacking through a route to and through one hill and into another - that would be considered to be one attack. It is also allowed to generate a defense in zones which allow the player's units to defend one phase line after another as the situation develops. It is important to avoid being too "tight" in terms of the mission allowances for an Op Sheet - provided you are not setting up a single order to attack an objective and then defend it on the same Op Sheet, you are probably OK.
Identify each Op Sheet as one of four types: Attack, Hasty Defense, Prepared Defense, or Move. Categorize the Op Sheet itself according to the one highest ranking operation on it according to this order:
- Prepared Defense
- Attack
- Hasty Defense
- Move.
6.6a Prepared Defense. A Prepared Defense is similar to a Hasty Defense, except that there is enough time for the troops to dig in fully to include the laying of minefields.
6.6b Attack Type. An Attack-type Op Sheet is any that includes any offensive operations - even to occupy terrain not garrisoned by the enemy. A group of units in Reserve counts as a group with attack orders.
6.6c Hasty Defense. A Hasty Defense is a quick defensive order that does not allow enough time to dig in fully or lay mines.
6.6d Move Type. Move orders are for non-combat movement. Units with Move-type Op Sheets must follow failure instructions if they make enemy contact.
Design Note: The concept of attacking an objective while a defense order accrues time in your pocket might raise eyebrows. The point here is that only a limited amount of the time spent implementing a Prepared Defense is that actually spent digging (gamers typically think that the time it takes to put together a prepared defense is due to digging alone). Actually, the majority of the time is expended doing coordination with other friendly units (units in the area, supporting units, securing needed supplies, setting up artillery fires, etc.) in order to be "ready to defend." The actual digging does not take all that long and need not be finished for the unit to be "ready to defend" - indeed doctrine in most countries is that field position improvement is an on-going process that never is really finished. The time accrued represents the staff preparing for a mission it knows is coming up - not Snuffy digging a prepared hole that he carries with him in the attack...
Play Note: In conjunction with the above, be careful where your units are when you start rolling for a Prepared Defense - a lucky die roll might cause you to dig in at a location you don't want. Wherever all the units are the instant the roll is successful is where they will be dug in - so be careful.
6.7 Task Organization
List the units making up an Op Sheet in its Task Organization. The Task Organization must provide a complete unit listing for that Op Sheet. Units not so listed cannot operate as part of an Op Sheet. The player can assign his units (on or off map) to any Op Sheet he devises.
6.7a List all units that are to conduct an Op Sheet's operation on that sheet's Task Organization. Players can divide their units as they see fit. If a Task Organization contains the "304 PG Rgt," then that Op Sheet contains all the 304th Panzergrenadiers' elements - including those off-map. Off-map elements contained on a Task Organization do count for that sheet's size modifier. Never leave any doubt about which units are or aren't in a Task Organization.
6.7b Limitation on Op Sheet Assignments. Never list a unit on more than two Op Sheets (one implemented, one not, or two non-implemented ones - never two implemented Op Sheets).
6.8 Op Sheet Creation
Players can create Op Sheets both before the game and during any Command Phase. When drawn, Op Sheets are non-implemented (except for those drawn before the game, see III.6). When the player successfully rolls on the Command Prep Table, the Op Sheet is implemented. A player can draw up any number of Op Sheets in a turn. Complete all Op Sheet parts when first creating it. A player can assign any of his units (on or off map) to any Op Sheet. Forces placed on a new Op Sheet while under an old implemented one remain under the old sheet's control until the new one implements.
6.9 Command Prep
Each Op Sheet begins its "Command Prep" when the player creates it. The Command Prep ends when the player implements the Op Sheet using the Command Prep Table.
6.9a While not assigned to some implemented Op Sheet, units belonging to a non-implemented Op Sheet are unassigned (see 6.3).
6.9b The game rules give each side a Command Prep Rating. This rating reflects each side's command system's ability to conduct operations quickly, or - more specifically - to change plans rapidly.
6.9c Op Sheet Size. Op Sheet Size modifies the player's Command Prep Rating for use on the Command Prep Table. To find the appropriate size, determine the number of elements in the Task Organization. An "element" is the representation of battalions of any type. Extras - such as regimental AT guns, Weapons Companies, Scout platoons, and other items not represented by a battalion - do not count. No matter how much of a given element is present, count it as one element. A group containing three companies each from a different battalion would have a size of 3, while one that has all three companies from the same battalion would have a size of 1 (which becomes a 0 with the staff modifier (6.9d)). A group with an infantry battalion, two tank platoons (of the same battalion as each other) and an AT Gun (from the regimental weapons) would have a size of 2 (after 6.9d, this becomes a 1).
6.9d Staffs. Any Op Sheet having one or more battalion (or higher) staffs attached to it subtracts ONE from the Op Sheet size. A staff is attached if the Op Sheet has at least one whole battalion (which must include all parts not in the dead pile) assigned to it. Multiple staffs do not give additional modifications.
For example, a full Infantry Battalion would normally get a size of 1, but since it has a staff attached the size is 0.
6.9e Weighted Turns. Each turn, a non-implemented Op Sheet accrues "weighted turns" representing the value of the time spent preparing. Before checking any Op Sheets for implementation in each Command Phase, add a number of marks (according to the following) to each sheet's tally. The number of marks made each turn depends on the condition of the units in each Op Sheet's Task Organization. If all the Op Sheet's members are unassigned AND none received any direct fires in the previous turn, the number is 3 weighted turns. If some (or all) are assigned, BUT none received direct fires in the previous turn, then the number is 2 weighted turns. If ANY member of the Task Organization received DIRECT fires in the previous turn, then the number is 1 weighted turn. If Task Organization falls into more than one category, it gets the smallest applicable number.
Example: Weighted Turns. The weighted turns given to each Op Sheet each turn is a simple idea that looks confusing as a rule, but is easy to understand by example. Weighted turns represent the preceding turn's value for mission preparation (and the tally likewise represents the summation of the earlier turns for this purpose). Obviously, units under fire require much longer to prepare for new missions than those in protected assembly areas. So, if you have three groups, one attacking a hill, one in defense, and another in an assembly area, they would get 1, 2, and 3 turns of credit or weighted turns respectively each turn. If each group was fired upon with direct fires in the preceding turn, they would each get only one turn of credit.
6.9f The Command Prep Table. During each Command Phase, the player can attempt to implement each of his non-implemented Op Sheets. The player is never forced to try to implement an Op Sheet. Use the Command Prep Table to implement Op Sheets. Add the total weighted turns accrued so far and follow the row giving the Op Sheet's type across to find the column containing that number. Modify your Command Prep Rating for the Op Sheet's "size" (6.9c & 6.9d). Find the row containing the modified Command Prep Rating and cross index it with the column found earlier to locate the table's value. Roll two dice. If the roll is greater than or equal to the table's value, implement the Op Sheet. Otherwise, the attempt fails, and you can try again next turn. Roll separately for each Op Sheet.
Example: The Command Prep Table. A player has a non-implemented attack Op Sheet with a full regiment on it awaiting implementation. So far it has accrued (it is sitting in a protected assembly area) 27 weighted turns. It has a size of 2 (three battalions less the staff modifier). The player has a Command Prep Rating of 3. Cross indexing the modified Command Prep Rating (5) with the 27 weighted turns (along the Attack-type line) gives a required roll of 10 or more. The player rolls two dice and gets a 6. The order does not implement...and the player curses his bad luck and threatens to sack the regimental commander.
On the next turn, he tries again. This time he has accrued 30 weighted turns (three more for this last turn) that changes the needed roll to a 8. The player grits his teeth and rolls the dice getting an 8 implementing the Op Sheet. Elated at this turn of events, the player chortles his approval thereby warning the sly mug across the table to watch out. Our hero realizes this and kicks himself for his lack of a poker face and promises himself to do better next time.
6.10 Implementation
Upon a successful roll on the Command Prep Table, an Op Sheet implements. The player must follow each implemented Op Sheet until he removes that sheet by whatever means: mission completion, failure, or unit reassignment.
6.10a Newly implemented Op Sheets always supersede older ones whenever a conflict arises, and the "age" of an Op Sheet is always dependent on when the sheet was implemented, not when it was written.
6.10b The player is free to use his units as he sees fit in following Op Sheet instructions, but he must follow them. He is free to vary his operational tempo for any reason he chooses, provided he does not violate Op Sheet instructions.
6.11 Mission Success
At some point the player can find that he has successfully fulfilled an Op Sheet's instructions. Once a mission succeeds, the units become unassigned (6.3). Remove completed Op Sheets from play.
6.12 Mission Failure
Every Op Sheet requires instructions about what to do if it fails. The decision to call off a mission rests solely with the player. The player can decide to start executing Failure Instructions in any friendly phase.
6.12a Any group moving via failure instructions must avoid enemy contact. If it cannot do so, the player must give it new failure instructions in the next Command Phase. Units cannot follow failure instructions which force them to move toward enemy locations - it is possible they might not be able to move at all, but be pinned in the middle of enemy territory as unassigned units - and that's bad.
6.12b It is possible for only a portion of a Task Organization to fail. An example would be a battalion defense where one company gets hammered, while the others are OK. Cross out the failed units from the Op Sheet and allow them to independently follow the failure instructions.
6.12c Any group of units from an Op Sheet which follow their failure instructions automatically become unassigned.
6.13 Special Handling Issues
6.13a Removing Units from an Implemented Op Sheet. If a new Op Sheet implements listing all or some of another implemented Op Sheet's Task Organization, erase the reassigned units from the older Op Sheet. Also, a player can voluntarily scratch off units in a Task Organization during any Command Phase and make them unassigned.
6.13b Removing Units from a Non-implemented Op Sheet. The player can scratch off units on such a Task Organization during any Command Phase. DO NOT adjust the Op Sheet's size modifier.
6.13c Adding Units to an Existing Implemented Op Sheet. To add units, draw their part on the graphic and add the written notes. Add them to the Task Organization. Those units (only) must go through the implementation process (using the staff modification from the gaining sheet, if any, and the size of the adding force only - determine weighted turns based on the adding force only) and they cannot function with their new Op Sheet until they implement it themselves.
6.13d Adding Units to an Existing Non-implemented Op Sheet. These units cause the subtraction of 3 weighted turns per element (battalion) added. The result must be the actual remainder or zero, whichever is more. Change the size modifier to reflect the new Op Sheet size. No other delays incur by adding units to an existing non-implemented Op Sheet.
6.13e Reinforcements and Op Sheets. Handle these according to 6.13c, 6.13d above or allow them to enter unassigned and write up a new Op Sheet for them. It is also perfectly acceptable to write up Op Sheets for reinforcements ahead of their arrival. Count all turns accrued before arrival at the 3 per turn weighted level.
6.14 Special Instructions
The following are different in some respects from the foregoing and supersede the earlier rules where conflict exists.
6.14a Preliminary Instructions. Follow these immediately - before the Op Sheet implements. Use preliminary instructions to get units to a common assembly area to prepare for future combat operations. When drawing up a new Op Sheet, the player can list any preliminary instructions he wants. These units must avoid all enemy contact during this movement.
Drop units from any implemented Op Sheet they might be on if assigned Preliminary instructions. They perform the instructions and are then unassigned.
6.14b Reserves. Use reserves to give Op Sheets a bit more flexibility. Designate reserves when drawing up the Op Sheet. Any portion of an Op Sheet can be in reserve. Consider an Op Sheet's reserves to have Attack-type orders for implementation purposes. Uncommitted reserves are unassigned. To commit a reserve, the player must first draw in the reserve's intended use on the Op Sheet's graphic (which cannot be changed later) and successfully pass a Die Roll Check (see 6.14d). Non-implemented Op Sheets cannot make any use of their reserves.
6.14c Alternates. A player can list alternate routes and/or objectives on an Op Sheet. The player can switch to these in the same way as he commits reserves. Draw alternates on the graphic when creating the Op Sheet. Once a player switches his Op Sheet to its alternates, he cannot later switch back.
6.14d Die Roll Checks. To commit a reserve or switch to alternates, make a Die Roll Check in the Command Phase. Conduct a Die Roll Check as follows: Roll one die. If the roll is greater than or equal to the Command Prep Rating of the checking side, then the Die Roll Check is successful. Otherwise, it has no effect. A player with a Command Prep rating of 7 or more cannot pass a Die Roll Check and is therefore unable to use Alternates or Reserves.
Example: Die Roll Check. A player with a Command Prep Rating of 3 wants to release a reserve. To perform his Die Roll Check, he rolls one die and gets a 3. He can release his reserve.
Play Note: It is possible (for some armies, anyway) to establish Op Sheets which consist of nothing but reserves. That allows a player a great deal of flexibility when he doesn't know where the enemy might be coming from. Such play is allowed, but must be used with care so as to not lose track of your own forces.
(An example night-attack Op Sheet with a supporting attack and a main effort, including preliminary movement to points of departure, is shown here in the rulebook; its diagram is omitted.)
6.15 Line Entry Command (optional)
Line Entry Command is a shorthand version of the command system. It does require a fair degree of honesty to use, since there is no graphic to follow.
6.15a For each Op Sheet in this system, allocate one line on a piece of paper. Enter the units involved on the left followed by the Op Sheet size and type. Jot down the mission of the units (e.g., Attack to capture village A).
6.15b Each Command Phase, jot down the weighted turns and make any implementation rolls normally. Place a check mark to the right of any line that implements.
6.15c You must come up with an idea of how you want to execute the mission when it is first written and follow that plan when it implements - regardless of changing circumstances.
6.16 Digging In
Digging In is a condition of a task force with an implemented Prepared Defense Op Sheet. Digging In is a property of an Op Sheet and not usually shown mechanically (but see 6.16f). All members of a Task Organization with an implemented Prepared Defense Op Sheet are Dug In. No other units are ever Dug In.
6.16a A unit loses its Dug In status if it leaves its hex. Units cannot reoccupy the hex to regain the benefit. A hex is Dug In only for the units in a hex at the moment the Op Sheet implements. Changing mode does not cancel the Dug In status of a hex.
6.16b Any number of units in a hex can be Dug In.
6.16c Players must keep track of which units are or aren't Dug In (see 6.16f).
6.16d Vehicle and Carrier units cannot be Dug In.
6.16e Op Sheet Changes & Requirements. Any change in an Op Sheet causing a unit to become unassigned or assigned to some mission other than Prepared Defense (Prepared Defense in the same location, that is), causes the unit to automatically lose Dug In status. Units assigned to an implemented Prepared Defense Op Sheet are Dug In only if the mission they are to conduct is also Prepared Defense.
6.16f A limited number of Dug In Markers are available in some TCS games. Even in these games there is not enough of these markers to mark every Dug In unit on the map - they are intended to help in areas where players might get confused.
7.0 Visibility and Weather
The individual game rules can give visibility and weather effects. When not explicitly given, there are no special effects due to weather.
7.0a Visibility is the maximum range at which LOSs can be unblocked. LOSs longer than the current Visibility are automatically blocked.
7.0b Weather can apply restrictions according to the game rules. When used, determine the Weather every hour turn during the Command Phase by a die roll on the Weather Table. The Weather determined affects the entire hour after the roll.
7.0c Night has its own effect on visibility (see 27.0).
7.1 Spotting Ranges
The ranges at which certain types of fires can occur is limited by "Spotting Ranges." Regardless of the appropriate Spotting Range, firing range might be still further limited by LOS (8.0) and weapon ranges.
7.1a The available Spotting Ranges are given on the Spotting Range Chart. The player must know the type of fire (Suppressive Fire Action, Fire-based Overwatch, or Movement-based Overwatch), the target type, the firer type, the range, and the target hex's terrain type. The Spotting Ranges are meant to be intuitive and easily memorized.
7.1b Regardless of other circumstances, fires are not allowed beyond the appropriate Spotting Range.
7.1c In the case of spotters for Mortars, the range from the spotter is used, NOT the range from the Mortar itself.
7.1d In the case of mixed Target or Firer types, apply the following. In the case of the Target, use the type with the longest Spotting Range. In the case of the Firer or Spotter, use the type with the shortest Spotting Range.
Design Note: Probably the most important feature of the modern battlefield is the fact that to any one observer on it, there is little or nothing to see. This has been termed the "Empty Battlefield". Even what appears to be "open" terrain is filled with minor obstructions to observation (trees, bushes, high grass, walls, small buildings, depressions, gullies, drainage ditches, and so on) making what appears to be an easy task to the game player (seeing what's coming at him) impossible. Rather than to attempt to control what a player knows, these rules inhibit his ability to use that knowledge. Furthermore, when you see that infantry running up the "barren" hill at you, remember there is a lot of firing going on which is beyond your control and of too little effect to worry about - the pot-shots of individual riflemen who are engaging fleeting targets of opportunity.
8.0 Line of Sight (LOS)
A Line of Sight (LOS) check determines if two units can see (and fire on) each other. Newer games have a hex center dot to facilitate these rules. Older games in the series (1991 and earlier) do not.
8.1 General Rule
8.1a LOS is determined by tracing a straight line from one hex's center dot to another. A thread or cut rubber-band can be of help. Features that lie along this line might block LOS.
8.1b Determining a Point or Hex's Elevation. The map has been printed with contour lines (natural measurements of the ground elevations) and a color-coding to assist in determining the elevation of any hex. The elevation of a particular contour line is given along the line in meters. The Contour Interval (vertical distance between the lines) is 20 meters. Ignore "Spot Elevations" and "Benchmarks" when evaluating elevations; they are for location reference only. The judgment of the elevation of a point falls into one of three categories:
A) Hilltops. A Hilltop is an area encircled by one last high contour line (possibly with the help of the map edge) and does not contain any contour lines higher than that top line. Elevations on a Hilltop are equal to the contour line encircling the feature. Hilltops are, in effect, flat.
B) Between or On Contour Lines. Draw a line through the point being evaluated which is perpendicular to the next higher and next lower contour lines. This line must begin at the next lower and end at the next higher contour lines. Determine which quarter mark the point is closest to (0/4, 1/4, 2/4, 3/4, 4/4). Add this proportion of the contour interval (20m) to the lower of the two contour lines used (you'll add one of the following: 0, 5, 10, 15, or 20). In other words, a point which falls closest to the 1/4 mark above the 30 meter contour line would have an elevation of 35 meters. Accuracy beyond 5 meters is not required. The case where a contour line goes right through the point is the easiest - read the value of that contour line and that is the elevation.
C) Bottoms. A Bottom is the inverse of a Hilltop. It is an area encircled by one last low contour line (possibly with the help of the map edge) and does not contain any contour lines lower than that final line. Elevations in a Bottom are equal to the contour line encircling the feature. Bottoms are, in effect, flat.
(Diagram "Elevation Determination": a contour sketch with lettered points A-L and their elevations, showing the perpendicular lines used. Elevations: A 100 (Hilltop), B 95, C 100, D 85, E 65, F 55, G 80 (Hilltop), H 70, I 55, J 50, K 60, L 40 (Bottom).)
8.2 Determining LOS
8.2a Rules of Thumb. If terrain along the line between the firer and the target is higher than both, the LOS is blocked. Terrain lower than either never blocks. If this principal does not decide the issue, follow the LOS Decision Rule (8.2b) below.
8.2b LOS Decision Rule
Step 1: Determine a straight line between the firer and target hex centers.
Step 2: Determine each end point's elevation.
Step 3: The targeted player selects a point of his choice along the LOS line as his "Point of Contention." Select any point along the line not in, or along the hexsides, of either end hex. (EXCEPTION: in Movement-based Overwatch Trigger spotting, he can select any point in the target's hex closer to the firer than the trigger's hexside.) He can select only one point and cannot later change it due to a bad choice.
Step 4: Determine the ground level of the Point of Contention (including modifiers), as well as the distance in hexes from the Lower End Point to both the Point of Contention and to the Higher End Point, and the Higher and Lower End Point elevations.
Step 5: Work through the following formula, if the selected Point of Contention is greater than or equal to the result, the LOS is blocked. Otherwise, the LOS is not blocked.
d(H-L)/D + L where...
- d = The distance from the Point of Contention to the Low End Point.
- H = The raw elevation of the High End Point.
- L = The raw elevation of the Low End Point.
- D = The distance from the High End Point to the Low End Point.
(Diagram "The LOS Formula": if the test value, d(H-L)/D + L, is less than the elevation of Point C [the Point of Contention], then the LOS is blocked.)
Line of Sight Issues
Hexside LOS: Unit A moves into hex B. Enemy unit C attempts to spot the Overwatch trigger along the center of the hexside unit A used to get into B along the LOS C. This LOS is blocked by the edge of the woods at E, so no Overwatch fire is possible.
Hex Dot LOS: In another phase, the LOS between units A and C comes up again when unit C wishes to fire an SFA at unit A. This time, the LOS is to the center dot of unit A's hex and is not blocked by the woods as before. Unit C couldn't engage A when it moved into position, but it can now AFTER A enters Fire Mode.
Formula Calculation: B is attempting to fire upon A, but the LOS is contended over point C. Point C has an elevation of 30 m which becomes 50 m because of the woods. d = 3 hexes, H = 60m, L = 25m, D = 8 hexes, giving the formula set up as 3*(60-25)/8 + 25 = 38.125, which is less than Point C, so the LOS is Blocked.
Example: Working through the LOS Formula. The players run into a dispute over LOS which cannot be resolved to both's satisfaction by "eye-balling" the terrain. The LOS is from a AT Gun to a Movement-based Overwatch trigger generated by a moving tank. The moving player selects a point along the LOS which is atop a small hill which has forest on it. The elevation of the Point of Contention is determined to be 40 meters (the elevation of the last contour line of the hill the PoC is on) plus 20 meters for the trees, for a total of 60 meters. The Higher End Point is determined to be 125 meters (it is slightly above the 120 meter contour line). The Lower End Point is in a hex where the center dot lies right on the 20 meter line, so it is 20 meters. The distance between the Lower End Point and the Point of Contention is 6 hexes and between the Lower End Point and the Higher End Point is 15 hexes. This sets up the formula as follows: 6*(125-20)/15 + 20 which equals 62 meaning the LOS is not blocked, but was very close.
8.3 Effects and Restrictions
8.3a LOS is either blocked or unblocked. Blocked LOSs do not allow fire combat or spotting to occur between the hexes in question. Unblocked LOSs allow fire combat and spotting in both directions. LOS has no other effects.
8.3b Trees (in forest, woods, hedgerow, orchard and other symbols) and buildings (alone or in towns and villages) add 20 meters to the ground's elevation if at the Point of Contention.
8.3c Units can always fire into or out of - but not through - forest, orchard, and town or village hexes. If the elevations work out correctly, it is possible to fire over these features. See also 8.3h.
8.3d Units have no effect on LOS.
8.3e Features within an end-point hex of an LOS never block an LOS, with the exception of when the Overwatch Trigger is in the center of the hexside a unit crossed to enter the hex - in that case, features in the end-point hex can block LOS.
8.3f Smoke and artillery Attack Zones are an infinitely high LOS block in its hex and hexsides. LOSs can freely pass into or out of such hexes, but never through them.
8.3g LOSs are never blocked into a unit's adjacent hexes. (This supercedes 8.3e.)
9.0 Fire Combat
Fire combat occurs in two forms in this game system: Area and Point. Area Fires are sprayed into a hex. Point Fires are aimed shots at a specific target within a hex. Firing types are either Area or Point. An Area weapon can only use the Area Fire Table. Point weapons can use either the Point Fire Table or the Area Fire Table.
Fire combats occur in the Action Phases as Suppressive Fire Actions (SFAs), Overwatch Fires, or Assault-style Combats. Artillery Barrage Markers automatically attack any unit which enters a hex in or adjacent to their Attack Zones.
9.1 General Restrictions on Fire Combat
9.1a A unit can fire as many times in an Action Phase as it has Overwatch Triggers, plus up to one Suppressive Fire Action. Mortar units can only fire ONCE per Action Phase (for a total of TWICE in a turn).
9.1b Only units in Fire Mode can fire. EXCEPTION: Mode has no effect on the ability to fire in Assault-style combat or to conduct AT Rolls, but EVEN in Assault-style Combat, Move Mode Mortars CANNOT fire.
9.1c Non-Artillery Fires have no effect on other units which are not in the target hex.
9.1d All direct fires require an unblocked LOS from the firer to the target. Indirect weapons (such as Mortars and artillery) require an unblocked LOS from a spotter to the target.
9.1e The Area Fire Table firepower of Suppressed and Buttoned Up units is x1/2. Paralyzed units generally cannot fire, but when they can, treat them as Suppressed.
9.1f Mounted units can fire only in Assault-style combat. Towed units can never fire.
9.1g No single unit can split its fire into multiple targets. Exception: The Pillboxes in Omaha which have two weapons systems each can fire these weapons individually at the same or different targets - together or separately.
9.2 Target Type Restrictions
A unit's target type (Point, Area, or Both) determines how an enemy unit can engage it. Point targets are hard vehicles that require a direct hit to be destroyed. Area targets are soft units and subject to elimination by random shots or explosive bursts. B-type targets are large enough to be aimed at and destroyed by Point weapons, but are soft enough to be destroyed by MG fires. A unit's target type appears on the counter's back.
9.2a Engage Point targets with the Point Fire Table, AT Rolls, and the Artillery Point Target Fire Table.
9.2b Engage Area targets on the Area Fire Table.
9.2c Engage B-type targets with the Point Fire Table, AT Rolls, or the Area Fire Table. Do not engage B-type units with the Artillery Point Fire Table - apply the artillery fires to the Area Fire Table instead.
9.3 Terrain Effects on Fire Combat
Each fire table gives terrain effects for each of four different classes of terrain: Billiard Table, Open, Partly Protective, and Protective. The Terrain Effects Chart will list the class of each of the game's terrains.
9.3a The applicable terrain effects are those of the target's hex and hexsides. Use the most protective terrain of the target hex when resolving a fire combat - therefore, a hex with some Open terrain and a small amount of forest (Partly Protective) would be considered to be Partly Protective.
9.3b Terrain has no effect on Area Fire Table rolls caused by minefields.
10.0 Losses
Losses for all units are in steps. Different unit types have different numbers of steps available. Mark step losses by placing Step Loss markers under the unit.
10.0a Infantry Platoons have five steps. Mortar Platoons, Infantry Sections, and MG units have two steps. All other units have one step.
10.0b Step losses do not affect the firepower of most units, but they do affect Morale Checks (see 16.2). Important: Mortar Platoons, however, have their Fire Strength HALVED if they have lost one of their steps.
Design Note: The lack of effect due to hits in, say, an infantry platoon, can seem odd at first and - in fact - earlier versions of this system did include a reduced firepower rule. After some reflection, I determined that this degradation was inappropriate. The reason? Let's take the infantry platoon as an example...all but one point of most infantry unit's firepower comes from its machineguns. As the unit takes losses, unless one of the guns is destroyed (unlikely) the platoon will scramble to ensure that the guns are manned and firing right up to the end. So, while that one point of firepower keeps dropping due to losses, the bulk of the firepower remains the same until the last step (the last six guys available to feed the "pigs,") is destroyed and no one is left to man the guns. Disagree if you like, but I believe history, and the inner workings of infantry units bear this out. A much more important method of reducing enemy fire effectiveness is suppression by fire, both in real life and here.
10.0c Whenever a fire table result calls for one or more step losses, adjust the markers under the target units and kill off any that reach their step loss limit. Permanently remove destroyed units from play.
10.0d Step losses belong to the unit that incurred them. Never transfer, absorb, or consolidate them with other units.
10.0e Ignore casualties in excess of the number of steps in a stack.
10.0f In Area Fires, step losses can come from any unit in the hex - BUT the first loss must come from the largest unit (in steps) in the hex. After that first loss, remaining losses can come from any unit in the hex. After the first step loss, split the remaining step losses in half and round normally. The defending player selects which units to inflict those losses upon. After these losses are taken, the attacking player inflicts the remaining losses (those left-over after the division by 2 and rounding procedure) on the units of his choice.
Example: Loss Distribution. Player A makes an Area Fire attack against a stack of Player B's units. The Area Fire Table result turns out to be 8 steps plus a Morale Check (a Three Dice result totaling 16 which is divided by 2). After Player B gets done screaming at Player A and kicking furniture around the room, they must inflict the 8 steps. There are two infantry platoons and an AT Gun in the target hex. First, they take the very first step loss from one of the infantry platoons. This leaves 7 steps to distribute. They divide the 7 by 2 and round normally to get 4. Player B inflicts 4 step losses between the two infantry platoons. Player A then gets to inflict the remaining 3 step losses. He takes great care to kill off the AT Gun and then to hit the infantry platoon hard which has the worst morale of the two - thereby setting up the target hex for a big failure when it comes time to do the Morale Check required of the Area Fire Table result. Player B swears under his breath.
11.0 Area Fire Combat
Resolve fires against area targets using the Area Fire Table. Handle the attack as one strike against the hex, with all Area and B-type targets being attacked together. Note that Area- and P-type firers can combine directly to make common Area Target attacks. Point weapons can make such shots (and add in with other units) at ranges up to 2x their nominal range, inclusive.
Procedure: Identify the Target Hex and the firers. Total the applied firepower and find the column heading containing that amount. Apply any applicable column shifts from the lists above the table. After finishing the above, roll two dice on the table and read the result. Apply the result. If one or more step losses or a Morale Check result occurs, do a Morale Check on the stack.
11.1 Restrictions
11.1a Area Fires do not affect P-type targets. Exception: See Buttoning Up, 16.7. Ignore P-type targets and anything mounted in Half-tracks (count things being towed) when calculating the stacking modification for an Area Fire Combat.
11.1b Any of the eligible target units in a hex can be used to satisfy the loss required (given 10.0f). If a carrier is destroyed, automatically destroy any mounted or towed units with it.
11.1c A hex which does not contain any targets susceptible to the Area Fire Table can be engaged anyway. See Buttoning Up, 16.7.
11.1d A hex can be fired upon any number of times in a single phase.
11.1e Apply the Range Shift of the longest range firer (or spotter, in the case of Mortars) involved. No range modification is ever used when the Area Fire Table is used to resolve Artillery or Sortie attacks.
Design Note: The longest ranged firer is used to help the game inhibit giant consolidated and coordinated shots (quite rare in real life, but all too common in wargames) from occurring. The game was designed to highlight and reward the kind of close-in sporadic fighting that did occur - not the typical wargame 'everyone within two klicks fire up that platoon in hex 12.34' shot.
11.1f Combat results on the Area Fire Table appear as step losses. Sometimes the casualty result gives a number of dice. In those cases, roll that number of dice and divide the results by 2. If the casualties are high enough as a result of the Area Fire Table result, one or more might be added to the Battalion Morale of units in the hex - see the Battalion Morale Additions Chart with the Area Fire Table for details.
11.1g While it is generally true that units can fire any number of times in a turn (given appropriate triggers and the like) there are two important restrictions to keep in mind: No unit can ever perform more than one Suppressive Fire Action in a turn and Mortars can fire only ONCE per Action Phase (for a total of twice per turn).
11.1h Any unit which enters any hex in or adjacent to a Barrage Marker's Attack Zone is automatically attacked by that marker. Units in hexes in the Attack Zone are attacked with full strength. Those in hexes adjacent to the Attack Zone are attacked with half strength. Separately handle this attack on the moving units the instant the units enter such a hex. Repeat the attack (from the same or different Artillery Barrage Markers) each time they enter such a hex. The attack made on the moving units does not involve or affect any units which already happen to be in the hex. If more than one Barrage Marker affects a given hex, make one attack with the cumulative firepower of all the Barrage Markers affecting the hex.
Example: Area Fires. One player announces an Area Fire in the form of a Suppressive Fire Action on a hex containing three halftracks with two mounted platoons and one dismounted platoon. It is in Open terrain and some of the units are in Move Mode. The attacking strength is 11 and all the firing units (including the Mortar's spotter, but not the Mortar unit itself, which does not matter) are 4 hexes away.
The 11 firepower gives the 10-12 column which is not shifted for the open terrain, nor for the 4-hex range, but is shifted +1 for the Move Mode units. Only the non-mounted platoon counts for stacking, so there are 8 steps in the hex giving another +1 shift. The total shift is +2 and the fire is resolved on the 17-20 table.
The firing player rolls two dice rolling a 46 which is a "One Die x 1/2" result. The player then rolls one die (getting a 5) and divides the result by 2 which gives 2.5 which is rounded to 3 losses. No addition is made to the Battalion Morales of the units in the hex. The owning player kills one step from one of the platoons in the hex. The remaining two step losses are split between the firing and targeted players. The targeted player applies his to another mounted infantry platoon (knowing full well what the firer will do with his step loss, he wants to mitigate his situation as best he can). The firer predictably uses his step loss to kill one of the halftracks (which takes one of the mounted platoons (sans a step) with it). The targeted player then goes on to make his Morale Check using the vaporized platoon's morale plus its dead steps.
11.2 The Crossfire Modifier
The modifier for Crossfire requires a bit more explanation than other table modifiers, so it gets this special rules section.
11.2a Requirements. For a fire resolution and its corresponding Morale Check to apply the Crossfire Modifiers, ALL of the following must apply:
- The fire attack must be on the Area Fire Table.
- The fire attack must be from a simultaneous Suppressive Fire Action (SFA) from two or more units. (Fires in a single SFA which are not resolved simultaneously do not count.)
- The incoming fire must include at least two non-adjacent hexsides (see the diagram in the rulebook). The firing player can only count one hex corner in his favor - if two hex corners are involved, one must favor the targeted player.
(Diagram: "A few examples of the requirements of the Crossfire Modifier" - fire arcs into a hex, showing cases where Crossfire is allowed and not allowed, given that other conditions are met. In the one corner case, the hexside counting as in the firer's favor is the only one that counts.)
11.2b Apply the Morale Table Crossfire Modifier if the Area Fire Table result which generated the Morale Check was eligible for its Crossfire Modifier according to the above.
12.0 Point Fire Combat
Point fire combat represents the fire of precision weapons against relatively large individual targets (such as vehicles or AT Guns) where a kill results from a direct hit. Resolve Point fires on the Point Fire Table.
Procedure: Total the applicable modifiers from the lists above the Point Fire Table. The total of the modifiers (the Net Modifier row to use) can be either positive or negative. Subtract the Defender's Defense value from the Attacker's Attack value to determine the Firing Differential column to use.
Using the Point Fire Table, cross index the Net Modifier with the Firing Differential to find a list of three numbers. They are the kill rolls for Close, Nominal, and Long ranges respectively. Select the one that applies to the fire. If your kill roll is a "P" instead of a number, a kill is not possible and the shot was wasted.
Roll two dice. If the roll is equal to or greater than the kill roll, the target is killed and Button Up others in the hex (16.7). Otherwise, there is no effect.
12.1 Restrictions & Special Cases
12.1a Identify each firing unit and its target. A given target can be engaged by as many or as few firers as the player wants, given the rules about Suppressive Fire Actions and Overwatch.
12.1b The range printed on the front of a Point weapon counter is its "Nominal" range. The weapon range categories are Close (less than or equal to 1/2 printed range), Nominal (greater than 1/2 and less than or equal to the printed range), and Long (greater than the printed range and less than or equal to 2x the printed range).
12.1c Missed shots, against any target, have no effect at all. In a number of cases, the Point weapon unit is better off engaging its target by using the Area Fire Table.
12.1d Automatically destroy any Mounted and Towed units whose carrier is destroyed.
12.1e The firing player can selectively target Point Fires against towed units, and such fires do not affect the towing unit regardless of the result.
12.1f Point Fire attacks with a Firing Differential of -5 or less are allowed (if a player mistakenly declares such an attack), but have no possibility of a kill.
12.1g See also the effects of Buttoning Up, 16.7.
12.1h B-type targets which have a Morale value on their counter's front instead of a Defense Value are assumed to have a Defense value of Zero.
Example: Point Fire Combat. A Panther fires on a Fire Mode Sherman at range 8 in Open terrain. This is a long range shot for the Panther (whose nominal range is 7). The following determine the Net Modifier: Open terrain +2, Target in Fire Mode -1, SFA fires +2, so the Net Modifier is +3. The Firing Differential is 5 (the Panther's Attack Rating) less 3 (the Sherman's Defense Rating) for a final differential of +2.
The cross index between the +3 Net Modifier and the +2 Firing Differential yields 22, 25, 51 of which the 51 applies to this combat because of the long range. The player rolls a 43 which is a miss and there is no effect on the Sherman.
The Sherman uses the Panther's fire as an Overwatch Trigger with which to return fire. Use the same Net Modifier (since the Panther, too, is in the Open in Fire Mode) but without the +2 for SFA fires so the Net Mod is now +1, and the Firing Differential is now -1 (the Sherman's attack is 3 (a short barreled 75mm gun) and the Panther's Defense is 4). The range for the Sherman is also Long.
The cross index this time gives 42, 52, 61 and use the 61 (for Long range). The player rolls two dice and manages to roll 62 which kills the Panther.
13.0 The Suppressive Fire Action
The Suppressive Fire Action (SFA) is the only non-Overwatch Fire method. Doing an SFA together is the only way for units in multiple hexes to engage a common target stack in one fire combat. To do an SFA, fulfill the various requirements below and announce the firers and the target. Mark any units firing an SFA with Fired Markers.
Each SFA fires require a single Target Hex. As long as you have units eligible to fire, you can continue to do SFA fires.
Design Note: Players should be forewarned of the implications of firing SFAs. While the fire of an SFA is coordinated between different units, the tradeoff is that after firing the SFA the units are marked as Fired. That removes their ability to fire Overwatch for the rest of the turn. For those who fail to leave someone to cover the units firing SFAs and choose to fire many SFAs in the first Action Phase of the turn, remember you were told to be careful - don't come running to me if you have no one left to fire Overwatch when the enemy bolts across an open field to assault your units.
13.1 Restrictions on SFAs
13.1a A player can do SFAs only in his own Action Phase.
13.1b SFA firing units must fulfill the following:
- They must have been continually in Fire Mode since the beginning of the current Phase.
- They cannot already be marked with a Fired Marker. EXCEPTION: Fired Marked units can spot for any type of fire from Mortars.
- Unassigned units (6.3) cannot fire SFAs; they can only fire Overwatch Fires.
13.1c A given target can be engaged by any number of separate SFA attacks. After engaging one target hex (with any number of firers, a player could target a hex with a couple of Area Fire Attacks, several Point Fires per Point Target before announcing that he is done with the hex), the SFA provides an Overwatch Fire trigger to the enemy. After that trigger and any enemy fires, the phasing player can perform another SFA against the same or different targets. To restate, No Trigger Occurs until the firing player announces that he is done firing SFAs against a particular target hex.
Example: Multiple SFA Attacks. To show the amount of fires a player could pour forth before allowing the enemy to have his Overwatch Trigger, a quick example is in order. As long as only one target hex is involved, the following is OK. The player fires three Area Fire SFAs at the hex, progressively bewildering the troops there, killing some. Not happy with the results, he fires two more SFAs at it. Now out of Area Firers, ten times in a row he selects a tank, fires Point Fires at a target in the hex, and then selects another tank and so on. When all of this is over, the targeted player gets his Overwatch trigger. The downside is that the firing player now has his entire army marked as Fired - and he did this to engage one hex.
13.1d Units in different stacks can combine their fires to do a SFA.
13.1e Suppressed units can freely join in on any SFA (or make their own) given their firepower modifications.
13.1f SFAs require no trigger.
13.1g A unit can conduct an AT Roll attack in addition to its regular fire SFA. Units are marked with a Fired Marker after they fire their regular SFA fires, not when they conduct AT Rolls.
13.1h After each SFA fire, mark all the units that fired with Fired Markers.
13.1i Only SFAs on the Area Fire Table allow the Crossfire Modifier to be applied.
14.0 Overwatch
Overwatch is this game system's approach to what is commonly called "Opportunity Fire" in other games. Overwatch Fire is a provoked action taken by units with an unblocked LOS to an Overwatch Trigger. An Overwatch Trigger (trigger, for short) is an event that draws enemy fire - such as the movement into a hex or enemy fires. A unit can fire more than one Overwatch Fire in a phase, provided the other conditions for firing are met.
Firing Overwatch is voluntary - no unit is ever forced to fire when an Overwatch Trigger occurs. These fires do not need to be planned in any way - eligible units which can see the trigger can take advantage of it.
Important: Handle all Overwatch Fires on a single stack basis. Units in two different stacks can never act on the same Overwatch Trigger. Once a trigger is spotted, conduct the Overwatch Fire exactly as any other fire in the game, and resolve it fully before continuing play. The firing player chooses which stack to fire and if he wants to use the trigger at all.
14.1 The Two Overwatch Cycles
There are two primary cycles of events that Overwatch Fires can follow in this game series. One is for Movement-based triggers. The other is for Fire-based triggers. Regardless of which cycle is in use, the cycle ends after the Overwatch Return Fire. In 14.1a and 14.1b, Player A is the one whose Action Phase it is. Player B is that other guy.
14.1a Movement-based Overwatch Cycle. This cycle occurs the instant a unit moves into a hex.
- Movement Overwatch Trigger (Player A)
- Overwatch Fire (Player B)
- Overwatch Return Fire (Player A)
14.1b Fire-based Overwatch Cycle. This cycle occurs when a player finishes firing an SFA.
- Suppressive Fire Action announced as finished (Player A)
- Overwatch Return Fire (Player B)
14.2 Overwatch Triggers
All Overwatch Fires require an Overwatch Trigger to occur. If there is no trigger or the trigger cannot be spotted according to the following, there can be no Overwatch Fires.
14.2a Events Generating Triggers. Two events trigger Overwatch: Movement and Fires. Triggers occur when A) an enemy unit enters a hex or B) when an enemy unit or stack fires. All triggers require an unblocked LOS to the event itself within the appropriate Spotting Range - for the Overwatching unit, or (in the case of Mortars) a spotter. If a stack moves into a hex or fires together, it generates only one trigger. AT Rolls, Assault-style Combats, and Artillery Missions never generate Overwatch Triggers.
14.2b LOS and Triggers. The location for all Overwatch Triggers is important. A Movement-based trigger's exact location is the center of the hexside through which the unit moved into the hex. Fire-Based triggers are visible if the LOS is unblocked to the hexsides surrounding the firing (not spotter) stack's hex along the line to the hex center. Triggers at one hex range are always visible, regardless of the trigger's location in the hex.
14.2c Movement-based Triggers. Movement triggers occur the instant an enemy unit enters a hex (after the unit is attacked by any Artillery Barrage Markers). Any Overwatch Fires against a unit moving occur before that unit changes Mode - regardless of the moving player's intention to switch Modes. Once the fire has been resolved, the moving units can switch Modes, or continue to move. A moving unit which draws Overwatch Fires can never use those fires as a trigger for its own Overwatch Fires.
The movement into Assault-style combat hexes, Mode change, SYRs, and mounting and dismounting are not Overwatch Triggers. The exit of a unit from an Overrun Combat generates a trigger.
14.2d Fire-based Triggers. These triggers happen whenever an SFA is finished, or a stack fires against a Movement-based Overwatch Trigger. When an SFA generates a Fire-based Overwatch Trigger, there exists one at each SFA firing hex, but the enemy can only select one hex as the trigger-generator to return fire against. In SFAs, no trigger occurs until the firing player announces that he is done firing SFAs at a given hex. Fires within Assault-style combats do not generate Overwatch Triggers.
14.2e Targets and Triggers. All triggers allow the attack of the Overwatch Firing Stack against any unit in the trigger's stack. All units in the stack are attacked anyway in Area Fires, but this means Point Fires can be directed against units in the hex which did not generate the trigger themselves.
Note: Remember that you must spot the firing Mortar unit in order to use its fire as a trigger. Being able to spot the Mortar unit's spotter has no effect.
14.3 Restrictions on Overwatch Fire Combat
14.3a Only units in Fire Mode and NOT Fired Marked, Paralyzed, or Suppressed can fire Overwatch. Units with a Fired Marker or in Move Mode can spot for Overwatch Fire from Mortars.
14.3b Units can make AT Rolls in response to Overwatch Triggers.
14.3c There is no exception to the inability of Suppressed and Paralyzed units to fire Overwatch.
14.3d A player cannot fire an Artillery Mission in response to an Overwatch Trigger.
15.0 AT Rolls
An "AT Roll" is the game's way of handling infantry small group assaults. Naturally, this combat method is dependent on the terrain available and the cover and concealment afforded.
Units can only use AT Roll attacks to destroy P-type and B-type targets at a range of one hex or less.
Important: A unit can make one AT Roll attack versus one target unit per step in the firing unit, but each target cannot be attacked more than once in a given fire. Units can perform their regular fire in addition to any AT Roll attacks they might make.
Procedure: Cross index the target hex's terrain with the attack's range on the AT Roll Table to determine the base roll needed for a kill. Roll two dice for each target in the Target Hex - up to a maximum of one attack per attacking step. Modify each roll according to the table's modifiers. A modified roll greater than or equal to the table's kill number destroys the target. If the raw dice roll made for an AT Roll attack is 3 or less, destroy the attacking step.
15.1 Restrictions
15.1a Only Infantry-type units can make AT Rolls. Mode has no effect on a unit's ability to do so (this does not allow Move Mode units to do AT Rolls as Overwatch Fires). Paralyzed and Mounted units cannot make AT Rolls. Suppressed units can, but do so with a modifier. No unit is ever required to make an AT Roll attack.
15.1b An AT Roll attack can be part of an SFA or Overwatch. Regardless, the unit conducting the AT Roll can also fire normally at the same time. A unit can do both during an Assault-style combat sequence as well.
15.1c When a unit makes an AT Roll attack against a hex, roll separately for each P-type or B-type target attacked. A given infantry unit can attack only one hex with AT Rolls per fire, regardless of the number of steps involved.
15.1d AT Roll attacks can only be made in the attacking unit's hex or adjacent to it.
15.1e AT Roll attacks are not affected by any Artillery Attack Zones in which they might occur.
15.1f A RAW dice roll made in an AT Roll attack of 3 or less destroys the step making the attack. These losses do not cause Morale Checks. Only the one step of the unit actually making the attack is affected by this rule.
Example: AT Roll Attack. The player decides to do an AT Roll attack against an adjacent stack of five tanks with a platoon of two steps. The Target Hex is protective terrain. The target is covered with smoke from an earlier mortar fire. The terrain of the attack is that of the Target Hex (Protective). The base roll for an adjacent attack with protective terrain is 8. Of the existing modifiers, only the +1 for a target with smoke applies, so the attack will be successful if the player rolls a 7 or more. He rolls once for each of the two tanks the unit can attack (because he only has 2 steps to attack with), getting a 9, and 4. The final result is that one of the tanks is destroyed.
16.0 Morale
Morale effects represent the troops' covert or overt actions to refuse to continue dangerous operations.
16.0a All infantry and weapons units are at times subject to Morale Checks and their results. Vehicles and Carriers never make Morale Checks of their own. When a Morale Check is required, the entire stack checks Morale as one item and the result affects the entire stack - vehicles and carriers ignore Suppressed or Paralyzed results, but must follow any SYR or Surrender results.
16.0b Units check Morale only when called for by the Area Fire Table result, or after every fire in Assault-style combat. Any Area Fire Table result other than No Effect requires the target stack to check Morale. Morale Checks never occur at any other time.
16.0c The Morale Rating of most units subject to Morale Effects is printed in white in a red box on the unit counter's front. It is a number ranging from zero (the best troops) to any number greater than zero. The greater the rating, the worse the troops are. Weapons units having a Point Defense value instead of a Morale Rating (such as AT Guns and Infantry Guns) have a Morale Rating of 3. On-map artillery units have a Morale Rating of 6.
16.0d Mark unit Morale conditions with Morale Markers. Assume all units under a Morale Marker to have the same Morale condition.
16.0e A unit's Morale condition is that unit's property alone. It is never transferred to other units.
16.0f Ignore results from the Area Fire Table calling for a Morale Check on units not subject to Morale Effects.
16.1 Battalion Morale
Battalion Morale is a measure of cumulative punishment. Step Loss markers in a Battalion Morale Box indicate Battalion Morale. The total of the Step Loss markers in a battalion's Battalion Morale Box is that battalion's Battalion Morale. Results from the Area Fire Table can cause additions to Battalion Morale. A Battalion Morale never becomes less than zero and can increase infinitely. Unless specified otherwise, all Battalion Morales begin at zero.
16.1a Only units belonging to a battalion with a Battalion Morale Box are subject to Battalion Morale.
16.1b All units in a battalion suffer the same Battalion Morale - regardless of their individual circumstances. One unit's Battalion Morale only affects another unit when a unit makes the Morale Check for a stack, otherwise the Battalion Morales of different battalions never affect one another.
16.1c Battalion Morale affects any of a battalion's units when they make Morale Checks.
16.1d Add any Battalion Morale addition incurred on a hex to every battalion represented in it. For instance, if units from two battalions are in a hex and the hex gets a +1 to the Battalion Morale result, each battalion suffers a +1.
16.1e Battalion Morale Reduction. Every Turn during the Clean Up Phase, both players recover their Battalion Morales simultaneously. Roll one die separately for each battalion with a Battalion Morale. If the roll is equal to or less than the battalion's current Battalion Morale, reduce that Battalion Morale by 1. On any other result, there is no effect. Remember, no Battalion Morale ever becomes less than zero.
16.1f Converting Old Company Morales to Bn Morales. In older games where an at-start value for "Company Morale" is given do the following: Average the Company Morales of all the companies in the battalion (ignore companies which did not have Company Morale before), and divide the result by 5. That is the Battalion Morale at start. Use one of the old Company Morale Boxes as the Battalion Morale Box for each Battalion in the old games.
Design Note: Unlike the Company Morale of earlier versions, Battalion Morale is a difficult thing to obtain and even harder to shake. Units will rarely have even small Battalion Morales (those with large ones can be written off...) and once a unit manages to obtain a Battalion Morale, it will be lugging it about for a long time!
16.2 Morale Checks
Make Morale Checks according to the following at the times listed in 16.0b.
Procedure: Add the unit's Morale, its Battalion Morale, the number of steps the unit has lost, and any applicable modifiers above the table. The unit's Morale is multiplied by 2 if the Morale Check is the result of any sort of Assault-style Combat (EXCEPTION: Do not apply this multiplier for Morale Checks generated by Overruns in Partly Protective or Protective terrain). Find the column on top of the Morale Table that contains the resulting number. Roll two dice. Read down the final column to find the row containing the dice roll result. Read to the table's left to determine the result. Apply the result.
Example: Morale Check with Save Yourself Retreat (SYR). After taking a step loss due to an Area Fire combat, a player has to make a Morale Check for his stack. The unit which took the step loss is an infantry platoon with a Morale of 4 and has now lost a total of three steps. It has a Battalion Morale of 1. The only modifier which applies is the +1 for being at Night. This gives a total of 9 (4 Morale + 3 Steps Lost + 1 Battalion Morale + 1 Night). Find 9 along the top of the Morale Table and roll two dice (11..66). The player rolls a 36 which gives an SYR result.
Go to the SYR Table. Roll one die and add the Unit Morale, Battalion Morale, and the number of steps lost. The player rolls a 4 and adds a total of 8. This gives a 12 and a result of "Retreat 5 Hexes, -1 Step." The stack retreats five hexes and the player chooses to inflict the step loss on one of the other platoons in the hex.
16.2a Determining Which Unit Checks Morale for the Stack. The selection of which unit performs a stack's Morale Check is important. The chosen unit must have the "worst morale" in the hex. To determine the "worst morale unit", select the one that has the greatest total of raw unit morale and casualties. Ignore Battalion Morale values when determining the "worst morale" unit. Select the applicable unit even if it died (in which case, apply the total number of steps the unit has lost, less any due to carrier destruction) in the fire combat generating the check (unless it was the only unit in the hex; in that case, there would be no Morale Check).
If no unit in the hex is subject to Morale or all units in the hex were destroyed, make no check.
16.3 Suppression
Suppression is the most common fire combat effect on a unit. Suppression hampers a unit's ability to fire and move.
16.3a Suppressed units CANNOT...
- ...Move, change Mode (except for SYRs and 16.3c), breach mines, or mount/dismount,
- ...fire Overwatch,
- ...Spot for artillery or Mortar fires.
16.3b Suppressed units CAN...
- ...Fire SFAs,
- ...Make AT Roll attacks.
16.3c Units in Move Mode that become Suppressed automatically switch to Fire Mode. Units mounted in carriers ignore this result.
16.3d Additional Suppressed results have no further effect.
16.3e Suppressed units automatically recover to normal during each Clean Up Phase.
16.4 Paralysis
Paralysis is a more severe Morale effect than suppression.
16.4a Paralyzed units are unable to move, change Mode (except for 16.4c), breach mines, mount/dismount, fire (except in one situation, see below), spot for artillery or mortar fires, or SYR. Essentially, they can do nothing.
16.4b Paralyzed units CAN fire once (as a Suppressed unit) during each Assault-style Combat against them. At no other time can they fire. Units can make this shot in addition to AT Roll attacks. If caught in a hex with an enemy unit (after making their one fire) during Assault or Consolidated Assault Combats (not in Overruns), destroy the Paralyzed units.
16.4c Units in Move Mode that become Paralyzed automatically switch to Fire Mode. Units mounted in carriers ignore this result.
16.4d Additional Paralyzed results on a stack already Paralyzed have no effect.
16.4e All Paralyzed units recover to Suppressed status during each Clean Up Phase.
16.4f Paralyzed units cannot choose to Flee at the beginning of an Assault Combat.
16.5 Save Yourself Retreats
A Save Yourself Retreat (SYR) is the result of the troops deciding that it is better to be elsewhere.
Procedure: An SYR can begin in one of three ways: because of a Morale Table result; voluntarily during a friendly Action Phase (in place of regular movement, to avoid drawing Overwatch Fires); or units choosing to "flee" in an Assault Combat's Fight or Flee Segment. Resolve SYRs on the SYR Table. Roll one die and add the unit's Morale, Battalion Morale, and number of steps lost (just like the regular Morale Check, except the unit Morale is NOT x2, even in Assault-style Combat) (the same unit checks here as did for the Morale Result, or the player's choice when no Morale Result occurred). Read the result of the modified die roll off the SYR Table. The result will be the number of hexes the unit must retreat and possibly step losses. Execute the result.
16.5a Any unit subject to Morale Effects can be forced to SYR (or voluntarily conduct one). SYRs always affect the entire stack (except Paralyzed units). Only units which could roll for an SYR themselves are subject to the losses from the SYR Table - ignore any losses which would apply to units which could not roll on the SYR Table for themselves. Losses are inflicted on a per stack basis, not per unit, and the owning player inflicts these losses as he desires upon the units in the stack.
16.5b Units in either Mode can SYR. At the SYR's end, regardless of the unit's original mode, place the unit in Move Mode and remove any Fired Marker from it.
16.5c Suppressed units can do SYRs (and lose their Suppressed marker at the SYR's end). Paralyzed units ignore SYR results. Paralyzed units cannot SYR. Units with Fired Markers can only conduct involuntary SYRs.
16.5d SYR movement is always in hex terms, not Movement Points. A stack executing an SYR must move the exact number of hexes in the result and cannot split up along the way. SYRs must move through enemy-free terrain traversable in regular movement. If a unit is unable to retreat the required number of hexes for any reason, destroy it. (See also 16.5L.)
16.5e For all SYRs, the SYR's direction must be locally to the rear and towards protective terrain. No "doubling back" is allowed, and the retreat must be in a reasonably straight line. Units must end their retreat further from all enemy units than when they began the retreat.
16.5f No unit conducting an SYR ever generates an Overwatch Trigger, even if the unit moves adjacent to enemy units.
16.5g During a friendly Action Phase, the player can voluntarily choose to have any number of his SYR-eligible units do an SYR. Such an SYR is the unit's entire movement. The unit cannot have moved before the SYR. Handle voluntary SYRs in the same manner as involuntary SYRs in all respects - to include the requirement to move the entire stack. A unit can only do one voluntary SYR in a phase. Units which have fired an SFA cannot also conduct a voluntary SYR in the same phase.
16.5h A unit that does an SYR cannot move further in that phase. The SYR does not affect the unit in future phases.
16.5i Units crossing a minefield hex during an SYR always do so by force, even if there is a breach.
16.5j Destroy Tow-Only units (while not being towed), Mortar units, AT Guns, Infantry Guns, and On-Map Artillery units forced to conduct an SYR.
16.5k Units conducting SYRs are susceptible to attack by any Artillery Barrage Markers whose Attack Zones they enter, or move adjacent to, during their retreat. Ignore Suppressed, Paralyzed, and additional SYR results during these attacks - the stack either surrenders or keeps doing the original SYR.
16.5L SYR'ing Adjacent to the Enemy. Destroy any unit which must enter a hex adjacent to any enemy unit during the course of an SYR. The only exception is the first hex of an SYR out of an Assault-style combat hex - there is no effect if that hex happens to be adjacent to enemy units (even those which were participating in the Assault-style combat). Also, IGNORE this rule during NIGHT turns - there is no effect for SYR'ing adjacent to enemy units during full night turns (the regular rule applies during twilight turns).
16.6 Surrender
The Surrender result on the Morale Table represents the complete collapse of resistance. Remove from play any stack that surrenders. Remove all units in such a hex, even if not subject to Morale results normally.
16.7 Buttoning Up
While not technically a Morale Result, Buttoning Up has been added to the effects which can be inflicted on tanks and other armored vehicles. Units subject to this rule include all P-type targets and any B-type target which is either a Tank, SP artillery Gun, Assault Gun, Tank Destroyer, Recon vehicle, half-track, or any other kind of Armored Personnel Carrier or vehicle. This rule does not affect Area-type targets, AT Guns, Infantry Guns, On-Map Artillery Guns, trucks, or wagons.
16.7a Inflicting a Buttoned Up Result. The applicable units in a hex automatically Button Up (and are marked with a Buttoned Up Marker) whenever any of the following occur:
- An Area Fire result greater than a Morale Check (one which would require a loss) is applied against their hex.
- An Artillery Barrage Marker's Attack Zone or Infantry Gun fire (100mm or larger) is applied to their hex causing a roll on the Artillery Point Fire Table - regardless of the roll's success.
- A Point Fire attack results in a kill of some unit in their hex.
- A Sortie Point Fire is made against their hex - even if the attack is unsuccessful.
16.7b Effects of Being Buttoned Up. A Buttoned Up vehicle or carrier suffers the following:
- Their Area Firepower is x1/2.
- They suffer modifiers on the Point Fire and AT Roll Tables.
- They CANNOT spot for Artillery or Mortar Fires.
- They CAN fire Overwatch, but do so with both modifiers and a Spotting Range restriction.
- All hex MP costs for movement (hex and hexside MP costs) are DOUBLED. The costs to change mode and conduct Overruns or Consolidated Assaults remain the same.
- Additional Buttoned Up results give no additional effects.
16.7c Removal of Buttoned Up Results. All Buttoned Up Markers are removed automatically from both side's units during the Clean Up Phase at the end of each turn.
17.0 Artillery
Artillery Missions are fired during each player's Action Phase. Only the Phasing Player can fire Artillery Missions during a given Action Phase. The player can integrate Artillery Missions with all the other activities he can do in his Action Phase. Resolve each fire mission by announcing the Target Hex, Mission type, Spotter, if Fast Fire, and size of guns firing; making a roll on the Adjustment Table; and attacking all units within or adjacent to the Attack Zone of the Artillery Barrage.
17.0a Unless specified otherwise, artillery can hit targets anywhere on any map.
17.0b Good Shoot Artillery Barrage Markers remain on the map until the beginning of the owning player's next Action Phase (Bad Shoot Markers are removed at the end of the Phase in which they were fired) and attack any unit (of either side) their Attack Zones happen to land upon (to include the hexes adjacent to the Attack Zone proper). After attacking the units already within or adjacent to its Attack Zone, a Barrage Marker no longer affects those units unless they attempt to move from one Attack Zone Hex to another Attack Zone Hex or hex adjacent to such a hex. Furthermore, units within an existing Zone can fire normally, provided all LOS requirements are met.
17.0c Artillery Barrage Markers act as LOS blocks in their Attack Zone hexes - functioning in exactly the same way as if each Attack Zone hex had a Smoke Marker in it. Hexes adjacent to the Attack Zone do not block LOS.
17.0d Artillery fires cannot be cancelled after being announced.
17.1 Artillery Fires
Artillery Missions (except for any game specific requirements) never need to be plotted in advance. During a player's Action Phase, the phasing player merely announces each Artillery Mission he wishes to perform and proceeds to execute it immediately. Ignore Called Fire Delays listed in older games.
One fire mission is the fires of a single artillery battery or battalion. Resolve each fire mission in its entirety before moving on with the phase. Every fire mission consists of the following:
- Announce Target Hex, Fires Type, Spotter, Round Size, and if it is a Fast Fire Mission.
- Place the Target Hex Marker in the desired Target Hex.
- Use the Adjustment Table to determine if a Good Shoot, Bad Shoot, No Shoot, or Bad Shoot with Scatter occurs.
- Replace the Target Hex Marker with the appropriate Barrage Marker.
- Resolve all fire combats within and adjacent to the Barrage Marker's Attack Zone.
17.1a A battery can execute ONE fire mission in a single turn. The number of guns in a battery has no effect on the battery's abilities, or its ammunition consumption.
17.1b A Battalion Fire Mission requires the fires of three batteries from the same artillery battalion. Being part of a Battalion Fire Mission uses up a battery's mission for the turn. For battalions with mixed gun types, use the smallest caliber for determining the firepower of the Artillery Attack Zone and the largest caliber for determining the availability of Fast Fires.
17.1c Resolve Artillery Missions independently of any fires of regular units (an Artillery Mission cannot have its firepower attack strengths increased by the addition of other units, etc.).
17.2 Spotting
All artillery fire missions require a spotter with an unblocked LOS to the Target Hex (except for Illumination (Illum) Missions, see 17.7b). Identify the unit responsible for spotting the mission when it is announced.
17.2a Any unit-type, from any organization, can spot for any artillery mission.
17.2b Restrictions. The spotter must have an unblocked LOS to the Target Hex. The spotter cannot be Paralyzed, Suppressed, Buttoned Up, or within a Barrage Marker's Attack Zone. A spotter must be in Fire Mode and have been in that Mode since the beginning of the phase.
17.2c Illumination Missions do not need spotters.
17.3 Ammunition
Each scenario gives the ammunition available. Players might receive more later in the game (as reinforcements which arrive at the beginning of the Action Phase in time for use), but generally the at-start amount needs to last through the game. Ammunition is given in "Battery Fires" and each Battery Fire is the ammunition needed to fire one battery fully in order to generate a Battery Barrage Marker. Battery Fires are given as HE (High Explosive), Smoke, or Illum (Illumination) types. A single battery can fire only one type of Battery Fire per mission.
In older series games (2-01 through 2-05), ammunition was given differently than is used in the current rules. To play those games using these rules, divide the HE and Smoke ammo allotments by 4. The Illum allotments given remains the same.
17.3a Players must keep a running record of their remaining ammunition by type and caliber. Delete used ammunition the moment it is fired. A player can never use more total Battery Fires than he has available - either guns or ammo.
17.3b Each Fire mission can consist of only one ammunition type.
17.3c A Battery Barrage Marker costs 1 Battery Fire of ammunition. A Battalion Barrage Marker (and hence, mission) requires 3 Battery Fires of ammunition. Fast Fire Missions cost triple the usual number of Battery Fires for the size of unit firing.
17.4 Adjustment
The Adjustment of an artillery mission determines if an Artillery Mission "scatters" from the intended Target Hex, and whether it uses either Good or Bad Shoot attack values. Adjustment is performed on the Adjustment Table.
Rocket Artillery always gives a Good Shoot and always scatters. The Adjustment Table is not used for Rocket fires.
17.4a The Adjustment Table. For regular missions, determine the range to the Target Hex from the spotter to get the Adjustment Table's range. Find the table applicable to that range. Roll two dice (11..66). Cross index the roll with the nationality of the firing unit. If a No Shoot occurs, return the ammunition to the player's pools, but the battery (s) which attempted to fire have used their one mission per turn up. If the mission Scatters, roll one die for direction, and another for distance. Move the Target Hex Marker to that hex and execute the Artillery Mission there as a Bad Shoot. Otherwise, execute a Good or Bad shoot on the intended Target Hex.
17.5 Artillery Barrage Markers and Fires Resolution
Most Artillery Missions place an Artillery Barrage Marker (either a Battery or Battalion, depending on the mission's size and type). Artillery Barrage Markers come in two colors. Before play decide which player gets which color so that it is easy to determine which Barrage Markers to remove at the beginning of each Action Phase.
Rocket Artillery Missions do not place a Barrage Marker - they are resolved on the spot and nothing remains afterward. Smoke Missions are marked with a Level 2 Smoke Barrage Marker.
Artillery Barrage Markers indicate the center of the Artillery Mission's "Attack Zone". The size of the Attack Zone is dependent on the Barrage Marker's exact type. Also, Barrage Markers attack units which happen to be or move into hexes adjacent to their Attack Zone - this represents the "fuzzy edge" of the Fire Mission.
Artillery Barrage Markers from Good Shoot missions exist on the map (after attacking all units already within their Zones) until the very beginning of the next friendly Action Phase, when they are removed. While on the map, these markers automatically attack any unit which moves into or adjacent to their Attack Zone hexes (each time it enters such a hex) AND obstruct LOS throughout their Attack Zone (to include hexsides).
Important: Bad Shoot Barrage Markers are removed at the end of the same Action Phase in which they were fired. Good Shoot Barrage Markers remain on the map until the beginning of the same player's next Action Phase.
Each Zone hex attacks the units within it with the appropriate firepower according to the type of Artillery Barrage Marker and shoot type using the Area Fire Table and/or the Artillery Point Table. Also, each Zone attacks units which happen to be or which move adjacent to it with half firepower.
17.5a Battery Barrage Markers. These represent the fires of one battery. The Attack Zone of a Battery Barrage Marker only consists of the Target Hex itself.
17.5b Battalion Barrage Markers. These represent the fires of three batteries. The Attack Zone of a Battalion Barrage Marker consists of the Target Hex and the six hexes immediately adjacent to it.
Design Note: When looking at an Artillery Barrage Marker sitting on the map attacking units throughout the turn, remember that a Good Shoot barrage lasts for upwards of half the time of a turn (10-15 minutes) and the marker represents an automatic number of repeat missions.
17.6 Mission Execution
-
Marking the Target Hex. The firing player places the Target Hex marker in the Target Hex he chooses. For Rocket Artillery Missions always scatter the Target Hex Marker, roll one die for direction and another for distance. Move the Target Hex Marker to that hex and resolve the Rocket Fire there. Rocket Artillery will never hit the exact original Target Hex.
-
Adjustment. If this is an Illumination Mission, replace the Target Hex Marker with an Illum Marker and skip down to 5 below. Determine the distance from the spotter to the Target Hex and use the Adjustment Table to determine the type of shoot. Scatter the Target Hex Marker if called for by the Adjustment Table. Rocket Artillery always gives a Good Shoot and the Adjustment Table is not used for Rocket Artillery missions.
-
Fire For Effect. If the mission consisted of Smoke ammunition, skip to 4 below (Smoke rounds do not generate fire attacks). Attack every hex in or adjacent to the Attack Zone containing units (enemy or friendly) with the appropriate firepower of the Artillery Barrage Marker (Good vs. Bad Shoot, and caliber of weapon) using the Area Fire Table, and then the Artillery Point Fire Table (this table only affects inside the zone, not adjacent, see 18.0). Inside the Attack Zone, use the firepower directly off the Artillery Barrage Fire Values Chart. Hexes adjacent to the Attack Zone are attacked using half that value.
-
Smoke Placement. For a Smoke Mission, replace the Target Hex Marker with a Level 2 Smoke Barrage Marker.
-
Mission End. Proceed with the player's Action Phase as desired.
17.7 Special Mission Types
17.7a Rocket Artillery. Rocket Artillery must always scatter its Target Hex (see 17.6, section 1) and does not use the Adjustment Table (see 17.4) or place a Barrage Marker. Resolve all attacks immediately - Rocket Artillery does not 'influence' the map until the next Action Phase like regular artillery can. For the first games in the series, here are the Rocket Artillery Zones (measured in hexes from the Target Hex) and Area Firepowers for each:
- Bloody 110: The Nebelwerfer fires have an Attack Zone of 5 hexes (firepower 20).
- Objective: Schmidt: None
- Omaha: The LCT(R) fires have an Attack Zone of 8 hexes (firepower 30).
17.7b Smoke Missions. Artillery can fire Smoke missions by using Smoke ammunition. No special requirements exist; simply use Smoke ammo in place of HE. Fire the mission normally. A Bad Shoot means nothing to a Smoke mission, however Smoke Missions will scatter if the Adjustment Table calls for that result. Replace the Target Hex Marker with a Level 2 Smoke Barrage Marker immediately. Only batteries (never battalions) can fire Smoke Missions.
17.7c Illum Missions. Use Illum Missions to light the battlefield at night. These missions do not count as a battery's mission for the turn. To fire an Illum mission, place the Illum Marker directly into the desired Target Hex. Do not use the Adjustment Table for Illum Missions. Illum can be fired into any hex on the map - visibility, spotters, and LOS has no effect on firing Illum.
17.7d Fast Fire Missions. Use these against priority targets. Only 122mm Guns or smaller can fire Fast Fire Missions. Announce the mission (at the moment of firing) to be a Fast Fire Mission. Expend triple the Battery Fires you normally would for the size of mission desired (3 Battery Fires for a Battery, 9 for a Battalion). Execute the mission as you would any other, except that the firepower of the Attack Zone is x2. On Map Guns cannot use Fast Fire Missions when they execute direct fires. All attacks made by the Attack Zone even after the initial burst are at the x2 firepower level.
18.0 Indirect Fire vs. Point Targets
Whenever an Artillery Barrage Marker is placed such that hexes containing P-type targets fall into its Attack Zone, use the Artillery Point Fire Table against them.
Important: Only hexes inside the Attack Zone apply this table, hexes adjacent to such zones do not. Roll two dice (modified according to the table's modifiers) for each P-type target in each hex. Roll once per target. If the modified roll is greater than or equal to the table roll, destroy the target. Make this same attack roll (once per target per hex) whenever a moving P-type unit enters a Barrage Marker's Attack Zone (again, not the adjacent hexes).
18.0a Artillery of any caliber can destroy targets with any defense value using this table.
18.0b A missed roll on this table has no effect, except that units in the hex Button Up (see 16.7).
18.0c If Infantry Guns of 100mm or larger fire at a hex containing Point Targets, roll once per target using the Artillery Point Fire Table in addition to any Area Fire attack made against the hex.
19.0 Smoke
Smoke blocks LOS and gives a modifier on some tables.
19.1 Smoke Effects
19.1a Hexes with a Smoke Marker present an infinitely high LOS obstacle. Smoke Markers affect their entire hex and its hexsides. Multiple Smoke Markers in a hex give no additional effect. Any number of Smoke Markers can be in one hex at one time. Units can always see OUT OF (or INTO) a hex containing Smoke (for ANY purpose, even spotting and Overwatch trigger observation), BUT a unit can never see THROUGH such a hex.
19.1b Never place Smoke Markers in an all-sea hex.
19.1c Smoke has no effect on movement.
19.2 Smoke Reduction
Remove all regular Smoke Markers and all Level 1 Smoke Barrage Markers in each Clean Up Phase. Then reduce all Level 2 Smoke Barrage Markers to Level 1 Smoke Barrage Markers.
19.3 Artillery Smoke
Artillery missions place Smoke Markers only when Smoke Missions are fired.
19.3a Each Smoke Mission generates one Level 2 Smoke Barrage Marker.
19.3b A Smoke Barrage Marker represents the same effect as having all hexes filled with regular Smoke Markers at or within the distance (in Hexes) from the Smoke Barrage Marker equal to its Level. Therefore, a Level 2 Smoke Barrage Marker "smokes up" all hexes out to and including two hexes from the marker. A Level 1 Smoke Barrage Marker "smokes up" all hexes including and adjacent to the marker.
19.4 Other Weapons and Smoke
Instead of their regular fire, larger Mortars (80mm+) and Infantry Guns (100mm+) can fire smoke. Firing smoke allows the player to place one regular Smoke Marker in the hex of his choosing (subject to scatter, see 19.4a) (for Mortars, the hex must be spotted by an appropriate spotter; Infantry Guns must fire as direct-fire) within the range of the firing unit. These units cannot fire smoke in response to an Overwatch trigger.
19.4a Mortar & Infantry Gun Smoke Scatter. Whenever a player wants to use a Mortar or Infantry gun to place a Smoke Marker, he must do the following: Identify the desired hex. Roll one die. On a 4-6, place the Smoke Marker where it was intended. On a 2-3, scatter the Smoke into an adjacent hex using a scatter die roll. Finally, on a 1, do not place any Smoke, but the SFA of the firing unit did occur and it is still marked as Fired. These rolls are also listed on the Mortar & Infantry Gun Smoke Scatter Table.
Design Note: At first glance this rule might seem a bit much over a little matter. It exists to correct for a degree of certainty players took advantage of and to account for both the occasionally ineffective smoke screen and the rather limited amount of smoke ammunition these units have with them. It also accounts for the now standard effect we put into our games - yes, you know the enemy is there, but the game won't let you take advantage of that information as if you really did.
20.0 Movement
During a player's Action Phase, he can move all, some, or none of his units. A unit moves along a contiguous path of hexes (in any direction or set of directions) using its Movement Allowance to pay each hex's and hexside's Movement Point cost. A moving unit can generate Overwatch Triggers. If the enemy fires, the players immediately follow the Overwatch cycle for that trigger, and the unit can continue moving only after the cycle ends.
20.0a Only friendly units in Move Mode that are not Suppressed, Paralyzed, or marked with a Fired Marker can move. Each unit moves through the hex grid keeping track of its remaining Movement Allowance as it expends Movement Points according to the game's specific Terrain Effects on Movement Chart. Units can move individually or in stacks. Stacks can stack or split off at any time during their movement at no additional Movement Point cost.
20.0b A unit cannot expend more Movement Points than its Movement Allowance. EXCEPTION: If otherwise able to move, a unit can always move a single hex in an Action Phase (into non-prohibitive terrain) regardless of the Movement Point cost. If the owning player uses the above, the one hex moved must be the ONLY hex that unit enters during that Action Phase. This rule does not allow units to change to Move Mode in addition to moving into a hex costing more MPs than they can afford.
20.0c Units cannot "save" unused Movement Points from turn to turn or transfer them from unit to unit. The only time the movement of one friendly unit assists another is by the use of carriers and vehicles as transport.
20.0d A unit or stack can halt its movement at any time and continue later with whatever Movement Points it had remaining. Be careful in doing so, so as to avoid confusion.
20.0e Units can use an SYR to move during an Action Phase (given the rules in 16.5) but can do so only if they have not yet moved in the phase. A unit that does so cannot move later in that phase.
20.0f A player can move his units as he sees fit as he follows their Op Sheet or unassigned unit instructions. Players should keep in mind that they should not violate the letter OR the SPIRIT of the instructions.
20.0g Units marked TOW ONLY (TO) instead of a Movement Allowance cannot move under their own power (even one hex) and must be towed. If they are forced to move by themselves, destroy them. These units have an assumed Movement Allowance of 2 for Mode Change and for proportioning movement with respect to carriers.
20.0h Units cannot enter the same hex as enemy units, except in Assault-style Combat. Destroy units forced to violate this rule.
20.0i Units can do an Assault-style Combat as a "stack" only if the stack existed at the Action Phase's beginning. Whether operating as a stack or individually, units must maintain their own Movement Allowances and points spent. Stacks can break up at any time during their movement. There is no Movement Point cost to stack or unstack.
20.0j Units that fire an SFA cannot move afterward - regular movement or voluntary SYR - and, conversely, units that move cannot fire an SFA later in the same phase. Involuntary SYRs are allowed.
20.0k See also the effects of Buttoning Up, 16.7.
20.1 Terrain Effects on Movement
Terrain affects movement by the Movement Point cost of various hex and hexside features as given on the Terrain Effects on Movement Chart. Each game has its own Terrain Effects on Movement Chart and the series itself has a Basic Terrain Effects on Movement Chart (given in the Charts and Tables Booklet). Use the Basic Terrain Effects on Movement Chart when playing the games Bloody 110, Objective: Schmidt, and Omaha. A hex's Movement Point cost is that of the hex plus any hexside feature crossed to enter it.
20.1a Certain features, such as buildings, are not listed on the Terrain Effects on Movement Chart. These have no effect on movement.
20.1b Elevation Changes. All units must pay +1 MP for each hex they enter that has a different center dot elevation than the one they came from - regardless of whether the change is up or down. In other words, if, as the unit moves from center dot to center dot, it must cross one or more contour lines, add the +1 MP cost. Multiple contour lines give no additional effect. Rule 20.1d applies here as well. Count contour lines which run through the center dot of the next hex to be moved into.
20.1c Bottlenecks. Bottlenecks are features, such as bridges, that force units to cross hexsides one at a time. All units must cross Bottleneck hexsides one at a time - never as a stack. Any number can cross during a turn, but they must do so one at a time. Units being towed or riding as passengers can cross a Bottleneck with their transporter. Each game might specify Bottleneck features. In addition, bridges, Roads (and road-like features, like tracks and Railroads), and Minefield Breaches are ALWAYS Bottlenecks when units move using them.
20.1d Units using Roads and Road-like features (trails, etc.) to move, ignore the Movement Point costs of the other terrain features in the hex or hexside. This only applies to units following the road's path. Moving along a road makes a unit vulnerable to negative modifiers during Overwatch Fires. Units can move paying the non-road costs of hexes (moving off-road) so as to avoid the penalties associated with moving on the road - they then are not eligible for the benefits, either.
20.1e Certain hexes and hexsides are prohibited. No unit can enter prohibited hexes or cross prohibited hexsides. Destroy units forced to do so.
20.1f If more than one terrain type (each with different MP costs) exists within a hex, apply only the most costly. Add the cost of hexside features a unit must cross to enter the hex to the most expensive terrain in the hex to determine the hex's total Movement Point cost. 20.1d might negate all or part of this rule depending on the terrain of the hex involved.
20.1g A hex's terrain cost is the same regardless of the direction from which a unit enters (given that hexside features can be different and that roads might negate in some directions).
20.1h Slow Go Terrain and Blocks. Slow Go Terrain and Blocks are no longer used.
20.1i Woods and Forest Features. Forests and woods are not whole-hex features, but sometimes occupy only a part of a hex. Consider a hex to be forest (or woods, as appropriate) for movement & combat if any of the hex is covered by the symbol. The actual location of the symbol is given for LOS effects.
20.1j Contour Lines and Vehicle Movement. No vehicle or carrier can enter a hex containing two or more contour lines. Rule 20.1d negates this.
21.0 Minefields
Use Minefields to prevent enemy movements into an area or to channel them into an area you want him to enter - a kill zone. Place minefields on the map either as part of the game's set up or whenever a new Prepared Defense Op Sheet implements.
21.0a Once emplaced, Minefields attack both sides in the same manner. There are no friendly Minefields.
21.0b Minefields attack either on the Area Fire Table (see 21.2 or 21.3, depending on the crossing type) or by a straight dice roll, depending on target type of the unit crossing the Minefield. Against an Area or B-type target moving under its own power, use the Area Fire Table. Against a P-type target, use the straight dice roll (a roll of 8 or more on two dice destroys the vehicle; roll for each vehicle separately). Only the Stacking modifier applies to the Area Fire Table roll. No other modifiers apply to the Area Fire Table, and none of them apply to the straight roll.
21.0c Ignore Suppressed or Paralyzed results given by a Minefield attack; apply all other Morale Table results normally.
21.0d Regardless of whether a unit attempts to cross a minefield by force or by breaching, resolve Overwatch Fires against that unit before it enters the Minefield Hex. This Overwatch Fire applies even if the unit starts adjacent to the hex. The trigger is located on the hexside entering the Minefield. Apply all the 'moving in a minefield' modifiers to the Overwatch Fire and use the terrain of the unit's current hex (not the Minefield's). No further Overwatch Trigger occurs when the unit actually enters the Minefield hex.
21.0e Dummy mines are no longer used in the series.
21.1 Laying Mines
Lay mines before the game begins (if given in the scenario's set up) or whenever a Prepared Defense Op Sheet (never a Hasty Defense one) implements. When laying mines before play begins, you cannot place them in any hex in which your opponent can set up, if your side sets up first.
When a Prepared Defense Op Sheet implements, the player can place one Minefield hex for every two infantry platoons on the Op Sheet (no rounding allowed, each Minefield hex MUST have two platoons as parents). Place minefields the instant the Op Sheet implements (during the Command Phase) anywhere at or within 4 hexes of each of the two platoons which generated the Minefield (provided the hex is also at least 5 hexes away from any enemy unit).
21.2 Crossing By Force
To Cross by Force, announce the attempt and pay the cost of the Minefield hex +2 MPs. Apply Overwatch Fires as per 21.0d. Attack the units moving into the hex with the 8+ straight roll for each P-type target in the hex, and then attack the Area and B-type targets in the hex with a firepower of 18 (modified for stacking only).
The player can attempt to cross any enemy Minefield by force. SYR units must always cross by force.
21.3 Breaching
To Breach a minefield, move adjacent to the Minefield and announce the breach attempt. Apply Overwatch Fires as per 21.0d. If still able to move, the unit must then spend the MP cost to get into the Minefield hex +3 MPs (rule 20.0b does not apply here). After paying that cost, the Mines attack as in 21.2. The attack, however, is done with a firepower of 9. The unit does not leave the hex adjacent to the Minefield until completing the breach (after the attack, flip the Mine Marker to its Breached side), and then it can continue to move with any remaining MPs it has.
21.3a Only infantry units in Move Mode can breach Minefields. Mounted, Suppressed, and Paralyzed units cannot breach Minefields.
21.3b Place the Breach Marker in the hex with the cleared path running from the hexside the unit breached to that directly opposite it. This breached path can be changed only by rebreaching the hex from another hexside. A hex can only have one cleared path.
21.3c No unit can end its movement in a Minefield Breach. If a unit becomes Suppressed or Paralyzed while crossing a breach (because of Overwatch Fires), it must move back to the hex it entered from and then become Suppressed or Paralyzed. No unit can enter Fire Mode in a breach hex. Units which do not have enough MPs to cross the breach and enter the hex on the other side cannot attempt to cross the breach or enter the breach hex.
21.3d Units moving by an SYR can never use a Minefield breach. They must cross by force.
22.0 Assault Combat
The player can conduct Assault Combats at any time during his Action Phase. Resolve each of these combats in its entirety before moving on. These combats affect only the units within the resolution hex. Every Assault Combat must end with one side or the other alone in the resolution hex. Assault Combats do not require any additional MP costs, except that the attacker must have enough MPs left when the assault is announced to enter the defending hex. Resolve any attacks by Artillery Barrage Markers against the moving attacking units before carrying out any Assault-style Combat.
Procedure: The attacking stack moves adjacent to the Defender and the players resolve any Overwatch and Artillery Barrage Marker fires. The Attacker announces his intention to do an Assault Combat. The Defender must then decide either to fight or to flee. If the Defender chooses to flee, all his units must do an SYR.
If the Defender stands his ground, place the attacking units in the target hex (resolve any artillery Attack Zone fires before continuing), first the Defender fires, then the attacker. As each side fires, the other must take the combat result AND make a Morale Check (even if the Area Fire Table result does not call for it) before moving to the next fire. In each new combat round, use the same firing order.
Combat rounds continue until one side or the other is alone in the hex.
22.0a Only Move Mode infantry units (NOT MGs, other weapons units, vehicles, or carriers) that are not Suppressed or Paralyzed and that have enough MPs left to enter the Defender's hex can attack in Assault Combat.
22.0b Move Mode units fire normally in an Assault with the exception of towed units and Move Mode Mortars which cannot fire at all.
22.0c Paralyzed units can fire (as a Suppressed unit) once per Assault Combat. If, after that one fire and its Morale Check, the enemy is still in the hex with them, destroy the Paralyzed unit. The presence of other non-paralyzed units in the hex does not stop this from happening.
22.0d The phasing player can Assault a hex as many times as he has the units to do so. He can make these Assaults in any order with respect to other actions and fires.
22.0e Mounted units cannot conduct Assault Combat as the Attacker. Mounted units in a hex against which the other player announces an Assault can dismount to receive the attack. Towed units cannot take advantage of this rule. Mounted Defenders can fire and accept the combat mounted, but cannot conduct AT Roll attacks and are automatically destroyed if their carrier is destroyed.
22.0f Area Fires in an Assault Combat hex only affect the enemy - even Mortar fires. Calculate the stacking modifier for each side separately.
22.0g In Assault Combat, use the terrain of the Defender's hex and ignore any hexside features. Both sides are considered to be in the same hex.
22.0h In each combat round, a unit can conduct both AT rolls and regular fire. Otherwise, each unit gets to shoot once per round. All Area Fires must be consolidated into one shot per round and make all available AT Rolls.
22.0i Fired markers have no effect on Assault Combats.
22.0j The attacking units must switch to Fire Mode at the instant of becoming Suppressed or at the beginning of the second combat round. Also, the Attacker can voluntarily switch to Fire Mode at the end of the first round of combat if there will be no second round (he won). The Defender can only change mode when becoming Suppressed or Paralyzed.
22.0k After resolving an Assault Combat, the Attacker (if still otherwise able to do so) can continue to move the units which made the Assault with any MPs they happen to have remaining.
22.1 Ending Assault Combats
Assault Combat rounds continue until one side or the other ends up alone in the hex. The following rules handle the situations that arise during Assault Combat execution.
22.1a If the Attacking stack suffers a Paralyzed result, execute an SYR with the attacking units. The combat ends immediately.
22.1b If the Attacking stack gets a Suppressed result, place a Suppressed Marker, switch the attacking units to Fire Mode, and continue the combat.
22.1c At the end of any combat round (both side's fires and Morale Checks), the Attacker can decide to give up with all or some of his units. The attacking units must conduct an SYR to leave the combat hex. Once the Defender decides to fight, he cannot later voluntarily end the combat - only the Attacker has this option.
22.1d If the defending units are (or become) Paralyzed, they get one shot as a Suppressed unit in the next combat round. If the Attacker is still in the hex after that fire's resolution, destroy the Paralyzed units.
22.1e If the Defender becomes Suppressed, place a Suppressed Marker, switch any defending units from Move Mode to Fire Mode, and continue the fight.
22.1f If either side Surrenders or is destroyed, end the combat.
23.0 Overrun Combat
Overrun Combat is the vehicular version of Assault. Effectively, the vehicles drive through the hex with guns blazing and exit the hex immediately. These combats end after one round - instead of the multiple rounds involved in an Assault or Consolidated Assault.
Procedure: The attacking units enter the Target Hex paying the hex's cost +3 MPs. The Defender fires first, followed by the Attacker. As each side fires, the other MUST make a Morale Check (if there are eligible units on that side) even if the table result does not call for it, before moving on. After both sides fire, the attacking units must exit into any adjacent hex.
23.0a Only vehicles and carriers (including any passengers) in Move Mode with enough MPs to pay for the Defender's hex plus 3 MPs can conduct Overrun attacks. Overrun singly or in stacks (given 20.0i). Units of both sides can fire in Move Mode, including mounted units (towed units cannot fire).
23.0b In Overrun Combat, use the terrain of the Defender's hex. Ignore any hexside feature the attacking units crossed to get into that hex.
23.0c A player can conduct Overruns at any time in his own Action Phase. Any number of overruns can be conducted against a single hex in one phase.
23.0d The attacking units do not pay additional MPs to enter the exit hex (that is part of the +3 cost) but that hex must be free of enemy units and may not be prohibited terrain. An attacking force cannot exit from the Overrun Target Hex directly into another one. Exiting an Overrun hex generates a Movement-based Overwatch Trigger. The Overrun itself does not.
23.0e Paralyzed units can fire as Suppressed units. They are not destroyed as in other Assault-style Combats.
23.0f Fired markers have no effect on Overrun Combats.
23.0g After resolving an Overrun Combat, the Attacker (if still otherwise able to do so) can continue to move the units which made the Overrun with any MPs they happen to have remaining.
23.0h Do not apply the x2 multiplier to unit morale during a Morale Check generated by an Overrun in Partly Protective or Protective terrain.
24.0 Consolidated Assault
A Consolidated Assault (CA) is one in which the player combines an Assault with an Overrun - an example would be to ride into the enemy hex mounted on tanks and then dismount to assault.
With the exception of the Dismount segment, the first stage of the CA sequence is the same as an Overrun, and the following stages (to include the multiple rounds of combat) are the same as an Assault Combat. Regardless of events, there is never a Defender Fight or Flee Decision Segment in the CA sequence.
24.0a Along with the units listed in 23.0a, only Move Mode Infantry units can conduct a CA, but they can be mounted on any vehicle or carrier - even trucks. Towed units cannot be part of a CA as the Attacker. Alternatively, the infantry units can move under their own power as part of a stack of vehicles to enter a CA.
24.0b To execute a CA requires both a vehicle or carrier AND at least one infantry unit. A player cannot decide to launch a CA with just infantry or vehicles. If either element is removed from the Attacker's force during the assault, finish the assault like this: If only Infantry is left, finish as a regular Assault Combat; If only vehicles are left, finish as an Overrun.
24.0c The vehicles or carriers involved in a CA do not need to leave the hex immediately as in Overruns. Instead, they participate in as many rounds as the attacking player wants - they can also voluntarily leave the hex (as in 22.1c) after any round of combat.
24.0d Combat rounds continue in a CA until the combat ends according to the same conditions as those that end an Assault (see 22.1). Exception: Continue as an Overrun if the CA becomes an Overrun according to 24.0b.
24.0e In CAs, use the terrain of the Defender's hex. Ignore any hexside features of that hex.
24.0f Other than the above, the special rules in 22.0, 22.1, and 23.0 apply to CAs as well.
25.0 Special Units
25.1 Carriers
Carriers are vehicles designed to transport other units. Trucks, wagons, and half-tracks are the usual carriers. A white box around the silhouette identifies a carrier. Each carrier unit represents the number of vehicles required to make up a platoon-sized portage capacity. Consider a unit mounted (or towed) if the carrier's counter is on top of it.
While a passenger, a unit expends MPs in proportion to the carrier's MA. For example, if a carrier with a MA of 18 expends a third (6 points), the transported unit with an MA of 6 expends that fraction also (2 points).
For simplicity, in the following rules "mounting" refers to all the operations of mounting, dismounting, hitching, or unhitching.
25.1a All carriers can carry up to 5 steps OR tow up to two towable (AT Guns, On-Map Artillery, Mortars marked Tow Only, and Infantry Guns) units. These limits are mutually exclusive: units that tow cannot carry at the same time or vice versa. Units which can be "carried" are Infantry, MG, and Mortar (that are not marked Tow Only) units.
25.1b Mounting costs the carrier 3 MPs and the mounting unit 1 MP. Units must be in Move Mode to mount and remain so while mounted. Suppressed or Paralyzed units cannot voluntarily mount or dismount.
25.1c Mounted units can fire only in Assault-style Combat. Such units cannot make AT Roll attacks. Units being towed and mounted Mortar units cannot fire at all.
25.1d If a carrier is destroyed, automatically destroy any units it might be carrying or towing.
25.1e Vehicles as Carriers. Players can use tanks and other vehicles as makeshift carriers. The vehicle capacity is 2 steps or one towed unit - these are also mutually exclusive. More than one vehicle can move as a stack to carry platoon sized units. The vehicle can fire using this rule (as can the regular carriers above). The remaining rules above also apply in these cases.
25.2 Mortars
Mortars are indirect fire Area Fire weapons (shown by a red circle around their range - meaning no LOS is required from the Mortar to the target, but from an appropriate spotter to the target instead). All Mortar platoons have two steps and are subject to Morale Effects.
25.2a Mortars do not require an unblocked LOS to the target from their own hex. They must, however, have an appropriate spotter that does. The spotter must be from the same next-higher-echelon as the Mortar itself - the same company (in the case of Company Mortars), same battalion (in the case of Battalion Mortar Platoons or Heavy Weapons Companies), or the same regiment (in the case of Regimental Heavy Weapons Companies or Battalions). Buttoned Up, Suppressed or Paralyzed units cannot spot for Mortars. Mode has no effect on a unit's ability to spot for Mortars.
25.2b Mortars are Area Fire weapons that are affected by the range of their spotter to the target hex. Important: Mortars can fire only ONCE per Action Phase (for a total of twice in a game turn). A Mortar cannot fire to obtain its "once per phase" in violation of the effects of Fired Markers and the like. Mortars involved in an Assault-style combat can fire once (provided they had not already used their one shot for the phase) and then attempt to live through future combat rounds without firing. Mortars can fire Overwatch Fires provided the spotter can spot the trigger.
25.2c Instead of regular fire, a Mortar can fire one Smoke or Illum Marker. Only 80mm or larger Mortars can fire these. Illum can be fired into any hex in range - visibility and LOS has no effect on firing Illum by Mortar. Smoke requires the target hex to be in range and spotted by an appropriate spotter. Smoke and Illum cannot be fired in response to an Overwatch trigger. Identify the hex to attempt to place Smoke with the Mortar and then see 19.4a to apply scatter.
25.2d Unless Paralyzed or Suppressed, Mortars can self-spot.
25.2e Mortars can move by themselves or be carried by carriers. Large Mortars (marked as Tow Only) cannot move by themselves and must be towed.
25.2f Even in Assault-style Combat, Move Mode Mortars CANNOT fire. Fire Mode mortars can fire once in these combats (if they haven't already shot their one shot for the phase, in which case, they couldn't fire at all) and their fires only affect enemy units.
25.3 Anti-Tank (AT) Guns
AT Guns are B-type targets and direct-fire Point firers. They have one step and have an assumed Morale of 3 (when no Morale Rating is given on the counter).
25.4 Infantry Guns
Infantry Guns are B-type targets and direct-fire Area Firers. They have one step and have an assumed Morale of 3 (when no Morale Rating is given on the counter).
25.4a Instead of regular fire, an Infantry Gun can fire one Smoke Marker to any hex in range with an unblocked LOS to the gun (subject to scatter, see 19.4a). Only 100mm or larger Infantry Guns can fire Smoke but cannot do so as Overwatch Fire.
25.4b If Infantry Guns of 100mm or larger fire at a hex containing Point Targets, roll once per target using the Artillery Point Fire Table in addition to any Area Fire attack made against the hex.
25.5 On-Map Artillery
Most games will restrict artillery to being off-map, but sometimes the situation will require these units to be on the map. On-map artillery functions like its off-map cousin in all functions except the following:
25.5a On-map artillery can direct fire. If any gun does so, the whole battery cannot fire regular artillery missions in the same turn - the inverse is also true. The on-map artillery unit must have no fewer than 2 guns remaining in play in order to be able to fire regular artillery missions.
25.5b All direct fires require an LOS from the firing unit to the target - On-map artillery is no exception. On-map artillery can never fire like Mortars. Given 25.5a, On-map artillery can participate in normal artillery missions using spotters. On-map artillery can fire SFAs or Overwatch.
25.5c For each gun that fires directly, expend one HE Battery Fire and place one Battery Barrage Marker on the Target Hex. The Battery Barrage Marker then attacks using the usual rules on the Area Fire Table (Good Shoot strength) and/or the Artillery Point Fire Table. On-map artillery never uses the regular Point Fire Table.
25.5d On-map artillery cannot fire Smoke or Illum in direct fire mode.
25.5e To fire regular artillery missions, all the battery's guns must be in Fire Mode and must not have fired Direct Fires in the current turn.
25.5f On-map guns have one step and an assumed Morale of 6. Suppressed or Paralyzed on-map guns cannot fire.
25.5g On-map Guns cannot use Fast Fire Missions when firing Direct Fires.
26.0 Aircraft
When aircraft are available, they are given as "sorties." A sortie is the attack of one aircraft against one target unit or hex. In earlier games, sorties represented an aircraft making a number of "runs" against the map. To play those games using these rules, consider each run for an aircraft as a separate sortie. Therefore, an old game air mission that allows two aircraft to make three Area attacks would convert into six separate sorties.
Resolve all aircraft fires in the Aircraft Fire Phase. Execute all available sorties before passing play to the enemy. Any number of the available sorties can be directed against a single hex, provided they are all placed on the map beforehand and are resolved independently.
The number of available sorties is determined by a die roll. The player selects the ordnance type and target hex when he executes his sorties. In games beginning with Hunters From the Sky, players have a marker for each possible available sortie. When a player is going to resolve his sorties, place all the markers on the hexes they are to hit and resolve them all after placement. Once placed, a sortie cannot be moved to another hex.
26.1 Sorties
26.1a Sorties use their Area (or strafe) ability to attack using the Area Fire Table. The sortie's Point ability is a dice roll to kill P-type or B-type targets. These abilities cannot be combined in one sortie. The player must announce which ability the sortie is to use when he resolves the attack and forfeits the other ability when he does so.
26.1b Resolve the Area attacks in the usual way - modify according to only those modifiers that apply to sorties. The straight Point kill roll requires a roll on two dice. Modify the roll according to the Sortie Point Fire Modifications Chart. If the modified roll is greater than or equal to the kill number, destroy the target. Any other roll has no effect, except that it will cause the units affected by 16.7 to Button Up.
26.1c On any turn in which one or more sorties are available, the player uses them all in the Aircraft Fire Phase. He picks each target hex and no ground spotter is needed.
26.1d In Matanikau, do not roll on the Sortie Successful Attack Table for each sortie. This effect has already been worked into the way that game handles its sorties.
26.2 Aircraft Sortie Resolution
Resolve each sortie as follows:
- Place all the side's available sorties for the turn.
- For each sortie, follow the remaining steps after placement:
- Identify the sortie to be resolved, its type and weapon load
- Roll one die on the Sortie Successful Attack Table. If the roll is within the range specified on the table, execute the attack. Otherwise no attack is made.
- Execute the attack, if any. If more than one Sortie is directed against a hex, each must be resolved independently.
27.0 Night
The difficulty of military operations at night is impossible to describe adequately. Dusk and Dawn are the turns just before and after real night begins. In these turns, the maximum visibility is limited. Dawn and Dusk turns do not qualify as either Night or Daytime, so the following are true: the Night rules and modifiers do not apply, and sorties cannot be used. Illum cannot be used during these turns.
27.1 Night Effects
27.1a The maximum number of weighted turns an Op Sheet can accrue at night is 2.
27.1b Night missions must be tightly controlled by their Op Sheets. Players must use much more precise routes and other control measures.
27.1c Visibility at night is two hexes.
27.1d Night turns represent a full hour. Even so, attempt to recover Battalion Morale only on even night turns (2000, 2200, 2400, etc.).
27.1e Morale Checks at night suffer additional modifiers. Artillery Adjustment is always conducted on the longest range table. Illum-lighted areas do not negate these.
27.1f Area, Point, and AT Roll combats are modified at night - even artillery fire resolutions are modified.
27.2 Illumination (Illum)
Illum rounds provide battlefield illumination.
27.2a Each Illum Battery Fire and each Illum Mortar shot generates one Illum Marker. See 17.7c and 25.2c for details.
27.2b Each Illum Marker generates a lighted area with a 5 hex radius around its location. This lighted area acts as a spot of daylight and negates the night effects (except for Morale). During Dawn and Dusk Turns Illum Markers have no effect on visibility.
27.2c Remove all Illum Markers on the map during each Clean Up Phase.
Designer's Notes (Version 3.1)
After numerous suggestions and comments by many players of version 3.0 rules in the games GD'40 and Matanikau, I decided to pull out the stops and make the changes players were asking for - as well as some of my own - in order to make the game play quicker and easier than that given in version 3.0.
The artillery system has been heavily revamped and integrated into the Action Phase. This eliminates both the need to plot missions and as well as a number of rules regarding spotting. The system is as clean as it gets and can now be integrated directly into your tactical actions. Beware of the effects of dumping artillery barrages on your objectives - unless you are willing to chase into your own barrages, you might protect the enemy from your assaults!
Battalion Morale (instead of Company Morales) means less bookkeeping and an effect that, I think, is in the correct proportion when compared to unit morale and casualties. This made for a more sensitive Morale Table and a bigger difference between good and poor units. Battalion Morales make up the least important of the triumverate which makes up morale - these are, in order of importance: Casualties, Unit Morale, and Battalion Morale.
Spotting Ranges allow a better look at the "empty battlefield" effect and dispenses with the old marking of overwatch firing units with Fired Markers. A marked unit risked getting "rushed" by attackers who knew they were safe. The same is still true of Suppressed units, but then that is the purpose of suppression (to allow freer movement of your own troops) and you have to earn it. The result works very well.
Buttoned Up adds a new dimension to armor engagements and, I think, adds just the right spice to simulate those actions well.
I am thankful for the amount of feedback version 3.0 got and I look forward to your comments on 3.1, but keep in mind that the door to further official system change is closed except to error correction. The TCS rules are done.
Chart of Common Graphic Symbols (for Op Sheets)
- Lateral Boundary (for a Battalion, for a Company): defines the limit of operations between adjacent units.
- Line of Departure (LD): designates the line at which operations begin: the jump-off point.
- Phase Line (PL, e.g. PL Fish): Phase Lines are used to control the actions of several units. They can be used to coordinate the units, and to define different phases of the operation.
- Unit Location (here a Battalion): used to mark a unit's location on the map.
- Objective (in this case, OBJ Green): denotes the area to be taken by an attack or held by a defense. Obtainment of the objective is how operations succeed.
- Axis of Advance (in this case, Axis Red): denotes the general course of movement of the assigned units. Units are free to move anywhere within the bounds of the axis of advance.
- Direction of Advance: gives the exact path the movement must follow. This control measure is much more restrictive than the axis of advance as the units must take exactly the path under the arrow.
- Area to be screened by Smoke: denotes the use of smoke. A good idea is to record the time to use it with the symbol - such as "Fire when advance reaches PL Cod Piece."
Note: the series rules' charts and tables are printed in a separate Charts and Tables sheet; they are transcribed in Part 2 below. The publisher's customer-support contact page is omitted.
Part 2: TCS Charts and Tables (version 3.1)
Transcribed from the "Tactical Combat Series v.3.1 Charts & Tables" sheet. Game-specific charts take precedence over these generic ones.
Weighted Turn Numbers
- 3 if unassigned and no direct fires.
- 2 if assigned but no direct fires. (2 is the max possible at night.)
- 1 if direct fires.
Command Prep Table
| Type | Weighted Turns Elapsed (6 columns) |
|---|---|
| Prepared Defense | 1-12 / 13-26 / 27-41 / 42-55 / 56-70 / 71+ |
| Attack | 1-6 / 7-12 / 13-27 / 28-42 / 43-60 / 61+ |
| Hasty Defense | 1-4 / 5-7 / 8-16 / 17-25 / 26-38 / 39+ |
| Move | 1-3 / 4-6 / 7-15 / 16-21 / 22-33 / 34+ |
Required roll, by Command Prep + Op Sheet Size (rows) and the six Weighted Turns Elapsed columns above, in order:
| Command Prep + Op Sheet Size | Col 1 | Col 2 | Col 3 | Col 4 | Col 5 | Col 6 |
|---|---|---|---|---|---|---|
| 1 or less | 10 | 8 | 6 | 4 | 3 | 3 |
| 2 | 10 | 9 | 7 | 5 | 4 | 3 |
| 3 | 11 | 10 | 8 | 6 | 5 | 4 |
| 4 | 12 | 11 | 9 |
Notes: # = Roll or more on two dice to implement. np = Not Possible.
Basic Terrain Effects on Combat and Movement Chart
| Terrain | Type | Foot Movement | Vehicle/Carrier Mvt (not Truck) | Truck Movement |
|---|---|---|---|---|
| Open | Open | 1 | 1 | 2 |
| Swamp | Partly Protective | 3 | 4 | P |
| Woods | Partly Protective | 1 | 2 | 3 |
| Hedge Hexside | Partly Protective | NE | +1 | +2 |
| Buildings | Partly Protective | NE | NE | NE |
Notes: ot = Other Terrain; P = Prohibited; NE = No Effect.
Spotting Range Chart
- SFA, Artillery Spotting, Fire-based Overwatch Trigger Fires: Spotting Range is UNLIMITED.
- Movement-based Overwatch Triggers:
- Target is Infantry or Weapons Unit. Terrain of Target (1) is:
- Billiard Table or Moving on ROAD: UNLIMITED
- Open: 3 Hexes
- Partly Protective, or Protective: ADJACENT ONLY
- (1) Use Terrain of unit OR (in the case of Movement-based Overwatch) that of the center of the hexside crossed during movement.
- Target is Vehicle or Carrier Unit: Spotting Range is UNLIMITED.
- Target is Infantry or Weapons Unit. Terrain of Target (1) is:
BUTTONED UP FIRERS or SPOTTERS: Above OR (if they have a Point Weapon) NOMINAL RANGE (whichever is less). If the firer does not have a Point Weapon, only apply the above.
Area Fire Table
Total all applicable modifiers (column shifts) to get a net shift before applying any. Resolve fires shifted off either edge of the table on the last table column.
The Terrain:
| Class | Regular | Some Units Dug In | All Units Dug In | Notes |
|---|---|---|---|---|
| Billiard Table | +2 | 0 | -1 | (applies to Sortie Attacks) |
| Open | 0 | -1 | -2 | (applies to Sortie Attacks) |
| Partly Protective | -1 | -2 | -2 | (applies to Sortie Attacks) |
| Protective | -2 | -3 | -3 | (applies to Sortie Attacks) |
Ignore P-type units when determining the Dug In quality of the target hex.
- -1 if Fire is at Night in a Lighted Area (do not apply to Artillery Fires)
- -2 if at Night, not in a Lighted Area (do not apply to Artillery Fires)
The Target:
- +1 if any unit in hex is in MOVE MODE (applies to Sortie Attacks)
- -1 if all or some units in the hex are already SUPPRESSED or PARALYZED (applies to Sortie Attacks)
- -1 if the Target Hex is in Smoke or an Artillery Attack Zone (do not apply to Artillery Fire Resolution) (applies to Sortie Attacks)
- -2 if at least one of the units in the hex has a P-type DEFENSE of 2 or more (applies to Sortie Attacks)
- +2 Overwatch Fires vs ROAD MOVING target
- +1 CROSSFIRE (See 11.2)
Range: Applies to every weapon (including Mortars, use range of spotter) EXCEPT Artillery and Sortie attacks. Apply the longest range firing unit only for each fire.
- +4 In hex
- +2 1 hex
- +1 2 hexes
- 0 3-4 hexes
- -1 5 hexes
- -3 6 or more hexes
Stacking (all apply to Sortie Attacks; ignore P-types and anything riding a Half-track, COUNT things being towed):
- +0 1 to 7 steps in hex
- +1 8 to 12 steps in hex
- +3 13 or more steps in hex
Suppressed Fires, Firers in Artillery Attack Hexes, or Buttoned Up Firers are x1/2 (these are cumulative).
Result by Total Firepower Directed at Hex:
| Total Firepower | No Effect | Morale Check | -1 Step (✪) | One Die x1/2 (✪) | Two Dice x1/2 (✪) | Three Dice x1/2 (✪) |
|---|---|---|---|---|---|---|
| Less than 1 | 11..53 | 54..65 | 66 | — | — | — |
| 1 | 11..51 | 52..63 | 64..66 | — | — | — |
| 2 | 11..45 | 46..56 | 61..66 | — | — | — |
| 3 | 11..42 | 43..54 |
Battalion Morale Additions:
- +1 if casualty result is 4 to 5 steps
- +2 if casualty result is 6 or more steps
Add Battalion Morale addition to EACH Battalion in the hex (if more than one). All results other than No Effect require a Morale Check. Dice results require division by 2 and rounding. ✪ Any applicable units in the target hex must Button Up.
Artillery Barrage Fire Values
| Size Ranges (mm) | 100 or less | 101-120 | 121-130 | 131-200 | 201-300 | 301 or more |
|---|---|---|---|---|---|---|
| Common Sizes | 75 | 105 | 122 | 150, 155 | 8 inch | 16 inch |
| Battery Barrage Markers: Good Shoot | 8 | 12 | 15 | 18 | 30 | 120 |
| Battery Barrage Markers: Bad Shoot | 4 | 5 | 6 | 8 | 14 | 54 |
| Battalion Barrage Markers: Good Shoot | 11 |
Barrage Zone Sizes: Battery: Target Hex only. Battalion: Target Hex and the Six Adjacent Hexes. Units in or entering hexes adjacent to a Barrage Zone Hex are attacked with 1/2 the Barrage Zone's Firepower.
Fast Fire Missions: Pay three times the ammunition. 122mm guns or smaller. Firepower above is x2.
Morale Table
Modifiers
- +1 if the target of an Artillery Barrage Marker attack (ACTUAL Attack Zone Hex only) or Sortie
- +1 if checking unit is already PARALYZED
- +1 Night, not negated by lighted areas
- -2 One or more units in the hex is DUG IN
- -1 If Stack contains one or more P-type Targets in it
- +2 CROSSFIRE (see 11.2)
- -1 if checking unit is in Partly Protective or Protective terrain
Roll: Unit Morale (Unit Morale x2 (2) if in Assault-style Combat) plus Bn Morale plus Steps Lost and Modifiers from above. Columns are 1 or less, 2, 3, 4, 5, 6, 7, 8, 9, 10, 11, 12, 13+.
| Result | 1 or less | 2 | 3 | 4 | 5 | 6 | 7 | 8 | 9 | 10 | 11 | 12 | 13+ |
|---|---|---|---|---|---|---|---|---|---|---|---|---|---|
| No Effect | 11..53 | 11..46 | 11..41 | 11..33 | 11..25 | 11..21 | 11..14 | 11 | — | — | — | — | — |
| Suppressed | 54..65 | 51..65 |
Notes: (1) Paralyzed units cannot SYR. On an SYR result, they remain paralyzed. (2) Do not apply this multiplier when making a Morale Check in an Overrun Combat in Partly Protective or Protective terrain.
Save Yourself Retreat Table
Roll one die, plus Unit Morale, Bn Morale, and Steps Lost.
| Result | Total |
|---|---|
| Retreat 3 Hexes | 8 or less |
| Retreat 4 Hexes, -1 step (1) | 9-11 |
| Retreat 5 Hexes, -2 steps (1) | 12-14 |
| Unit Disintegrates, destroy all steps (2) | 15 or more |
(1) Do not apply losses to units which could not roll for an SYR themselves. Apply step losses per stack, NOT per unit. (2) If any units are in the hex to which (1) applies, those units retreat 7 hexes.
Minefield Costs and Attacks
- By Force: MP cost +2. Area Fires attack with 18 firepower. Point-target roll of 8 or more to kill.
- By Breaching: MP cost +3. Area Fires attack with 9 firepower.
Adjustment Table
(Do not use for Rocket Artillery Fires.)
| Range from Spotter to Target Hex | Nationality | No Shoot | Scatter | Bad Shoot | Good Shoot |
|---|---|---|---|---|---|
| 3 hexes or less | 1. US | 11..14 | 15..16 | 17..32 | 33+ |
| 3 hexes or less | 2. Commonwealth, Germans | 11..16 | 21..23 | 24..36 | 41+ |
| 3 hexes or less | 3. Other | 11..22 | 23..26 | 31..44 | 45+ |
| 3 hexes or less | 4. Japanese, Soviets | 11..23 | 24..32 | 33..52 | 53+ |
Mortar and Infantry Gun Smoke Scatter Table
| Die Roll | Result |
|---|---|
| 1 | No Smoke placed, unit is still Fired Marked |
| 2-3 | Smoke scatters out 1 hex, roll die for direction |
| 4-6 | Smoke lands in intended hex |
Point Fire Table
Modifiers (total determines table row used)
The Terrain: Billiard Table +3; Open +2; Partly Protective 0; Protective -1.
The Target:
- -2 Target is an AT or Inf Gun
- -1 If target is DUG IN
- -1 Target is in FIRE MODE (do not apply to AT Guns)
- +2 Overwatch fires vs ROAD MOVING target
- -1 Target is in a SMOKE or in ARTILLERY ATTACK ZONE hex
The Firer:
- +1 AT Gun is the firing unit
- +2 Fires are an SFA
- -2 Firer is BUTTONED UP, SUPPRESSED, or in an ARTILLERY ATTACK ZONE Hex
Other: -2 NIGHT (negated in Lighted Area).
Each cell gives the numbers needed on two dice to kill at (close, nominal, long) range. Columns are Firing Differential (Attack minus Defense).
| Net Mod | +5 or more | +4, +3 | +2 | +1 | 0 | -1 | -2 | -3 | -4 |
|---|---|---|---|---|---|---|---|---|---|
| +4 or more | 12, 16, 42 | 14, 22, 44 | 16, 23, 45 | 22, 25, 45 | 23, 31, 46 | 33, 43, 52 | 41, 46, 61 | 46, 56, 64 | 54, 62, 66 |
| +3 | 14, 22, 44 | 16, 24, 46 | 22, 25, 51 | 24, 31, 51 | 25, 33, 52 | 35, 45, 54 | 43, 52, 63 | 52, 62, 66 | 56, 66, P |
Notes: Firing differential of -5 or less has an automatic no kill possible. a, b, c = a is close range, b is nominal range, c is long range (Close = 1/2x Printed Range, Nominal = Printed Range, Long = 2x Printed Range). The number is the roll "or more" to kill at the given range on two dice. P = Kill is impossible. If a kill results in a hex, the remaining applicable units in the hex must Button Up.
Artillery Point Fire Table
A modified roll of 10 or more destroys the target.
- -1 if attack is from a Bad Shoot mission or Infantry Gun (100mm or greater)
- +1 if the attack is from a Fast Fire Artillery Mission
Regardless of the success of the above roll, all applicable units in the hex rolled for are Buttoned Up.
AT Roll Table
Modifiers
- +1 Target in SMOKE
- +1 Target is BUTTONED UP
- -2 Target STACKED with INFANTRY
- -2 Firer SUPPRESSED
- -1 Target or Firer is in ARTILLERY ATTACK ZONE
- +1 VISIBILITY is 3 or less or at NIGHT (negated in Lighted Areas)
- +1 If against a ROAD MOVING target in Overwatch fires
| Target Terrain | In Hex | One Hex Range |
|---|---|---|
| Billiard Table or Open | 9 | 10 |
| Partly Protective | 8 | 9 |
| Protective | 7 | 8 |
Roll two dice. Modify the dice as above. If the number rolled is greater than or equal to the above, destroy the target. Otherwise, no effect.
✪ AT Roll Attacker Step Loss: If an AT Roll is made with a RAW roll of 3 or less, destroy the step that made the attack.
Sortie Successful Attack Table
| Die Roll | Conditions |
|---|---|
| 3-6 | Open with No Smoke or Billiard Table Terrain with No Smoke |
| 4-6 | Other than the Above |
Sortie Point Fire Modification Chart
| Modifier | Reason |
|---|---|
| -2 | Target in Smoke, Artillery Attack Zone, Partly Protective or Protective Terrain |
| -1 | Target in Move Mode |
| +2 | Target's Defense is 2 or less |
| -1 | Target is Dug In |
Note: Even if a Sortie Point Fire is unsuccessful (provided the attack roll was made), the applicable units in the target hex must Button Up.
Part 3: Hunters from the Sky Game Rules (TCS #6, The Battle for Maleme, 20-23 May 1941)
Introduction
The German attack on Crete was the first large-scale use of airborne forces in history. This was also the first capture of an isolated island without complete command of the seas. Hunters from the Sky covers the assault of the Luftlande-Sturm-Regiment on the New Zealand 5th Brigade to seize the Maleme Airfield.
1.0 General Special Rules
1.1 Digging In. Only those Commonwealth units which begin play on the map and which have never moved are considered to be Dug In. No other unit ever is considered as such. PLAY TIP: Show Commonwealth release and Dug In status with standardized orientations.
1.2 Command and Control. The TCS Command rules are not used in this game. All Axis units on the map and all released Commonwealth units can be used in any way the player sees fit.
1.3 Set Up & Map Notes
1.3a Order of Set Up. The German player always sets up first, including all his Air Transport planning. Before play begins, the German player must select the Direction of Drift. Place the Direction of Drift Marker on the Scatter Diagram in any desired facing. The Direction of Drift cannot be changed after play begins.
1.3b Battalion Morale. All Battalion Morales start each scenario at zero. The Scratch-27 NZ units are considered part of the "Misc" Battalion.
1.3c Minefields. Neither side can deploy minefields.
1.3d Tavronitis River Bed. The Tavronitis River is dry. Because of this, it can be moved through normally. Units in the River Bed (as determined by the hex's center dot) are on Billiard Table Terrain.
1.3e Tavronitis River Bridge. Units on the bridge use Primary Road terrain for movement and Billiard Table terrain. The bridge does not block LOS and units in bridge hexes have an elevation of 10 meters.
1.3f Tavronitis River Island. The Island in the middle of the Tavronitis (connecting the two Tavronitis Bridges) is Open terrain and is 5 meters above the riverbed. It can act as an LOS blockage.
1.3g Gullies. Units located in a gully can only be observed from and can only conduct direct fire against adjacent hexsides. Overwatch triggers which occur when a unit moves into a gully can be seen and fired upon (use the Gully hex's Terrain Type). Indirect fire can only be directed into a gully if there is a spotter in an adjacent hex. Mortars can fire out of a gully with no problems. Artillery can be targeted adjacent to a gully hex without further restrictions; Zone hexes inside the gully attack normally. Air sorties can be directed at gully hexes.
1.3h Vineyards. Vineyard hexes are partly protective cover and have a height addition of 5 meters for LOS purposes.
1.3i Bofors Pits. Any unit inside a Bofors Pit hex gets the Bofors Pit terrain effects (even if currently assaulting the hex to capture it). Bofors Pits do not affect LOS. Units in Bofors Pits cannot also be Dug In.
1.3j Maleme Airfield. Only hexes which have their hex dot within the perimeter of the printed airfield are considered to be hexes of the Maleme Airfield itself. Any hex considered to be part of the airfield is subject to the Billiard Terrain type, even if there is some Open terrain in the same hex, an exception to Series rule 9.3a.
1.4 Sequence of Play. In any scenario beginning at 0700, 20 May, there is no Commonwealth Action Phase until 0720. On any turn in which there are Glider or Parachute Assault landings, the German Action Phase is first.
1.5 Zero Movement Allowance Units. Some units have a movement allowance of zero. They cannot move under their own power, nor can they be towed. They are fixed in place. If forced to retreat they are destroyed.
1.6 AT Rolls. No AT Roll attacks are allowed in this game because of the complete lack of personal anti-tank weapons available.
2.0 German Special Rules
2.1 Air Transportation. All German units (except the Motor Sailing Flotilla, see 2.9) arrive by Air Transportation in one of three modes: Glider Assault, Parachute Assault, and Air Landing. The type of landing any German unit must perform is listed on the German Reinforcement Chart. Regardless of type, air transportation must be planned in advance and the landings occur in the German Action Phase of the planned turn. In any turn where the German player has Glider or Parachute landings scheduled, his Action Phase must be played first. Regardless of method, landing from the air is not an Overwatch Trigger.
2.1a Air Transportation Planning. All morning of 20 May Glider and Parachute Assault Landings must be planned before the Commonwealth player sets up. These are plotted using the provided German Landing Plan. For each Drop Zone (company or battalion as indicated on the Landing Plan) or Glider Landing hex, record the hex you desire (if different than the Historical hexes). These drops occur on the turns given on the German Landing Plan.
Parachute units becoming available on or after 1500 20 May are plotted as in the above on the turn they become available for arrival on their scheduled turns on May 21st.
Air Landing units becoming available at 1500 20 May can be scheduled to arrive on any turn beginning 1500 21 May or later, provided the scheduling is done no less than 24 hours in advance. Air Landings can only be scheduled for one Flight per turn and only on those turns giving an Air Landing Box for the correct date.
2.1b Flights. All Air Transportation uses the division of units into Flights. For Glider Assaults, each Flight can consist of only one unit. In Parachute Assaults, a Flight must be two units (unless after all two-unit Flights have been assigned and a lone unit remains to be assigned a Flight of its own). In Air Landings, each Flight must contain 3 units (with a "remainder" Flight as in Parachute Assaults). Each unit, when counting units for a Flight, is a single counter, regardless of step size or type.
2.1c Glider Assault. Record the target hex for each Flight of Glider Assault units (one unit per Flight) according to the times and units listed on the German Landing Plan. These landings occur as the first event in the German Action Phase. Simply place the Flight into the plotted target hex. Units landing by Glider can be placed in Move Mode or Fire Mode (German Player's choice at the instant of landing) and function normally with full movement and fire abilities in that turn, to include the ability to fire SFAs. There are no losses inflicted on units landing by Glider, unless they happen to land on top of a Commonwealth unit, in which case the Glider Flight is destroyed.
2.1d Parachute Assault. Parachute Assaults must be assigned according to the German Landing Plan. Units are assigned either Company or Battalion Drop Zones and the player cannot change the times, or type of drops the units will make, but he can assign Drop Zone Hexes which might be different from the historical ones. Make any Parachute Assault Landings as the very last action in the German Action Phase. Units making a Parachute Assault landing must be placed into Move Mode and cannot move, fire, or change Mode in the phase in which they land; they can only conduct involuntary SYRs. Generally, units landing in Parachute Assault cannot fire on the turn they land. If these units are defenders in Assault Combat, infantry can fire with a strength of 1; all other unit types are automatically eliminated. The turn after such units land, they function normally.
For each Drop Zone (Company or Battalion) follow the routine below.
- Place the Drop Zone Marker in the plotted Target (or Drop Zone) Hex.
- Scatter the Drop Zone Marker by rolling one die for direction (according to the Scatter Diagram) and another for distance. If the Drop Zone Marker shifts out to sea, place it in the last land hex available along the direction of scatter. If it exits the map area, see 2.1e.
- Place the Drop Zone Marker in the resultant hex.
Then, for each Flight assigned to this Drop Zone, do the following:
- A) Roll two dice and subtract 5. Displace the Flight along the Direction of Drift that number of hexes (a negative number would displace directly opposite the Direction of Drift).
- B) From that Drift Hex, roll one die. Place the Flight in the hex adjacent to the Drift Hex determined in A in the direction of this roll using the directions from the Scatter Diagram. Each Flight must land as a stack.
- C) Apply any automatic losses inflicted by the Parachute Loss Table, based on the range from each flight to the nearest Commonwealth unit (of any type). Commonwealth units further than three hexes away do not matter. LOS, etc. does not matter. These losses are inflicted on each unit of each Flight separately and these losses do not require Morale Checks or additions to Battalion Morale.
- D) Repeat A), B), and C) for all Flights using this Drop Zone. See 2.1e for any units which scatter off the map's edges.
Example: Parachute Assault Scatter Sequence (diagram, described). First, the Drop Zone Marker for this DZ is scattered as shown from the plotted drop zone hex. The German player rolled a 3 for direction and a 2 for distance; this scattered the DZ Marker as shown. Next, the troops assigned to this DZ are divided into the two-unit flights shown, with one remainder flight of one unit. The German player then places out the flights one at a time with the die rolls shown. The diagram shows the end positions of all the flights landing in this group. After taking any landing losses, the player is ready to move to other drop groups or to the end of his phase. (Die rolls shown in the diagram, flights A to F: distance/scatter rolls 8 and 3; 9; 6 and 1; 4 and 4; 4 and 1; 11 and 6 — the diagram's pairing of the numbers is not fully recoverable from the text layer.)
2.1e Drifting Off the Map. Units which drift off the South or East Map edges are automatically destroyed. For any Flight which drifts off the West edge of Map A, roll one die. Place the Flight that number of turns in the future on the Turn Record Track. The units enter hex A11.32 as reinforcements on that turn. If a Drop Zone Marker scatters off the map edge, follow the above separately for each Flight.
2.1f Air Landing. ONE Flight of three units can be planned for each turn for Air Landing. Place these Flights into the boxes provided with the Turn Record Track for the planned turns. On that turn, the Flight must either land at Maleme OR enter the Landing Pattern Box. Flights starting a turn in the Landing Pattern Box must land that turn either at Maleme, OR crash land on any beach hex within 3 hexes of the Maleme airfield. Newly arriving Flights cannot crash land on the beach; they must enter the Landing Pattern Box first. Place the landing Flight in either any hex of the Maleme Airfield or any beach hex at or within 3 hexes of the airfield and make the roll for the Flight on the Air Landings Loss Table. Conduct Air Landings as the first thing in the German Action Phase. Units landing by Air Landing can be placed in Move Mode or Fire Mode (German Player's choice at the instant of landing) and function normally with full movement and fire abilities in that turn.
2.1g Landing Atop the Enemy. Any German unit which lands on top of a Commonwealth unit (of any type) using Glider, Parachute or Air Landings is automatically destroyed.
2.1h Overstacking on Landing. German units which end up overstacked because of the landing rules can remain overstacked without penalty until the end of the first German Action Phase in which those units can move out from the hex. If they are still overstacked at that point, kill off the excess.
2.1i Landing in the Ocean. German units which drift out into all-sea hexes while executing their Parachute Drop scatter are destroyed. Their fate does not generate additions to Battalion Morale.
2.2 Bicycle/Motorcycle Infantry Units. All infantry and MG units from the 55 Krad and 95 Aufk Battalions are Bicycle/Motorcycle equipped. These units pay reduced movement costs for Primary or Secondary roads when at least six hexes from any enemy unit.
2.3 German Artillery. The following batteries are available to the German player:
| Battery | Guns |
|---|---|
| 1-I-95 | 4x 75mm |
| 2-I-95 | 4x 75mm |
| 4-II-95 | 4x 75mm |
| 5-II-95 | 4x 75mm |
The German player cannot shoot Battalion Artillery Missions.
The guns of one battery become available after the German player devotes a block of 3 turns worth of Air Landings to bring them in. Only one battery can arrive per block of 3 turns allocated, although the player could devote several three-turn blocks sequentially to bring the batteries in one after another.
2.4 Artillery Ammunition. As each Artillery battery becomes available, 25 HE, 4 Smoke and 1 Illum Battery Fires also becomes available.
2.5 German Air Power. Each daylight turn, the German Player will be provided with air support. Roll two dice and consult the German Air Power Table. A Ju 87b attacks with an area fire value of 19, or can attempt to destroy point targets on a two dice roll of 8+. An Me109e attacks with an area firepower value of 13, but has no Point Attack effect.
2.5a Initial German Air Bombardment. On the 0700 and 0720 Turns of May 20, roll twice on the German Air Power Table and execute all the air sorties it gives the German Player. (Execute one roll's batch of sorties, then roll again and execute the next batch.) The two rolls are in addition to the die roll modifier for that morning.
2.6 The Motor Sailing Flotillas (Optional). These units (listed on the German Reinforcement Chart) can land any time after 2400, 21 May. Place them in any coastal hex west of the Tavronitis River that is at least 20 hexes from the nearest Commonwealth unit.
2.9 Captured Equipment. Each time the German player captures a Bofors Pit hex (only when the Pit is first captured by German troops, after resolving any Overwatch fires), roll one die. On a roll of 5 or more, place a captured Bofors Gun unit in that hex. The captured gun is fully operational at the moment of capture; it is in Fire Mode and is capable of SFAs immediately. There are only four Captured Bofors Guns available to the German player; do not roll for more Bofors Guns after the fourth enters play. If some captured guns remain after all the Pits have been rolled for, they never enter play.
The German player also captures trucks. The instant the Maleme Airfield terminal (A39.27, marked with the two trucks on the map) is occupied by German units, place the two Captured truck units in that hex.
2.10 Regimental Weapons. The IV-Sturm is the regimental weapons battalion for the Sturm regiment. The 13 Company (105mm mortars) may be called for fire by any unit of the Sturm regiment.
3.0 Commonwealth Special Rules
3.1 Commonwealth Release. The historically rigid release (3.1c below) is very restrictive and does not make for a very good game. Generally players will enjoy the game better with the normal 3.1b Looser Release system. The choice is yours. Regardless of the system in use, NO CW unit can EVER set up WEST of the Tavronitis River (even when 3.10 is in play).
3.1a Battalion Defense Zones. Until they are Released, Commonwealth units must remain within their Battalion Defense Zone. All Battalion Defense Zones consist of the Battalion Zone Marker's hex and all hexes at or within 10 hexes of that hex. Units can move and fire freely provided they remain within their Battalion Zone. Once Released, units can move and fight anywhere on the map. Mark the Battalion Defense Zone of each unreleased Battalion with that Battalion's Marker. Remove the Battalion Zone Marker from the map to designate that a Battalion has been released.
3.1b Looser Release (printed "3.1a" in the source). Each turn during his Action Phase (starting with the first turn), the Commonwealth player rolls two dice. If the roll is 11 or greater, he can release one of his battalions (his choice). Any units still not released at 2400 21 May, are released at that time. Reinforcements are always released when they arrive.
3.1c Historically Rigid Release. (Optional) Until 2400 on 21 May, each Battalion, including the Engineering Detachment, must maintain all of its unreleased troops within the Battalion Defense Zone, as defined in the initial set up.
3.2 "Infantry Guns". "Z" Battery, Coastal Defense, Royal Marines, was located in a concrete bunker on the North side of Pt.107. These guns can fire inland, but only as direct fire Infantry Guns. C Battery, 27th NZ Artillery is without sights. Because of this, they can only be used as direct fire infantry guns.
3.3 The "I" Tanks. The Commonwealth Player is blessed (if that is the correct term) with two Matilda tanks. Make a "Breakdown Check" each turn when these tanks move one or more hexes. Roll one die for each tank. On a roll of one, remove it. Otherwise there is no effect. This rule has no effect on the Mk III tanks, only the Matildas.
3.4 Cretan Militia and the Maori. The Commonwealth player has four Cretan Militia units. Place these (two at Pirgos, one at Modhion, and one at Platanias) at 0700, 21 May. They cannot be placed into a hex which contains a German unit. They cannot leave their village and destroy them if forced to do so.
The Maori (the 28th NZ Bn) were fierce fighters in close combat and wielded their knives with great effect. To show this, any unit of the 28th NZ Bn which is engaged in any type of Assault Combat (attacker or defender) has its firepower strength x3 (in addition to range shifts). Furthermore, in any such Assault-style attack or defense, these units receive an additional -3 modifier for the Morale Table.
3.5 Anti-Aircraft Gun Defense. The Commonwealth has several 3 inch and Bofors Anti-Aircraft guns. Units marked "AA" instead of a firepower value are incapable of firing at ground targets, even when being overrun by assault combats. AA guns can spot for artillery fires. Except when using the Air Landings Loss Table, these weapons behave as if they were unarmed. They have an assumed Morale of 3. These units automatically surrender when a German unit enters their hex.
3.6 Commonwealth Artillery. The following batteries are available to the Commonwealth Player:
| Troop | Guns |
|---|---|
| A, 27th NZ | 2x 94mm (available at start) |
| B, 27th NZ | 3x 75mm (available at start) |
| C, 2-3 Aus | 4x 75mm (available according to 3.8 OR 1200, 23 May otherwise.) |
The Commonwealth player can never shoot Battalion Artillery Missions.
3.7 Artillery Ammunition. The Commonwealth Player begins the game with 50 HE, 6 Smoke, and 5 Illum Battery Fires. At 2400, 21 May, add 100 HE, 15 Smoke, and 10 Illum Battery Fires. Commonwealth Battery Fires can be used with either of the available gun types.
3.8 Reinforcements for the 5th Brigade (optional). During the night of 21-22 May, the last Commonwealth counterattack was ordered in the Maleme area. The attack forces consisted of the 20th and 28th NZ Battalions and they actually succeeded in regaining the east edge of the Airfield. In this variant, roll one die at 2400, 21 May and compare to the following chart:
| Roll | Reinforcements |
|---|---|
| 1 | No Change |
| 2 | 20th NZ Bn |
| 3 | C, 2-3 Aus Artillery and 2-1 Aus MG Company |
| 4 | 2nd Bn, 7 Aus Rgt |
| 5 | 18th NZ Bn |
| 6 | 1 Welch Bn |
Receive all the reinforcements with rolls less than or equal to the number rolled. Consult the Reinforcement Schedule for their new arrival times.
3.9 The 1st Greek Regiment (optional). Add the 1st Greek to initial Commonwealth forces. Their battalion area is anywhere within 8 hexes of A20.23 and they can set up anywhere in this area.
3.10 Free Deployment (optional). Allow the Commonwealth player to readjust his Battalion Defense Zone Markers up to 20 hexes from the set up's printed location and set up accordingly.
4.0 Scenarios
4.1 The Initial Assault and Response: 0700-2400, 20 May
- First Turn: 0700, 20 May
- Last Turn: 2400, 20 May
- Map Area: All
- Number of Turns: 44
Set Up
German: None
Commonwealth:
- 7 Aus and 156 LAA Anti-Aircraft Detachments: 1x AA Gun in each Bofors Pit
- "Z" CD: 2x 4 in Guns at A38.21
- "C" RM: 2x HAA Guns at A39.18
- Royal Air Force Det: 33 Sqd at A36.21, 30 Sqd at A43.15, 1x RAF MG each at A38.27, A39.27, and A36.21
- C, 27th NZ: w/i 2 B13.13
- FPC (Field Punishment Center) Platoon: B12.10
- Band Platoon: B46.10
- 5th Bde Bren Carriers (3x Bren): B51.13
- B, 7 RTR (2x Matilda): A42.21
- Scratch, 27th NZ MG: 1x MG at A47.24 and A44.18, 2x MG with any 22 NZ unit, 2x MG with any 23 NZ unit.
Note: All of the units above are Released.
- 21st NZ: Battalion Defense Zone Marker: A52.04. All units, less one Infantry Platoon from D Company, within the Battalion Defense Zone. One Infantry Platoon from D Company at A31.16. D Company is Released.
- 22nd NZ: Battalion Defense Zone Marker: Anywhere on Map A east of the Tavronitis River. All units within Battalion Defense Zone. A Company is Released.
- 23rd NZ: Battalion Defense Zone Marker: A58.12. All units within Battalion Defense Zone. C Company is Released.
- 28th NZ: Battalion Defense Zone Marker: B38.10. All units within Battalion Defense Zone. No units are Released.
- NZ Eng Det: Battalion Defense Zone Marker: B19.16. All units within Battalion Defense Zone. No units are Released.
Victory Conditions: A player possessing both Maleme Airfield (all hexes) and Pt. 107's hex wins; any other result is a draw.
4.2 Maleme is Secured: 1400-2400, 21 May
- First Turn: 1400, 21 May
- Last Turn: 2400, 21 May
- Number of Turns: 23
- Map Area: All
Set Up
German:
- Sturm: 3 Co (-2 platoons), 4 Co (-3 platoons), 5 Co (-1 platoon), 7 Co (-1 platoon), 8 Co (-2 platoons), 9 Co (-2 platoons), 13 Co (no losses), 14 Co (-9 guns), 15 Co (-1 section). The following Sturm Companies have been destroyed: HQ-I, 6, 10, 11, 12, 16.
- Other: 3-7 Flk (-2 sections), 1-7 Art (-2 guns), 2x Captrd Bofors, 2x Captrd Trucks (all Bofors Pits have been rolled for).
- Set up west of the following line (inclusive): From the south map edge along the A28.xx hexrow to A28.08, then from A28.08 to A38.13. From A38.13 follow the road to A46.21, then follow the A46.xx hexrow to the ocean. Captrd Bofors must each be in its own Bofors Pit. The Captured Trucks can set up anywhere in the zone.
Commonwealth:
- Dead Units: All Bofors AA, RAF, Matilda, "Z" CD units. 4x Scratch, 27 NZ MG sections.
- Set Up: C, 27th NZ: w/i 2 B13.13. FPC Platoon: B12.10. Band Platoon: B46.10. 5th Bde Bren Carriers (3x Bren): B51.13. Scratch, 27th NZ MG: 2x MG with any 23 NZ unit. Note: All of the above units have been released.
- 21st NZ: Battalion Defense Zone Marker: A52.04. All units, less one Infantry Platoon from D Company, within the Battalion Defense Zone. One Infantry Platoon from D Company has been destroyed. D Company is Released.
- 22nd NZ: Battalion Defense Zone Marker: Anywhere on Map A east of the German Set Up Line. Losses: -1 platoon each from A Co., B Co., and HQ Co. All other units within Battalion Defense Zone. A Company is Released.
- 23rd NZ: Battalion Defense Zone Marker: A58.12. All units within Battalion Defense Zone. C Company is Released.
- 28th NZ: Battalion Defense Zone Marker: B38.10. All units within Battalion Defense Zone. No units are Released.
- NZ Eng Det: Battalion Defense Zone Marker: B19.16. All units within Battalion Defense Zone. No units are Released.
- Cretan Militia: All, deployed in their respective cities.
- Artillery Ammo: 30 HE, 2 Smoke, 2 Illum.
Victory Conditions: The player possessing both Maleme Airfield and Pt. 107 wins; any other result is a draw.
4.3 The NZ Counterattack: 2400, 21 May - 1800, 22 May
- First Turn: 2400, 21 May
- Last Turn: 1800, 22 May
- Map Area: All
- Number of Turns: 45
Set Up
German:
- Sturm: 3 Co (-3 platoons), 4 Co (-3 platoons), 5 Co (-2 platoons), 7 Co (-1 platoon), 8 Co (-2 platoons), 9 Co (-2 platoons), 13 Co (-1 platoon), 14 Co (-9 guns), 15 Co (-1 section). The following Sturm Companies have been destroyed: HQ-I, 6, 10, 11, 12, 16.
- 2 FJ Rgt: HQ Co, 5 Co (-2 platoons), 6 Co (-1 platoon)
- 100 Mountain Rgt: 6 Co (-1 platoon), 7 Co (-1 platoon), 8 Co (-1 platoon), 9 Co (no losses), 10 Co (no losses)
- Other: 3-7 Flk (-2 sections), 1-7 Art (-2 guns), 7 PJ (-6 guns), 2x Captrd Bofors, 2x Captrd Trucks (all Bofors Pits have been rolled for).
- Set up west of the following line (inclusive): From A43.01 along the road to A49.10. Then follow the Axx.10 hexrow to A54.10. From A54.10 to A54.15, then to A46.19 and along the A49.xx hexrow to the sea. 5-II-2 FJ Rgt and 6-II-2 FJ Rgt must set up in any hex of Pirgos.
- There is no German artillery available as yet. Plot all remaining air landings before play begins.
Commonwealth:
- Dead Units: All Bofors AA, RAF, Matilda, "Z" CD units. 4x Scratch, 27 NZ MG sections. 2x Pirgos Militia MG units.
- Set Up (all units are released): C, 27th NZ: w/i 2 B13.13. FPC Platoon: B12.10. Band Platoon: B46.10. 5th Bde Bren Carriers (3x Bren): B51.13. Scratch, 27th NZ MG: 2x MG with any 23 NZ unit.
- 21st NZ: A, B, C, and D Co (-1 platoon) w/i 3 A52.04; HQ Co w/i 2 A60.03.
- 22nd NZ: A Co (-1 platoon) w/i 2 A52.09; B Co (-1 platoon) w/i 2 A55.13; C Co w/i 2 A55.08; D Co w/i 2 A46.02; HQ Co (-1 platoon) w/i 2 A56.10; 3x Bren, Bn Mortar Platoon w/i 2 A57.05.
- 23rd NZ: A Co w/i 1 A62.13; C Co w/i 4 A62.10; D Co w/i 1 A59.14; HQ1 Co w/i 2 A56.14; HQ2 Co w/i 2 B4.14; 1x Bren, Bn Mortar Platoon w/i 2 B6.10.
- 28th NZ: All w/i 5 of B38.14.
- Eng Det: All w/i 10 of B19.16.
- Cretan Militia: All except Pirgos, each in their own cities.
- Artillery Ammo: 100 HE, 15 Smoke, 10 Illum.
Victory Conditions: A player possessing both Maleme Airfield and Pt. 107 wins; any other result is a draw.
4.4 The Battle for Maleme: 0700, 20 May - 2200, 23 May
- First Turn: 0700, 20 May
- Last Turn: 2200, 23 May
- Map Area: All
- Game Length: 204
Set Up
German: None
Commonwealth:
- 7 Aus and 156 LAA Anti-Aircraft Detachments: 1x AA Gun in each Bofors Pit
- "Z" CD: 2x 4 in Guns at A38.21
- "C" RM: 2x HAA Guns at A39.18
- Royal Air Force Det: 33 Sqd at A36.21, 30 Sqd at A43.15, 1x RAF MG each at A38.27, A39.27, and A36.21
- C, 27th NZ: w/i 2 B13.13
- FPC Platoon: B12.10
- Band Platoon: B46.10
- 5th Bde Bren Carriers (3x Bren): B51.13
- B, 7 RTR (2x Matilda): A42.21
- Scratch, 27th NZ MG: 1x MG at A47.24 and A44.18, 2x MG with any 22 NZ unit, 2x MG with any 23 NZ unit.
Note: All of the units above are Released.
- 21st NZ: Battalion Defense Zone Marker: A52.04. All units, less one Infantry Platoon from D Company, within the Battalion Defense Zone. One Infantry Platoon from D Company at A31.16. D Company is Released.
- 22nd NZ: Battalion Defense Zone Marker: Anywhere on Map A east of the Tavronitis River. All units within Battalion Defense Zone. A Company is Released.
- 23rd NZ: Battalion Defense Zone Marker: A58.12. All units within Battalion Defense Zone. C Company is Released.
- 28th NZ: Battalion Defense Zone Marker: B38.10. All units within Battalion Defense Zone. No units are Released.
- NZ Eng Det: Battalion Defense Zone Marker: B19.16. All units within Battalion Defense Zone. No units are Released.
Victory Conditions
- German: The German player must hold all of Maleme Airfield and Pt. 107 by 0800 21 May AND have cleared all the map area west of B21.xx of ALL Commonwealth units by the end of the game.
- Commonwealth: Avoid the German conditions.
German Landing Plan
Use the Historical Drop Zones or designate your own. Note that even if you designate your own Drop Zones, companies listed below must drop as companies and battalions as battalions. This must be filled out (except for the 21 May drops) before play begins in any scenario beginning 0700 20 May. (The sheet has a "Player Chosen Drop Hex(es)" blank column beside each row.)
| Time | Units | Drop Type | Historical Drop Hex(es) |
|---|---|---|---|
| 20 May 0720 | HQ-I-Sturm | Glider | A30.25, A32.25 |
| 0720 | 3-I-Sturm | Glider | A35.28, A33.25, A34.26, A36.29 |
| 0720 | 4-I-Sturm | Glider | A34.10, A36.10, A42.13, A44.13 |
| 0740 | 9-III-Sturm | Parachute | Company Drop Zone at A47.21 |
| 0740 | 10-III-Sturm | Parachute | Company Drop Zone at B17.18 |
| 0740 | 11-III-Sturm | Parachute | Company Drop Zone at A55.10 |
Note beside the 0740 rows: the DZs for this turn cannot be plotted closer than TEN hexes from any other DZ.
For the following, select the Drop Zone Hexes in the 1500 turn of 20 May.
| Time (21 May) | Units | Drop Type | Historical Drop Hex(es) |
|---|---|---|---|
| 1500 | II-2 FJ | Parachute | Battalion Drop Zone at B18.16 |
| 1600 | 7 PJ | Parachute | Battalion Drop Zone at A19.29 |
Allied Order of Battle
Creforce
5th New Zealand Brigade
- 21st NZ Bn (10x Inf, 1x 3in Mortar)
- 22nd NZ Bn (15x Inf, 1x 3in Mortar, 3x Bren)
- 23rd NZ Bn (13x Inf, 1x 3in Mortar, 1x Bren)
- 28th NZ Bn (15x Inf, 1x 3in Mortar)
- 5 Bde Transport Sec (3x Bren)
- 5 Bde Band (1x Inf)
- 5 Bde Field Punishment Center (FPC) (1x Inf)
- Scratch 27th NZ MG Bn (6x MG)
- C, 27th NZ Art Bn (4x 75mm IG, 2x Truck)
NZ Engineering Detachment (NZ Eng)
- 7th Field Co (7 Fld) (4x Inf)
- 19th Army Troops (19 A) (6x Inf)
B, 7th Royal Tank Rgt (B, 7 RTR) (2x Matilda)
1st Greek Regiment
- A Bn (10x Inf)
- B Bn (10x Inf)
Anti-Aircraft Detachment
- 7th Aus (4x Bofors)
- 156th LAA (6x Bofors)
Royal Air Force Detachment (RAF) (2x Inf, 3x MG)
Royal Marine Detachment
- Z, CD (2x 4in Inf Gun)
- C, RM (2x 3in AA Gun)
Creforce Reserves
- 20th NZ Bn (15x Inf, 1x 3in Mortar, 1x Bren)
- C, 3rd Hussars (C, 3 Hus) (3x Mark III Light Tanks)
- Creforce Transport Co (16x Trucks)
- Det 2-1 Aus MG Bn (2x MG, 1x Bren)
- 2-7 Aus Bn (15x Inf, 1x 3in Mortar)
- 1st Welch Bn (15x Inf, 1x 3in Mortar, 4x Bren)
- 18th NZ Bn (15x Inf, 1x 3in Mortar, 1x Bren)
- Cretan Militia (Militia) (4x MG)
German Order of Battle
XI Fliegerkorps
Airlanding-Sturm Regiment
- I-Sturm Bn (10x Inf)
- II-Sturm Bn (12x Inf, 4x 81mm Mortar)
- III-Sturm Bn (12x Inf, 4x 81mm Mortar)
- IV-Sturm Bn (Regimental Troops) (3x Inf, 6x MG, 3x 105mm Mortar, 12x 37mm AT Gun)
7th Air Division
- II-2 FJ Bn (9x Inf)
Divisional Troops
- 3 Co., 7 Pio Bn (partial) (3x Inf)
- 7 Artillery Bn: 1-7 Arty (4x 75mm Inf Gun); 3-7 Arty (2x 75mm Inf Gun)
- 7 PJ Bn (18x 37mm AT Gun)
- 7 Flak Bn (12x 20mm AA Gun)
100th Mountain Rgt
- I-100 Mtn Bn (9x Inf, 6x MG, 3x 81mm Mortar, 2x 75mm Inf Gun)
- II-100 Mtn Bn (9x Inf, 6x MG, 3x 81mm Mortar, 2x 75mm Inf Gun)
- III-100 Mtn Bn (9x Inf, 6x MG, 3x 81mm Mortar, 2x 75mm Inf Gun)
- 16 Co., 100 Mtn Rgt Troops (12x 37mm AT Gun)
- sIG Co., 100 Mtn Rgt Troops (2x 150mm Inf Gun)
Divisional Troops
- 95th Aufk Bn (6x Inf, 2x MG, 3x 81mm Mortar, 3x 37mm AT Gun)
- 95th Pio Bn (9x Inf)
- 95th PJ Bn (24x 37mm AT Gun, 3x 50mm AT Gun)
Attached Troops
- 55th Krad Bn (from the 5.Pz Div) (9x Inf, 6x MG, 3x 81mm Mortar)
- 84th Flak Bn (from 12.Army) (9x 20mm AA Gun)
Other: Captrd Bofors (4x Bofors Gun), Captrd Trucks (2x Truck)
5th Mountain Division, 85th Mountain Rgt
- I-85 Mtn Bn (9x Inf, 6x MG, 3x 81mm Mortar, 2x 75mm Inf Gun)
- III-85 Mtn Bn (9x Inf, 6x MG, 3x 81mm Mortar, 2x 75mm Inf Gun)
- 16 Co., 85 Mtn Rgt Troops (8x 37mm AT Gun)
Time: All times utilized are per the German system [this is one hour behind Cairo (used by the defenders) and one hour ahead of London].
German Reinforcement Chart
All availabilities are 20 May.
| Time Available | Method | Units |
|---|---|---|
| 0720 | Glider Assault | I-Strum Bn |
| 0740 | Parachute Assault | III-Strum Bn, IV-Strum Bn, 3-7 Flak Bn |
| 0800 | Parachute Assault | II-Strum Bn |
| 0900 | Parachute Assault | 1-7 Arty Battery |
The following are released at the times below; schedule them to arrive at least 24 hours after their release. See the German Landing Plan for Parachute Assault units. Place Air Landing units (divided into 3 unit flights) onto the spaces provided on the Turn Record Track.
| Time Available | Method | Units |
|---|---|---|
| 1500 | Parachute Assault | 2 FJ Rgt |
| 1500 | Air Landing | 3-7 Arty Battery, 5-7 Flak Bn, 100 Mtn Rgt (less III-100 and 4x AT Guns of 16 Co) |
| 1500 | Air Landing | 85 Mtn Rgt, 95 Pio Bn, 95 Aufk Bn, 95 PJ Bn, 55 Krad Bn |
| 1500 | Air Landing | All Four Batteries of the 95 Artillery (No counters exist for these guns, see rule 2.3) |
| 1600 | Parachute Assault | 7 PJ Bn |
| Optional | Flotilla | 3-7 Pio Bn, 2-84 Flak Bn, III-100 Mtn Rgt (plus 4x AT Guns of 16 Co) |
Commonwealth Reinforcement Chart
All units enter anywhere along the East edge of Map B.
| Time | Units |
|---|---|
| 0700, 21 May | Cretan Militia |
| 0240, 22 May | C & D Co., 20th NZ Bn, Creforce (6 Trucks), C Co., 3rd Hus (3x MkIII Tanks) |
| 0440, 22 May | 20th NZ Bn (Remainder), Creforce (10 Trucks) |
| 1800, 22 May | Det 2-1 Aus MG |
| 1200, 23 May | C, 2-3 Aus Artillery Battery becomes available |
Optional (see 3.8):
| Time | Units |
|---|---|
| 0100, 22 May | 20th NZ Bn |
| 0200, 22 May | 2-7 Aus Bn, Det 2-1 Aus MG Co |
| 0400, 22 May | 1st Welch Bn, C, 2-3 Aus Artillery Battery becomes available |
| 0600, 22 May | 18th NZ Bn |
Designer's Notes
Invasion games have always been a favorite of mine and there is nothing more interesting to me than an airborne assault. Although the attack on Crete has been a popular design topic, most of the previous efforts look at the battle from an operational level and do not provide the type of tactical detail available in the TCS.
The Battle for the Maleme Area is extremely well suited to the TCS system. Both sides are slightly larger than a regiment in strength and the battle area fits nicely on two maps. The battle might seem long by TCS standards, but the low unit density and lack of tanks will make turns fly by more quickly than usual.
Research started with a collection of every piece of reference material available on the subject (being my first real research project there were a number of lessons to be learned regarding the cost and speed of acquiring materials). Most sources concentrated on the Allied side and the New Zealand Official History was very useful in providing a good overall picture of the battle down to the company level. But, the heart of the TCS is the platoon and I was stuck without detailed data for quite some time. Eventually, the New Zealand Battalion Histories for each unit were located and these gave me the weapons counts and starting locations that were needed (including the facts that various platoons were missing and that the HQs were acting as weak infantry).
On the German side, the Order of Battle for the Wehrmacht units was easily obtained from the captured records of the 12th Army. The problem was I could not find any Luftwaffe Records. This was very frustrating since several sources referenced two wartime reports (one written by the IX Air Corps and the other by the 4th Air Fleet). These were eventually located and provided the needed data for paratrooper ratings and air transport schedules.
Before leaving the subject of research, I would like to thank Vance von Borries for his valued assistance. We were able to share research about half-way through our respective projects and had several discussions on various subjects. Though we never did agree on the exact number of gliders employed, I believe our exchanges materially affected both efforts.
Historical Notes
Campaign Background
The island of Crete is located halfway between Greece and the north coast of Africa. From here the Allies could threaten the Rumanian oil fields and the Axis could contest the British presence in the Mediterranean. Thus, for both sides the island took on a strategic importance in the early months of 1941.
The British prepared a defensive plan for the island, but never allocated the resources needed to carry it out. Garrison units were in place as early as December 1940 and efforts were made to expand the port facilities. However, it wasn't until the evacuation of Greece that the defense of Crete was taken seriously.
As the British were leaving Greece, troops were dropped off in Crete to shorten the evacuation route for the Royal Navy. Many of these did not believe they would remain on the island for any length of time and several formations (including the New Zealand 6th Brigade) did move on to Egypt. As most of these units landed, their heavy weapons and equipment were deposited into warehouses at Suda Bay. After several days, the weapons were evenly divided and redistributed to the various defensive positions around the island. Defenses were improvised as the men realized their stay would not be as short as expected.
The German preparations for the invasion were about as hurried as those of the British defense. General Student was asked to begin planning for the operation on 21 April. Student favored a single, concentrated operation against one airfield, while Göring favored simultaneous drops at multiple locations. The availability of transports finally forced a compromise where morning drops would be made in the Maleme and Canea areas and would be followed in the afternoon with landings in the Retimo and Heraklion sectors.
The Forces
The Maleme sector was assigned to the 5th NZ Brigade of four battalions (21st, 22nd, 23rd, and 28th). The 28th Battalion was made up exclusively of Maori tribesmen. Also assigned to the brigade was a battalion strength engineer detachment, several platoons of a MG Battalion, artillery, and two Matilda tanks. In the area, but not directly under the brigade's command were two batteries of AA guns and several RAF and RM detachments.
For the assault, the Germans had the Sturm Regiment and the 7th Flieger Division. In the final plan, each of the four regiments would be given a different objective and split between the morning and afternoon drops. The Sturm Regiment was assigned Maleme. For follow-up, the 5th Mountain and elements of the 6th Mountain and 5th Panzer Divisions were available. The Mountain troops proved very well suited to the role they were to play given their light equipment and their training for rough terrain. Many of these soldiers, however, had never flown in aircraft before.
Defense at Maleme
The New Zealand defense at Maleme (and all of Crete for matter) was rooted in the preconceived idea that although the threat of airborne attack was real, the most significant danger would come from the sea. Thus, the 5th Brigade was not only assigned the task of defending the Maleme airfield, but of also covering the coast all the way to Platanias.
The airfield and the overlooking height of Pt. 107 was assigned to the 22nd Bn. This unit was the strongest in the brigade and was also heavily reinforced. The 23rd Bn was reduced in strength by the loss of its B Company, so they were posted just east of the airfield in order to support the 22nd if needed. The 21st Bn (the weakest in the brigade) was positioned inland from the coast in order to support both the 23rd and 22nd Bns. The Engineers were construction troops who were converted into infantry and given a length of coast to defend. Finally, the 28th Bn was to defend Platanias and form the brigade reserve.
Two colorful units were also in the 5th Brigade area. The first was the brigade band which shows the lengths to which the defenders were forced to go to defend their sector with infantry. The second was the Field Punishment Center (FPC), a collection of the brigade's discipline cases. These were not hardened criminals or mutineers, but were instead slackers and those caught stealing oranges from the locals. They performed very well once the Germans arrived.
The German Attack Plan
The German plan of attack at Maleme was based on the belief that the airfield was the prize the NZ troops would be defending. They expected that the areas to the east and west of the field to be free of defending units. This proved to be true in the west, but was not in the east. A fact that gave disastrous results.
The initial assault wave consisted of four Glider Detachments. Det. Braun would land near and capture the Tavornitis River Bridge. Det. v.Plessen would land on the west edge of the airfield and would be responsible for silencing the AA guns posted there. Det. Koch would land on either side of Pt. 107 and would clear the hill.
The main body of the regiment would arrive by parachute after the glider landings. First would come the III Bn which would land to the east of the airfield. Next would be the IV Bn landing to the east. Its job would be to support the hard-pressed glider troops. Finally, the II Bn would land in the west to form the regimental reserve.
The Battle
As the morning of 20 May 1941 dawned, the German bombers made their normal run over the island. After they passed, the troops started their daily routine with lining up for chow. The morning quiet was broken by a new German attack with Stukas and fighters screaming in low over the countryside. The time was 0700 and, unknown to the troops on the ground, the sky was thick with transports bringing in the much expected invasion.
The gliders arrived on schedule amid the dust and confusion of the air attack. Losses to AA fire was minimal, but several gliders crashed upon landing. Det. Braun was able to secure the bridge and began pushing a wedge into the NZ positions along the main road. Det v.Plessen was able to silence the AA guns, but was stopped short of the edge of the airfield. Det. Koch suffered the most from fire and found themselves disorganized and engaged with many more defenders than expected.
9th Company landed in good order and made significant progress. They were able to clear Pirgos and apply pressure to the airfield. The landings of II and IV Bns went according to plan and by noon, 8th and 15th Companies were attacking Pt. 107 from the southwest. But, where was the rest of III Bn?
III Bn suffered badly from two poor decisions. First, the company commanders feared they might be landed in the sea, so they instructed the transport pilots to drop them a "little" further inland. This resulted in a great deal more scatter than should have occurred. The second bad decision was related to the selection of the drop zones and the location of the defenders. In covering the coast, instead of concentrating in the defense of the airfield, the mass of the 5th Brigade occupied III Bn's drop zones. The slaughter of isolated groups of paratroopers was almost complete. For example, a list of 126 names was found on a fallen German officer (the list of his company's initial drop). By 1000, the New Zealanders had accounted for every name on the list. Those who survived the massacre could do little more than to find a place to hold up and provided nothing more than a nuisance value for the remainder of the battle.
Back at Maleme, the 22nd NZ was fighting well. Though the troops on the west edge of the airfield had been destroyed, no real German gains were allowed at either the airfield or Pt. 107.
A counterattack by the two Matilda tanks was ordered in the early afternoon. The attack started around 1615 hours supported by 20 survivors of C company and the RAF Detachment. The panic on the German side was total as they had no weapons that could knock out these monsters. As fate would have it, mechanical problems would take care of the situation. The first tank fell out when it was discovered that the ammunition for the 2 lbr gun would not fit in the breach block and the turret wouldn't traverse. The second tank continued and reached the riverbed, drove under the bridge, and (after its turret jammed) drove up and down the riverbed machine-gunning Germans until its engine gave out. Then it was abandoned.
As stated, 22nd Bn was holding well, but Colonel Andrew did not know what was happening. Contact had been lost with the HQ Company (it was destroyed at Pirgos) and runners could not get through to C and D Companies. Communications with Brigade were sporadic and since parachutes were also seen to the east it could only be assumed that the other battalions were as hard pressed as the 22nd. The tank attack, Col Andrew's last trump card, had failed and requests for reinforcements had gone unanswered. Based on the above, the decision which may have cost the Allies the battle of Crete was made: Point 107 would be abandoned. The 22nd NZ became filing off the hill. On the way down, Andrews stumbled into the promised reinforcements (a company each from the 23rd and 28th Bns). These companies had not started their move until dark (for fear of air attack) and had lost their way. By this time, dawn was breaking and it was too late to return to the hill.
May 21st was a day for the Germans to consolidate and begin their reinforcement program. As dawn came, they could not believe their good fortune to find Pt. 107 vacant and through the morning they moved to occupy it and the village of Pirgos. The paradrops conducted in the early afternoon of the 21st were, like those of the 20th, of mixed success. The anti-tank guns dropped west of the river (in direct response to the Matilda attack of the previous day) were conducted in good order. The drops east of Pirgos, however, were the result of the same bad judgment that had destroyed the III Bn. The Germans believed they were facing the entire 5th Bde and that the enemy rear would be devoid of troop concentrations. The plan was to drop the two companies behind the enemy lines. In reality, these units suffered as badly as those dropped in the same area the day before.
As mid afternoon approached, transports began arriving at the airfield carrying the first mountain troops. Most were able to land in good order, but a few were forced to crash land on the beach.
During the late afternoon, the New Zealanders realized the implications of the continuous air traffic at Maleme and began planning a counterattack. This was to begin at dusk from positions near Platanias and would be conducted as follows:
- Three newly arrived Light Tanks would attack down the road.
- The 28th NZ Bn would attack between the road and the foothills.
- The 20th NZ Bn would attack between the road and the coast.
The arrival of the 20th NZ Bn was significantly delayed, however, by Creforce command because they would not be released until their coastal duty was fully taken over by the 2/7 Australian Bn. This again shows the paranoia associated with the threat of a seaborne attack and is doubly ironic in that at the time that the 20th Bn was waiting to be relieved, naval gunfire flashes were spotted to the north as the Royal Navy dispersed the German Flotilla.
The late arrival of the 20th Bn resulted in a delayed start of the counterattack. Good progress was made, but the attack was slowed by the remnants of III-Sturm and II-2 FJ who had converted many buildings into 2-4 man strongpoints. As the attack reached Pirgos, dawn began to break and the attacking force was subject to the full weight of the Luftwaffe. The attack reached the east edge of the airfield before being forced to fall back to their starting positions in a much reduced force.
From here the battle was one of constant pressure along the road and flanking marches by the Mountain troops. Fear that the Maleme Germans would link up with the 3rd FJ Regiment to the southeast and cut off the retreat route finally forced the 5th Bde to fall back behind Ay Marina. The fight for the Maleme airfield had ended and the fate of Crete was sealed.
Part 4: Hunters from the Sky Revisions (Errata and Additional Rules)
Transcribed from the publisher's "HFTS_Revisions" document. The first section lists changes based on a 10 May 1997 survey of the battlefield; the second section gives additions and changes that reflect the original submission of the game (which included the Command Rules and a more detailed landing system). Where they differ, these revisions are the designer's later word on the rule numbers they cite. The unit-location notation in the Historical Set-up (for example "W5204") is as printed in the source.
Changes Based on 5/10/97 Survey of Battlefield
1.3d Tavronitis River Bed. The river bed is much more uneven and brush covered than originally believed, change the terrain type to clear.
1.3h Vineyards. Troops with a significant height advantage could "line-up" their fields of fire with the rows in the vineyards. To reflect this, Vineyards (excluding the bamboo edge) do not block LOS for troops that are dug in if they have a 40m height advantage over their target.
OPTIONAL: The vineyards and olive groves located near the coast are currently surrounded by hedgerows of bamboo. Though bamboo is mentioned in at least one 1941 source, I'm not sure if it was as widespread as now (though I suspect it was). Use the following as an optional until I get more conformation: For LOS purposes, consider the edge of all Vineyard terrain features located at or below 40m elevation to be 5m tall (draw a black line around these as a reminder).
Additions/Changes to Reflect Original Submission
(includes the Command Rules and a more detailed landing system)
1.2 Command and Control (players will have to make up some Op Sheets)
1.2a German Command Prep Ratings.
- Initial: 5 (represents the significant loss of unit commanders during the initial drops)
- 21 May, 1500: 3 (represents the arrival of Ramcke with the para reinforcements)
- 22 May, 1800: 2 (represents arrival of Ringel, commander of 5.Geb Div)
1.2b Commonwealth Command Prep Ratings.
- Initial: 7 (before Commonwealth release)
- 21 May, 2400: 4 (after Commonwealth release)
1.2c German Higher Commander's Intent. The Germans are to drive the Commonwealth off the East Map edge and link up with the 3rd Fallschirmjäger Regiment dropping in the Prison Valley Area (southeast of map) by the end of the second day. Failing this, secure the Maleme Airfield such that reinforcements can be safely landed.
1.2d Commonwealth Higher Commander's Intent. The New Zealand 5th Brigade is to cover its sector of the coastline of Crete and destroy any German penetration. The Brigade also holds the western most position and must protect the flank of the Army.
2.1 Air Transportation. German units are transported to Crete by one of three air transport modes: Glider Assault, Parachute Assault, and Air Transport. The three modes utilize similar procedures for planning and loading but differ in the rules for delivery. The general outline is as follows:
- Target hexes and mode of transport are planned several turns in advance.
- Each Unit is loaded into Sticks (individual aircraft) and then into Flights of three to five aircraft (generally one Platoon or Gun Section).
- Delivery is conducted by Flight and all landings occur during the Aircraft Sortie Phase after all air attacks have been conducted. The Landing Sequence is as follows: a) Place Flight in target hex. b) Check for Scatter. c) Check for Aircraft Losses. d) Conduct Opportunity Fire.
2.1a Transport Planning. The arrival of all German Units must be planned in advance. Units scheduled to arrive on 20 May are plotted before the Commonwealth Player sets up; reinforcements must be planned at least 24 hours in advance [this represents not only the normal planning time but also the fact that Reinforcements were committed based upon information which was usually hours old].
On 20 May, units may be plotted to land between 0700 and 1000 only [the transports were recycled for the afternoon drops at Retmo and Heraklion]; on subsequent days, units may land between 1000 and 1800. For Assault landings, plotting entails recording the target hex and time of arrival for each Flight of Gliders and each Company of Paratroopers (initial Op sheets should also be prepared and Reserves are NOT allowed). The Glider Troops must also land at least one turn ahead of any Paratroopers.
All Air Transport Reinforcements are planned to land at Maleme Airfield (as defined in 1.3j) and it is only necessary to plot the Turn, Company, and number of arriving Flights (all Air Transport units arrive without orders). The Airfield may only receive three Flights per turn (about 25-27 Aircraft per hour) and the German Player is limited to this maximum when planning. Flights will land during the turn they are scheduled to arrive or may be held in the "Landing Pattern Box" for up to one turn (useful if the Airfield has been brought under unexpected enemy fire). Flights which start a turn in the "Landing Pattern Box" must land that turn either at Maleme or by crash landing on a beach hex within 5 hexes of the Airfield. Newly arriving Flights may then be landed at Maleme if there is remaining capacity for the turn, or may be placed in the "Landing Pattern Box". Once planned, a Flight cannot be canceled.
2.1b Transport Loading. Each combat unit is loaded into a Flight of aircraft based upon its bulk, weight, and delivery method as shown in the table below.
| One Flight Consisting of | Aircraft per Flight | Aircraft Losses: 1 Loss | Aircraft Losses: 2 Losses |
|---|---|---|---|
| 1 x Inf Plt | 3 | -2 steps | -3 steps |
| 1 x Byc Inf Plt | 3+3* | -1 step | -2 steps |
| 1 x MC Inf Plt | 5+5+5** | -1 step | -2 step |
| 2 x MG Sq | 3 | -1 step | -2 steps |
| 1 x Byc MG Sq | 3 | -1 step | |
| 1 x MC MG Sec | 4 | -1 step | |
* counts as 2 Flights for Planning and Loss Check. ** counts as 3 Flights for Planning and Loss Check.
(Table transcribed from a page image; the row-to-column pairing of the "2 Losses" entries for the 81mm and 105mm mortar rows follows the printed layout.)
2.1c Flight Scatter. Each Flight of Gliders and Paratroopers must check for Scatter from the plotted landing hex. Flights scattered off the South or West edge of the map are placed in the last hex and are Paralyzed. Units that scatter into the Sea are eliminated.
- Gliders: roll 1D6 and on a 1 move the Flight 1D6 direction and 1D6 distance.
- Paratroopers: two separate checks are required:
- a) roll 1D6 and on a 1-3 move the Flight 1D6 hexes to the south-southwest (move 1 hex south, then 1 hex southwest, etc.). Units of the 10th, 11th, and 12th Companies always scatter and are moved 2x the distance rolled.
- b) roll one red and one white die for each Flight and resolve scatter in accordance with the diagram below (old converged artillery concentration).
Scatter Diagram (bold is red die results), reproduced as printed (the original is a hex diagram):
                 3-6
              \   1   /
         3-6   \______/   3-6
          6    /      \    2
            __/  1-2   \__
              \        /
         3-6   \______/   3-6
          5    / 3-6  \    3
              /   4    \
2.1d Aircraft Loss Check. After the final landing hex has been determined, the German Player must roll to see if any Transport losses have occurred (includes such things as mechanical breakdown, broken Glider tow lines, Anti-Aircraft fire, and crash landings). This is done for each Flight (note: some units require multiple Flights) and the following Table is used. Cross index the Loss Factor (described below the table) with 2D6 and apply the results. Hits destroy unit steps and equipment as shown in 2.1b (this has no effect on Battalion Morale).
Aircraft Loss Table (rows: 2D6 roll; columns: Loss Factor; entries: number of Aircraft Losses, see 2.1b; a blank means no loss)
| 2D6 | 0 | 1 | 2 | 3 | 4 | 5 | 6 | 7 | 8 | 9 | 10 | 11 | 12 | 13 | 14 | 16 | 18 | 20 | 22 |
|---|---|---|---|---|---|---|---|---|---|---|---|---|---|---|---|---|---|---|---|
| 2 | 1 | 1 | 2 |
LOSS FACTOR:
- +2 for each AA Gun within range (regardless of LOS).
- +2 for units landing by Glider.
- +1 for Air Transports landing at Maleme if the Airfield (any hex) was hit by Artillery fire this turn.
- +10 for Air Transports landing on the Beach.
2.1e Opportunity Fire. All Commonwealth Infantry and MG units within range may conduct a special form of Opportunity Fire against German Flights as they land (normal LOS rules apply against Gliders and Transports; no LOS restriction against Paratroopers). This fire is conducted normally with the following fire factors: x1 against Gliders, x4 against Paratroopers, and x3 against Air Transports (no other modifiers except range and density are used). All units may fire at all available targets but only one "shot" is resolved against each target stack. This fire does not affect the ability to fire in upcoming Action Phases and no German Overwatch is triggered. Losses, Morale Checks, and Battalion Morale are handled normally.
2.1f After Landing. Units which land without becoming Suppressed or Paralyzed may be placed in any desired mode. Glider/Transport units may utilize half their movement allowance in the upcoming German Action Phase; units landing by Paradrop are considered to have expended their full movement allowance for the turn. Any unit that lands in the same hex as a Commonwealth unit must conduct an immediate Close Assault. This combat is handled normally except that the Glider units have their fire factor reduced to half and Paratrooper Units are quartered (this is in addition to the possible effects of 2.11).
2.4 German Artillery. Battery counters should be made for the German Artillery batteries and all on-map artillery rules apply. German Artillery Ammunition must be transported to Crete per 2.1 above. The Germans may utilize Fast Fire.
2.11 Reduced Firepower Values. Hunters was originally playtested under a version of the TCS rules that halved the firepower of Infantry Platoons that had 50% losses. Since most of the Fallschirmjäger sustain heavy losses upon landing, this TCS rule change has had an unbalancing effect on this game and the half firepower rule should be used for Fallschirmjäger (but not Gebirgsjäger) platoons that have sustained over 50% losses.
3.1 The Commonwealth Release System. The Commonwealth Commanders on Crete were obsessed with remaining prepared to repulse a seaborn landing and thus a great number of formations remained stationary during the critical first and second days of the battle. The following restrictions are designed to reflect this situation.
Until the dispersal (or Landing) of the German Flotilla at 2400 on 21 May, each Battalion (and the Engineer Detachment) must maintain the majority of its troops within the Battalion perimeter (as defined by the initial set-up). During this time a maximum of one Company may be dispatched on operations outside this area. [The 22nd Battalion was not reinforced until after dark on the 20 May and then by only two Companies...one each from the 23rd and 28th Battalions].
3.1a The 5th Brigade Defense Plan (Variant). The 5th Brigade had an established defense plan whereby the Battalions were to immediately counterattack any German landing. The commander of the 22nd Battalion requested throughout the first day that this plan be implemented and even sent up prearranged flares to signal 23rd Battalion. Due to the disorganized nature of the German drops and the continued fear of seaborne attack this plan was never executed and 22nd Battalion was compelled to withdraw from Pt.107. In this variant the Commonwealth Player is relieved of the requirements of 3.1 and is considered to have a Command Prep rating of 4 from the start (this also allows the use of Reserves).
3.6 Commonwealth Artillery. Battery counters should be made for the Commonwealth Artillery and all on-map artillery rules apply. Each on-map Battery begins the game with 50 Battery Fires of ammunition and sharing of ammunition between batteries is not allowed. Any Battery that moves may carry with them a maximum of 15 Battery Fires (the remainder is destroyed at the set-up location as there was insufficient transport to move it). Also, the Battery received as a reinforcement arrives with only 15 Battery Fires.
Due to the Commonwealth reliance on wire communications (that were easily/often broken by Stuka attacks) they use the "Other" line on the Artillery Adjustment Table. Also, the Commonwealth player may not utilize Fast Fire and no fire is allowed prior to 0800 on 20 May.
3.11 Naval Gunfire Support. At midnight each night there is a chance that two Royal Navy Destroyers will be available to shell the Maleme area. Roll 1D6 and on a 1, two Destroyer fire missions (100mmHE) may be conducted against the Airfield (fire like normal Artillery using the maximum adjustment table).
6.0 Victory Conditions
6.1 "Sudden Death". At 2400 on 20 May, the German Player rolls 1D6 if he is not in full possession of the Airfield. On a roll of 1, Maleme has not been selected as the area of emphasis for future efforts and the Commonwealth Player wins a Major Victory.
6.2 Victory Points
6.2a German. Victory for the German Player is based upon successfully exiting units from the map. VP's are earned by comparing the time the units are exited with the requirements contained in the VP Chart.
6.2b Commonwealth. Victory for the Commonwealth Player is based upon the control of terrain features. This is judged at 0600 each day and are accumulated throughout the game.
6.2c Victory Point Comparison. A Player wins a Major Victory if he has 10 VP's more than his opponent and a Minor Victory if he has 5 VP's more. Any other result is a draw. Shift the Victory one level in favor of the Commonwealth if Fallschirmjäger platoon losses exceed 100 steps (count infantry platoons only).
German VP Chart
| Unit | Exit | Time | Early | On-Time | Late |
|---|---|---|---|---|---|
| FJ Co (16th) | SW | 1000, 20 May | 0 | 5 | 0 |
| FJ Co (6th) | W | 1000, 20 May | 0 | 5 | 0 |
| Mt Btl (I/85) | SE | 1800, 22 May | 15 | 10 | 5 |
| Mt Btl (I/100) | SE | 0600, 23 May | 15 | 10 | 5 |
[Historic level = 50]. Early = at least 24 hours before the requirement. Co = at least 15 Steps; Btl = at least 50 Steps. (Unit designations are for reference only.)
Commonwealth VP Chart
| Location | Victory Points |
|---|---|
| Maleme Airfield | 5 |
| Pt.107 | 5 |
| Tavronitis | 2 |
| Pirgos | 5 |
| Xamoadhokhori | 2 |
| Dhaskaliana | 2 |
| Kondomari | 2 |
| Modhion | 2 |
| Platanias | 5 |
[Historic level = 42]
Historical Set-up and Orders
Commonwealth:
- 21 NZ: A/B/C/D Coys (less 1xPlt) w/i 3 of W5204; 1xPlt at W3116; HQ Co w/i 2 of W6003.
- 27 NZ MG: 1xMG at W4724 and W4418.
- 22 NZ: A Co w/i 3 of W3919; B Co w/i 3 of W4211; C Co: W4230, W4126, and W3730; D Co: W3519-25, W3619-24, W3720-24; HQ Co (less 1xPlt, Mort, Carriers) in Pirgos; 1xPlt at W4603; Mort at W5215; Carriers at W3723. 27 NZ MG: 2xMG with D Co.
- 23 NZ: A Co w/i 1 of W6215; C Co w/i 4 of W6210; D Co w/i 1 of W5915; HQ1 Co w/i 2 of W5615; HQ2 Co, Mort, and Carrier w/i 2 of E0414. 27 NZ MG: 2xMG with HQ1 Co.
- 28 NZ: A Co w/i 2 of E4807; B Co w/i 2 of E4306; C Co w/i 2 of E4210; D Co: E2712, E3217, E3717; HQ Co in Platanias.
- Eng Det: 7 Fld Co w/i 4 of E1417. 19 A Tps w/i 5 of E2416.
- Orders: Each Battalion/Engineering Det is on a separate Prepared Defense.
Brigade Troops (may be assigned to any Op Sheet):
- AA Det: 1xAA in each Bofors Pit
- RM Det: 2xCD Guns at W3821; 2xAA Guns at W3918.
- RAF Det: 1xInf at W3621, W4315; 1xMG at W3827, W3927, and W3621.
- 7RTR: W4221.
- FPC: E1210.
- Band: E4610.
- Trans: E5113.
- A/27 NZ Art: w/i 2 of W5802; B/27 NZ Art: w/i 2 of W6110; C/27 NZ Art: w/i 2 of E1313.
Historical German Landing Plan
20 May: 0720 Glider Detachments:
- HQ/STURM (Det Braun) - W3025, W3225. Order: take Tavornitis bridge.
- 3/I/STURM (Det vPlessen) - W3430, W3629, W3733, W3232. Order: clear the west edge of the airfield.
- 4/I/STURM (Det Koch) - W4415, W4615, W3505, W3305. Order: capture Pt.107.
0740 III Battalion Group. Order: take Maleme airfield.
- 9/III/STURM [4 Flights] - W4822
- 10/III/STURM [4 Flights] - E1718
- 11/III/STURM [4 Flights] - W5618
- 12/III/STURM [4 Flights] - E0320 (the 10th, 11th and 12th Companies are subject to increased scatter per 2.1c)
- 14/IV/STURM [2 Flights] - W4822
- 3/7Fla-MG [1 Flight] - W4822
0740 IV Battalion Group. Order: support the attack on the airfield.
- 13/IV/STURM [3 Flights] - W1730
- 14/IV/STURM [2 Flights] - W2228
- 15/IV/STURM [3 Flights] - W2428
- 3/7Fla-MG [2 Flights] - W2029
0800 II Battalion Group. Order: form defense against attack from west (i.e. cannot attack airfield without implementing a new order).
- 5/II/STURM [4 Flights] - W1130
- 6/II/STURM [4 Flights] - off map near W1132 (historically the 6th Co marched west and never entered the Maleme battle).
- 7/II/STURM [4 Flights] - W1128
- 8/II/STURM [4 Flights] - W1133
- 14/IV/STURM [2 Flights] - W1330
0800 South Group. Order: form defense against attack from south (i.e. cannot attack airfield without implementing a new order).
- 16/IV/STURM [3 Flights] - off map near W2501 (historically the 16th Co marched south and never entered the Maleme battle).
0900 Support Group. Order: support the attack on the airfield.
- 1/7Art [2 Flights] - W2428, W4822
21 May: 1500 East Group:
- 5/II/2FJR [3 Flights] - E2118
- 6/II/2FJR [3 Flights] - E1618
1600 West Group:
- HQ/II/2FJR (Det Klein) [3 Flights] - W2228
- 1/7PzJäg [3 Flights] - W2029
- 2/7PzJäg [3 Flights] - W2027
- 3/7PzJäg [3 Flights] - W1829
Air Transport reinforcements:
- 21 May, 1600-1800: II/100GJR [17 flights]
- 22 May, 1000-1200: I/85GJR [17 flights]
- 22 May, 1200-1500: I/100GJR [17 flights]
- 22 May, 1500-1700: 3/7Art [2 flights]
- 22 May, 1700-1800: 95Pio [9 flights]
- 23 May, 1000-1300: 95Art [16 flights + ammo]
- 23 May, 1300-1500: 95PzJäg [15 flights + ammo]
- 23 May, 1500-1800: 55Krad (1st, 2nd, and 2/3rds of 4th Co) [24 flights + ammo]
- 24 May, 1000-1400: III/85GJR [17 flights + ammo]; 16/85GJR [8 flights + ammo]; 16/100GJR [8 flights + ammo]
- 24 May, 1400-1700: 95Aufk [20 flights + ammo]; 5/7Fla-MG [6 flights + ammo]
NOTE: The sIG/100 and 55Krad (3rd and 1/3rd of 4th Co) are available in the Reinforcement Pool but did not arrive until 25 May or later.
Part 5: Update for TCS v4.0 Rules (July 2009)
3.4 Maori (28th NZ Bn). Add 2 to their firepower per step rather than 1 at range zero (see v4.0 11.3d). In addition, these units also ignore any Suppressed result from the Morale Table when in Assault-Style combat.
3.5 AA guns do affect German sorties as per TCS v4.0 25.1e.